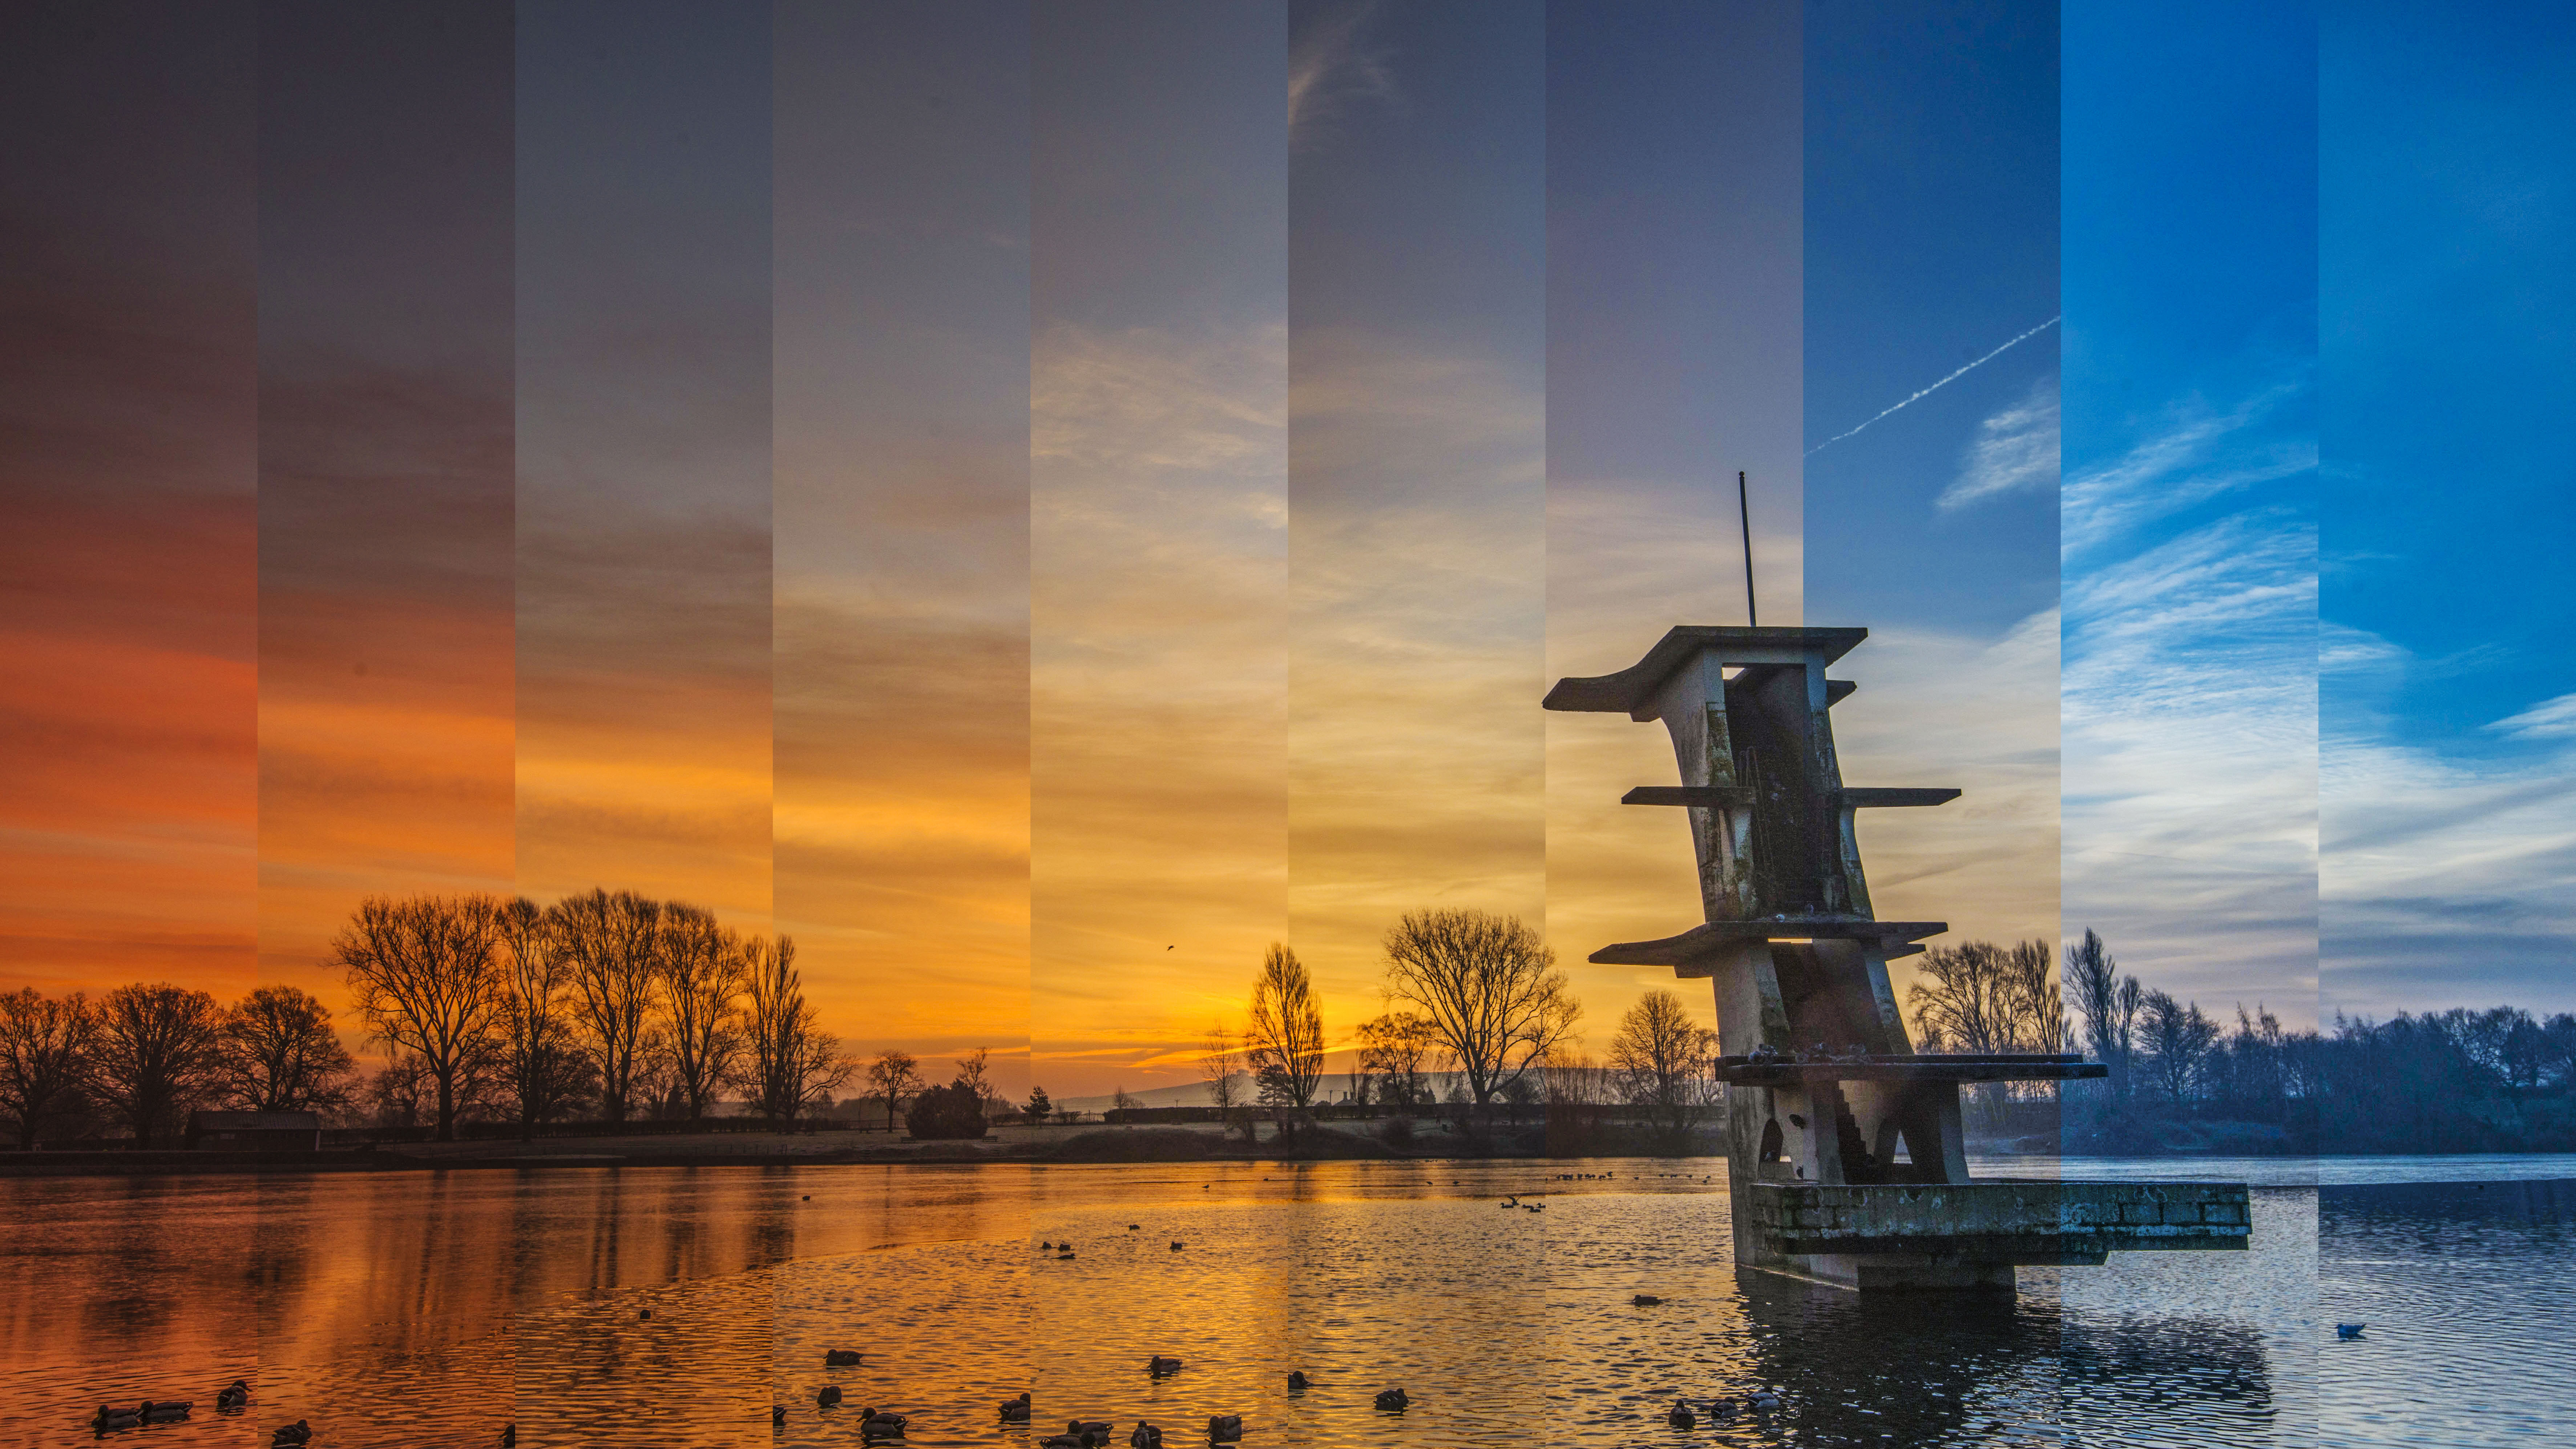
Create a stunning time slice in Photoshop and show the passage of time
Craft a unique collage that shows the passage of time, using some fundamental Photoshop CC layer skills
Watch video: Craft a time slice image in Photoshop CC
This simple technique is a creative way to show off an entire timelapse sequence in a single image. Perhaps you have a set of timelapse photos on your hard drive that could work for this, but if not then why not shoot a new sequence? It could be a great way to show the passing day in your garden or elsewhere.
All you need to do is set up your camera on a tripod and engage the interval shooting setting. If your camera does not have this feature, then you can investigate the best camera remotes with an inbuilt interval timer. Or simply grab a seat next to your tripod and press the shutter every 20 minutes or so.
It’s a wonderful way to show the transition between night and day, but you can use the same technique for any sequence in which the subject changes over time, from melting ice cream to the gentle ebbing of the tide.
Piecing together the shots is a quick and simple process in Photoshop CC. We pick those that we want to use, then load them into layers and use simple layer masks to create strips for each image.
If you’re new to layer masks then this will be a gentle introduction to one of Photoshop’s most powerful features. We’ll also explore the grid options, which can be handy whenever you need to divide an image into segments like this. It takes a matter of minutes to put together, and the results offer a unique perspective on the world around you!
• See also: Best timelapse cameras
01 Shoot a sequence
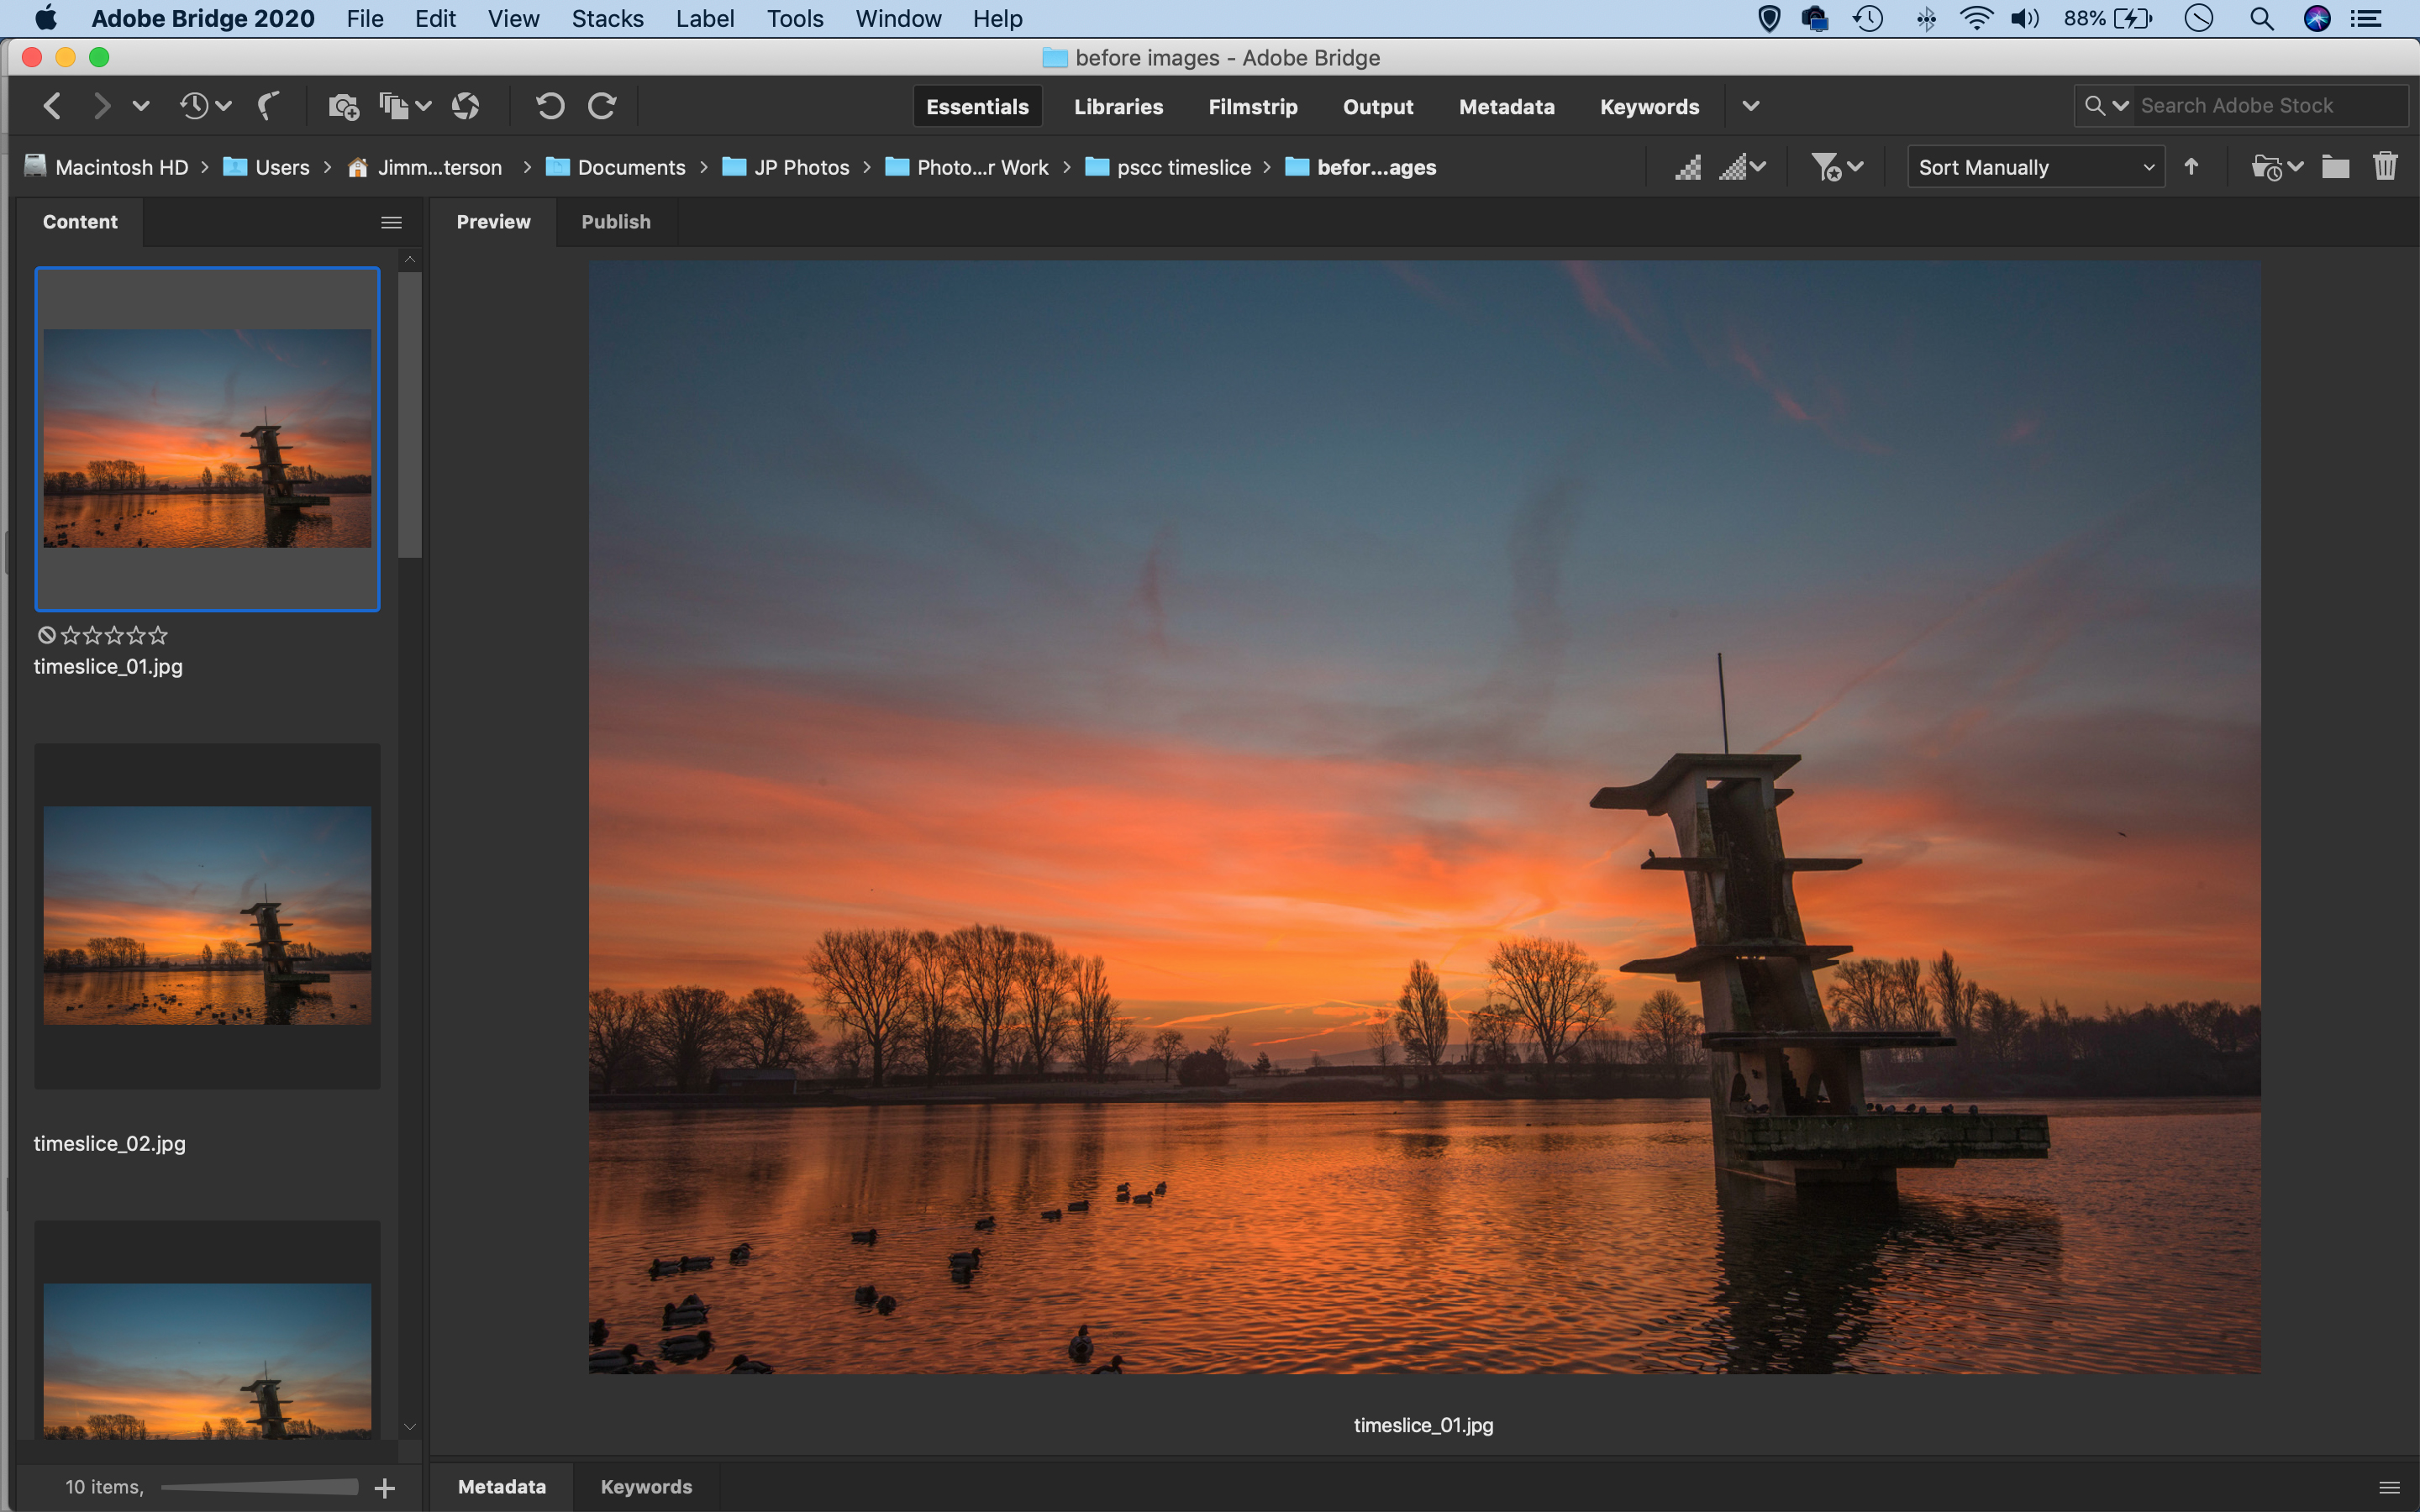
Set your camera up on a tripod. For the exposure mode, pick Aperture Priority and engage the interval timer (if your camera doesn’t have it, you could use an external cable release timer, or fire the shutter yourself). Shoot to capture a day-to-night sequence.
02 Load into layers
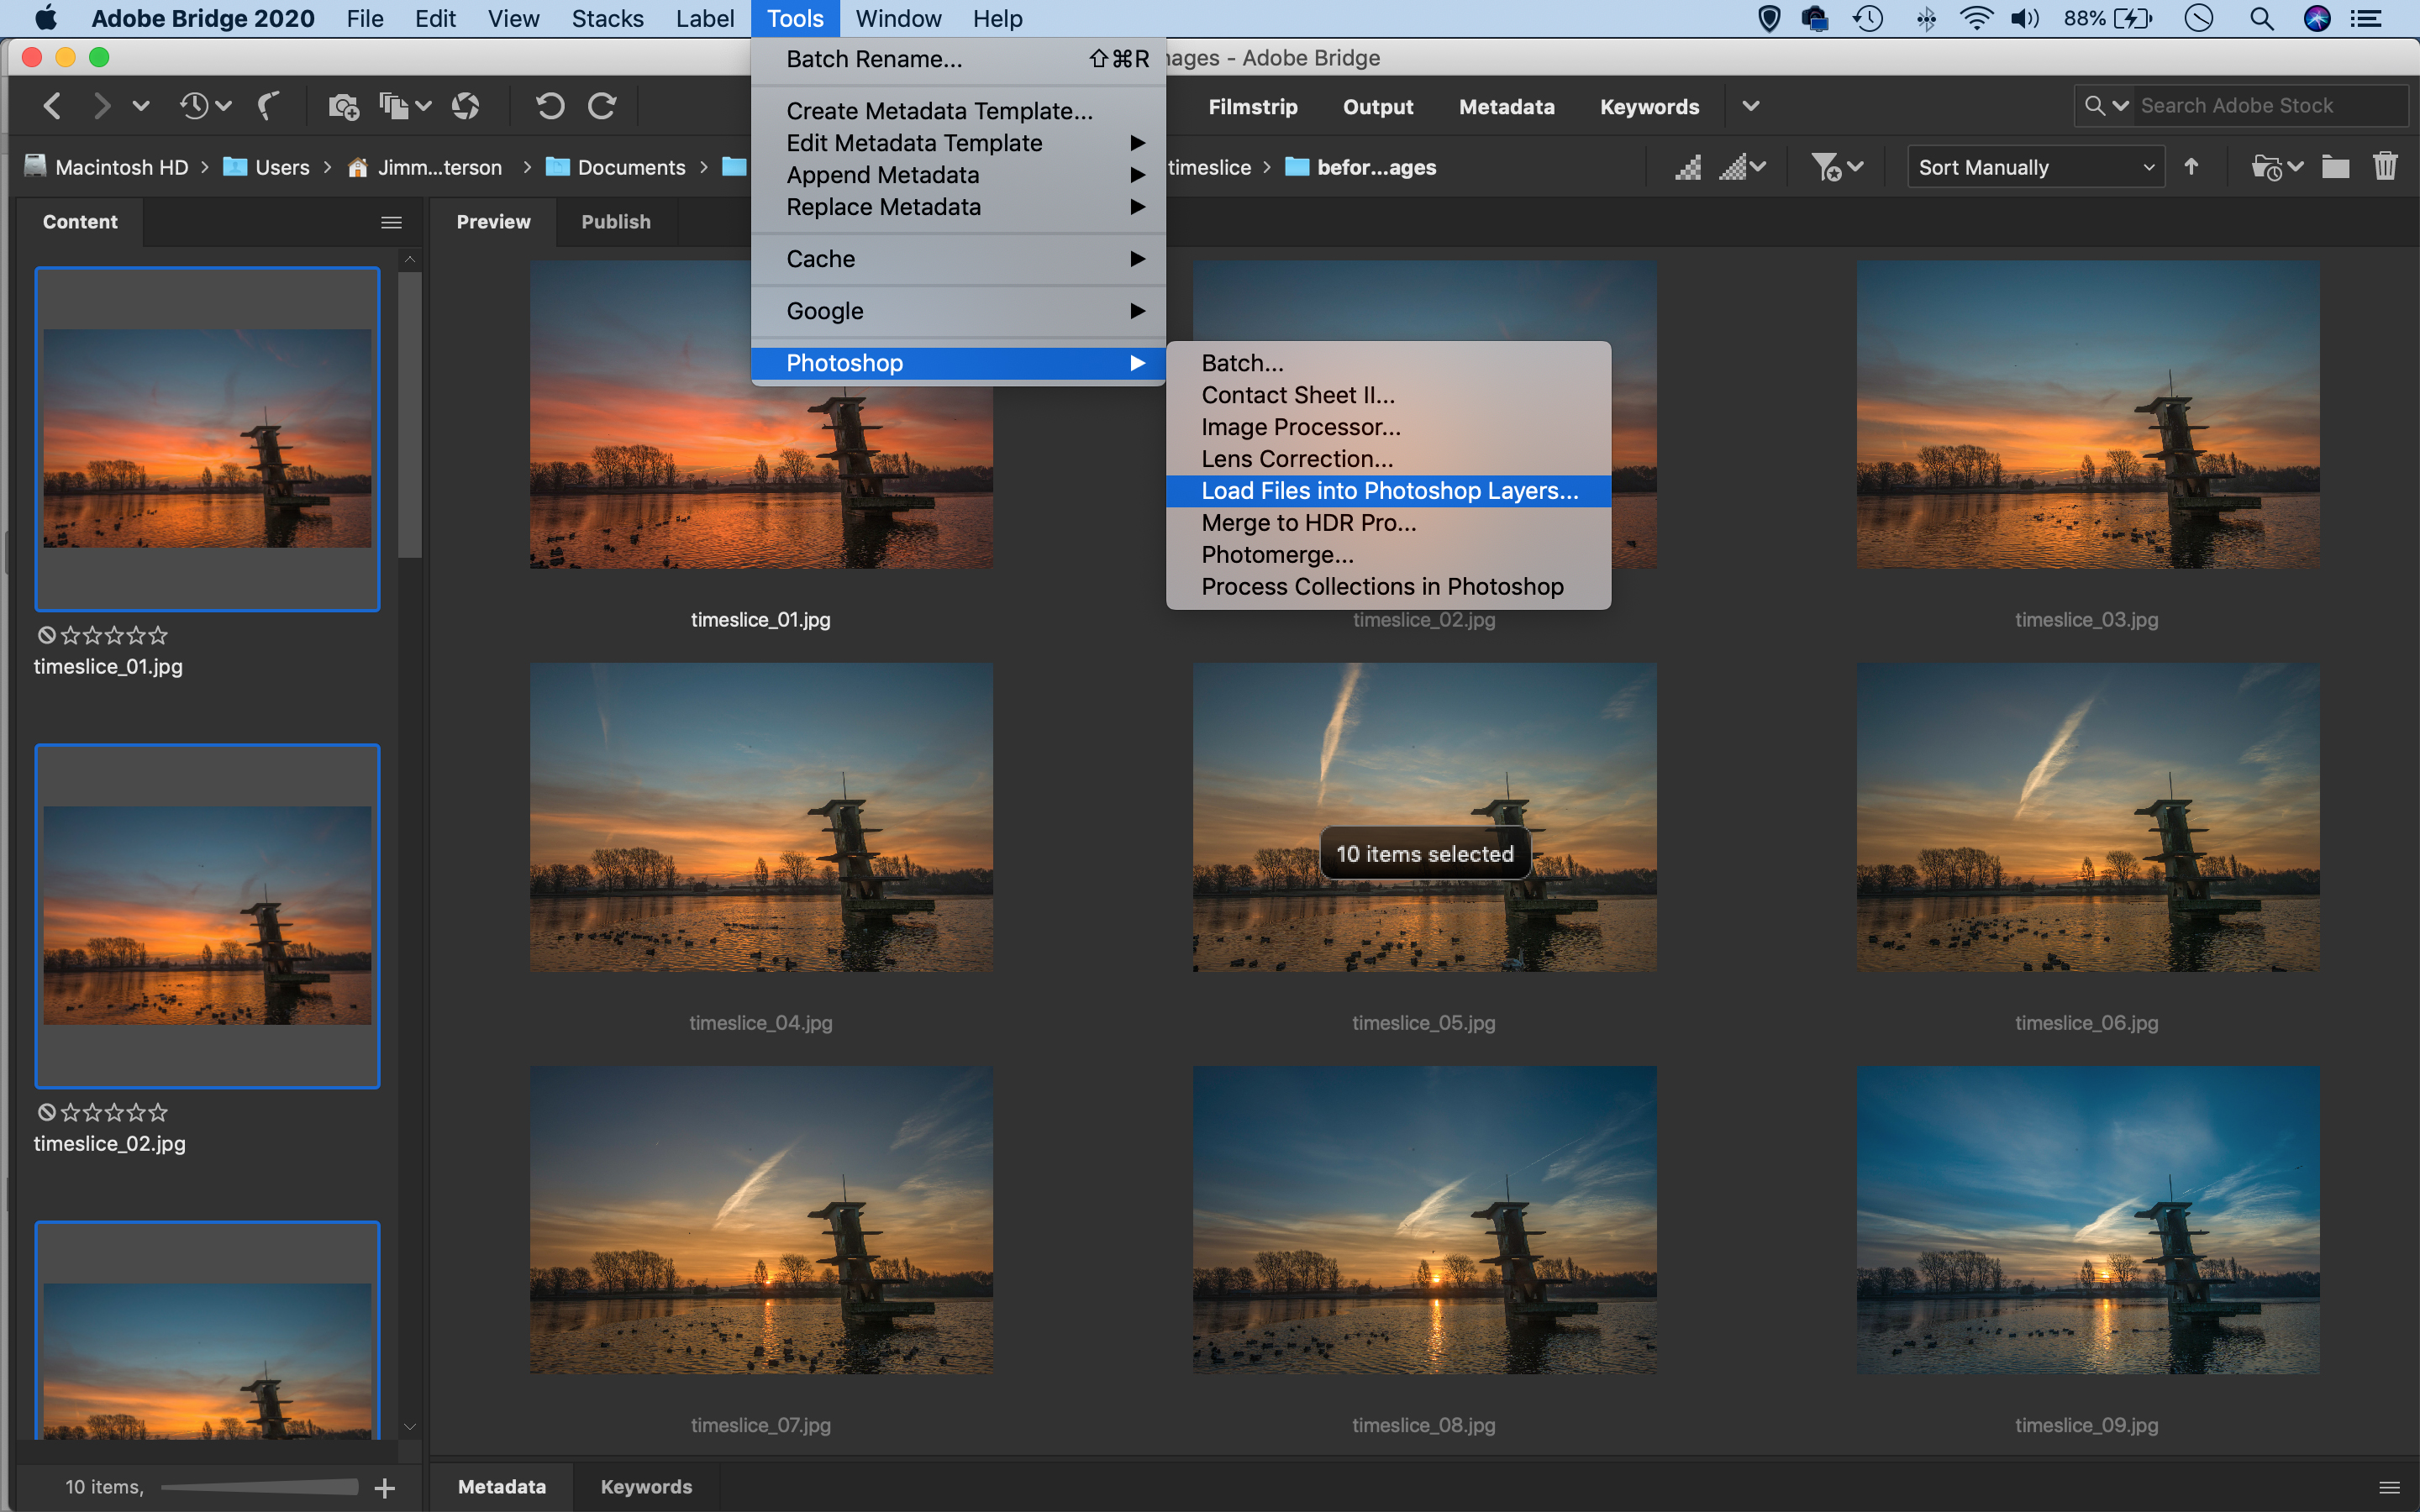
Choose your favourite shots using Adobe Bridge, then select them, right-click them and choose ‘Open in Camera Raw’. Use the tonal tools to enhance the images, then hit Done. Select them all again and go to Tools > Photoshop > Load Files into Photoshop Layers.
03 Make a grid
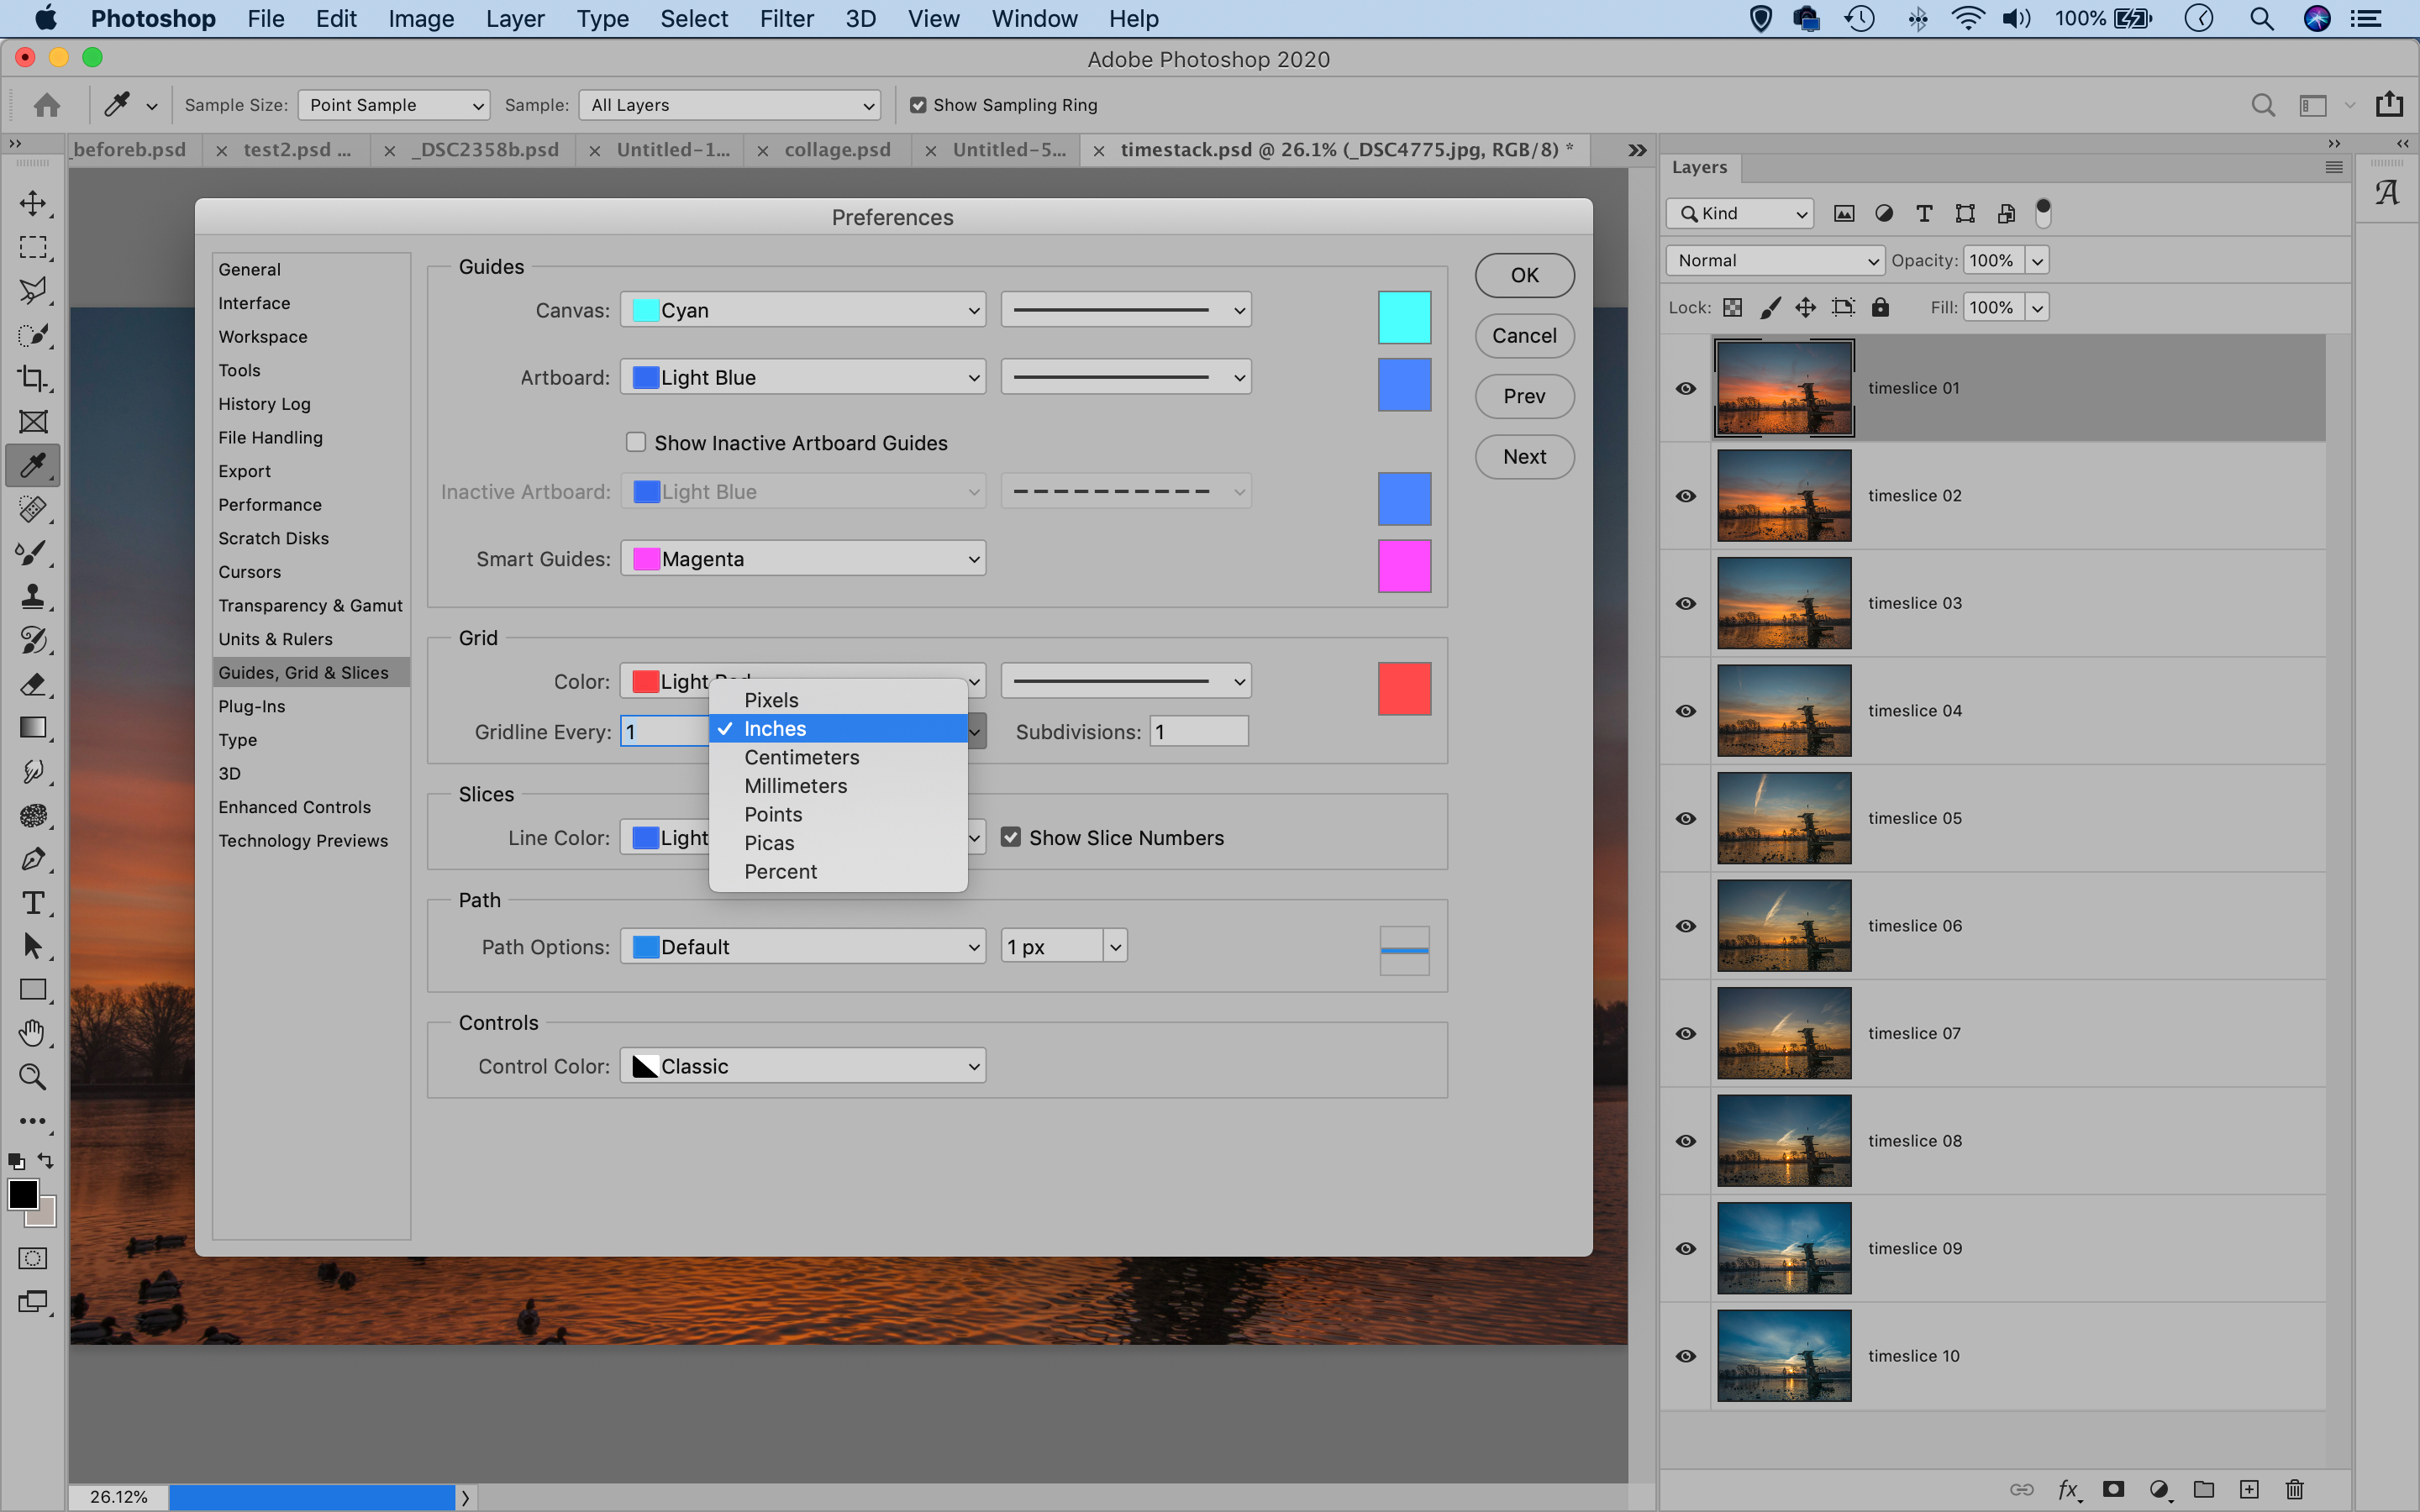
Go to Image > Image Size and set the width to the same number of inches as there are layers in your stack. So for 10 shots set it to 10 inches (uncheck Resample Image). Go to Preferences > Guides, Grids and Slices. Set the Gridline: Every 1 inches, hit OK.
04 Drag a selection
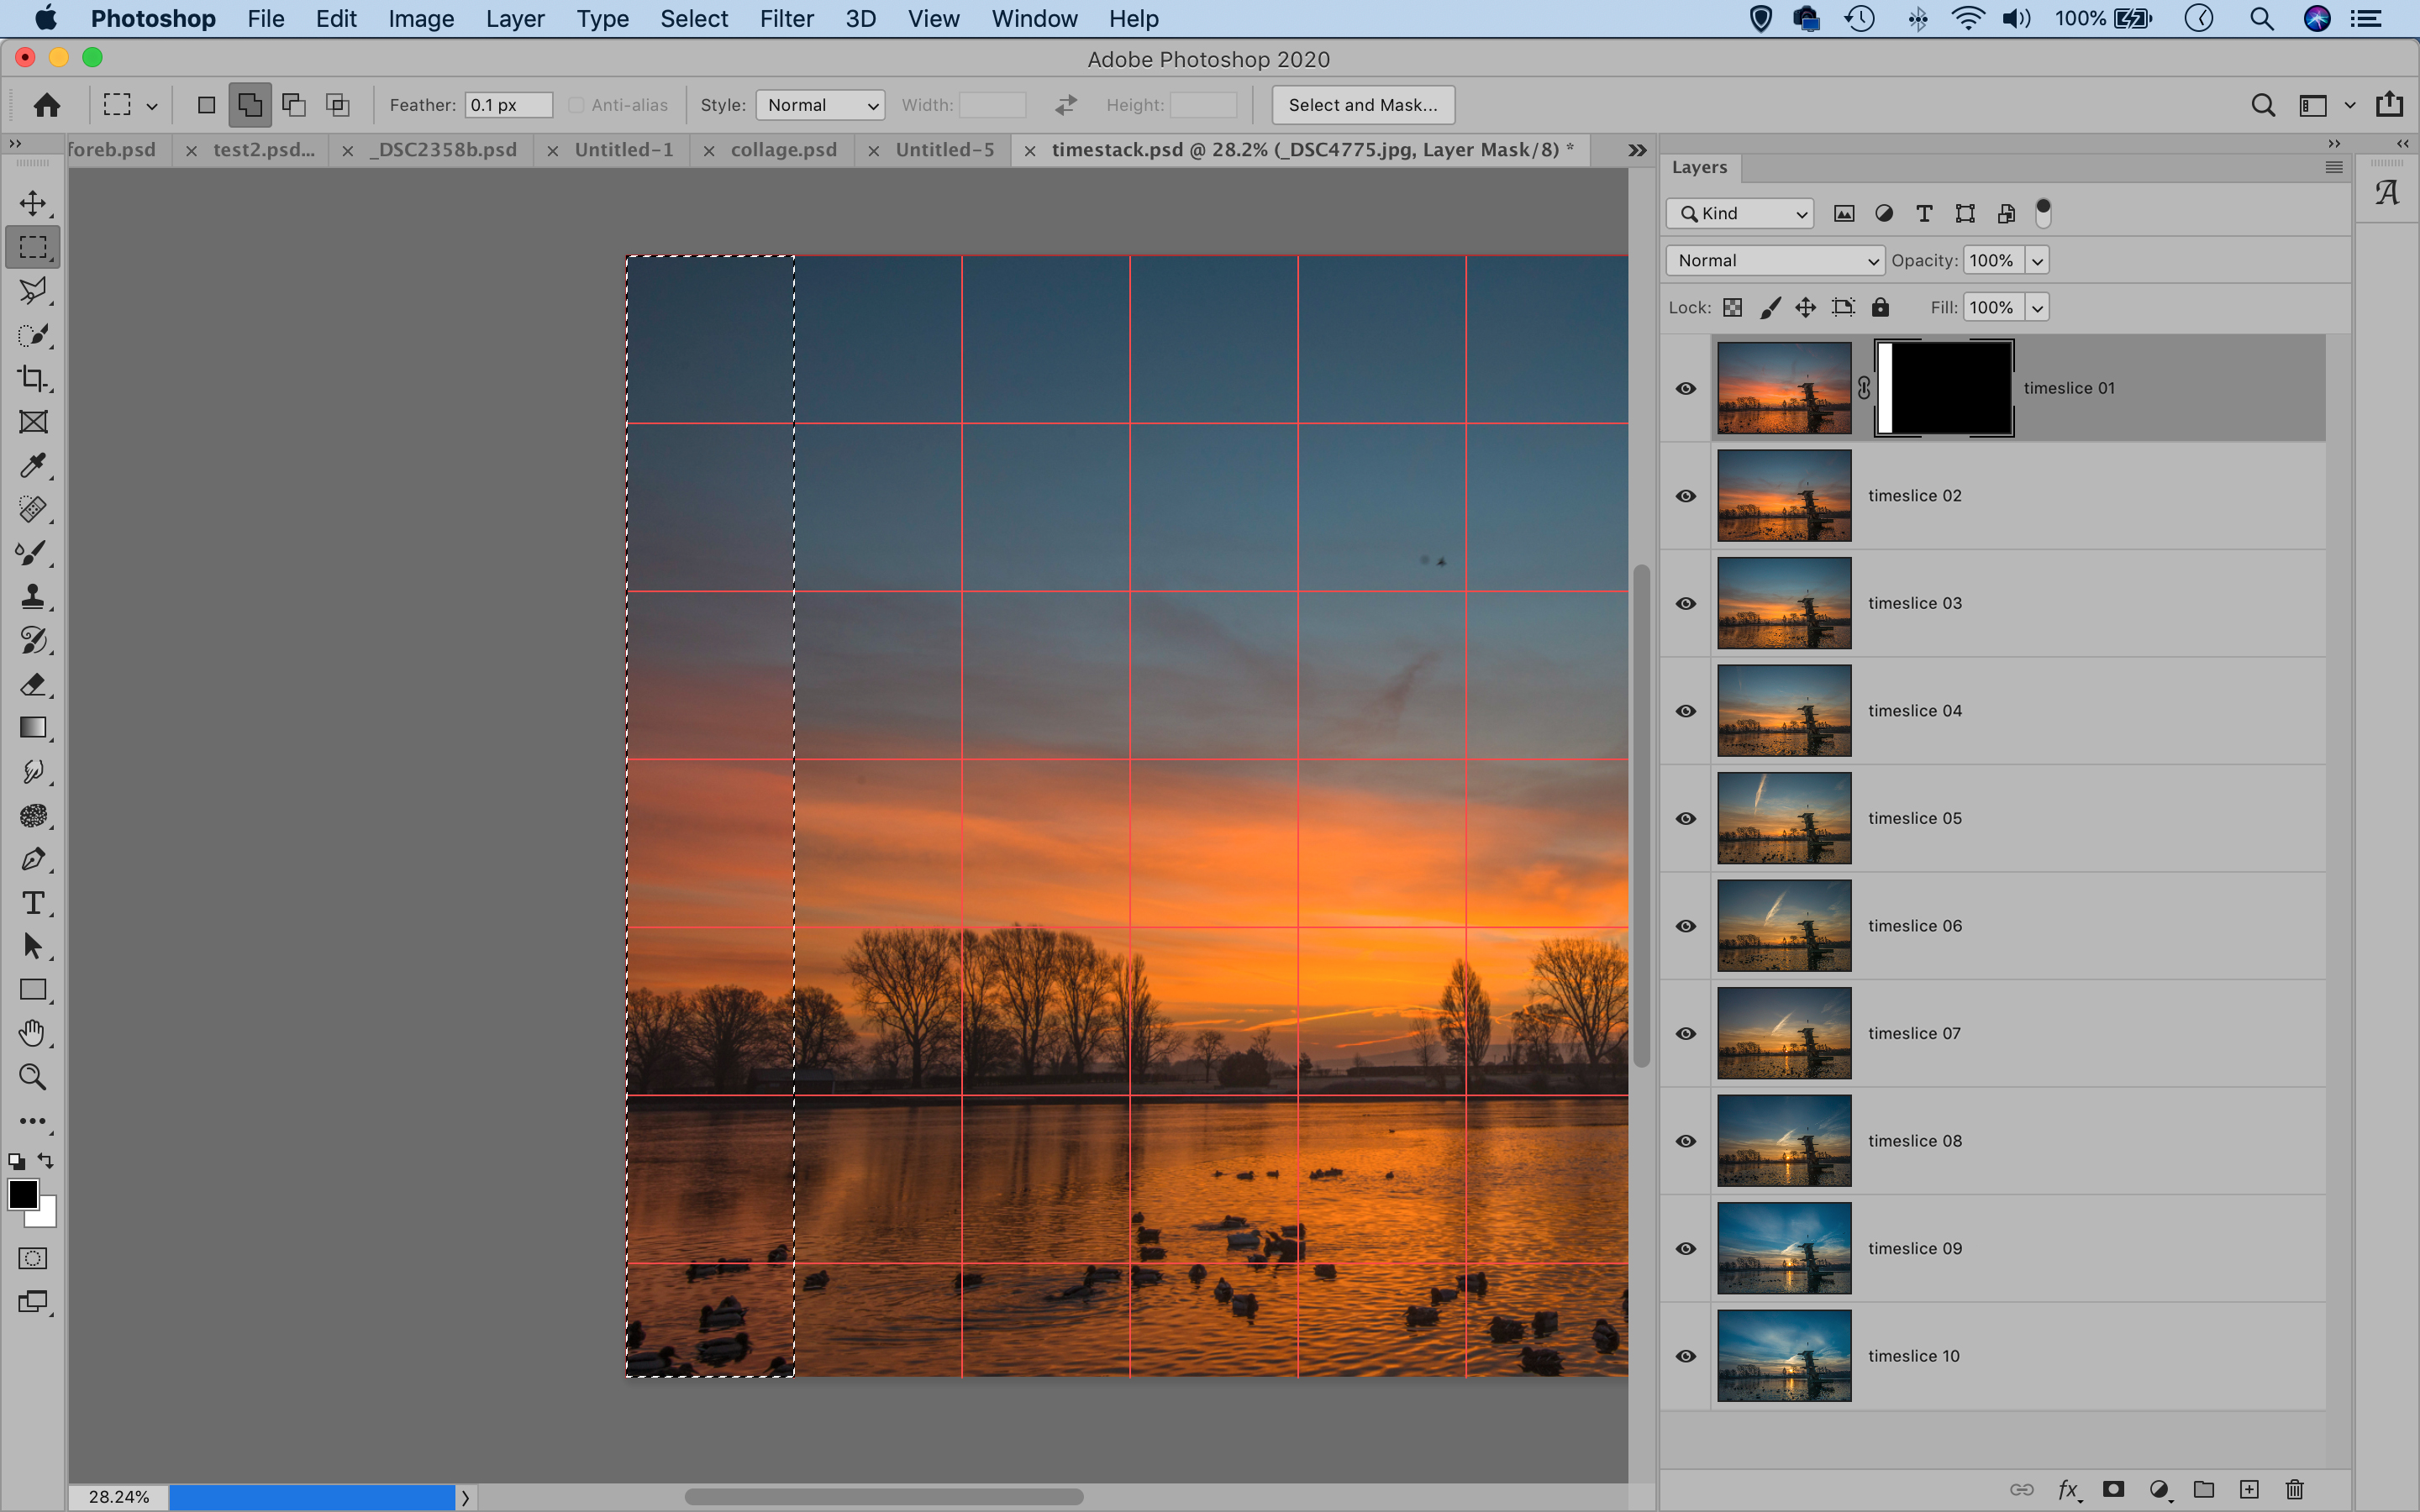
Go to View > Show > Grid, then View>Snap to, and make sure Grid is turned on. Highlight the top layer, grab the Rectangular Marquee tool, then drag a selection over the left-most column. Click the Add Layer Mask icon to convert the selection into a layer mask.
05 Add masks
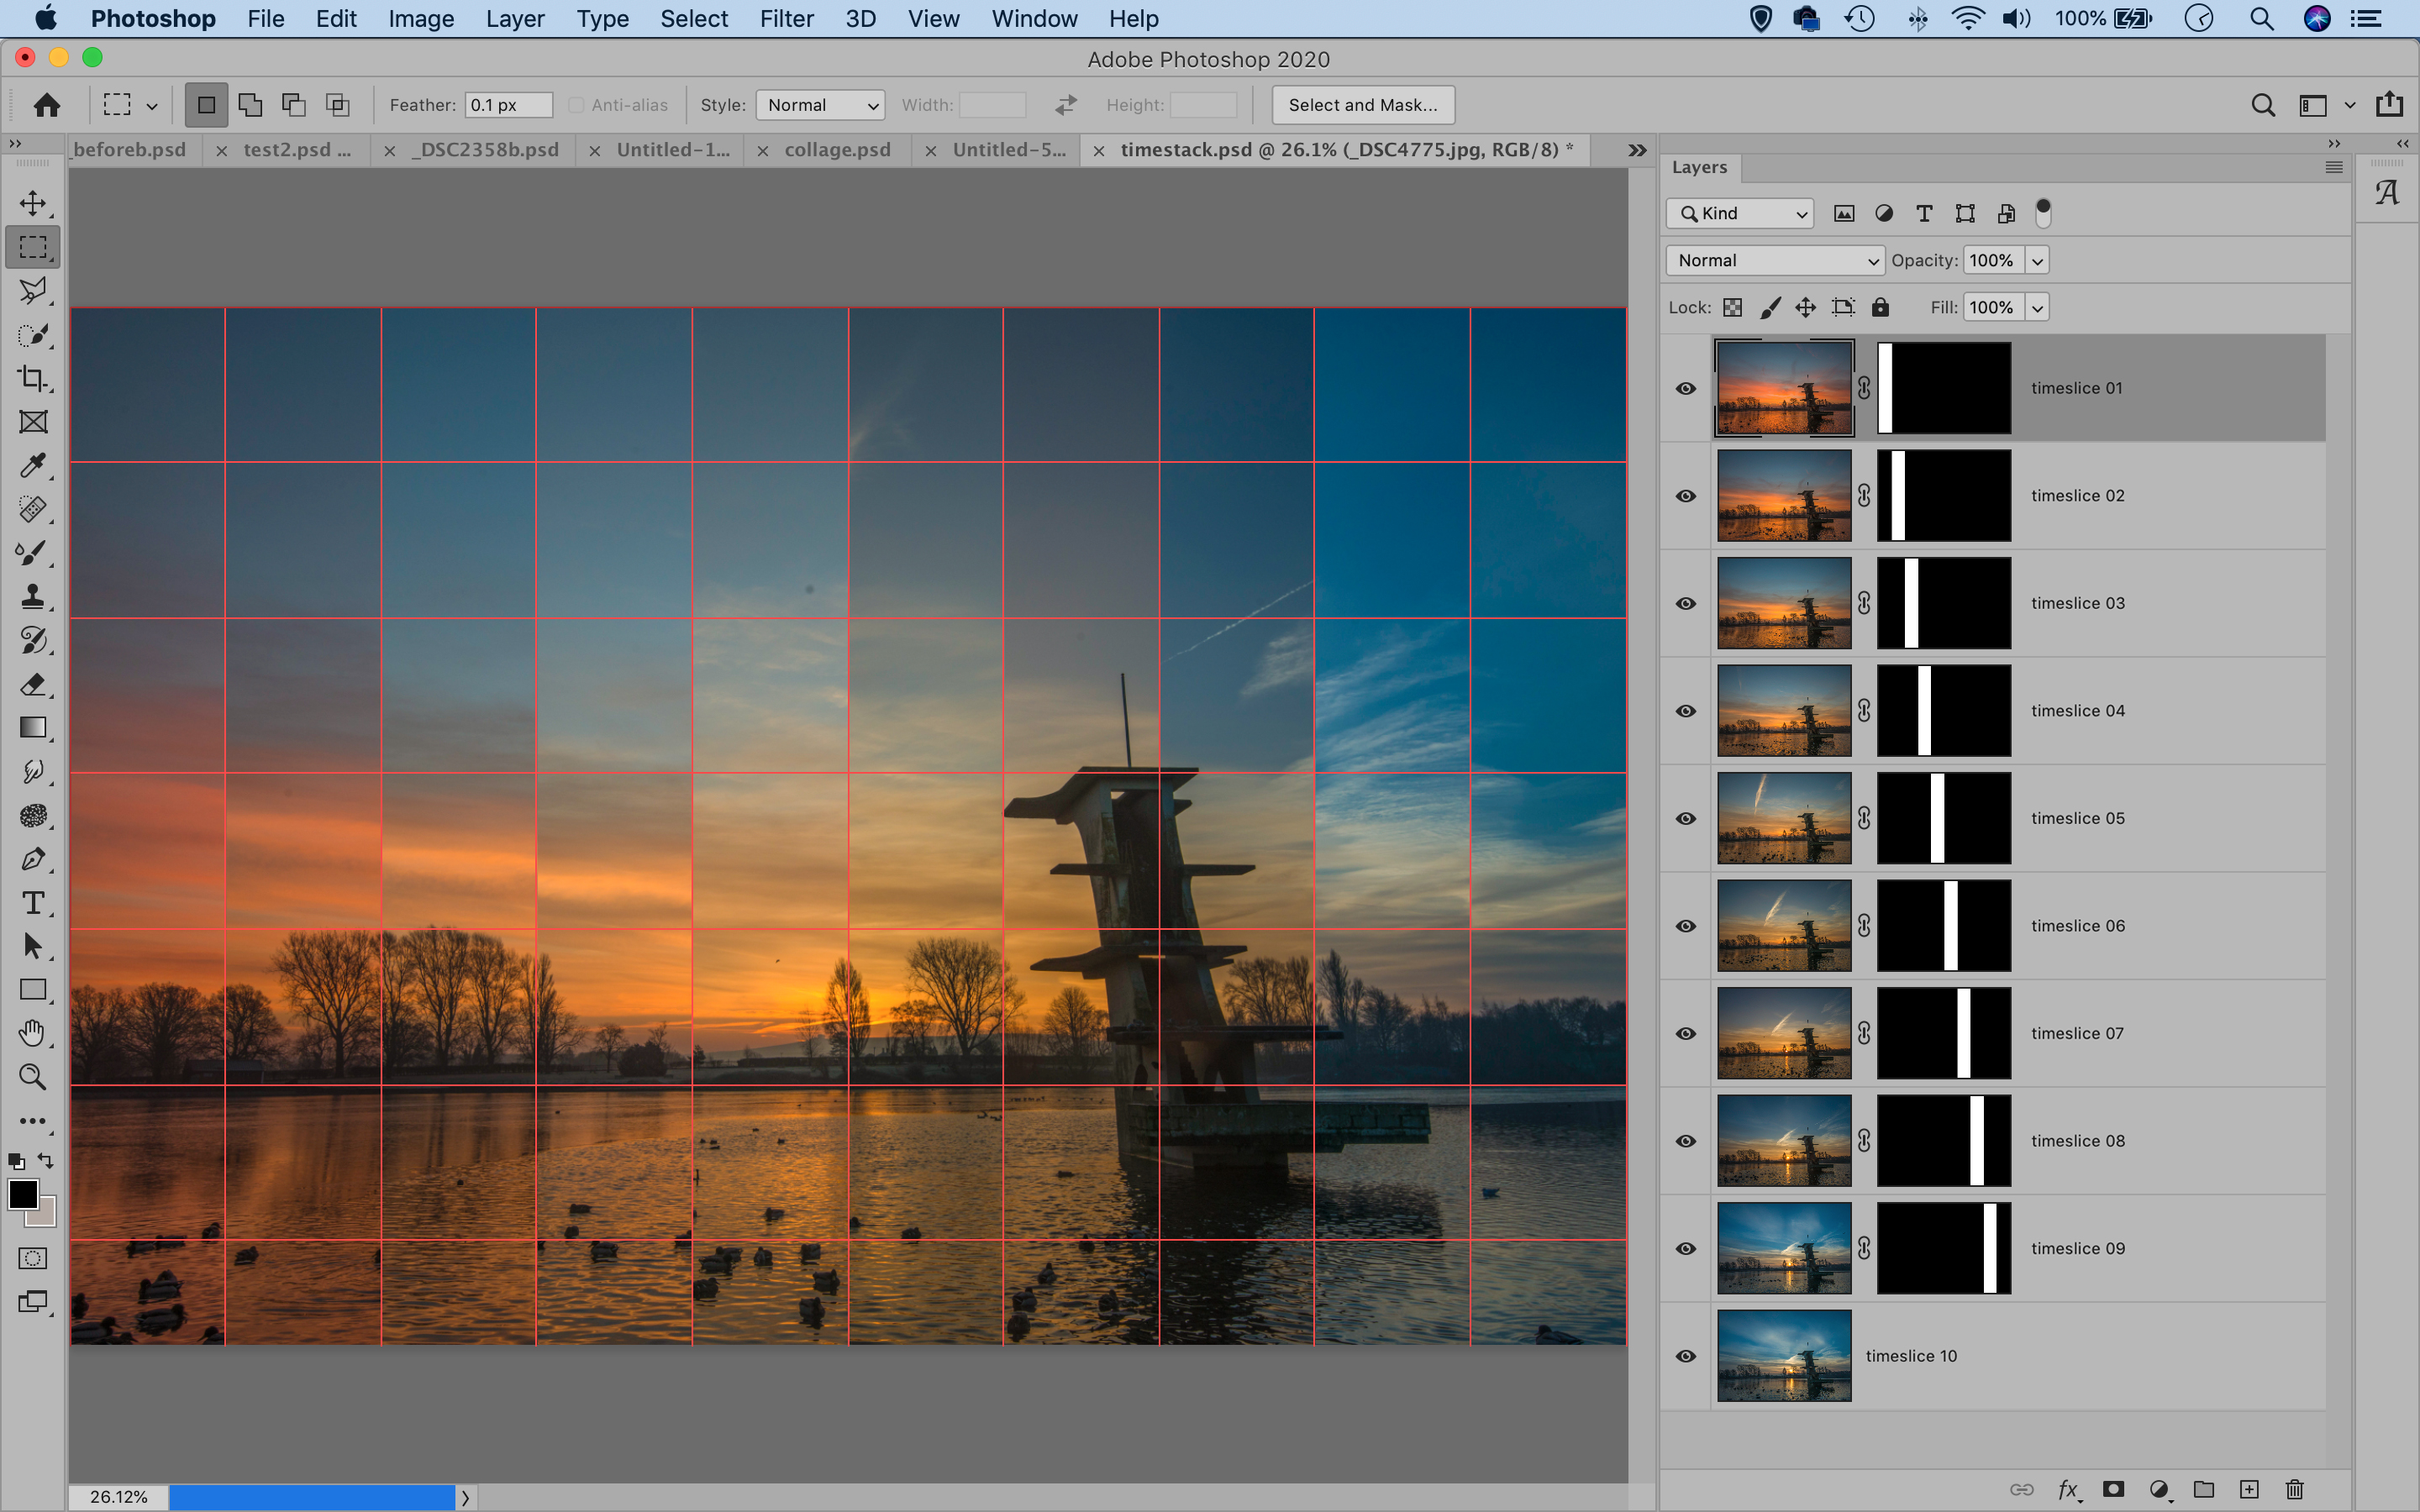
Highlight the layer below, then drag a rectangular selection over the next column, then click the Add Layer Mask icon again. Continue working down through the stack adding masks to all but the bottom layer, so each shot has its own space in the composite.
06 Tone the collage
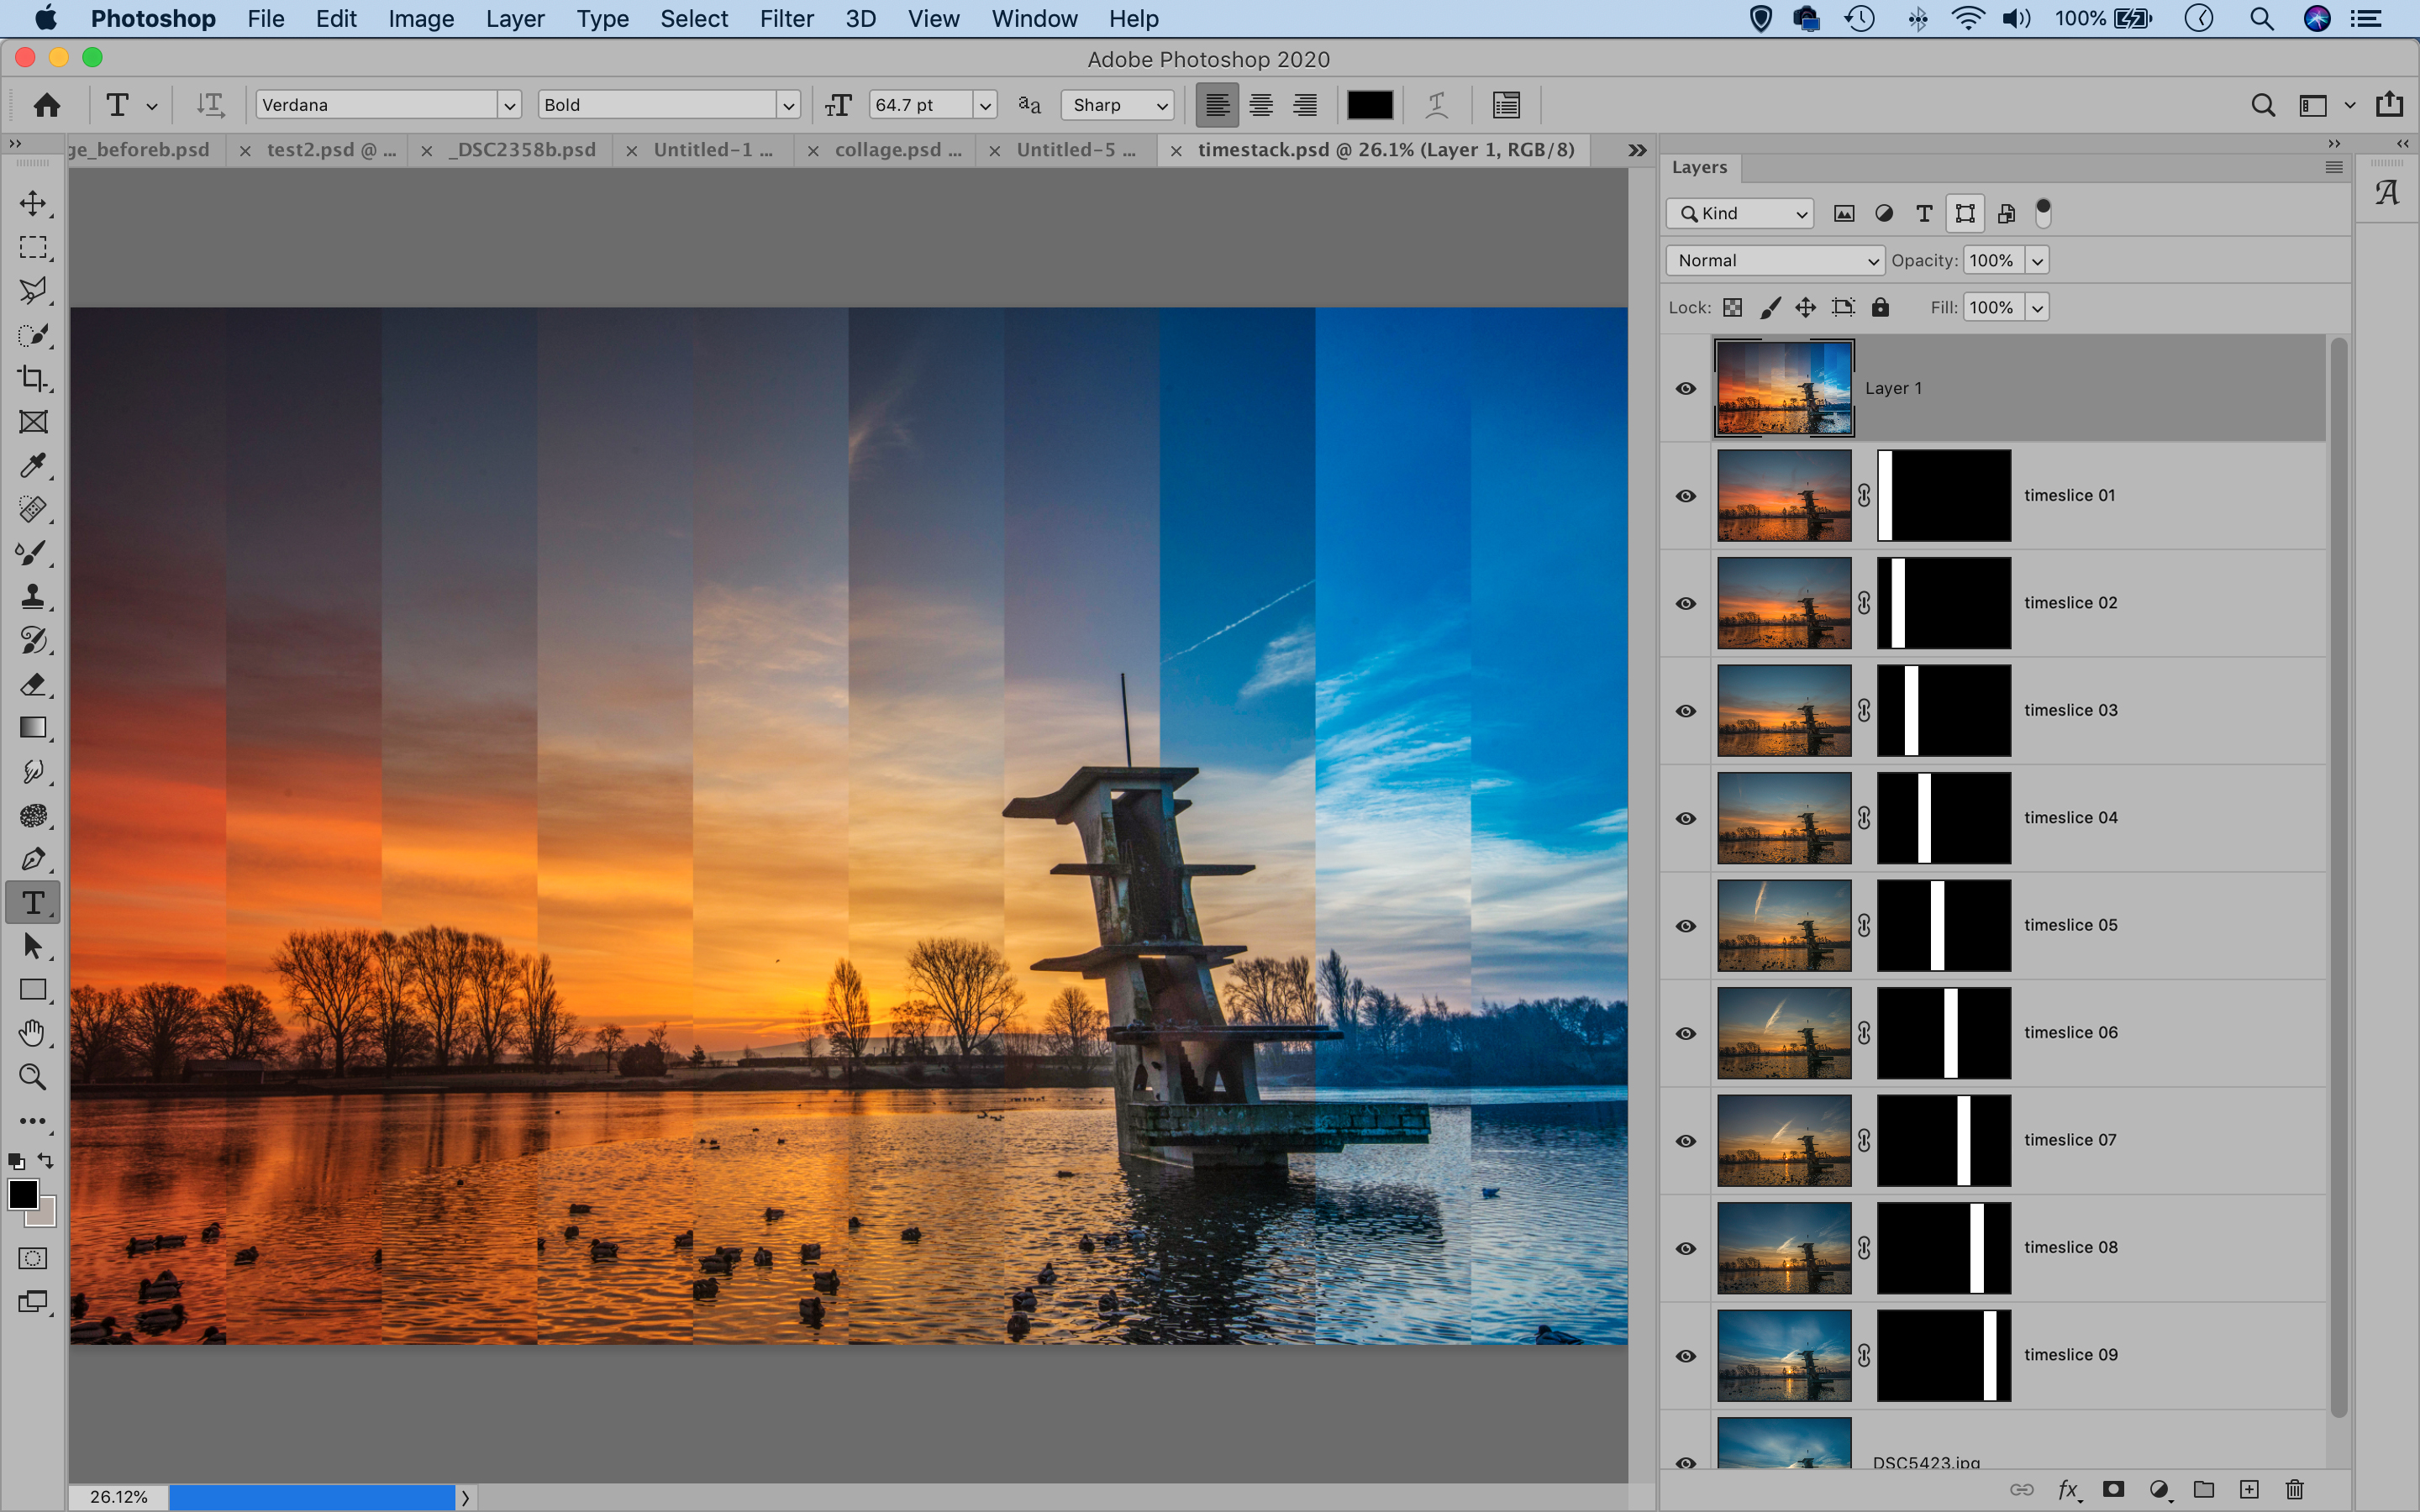
Highlight the top layer, then hit Cmd / Ctrl + Shift + Alt + E to merge a copy of all the layers below. Go to Filter> Camera Raw Filter to boost the tones and contrast. Finally, to emphasize the changing colors of our composite, we boosted Vibrance and Saturation.
PhotoPlus: The Canon Magazine is the world's only monthly newsstand title that's 100% devoted to Canon, so you can be sure the magazine is completely relevant to your system.
Read more:
100 Photoshop tips
The best photo editing software: image editors for novices through to pros
The best photo-editing laptops: top laptops for photographers
10 best online photography courses – from beginner guides to masterclasses
Get the Digital Camera World Newsletter
The best camera deals, reviews, product advice, and unmissable photography news, direct to your inbox!
The lead technique writer on Digital Camera Magazine, PhotoPlus: The Canon Magazine and N-Photo: The Nikon Magazine, James is a fantastic general practice photographer with an enviable array of skills across every genre of photography.
Whether it's flash photography techniques like stroboscopic portraits, astrophotography projects like photographing the Northern Lights, or turning sound into art by making paint dance on a set of speakers, James' tutorials and projects are as creative as they are enjoyable.
He's also a wizard at the dark arts of Photoshop, Lightroom and Affinity Photo, and is capable of some genuine black magic in the digital darkroom, making him one of the leading authorities on photo editing software and techniques.


