How to create a double exposure in Photoshop Elements
Create a double exposure in Photoshop Elements quickly and easily using Adobe's Guided Mode
Watch video: How to create a double exposure in Photoshop Elements
Creative double exposure images were a staple of old analogue film photography – sometimes intentionally, sometimes completely by accident! If you're old enough to remember getting rolls of film developed at the drug store, you probably remember some quirky results coming back when you forgot to wind on the film.
We've explained how to shoot a double exposure in-camera, but if you don’t have a camera that possesses the feature – or if you have images you’ve shot previously that you’d like to turn into double exposures – you can achieve the same result quickly and easily in Photoshop Elements.
Using this method has a number of benefits. Firstly, while the in-camera method enables you to shoot two images specifically designed to work together, performing this technique in Elements enables you to edit any two photographs you’ve ever taken – or, indeed, to embellish one of your own pictures with a texture or stock image that you’ve found elsewhere.
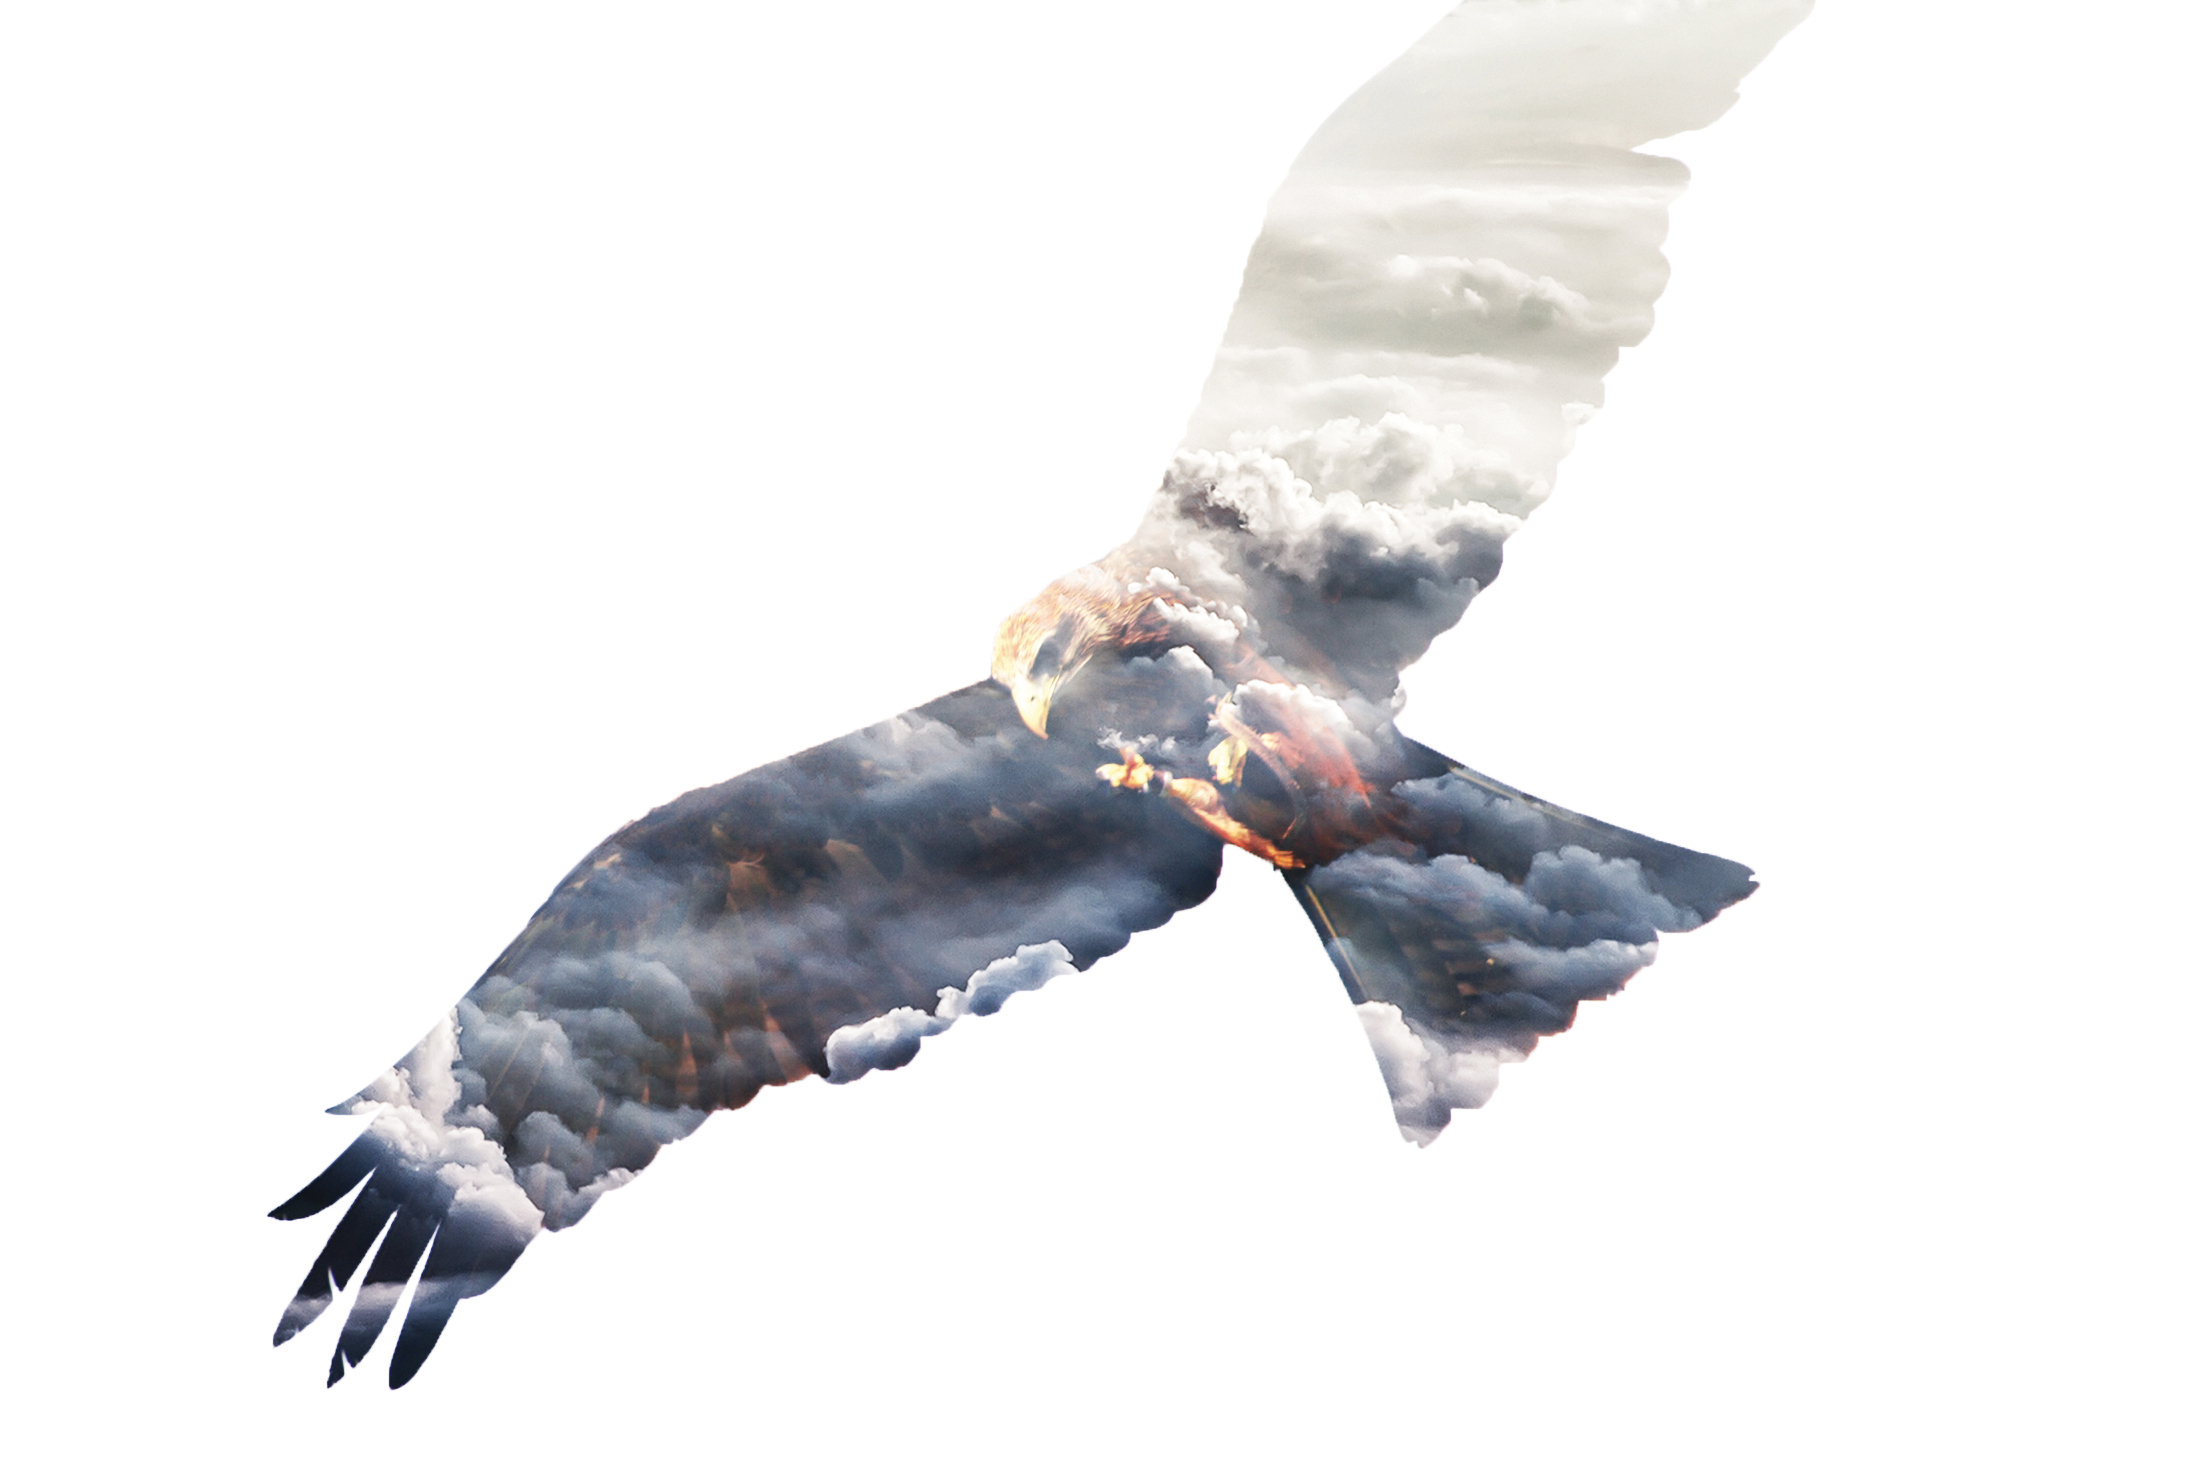
In fact, Elements has three pre-prepared images – Forest, City and Cloud – that make excellent second exposures to edit together with your own original photograph. You also have the benefit of choosing the intensity of the exposure effect, so you can better control the blend between the two images you've chosen.
Finally, you can also add a color or monochrome treatment to finish off your image. They work a little bit like Instagram filters, so some of them are best applied with consideration – but again, you can tweak the strength of the effect using the Intensity slider.
Creating double exposures in Elements gives you much more freedom to experiment than doing it in-camera, so it’s worth creating a folder full of different textures and backgrounds to see how they’ll work together. And if you use Affinity Photo, check out our guide on how to create a double exposure effect in Affinity.
01 Choose first exposure
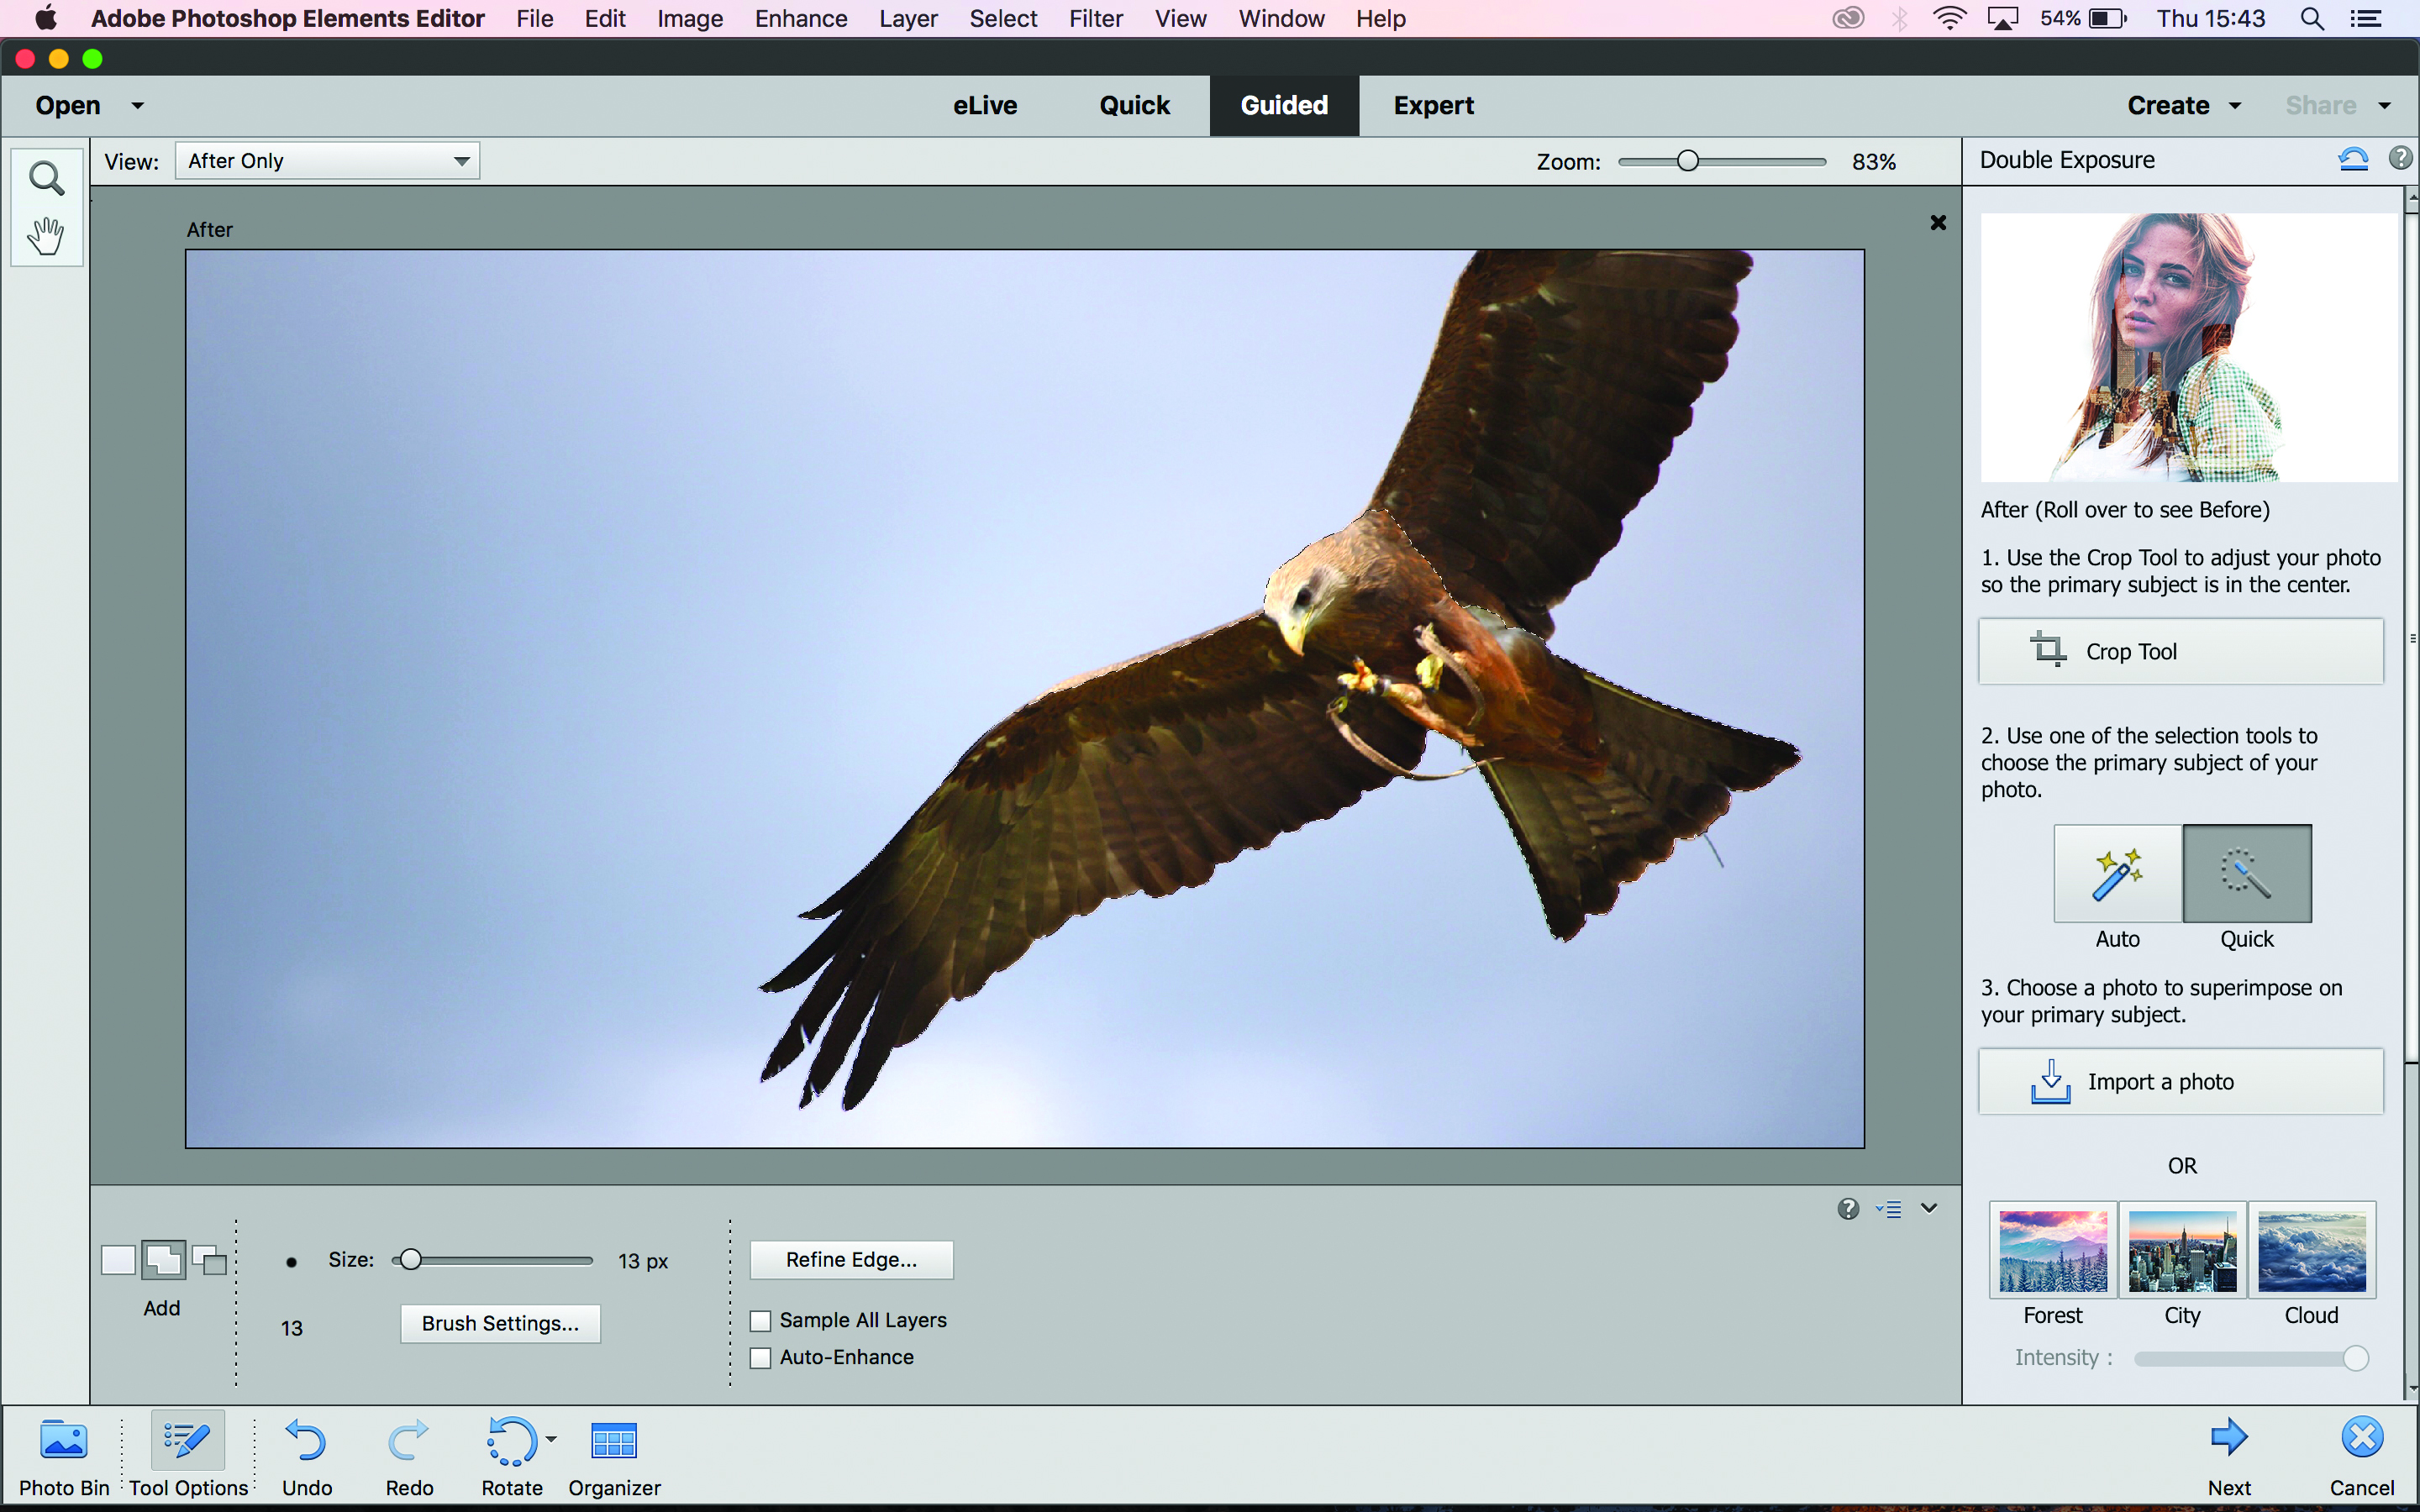
Open your first image and click on the Quick tab to make any exposure tweaks. Now click on the Guided tab then Fun Edits, and here you need to select Double Exposure. Using the Quick tool, click and hold the left mouse button on your subject and drag it around until the subject is selected. A contrasty subject on a lighter background will work best.
02 Choose second exposure
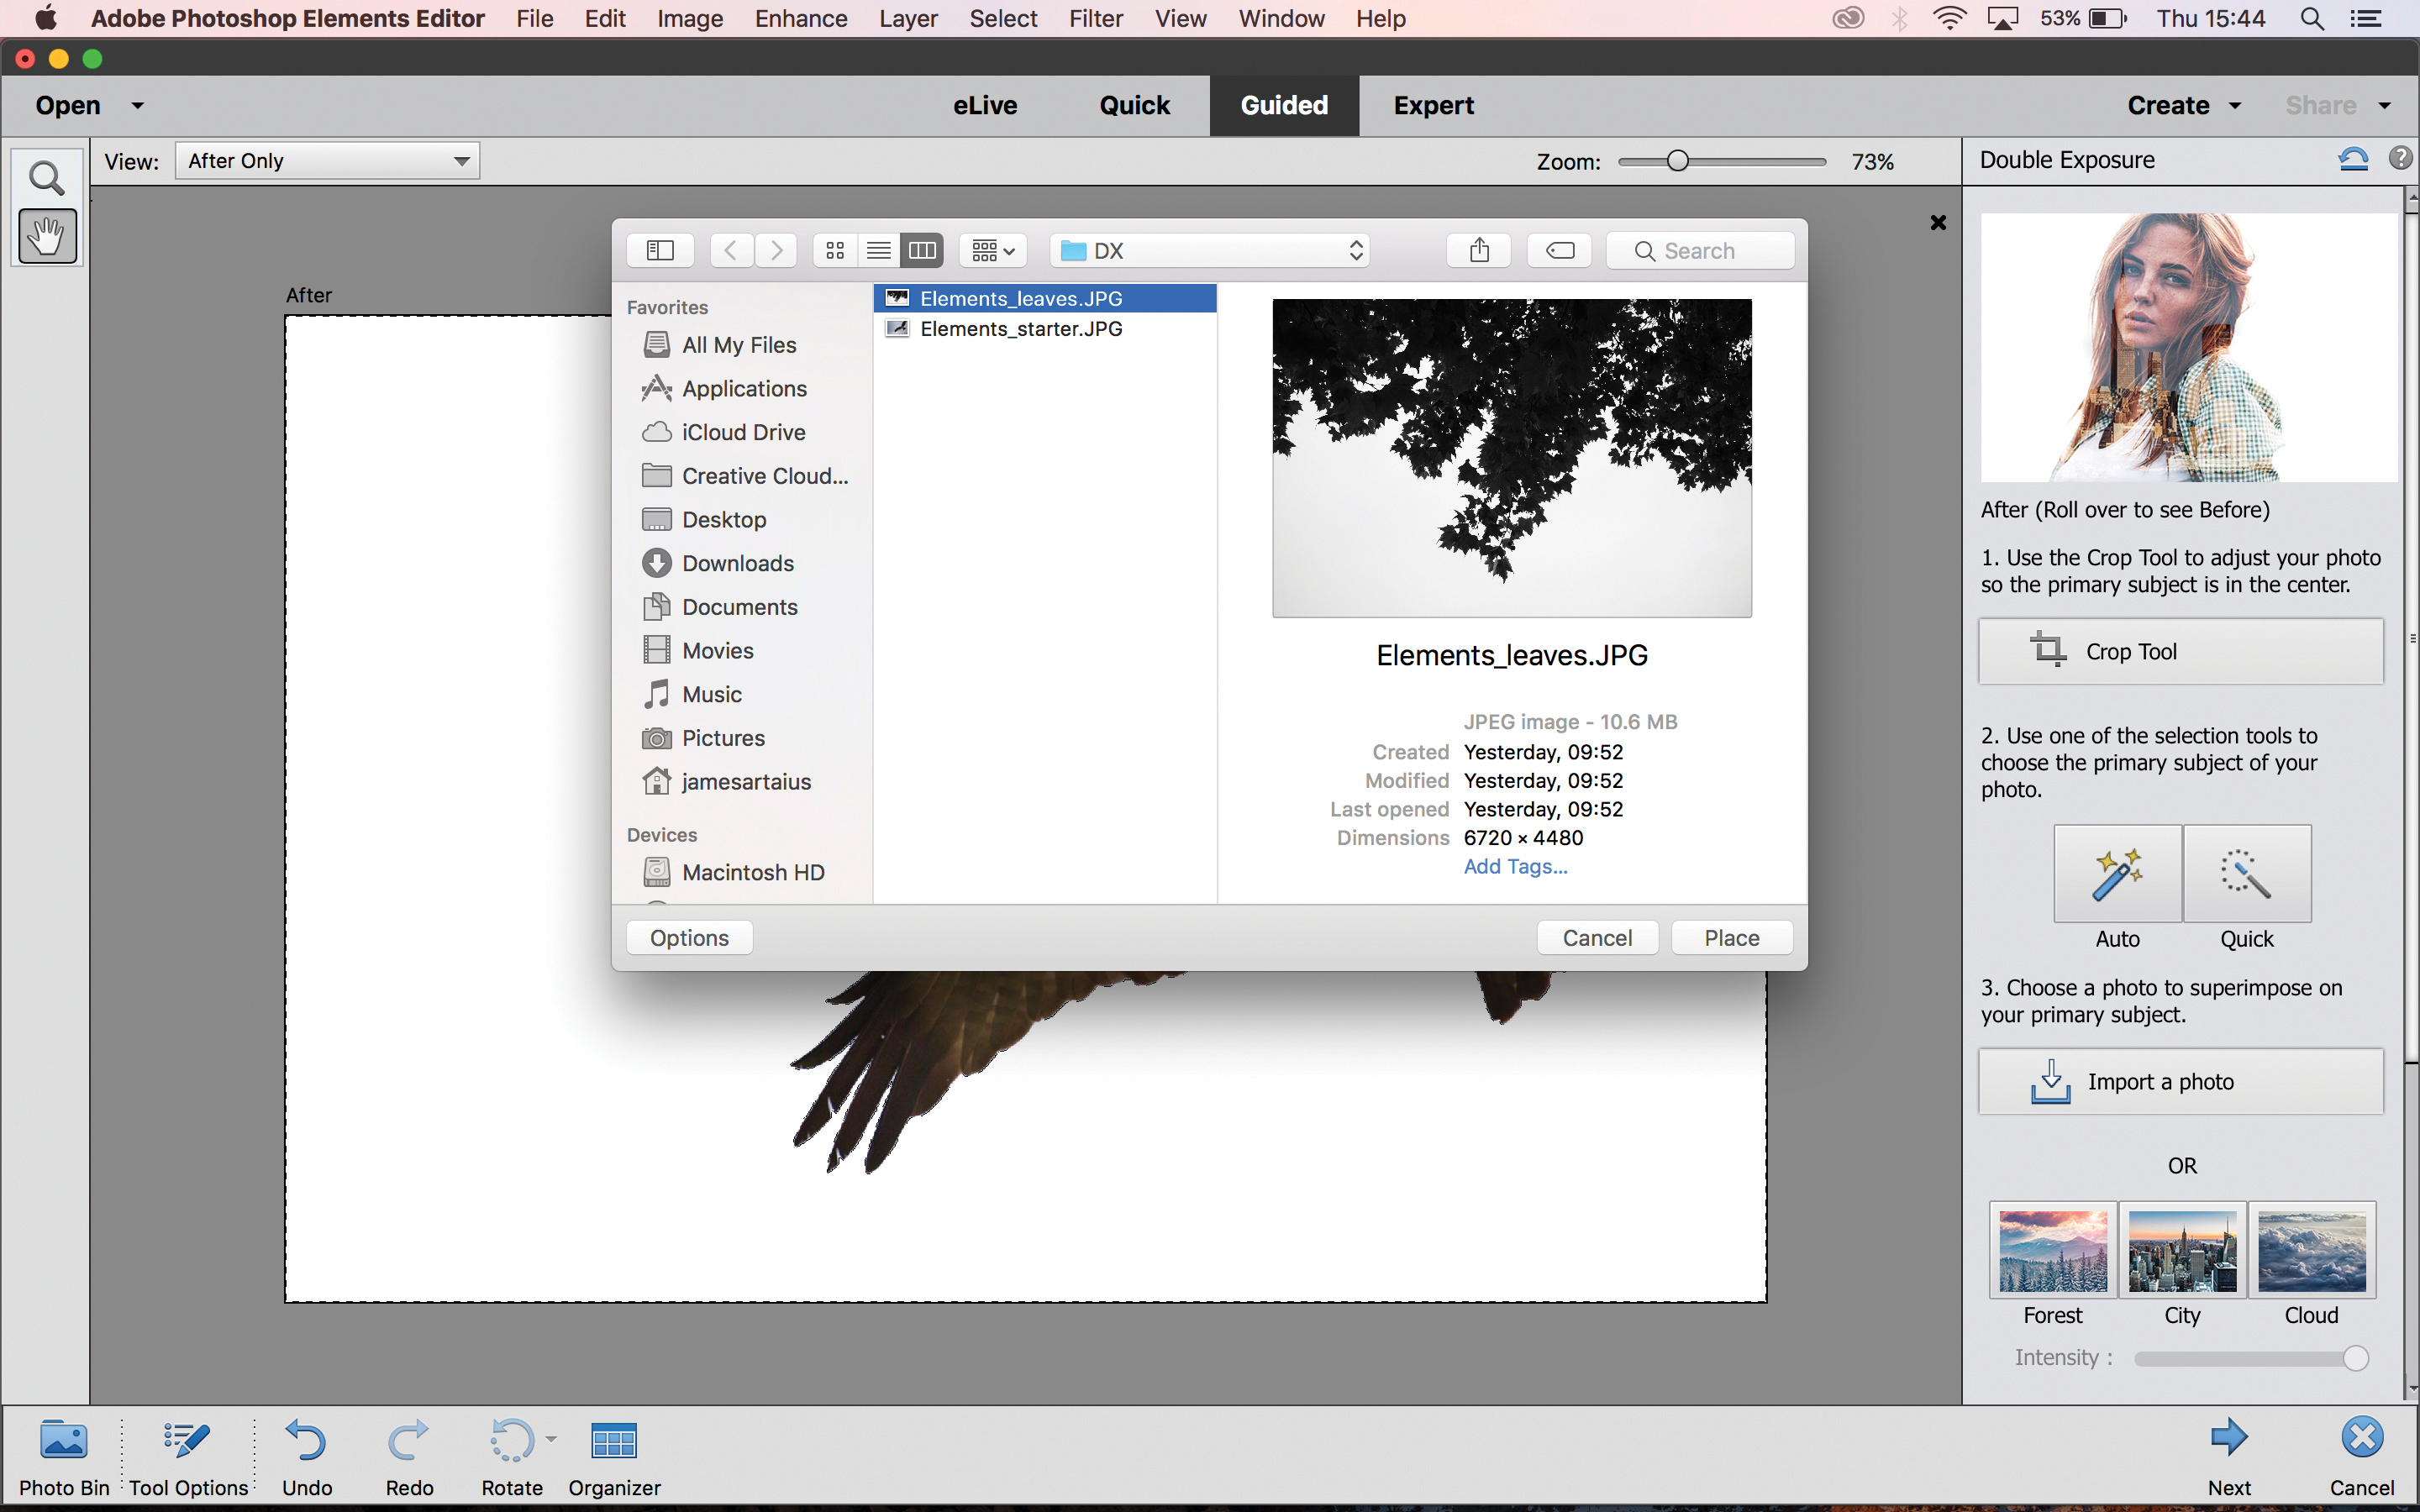
Now you have two options. Firstly, you can click ‘Import a photo’ to choose an image from your hard drive as your second exposure. Like your first image, a contrasty subject against a light or white background will yield best results.
03a Place second exposure
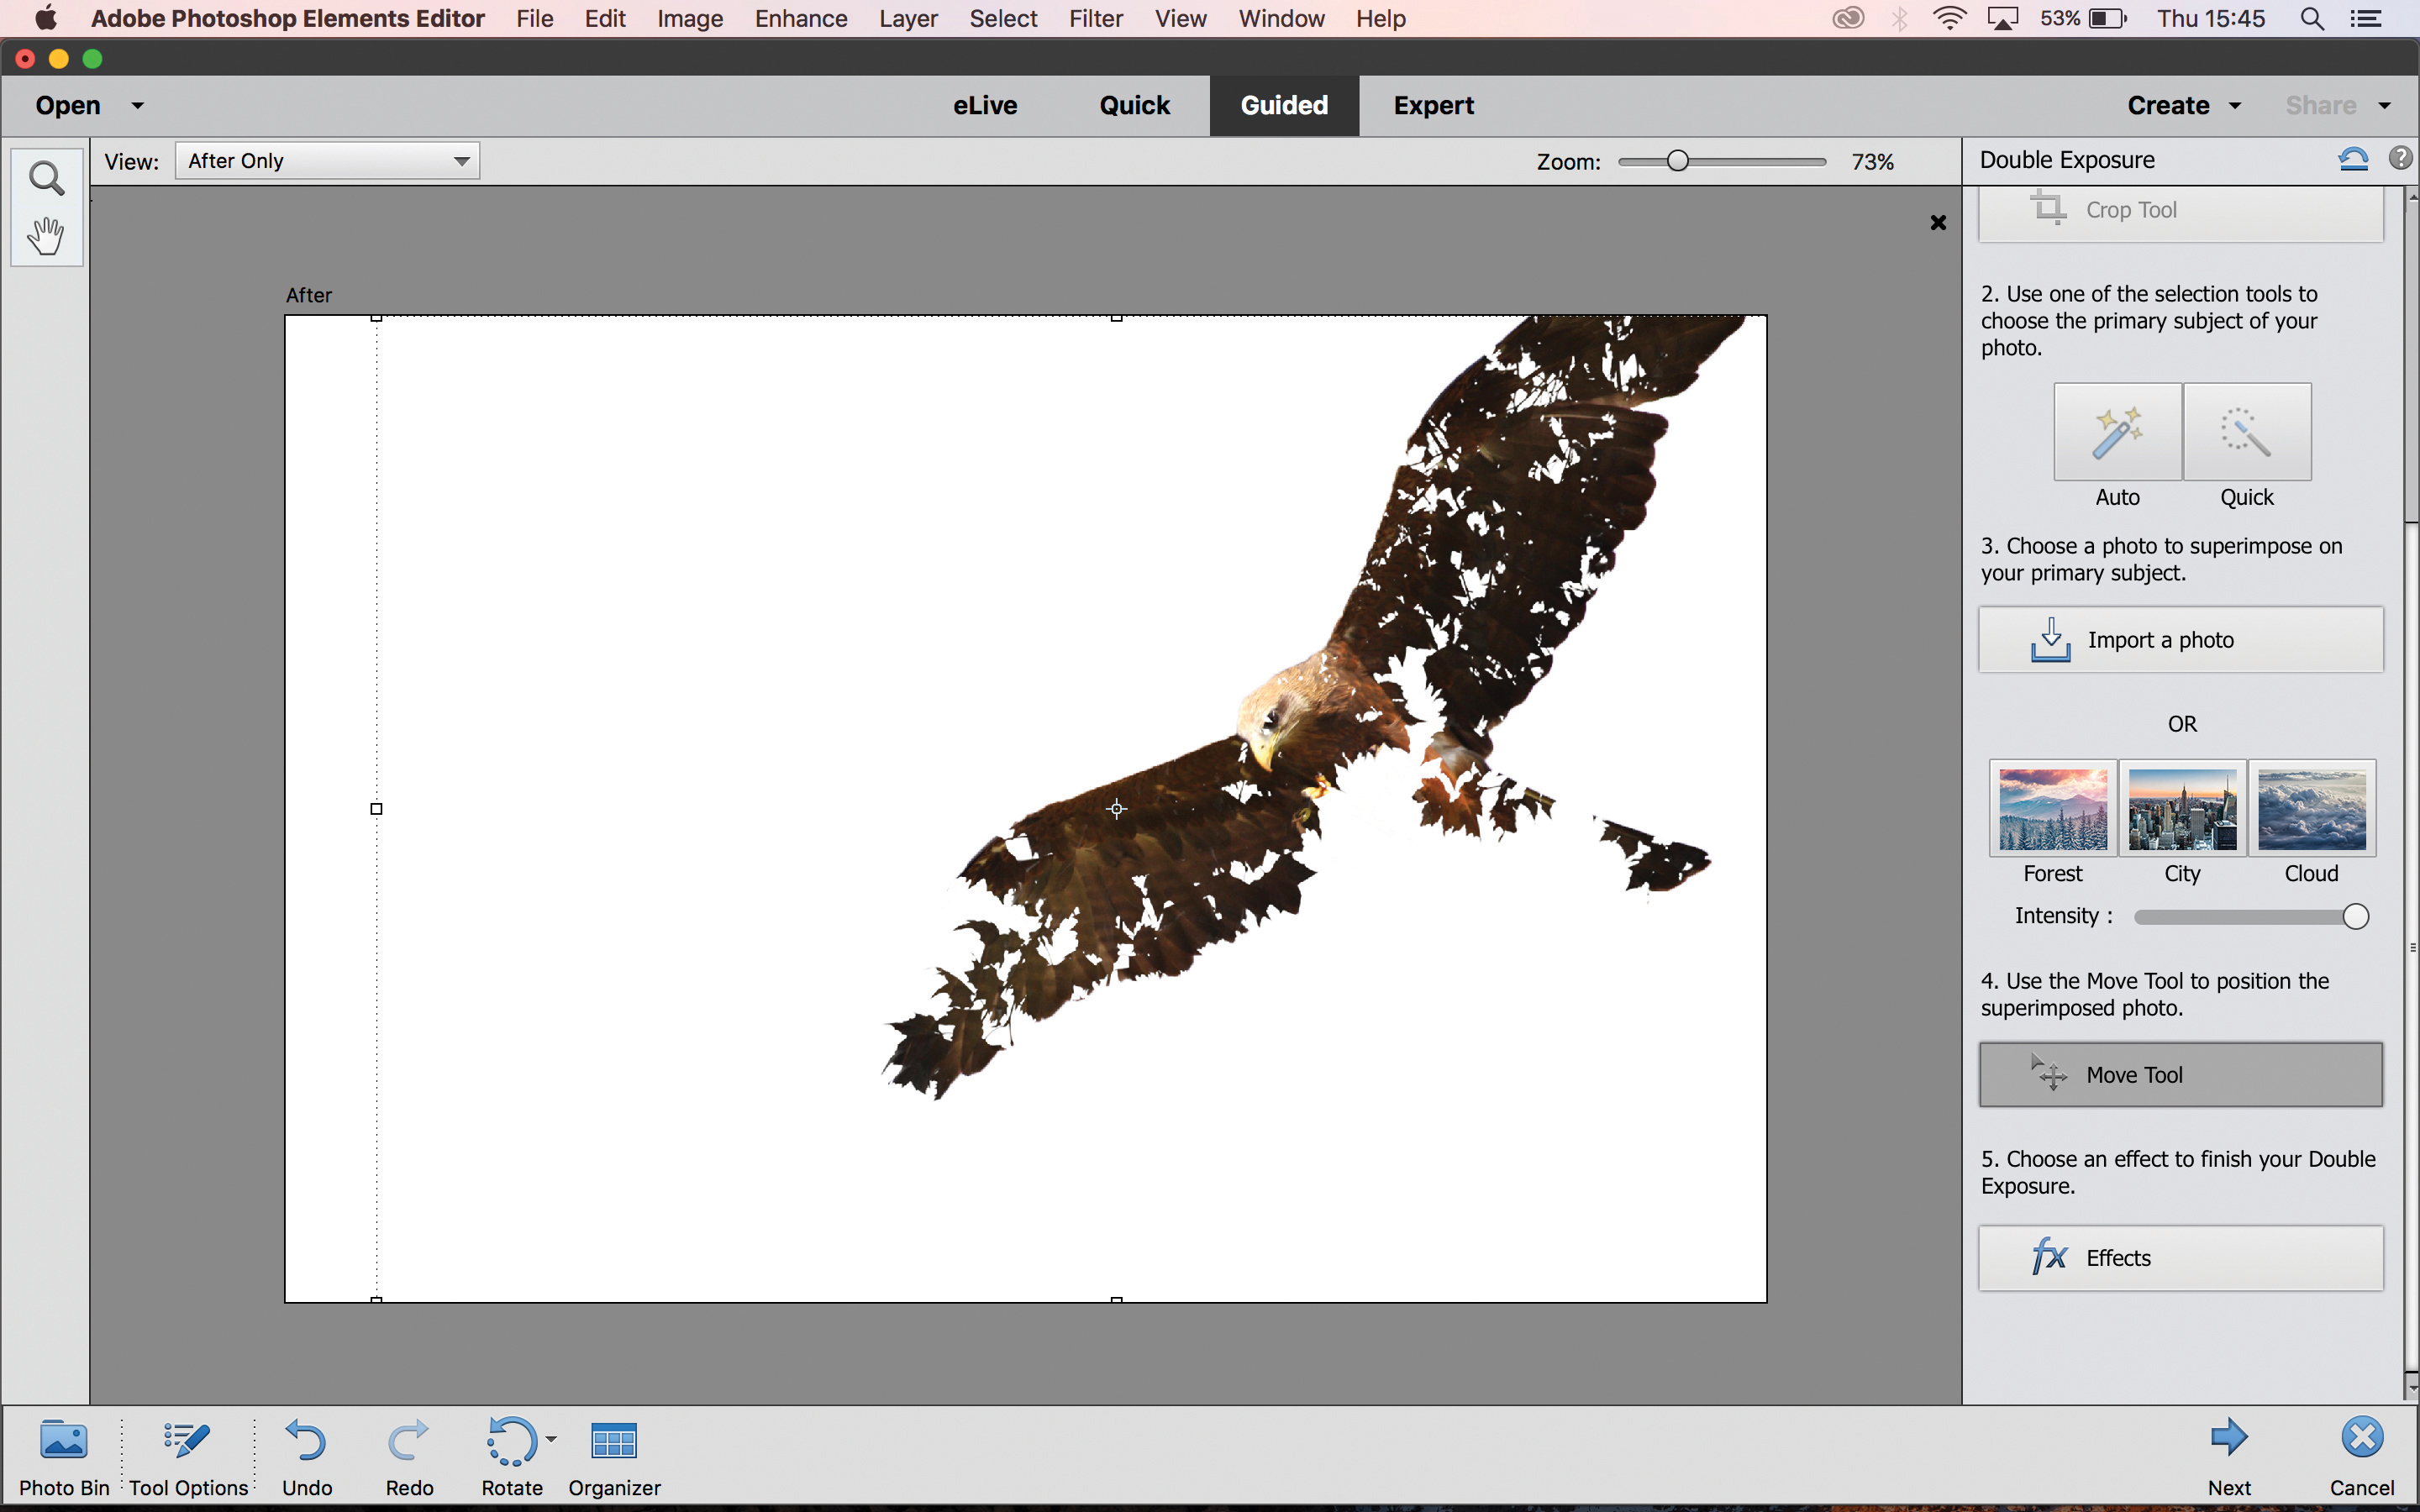
As you can see, the second exposure only appears within the area we selected in step 01. Use the Move Tool to drag this second image around (and resize it, by clicking and dragging the corners) until you are happy with the placement.
03b Use an exposure from Elements
Alternatively, you can use one of the existing images provided by Elements as your second exposure – the cloud works best for our photograph of the bird. Use the Intensity slider to control the strength of the double exposure effect.
04 Add a color effect
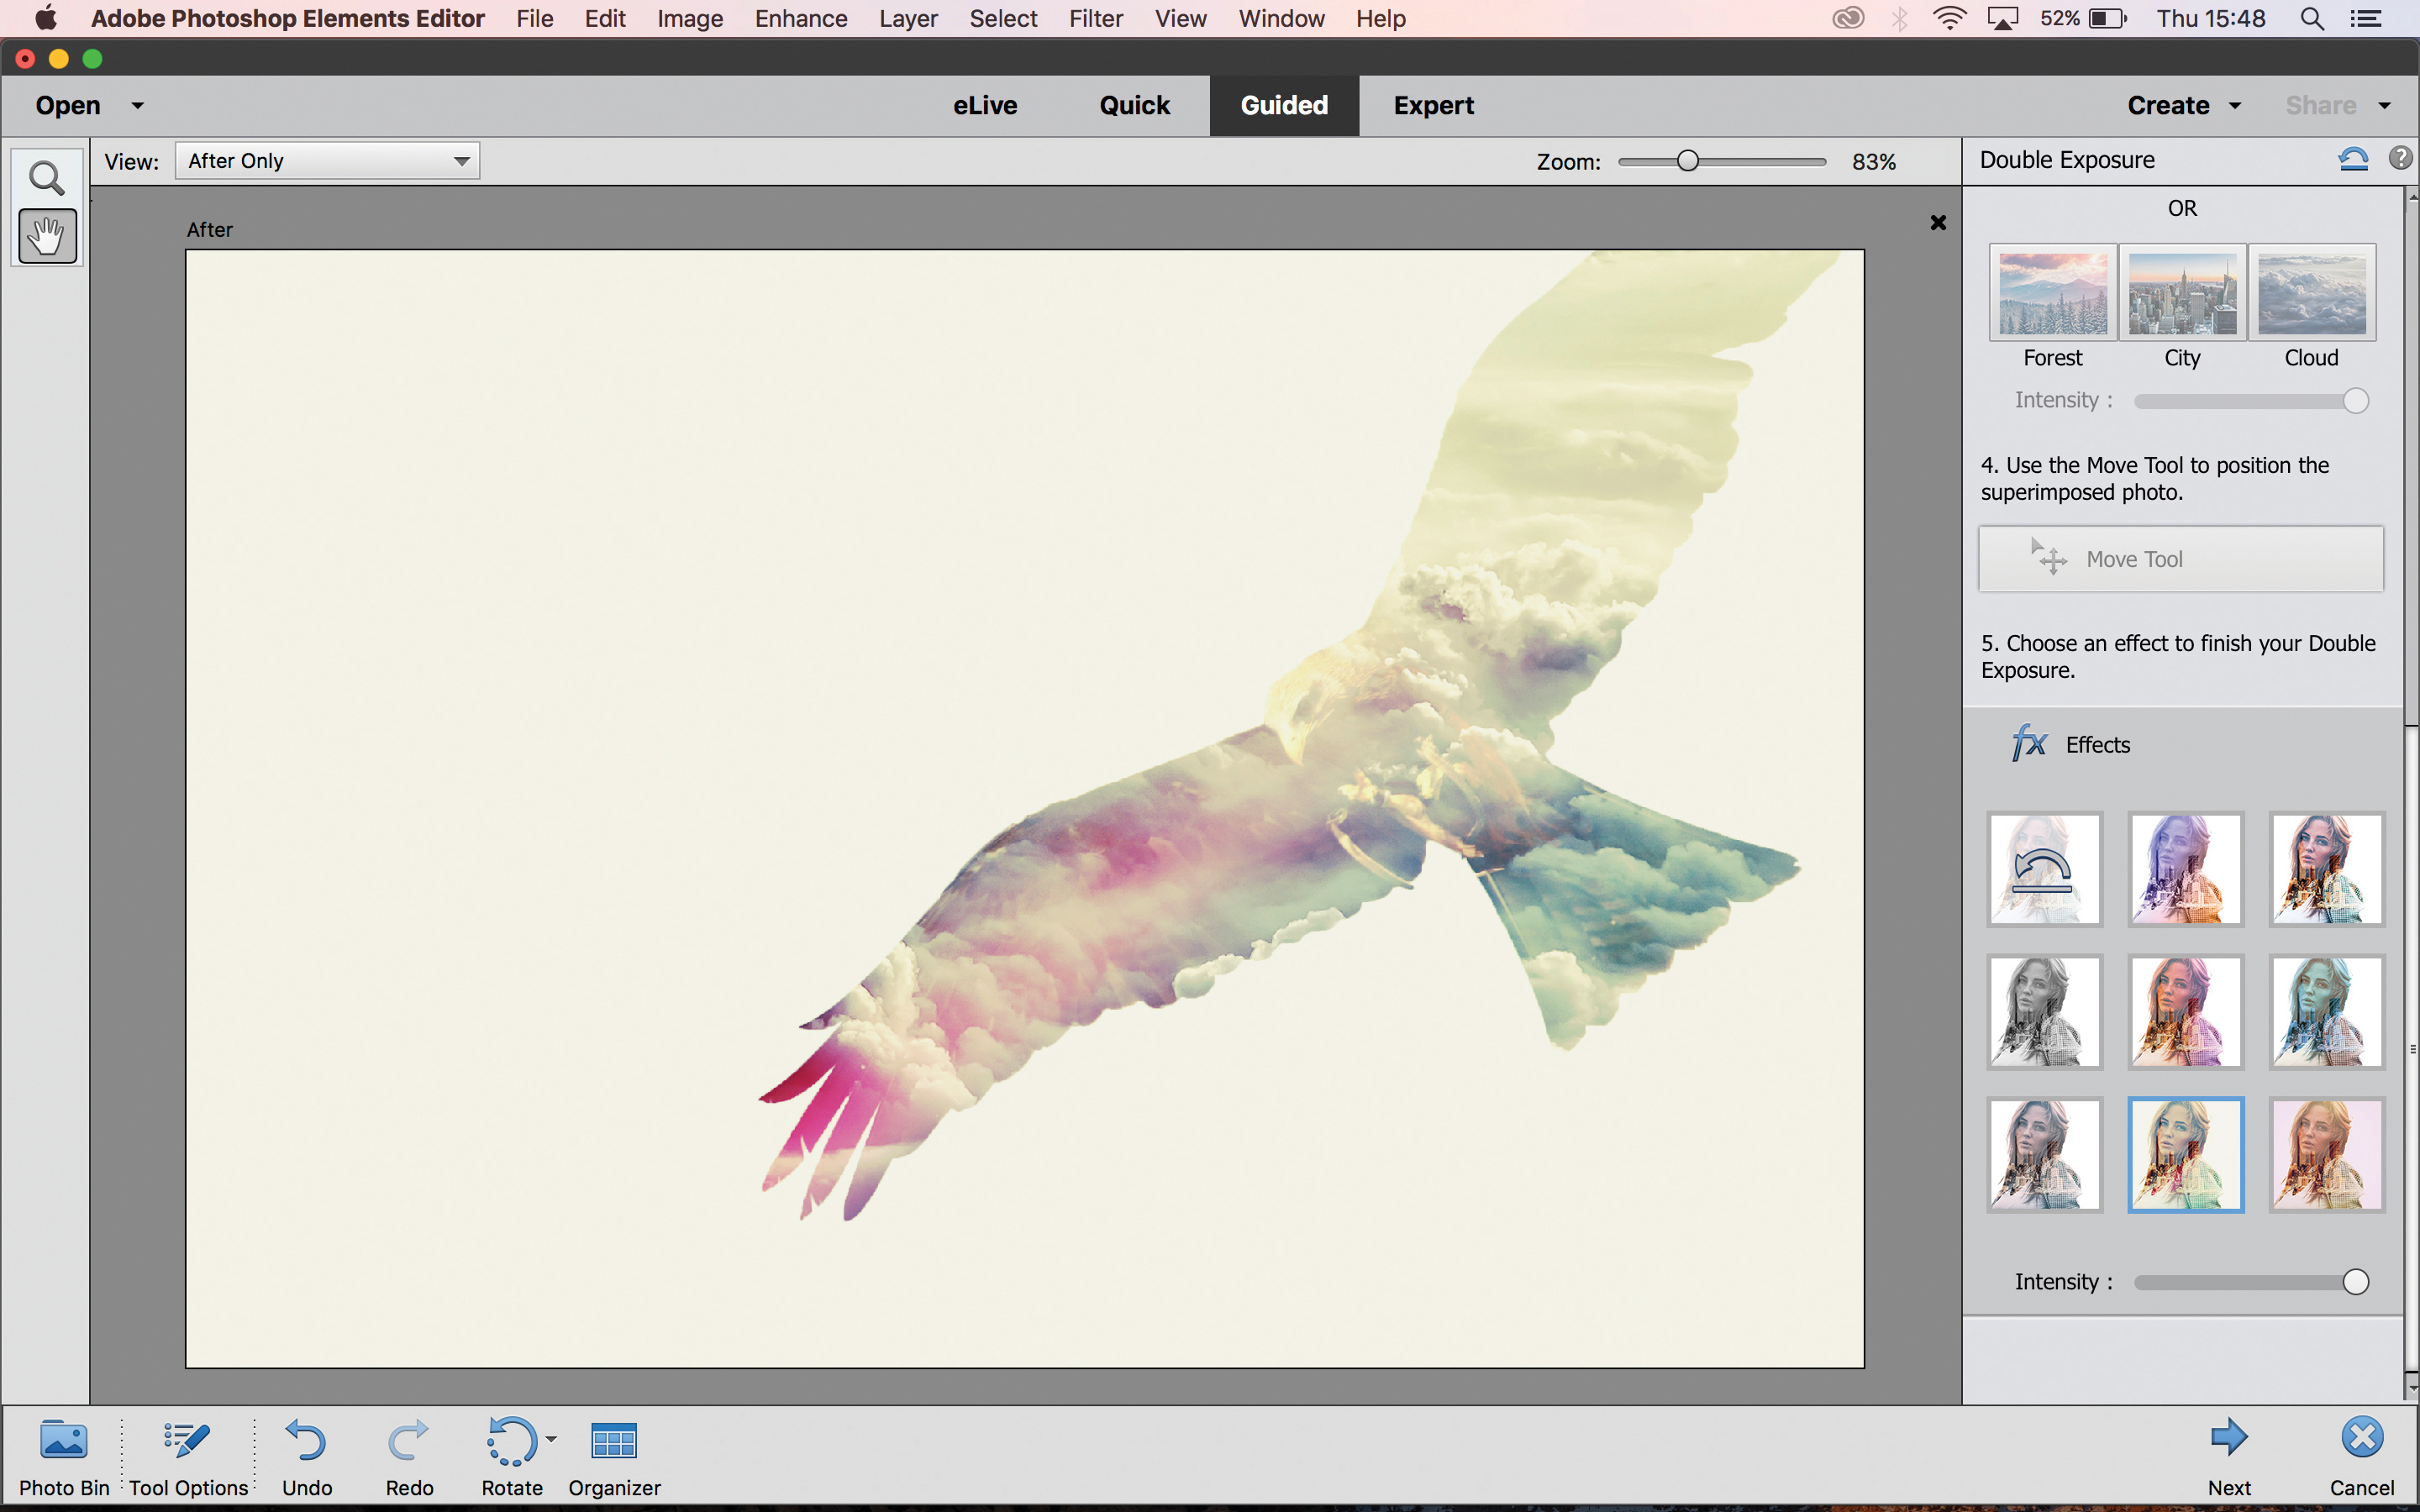
Once you are happy with the double exposure that you've created, you can add a color treatment on top. Click through the thumbnails in the Effects panel to see which you like – again, you can change the Intensity using the slider. Some of the effects an be a bit "Instagrammy", so you might need to exercise a little restraint!
05 Crop and output
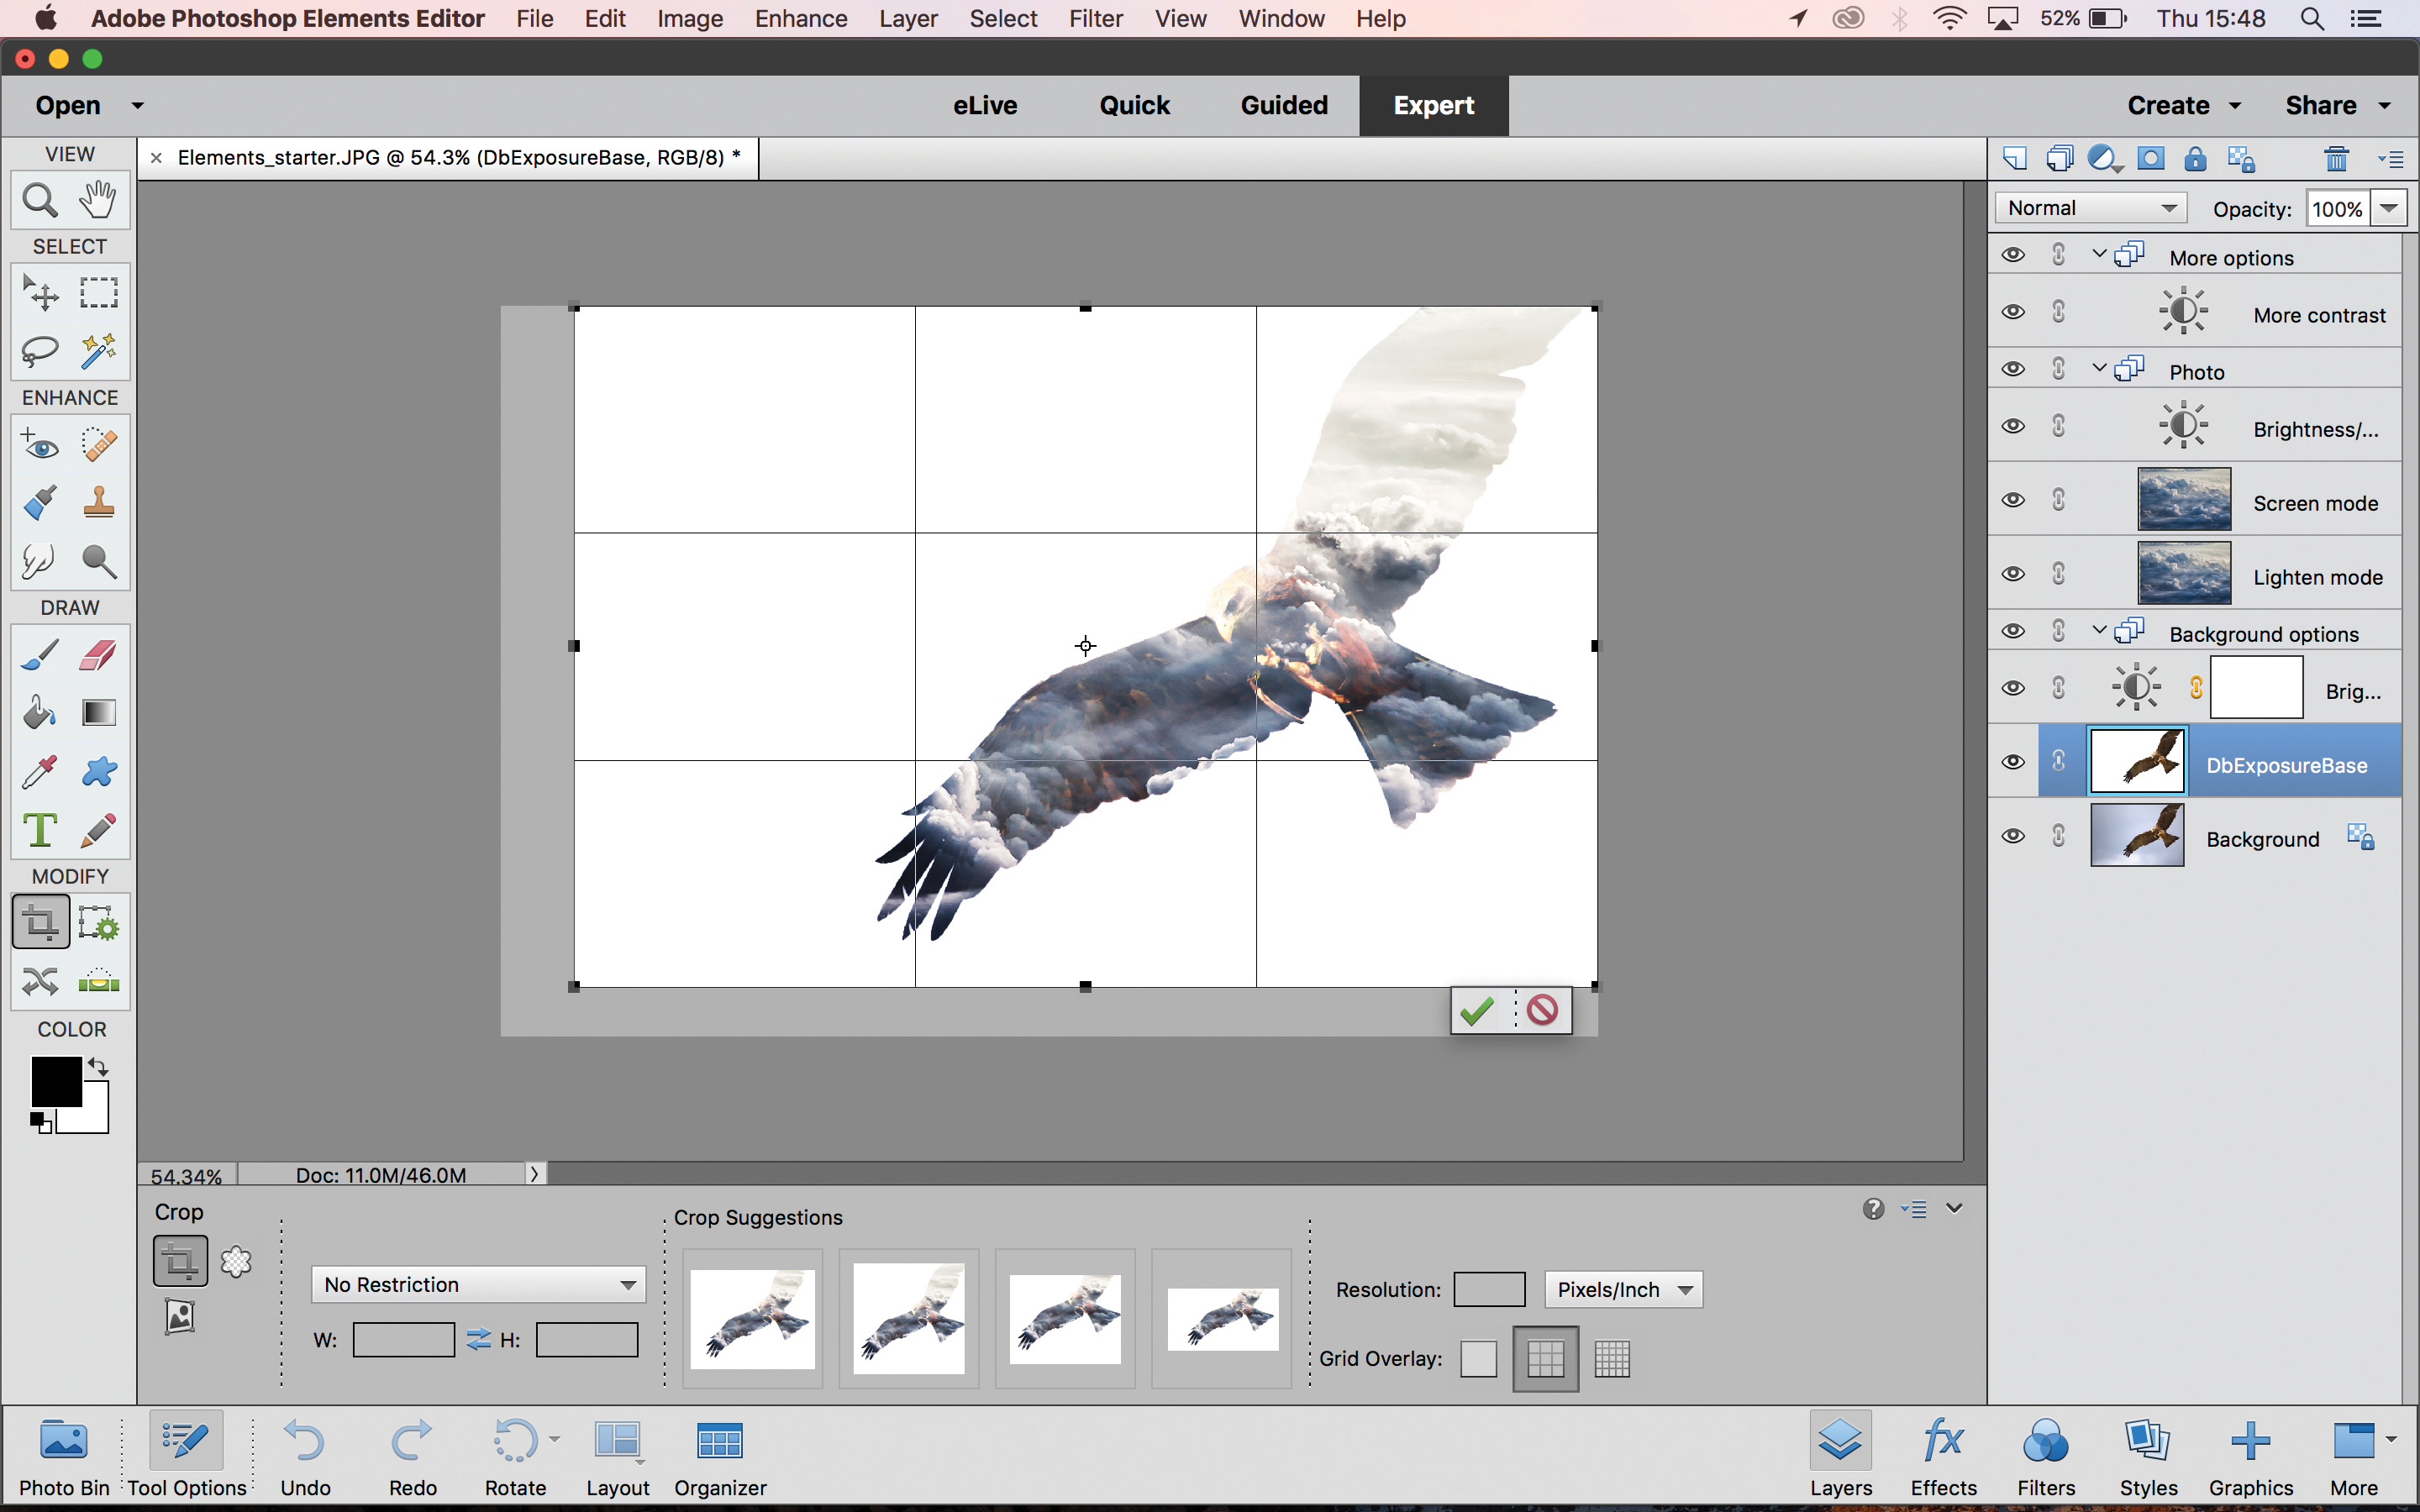
Click ‘Next’ and then continue editing in Expert Mode. Use the Crop tool to change the framing of your image if required. When you're happy with the results, click Layer>Flatten Image and then save it.
Read more:
The best photo editing software: image editors for novices through to pros
The best MacBooks for photo editing in 2020
The best desktop computer for photo editing – top PCs for photographers
Get the Digital Camera World Newsletter
The best camera deals, reviews, product advice, and unmissable photography news, direct to your inbox!

James has 22 years experience as a journalist, serving as editor of Digital Camera World for 6 of them. He started working in the photography industry in 2014, product testing and shooting ad campaigns for Olympus, as well as clients like Aston Martin Racing, Elinchrom and L'Oréal. An Olympus / OM System, Canon and Hasselblad shooter, he has a wealth of knowledge on cameras of all makes – and he loves instant cameras, too.

