Forget ND filters! Blur skies for easy long exposures in Photoshop Elements
Skip the neutral density filters – create long-exposure effects by using the Radial Blur filter in Photoshop Elements
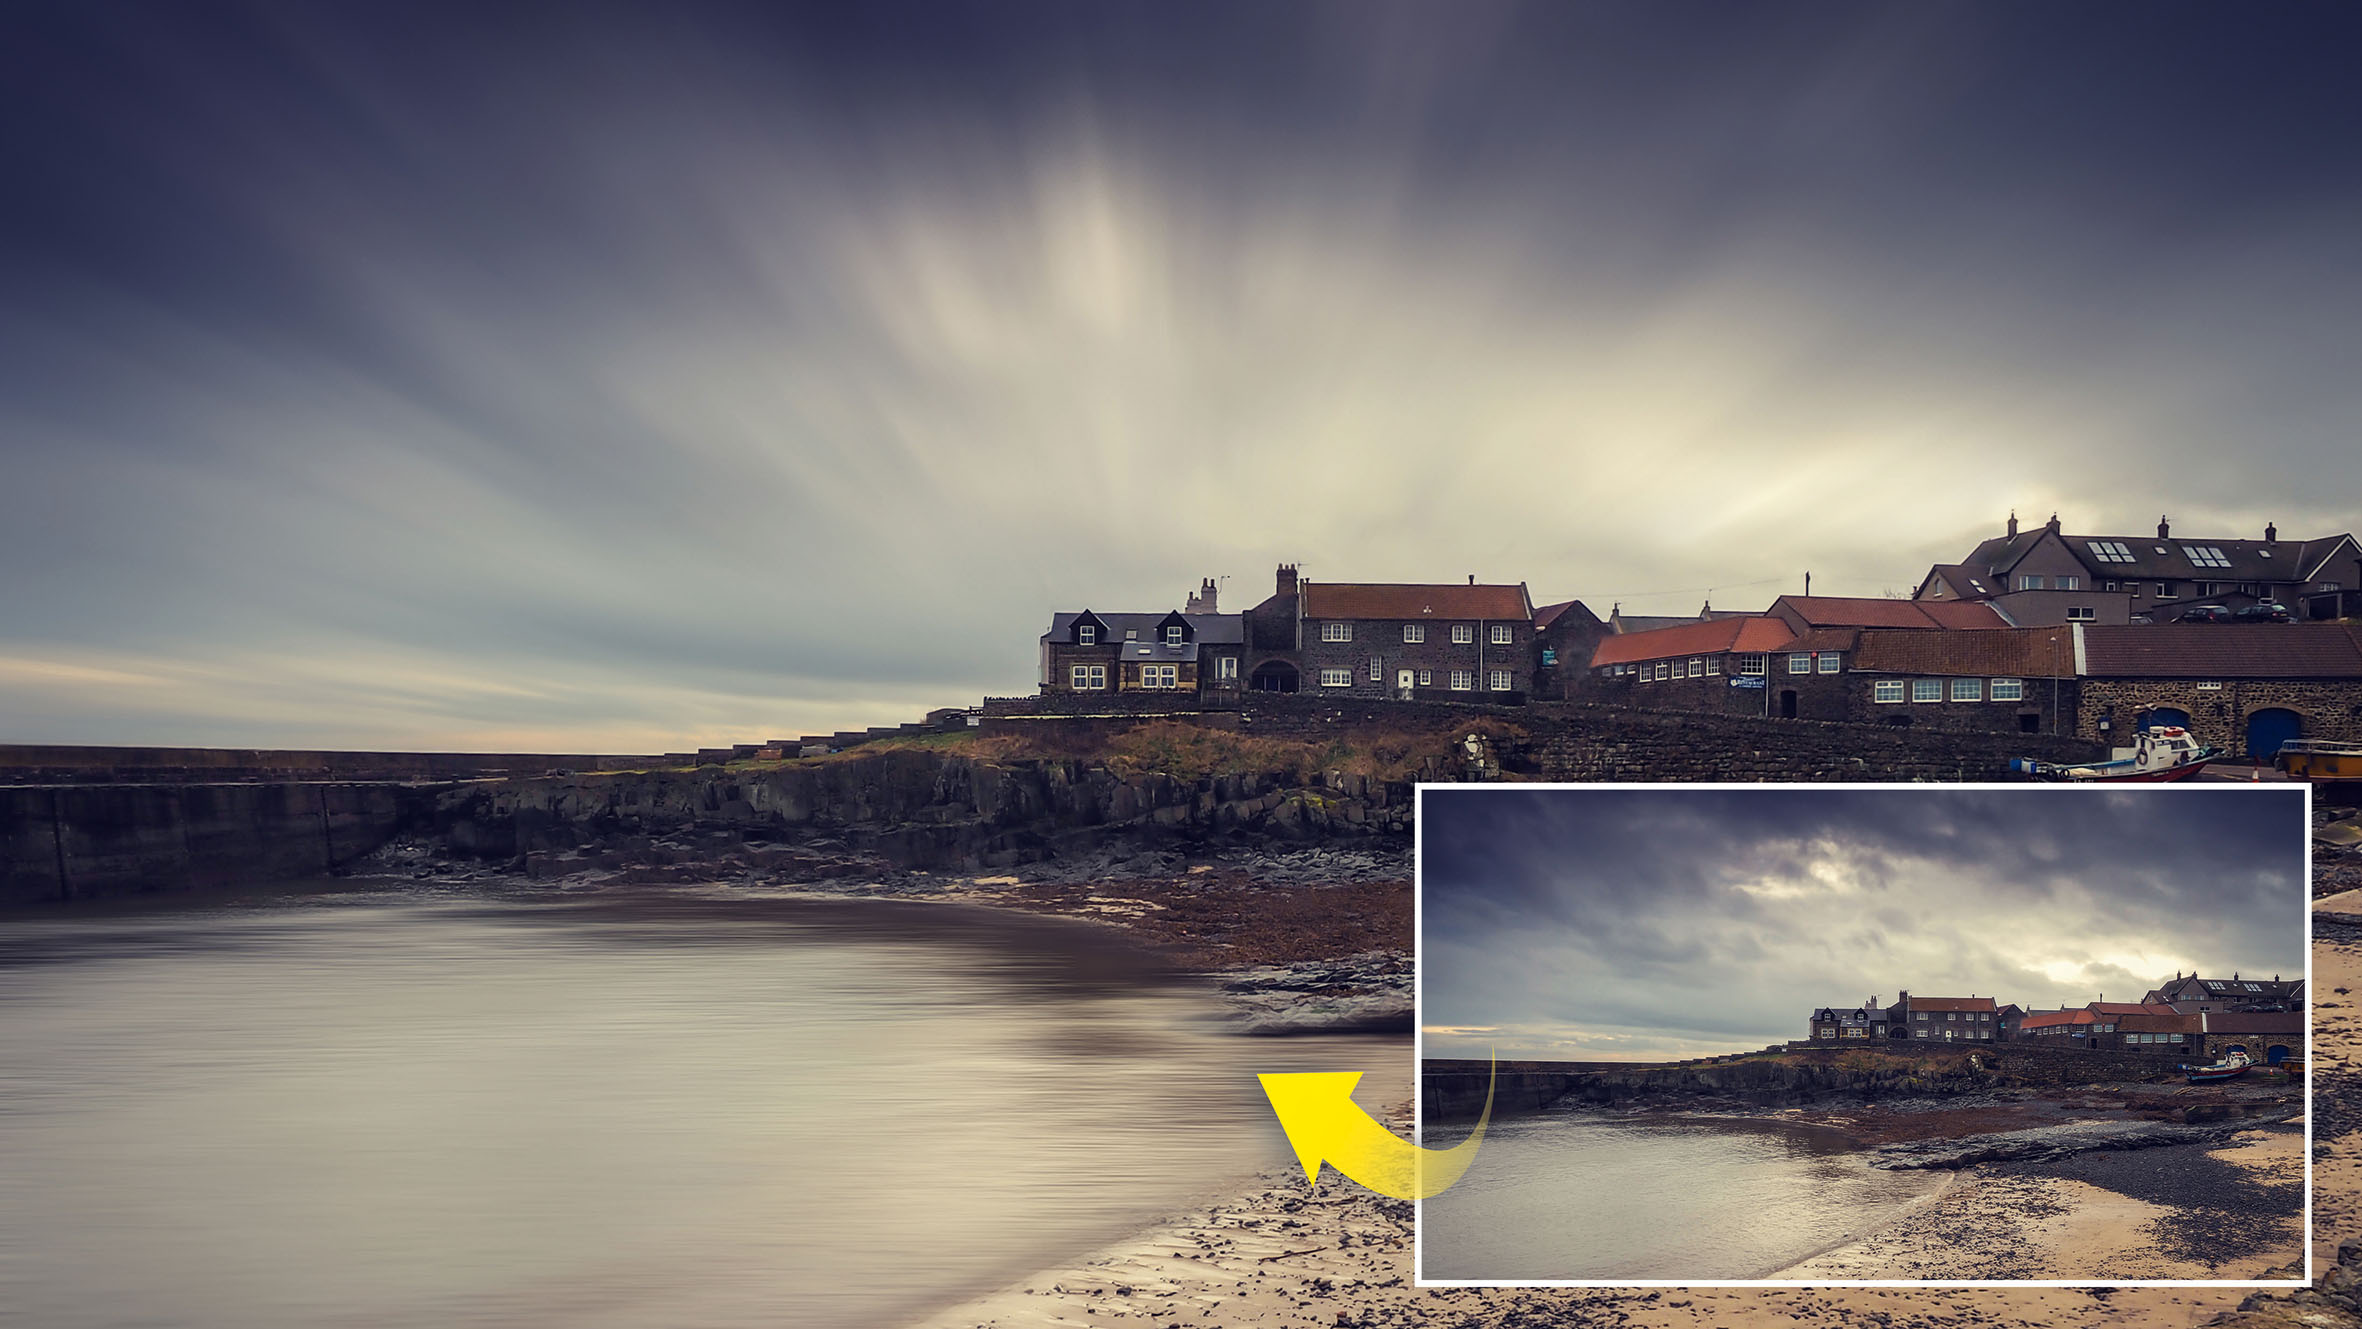
Watch video: Mimic a long exposure effect with Photoshop Elements
So, you’re on a day out with the camera and you realize the best way to capture a spectacular landscape scene would be by introducing some movement into the clouds, or water if you are near the coast. This is usually done with a long exposure and accessories like a light-blocking 10-stop ND filter to make this easier. But what do you do if you’ve left your filters at home?
Fear not! I’m going to show you a way you can still realize your vision of the scene and it’s all thanks to the to the filters found in Photoshop CC and the budget-friendly Elements software we’ll be using here, specifically the Radial Blur filter which will allow you to replicate the zoom blur effect in the sky as clouds would move in a long exposure.
The Radial Blur filter is also found in the full version of Photoshop CC and effectively gives the pixels in your frame a streaked effect, which recreates the effect of clouds moving through the sky during that long exposure.
The technique works especially well with landscape scenes that feature big skies, whether captured on a dark, moody day, or brighter skies with clouds that will show off the movement effect. What’s more, it’s a great trick to try out on some older images from your archive to breathe new life into your images.
So, ready to get things moving? Download our start file taken at Craster or open your own landscape you’d like to try it out on and follow the steps here, or watch the video to see how it’s done in real time.
01. Make a duplicate layer
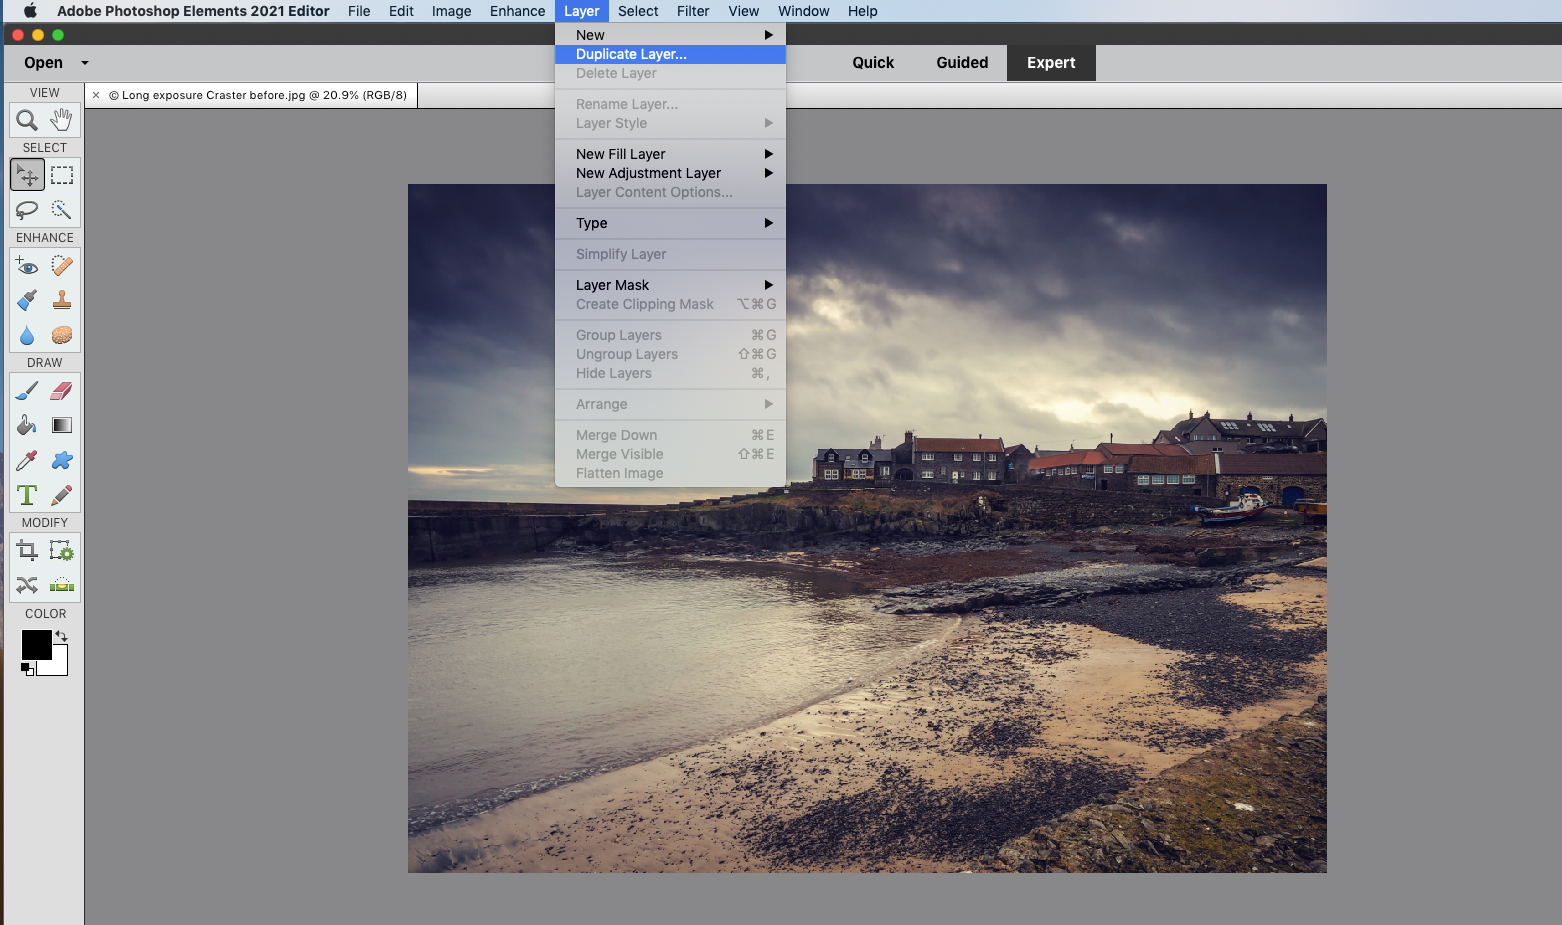
Open your image into Elements with File > Open. The first job is to create a duplicate Layer. You can do this by clicking Layer > Duplicate Layer or by using the keyboard shortcut, which is Ctrl/Cmd + J. Your new duplicate Layer will appear in the Layers panel.
02. Select the blur filter
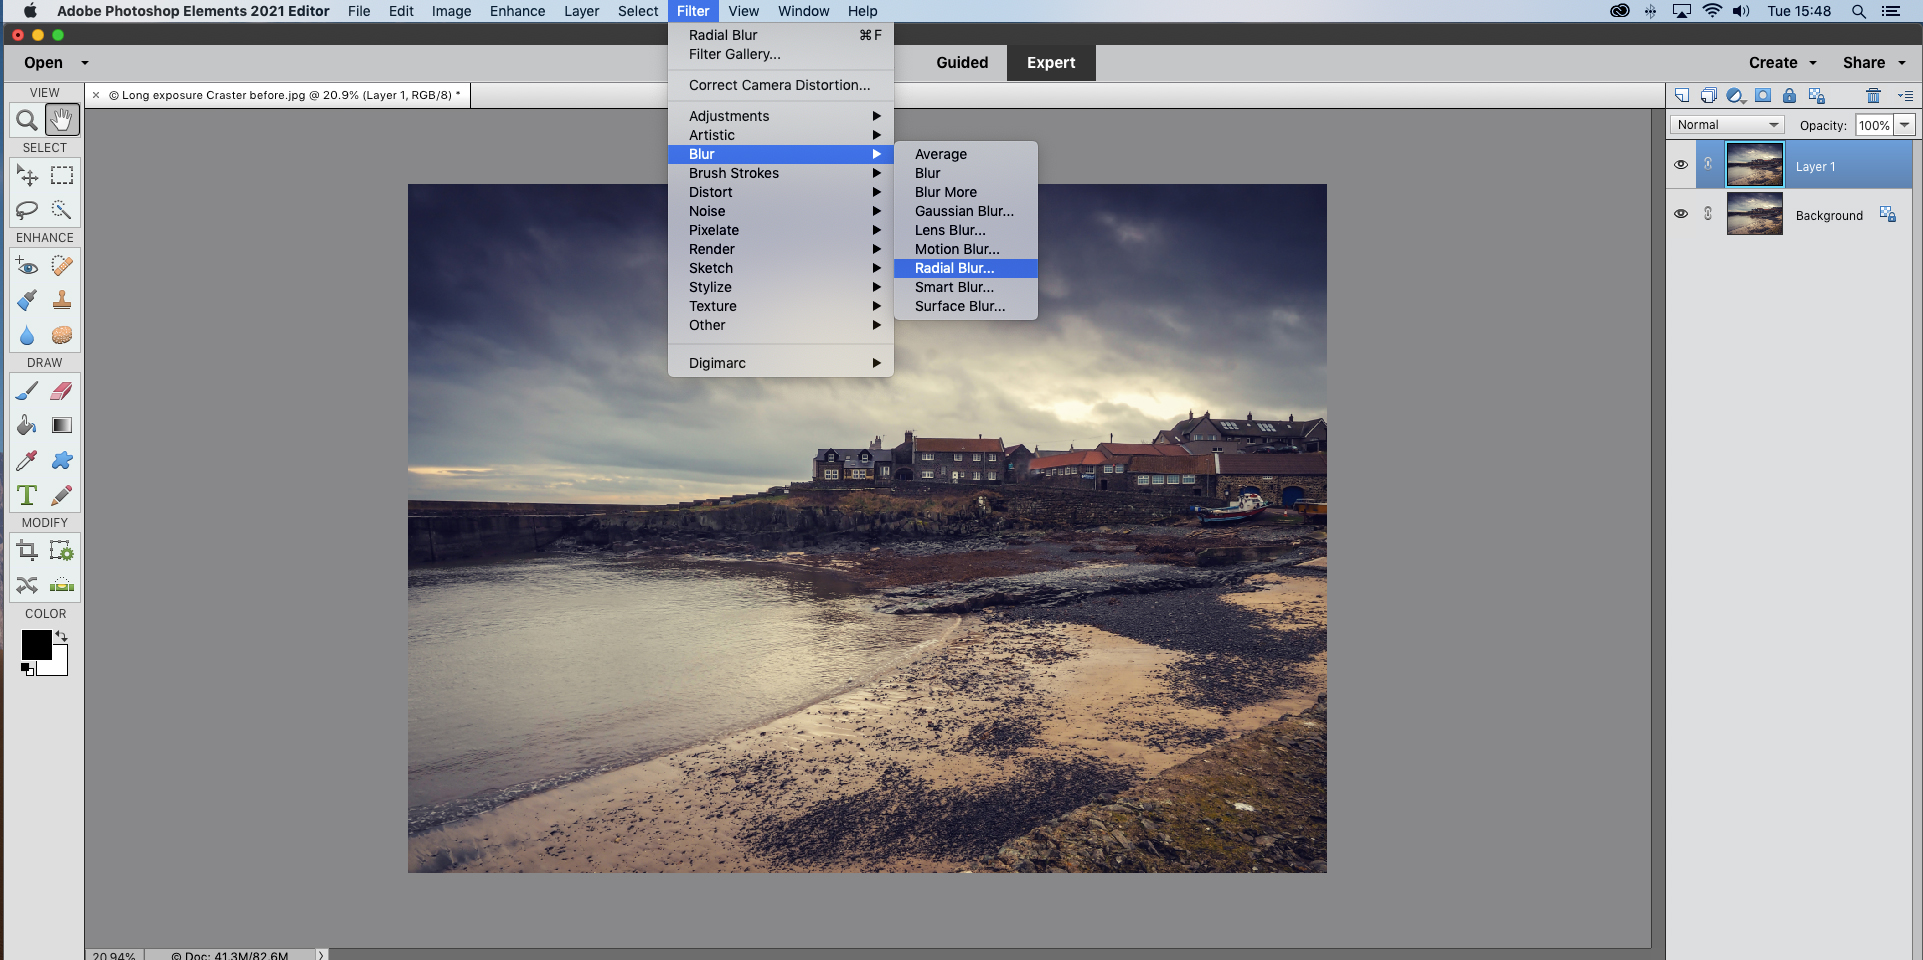
Elements has a number of Blur filters, which all work in different ways. But the one we want is Radial Blur. Go to Filter and scroll down to Blur, before navigating with the mouse to Radial Blur. Once you have selected this option a dialog box will appear.
03. Dial in your settings
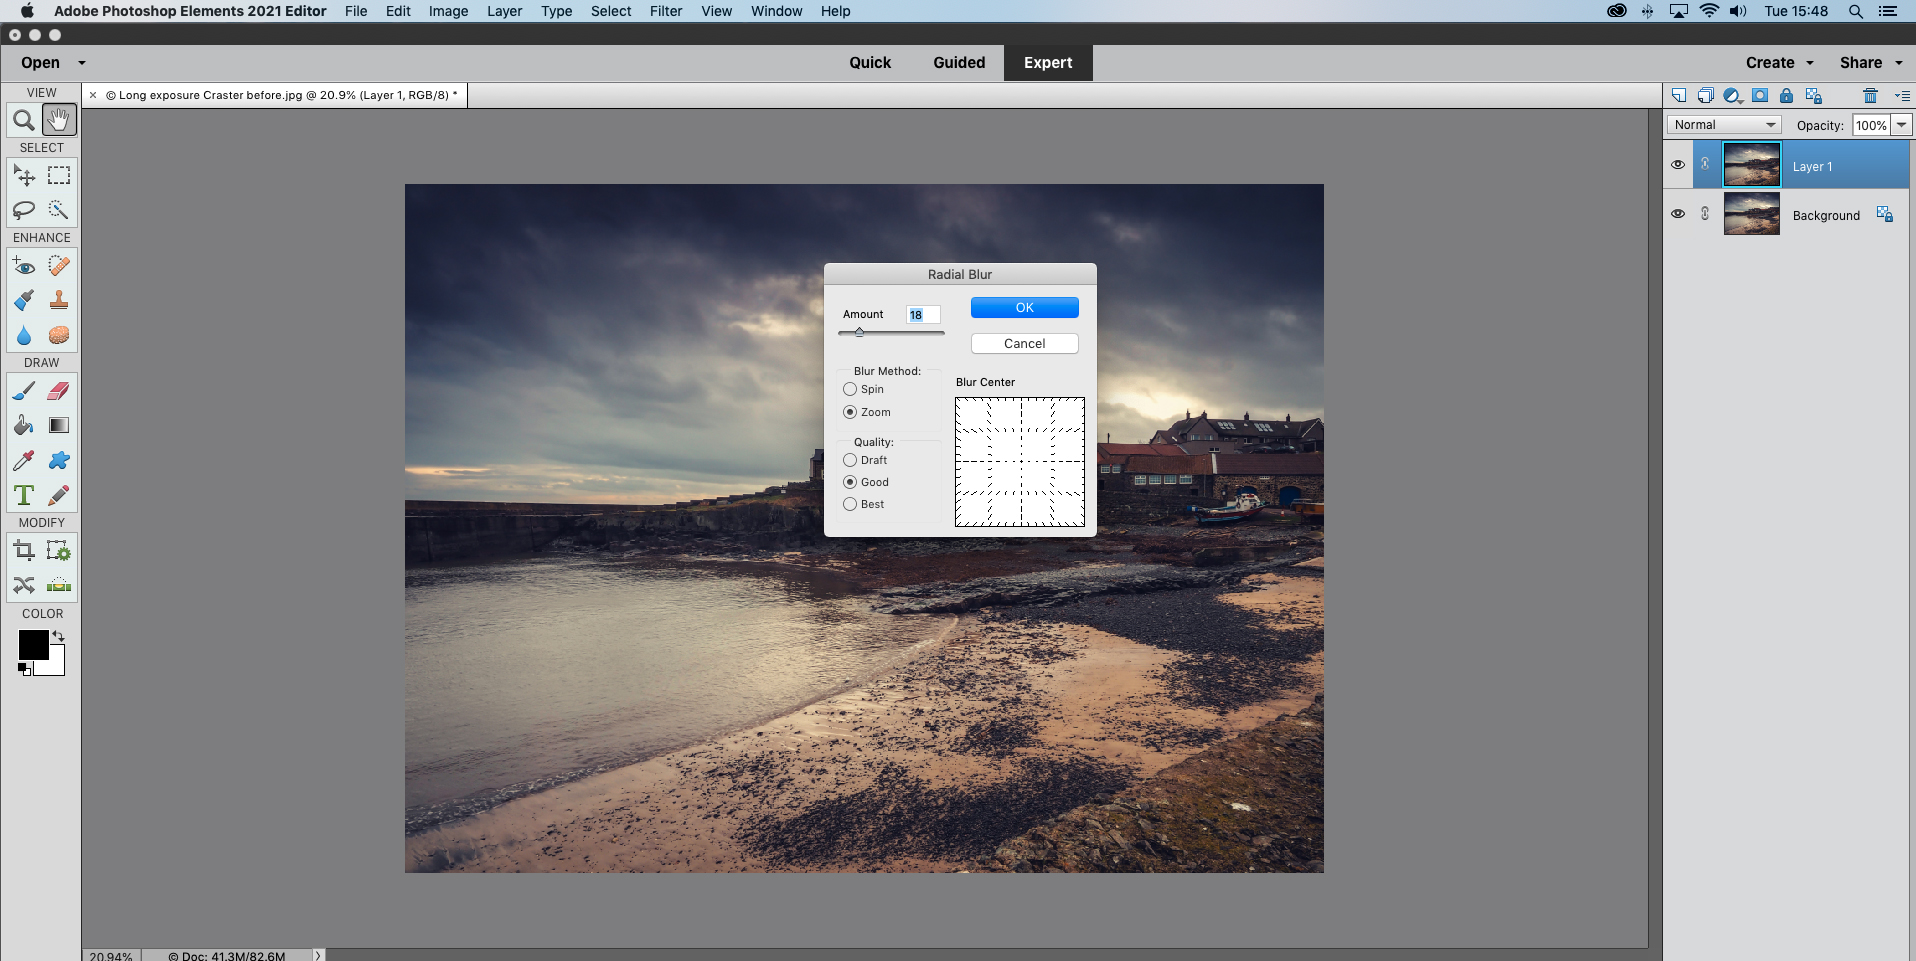
Change the Blur Method from Spin to Zoom and set the Amount to 18 to begin. Leave the Quality at Good, then place the Blur Centre where you want to be in the frame, all of the blur will seem to gravitate towards this point. Click OK to apply the filter.
04. Add a layer mask
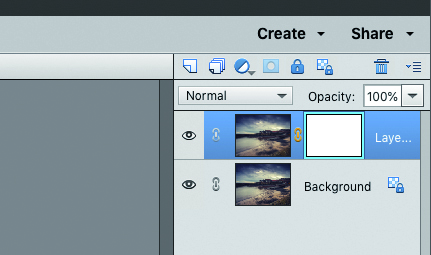
The blur has been applied to the whole frame so we need to restrict it to the sky and water only. In the Layers panel click on the Add Layer Mask icon, which is identified by a ‘circle within a rectangle’. You’ll notice a white box will appear on your active layer.
05. Brush away the blurred pixels
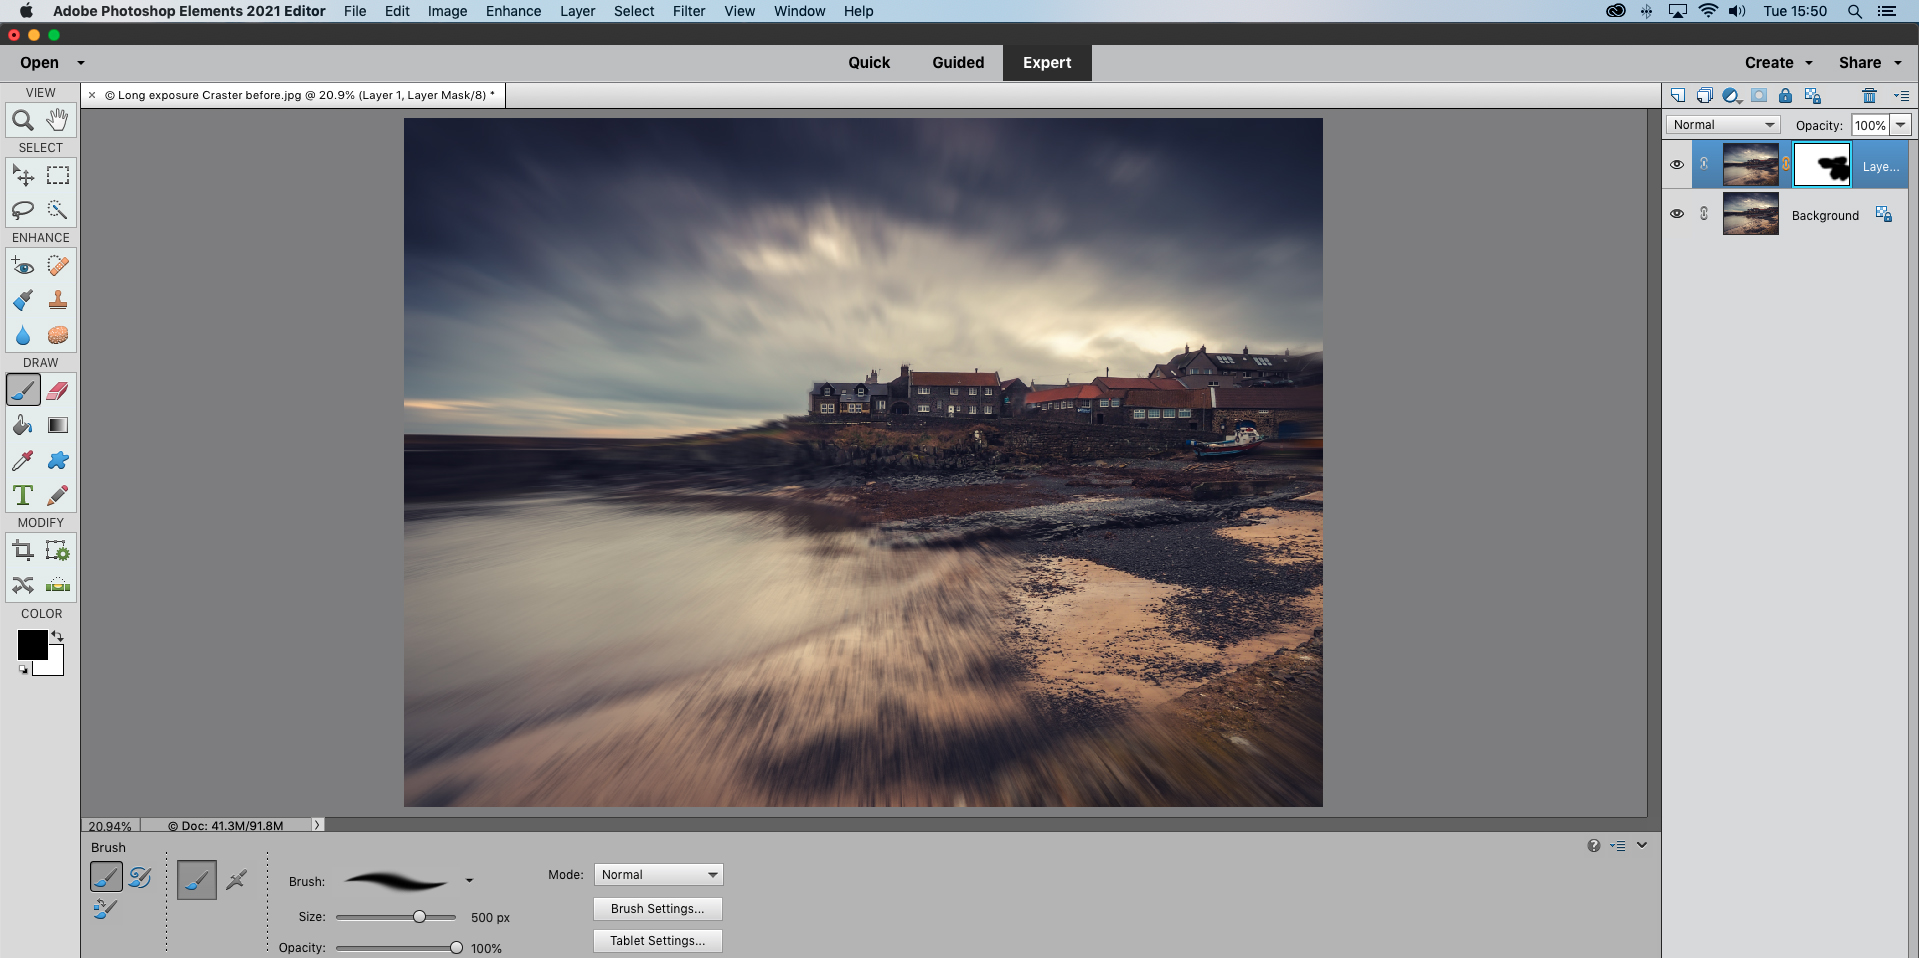
Grab the Brush Tool and set it to Black soft-edged brush then resize it with the Square Bracket keys. Brush over anything in the scene that should remain static – in our case the fishing huts, harbor wall and beach, so only the sky remains streaky and blurred.
06. Finish off and save

If you make a mistake when masking hit X to change the Brush color from black to white and you can then unmask that area to reveal it again. When you’re done go to Layer > Flatten Image and go to File > Save As to save your finished image under a new filename.
PhotoPlus: The Canon Magazine is the world's only monthly newsstand title that's 100% devoted to Canon, so you can be sure the magazine is completely relevant to your system.
Read more:
The best photo editing software: image editors for novices through to pros
The best photo-editing laptops: top laptops for photographers
10 best online photography courses – from beginner guides to masterclasses
Get the Digital Camera World Newsletter
The best camera deals, reviews, product advice, and unmissable photography news, direct to your inbox!
PhotoPlus: The Canon Magazine is the world’s only 100% Canon-focused title on the newsstand. Launched in 2007, for 14 years it has delivered news, reviews, buying guides, features, inspirational projects and tutorials on cameras, lenses, tripods, gimbals, filters, lighting and all manner of photography equipment.
Aimed squarely at enthusiast photographers who use the Canon DSLR or mirrorless camera systems, all content is tailored to Canon users – so everything from techniques to product tests are tailored to those using the EOS camera system.
Editor Peter Travers brings 14 years of experience as both a journalist and professional photographer, with Technique Editor Dan Mold shoring up the magazine with his 6 years of expertise.


