Gobo lighting: tips for dramatic portraits and film noir photography
Create moody film noir effects and add dramatic lighting to your portraits using a gobo
A ‘gobo’ is a term that originated in the film industry, where lighting plays a huge part in creating a mood to match the unfolding drama. It’s used to describe anything that ‘goes between’ the light source and the subject or background that creates a pattern of shadows.
As such, gobos come in all kinds of shapes and sizes. There are natural gobos – think of the sun shining through leaves, creating a pattern of shadows underneath. Then there are the kinds of gobos that we create ourselves, to change the mood of our scene. A classic example is the film noir look we’ve evoked here, where a blind between the light and subject creates stark horizontal shadows.
We’ll look at a variety of gobo lighting techniques that you can use to add depth and drama to your portraits. Your light source can be anything you like – we used a speed light and a studio flash head – but any light will do, so long as it’s from a small source like a bare bulb. If the light source is too big, then the shadows will become soft-edged and the patterns less defined.
Read more:
• Best photography lighting
• Boudoir photography tips
• Get more photoshoot ideas
So the source needs to be small and hard. Think of direct sunlight – it comes from a small source (okay, the sun is huge, but it’s a long way away!) so the light it produces is very hard-edged and contrasty. In fact, if it’s a bright day, you could use the sunlight spilling through the window. And if you’re happy to ramp up your ISO a little, you can even get away with using household lamps.
Lighting setup 1: The film noir look
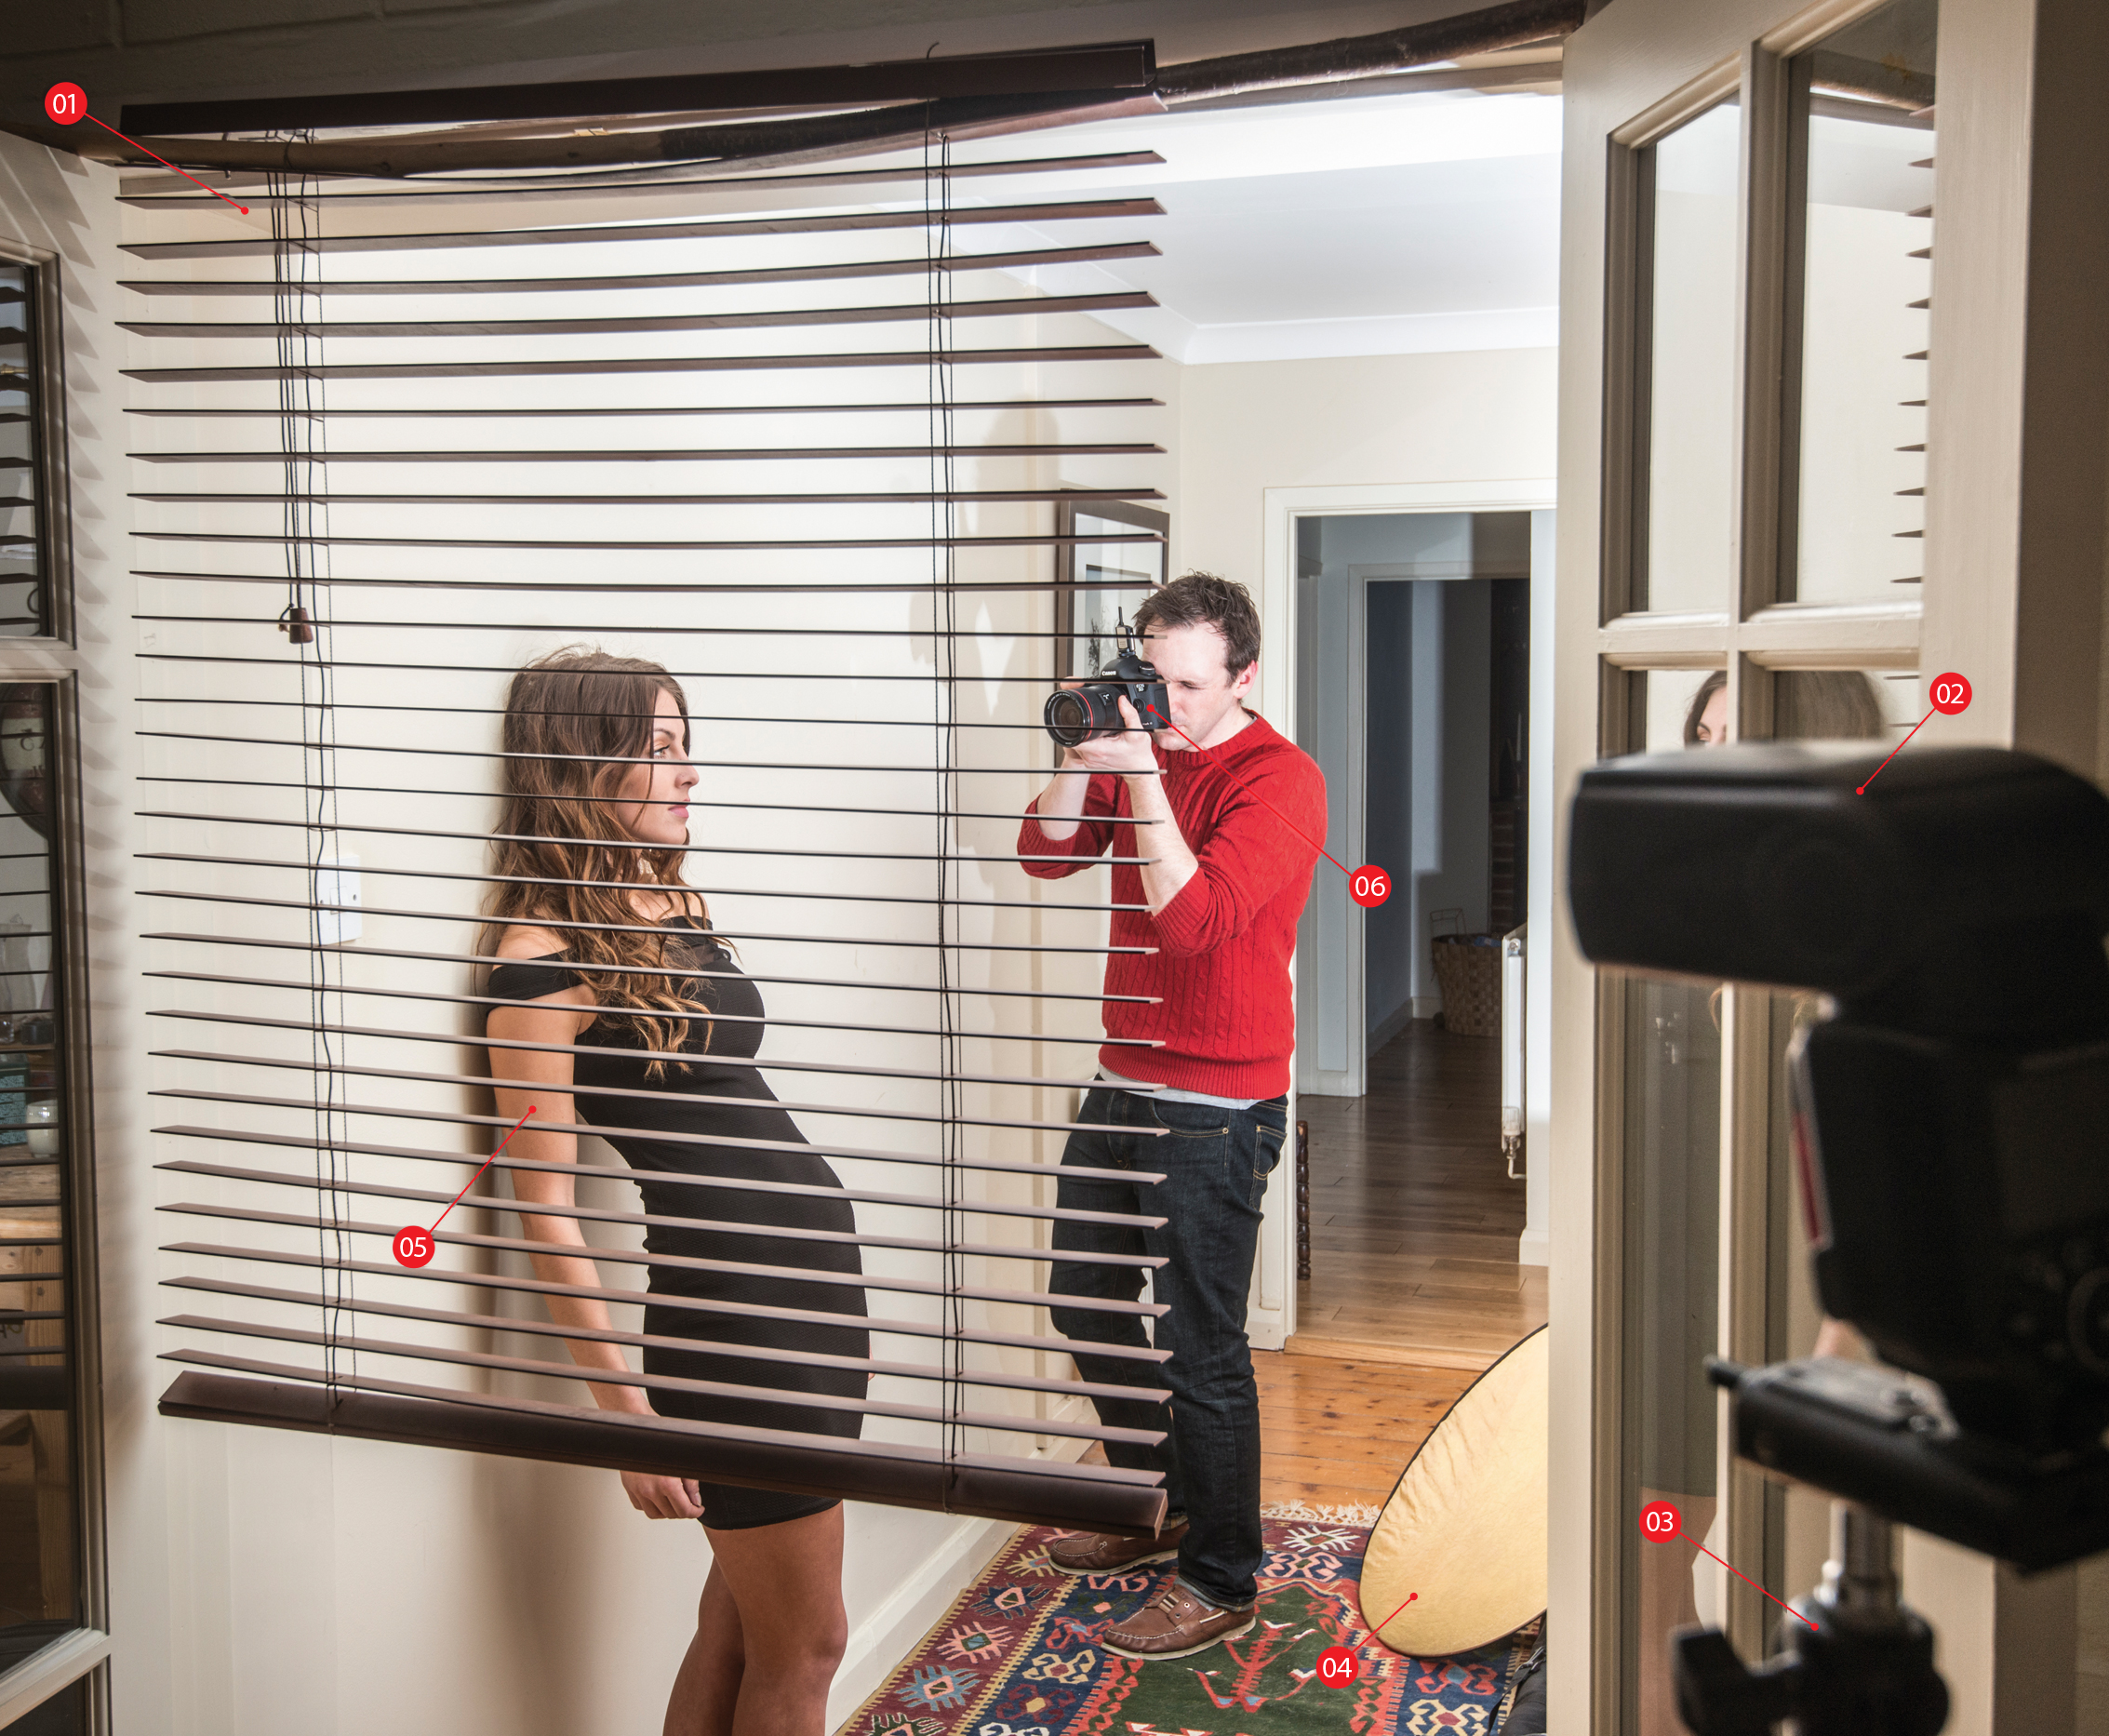
01 Gobo
So-called because it ‘goes between’ the light source and the subject, a gobo can be anything that casts an interesting shadow. We hung the blind in a doorway then positioned the light on the other side to create horizontal stripes across the wall.
02 Light source
Keep the light source as small as possible for hard shadows. We fired one speed light (seen here fitted with a wireless trigger) through the blind, with a second flash opposite the model fitted with a grid to control the spread.
03 Distance
Small light sources create hard shadows, which is important if you want clearly defined patterns of light. Distance also plays a part; the further the light is from the gobo, the smaller it is in relation to the subject, and the harder the shadows.
04 Reflector
If the main light source is behind your subject, then a reflector comes in handy. It acts almost like another light source, bouncing light back into the shadows, and is useful if shooting in sunlight, as the bounced light helps even out contrast.
05 Posing
It can be tricky to judge how shadows will fall across your subject, especially if using flash. So take plenty of shots and ask your subject to move one way or another between frames. Even tiny movements have a big impact on the way the light falls.
06 Camera setup
Set your camera to manual mode. Use a low ISO, like 100 or 200, and set the shutter to your max sync speed (usually 1/200 or 1/250 sec) then take a test shot. Adjust either the aperture or flash power / distance until you get the effect you’re after.

Setup 2: Sun hat
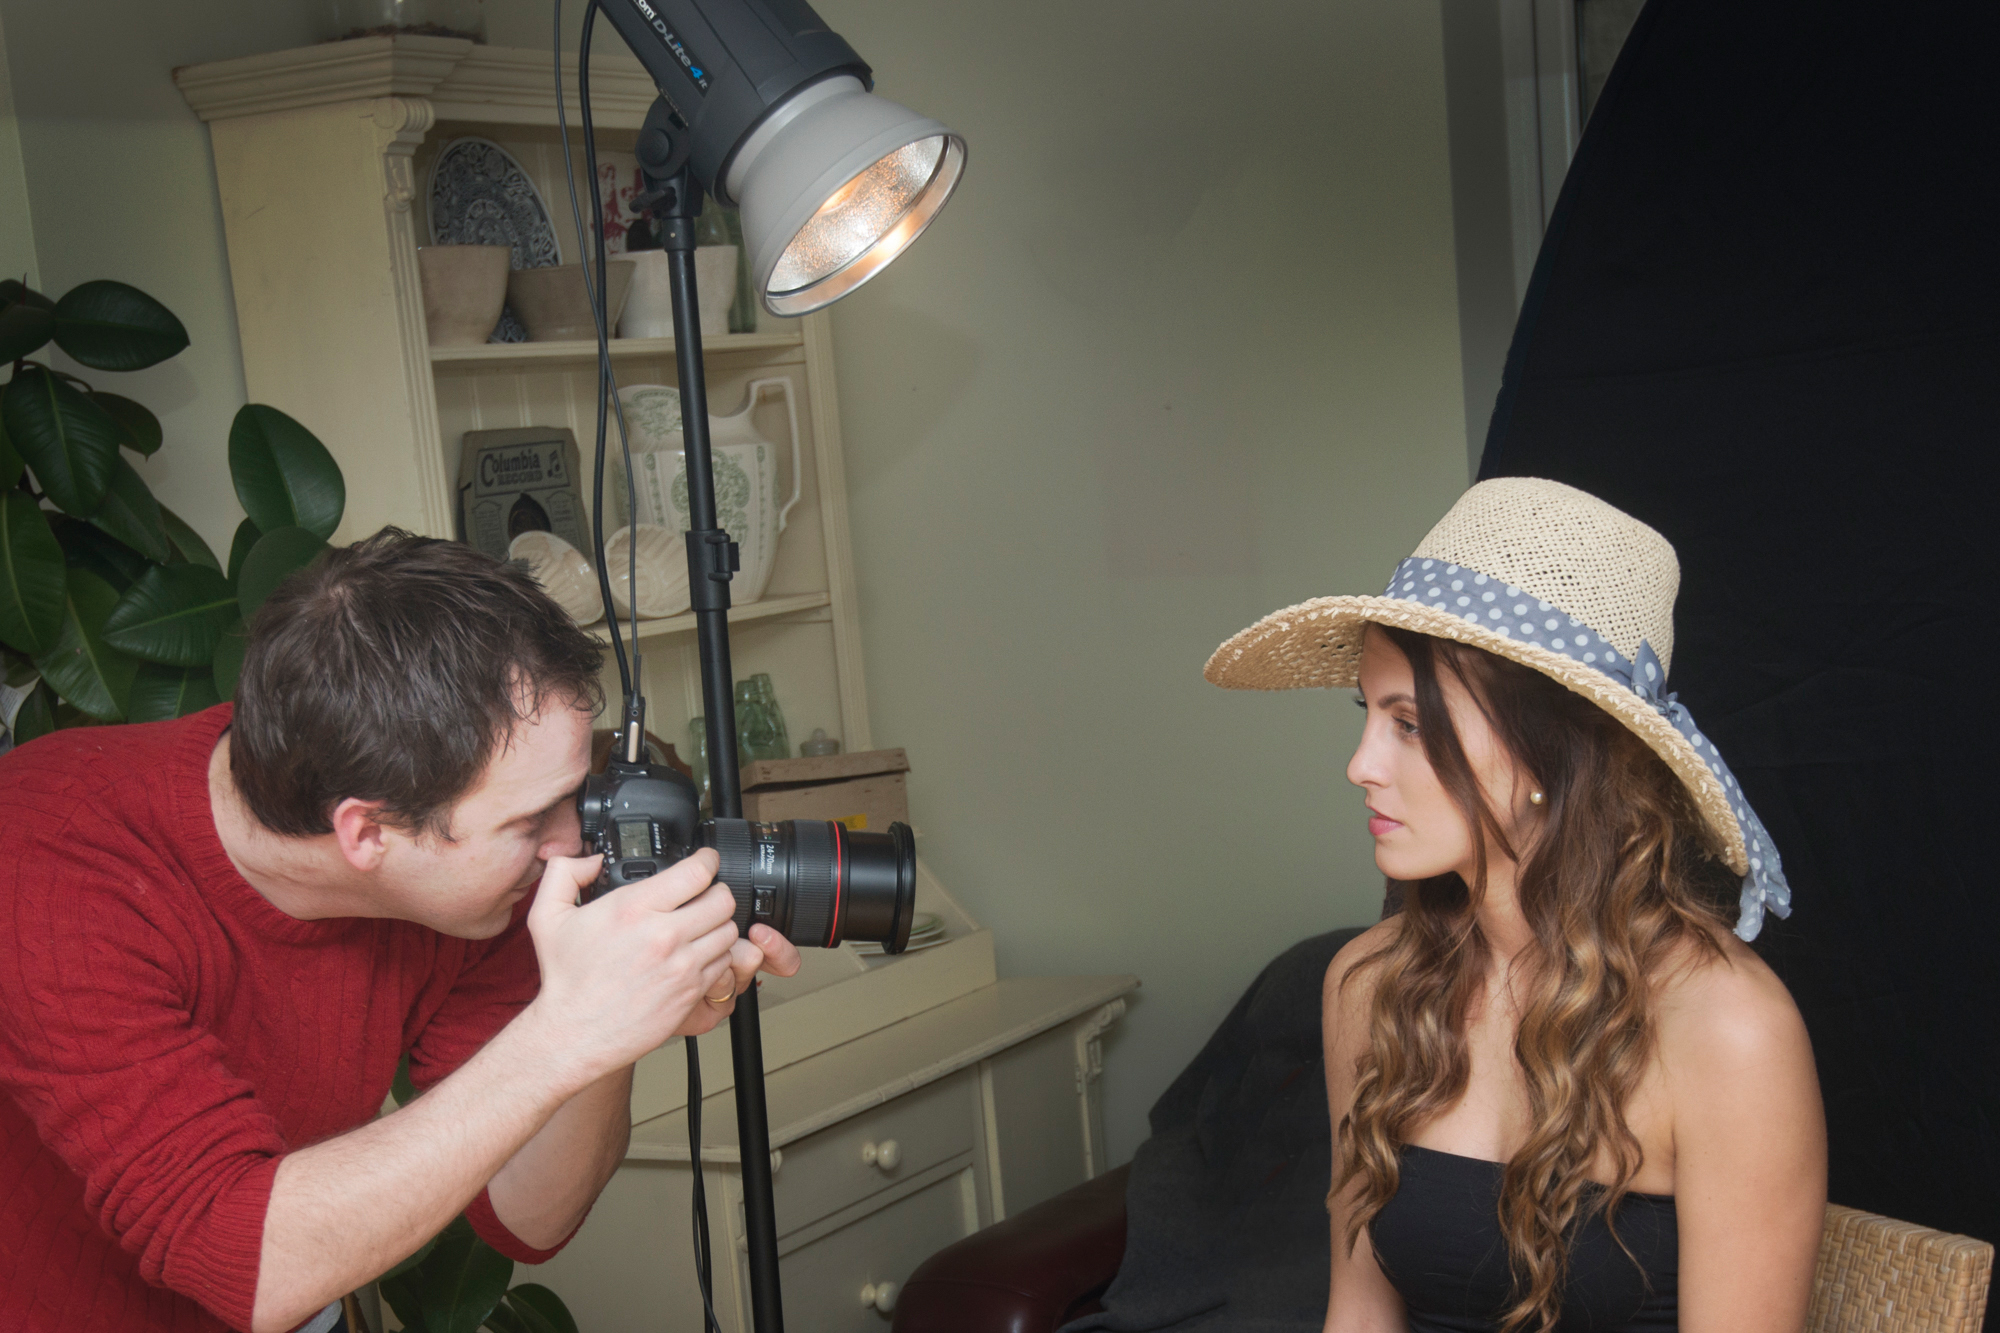
A sun hat can make a fantastic dappled pattern across the face. Position the light source directly above the head, as high up as possible. Or alternatively, if it’s a cloudless day, head outside and use direct sunlight. We used a studio flash head here.
A reflector placed directly underneath the chin will help to lift the shadows and lower the contrast by bouncing some of the harsh light back up into the face. Ideally, you’ll want both eyes to be in patches of light. Ask your subject to move their head very slightly between shots until you nail it.

Setup 3: Screen
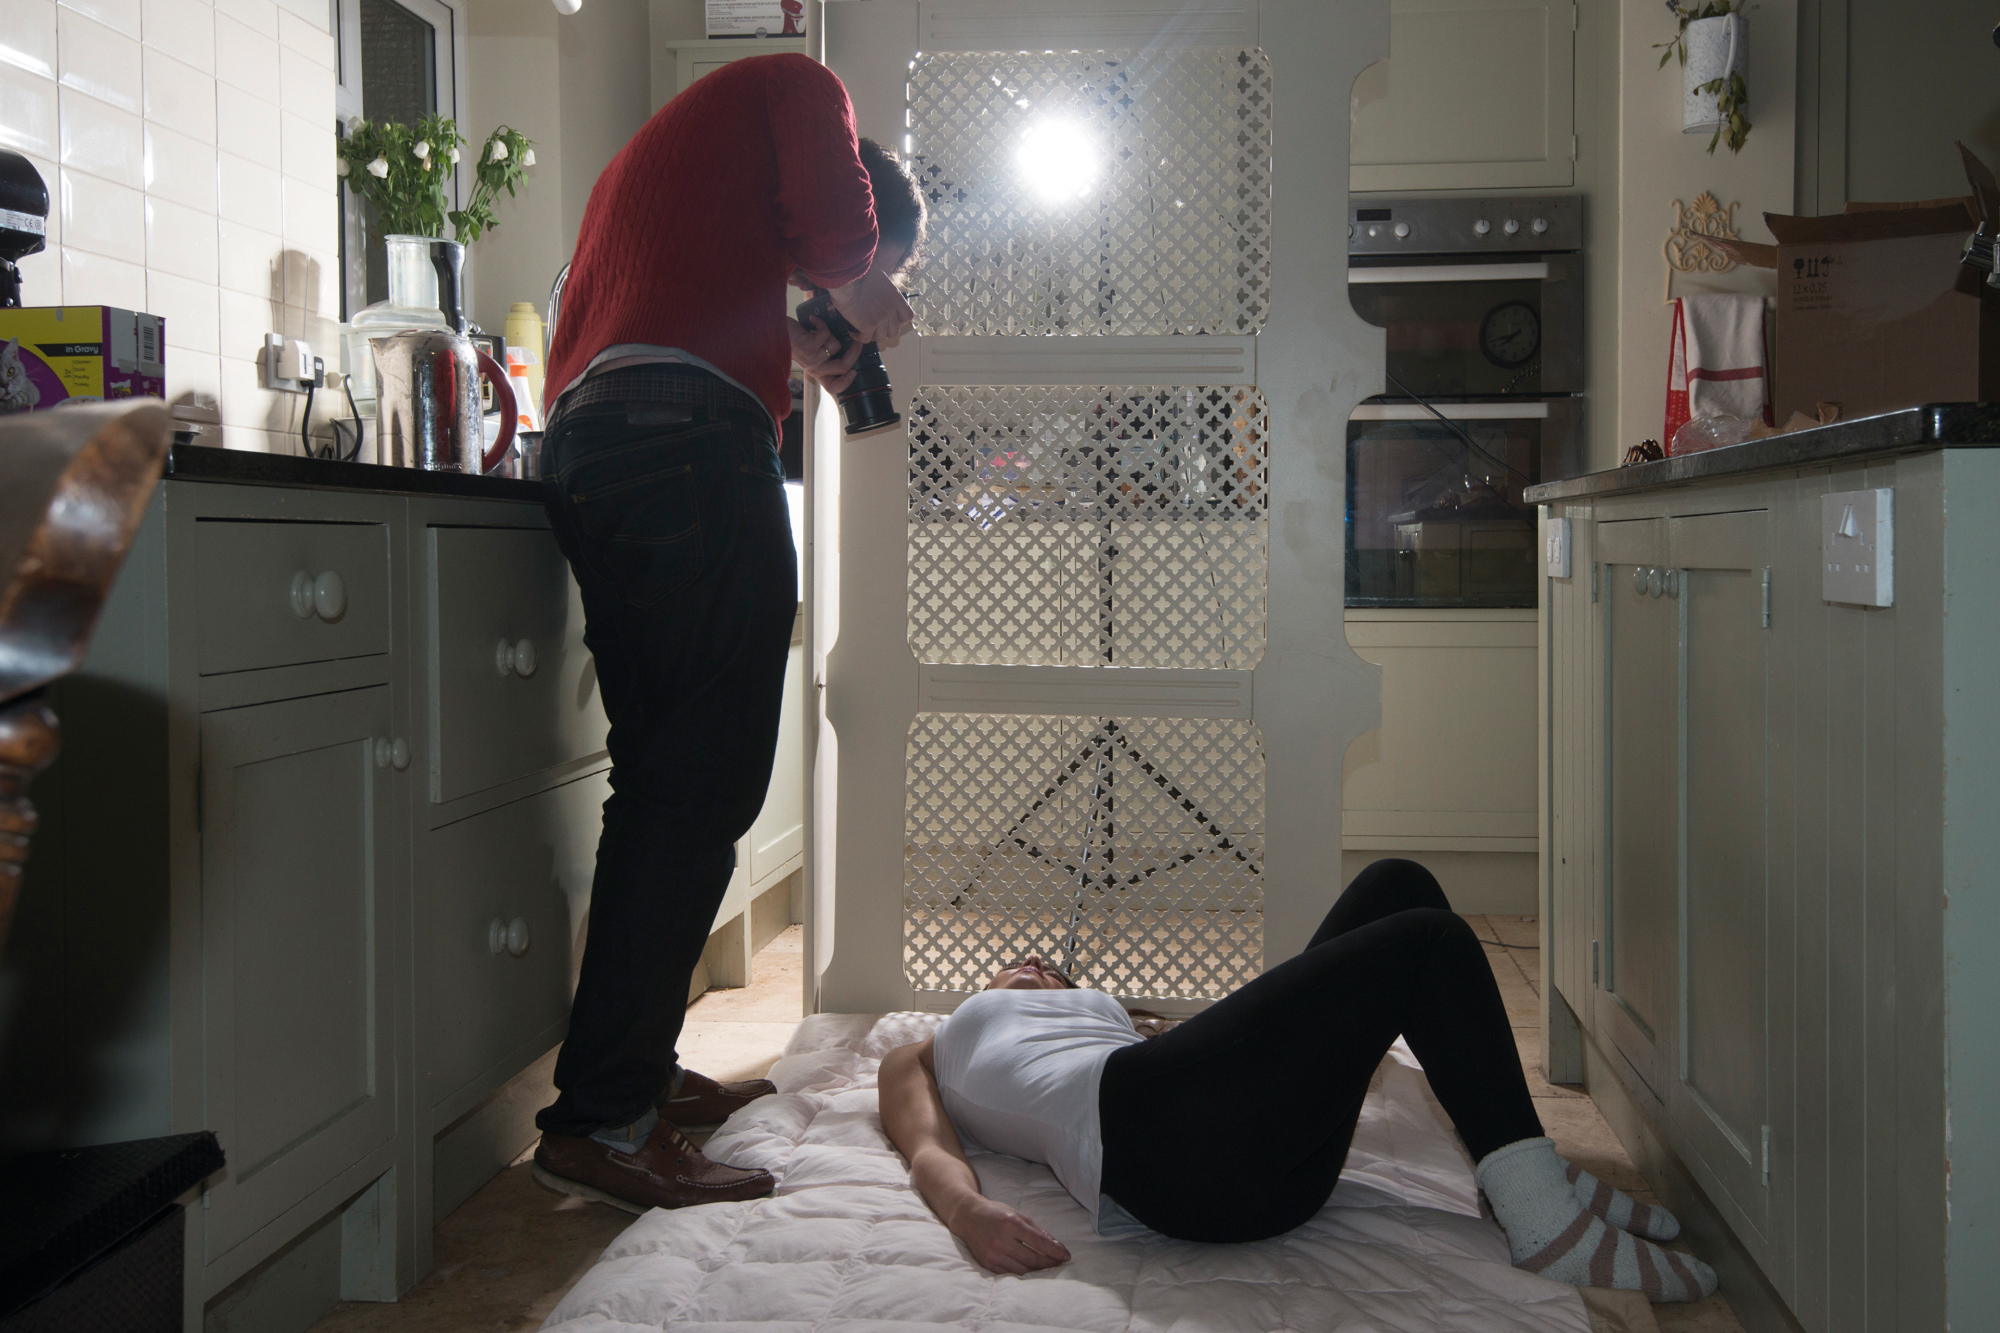
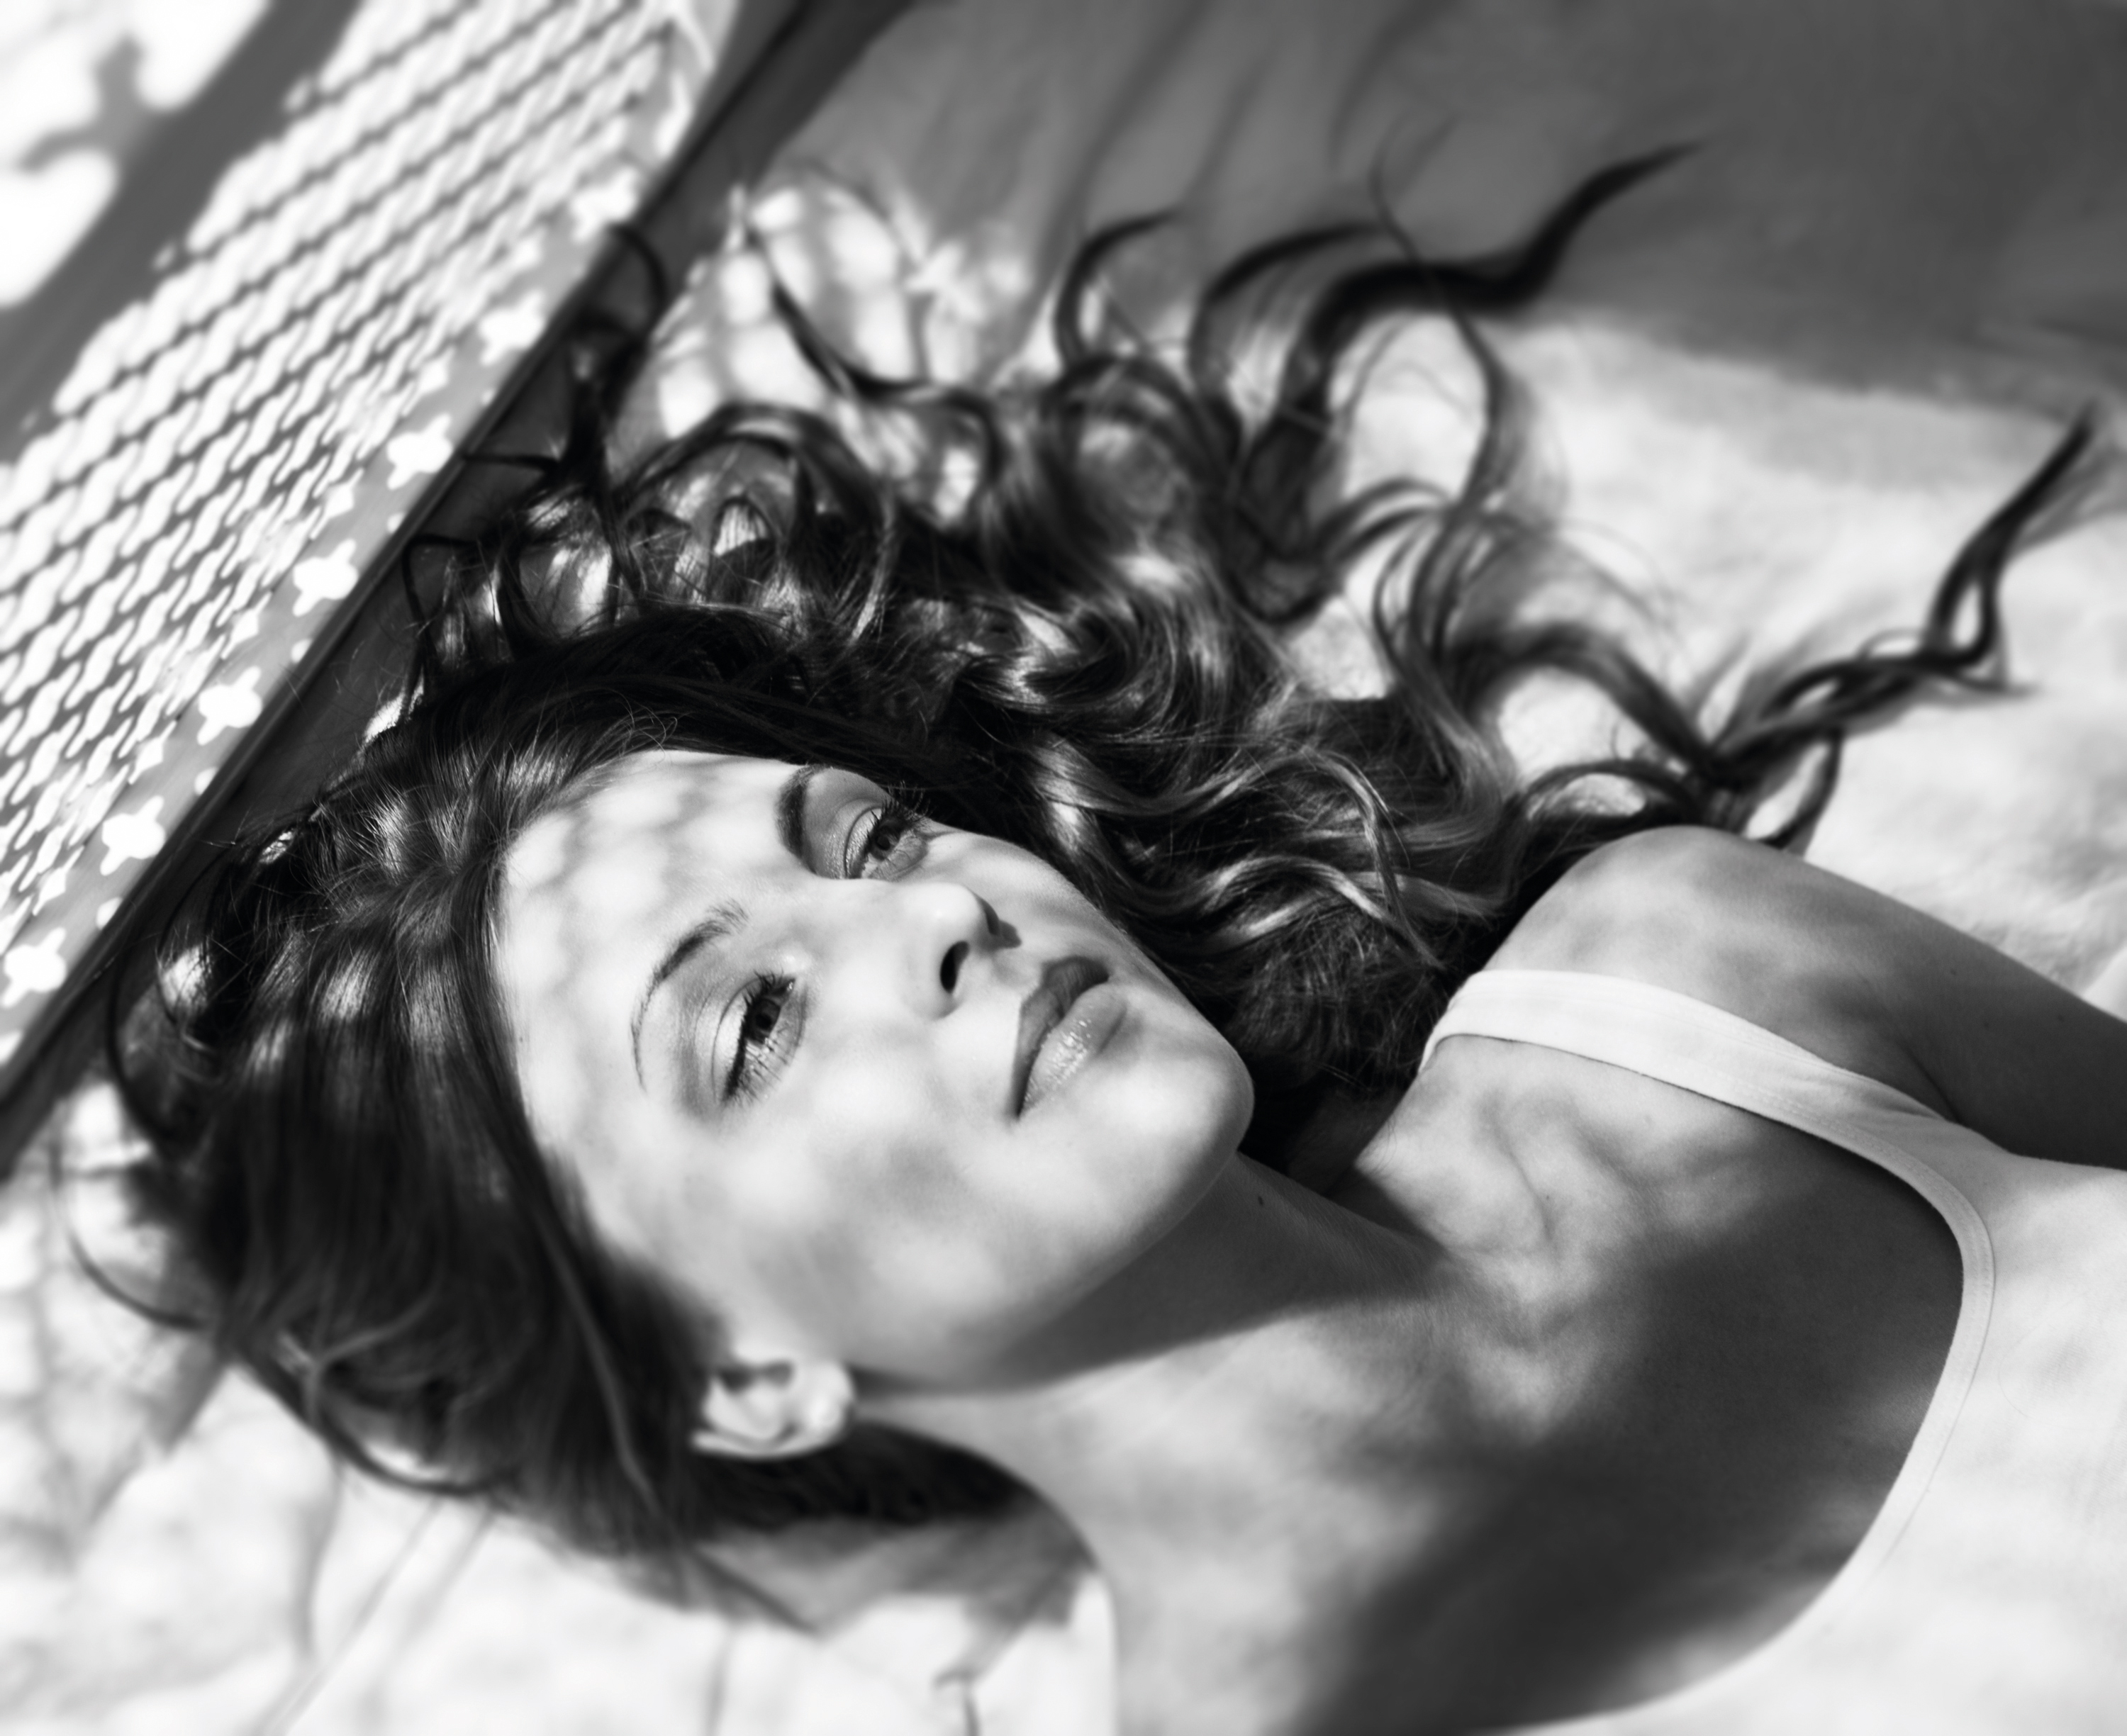
Look around the home and you’re likely to find plenty of objects that will create interesting shadows. Here a radiator cover makes a dappled light effect. Shot from above with the model lying on her back, it suggests morning sunlight breaking through a nearby window.
Gobo lighting is often perfect for a black-and-white treatment. Monochrome is a great simplifier, and with this type of lighting there’s always a danger that the frame will start to look too busy. Stripping out the color not only emphasizes the patterns and shapes, but also gives your portraits a classic, timeless feel.

Setup 4: Window
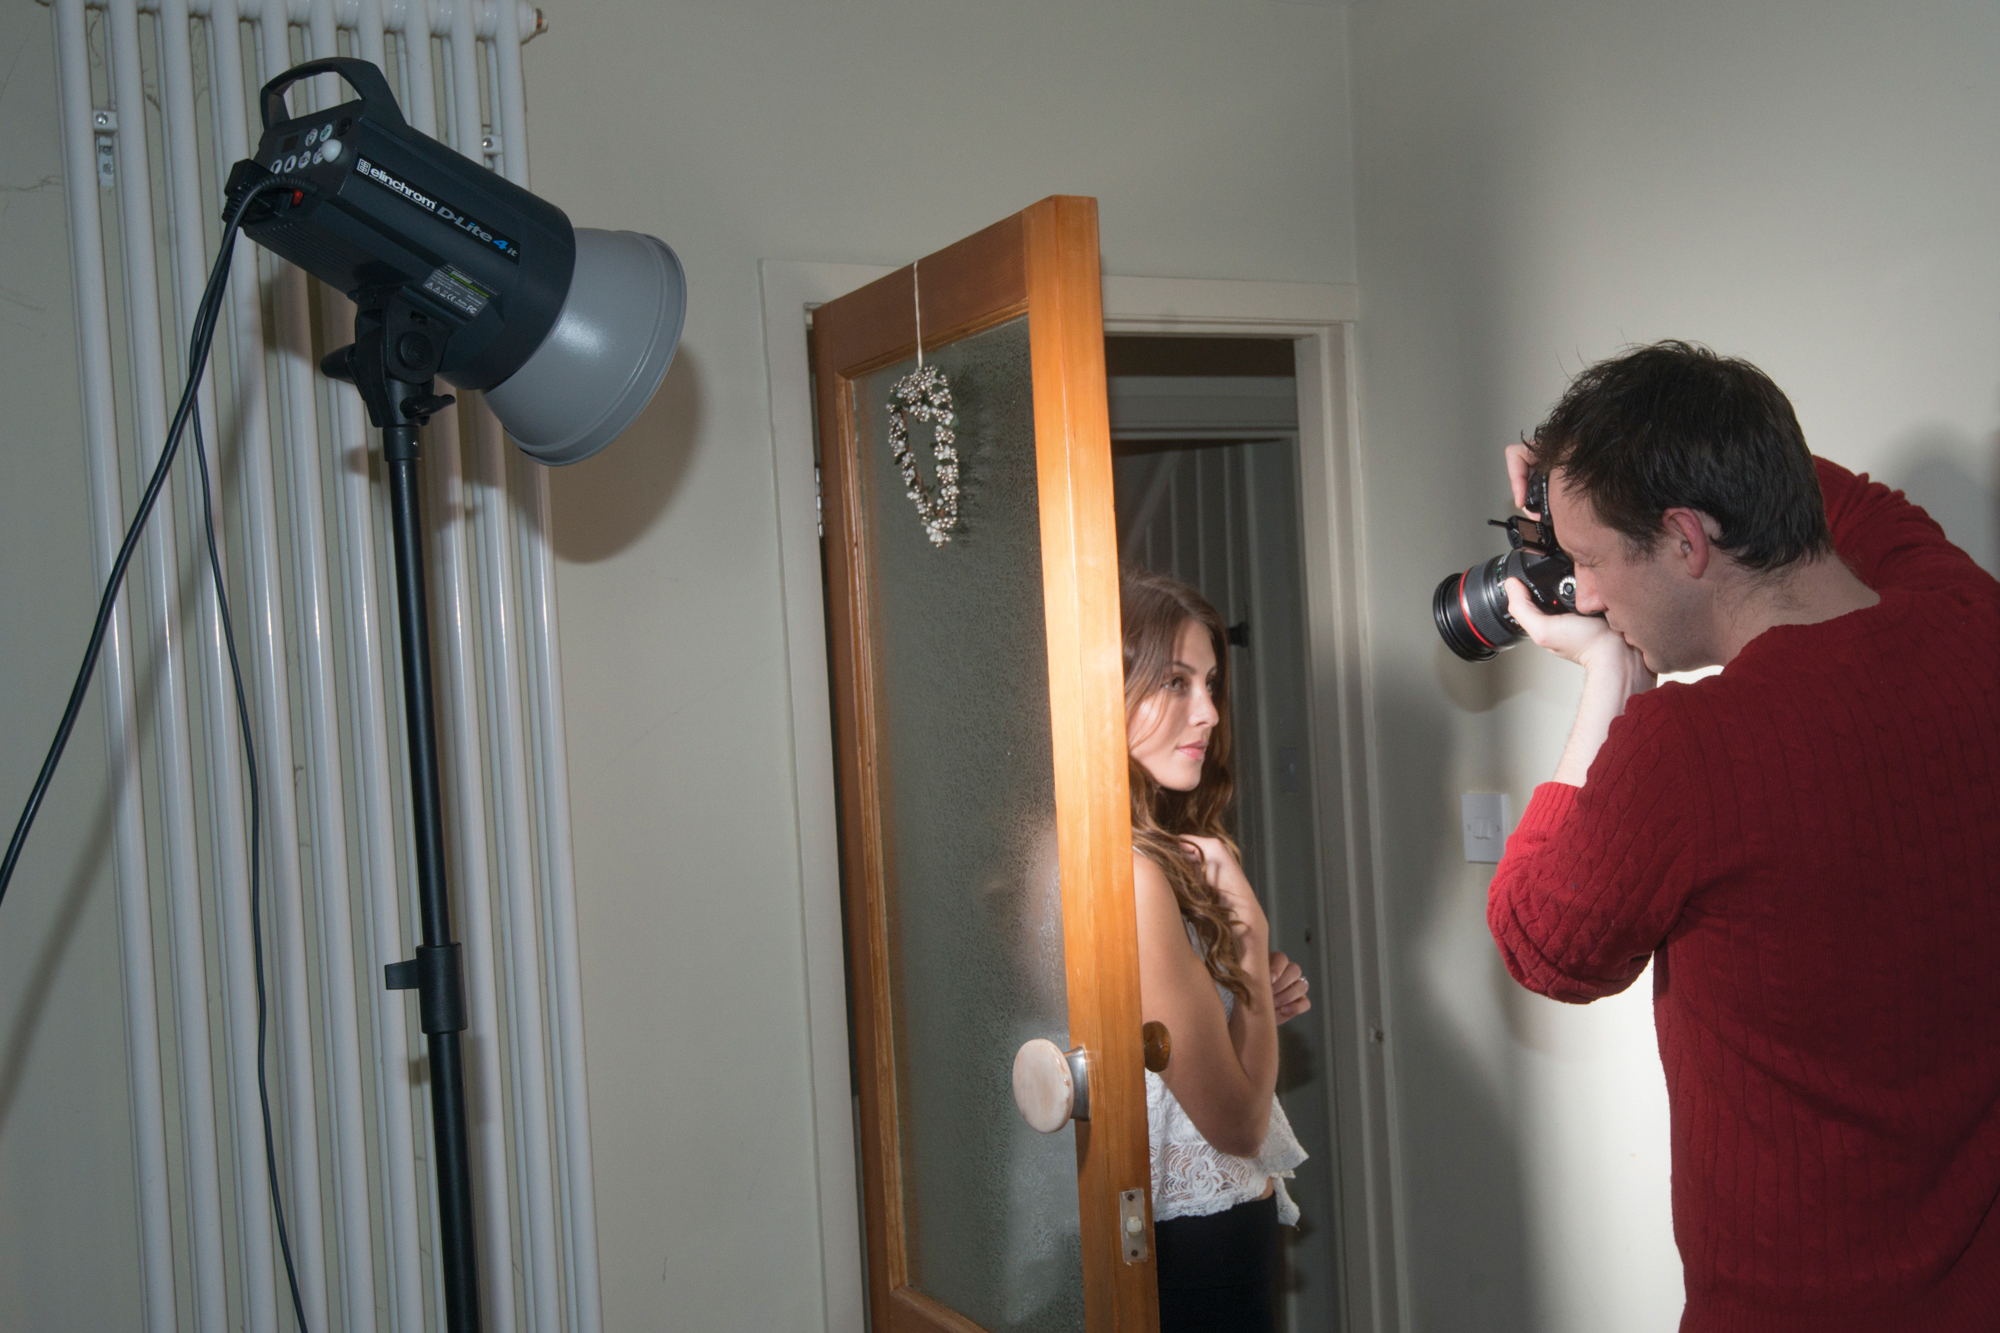
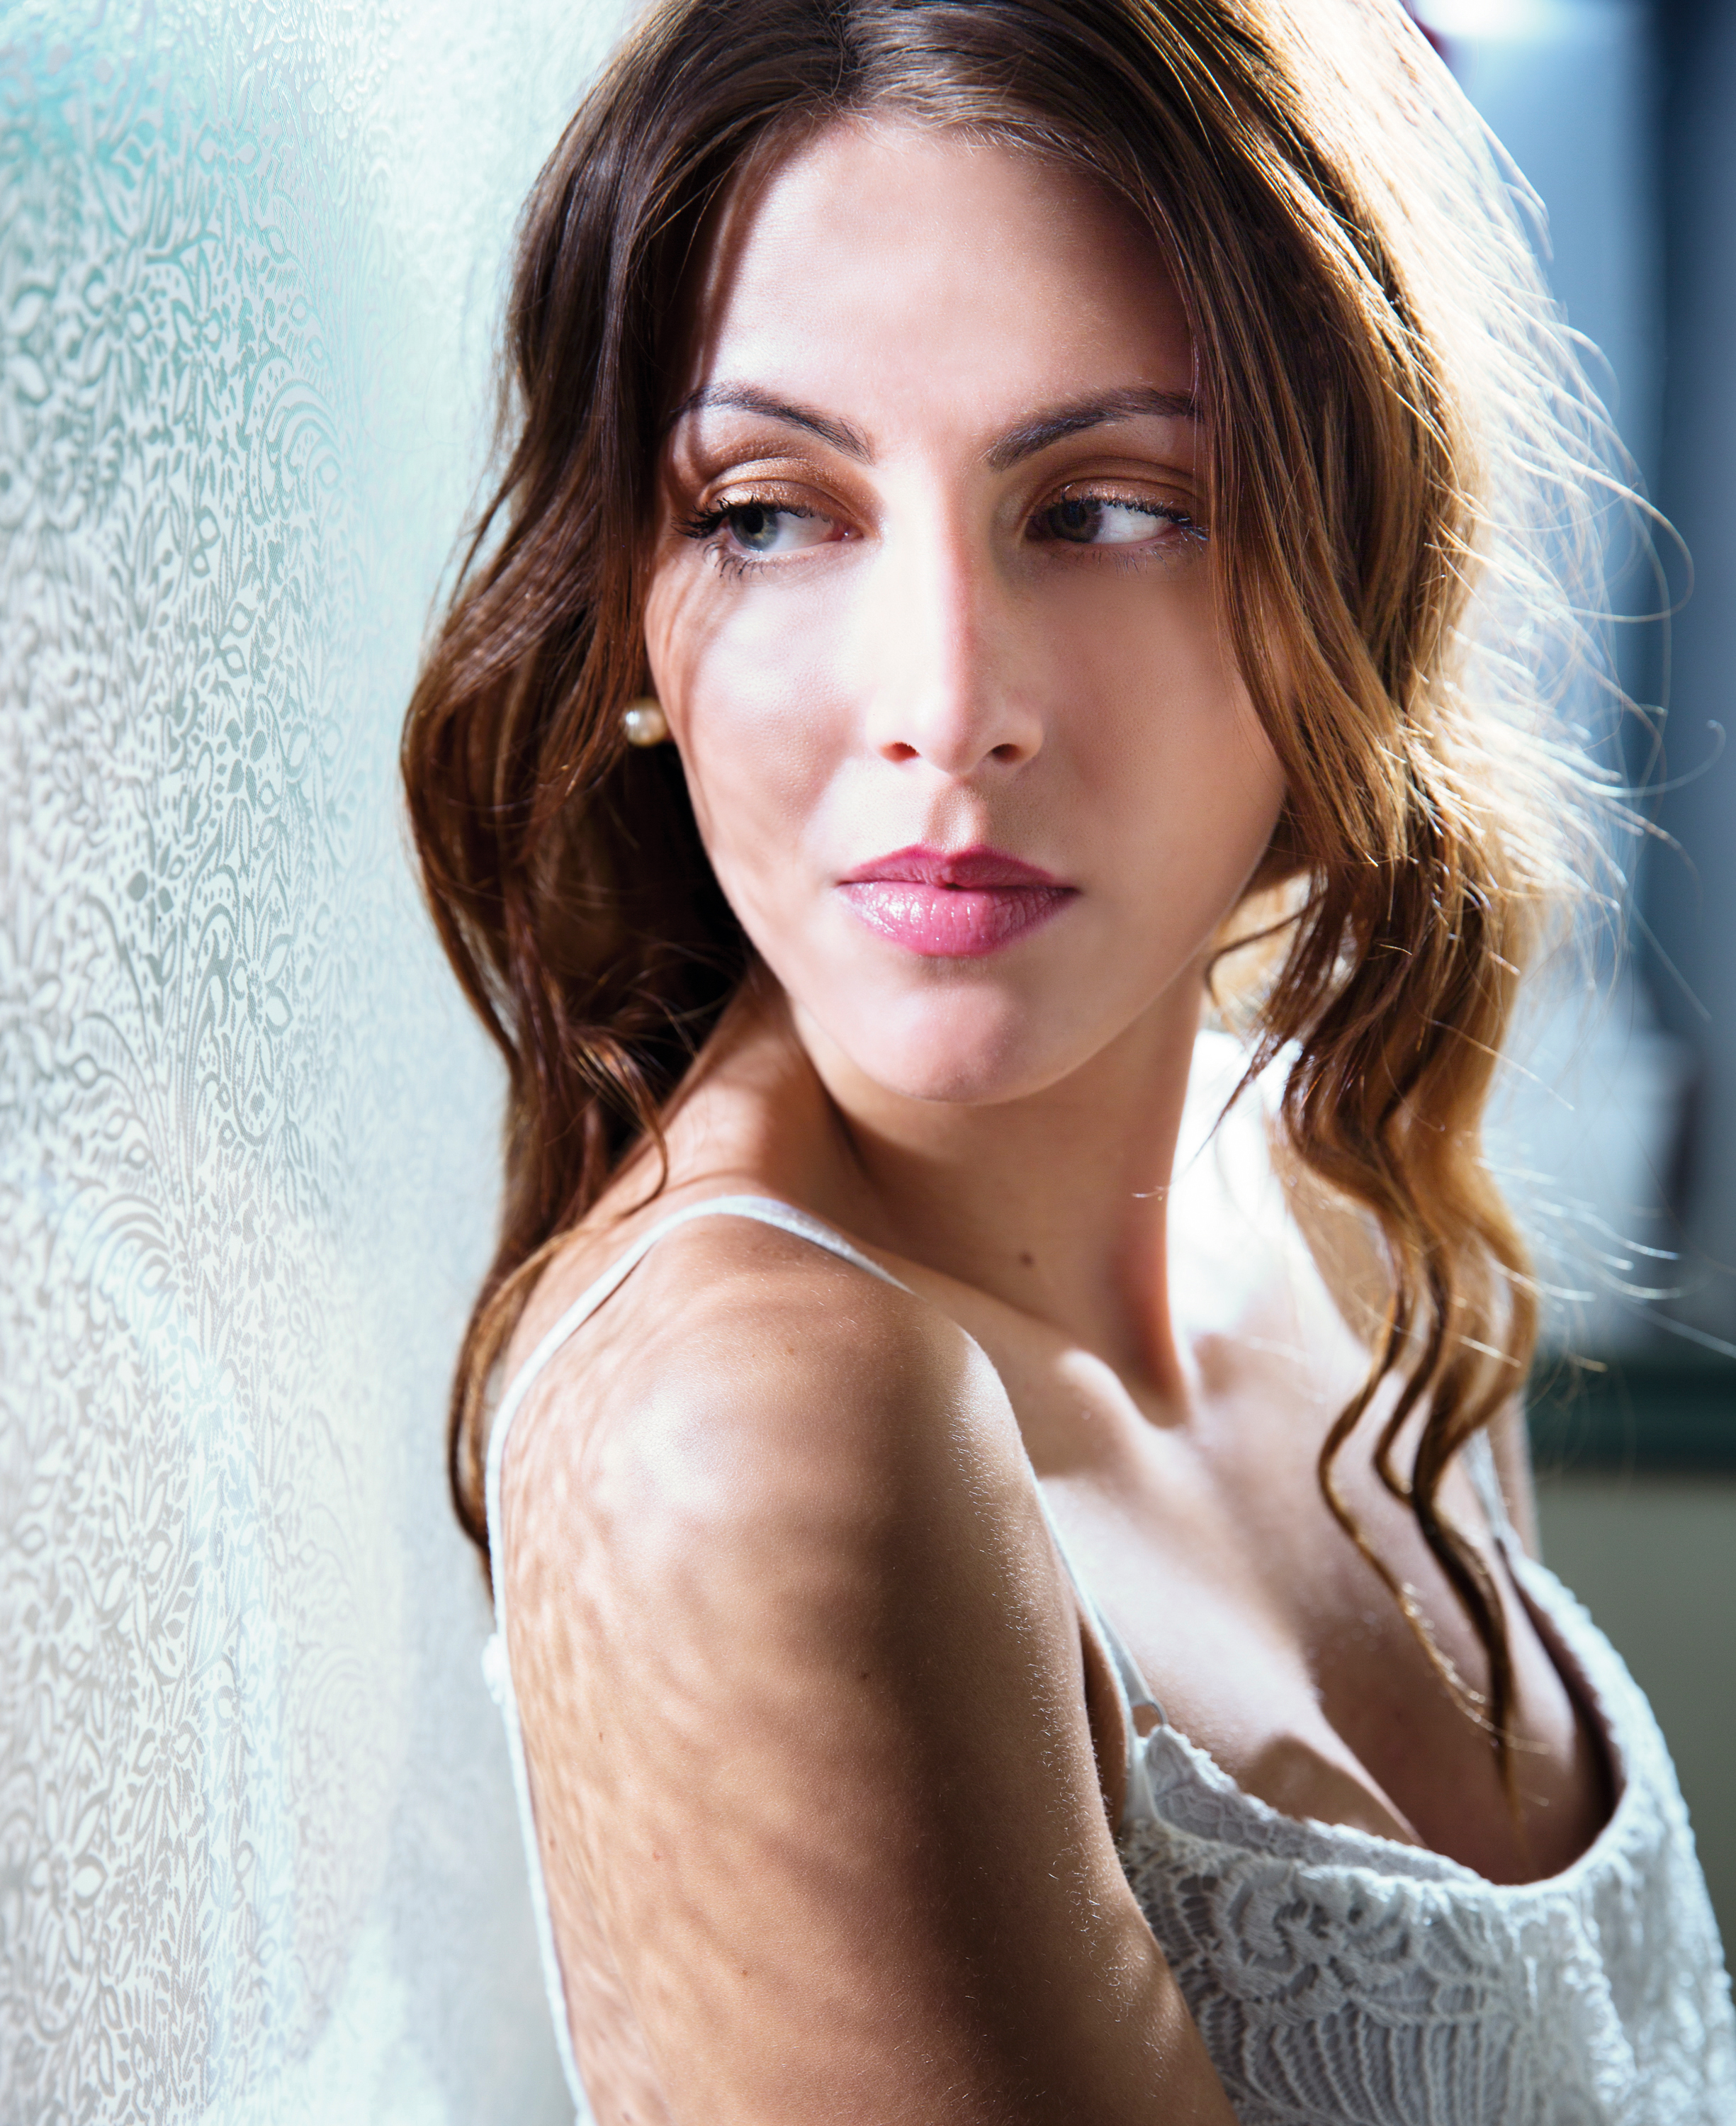
Windows will often have a patterned effect that can be used to cast interesting shadows. Here the panel from an interior door creates patches of light over the face and shoulder. We positioned a second light in the doorway to light the subject from behind, creating the backlit effect you can see in the main image.
Notice, too, how the pattern of shadows falls away – it’s stronger on the shoulder than over the face, which is marginally further away from the window. So, if you want strong and well-defined patterns, position your subject closer to the gobo.

Setup 5: Lace
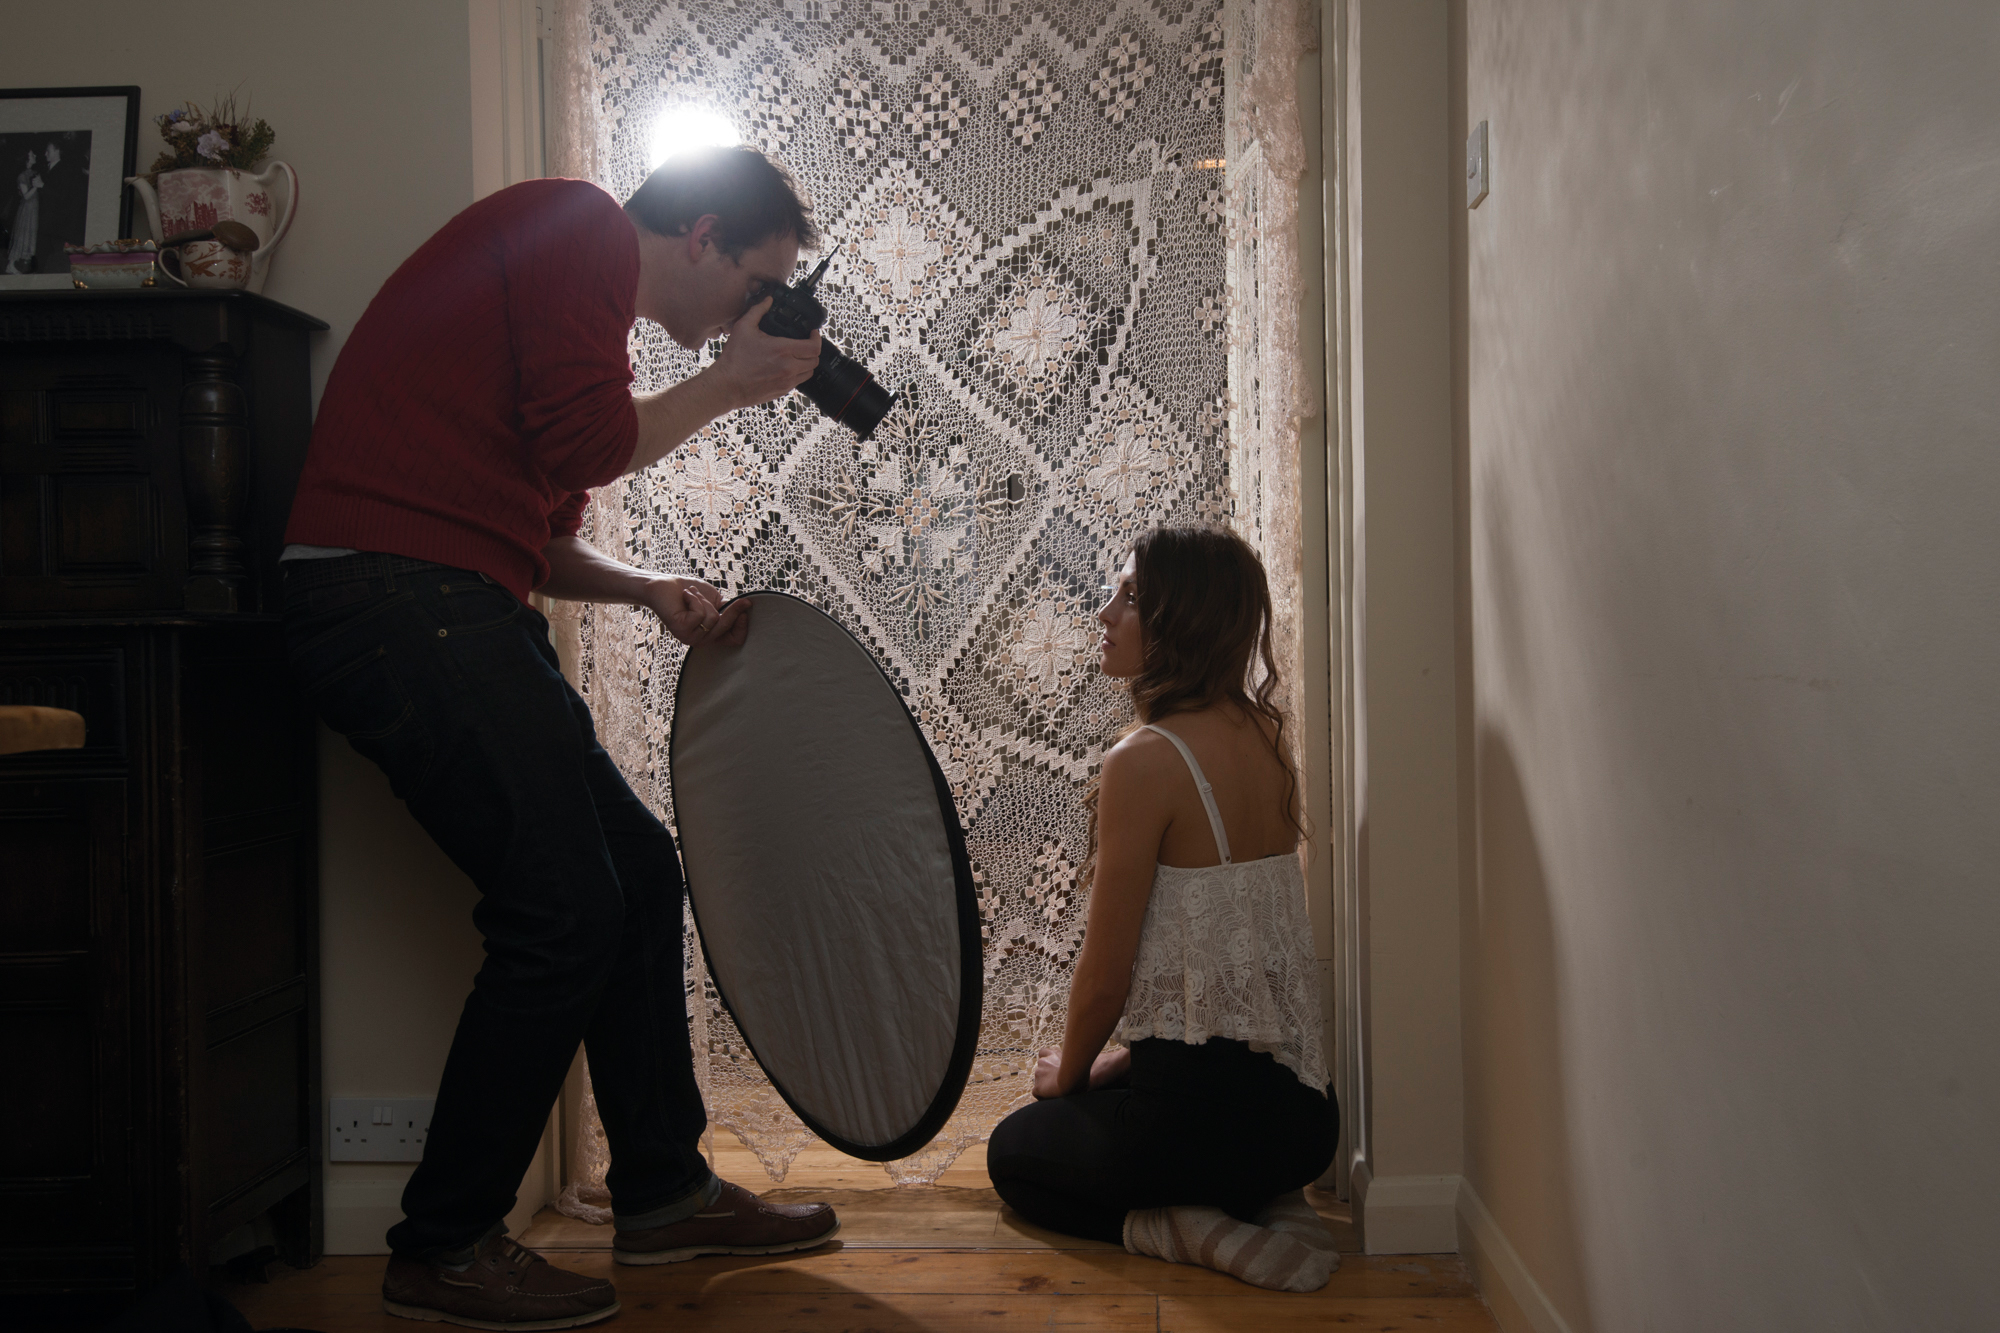
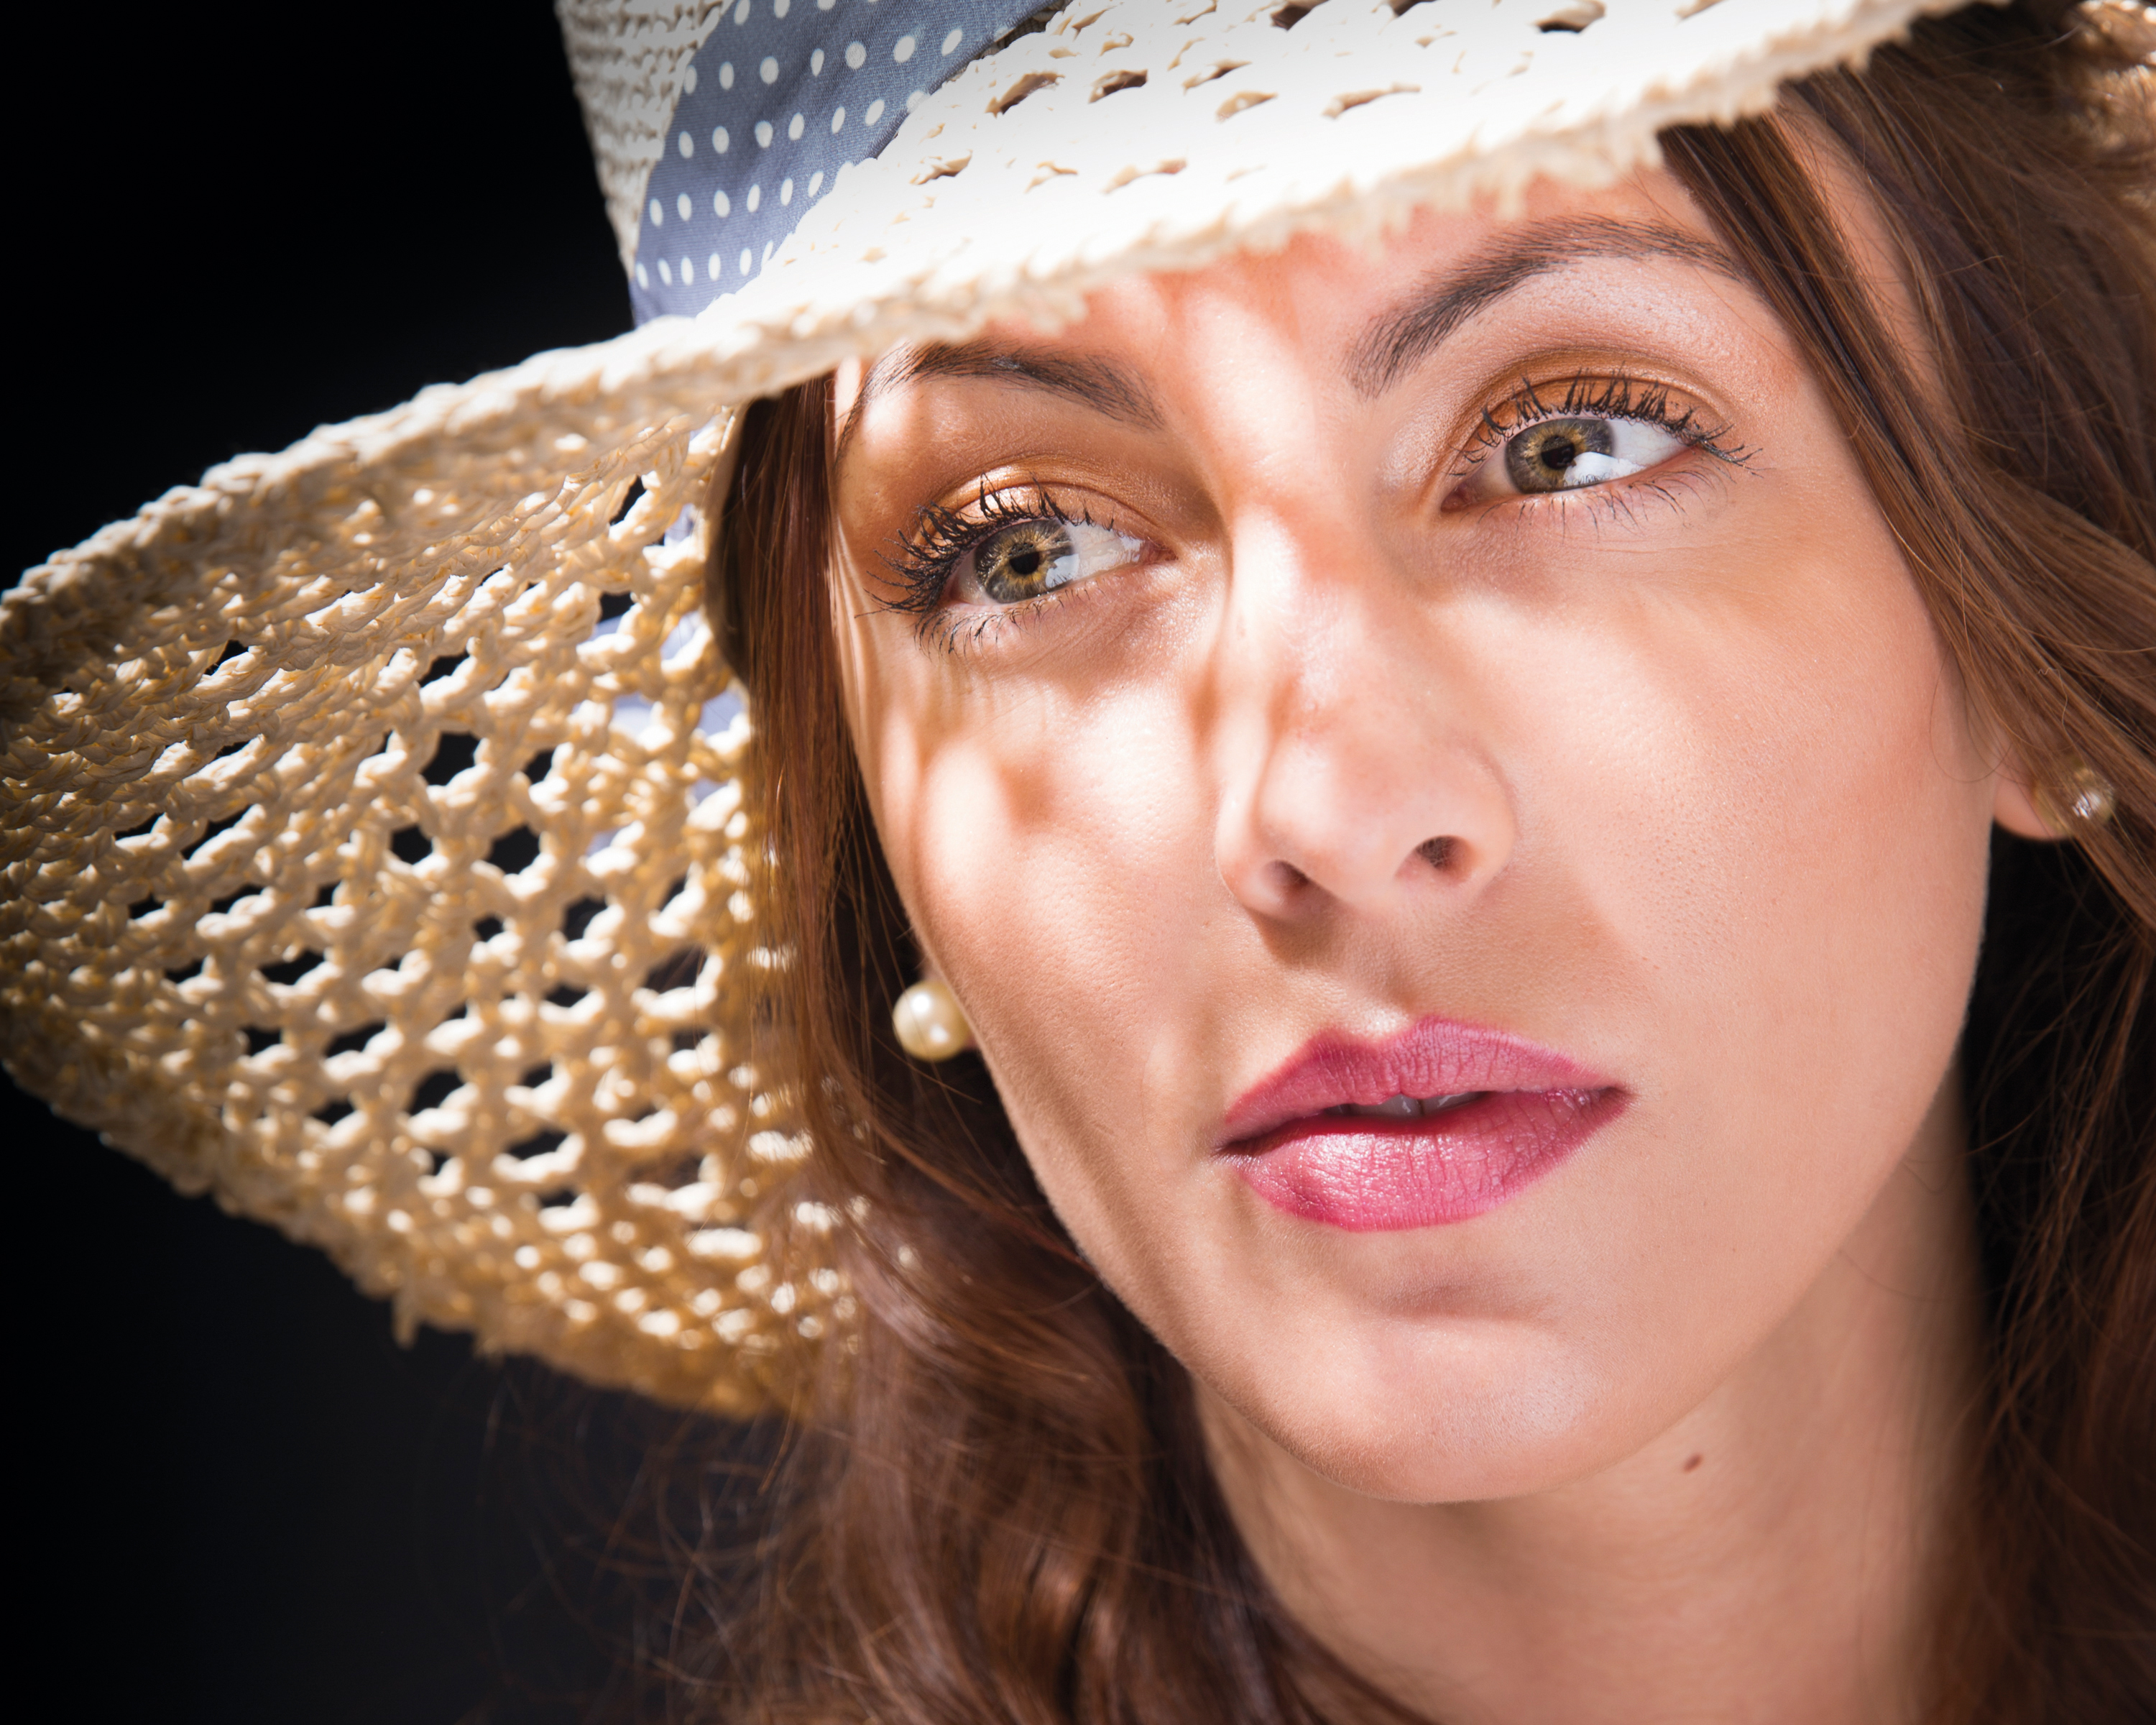
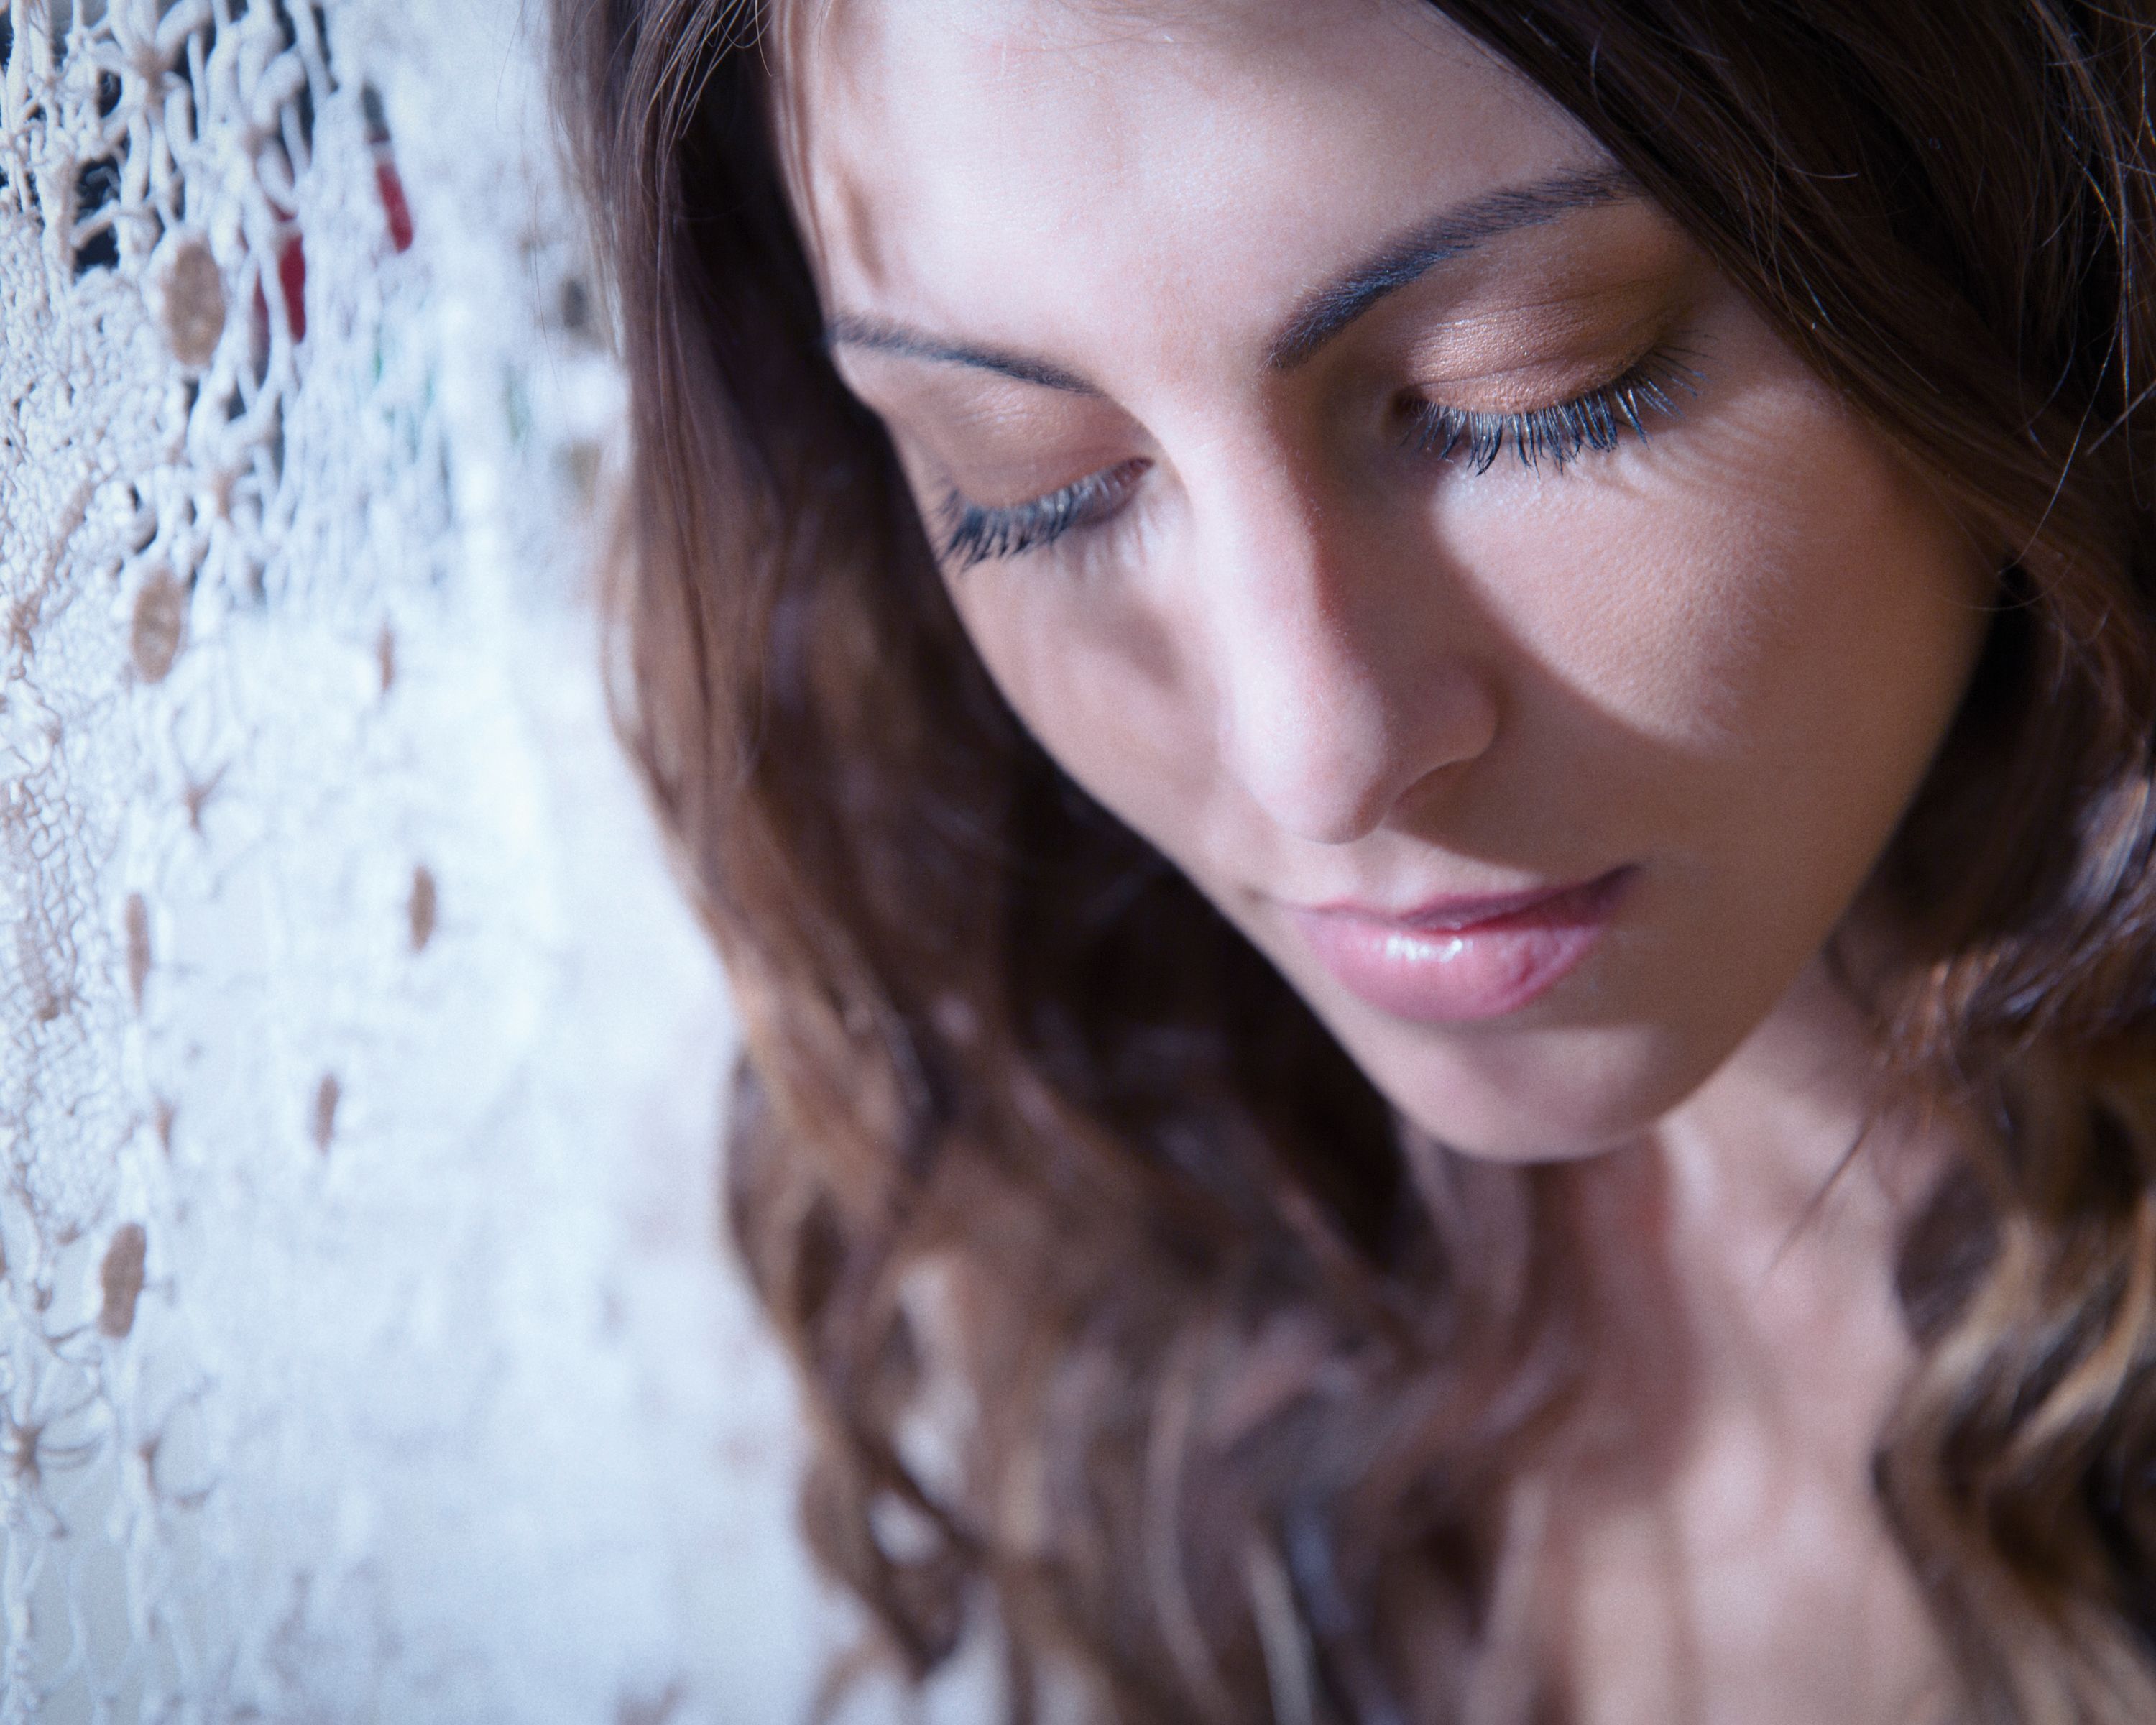
Lace, or other materials with similar patterned transparency, can cast beautiful shadows. Shooting side-on like this will enable you to include the material in the frame, although it can lead to harsh lighting across the face.
Look to position the light so that the shadow cast by the nose creates a triangular patch of light on the cheek. This is sometimes called Rembrandt lighting, after the master painter. For a moody shot of the subject’s eyelashes like this, lower the flash power and open up the aperture for a shallow depth of field, so that everything but the lashes is thrown out of focus.
More videos:
Photography tips and technique videos
Studio portrait lighting: essential tips and setups explained
Couple photography: poses for portraits of pairs of people
Get the Digital Camera World Newsletter
The best camera deals, reviews, product advice, and unmissable photography news, direct to your inbox!
The lead technique writer on Digital Camera Magazine, PhotoPlus: The Canon Magazine and N-Photo: The Nikon Magazine, James is a fantastic general practice photographer with an enviable array of skills across every genre of photography.
Whether it's flash photography techniques like stroboscopic portraits, astrophotography projects like photographing the Northern Lights, or turning sound into art by making paint dance on a set of speakers, James' tutorials and projects are as creative as they are enjoyable.
He's also a wizard at the dark arts of Photoshop, Lightroom and Affinity Photo, and is capable of some genuine black magic in the digital darkroom, making him one of the leading authorities on photo editing software and techniques.

