Experiment with LAB mode in Adobe Photoshop CC to enhance your colors
Use Photoshop CC's powerful LAB mode to boost your images realistically or completely alter the colors
Watch video: How to use the LAB mode in Photoshop CC
Most of us will normally work on our Photoshop CC images in the RGB color mode. In this mode, each pixel is given a certain value for red, green and blue. These combine to create millions of colors. As such, RGB mode is the principal mode for most edits. But it does drawbacks… In RGB mode the color and brightness of your image is tied into one. Adjust the red, green or blue value of any pixel and, as well as changing the color, you’ll also affect brightness.
This is where LAB mode comes in. Like RGB, LAB is also an acronym. It stands for Lightness, A and B channels. These represent an entirely different set of values for each pixel. The Lightness values determine how bright the pixels are, while the A and B values set the color. Put simply, LAB Mode lets us edit color and brightness independently of one another – something that is harder to achieve in RGB mode.
Not only is this very useful for boosting color intensity and making images ‘pop’ with color, it’s also a very powerful means for changing colors completely.
In this tutorial we’ll look at how it’s done. First, we’ll enhance the colors in the image by squeezing the A and B color channels, which gives a powerful yet natural boost to the image. Once done, we’ll go on to enhance the contrast, control the effect with a mask, and experiment with color-changing shifts.
01 Switch to LAB
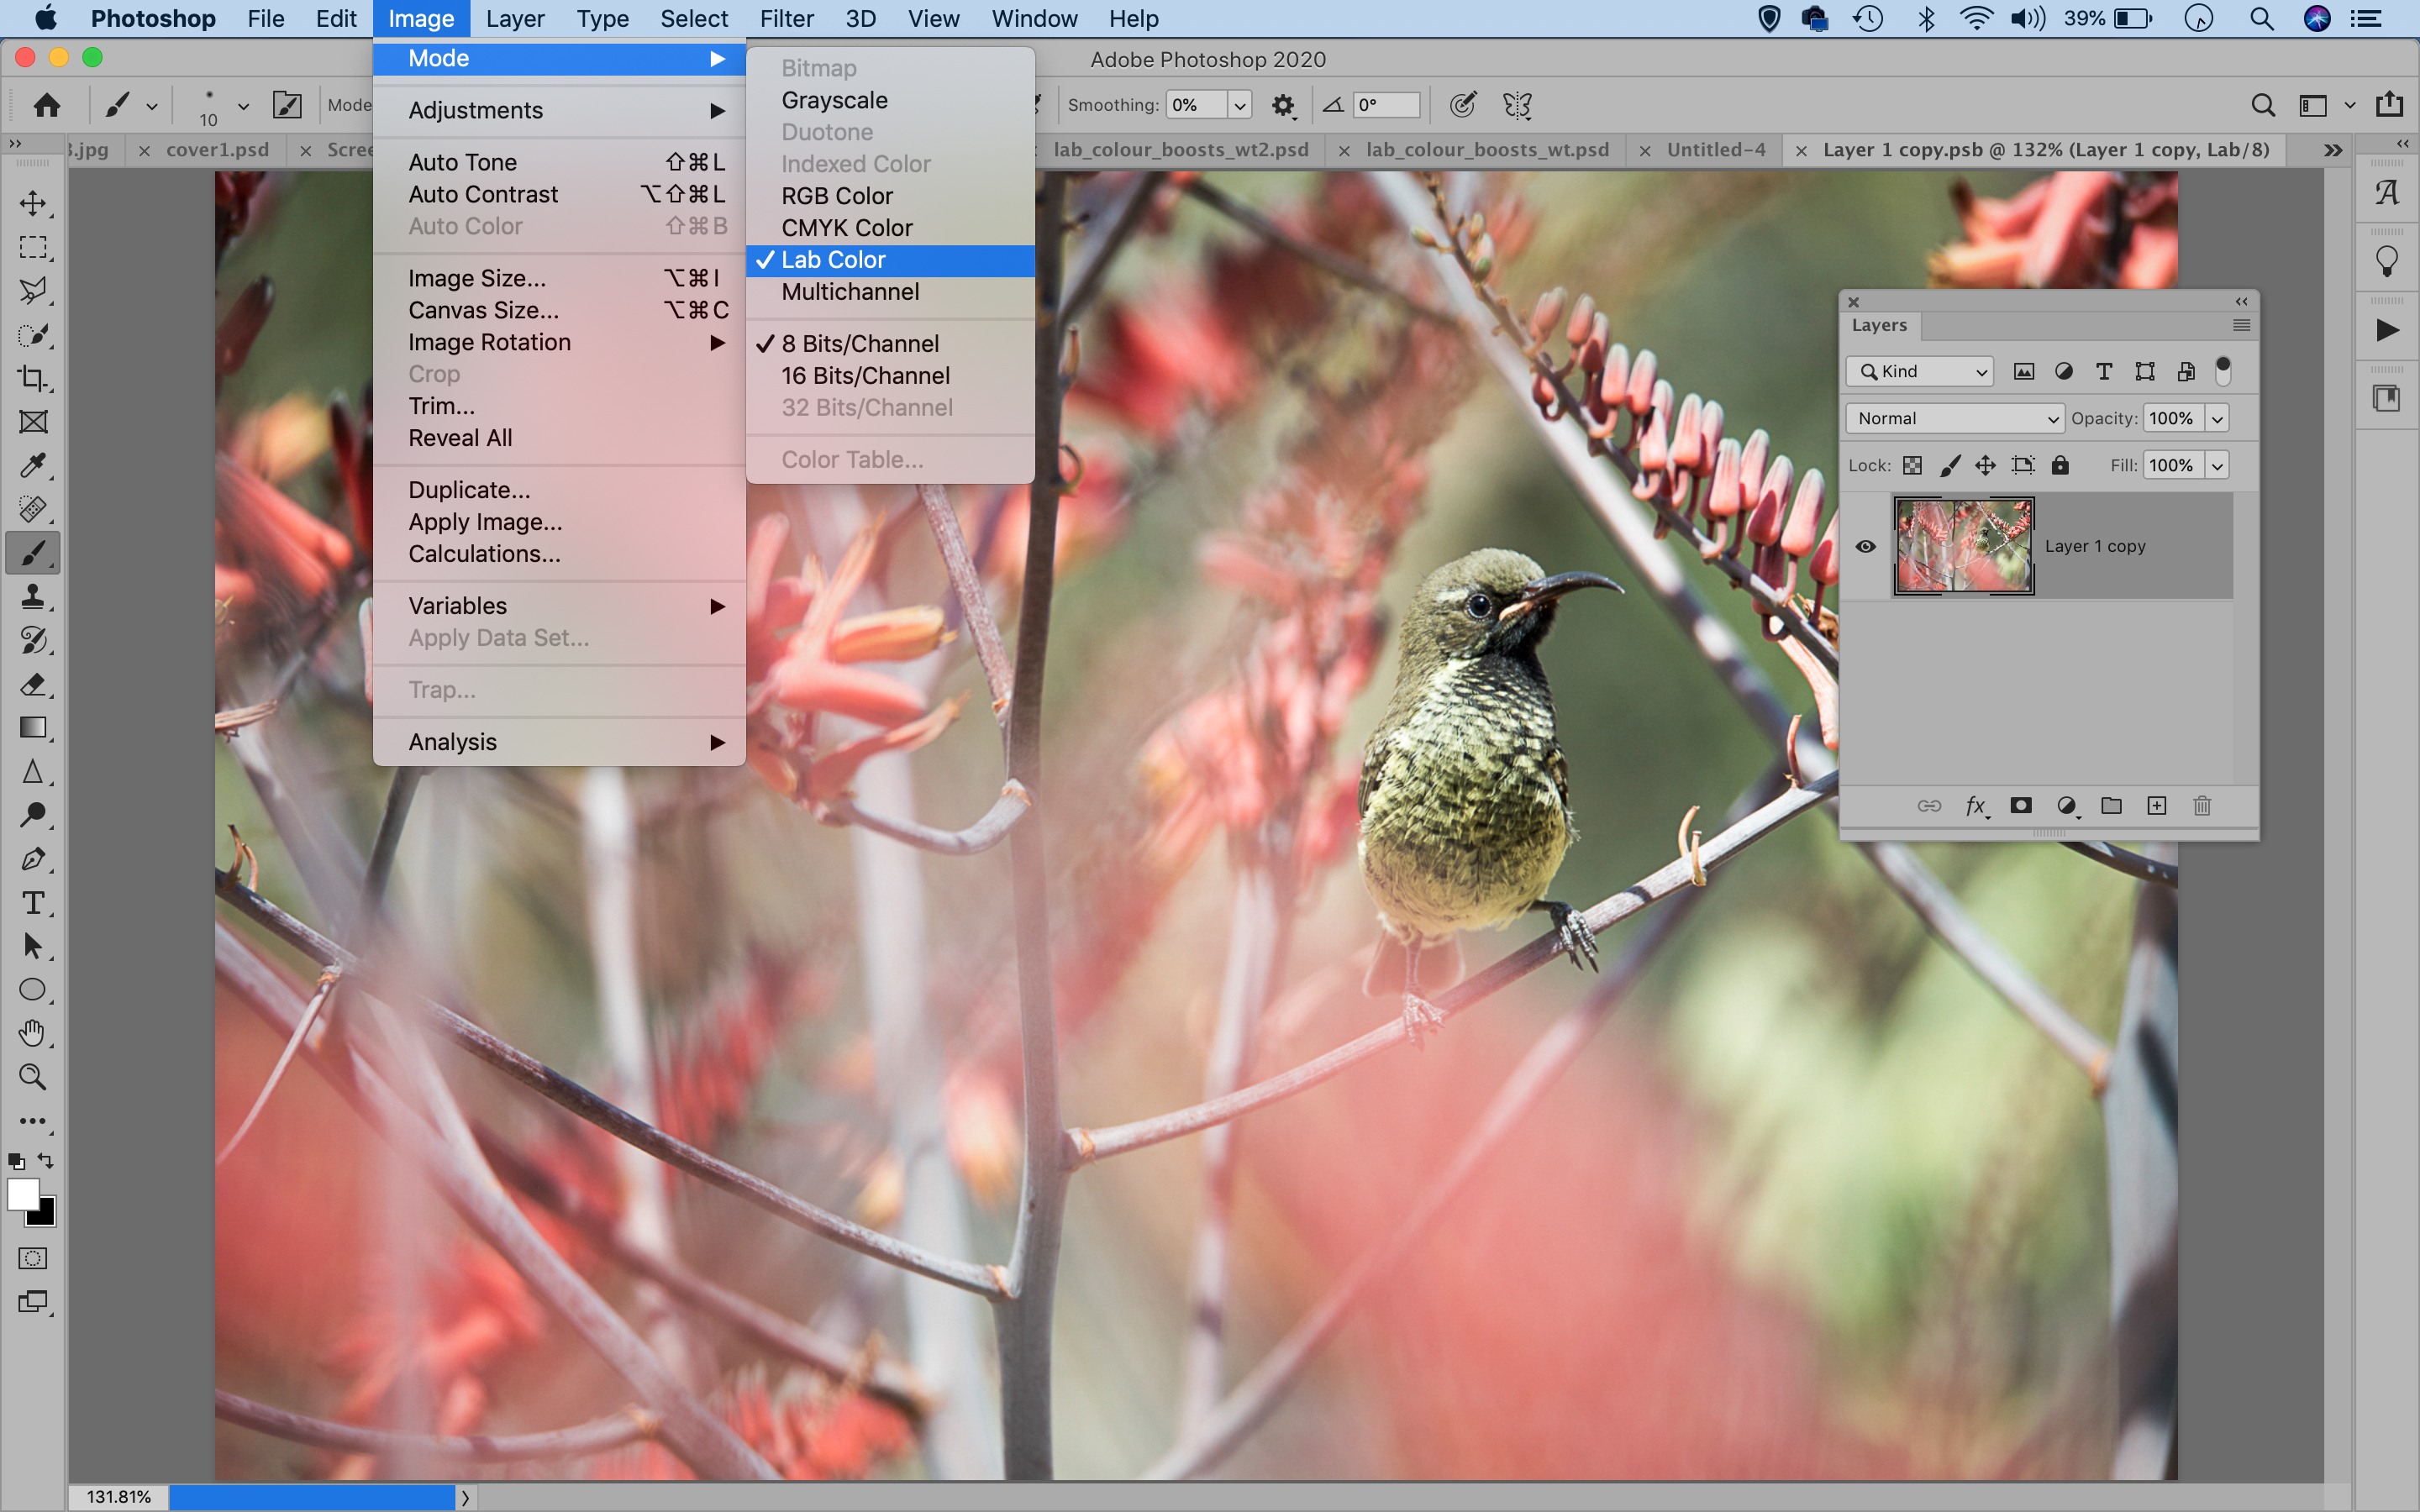
Open up your image or use our start file which can be downloaded here. Go to Image > Mode > LAB Color. If your shot has a few layers, press Cmd / Ctrl + Shift + Alt + E to merge a copy of the layers, then right-click the layer and ‘Convert to Smart Object’. Double-click the Smart Object thumbnail to open it in a new window, then convert this to LAB.
02 Target the A Channel
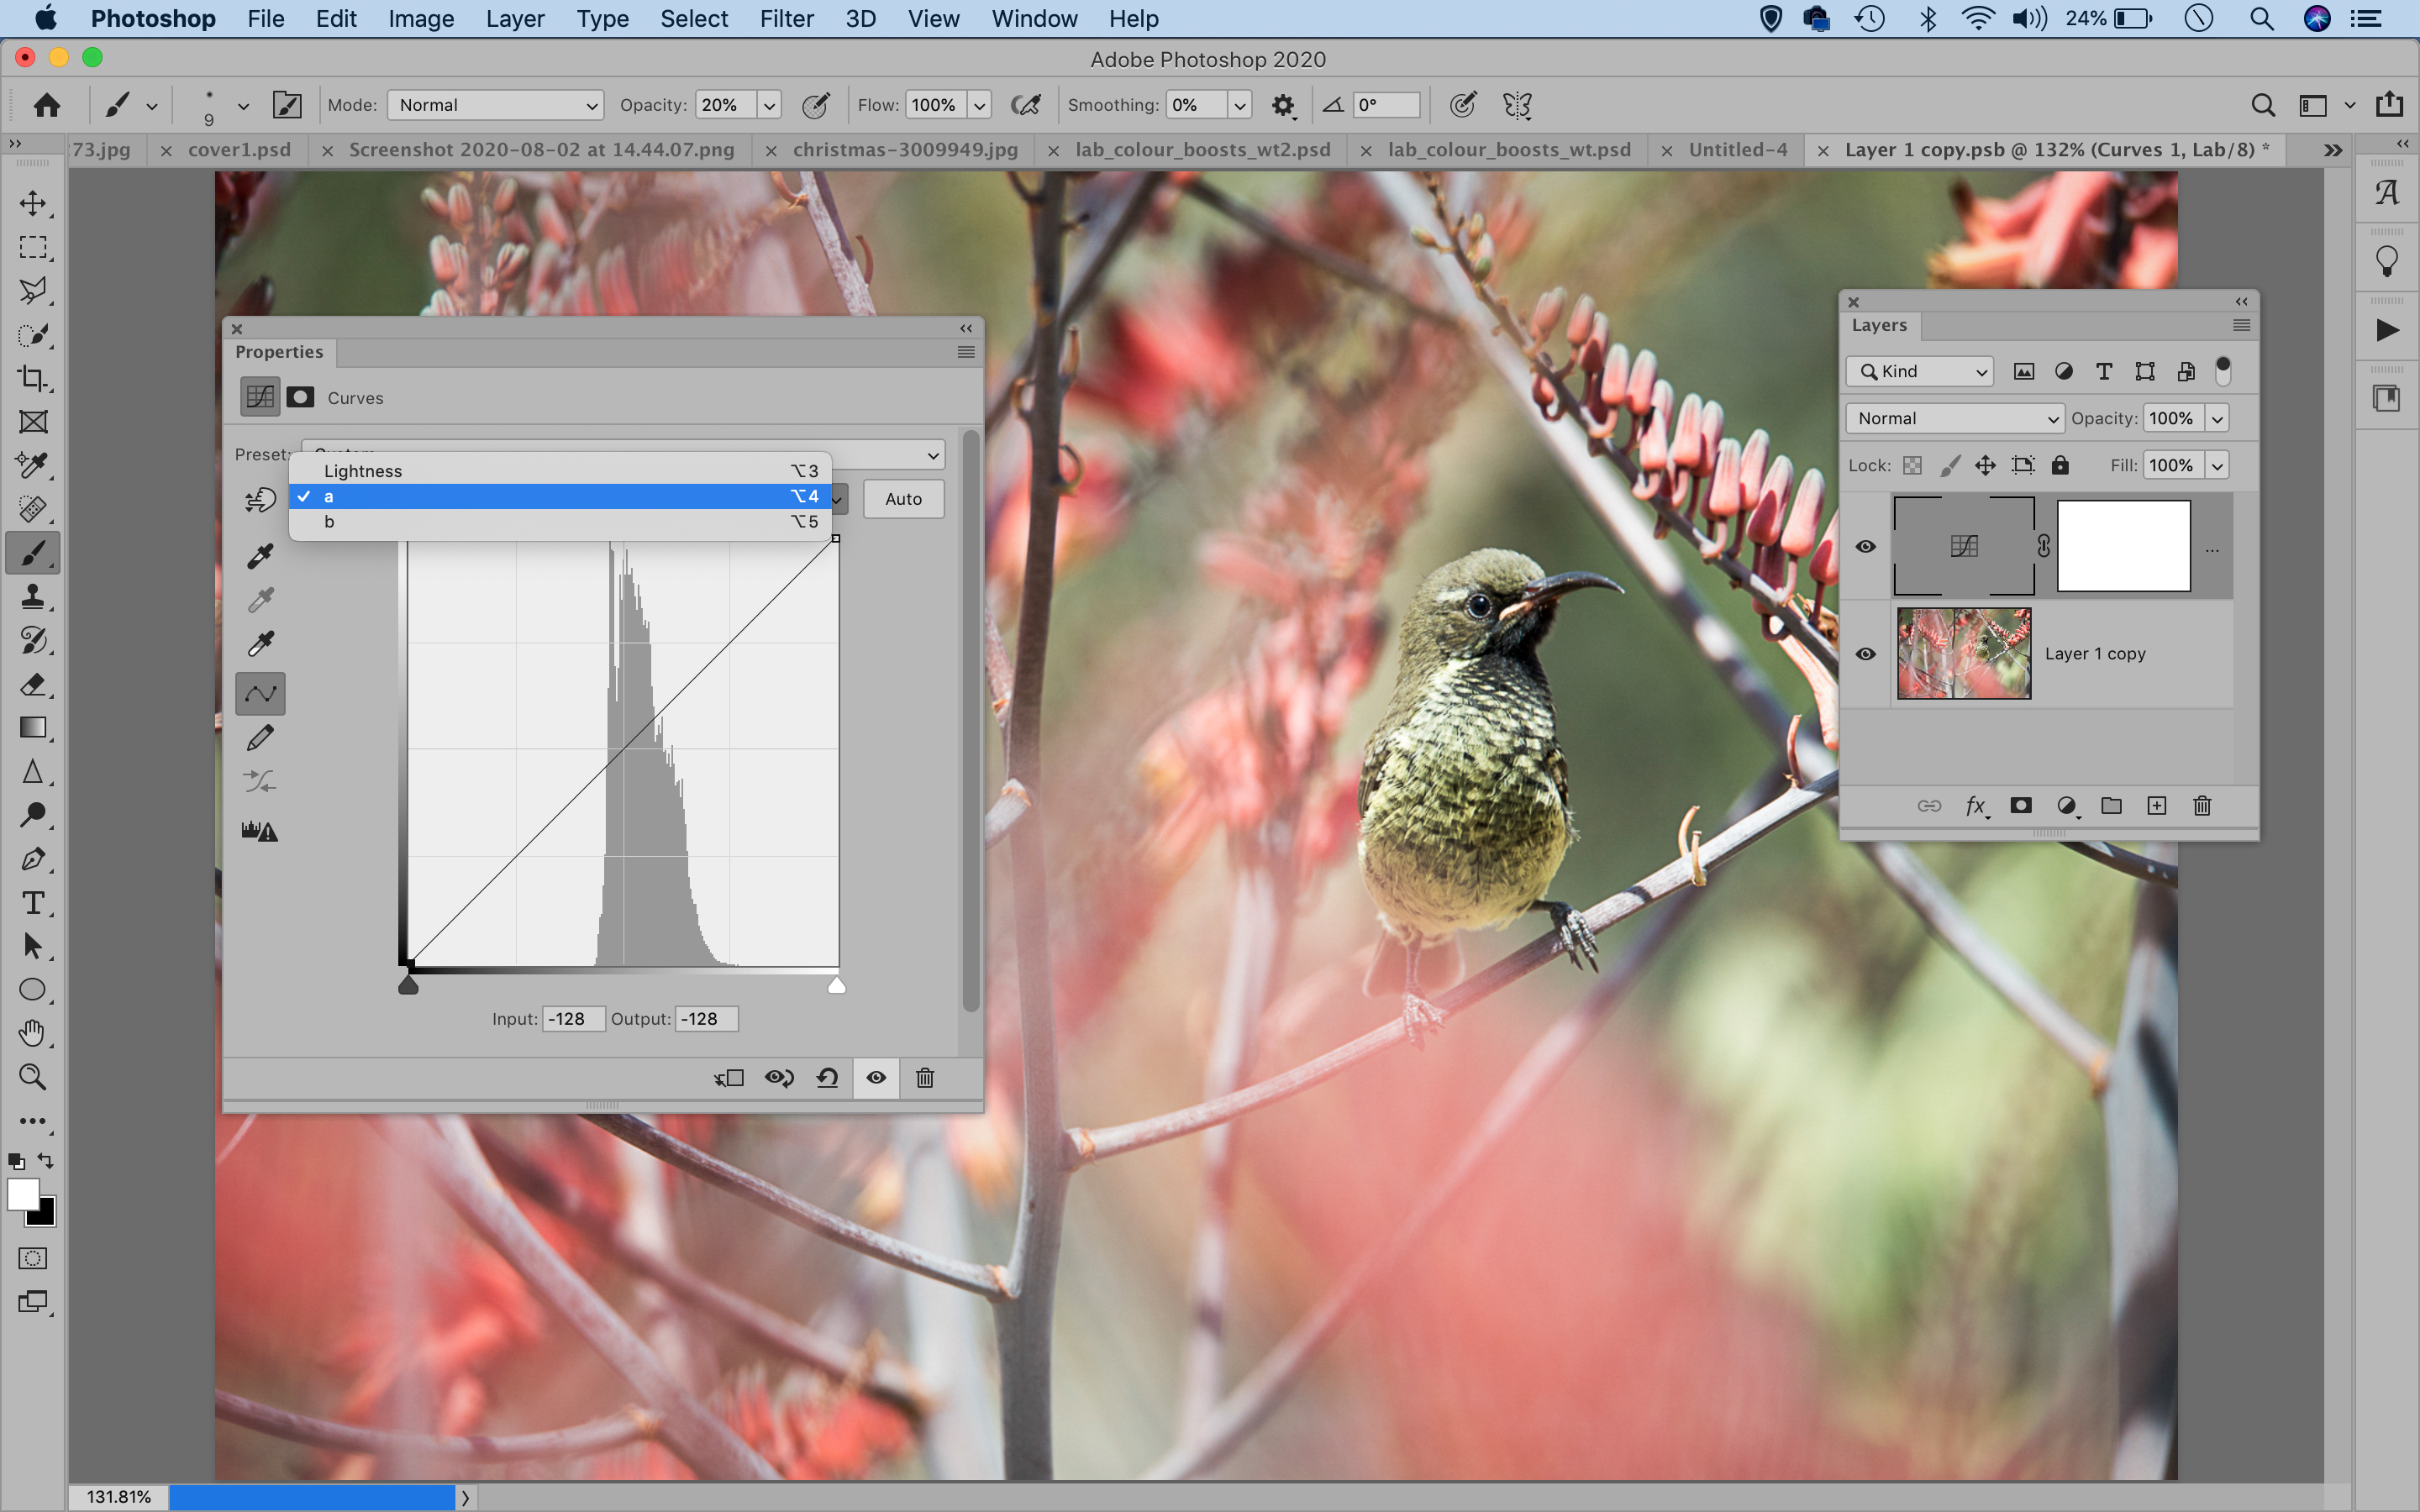
Go to the Layers panel and click the Adjustment Layer icon. Choose Curves. Expand the Properties panel to display a large graph. Click on the channel dropdown (where it says Lightness) and choose A. This represents the green-magenta spectrum of colors.
03 Boost the greens
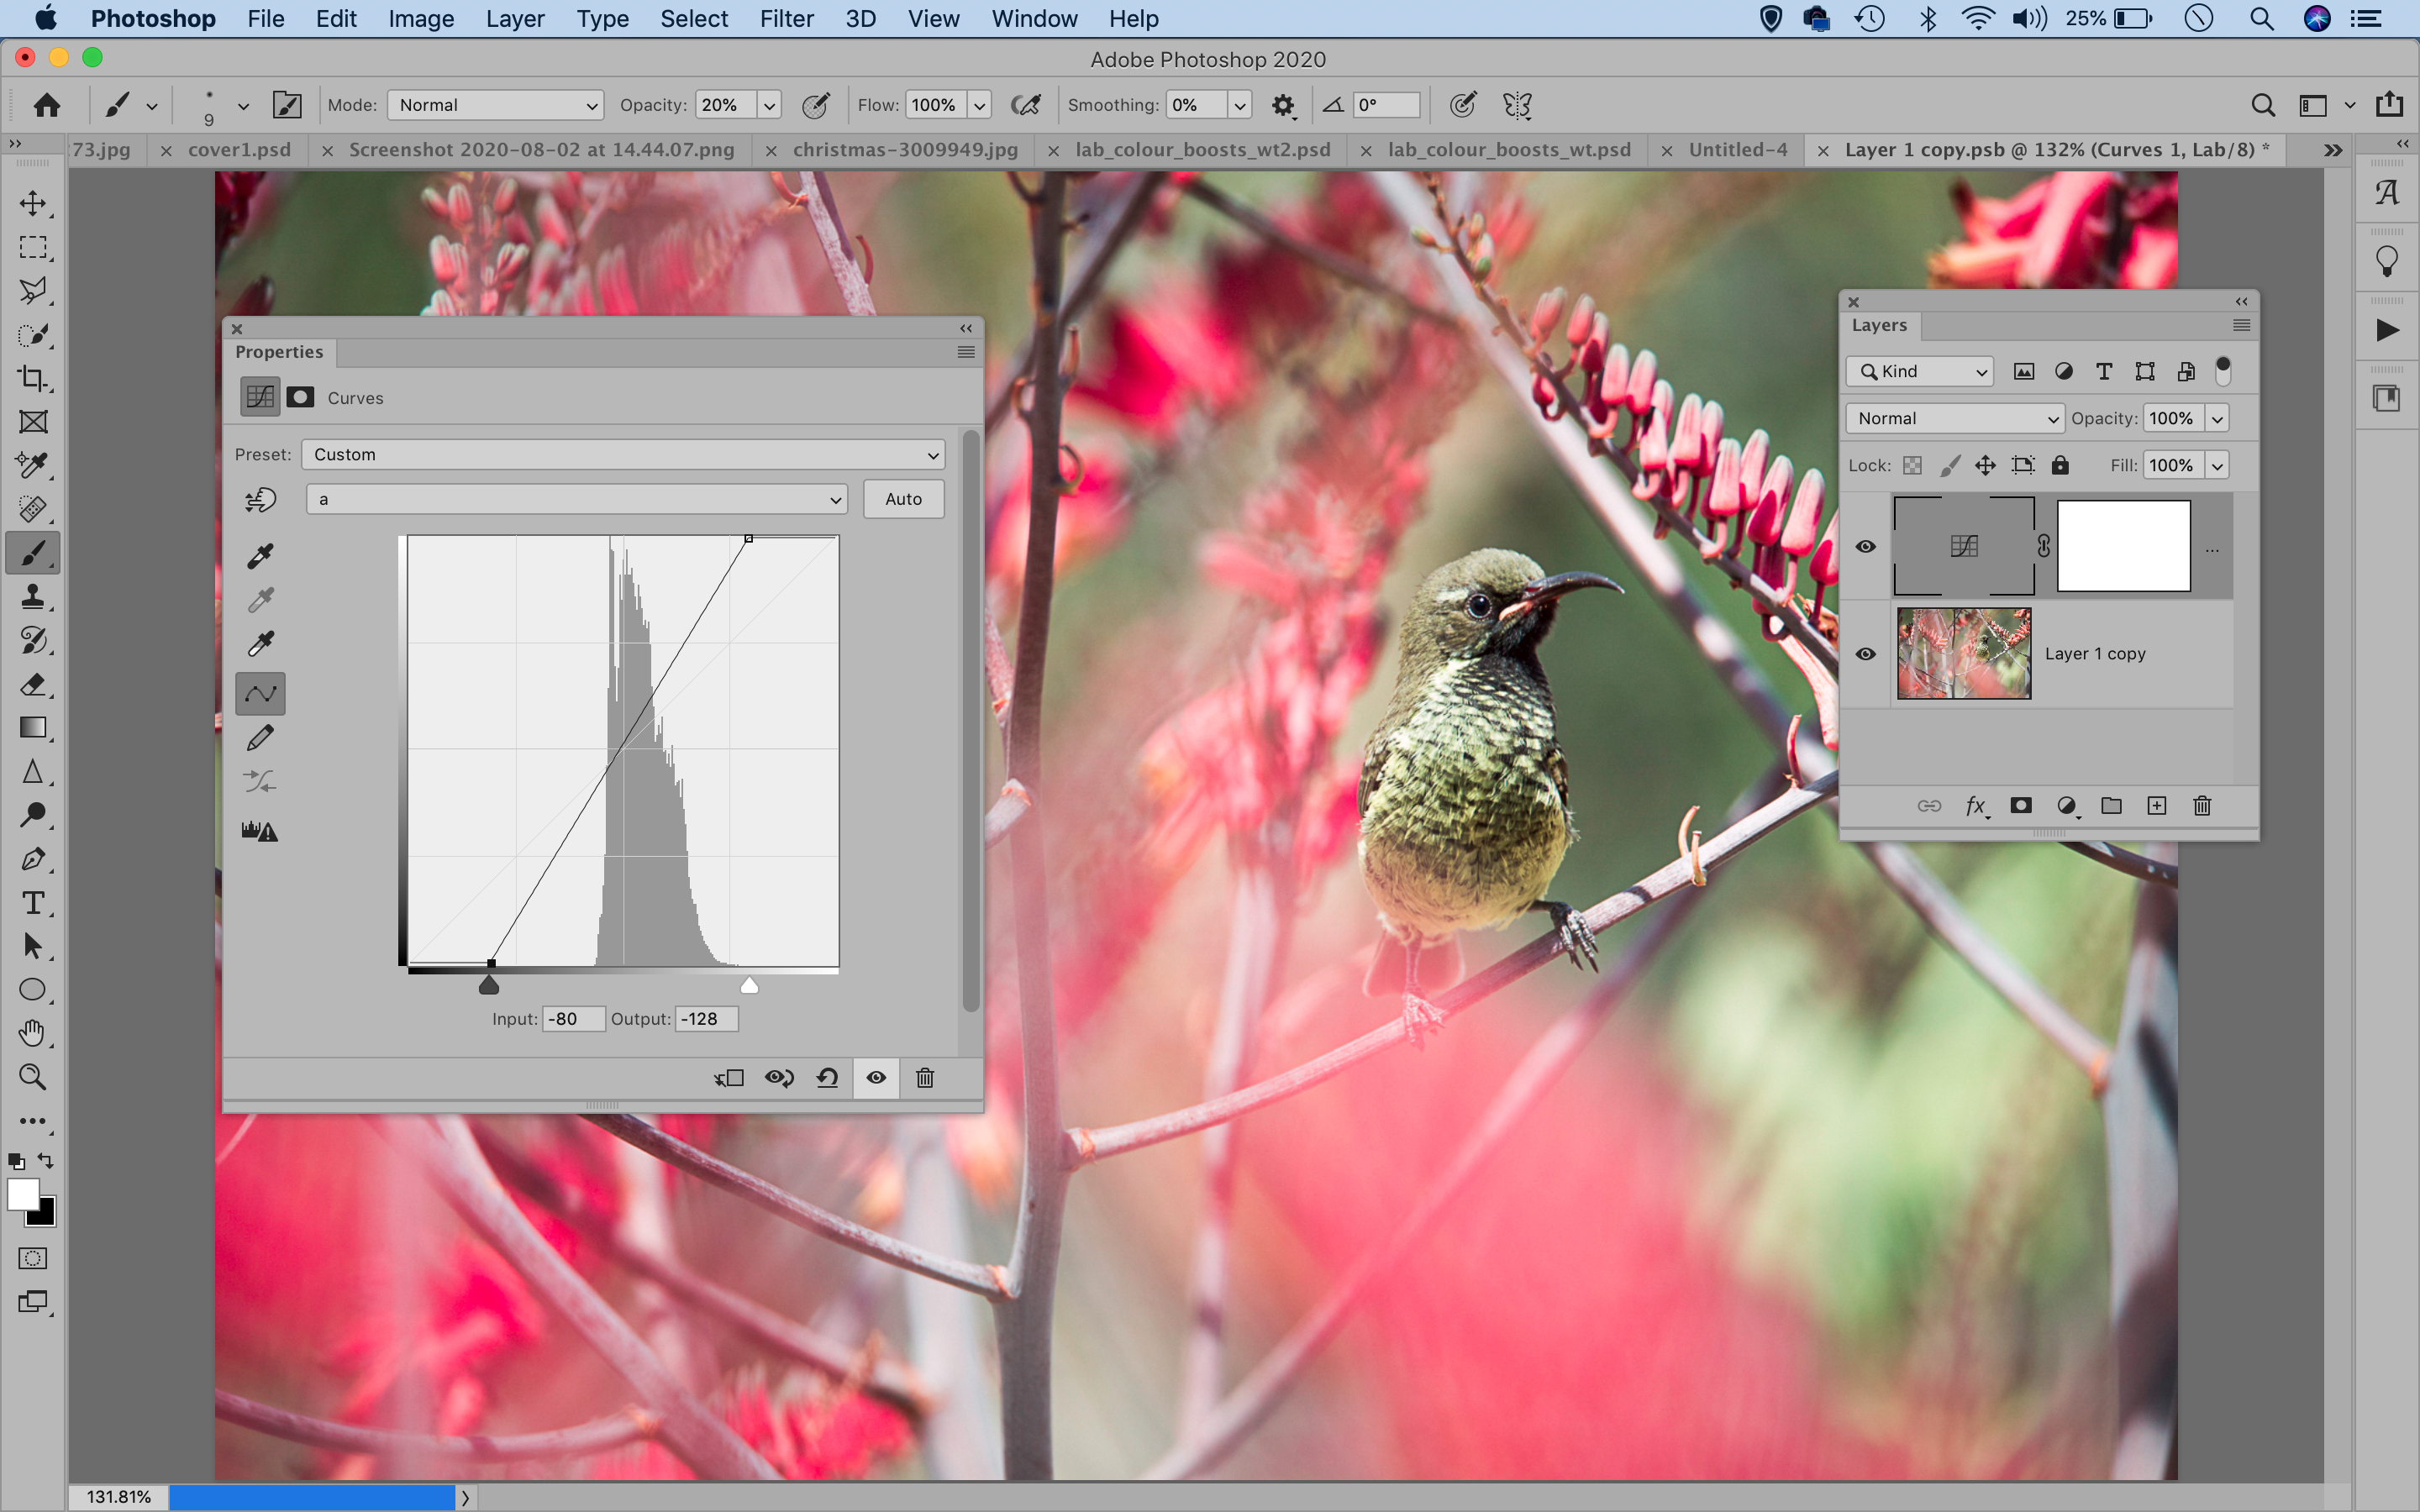
Drag the black and white arrows along the bottom of the graph in by equal amounts, ensuring the diagonal line intersects the centre of the graph (if it doesn’t stay over the centre, the colors will shift). The result is a powerful, natural-looking, boost to the greens.
04 Squeeze the B Channel
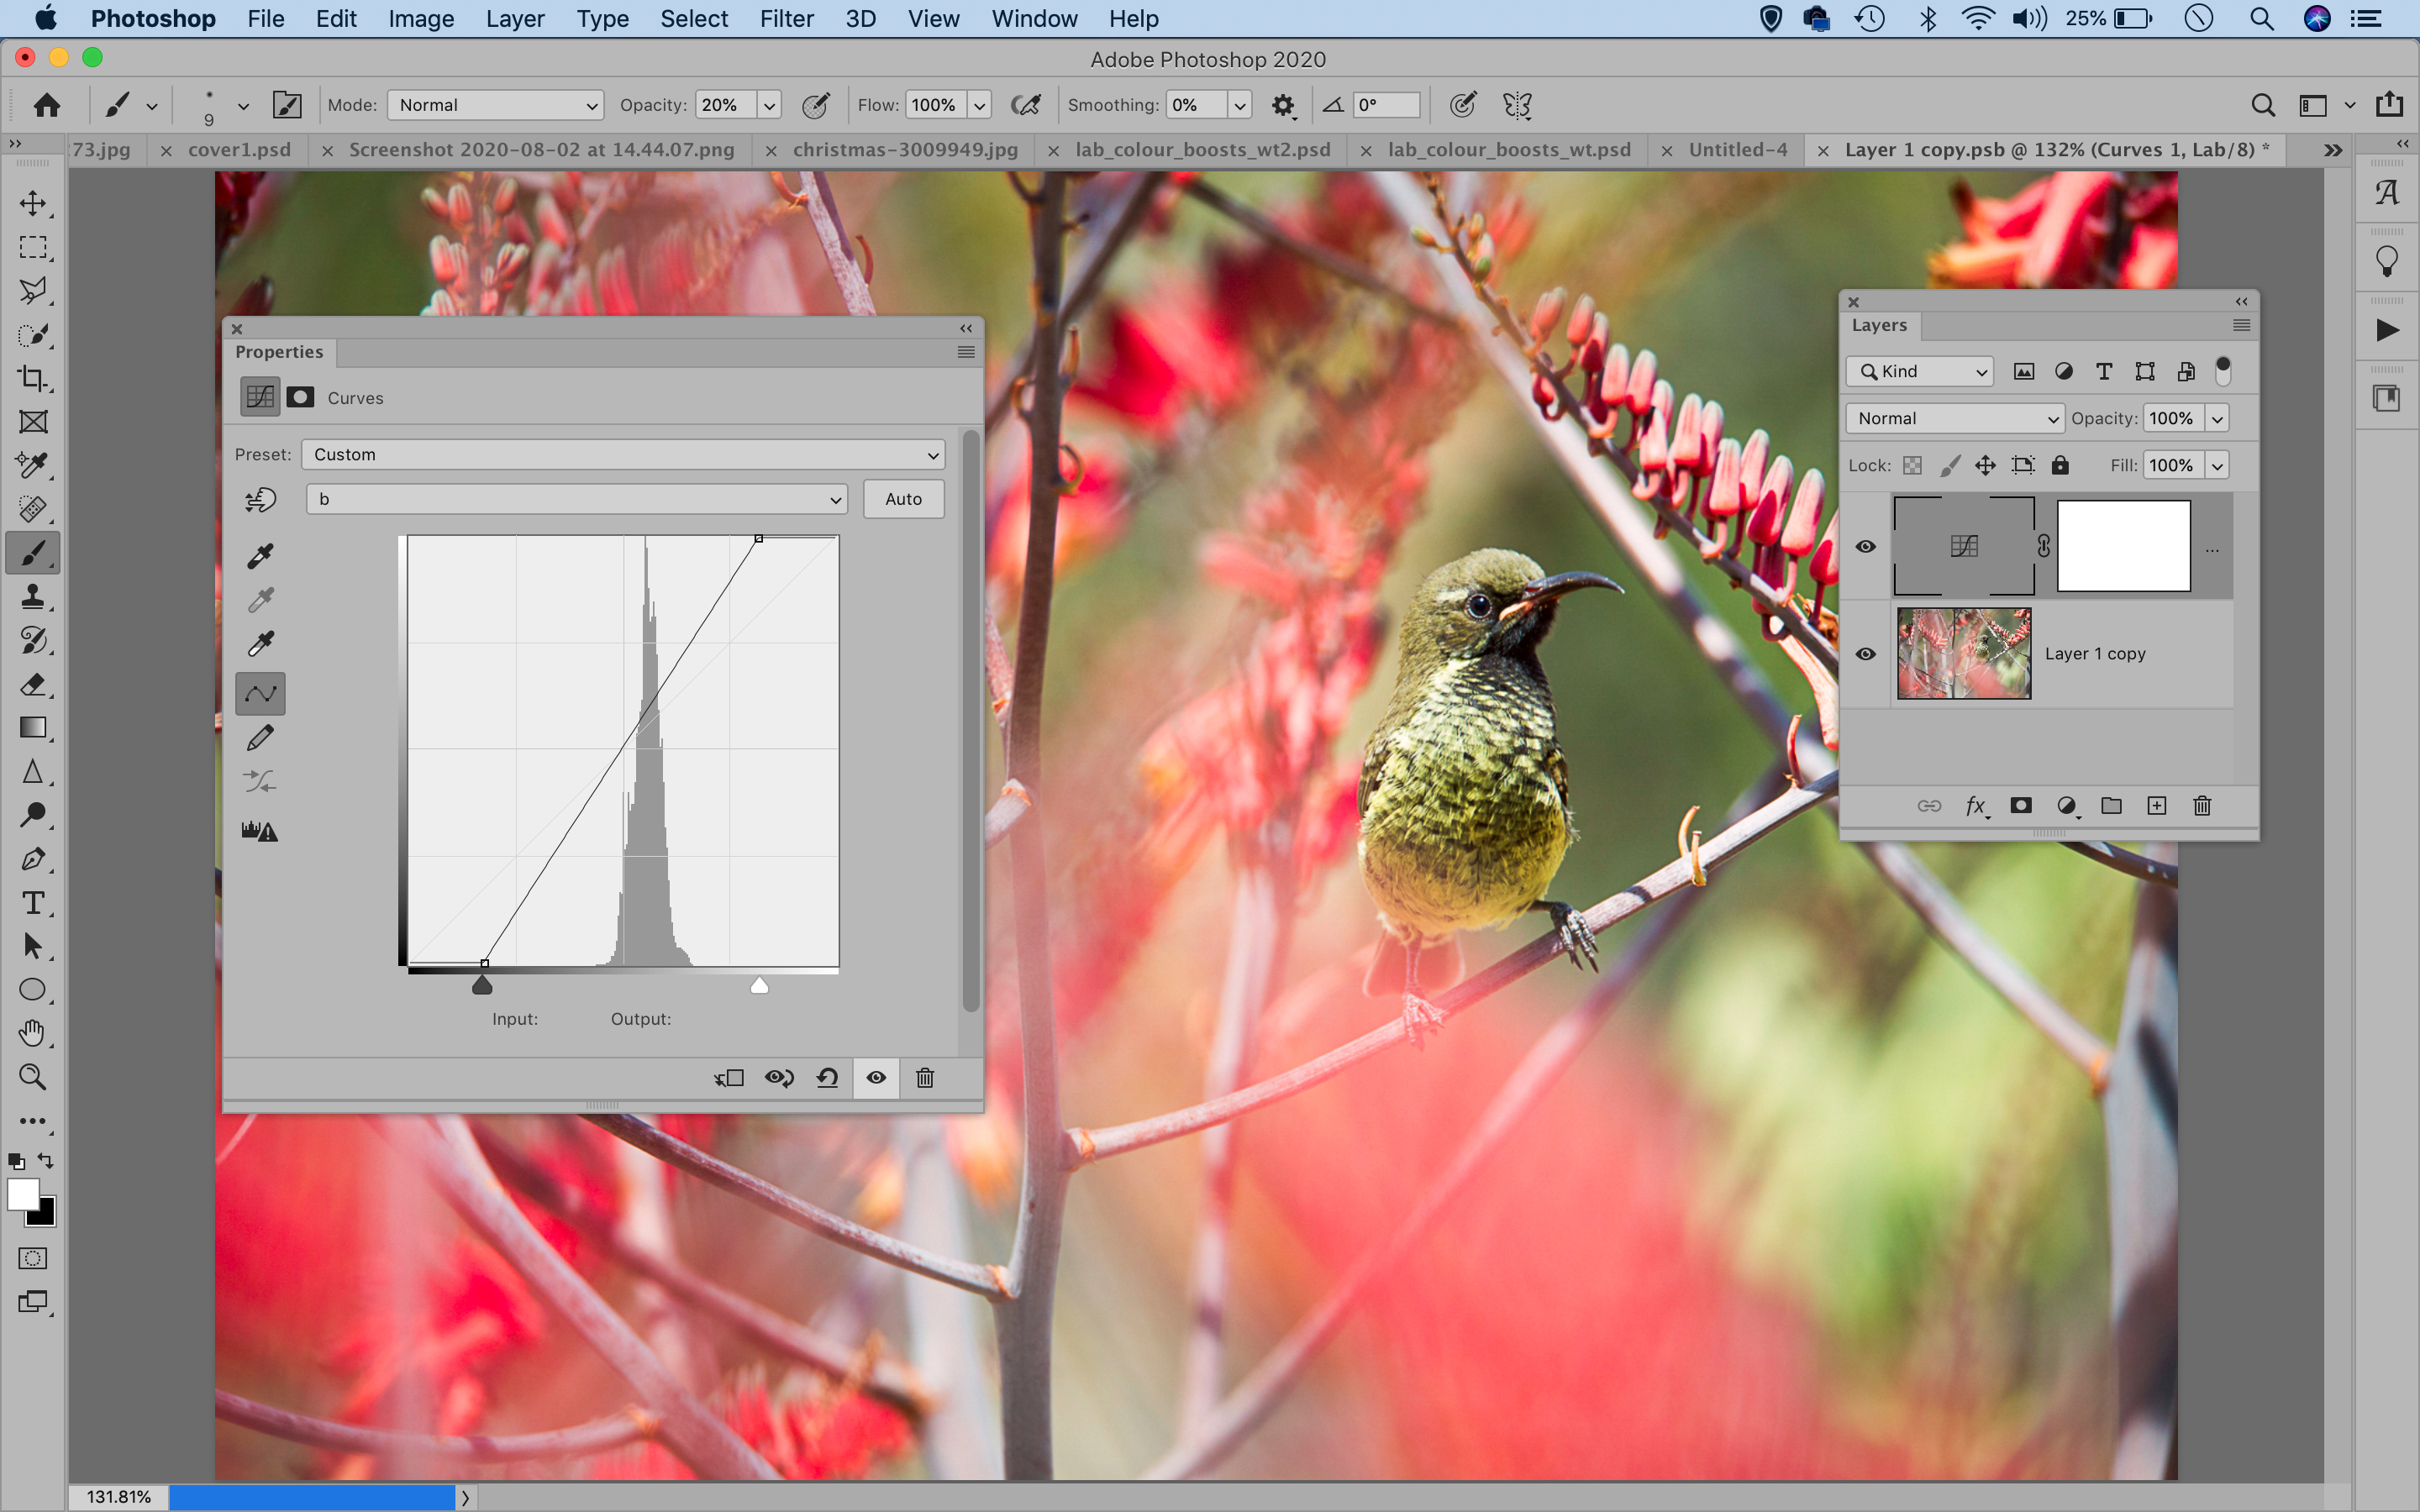
Next, go to the channel dropdown and choose the B channel. This controls the yellow-blue spectrum of colors. Repeat by dragging the arrows in (or, drag the top and bottom points on the curve line). The further inwards you drag, the stronger the boost in color.
05 Increase the contrast
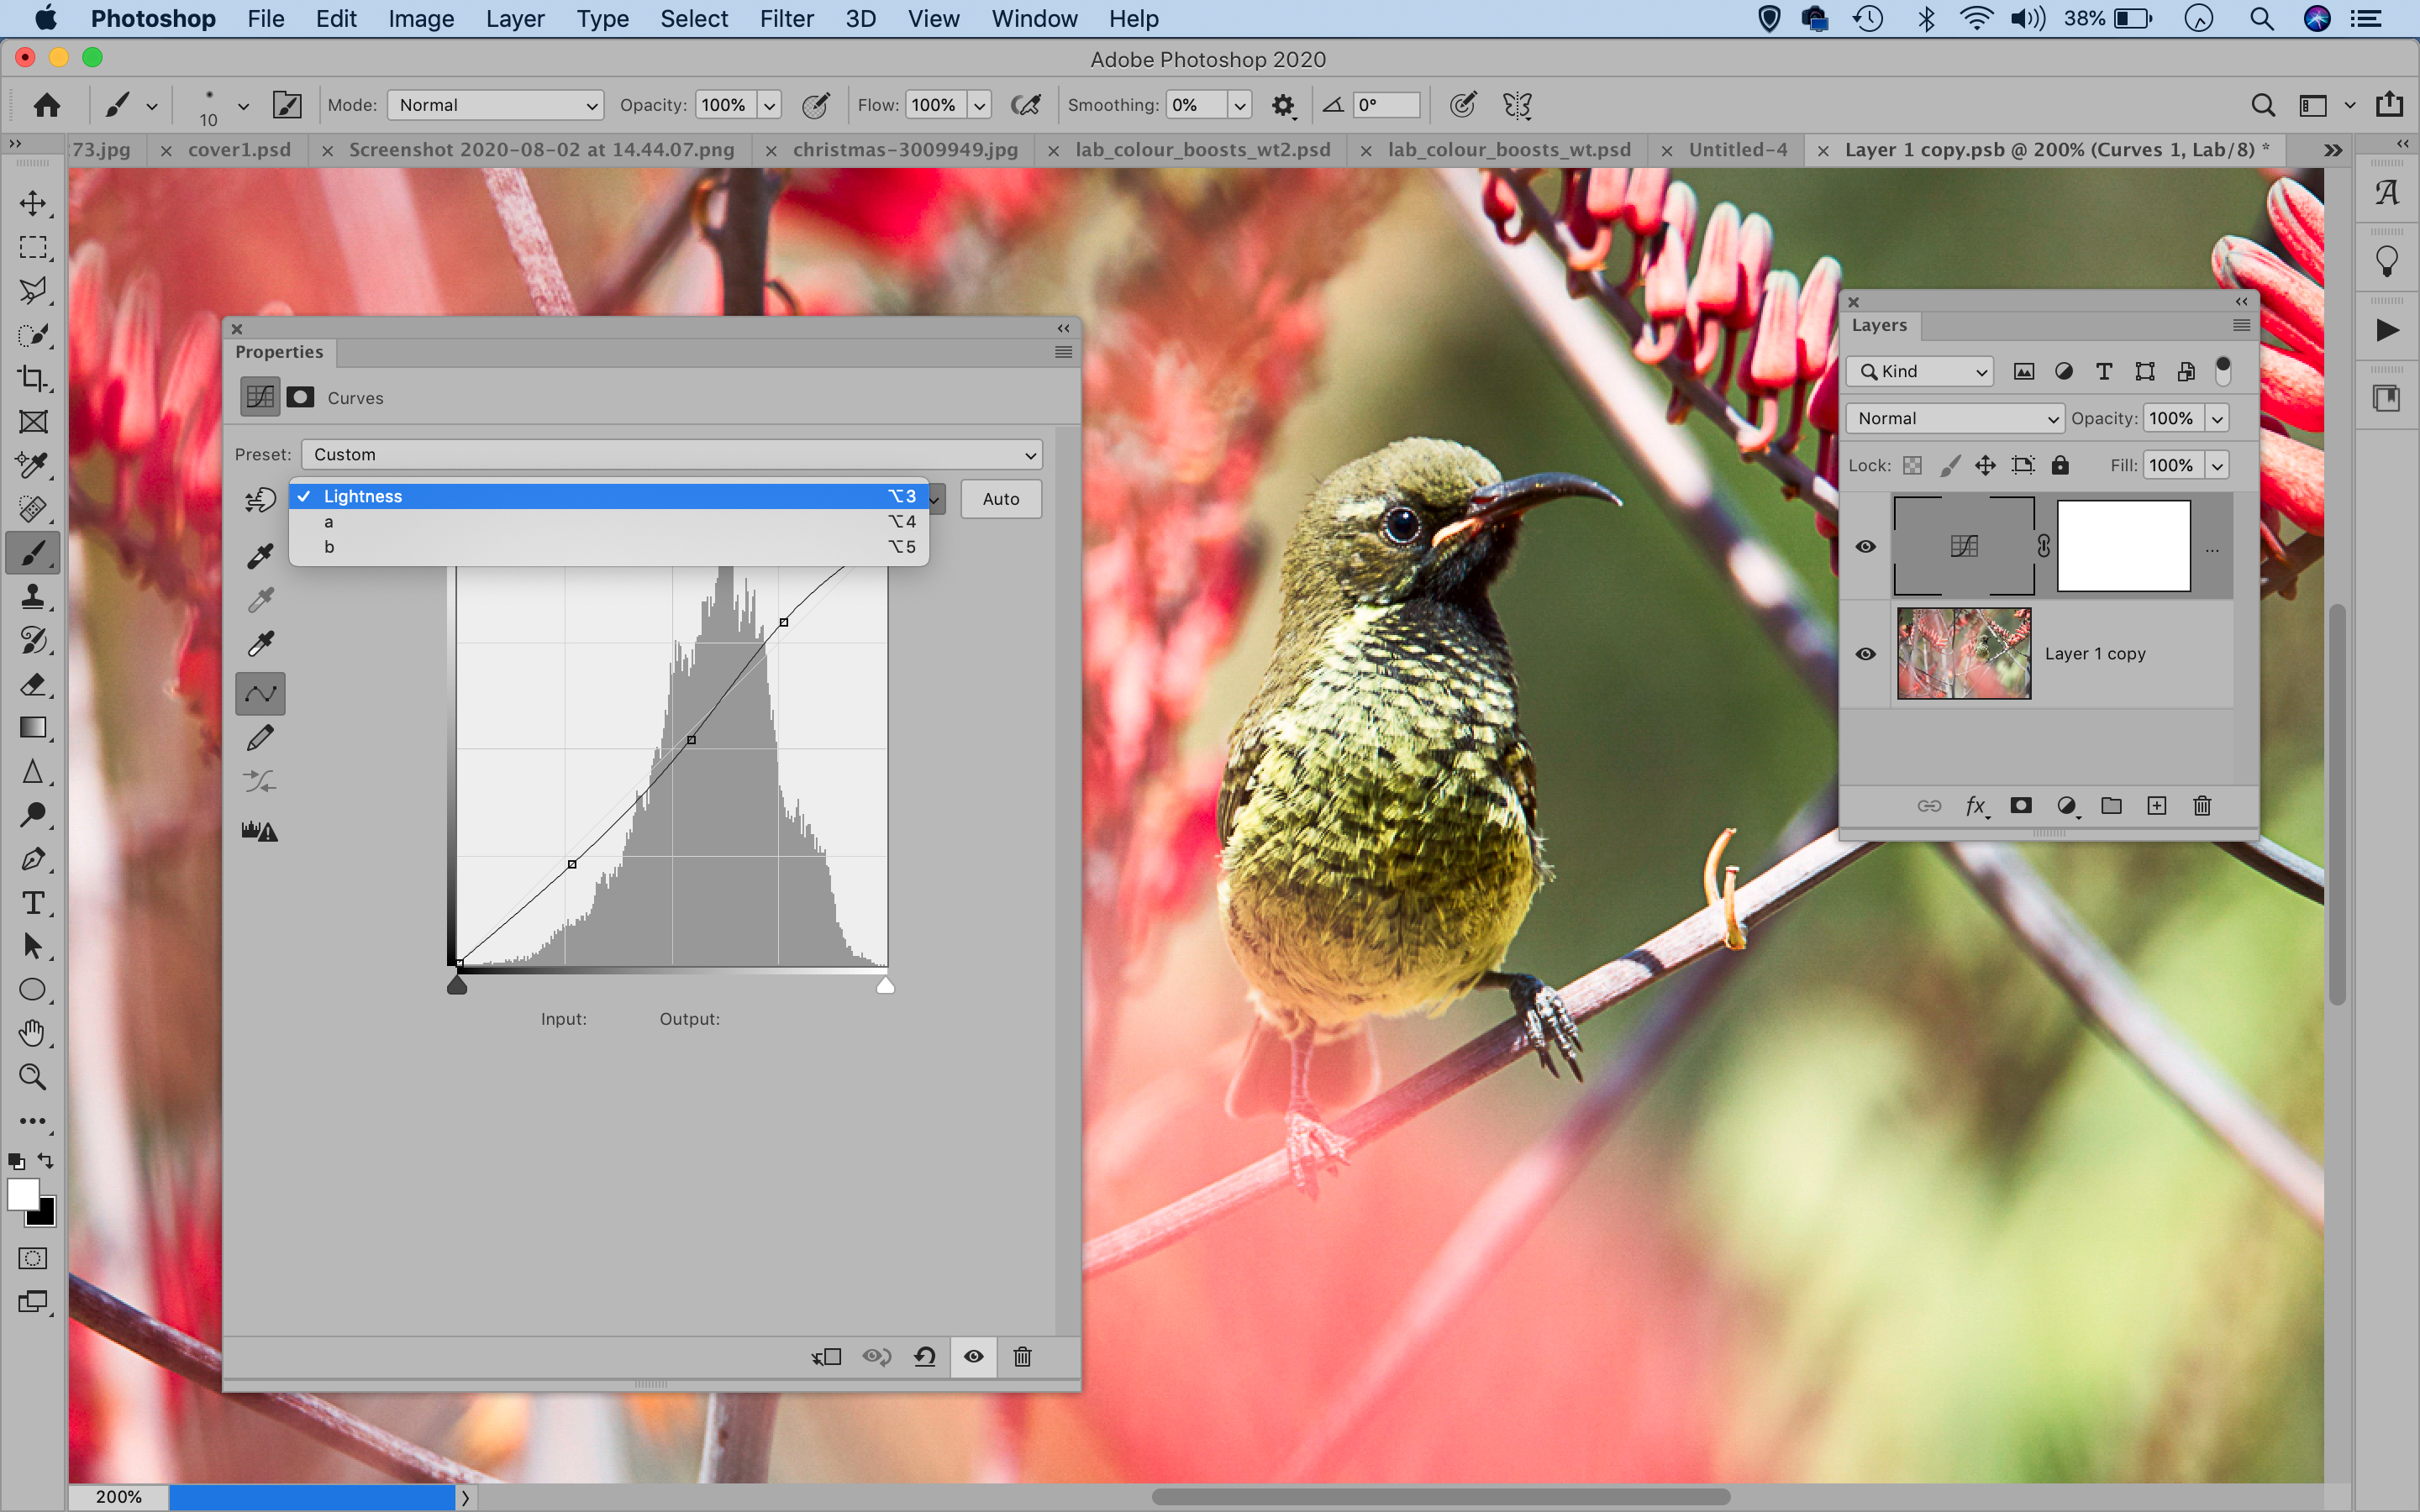
The Lightness channel lets us change the luminance values in the image without affecting the colors. Drag a point near the top of the line upwards, and a second point downwards to boost the contrast with a shallow S-shaped curve.
06 Fine-tune with a mask
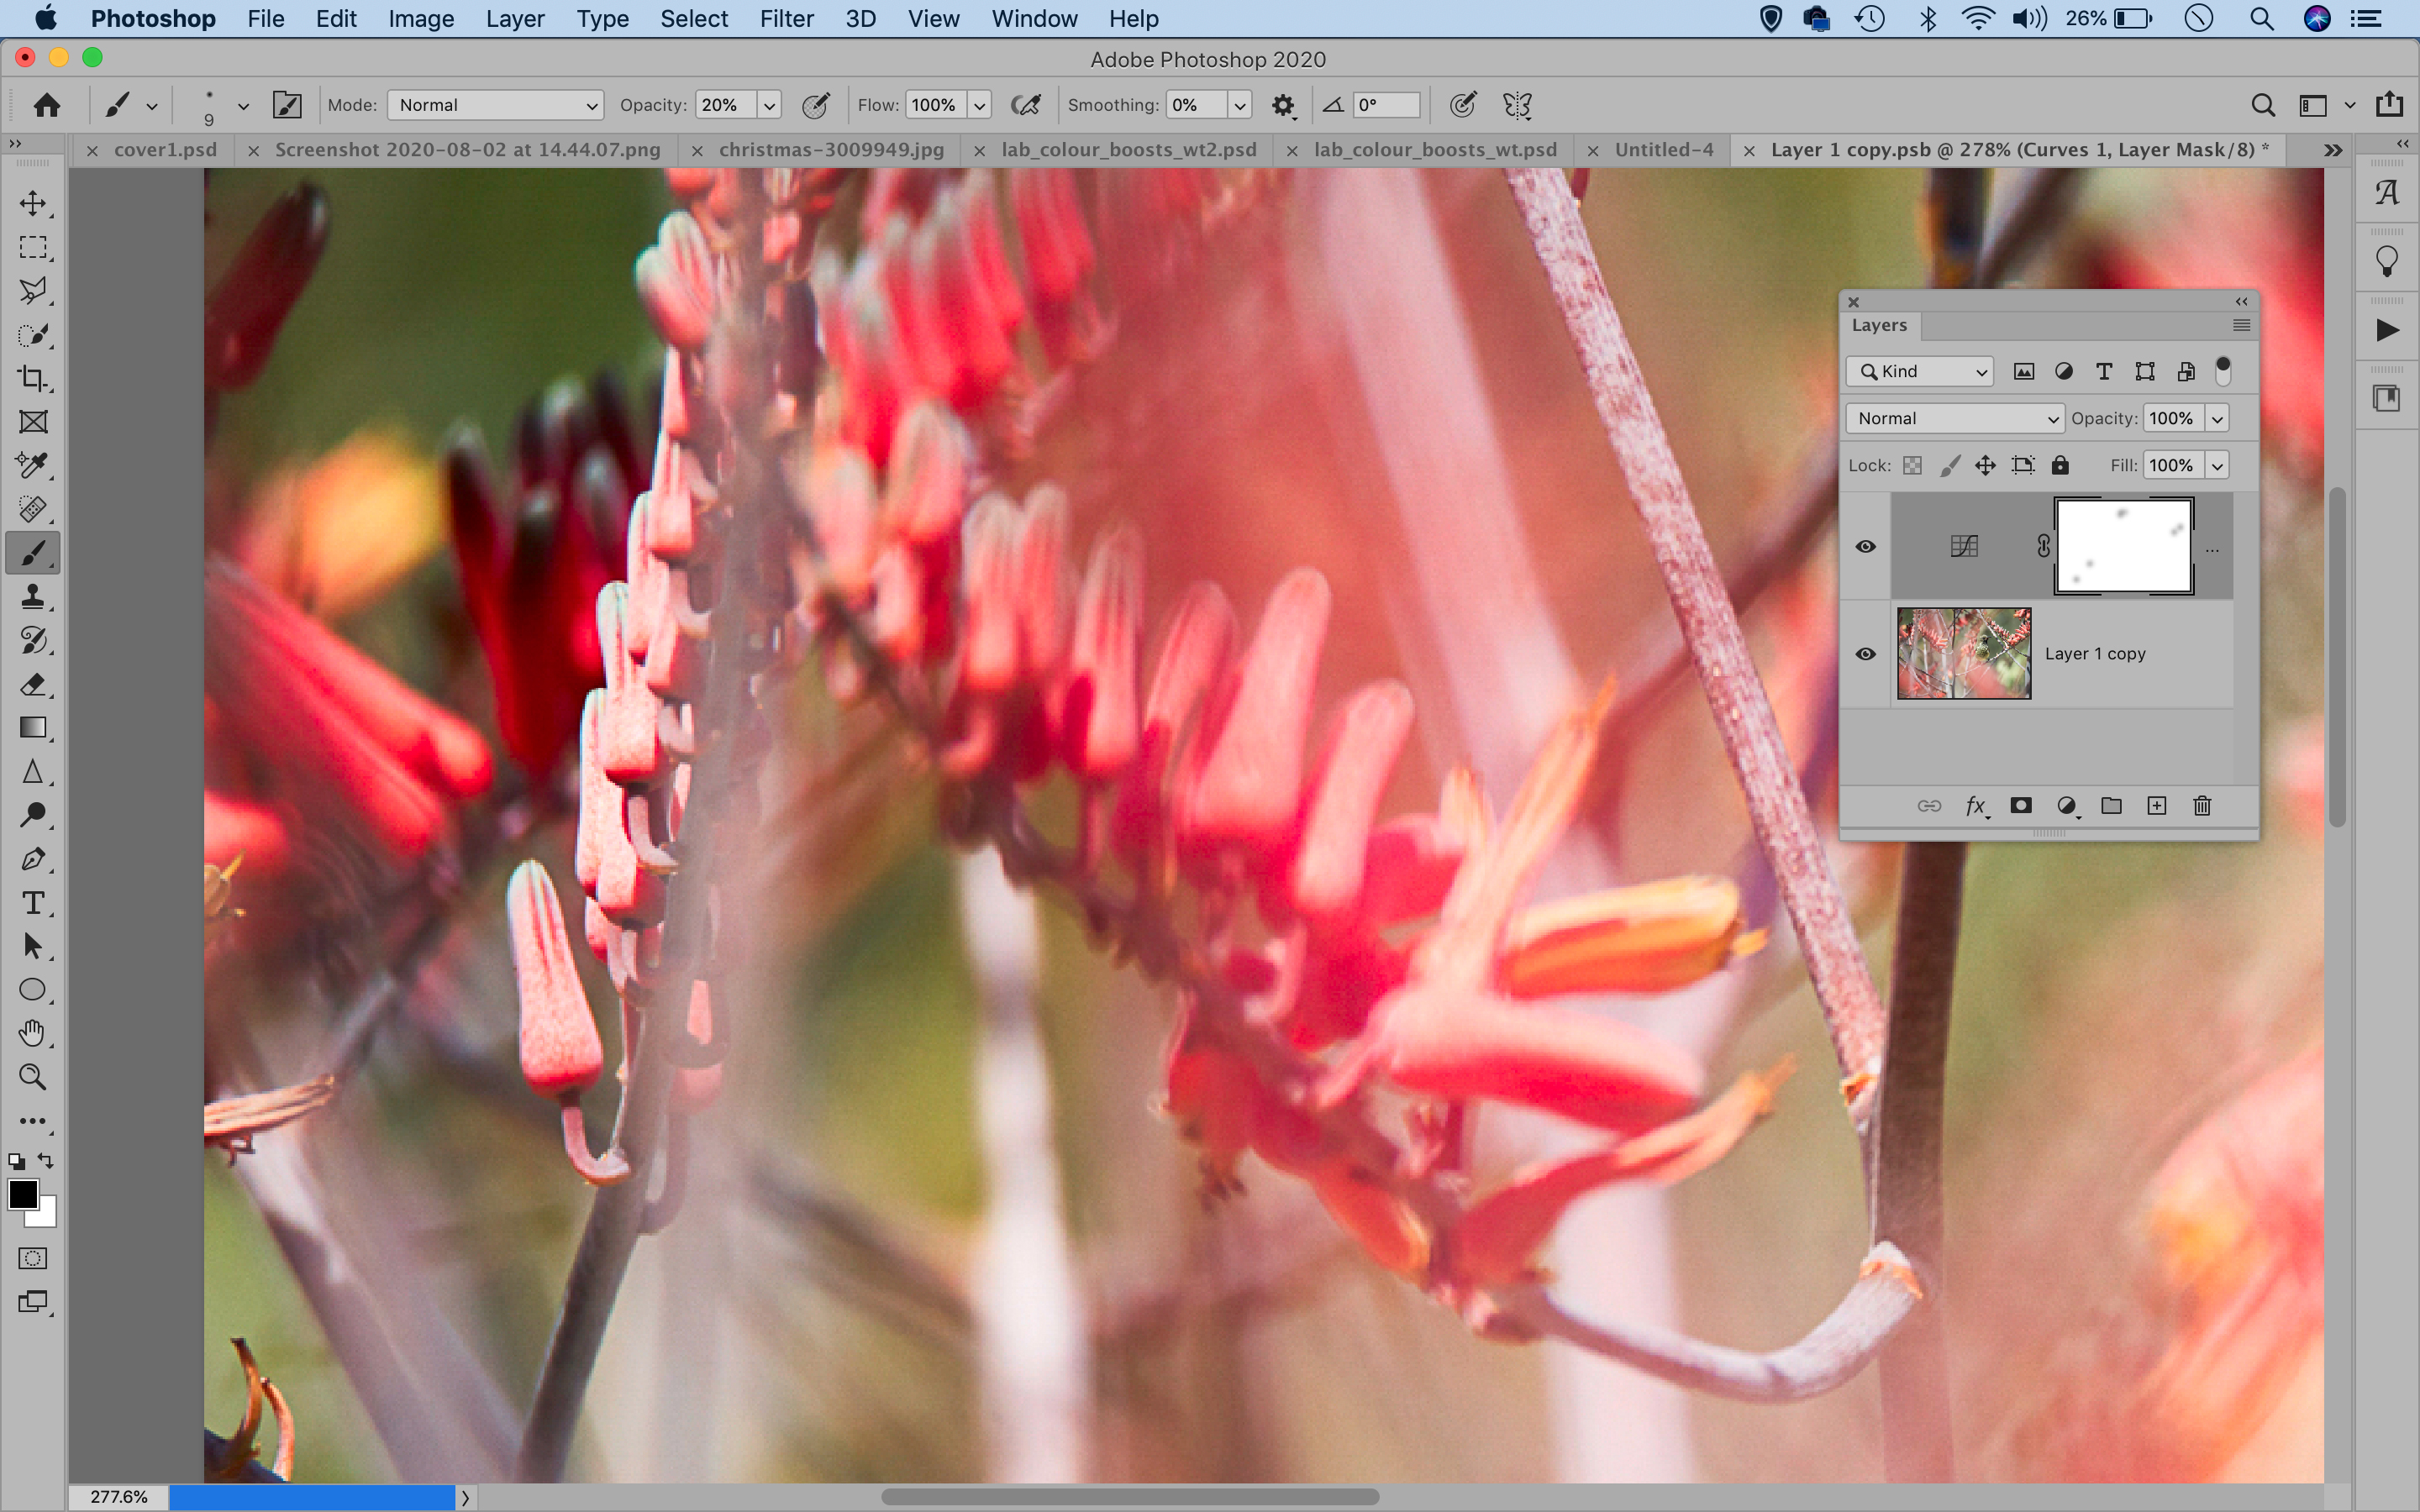
If you find parts of the shot look over-saturated you can reduce the effect by painting on the layer mask attached to the Curves layer. Highlight the mask thumbnail, grab the brush tool, set color to black and brush opacity to 20%, then paint to soften the effect.
PhotoPlus: The Canon Magazine is the world's only monthly newsstand title that's 100% devoted to Canon, so you can be sure the magazine is completely relevant to your system.
Read more:
Photoshop tips
The best photo editing software: image editors for novices through to pros
The best photo-editing laptops: top laptops for photographers
10 best online photography courses – from beginner guides to masterclasses
Get the Digital Camera World Newsletter
The best camera deals, reviews, product advice, and unmissable photography news, direct to your inbox!
The lead technique writer on Digital Camera Magazine, PhotoPlus: The Canon Magazine and N-Photo: The Nikon Magazine, James is a fantastic general practice photographer with an enviable array of skills across every genre of photography.
Whether it's flash photography techniques like stroboscopic portraits, astrophotography projects like photographing the Northern Lights, or turning sound into art by making paint dance on a set of speakers, James' tutorials and projects are as creative as they are enjoyable.
He's also a wizard at the dark arts of Photoshop, Lightroom and Affinity Photo, and is capable of some genuine black magic in the digital darkroom, making him one of the leading authorities on photo editing software and techniques.


