Watch video: Blur backgrounds in Photoshop Elements
Being able to experiment with depth of field is one of the biggest advantages of having a DSLR or mirrorless system. Shooting with the aperture wide open will enable you to blur backgrounds and create subject separation for a striking, three-dimensional effect.
Sometimes shooting with a wide aperture isn’t practical, as the resulting plane of sharp focus may be too narrow to accurately use – or perhaps you shot wide open but would still like the background to be blurred even further.
We’re going to show you how to do that in Photoshop Elements using layers, though the process is very similar if you want to use Photoshop CC. To further boost the distinction between blurry background and sharp portrait, we'll also sharpen the details of the owl’s face as well.
Read the steps below and watch the video above to see how you can do it. You can get the Owl.jpg start image here or use one of your own shots to follow along.
01. Select your subject
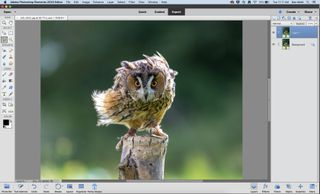
Open the Owl.jpg image (or your own picture) and hit Ctrl/Cmd + J to duplicate the layer. Now grab the Polygonal Lasso Tool, and in the Tool Options make sure that Feather is set to 0px. Then just click all the way around it to make a rough selection.
02. Refine the selection
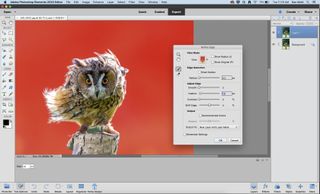
In the Tool Options click Refine Edge and set the View Mode to Overlay, then use the Refine Radius Tool and paint over the tricky flyaway hairs to add them to the selection. Set the Feather to 1px and set Output To as New Layer with Layer Mask.
03. Add in any missing gaps
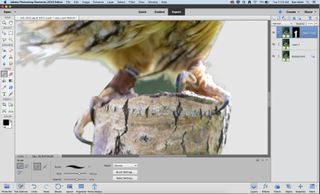
Hit OK, then, on your new layer, zoom in and look for any gaps, such as between the legs of the owl, in our image. Select these once again with the Polygonal Lasso Tool and paint black over them on the layer mask to hide these areas.
04. Blur the background
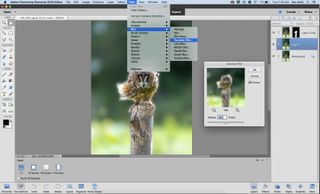
Reveal the layer beneath your top one and click it to make it active. Now head up to Filter > Blur > Gaussian Blur to start blurring your shot. We felt that a value of 36px worked well to add more subject separation to our image. Hit OK to apply it when you’re done.
05. Remove your subject
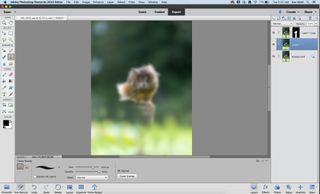
You need to remove your subject from this layer, so there isn’t any overlap with your ‘sharp’ layer. Use the Clone Stamp Tool holding Alt to sample ‘good’ parts of your image and paint over your subject until you’ve removed it completely.
06. Sharpen the owl's face
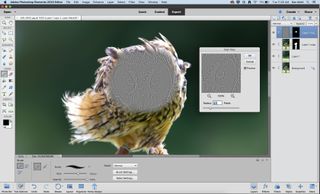
Make your top layer active and press Ctrl/Cmd + J to duplicate it. Go to Filter > Other > High Pass and set the Radius to around 2-4px and hit OK. Set the Blending to Overlay and mask off the whole image apart from the face to finish.
PhotoPlus: The Canon Magazine is the world's only monthly newsstand title that's 100% devoted to Canon, so you can be sure the magazine is completely relevant to your system.
Read more:
The best photo editing software: image editors for novices through to pros
The best photo-editing laptops: top laptops for photographers
10 best online photography courses – from beginner guides to masterclasses
Get the Digital Camera World Newsletter
The best camera deals, reviews, product advice, and unmissable photography news, direct to your inbox!

Deputy Editor on PhotoPlus: The Canon Magazine, Dan also brings his technical wizardry and editing skills to Digital Camera World. He has been writing about all aspects of photography for over 10 years, having previously served as technical writer and technical editor for Practical Photography magazine, as well as Photoshop editor on Digital Photo.
Dan is an Adobe-certified Photoshop guru, making him officially a beast at post-processing – so he’s the perfect person to share tips and tricks both in-camera and in post. Able to shoot all genres, Dan provides news, techniques and tutorials on everything from portraits and landscapes to macro and wildlife, helping photographers get the most out of their cameras, lenses, filters, lighting, tripods, and, of course, editing software.
