Adobe Camera Raw: Enhance your Raw files easily in Photoshop
Discover a host of tonal tricks in Adobe Camera Raw that boost dull colours and enhance fine details in your photographs
Watch video: Use Adobe Camera Raw in Photoshop CC
How often do you open up a freshly captured photo with great anticipation, only to be lightly underwhelmed by the image on-screen? Colors can look dull, highlights washed out, or shadows too deep. However, it’s easy enough to enhance these details, add punch and create an image that looks more like the actual scene, as you remembered it when you took the photo.
Take our bluebell portrait here. Initially the colors look rather disappointing and nothing like the vibrant blues we experienced during the shoot. But with a few simple tricks it’s possible to come up with something much more pleasing to the eye.
Camera Raw and Lightroom offer all the tools you need to carry out these enhancements. But while the interface is intuitive and simple, the tools aren’t all immediately obvious. So in this tutorial we’ll explain how to make a series of powerful tonal adjustments that you can use to boost any image – whether it be one that you’ve just captured, or a shot with uncapped potential that’s languishing in your image library.
We’ll begin with simple image-wide tweaks, using the basic tonal sliders, then progress to more advanced local adjustments while employing a range of Camera Raw tricks, from the powerful range masking command to the subtle importance of vignettes.
We’ve used the Adobe Camera Raw plugin in Photoshop CC to edit our image here, but you’ll find near-identical tools in Lightroom’s Develop Module, if you prefer. The skills here can be used to coax all kinds of images into life.
01 Check for clipping
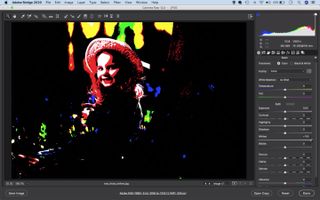
Go to the image in Adobe Bridge, right-click it and choose ‘Open in Camera Raw’ (this works for Raws and JPEGs). Hold Alt while dragging whites to show clipped pixels. Alt-dragging also changes the view for Blacks, Exposure, Highlights, Shadows and Dehaze.
02 Boost weaker colours
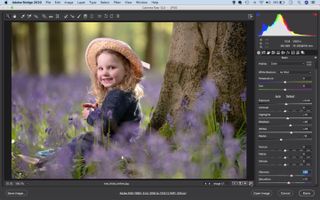
Set the whites and blacks to a point just before clipped pixels appear. Keep tweaking the other sliders to enhance the tones as shown. Increasing Vibrance will target and boost the weaker colors, so it’s great for enhancing colors while retaining skin tones.
03 Paint to adjust
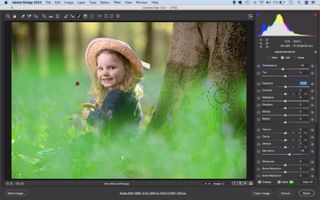
Grab the Adjustment Brush and begin painting over the bluebells. You can press ‘Y’ (‘O’ in Lightroom) to toggle a mask overlay on or off, this helps check which areas are affected. Once done, drag Temperature to the left to cool the colors, and increase saturation.
04 Target a color
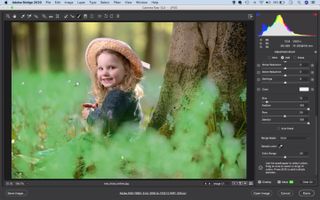
We can use the Range Mask command to force our adjustment to zero on the blues in the flowers. Set Range Mask: Color, then turn off the mask overlay and click on a blue color to sample it. Hold Shift and click on up to four more points to sample other shades.
05 Warm the skin
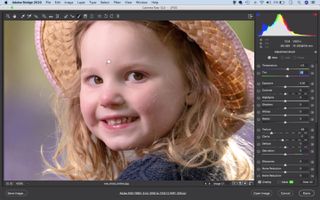
Hit ‘N’ for a new adjustment, then paint over the greens in the back and use sliders to boost the colors. Make another adjustment for the skin. Paint over the area and lower Texture to soften the skin and up Temperature and Tint, counteracting the green tint to the face.
06 Darken the corners
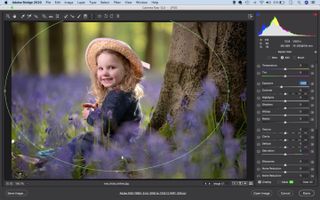
Vignettes can help to draw the eye towards the model and away from the edges of a frame. Grab the Radial Filter tool then check Outside in the settings on the right. Drag a circle over the subject, then lower the Exposure slightly to darken the edges of the frame.
PhotoPlus: The Canon Magazine is the world's only monthly newsstand title that's 100% devoted to Canon, so you can be sure the magazine is completely relevant to your system.
Read more:
100 Photoshop tips
The best photo editing software: image editors for novices through to pros
The best photo-editing laptops: top laptops for photographers
10 best online photography courses – from beginner guides to masterclasses
Get the Digital Camera World Newsletter
The best camera deals, reviews, product advice, and unmissable photography news, direct to your inbox!
The lead technique writer on Digital Camera Magazine, PhotoPlus: The Canon Magazine and N-Photo: The Nikon Magazine, James is a fantastic general practice photographer with an enviable array of skills across every genre of photography.
Whether it's flash photography techniques like stroboscopic portraits, astrophotography projects like photographing the Northern Lights, or turning sound into art by making paint dance on a set of speakers, James' tutorials and projects are as creative as they are enjoyable.
He's also a wizard at the dark arts of Photoshop, Lightroom and Affinity Photo, and is capable of some genuine black magic in the digital darkroom, making him one of the leading authorities on photo editing software and techniques.

