Create vibrant HDR images in Affinity Photo with merge and tone mapping tools
Use the powerful HDR Merge command to create and tone-map detail-rich HDR images from bracketed exposures
Start here
• Affinity Photo tutorials
The tutorials
1. Affinity Photo vs Photoshop
2. RAW editing with Affinity Photo
3. Focus merge with Affinity Photo
4. Replace a sky in Affinity Photo
5. Moody mono in Affinity Photo
6. Six Affinity Photo landscape tips
7. Color correction in Affinity Photo
8. Live Filters in Affinity Photo
9. Create a classic wet plate look
10. Remove objects in Affinity Photo
11. Paint an abstract portrait
12. Enhance skintones in Affinity Photo
13. Create HDR in Affinity Photo
14. Replace a sky in Affinity Photo
15. Affinity Photo double exposures
16. Affinity Photo Denoise tool
Watch video: Create an HDR image
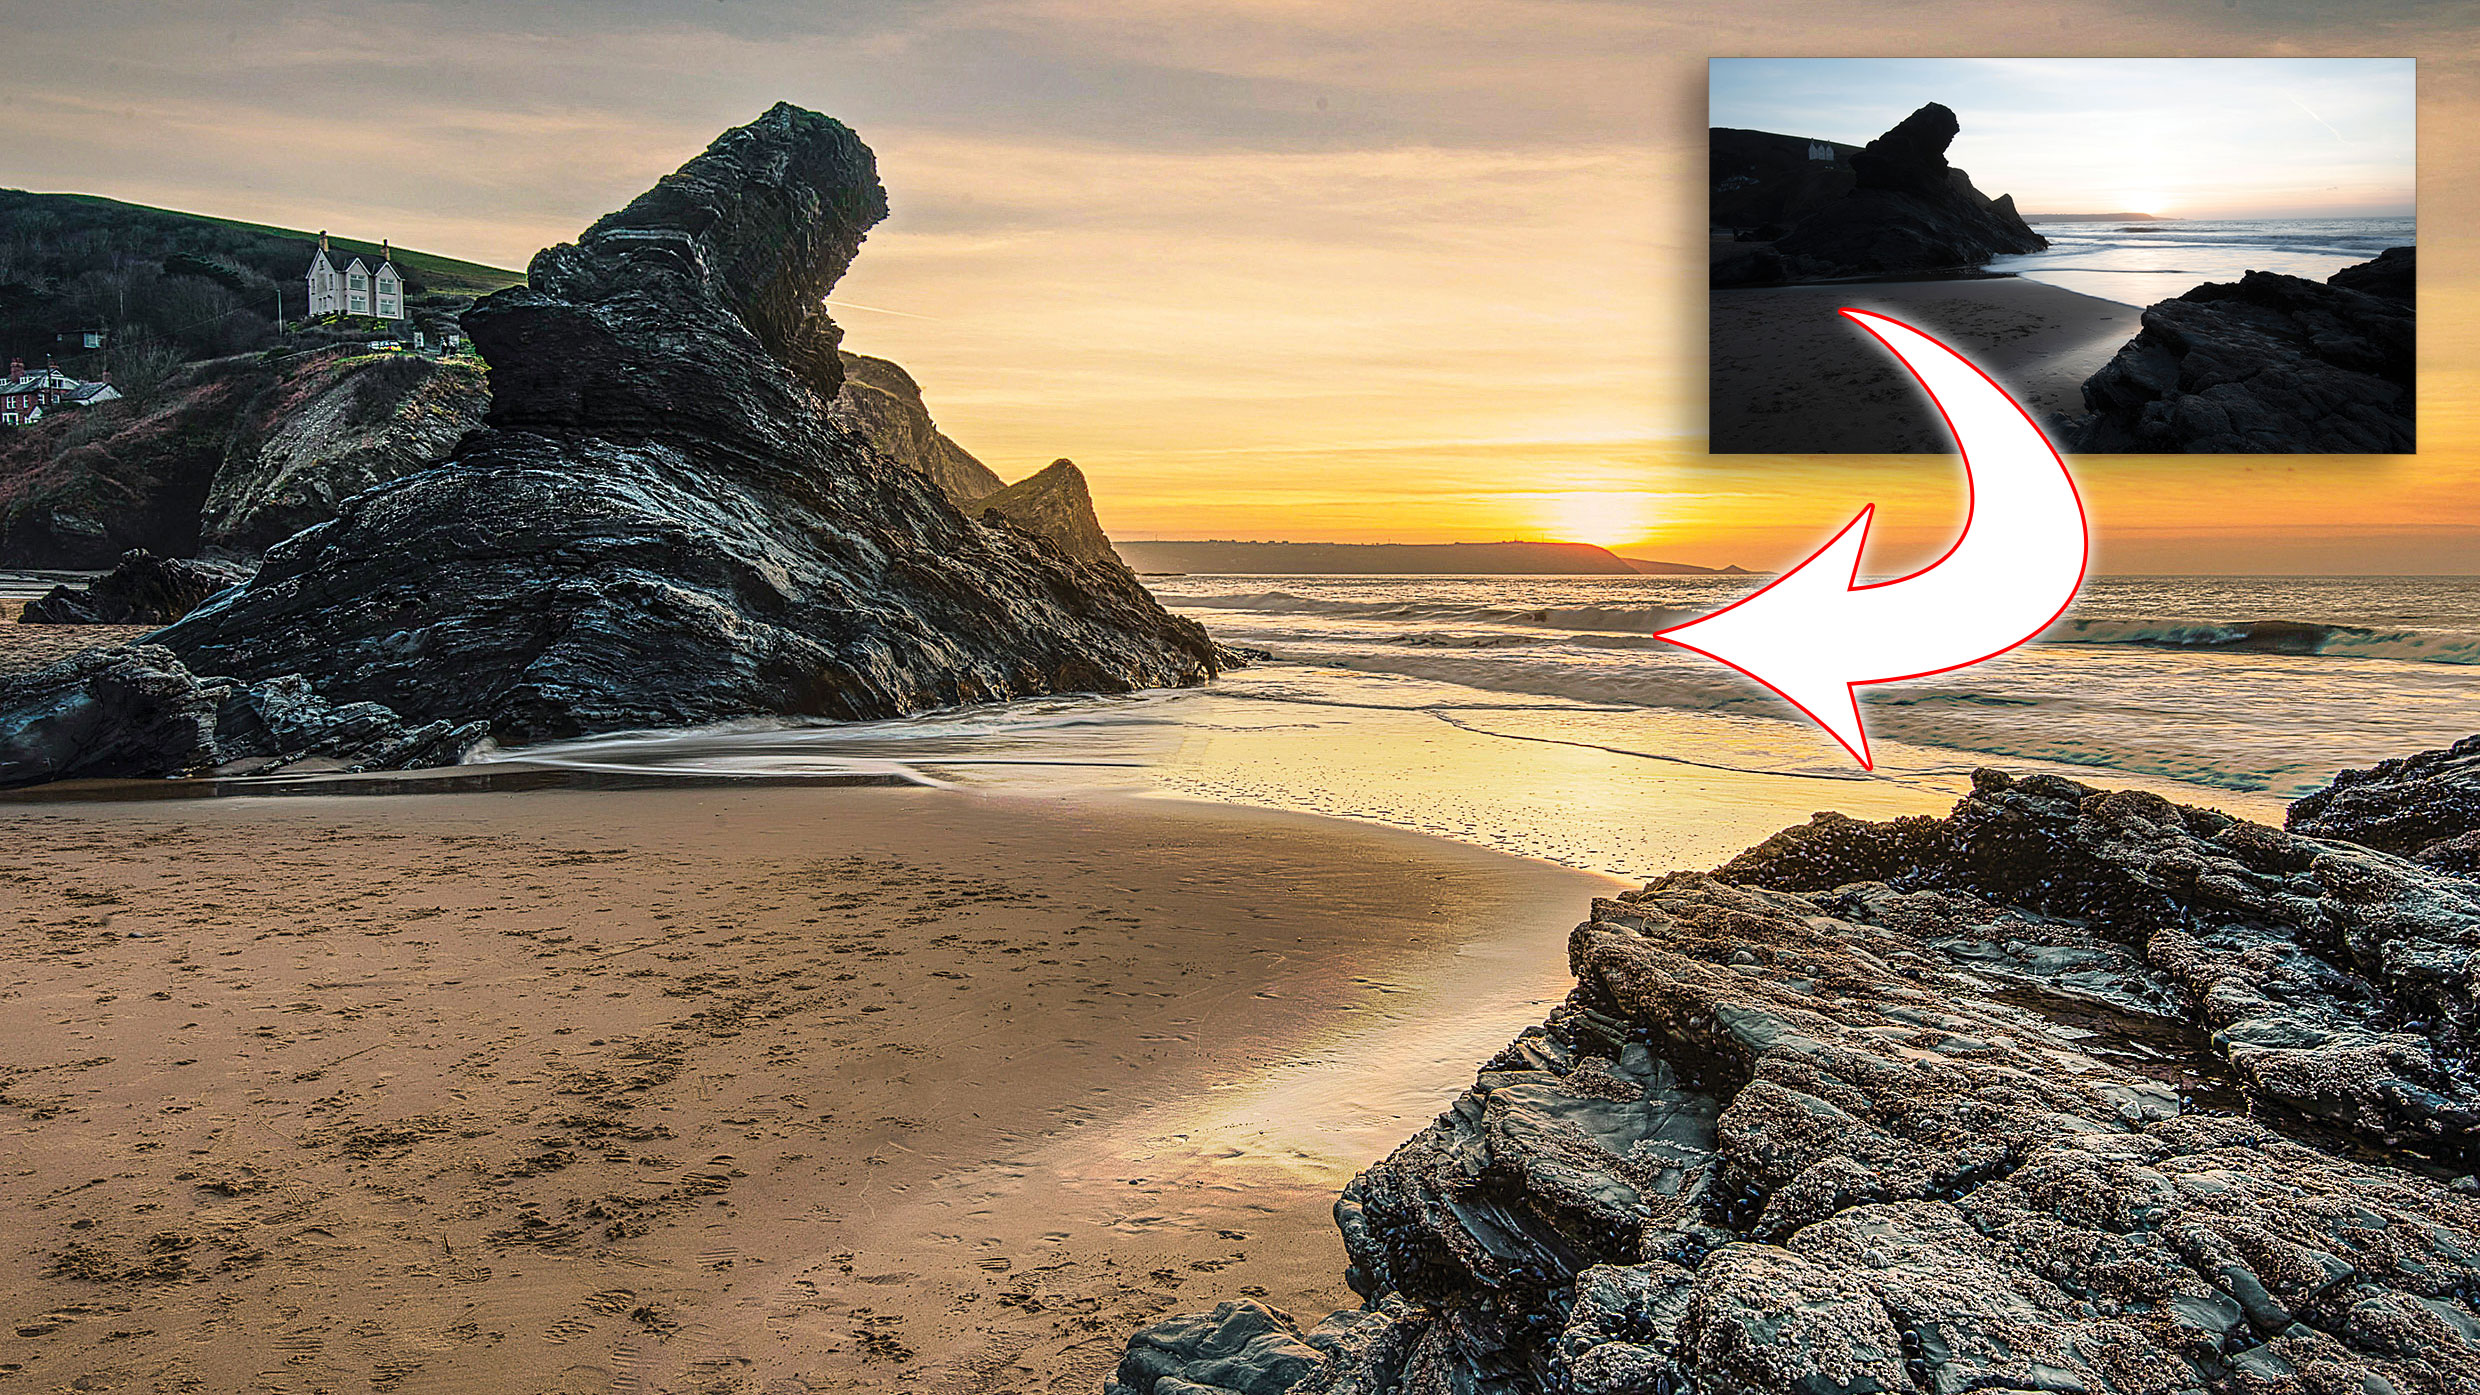
The HDR tools in Affinity Photo allow you to merge a set of three or more bracketed exposures to create an image with an expanded dynamic range – perfect for retaining detail in high-contrast scenes, like our costal landscape above.
Here we’ll look at the HDR controls in Affinity Photo. First we use the HDR merge command to combine our images. This offers basic controls that allow us to fix ghosting and misalignment between frames. Once our set of exposures are merged into a 32-bit HDR image, we have a rich level of colour and detail to work with, but initially the image can look a bit flat. The trick is knowing how to tease out the details.
Using the Develop persona in Affinity Photo, we can enhance our HDR image and give it some much-needed punch. There are a range of handy tone-mapping presets we can use to get us started, then we can go on to use the manual controls to boost colour, tweak white balance and add punch. Once done, we can finish off our image in the Photo persona by retouching any details. The results can be just as impressive as those from other image editors like Photoshop or dedicated HDR software.
Step 1: Begin the merge
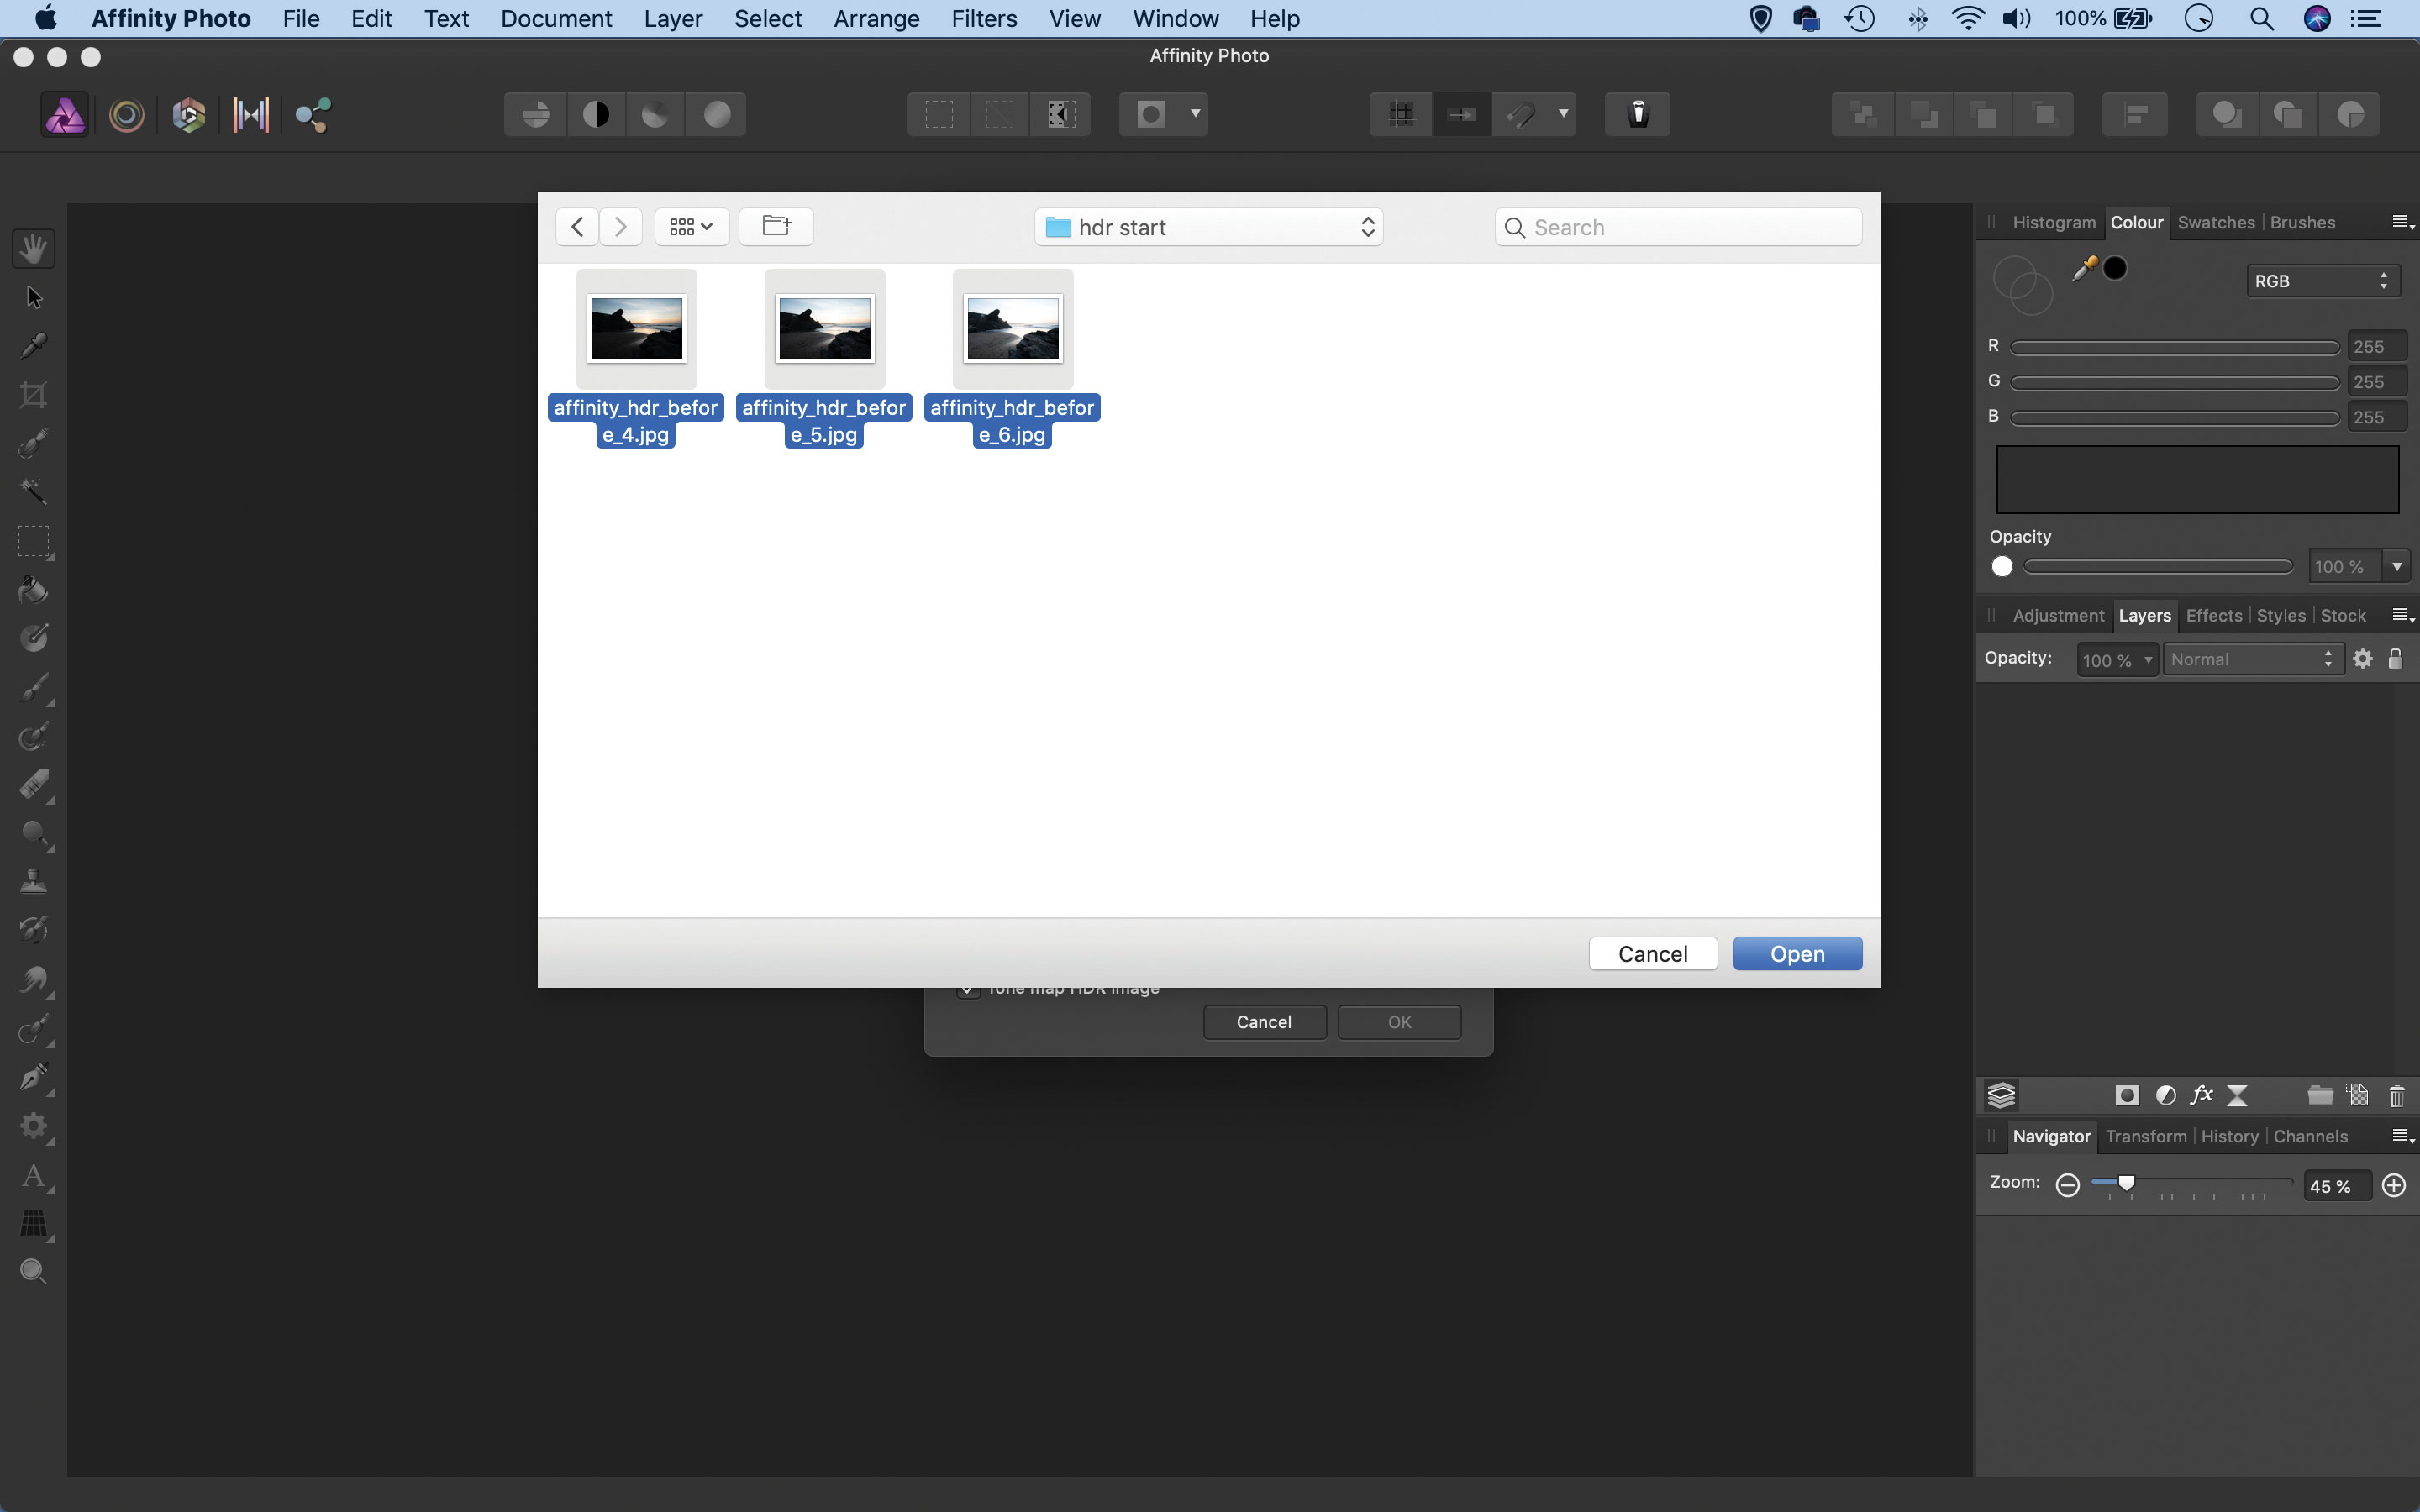
Go to File > New HDR Merge. Next click Add, then go to your set of bracketed exposures and shift-click between the first and last to highlight them and hit Open. In the merge options check ‘Automatically remove ghosts’. This fixes discrepancies between frames, like the waves and boat here.
Step 2: Correct alignment
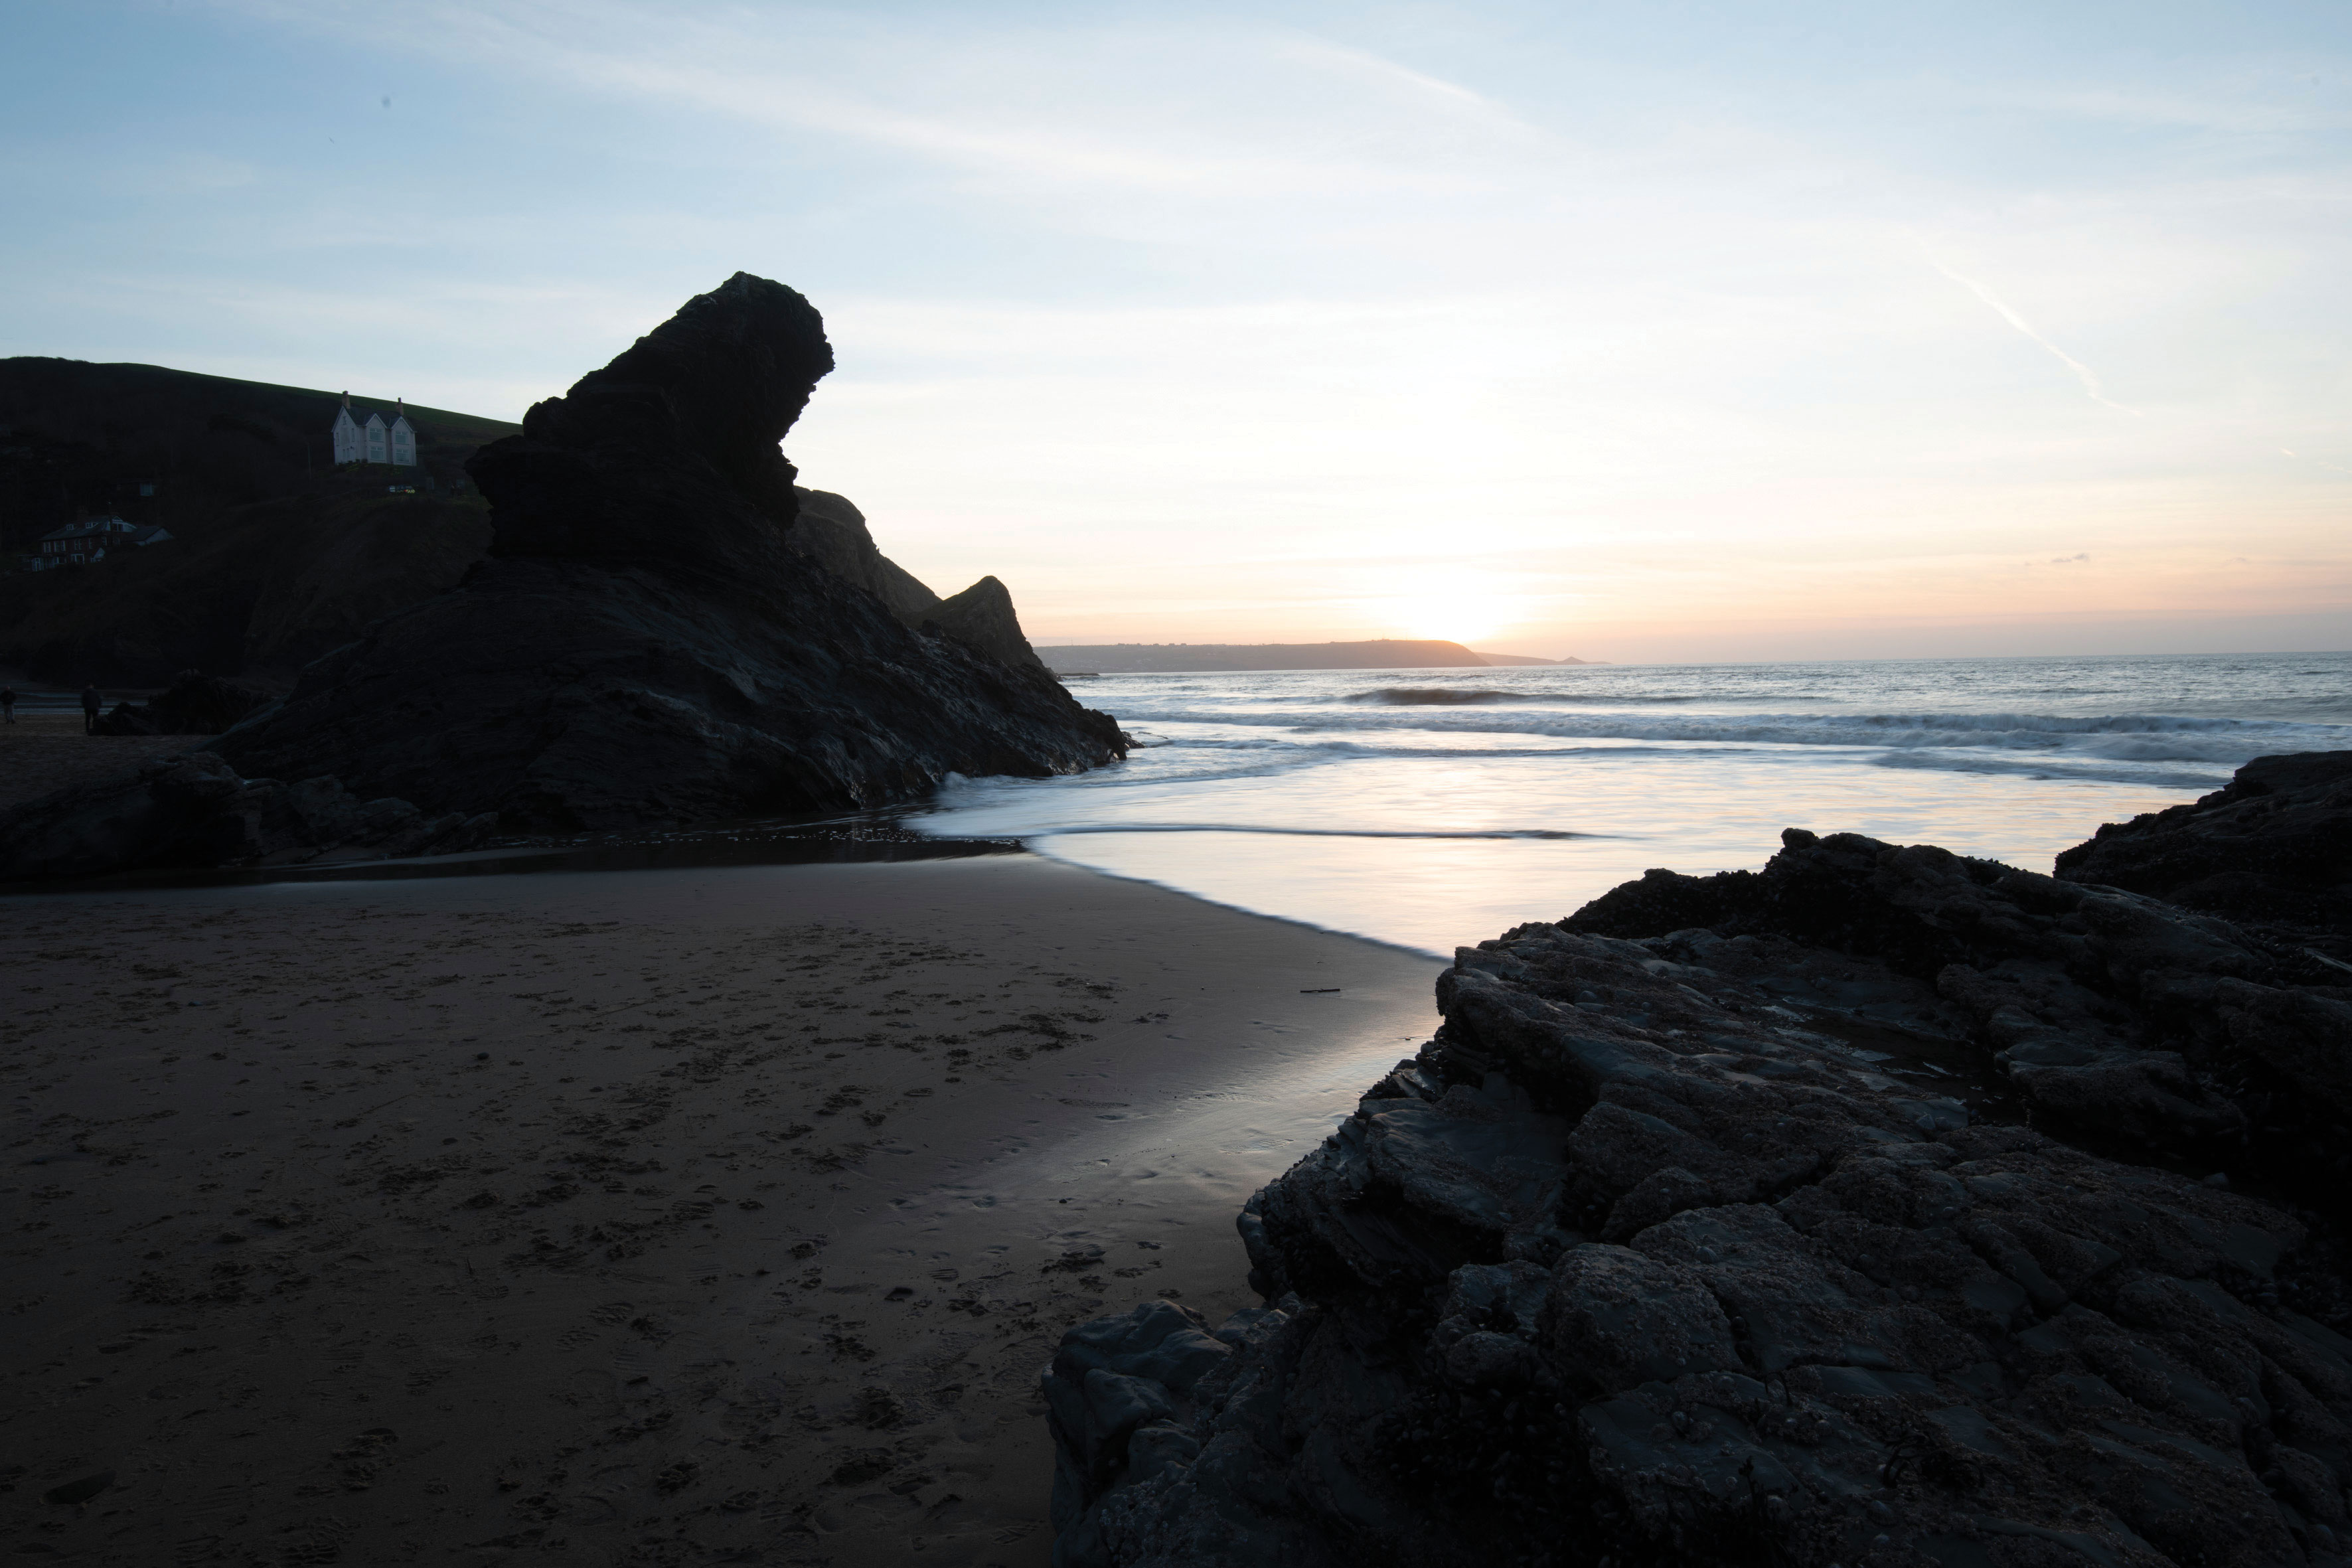
In the merge options you can choose to ‘Automatically align layers’. This can be useful if a tripod was not used, or if there’s misalignment between images in the set. You can tailor the alignment to ‘scale, rotate and translate’ or ‘perspective’. The latter is more suitable for nudges during capture.
Step 3: Begin tone-mapping
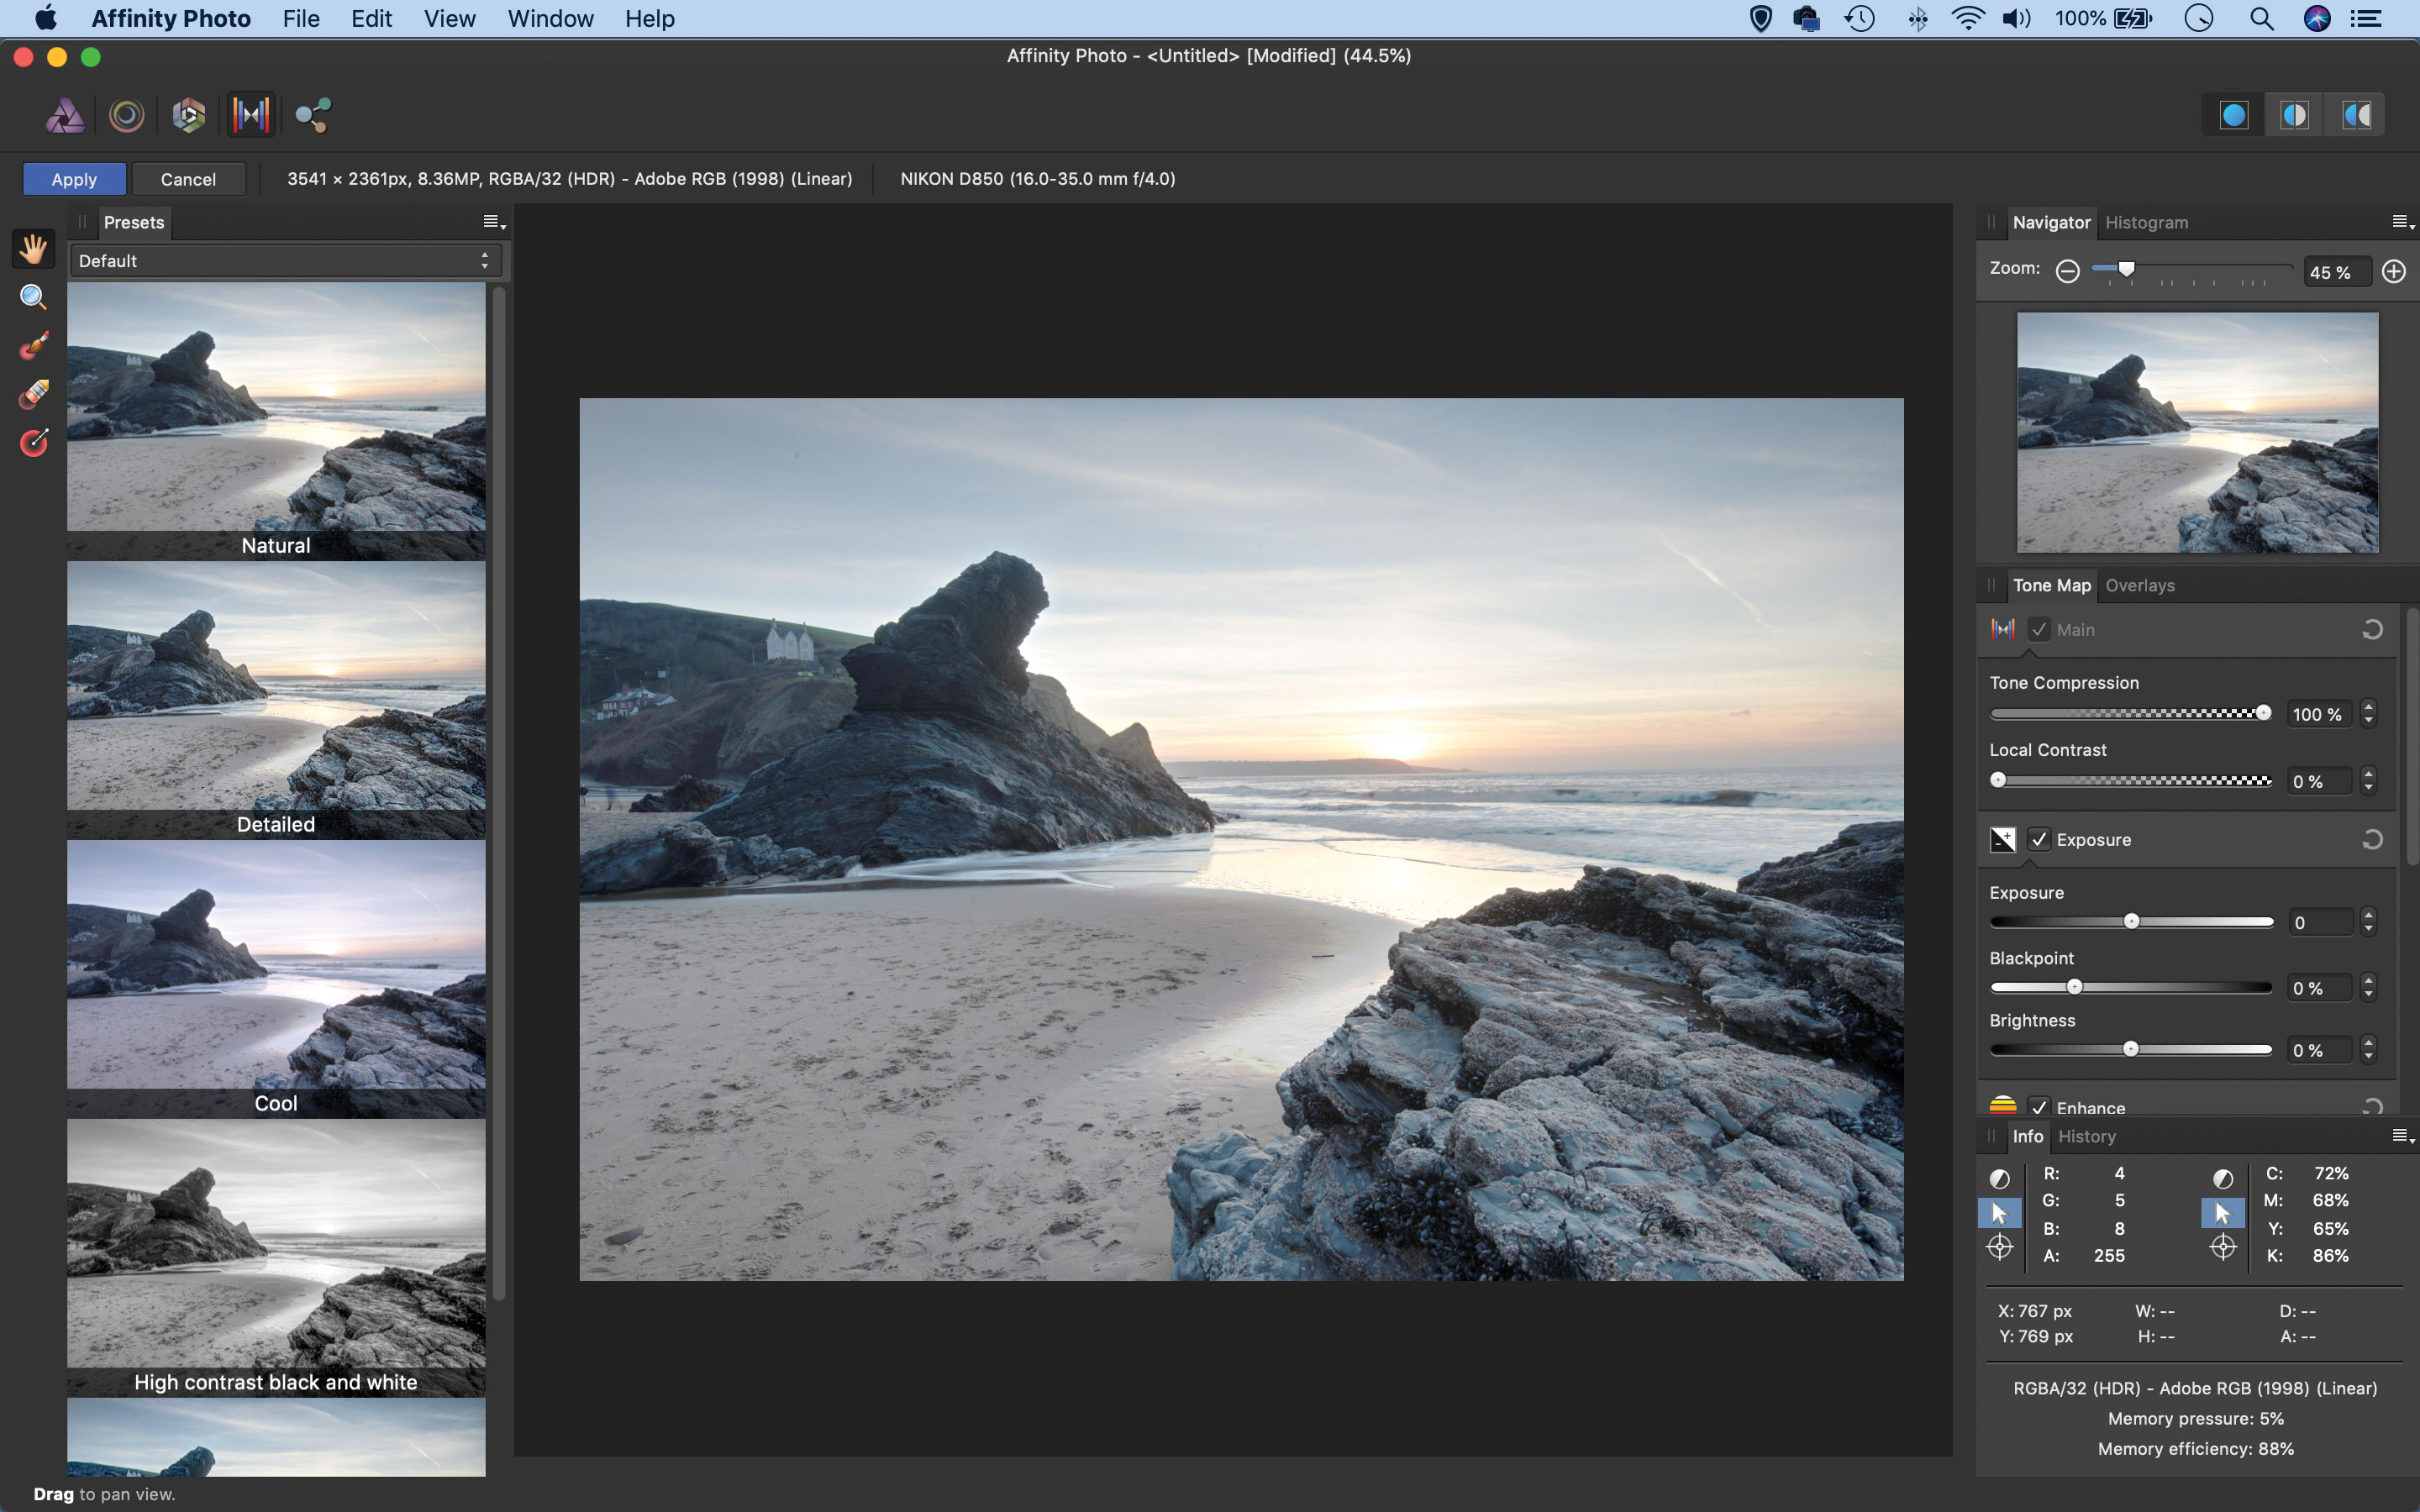
Checking noise reduction can be useful if the set of photos are Raws, but for JPEGS it’s usually best to turn it off. Checking ‘Tone Map’ will automatically adjust the tones to even out the highlights and shadows, but we can tweak these afterwards too if we need to. Hit OK to merge the HDR.
Step 4: Choose a preset
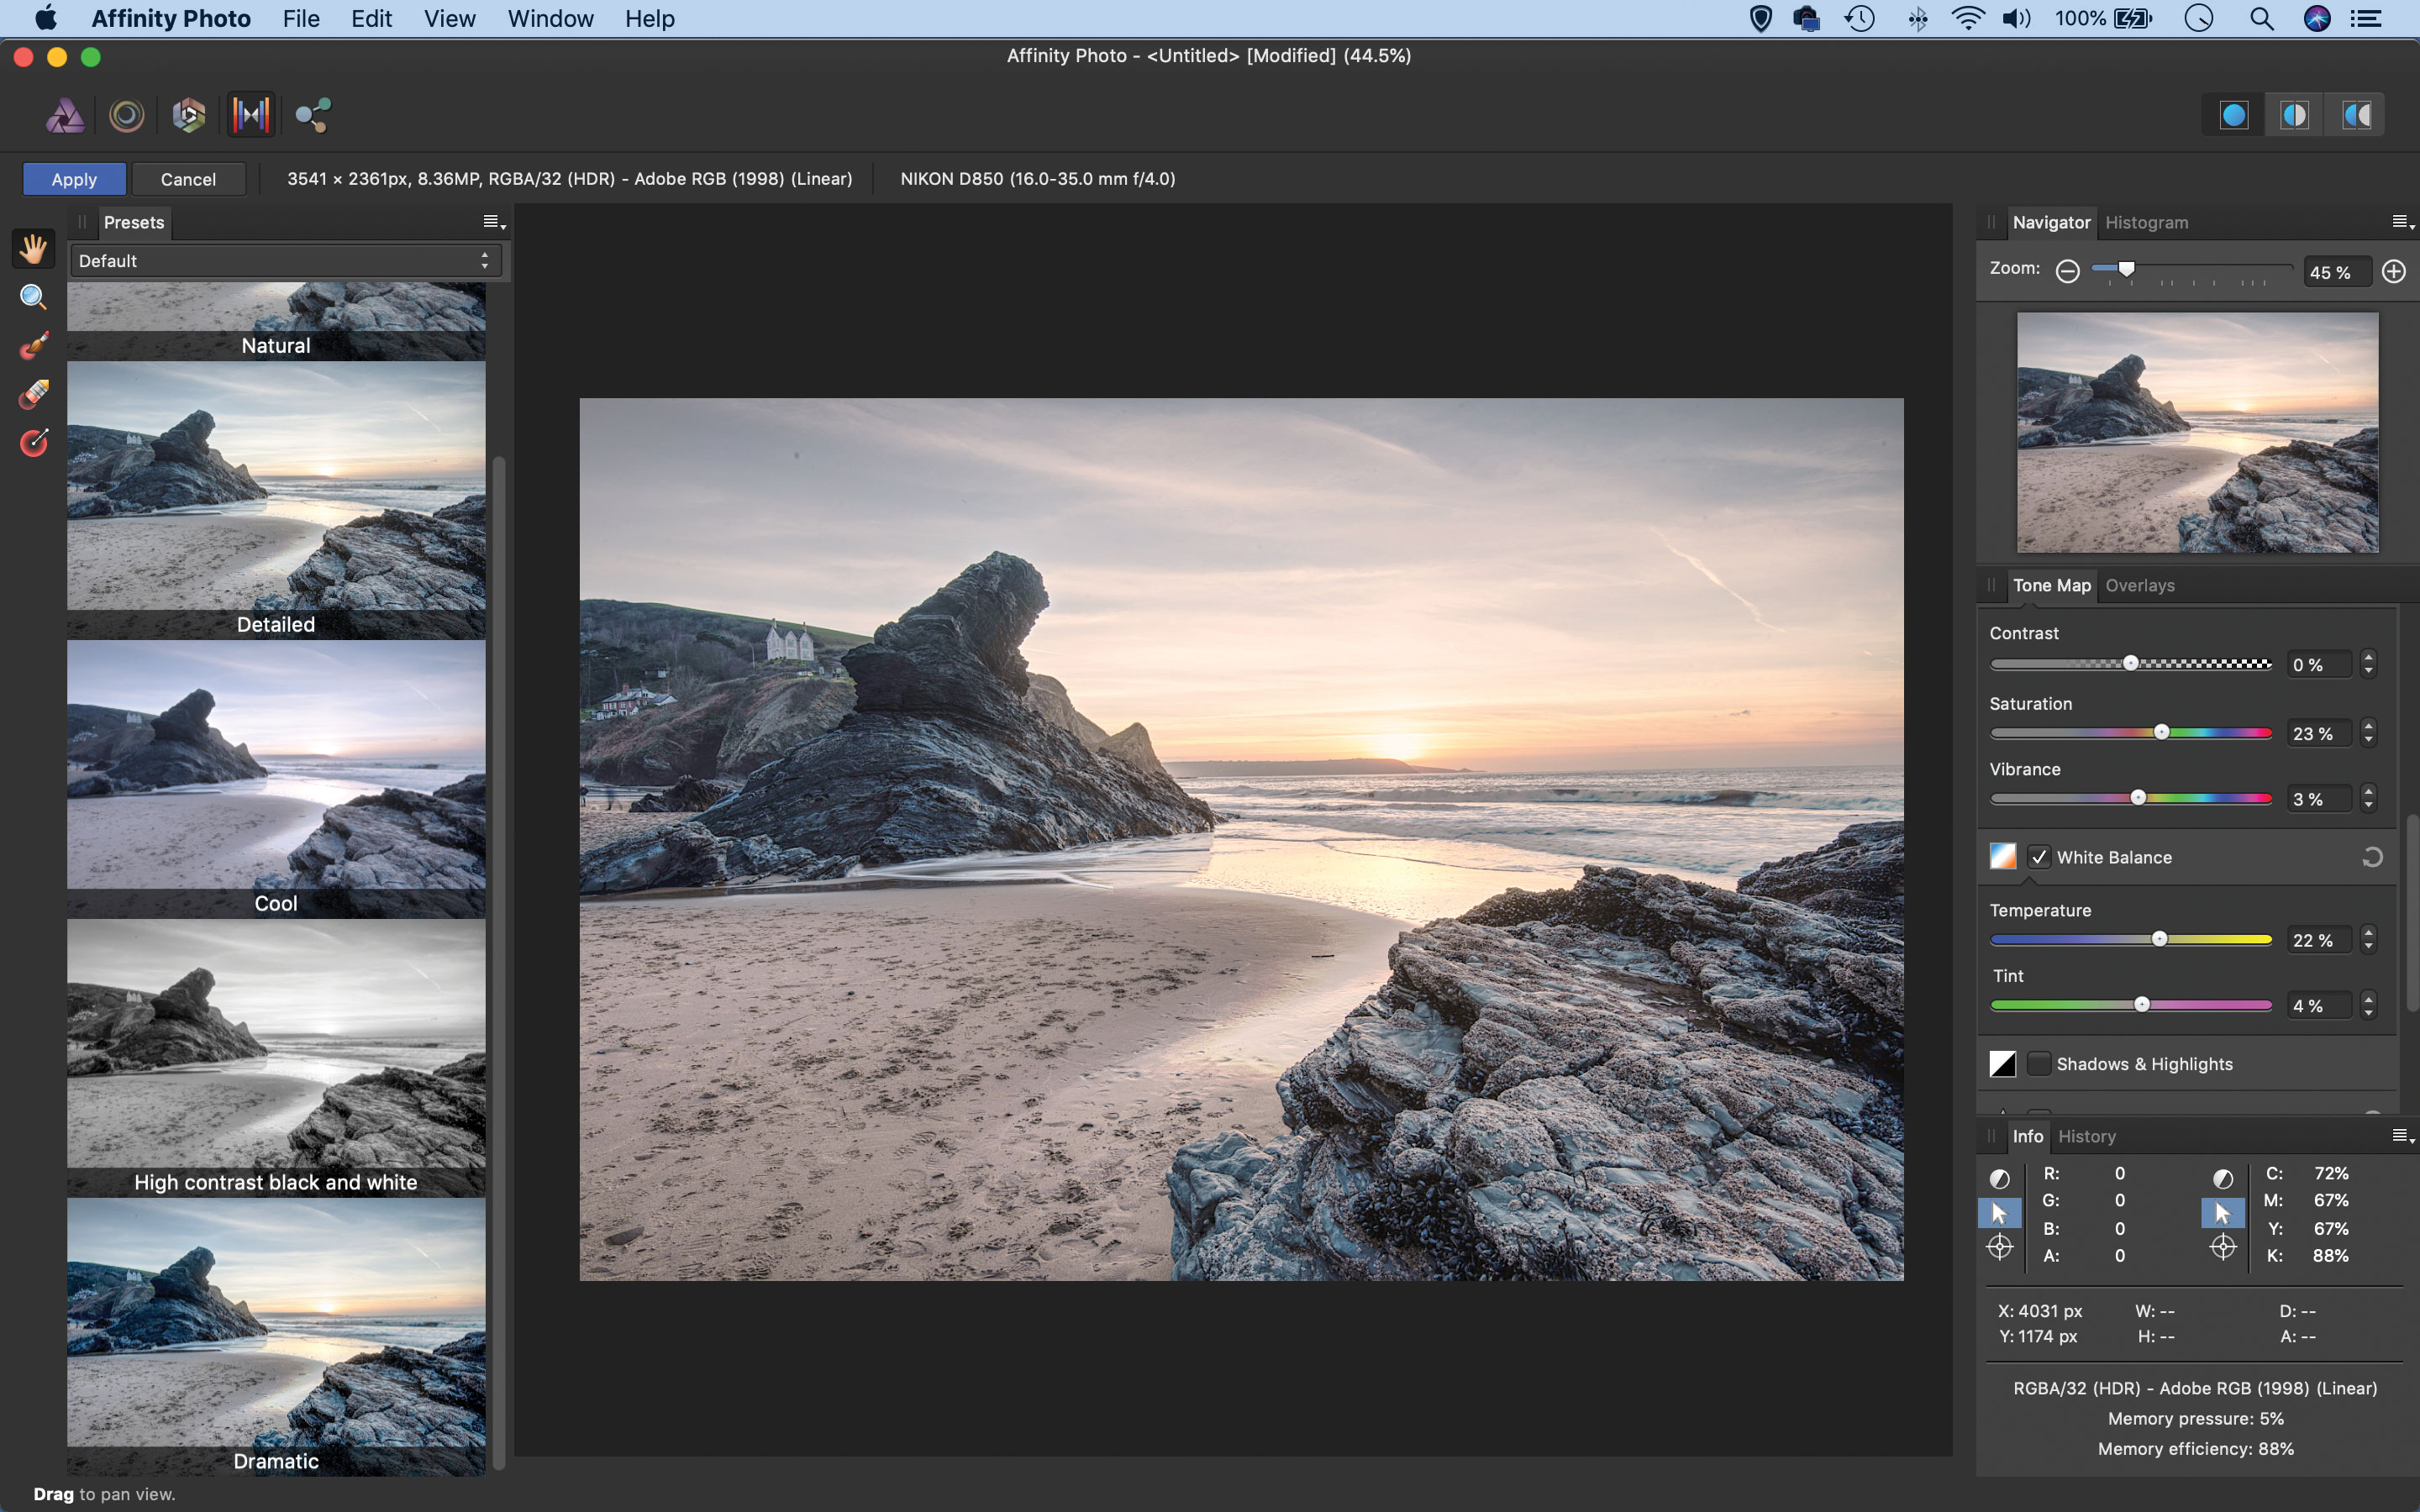
Once your image is merged, go to the Presets panel on the right and choose one of them as a starting point for your tone-mapping. Here we’ve used the ‘Detailed’ preset, which enhances the texture in the rocks and the detail in the sky. Next, go to the tonal tools on the right and fine-tune the look you want for the photograph.
Step 5: Adjust colours
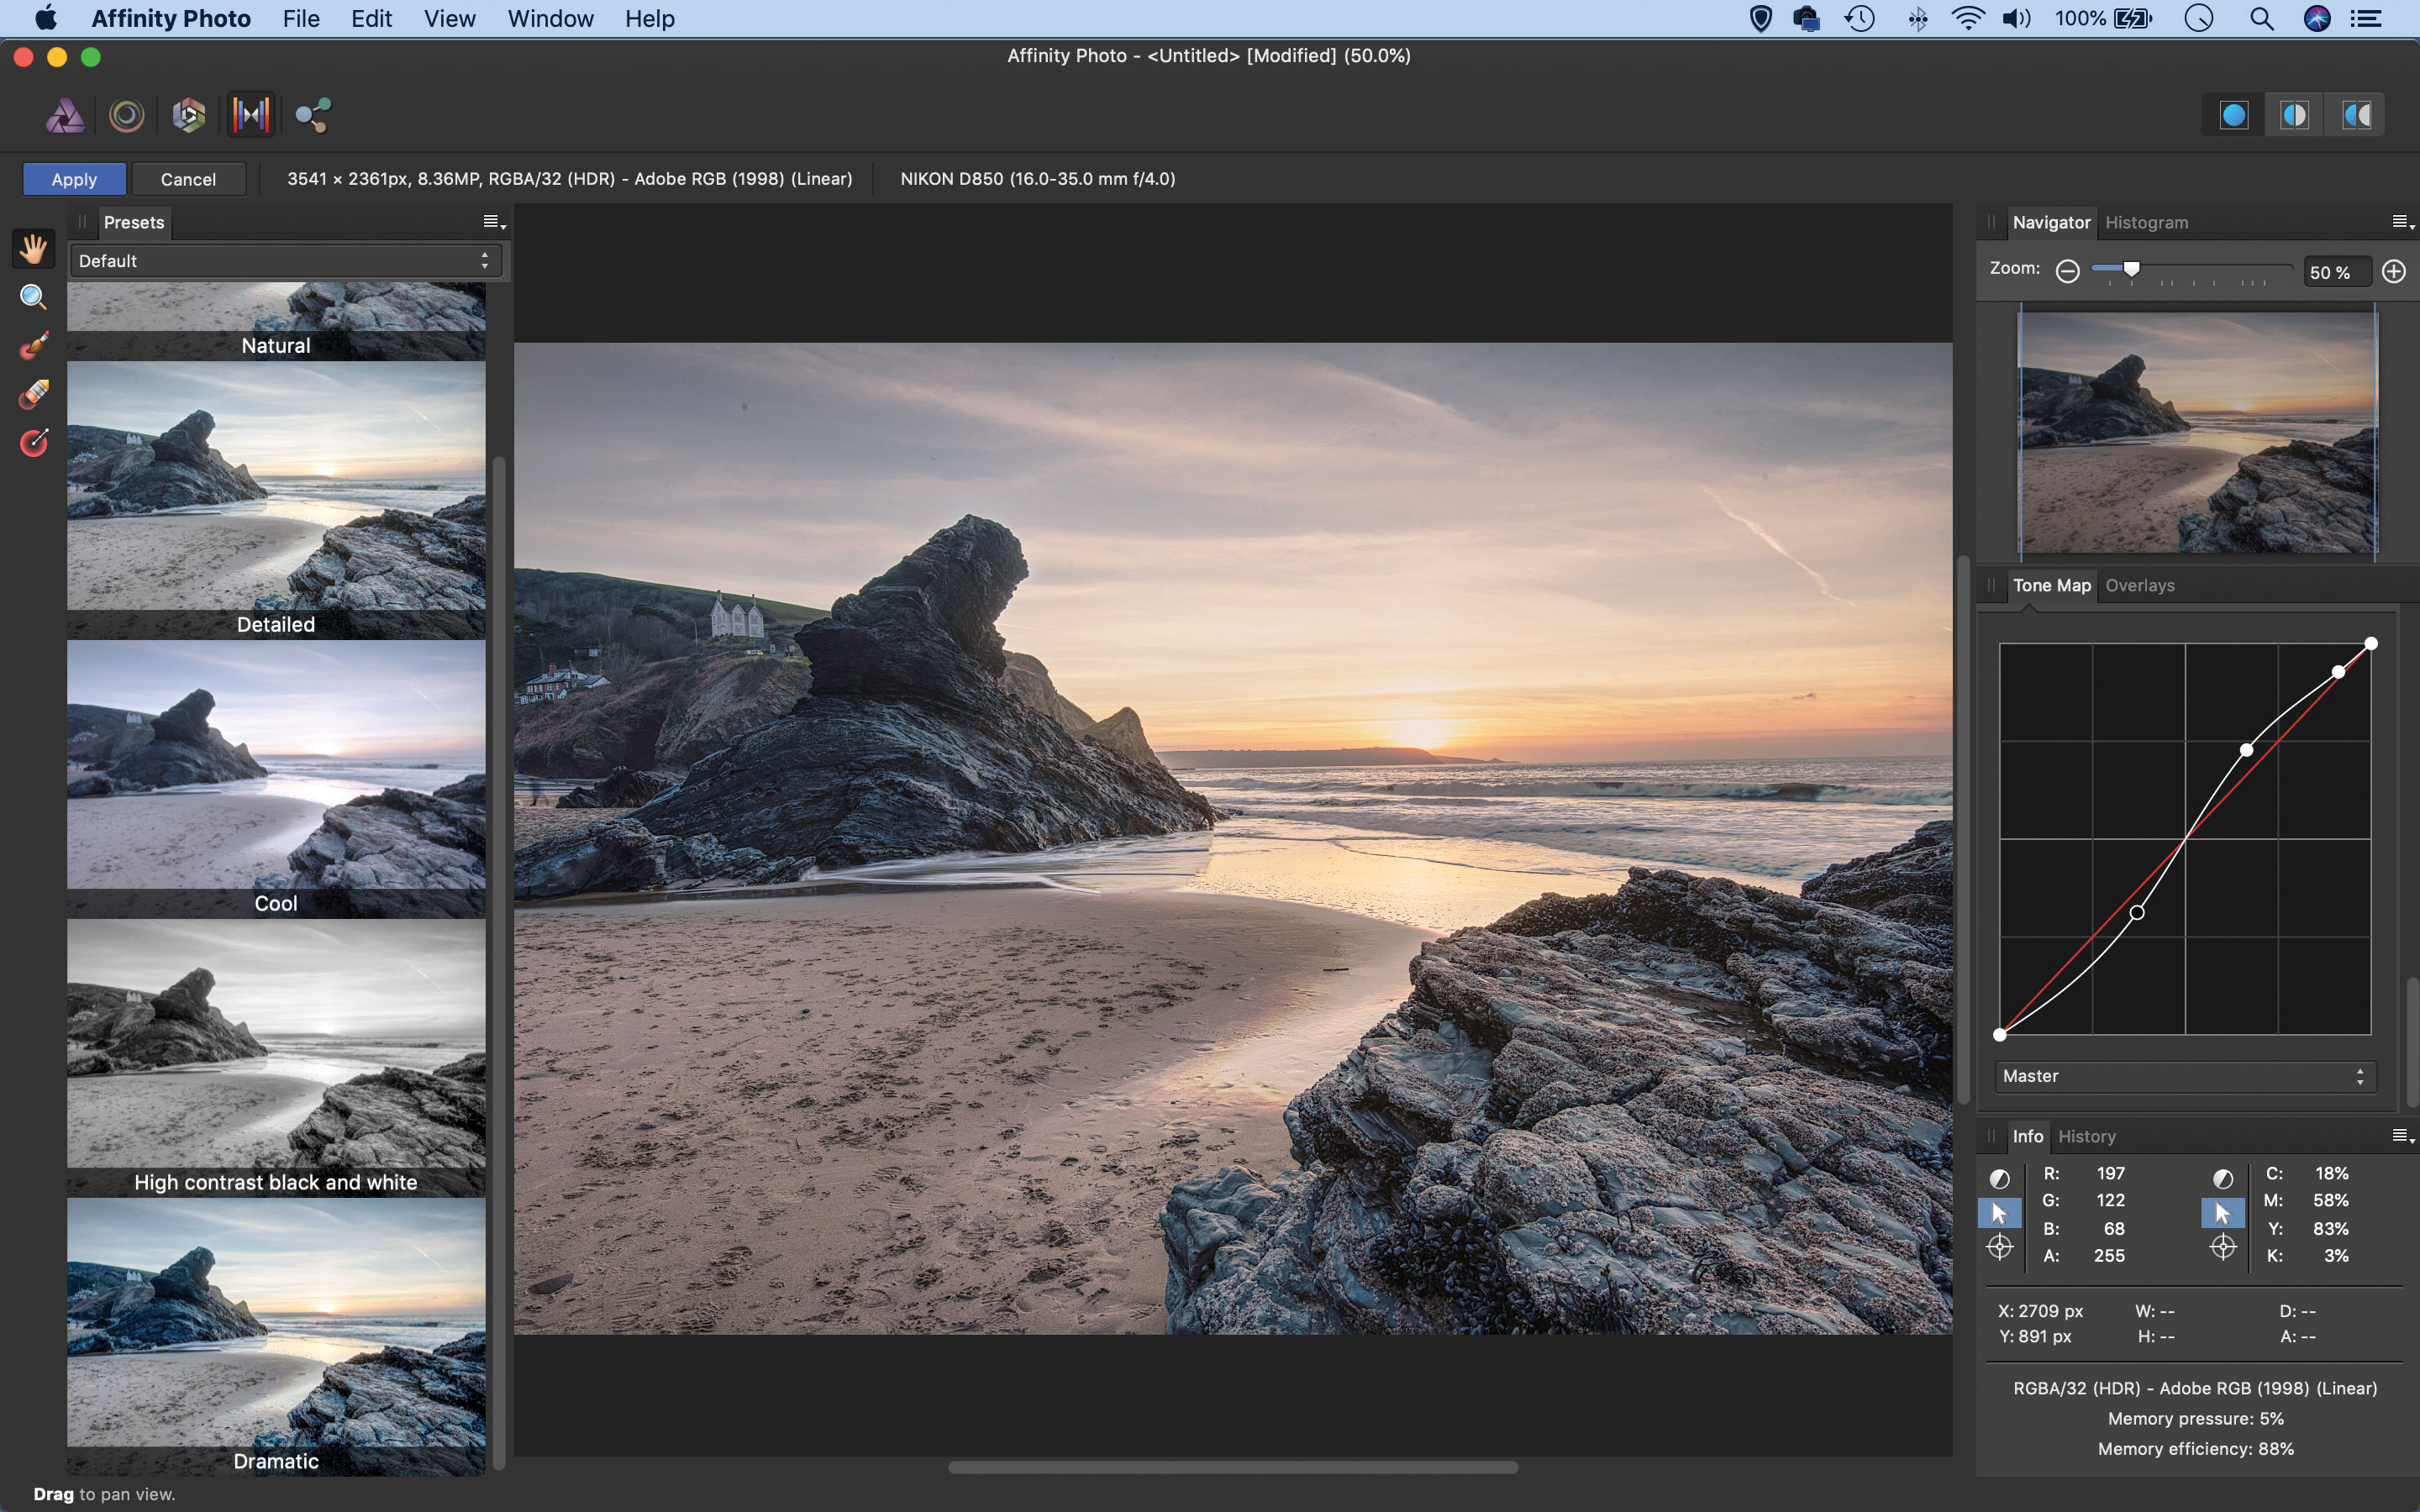
Check ‘White Balance’ on the right side, then drag Temperature to the right to if you want to warm the tones. Next, drag Saturation to the right to make the colours more intense. Check Shadows and Highlights, and reduce the highlights slightly if you're seeing some areas blow out. Check ‘Curve’ and plot an S-shape, as shown, to boost contrast.
Step 6: Finish off
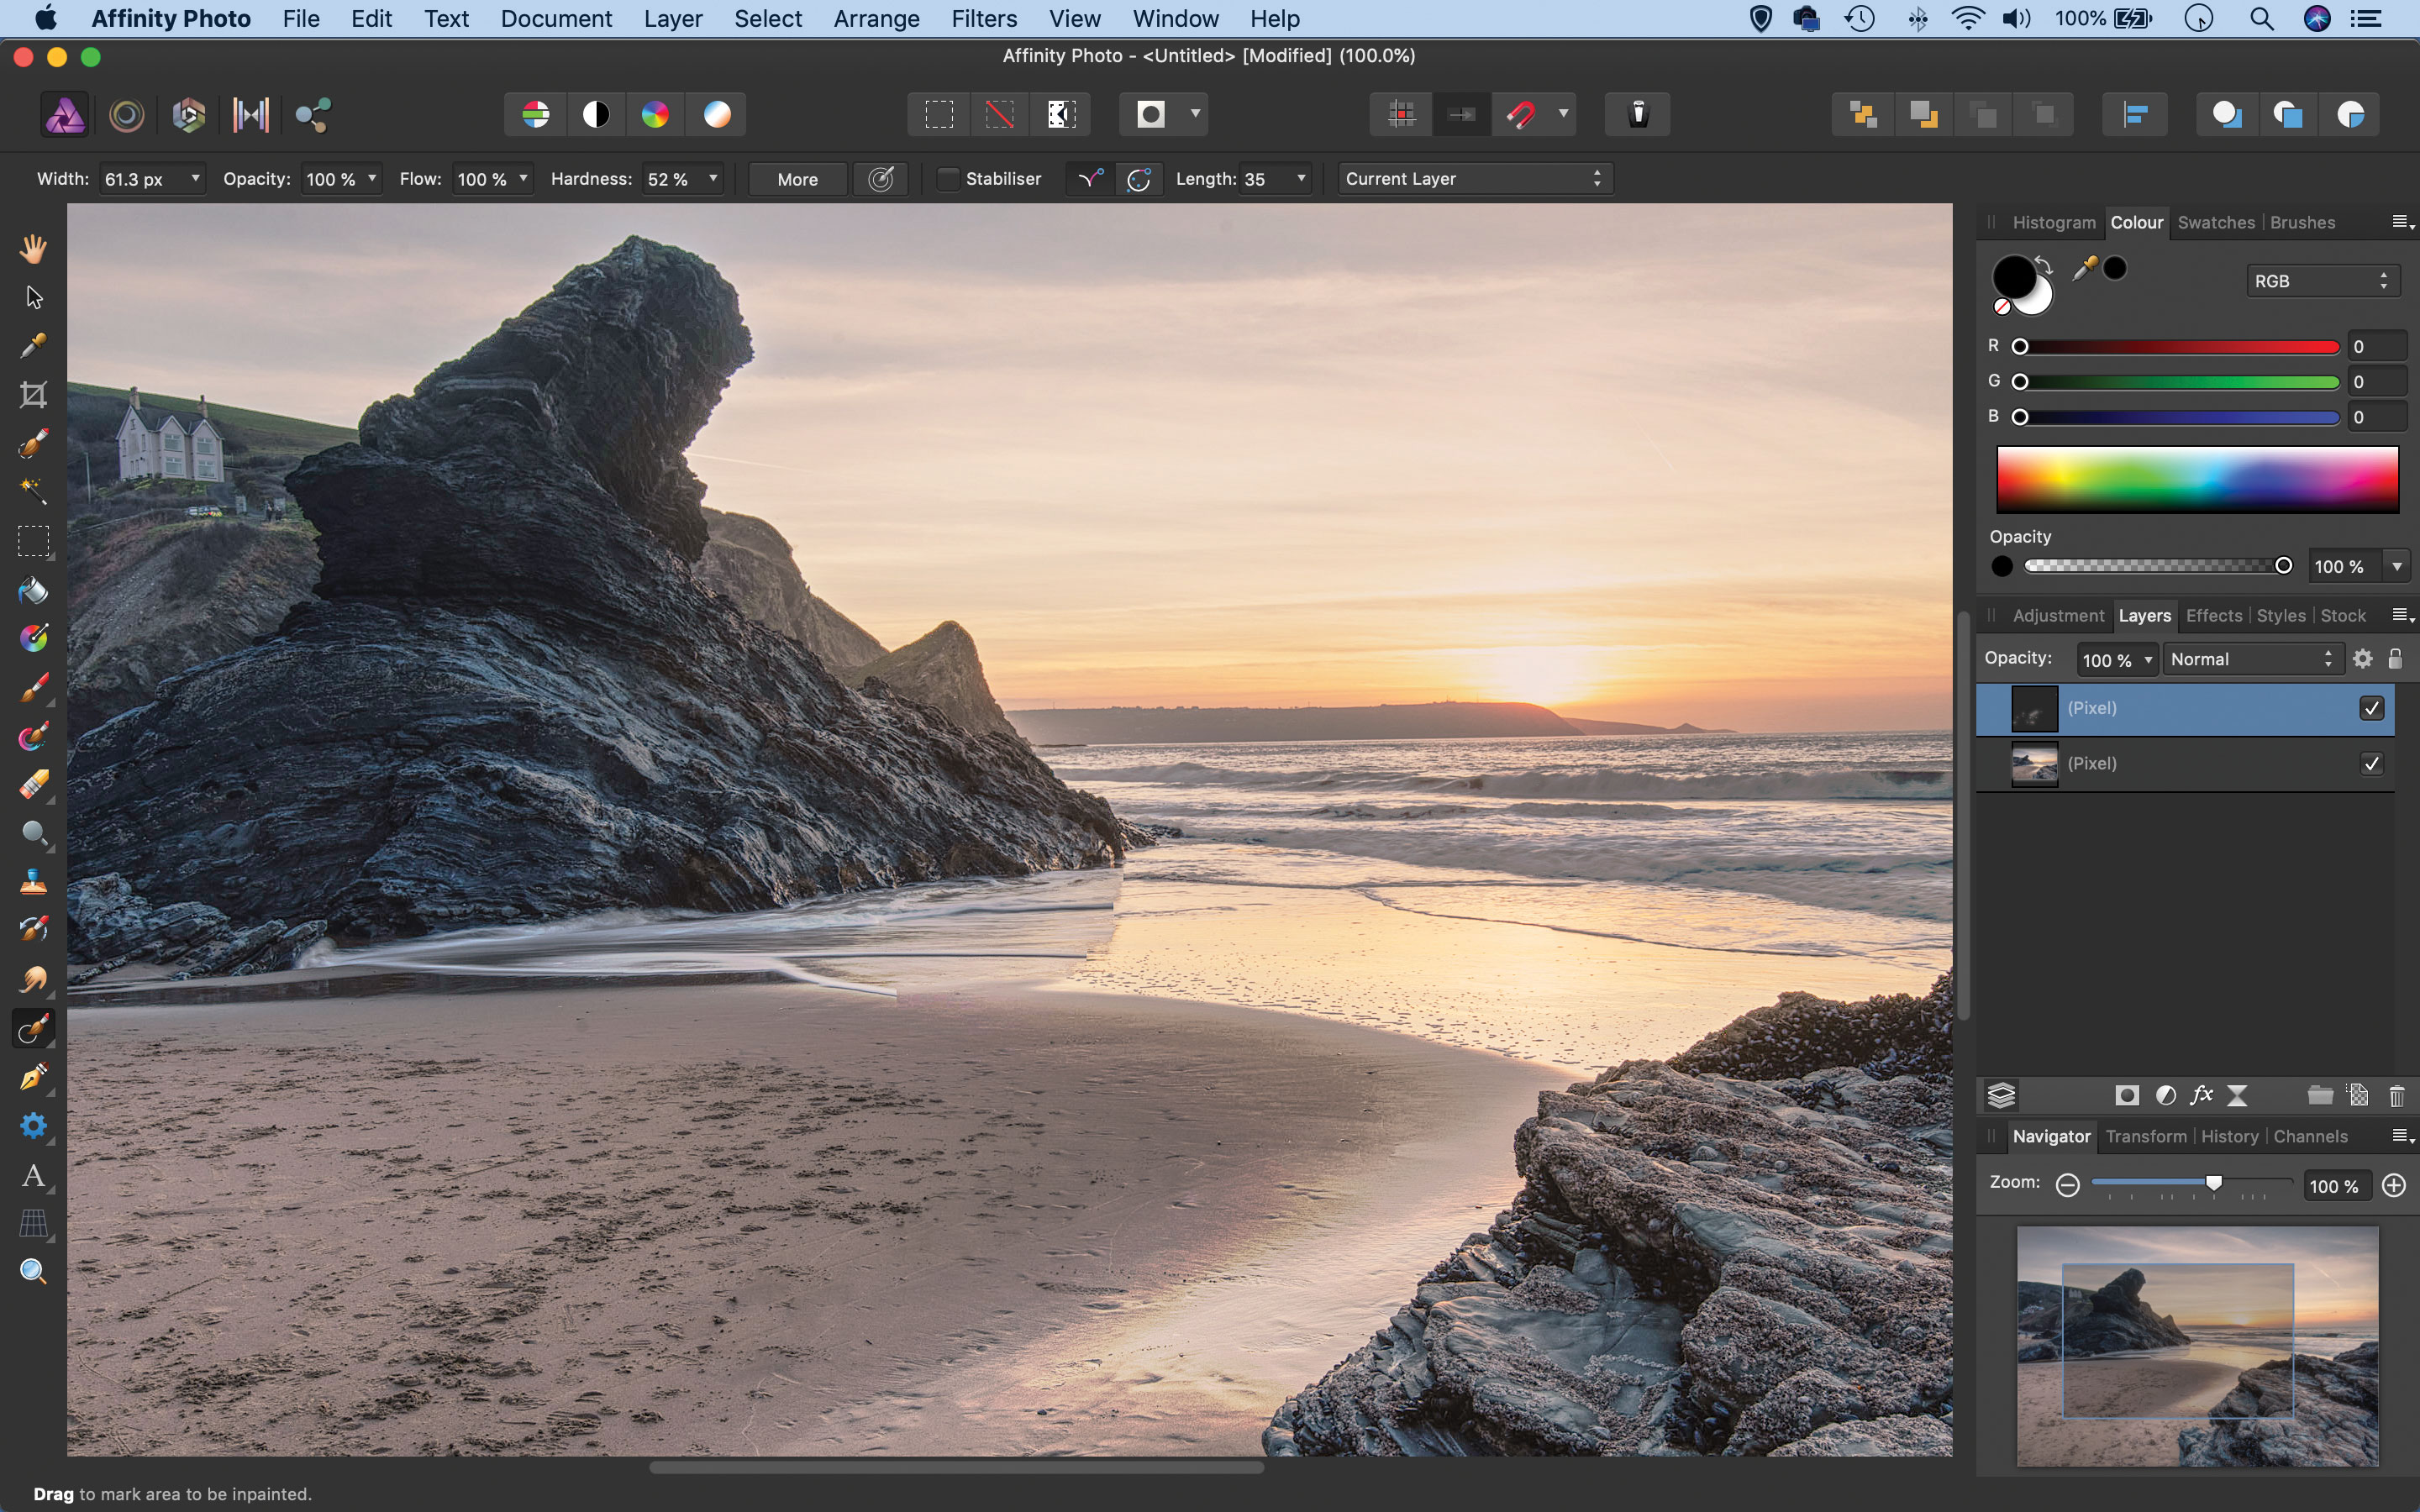
When you’re happy with your tone-mapping, hit Apply. You can now finish off the image in the Photo persona. We’ve removed some messy spots of sand in the foreground in our image. When you’re happy, go to File > Export to export the image in a usable 8 or 16-bit format, like a JPEG or TIFF.
Quick tip
HDR photography begins in-camera by taking a set of exposures to record optimum detail in the brightest and darkest parts of a scene. Here the contrast between sky and land is too great to be captured in a single frame, so we take a series of bracketed exposures. It’s best to use a tripod and cable release so the frames are in perfect alignment, but if you don’t have one you can get away with hand-holding – keep the camera as steady as possible and use a fast drive mode to shoot frames quickly.
Read more:
• Affinity Photo 1.8 review
• Affinity Photo 3-month trial and half-price offer until April 20, 2020
About N-Photo magazine
This tutorial originally appeared in N-Photo, the monthly newsstand magazine for Nikon photographers. Why not subscribe to a print edition, and have the magazine delivered direct to your door every month?
Alternatively, we have a number of different digital options available, including:
• Apple app (for iPad or iPhone)
• Zinio app (multi-platform app for desktop or smartphone)
• PocketMags (multi-platform app ideal for Android devices)
• Readly (all-you-can-eat digital magazine subscription service)
If you wanted a printed version of any of our most recent issues we have a selection of back issues to choose from in our online store.
Read more:
• Photography tips and tutorial videos
• The best photo editing tools and accessories
• The best desktop computers for photo editing
• The best photo-editing laptops right now
• The best photo editing software today
Get the Digital Camera World Newsletter
The best camera deals, reviews, product advice, and unmissable photography news, direct to your inbox!
N-Photo: The Nikon Magazine is a monthly publication that's entirely dedicated to Nikon users. As a 100% independent magazine, you can be assured of unbiased opinion from a trustworthy team of devoted photography experts including editor Adam Waring and Deputy Editor Mike Harris.
Aimed at all users, from camera newcomers to working pros, every issue is packed with practical, Nikon-specific advice for taking better photos, in-depth reviews of Nikon-compatible gear, and inspiring projects and exciting video lessons for mastering camera, lens and Photoshop techniques.
Written by Nikon users for Nikon users, N-Photo is your one-stop shop for everything to do with cameras, lenses, tripods, bags, tips, tricks and techniques to get the most out of your photography.

