Photography cheat sheet: portrait lighting techniques
How do you go about lighting a portrait with just one light source? Here are six things to try

Professional-looking portraits don't always require professional lighting setups. While it definitely helps to have appropriate lights, such as LED light panels or the best flashgun, what makes the crucial difference between an average portrait and a great one is knowing what to do with the kit you have.
Much of your success comes down to arranging your light source so that it complements the subject being photographed, and using a few accessories where required – such as flash diffusers – to modify the light in the scene. These don't need to be expensive, and often you can substitute something you may have lying around the house. A large piece of white foam or sturdy cardboard, for example, can often work perfectly well as reflectors for photography.
Below, we've shared a photography cheat sheet on portrait lighting techniques from our print magazine Digital Camera.
Photography cheat sheet: portrait lighting
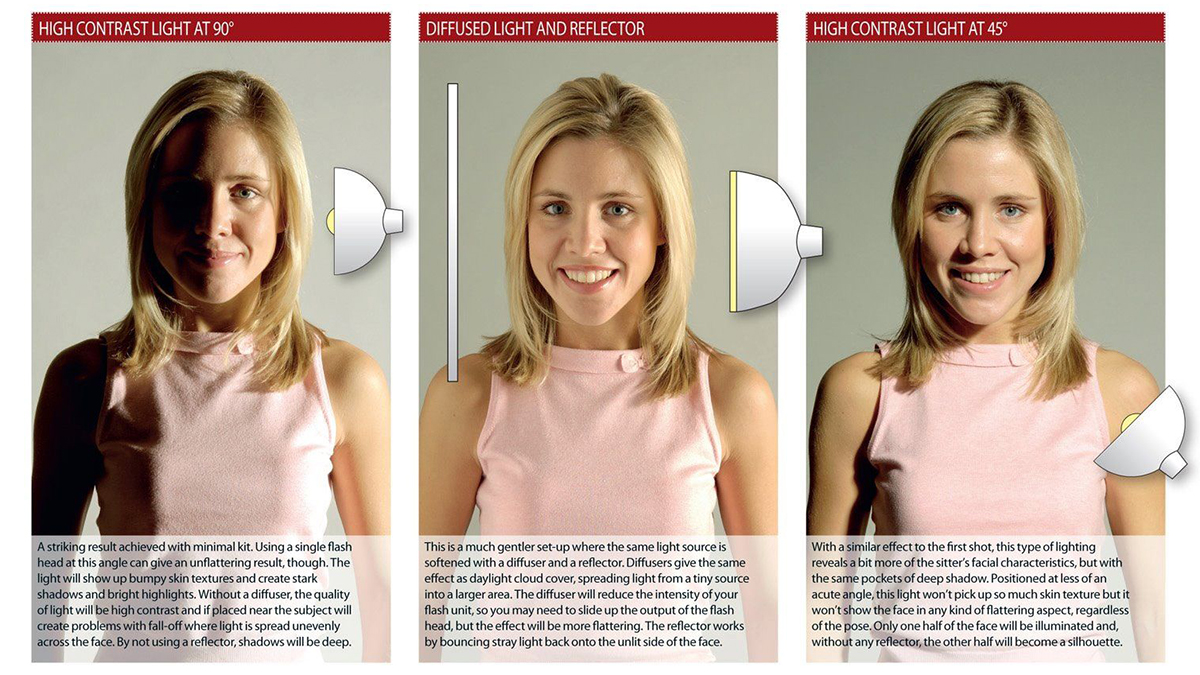
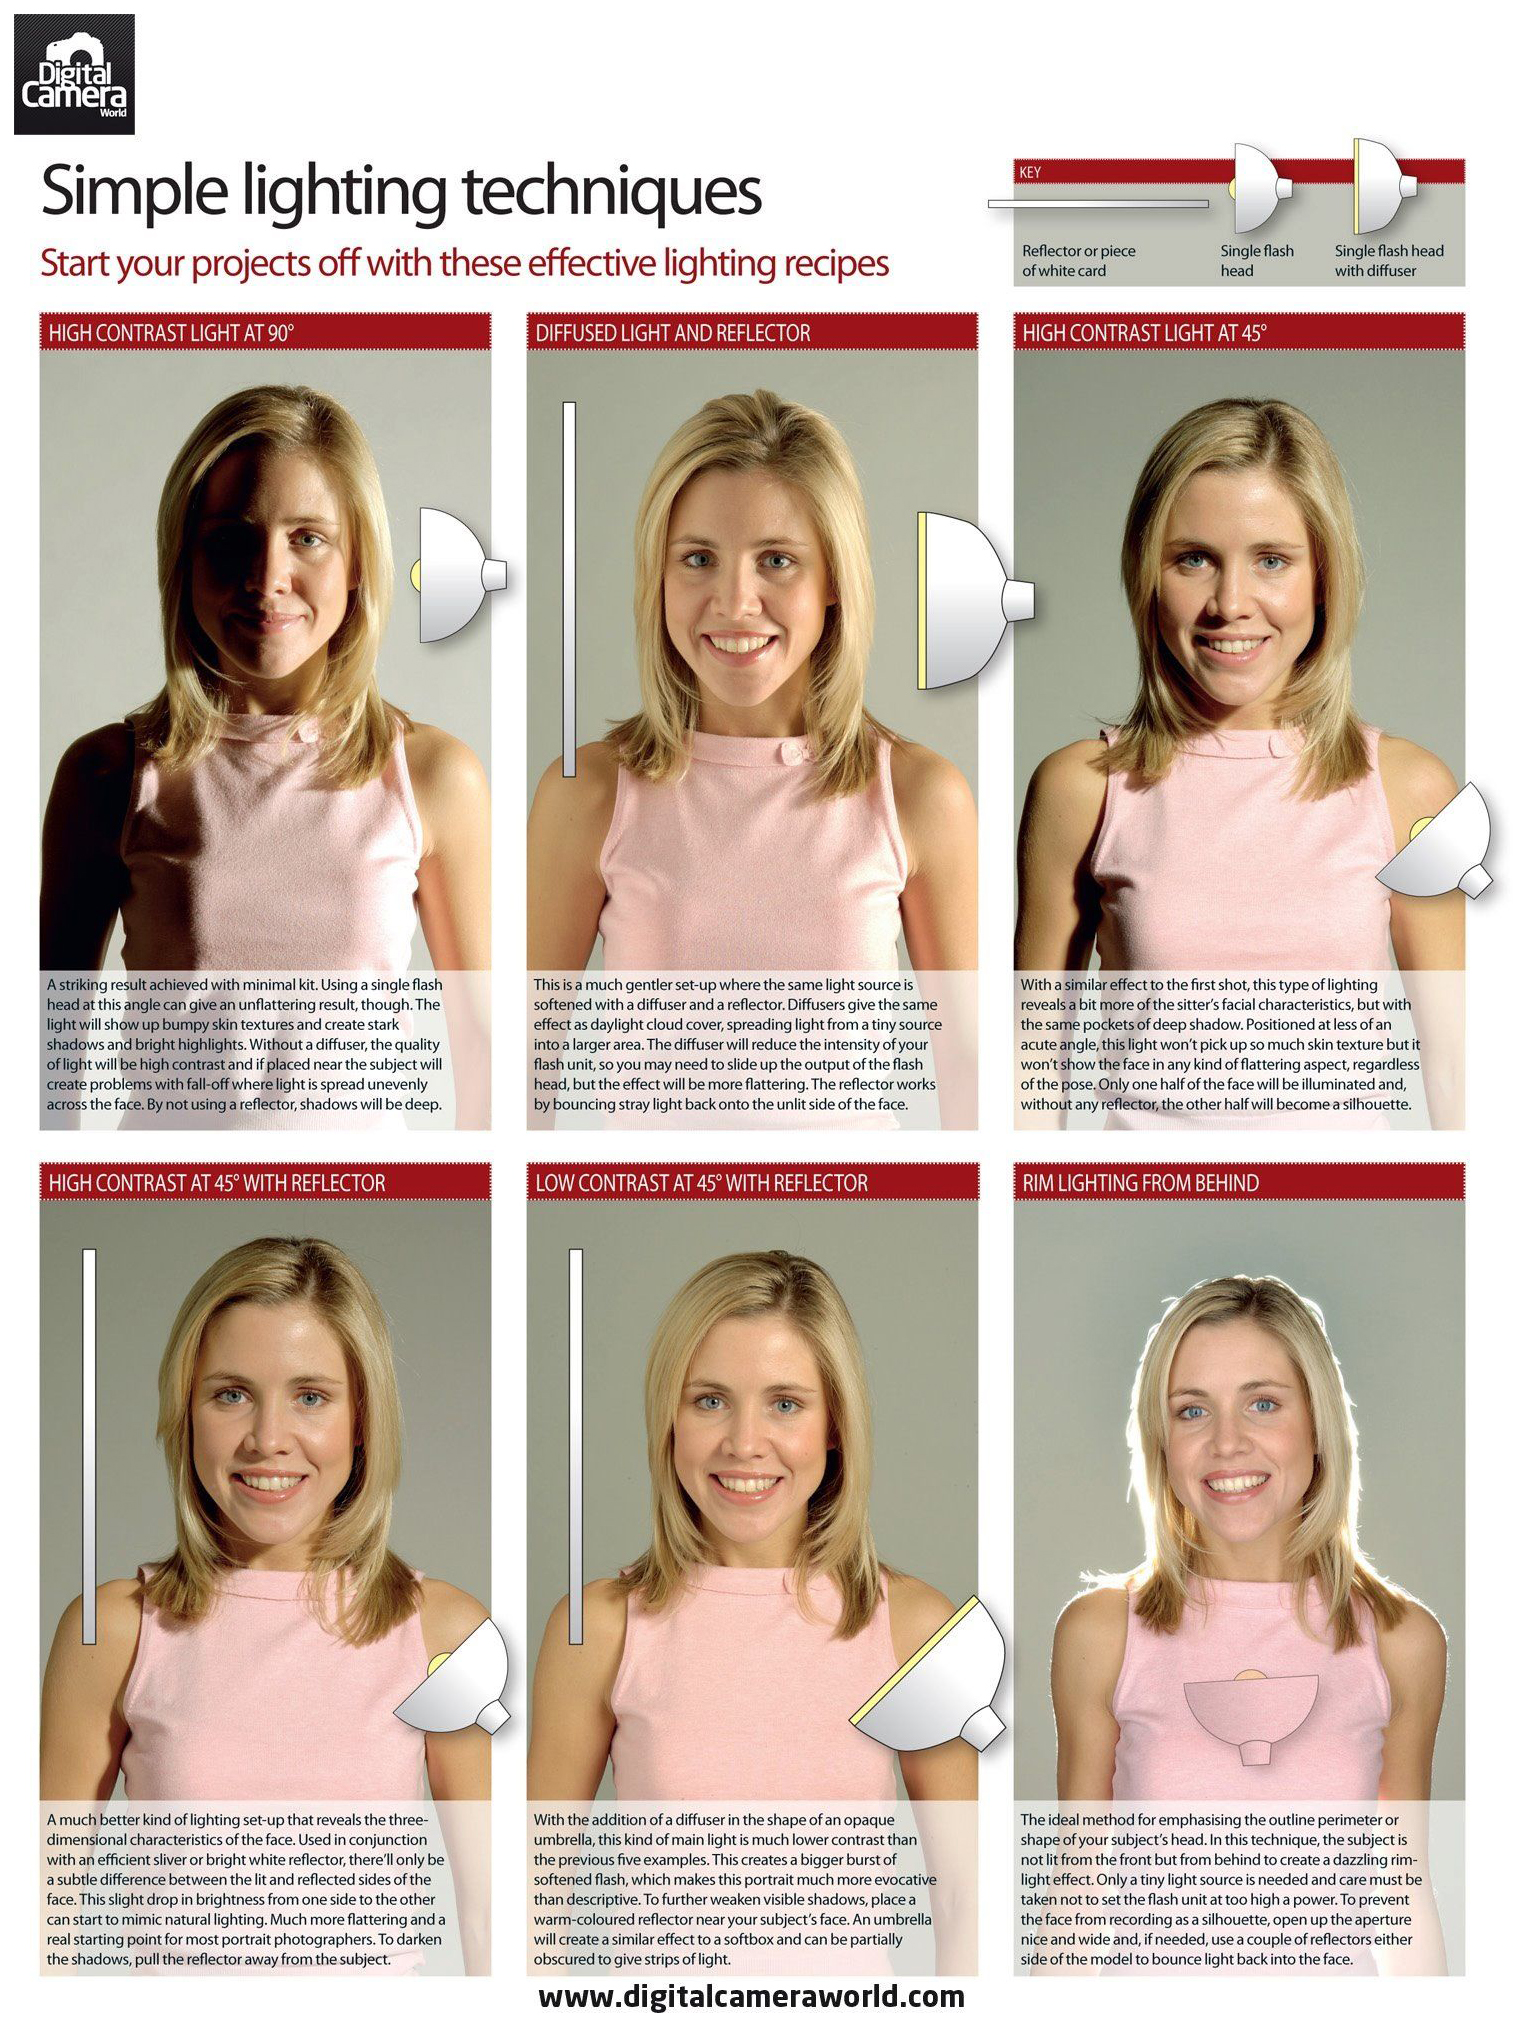
The six setups on the cheat sheet below show what kind of effects you can achieve with just a single light and a reflector.
Perhaps you can start by thinking: what kind of look do I want to achieve? Do you want Rembrandt-style lighting, where part of the face is lit and part is in shadow? Or do you want a more even kind of light throughout?
Check out the cheat sheet below to learn how to produce six straightforward lighting effects, and hit the top-right-hand corner to get it in a higher resolution. Make sure to check back for more of our photography cheat sheets, too!
Whether you're a beginner portrait photographer, or you want lighting setups for professional portraits, the techniques below can be used regardless.

For a strong light that results in a high-contrast look, position the light close to the subject without any diffusers. This will create strong shadows which highlight certain facial features, and with the right subject, this can look great. A bit of distance and an accessory like a diffuser will help to spread and soften the light, giving a softer effect if that's what you're looking for.
The use of a reflector can add balance and help to fill in shadows, and using a colored one can add warmth or coolness too. A gold-colored reflector, for example, will bounce a warmer light back to the subject, while a silver one will help to keep things cool.
Maybe you want to emphasize the shape of the subject by lighting it from behind? This will create a rim light that will catch the hair, and it can easily give the final image more vitality. It won't always be appropriate with every model, but it's easily achieved and gives you something less obvious to experiment with.
You might also like our guides to the best camera for portraits and the best lens for portraits.
Get the Digital Camera World Newsletter
The best camera deals, reviews, product advice, and unmissable photography news, direct to your inbox!
The former editor of Digital Camera World, "Matt G" has spent the bulk of his career working in or reporting on the photographic industry. For two and a half years he worked in the trade side of the business with Jessops and Wex, serving as content marketing manager for the latter.
Switching streams he also spent five years as a journalist, where he served as technical writer and technical editor for What Digital Camera before joining DCW, taking on assignments as a freelance writer and photographer in his own right. He currently works for SmartFrame, a specialist in image-streaming technology and protection.

