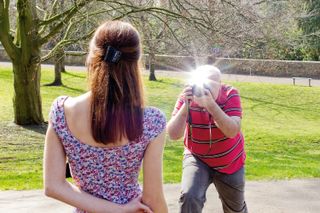
Fill-in flash: tips and tricks for using a flashgun in daylight
Your built-in flash can work wonders on your portraits – here's how to use and control fill flash
Watch the video: fill-in flash
Flash can be essential in low light, particularly when you’re shooting living subjects, but it often ends up being a necessary evil, killing the atmosphere. Ironically, flash is often of more creative use in the hours of daylight.
What is fill flash?
Sometimes called ‘synchro sun’, and better known as ‘fill flash’, a burst of artificial light can be effective in practically any outdoor situation. What’s more, you don’t need any specialist kit – you can make do with the pop-up flash that comes built into many popular cameras.
• More photography tips: how to take pictures of anything
The main restriction with the technique is that it only works if you’re the right distance away from the right subject. A range of 0.7 - 4m (2-12 feet) is ideal, so the trick is great for portraits.
In bright sunshine, when you might think there’s enough light anyway, flash helps reduce the contrast on a subject, filling in the shadows that make eye sockets look dark and hide other facial details.
On a dull, overcast day, a burst of flash has the opposite effect, adding contrast and making portraits more three-dimensional and colorful. And whatever the weather, the flash also gives a sparkle to people’s eyes by adding bright ‘catchlight’ reflections.
In its most basic form there’s little more to the technique than firing the pop-up flash and shooting. You need to be using the right exposure mode, though. Program or Aperture Priority work best if you have autofocus turned on and are using standard evaluative metering.
The beauty of fill flash is that you combine two exposures – one taken using daylight, and the other with flash. By varying the settings you can make the fill flash effect stronger or weaker, which is handy for increasing or decreasing the brightness of the background independently of the subject.
1. Push for pop-up

For fill flash, the easiest exposure mode to use is Program. This sets the aperture and shutter speed for you, for a balanced exposure with flash. Use evaluative/matrix metering and the AF points so that the camera knows where the subject is in the frame. Now pop up the flash.
2. Step down

Auto exposure is often perfect, but you can play with the settings to make the fill flash effect stronger or more subtle. To make the background look darker – to make a sky look more blue, say – you need exposure compensation. Try -1.0 (one stop underexposed).
3. Play with power

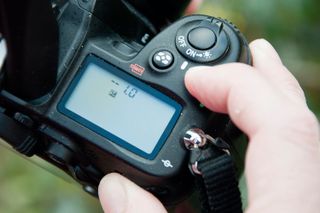
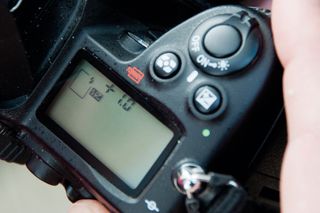
The exposure compensation will make the foreground and background darker. To ensure that the subject is properly lit, adjust the flash power. Press the flash pop-up button and turn the front dial. On cameras such as the D3100, press +/- Exposure Compensation, too.
4. Finalize settings

Set the Flash Exposure Compensation to +1.0 (one stop over). This is the maximum allowed, although you can turn the power down to -3.0). Take a picture and the subject will be properly exposed but the background will be darkened by the new setting.
More videos:
147 photography techniques, tips and tricks for taking pictures of anything
Studio portrait lighting: essential tips and setups explained
Headshot photography tips: how to shoot the perfect head-and-shoulders portrait
Couple photography: poses for portraits of pairs of people
Get the Digital Camera World Newsletter
The best camera deals, reviews, product advice, and unmissable photography news, direct to your inbox!
Chris George has worked on Digital Camera World since its launch in 2017. He has been writing about photography, mobile phones, video making and technology for over 30 years – and has edited numerous magazines including PhotoPlus, N-Photo, Digital Camera, Video Camera, and Professional Photography.
His first serious camera was the iconic Olympus OM10, with which he won the title of Young Photographer of the Year - long before the advent of autofocus and memory cards. Today he uses a Nikon D800, a Fujifilm X-T1, a Sony A7, and his iPhone 15 Pro Max.
He has written about technology for countless publications and websites including The Sunday Times Magazine, The Daily Telegraph, Dorling Kindersley, What Cellphone, T3 and Techradar.
