Extract maximum detail from your Raw files in Photoshop for extra impact
Tease hidden details from shadows and highlights in Raw images in Photoshop CC for perfectly balanced landscapes
Watch video: Reveal hidden detail in Photoshop CC
Have you ever shot a landscape under glorious conditions then rushed home to look at the results, only to find they are slightly underwhelming? It’s happened to me more than once. It doesn’t necessarily mean you did something wrong… it might be that the image needs a little coaxing into life. Often the challenge with landscapes is in recording detail in the brightest and darkest parts of the scene.
When the sun is low in the sky this can be doubly difficult, as the highlights will be strong and the shadows can be very deep. As such, on initial inspection the scene can be a disappointment, with detail-less dark areas or blown out skies.
However, just because the detail isn’t visible at first, it doesn’t mean it’s not there. As long as pixels aren’t clipped to pure black or white, then there’s a good chance we can pull detail out of the tonal extremes and balance the image. This is especially true if the image is a Raw file as Raws have greater dynamic range than JPEGs, which means they hold extra detail in the highlights and shadows. But even JPEGs can be enhanced to tease out extra detail.
We‘ll do this using the local adjustment tools in Photoshop CC's Camera Raw (you’ll find near-identical tools in the Lightroom Develop Module). The key tools are the Graduated Filter and Adjustment Brush. They let us isolate and adjust areas with ultimate control...
01 Lift the land
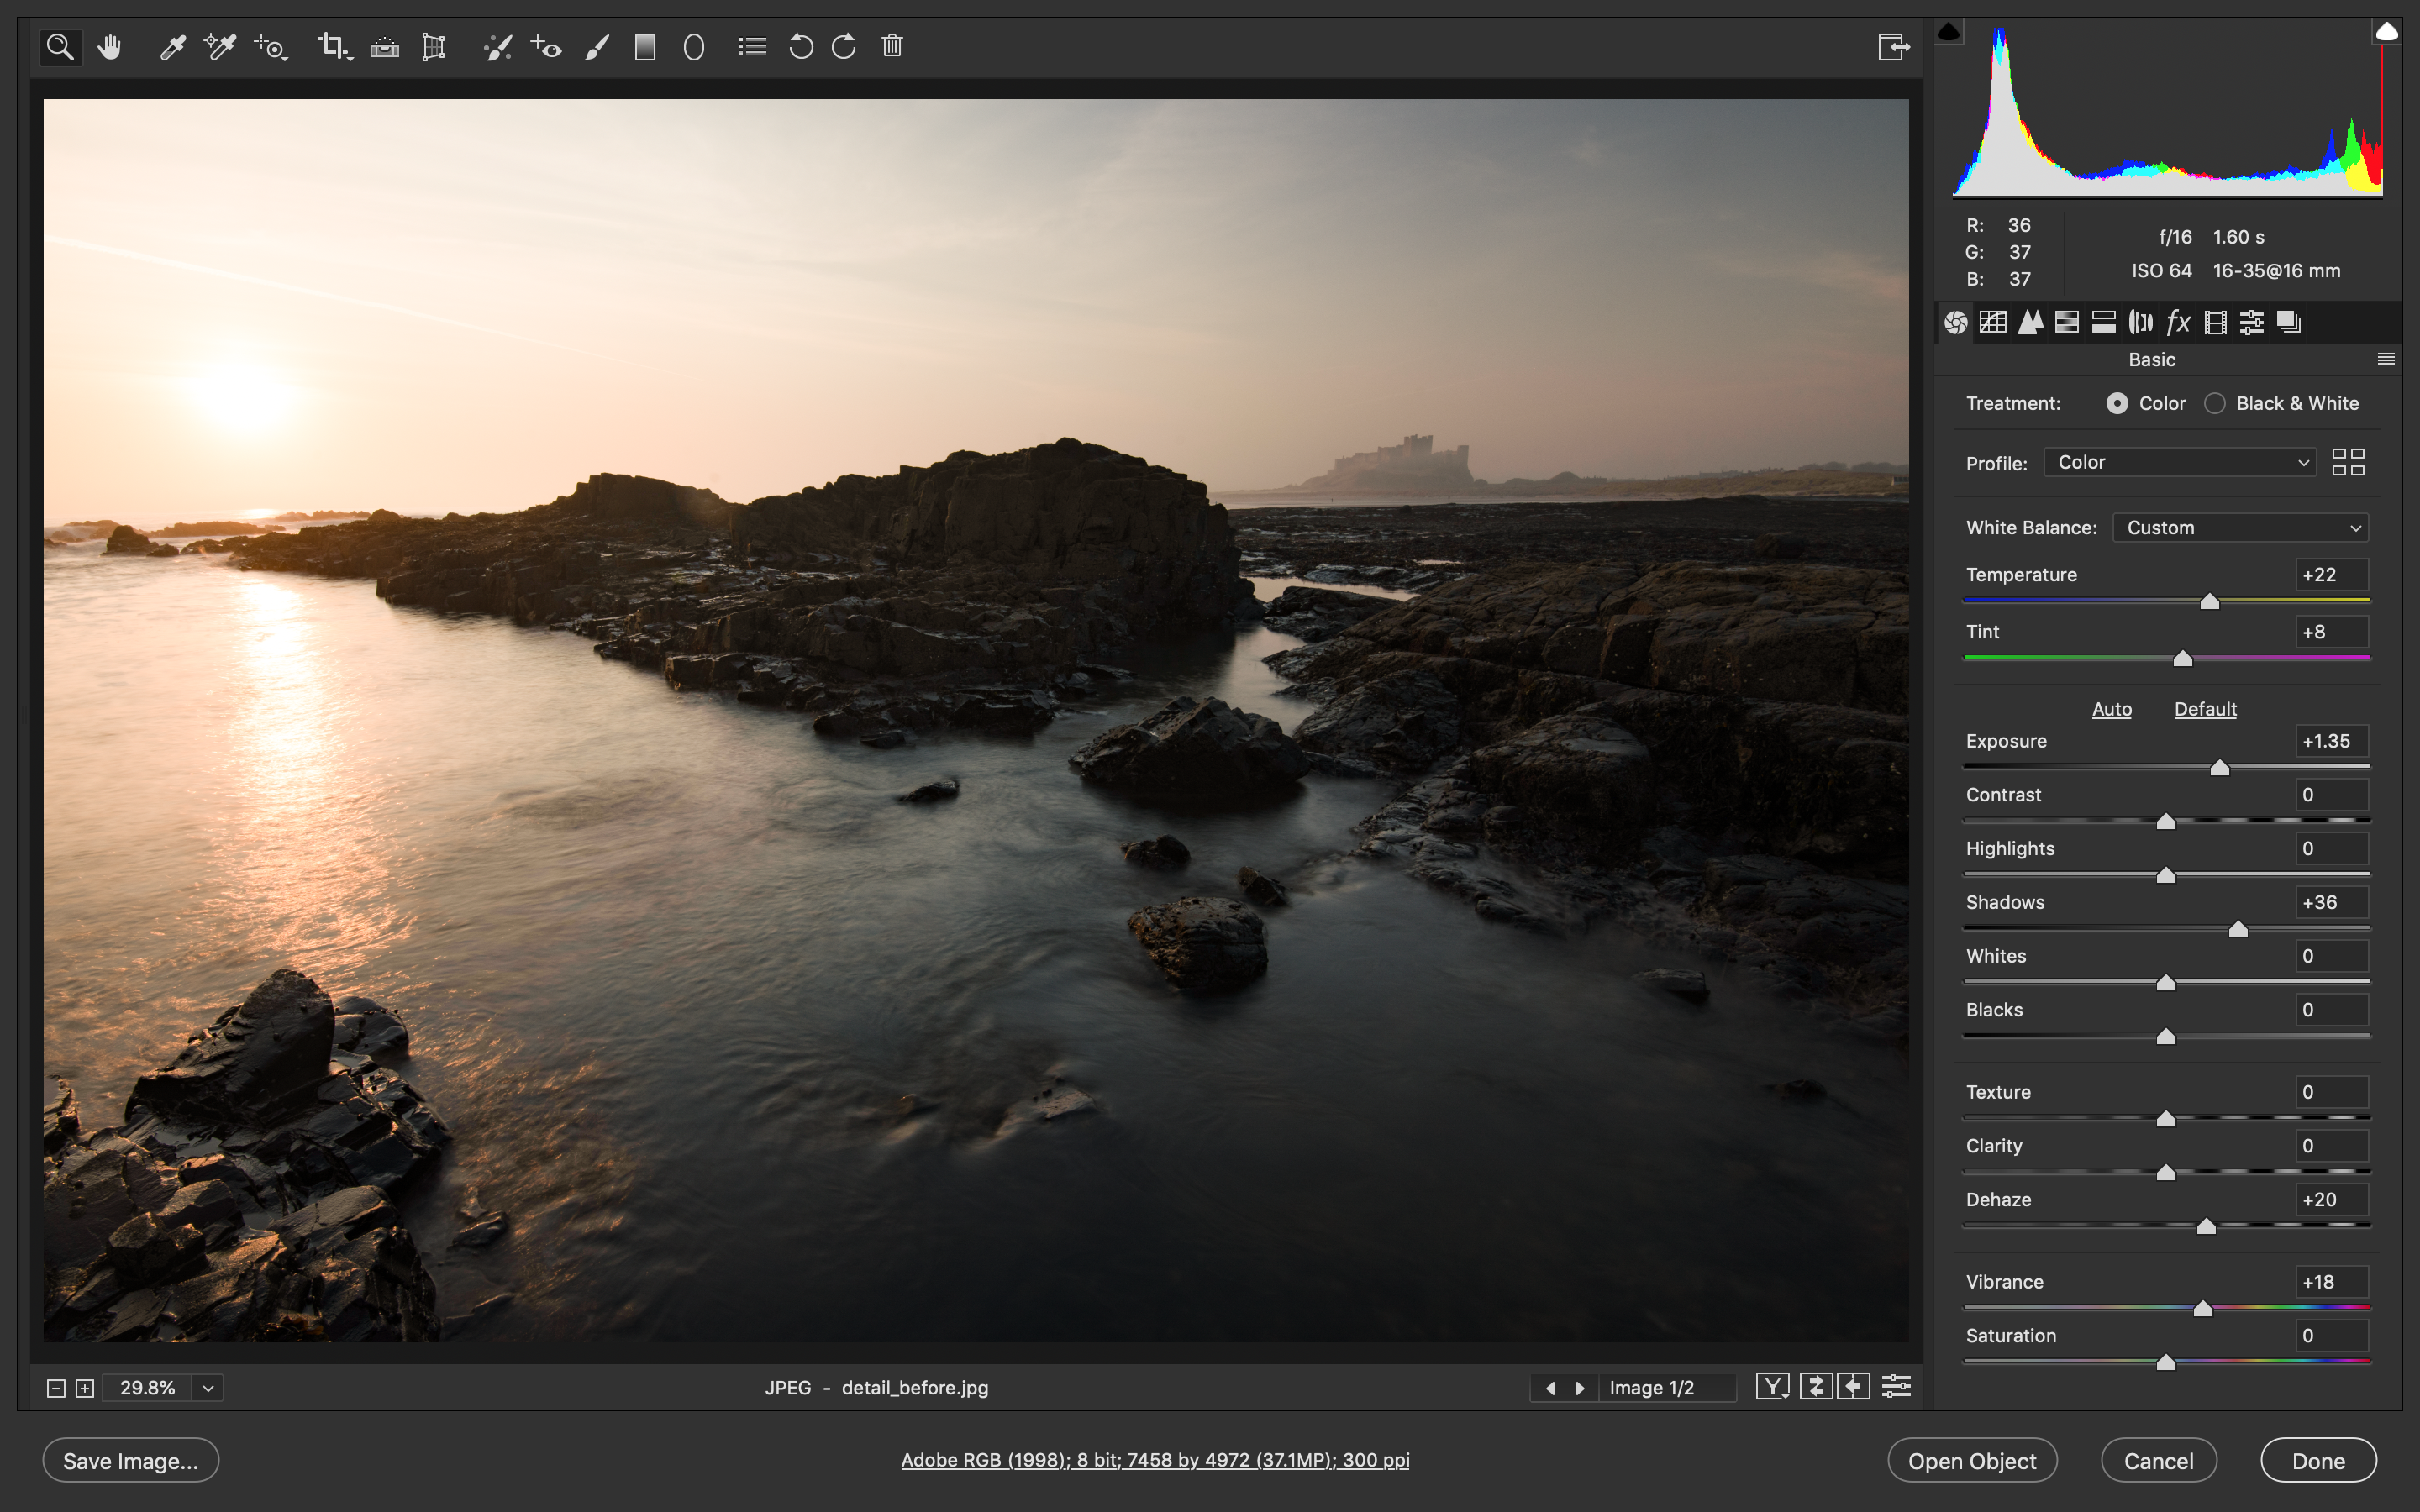
Open the image in Camera Raw (or go to Lightroom’s Develop Module), then go to the Basic panel and lift Exposure and Shadows as shown to brighten the land. Our scene is hazy, so we set Dehaze to +20. To warm up the shot, we dragged Temp and Tint to the right.
02 Darken the sky
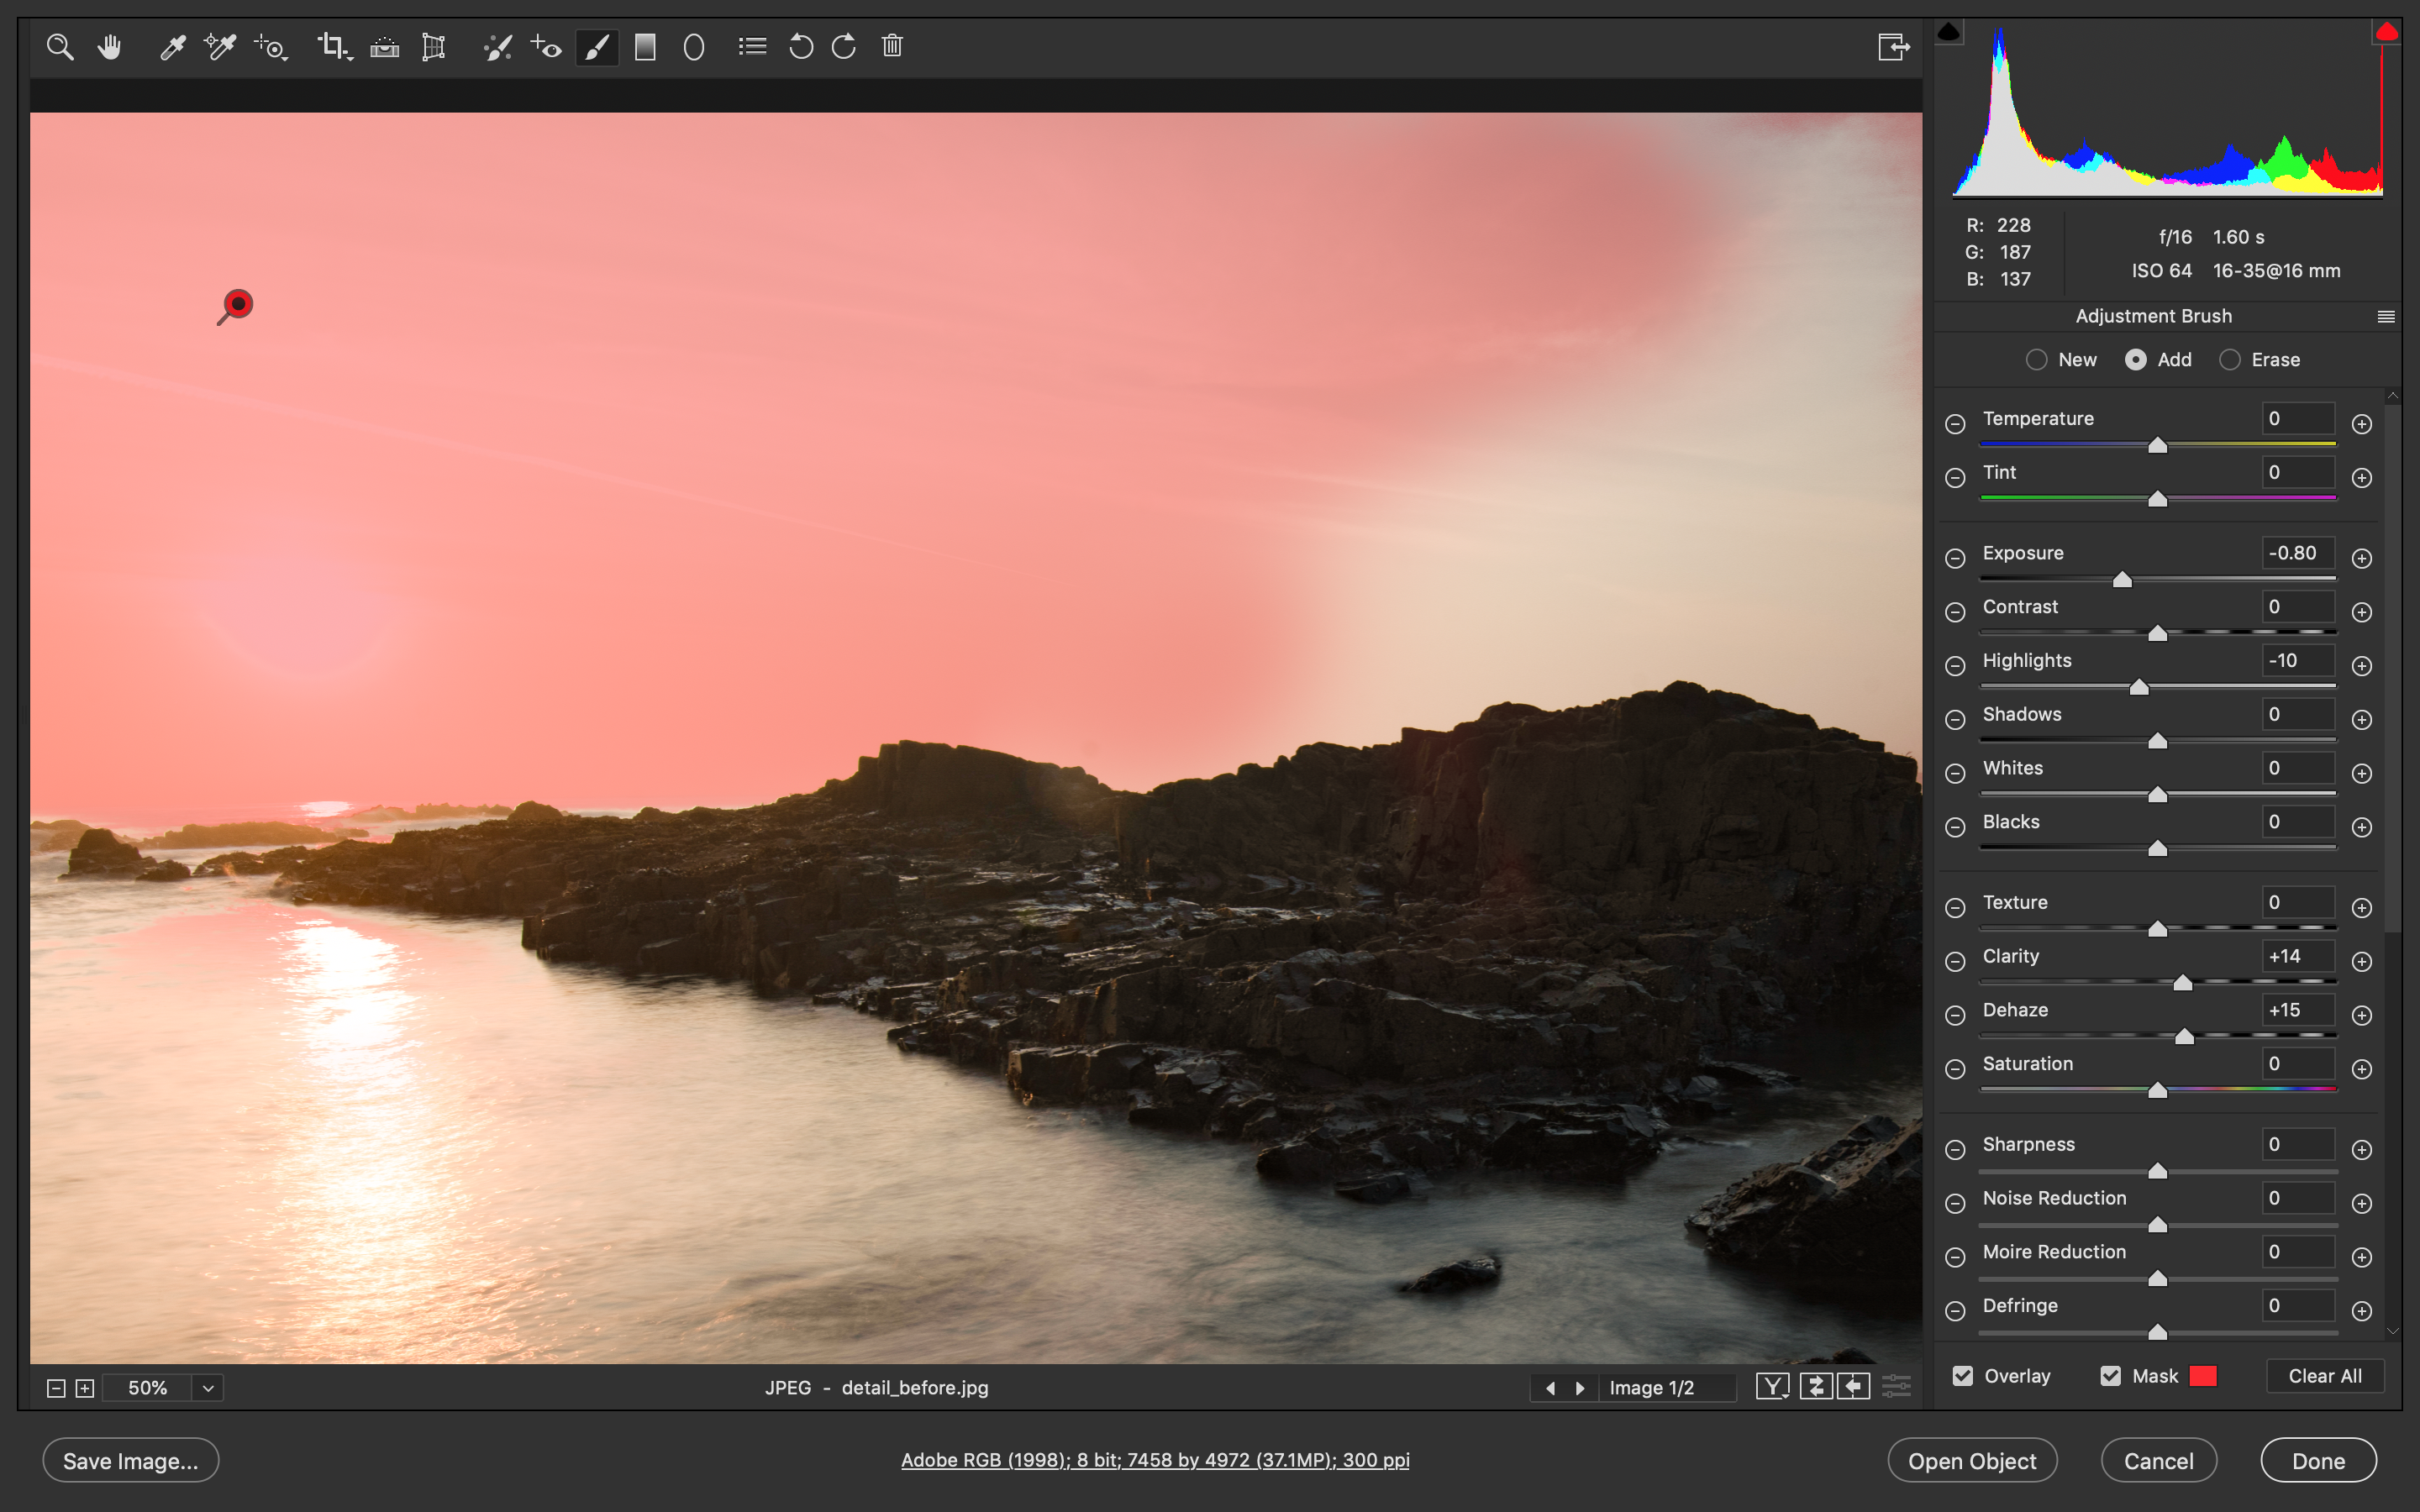
Now the sky is too bright. Grab the Adjustment Brush, go to the settings on the right and check Auto Mask. Hit Y to toggle the mask overlay on, then paint the sky to isolate it. Hit Y to hide the mask, then reduce Exposure, increase Clarity and Dehaze like so.
03 Boost the rocks
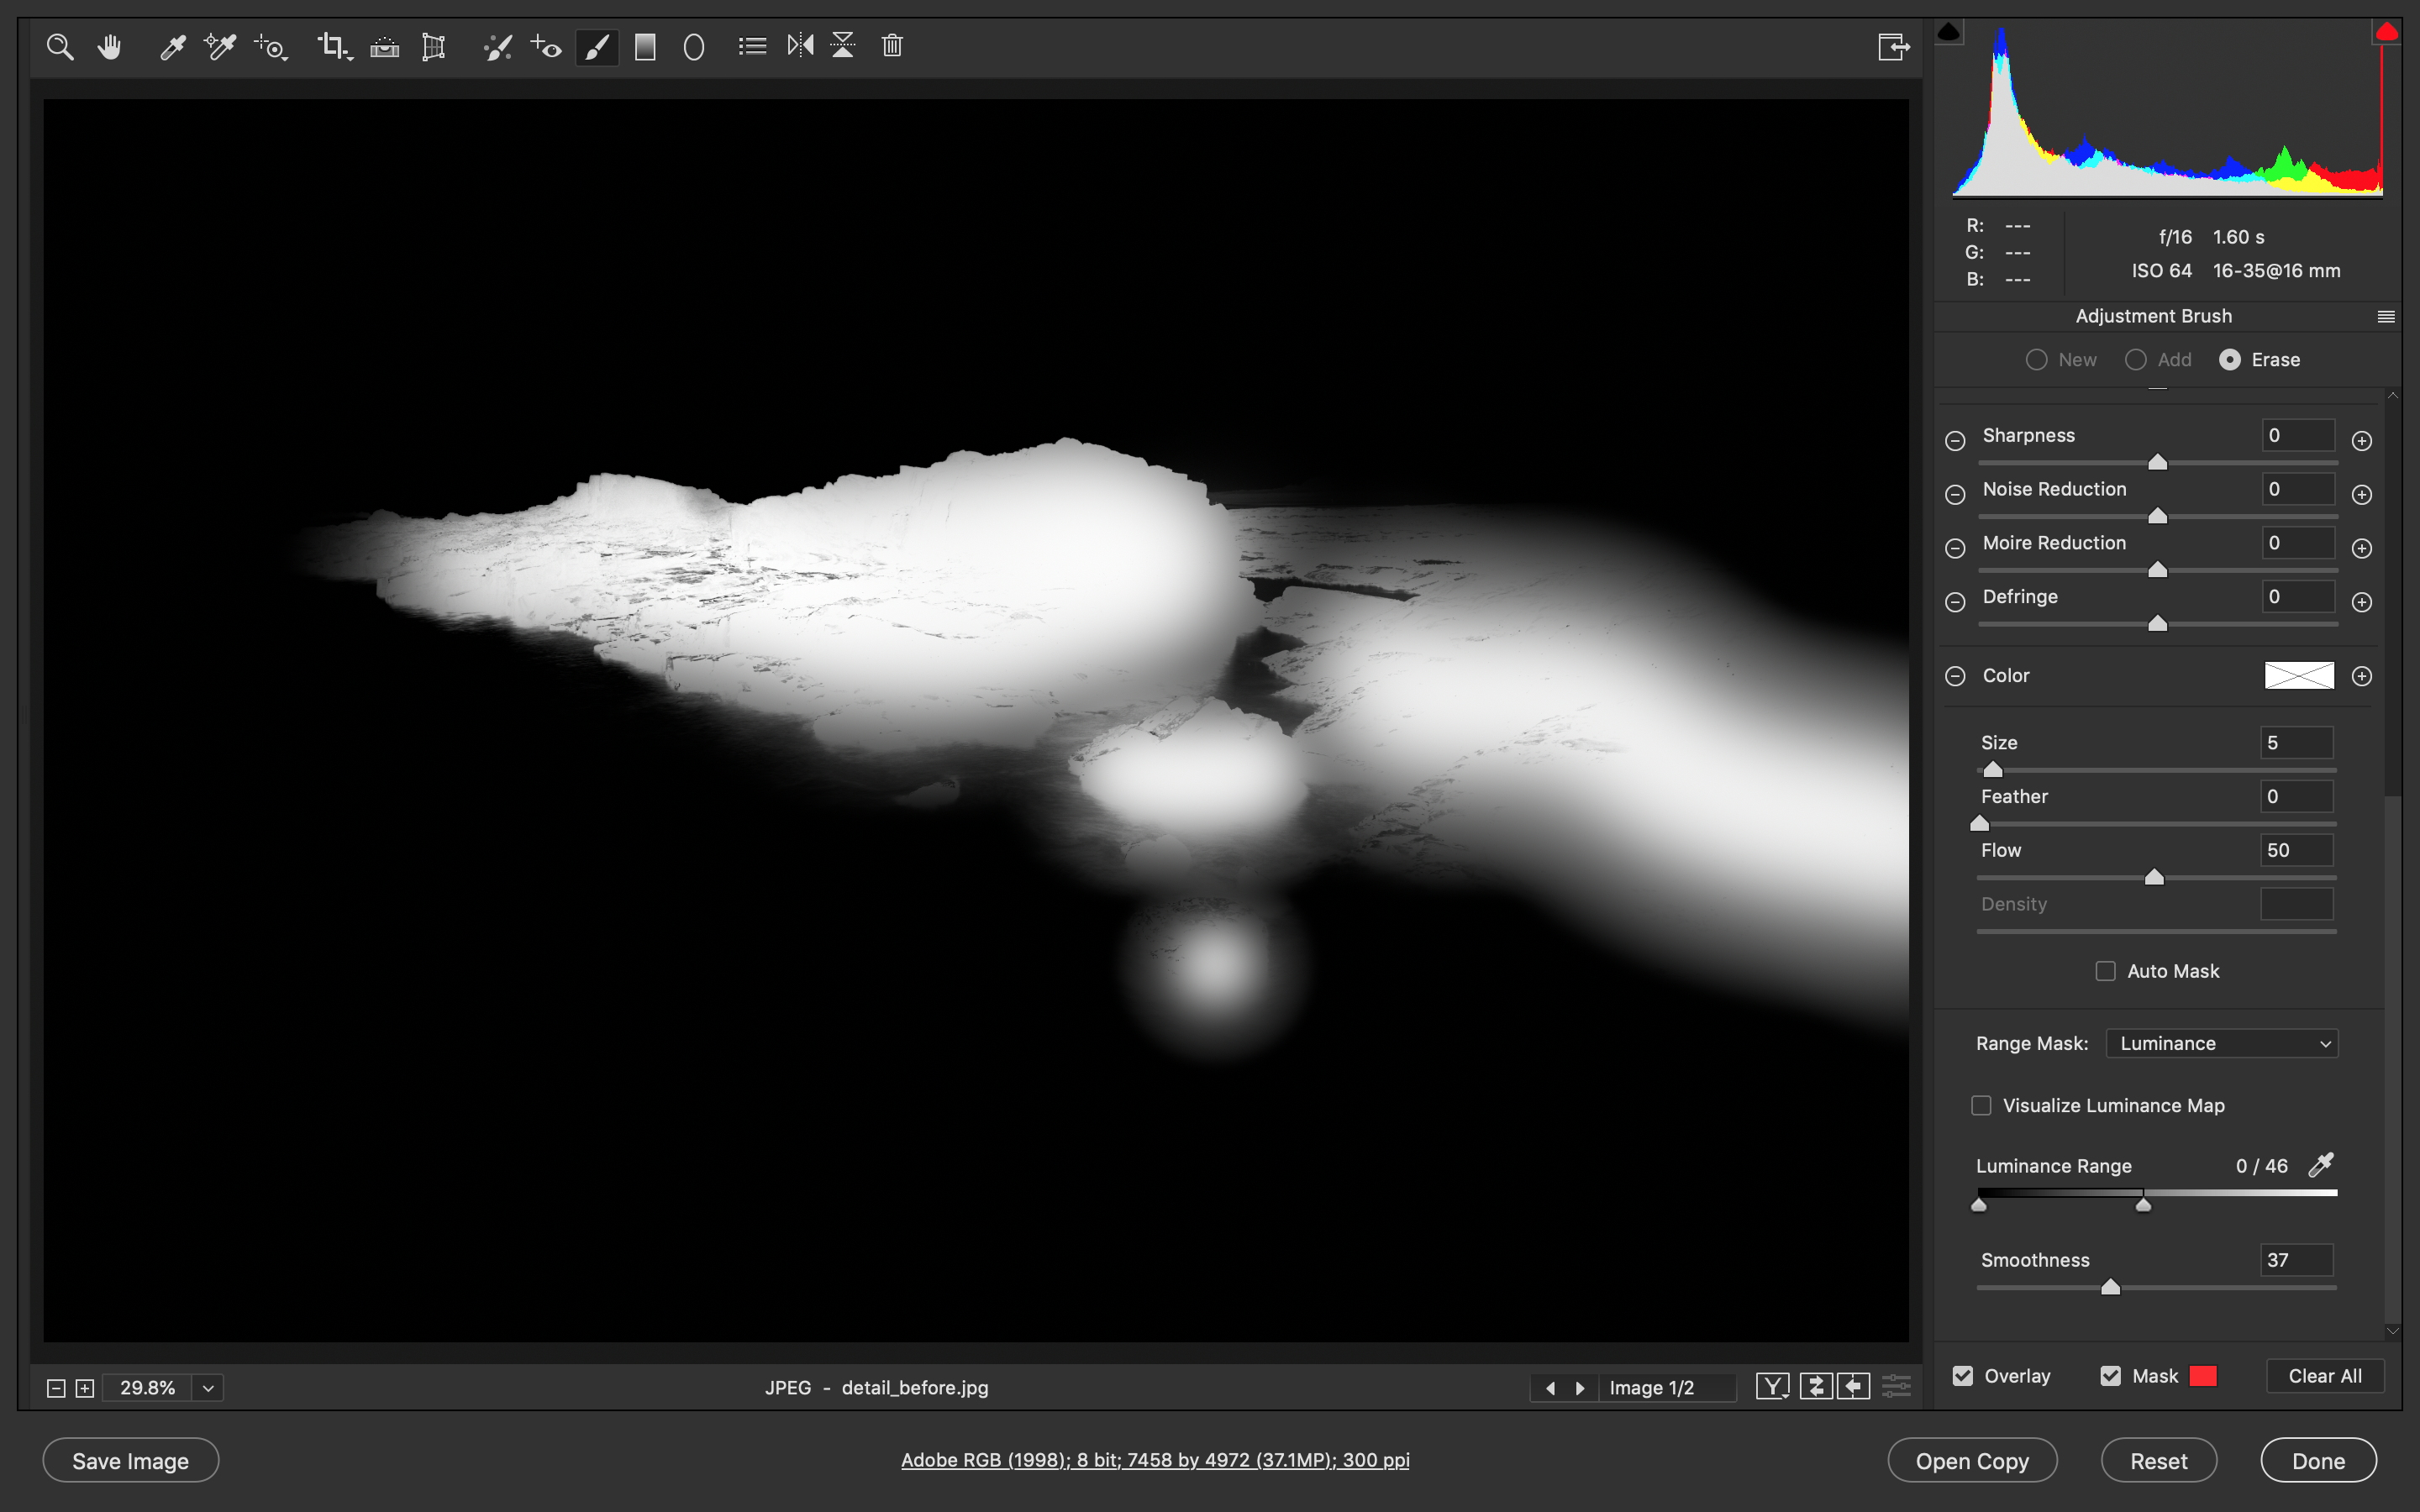
Hit N for a new adjustment, uncheck Auto Mask and paint over the rocks. Increase Exposure and Shadows. We can use Range Masking to target the darker tones in the rocks. Set Range Mask: Luminance, then hold Alt and drag the white point in to exclude the highlights.
04 Enhance the castle
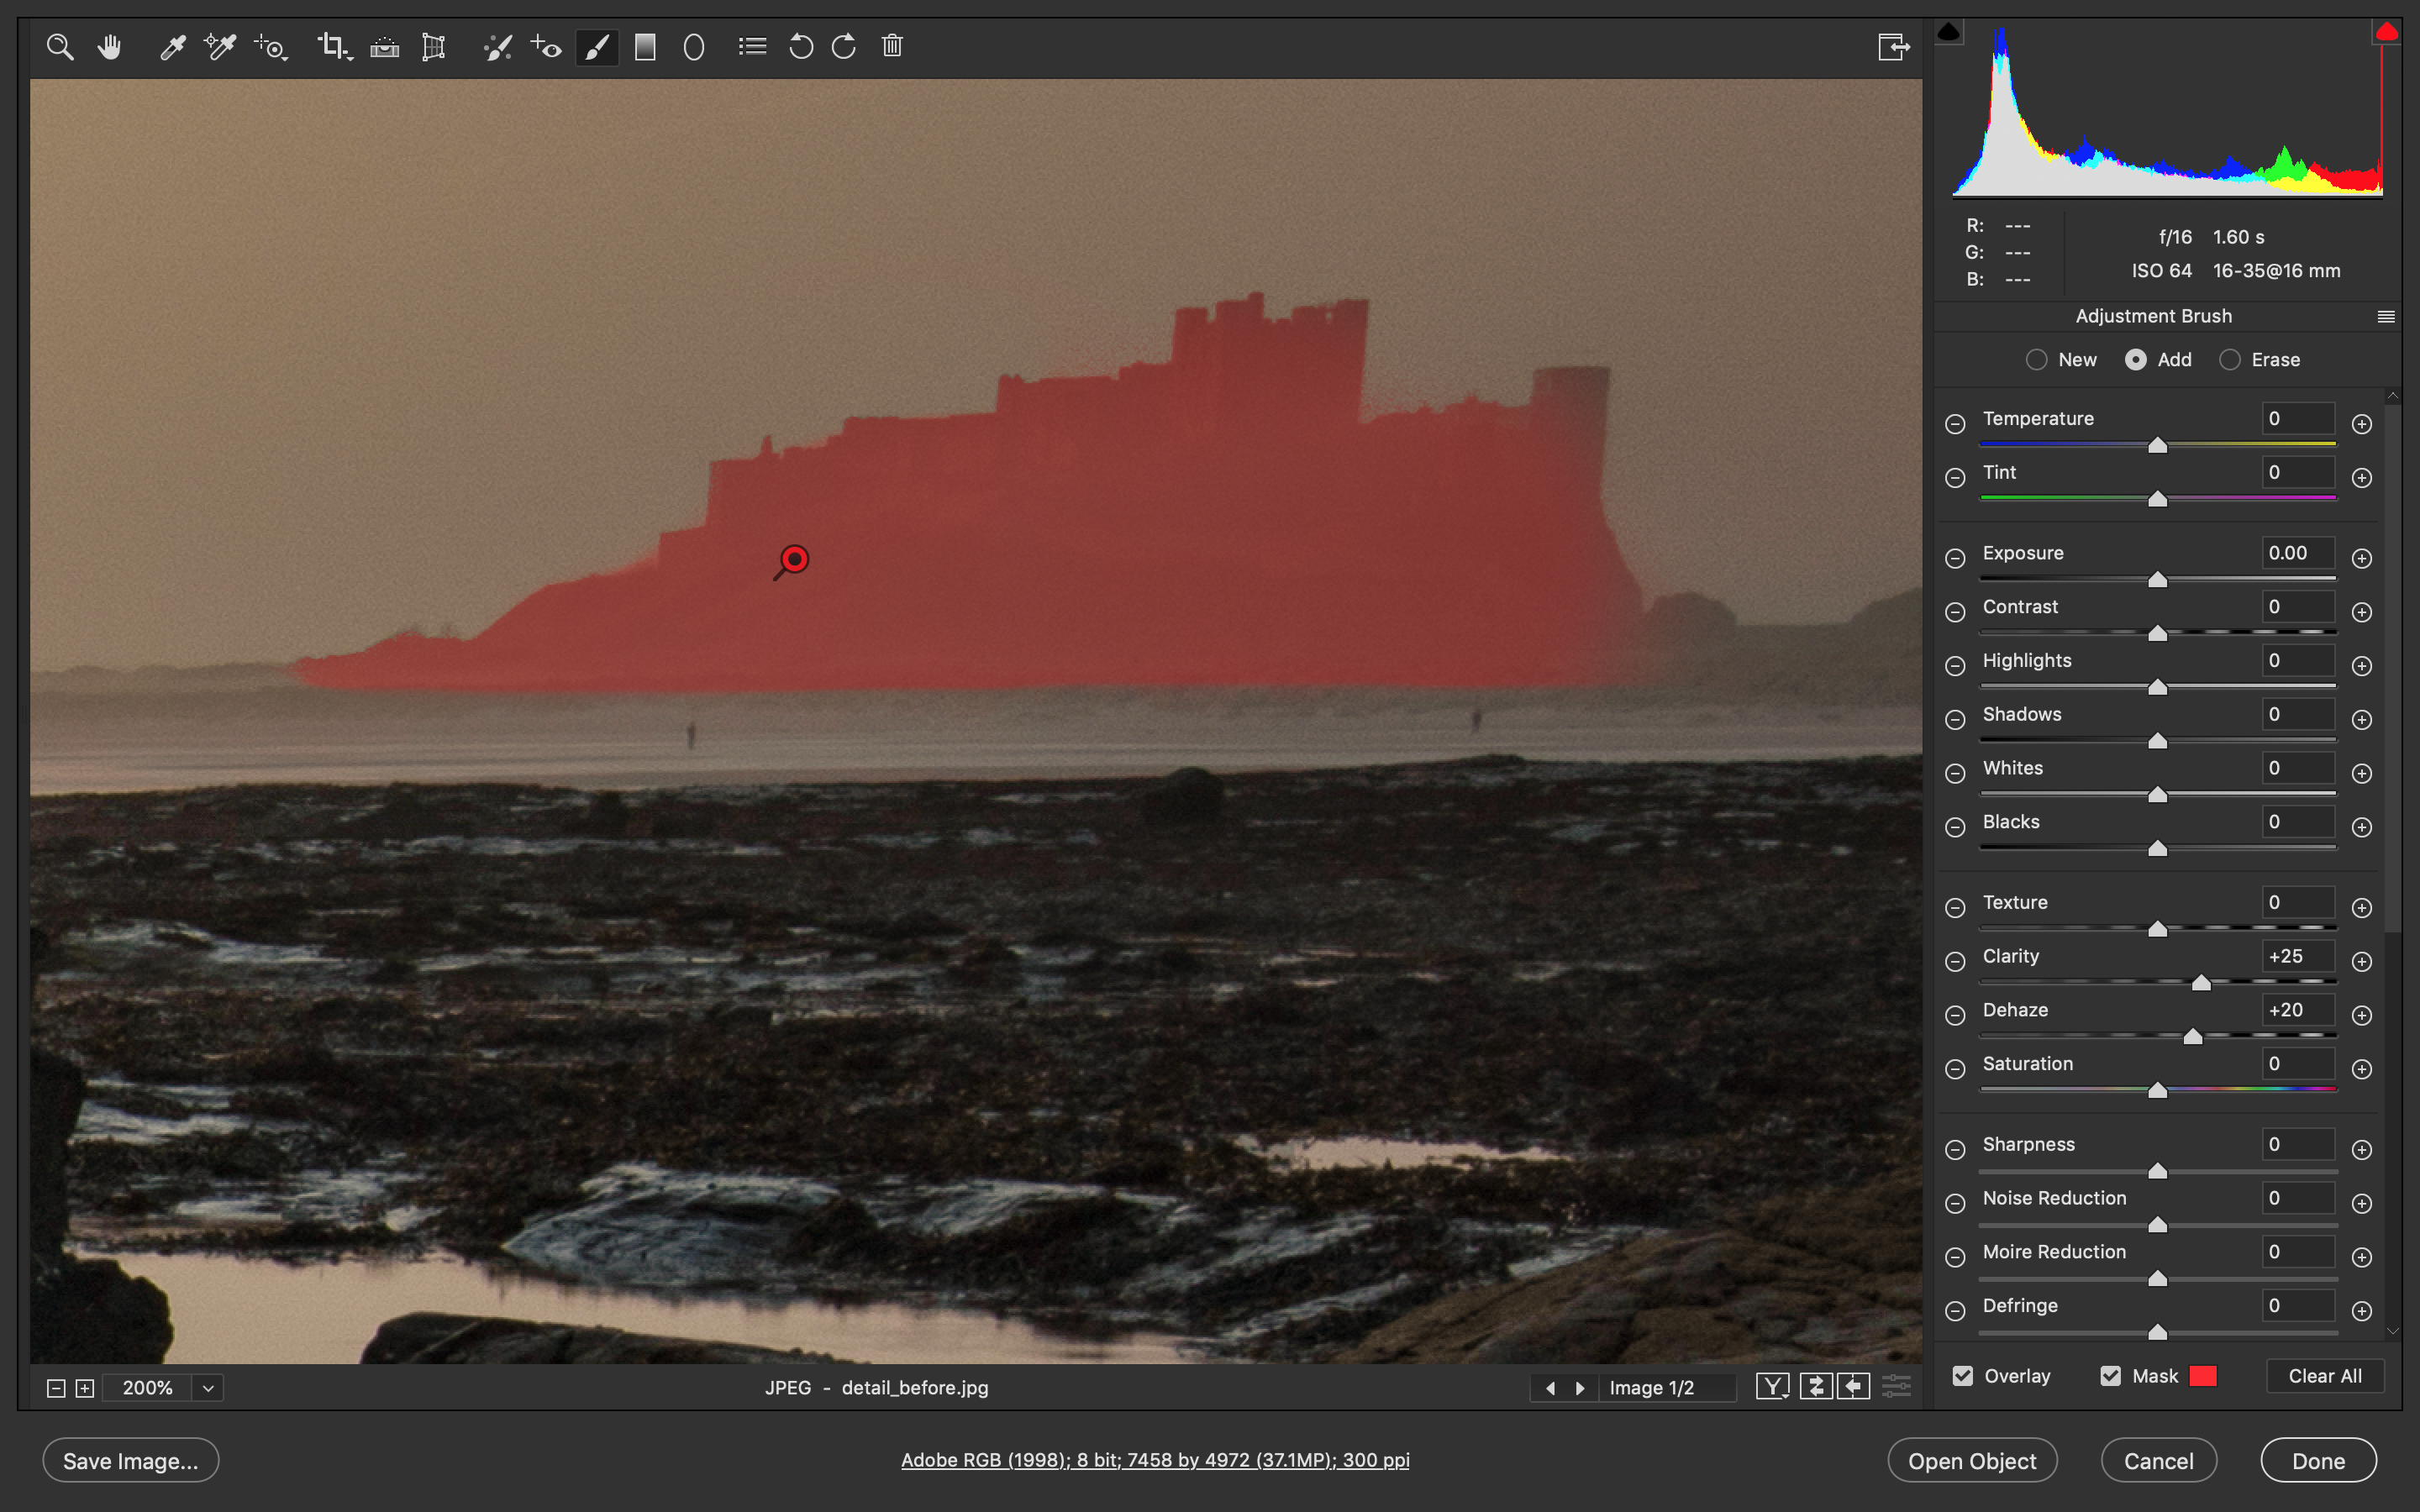
We can make another adjustment so that the castle stands out. Hit N again and check Auto Mask then paint over the castle. Increase Clarity and Dehaze to enhance the detail. If you need to subtract from any mask overlays, hold Alt and paint to remove areas.
05 Balance the brightness
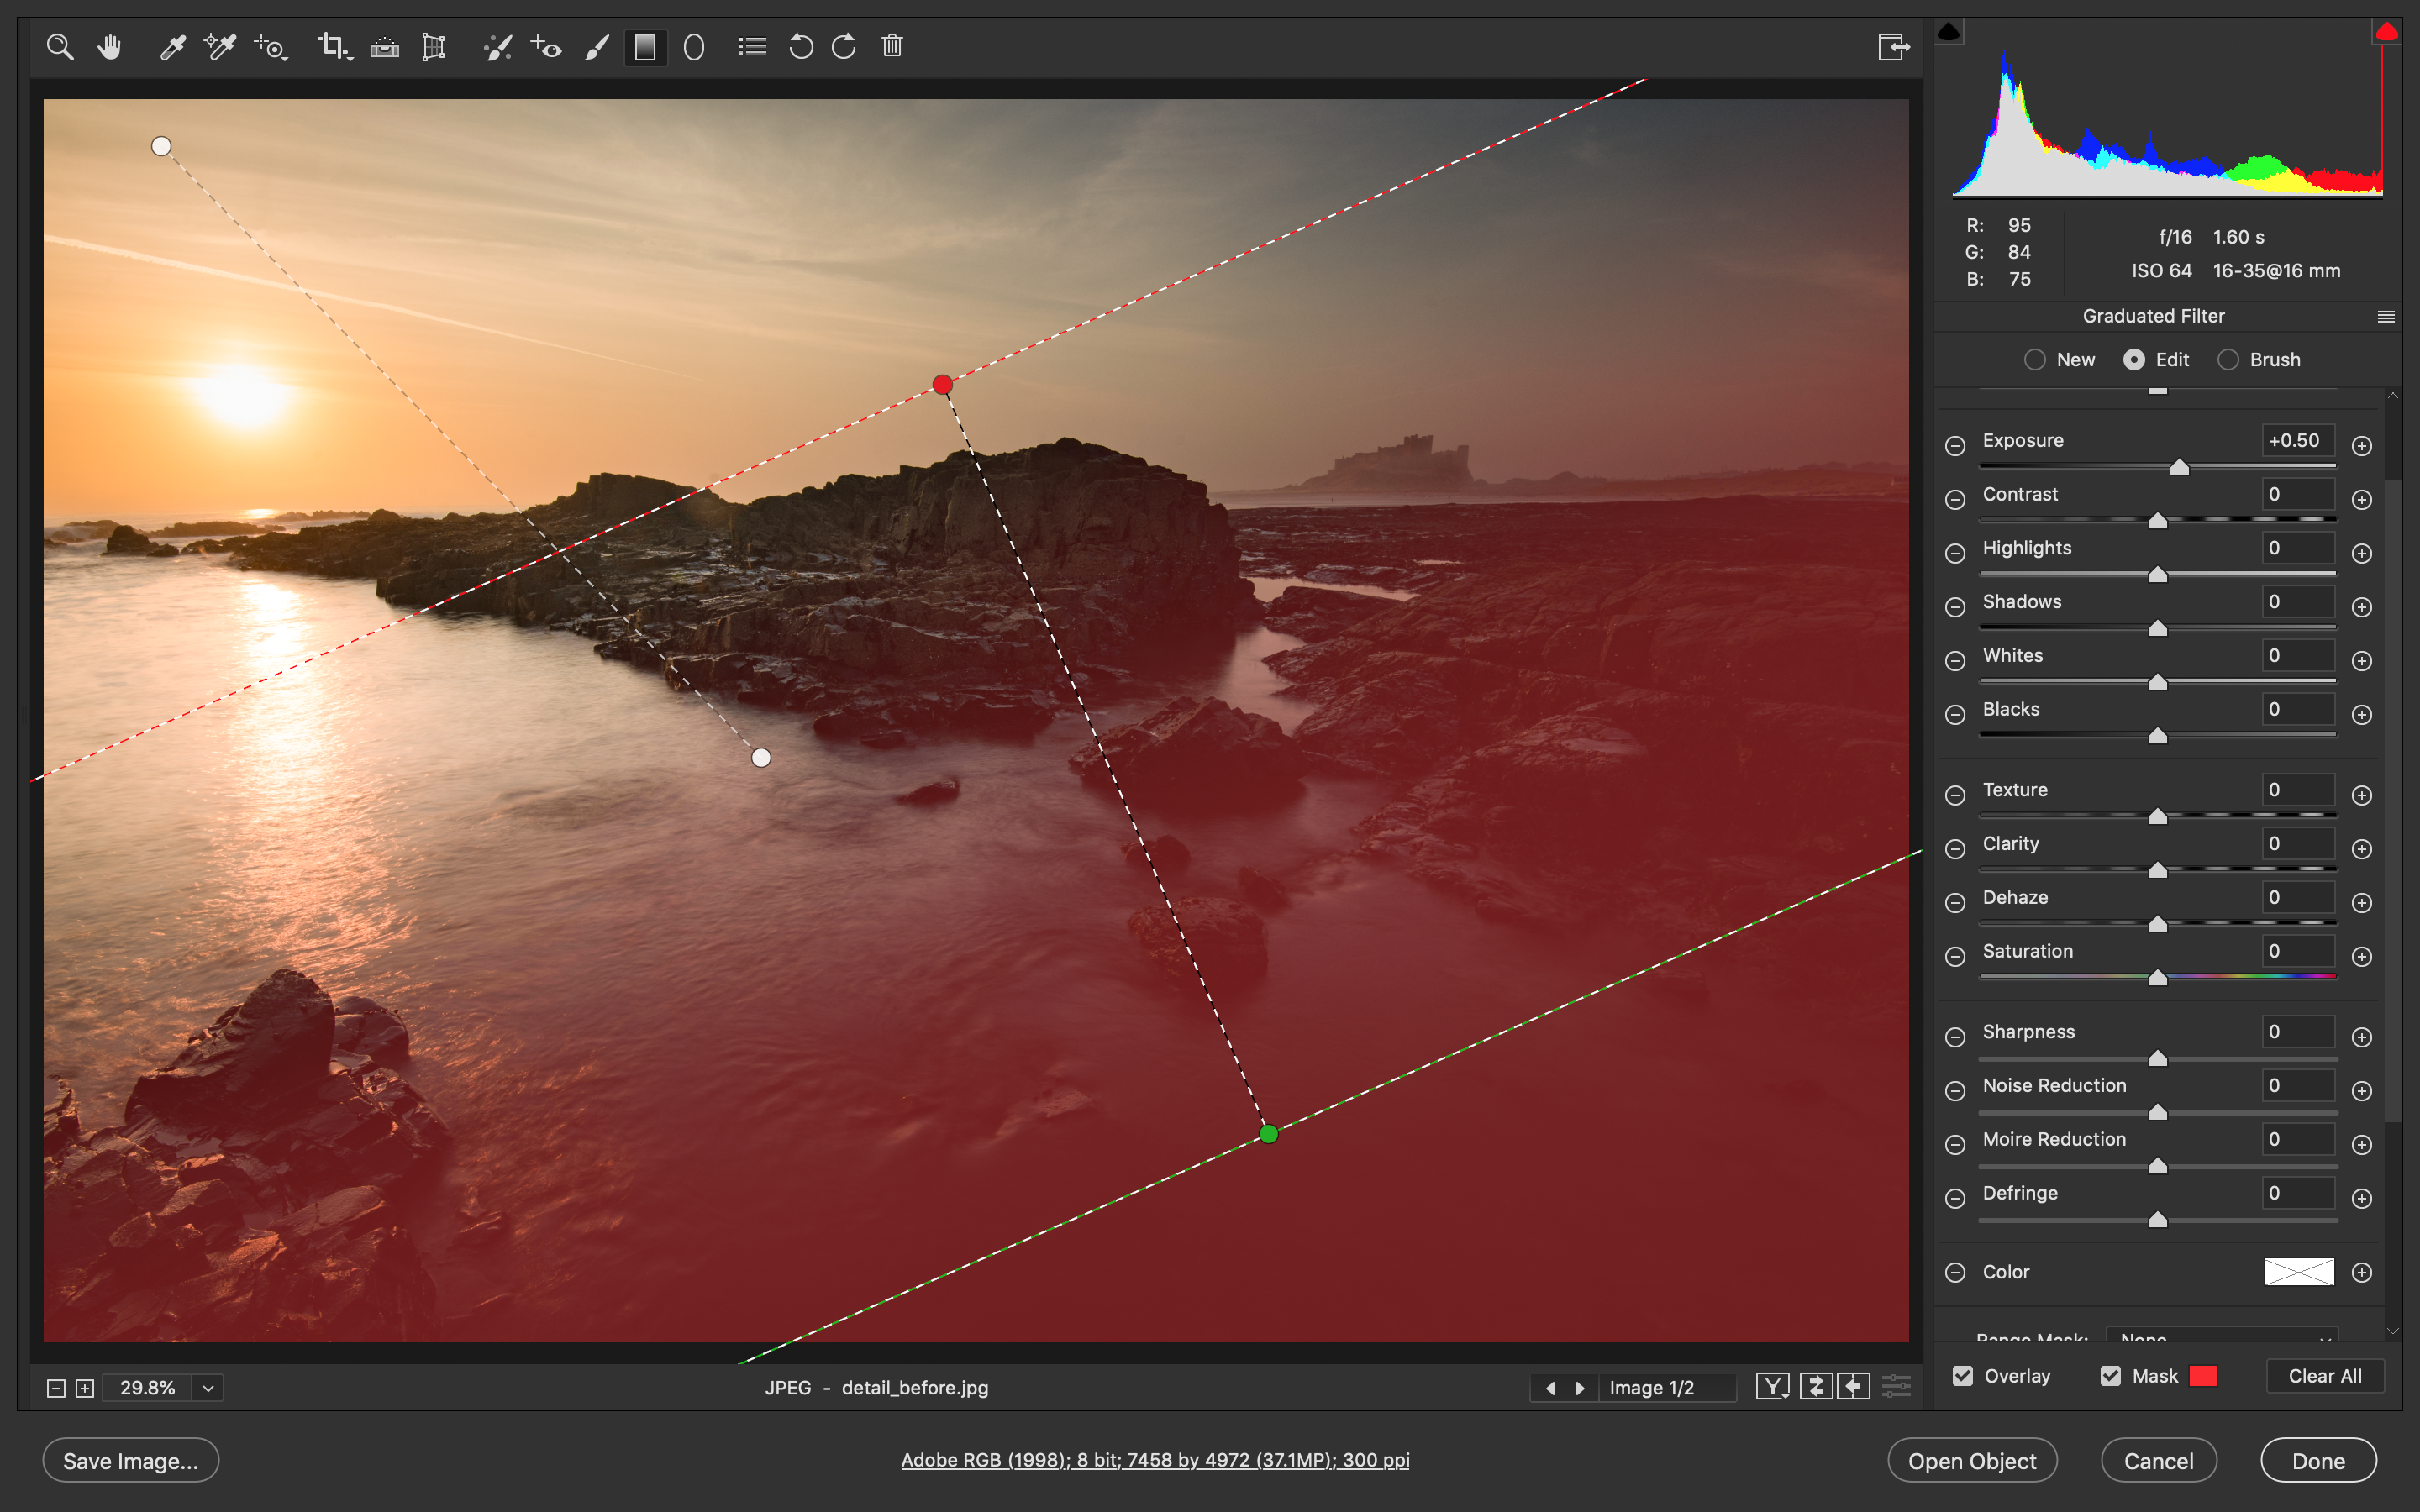
The top left side of the image is a bit bright, and the bottom right too dark. Grab the Graduated Filter, click the minus icon, then drag from top right to the centre. Click the Exposure plus icon and drag up from the bottom right to lift the corner and balance the tones.
06 Draw the eye
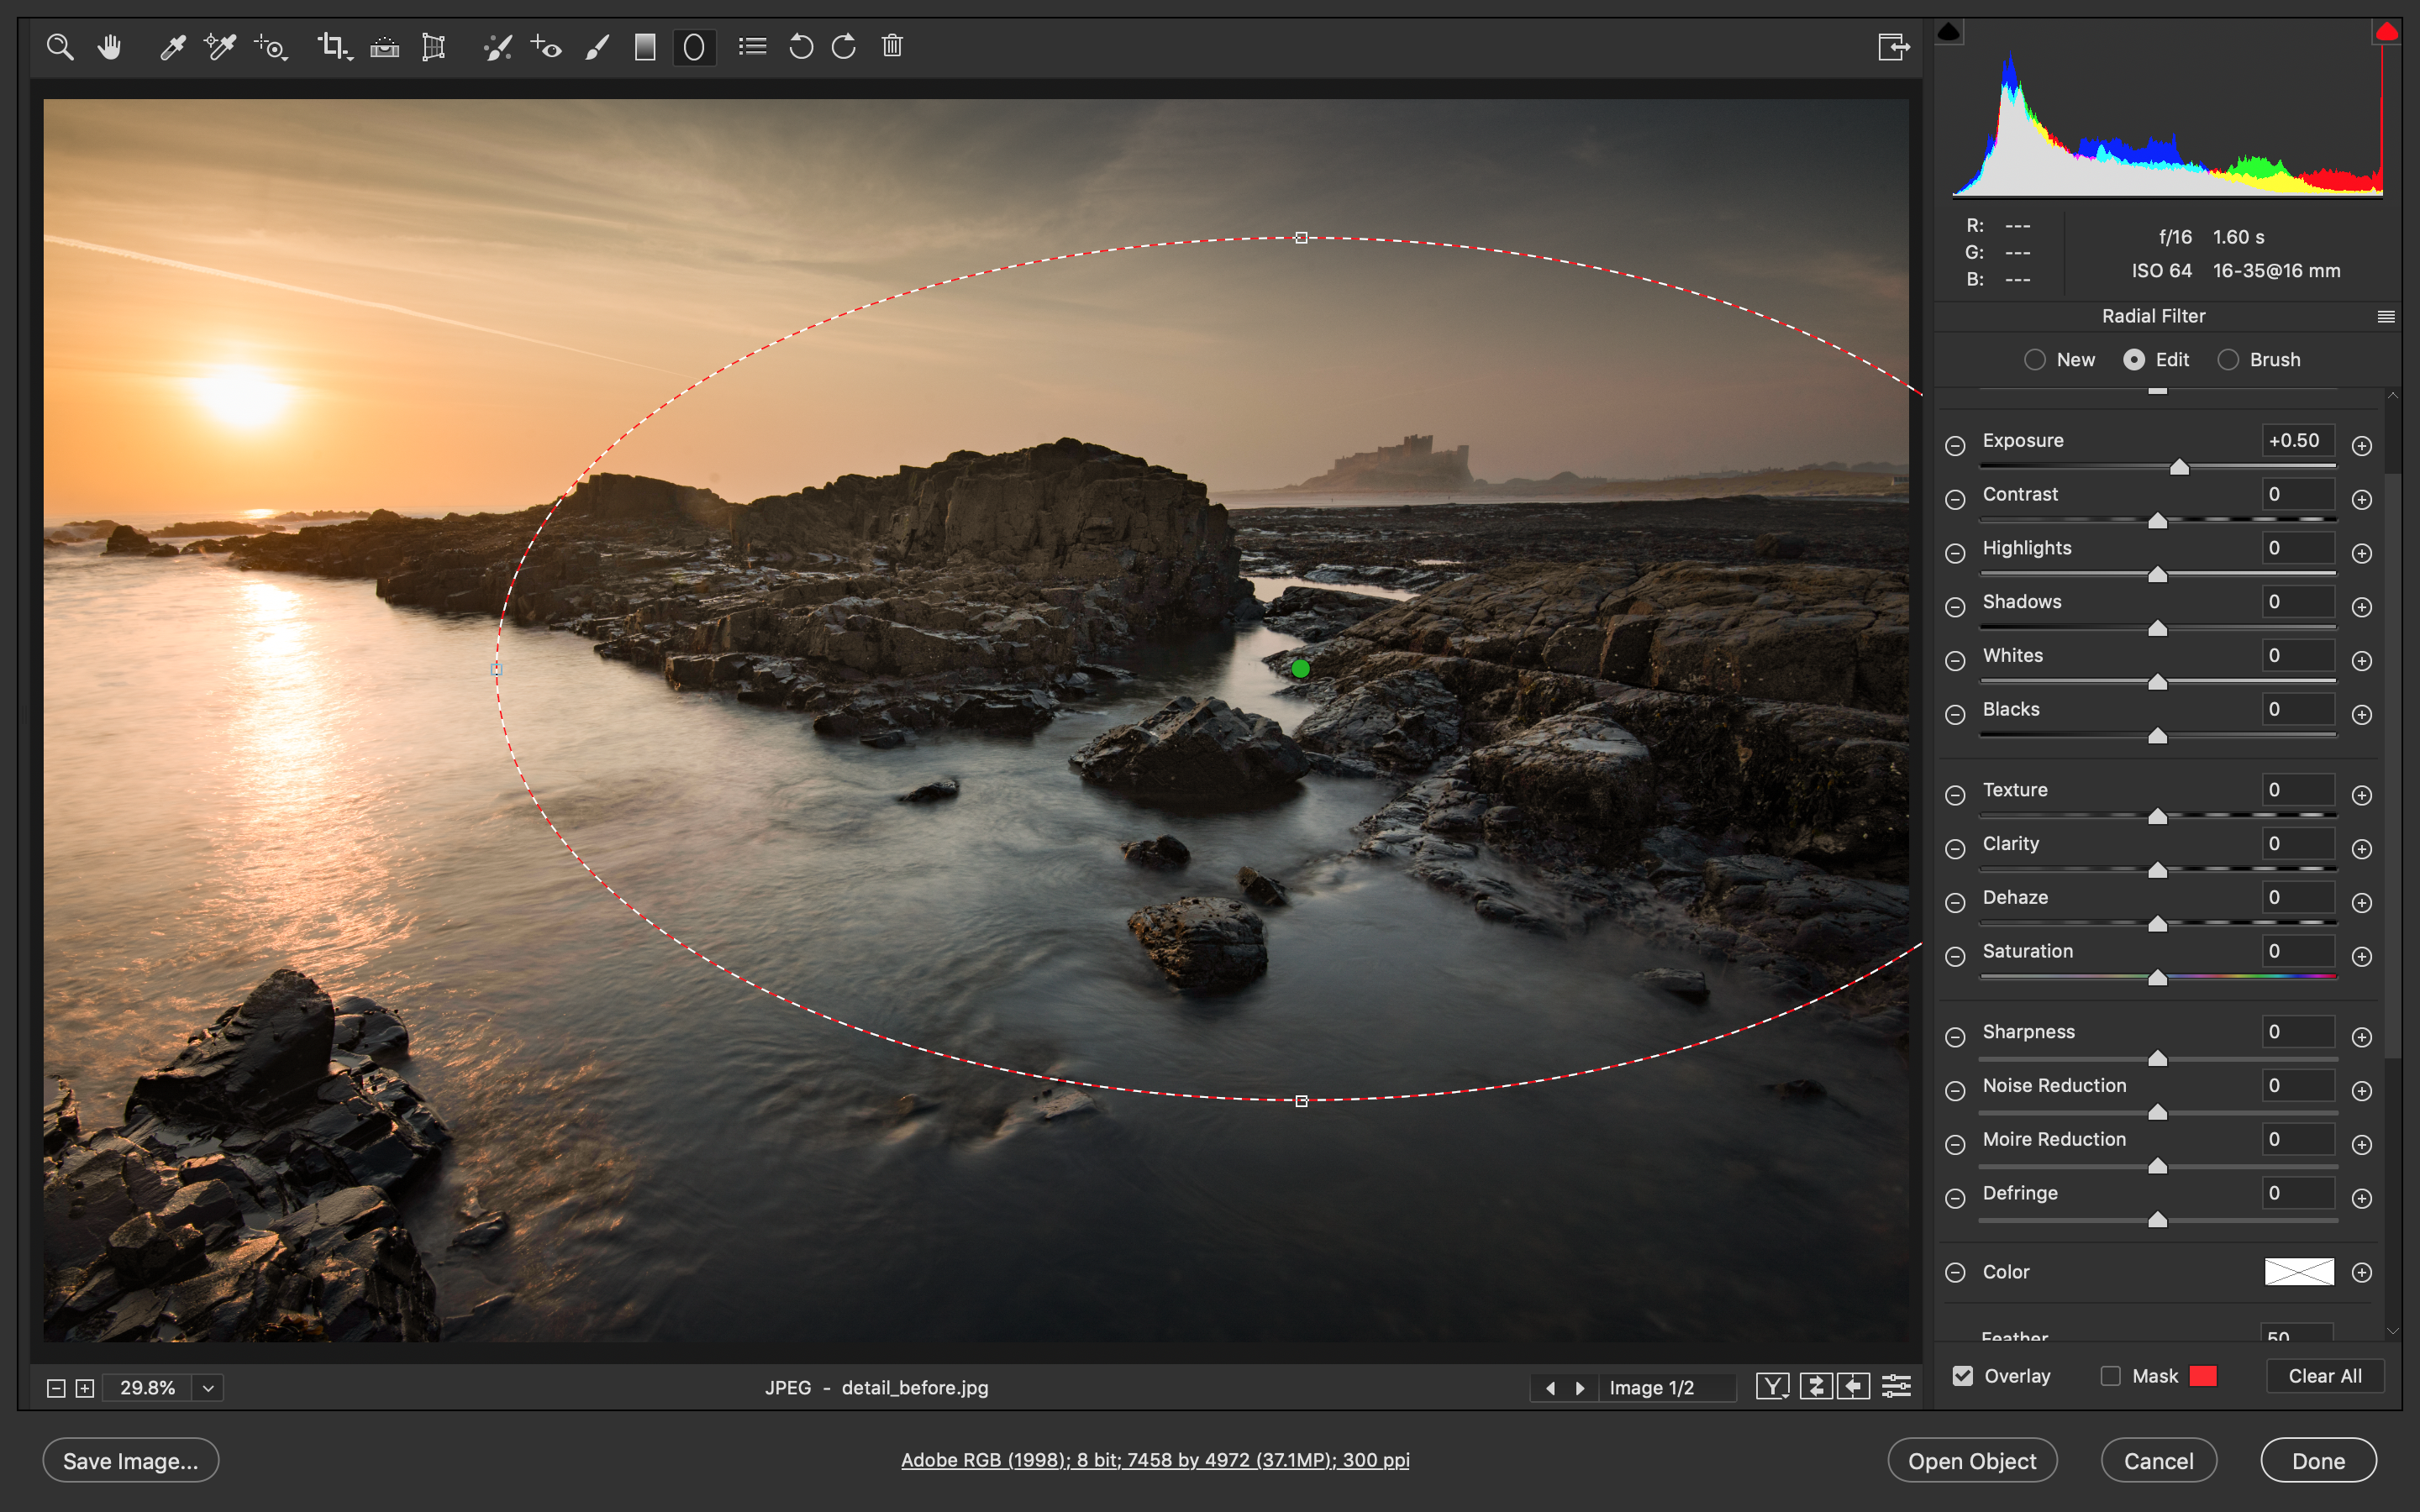
Finally, a subtle radial filter can be used to draw the eye towards the subject by lightening the area. Grab the Radial Filter tool from the toolbar and drag a circle over the castle. Check ‘Inside’ on the right then increase Exposure slightly to lift the area.
PhotoPlus: The Canon Magazine is the world's only monthly newsstand title that's 100% devoted to Canon, so you can be sure the magazine is completely relevant to your system.
Read more:
100 Photoshop tips
The best photo editing software: image editors for novices through to pros
The best photo-editing laptops: top laptops for photographers
10 best online photography courses – from beginner guides to masterclasses
Get the Digital Camera World Newsletter
The best camera deals, reviews, product advice, and unmissable photography news, direct to your inbox!
The lead technique writer on Digital Camera Magazine, PhotoPlus: The Canon Magazine and N-Photo: The Nikon Magazine, James is a fantastic general practice photographer with an enviable array of skills across every genre of photography.
Whether it's flash photography techniques like stroboscopic portraits, astrophotography projects like photographing the Northern Lights, or turning sound into art by making paint dance on a set of speakers, James' tutorials and projects are as creative as they are enjoyable.
He's also a wizard at the dark arts of Photoshop, Lightroom and Affinity Photo, and is capable of some genuine black magic in the digital darkroom, making him one of the leading authorities on photo editing software and techniques.


