The ultimate guide to street photography – Part 2: Camera settings
Our ultimate street photography guide continues, with a look at the camera settings that'll help you conquer the streets
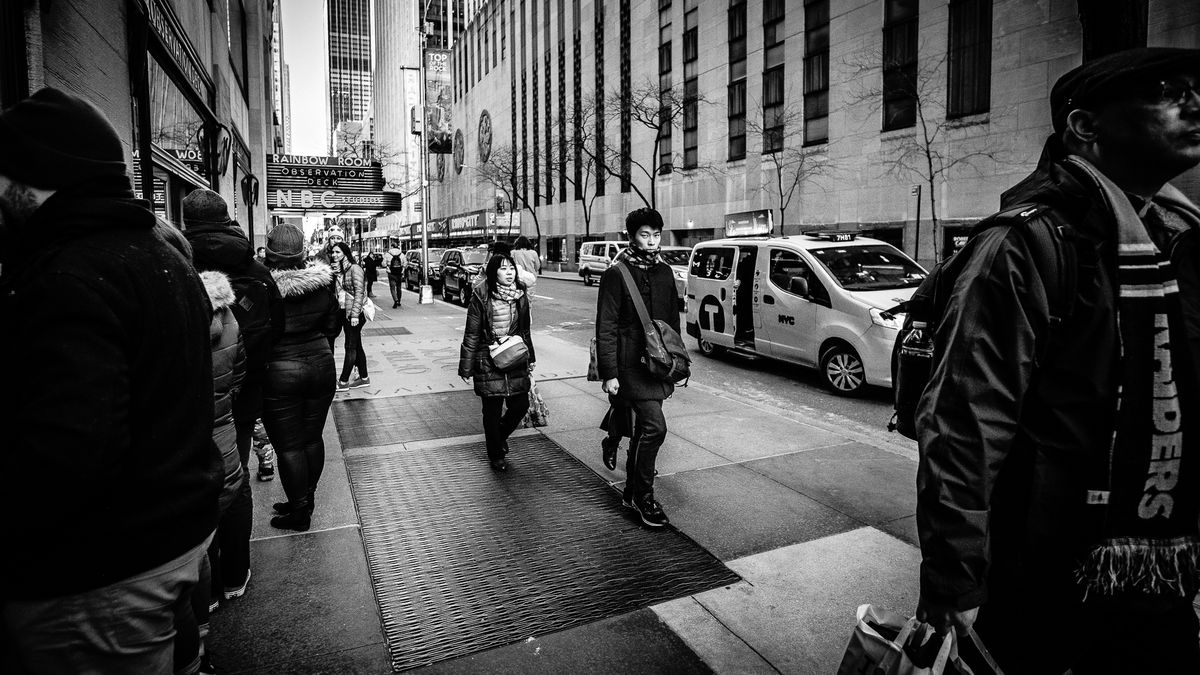
If you're hitting the streets with your camera, we're here to help you stack the odds in your favor and shoot some stunning street photography. So before you start pounding the pavement, sit down and digest this advice to turn hit-and-miss snaps into sure-fire shots worthy of sharing on social or hanging on your wall.
We've already looked at the best lenses for street photography and how to get the most out of them in the first part of our guide, so now it's time to look at your settings. Before we start, though, it's important to note that settings work differently from person to person and within varying styles and genres.
• Read more: Street photography tips
If we're shooting a portrait up-close, we'll likely use different general settings than if we're just wandering about looking for shots full of contrast. So use these as starting points, and feel free to fine-tune and tweak everything as you continue through your photography journey.
The settings we'll refer to relate to a number of things: drive modes, metering, picture / color profiles, white balance, shooting priorities (auto, manual, shutter and aperture), and auto / manual focus, along with a few other customizable options beyond those.
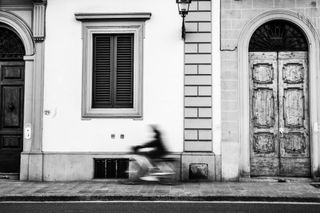
Street photography can sometimes feel difficult and other times feel an absolute breeze. It has a similar feel to me when playing sports; the more you practice, the better you get – but there are always off days where things just don't go to plan. However, modern cameras have so many highly tuned options and settings for you to give yourself an edge on the playing field.
Being confident in your camera and your settings will enable you to trust your camera, and start shooting great photos without constantly delving into the menus when things don't feel like they're going your way. Let's start by looking at the shooting priority modes.
Shooting priority modes
Automatic
Some people frown on it but, if you're just starting out in photography, you could go with full Auto. It won't always offer the perfect setup, but it will get you decent exposures the majority of the time – and, importantly, it will let you focus on composition and capturing the crucial moments, rather than wrestling with settings.
Auto program mode will pretty much take care of everything when it comes to the exposure fundamentals of aperture, ISO and shutter speed. It will get things wrong from time to time; perhaps you're photographing someone on a cool motorbike as they go past, and Auto may keep your ISO low at around 100 and choose a slow shutter of 1/30 sec, resulting in a blurry person on a bike – not ideal.
Auto is making educated guesses based on how bright the scene is, not what's actually happening in it. Most of the time it will be just fine, but as you progress you can start making the decisions instead of the camera.
Aperture / shutter priority (semi-automatic)
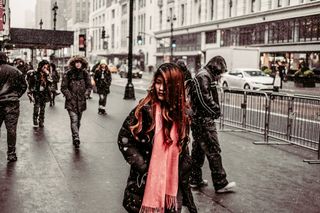
These can at first seem like slightly confusing modes, but think of auto as riding a bike with both stabilizers and these modes as having just one of them attached. You'll likely move onto semi-auto when full auto just isn't performing well enough for you anymore, as this is a halfway house to full manual. This is the mode that I use 99% of the time, as street photography can sometimes need fast responses – so being in full manual might leave you messing around and missing a great shot.
In semi-automatic you can set either the aperture or shutter speed yourself, and the camera will take care of the rest. Let's say you're a fan of beautifully blurred backgrounds; you can set your aperture to the widest available (like f/1.2 or f/1.8) and the camera then selects the right ISO and shutter speed accordingly.
The reason I use semi-auto most of the time is that I tend to photograph moving subjects, like people or cars, or even it might be me that's moving past on a bus or train. I tend to set my aperture wide open, and crank my ISO to around 800-1250. This will always leave me with faster shutter speeds, so people are crisp and sharp. The reason I don't leave my shutter set to high is that this can often push your ISO to 6400 and above, resulting in too much noise in the final image for my taste.
Full manual
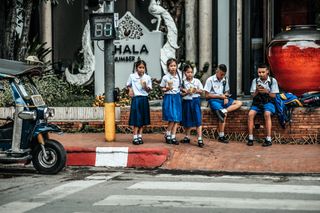
If you've been shooting in semi-automatic for some time then the jump to full manual really isn't that big. Especially when you consider that it's not very often you'd ever need to change all three of your main exposure settings at once.
Let's face it, the majority of us tend to shoot with our lenses open as wide as possible (because that's what you've paid for), and often our ISO remains pretty constant unless you move from one huge extreme to another (like going from inside to outside). So really all that leaves is you to keep an eye on your shutter speed for the majority of the time.
Shooting in manual mode is pretty easy if you're in a consistent environment, such as an overcast day or indoors where the overhead lights aren't changing, so why not give it a go. We're also blessed with such high dynamic ranges on most modern cameras that even if you get it a bit wrong, there's a high change you can correct the exposure in post.
When shooting in manual, you'll find that the aperture and shutter speed dials have been well positioned for quick changes while shooting. ISO, however, can often be buried in a menu or a combination of button clicks. So you might be wise to re-assign the ISO control to an easy-to-reach button.
Metering modes
There are usually three or four ways for your camera to recognize the scene you're shooting in and apply the correct exposure (note that this doesn't apply to shooting in manual, other than to serve as a guide). Again there's no right or wrong; they can appear to do a very similar job, but each has subtle differences:
Multi
Splits the scene into separate zones, so that the camera can recognize tricky scenarios. Effective for most shooting scenarios you are likely to encounter, but your camera can sometimes be fooled into under- or overexposing if there's a dominant amount of white or black in the frame.
Spot
Enables you to take an exposure reading selectively, from just a small part of the frame (usually your focus point). Taking a spot reading from the subject you want in focus ensures that they are the only thing influencing exposure. This is the mode I use the majority of the time, as it's okay if the sky goes bright or the shadows become black because my main subject will always be exposed how I wish.
Average (Matrix)
This can be a very simple and straightforward way to meter a scene when you are in nice even light, and aren't working with a scene that includes too many drastic shadows or highlights. It is, for all intents and purposes, the 'auto' of metering modes. A more basic version of the multi-metering mode.
Center-weighted
Like average metering, the camera meters from the whole frame but places more emphasis on the center – with the assumption that this is probably where the main subject lies. Which is quite an assumption! So, the center-weighted metering mode is probably the least used out of the main options available.
One of the best ways to try these out is to stick your camera on a tripod in full automatic mode. Then fire off four images, one from each mode, and see which suits your style best. You may not see much difference in two or three of the images but one will often look vastly different to the rest. I often switch between Spot and Average / Matrix depending on the circumstances.
Drive modes
Again there are a few options available here, enabling you to shoot either just one frame or capture multiple images in a single second. I personally think there's a certain amount of refinement and dignity about shooting in single shot mode; in the film days many couldn't afford to be shooting more than one frame every few minutes, let alone trying to fire off 15 shots in a single flex of your trigger finger!
I shoot in single image mode as it enables me to assess the scene and concentrate on that one great image. If I'm out shooting for a couple of hours, I won't come back with much more than about 40 or 50 images – there's just no need. There are, of course, the high-speed burst modes, but this will really just end up with you sat at your computer for far longer than you need to sifting through duplicates.
Leave this setting for the sports and wildlife photographers who need to capture a lot of images in order to have that final keeper. When it comes to street shooting, it really is about quality over quantity.
Picture Profiles
Many of us choose to shoot in RAW these days. The best memory cards – and especially the best CFexpress cards – pack so much storage space that you get much greater creative freedom by shooting JPEGs as well as RAWs.
When selecting a 'look' with picture and color profiles, this only applies to the back of your camera and the JPEGs it spits out – and 99% of the time I only ever use the JPEGs, so getting the image right in camera is not only important for those final images, but also it enables me to see what I am shooting along the way.
I often have my screen set to black and white, and with contrast settings tuned to match what I'd like my final image to look like. The beauty of shooting RAW and JPEG simultaneously is that you can always create a colored image from your unfettered 'negative' if you don't like the mono when you come to the post-processing stage.
Many cameras now allow for multiple 'looks' to be stored ready to go as you shoot on the move. I have a few I like to go between depending on what I'm shooting – 'Street', 'Editorial', 'Everyday', 'Vivid' and so on. If your camera doesn't have these options it will at the very least enable you to control things like contrast, saturation, and sharpness to get a decent look in-camera. Spending some time fine-tuning these is well worth your time.
White Balance
This is another setting that I try and get correct in-camera. Sure, shooting RAW will easily enable you to change this later – but why not just get it the way you want while you're taking your shots? The white balance also affects your image when shooting black and white images. It's only subtle, but try adjusting the white balance in post on some of your mono shots to see the change.
For street photography I tend to set it to either the sunlight or cloudy setting, or around 5800k on the Kelvin scale. Auto white balance will do a decent enough job of getting it right, but again if you take full control it will provide more consistency. The camera will shift the balance to accommodate skin tones, foliage, light temperature, skies and more – so if you leave it in auto, expect to do lots of correction after the fact.
As with all aspects of shooting, it's a constant trade-off of consistency versus spontaneity; leaving everything in automatic will ensure that you only ever need to point the camera and press the shutter, so you can move at the speed of thought. However, to take creative control you'll need to manipulate things like the aperture and shutter speed.
Start with these general settings, and gently work your way up to more manual control to see what you're comfortable with. Remember that you're not trying to impress anybody; as long as what you're doing works for you, and you're getting the shots you want, that's all that matters!
Read more:
Best lens for street photography
Best pancake lenses
Best mirrorless camera
Best Fujifilm camera
Best Olympus camera
Best Nikon camera
Best Canon camera
Get the Digital Camera World Newsletter
The best camera deals, reviews, product advice, and unmissable photography news, direct to your inbox!
Alistair is the Features Editor of Digital Camera magazine, and has worked as a professional photographer and video producer.
