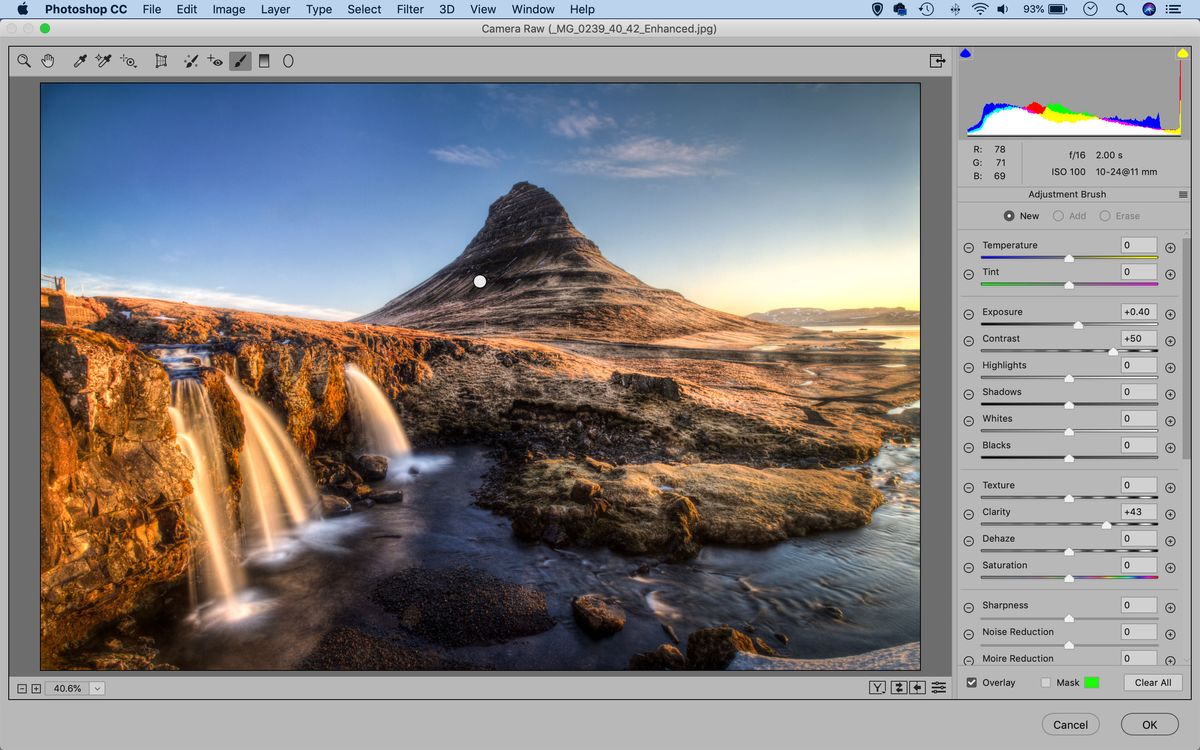
Common photo problems and how to fix them in Photoshop: #12 My HDRs lack contrast
With HDR you can flatten a huge range of tones into a single image, but this often flattens the contrast too

HDR, or high dynamic range photography is hugely popular. You can use it to capture ultra-high contrast scenes with too high a brightness range for a single exposure, and to add drama, depth and spectacle to a scene. However, bringing up the shadows and toning down the highlights can also leave your images looking unexpectedly flat... so what do you do?
Adobe trial downloads
• Download Photoshop
• Download Lightroom
• Download Premiere Pro
See all 15 instalments
• 15 common photo fixes
Computers and photo editing
• Best photo-editing software
• Best laptops for photographers
• Best desktop computers for photo editing
Photo tips and ideas
• 11 home photo projects
• 44 tips cards to cut out and keep
• Photography tips for beginners
Welcome to the 12th instalment in our 15-part series on how to fix common photo problems in Photoshop, Lightroom and Adobe Camera Raw.
The COVID-19 crisis has left many of us confined to our homes to reduce the risk of transmission, but that's no reason to sit still and do nothing. In fact, it's the ideal opportunity to try out some new photo editing techniques and photo fixes on all your nearly-great pictures and not-quite-there-yet masterpieces.
In this instalment we'll show you how add some contrast into your HDR images. That's the paradox with high dynamic range photography – in compressing a huge range of brightness levels into a single image, you can often and up with one that looks just a little flat.
Curves adjustments and the Dehaze tool
After merging a set of exposures to an HDR, you’ll often find the result lacks contrast, as the process lifts shadows and darkens highlights. You can see details across the whole tonal range, but the overall contrast can suffer as a result.
One solution is to boost contrast universally (either with an S-shaped curve in the Curves dialog, or by using Levels).
But for better results and more local control, you can apply local contrast with the Adjustment Brush in Adobe Camera Raw or Lightroom. Simply grab the tool, dial in positive Contrast, Clarity or Dehaze, then paint over parts of the image to add punch.
Jargon buster
S-shaped curve: One of the most useful adjustments you can make in the Photoshop Curves panel. You drag the left end of the curve down to flatten and darken the shadow details and drag the right end of the curve upwards to flatten and brighten the highlights. This creates a steeper section in between which boosts the midtone contrast – and creates the characteristic 'S-shape'.
Adjustment Brush: A freehand brush tool in Adobe Camera Raw and Lightroom which applies adjustments you specify in the tools panel to selected areas of the image – you simply brush over the areas you want to modify.
Clarity: An adjustment in Adobe Camera Raw and Lightroom which emphasises the outlines of objects and adds extra 'punch' to images that might otherwise look a little flat. It uses the same edge contrast enhancement process as sharpening tools, but on a larger scale.
Dehaze: The Dehaze tool in Adobe Camera Raw and Lightroom might sound as if it's designed solely for distant landscape shots, but actually it has a contrast improving effect that's useful with all sorts of images and subjects.
Next instalment: #13 Sensor marks ruin my photos
If you don't use Photoshop or Lightroom, why not sign up for the trial version? You can use this free for a period of 7 days and then decide which of three Photography Plan subscriptions would suit you best.
Get the Digital Camera World Newsletter
The best camera deals, reviews, product advice, and unmissable photography news, direct to your inbox!
The lead technique writer on Digital Camera Magazine, PhotoPlus: The Canon Magazine and N-Photo: The Nikon Magazine, James is a fantastic general practice photographer with an enviable array of skills across every genre of photography.
Whether it's flash photography techniques like stroboscopic portraits, astrophotography projects like photographing the Northern Lights, or turning sound into art by making paint dance on a set of speakers, James' tutorials and projects are as creative as they are enjoyable.
He's also a wizard at the dark arts of Photoshop, Lightroom and Affinity Photo, and is capable of some genuine black magic in the digital darkroom, making him one of the leading authorities on photo editing software and techniques.
