Canon School: How to correct exposure with a Canon camera
Part 9: We explain all you need to know to capture more consistent exposures with your Canon camera
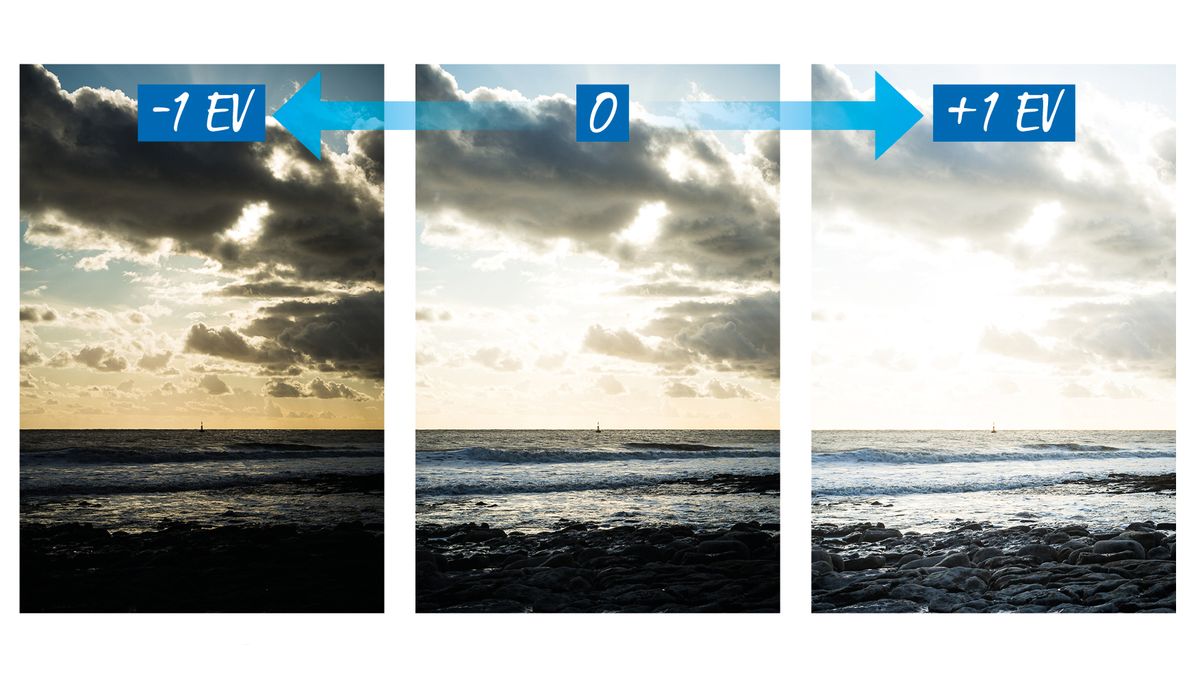
Welcome to our new Canon School tutorial series part 9, in this tutorial learn all you need to know to capture better exposures with your Canon camera.
Trying to achieve a good exposure with a digital camera is world away from the occasional finger-crossing that came with shooting film. Being able to preview the results on the rear screen and check the brightness range with the histogram means that you know exactly what you’re getting straight out of the camera, and can make any exposure adjustment to ensure you get good results.
And you will need to make exposure adjustments. Despite a top-of-the-range EOS body, such as the EOS 5D Mark IV being loaded with a 150,000-pixel metering sensor that can recognize colour and faces as well as brightness – it is, in effect, a miniature imaging sensor – it can still get things wrong occasionally.
Rather than measuring the light that’s falling onto the subject of a photograph, your camera measures the light that’s reflected by the subject into the lens, and this can lead to exposure errors. Camera meters are tuned to approximately 18% grey – they assume that the world is a mid-tone grey that reflects approximately 12-18% of the light that falls on it. Although many scenes average out to an overall mid-tone, there will be plenty that are either darker (and reflect less than 18% of the light that falls on them), or brighter (which reflect more than 18%). Generally speaking, your camera still wants to make an exposure closer to mid-tone, which can result in dark scenes looking too bright and bright scenes looking too dark.
If the scene or subject is bright, then you’ll need to add more light to keep it bright in the photo. Do the opposite when metering a dark object – take light away, essentially, to keep it dark. If you don’t, then the camera will assume that the bright object or the dark object should appear as a mid-tone in the image…
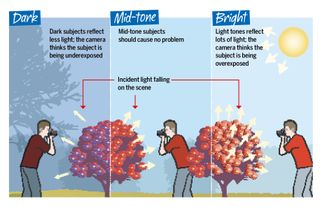
1. How your camera meters the light
The metering sensor sits near the viewfinder and measures the amount of light reflected up to the focusing screen by the camera’s internal mirror. The sensor is configured to 18% reflectance – or the amount of light reflected by an object that has a mid-tone value (such as grass or pavement, for example). This doesn’t always work out in the real world, which is why some photographers take a meter reading from a grey card and then set the exposure manually to ensure that they get consistent results in shots.
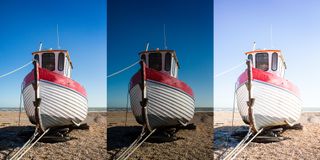
2. Taking a reading
Evaluative metering with exposure comp can be a quick way of working, but it takes time to be able to judge when it’s required and how much you need. A shift in the way you’ve framed a shot, or where you focus, can make a big difference to the exposure too – not always in a good way. By switching to Partial or Spot metering you can take an exposure reading from a much smaller part of the image, and lock that setting in using your camera’s Autoexposure Lock button (look for the one marked ‘*”).
Just try to remember all that mid-tone malarky. If the subject you take a meter reading from is mid-tone, there’s no problem. If it isn’t, try metering from a mid-tone in the same light as your subject before locking the exposure. Most EOS bodies have their spot meter fixed at the centre AF point, so you may need to recompose after locking the exposure.
The indicator at the centre of the exposure scale in the viewfinder indicates the metered mid-tone value. If the spot meter is pointed at a mid-tone, then no adjustment is needed, but if you take a reading from an area brighter or darker than mid-tone, then use exposure comp to move the indicator along – to the right for bright subjects, to the left for dark ones.
3. High-contrast scenes
Exposure compensation is useful if you have lots of exposure latitude – space on the graph to shift the histogram left or right. But what if you don’t? High contrast scenes, where the histogram shape is already clipped at each side, offer little room for tweaks and you may need to employ other skills. Here are some situations where you can’t rely on exposure compensation.
There’s often little latitude for exposure adjustment when shooting a landscape, and you might be unable to find a single exposure that can record detail in both the sky and the foreground. One solution is to use a graduated filter to darken the top of the picture, then bring it closer to the exposure value for the bottom. Alternatively, shoot three (or more) images from the same position, adjusting the exposure each time to record a full range of detail of the scene, and then blend the best bits of each image together in Photoshop.
4. Bracketing for bigger compensation
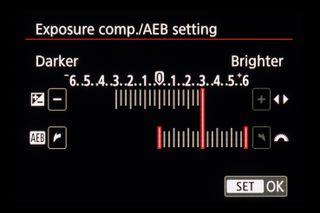
EOS mirrorless cameras enable you to compensate the metered reading up to plus or minus three stops in 1/3-stop increments, but an EOS DSLR enables you to comp up to five stops. But the readout in the viewfinder will only show up to +/- 2 or +/-3 stops. If you want to set exposure comp beyond here you’ll need to use the Quick Control screen or dip into the Expo.comp/AEB menu (found in the camera’s red Shooting menu).
You can even go beyond a camera’s comp range by activating Auto Exposure Bracketing (AEB). This means that if you apply the full amount of comp to the standard exposure and then bracket the full three stops, you can hit +/-6 or +/-8 stops of compensation. Depending on which camera you’re using, AEB and/or exposure compensation may be automatically deactivated when you switch the camera off. If your camera doesn’t do this, remember to reset it to zero once you’ve finished taking pictures to avoid making exposure errors on subsequent shots.
PhotoPlus: The Canon Magazine is the world's only monthly newsstand title that's 100% devoted to Canon, so you can be sure the magazine is completely relevant to your system.
Read more:
Canon DPP: Canon Digital Photo Professional tutorials
The best cheap Canon camera deals
Get the Digital Camera World Newsletter
The best camera deals, reviews, product advice, and unmissable photography news, direct to your inbox!
The editor of PhotoPlus: The Canon Magazine, Peter 14 years of experience as both a journalist and professional photographer. He is a hands-on photographer with a passion and expertise for sharing his practical shooting skills. Equally adept at turning his hand to portraits, landscape, sports and wildlife, he has a fantastic knowledge of camera technique and principles. As you'd expect of the editor of a Canon publication, Peter is a devout Canon user and can often be found reeling off shots with his EOS 5D Mark IV DSLR.

