Use Blending Modes in Photoshop CC to craft creative composite images
Create fantastic composite images with the use of blending modes in Photoshop CC
Watch video: Use blending modes in Photoshop CC
One of the easiest ways to get creative with your photos in Photoshop is by combining images using blending modes. After copying one image – or part of it – onto another, the elements will appear on separate layers in Photoshop. Then all you have to do is experiment with blending modes to combine the two layers in a host of different ways.
In Photoshop CC there are 27 blending modes to choose from, and each works by employing a different algorithm to the pixels in your image. For instance, the Multiply blending mode works by multiplying the RGB values of each pixel on the blend layer (the currently selected layer) with those of the adjacent pixels on the layers below.
We’ve used an array of different images to create our textured portrait effect (these were downloaded from www.pixabay.com, search for images 21799, 2719560 and 671630). Once copied in to our portrait, we change the blend mode to merge the texture with the portrait below. We can go on to fine-tune the look by lowering the layer opacity, resizing and repositioning the layer, or adding a layer mask to control how it plays over the image.
01 Prepare the portrait
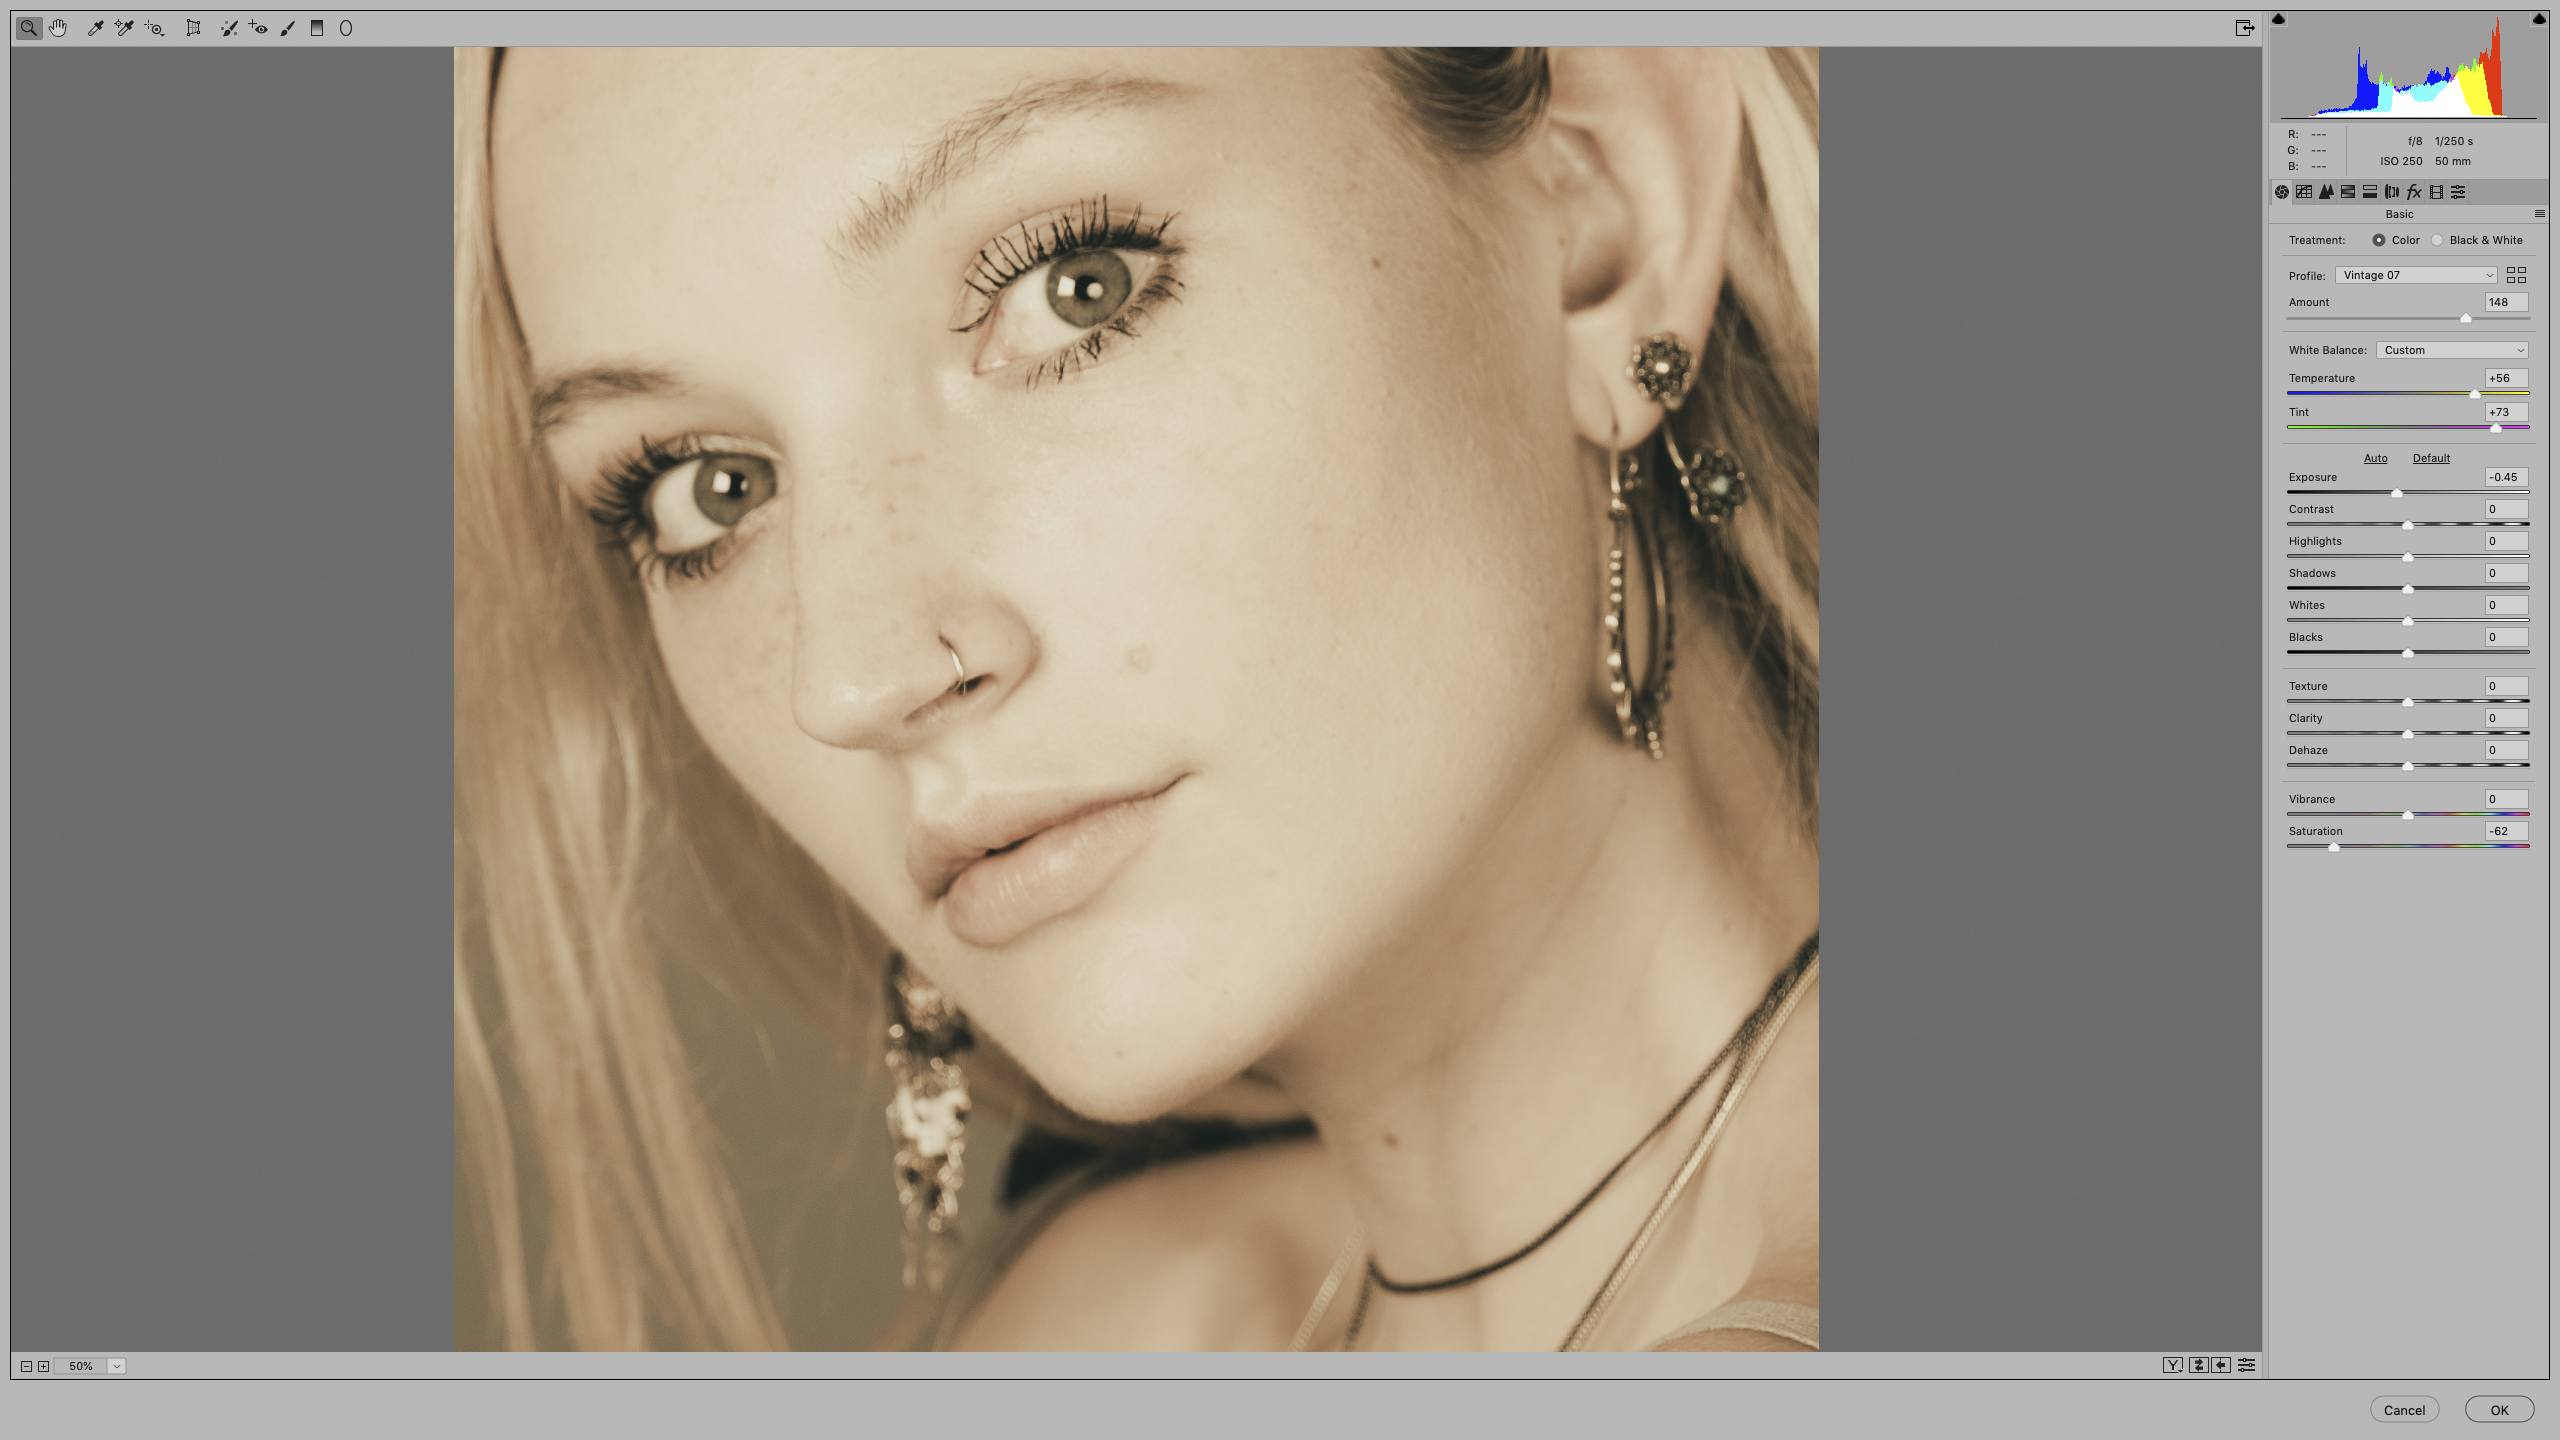
Download the blend_modes.jpg start image here, or bring your own picture into Photoshop, then go to Filter > Camera Raw Filter. In the Profile Browser choose the Vintage07 profile, then increase Amount and drag Temperature and Tint to the right. Drop Saturation to -60 and Exposure to -0.45. Press OK.
02 Blend in a cracked texture
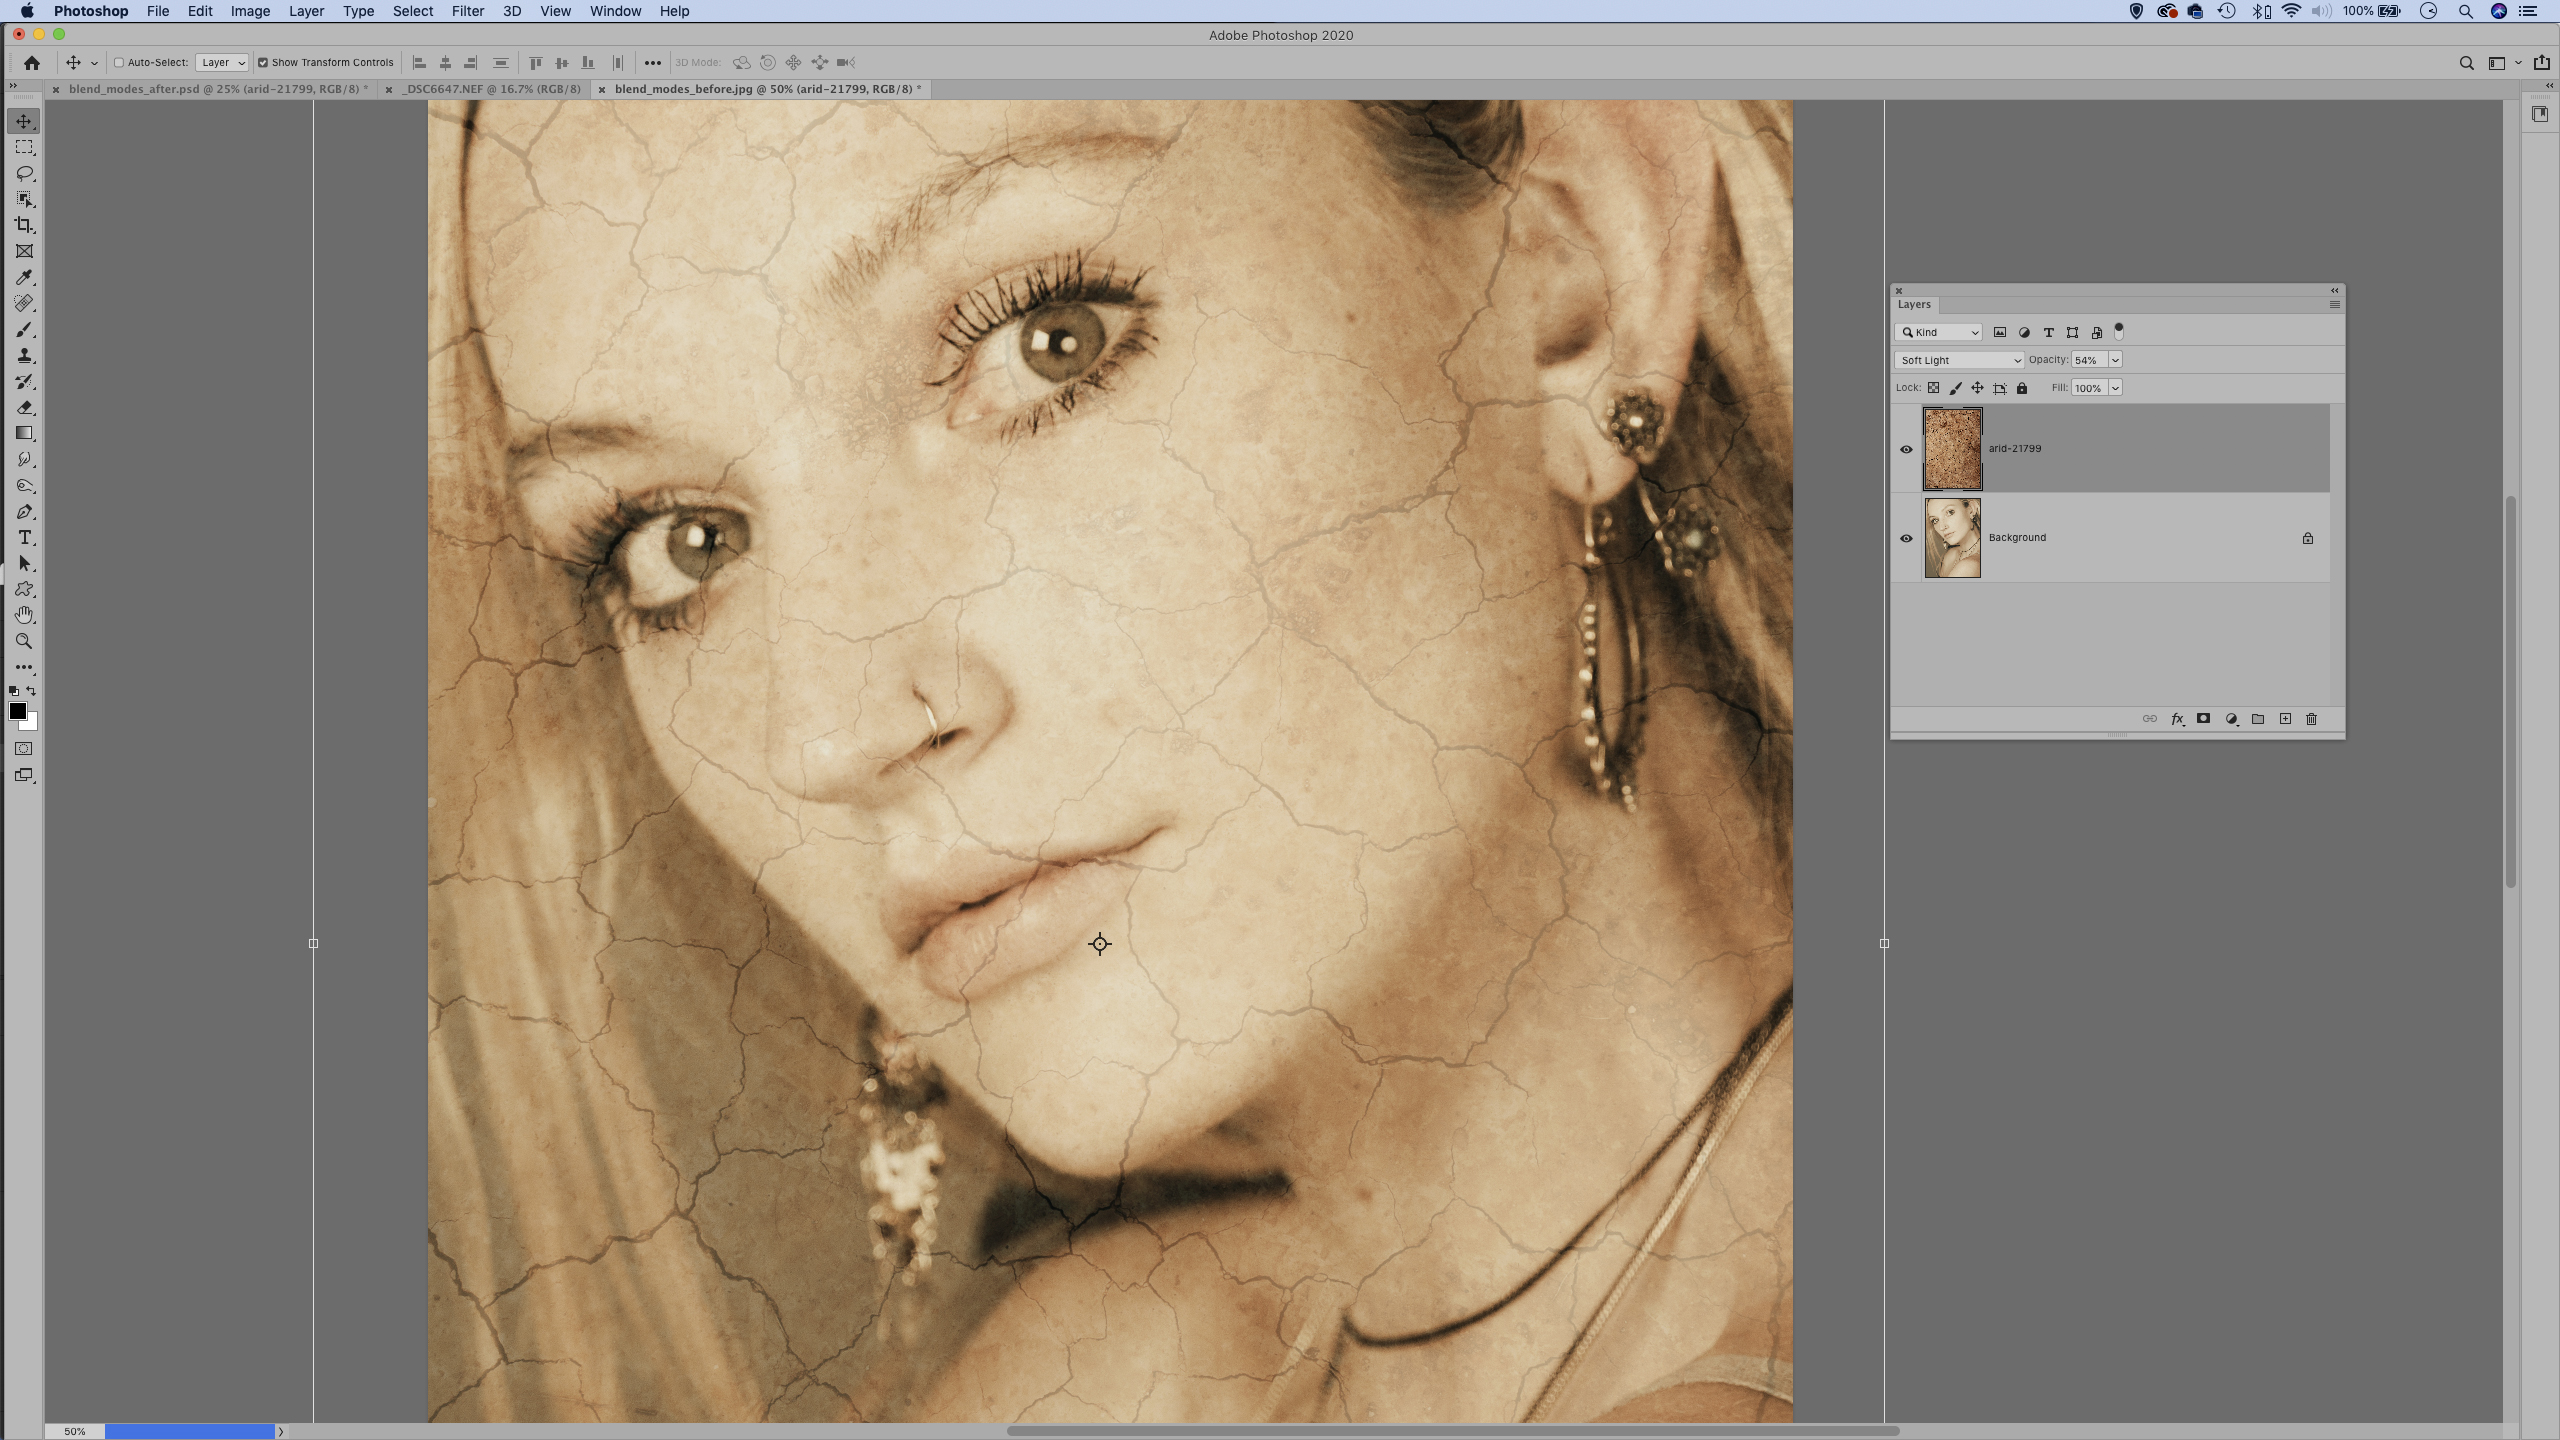
Download images 21799, 2719560 and 671630 from www.pixabay.com. Open the 21799 image and use the Move tool to drag it into the portrait. Hit Cmd/Ctrl + T to resize. Go to the Layers panel, click the blend mode dropdown at the top and choose Soft Light.
03 Paint on the layer mask
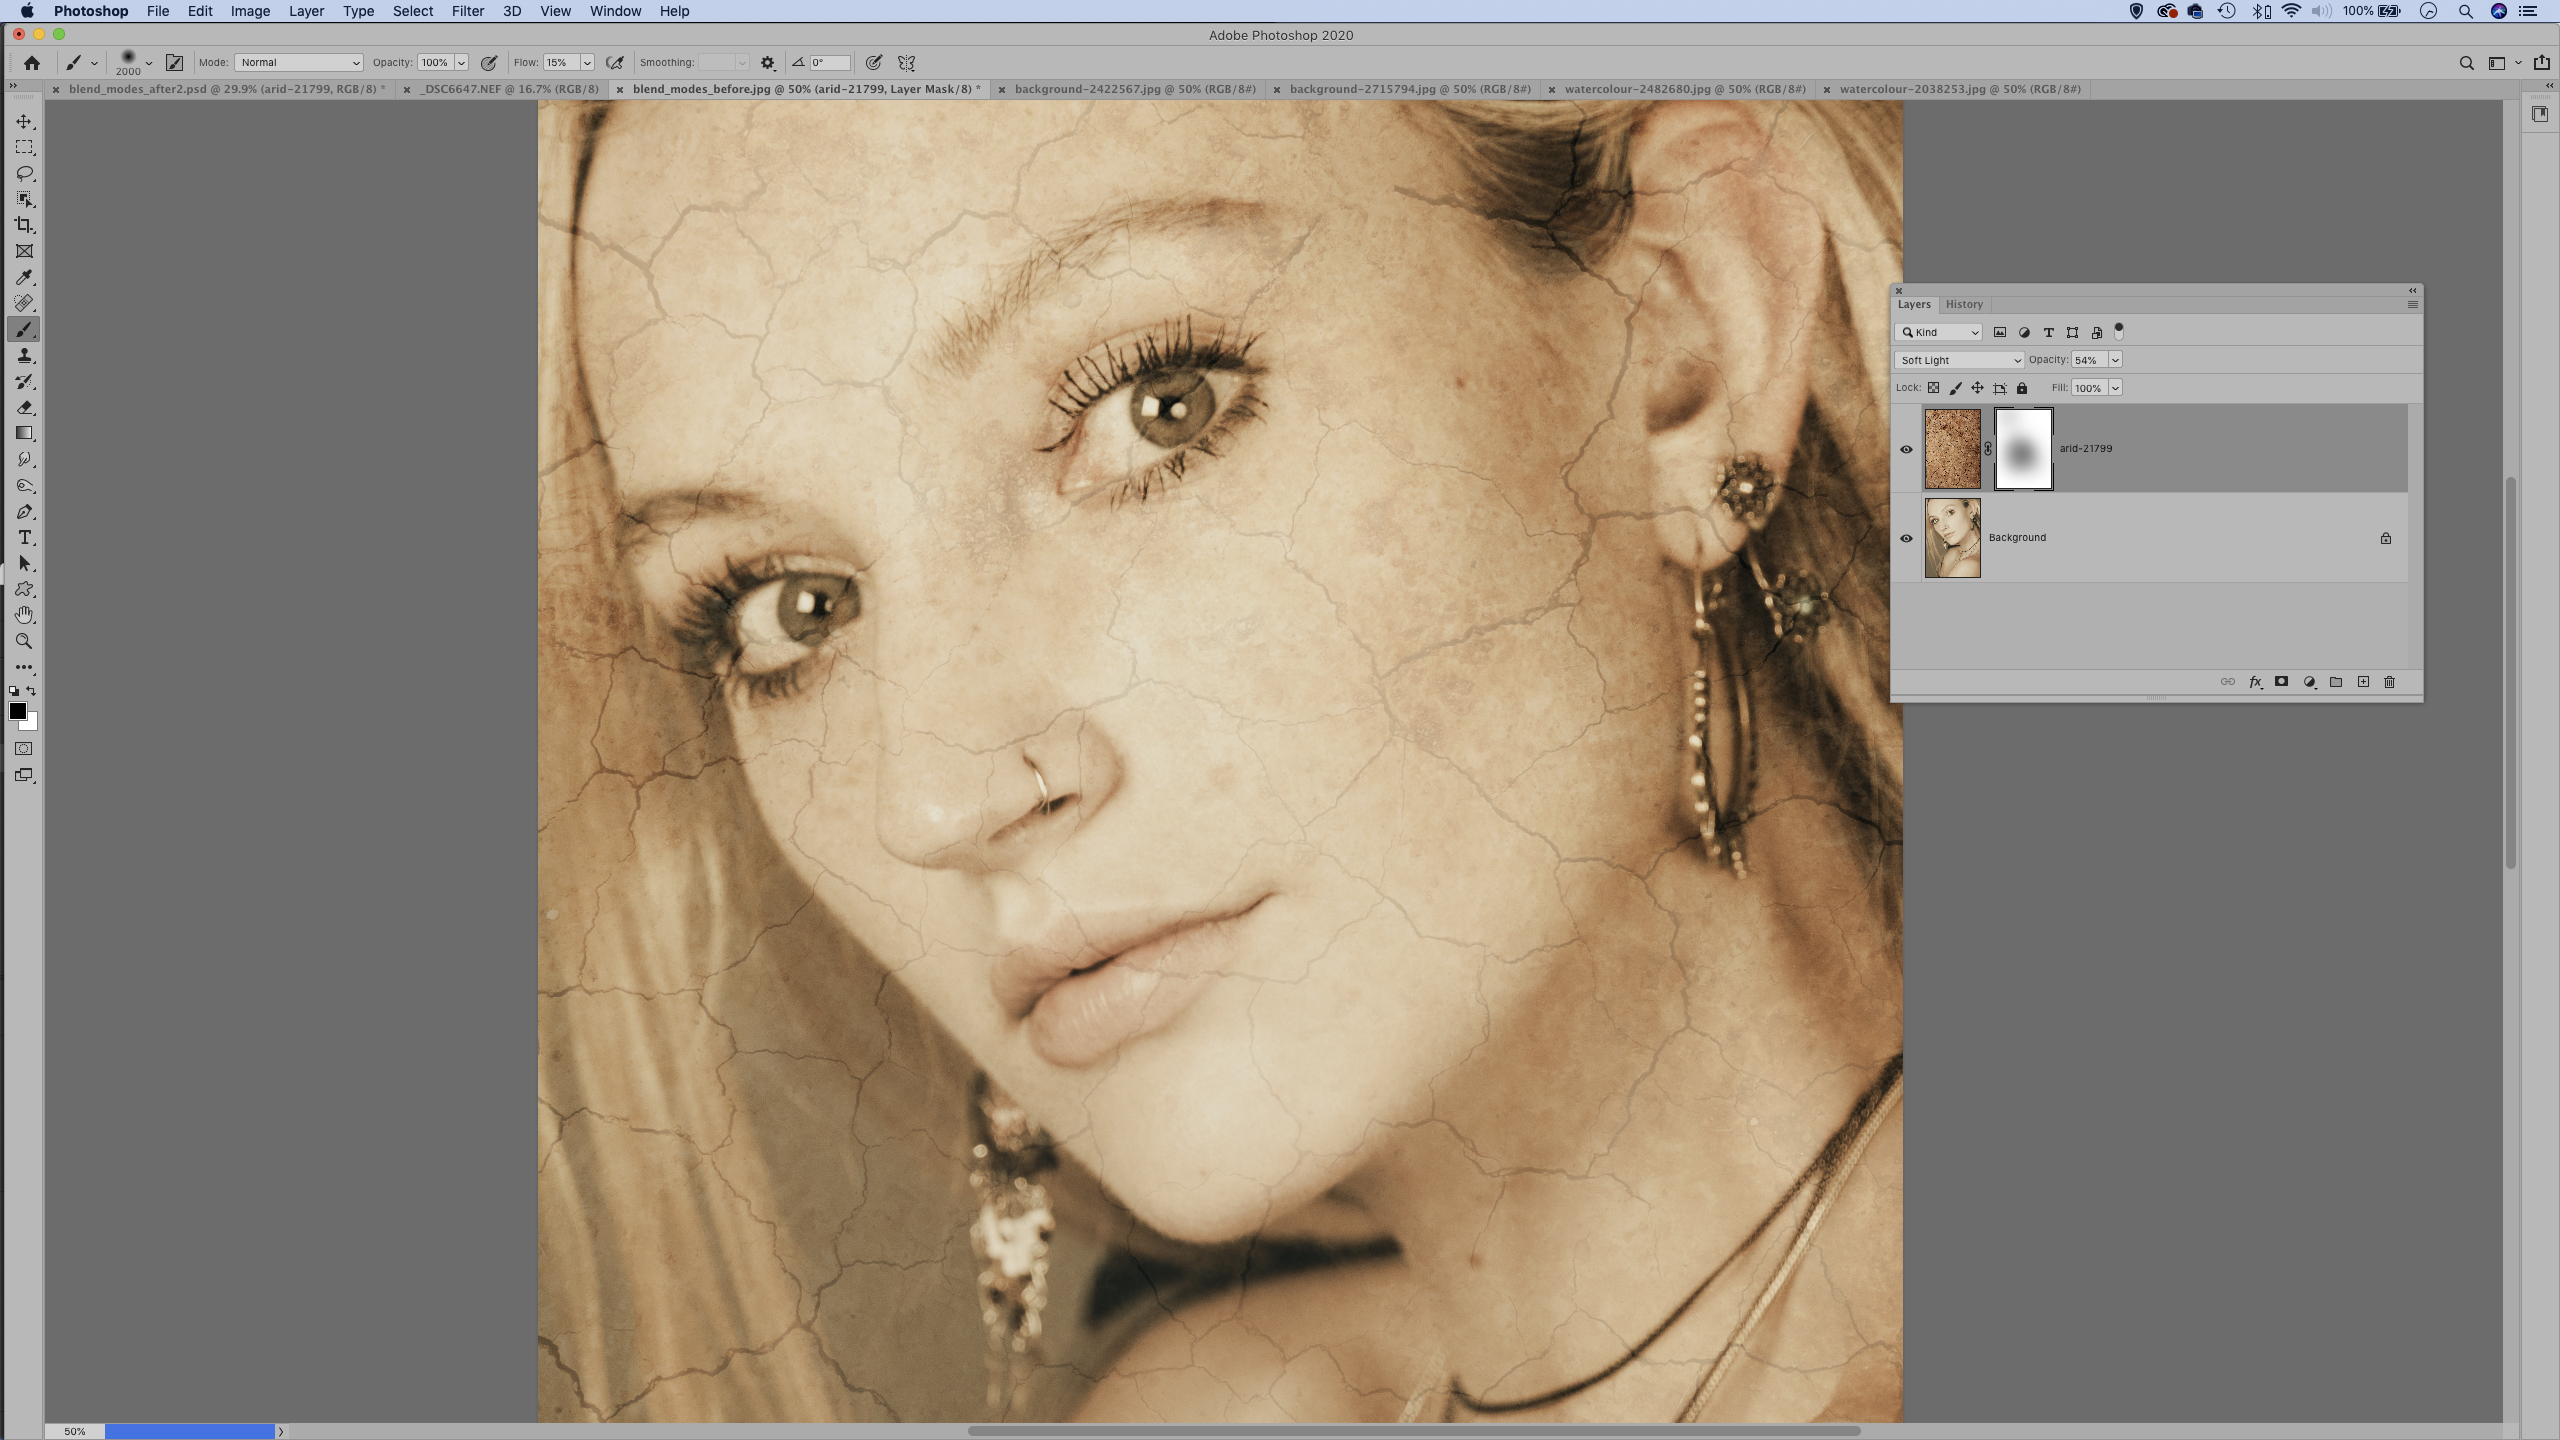
Lower the layer opacity to about 50% to tone down the effect. Next, click the Add Layer Mask icon in the Layers panel, then grab the Brush tool. Using a large soft brush, paint with black over the face to soften the cracks, so they are less uniform over the face.
04 Blend in more textures
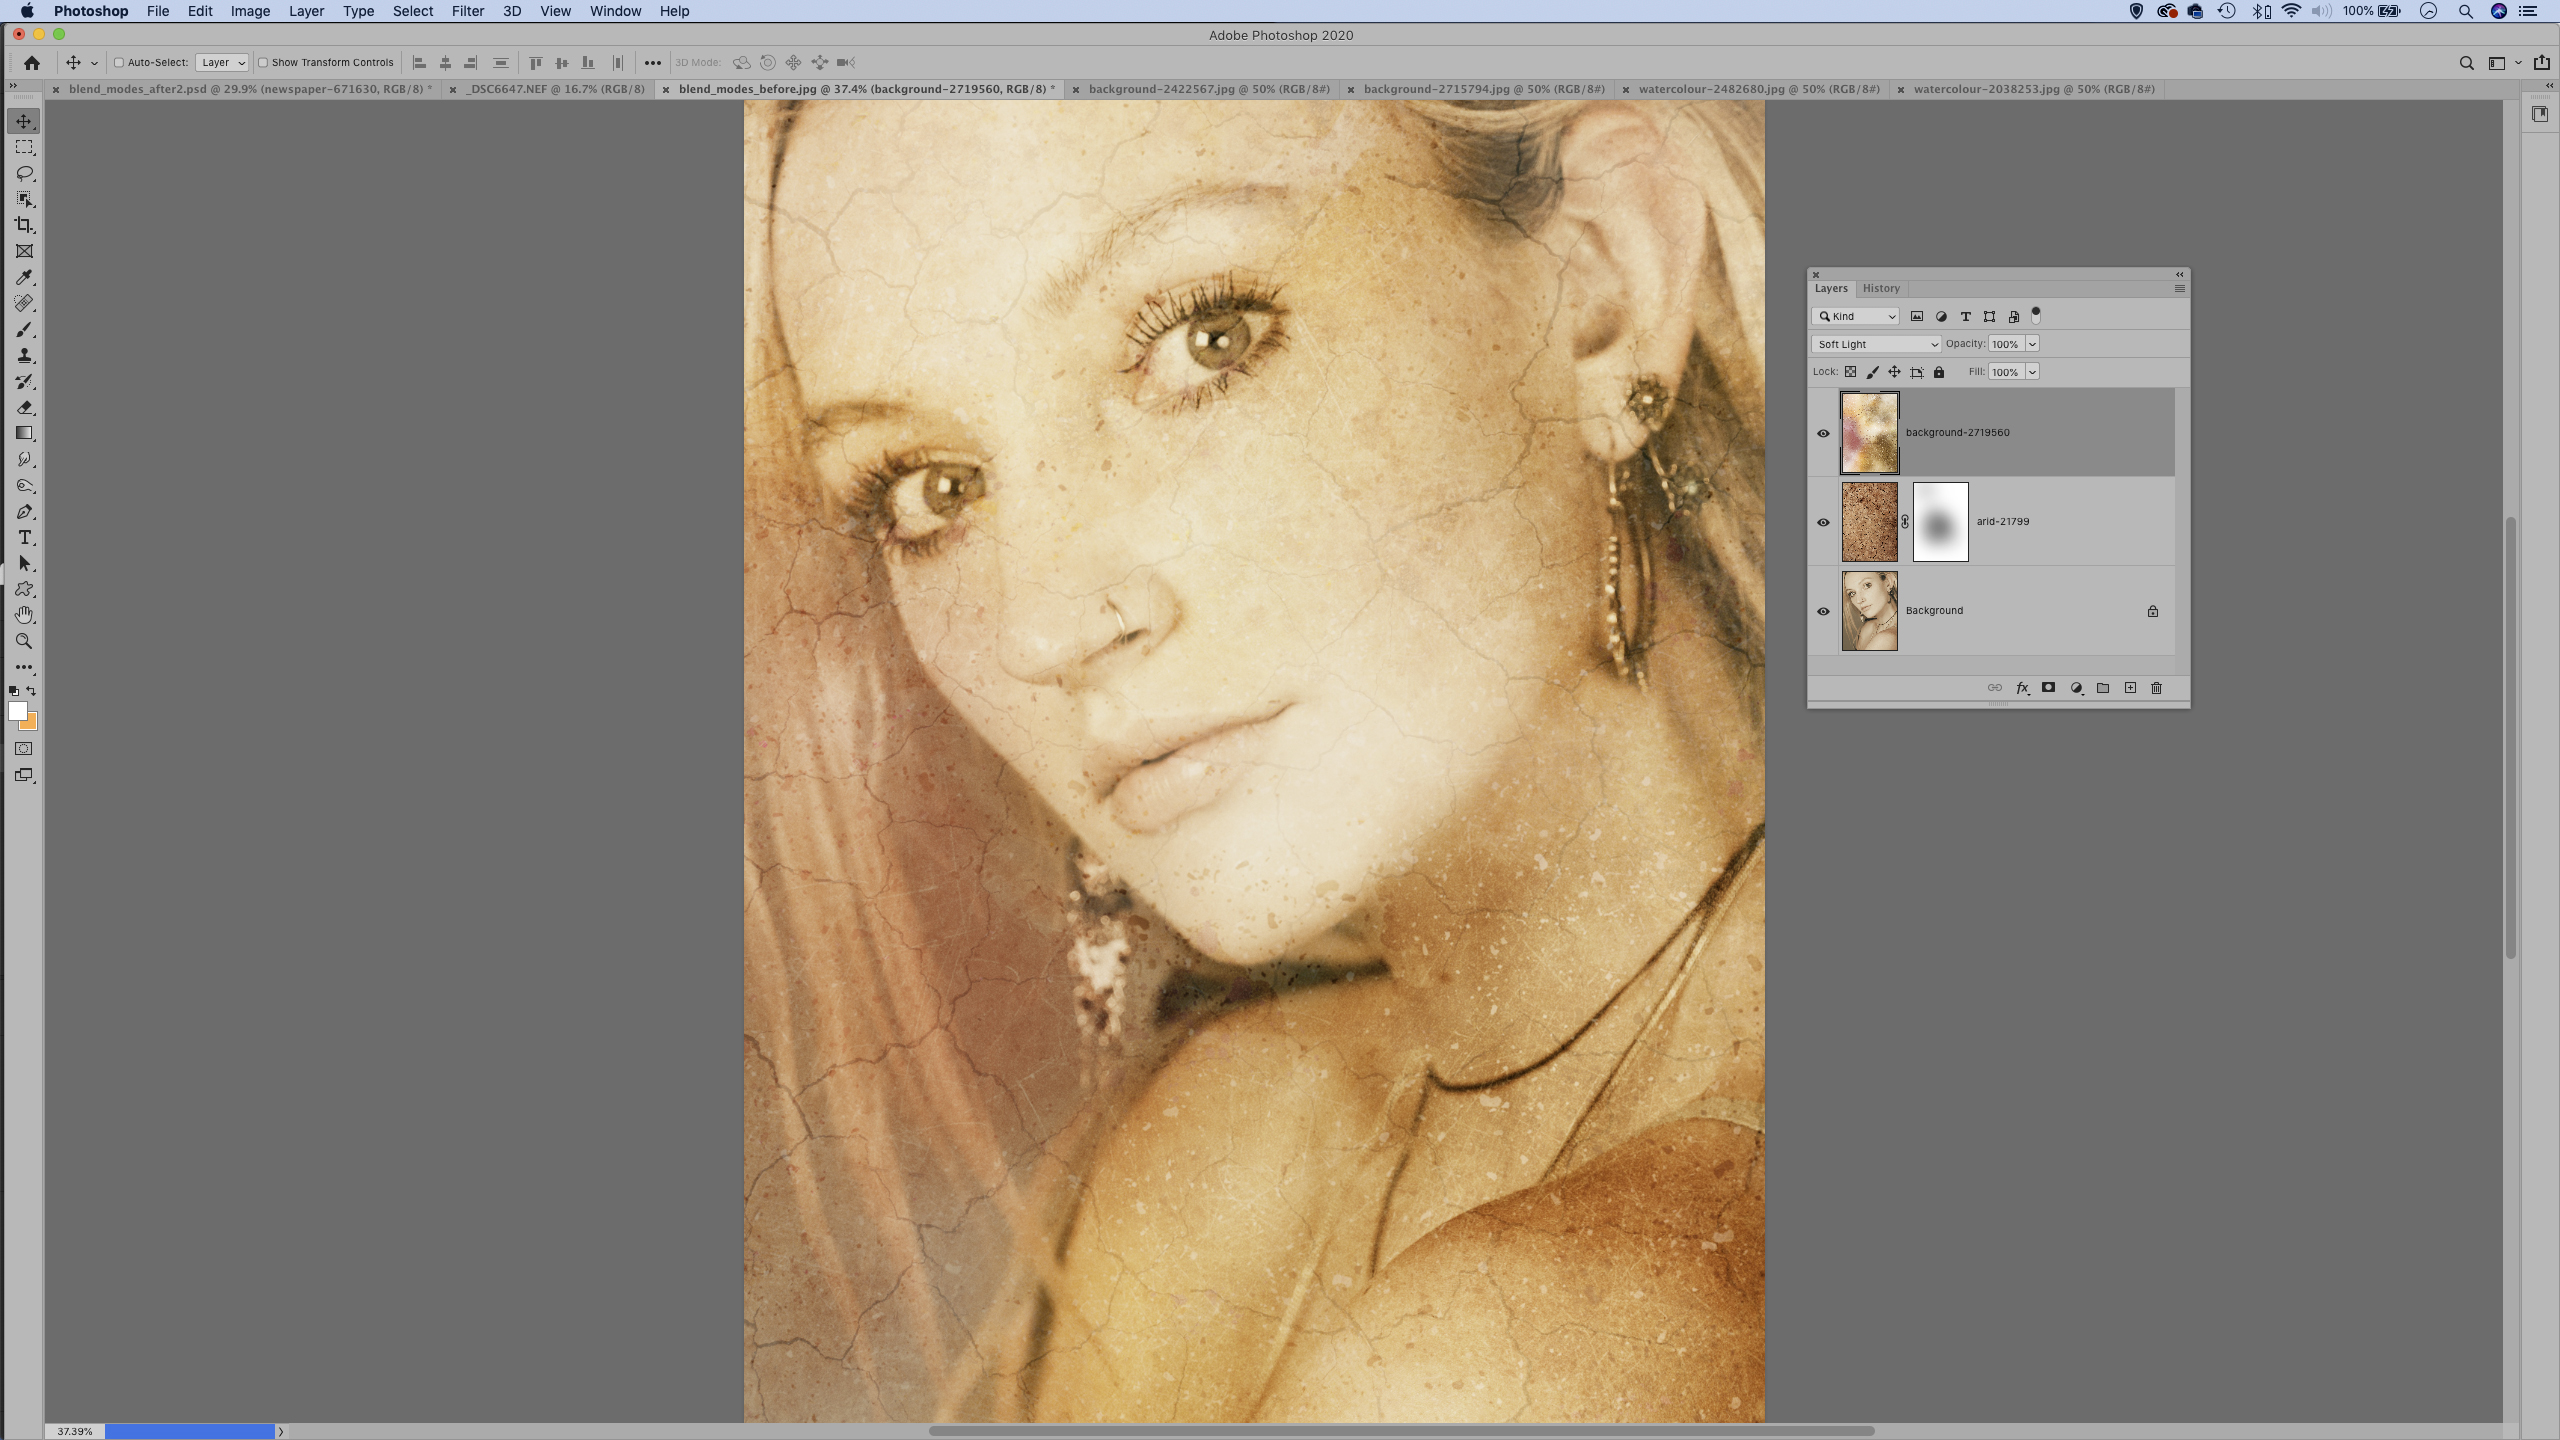
Open image 2719560 from www.pixabay.com, copy it in and change the blend mode to Soft Light (or try other blend modes for different effects). Hit Cmd/Ctrl + T and adjust the sizing and position of the layer to find the best blend of colors for the image.
05 Mask off the text
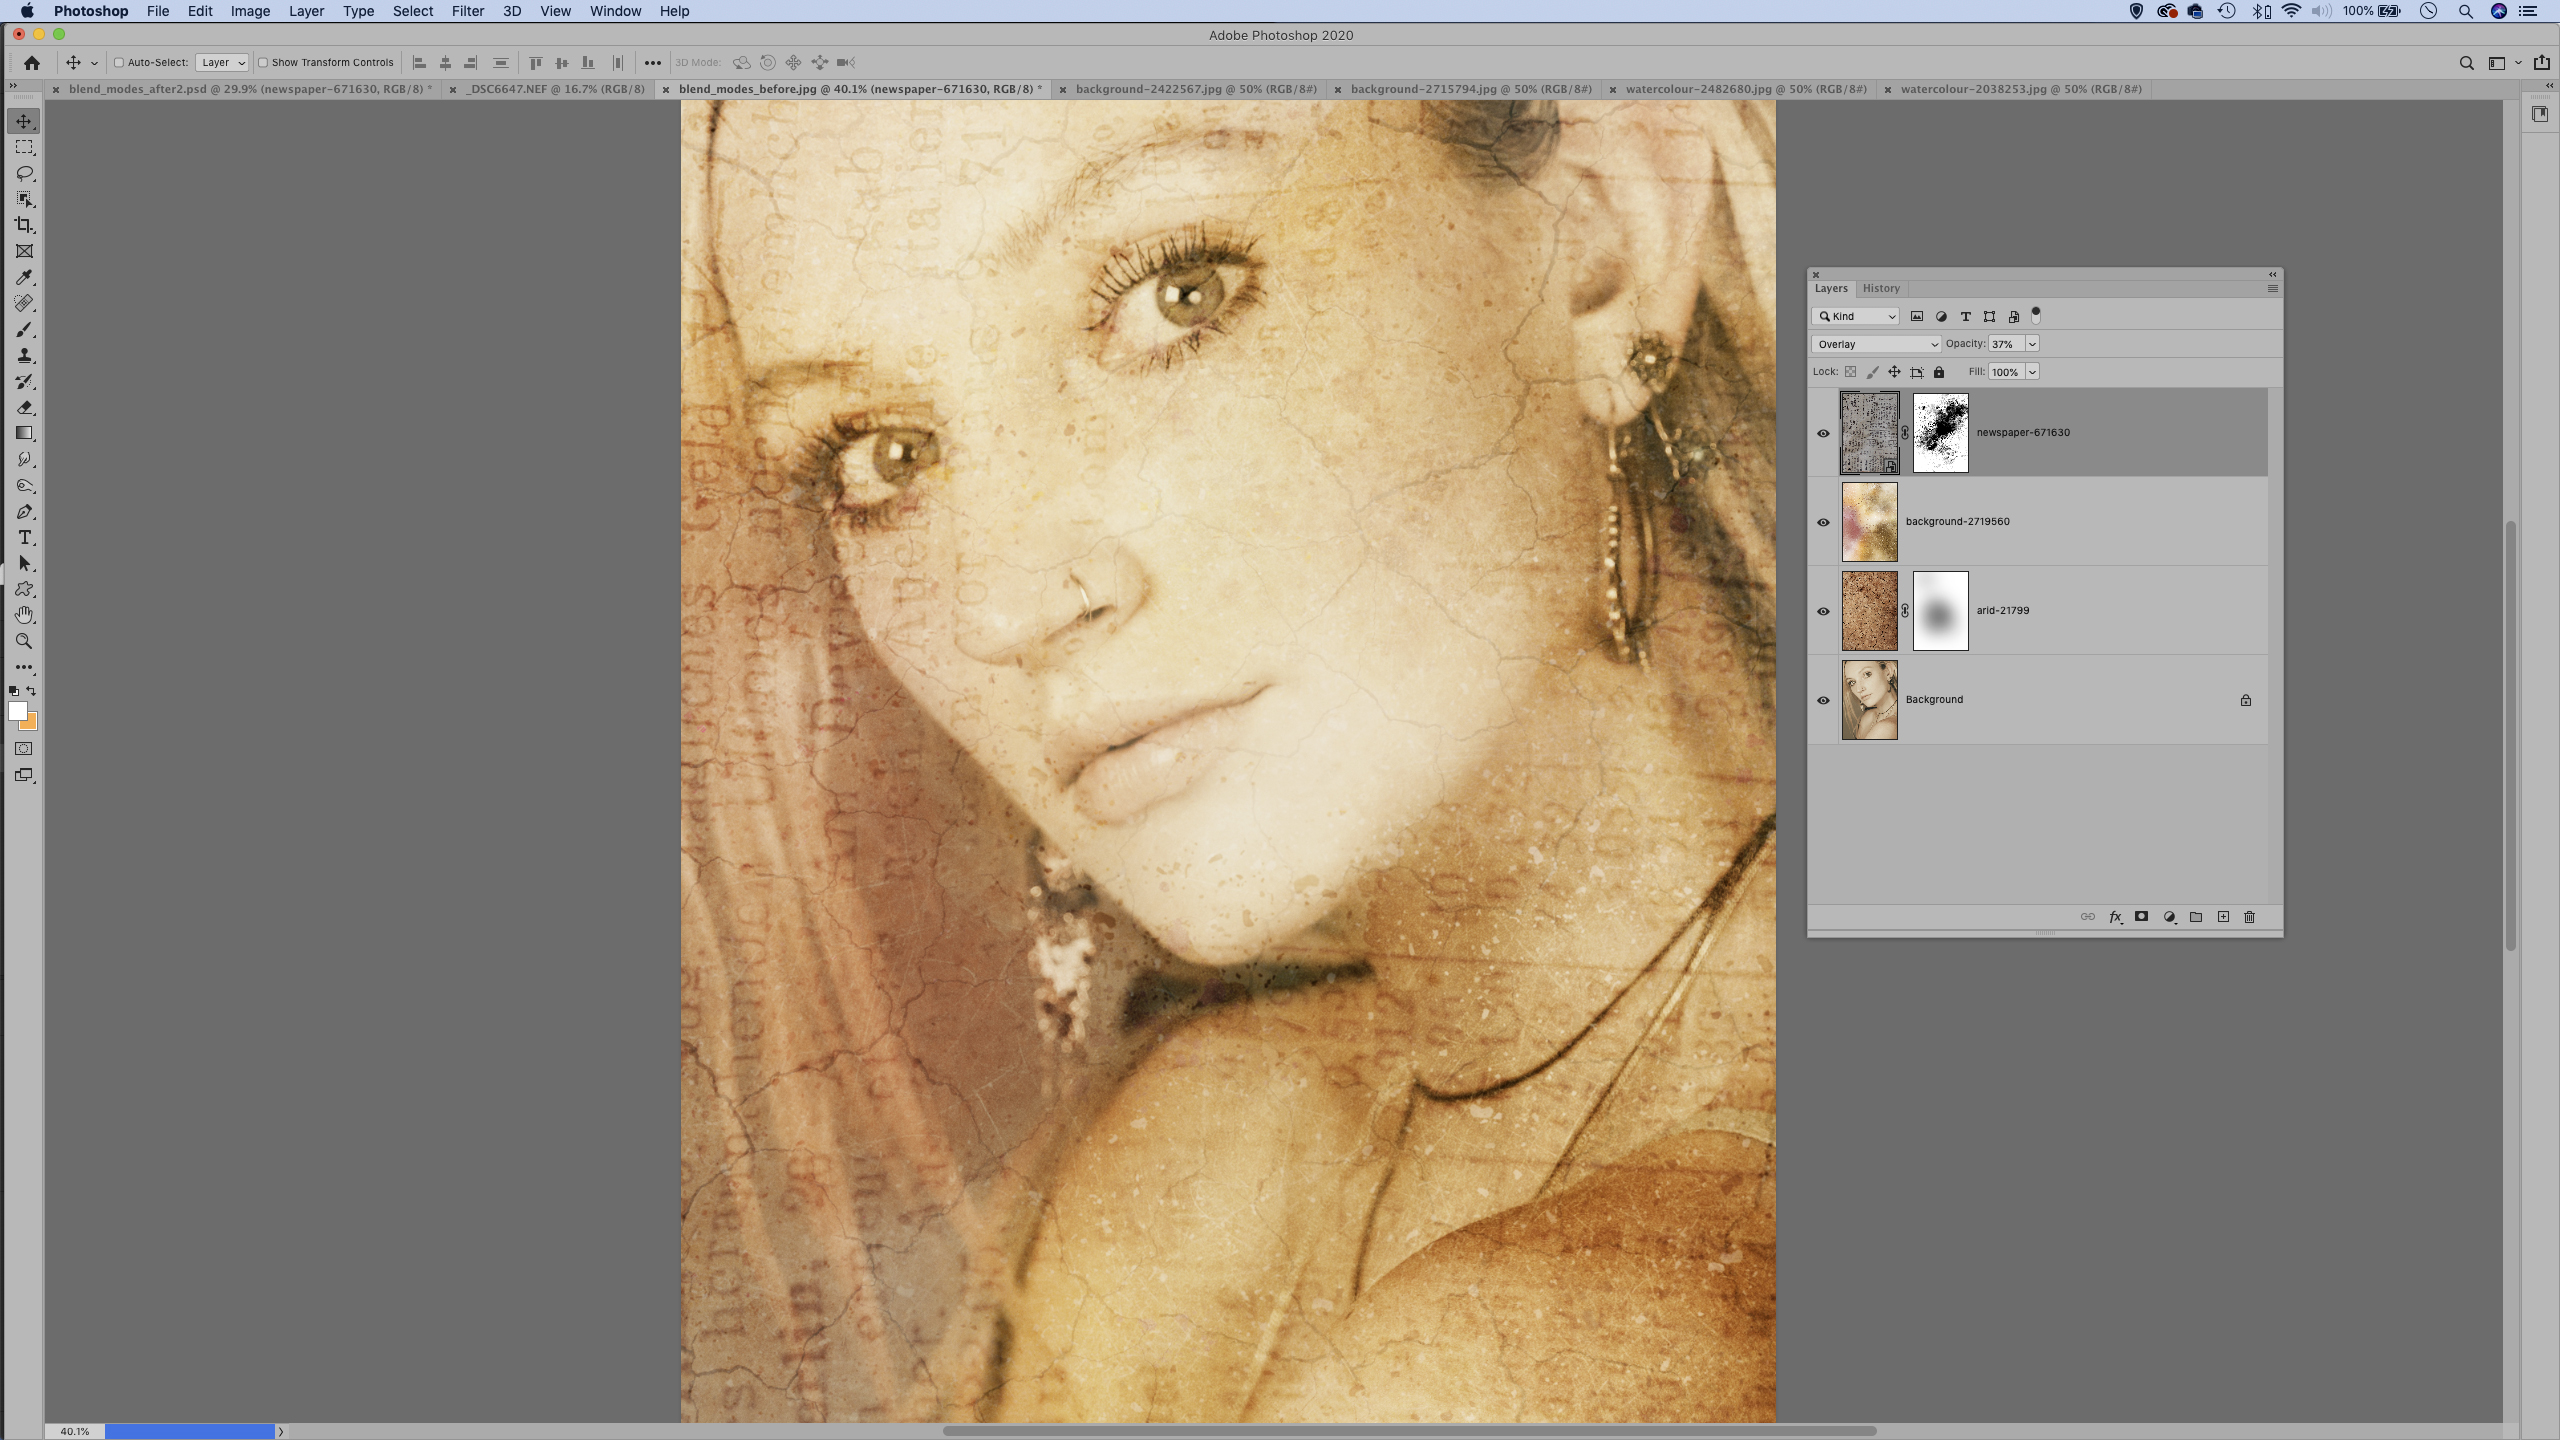
Open image 671630 of the newspaper then use the Move tool to drag it in to the main image. Position the layer, set the blend mode to Overlay and lower the opacity to 40%. Add a mask and paint black to hide parts of the layer so the text effect is more broken up.
06 Alter the contrast
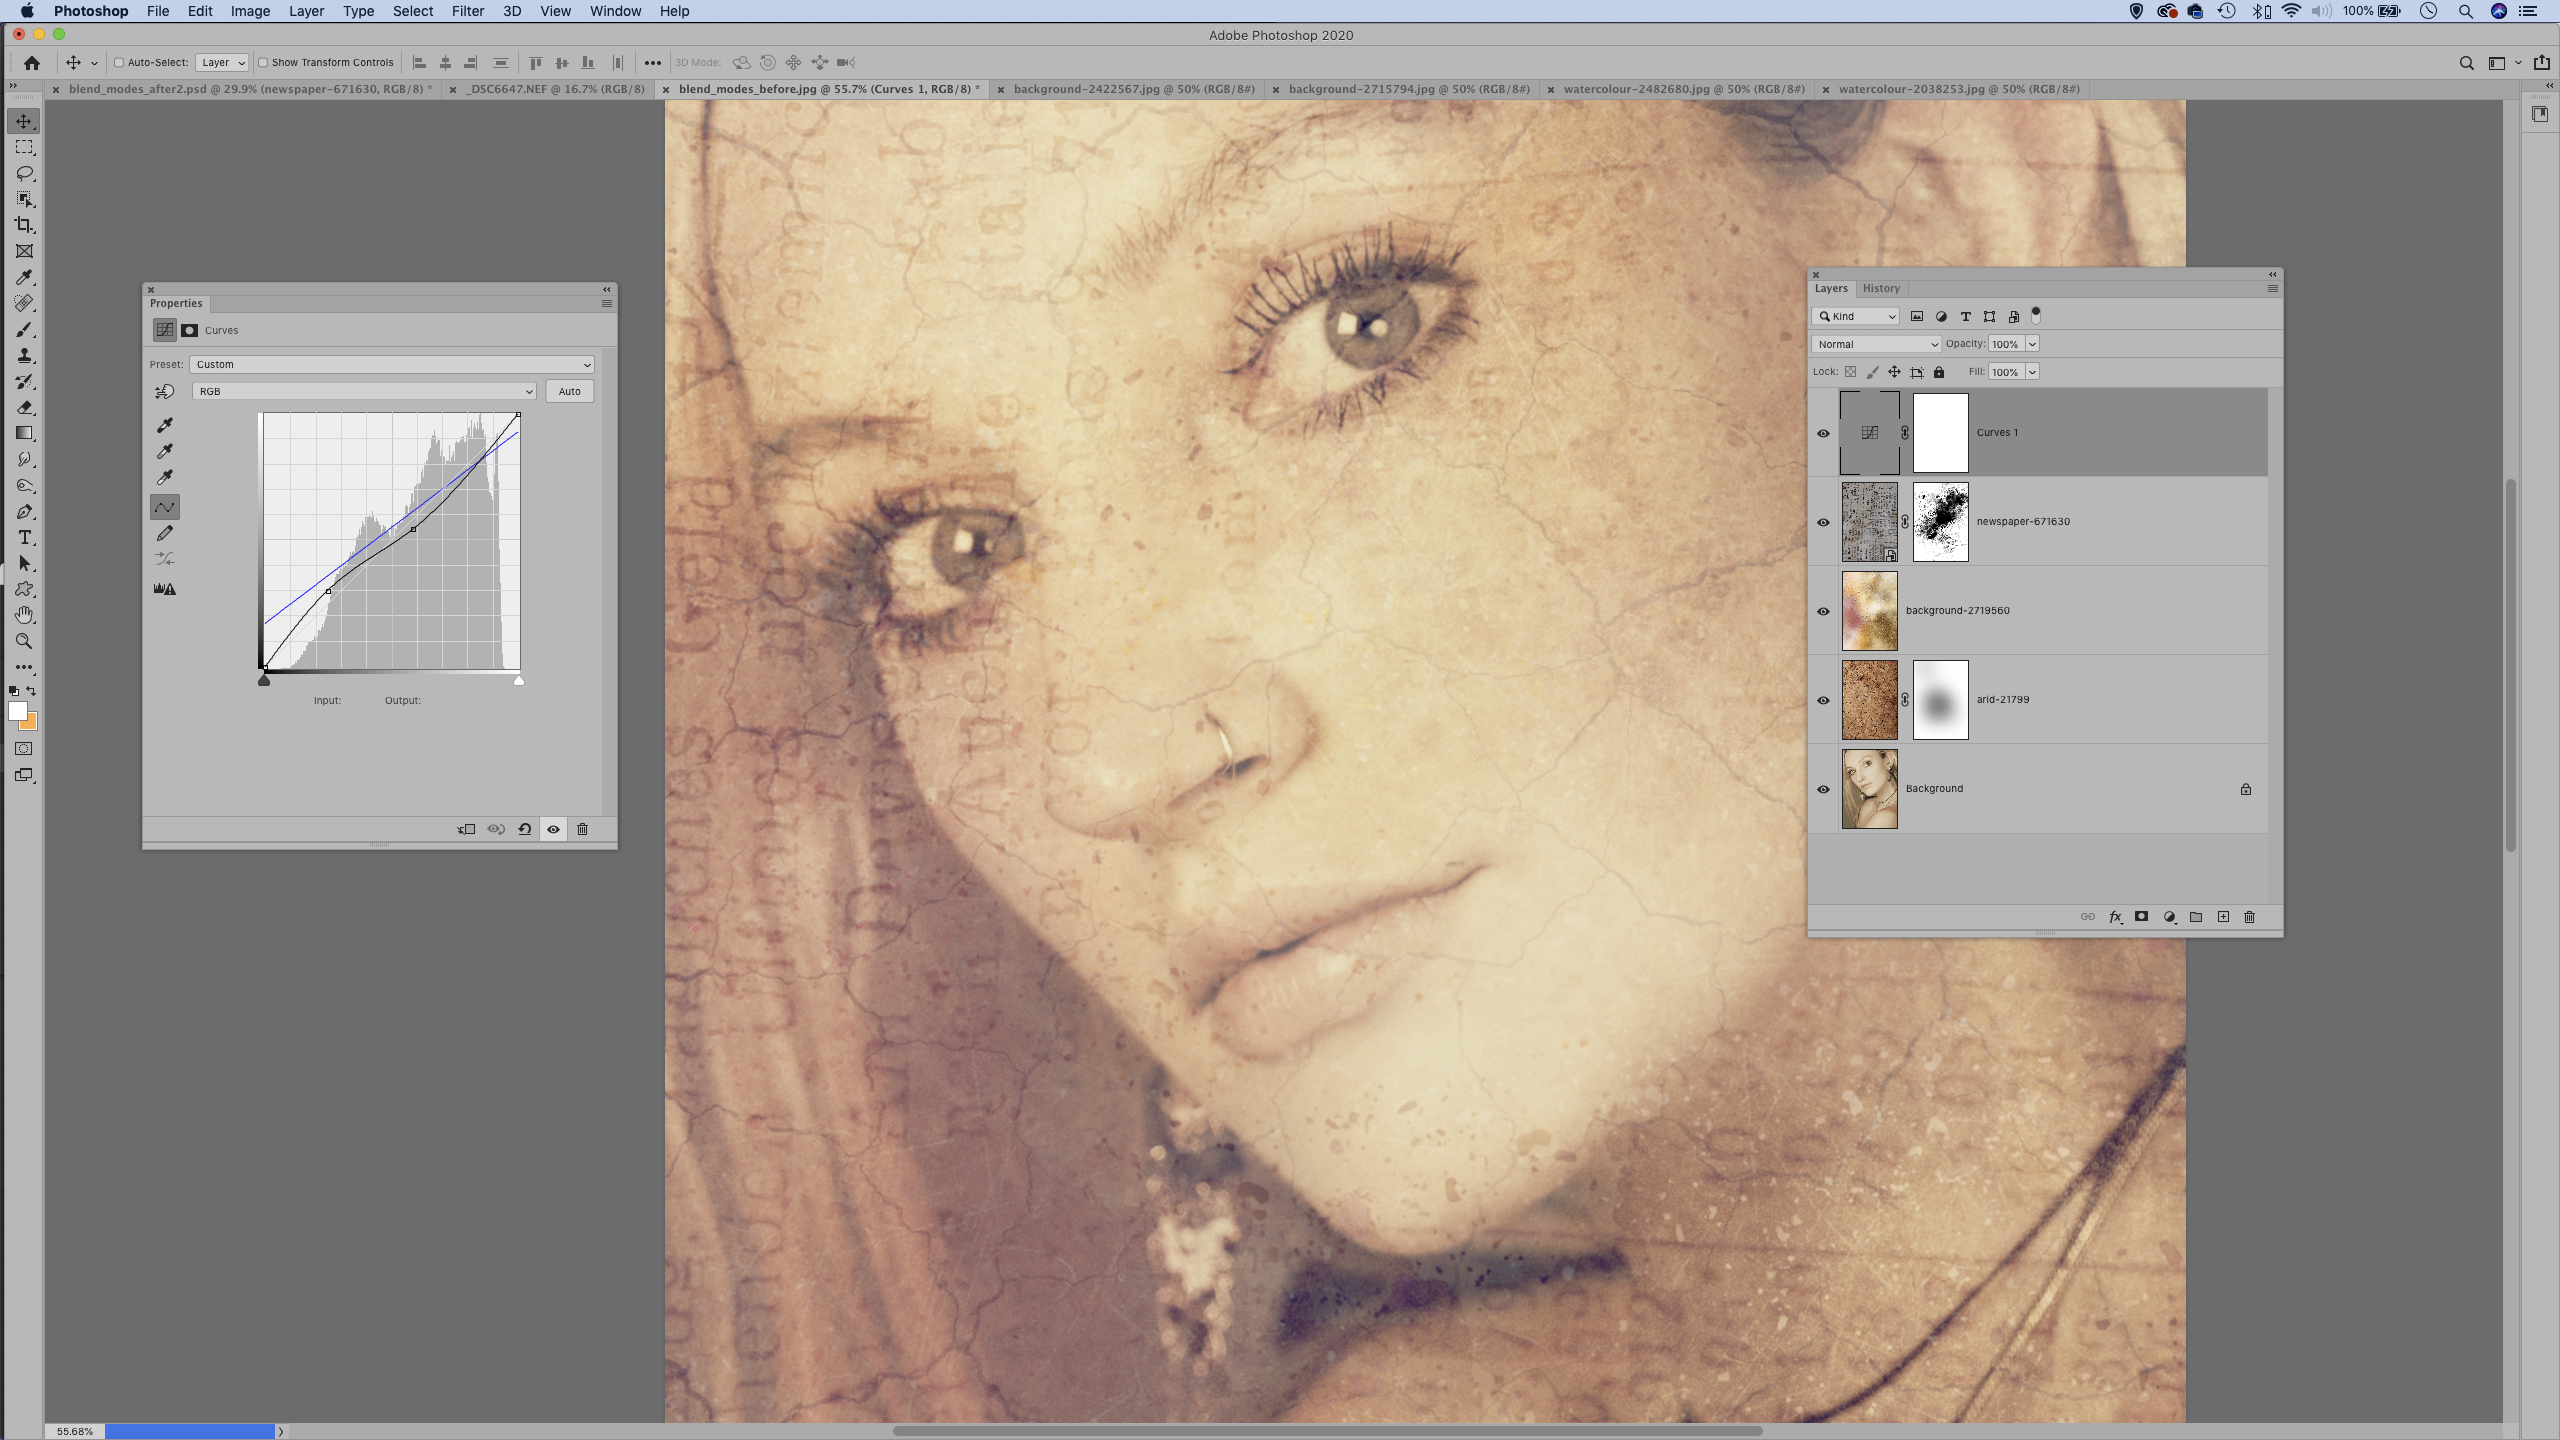
Click the Create Adjustment Layer icon and use Curves. Drag the bottom of the curve up and the top part downwards to reduce contrast. Click the RGB dropdown and pick Blue, then flatten out the diagonal line by lifting the bottom left and dropping the top right.
PhotoPlus: The Canon Magazine is the world's only monthly newsstand title that's 100% devoted to Canon, so you can be sure the magazine is completely relevant to your system.
Read more:
100 Photoshop tips
The best photo editing software: image editors for novices through to pros
The best photo-editing laptops: top laptops for photographers
10 best online photography courses – from beginner guides to masterclasses
Get the Digital Camera World Newsletter
The best camera deals, reviews, product advice, and unmissable photography news, direct to your inbox!
The lead technique writer on Digital Camera Magazine, PhotoPlus: The Canon Magazine and N-Photo: The Nikon Magazine, James is a fantastic general practice photographer with an enviable array of skills across every genre of photography.
Whether it's flash photography techniques like stroboscopic portraits, astrophotography projects like photographing the Northern Lights, or turning sound into art by making paint dance on a set of speakers, James' tutorials and projects are as creative as they are enjoyable.
He's also a wizard at the dark arts of Photoshop, Lightroom and Affinity Photo, and is capable of some genuine black magic in the digital darkroom, making him one of the leading authorities on photo editing software and techniques.


