Lightroom series part 26: How to merge a series of exposures into a raw HDR shot
Merge bracketed exposures into to a single HDR file without losing access to Lightroom’s full raw editing toolset
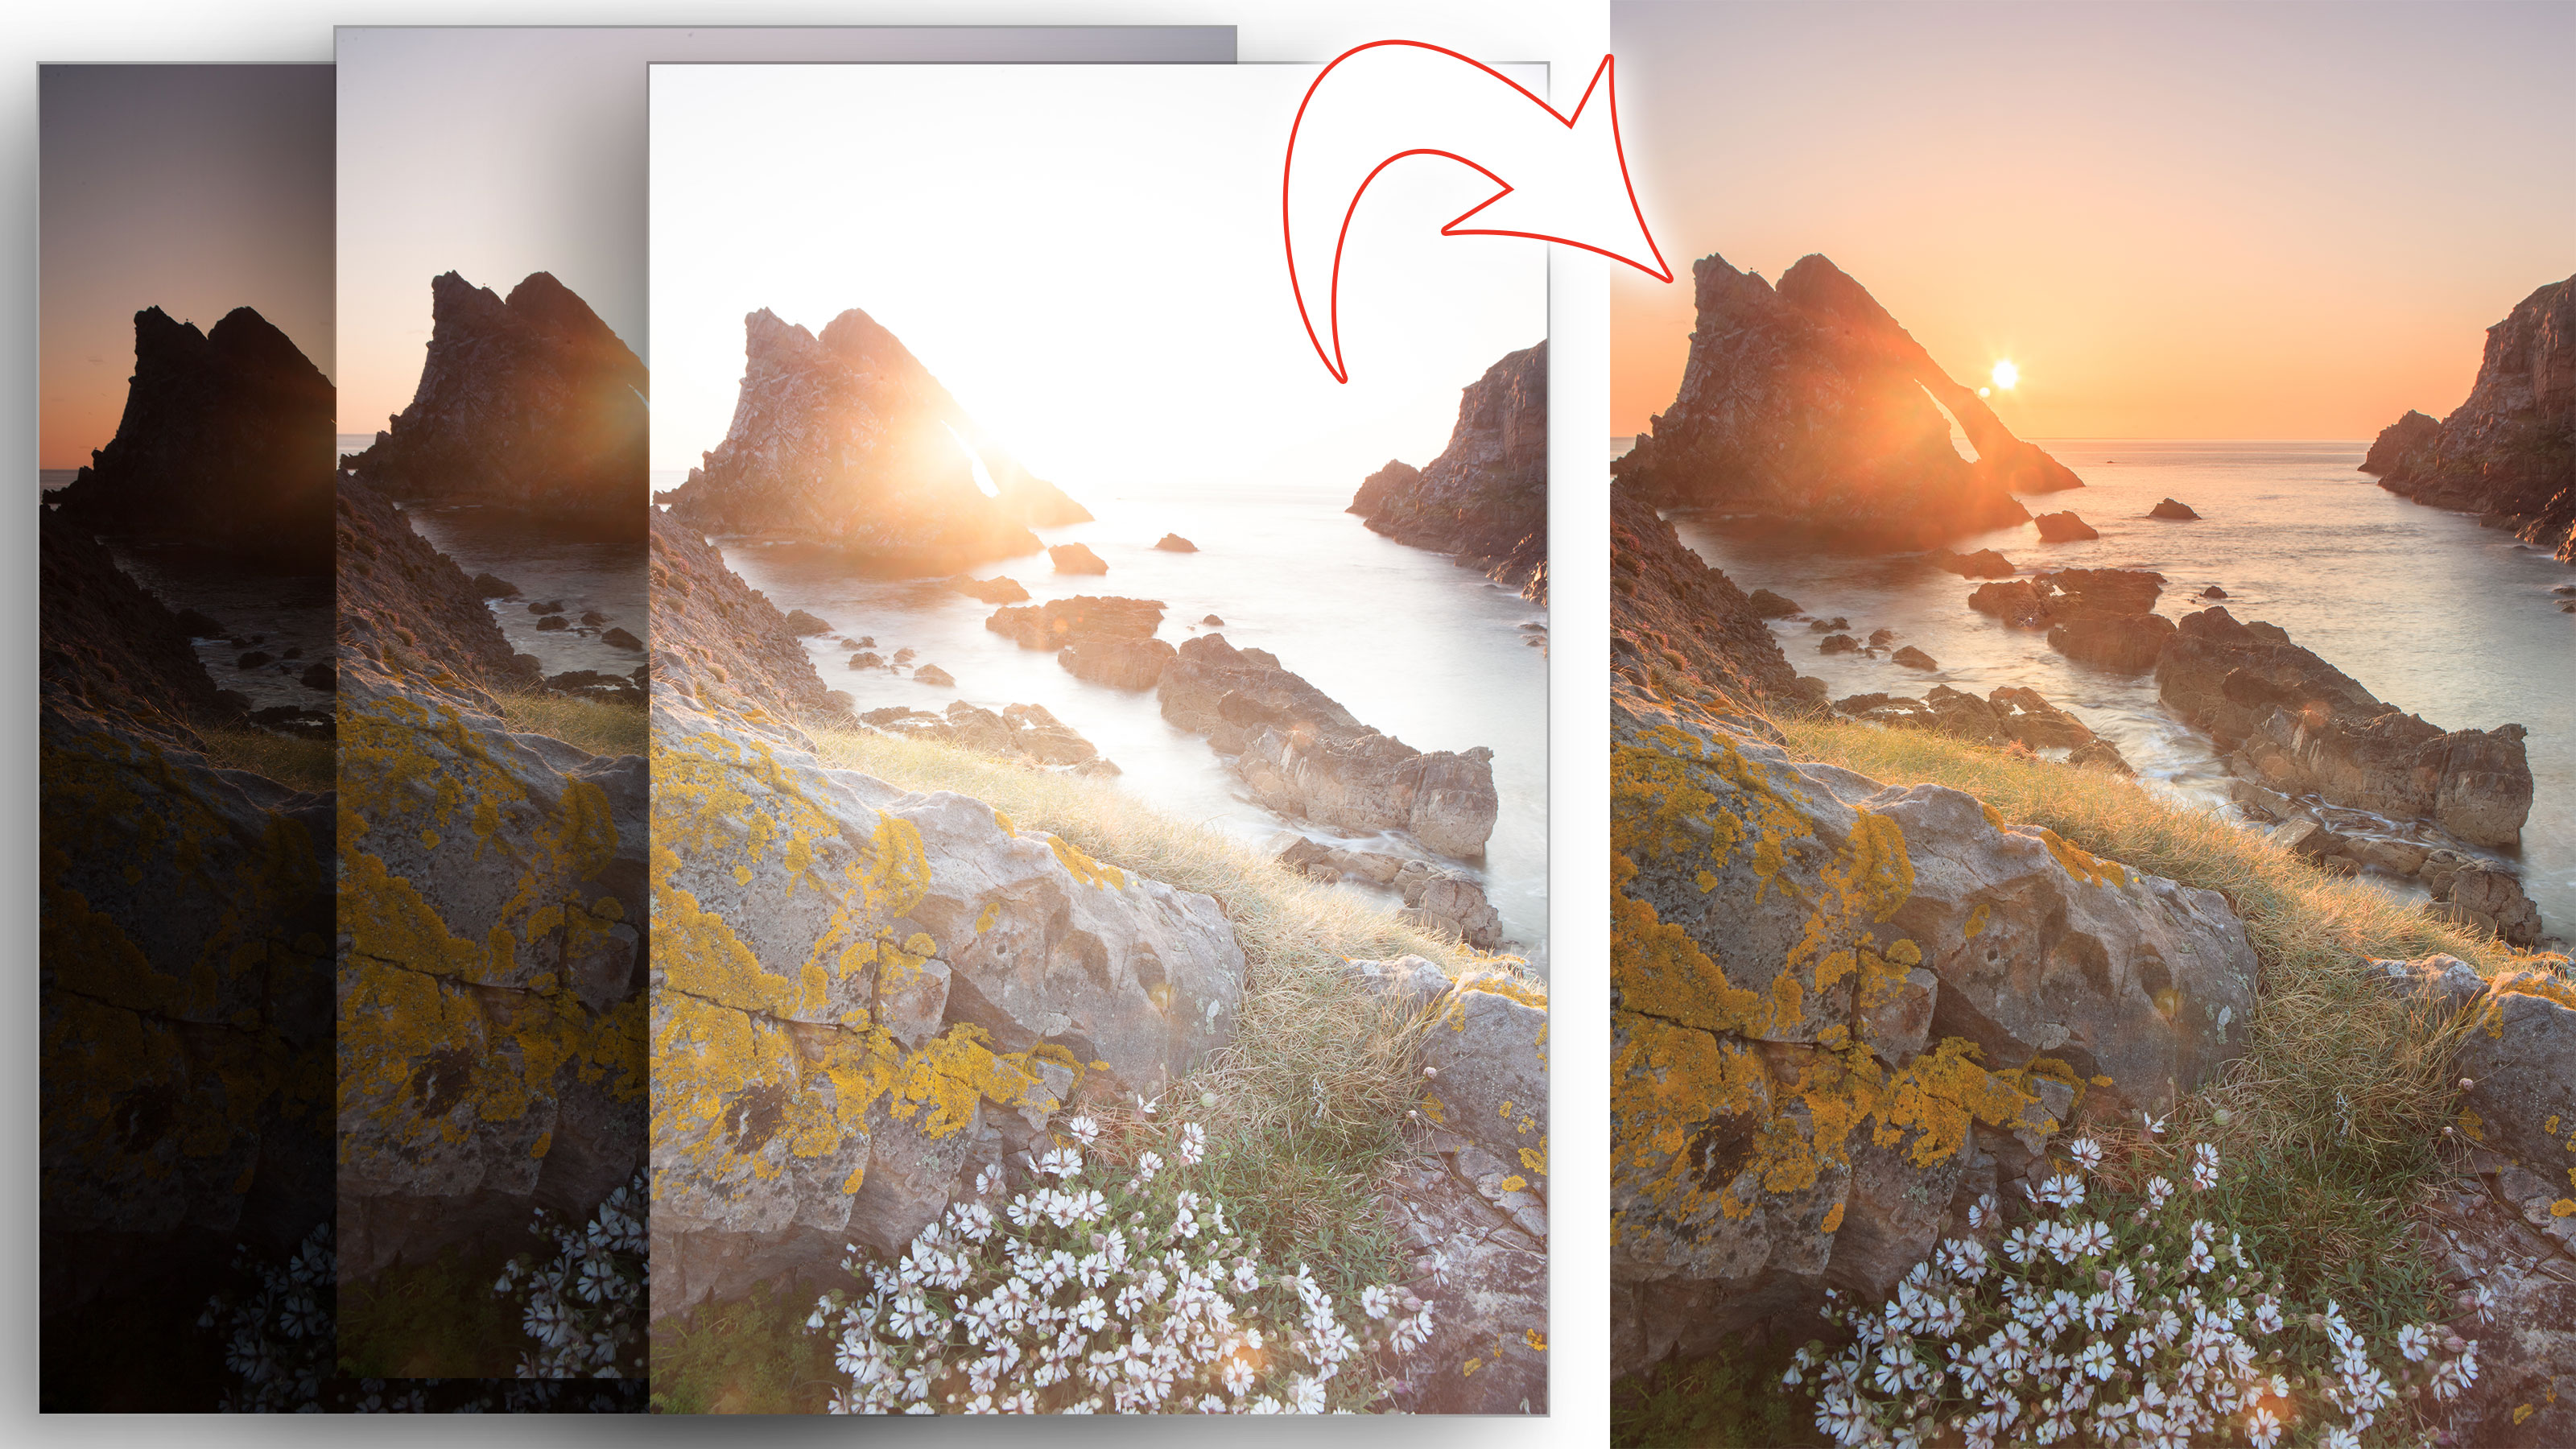
High Dynamic Range describes a photo with an exceptionally wide tonal range – beyond what a typical camera can capture in one shot. You’ll typically create an HDR file by merging a series of photo shots at differing exposures to get a photo with an increased range of tones.
Welcome to the 26th instalment of our Lightroom series, first published in Digital Camera magazine (see below for subscription offers).
If you are already a Lightroom user, you could discover some new tricks and processes you haven't tried yet. If you don't use Lightroom, then scroll down to the bottom where you'll discover how to get it and which Adobe Photography Plan is best.
When shooting landscapes, you often find that an exposure for the sky makes the ground too dark, and an exposure for the ground would blow out the sky. The solution is to take a shot for the sky, and a shot for the ground, and another somewhere in the middle would allow you to get a smooth transition.
A typical sequence could have anywhere from three to nine shots, covering a range of exposures from three stops overexposed to three stops underexposed.
There are several programs that deal with HDR. Even Photoshop can do HDR, but the 32-bit files created cannot be edited directly in Photoshop. You need to create a 16- or 8-bit version of the file that loses some of the benefit of the 32 bit HDR file.
Fortunately when you use Merge to HDR in Lightroom, you retain the same editing features of any raw file. This means you can use White Balance and have a huge range in Exposure control. Most of the Lens Profiles available are for raw files only, so your HDR file can benefit from them too.
The best camera deals, reviews, product advice, and unmissable photography news, direct to your inbox!
• See more Lightroom tutorials
1. Compile your exposures
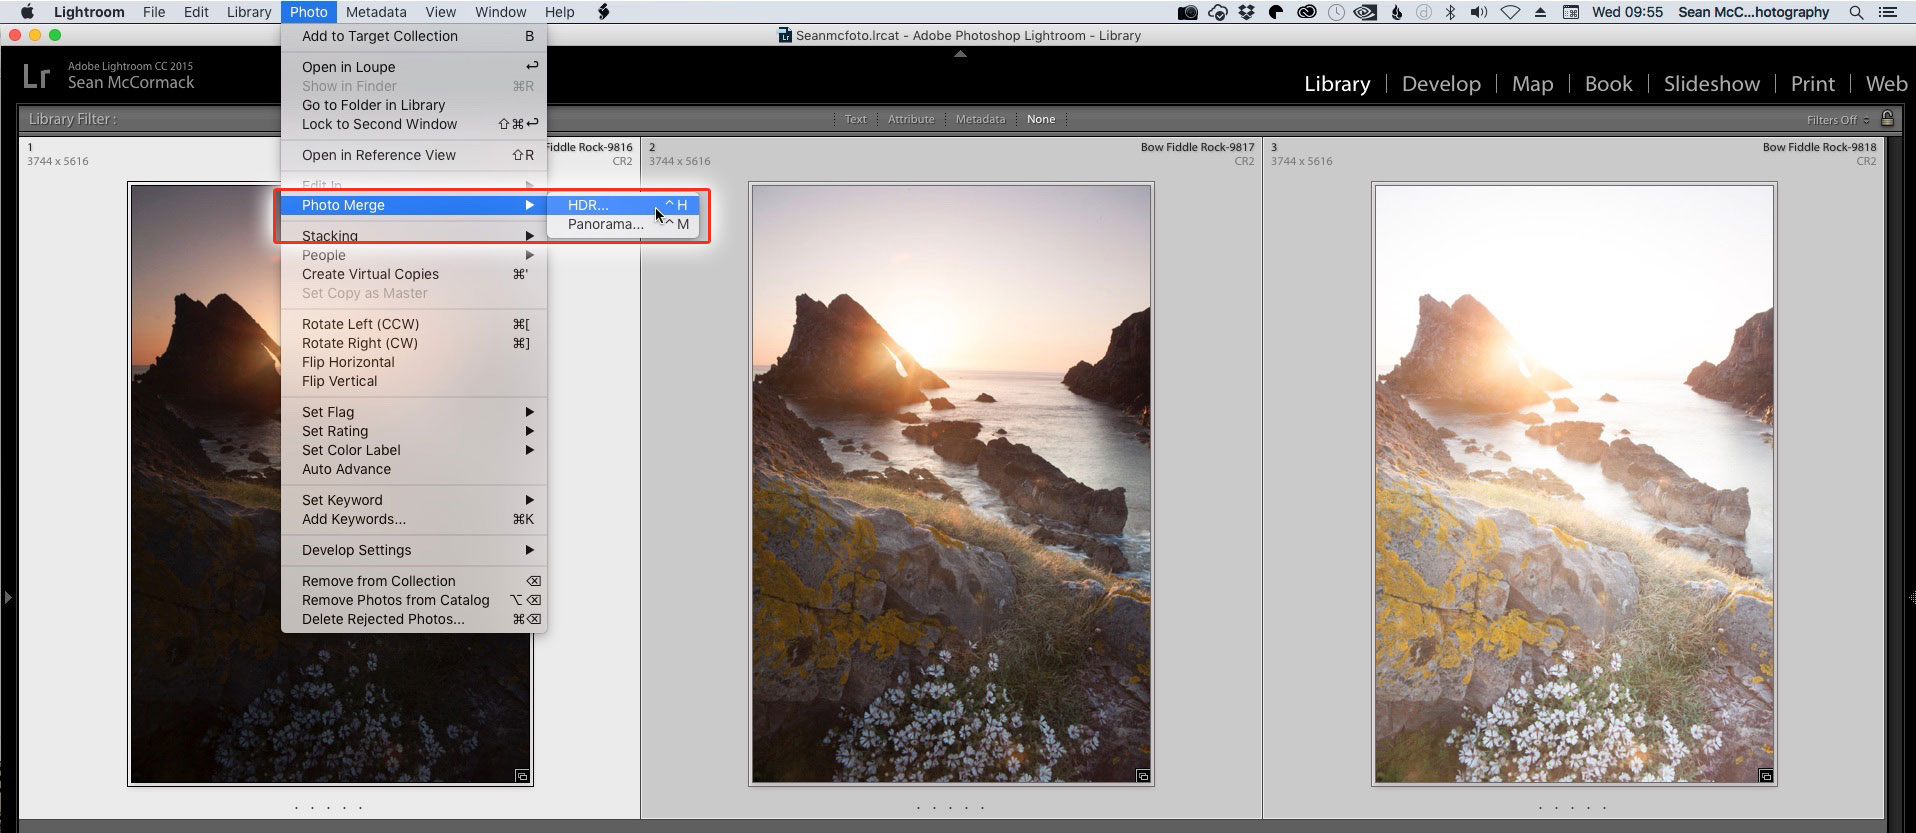
Collect the images you want in the panorama together and select them in the Grid. From the Photo menu, choose Photo Merge and then HDR. This has the shortcut Ctrl+H, which is the same in both macOS and Windows.
2. Preview the results
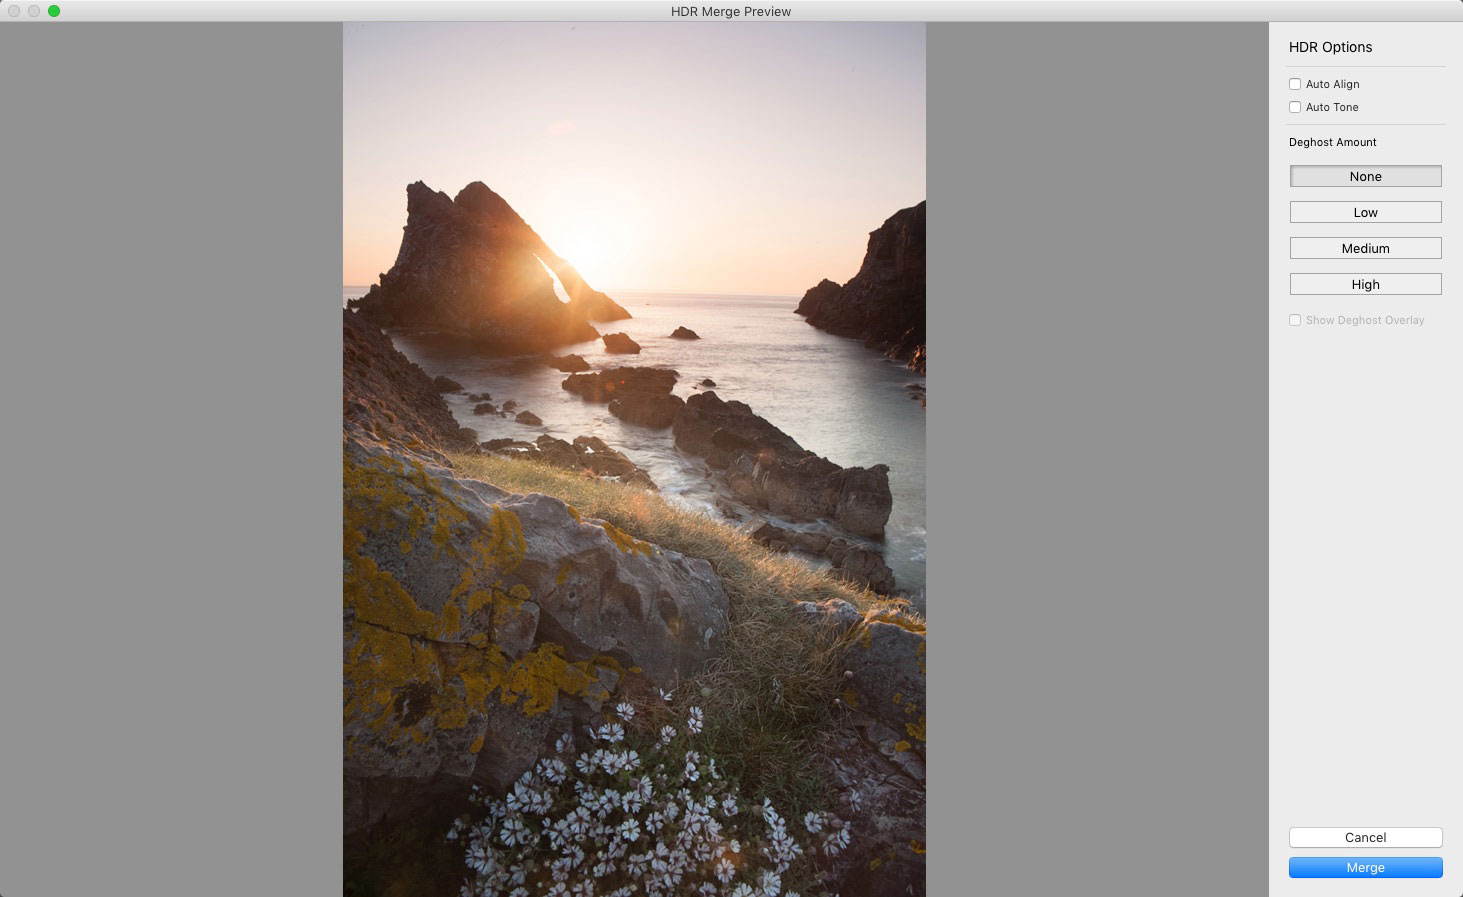
The Merge to HDR dialog will open and you’ll have a short wait while a preview is created. Once you’re happy, you can skip the preview by using the shortcut Shift+Ctrl+H to merge. Drag the edges of this dialog box to get a larger preview.
3. Align and Tone
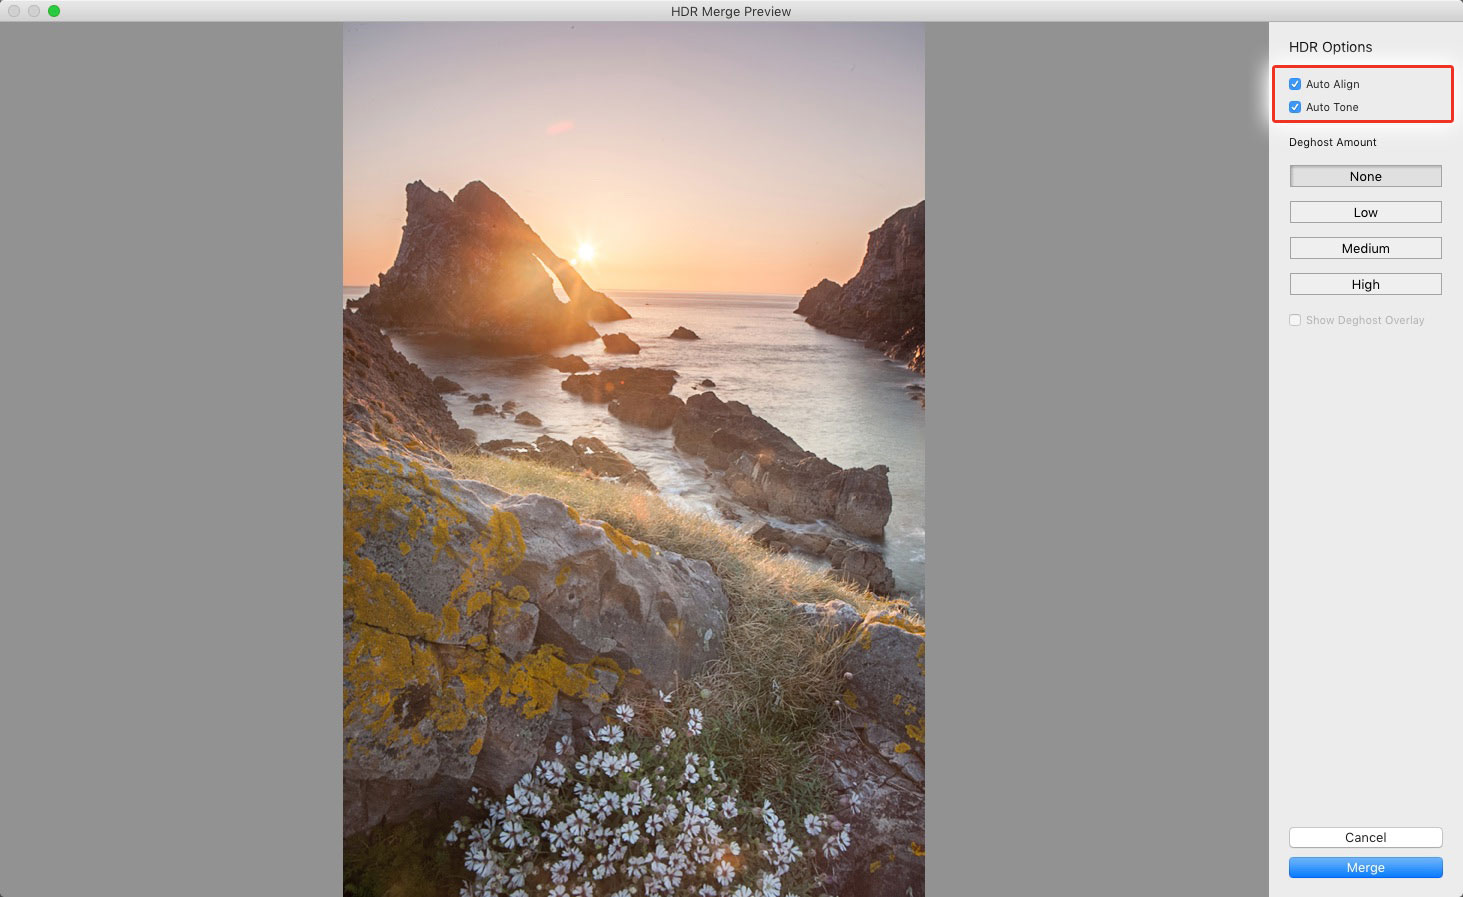
The first two options are Auto Align and Auto Tone. Auto Align will fix errors from handheld brackets, or accidental tripod movement. Auto Tone applies a tonal correction. It’s generally -100 Highlights and +70 Shadows, with +15 Whites and -15 Blacks, rather than being based on the image itself.
4. Deghost amount
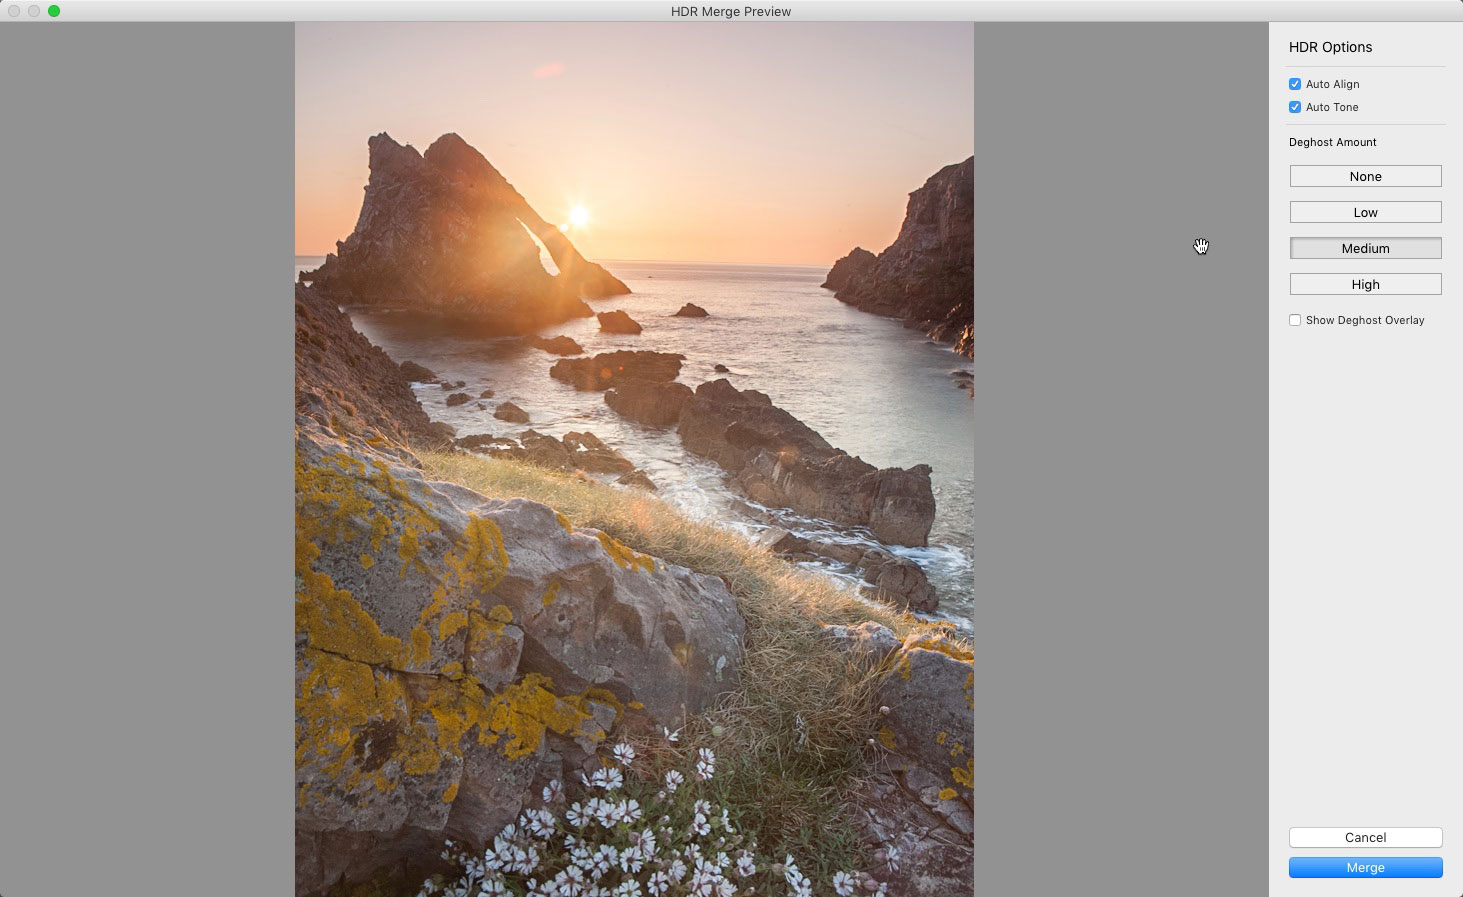
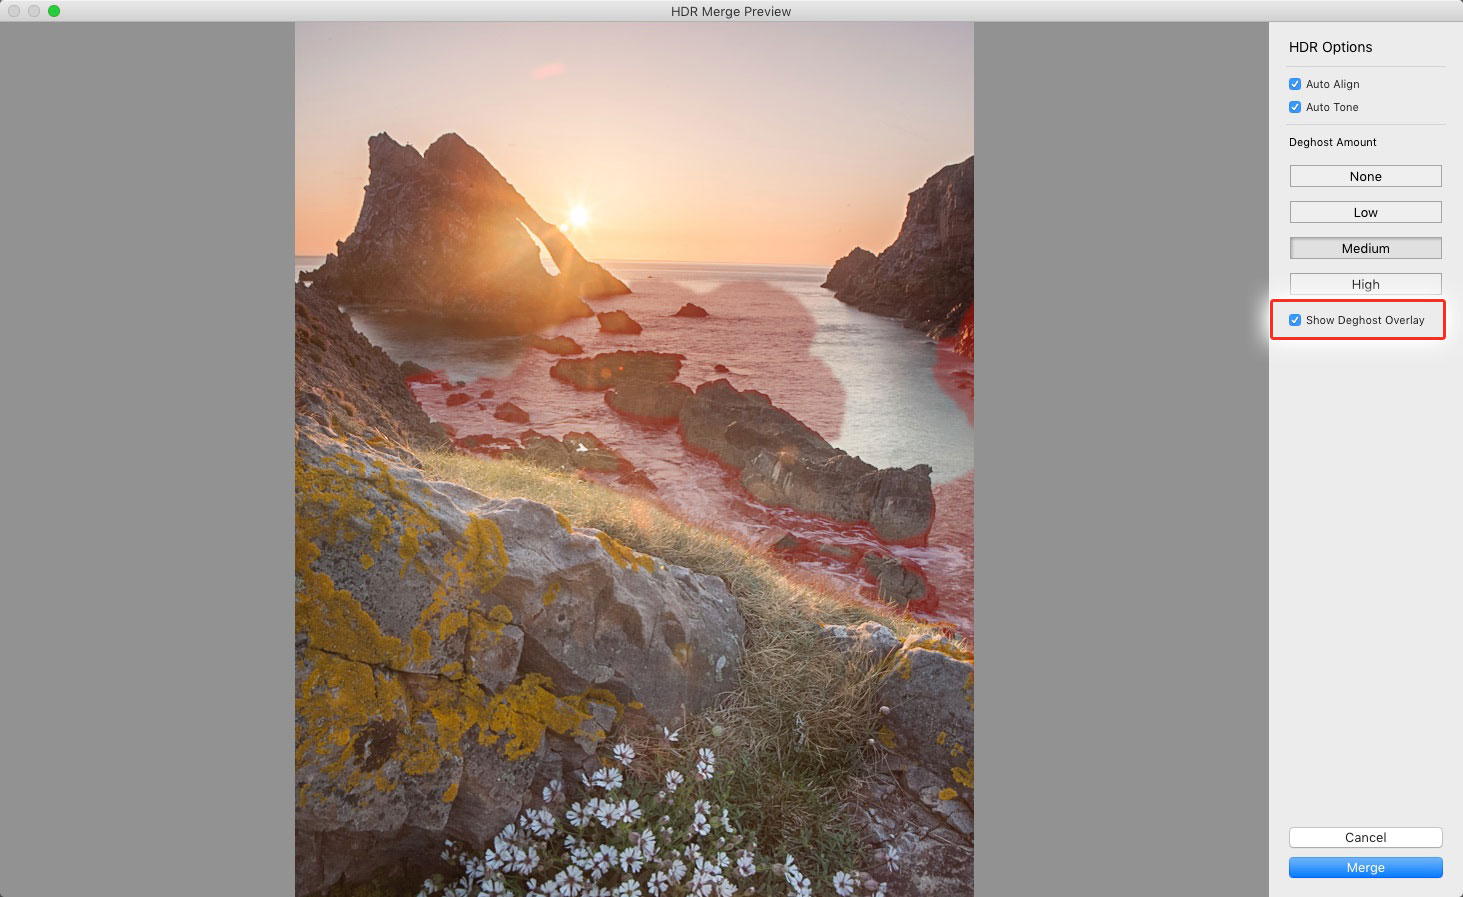
Anything that moves in your photo (for example, waves or clouds) can cause ghosting, which can show up as an artefact in the merged photo. If nothing is moving, leave this on None. Try the other options to see what looks the best if you have some movement.
5. Check and merge
To check which areas are being replaced, turn on the Show Deghost overlay. You can click on the preview to zoom in slightly. Once you’re happy, click the Merge button. Lightroom will then merge the files in the background.
6. Finishing touches
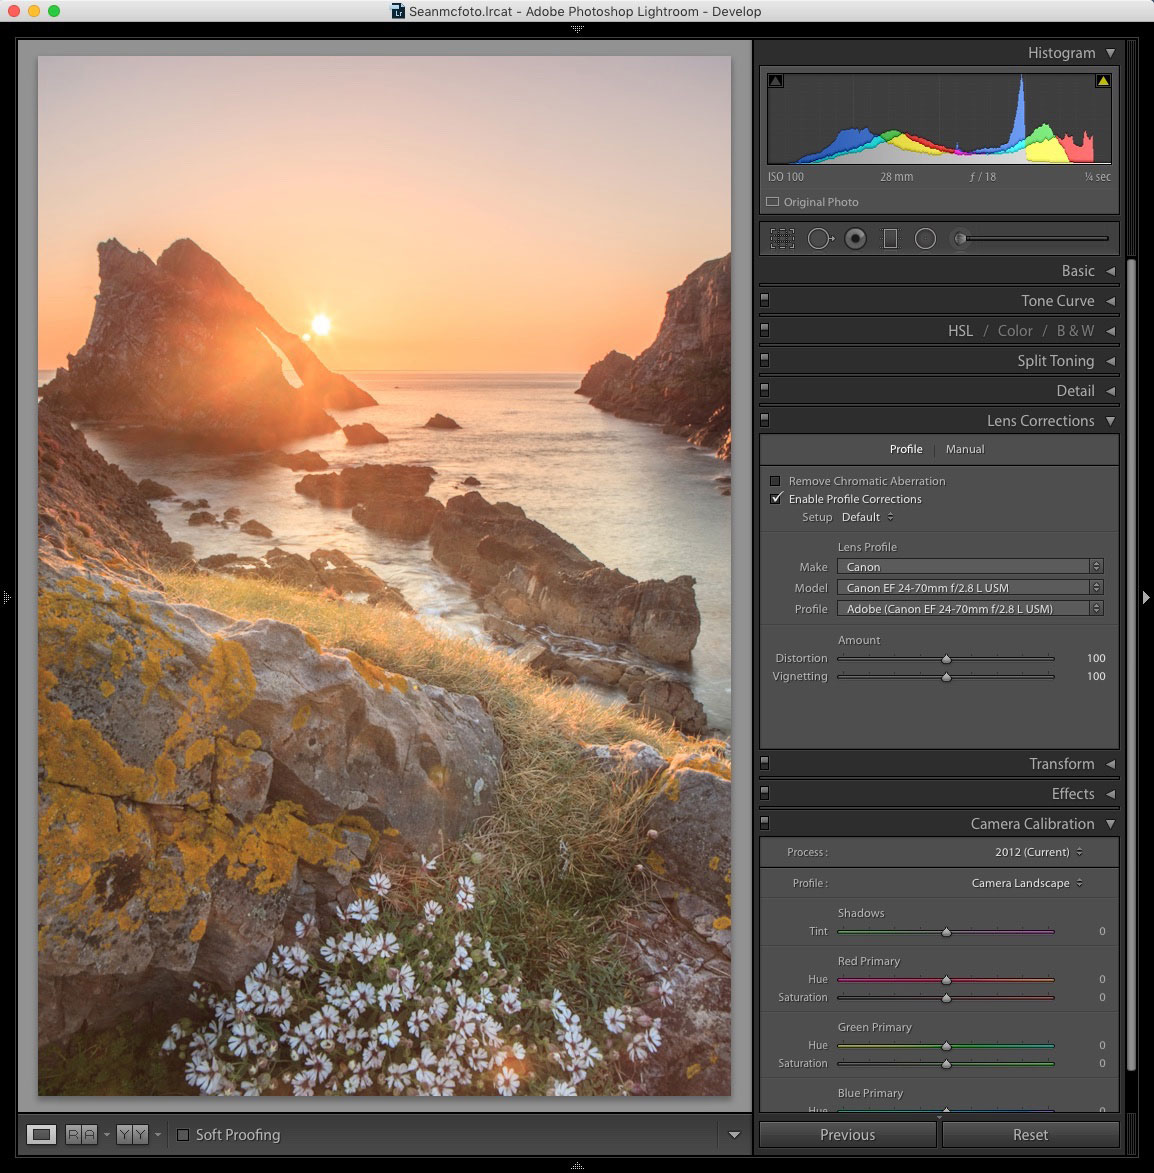
Because the HDR file is a DNG, you can apply a camera profile, like a Vivid or Landscape mode. You have full White Balance control, so you can easily warm the photo for a golden hour look, and do further edits to the file in Lightroom. Here I’ve also fixed the horizon and applied a lens profile.
Expert tip: HDR best practice
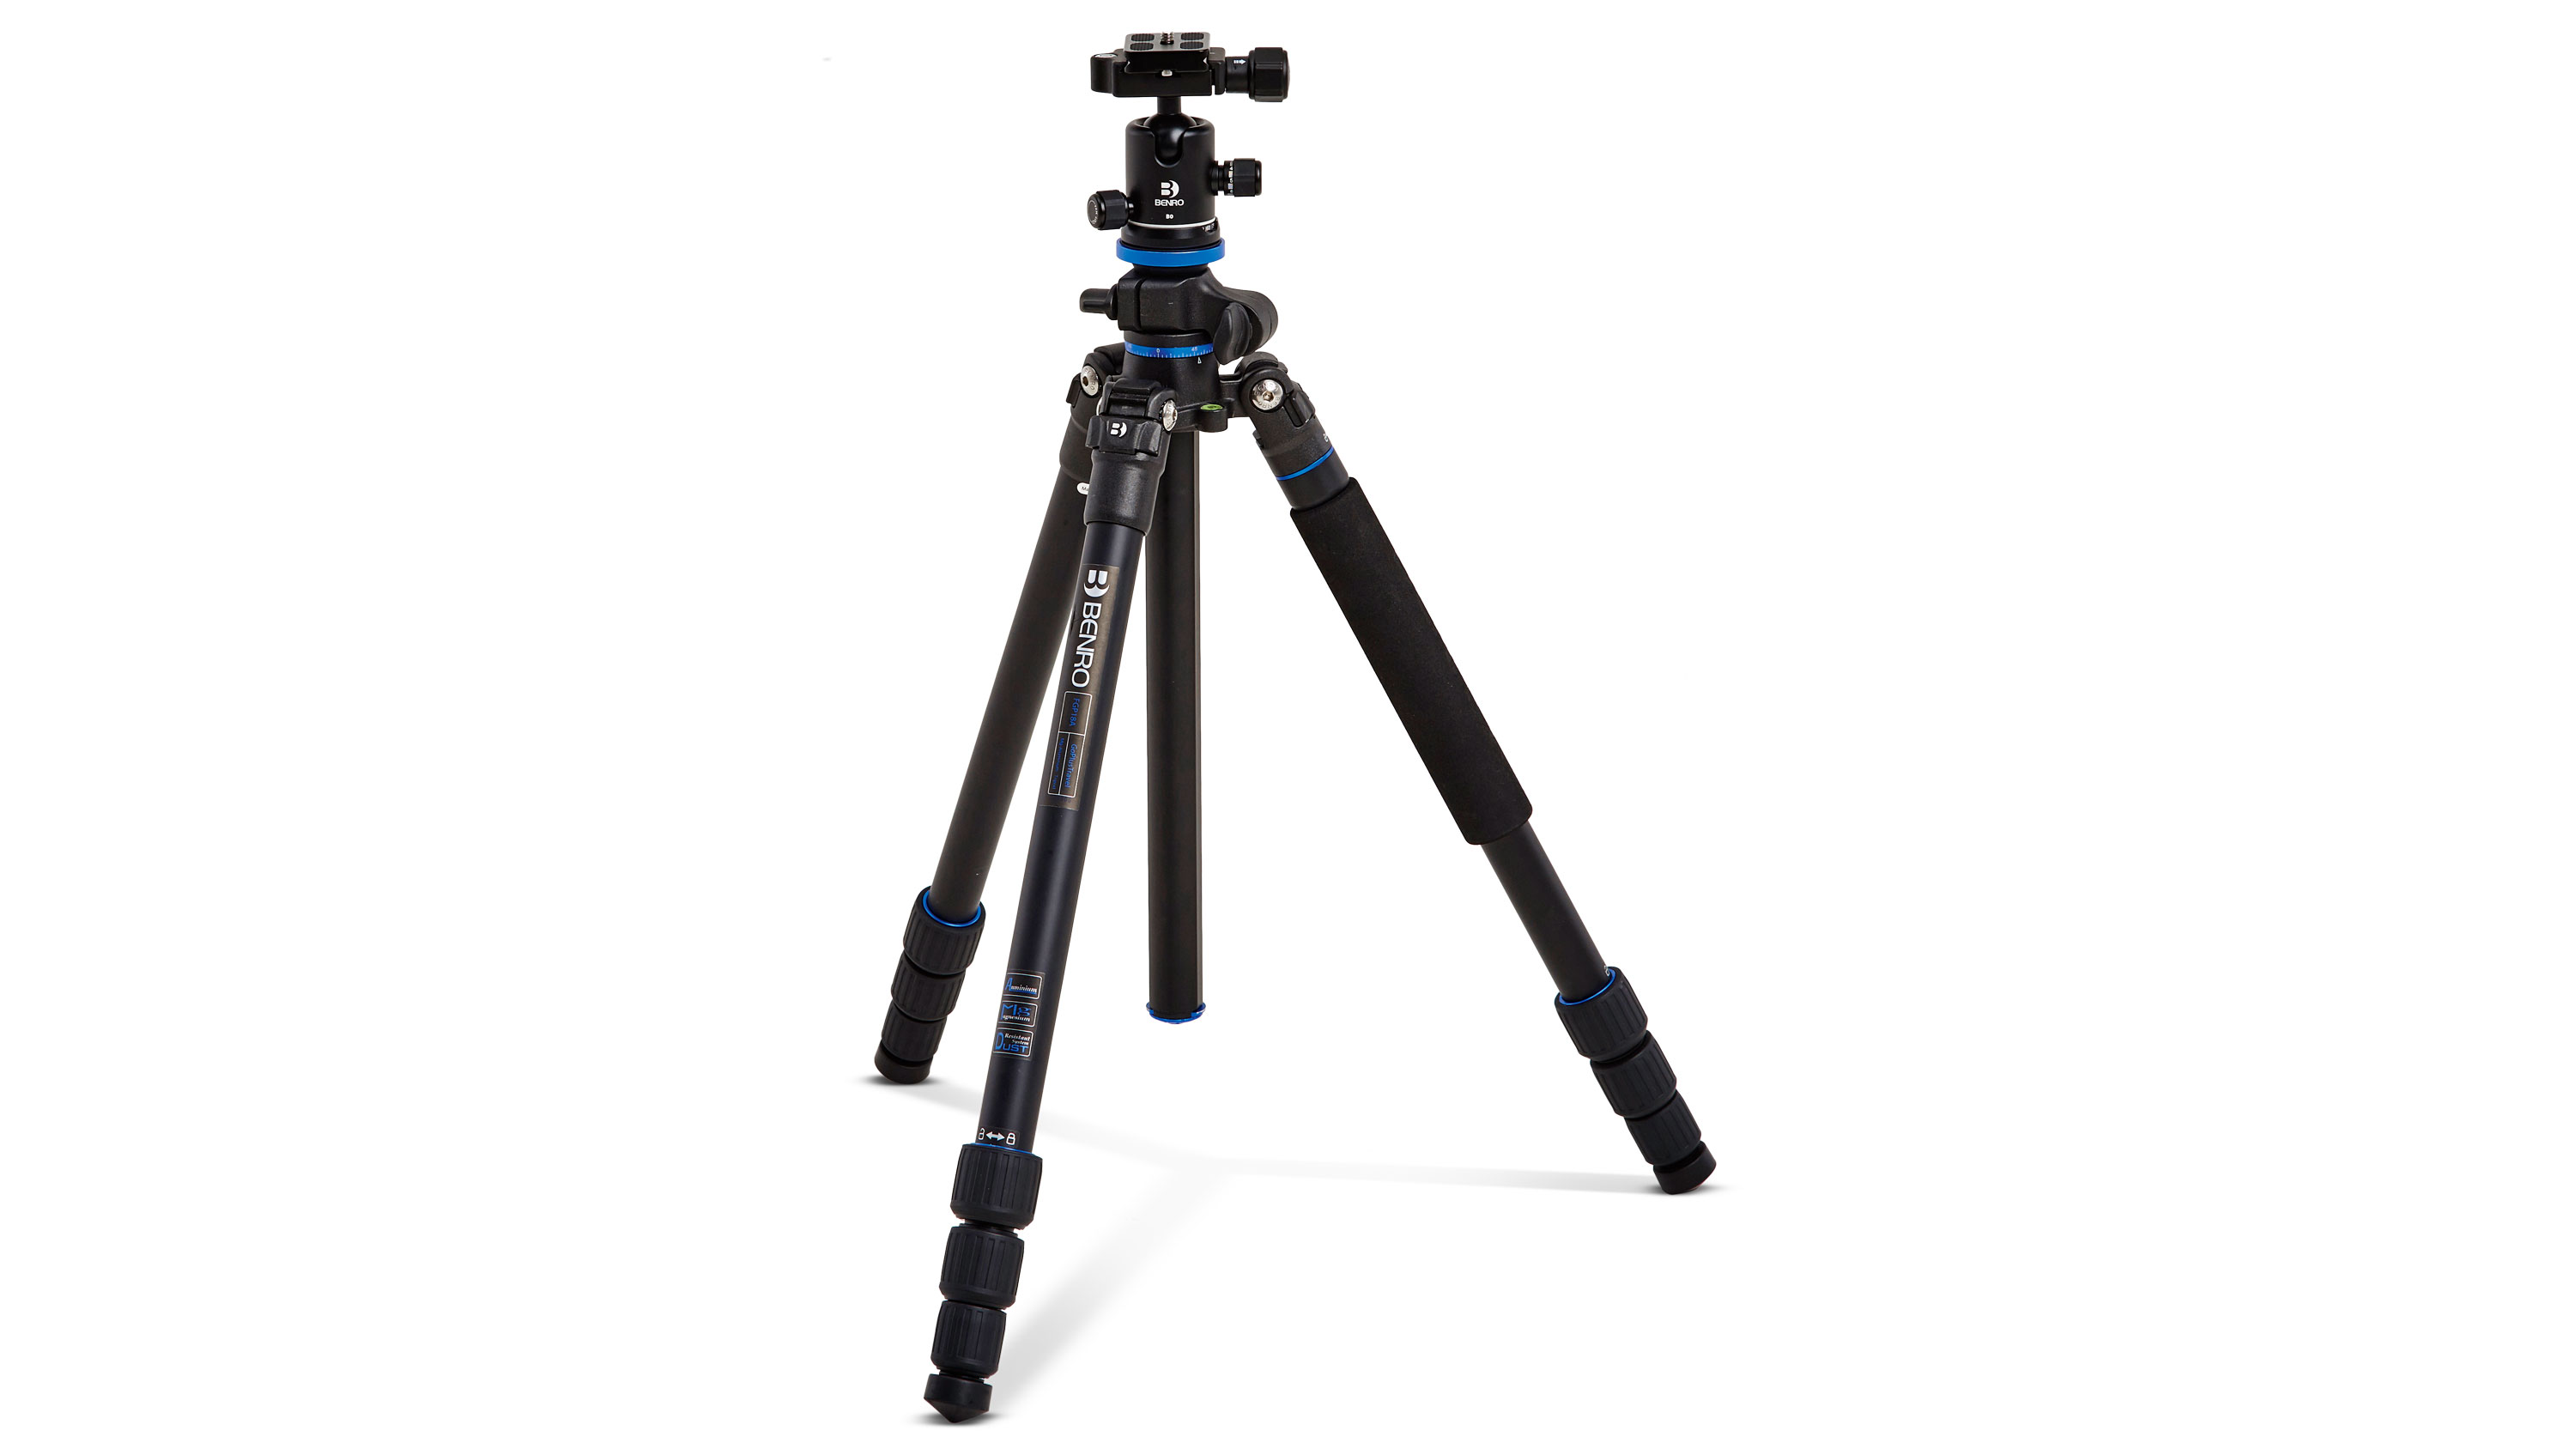
There are a few tricks to getting good shots for HDR Merge. With landscapes, your apertures tend to be stopped down for more depth of field. While your 0 exposure may be easily handheld, you may find that your -3 exposure is really long. For this reason, it’s best to always use a tripod to avoid camera shake.
Speaking of shutter speed, this is the only setting you should be changing to create your bracketed set. As aperture controls depth of field, this needs to remain the same. The only other option is ISO. As the different ISOs will have different noise patterns, you’ll get really strange noise ghosting in the HDR from this, which is best avoided.
The final consideration is that you’re not limited to three exposures. Some people do five, in two-stop intervals. Others do seven or nine in one-stop intervals. You can even do it from two photos, but you need to limit the range of exposures, as you’ve fewer options for ghosting with this limited approach.
About Digital Camera magazine
This tutorial originally appeared in Digital Camera Magazine, the monthly newsstand magazine for all photographers. Why not subscribe to a print edition, and have the magazine delivered direct to your door every month?
Alternatively, we have a number of different digital options available, including:
• Apple app (for iPad or iPhone)
• Zinio app (multi-platform app for desktop or smartphone)
• PocketMags (multi-platform app ideal for Android devices)
• Readly (all-you-can-eat digital magazine subscription service)
If you wanted a printed version of any of our most recent issues we have a selection of back issues to choose from in our online store.
How to get Adobe Lightroom
Adobe Lightroom is available in two versions: the regular Adobe Lightroom Classic CC designed for desktop users, which is what we cover in this series, and a new cloud-based Adobe Lightroom CC, which stores your files online and offers a similar but reduced set of features. For regular desktop users we recommend Adobe Lightroom Classic CC.
Adobe offers three subscription based Photography Plans which you can click on below. We recommend either the regular Photography Plan, or the Photography Plan (1TB) which costs more but comes with 1TB online storage in case you decide to go with Lightroom CC.
For this set of tutorials and for anyone who likes to work on a single main computer, we recommend the regular Creative Cloud Photography Plan. This is the cheapest way to get started AND it comes with Photoshop CC too.
Read more:
• This is the best photo-editing software today
• These are the best laptops for photographers right now
• We help you choose the best desktop computers for photo editing
Sean McCormack is a commercial, and editorial photographer, book author, and regular contributor to Digital Camera magazine based in Galway, Ireland. He has extensive experience with Lightroom, dating back to its original beta version, and has tried out just about every plugin and preset available. His latest book is Essential Development 3: 25 Tips for Lightroom Classic’s Develop Module.
