Watch video: How to shoot a traffic trail scene
One of the best things about a mirrorless or DSLR camera is the manual and semi-automatic modes they have, which make it possible to get really creative with your shutter speed and aperture.
In this project you'll find out how to use your camera’s manual mode so that you can extend the shutter speed, which is the length of time that you expose the camera sensor to light.
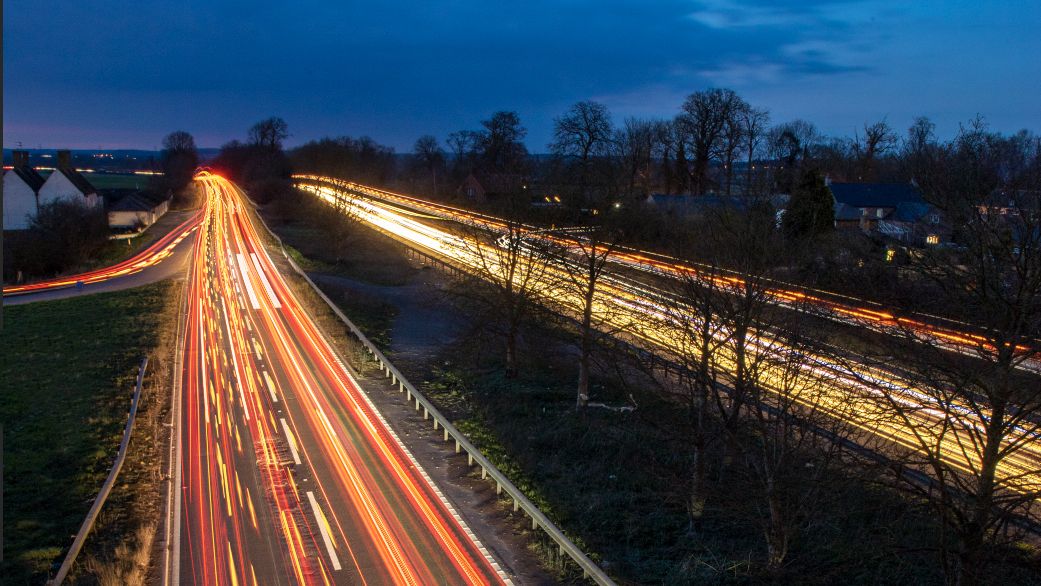
A long exposure, usually several seconds, allows you to record the motion of any moving part within a frame, such as the bright headlights and brake lights of moving cars. By locking off the camera on a tripod we can keep the landscape sharp but turn the traffic into long, eye-catching vibrant streaky trails.
Shoot at dusk, the hour after sunset, so there’s still a bit of color in the sky and take a friend with you when you’re out shooting if you don’t feel safe shooting at night on your own.
• Top landscape photography tips
01 Set up on a tripod at a safe location
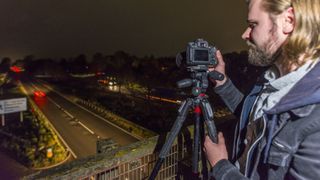
Find a public walkway that overlooks a busy road so you can maximise your opportunity to shoot lots of cars going past. Make sure your tripod isn’t in the way of people walking past and definitely don’t set up in the road! Avoid leaning your tripod against any railings as this will likely mean more vibrations appear from passing cars could be picked up resulting in the whole image being blurry and unusable.
02 Use manual focus for sharp shots
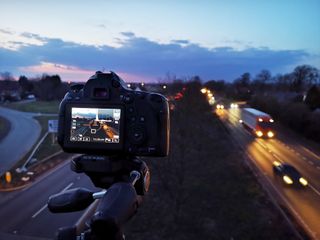
Go into Live View and focus on part of the road about a third of the way into the frame, the AF point will then turn green on most cameras to show focus has been acquired and is now set. You can lock it in place so you don't accidentally refocus when pressing the shutter button by going into the Manual Focus (MF) on your camera.
03 Dial in the right settings
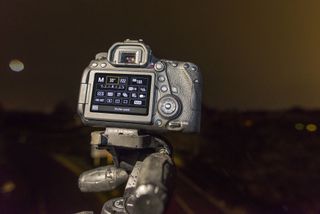
Go into the Manual mode (M) of your camera and input a shutter speed of 30 seconds, an aperture of f/22 and an ISO of 100 for best image quality. Then set it to shoot Raw files so you have more exposure data to play with when editing.
Take a test shot and see if you’re happy with the composition and overall exposure. If it’s too bright, lower the shutter speed, or boost the ISO if the result is too dark and try again. It's much easier to fix any exposure, focus or compositional problems here than back at your computer.
04 Build up the effect in Photoshop
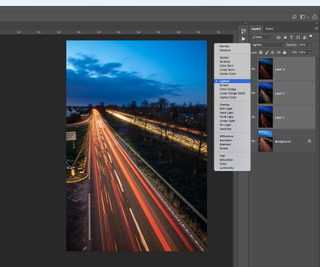
You’ll likely need to combine a few images together to get a perfect result. To do this, select all of the Raw trail pics you want to merge together in Adobe Bridge and open them into Photoshop’s Adobe Camera Raw. Right-click one of the image thumbnails and choose Select All, then you can make your Raw edits to all of the images so the adjustments are consistent throughout. Now click Open Images to bring them into Photoshop. Hit Ctrl/Cmd+A to select one of the trails, Ctrl/Cmd+C to copy it and Ctrl/Cmd+W to close the image down, and in another of your pictures hit Ctrl/Cmd+V to paste it in and repeat to bring all your light trail pics in. Then go to the Layers panel (Window>Layers) and select all of the layers and change the Blending Mode from Normal to Screen to see them all combined.
Half-price magazine subscription
PhotoPlus: The Canon Magazine is the world's only monthly newsstand title that's 100% devoted to Canon, so you can be sure the magazine is completely relevant to your system. Every issue comes with a disc of video tutorials too. Save up to 50% off the usual newsstand price with a subscription. Offer ends 01 December.
from US$22.70| from £9.70 | from €17.00 per quarter
Read more:
The best photo editing software: image editors for novices through to pros
Night Photography tips
How to prepare for low-light and night photography
Get the Digital Camera World Newsletter
The best camera deals, reviews, product advice, and unmissable photography news, direct to your inbox!

Deputy Editor on PhotoPlus: The Canon Magazine, Dan also brings his technical wizardry and editing skills to Digital Camera World. He has been writing about all aspects of photography for over 10 years, having previously served as technical writer and technical editor for Practical Photography magazine, as well as Photoshop editor on Digital Photo.
Dan is an Adobe-certified Photoshop guru, making him officially a beast at post-processing – so he’s the perfect person to share tips and tricks both in-camera and in post. Able to shoot all genres, Dan provides news, techniques and tutorials on everything from portraits and landscapes to macro and wildlife, helping photographers get the most out of their cameras, lenses, filters, lighting, tripods, and, of course, editing software.
