7 golden rules of tripod stability
Get your sharpest shots yet with our tips

Whether you've just bought your first tripod or you've been using one for a while, knowing how to use it correctly is vital.
There are a number of easy mistakes that can affect your tripod's stability, and this in turn can mean your images aren't as sharp as they could otherwise be.
Here are the seven most important things to get right to ensure your tripod stays steady.
1. Check the payload of both your head and legs

The first thing to check is that your tripod can support the equipment you're planning on using.
All tripod legs and heads have a maximum weight they can support, sometimes referred to as the payload.
If your equipment exceeds this limit, you might find your tripod or head may move under the extra weight, which will affect the sharpness of your images.
You can do this easily on the tripod manufacturer's website, or through the documentation that came with your equipment. If you bought your legs and head separately, make sure to check both.
• The best carbon fiber tripods
2. Check the feet for rubber spikes

Tripods tend to be designed with small rubber feet and, on some models, removing these reveals small spikes.
These are designed for use on softer surfaces such as grass, so if you tend to shoot in these conditions, you may find using these provides better grip than the rubber feet.
3. Extend the legs in the right order

To ensure your tripod is as stable as possible, you should extend the legs in the right order.
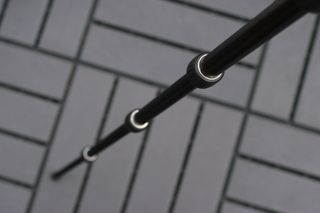
You should have three of four leg sections per leg, and the first ones you should extend are the thickest, uppermost sections.
If extending this first section doesn’t provide the height you need, extend the next section along (the second-thickest section), before moving to the next ones if you need to.
4. Only extend the centre column last

The fastest and most tempting way to give yourself extra height is by simply lifting the centre column and locking it in the desired position, but this should only be used once all leg sections have been extended.
This is sometimes necessary for the required height, but it will compromise stability.
Always extend the leg sections first, then move to the centre column if you absolutely need to.
5. Don't overtighten

Tripods that are designed with simple clasp locks make it easy to secure and release a leg section, as they can only be set to one of two positions.
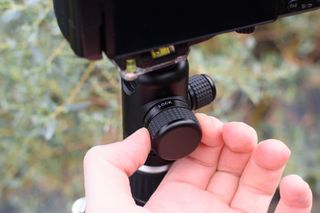
Many tripods and heads, however, have screw locks, which need to be tightened and unscrewed. You should check that each of these is sufficiently tightened so that nothing moves during the exposure.
One thing you shouldn’t do, however, is to screw anything too tightly. Providing you have a good-quality tripod to begin with you shouldn’t need to anyway. Doing so can end up causing damage.
6. Use the hook if there is one

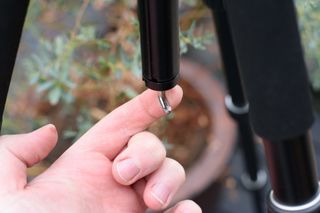
Many tripods have a small hook on the underside of the centre column, and this allows you to hang a bag or weight of some kind for extra stability.
This is particularly useful in windier conditions, or when there may be any vibrations in the environment, such as from nearby traffic.
7. Mount telephoto lenses using the collar

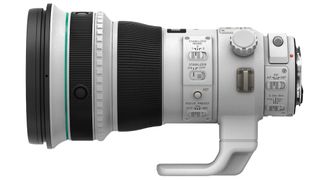
Some longer and heavier lenses may imbalance a camera when they are mounted conventionally, and this may move during the exposure.
Lenses that are particularly susceptible to this are designed with a collar that sports its own tripod mount.
These allow you to mount the camera and lens combination closer to its centre of gravity, which makes this less of an issue.
As a general rule, you should turn off the image stabilisation system on your camera or lens when using a tripod. Such systems can sometimes detect vibrations when mounted on a tripod, which they then attempt to correct. This in turn can create a never-ending loop of vibration and correction, which can compromise sharpness. Some systems, however, are smart enough to sense when they are being used in conjunction with a tripod, and will turn themselves off automatically – but most don't do this.
... and how to trigger the exposure
Once you've got your tripod as stable as possible, the last thing you want to do is to cause it to move in some way during the exposure.
For this reason, you should trigger the exposure using a cable release or a wireless remote, or with your camera’s self timer. One of these three methods will ensure that your tripod and camera remain in place.
If you're using a DSLR, you may be able to program the camera to flip the mirror up in a separate action to the shutter opening. This option is sometimes marked Mirror Up or Mirror Lock.
Get the Digital Camera World Newsletter
The best camera deals, reviews, product advice, and unmissable photography news, direct to your inbox!
The former editor of Digital Camera World, "Matt G" has spent the bulk of his career working in or reporting on the photographic industry. For two and a half years he worked in the trade side of the business with Jessops and Wex, serving as content marketing manager for the latter.
Switching streams he also spent five years as a journalist, where he served as technical writer and technical editor for What Digital Camera before joining DCW, taking on assignments as a freelance writer and photographer in his own right. He currently works for SmartFrame, a specialist in image-streaming technology and protection.
