Camera ISO settings: take control of your exposures in low light
Master the ISO setting on your camera so you can take better shots in low light
Watch video: How to control ISO
ISO is the sensitivity of your camera’s sensor (or the film, if you're shooting analog!) to light, and is also the third ingredient in the ‘exposure triangle’, along with shutter speed and aperture. We pick low ISOs when we’re shooting in bright light, and we increase the setting, mostly, the more the light levels drop.

If you’re shooting with your camera attached to a tripod, and a slow shutter-speed setting is not an issue, then keep the ISO as low as possible – ISO100, for example. Only increase the ISO when you need to adjust your other settings – a classic case is when we need our shutter speed fast enough for shooting handheld, so any movement of our camera and lens in our hands won’t cause a blurred photo. See also What is ISO?
In this example, we’re shooting a performing musician on stage in challenging low light conditions:
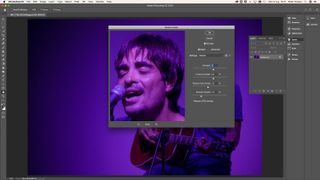
Shooting at only ISO100 and f/6.3, our shutter speed was slow at only 1/8 sec, which meant a blurry handheld photo. By increasing the ISO to 1600, it’s increased the sensor’s sensitivity, which enables us to select a shutter speed of 1/125 sec at f/6.3: good for a sharp handheld shot!
The downside is the higher the ISO, the more ‘noise’ introduces itself. Also, noise is more apparent on smaller APS-C sensor cameras compared to larger sensors on full-frame cameras. Put simply, this is because the sensors (and, therefore, the pixels and photosites) are smaller on crop sensors.
You can also increase the ISO if light levels are low and you want to use a narrower aperture for a brighter exposure of a scenic shot, and want a fast enough shutter speed without the need for a tripod (see Step 4).
ISO is a key feature on your camera, and one that you need to fully understand to take better photos.
• See also Best light-light cameras
1. How to adjust ISO
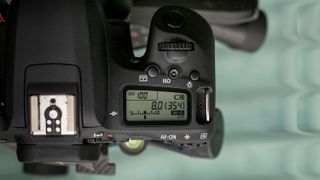
Depending on your camera, there are a number of ways to change the ISO sensitivity. Some bodies have a dedicated ISO button, Fujifilm cameras feature a dedicated ISO dial, and many cameras have a quick-menu button (like the Q button on Canons) or touchscreen interface.
A typical ISO range will start at 100 and go up to 25,600 or even higher, depending on your system.
2. Low ISO
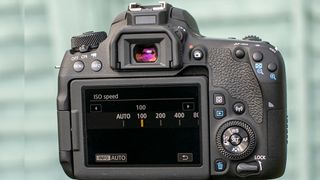
When shooting in daylight, you’ll want to keep the ISO setting as low as possible – which means shooting at your camera's base ISO. In other words, use the lowest native ISO setting – for many cameras this is ISO100. At this point, it will produce the highest image quality possible.
If you’re taking images on an overcast day, you may need to push the ISO up to the 400 or 800 point to compensate for the lower light.
3. Higher ISO equals more noise
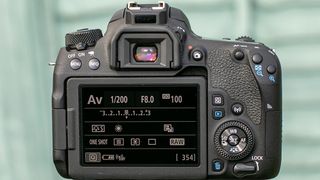
You can use higher ISO settings when you need to increase your shutter speed setting in low light. However, the more you increase the ISO, the more noise will start to appear in your images. It’s a compromise between keeping the ISO as low as possible, and avoiding the camera shake caused by slow shutter speeds.
4. High ISO for narrow apertures
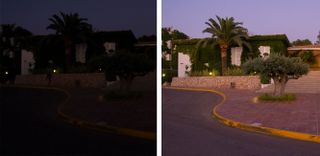
Here’s an example of using ISO effectively when shooting a scene in the evening where we want a narrow aperture of f/8 and a shutter speed of 1/80 sec for a sharp result. With our ISO set to 200 in the ambient light, the exposure is very dark (left). If we push the ISO to 1600, however, the near-nighttime shot is well exposed (right).
Read more
What is ISO?
How to understand ISO settings
Understanding the exposure triangle
The best Canon camera in 2020
Get the Digital Camera World Newsletter
The best camera deals, reviews, product advice, and unmissable photography news, direct to your inbox!
The editor of PhotoPlus: The Canon Magazine, Peter 14 years of experience as both a journalist and professional photographer. He is a hands-on photographer with a passion and expertise for sharing his practical shooting skills. Equally adept at turning his hand to portraits, landscape, sports and wildlife, he has a fantastic knowledge of camera technique and principles. As you'd expect of the editor of a Canon publication, Peter is a devout Canon user and can often be found reeling off shots with his EOS 5D Mark IV DSLR.
