
Before you read this buying guide, it’s worth considering whether you are better suited to a camera backpack, a messenger bag, or a sling bag (a halfway house between a shoulder bag and backpack, it is worn on the back but slides round to the front for easy access to gear).
The main advantage of a 'proper' backpack is that they are more capacious than other types of camera bags, offering more room for photo gear as well as non-photographic items. In addition to your usual camera kit, many backpacks have compartments to accommodate a mix of clothing, laptops, your lunch, more exotic photographic accessories such as a drone, as well as being able to secure tripods and the like to the outside.
What's more, they enable you to carry it all in comfort, with the load spread across your shoulders, torso, and hips, while breathable designs reduce sweaty-back syndrome. As such, they are ideal for landscape and travel photographers, who may be carrying their kit around for hours. Their downside is that you generally have to remove a backpack completely to access any gear, so they're not as quick for capturing fleeting moments.
I've hand-picked a wide range of backpacks for this guide, suitable for everything from day trips around town to more extensive hikes, so there should be something to suit your specific photographic transport needs. Without further ado, let's put our backs into it!

George has been freelancing as a photo fixing and creative tutorial writer since 2002. An outdoor enthusiast, he's tried dozens of bags to carry his photography kit and is your guide to the best camera backpacks available today.
The Quick List

The McKinnon Cube Pack can be used to store and organize your camera gear inside a larger McKinnon backpack or act as a backpack in its own right if you need to travel fast and light.
Read more below...

A sturdy and capacious backpack that can be adapted for use as an all-purpose backpack or for various photographic scenarios.
Read more below...

This sturdily constructed and water-resistant backpack is perfect for travel / landscape photographers who need to go ‘off-road’ while keeping their kit safe.
Read more below...

The Shimoda Urban Explore 25 will suit traveling photographers who need to carry additional gear, such as laptops and clothing, in style and comfort.
Read more below...

This clever backpack system enables you to fix extra modules to the front any time you need to carry additional gear with you.
Read more below…

The Tenba DNA 16 DSLR Backpack does a great job of providing your kit with plenty of storage space and protection from extreme weather (as well as being comfortable to carry on a shoot).
Read more below...
Load the next products ↴

If you have a lot of gear to cart around, the Flexloader can swallow a camera body or two, plus up to eight additional lenses, with space to spare for a drone, gimbal, tripod, and laptop – but it's big…
Read more below

Weighing just 400g, the LowePro RunAbout folds away to take virtually no space and can be stowed when empty inside larger bags, but doesn't offer much in the way of protection for your gear.
Read more below

With a super-sturdy construction, Lowepro's Pro Trekker BP 650 AW II will keep your expensive gadgets protected against whatever nature throws at it, while its modular interior can be adjusted to suit a wide range of photo gear.
Read more below
The best camera backpacks
Why you can trust Digital Camera World Our expert reviewers spend hours testing and comparing products and services so you can choose the best for you. Find out how we test.
Best camera backpack overall
✅ Versatile Design: Functions as both a compact camera cube and a 21L backpack, offering flexibility.
✅ Water-Resistant: Keeps your gear dry in wet conditions, offering peace of mind during outdoor shoots.
❌ Limited Capacity: While versatile, the 7L camera cube might be too small for larger setups or additional lenses and gear.
❌ Dependent on Larger Backpack: Although it works independently, it’s designed to fit inside the larger McKinnon Camera Backpack 25L.
The Gomatic (or Nomatic in the States) McKinnon Cube Pack 21L is both a camera cube and a backpack. In its camera cube form, the Cube Pack is a rugged 7-liter box that has enough space for a small DSLR or compact camera, a lens, and a range of accessories such as chargers. The cube can be separated by dividers that can be rearranged using ‘hook and loop’ Velcro fasteners.
The cube is designed to fit inside the larger McKinnon Camera Backpack 25L (see below), but this is not necessary; if you want to travel light, you can transform the cube into a 21L backpack by simply unzipping a compartment. Think of the larger 25L McKinnon backpack as the mothership and the Cube Pack as a shuttle that you can use to transport your kit on shorter trips.
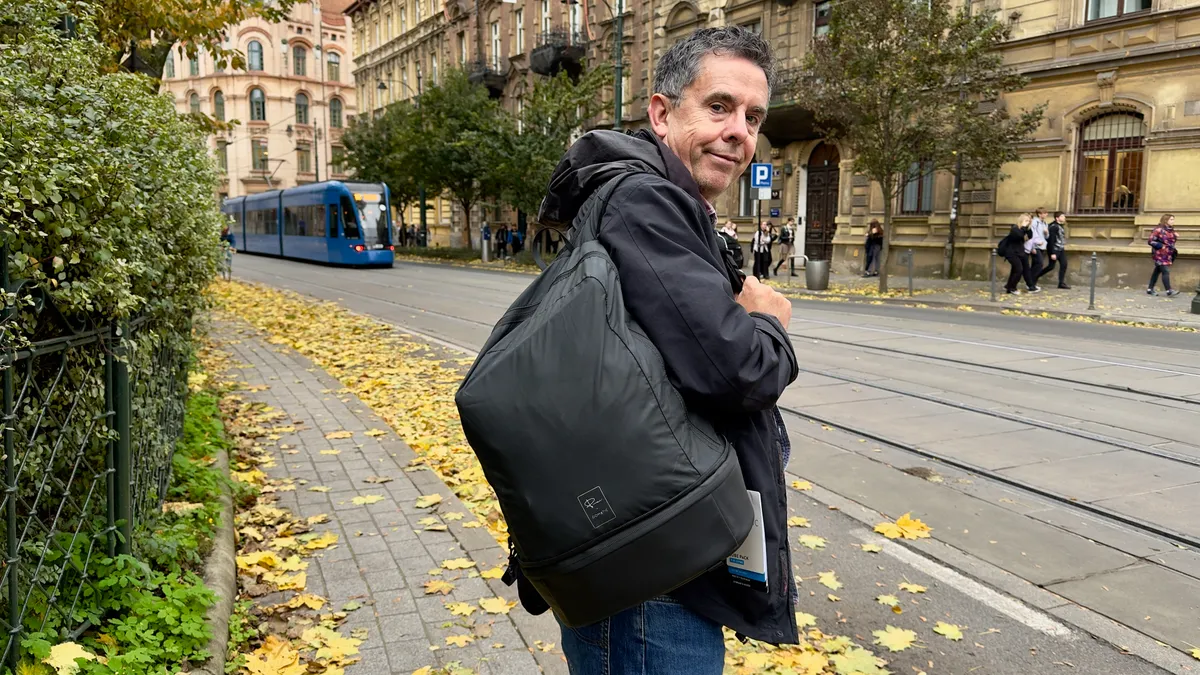
When deployed in its backpack form, you can use the McKinnon Cube Pack to transport camera gear and essentials like clothes in the underseat space when flying (which saves you the cost of paying extra for overhead luggage space). On a three-day trip to Poland, the Cube Pack was all I needed to carry kit and clothing (and I welcomed the concealed zippable passport pocket inside the backpack section of the Cube Pack). It is also water-resistant, so my kit stayed dry when it rained.
Read our full Nomatic McKinnon Cube Pack (21L) review
Best backpack for general use

✅ Modular Design: Compatible with camera cubes that can be tailored with Velcro dividers, making it highly adaptable.
✅ Tech-Friendly: Dedicated space for an iPad and keyboard makes it a great option for content creators who need to work on the go.
❌ Additional Costs: To fully utilize the bag’s potential, you may need to invest in extra modular accessories, like camera cubes.
❌ Requires Setup Time: Adjusting the ladder system and configuring the cubes can take time, which could be inconvenient for quickly accessing or changing your gear setup.
This spacious 25L backpack has a ‘ladder’ system that enables you to adjust the size of its internal compartments so that there’s more space for camera gear and less room for other items such as clothes (or vice versa). The ladder is simply a hinged divider that you can reposition with ease.
However, to make this backpack suit your photographic storage needs you may need to spend more money on modular accessories such as a range of camera cubes that are available in different sizes. You can set up the interior of these cubes (using adjustable ‘hook and loop’ Velcro dividers) to suit various shooting scenarios and then pop the appropriate cube into the 25L backpack.
If you need to use the McKinnon as a non-photographic backpack, you can remove the cubes to make more space. You can also pop the McKinnon Cube Pack (see above) into the 25L backpack.
I tested the McKinnon 25L backpack by transporting my photography gear to shoot an orchestra. I didn’t use any camera cubes as I needed to fit a chunky SmallRig All-In-One Kit for Smartphones carry case inside the backpack. I also brought a wide range of smaller accessories, such as a Hollyland Lark M1 microphone kit, which I used to interview the conductor and various musicians.
Smaller accessories, such as cables and chargers, fit nicely into the backpack's interior zipped compartments. These pockets are made of mesh, which enabled me to easily find the accessories inside. I also liked that I could store my iPad and its keyboard in a zipped storage section, so I could write up my review on the train journey back from the shoot.
Read our full Gomatic McKinnon Camera Backpack (25L) review
Best backpack for DSLR cameras

✅ Comfortable for Heavy Loads: Despite carrying up to 12kg of gear, the padded shoulder and waist straps make it surprisingly comfortable, even on hilly terrain.
✅ Female-Friendly: Option of women’s shoulder straps in three sizes at no extra cost, making it inclusive and comfortable for female photographers.
❌ Not Fully Waterproof: Although water-resistant, it may not offer complete protection in extreme weather, necessitating additional waterproof covers or bags.
❌ Heavy When Fully Loaded: Can become quite heavy when filled with gear, which may be cumbersome during extended travel or long hikes.
As the name suggests, the Explore V2 backpack range is designed to meet the needs of the travel / adventure photographer, and it does this with aplomb! The various compartments and pockets of this backpack can be populated with a range of accessories. You can then access various items quickly and easily using one of the multiple entry points into the bag. As with the McKinnon Camera Backpack (above), you need to buy additional internal storage packs – or Core module units – to help keep your camera gear organized.
When testing the Shimoda, I used a medium Core unit, which left me with extra space to store kit (or clothing) outside of the Core. The larger Core unit fills more of the backpack’s interior, leaving less space for clothing. There’s also a padded storage space for a 15-inch laptop in case you need to do any photo processing while away on a shoot.
Once I filled the Shimoda with a wide range of DSLR kit, it weighed in at a hefty 12kg, but the backpack’s sturdy and padded shoulder straps and the supporting waist strap made it surprisingly comfortable to carry, even on hilly terrain.
Female photographers can choose to ship the Shimoda with women’s shoulder straps at no extra cost, and these come in three sizes. Check out my colleague Hannah Rooke’s full review for a female perspective on the Shimoda Explore 35L.
The Explore V2 is made of water-resistant nylon, which is essential if you’re heading into the wet wilds to capture some stunning landscape shots. Most of the external zips are protected by a seal that prevents water from entering the backpack when the zips are shut. A nice touch is a whistle built into the chest strap, which can be used to signal for assistance if you get into trouble and there’s no phone signal!
Read our full Shimoda Explore V2 35L review
Best backpack for style

✅ Versatile Size Options: Available in 20L, 25L, and 30L sizes, catering to different needs and preferences.
✅ Dual-Use Functionality: Transitions from a camera bag to an everyday backpack by removing the core unit, providing flexibility.
❌ Moderate Gear Capacity: 25L may not be sufficient for those needing to carry extensive gear or larger items, especially in professional settings.
❌ Limited Outdoor Adventure Features: Compared to more rugged models, it lacks features tailored to serious outdoor or adventure photography.
Backpacks in the Urban Explore range are available in three sizes: 20L, 25L, and 30L, and I took the mid-range version for a test shoot. The Urban Explore 25 wasn’t too heavy to carry on a long walk (I clocked up over 13,000 steps on that shoot), but it was capacious enough to transport a wide range of equipment.
Unlike the Shimoda Explore V2 range (above), the Urban Explore backpacks ship with an insertable core unit that you can configure using ‘hook and loop’ Velcro pads. This enables you to customize the interior of the backpack to suit specific kit storage requirements. If you do want to use the Shimoda Urban Explore as an everyday bag, simply remove the core unit and fill the 25L space with whatever you like. It also boasts two side pockets that you can use to store a tripod and a water bottle, for example.
The Urban Explore features some welcome design touches, such as a built-in keyring clip, hidden SmartTag and Passport compartments, and a laptop sleeve that accommodates laptops up to 16 inches in size. There’s also a pass-through strap that makes it easier to pop the backpack on your wheeled luggage when navigating through an airport (plus the backpack meets international carry-on size requirements for flights). And although it's not designed for the most extreme weather thrown at you by the great outdoors, the Urban Explore is water-resistant enough to keep your kit dry during city drizzle.
Read our full Shimoda Urban Explore 25 review
Best modular backpack system

✅ Modular Design: If your needs outgrow the bag, you can add additional modular storage components to the outside.
✅ Multiple Access Points: You can get to your gear through the main compartment, from the top, or from either side.
❌ Heavy When Empty: Weighing 2.3kg before you even put any gear into it, this heavy-duty bag is, well, heavy…
❌ An Expensive Proposition: The bag itself comes with a premium price tag, and the modular add-ons can soon see the cost skyrocket.
This is the third generation of Lowepro's ProTactic BP 350 AW hard-wearing, modular camera backpacks, constructed with 85% recycled fabrics and featuring a protective hard-shell frame that holds its shape, offering superior safety for gear compared to soft-shell alternatives.
It is highly modular and customizable, featuring extensive exterior webbing, redesigned padding, and two new Quick Straps with a 'gatekeeper' system for securely attaching a full-sized tripod and other accessories. There are no fewer than four convenient ways to access gear: through a hard-shell top lid, the rear panel, and two side doors. An improvement over the previous generation is its fully detachable waist belt.
It is relatively heavy, at 2.3kg, and there's no getting away from the fact that the ProTactic line is an expensive system, especially when factoring in the cost of bolt-on accessories. But the BP 350 AW III is a top choice for professionals who require a hard-wearing and highly adaptable bag system, making it worth the premium price for its specialized performance.
The bag replaces the ProTactic BP 350 AW II, which, at the time of writing, was available at a steep discount – if you're happy to settle for last year's model.
Read more: Lowepro ProTactic BP 350 AW III review
Best daypack

✅ Built-in camera storage: Unlike backpacks that require additional storage cases, the Tenba DNA 16 comes with a dedicated camera compartment.
✅ Discreet Design: The lower compartment folds into the backpack, making it less obvious that you're carrying expensive camera gear, enhancing security.
❌ Rolltop Inconvenience: While water-resistant, the rolltop can be less convenient to open and close quickly, which may slow access to gear.
❌ Heavier Base Section: With built-in camera storage, the lower section can add weight and bulk.
The Tenba DNA 16 DSLR backpack has two main storage sections. The base section hinges out to reveal a classic camera bag interior, with padded pockets for a camera body and up to six lenses, so there’s no need to buy additional storage cases for your camera kit.
I was able to fit a Canon EOS 650D with an attached 24-70mm f/2.8 lens into the center compartment of the Tenba DNA’s lower section. The camera and extra lenses are separated and protected by padding, which can be removed or repositioned with hook-and-loop Velcro strips. You can even lift out the whole of the DSLR storage area’s padded compartments if you want to use this lower section to store other items as an everyday bag.
Because this lower section hinges back into the body of the backpack, people won’t know that you’re carrying anything more valuable than your clothes, which should help protect your camera kit from unwanted attention.
The top compartment of the Tenba provides a general storage area for miscellaneous kit or clothing and features a couple of little pockets, which are handy for storing smaller items. This top section is accessed via a water-resistant rolltop with Velcro seals that enable you to extend storage capacity, if required. After you’ve rolled and sealed the top, there’s no danger of water invading the bag.
You can carry the Tenba on your back, via a handle at the top, or piggyback it on your airport suitcase’s extendable handle via a strap dedicated to this purpose.
Read our full Tenba DNA 16 DSLR backpack review
Best heavy-duty camera backpack

✅ Generous Storage Capacity: The spacious interior is ideal for photographers needing to carry a large amount of gear.
✅ Comfortable for Long Hauls: Despite its size and weight, padded straps provide comfort, making it suitable for long hikes with heavy loads.
❌ Expensive: Given its size and feature set, this backpack comes with a higher price tag.
❌ Overkill for Casual Use: The robust build and extensive features may not be necessary for photographers with more modest gear-carrying requirements.
A huge, front-loading camera backpack, the Manfrotto Pro Light Flexloader L isn't ideal for anyone who won't make full use of its generous interior capacity, given its price and size. But if you need a big backpack that will give you peace of mind that your gear is well-protected, step right up: here it is.
The shock-absorbing dividers inside the Pro Light Flexloader mean your gear is well-protected from impacts. There's a decent degree of customization on offer, too; you can whip out all the internal gubbins and use it as a regular backpack if you want. I was then able to squash it down to a size where it may be more likely to fit within airline carry-on dimensions…
There's no getting away from it: this is a big and heavy bag, but its padded straps make it comfortable to wear, meaning it's a good choice for long hikes where you need to carry an extensive amount of gear.
Read our full Manfrotto Pro Light Flexloader L review
Best ultra light camera backpack

✅ Ultra-Lightweight: Weighing just 400g, this is Lowepro’s lightest backpack, making it an excellent choice for short photo excursions.
✅ Side Pockets and Pull Cords: Features like side pockets and pull cords add practicality, making it easier to organize and secure smaller items.
❌ Limited Capacity: The RunAbout Pack-Away may not have the space for those who need to carry more substantial gear.
❌ Basic Features: Lacks advanced features and padding that more specialized camera backpacks offer.
The RunAbout Pack-Away Daypack is an ideal choice for photographers and hikers who need a lightweight, compact solution for short excursions away from base camp. Weighing in at just 400 grams, it’s Lowepro’s lightest backpack, making it incredibly easy to carry without adding unnecessary bulk.
When not in use, the daypack conveniently rolls up into a compact 11x3.9-inch cylinder, allowing you to slip it inside or attach it to your main rucksack without significantly impacting your overall load.
This daypack offers a practical alternative to hauling a large, cumbersome 70L rucksack around when you only need to carry the essentials. Its design features a drawstring top for quick access and zipped back openings for added security. The side pockets provide additional storage for small items, like water bottles or snacks, and the pull cords make it easy to compress or adjust the pack as needed.
Despite its minimalist design, the RunAbout doesn’t skimp on functionality. Its super-lightweight build is perfect for those who prioritize mobility and convenience, whether you’re capturing photos on a mountain trail or taking a brief hike from camp.
The pack’s easy-to-stow nature makes it a go-to choice for anyone who needs a reliable, space-saving option for short trips. If you’re in search of a daypack that combines portability with practical storage, this fantastic little bag is my top pick.
Read our full Lowepro RunAbout BP 18L backpack review
Best backpack for outdoor protection

✅ Customizable Fit: The ActivLift system allows you to adjust the shoulder straps to suit your torso size, enhancing comfort on long hikes.
✅ Hydration Ready: Features a large zippered pocket with a passthrough and attached loop for a 2L hydration reservoir, plus a stretch pocket for a water bottle.
❌ Large and Bulky: Due to its size, it might be too large or bulky for casual outings or for those who don’t need to carry extensive gear.
❌ Complex Organization: The large interior with many padded dividers may require careful organization and adjustment to store gear efficiently.
The Pro Trekker 650 AW II is the largest backpack in Lowepro’s Pro Trekker range, with a generous 43-liter capacity. When fully crammed with a range of DSLR and mobile photography accessories, the backpack weighed in at a hefty 10kg, but, thanks to the sturdy shoulder straps and the padded rear, it was very comfortable to carry even over rugged terrain, with hip straps effectively further spreading the load. For additional comfort, you can adjust the height of the shoulder straps relative to the backpack using the ActivLift system. This helps to customize the design of the backpack to suit your torso size.
As an outdoor backpack, the Pro Trekker 650 AW II is constructed from resistant ripstop material reinforced with carbonate and TPU coatings, so you can place it on rough surfaces without fear of damage. The spacious interior of the Pro Trekker 650 AW II is crammed with thick padded dividers to hold your valuable and fragile lenses securely in place. Thanks to a hook-and-loop Velcro, you can reorganize the interior layout of the dividers to suit a wide range of kit, from large camera and lens combinations to drones and camcorders. To keep your gear even safer, a supplied waterproof weather wrap can enclose the entire backpack. Both the front and side of the backpack are designed to carry a wide range of tripods, all the way up to a Gitzo Systematic.
The bag has a large zippered pocket with a passthrough and an attached loop for a 2L hydration reservoir to help keep your thirst at bay on an arduous hike. There's also a big stretch pocket and compression straps to secure a water bottle. The bags in the Pro Trekker range are branded with a green line to indicate Lowepro’s commitment to sustainability (such as using 87% recycled material), so you can enjoy using it guilt-free.
Read our full Lowepro Pro Trekker BP 650 AW II review
How to choose the best camera backpack
With such a wide range of backpack sizes available, you need to decide whether a smaller airline cabin-compatible backpack or a capacious model that can swallow a more extensive set of gear best suits your needs.
Many of my recommended backpacks require the purchase of additional camera storage units (or ‘cores’ or ‘boxes’, depending on the manufacturer) that you can pack with camera gear and insert into the backpack.
Although these modular units add to the expense of a backpack, they can be very convenient as you can insert different units into your backpack depending on the type of shoot that you’re planning. For example, one unit might be packed with your camera, lenses, and external flashgun, while another box might contain your drone kit and its accessories. You can insert the relevant pre-packed storage unit quickly and easily.
You may not need to buy additional internal storage units, as some gear (such as camera cages and gimbals) comes with its own specially designed carry cases that can slot straight into a larger backpack.
If you don’t want to pay extra for storage units, then consider backpacks with dedicated camera compartments built in, which generally ship with adjustable hook-and-loop Velcro dividers.
How does a waterproof zip work?
Many backpacks have water-resistant seals that overlap the zippers that access the backpack’s interior. As the zipper closes, the top of the seal connects with the bottom (like closed lips), preventing water from entering the bag’s interior. Many bags also ship with an additional water-resistant weather wrap that fits over the entire backpack for extra protection.
What is a rolltop?
A rolltop is a water-resistant flap of material that is folded inside the top of a backpack. If you need to extend the bag’s interior space, then you can unroll the material and fasten it with a clip. When the material is rolled in on itself, it forms multiple water-resistant layers, so there is very little chance of water making its way into the backpack.
What's the ideal interior layout for my gear?
A common feature of camera backpacks is interiors that are not only padded but customizable, with Velcro dividers that can be rearranged and reoriented to fit snugly around your equipment. Try laying out your photography kit on a table, roughly in the configuration it will be in your backpack, leaving a little space for internal dividers, then measure the size of the overall width, depth, and height.
What's the best way to access a backpack?
With traditional camera backpacks, you have to take the bag off and lay it on its back to access your kit from the front, which is not ideal if the ground is wet or muddy. Some backpacks have rear access, so you can lay the bag down on its front, while others offer side access, so you don't even need to put the bag down to get at your gear.
How we test the best camera backpacks
When compiling this guide, I've been careful to choose a range of bag manufacturers to offer you a greater choice of backpack styles and prices.
I used each backpack to transport a variety of video and photographic gear setups to various shoots in both rural and urban locations, so I’ve had hands-on experience with all the backpacks featured in this buying guide, and I’ve also written many of the full reviews that the guide’s mini-reviews link to.
Find out more about how we test on Digital Camera World
