10 hidden features in Lightroom Classic CC
Kirk Norbury reveals shortcuts and hidden tools that help him to work faster and smarter in Adobe Lightroom Classic CC
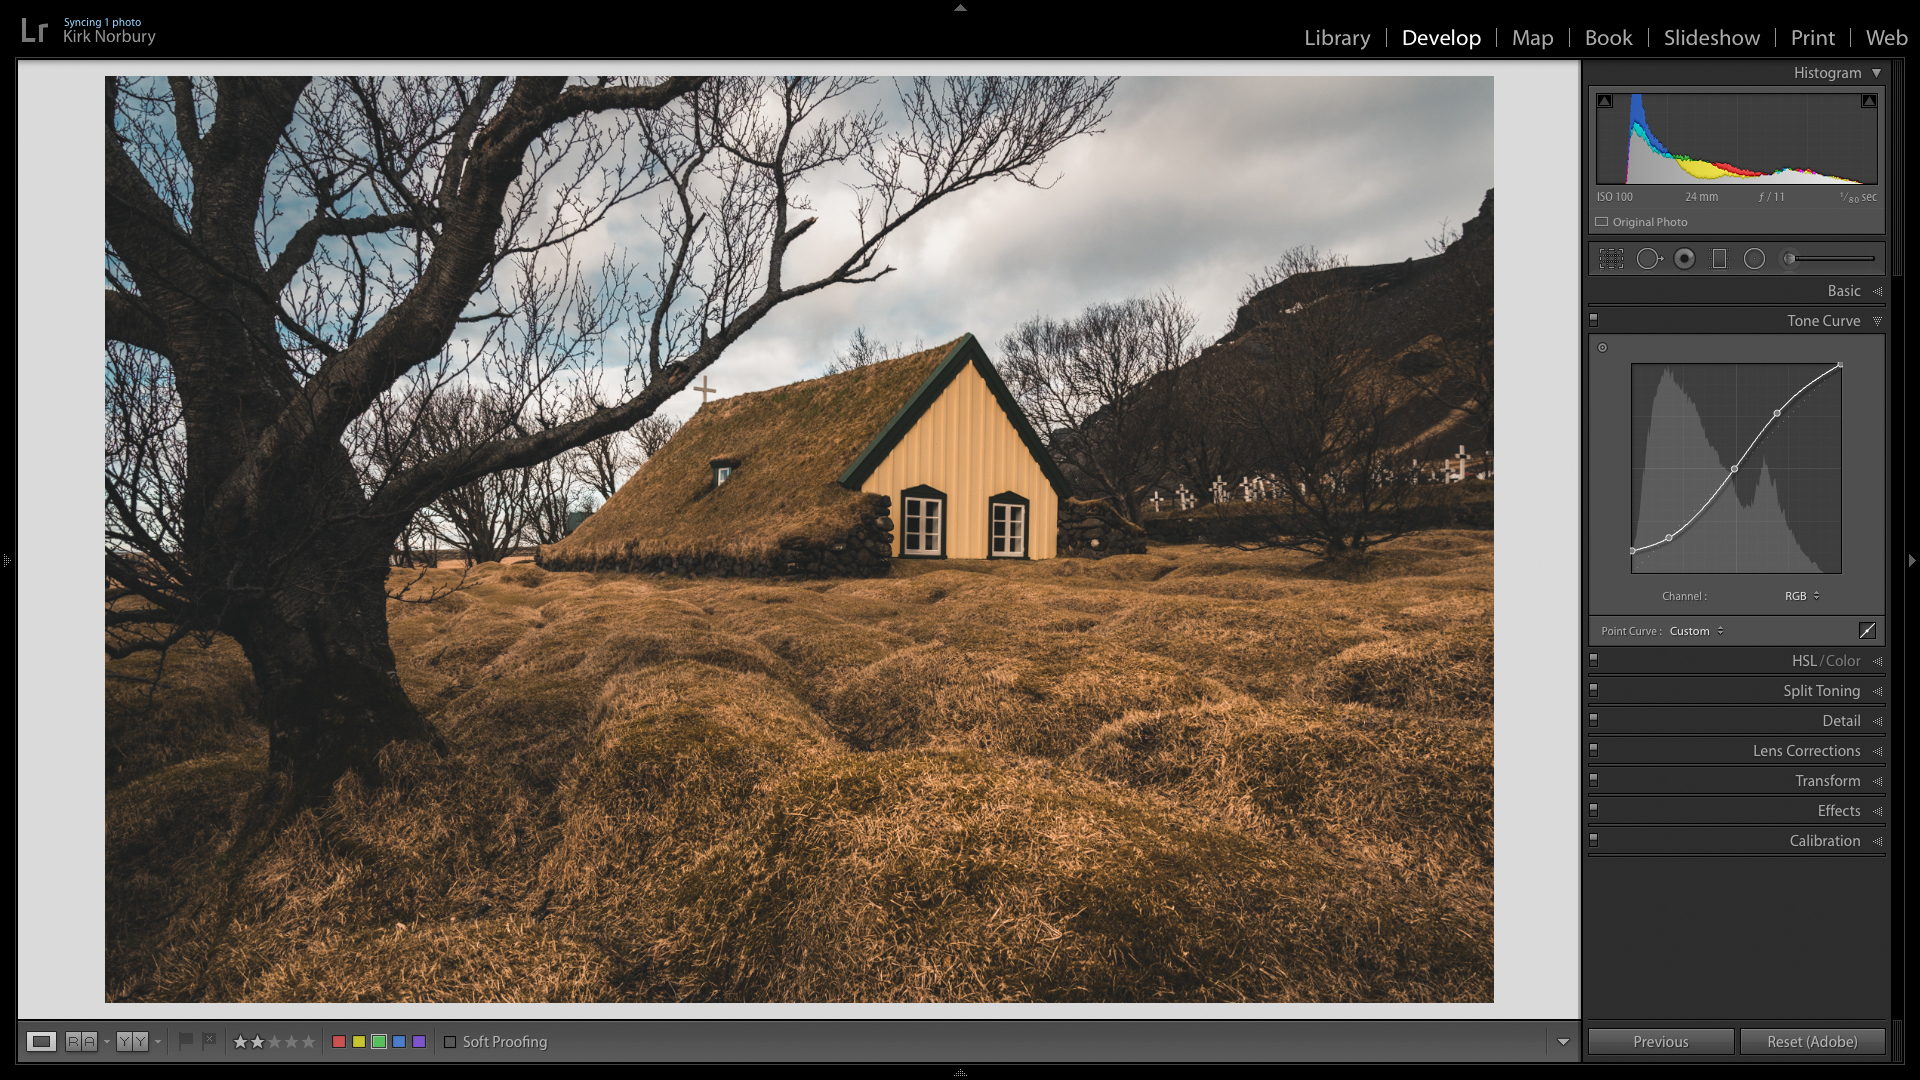
I’ve been using Lightroom for many years now and when you have used a software for editing images as much as I have I’m always on the lookout for tips and tricks that will make my life a lot easier and get the the most out of Lightroom. In this article I will be going through my top 10 hidden features that I use on a daily basis while editing in Lightroom Classic CC.
• See: Why I dumped Lightroom CC and went back to Lightroom Classic
1. Auto masking
Auto Mask is a fantastic feature if you are wanting to be very selective on where you want to see your adjustments. This is done within the brush tool and can be selected just below the sliders for adjusting the brush size. When I use the Auto Mask feature I always make sure the “Show Selected Mask Overlay” box has been checked. This just makes it a lot easier to see where has been selected and if it’s gone over the desired area. You can see in the image below I only wanted to select the leaf so by starting in the middle of the leaf this gives Lightroom an idea of what it’s got to work with and once you get towards the edge the auto mask kicks and stops it from going over the edge. If the adjustment does bleed over then you can select the erase tool and clean up these areas before you start changing the selection.
2. Selective colour change
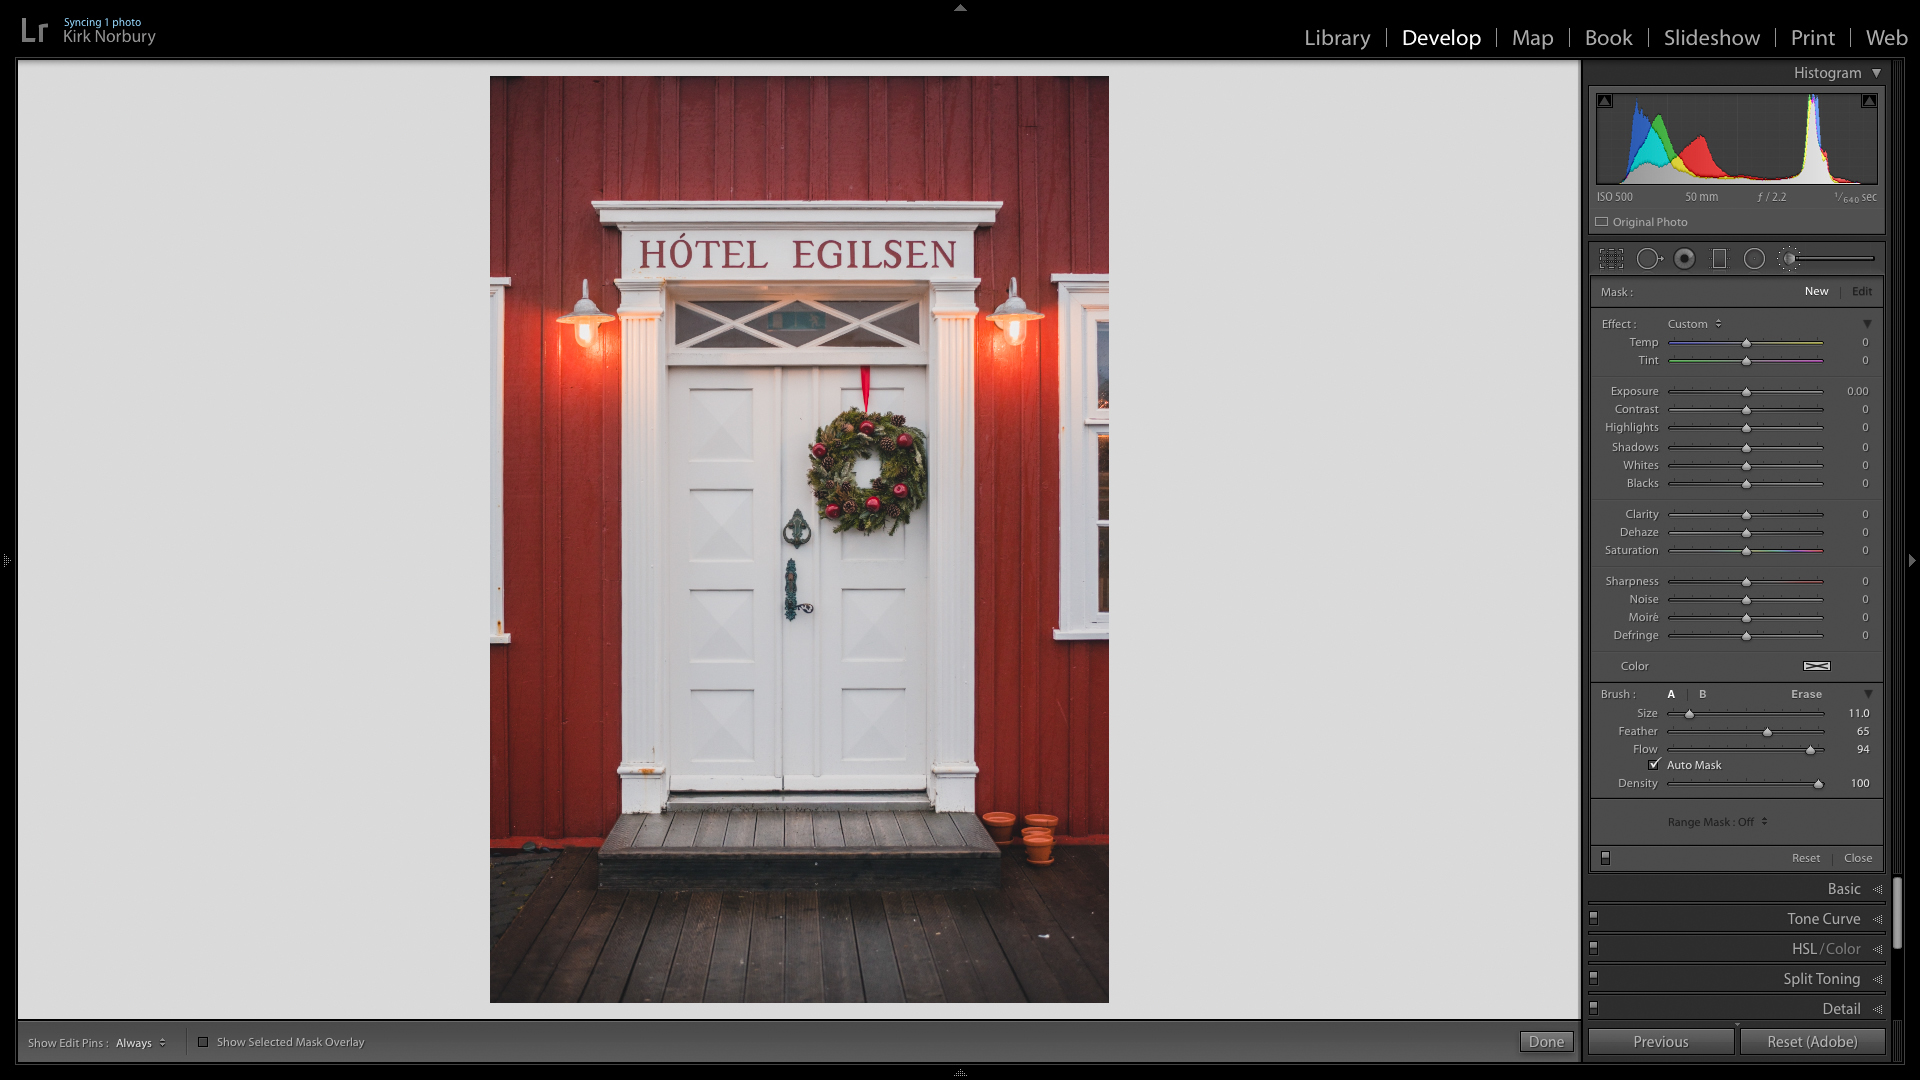
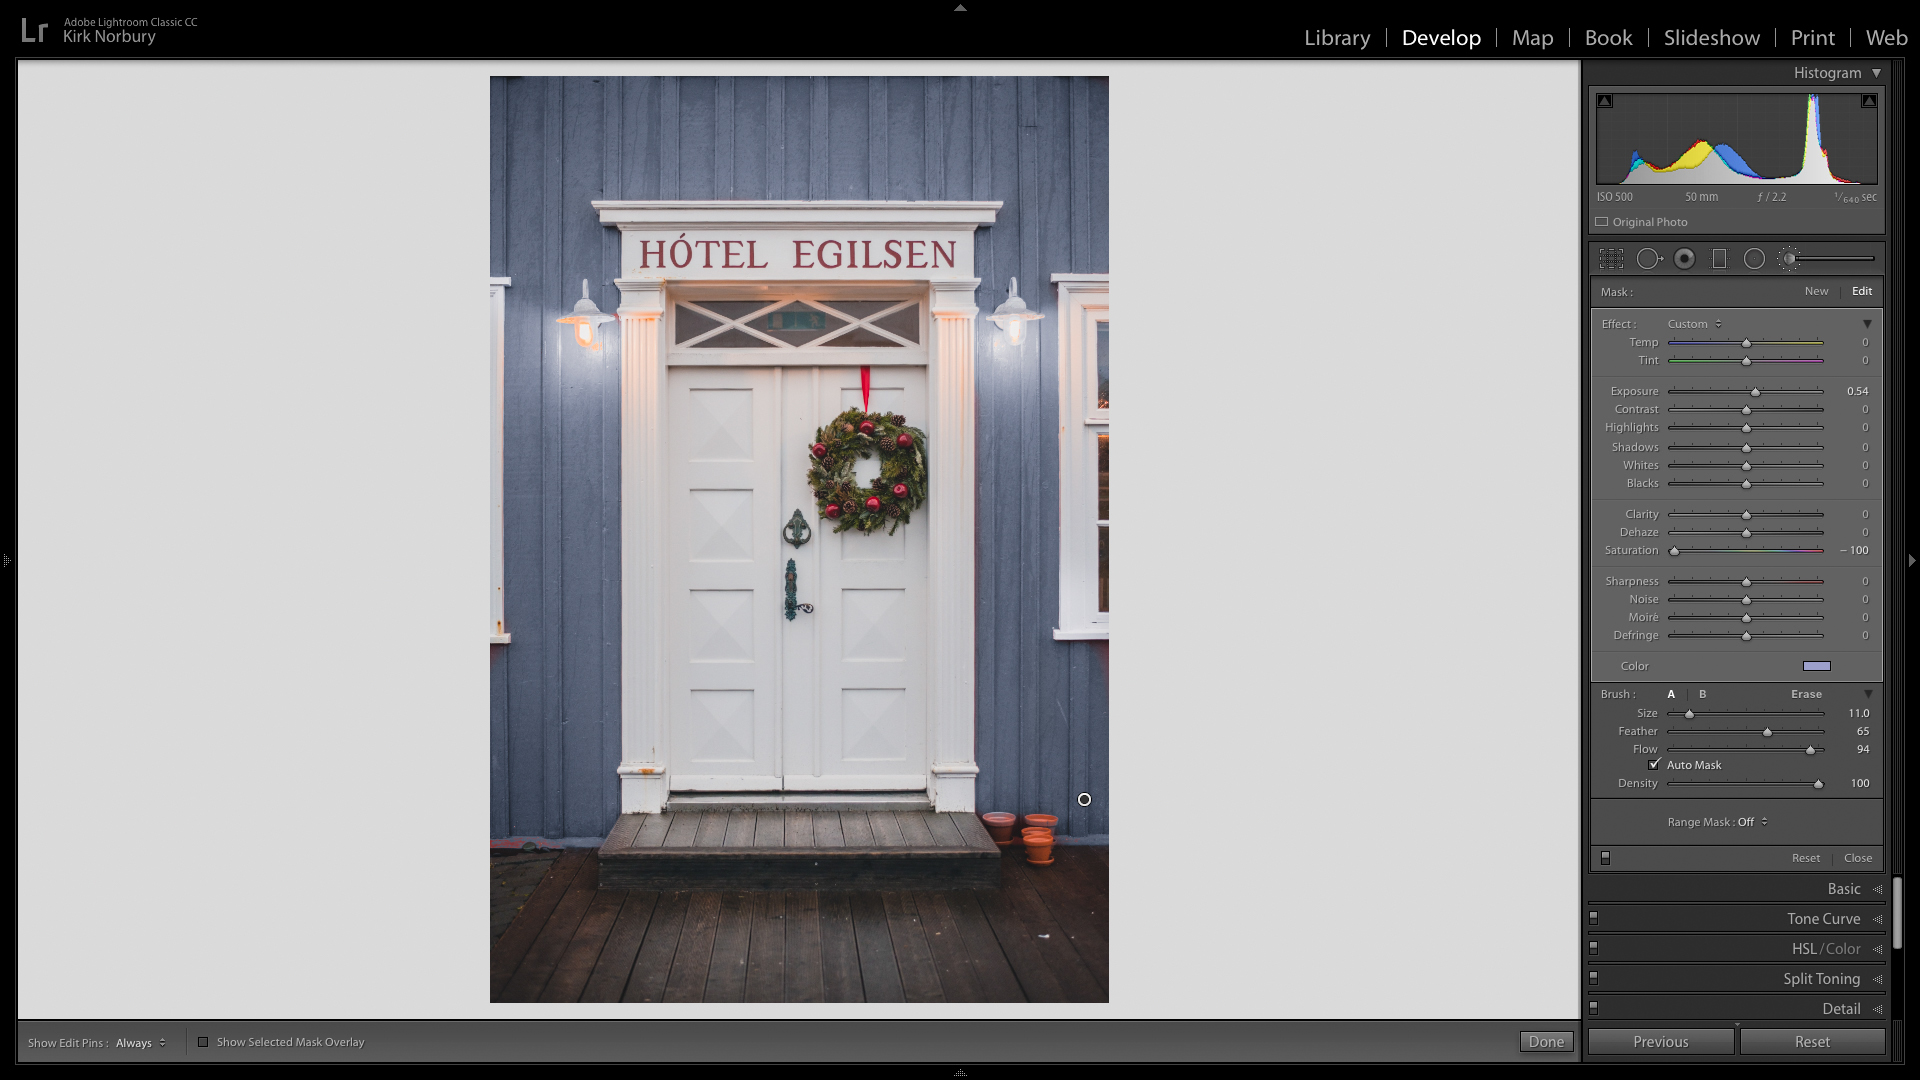
Generally when wanting to change the colour of an element in your image you have to use the Hue sliders but there is a limit to how far a colour can be pushed. But let's say you want to change the colour of a element completely? Like earlier, use the auto mask on the Brush tool to select the area you would the colour to be changed. I then turn the saturation all the way down and I also adjust the exposure so it’s a little brighter and easier to see. With the Brush module still open, at the bottom you will see a small rectangle box with an X through it. Click this and you will now be able to select a colour to be added to the selection. By moving the dropper around and changing the opacity of the selected colour, a brand new colour will be in your image.
3. Masking when sharpening
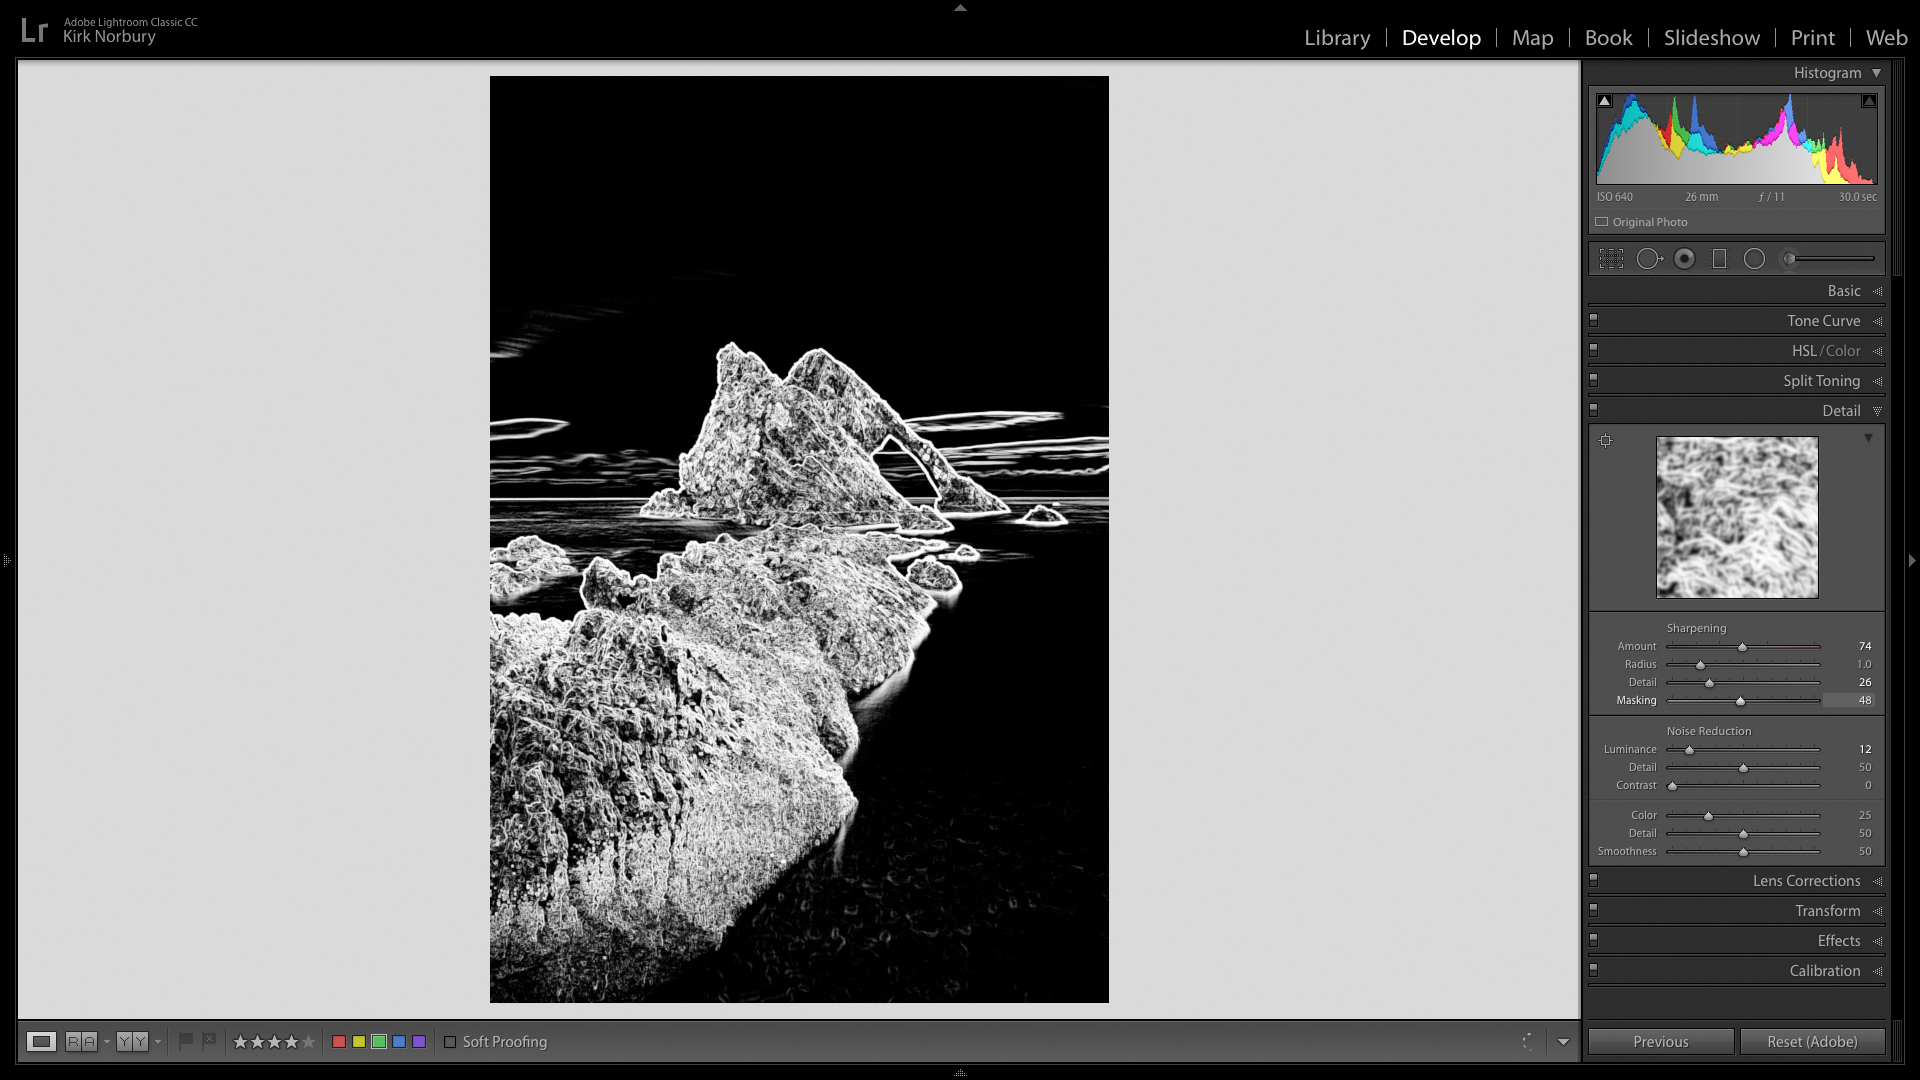
Now speaking of masking, once I’ve completed my edit of an image I also like to sharpen it for the web but using the sharpen sliders always does this globally. Meaning, the sharpness has been applied to all of the image which is something I don’t like to do as if there’s open sky, smooth water, clouds. I don’t want any sharpness added in these areas as it begins to look like noise and grain. So, underneath the sharpening sliders there’s a masking feature but if you click and drag this slider it’s very hard to see what it is doing. By holding down the Option key (alt on Mac) and then begin to move the slider you will see which areas will be affected by the sharpness. The areas in black are the areas that will not have any sharpness applied to them. Very handy if your images have a lot of sky in them but you want the foreground to be tack sharp.
4. Match tonal exposures
If I’m working with a lot of images and they’re from the same sequence and the exposures are quite different from one another as I’m shooting in Aperture Priority but I want the exposures to be consistent throughout all the images. If you just copied over the settings from one image to another and the exposure is different the image will appear even darker or lighter than previously. To get around this, I first click the image with the exposure I like and open it the develop module, go down to the filmstrip at the bottom and select the other images from the sequence. You then want to go to “Settings” > “Match Tonal Exposures”. Now you’ll see the other images match to the original image.
5. Fader LR plugin
Now with this feature in Lightroom this is the only one that requires a plugin to be installed but once you see what it does you’ll understand why I use it so much. I love using presets for editing my images (see our list of free Lightroom presets); I like creating my own to keep a consistent style and I also like download other photographers that maybe emulate a popular film stock. Though, one issue I’ve always had with presets as they never look the same on two different images. The preset may appear too strong and dialling it back as you would need to move the sliders independently and as we didn’t create the preset it’s hard to accurately adjust the preset in a consistent way. When editing in iphone apps like VSCO you can change the opacity of presets which is very handy if they appear too strong. Well, with the Fader LR plugin you can do exactly that and the plugin is also free which is even better. Once you’ve installed the plugin, you open it and a dialog box pops up and it allows you to go through all your presets. Once selected you can then begin to change the opacity to your desired strength and while doing this you can see all the sliders moving in unison. To download the plugin yourself follow the link below.
Get the Digital Camera World Newsletter
The best camera deals, reviews, product advice, and unmissable photography news, direct to your inbox!
6. Give images the faded look

A very common theme with photographers at the moment is trying to emulate traditional film and one aspect that you always see with film, especially in black and white images is a faded appearance to the blacks and shadow areas. Now, recreating this in Lightroom can be quite difficult as the main sliders struggle to do it. So to do this you will need to go down to the Tone Curve and make sure it’s selected as “Linear”, I then add a few points spread across the line and give the image a small S curve. Now, to give it the faded look you need to click and drag up the very bottom left point (the one in the corner). Do this slowly as the effect can be seen very quickly.
7. Share Collections with clients
For this to work you first need to make sure that your Lightroom account is connected to the cloud or Lightroom CC as it is now known as. When I want to share some images with a client but I don’t want to export the images, I will create a collection with the selected images I then make sure the box is clicked to sync them with Lightroom CC. Once this is done you will see a “Make Public” button at the top right, clicking this generate a link you can share with your clients. One feature I like with this the client can add comments to images that you’ll be able to see.
8. Rate images faster
If I’m working on a large project for a client and need to go through 1000’s of images to make my selection for editing it’s not a job I want to spend all day doing. The quicker the better. Usually you have to click each image and then click what rating you want to give it and then click to the next image, this is already way too many clicks for my liking. Instead, open the first image and press the Caps Lock key and leave it on. By using the numbers on the keyboard 1 through 5 every time you press the number Lightroom will automatically go to the next image. Doing it this way saves me a lot of time.
9. Be more precise with sliders
I generally work on my 21” iMac so I don’t have as much room to work with on the screen compared to bigger monitors and when moving the exposure slider for example I feel it jumps too quickly and it’s hard to get a precise movement. If you click and drag the edge of the develop module alongside the sliders you can expand their size making it a lot easier to see the changes when moving the sliders.
10. Edit videos
This hidden feature is quite new to me as I had no idea you could even do this. As well as being a photographer I also make a lot of videos and sometimes those videos are stored within Lightroom for organisation. Though they are never edited in Lightroom as when you click Develop nothing happens. This is not entirely true. If you click the video file to play it, at the bottom there is small box next to the timestamp and settings gear. Click this and select “Capture frame”, this will create a jpeg from where the video is paused and you can now edit the file just like any other image in the Develop module. Once finished editing the image, copy all of the settings and then paste them onto the original video.
Read more:
Crash course: Adobe Lightroom for complete beginners
The best portable hard drives for photographers in 2019
The best memory cards for your camera:
the best SD, microSD, XQD & CF cards
