101 amazing photos you HAVE to take!
There are 101 amazing photos you must take – and some are ideally suited to shoot during the lockdown
We all have our personal bucket list of must-take photos, but some shots are so stunning that every photographer should have them in their portfolio.
Our book of 101 Amazing Photos to Take Before you Die, published in October last year, covers every genre of photography as well as specialist shots like capturing the Aurora Borealis, taking breathtaking conceptual portraits, and the best way to photograph world-famous landmarks like the Eiffel Tower and the Giza Pyramids.
Of course, those globe-trotting shots aren't possible while we're all stuck at home during the current crisis. So we've picked 10 of our favorite shots that you can try while we all wait for the lockdown to end! The full step-by-step instructionals can be found in the bookazine, but these should give you some shoot inspiration…
101 Amazing Photos to Take Before You Die: £17.99
Delve into this book of 101 must-take photographs and learn key techniques for amazing results. This 180-page guide will help you capture the perfect shot, and inspire you on new adventures with your camera.
1. Underwater photography
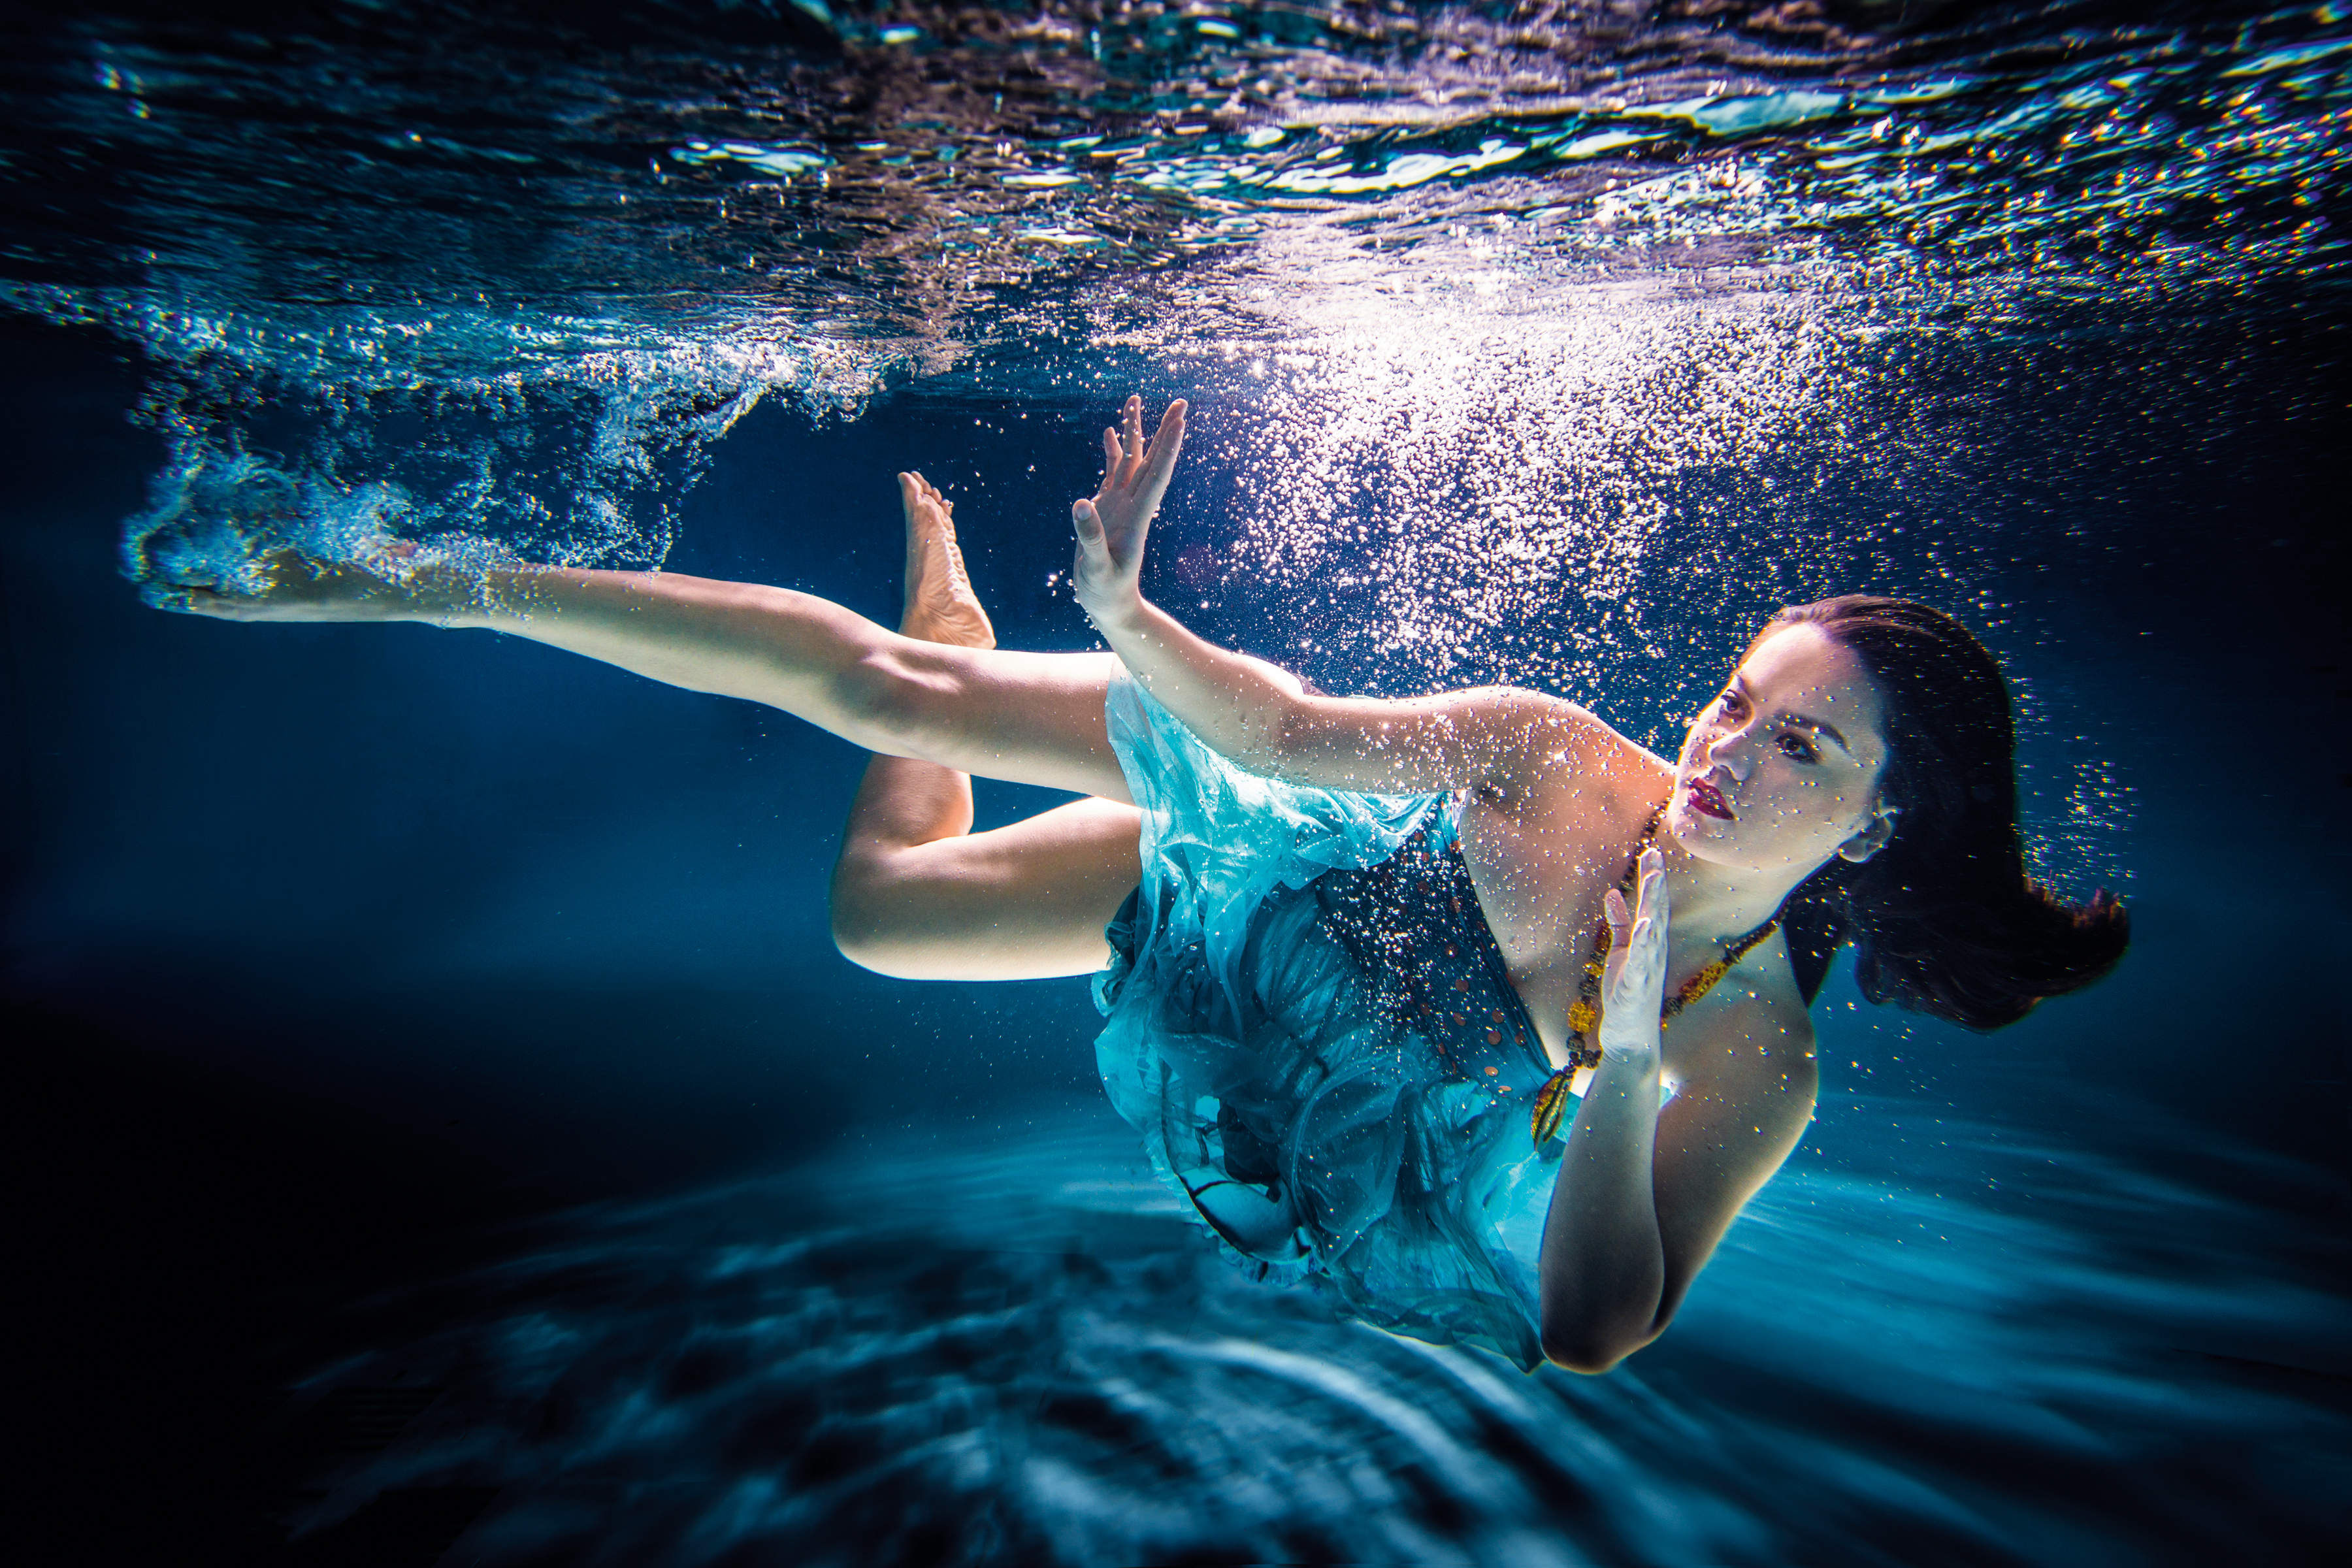
A swimming pool might not be the easiest environment for photography, but the floating effect that the water has on hair and clothes can’t be achieved anywhere else. This makes it the ideal location for a fashion shoot with a difference! With a few inexpensive pieces of kit, a willing subject and a good set of lungs, anyone can do it.
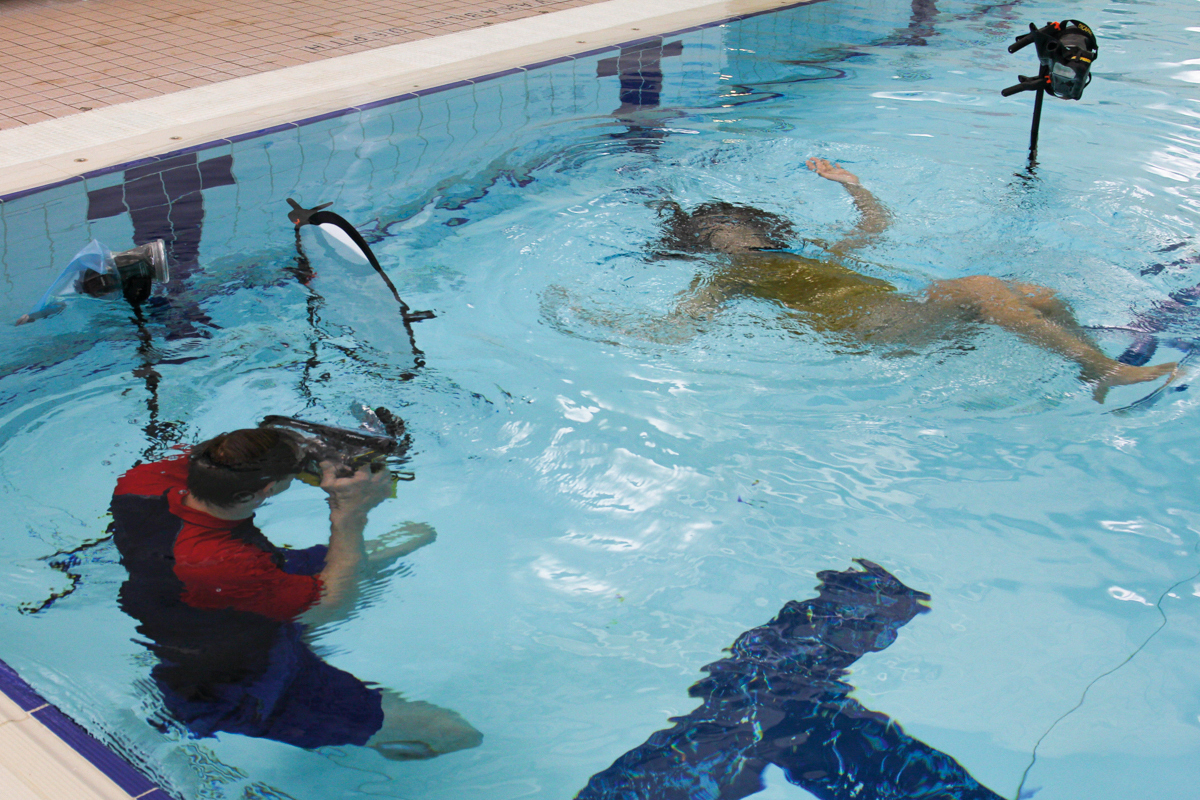
An underwater pro might use a hard waterproof housing that matches the camera’s controls, with extra ports for lenses, underwater flashes and sync cables. But this type of kit could cost thousands, and is designed to withstand scuba diving in the open seas. In the pool we can take a few shortcuts and cut costs dramatically.
Instead of the hard housing, for a fraction of the cost you can get a clear waterproof bag case, such as those made Ewa-Marine. These offer basic control as it’s harder to press the camera buttons, but that’s fine – once we’re set up here all we really need to do is focus and press the shutter. And you can always use one of the best underwater cameras, which obviously have no issue getting wet!
Light falls off very quickly underwater, and also changes to a bluish color, so it’s difficult to get good shots with ambient light alone. Instead you can sandwich a couple of speed lights to illuminate the subject, and do some tonal tidying in Photoshop later. We began with manual mode, 1/200 sec, f/10, ISO160, with the flashes in manual on full power – and we were triggering them with the pop-up flash on the camera, though you can use triggers to achieve the same effect.
Get the Digital Camera World Newsletter
The best camera deals, reviews, product advice, and unmissable photography news, direct to your inbox!

2. Shoot the Milky Way
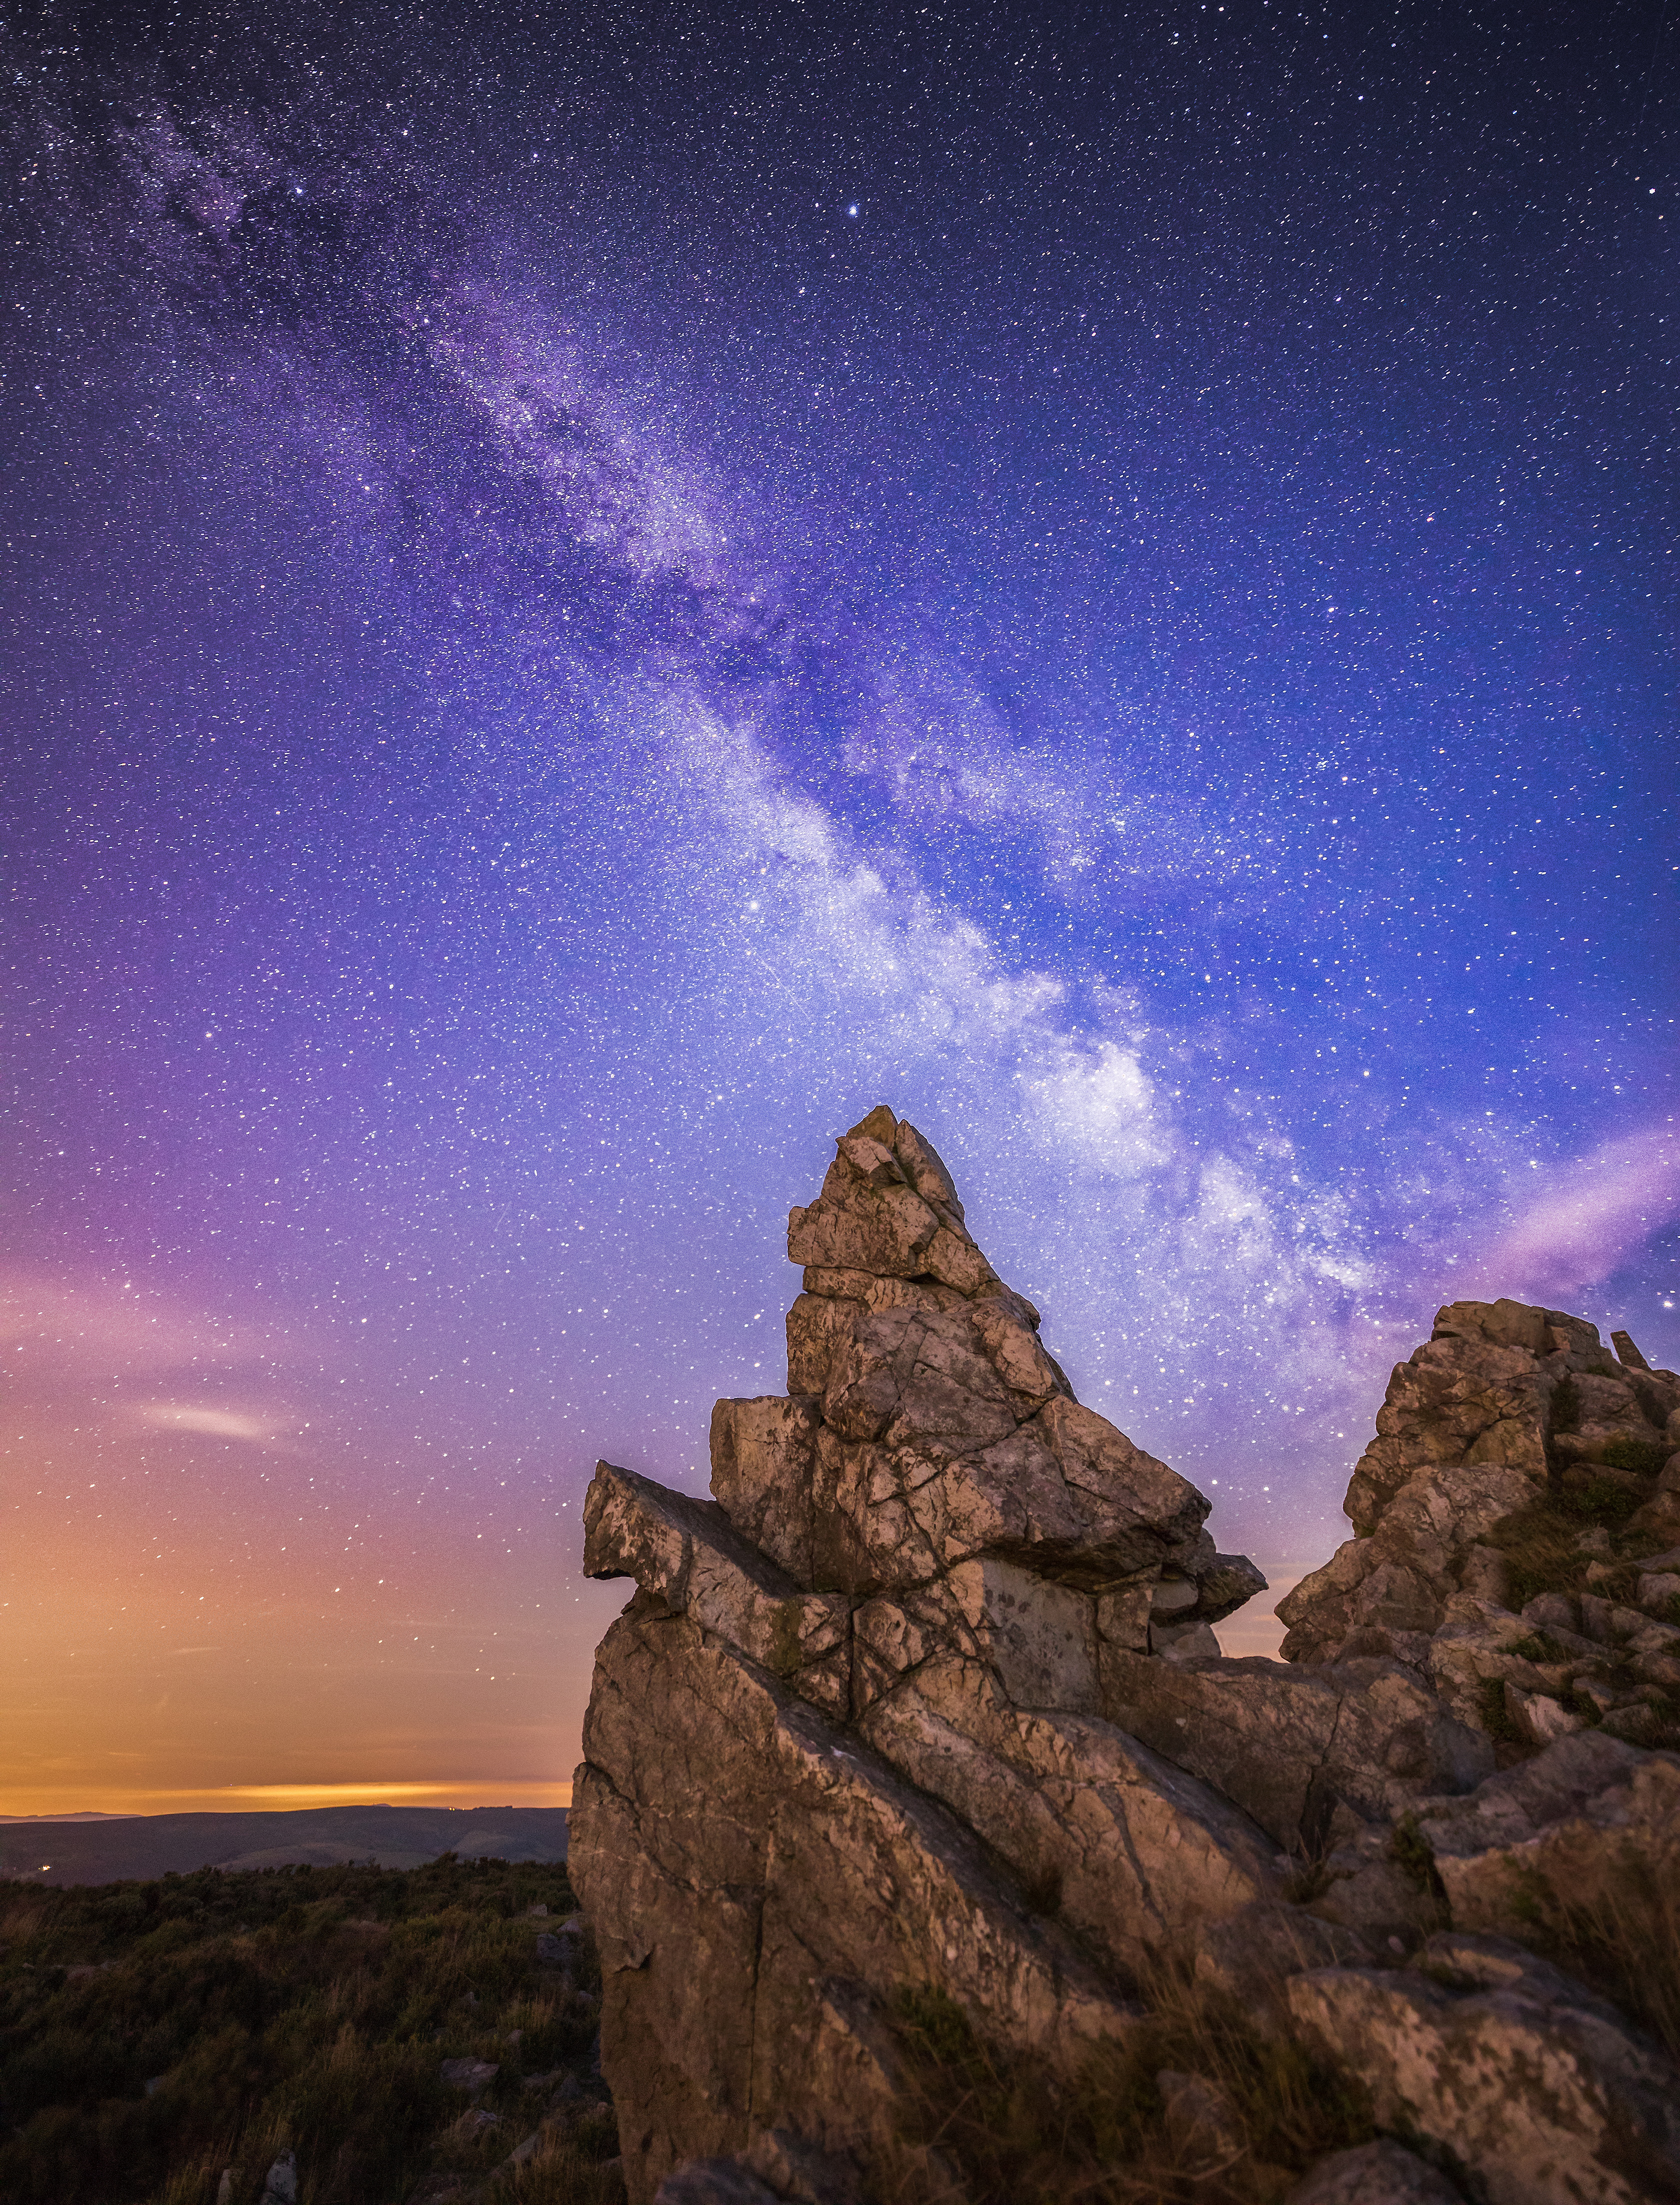
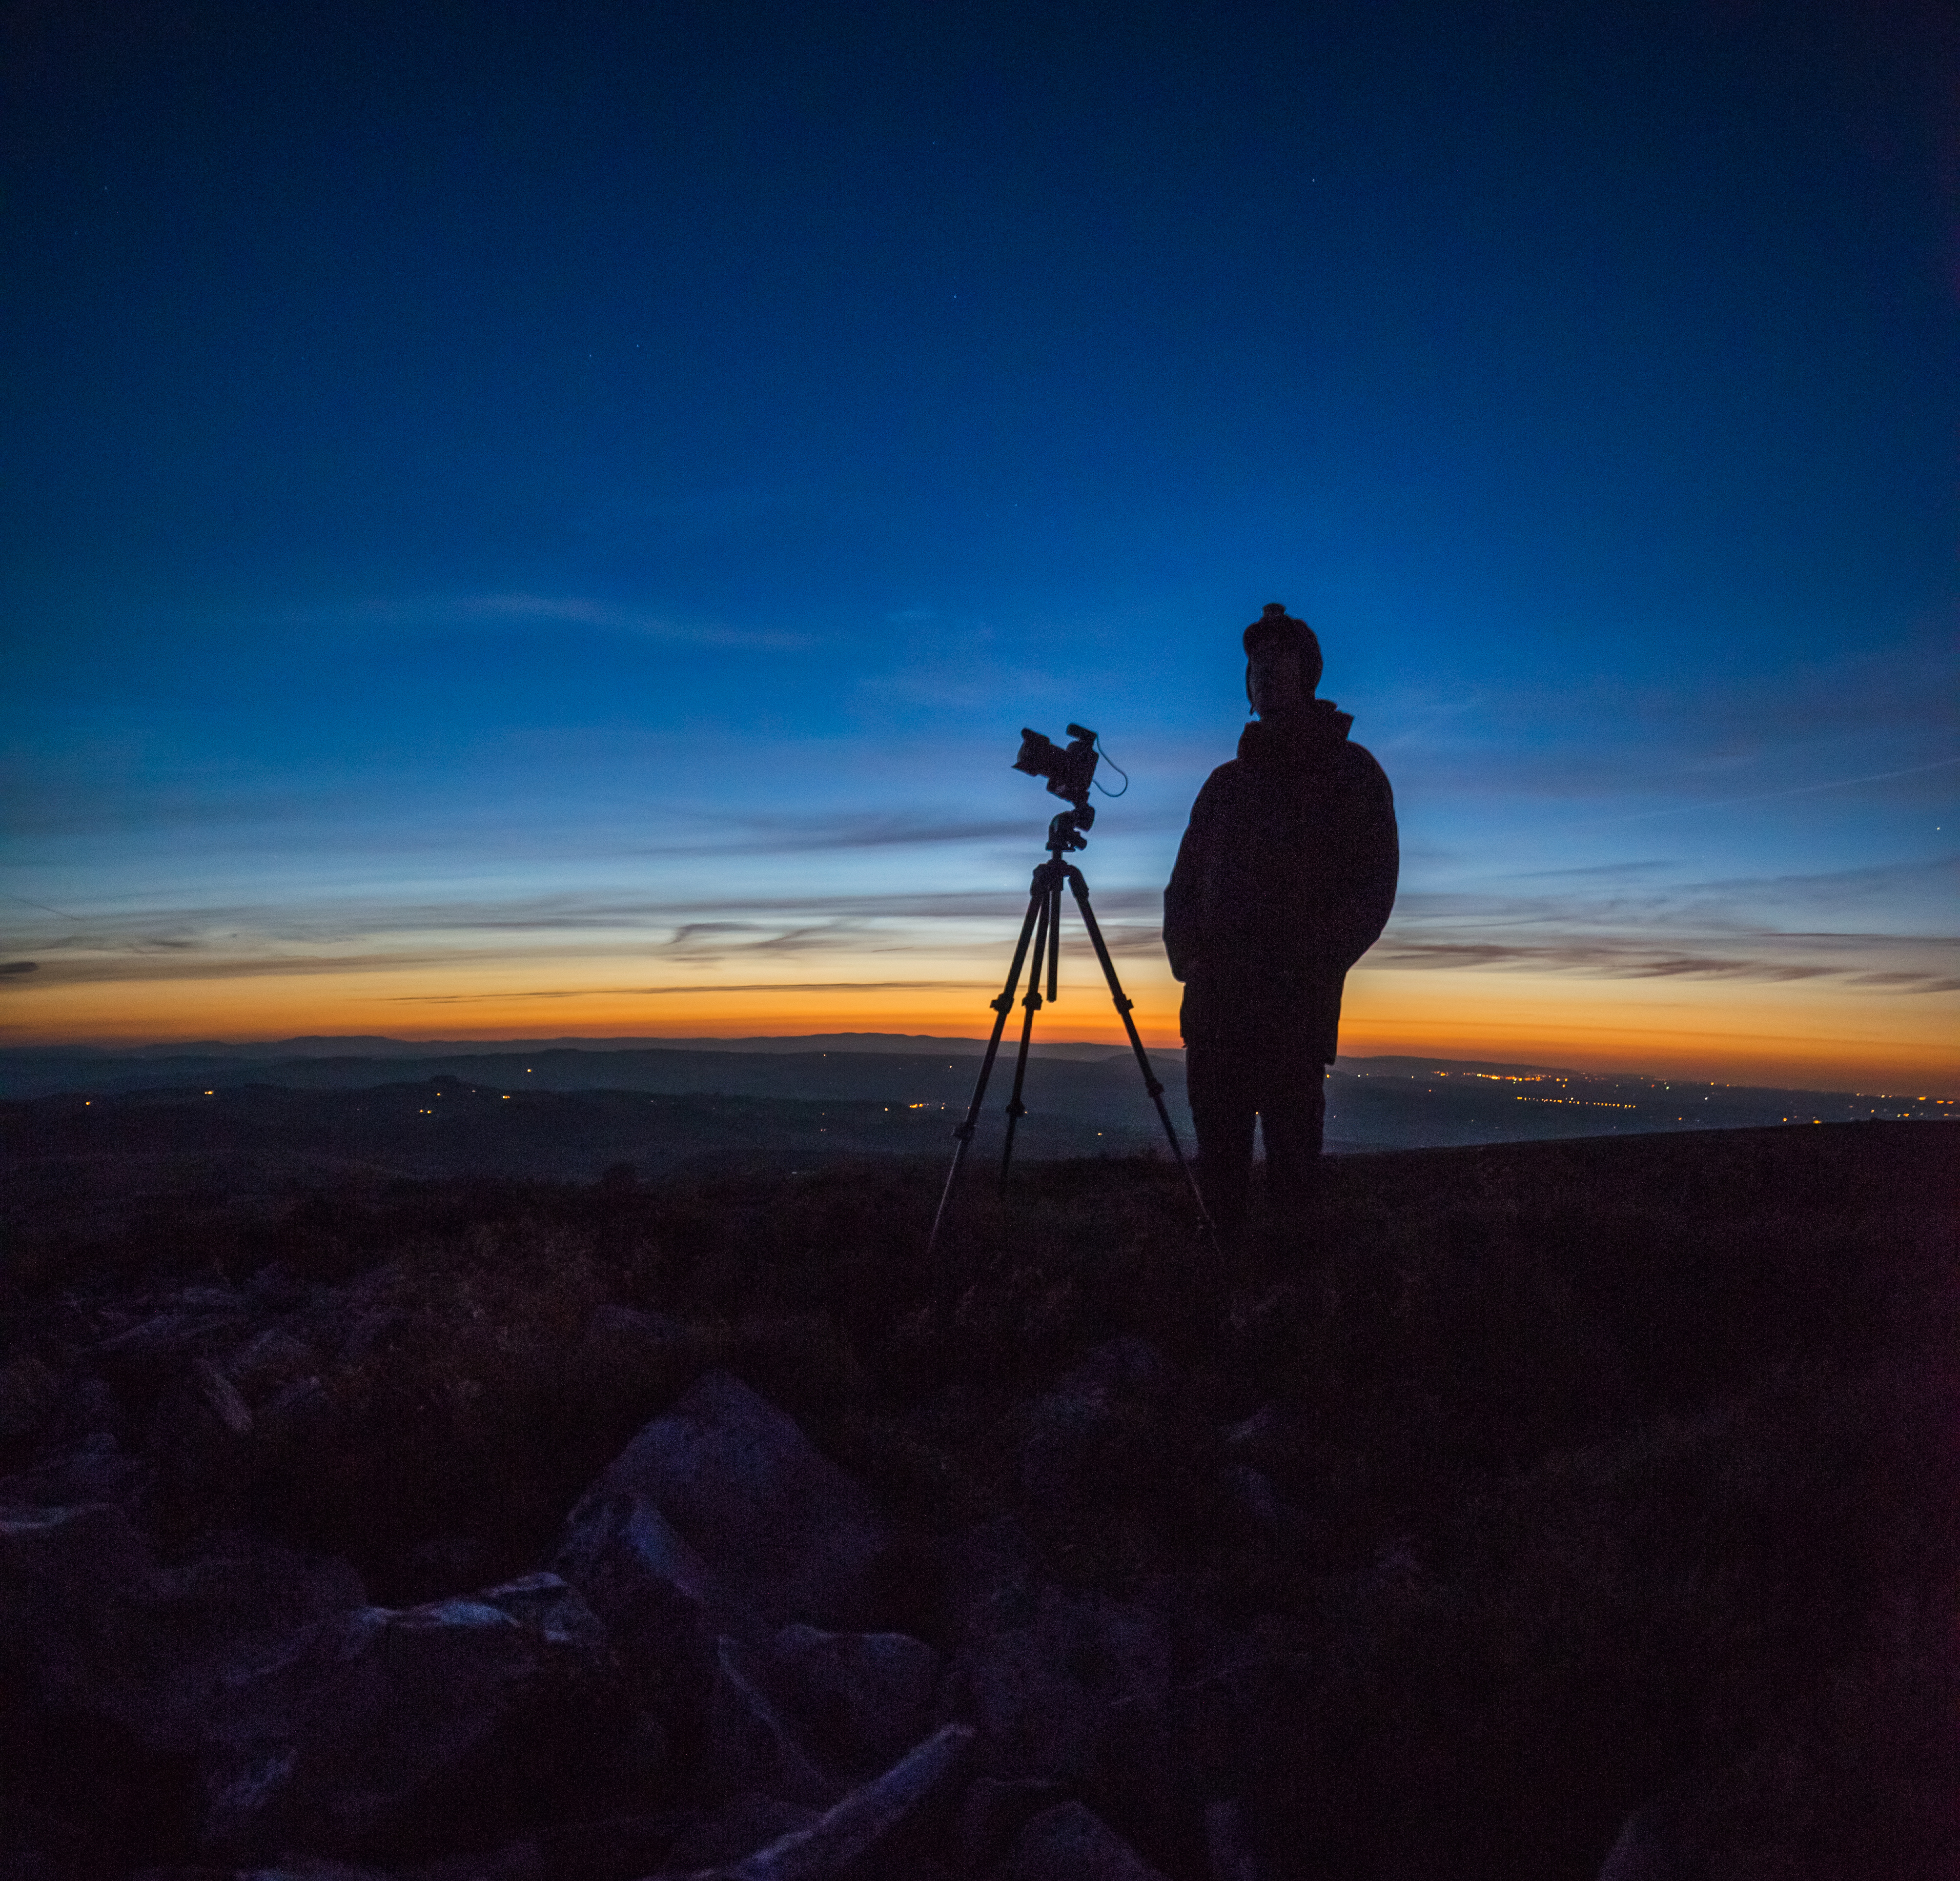
There is a huge amount of planning that goes into a productive Milky Way shoot. It starts with making sure that the forecast is clear, with no moon between April and September when the Milky Way is visible in the Northern hemisphere. The other issue is light pollution, which can blot out large portions of the Milky Way and other stellar formations.
Having found a dark spot, you will want a good foreground for your photograph; a good shot needs an earthbound anchor, such as abandoned buildings, trees or a body of water. We chose the stark angularity of Manstone Rock in Shropshire for this shot, where the My Sky Guide app showed that the galactic core would be visible after 11.30pm and almost rising due south.
To capture it, you'll need a camera with a good high ISO capability and a very wide-angle lens – in this case, we shot with the Sigma 14mm f1.8. Using a torch to light and focus on the rocks in Live View (with the bright stars remaining in focus, even at f/1.8), we were getting clean shots at ISO2000 (though we would expect to shoot up to 6400) and settled on a shutter speed of 25 seconds (using the '500 rule', dividing 500 by the focal length (including the crop factor if applicable)).

3. UV Light photography
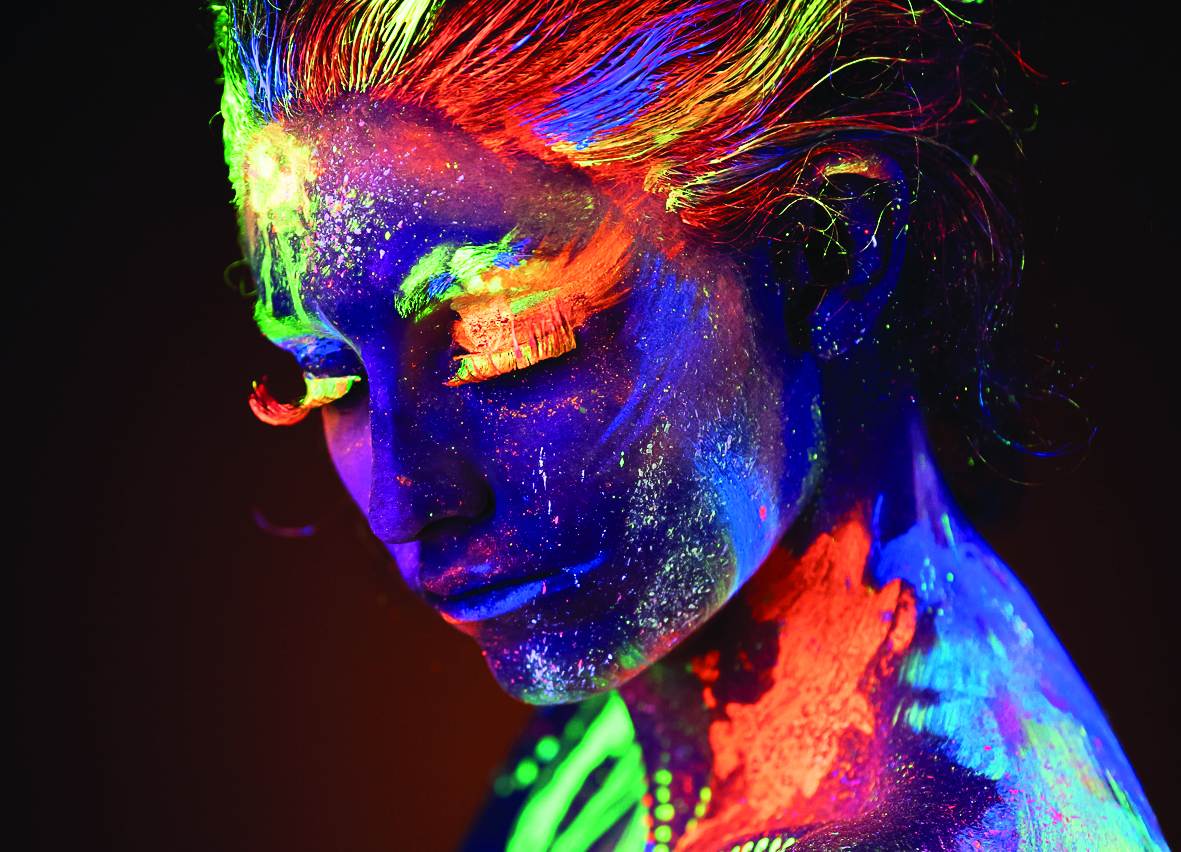
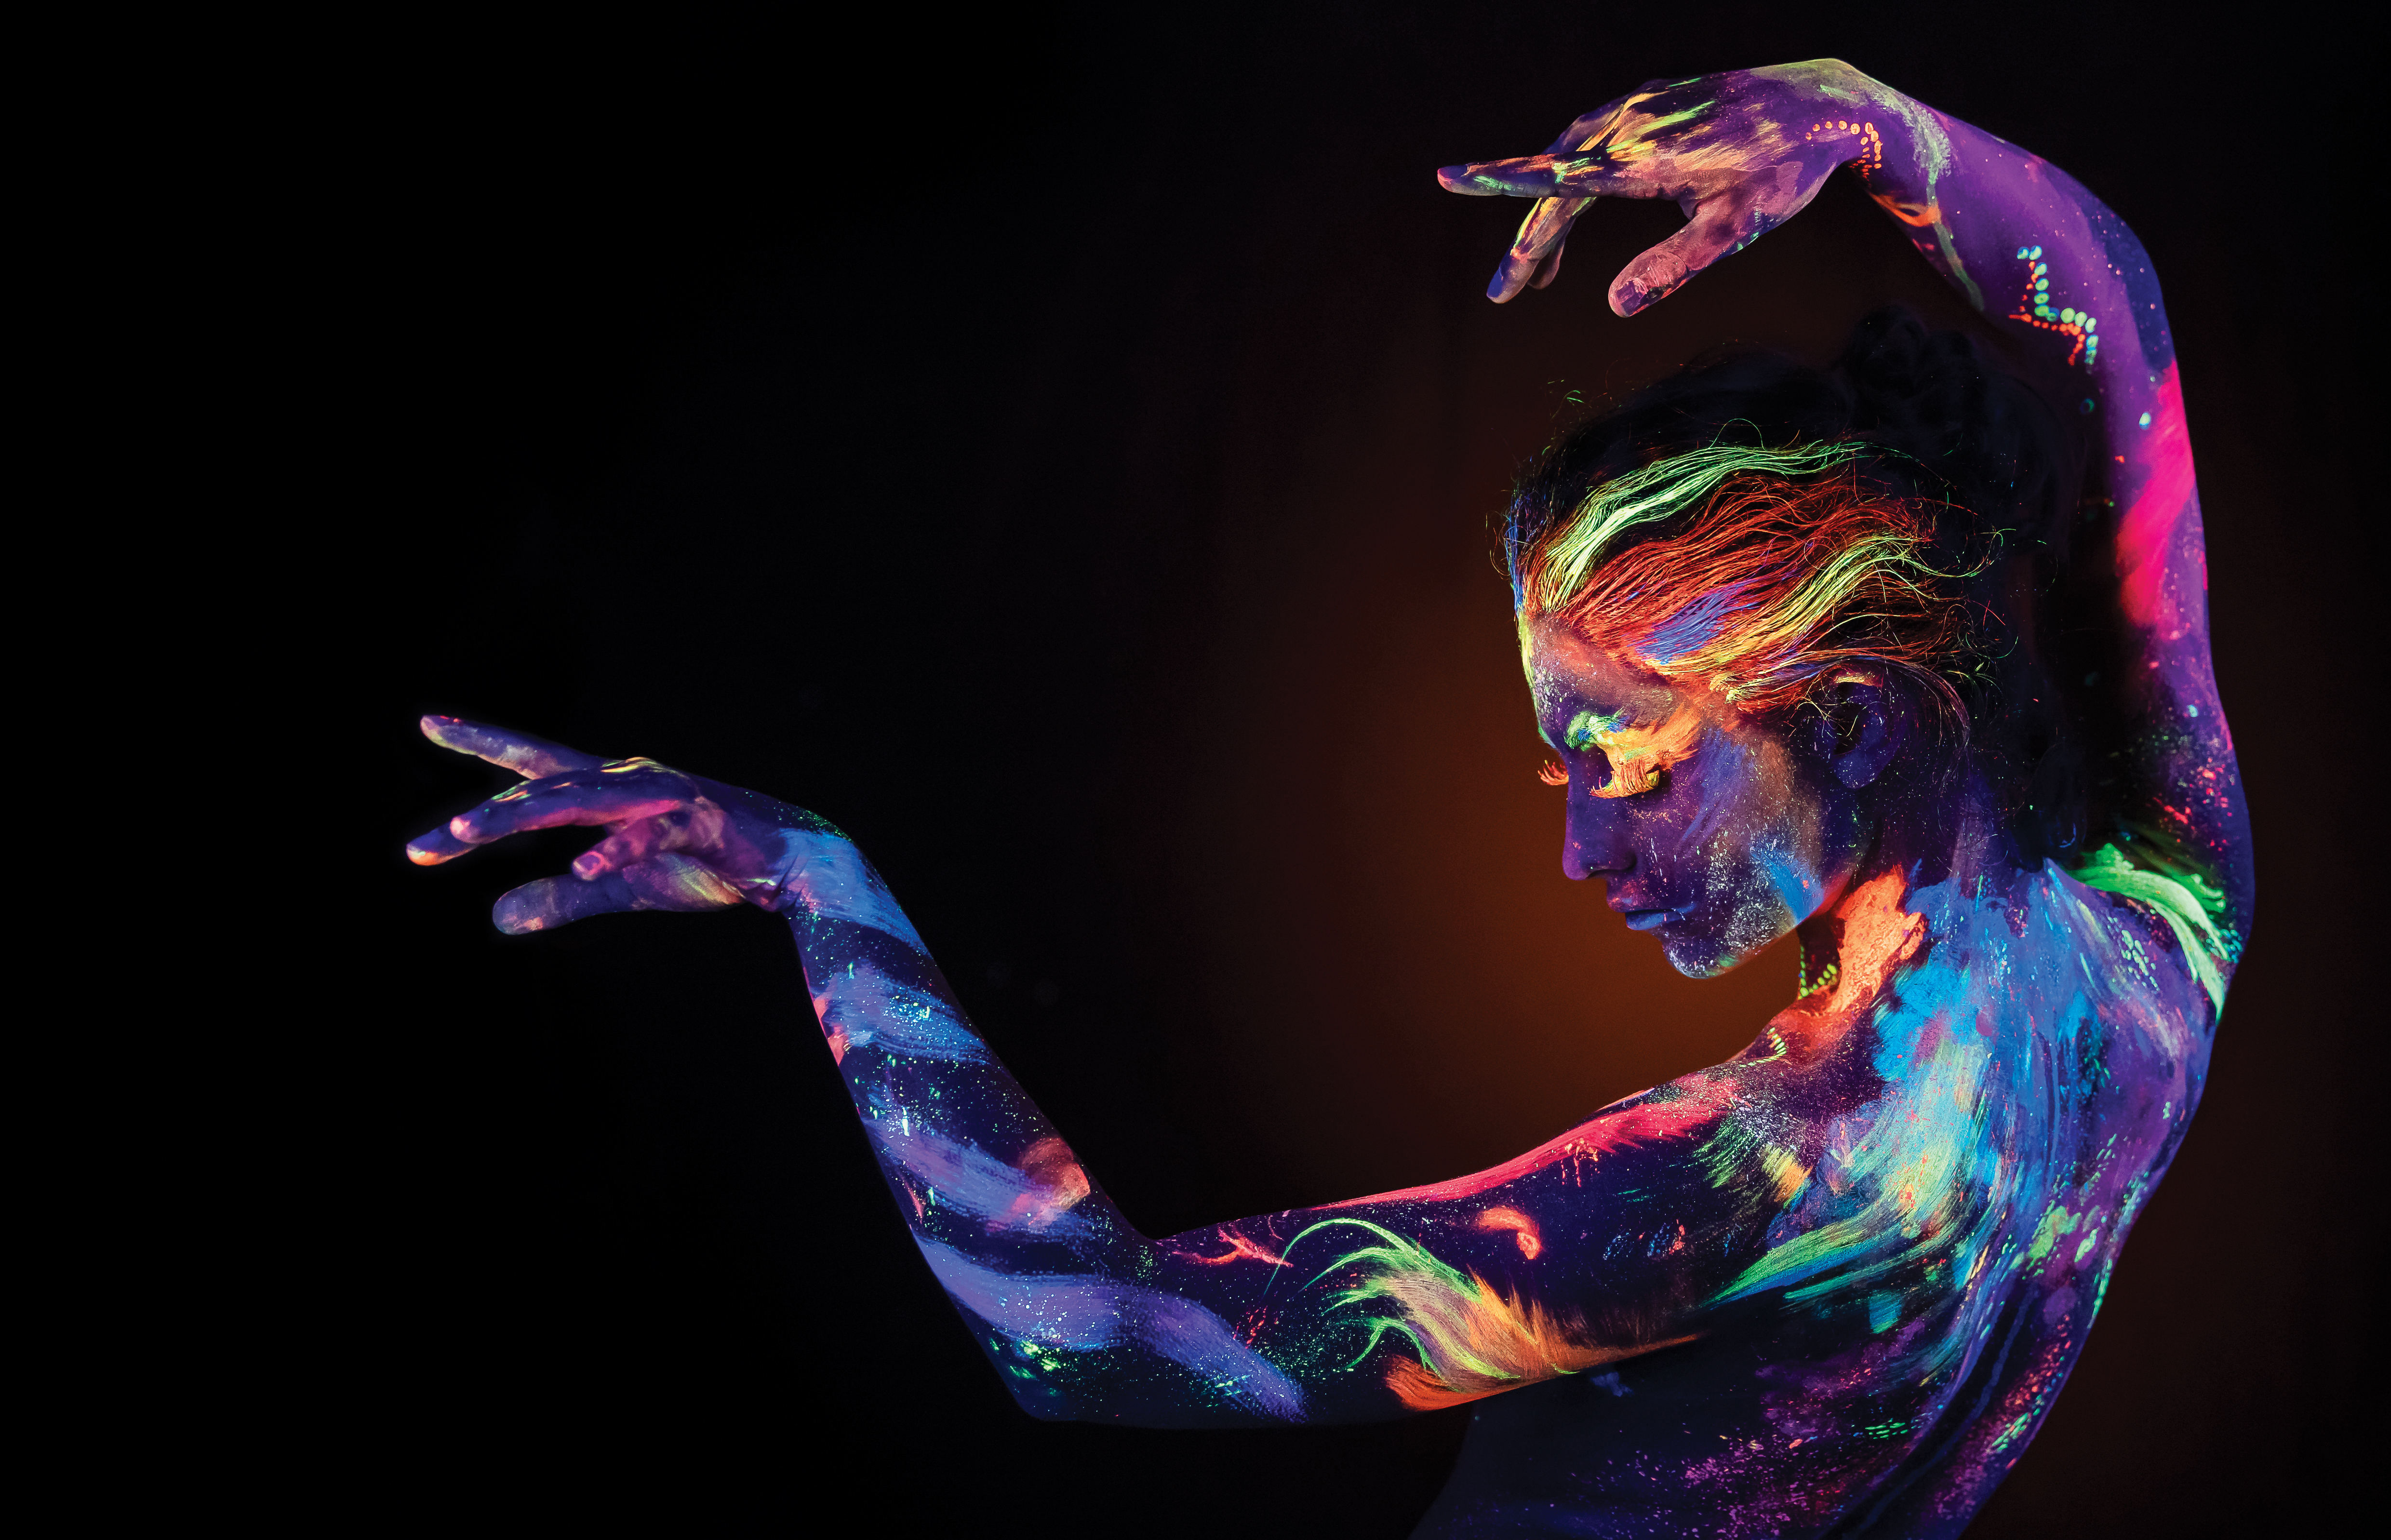
Blacklight photography involves shooting a subject under ultraviolet lighting. To the eye these kind of lights appear to emit very little illumination, but that’s because the bluish UV light is at the limits of the visible spectrum. However, the UV can cause white or neon colors to produce visible light – and this creates a glow that looks incredible when used in combination with body painting.
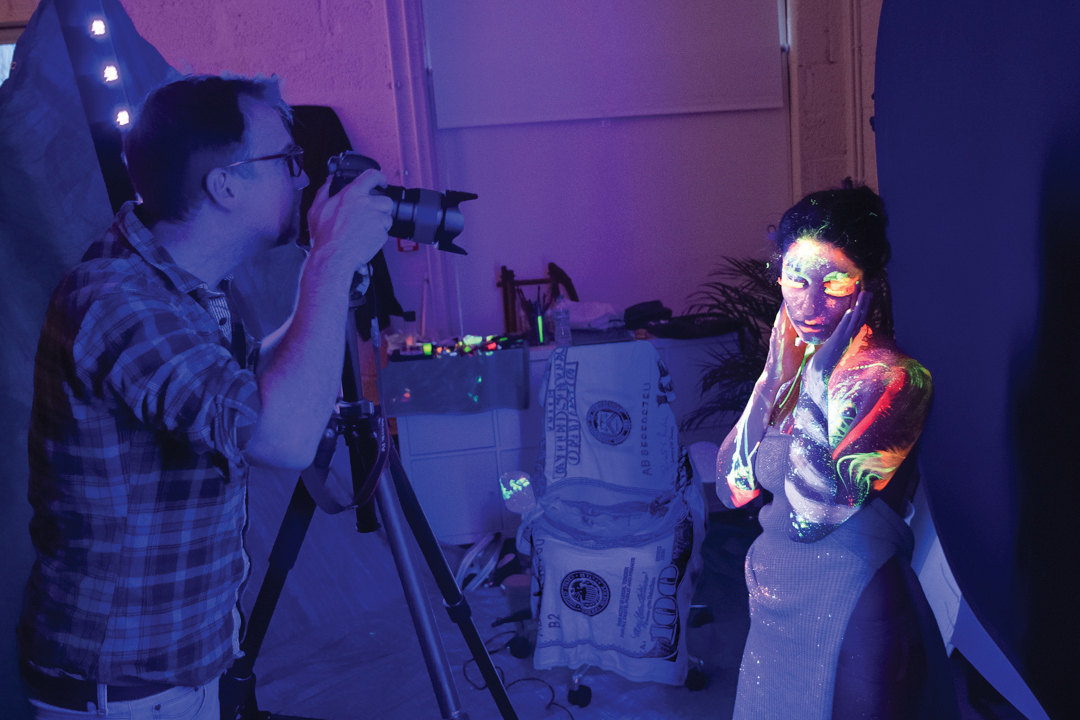
We booked a model and a makeup artist and hired a couple of UV LED batten for our blacklight shoot. You don’t necessarily need to spend lots on this, though, as you can achieve similar results on a shoestring budget. The body paint costs just a few pounds, and you can buy UV lights or bulbs online for as little as ten bucks. Then all you need is a willing subject, a paintbrush and a dark space to get creative in.
The main challenge is to overcome the low light, so all the usual low-light techniques come in to play. With the camera on a tripod and set to manual we shot at ISO1250, f/2.8 and 1/125 sec. We also mixed the lighting, adding a studio strobe (a speed light would also do the trick) with a honeycomb and an orange gel to add a soft glow to the background.

4. Cloudy chaos
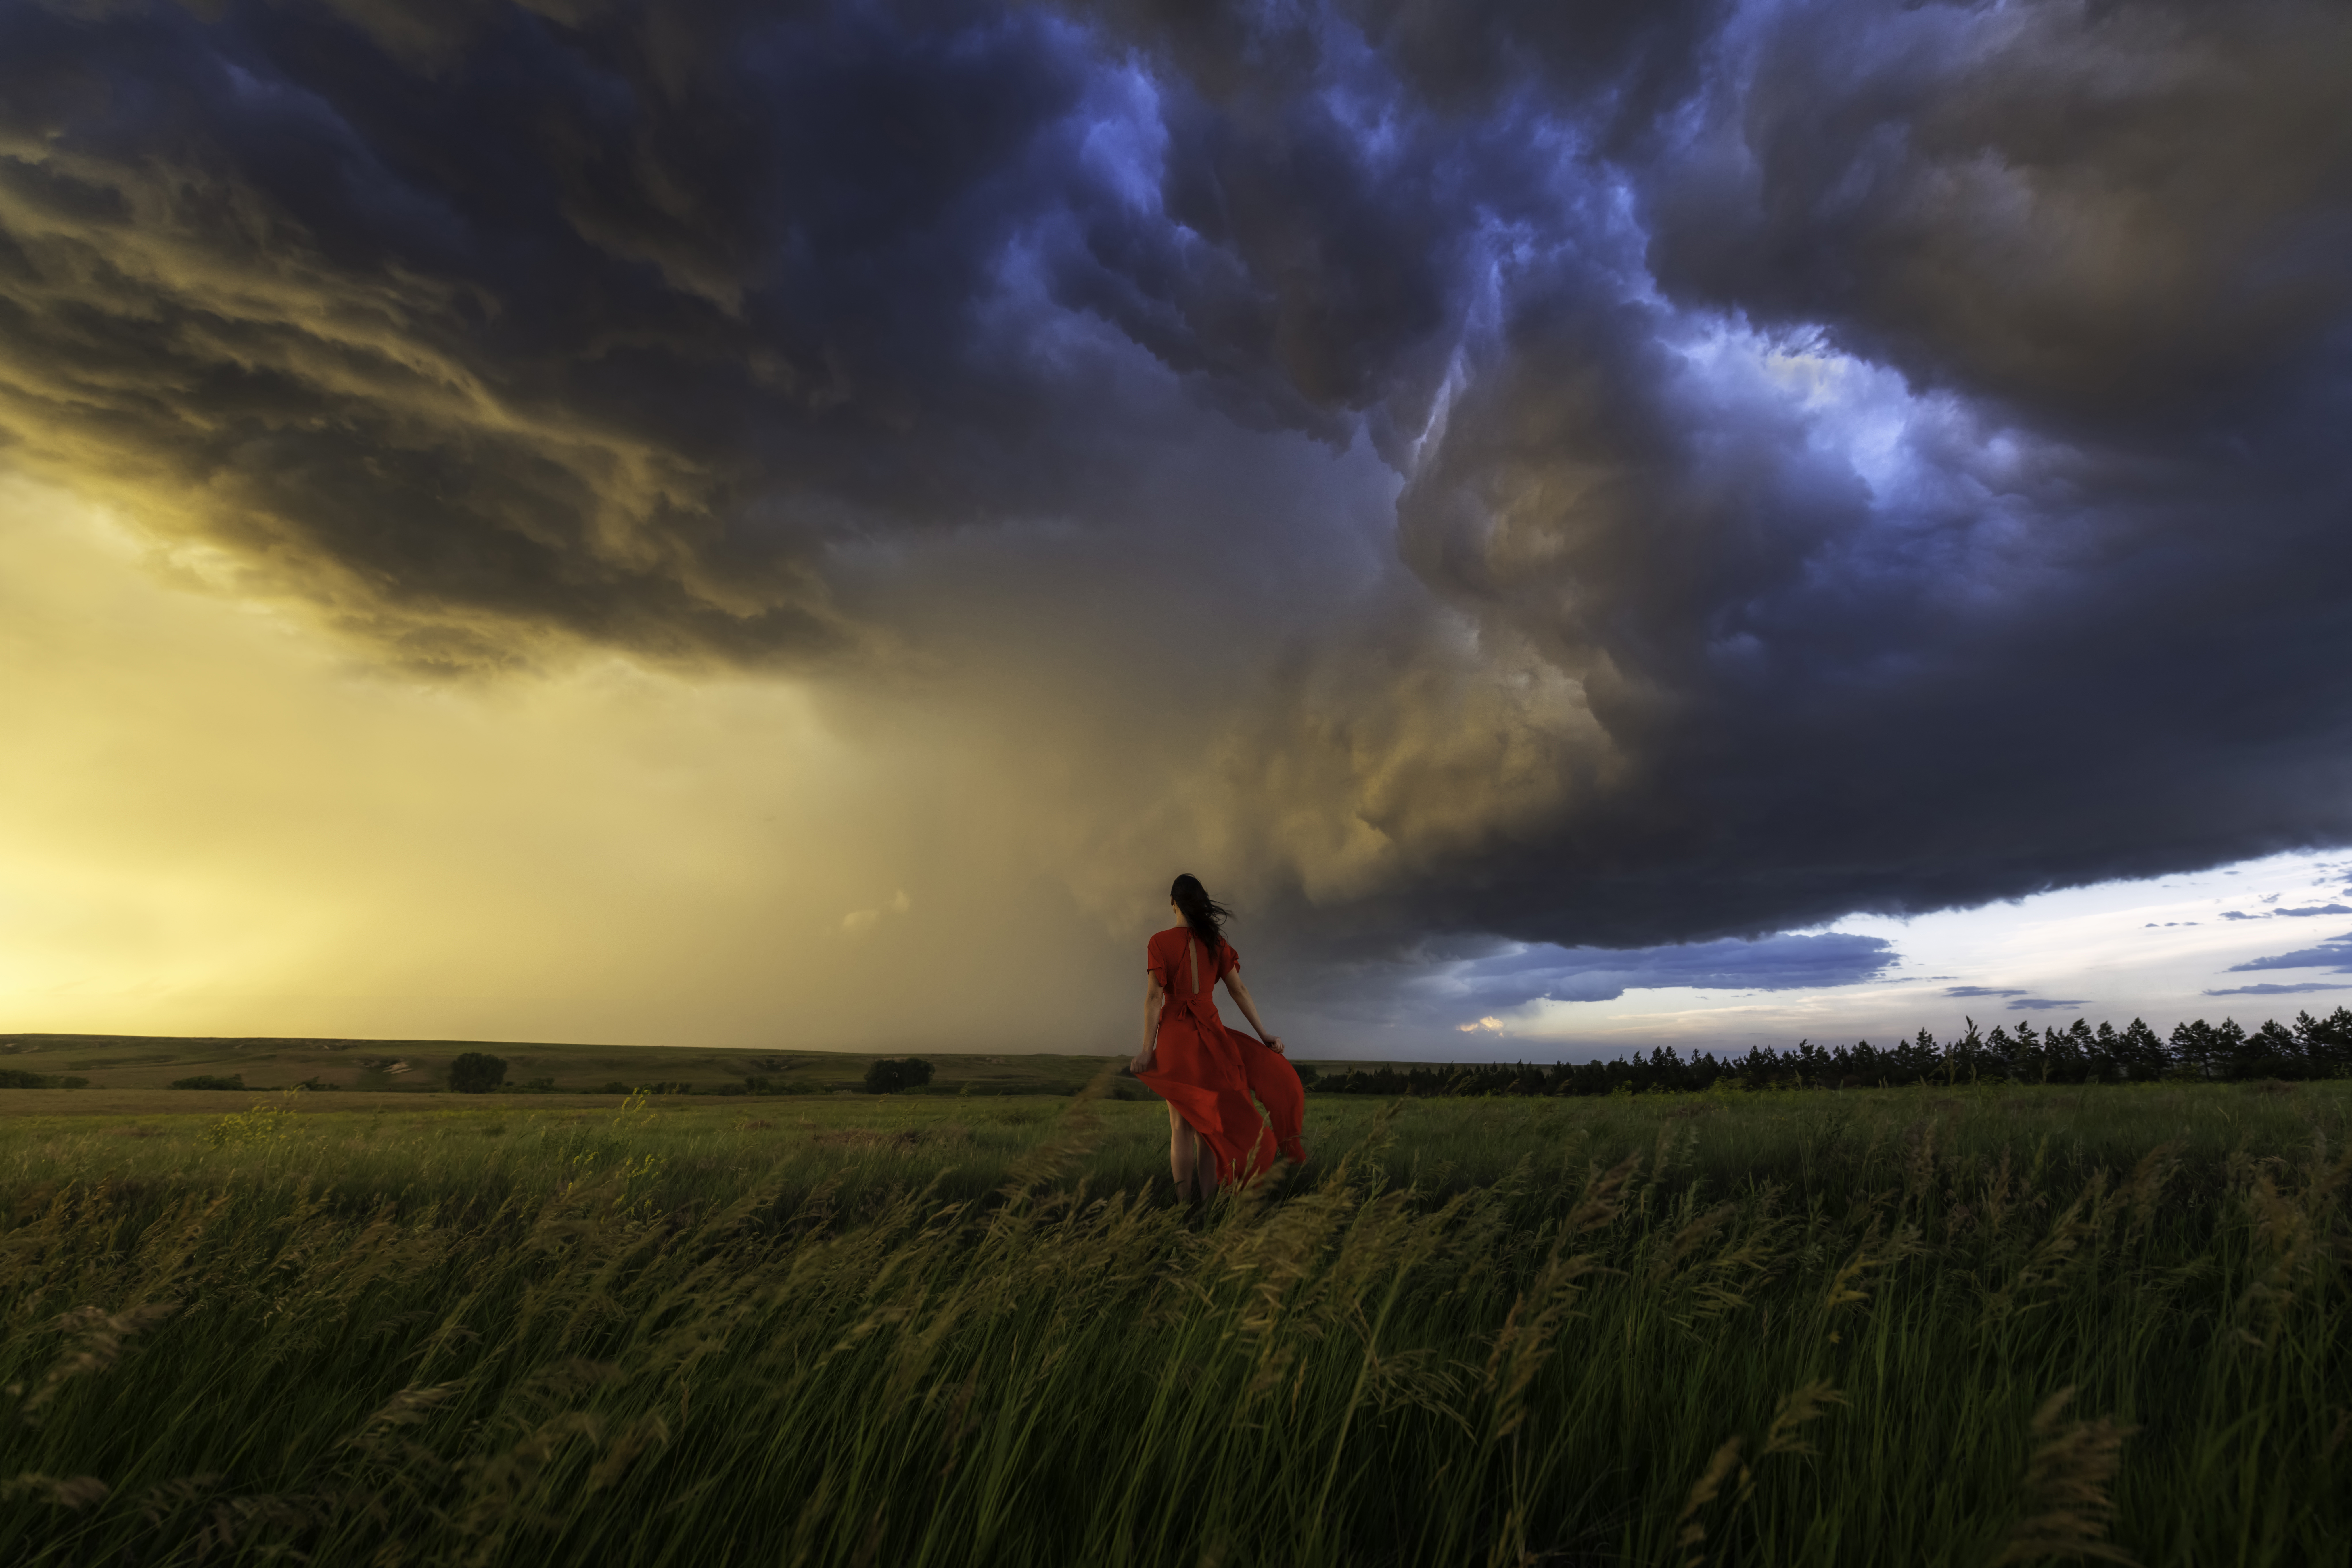
Capturing storm clouds is difficult predictably plan and shoot. When everything comes together, though, the results are well worth it. For the best chance of shooting a spectacle, study the weather forecast for several days; wind speed, direction, cloud coverage and precipitation all play a part.
Where storm clouds are gigantic, use a wide-angle lens such as a 14-24mm f/2.8 to fit them in the frame. For less expansive clouds, a 24-70mm f/2.8 lens is ideal. You’ll need your gear securely mounted on a sturdy tripod, and in strong, stormy winds you will require something to weigh the tripod down, such as a bag of stones or a heavy backpack.
Composition-wise, it’s not enough to plonk stormy clouds in the middle of the frame; for visual interest, make leading lines of roads or paths. Include foreground details such as lone trees, people or buildings, as these will give the viewer a sense of the scale of the storm clouds and create awe. Your own exposure settings will depend on your own situation, but this was taken at 1/125 sec, f/5.6 and ISO640.

5. Creative still life
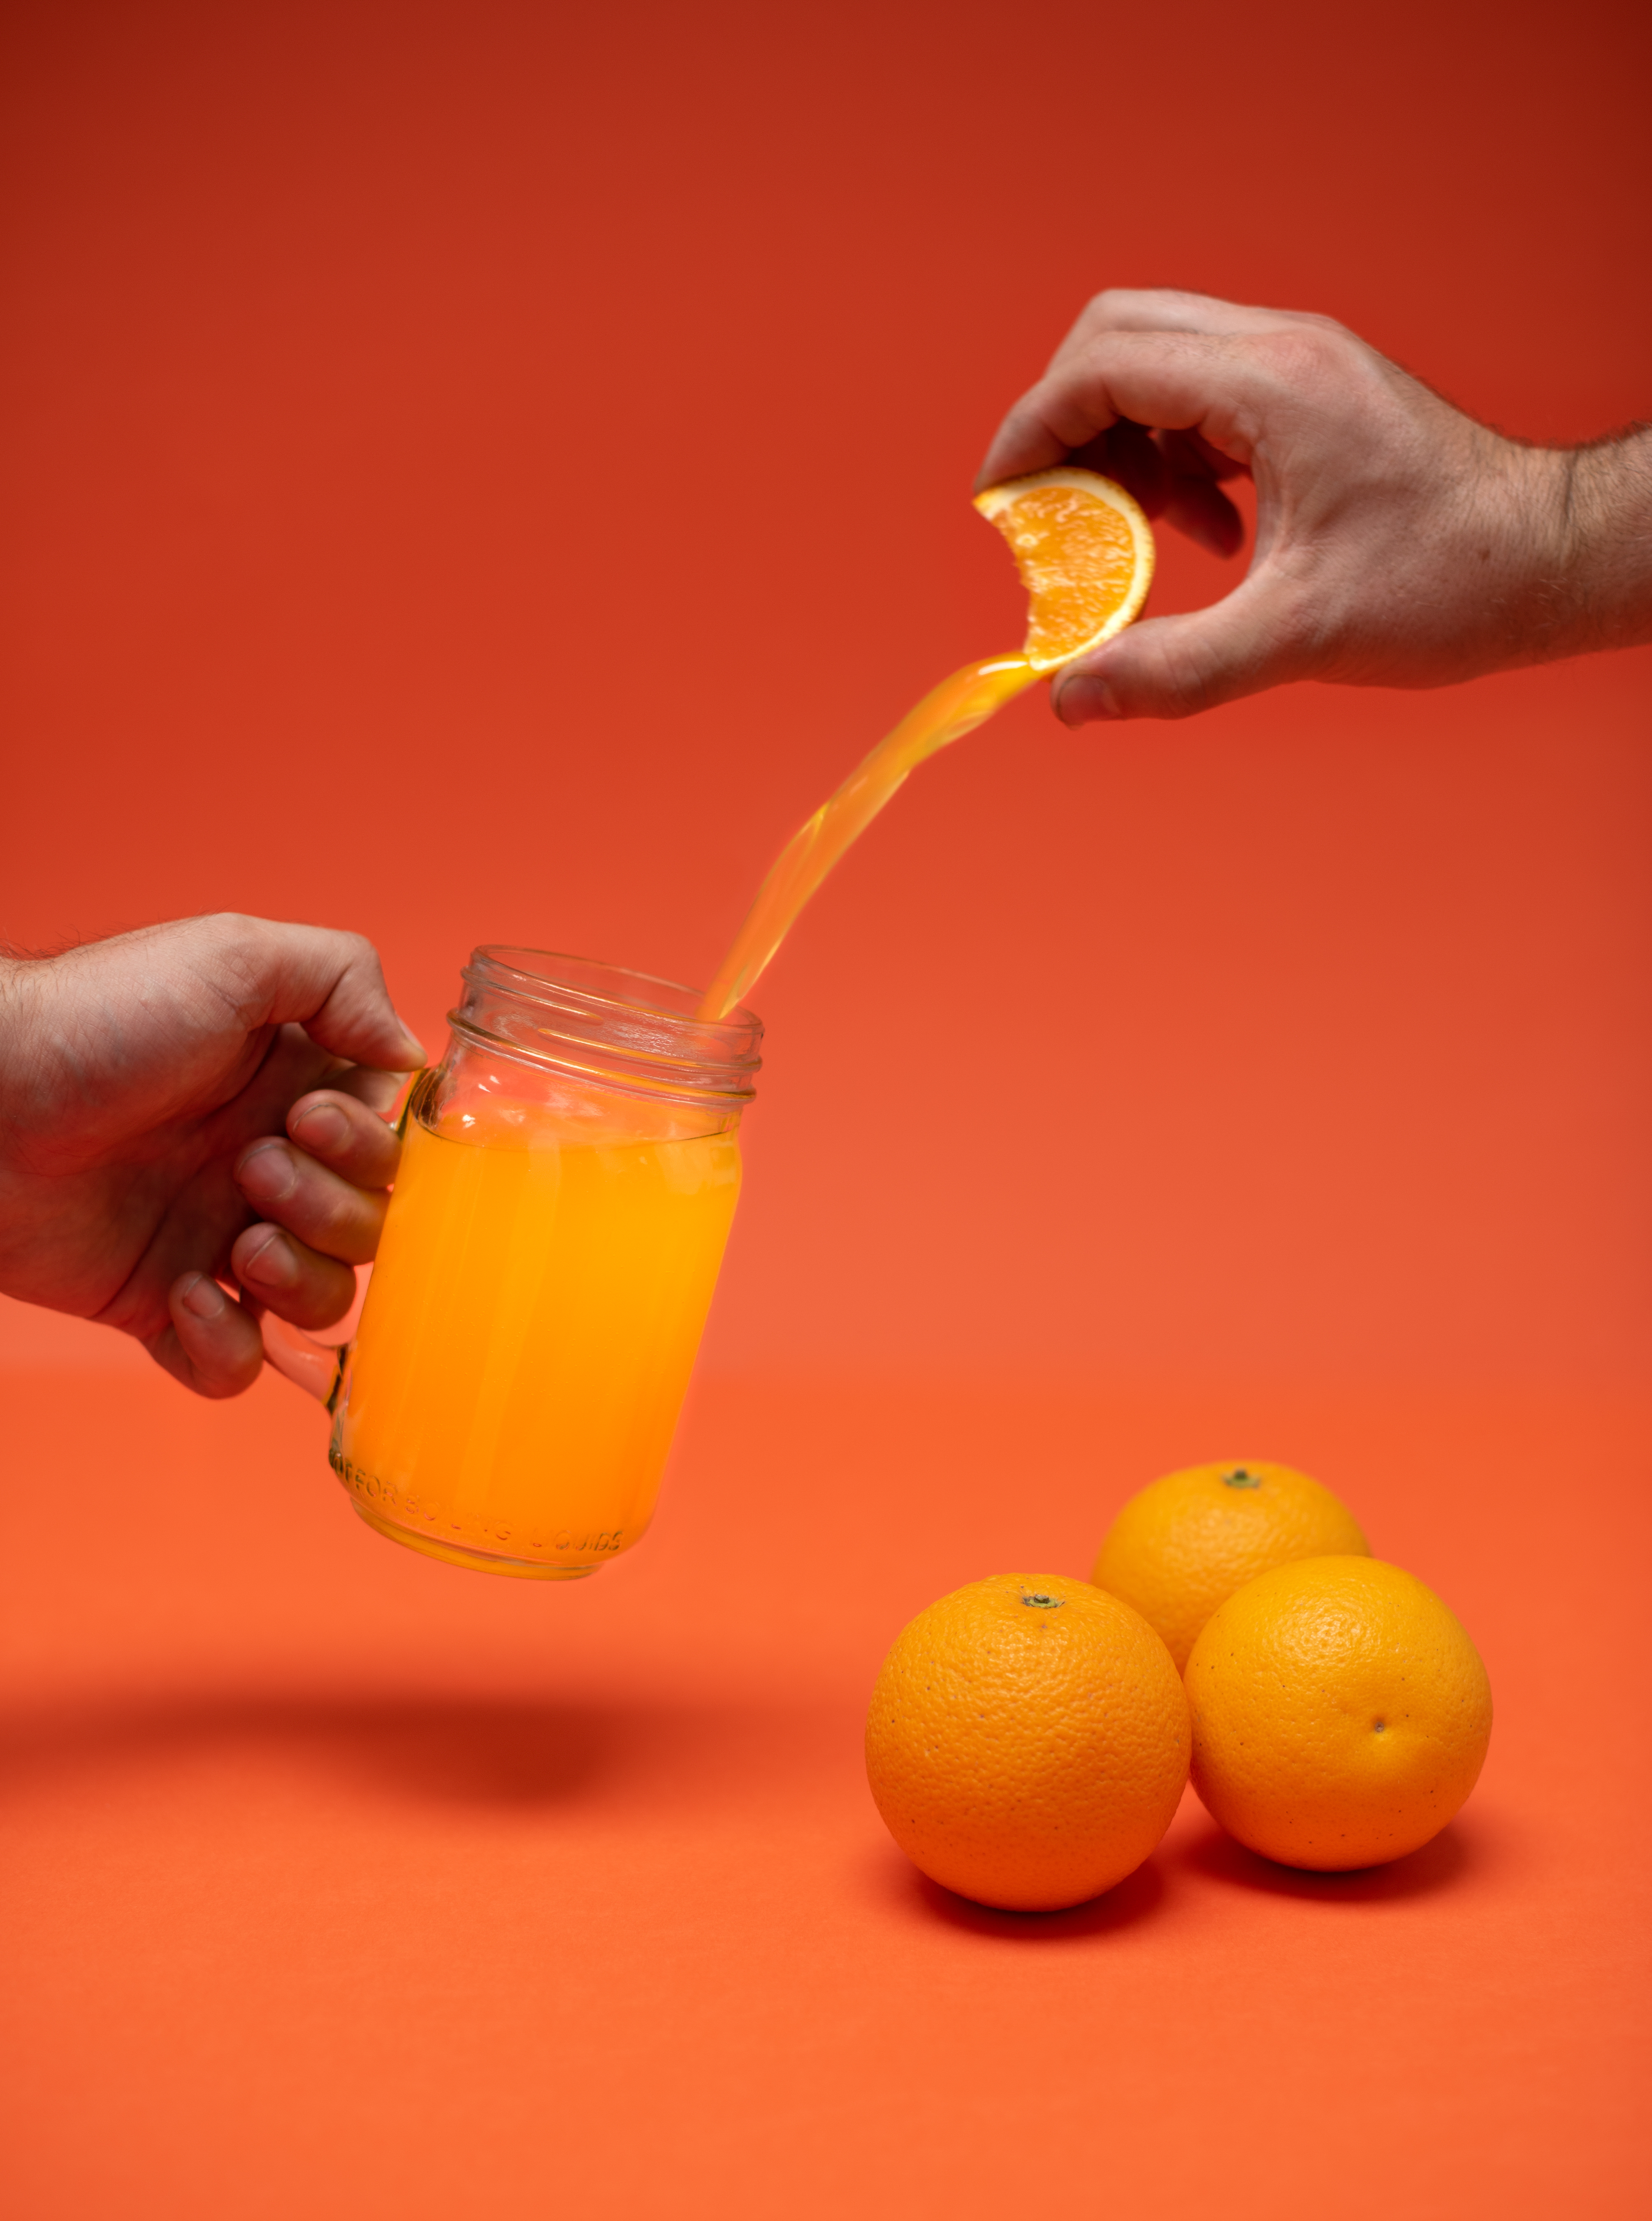
To try a creative still life photograph like this at home, you only need a few items: a bright, colorful backdrop, some soft window light, a clean glass and jug, oranges (or other fruit that matches the backdrop), squash and the ability to shoot from a tripod.
For this shot we took three separate images: one with the glass of orange juice being held, one where we poured the orange juice out of a jug, and another of us squeezing a slice of orange. We then put these together in Photoshop with a little masking to make it look like the slice was pouring juice straight into the glass.
A tripod is imperative for this project, since the camera needs to remain in the same position for each shot. The tripod also enables you to work at a slow shutter speed and keep the ISO low, and gives you the ability to use a self-timer if you're working alone. We started shooting at f/2.5, 1/40 sec and ISO100.


6. Create a star trail
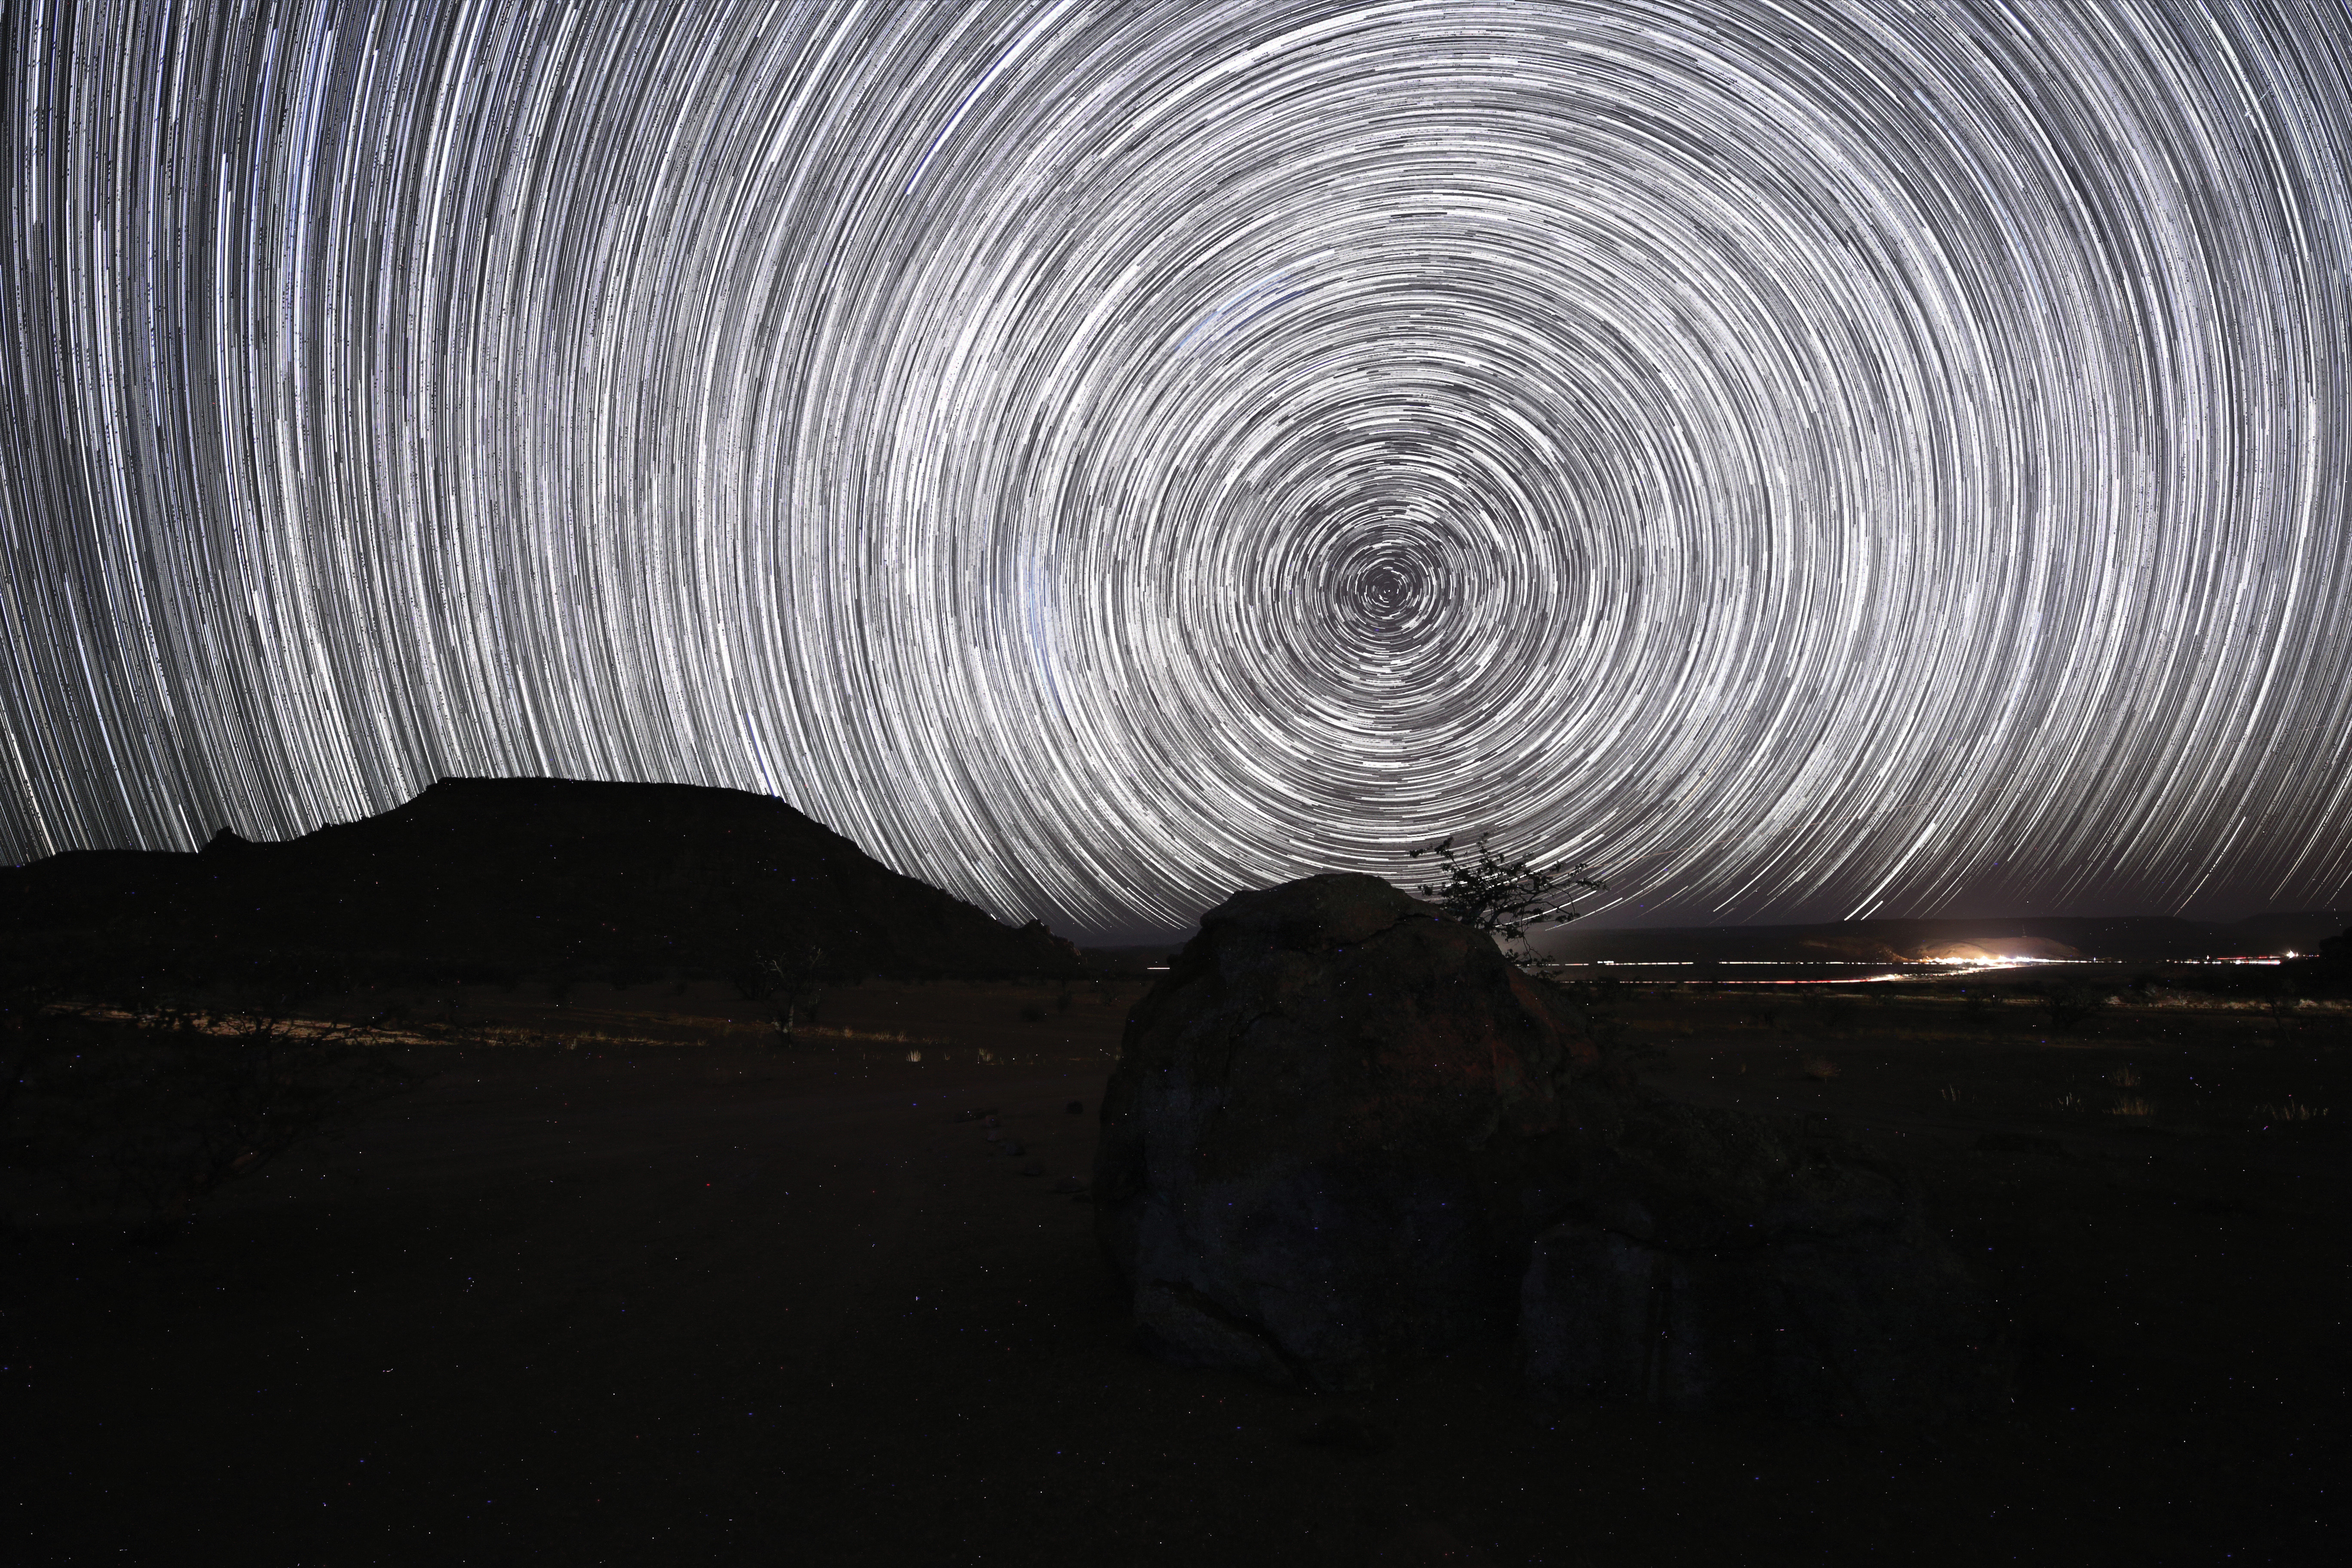
Creating a star trail is pretty straightforward, but it requires a basic understanding of how the night sky works. The Earth spins on a tilted axis so if you point your camera to the north, if you are in the northern hemisphere, or to the south if you are in the southern hemisphere, you will photograph stars that are circumpolar: they appear to travel in circles that get tighter towards the poles.
Although the basic technique outlined here is simple (all you need is a kit lens and a tripod), there are more advanced ways to do it. Probably the biggest improvement you can make with any star trail image is the composition. You can produce a star trail anywhere just by pointing your camera towards the planet’s poles, but if you have something interesting in the foreground of your image, the star trail can look more dramatic.
You don’t need to get too close to your foreground subject (after all, your lens must be on Infinity focus) but an interesting building, tree, statue or even mountain range can add real impact to your star trail image. We started in manual at 30 seconds, f/2.8 and ISO800. Adjust the exposure until you’re happy with the image, then take the same image over and over for at least an hour (the longer, the better). This is best done with an intervalometer.
With free software like StarStaX you can drag in all the JPEG images, choose Gap Filling mode and click Start Processing – in 10 minutes, the software will have overlaid all the images to produce a dramatic star trail shot.

7. Paint with light
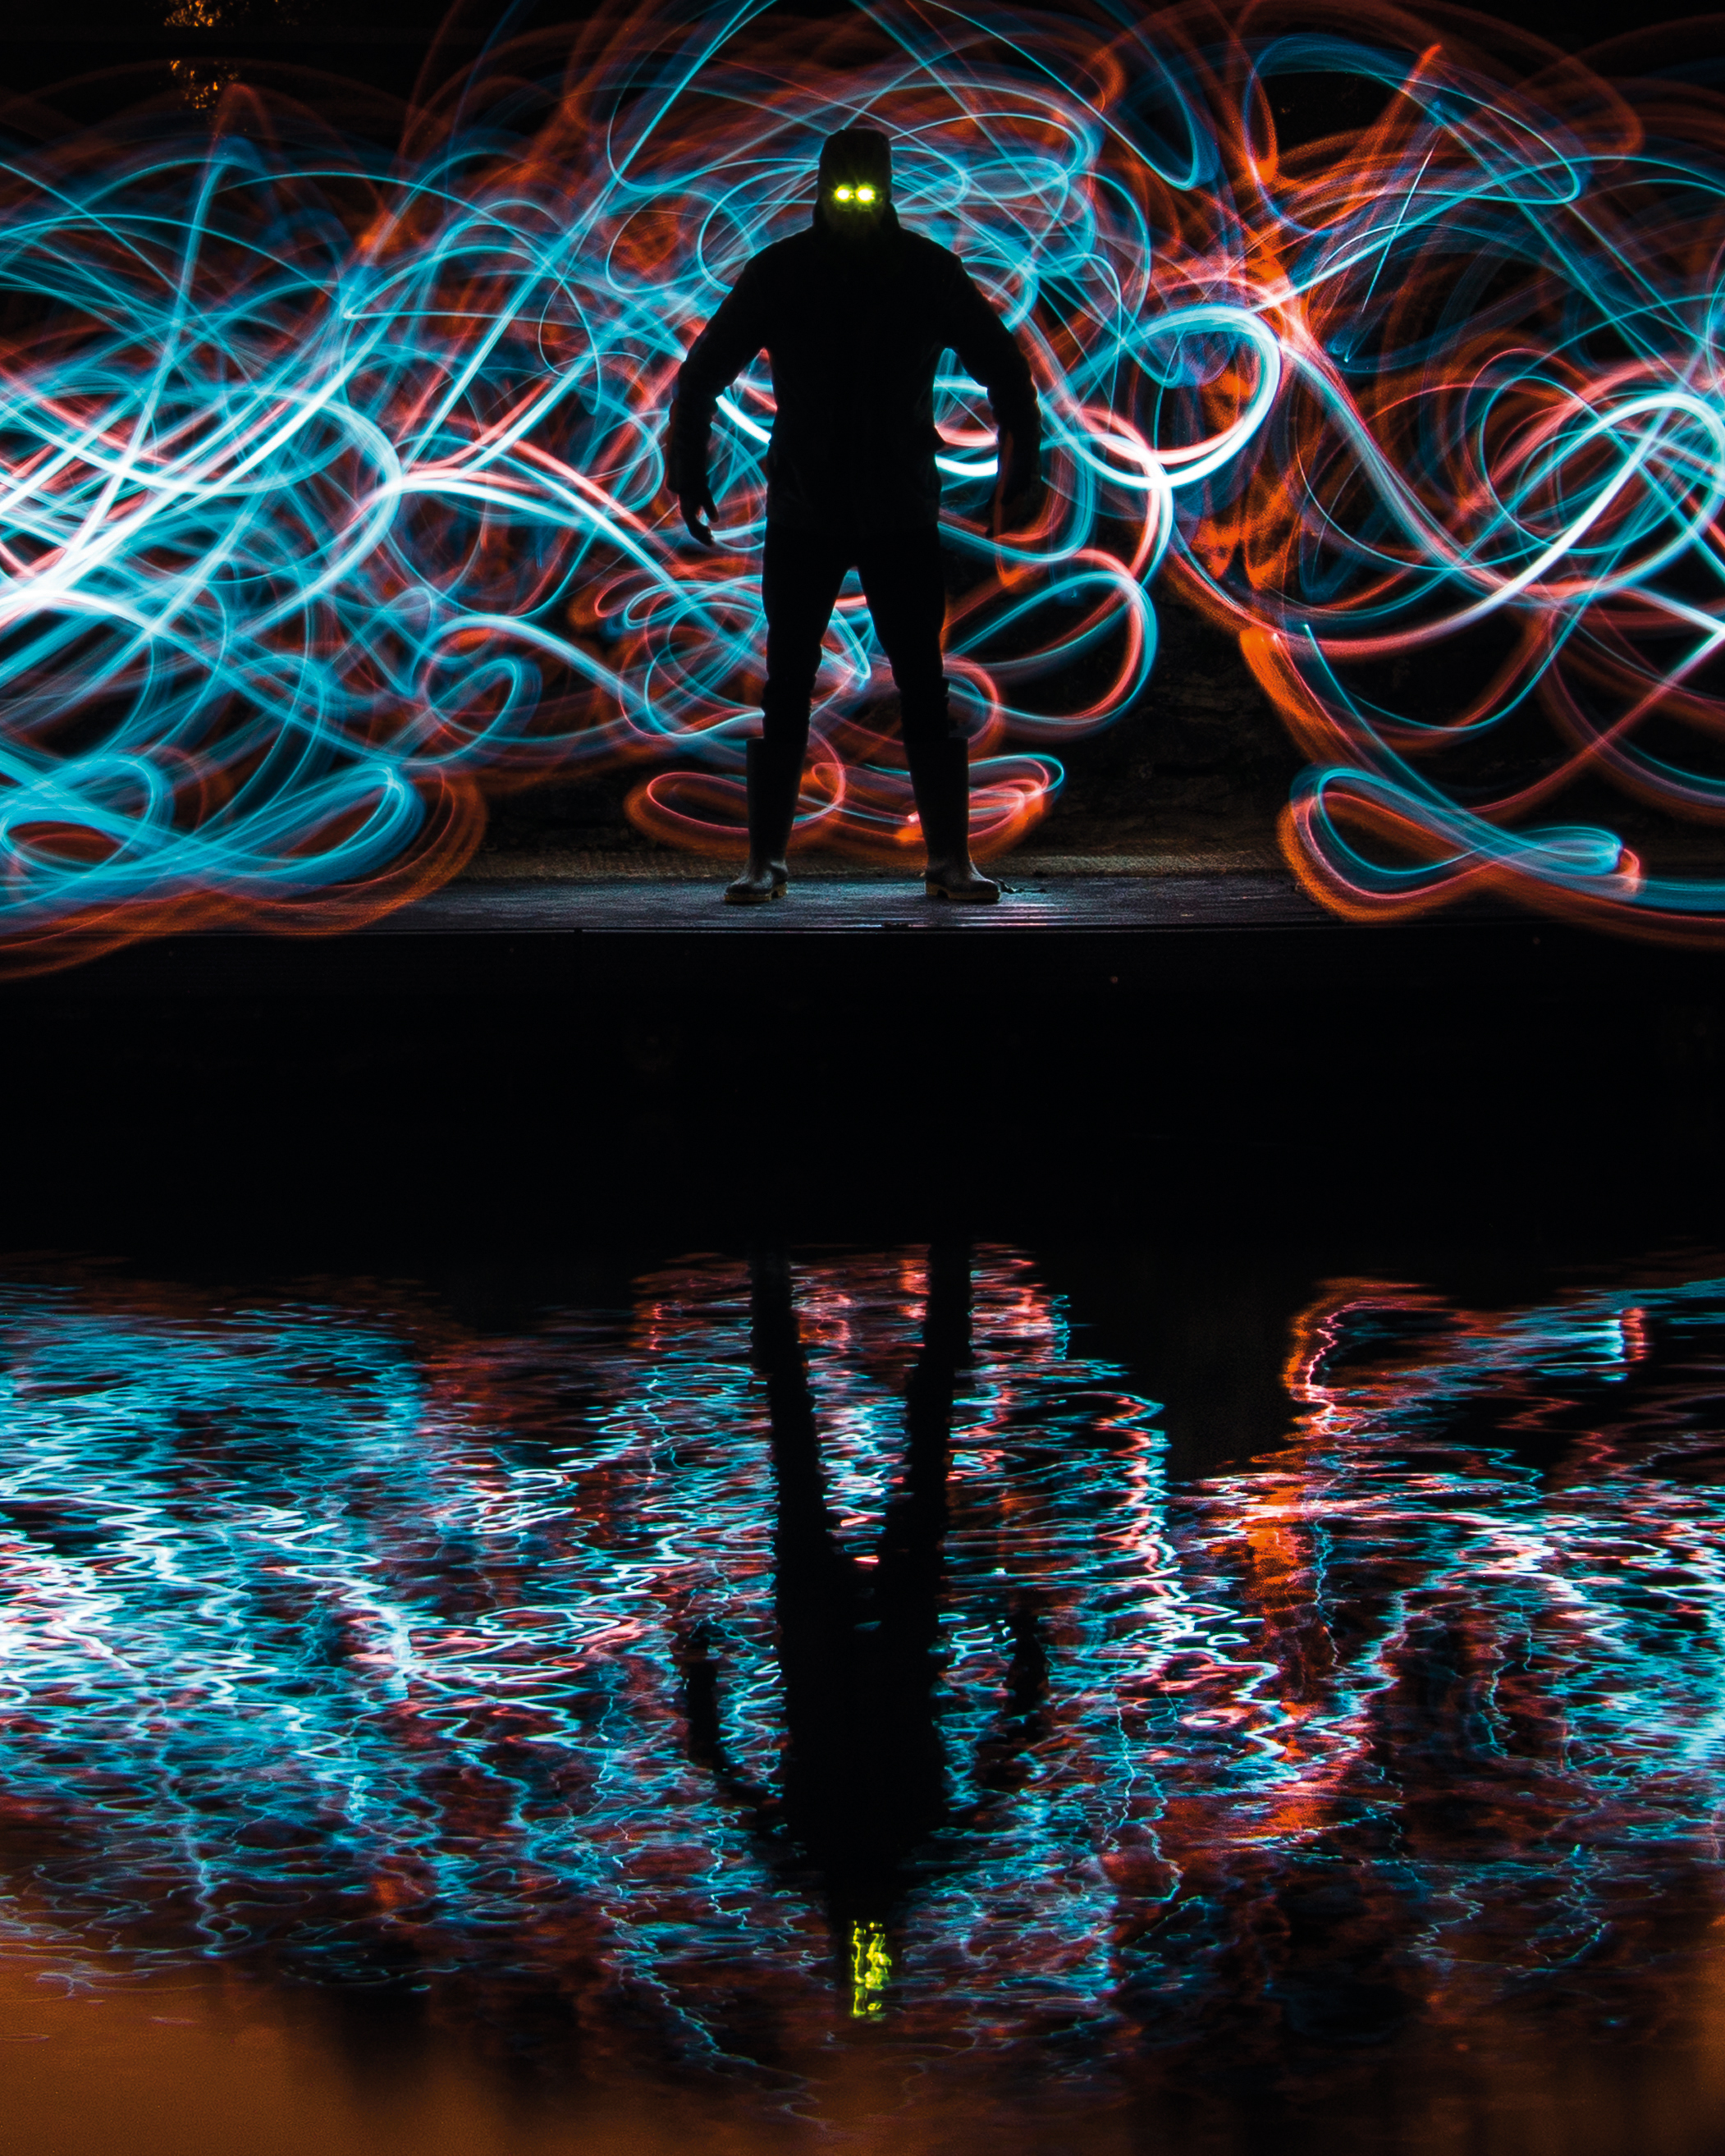
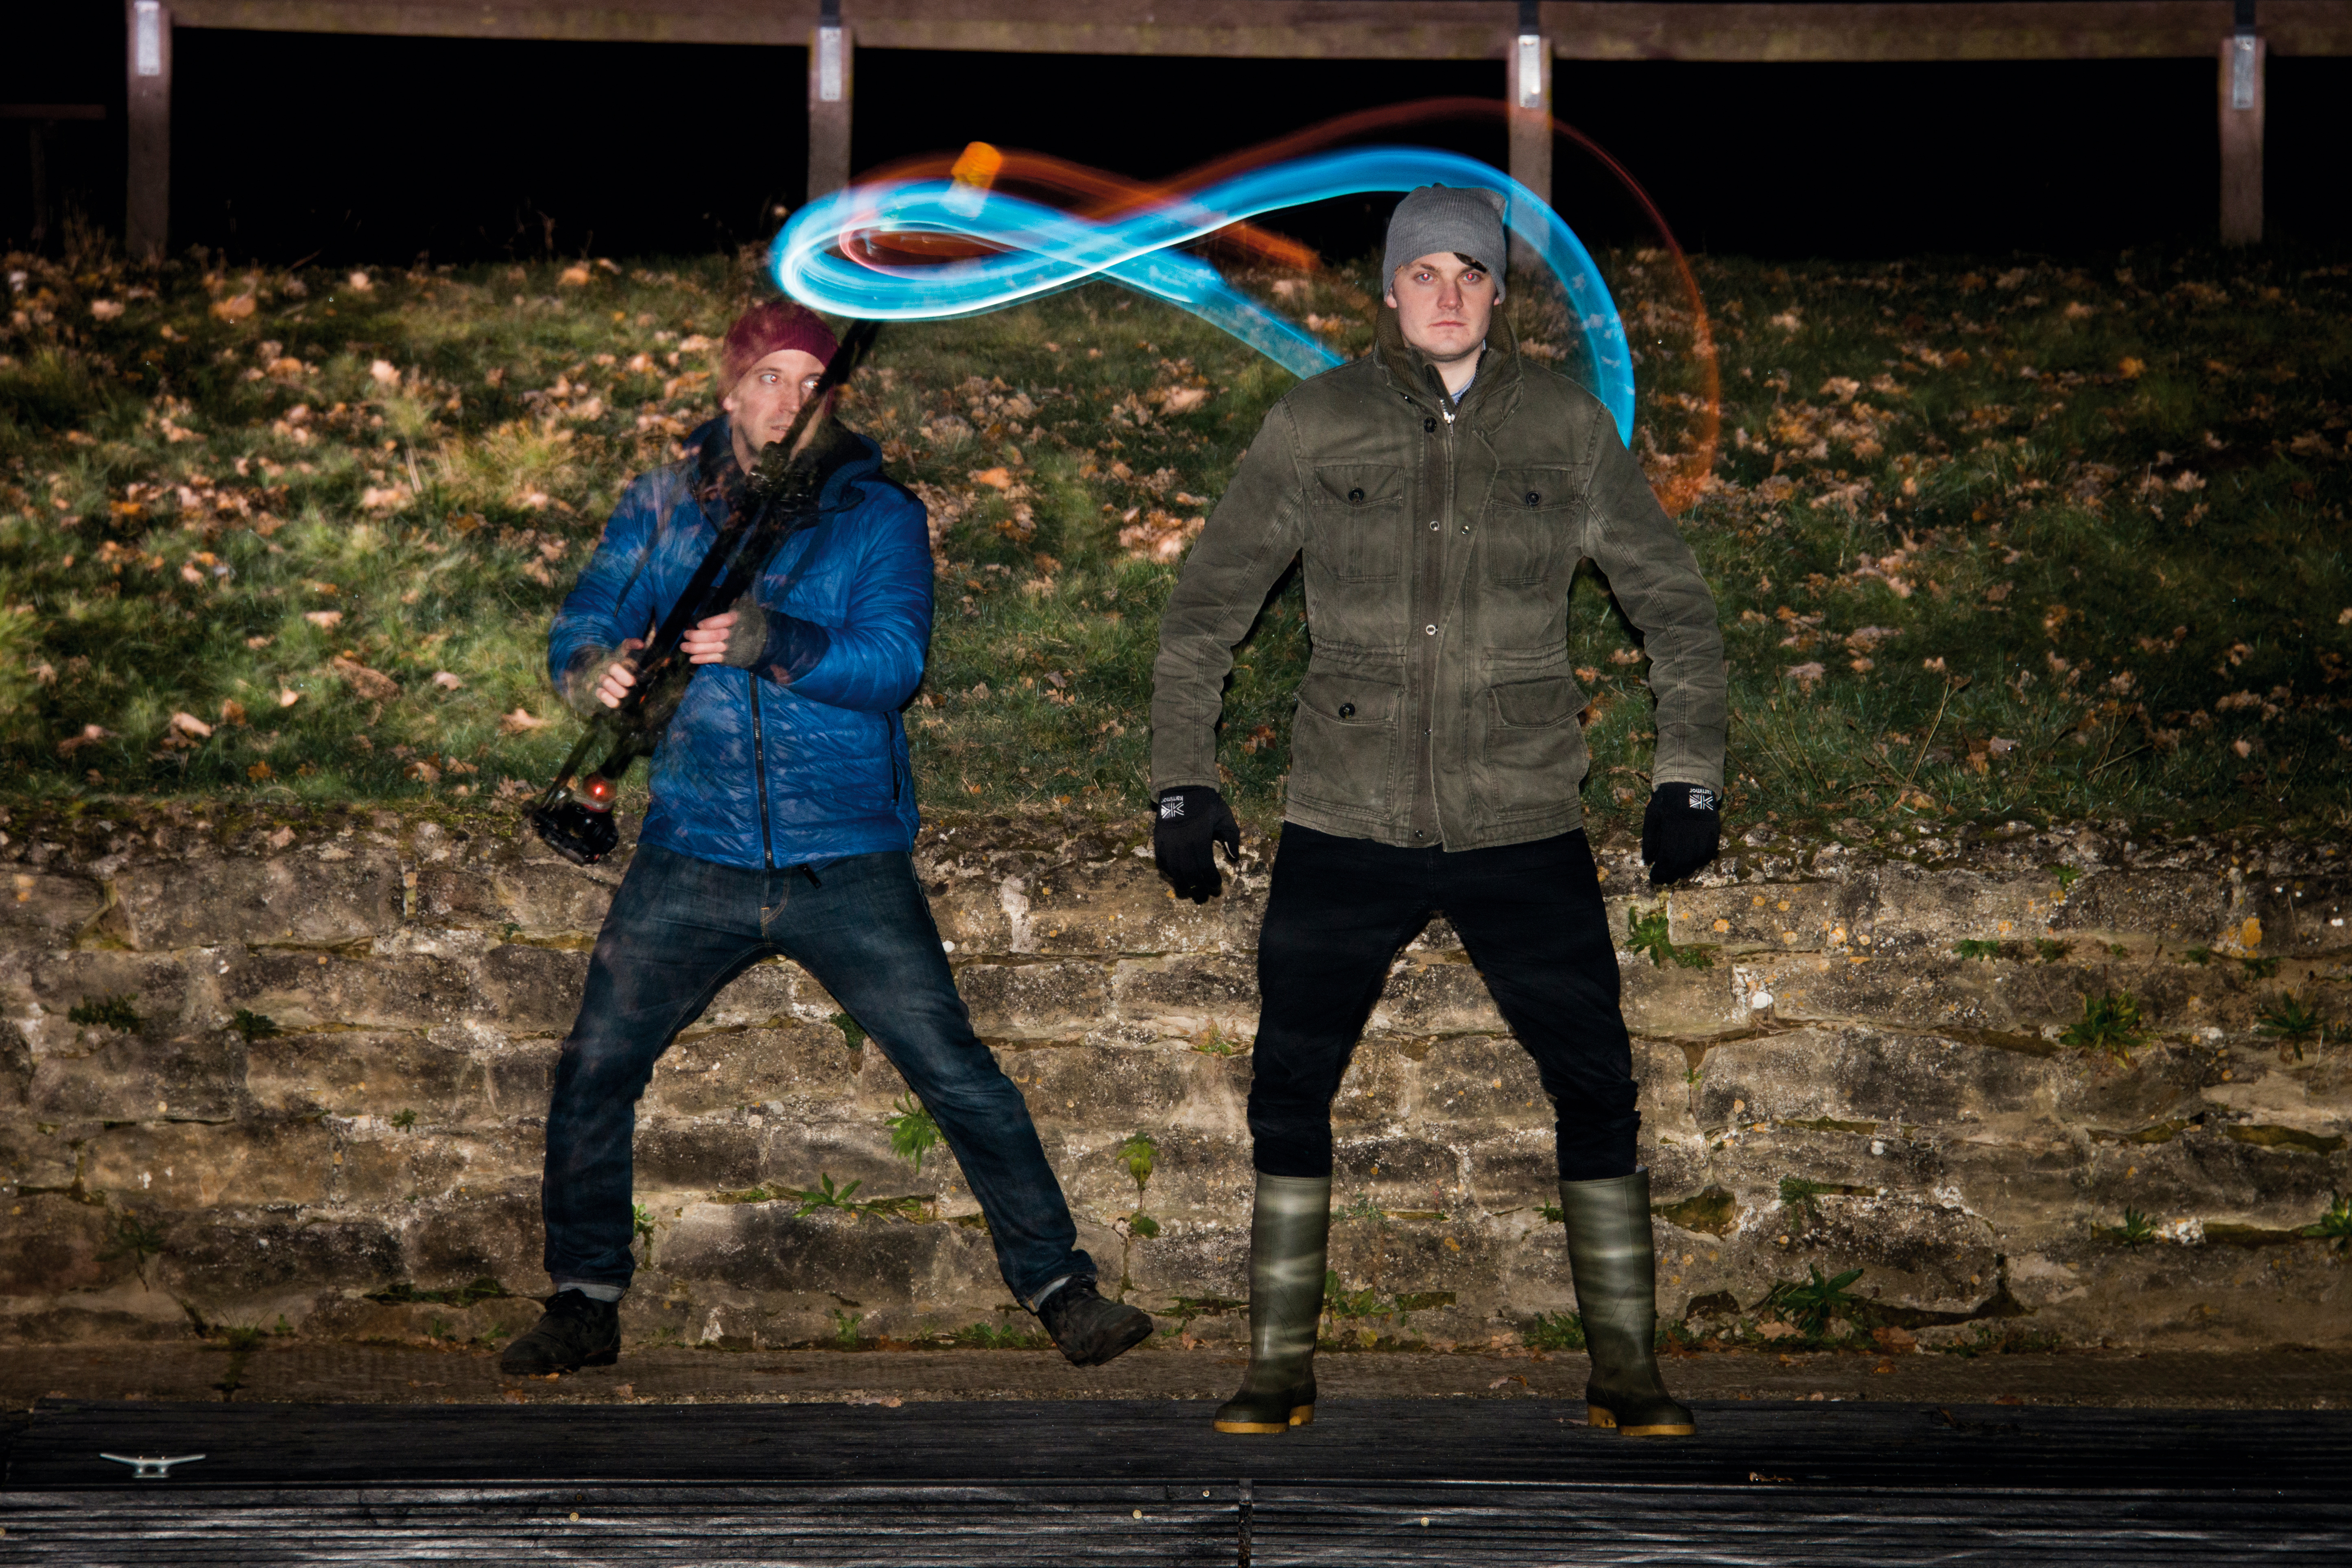
In 1882, pioneering photographer Georges Demeny attached light bulbs to an assistant and told him to jump. Ever since then, photographers have been combining moving lights and long exposures to ‘paint’ with light. For a fresh approach to the technique, we suggest adding reflective surfaces to enhance the effect.
If you’re new to light painting, you’re in for a treat. It’s one of those wonderful techniques that demonstrates just how exciting photography can be once you
start experimenting with your exposure. A light painting is created by moving any light source through a dark scene while the camera’s shutter is locked open. In exposure terms light is accumulative, so dragging a torch across the frame is like taking chalk to a blackboard.
Besides a sturdy tripod, a dark environment and a few torches, the key here is your camera’s Bulb exposure mode, which enables you to keep the shutter open for as long as you like – so you can take exposures that last for several seconds or even several minutes.
Once you get the basics right, the real fun is in experimenting with different light sources and moves to create wonderful patterns like this – our settings were 160 sec, f/6.3 and ISO100, but have a play (keeping the ISO as low as possible) and see what works for you!

8. Stroboscopic action portraits
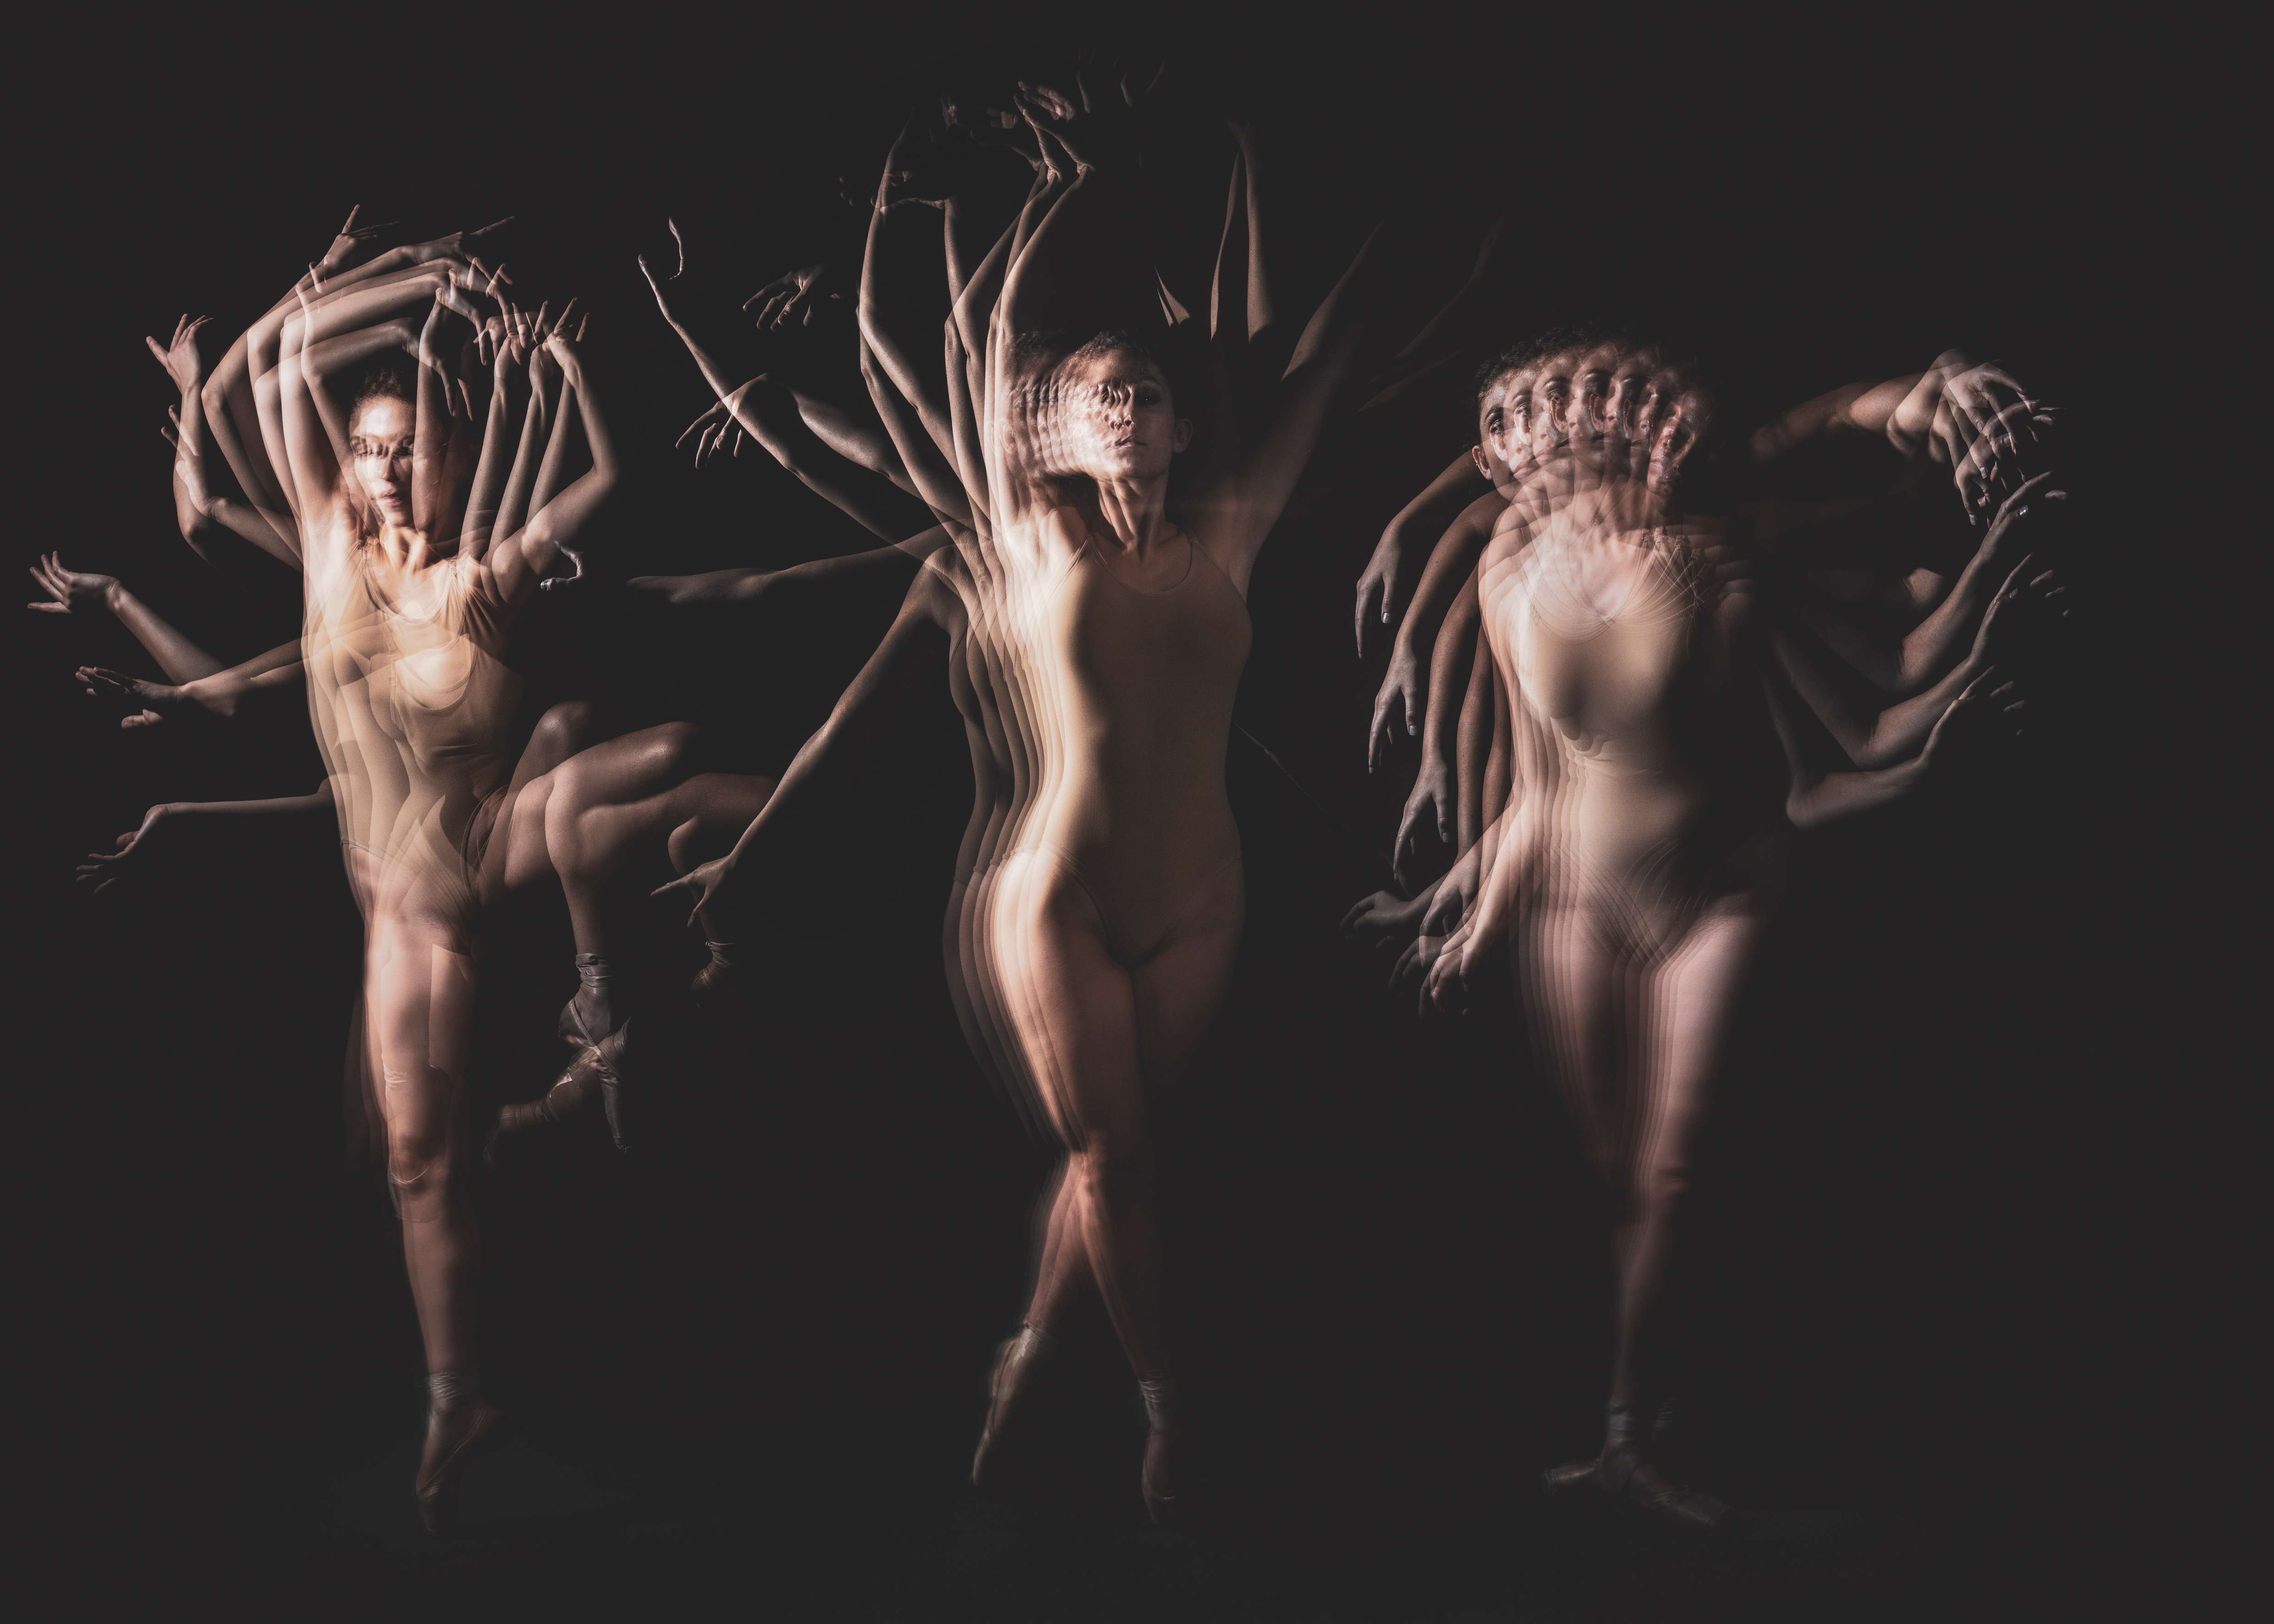
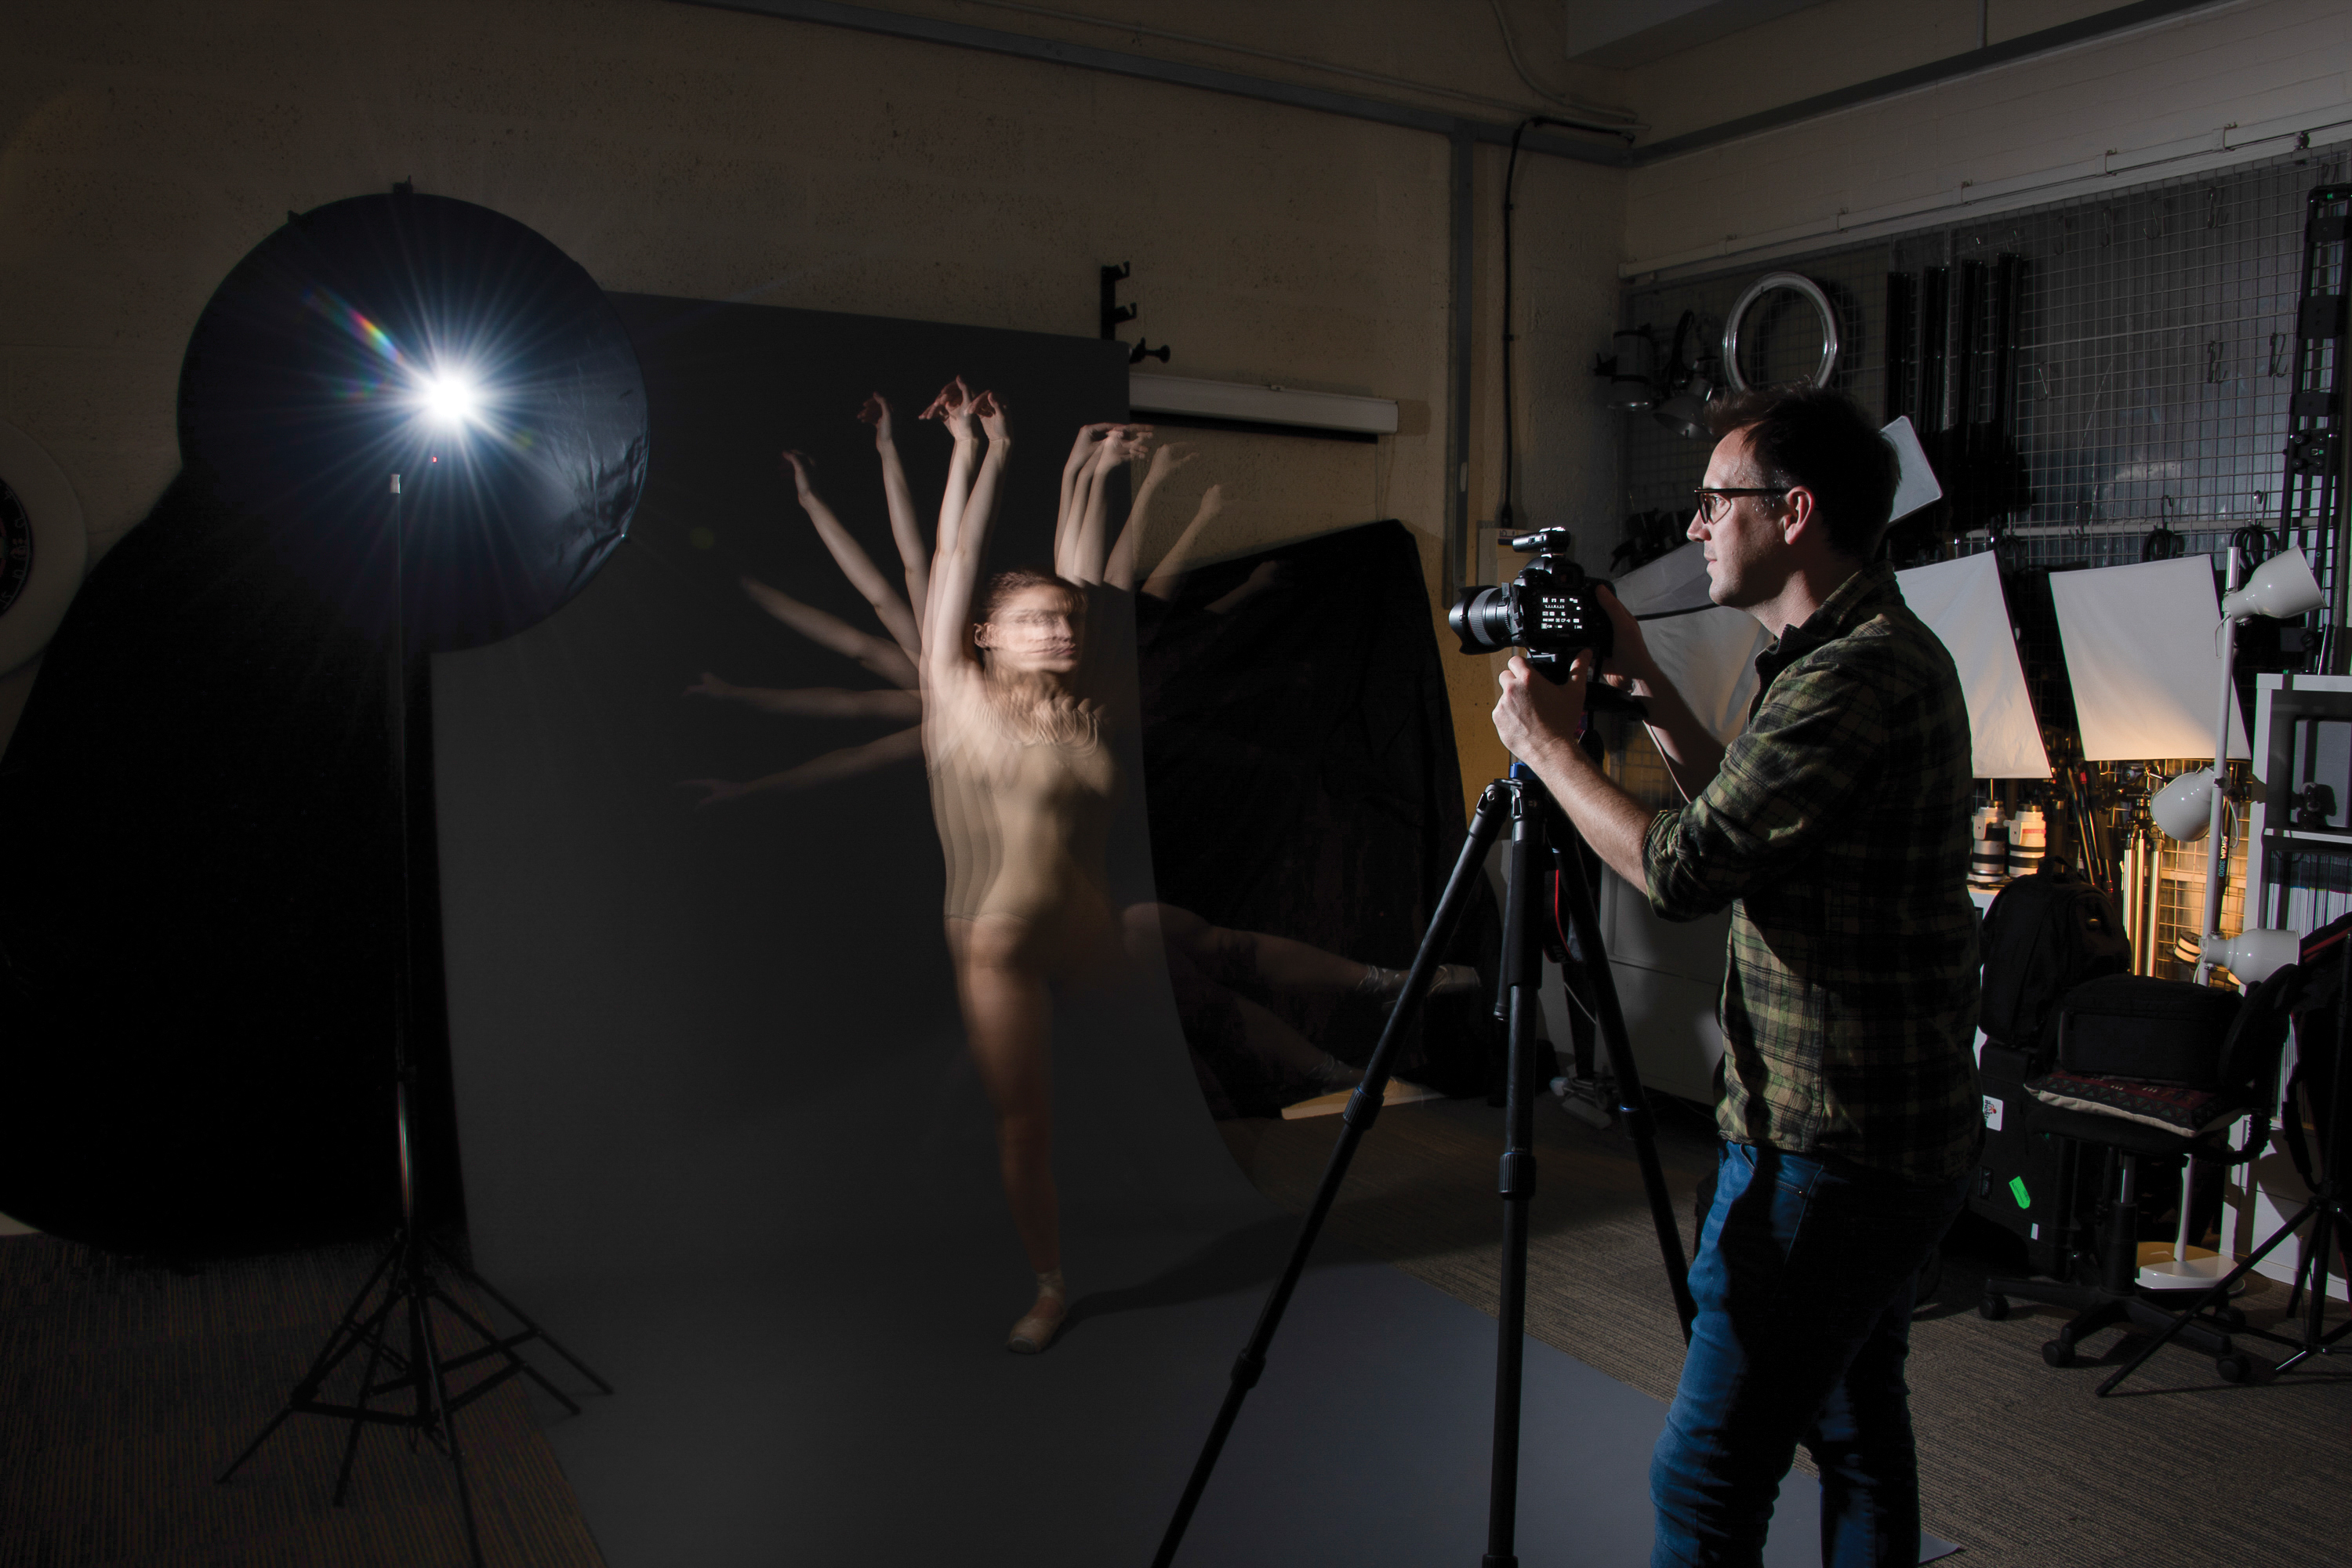
This stop-motion effect is created by a pulsing flash that fires lots of times during a long exposure, freezing the action multiple times as our dancer moves through the frame. Known as stroboscopic flash, it’s an interesting technique to try on any moving subject. All you need is a dark space, a tripod and a speed light with a stroboscopic or ‘multi’ mode.
Timing plays a huge part here, and in three distinct ways. First there’s the timing of the flash – you can choose the number of flashes and determine how quickly they fire, so you’ll get varying results depending on the flash count and frequency. Secondly, there’s the timing and flow of the subject’s motion – actions that might look graceful in real time can result in a jumbled mess with the stroboscopic effect, so there’s a good deal of trial and error involved in nailing the pose.
Thirdly, there’s the art of pressing the shutter button at the right moment – try shooting the same sequence twice and you’re likely to get very different results, as there can be dramatic changes depending on the split second that the shutter button is engaged.
Start in manual with a shutter speed of around 1 second, aperture of f/11 and ISO100. Take a couple of test shots and, if the background is too bright, close down the aperture or lower the ISO. Most speed lights enable you set two strobo controls; Hz controls flashes-per-second, and flash count determines total flashes. With flash count 10 at 8 Hz, we’ll get 10 bursts over 0.8 secs. Dividing the Hz by the count gives the shutter speed.

9. Lightning strikes
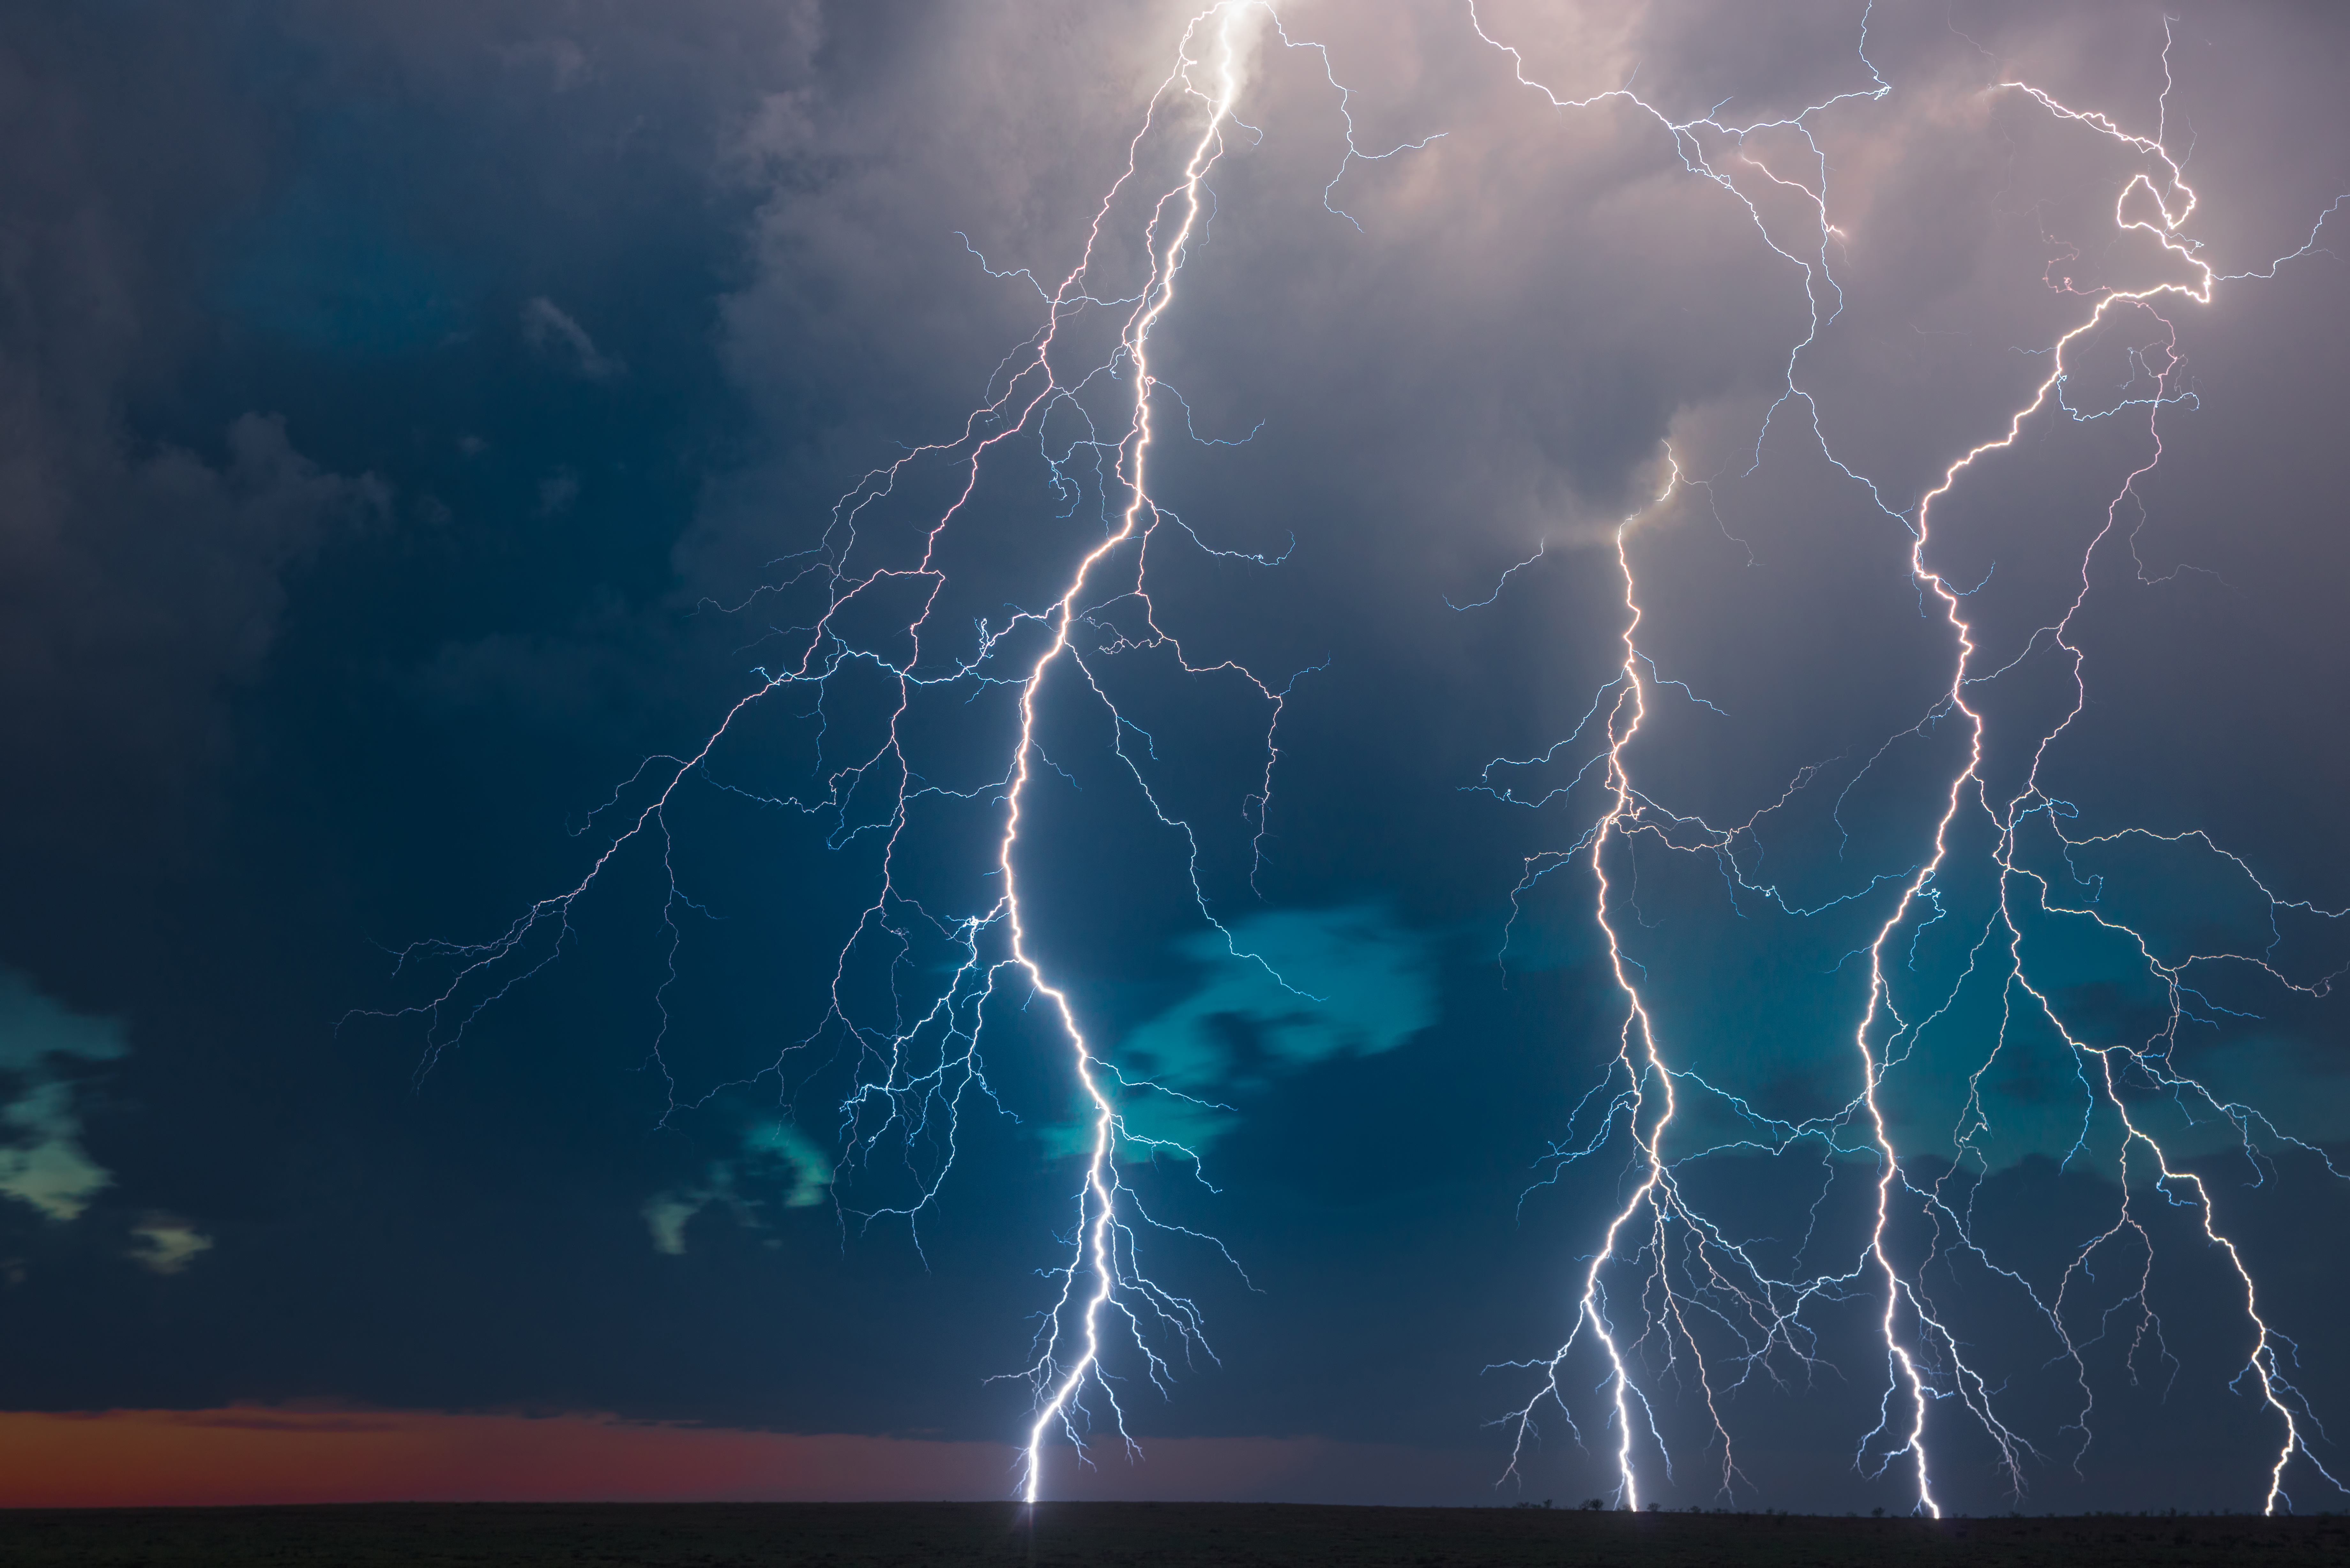
Capturing dramatic forks of lightning as they dart across a stormy sky requires plenty of patience, but also luck. This is something that could be comfortably shot from or through a window at home, but if you're going to venture outside then be sure that your camera and lens are weather-sealed.
It’s hard to predict when lightning will strike, but by using Bulb mode and keeping the shutter open for longer durations, you can improve your chances. Using a cable release or remote control, set a wider aperture of around f/11 and an ISO of around 100-400. Then, as soon as the lightning strikes, close the shutter.
With lightning you will need to employ manual focus, pre-focusing on where the lightning is likely to strike. Moisture can soften the look of lightning, so you’ll get sharper results shooting away from heavy rain. For the sharpest images keep the shutter open for the shortest possible time, and use a flexible telephoto lens such as a 24-70mm to help with composition.

10. Master the moon
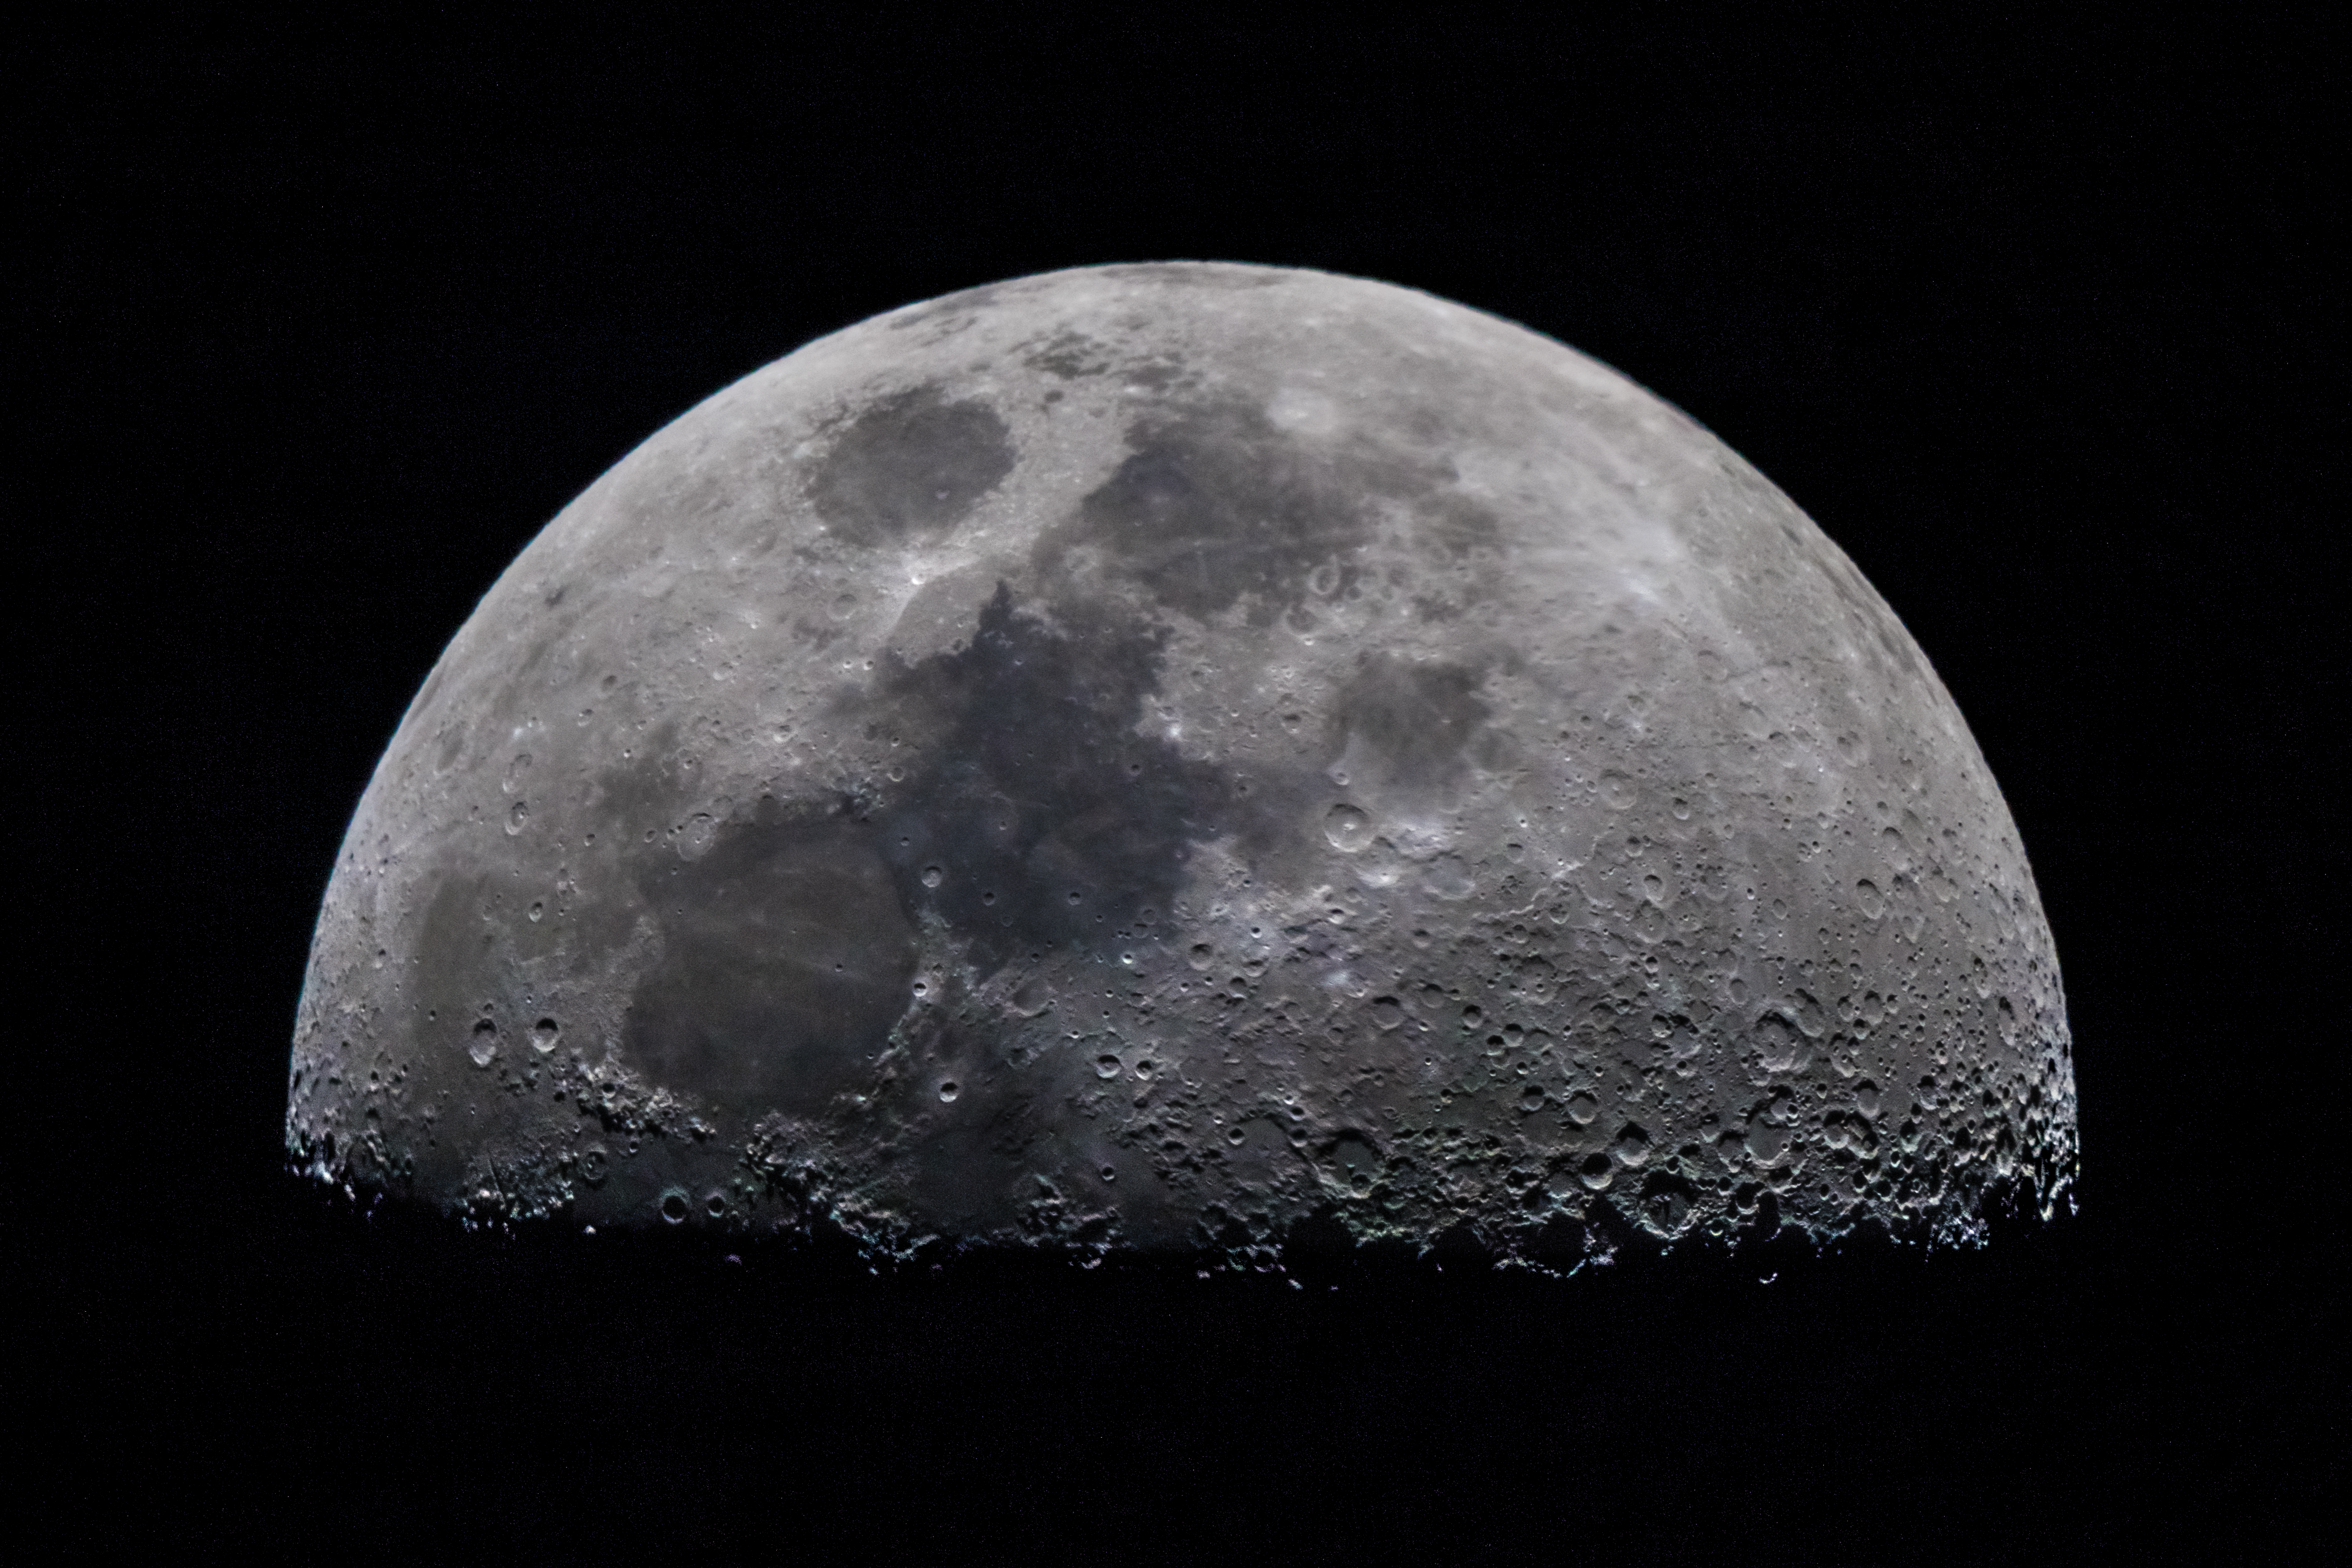
One of the most popular subjects in night photography, the Moon is beautiful to look at but also very challenging to capture in a photo. Anyone with a long zoom lens or a point-and-shoot camera can get a decent photo, but it most likely will not have the same impact as an image with detailed texture of the Moon’s surface without any further processing.
By using the wrong camera settings, poor focus or an unsteady tripod, the result will be a photo that may look right at first sight, but upon zooming in the errors will become evident. The longer the focal length, the more attention is needed in order to get a sharp photo.
The method we're using requires a T-ring adaptor coupled with a camera and a reflector telescope, which produces stunning photos that are rich in detail and at a very low cost. For this example, a Sky-Watcher Newtonian telescope with a focal length of 650mm has been used, along with a 2x Barlow lens that came with the kit. The total magnification is similar to a 1,300mm zoom lens, and the camera settings are also applicable when using a zoom lens – in this case we're shooting at 1/180 sec, f/8 and ISO800.
• Best cameras for astrophotography
• Best telescopes for astrophotography


101 Amazing Photos to Take Before You Die: £17.99
Delve into full list of 101 must-take photographs and learn key techniques for amazing results. These inspirational guides will help you capture the perfect shot.
Read more:
Can't get to the shops? Download 5 digital issues of a photo magazine for $5 / £5
Stuck at home: 11 photo projects to try indoors during the COVID-19 crisis
44 tips cards for photographers
Photography tips and techniques videos

James has 22 years experience as a journalist, serving as editor of Digital Camera World for 6 of them. He started working in the photography industry in 2014, product testing and shooting ad campaigns for Olympus, as well as clients like Aston Martin Racing, Elinchrom and L'Oréal. An Olympus / OM System, Canon and Hasselblad shooter, he has a wealth of knowledge on cameras of all makes – and he loves instant cameras, too.
