A day in the life of astrophotographer Alyn Wallace
We join professional astrophotographer Alyn Wallace in Wales for a masterclass in searching for stars

Alyn Wallace has an arsenal of apps and websites on his phone to help him plan his night shoots. These are some of his favorites:
1. Clear Outside (Free). Weather forecasts for astronomers, with info on cloud cover and dew point.
2. Magic Seaweed. A website designed for surfers, but very useful for showing the tide times for coastal shoots.
3. Phases of the Moon (£1.63). As the name suggests, this gives detailed information about the phases of the moon.
4. Light Pollution Map – Dark Sky (Free). Detailed info on light pollution in map form; also gives info on the Northern Lights.
5. Stellarium (Free on web; £2.99 as app). A night sky emulator, pre-visualising where the Milky Way and planets will be.
6. PhotoPills (£9.99). Its augmented reality feature lets you work out when the Milky Way will be exactly where you want it.
7. ISS Detector (Free). Tells you when and when the International Space Station will next be overhead in your location.
The heat of the summer sun is starting to fade as we walk down the long path down to Three Cliffs Bay, which sits below the mediaeval ruins of Pennard Castle on Wales’ Gower Peninsula.
It is a location that Alyn Wallace knows well, and has helped to promote: his images of the neon-blue-glow bioluminescent plankton in the bay in 2018 went viral.
The natural phenomenon is unpredictable, but there is a chance we could see it tonight – and others arriving on the beach are obviously hoping this too.
Alyn explains that astrophotography shoots need a lot of planning, to ensure you are in the right place in the right time. He has chosen a night with no moon, and one where there is a low tide late in the night.
A suite of apps on Alyn’s phone (see '7 essential tools for astrophotography') shows his homework, and gives us our rough itinerary for the night.
The Milky Way will look at its best over the cliffs just before midnight – and the International Space Station will pass overhead at 1.40am, and be visible for just over two minutes.
Despite some people thinking that astrophotography is a winter pursuit, Alyn explains that there are things to shoot in the night sky all year round.
Get the Digital Camera World Newsletter
The best camera deals, reviews, product advice, and unmissable photography news, direct to your inbox!
The Milky Way is best shot between March and September, as this is when you can see its core.
In March and April, it is visible in the southeast just before sunrise. In summer, it is due south, and visible all night. In August and September, it is seen in the southwest just after sunset.

Alyn uses his PhotoPills app, which combines a view of Three Cliffs Bay from the phone’s camera to create a simulation of what the Milky Way will look like here in a couple of hours’ time.
Although Alyn studied astronomy at university, he didn’t get into photography until later.
“Back then, I was living off baked beans – I didn’t have enough money for a camera,” he explains.
Seeing the Perseids meteor shower on holiday in Turkey in 2015 persuaded him that he needed a DSLR. He was working in design engineering at the time – but his astrophotography has since taken over. He became a full-time pro in January 2018.
Alyn sells his own Lightroom presets, too – these cost £20/$26 and are designed to give a structured workflow for those who want to edit and enhance their astro images. The presets give his own formulae for reducing noise, making the stars stand out from the dark sky, sharpening, color grading and more.
His next venture is to develop and market filters for star photographers – Alyn is currently trialling several variants from Kase Filters.
Having the right kit for the job is essential for astrophotography – but it all fits very neatly into a sensibly sized backpack.
Alyn Wallace’s astrophotography kit
Alyn is a convert to mirrorless cameras now – using a Sony Alpha 7 III as his main stills camera. But it is the choice of lens that is even more essential.
He needs wide lenses – but also ones that are as wide-apertured as possible so that they can let in as much light as possible without having to use even higher ISOs.
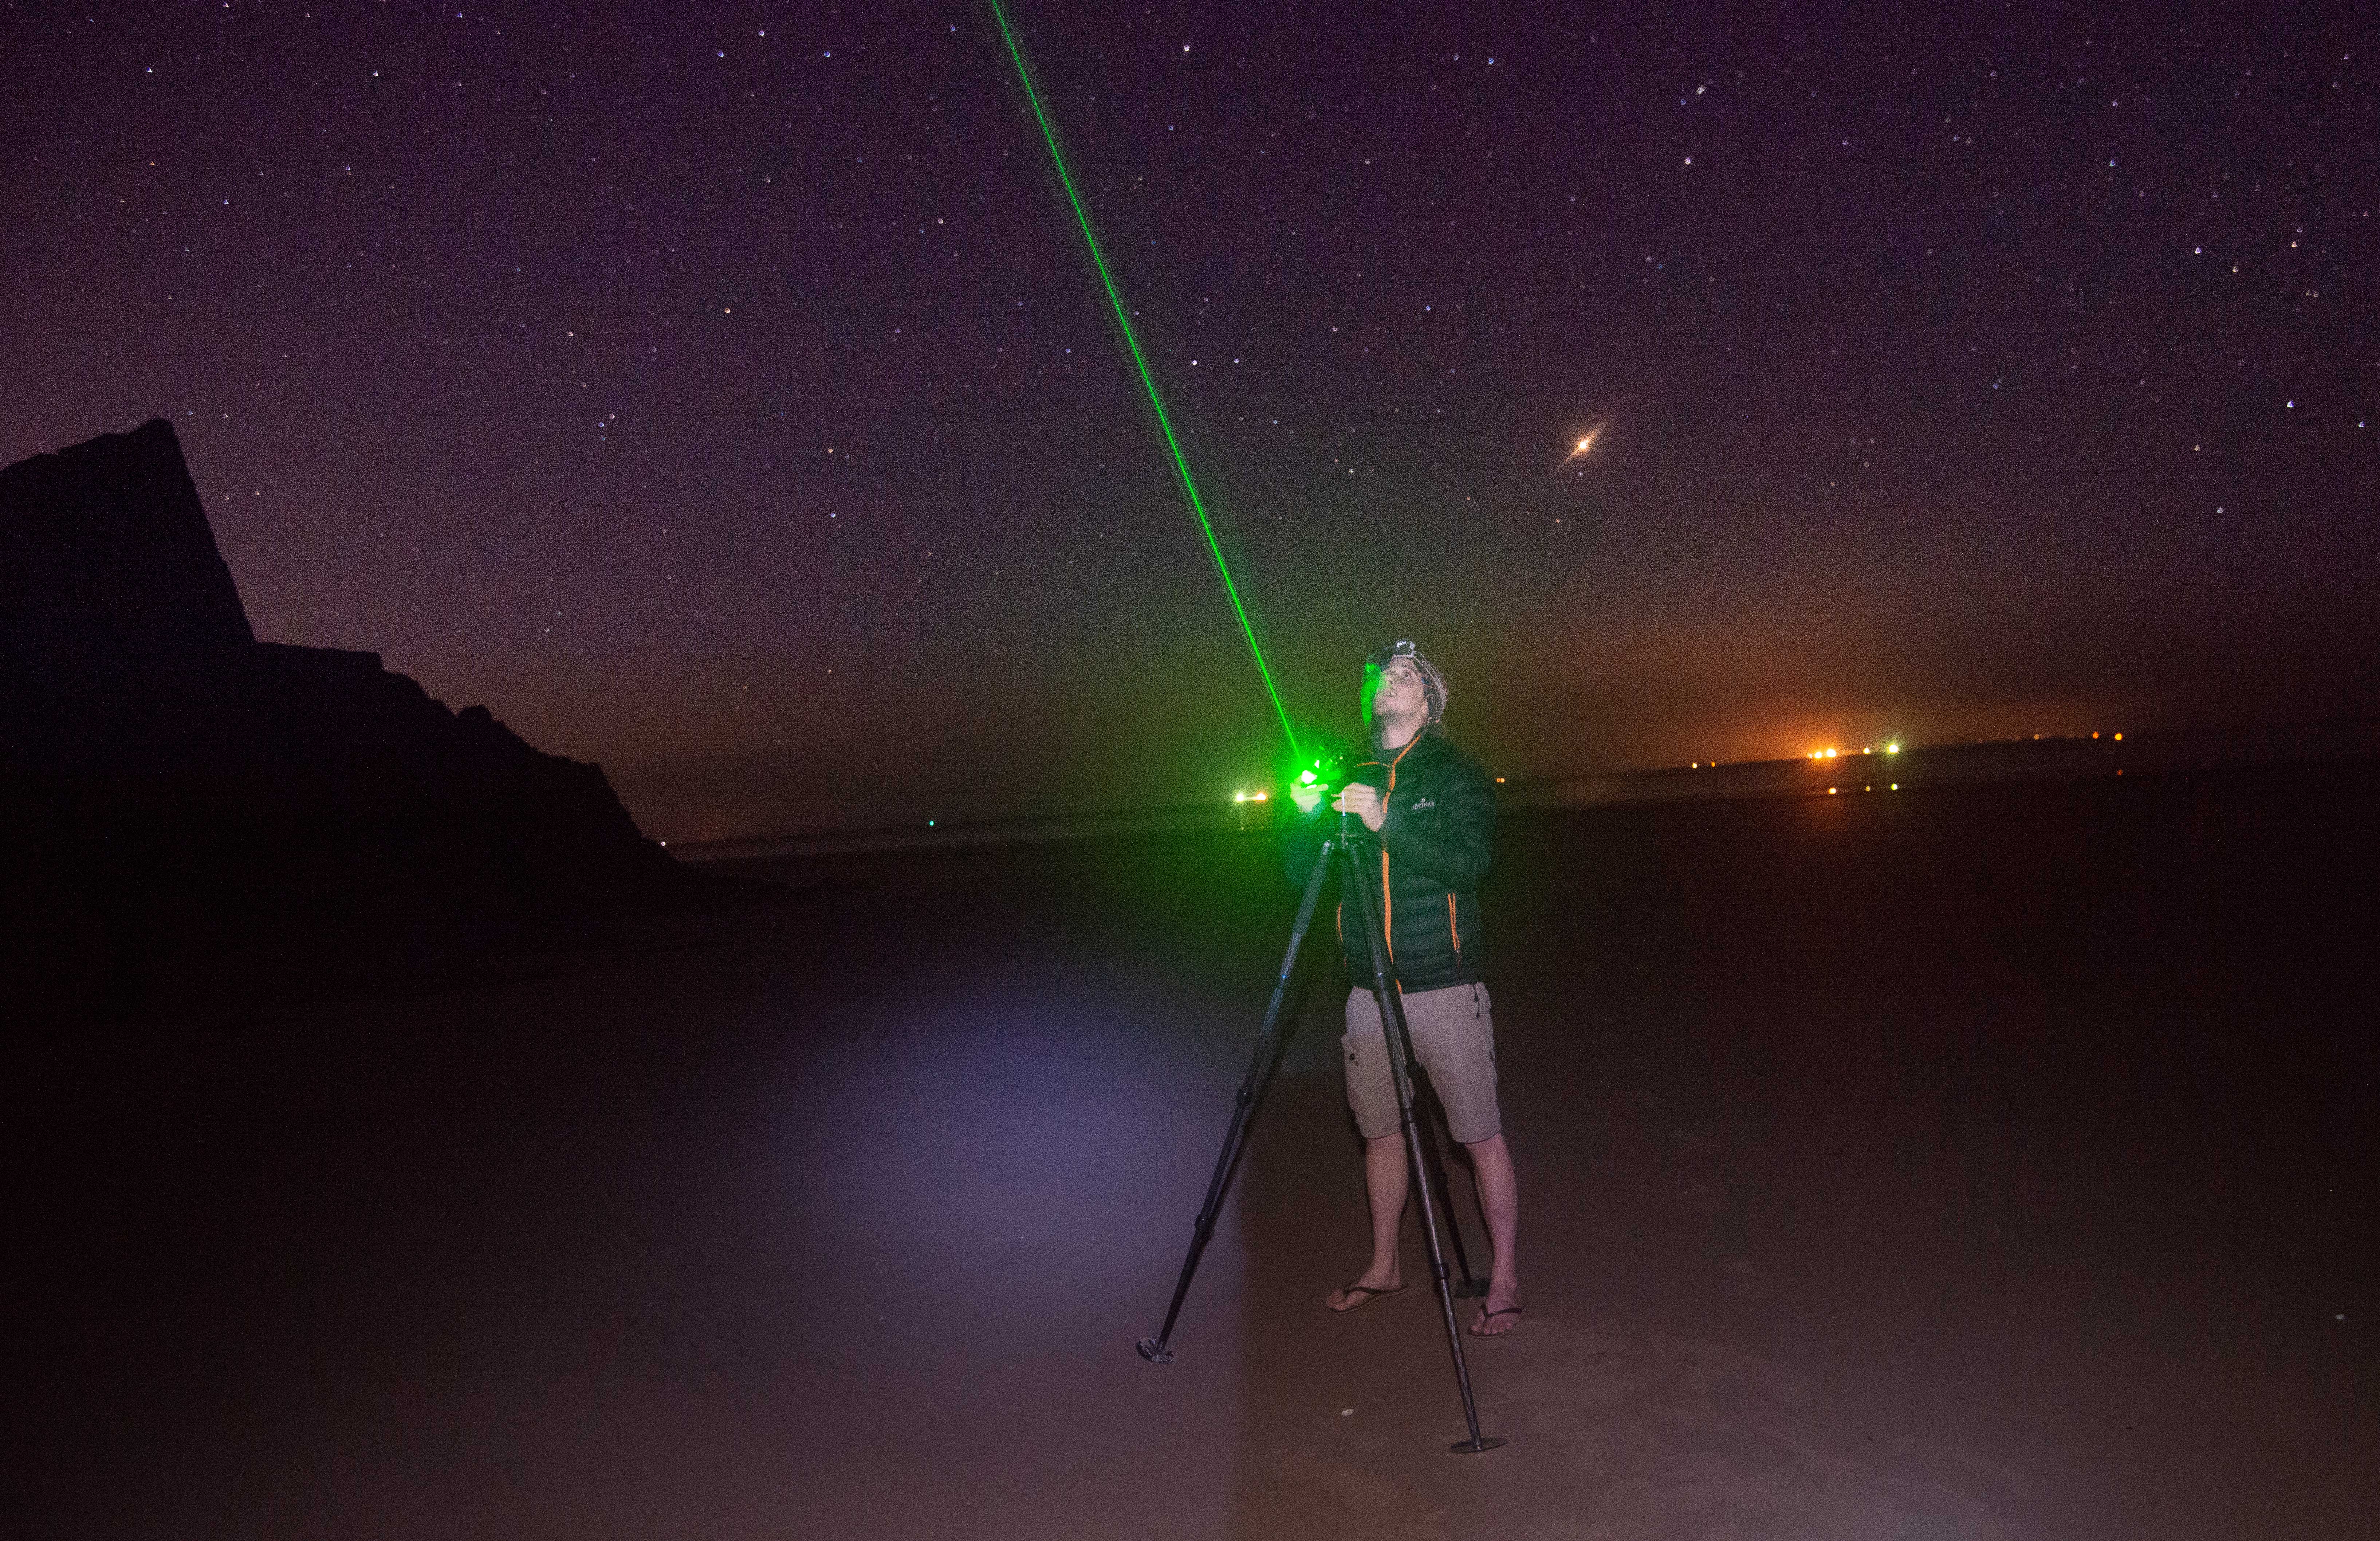
The most impressive piece of kit, though, has to be his Move Shoot Move star-tracker. This motorized unit fits onto the ballhead of his tripod, and follows the night sky.
But its party trick is the built-in laser pointer that he uses to align the unit with the Pole Star – it shoots a powerful green beam up into space when he switches it on.
His current model costs £190/$249 and is much lighter than previous ones he has used.
• The best cameras, lenses and gear for shooting the night sky
Behind the scenes of an astrophotography shoot
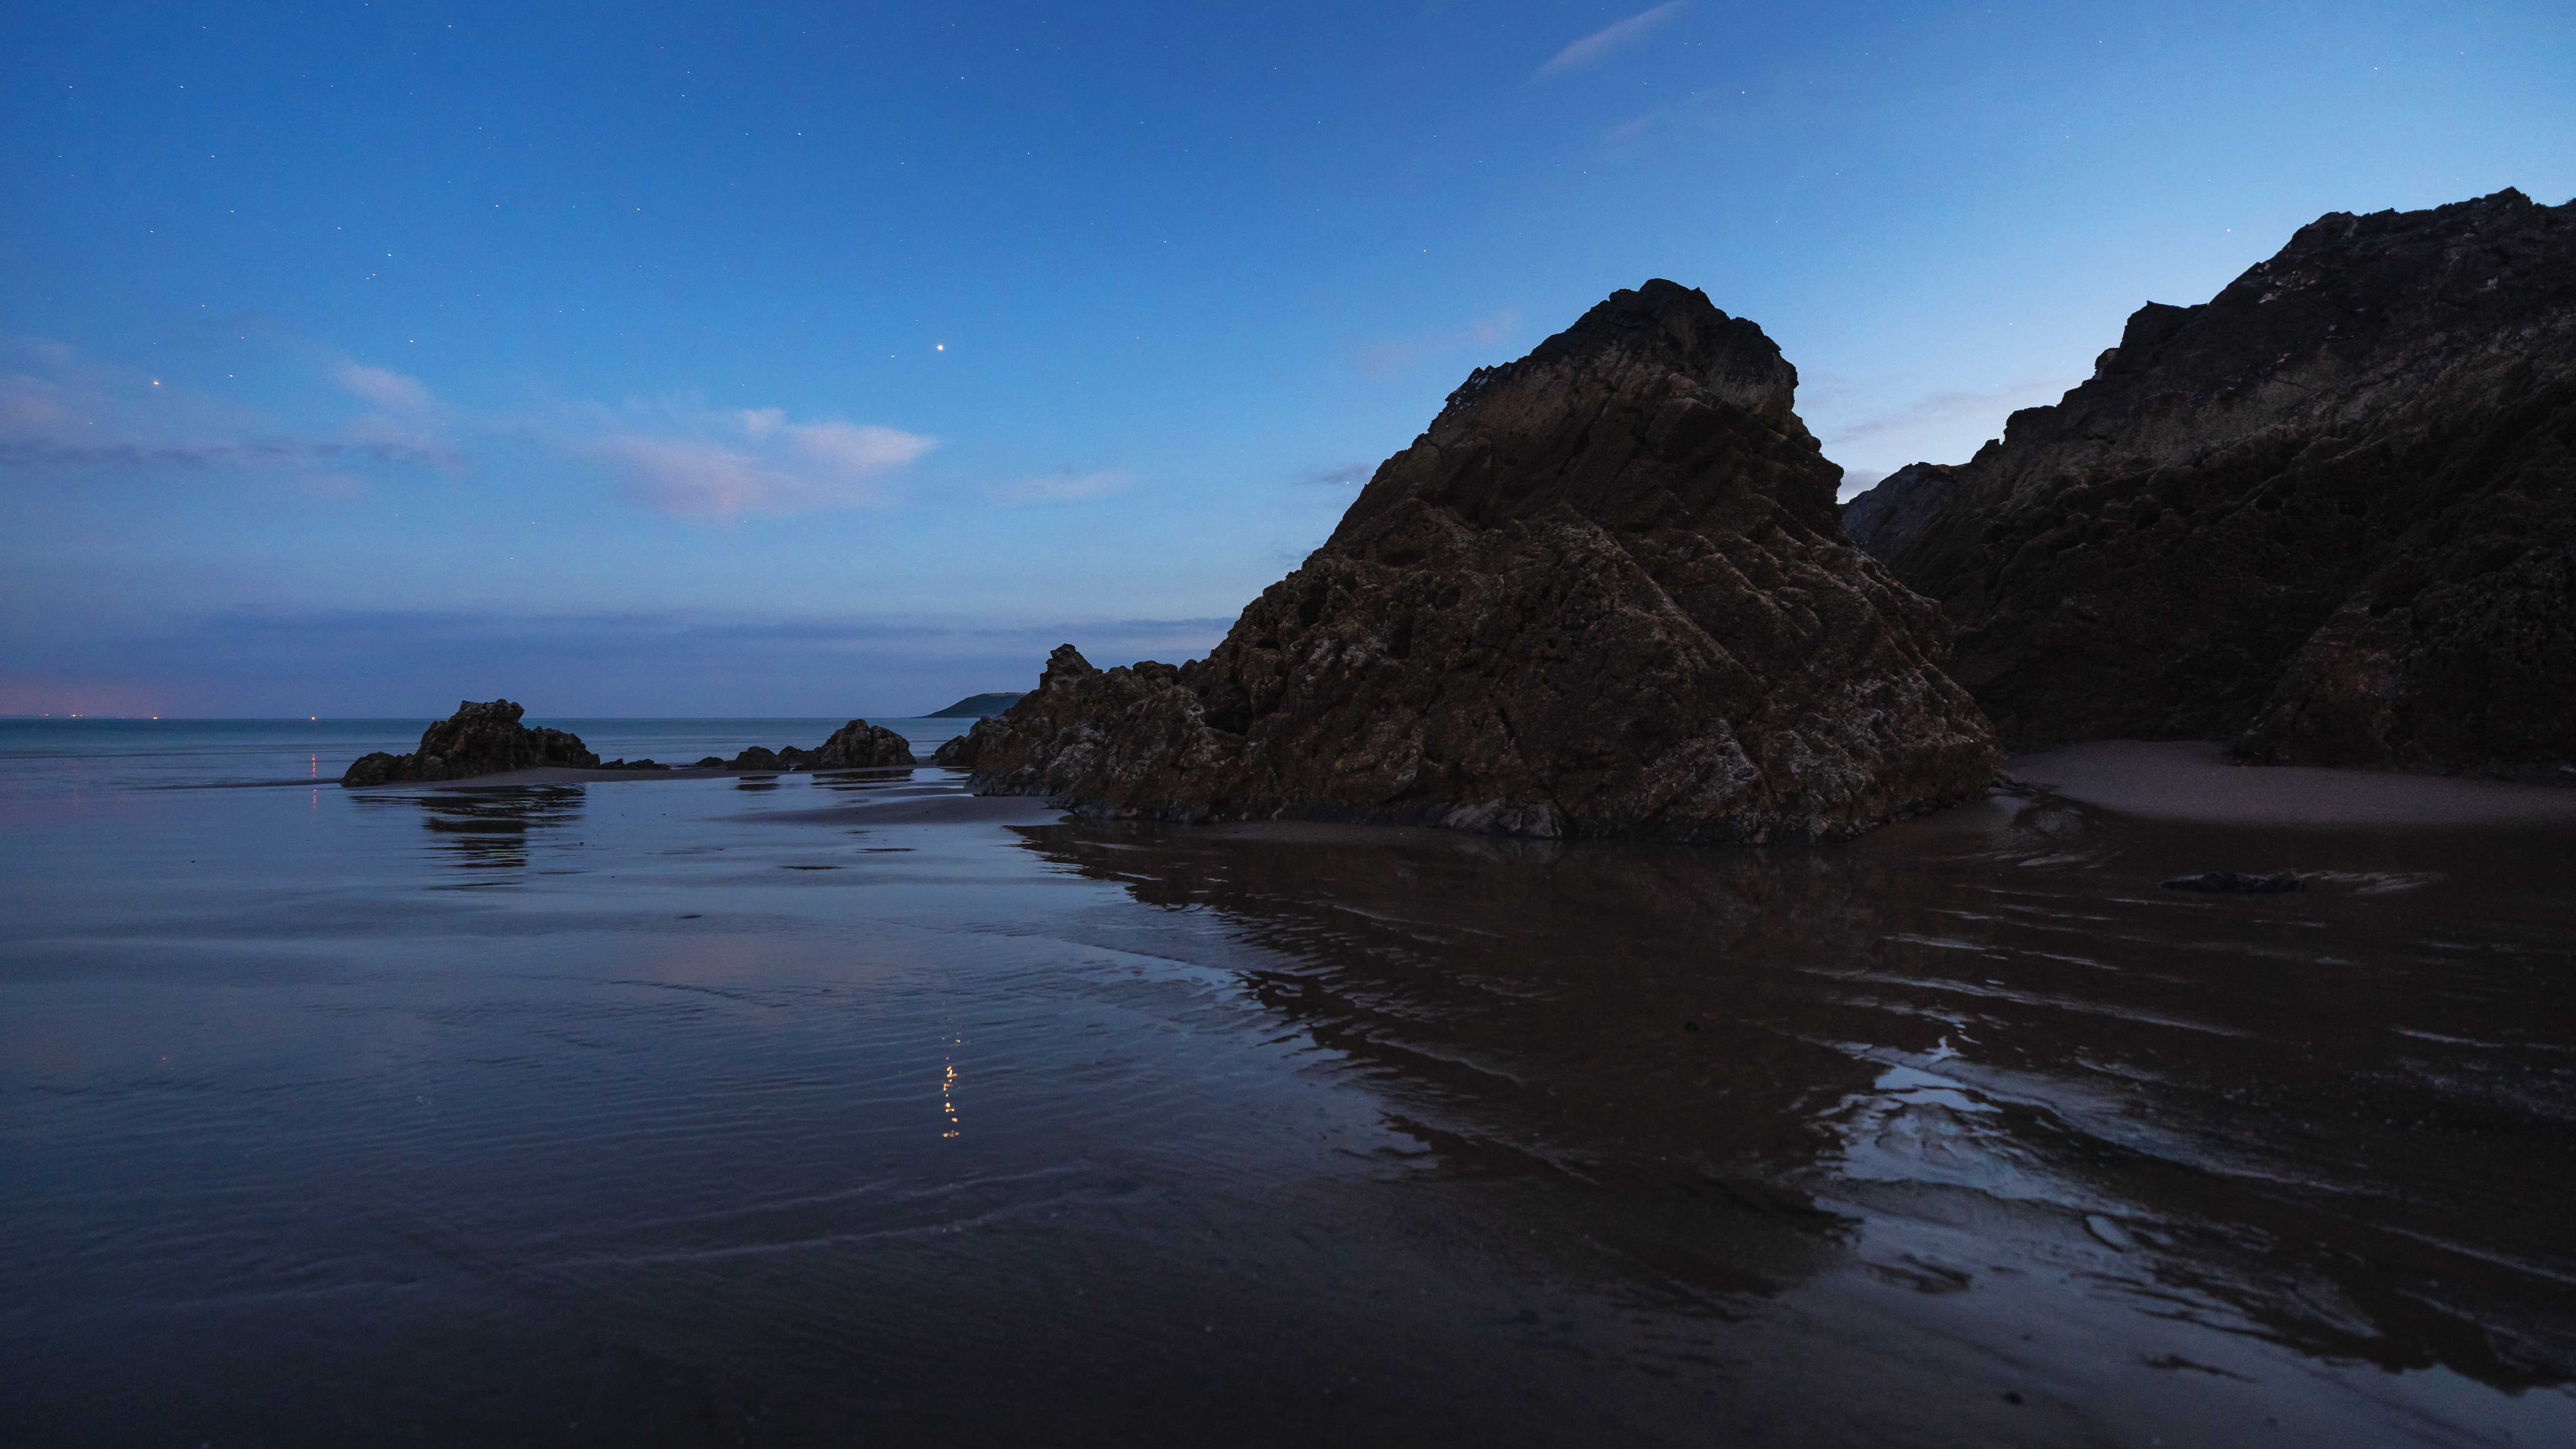
Jupiter is one of the planets that we can see clearly, and Alyn takes pictures of it as the sky starts to darken. He frames the shot so the planet’s glow reflects in the wet sand of the beach.
Our shot of the Milky Way looks strong – but it’s marred by a group of revellers who have lit a fire at the base of the cliff. We wait patiently for the blaze to die down so that’s less of a distraction in the composition.
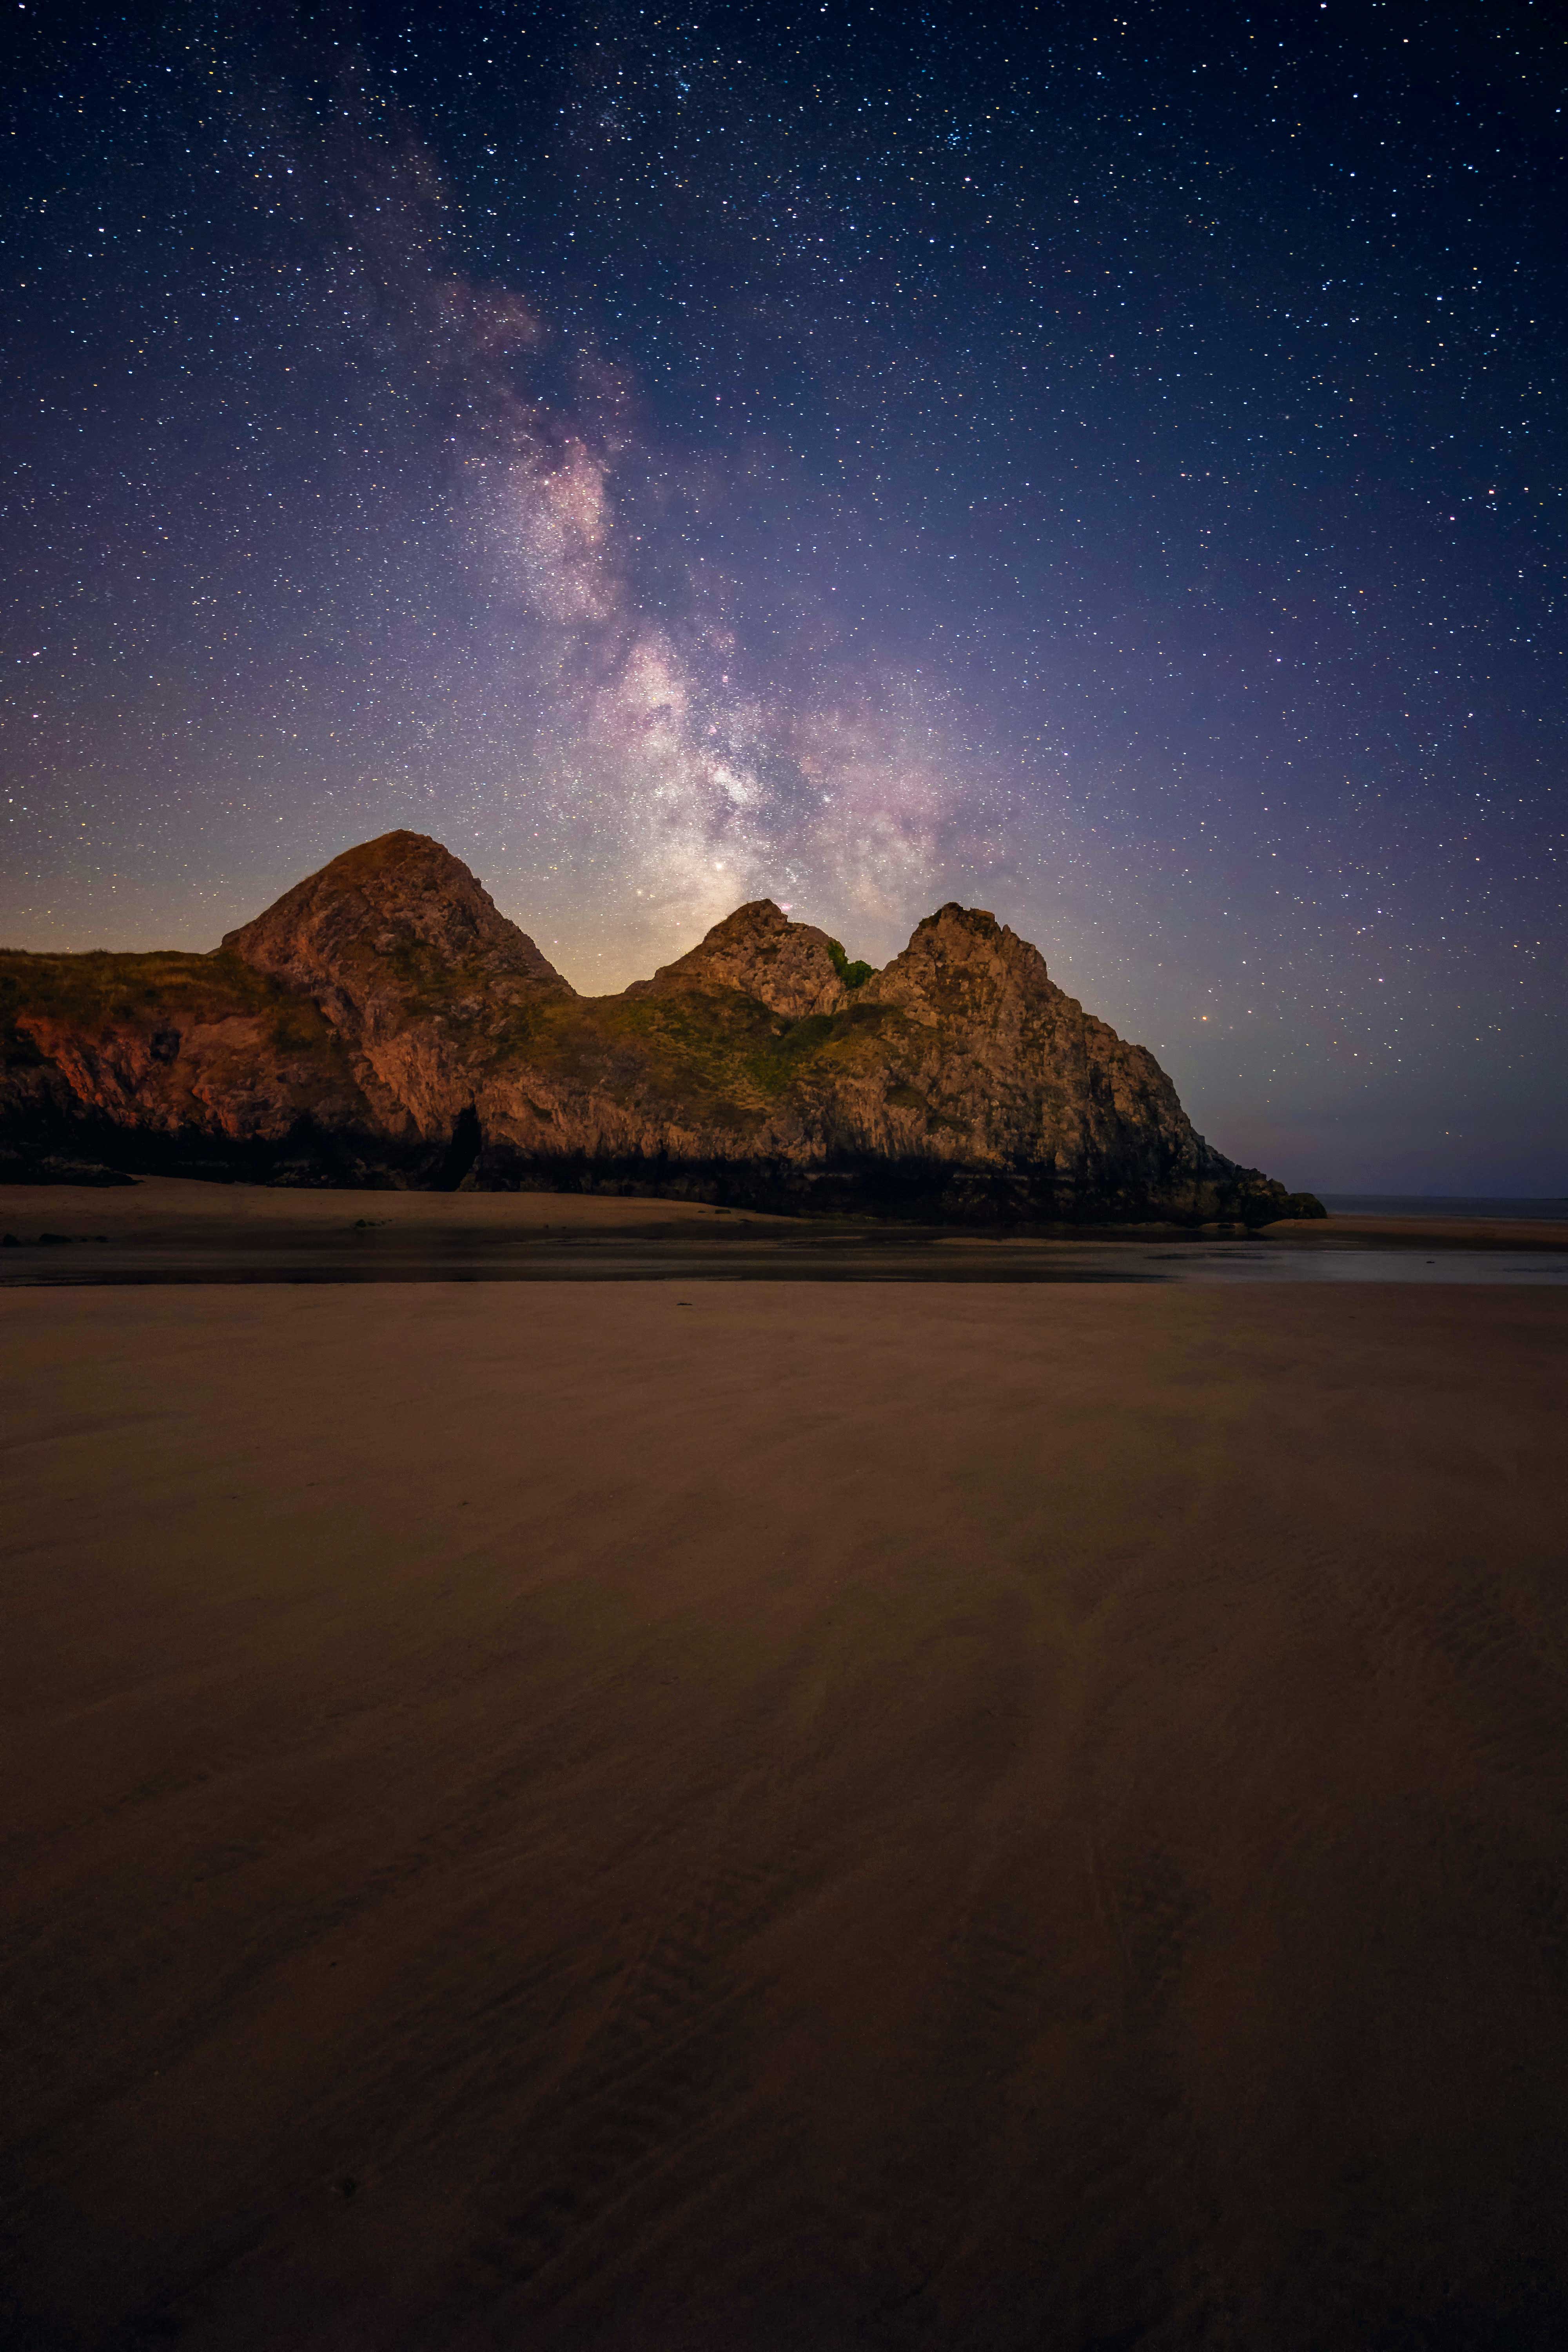
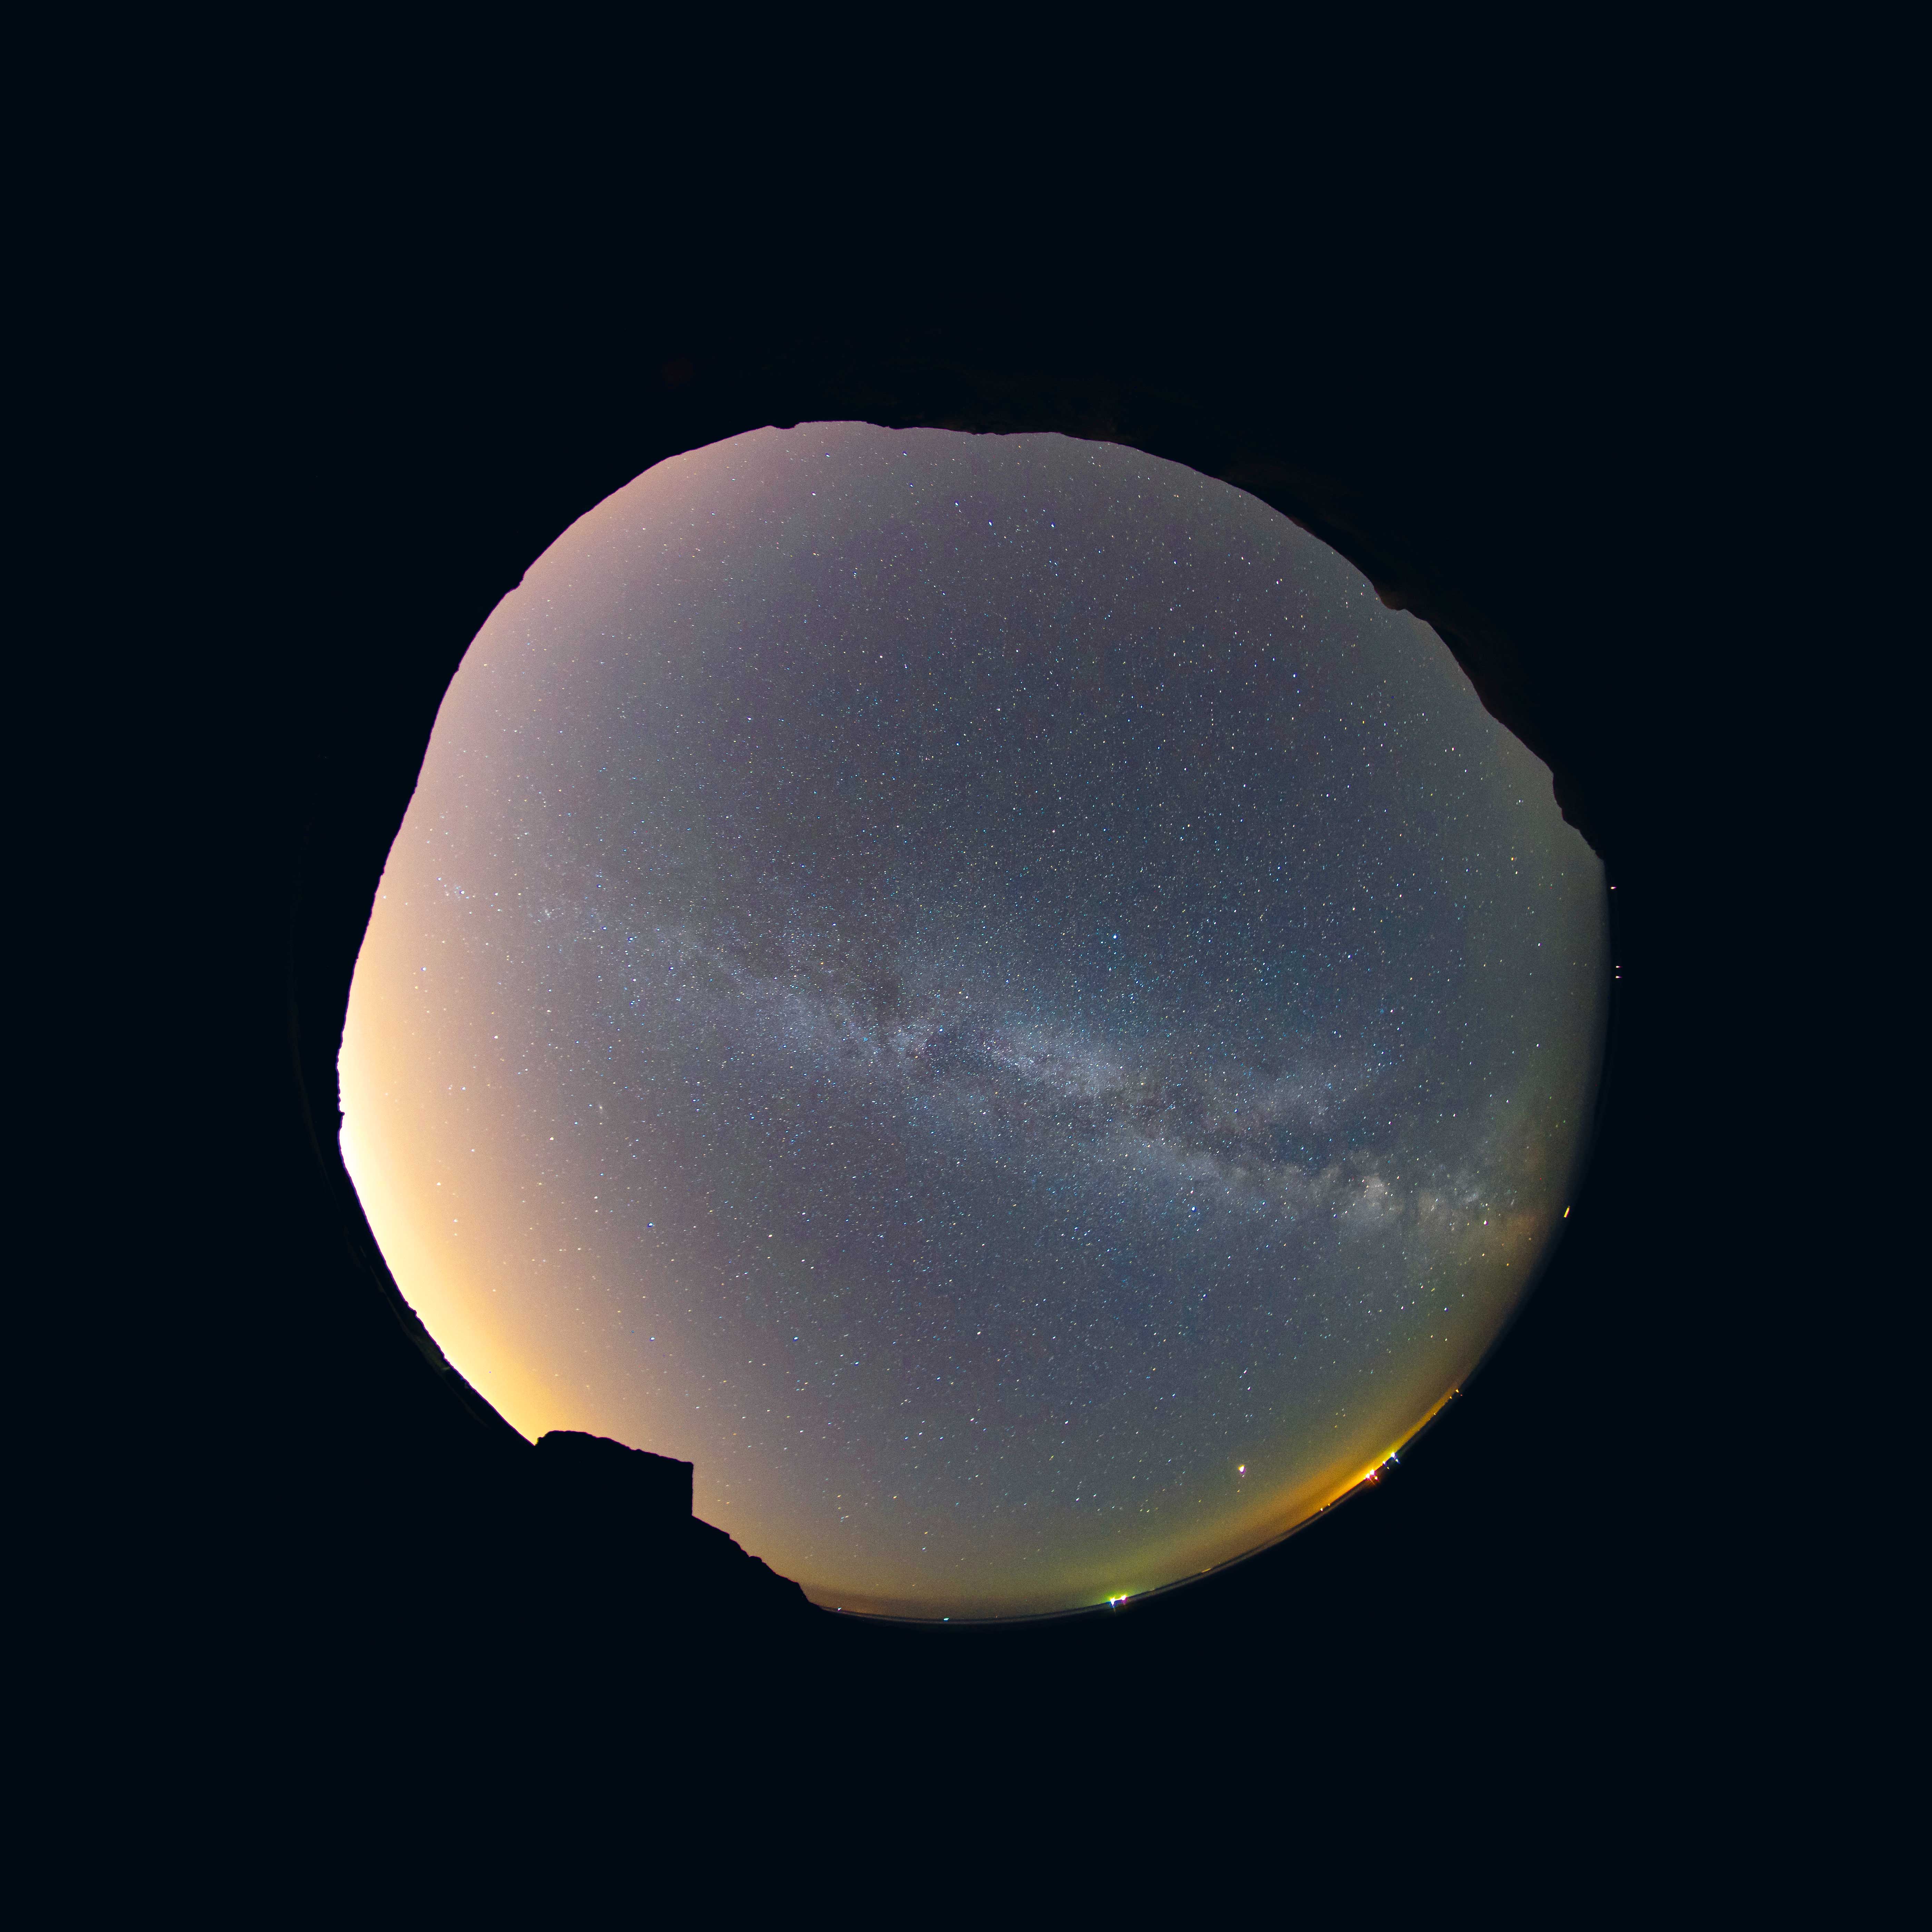
Next Alyn gets out his circular fisheye lens, shooting directly upwards to capture the whole of the Milky Way’s core across the night.
With the tide receding, we move to a rock that is now fully exposed in the bay. Here Alyn sets up to shoot one of his signature selfies – adding himself as a scale object in his nightscape.
Angling the camera so that Ursa Major is behind the rock, he scales the rock and fires the camera wireless from some 40 metres away.
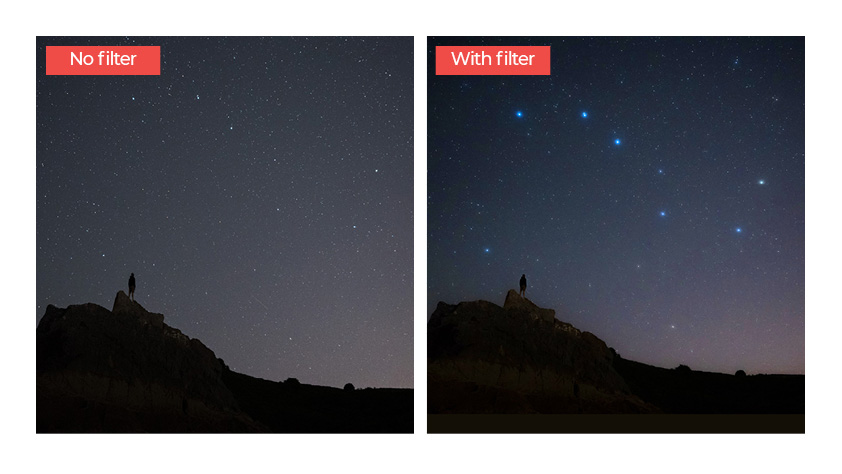
A drawback of digital cameras is that they capture so many stars, including those not visible to the naked eye. Alyn often uses a fog filter to create a soft-focus effect that makes the brightest stars glow, while leaving weaker stars unaffected.
This helps make constellations more visible in his shots, such as in this image of the Big Dipper. Alyn plans to be marketing his own starglow filters soon.
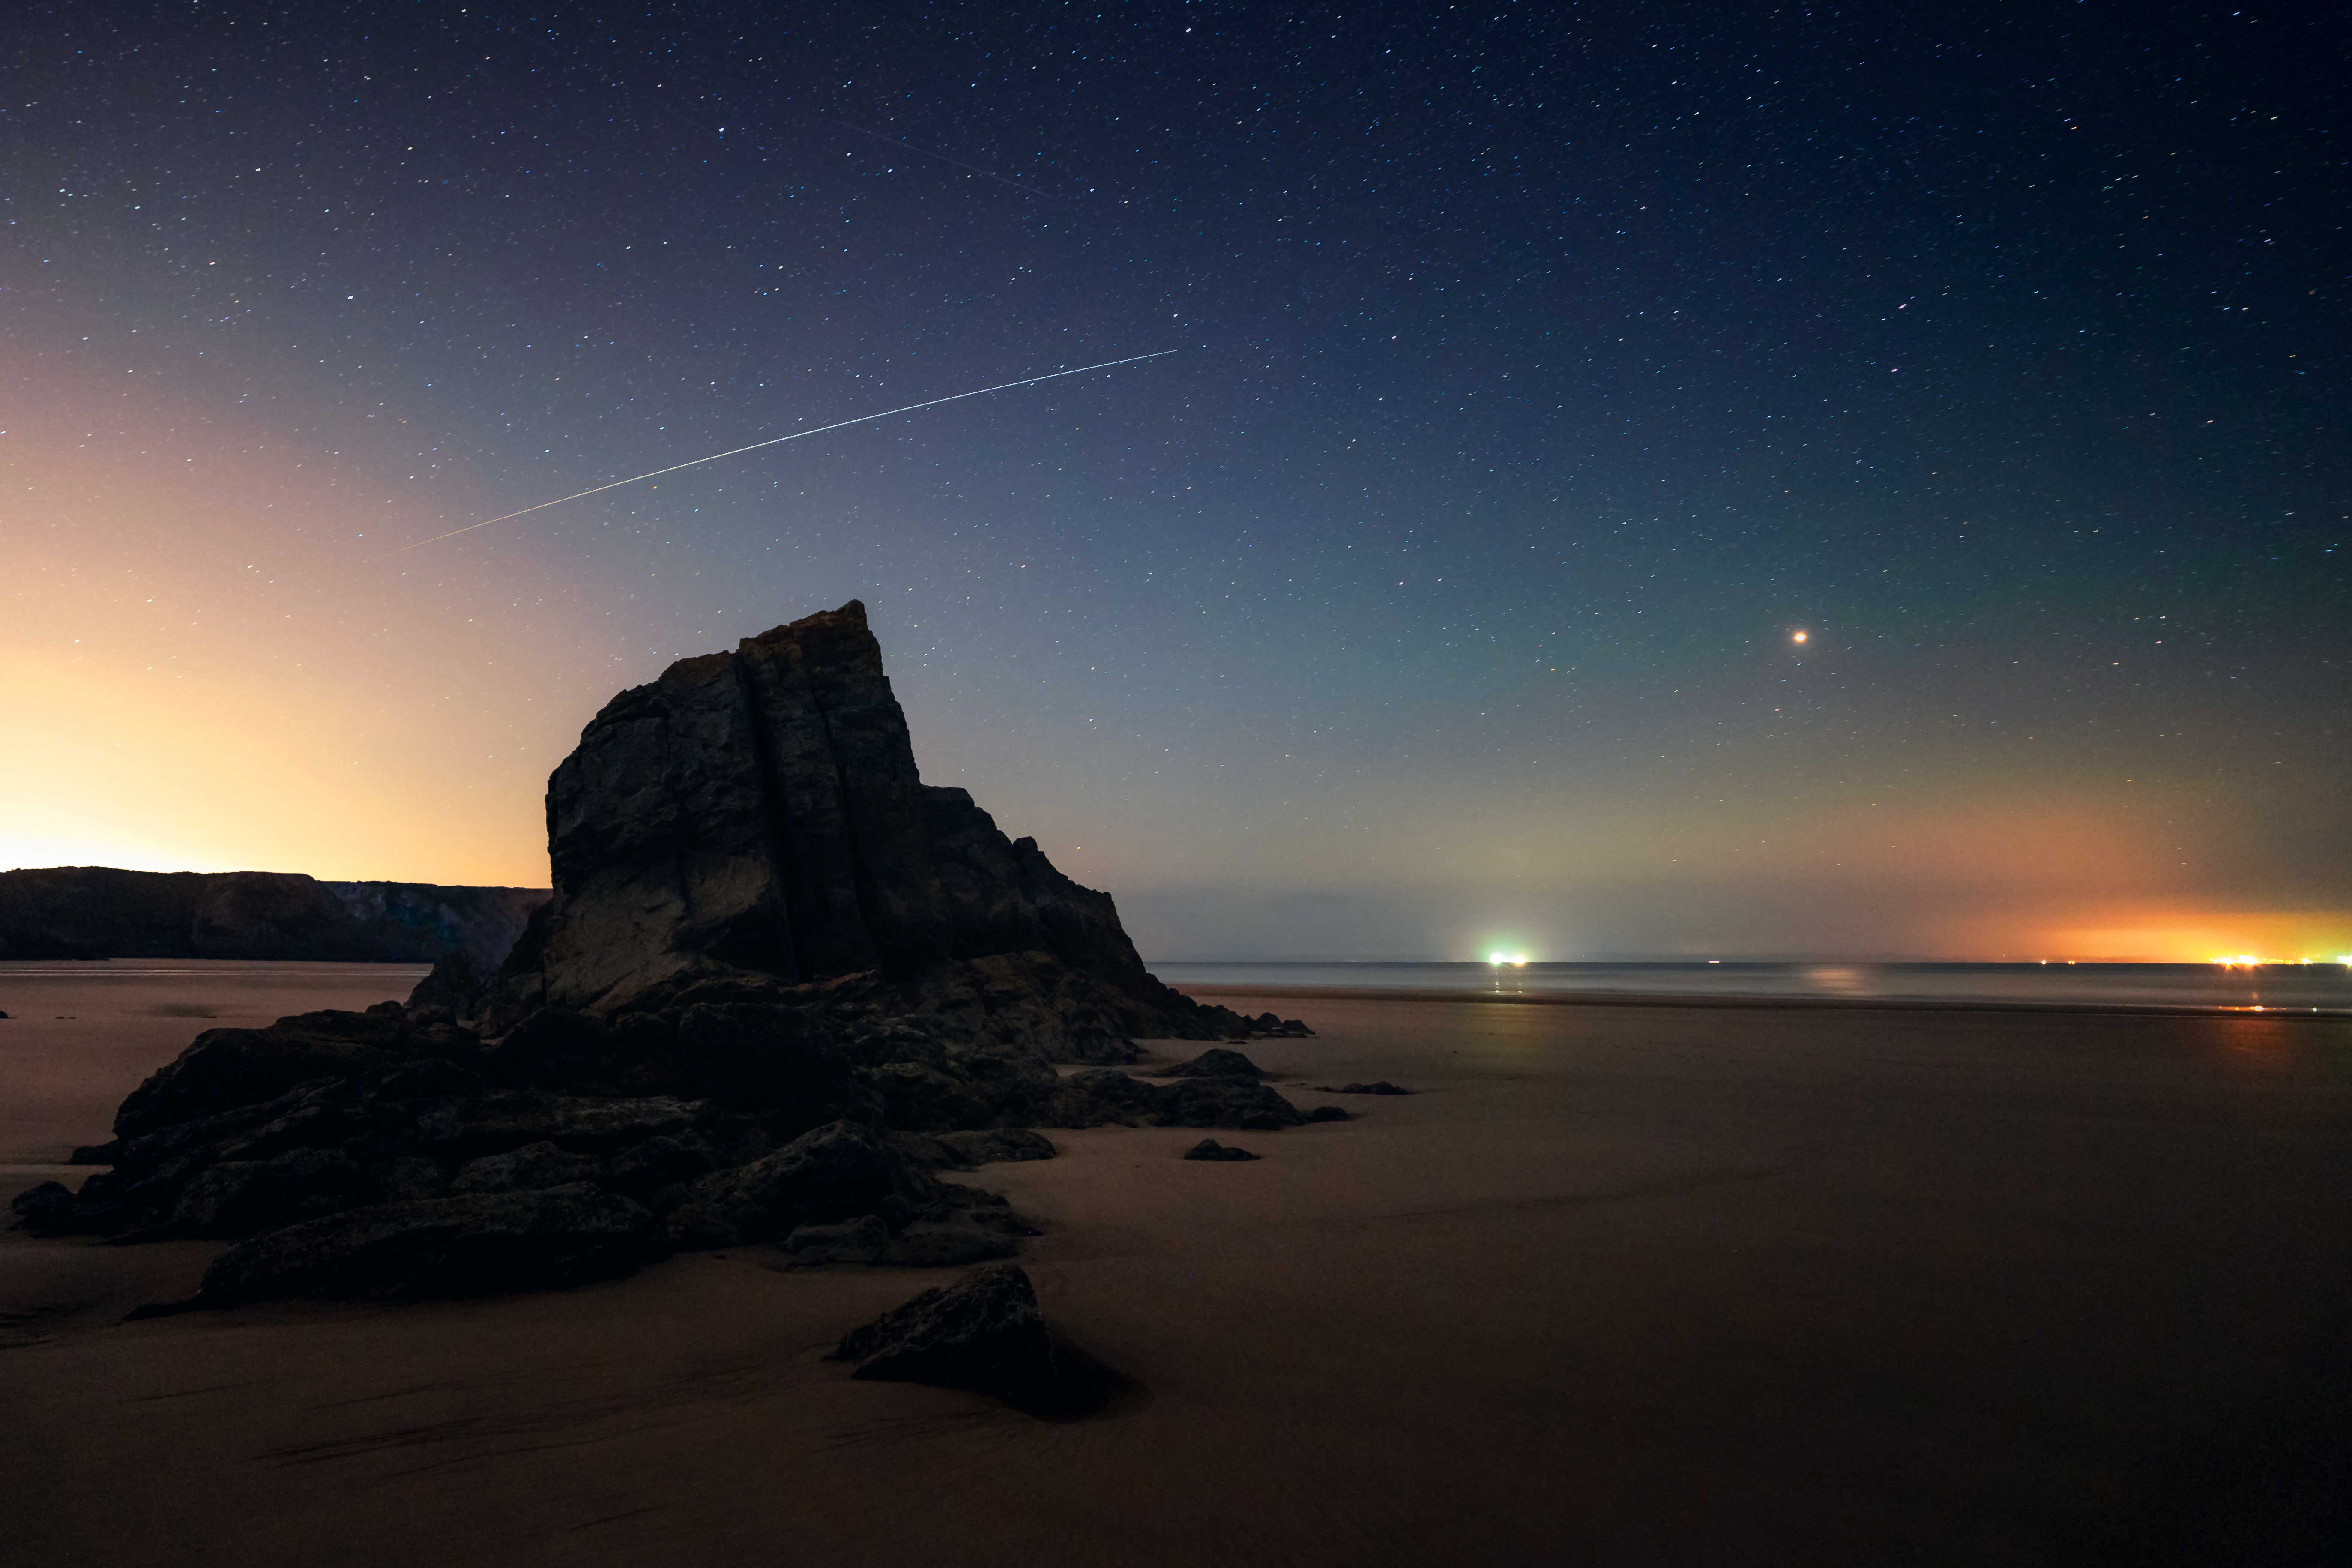
A few more minutes and the ISS will be due – so Alyn scurries into position on the other side of the rock, to get the shot set up for this extra-long-exposure image of the space station streaking slowly across the sky.
Alyn uses ‘the 500 rule’ for this shot: as the earth is spinning and the stars slowly move across the frame, the 500 rule lets him work out the longest shutter speed he can use.
Here's how it works: divide 500 by the effective focal length of your lens – so for a 24mm, the longest shutter speed will be 20 sec. For longer exposures, you need a motorised star-tracking head – or you can combine shorter exposures with the free Sequator stacking program.
• More photography tips
Just as we begin pack up, Alyn notices a small detail in one of his pictures... a glow of blue in the water. We hurry down to the water’s edge for a closer look.
Sure enough, the waves break to create a blue glow – just as in his shots. It’s not enough to take pictures of this time – but it’s a stunning thing to see all the same.
• Read more: How-to guides, tips and videos on getting your best astro shots
Inside Alyn Wallace’s camera bag
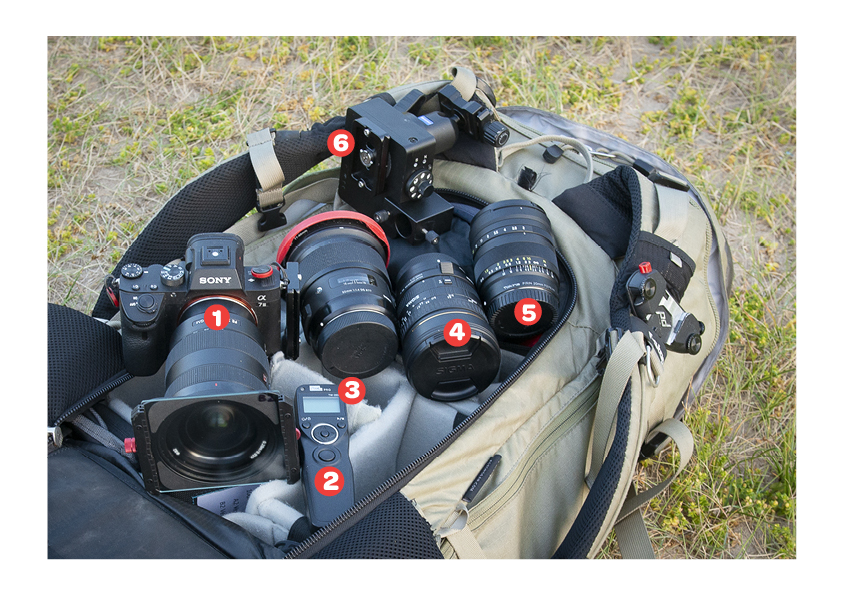
1. Sony A7 III. “I’ve been using an A7S II for shooting video for a while, but have just switched to Sony for shooting stills, too. It made sense to use one system, and the A7 III performs better than my old Canon EOS 6D II.”
2. Pixel TW-283. “A wireless remote that I use to fire the shutter, for time-lapse and long-distance selfies.”
3. Multimat Kumfie. “Sold in camping shops for about a fiver, this folds up in my backpack and is very light, but can be used to kneel on.”
4. Sigma 8mm f/3.5 Fisheye. “This fisheye lens gives a 180° view; I use it to get shots of the whole of the night sky in one exposure. It is great for meteor showers – or for showing light pollution. It’s a Canon-mount, but I use it with the Sigma MC-11 adaptor so it fits on my Sony E-Mount.”
5. Tokina Firin 20mm f/2. “Fast wide lenses are essential for shooting astrophotography. The Tokina Firin 20mm f/2 is a new favorite – as is Samyang’s 24mm f/1.4 (which is currently away being serviced). I also carry around Sony’s own G Master 16-35mm f/2.8 and a Sigma 50mm f/1.4 Art.”
6. MSM Star Tracking head. “The SiFo Rotator is a motorized pan head with a built-in rechargeable battery. It can be used for time-lapses, but it can also be used for star tracking – this involves panning the camera to match the earth’s rotation, to avoid blur in long exposures. You align the head with the North Star using an optional laser pointer.”
7. Haribo Starmix. “These sweets are perfect for a quick energy boost if you start to flag during a long night’s work. I always have a packet in my bag.”
8. Old CDs. “To stop my tripod from sinking into the sand during a long expsoure, I unscrew the feet of my Benro Travel Angel FTA28C tripod and attach old CD-ROMs.”
Camera setup for shooting stars
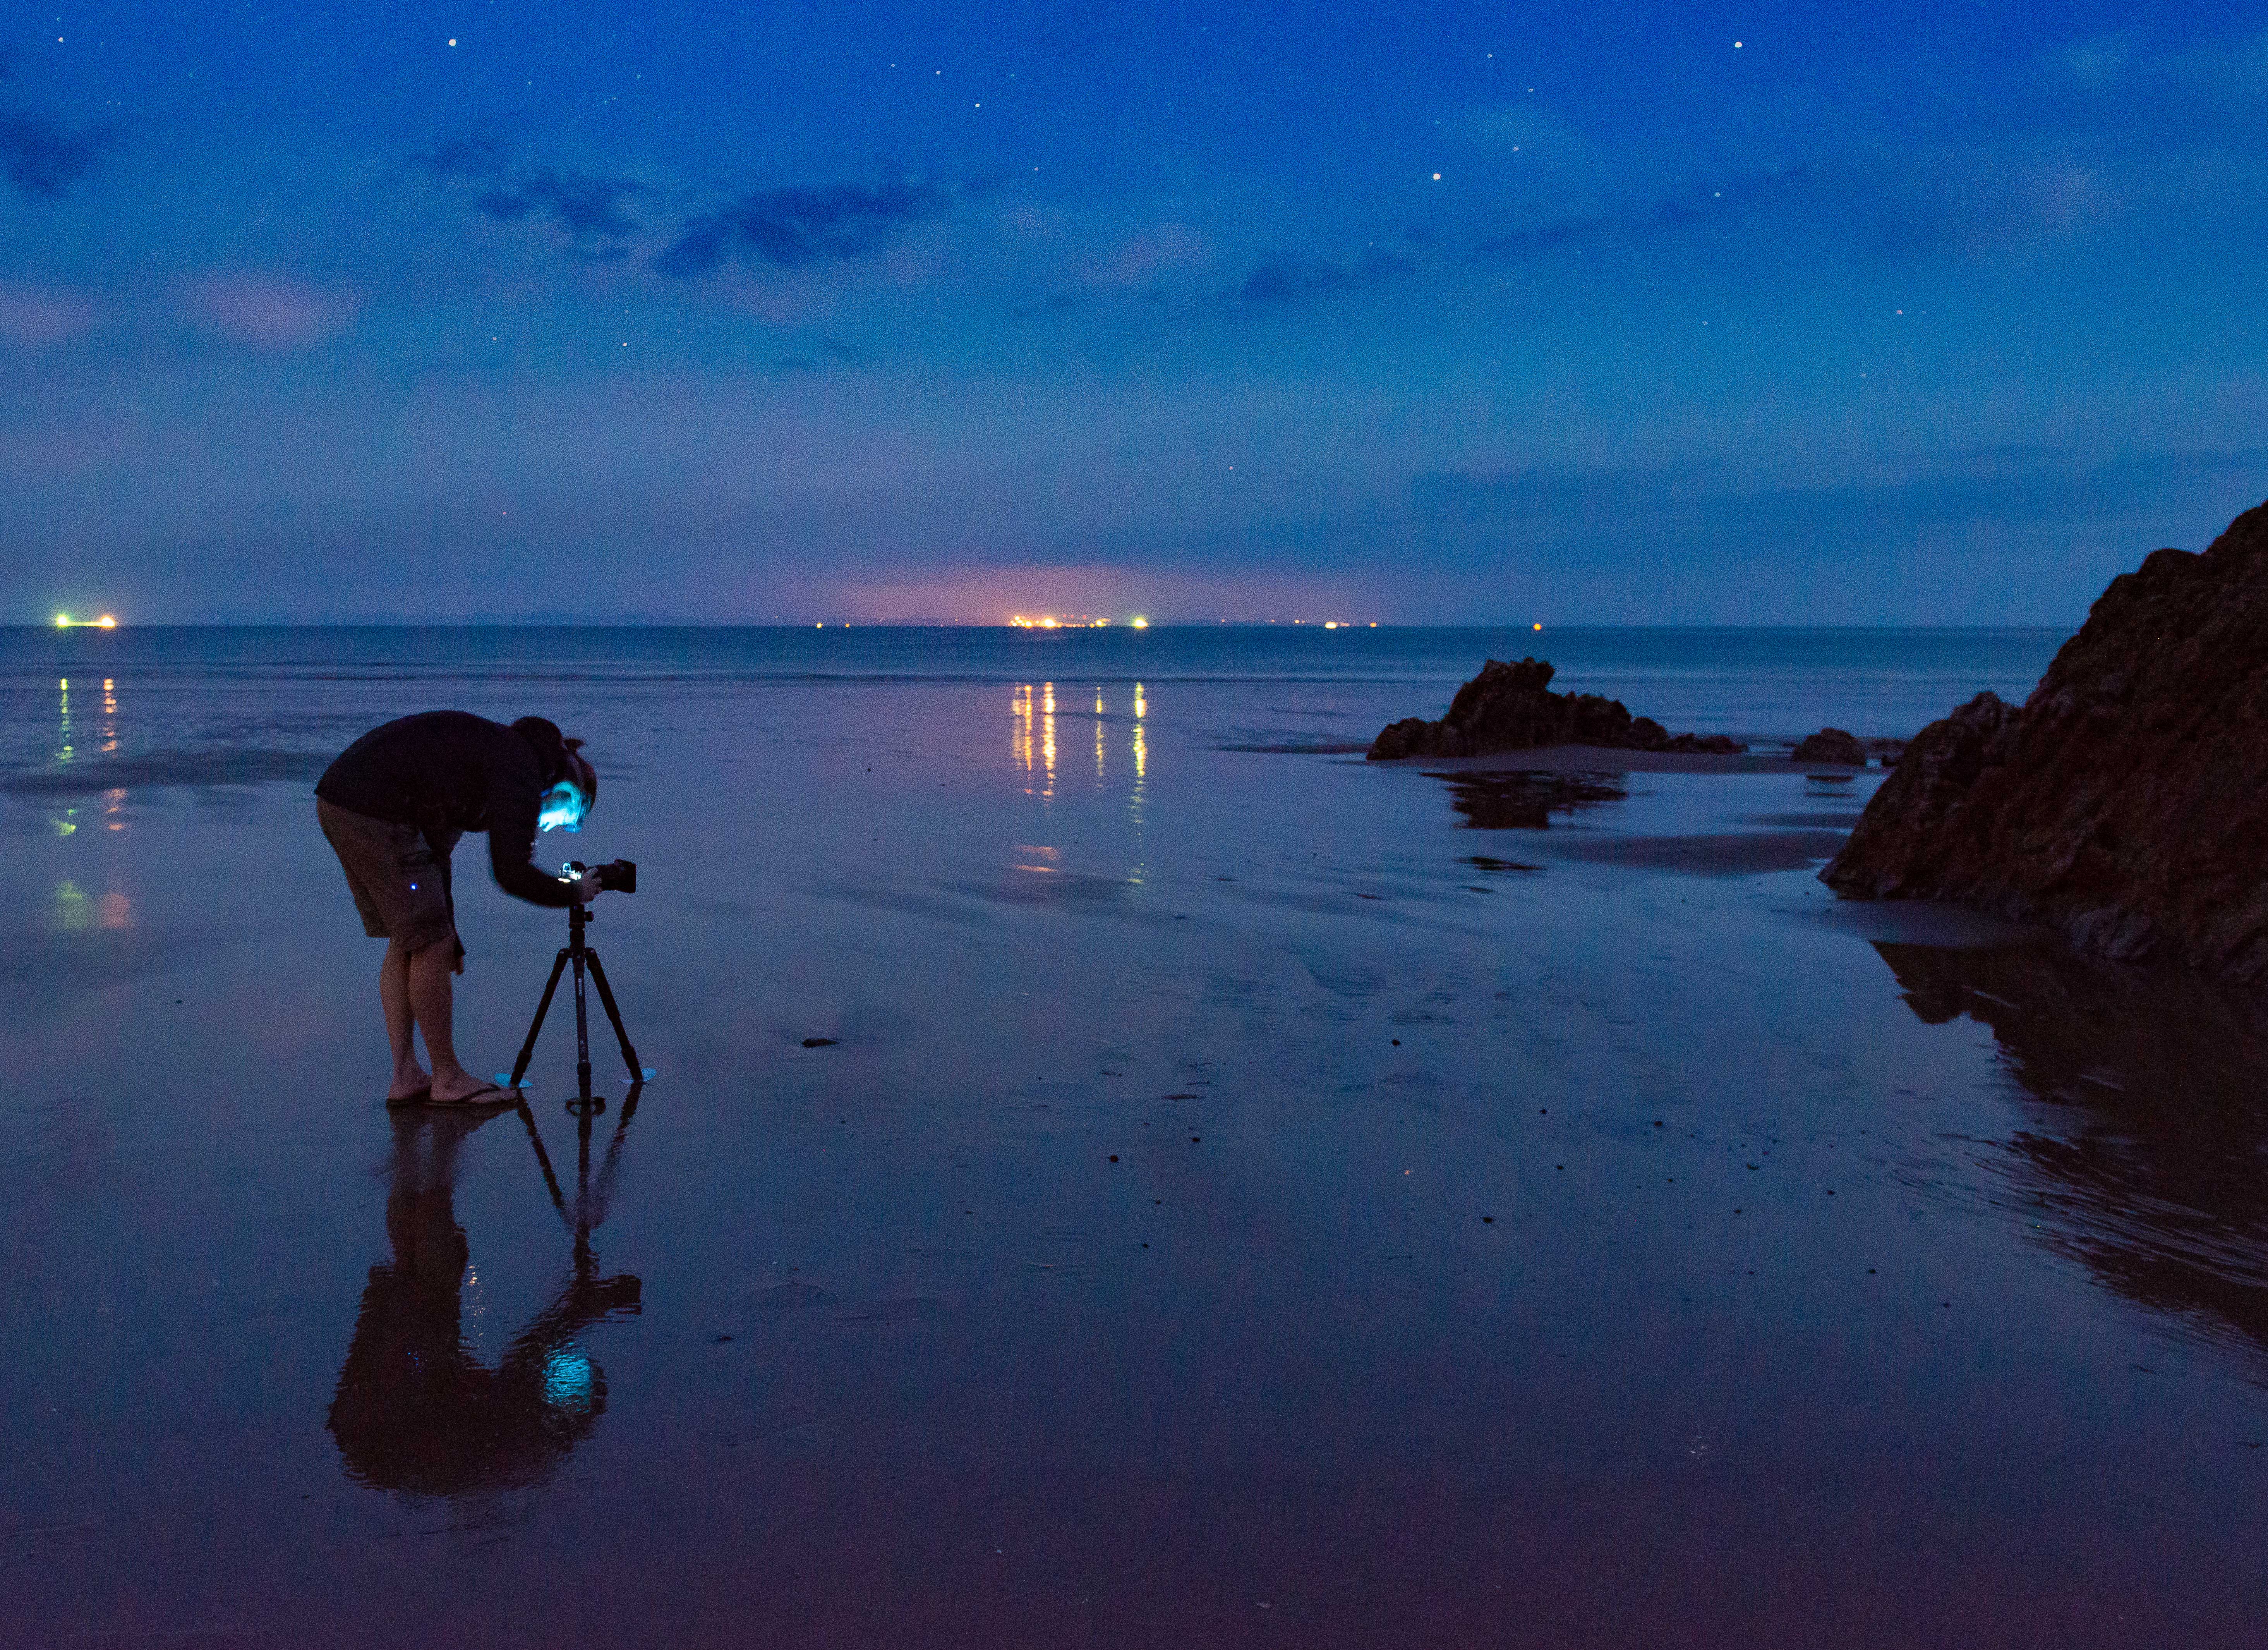
- You need a wide-apertured wide-angle lens. An f/2.8 is good – but wider is better. You will also need a good sturdy tripod. (See our guide to the best lenses for astrophotography.)
- Set the aperture to f/2.8, and the ISO to 3,200 or 6,400. This will give you a shutter speed of around 15-30 seconds.
- Focus manually in Live View – zoom in on the brightest star on the camera’s rear display to ensure that is sharp.
- Check the composition. You can use a test shot at a higher ISO of say 50,000 so that the exposure is just a couple of seconds. The Sony A7 III has a Bright Monitoring feature, which gives a better exposure simulation in Live View, so this trick is not necessary.
- Use a wireless remote, but also have the camera set to fire after a two-second delay, to minimize vibrations.
Read more
• A day in the life of professional landscapes photographer Jim Cossey
• A day in the life of professional bird photography Tesni Ward
• A day in the life of professional car photographer Amy Shore
• A day in the life of pro landscape photographer Jeremy Walker
• Best head torch
Chris George has worked on Digital Camera World since its launch in 2017. He has been writing about photography, mobile phones, video making and technology for over 30 years – and has edited numerous magazines including PhotoPlus, N-Photo, Digital Camera, Video Camera, and Professional Photography.
His first serious camera was the iconic Olympus OM10, with which he won the title of Young Photographer of the Year - long before the advent of autofocus and memory cards. Today he uses a Nikon D800, a Fujifilm X-T1, a Sony A7, and his iPhone 15 Pro Max.
He has written about technology for countless publications and websites including The Sunday Times Magazine, The Daily Telegraph, Dorling Kindersley, What Cellphone, T3 and Techradar.
