A-Z of camera effects: 26 photographic effects every photographer should know
26 fantastic camera effects to try – from abstraction to zoom burst
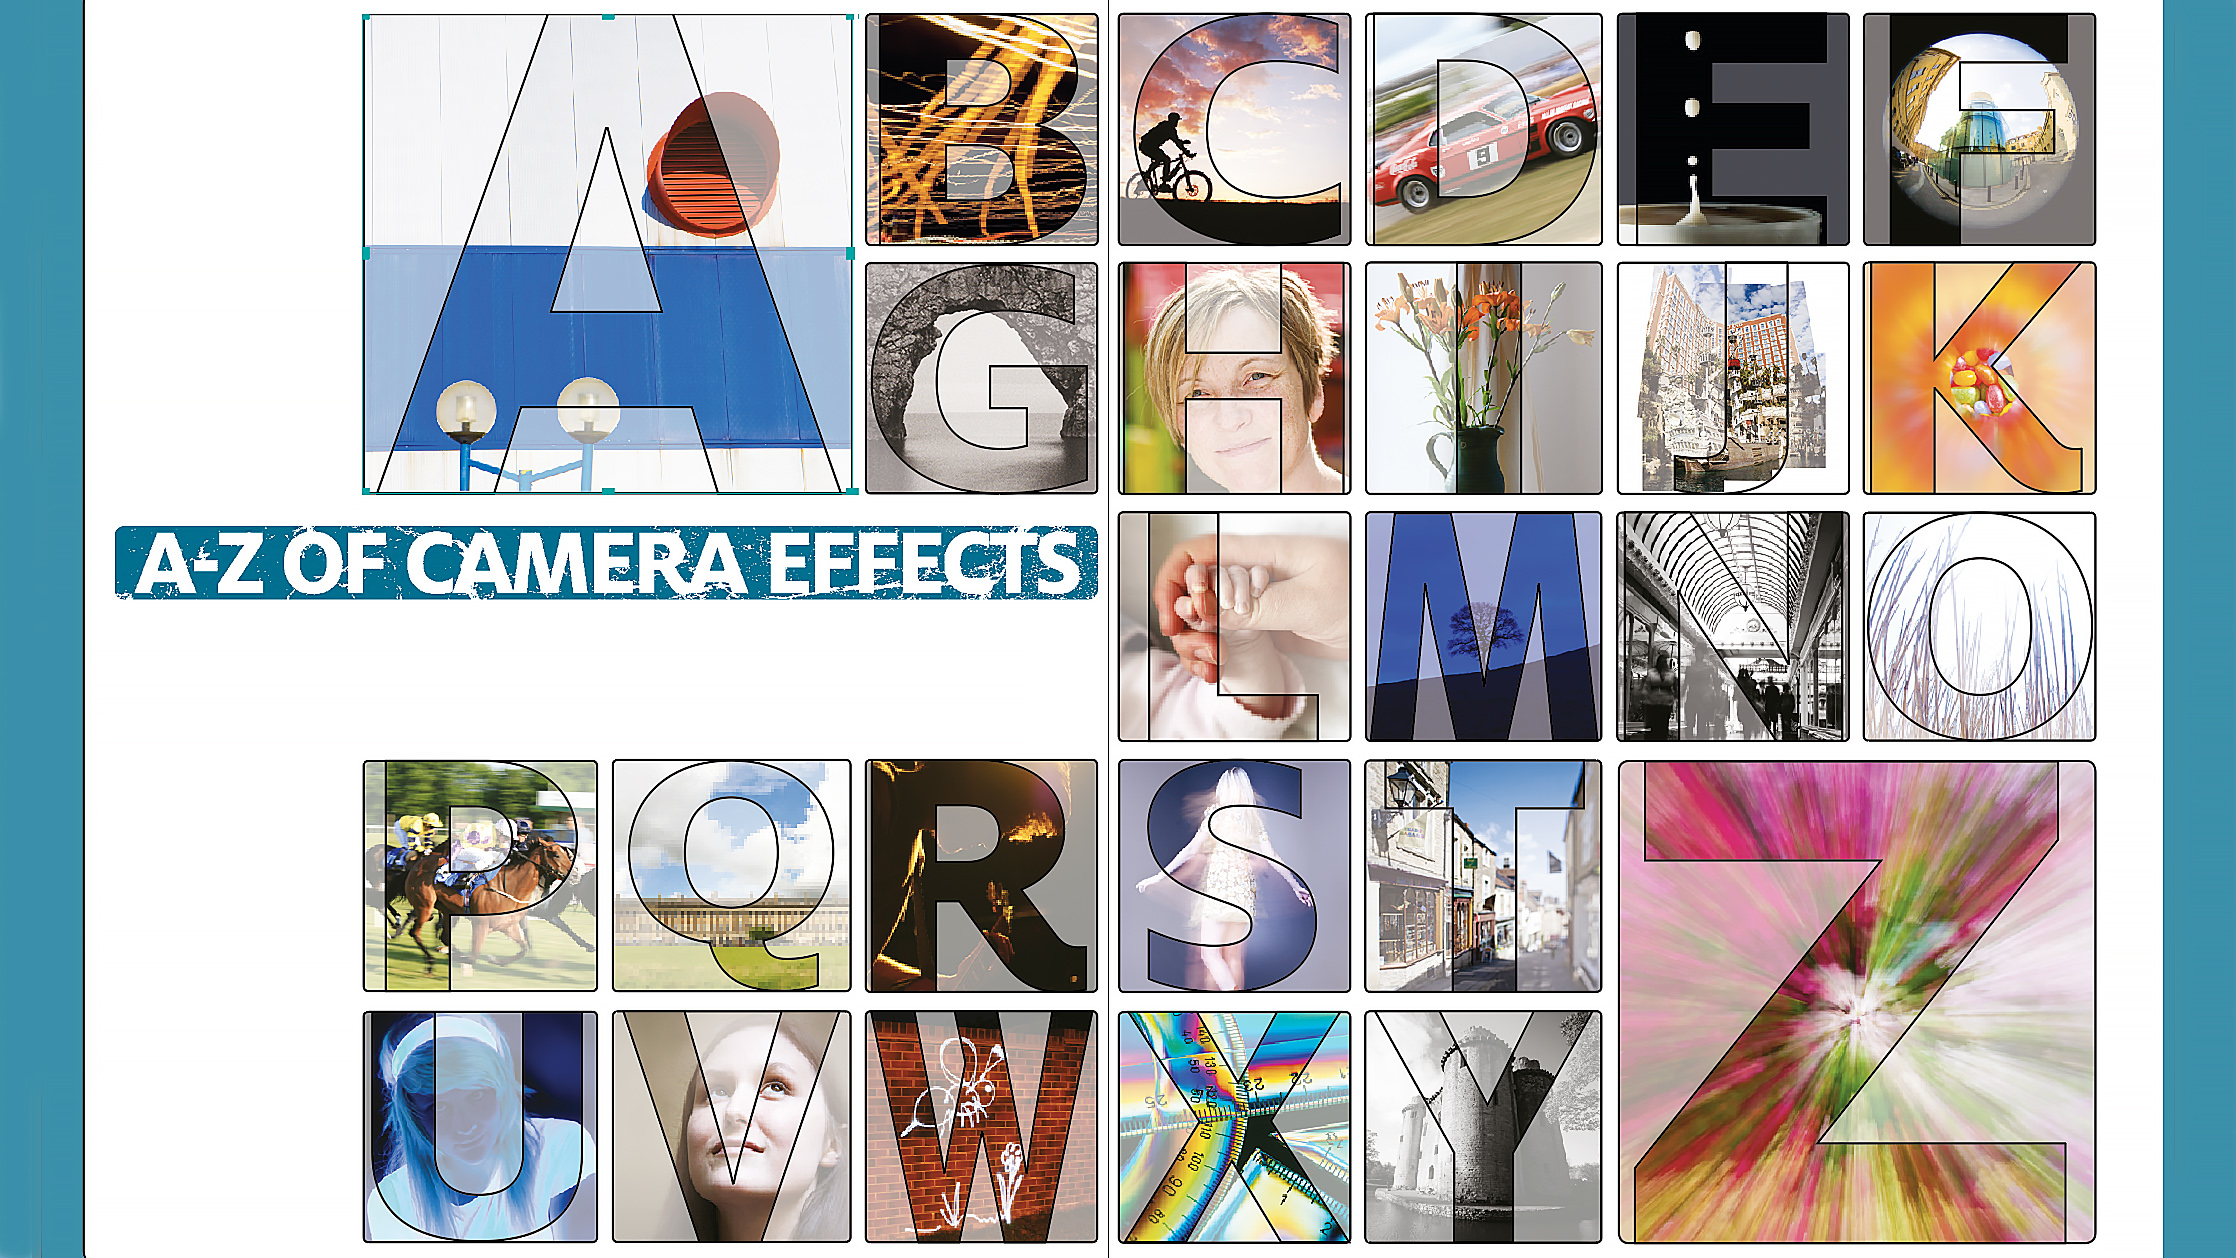
There are hundreds of great camera effects that you can explore as a photographer. Many of them are well-known, but others are more obscure and less-commonly used. In this feature we have put together 26 of our favorites, to provide a fun A-Z of photo effects that you might want to try with your own camera.
If you have a favorite of your own, or want to share with us some of your pictures using one or more of these tricks and techniques, then do feel free to share them with us on the Digital Camera World Forums.
A is for Abstract
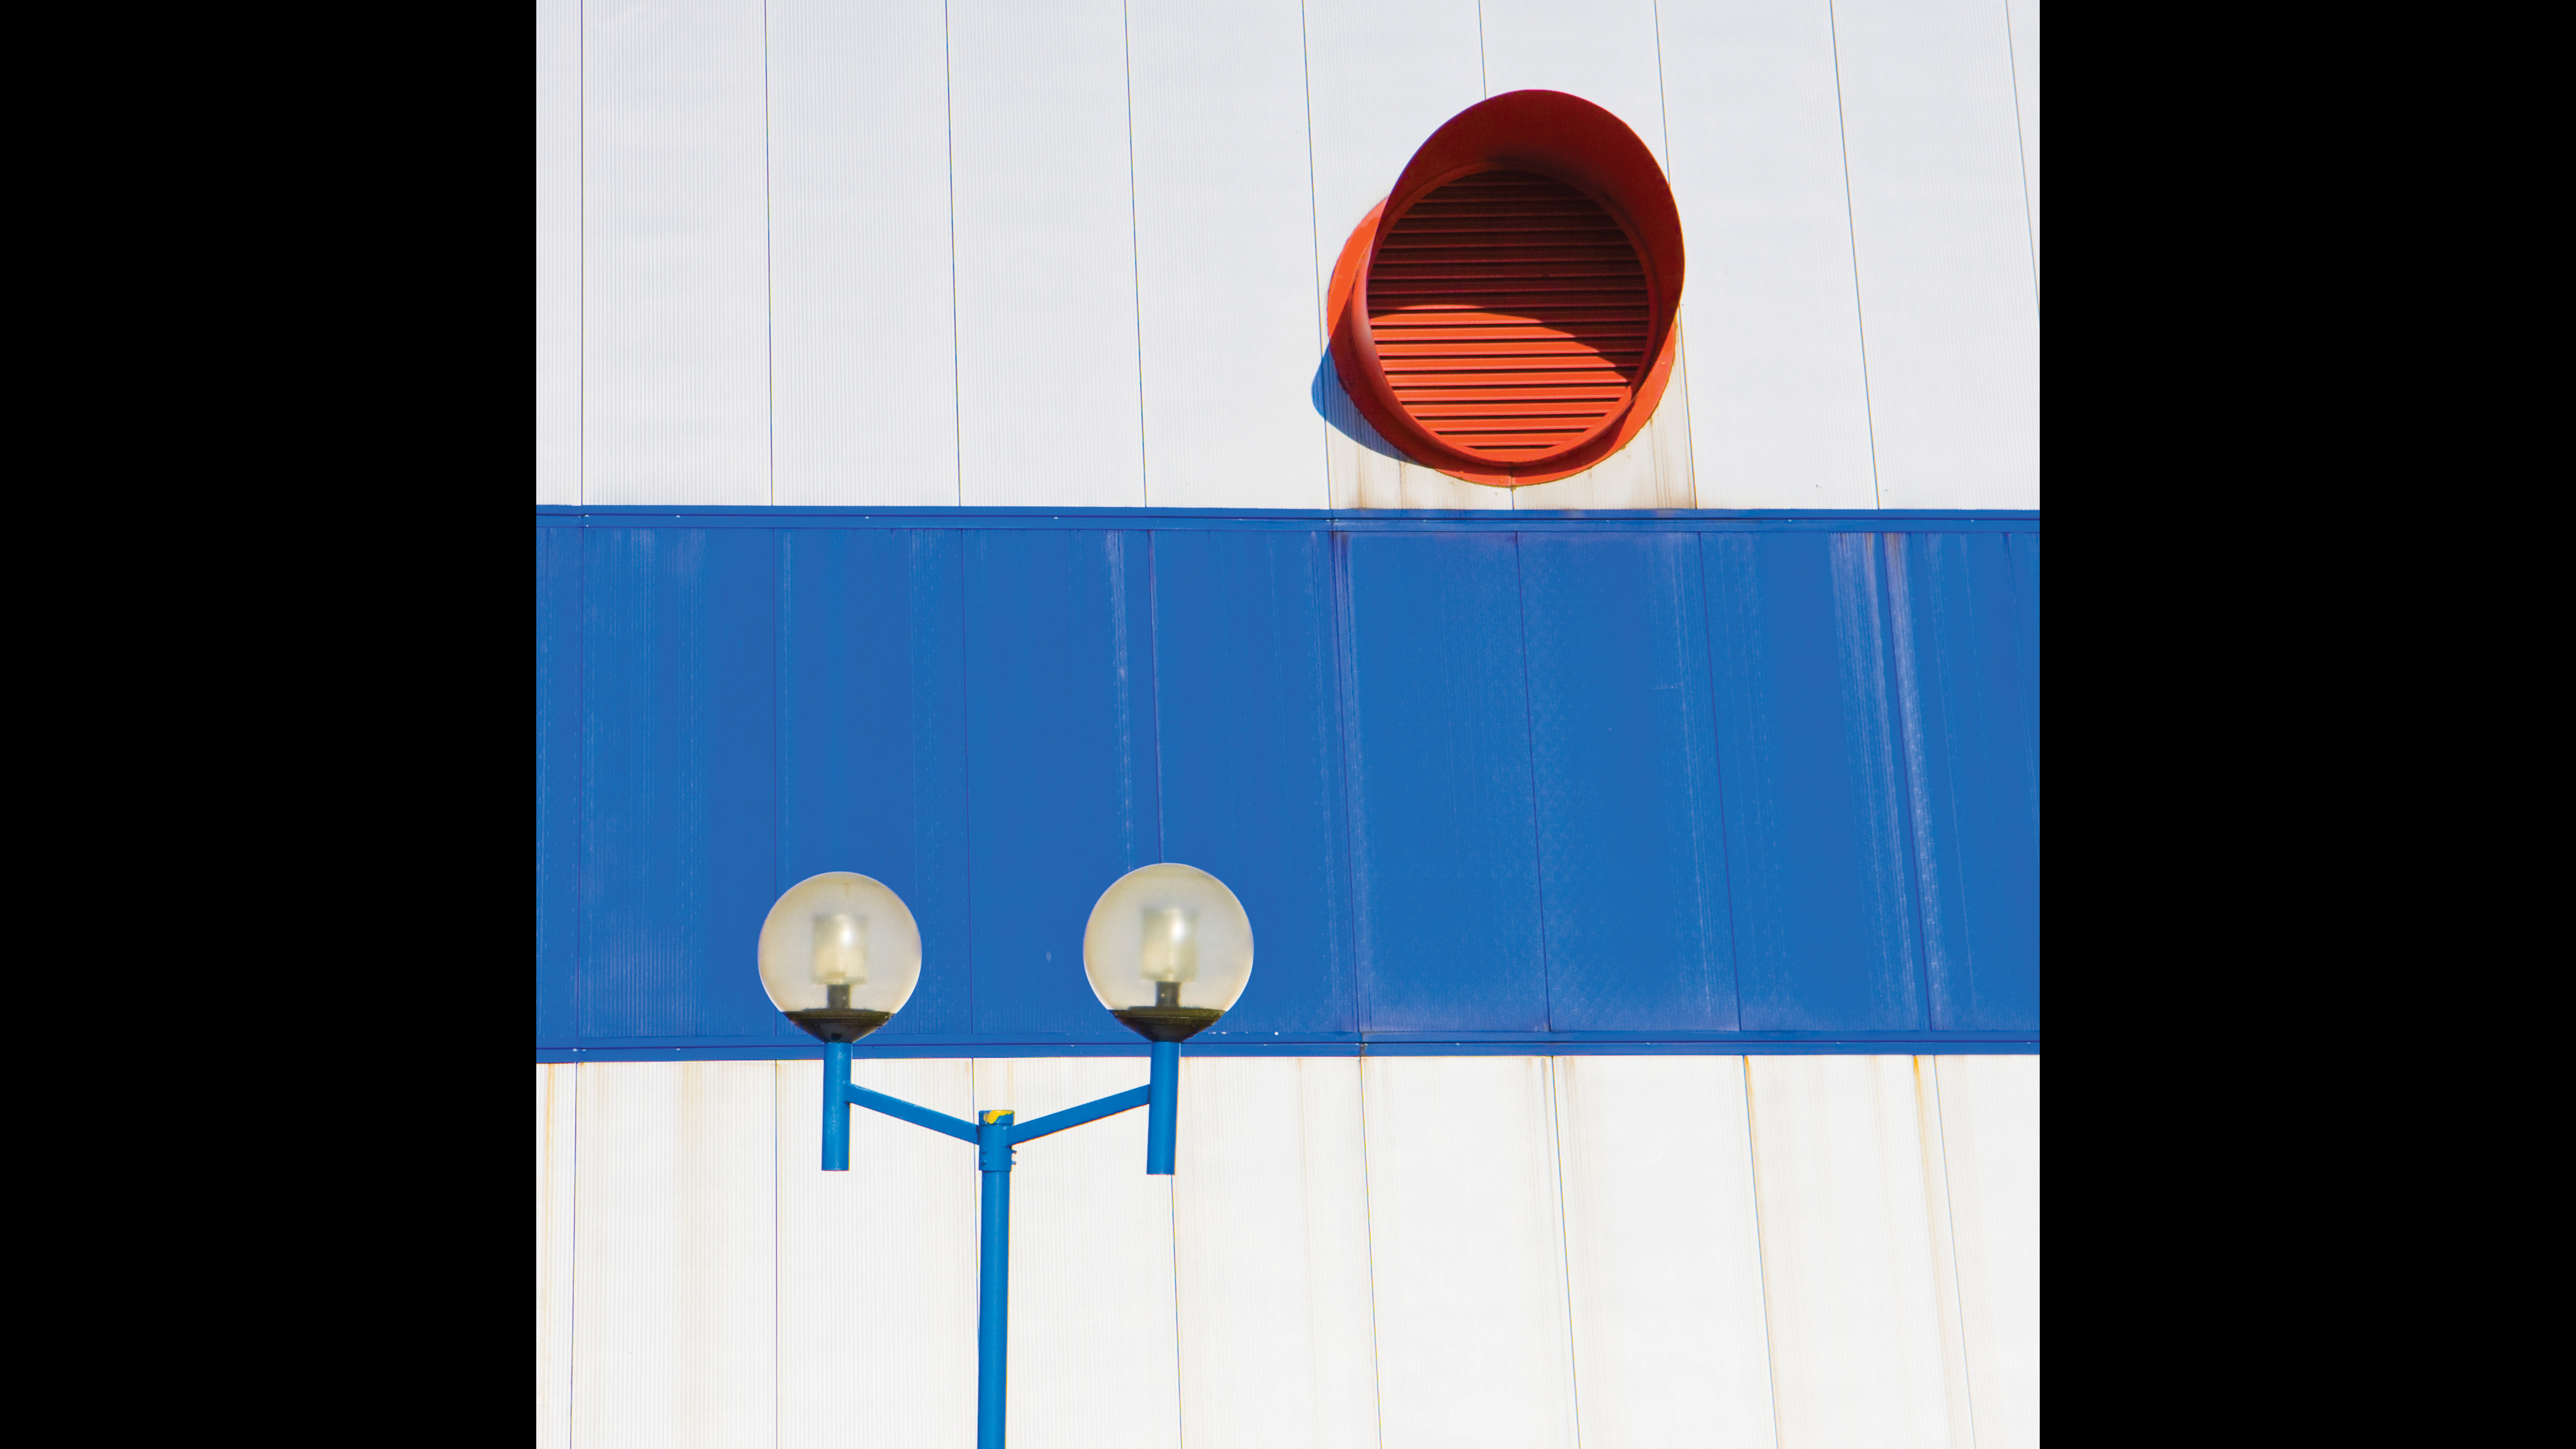
What is it? Arguably, all creative photography is about making the world look more abstract. Shooting in black and white, for instance, can be seen as a way of capturing a more abstract reality (as can many of the other effects in our A-to-Z of photographic effects). One of the simplest ways of finding abstracts, however, is to simply zoom in to include just a small part of the scene in front of you. The viewer sees familiar subjects in a fresh way, being forced to look closely to work out what he or she is looking at.
Special kit: None
Shooting tips: Look for patterns and bright colors, and then crop in close so these are shown in isolation.’
B is for Bulb
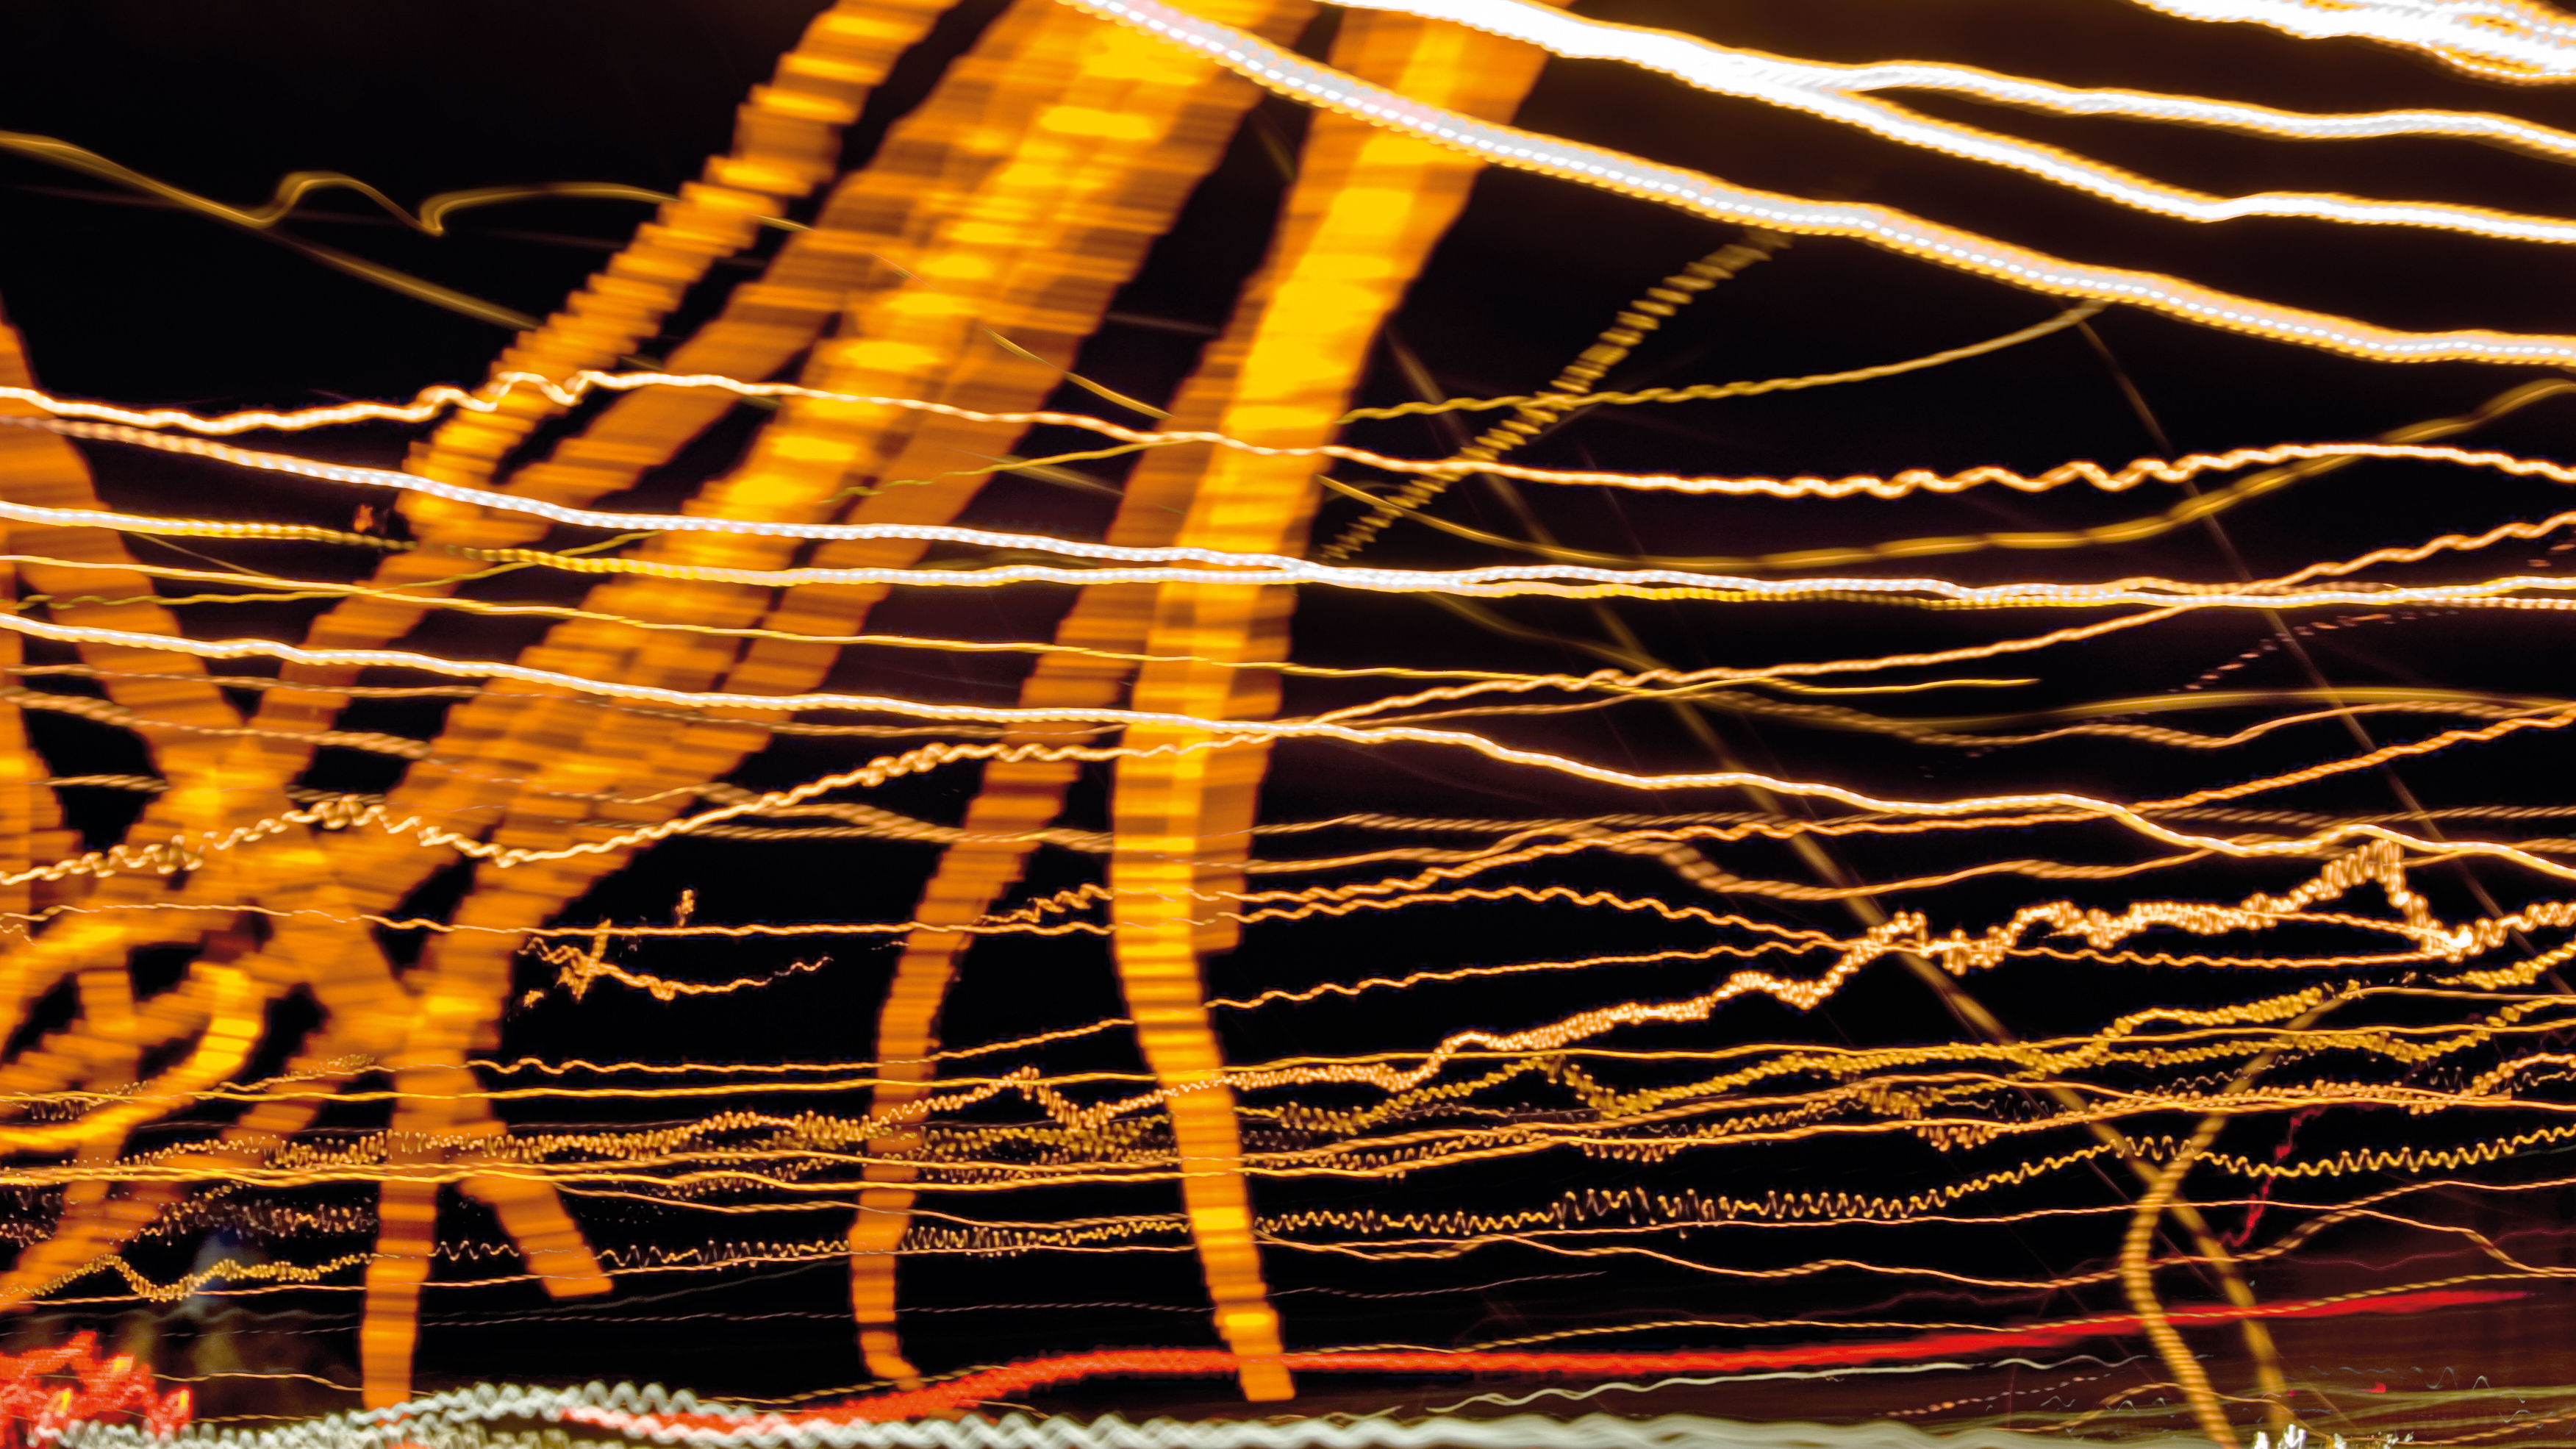
What is it? The B (or bulb) setting can only be accessed in Manual (M) exposure mode. It allows you to set super-long exposures lasting seconds – or even minutes. The shutter keeps open for as long as you keep the trigger pressed down. As such long exposures require a tripod, you need to use a remote cable release with a lockable switch to avoid jogging the tripod during the long exposure.
Special kit: A camera remote or cable release
Get the Digital Camera World Newsletter
The best camera deals, reviews, product advice, and unmissable photography news, direct to your inbox!
Shooting tips: For an interesting effect, shoot using the Bulb setting from the dashboard of a moving car to create an abstract pattern of lights. Use shutter speeds of around a minute at f/11, ISO100. Let someone else drive!
C is for Contre-jour
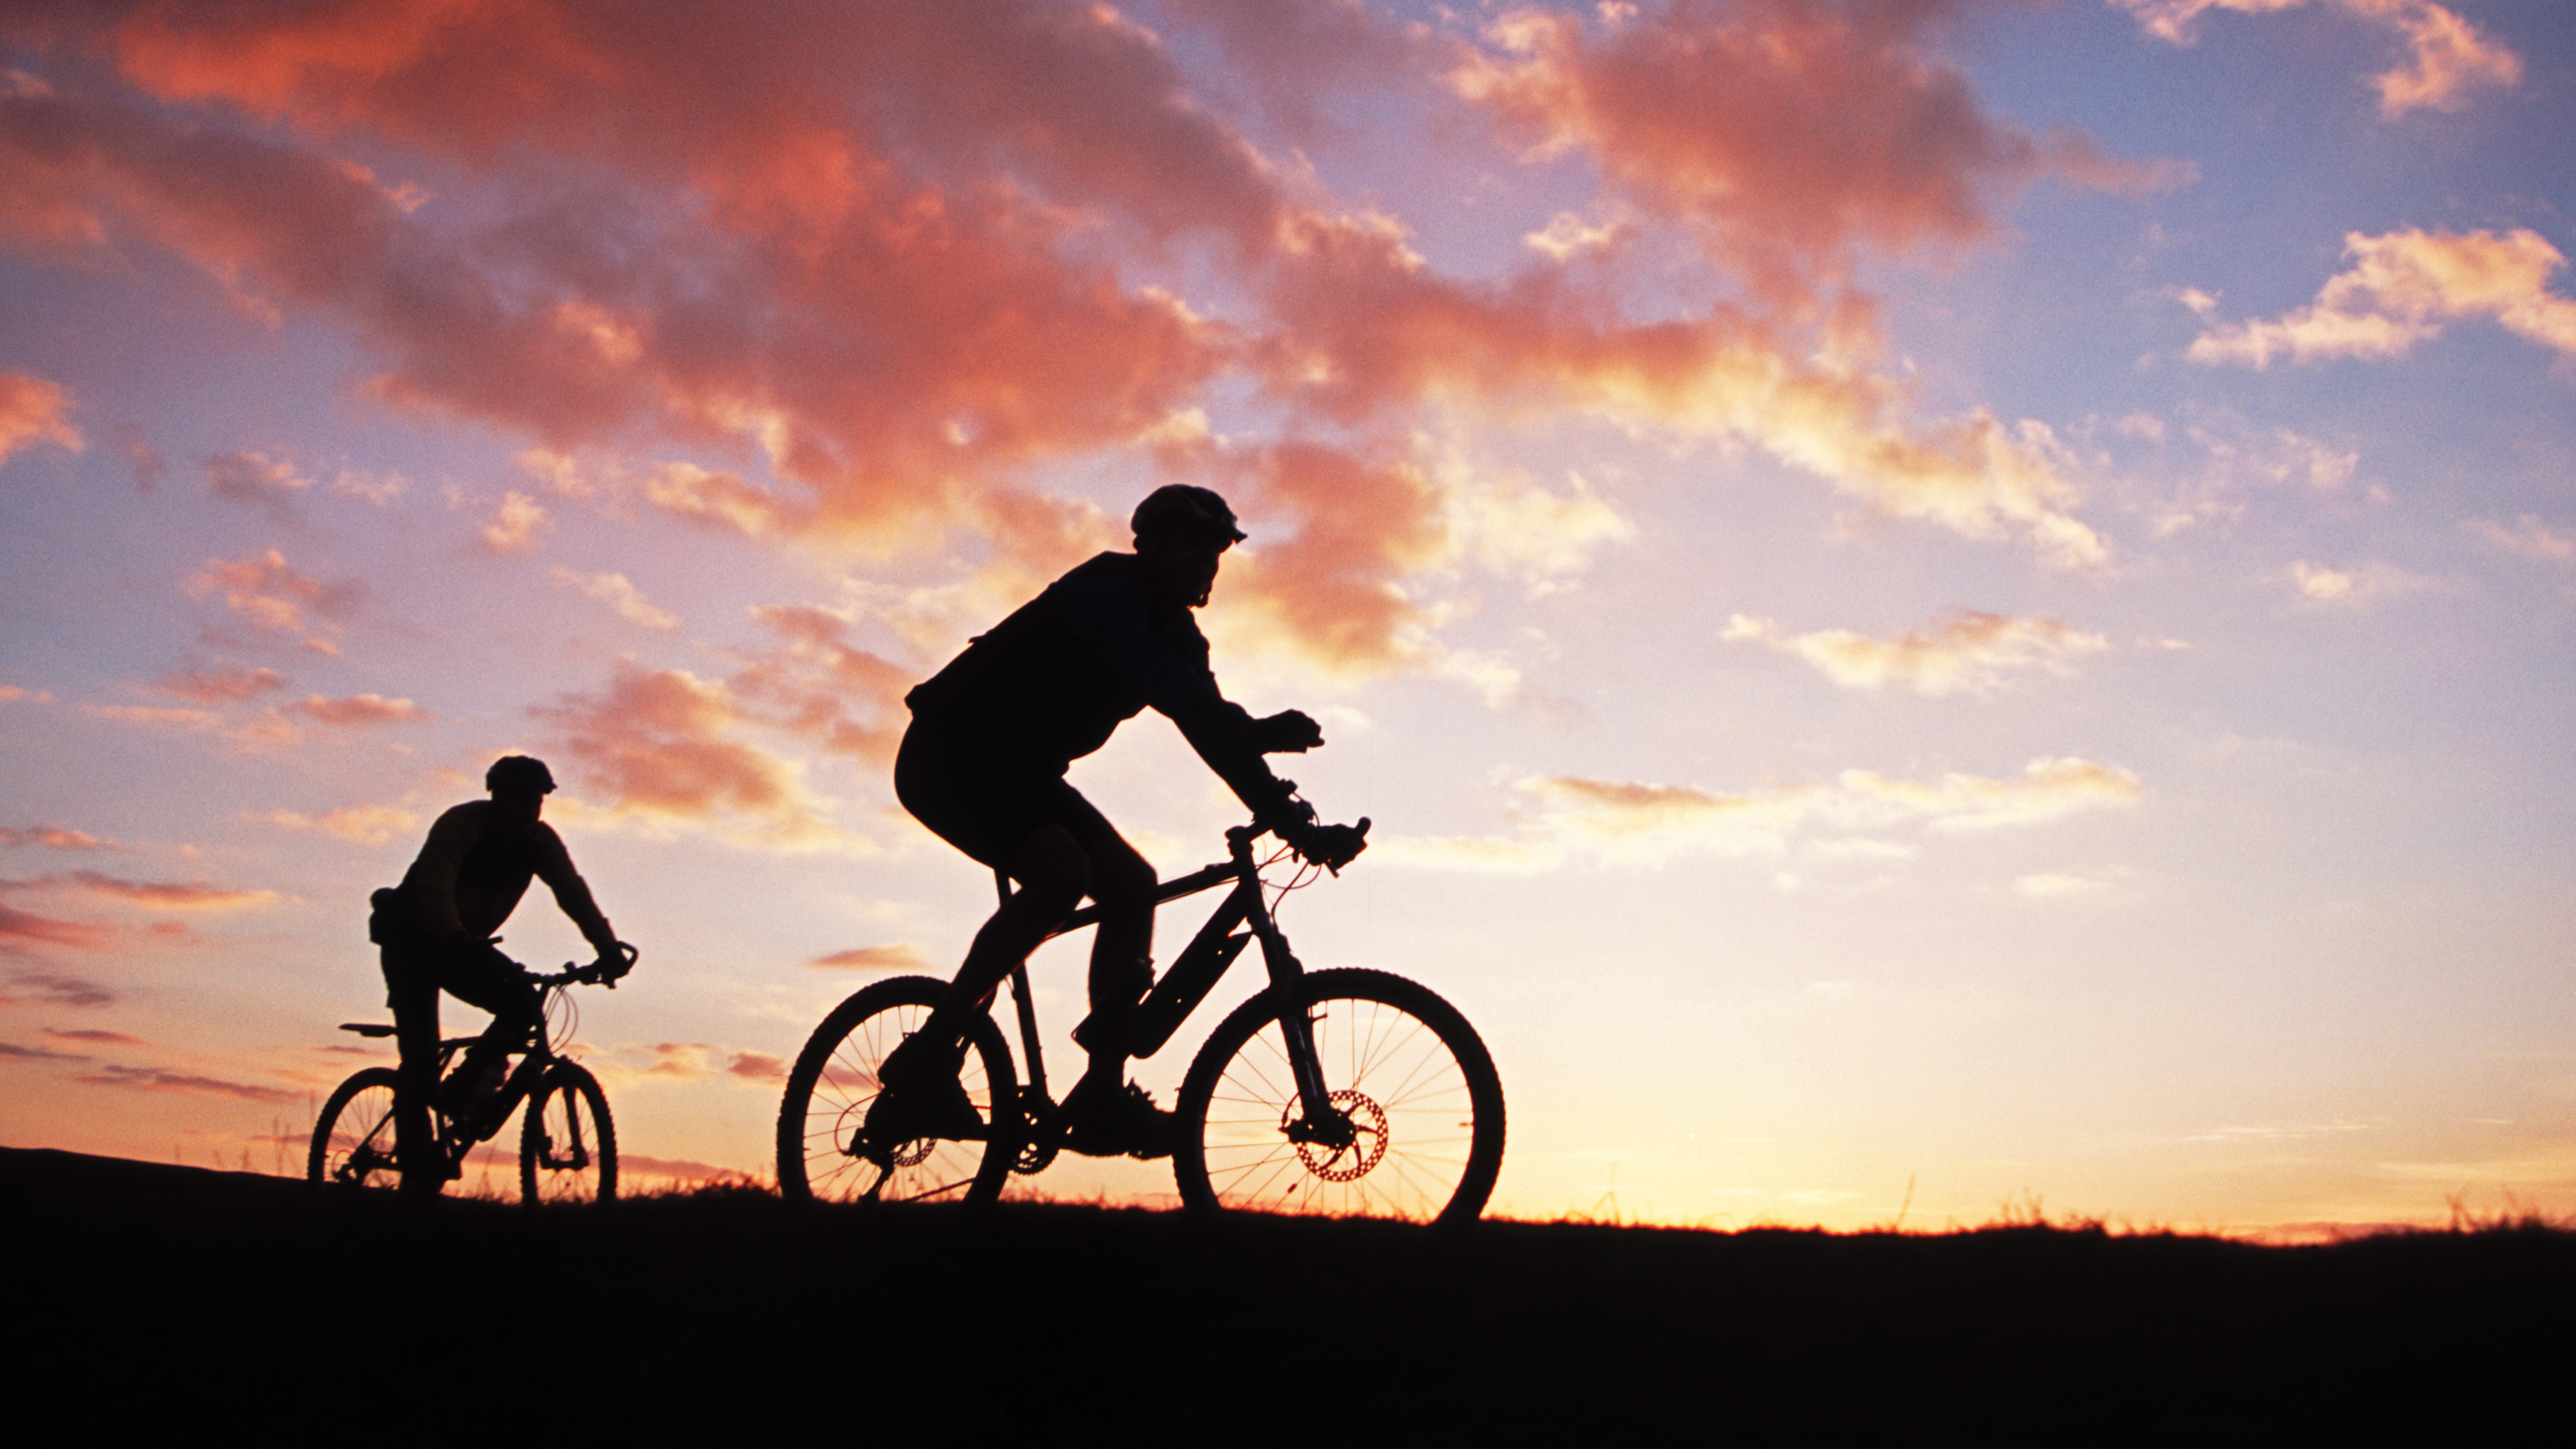
What is it? Contre-jour is French for ‘against daylight’, and is used to refer to images taken directly into the main source of light: if you expose for the bright background the subject will invariably be ‘underexposed’, and may even be completely silhouetted, as in our example; if you expose for the subject, the background will be overexposed, and may produce a rim-light around the subject, which can be effective when shooting portraits (see R is for Rim light).
Special kit: None
Shooting tips: When shooting at sunrise and sunset, keep an eye out for shapes that might make for an interesting silhouette. Silhouettes make for very graphic images, emphasizing line and shape at the expense of texture and detail.’

D is for Dutch Tilt
What is it? Dutch tilt is simply changing the angle at which a photograph is taken. Tilting your camera is an effective way of making images look more dramatic: in motor sports, the track appears steeper and more exciting; in portraiture, a jaunty angle can create tension and help bring straightforward portraits to life.
Special kit: None
Shooting tips: Think about how much to tilt your camera, considering what elements to leave in and leave out. When there are horizontal lines in your shots, try angling your SLR so they run diagonally to or from one of the corners.’
E is for Edgerton
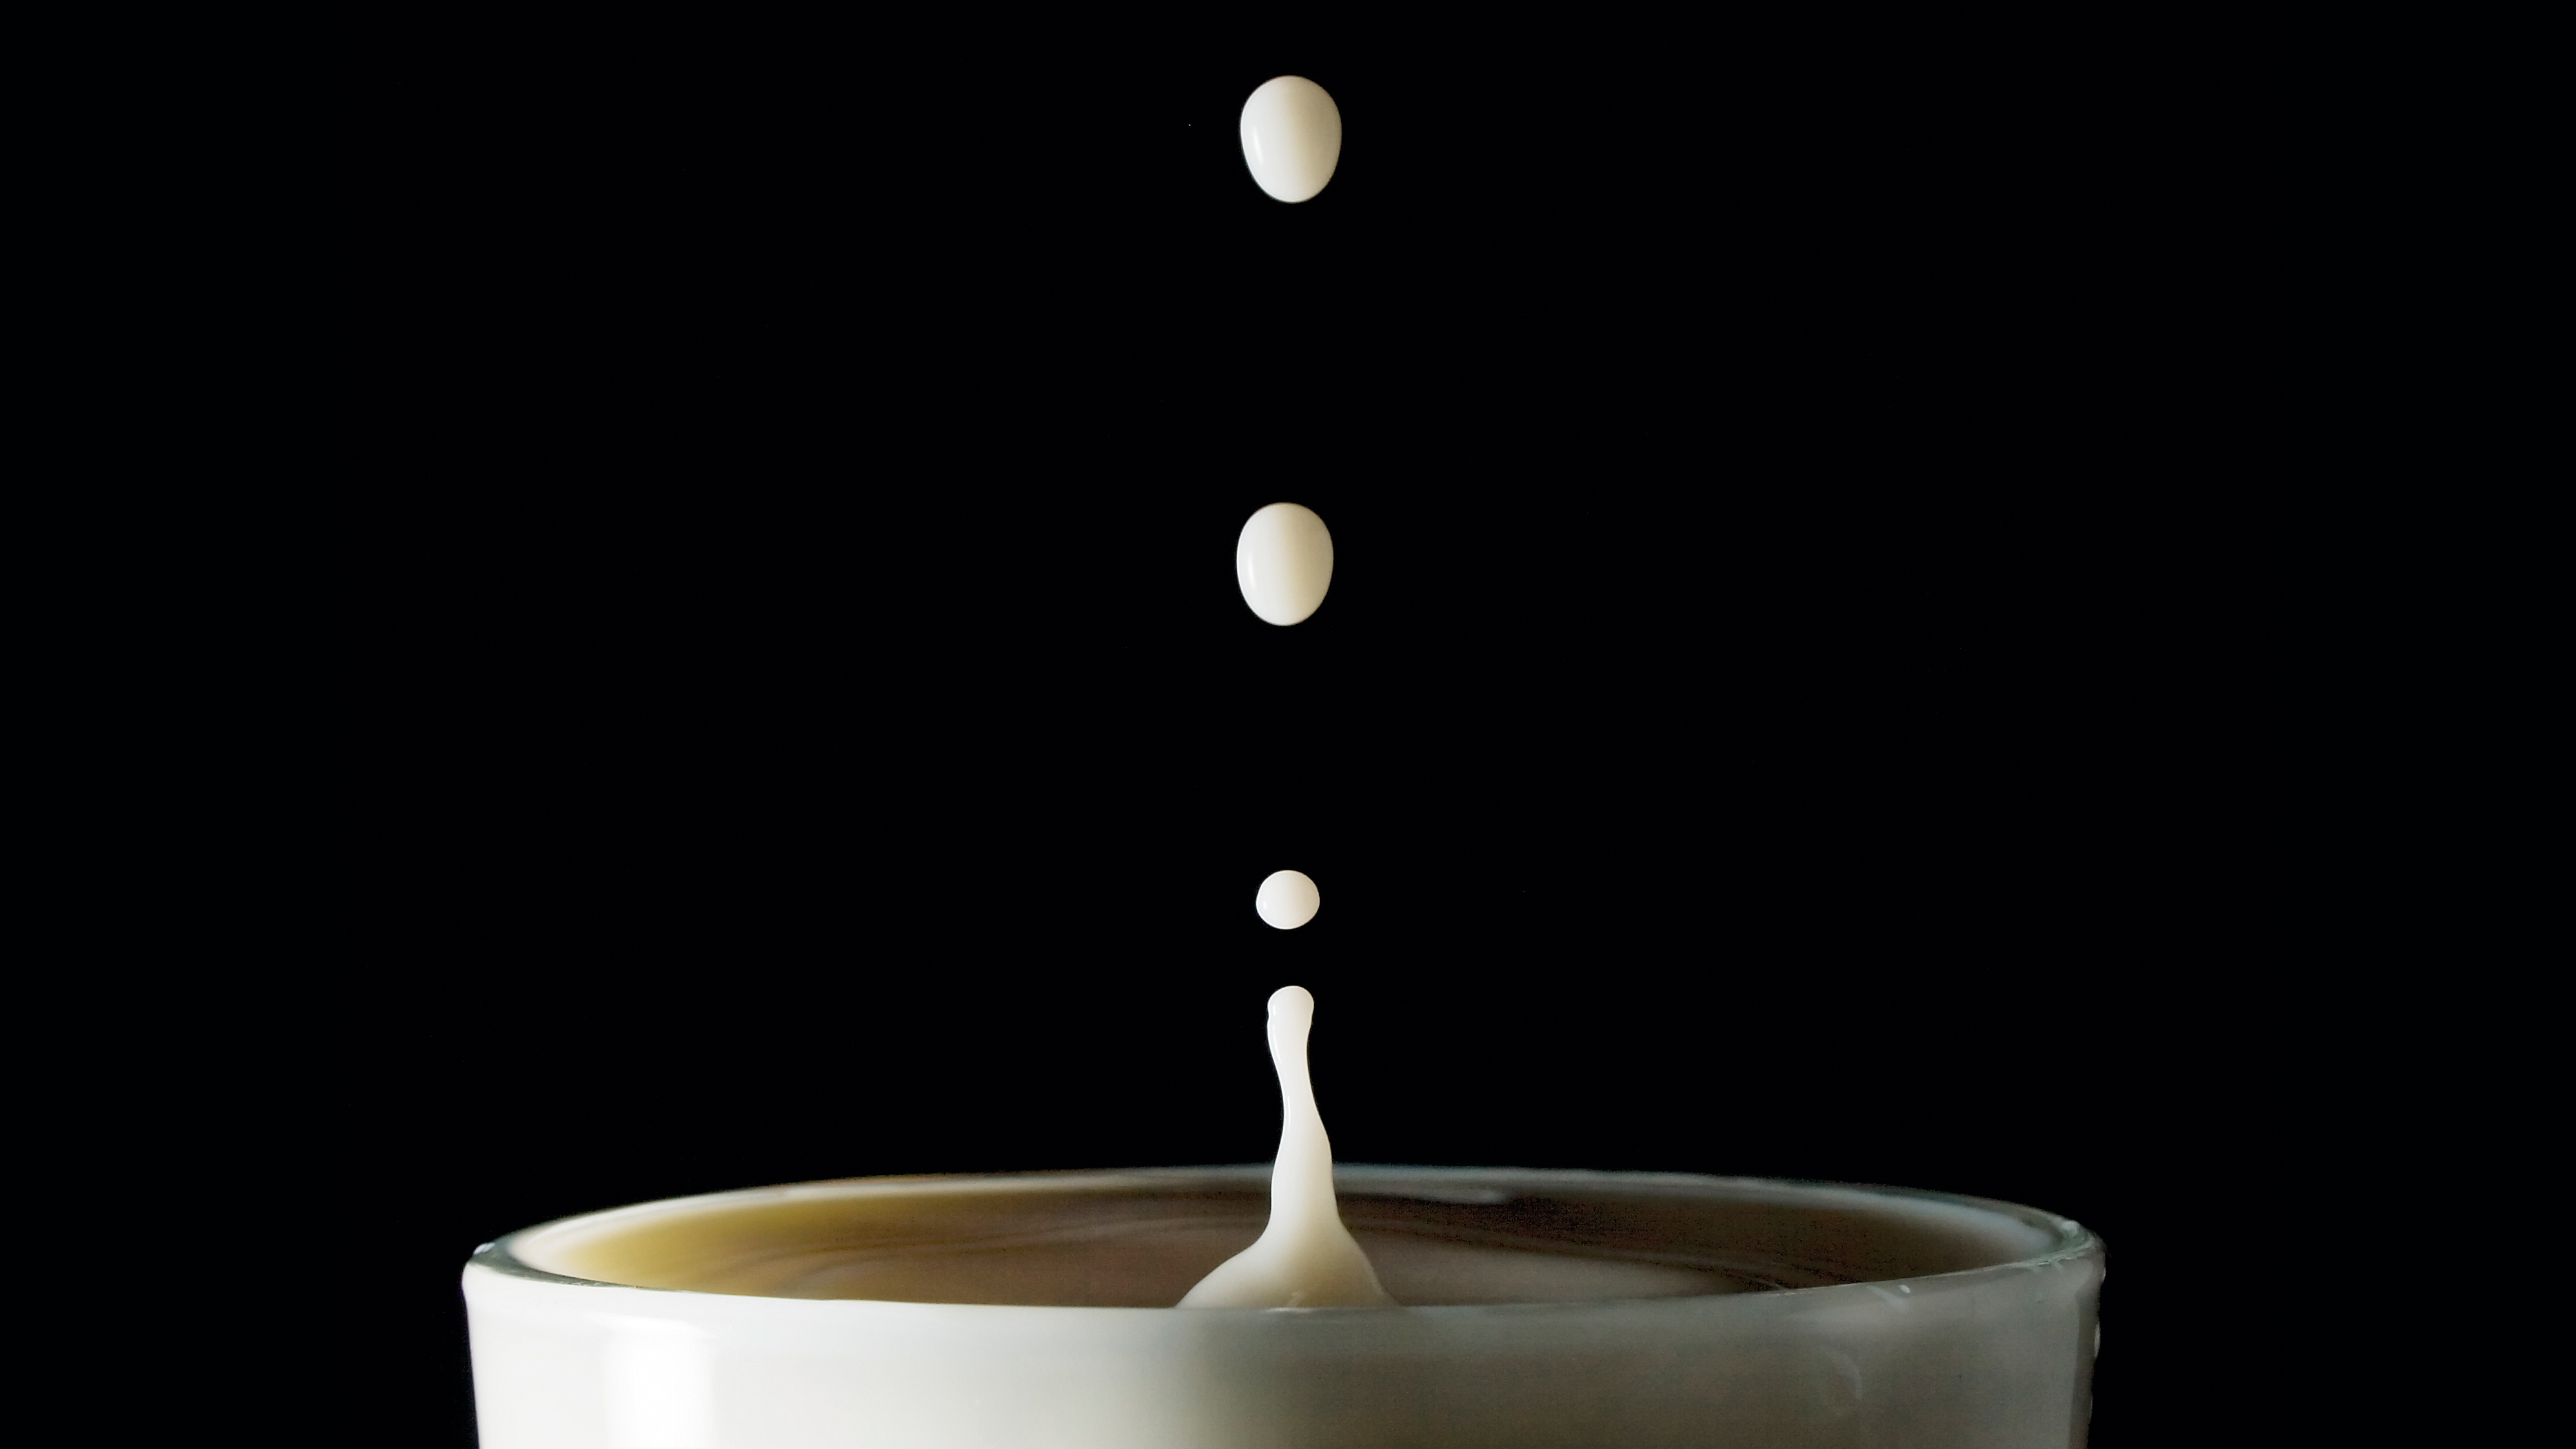
What is it? Harold Edgerton is the pioneer of electronic flash and high-speed photography. Thanks to his work, it is possible to freeze subjects using a burst of flash. A flashgun controls the amount of light it emits by how long it lasts. Its minimum setting, lasting about 1/50,000 sec, will allow you to capture water droplets and milk splashes with relative ease; the difficulty is in the timing. The same technique can freeze a speeding bullet – but the advantage of household liquids is that you can keep taking pictures until you get the shot you want, without the need for a specialist triggering system.
Special kit: Hotshoe flashgun with off-camera sync cable. Lots of spare batteries!
Shooting tips: Set up the scene so that the drips are constant, with the exposure and focus set manually. This helps increase your hit rate – but expect lots of misses.
• Water drop photography: freeze water splashes with off-camera flash
F is for Fisheye
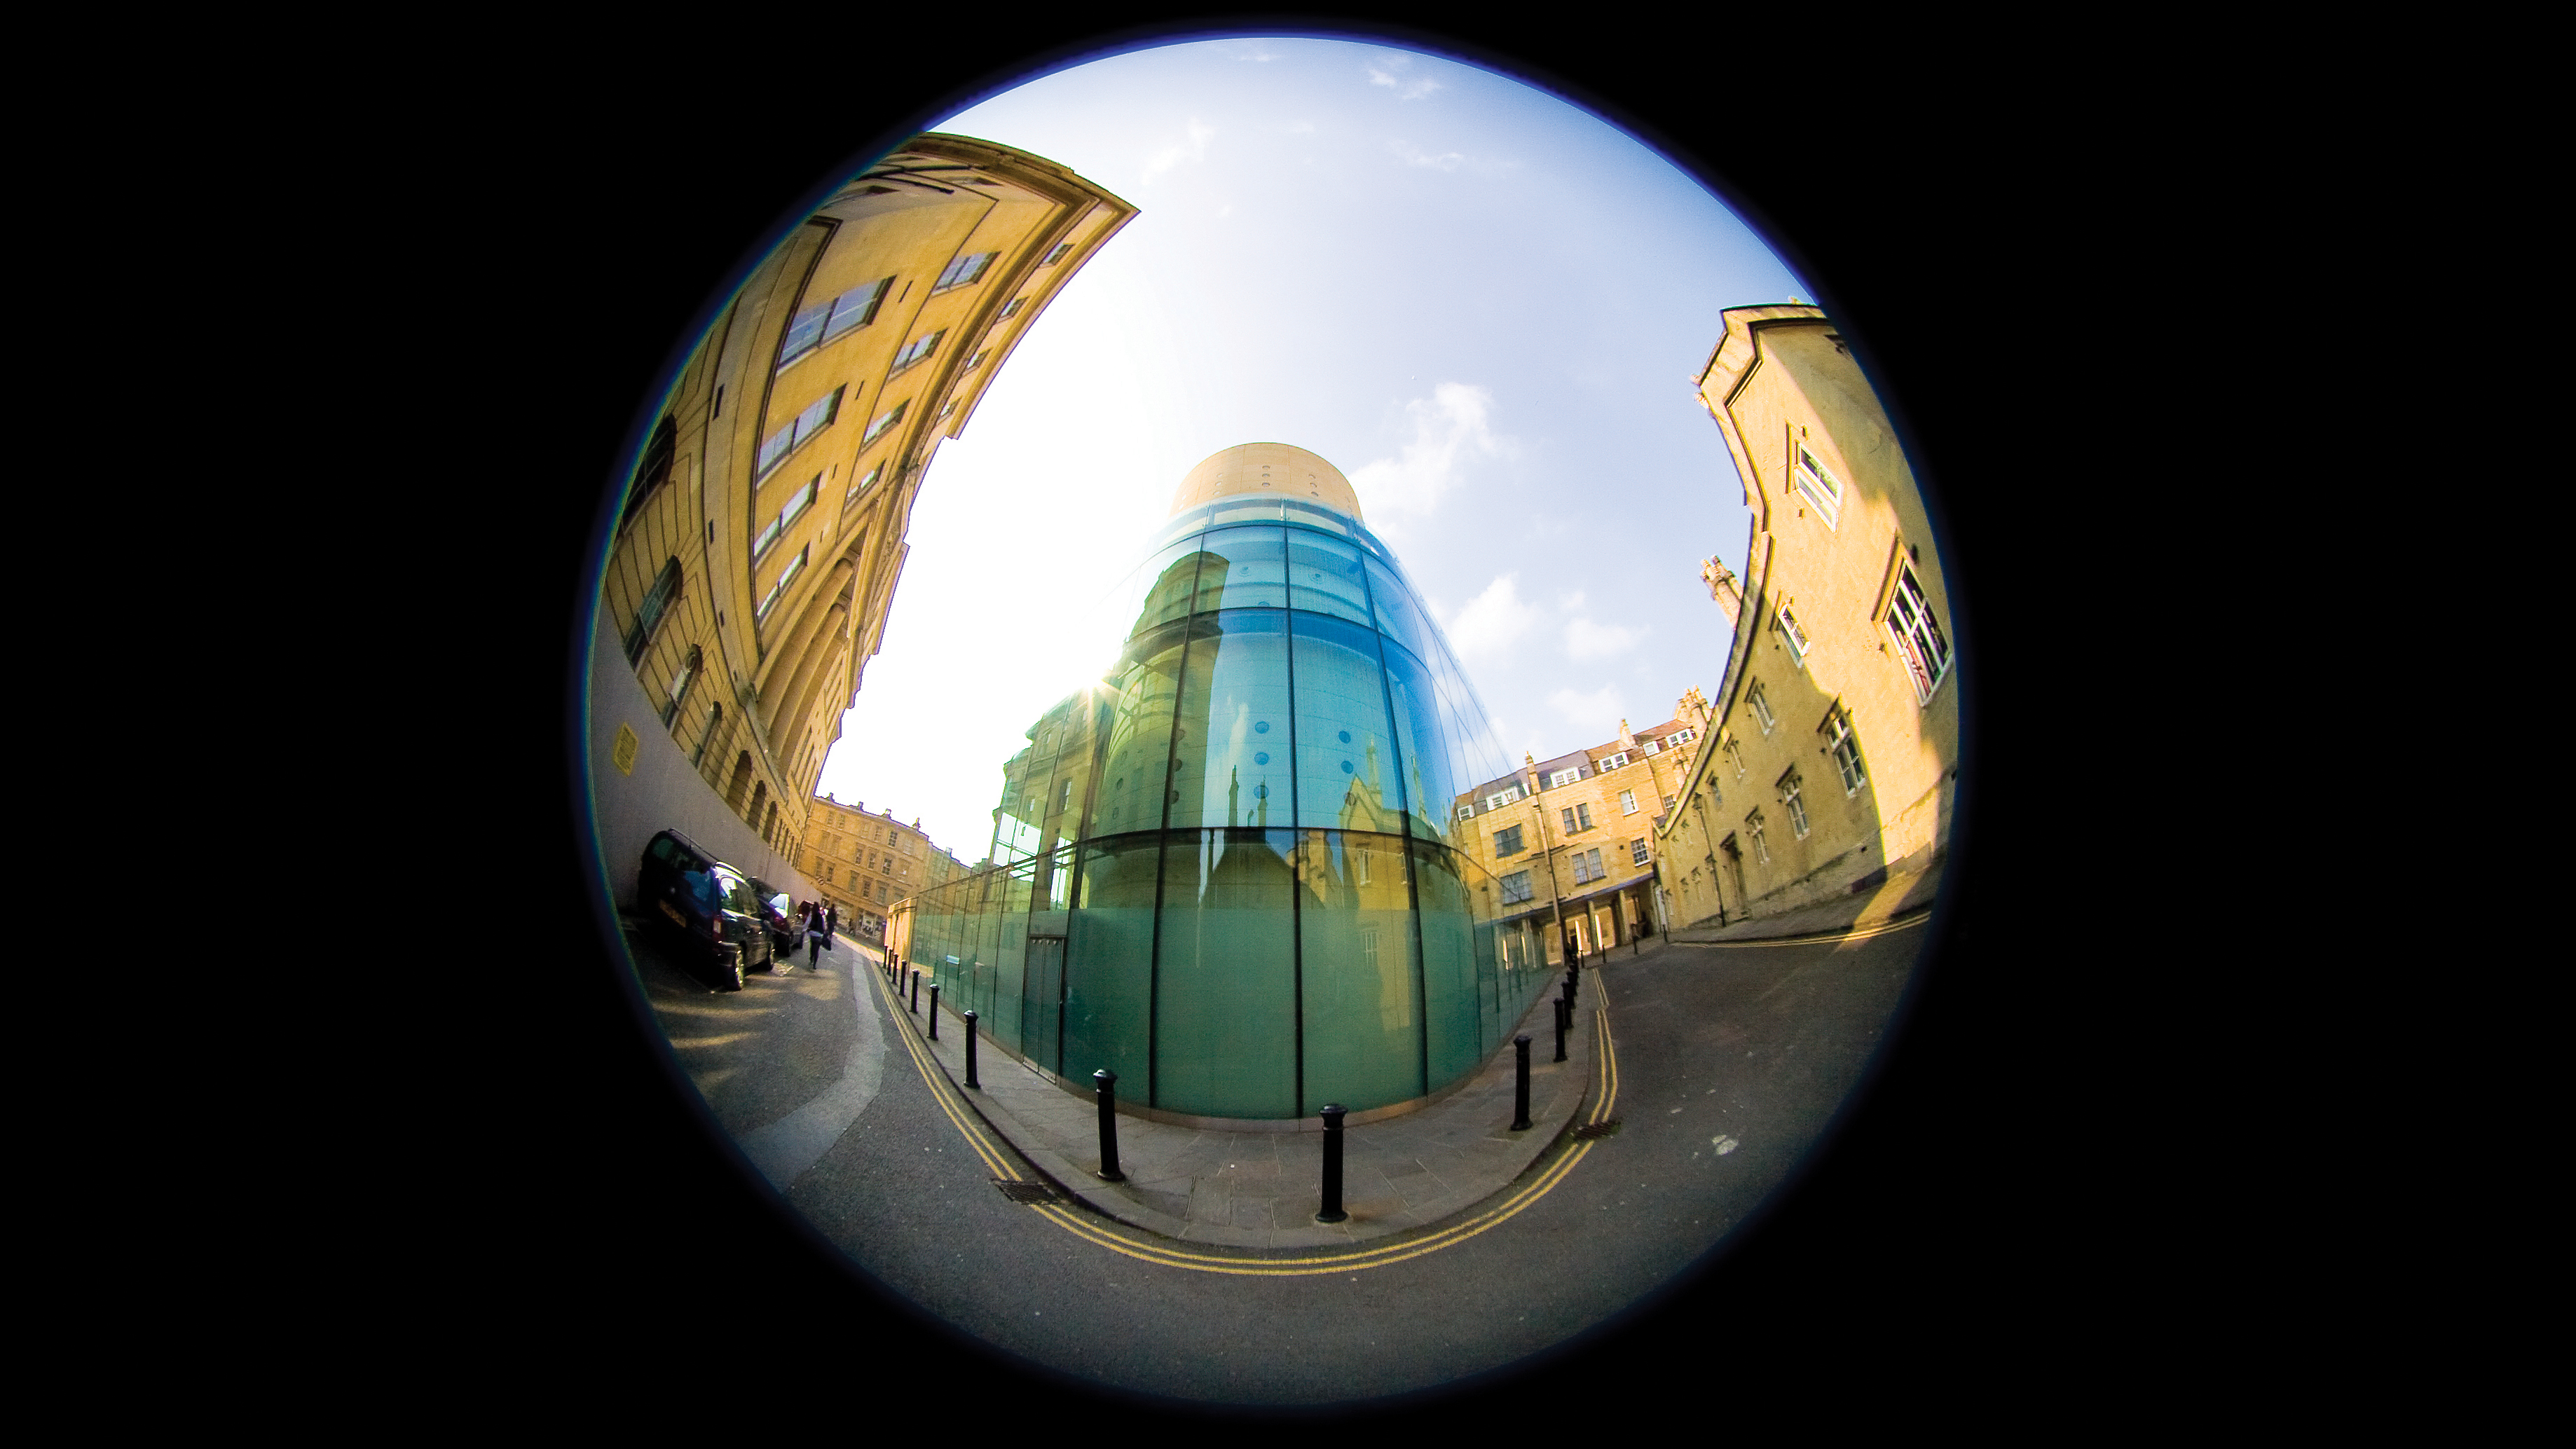
’What is it? A fisheye is a specialist wide-angle lens that produces a distorted image with an extreme angle of view. There are two types of fisheye lens: full-field fisheyes fill the whole frame with an image that bows out at the edges; circular fisheyes are more extreme – giving a round, central image with a 180° angle of view.
Special kit: We used a Sigma 4.5mm f/2.8 EX DC HSM Circular Fisheye, which costs £575, but which could be hired.
Shooting tips: Use center-weighted or spot metering when using a circular fisheye – and take great care not to scratch the bulbous front element.
• The best fisheye lenses in 2020
G is for Grain
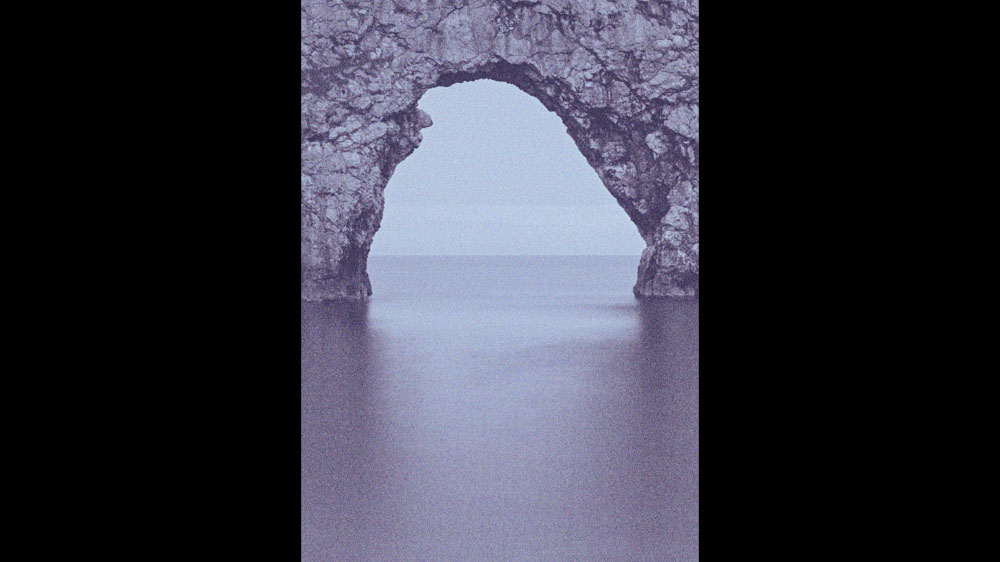
What is it? In the days before digital, ‘grain’ was the term used to describe the granular clumps in the film emulsion. In digital photography, it describes the visible electronic noise in the picture. Grain increases with ISO, and while it can be unwanted, it can also be used creatively to convey mood or exaggerate textures. It’s especially effective when trying to mimic the look of grainy black-and-white prints.
Special kit: None
Shooting tips: Bump up ISO and try reportage-style shots converted to black and white.’
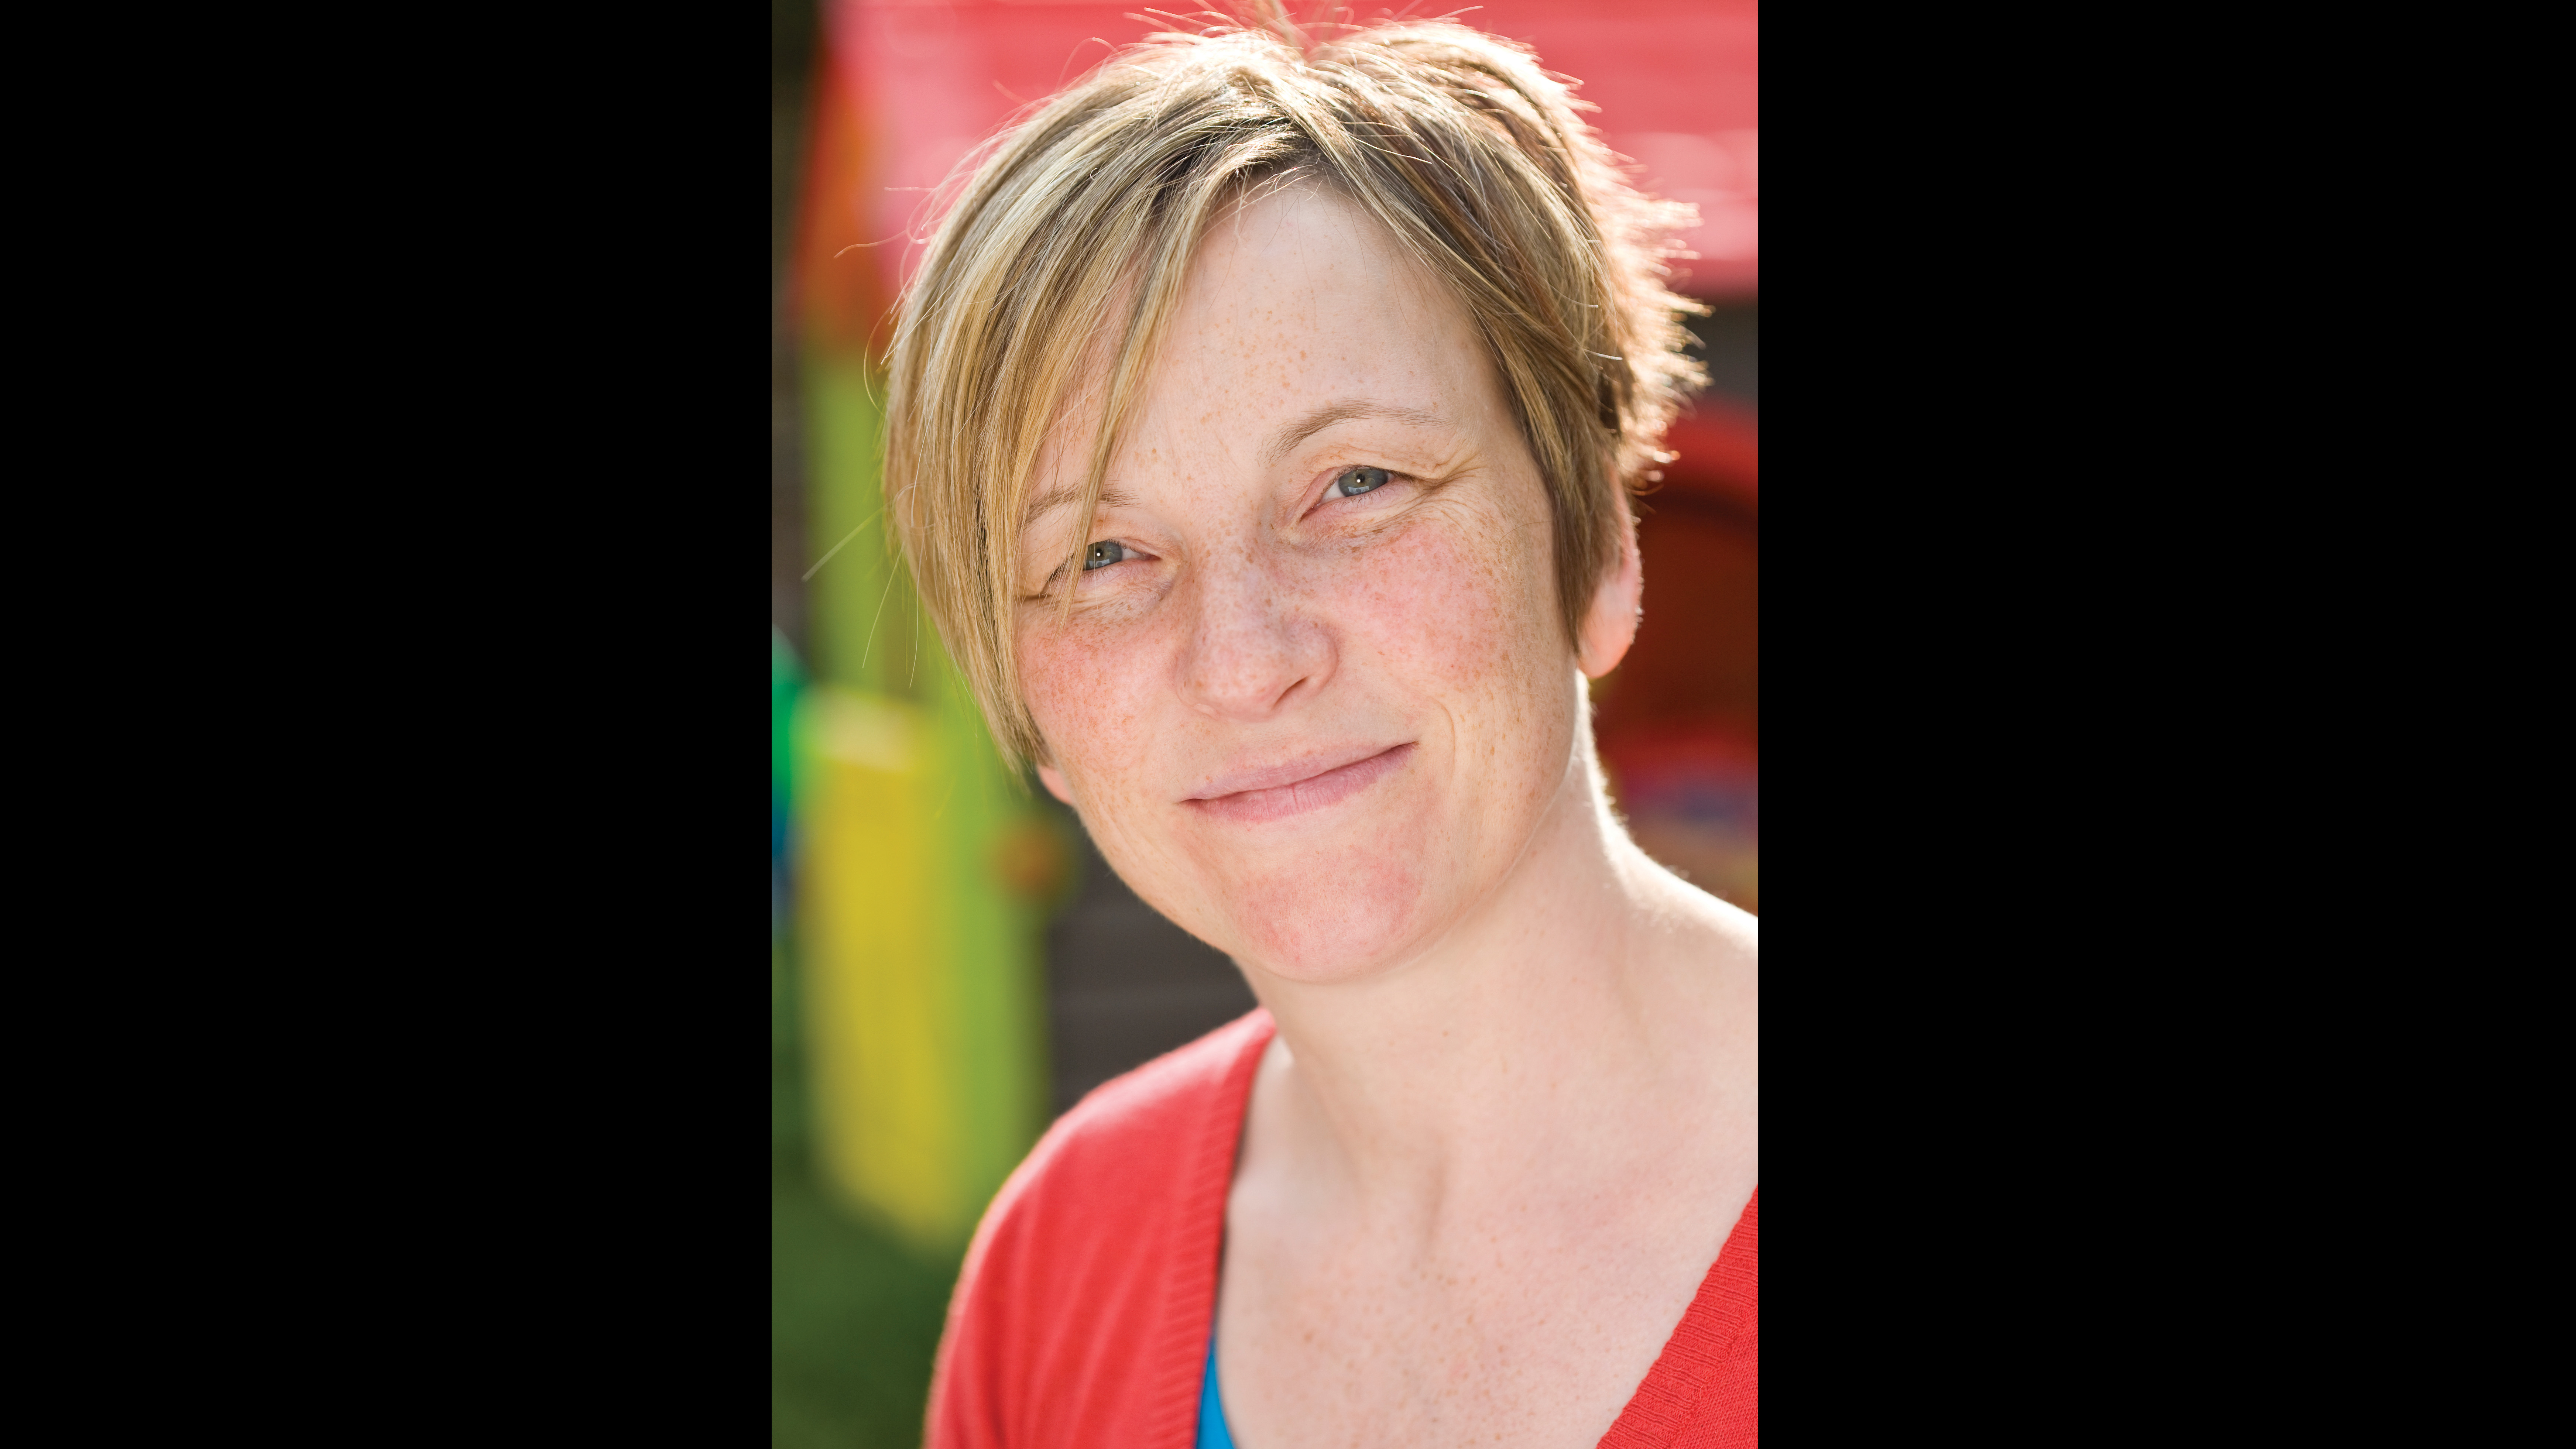
H is for HSS
’What is it? High-speed sync or HSS refers to the shutter speed at which a flash will work – or sync – with your camera. If high-speed sync isn’t set, flash units will only work successfully at shutter speeds up to around 1/200 sec (depending on the model of camera) – this is only really an issue if you want to use a flash in bright conditions and want to use a wide aperture.
Special kit: A flashgun with high-speed sync (HSS) feature.
Shooting tips: In our example, an aperture of f/4 at ISO100 needed a shutter speed of 1/1000 sec. We wanted to add a burst of fill-flash to soften shadows and add a catch-light, so we set HSS to make the flash sync successfully at a shutter speed of 1/1000 sec.
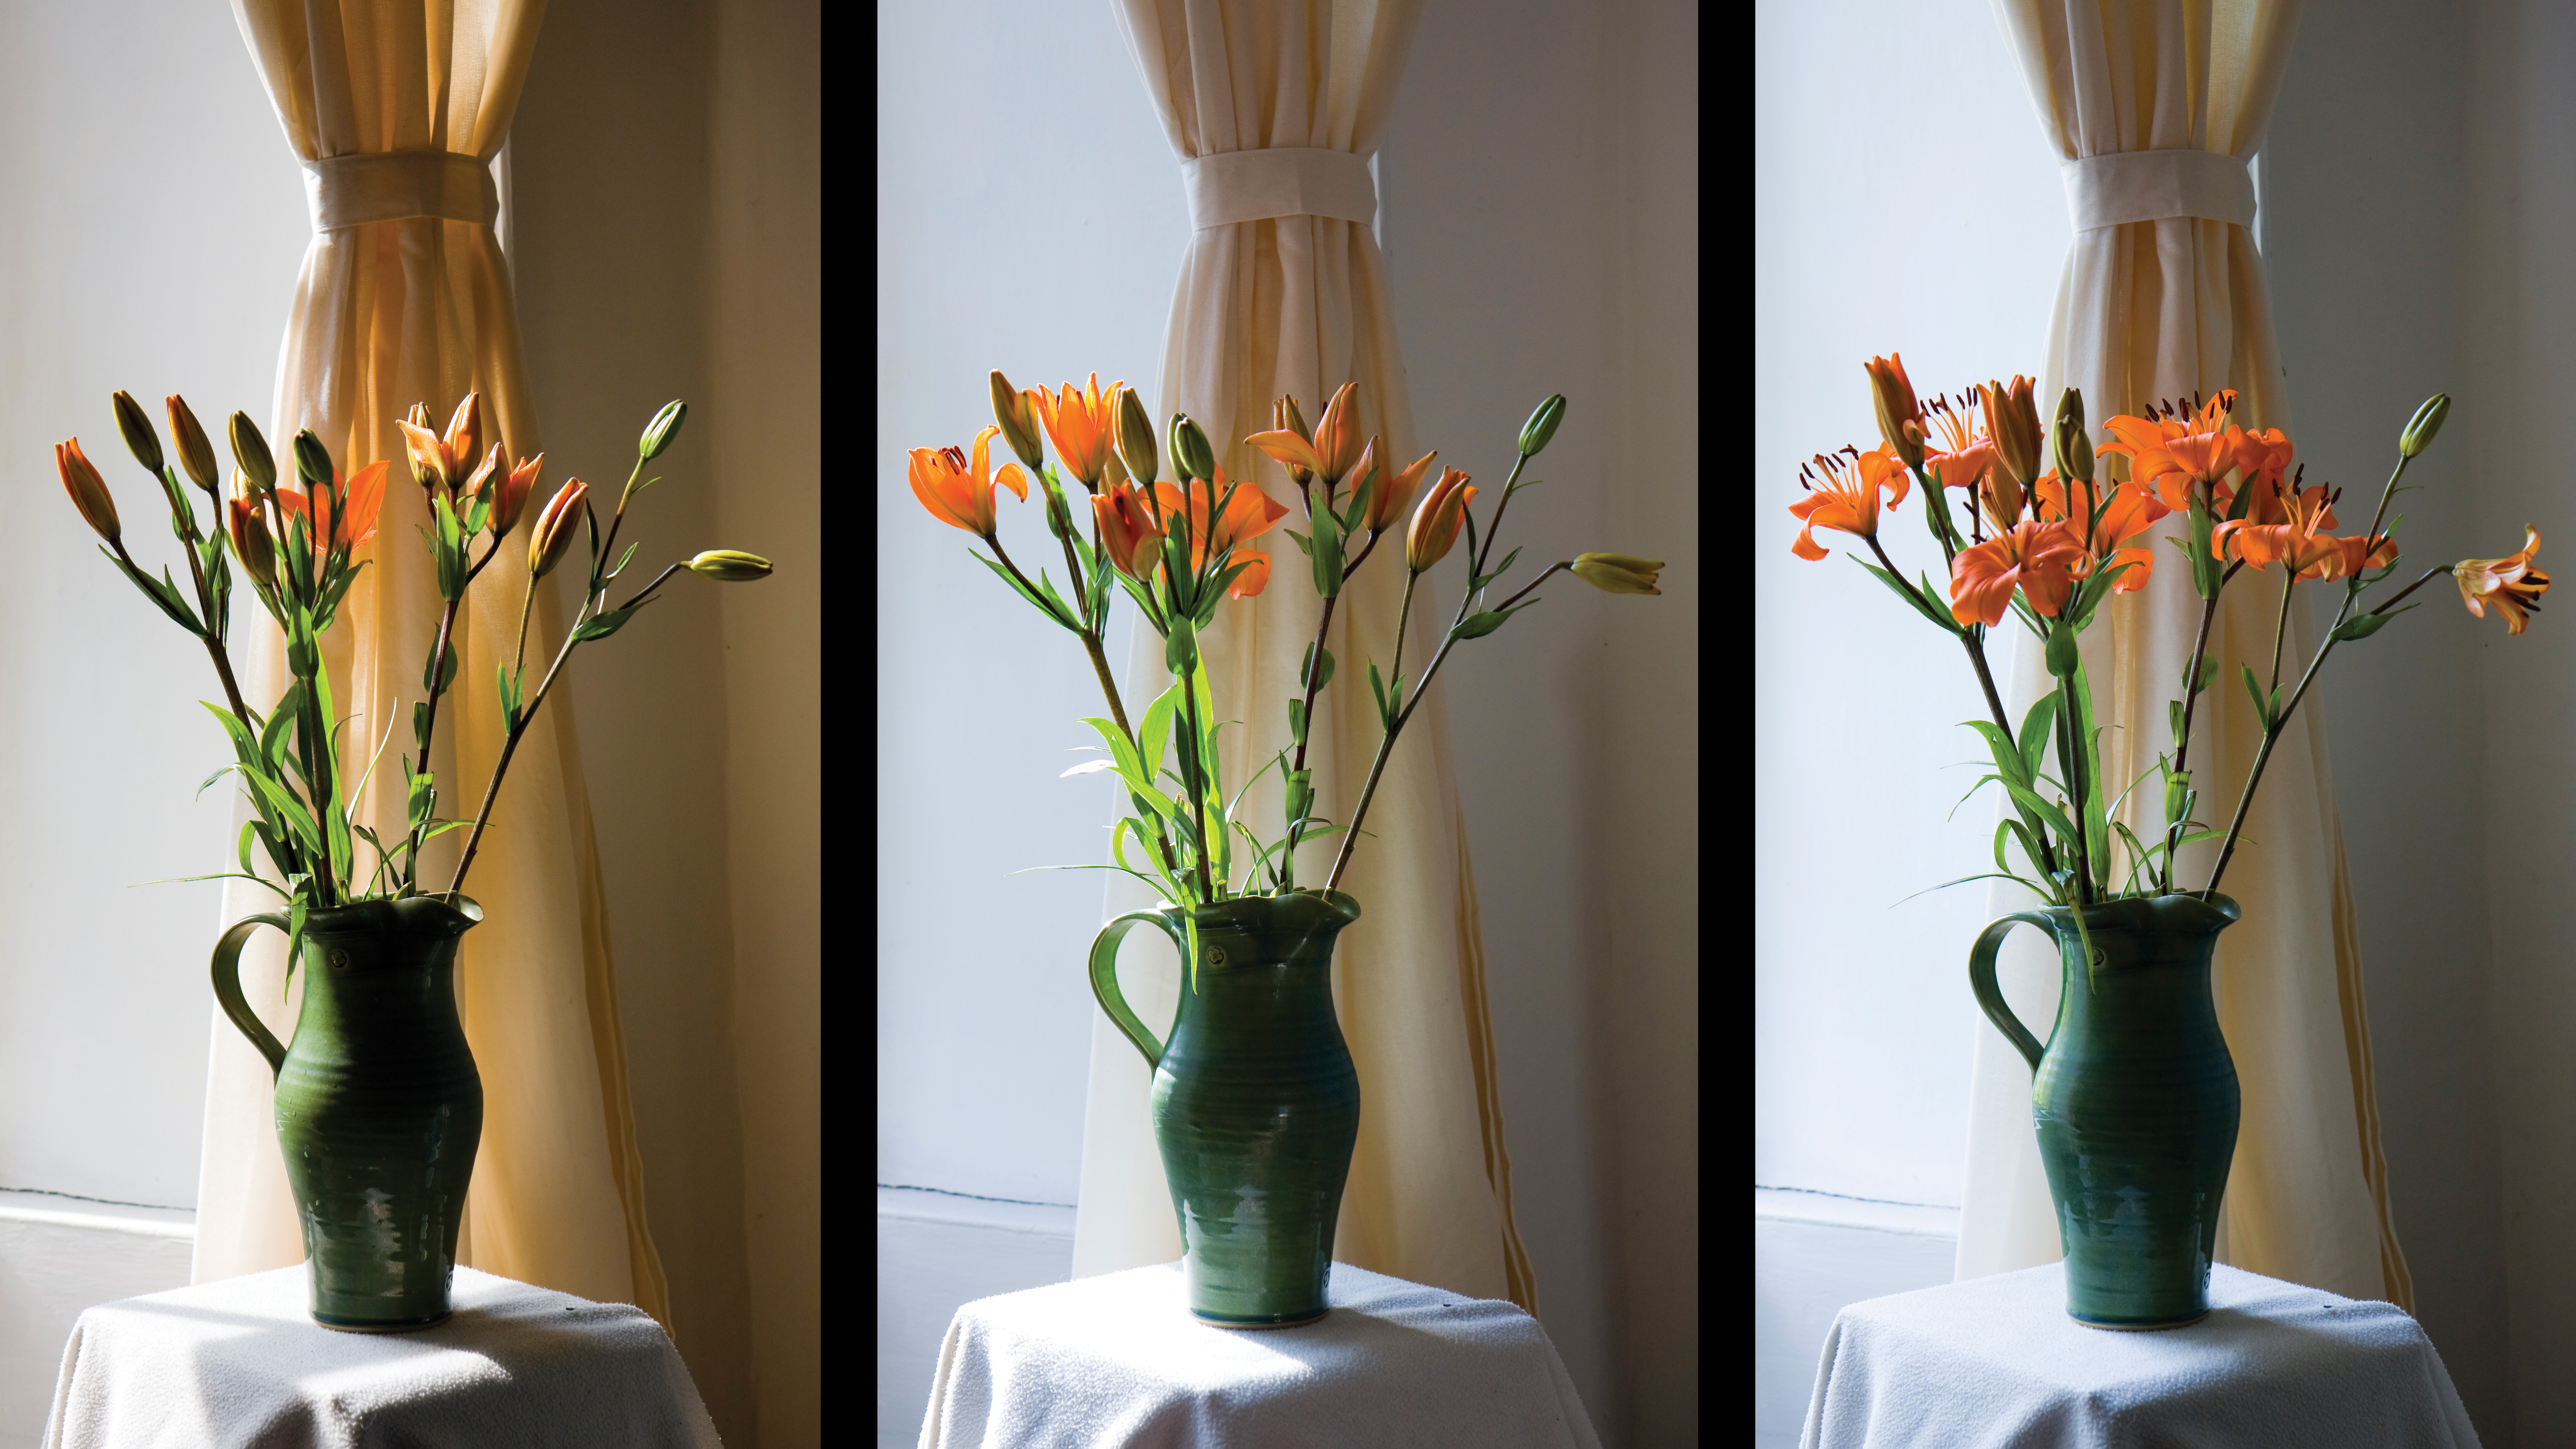
I is for Intevalometer
What is it? Shooting a subject at regular intervals allows you to show you how it changes over time. It is a great technique for making a series of shots that shows a plant growing – or to show something rotting away with age!
Special kit: Use a cable release with an interval shooting function, such as the Hähnel Giga T Pro. If you own a Canon camera use the EOS Utility program that came with your camera has an intervalometer feature.
Shooting tips: It can be hard to work out how long you need between each shot, however, it is better to have more shots than you need than to miss a decisive stage.’

J is for Joiner
What is it? The joiner effect was made popular by the artist David Hockney – and has become a lot easier to do in the Photoshop era, as each ‘tile’ can be stretched and cloned so that you can’t see the joins. However, it can be fun to go old-school – shooting a scene in bits, then sticking prints on a piece of card. The rough-and-ready look, with imprecise alignment, can add to the effect – as in our shot of the Treasure Island hotel in Las Vegas.
Special kit: None
Shooting tips: Practice how many shots you will need to cover a scene, ensuring that you get a decent amount of overlap between each shot. ‘

K is for Kaleidoscope
What is it? A kaleidoscope uses mirrors to create a colored pattern from simple subjects. For a similar effect with your camera, make a tube using a sheet of silver card or mirror plastic that fits over the front element of your lens. Now point this at a colored subject and see the color spread out.
Special kit: A macro lens works best, allowing you to fill the screen with a more abstract pattern. We used a sheet of shiny, silver corrugated plastic from a craft store. You can also try using silver foil.
Shooting tips: If the front element of your lens is recessed, roll up the tube so it fits in the recess. This creates a better center circle for the effect.

L is for Lens Baby
What is it? The original Lensbaby is a lens that creates a small ‘sweet spot’ of focus then gradually blurs out everything around that area. Using a clever bending and pivoting mid-section, the Lensbaby can move the sweet spot of focus around the frame, without you having to change position. This gives an out-of-focus area that looks more like radial or motion blur than the effects you can achieve with aperture and depth of field.
Special kit: We used the Lensbaby Composer for our shot.
Shooting tips: Lensbaby lenses are manual-focus only. A tripod can help to steady your hand and maintain strong focus, even on moving subjects.
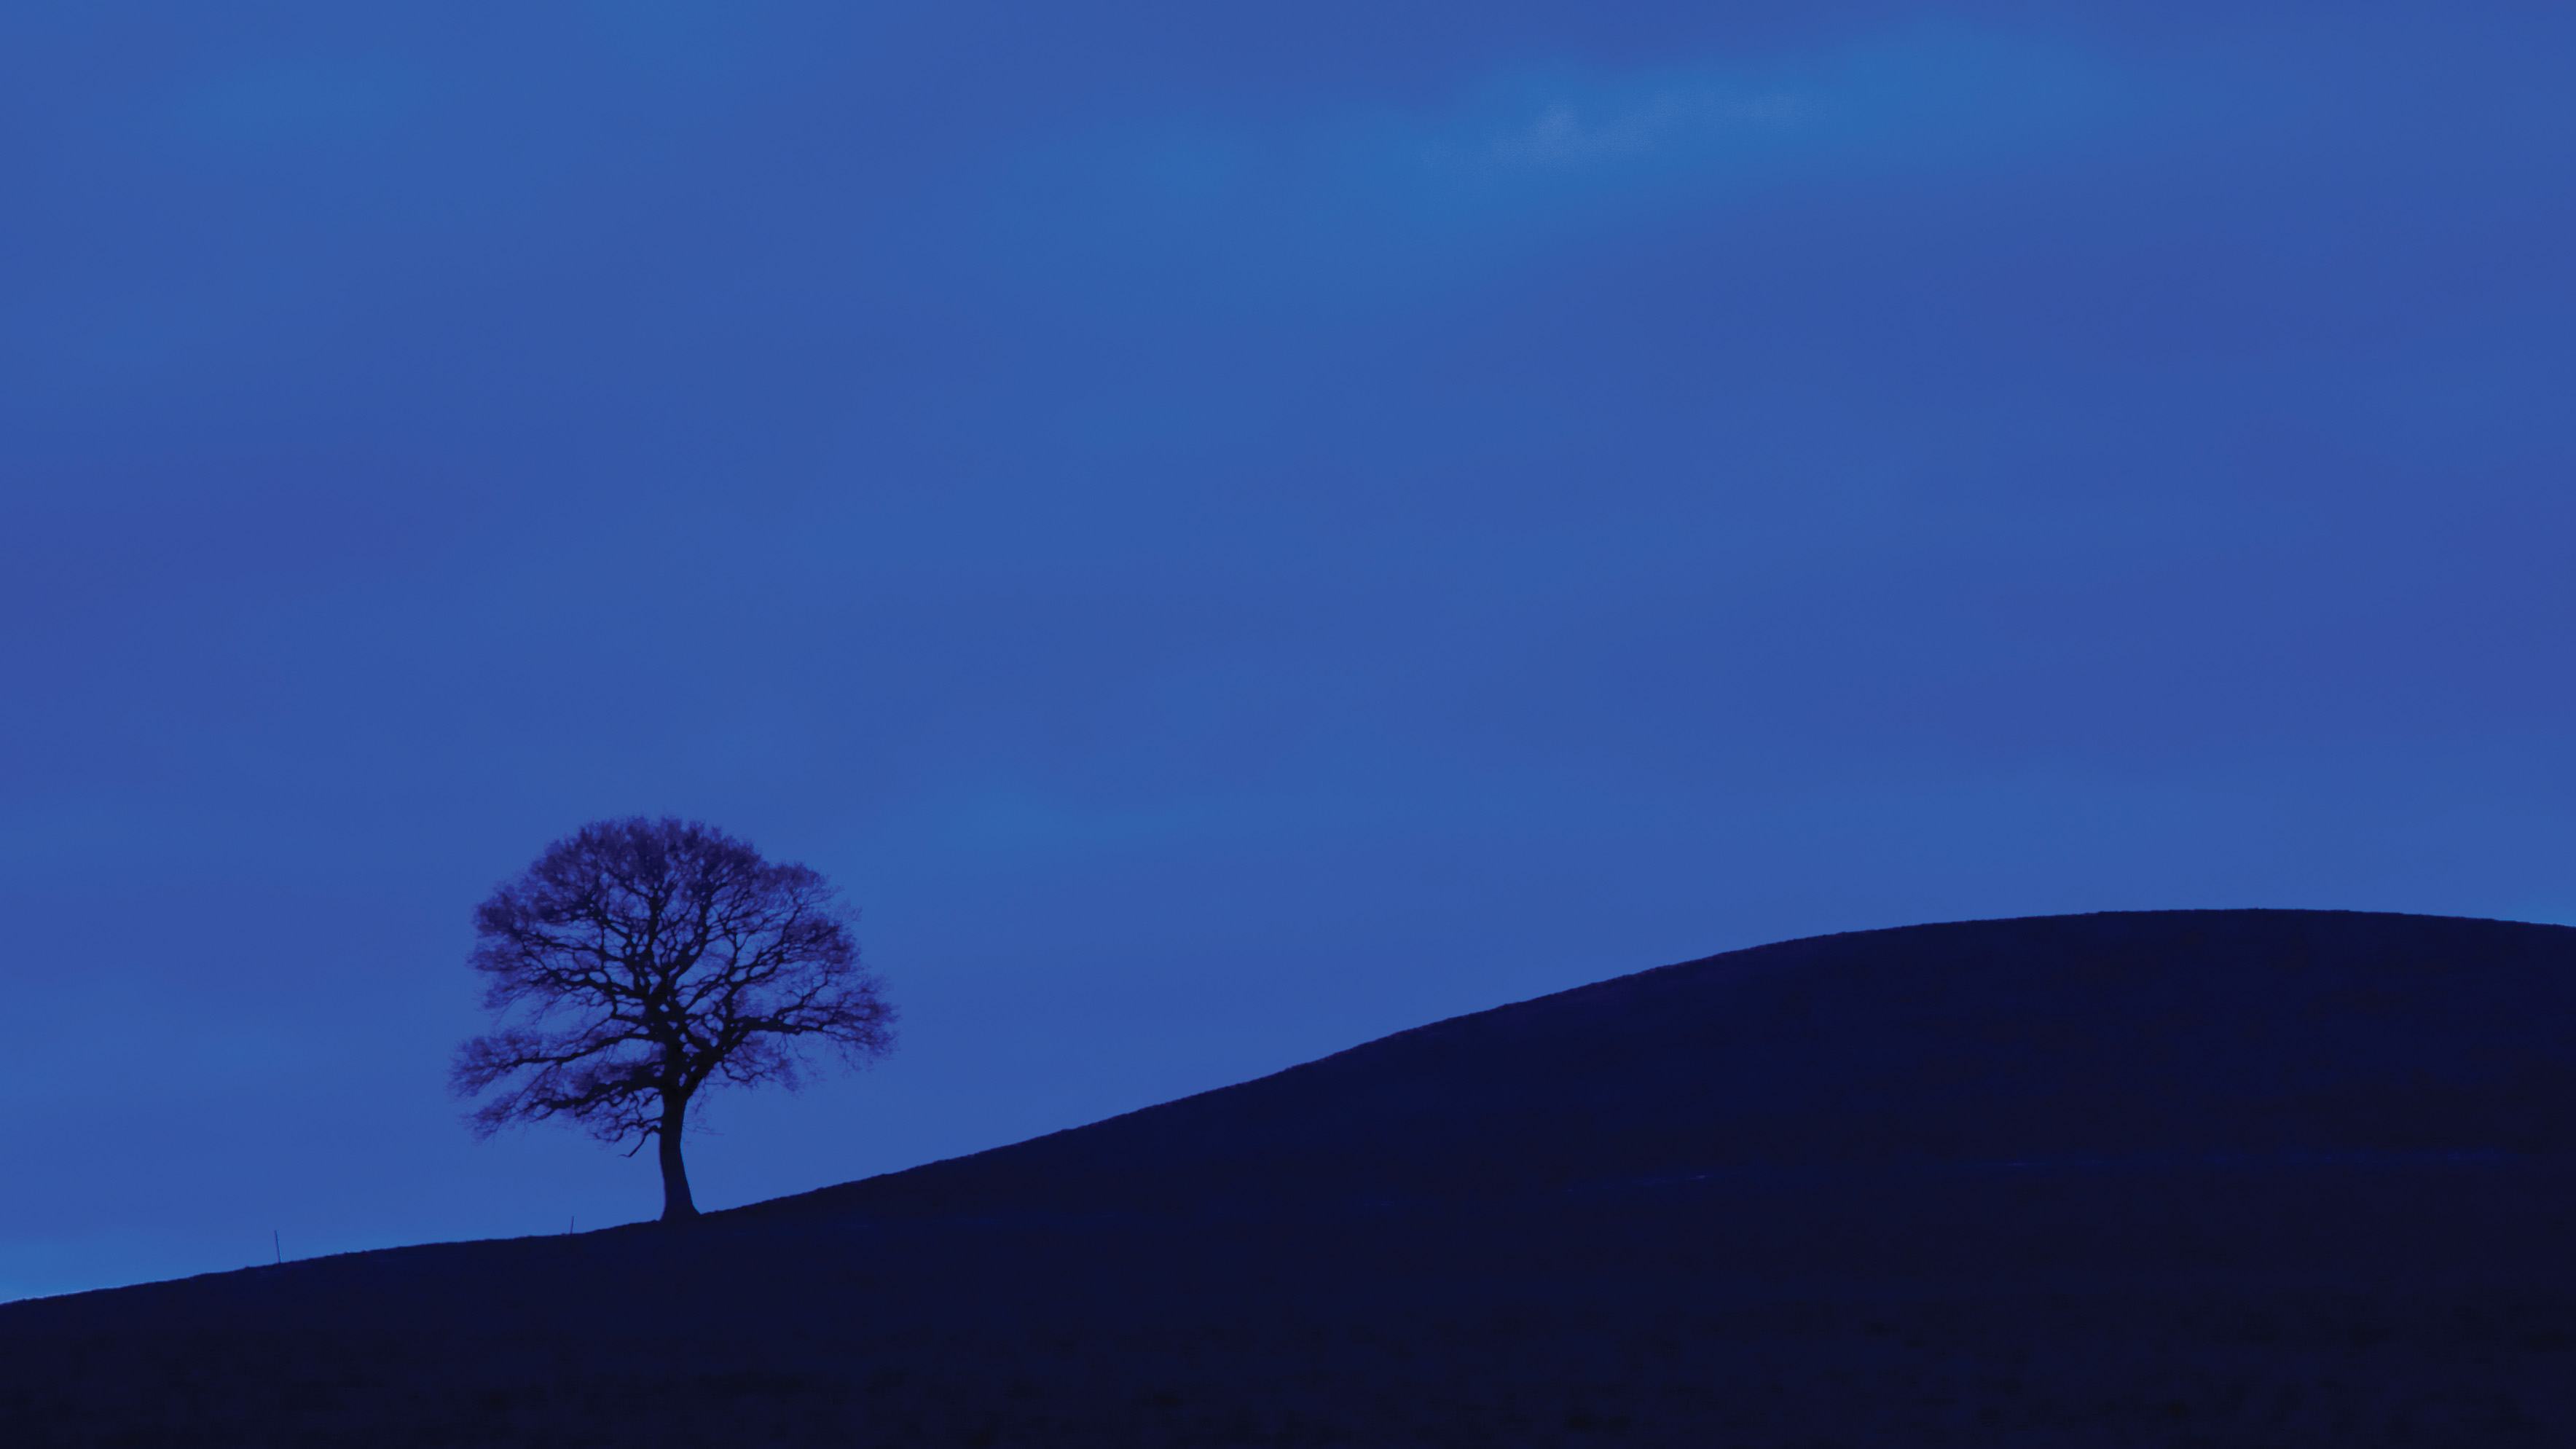
M is for Mock moonlight
What is it? ‘Mock moonlight’ or ‘day for night’ is an old television effect to give an impression of night without the expense. A daylight scene is shot using filters to give a strong blue tone. To do this with a digital SLR, simply set the white balance to Tungsten, then under-expose by setting exposure compensation of -2.
Special kit: None needed, but you can increase the effect by adding a blue-colored ‘cool down’ filter.
Shooting tips: For more a more realistic high-contrast night effect, shoot into the light. The sun can even be made to look like a full moon, if it is very low in the sky.
’
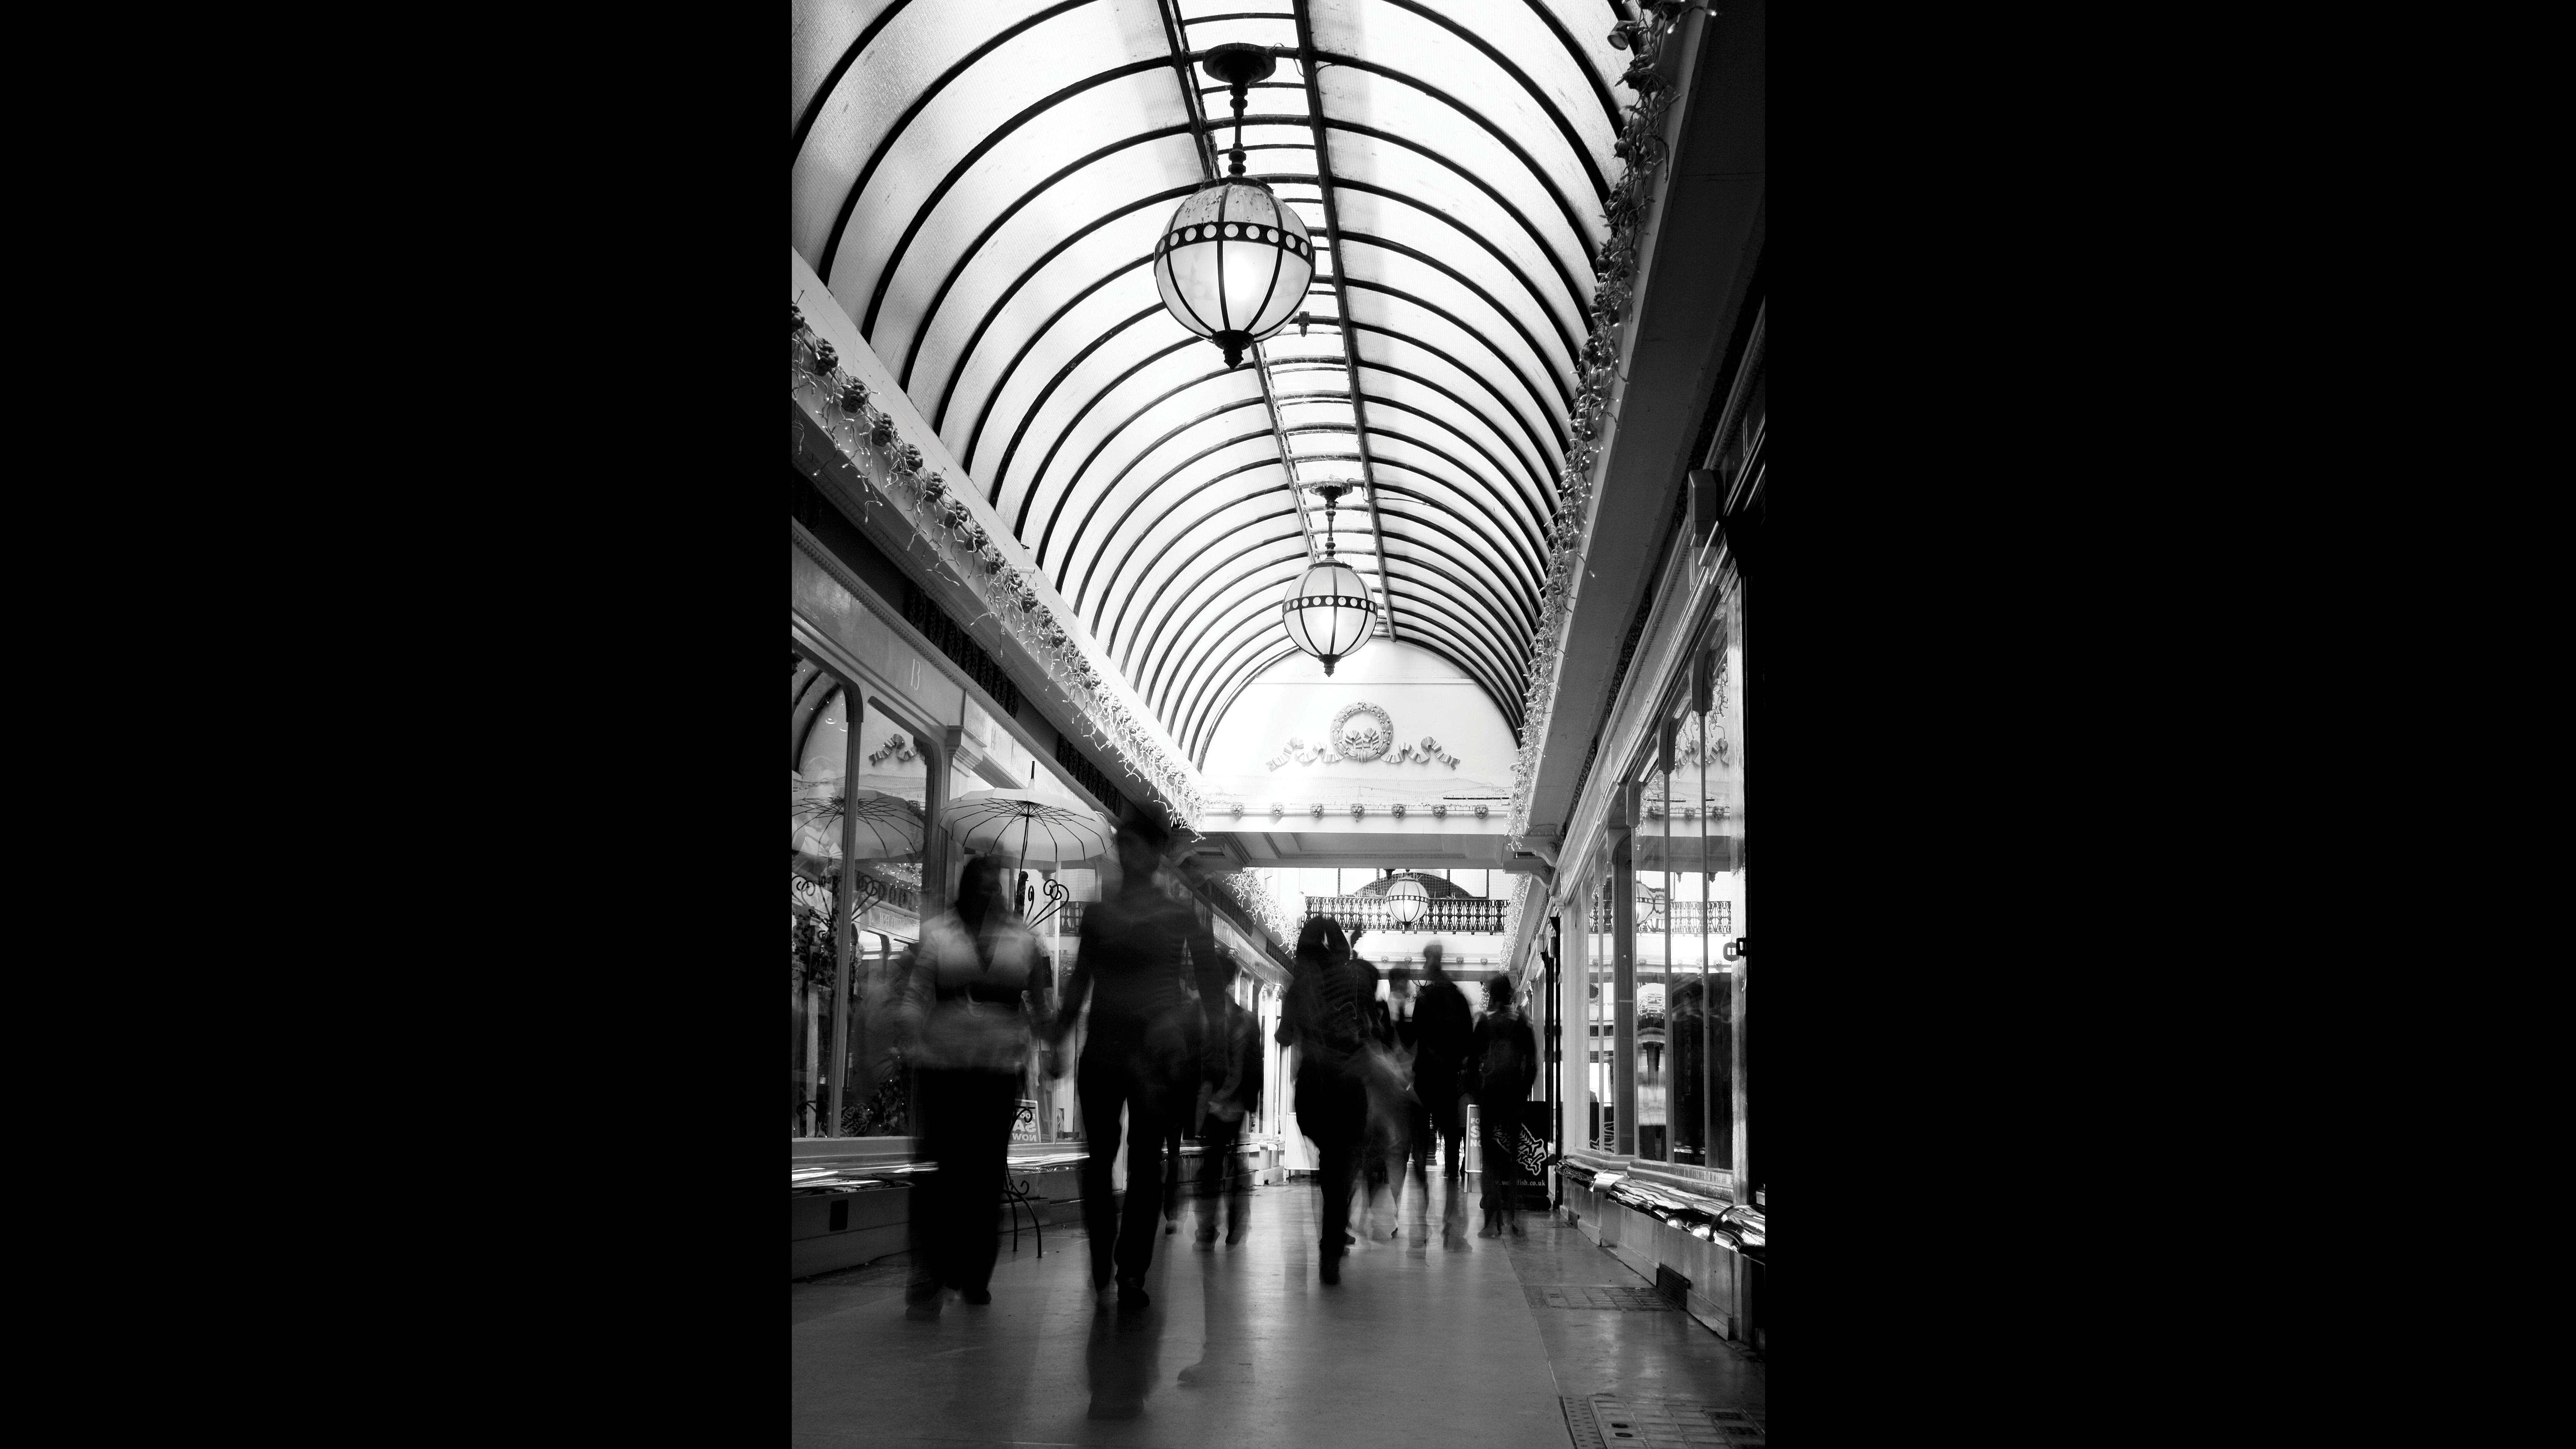
N is for Neutral Density
What is it? A Neutral Density or ND filter limits the light reaching your D-SLR’s sensor, enabling you to obtain slower shutter speeds to capture motion-blur effects – ideal when shooting in broad daylight at your narrowest available aperture results in shutter speeds too fast to capture a sense of movement.
Special kit: Try a three-stop ND filter (ND9); you may need to use two filters at once. B+W and Lee make a 10-stop ND filter. You’ll definitely need a tripod.
Shooting tips: Set shutter speed to 1 sec for slight movement or 10 secs for increased movement. A remote camera release will help you avoid nudging your camera.
See also: The best neutral density filters
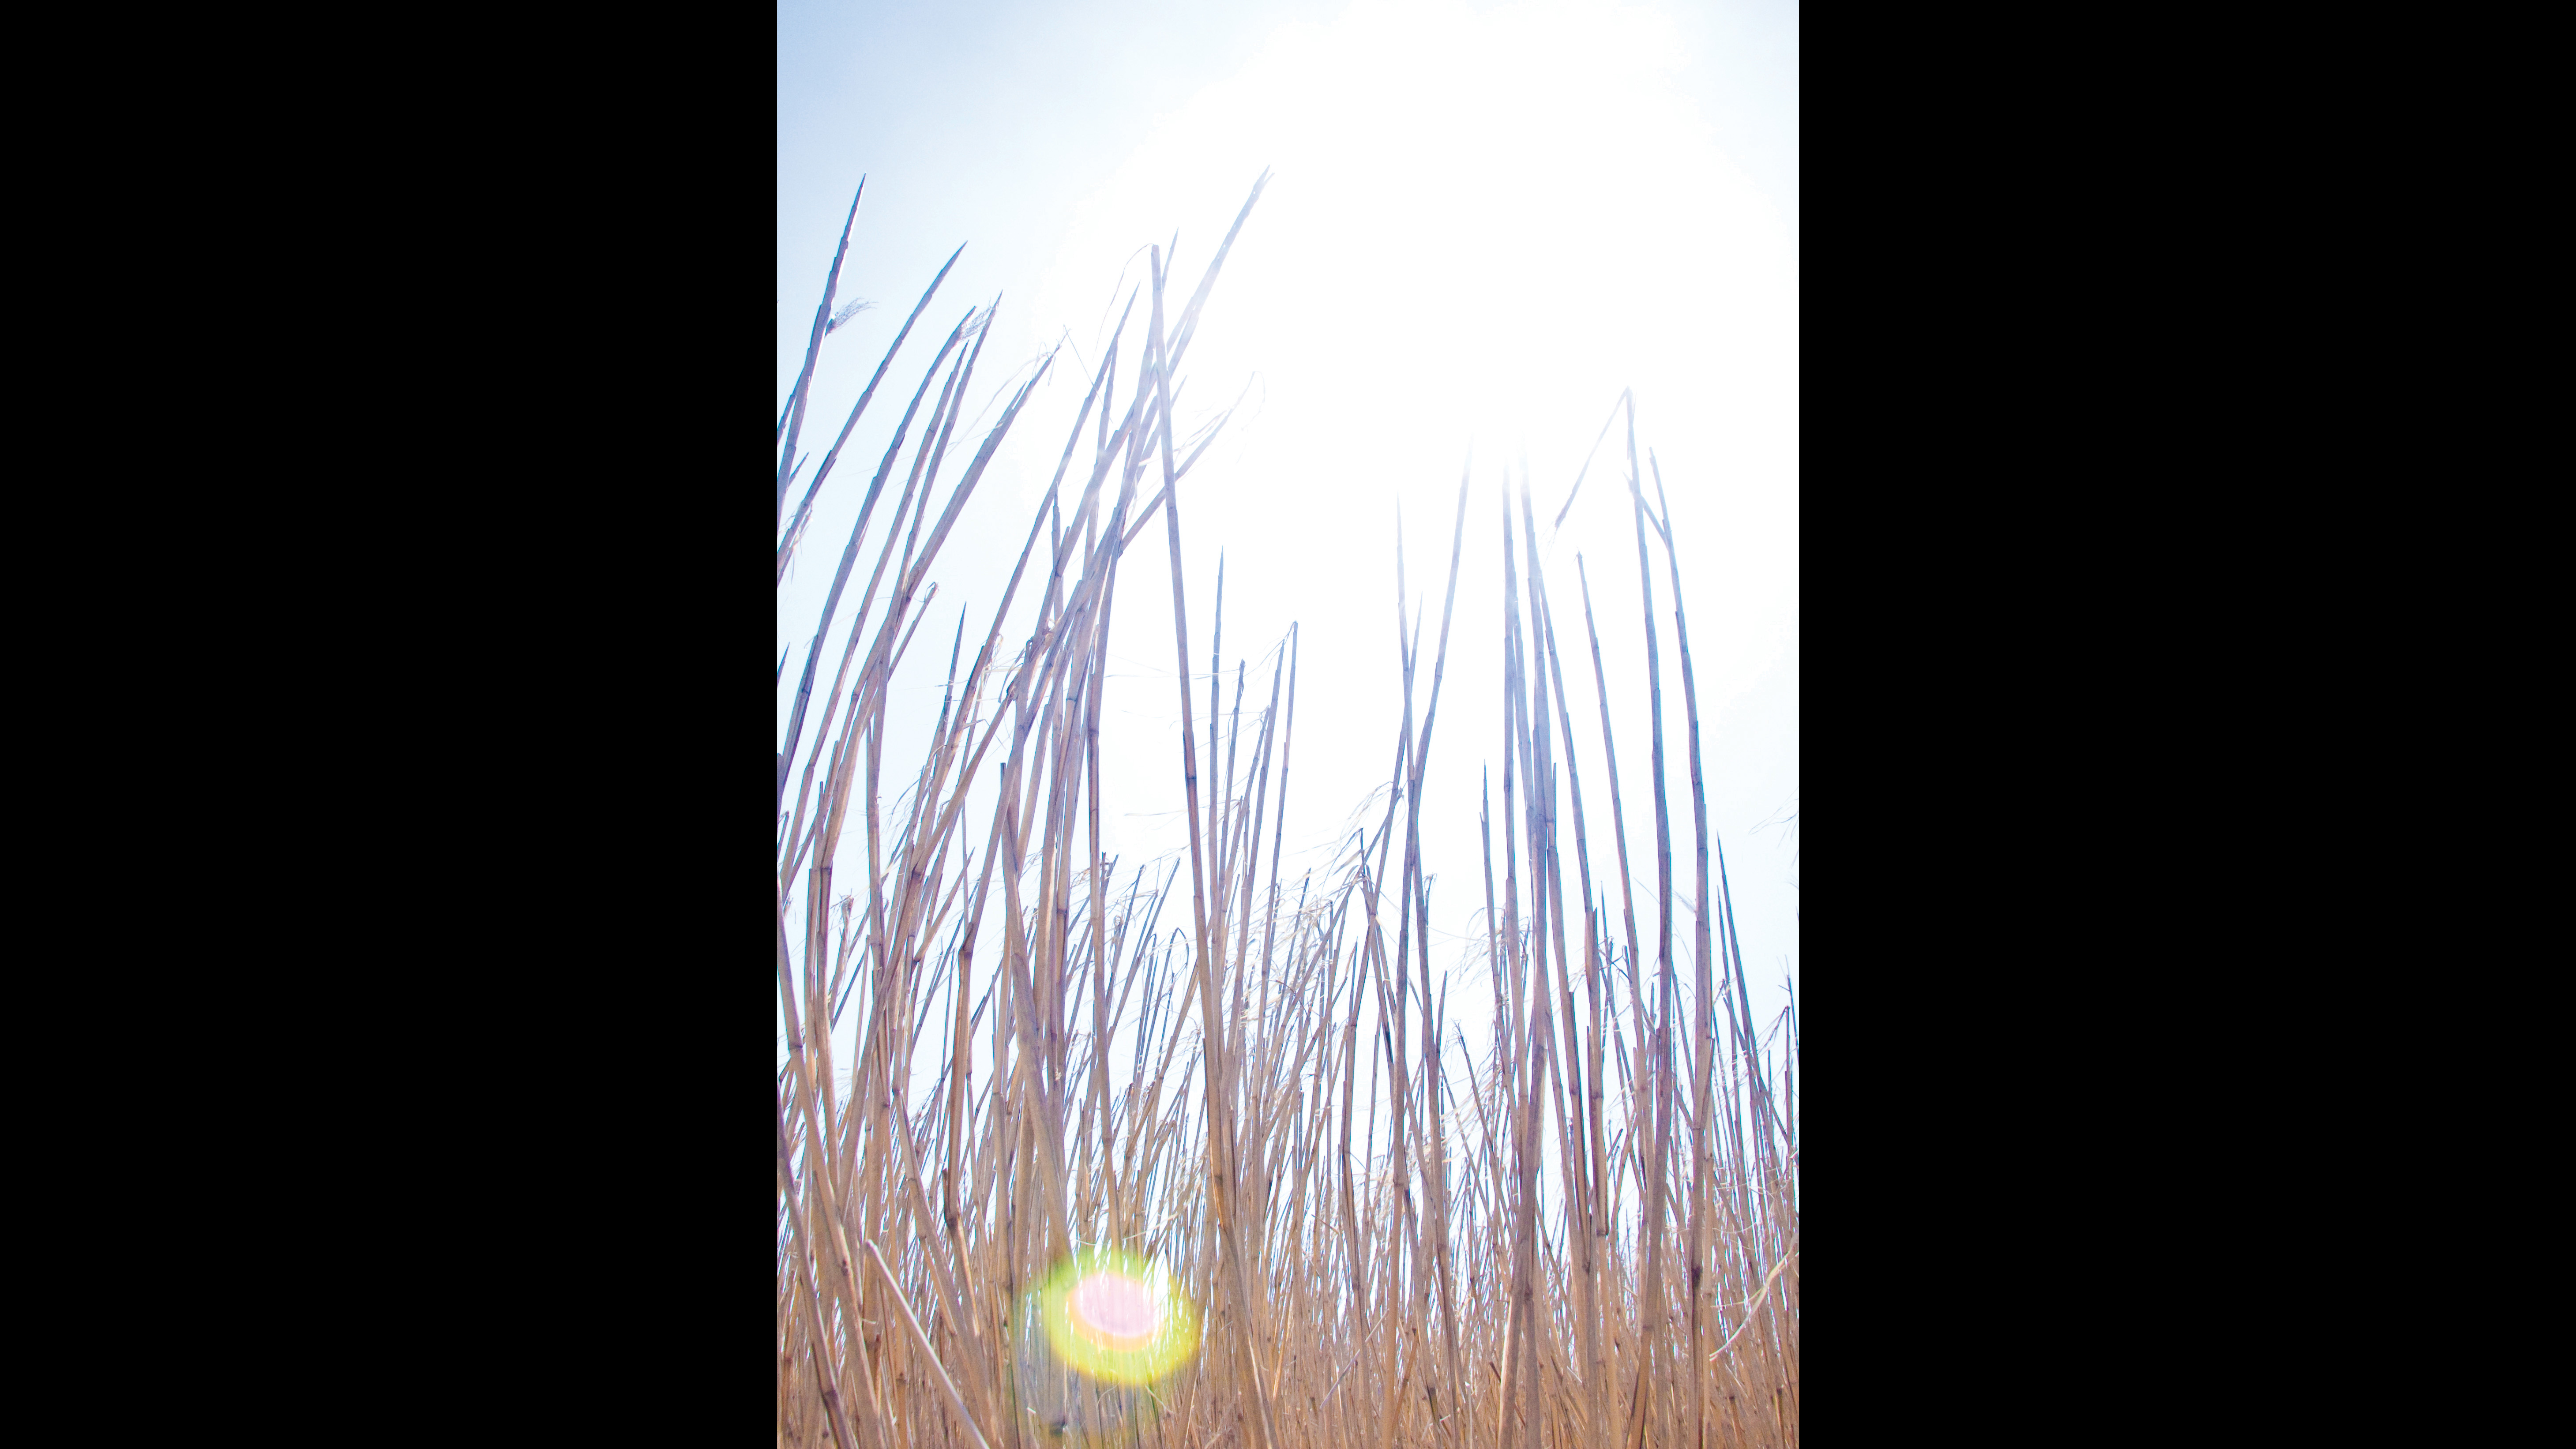
What is it? It may seem strange that we’re encouraging you to take overexposed shots on purpose, but it’s a great photographic effect to have in your skills arsenal. If used correctly you can end up with dreamy, ethereal images – and can make hot place actually look hot!
Special kit: None.
Shooting tips: It’s important to pick the right sort of subject or scene that will lend itself to being over-exposed; look for light tones and shoot when the sun is low in the sky. Shoot in Av (Aperture Priority) mode and use exposure compensation to dial in +1 or +2 stops of extra exposure to brighten up your results. Shooting well-lit scenes or straight into the sun will enhance this effect.
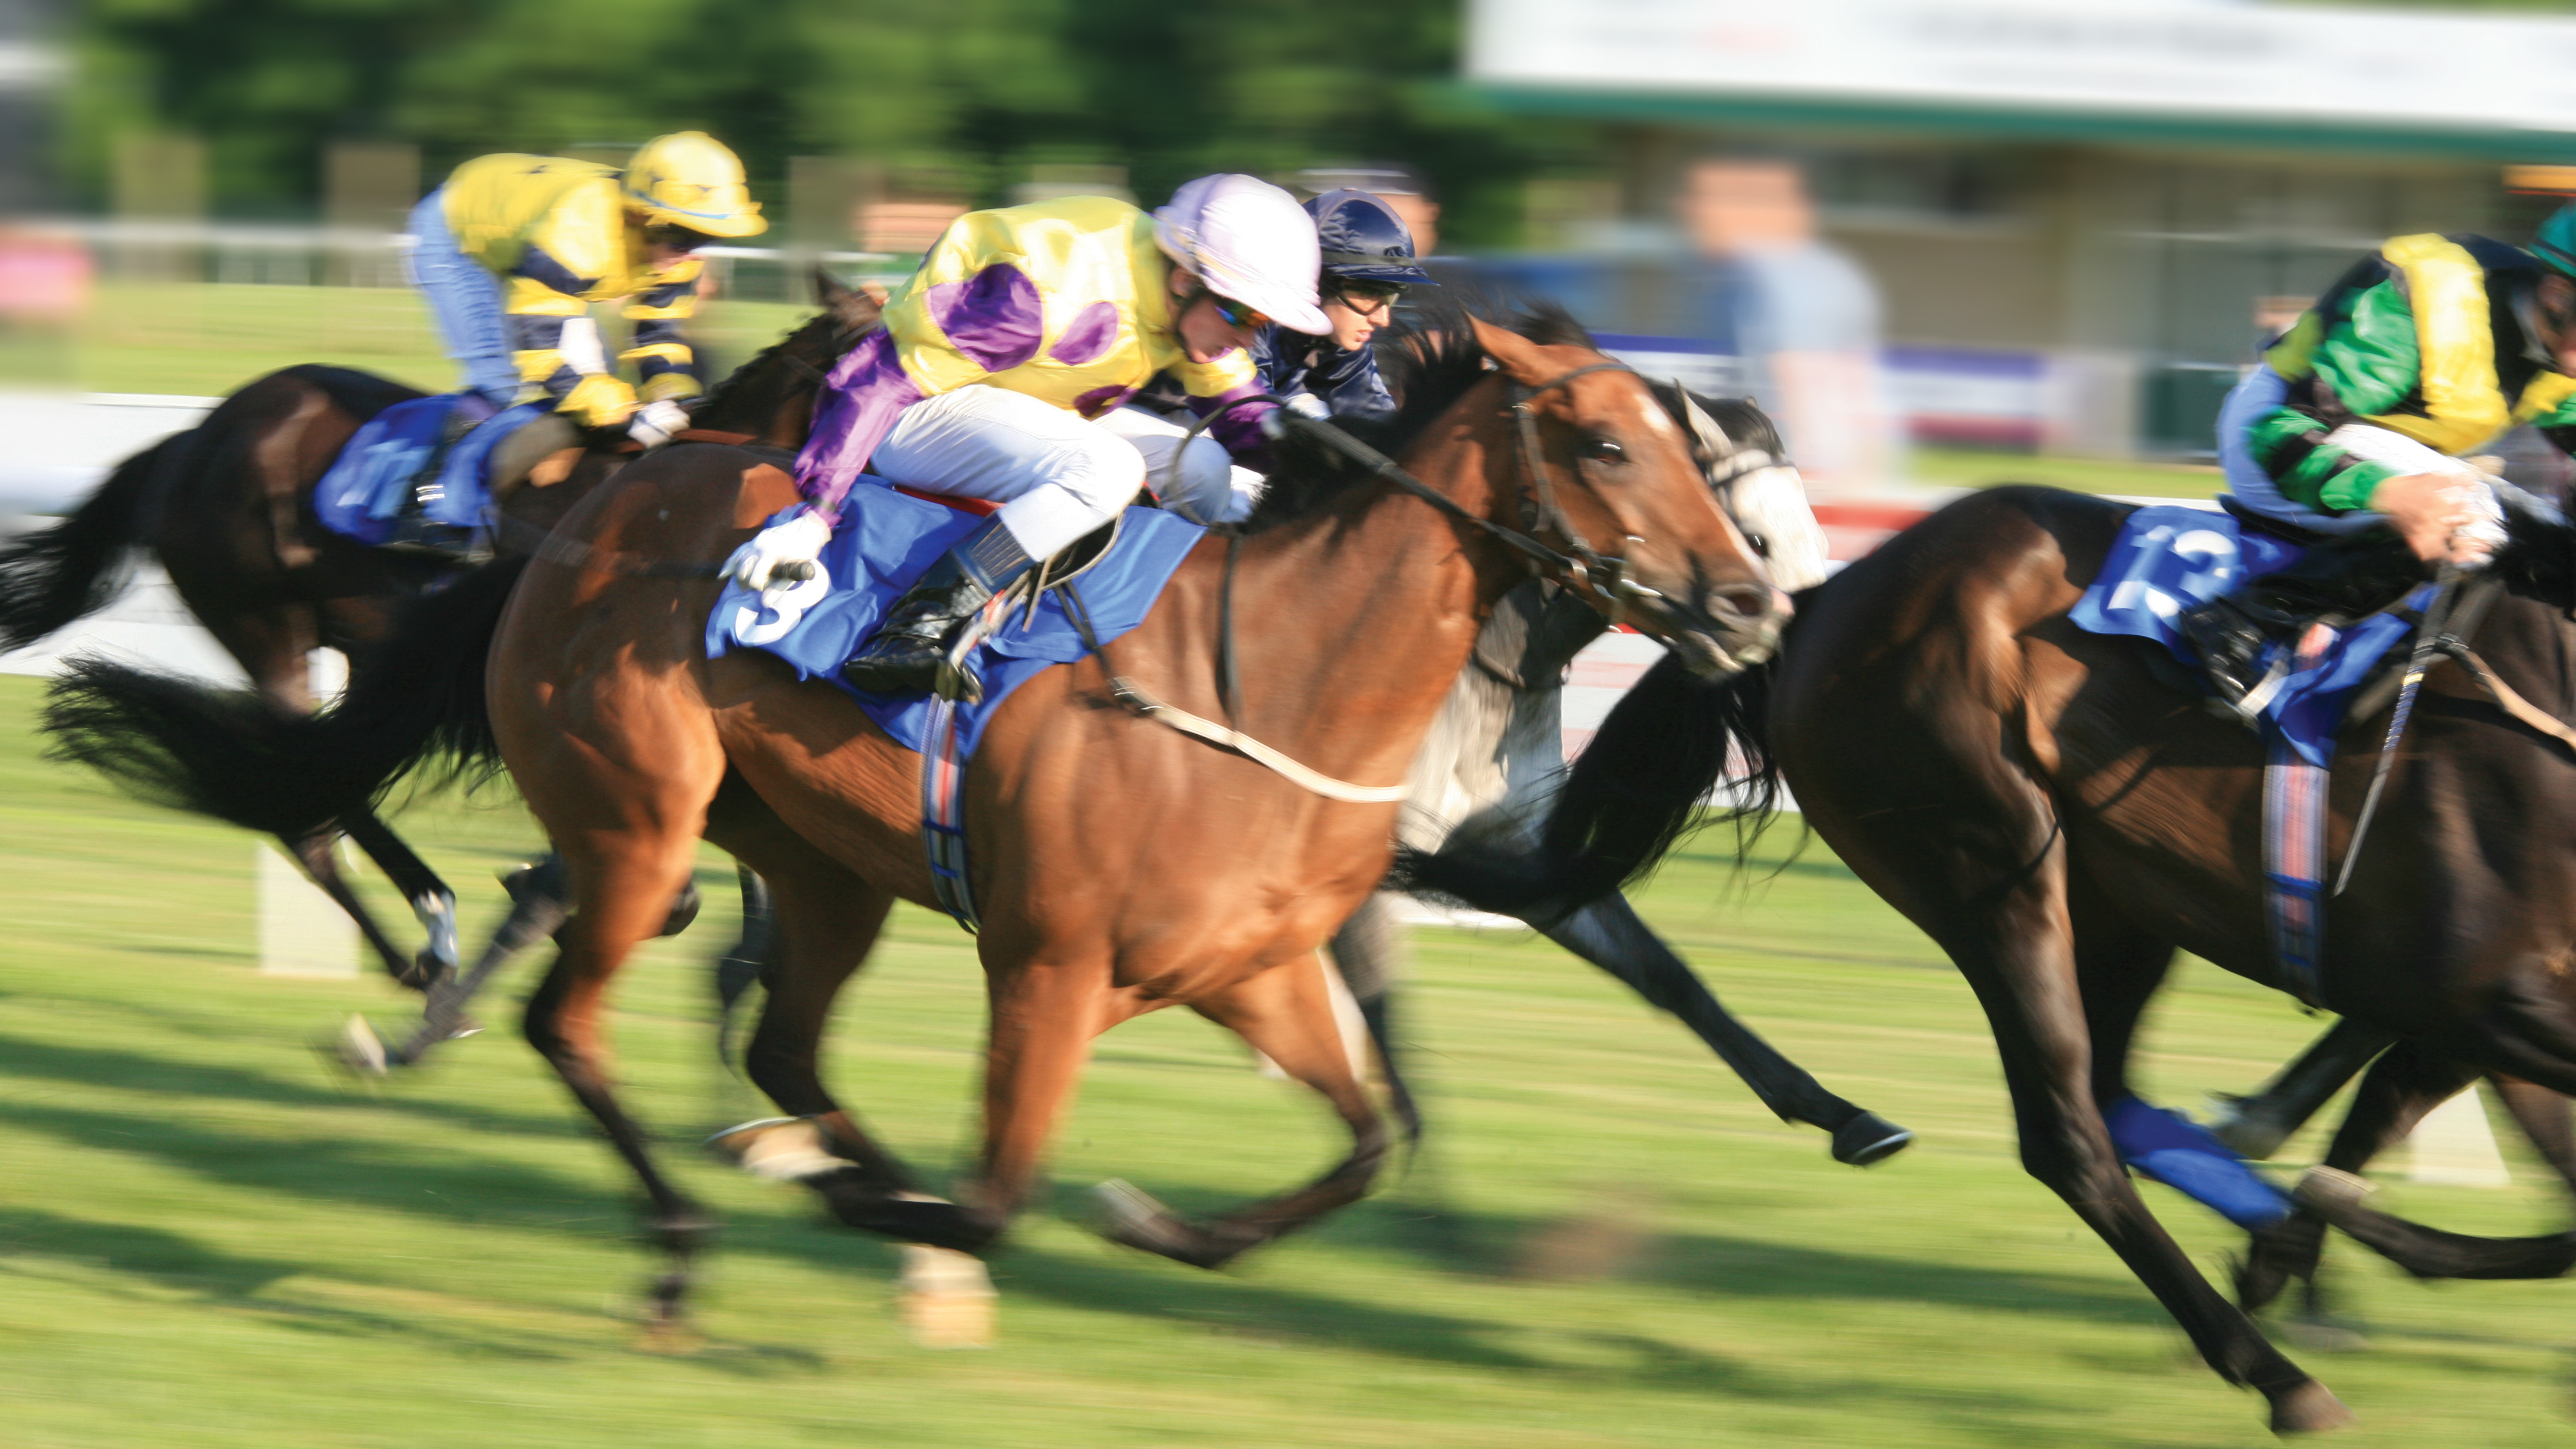
P is for Panning
What is it? Panning is a method of capturing a sense of movement by tracking a subject with a slow shutter speed as it moves past you. It works superbly when photographing action sports to emphasize the speed of motion.
Special kit: Monopod (optional)
Shooting tips: Set a slow shutter speed of around 1/40-1/100 sec. Switch to your Continuous Shooting mode. Track your subjects using the AI Servo autofocus mode, pivoting in a smooth 180º arc, shooting continuously as your subjects whizz past. A monopod can help produce smoother results.’
’

Q is for QuickTime
What is it? A QuickTime Virtual Reality movie is a way of combining multiple images to create a seamless 360º panorama that can be toggled left or right to provide a virtual tour of a scene. They are popular with museums.
Special kit: QuickTime player and some movie creation software, like Pano2VR.
Shooting tips: You need to shoot a series of source images that can be merged seamlessly to produce a two-dimensional panorama. The key to getting seamless panoramas is to use a tripod, keep your camera level for every shot and overlap images by at least 30%.
See also: The best 360 cameras
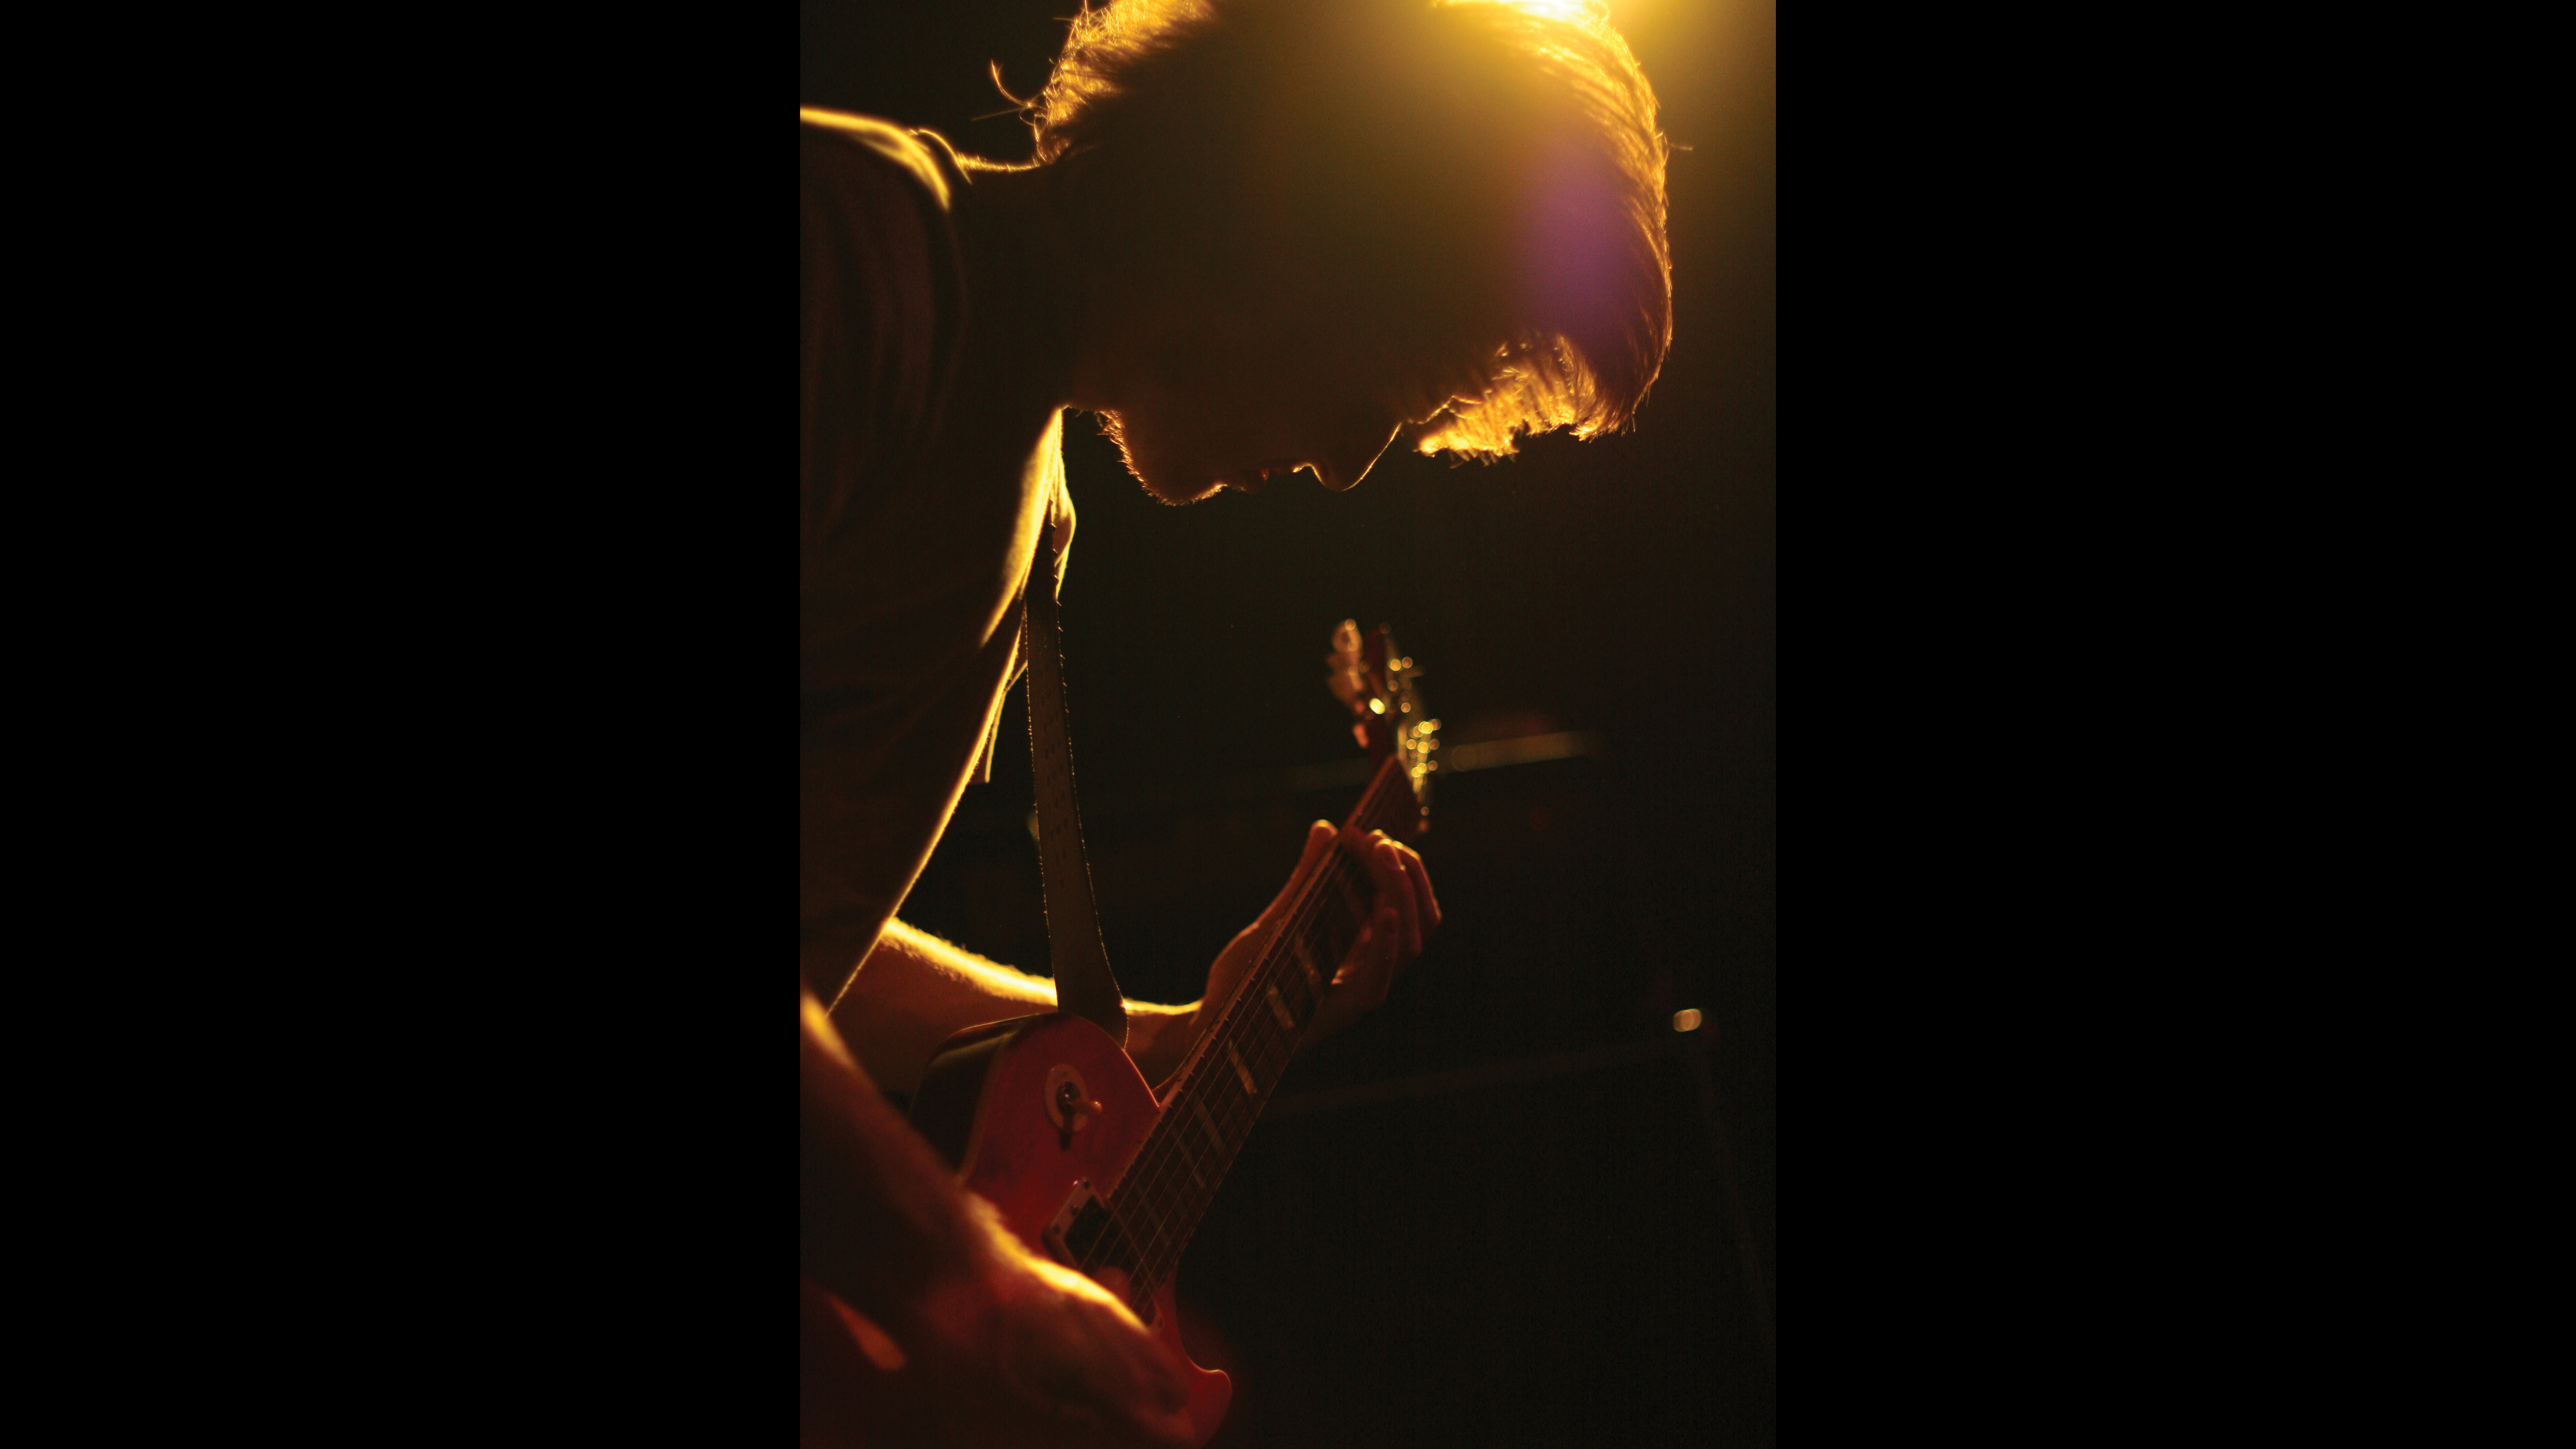
R is for Rim light
What is it? Rim light illuminates a subject from behind, often to make the subject stand out from the background, but sometimes to bring out detail in otherwise-hidden areas. Rim lighting can occur naturally from the sun or other ambient light, or can be created in a studio. It is particularly useful for lighting hair.
Special kit: If shooting in a studio, you may want to use a single modeling light.
Shooting tips: To avoid lens flare and lower contrast, rim lighting should be used behind the subject, slightly higher than the camera. It helps if your subject is blocking the light entirely, but you can use a shade to assist.
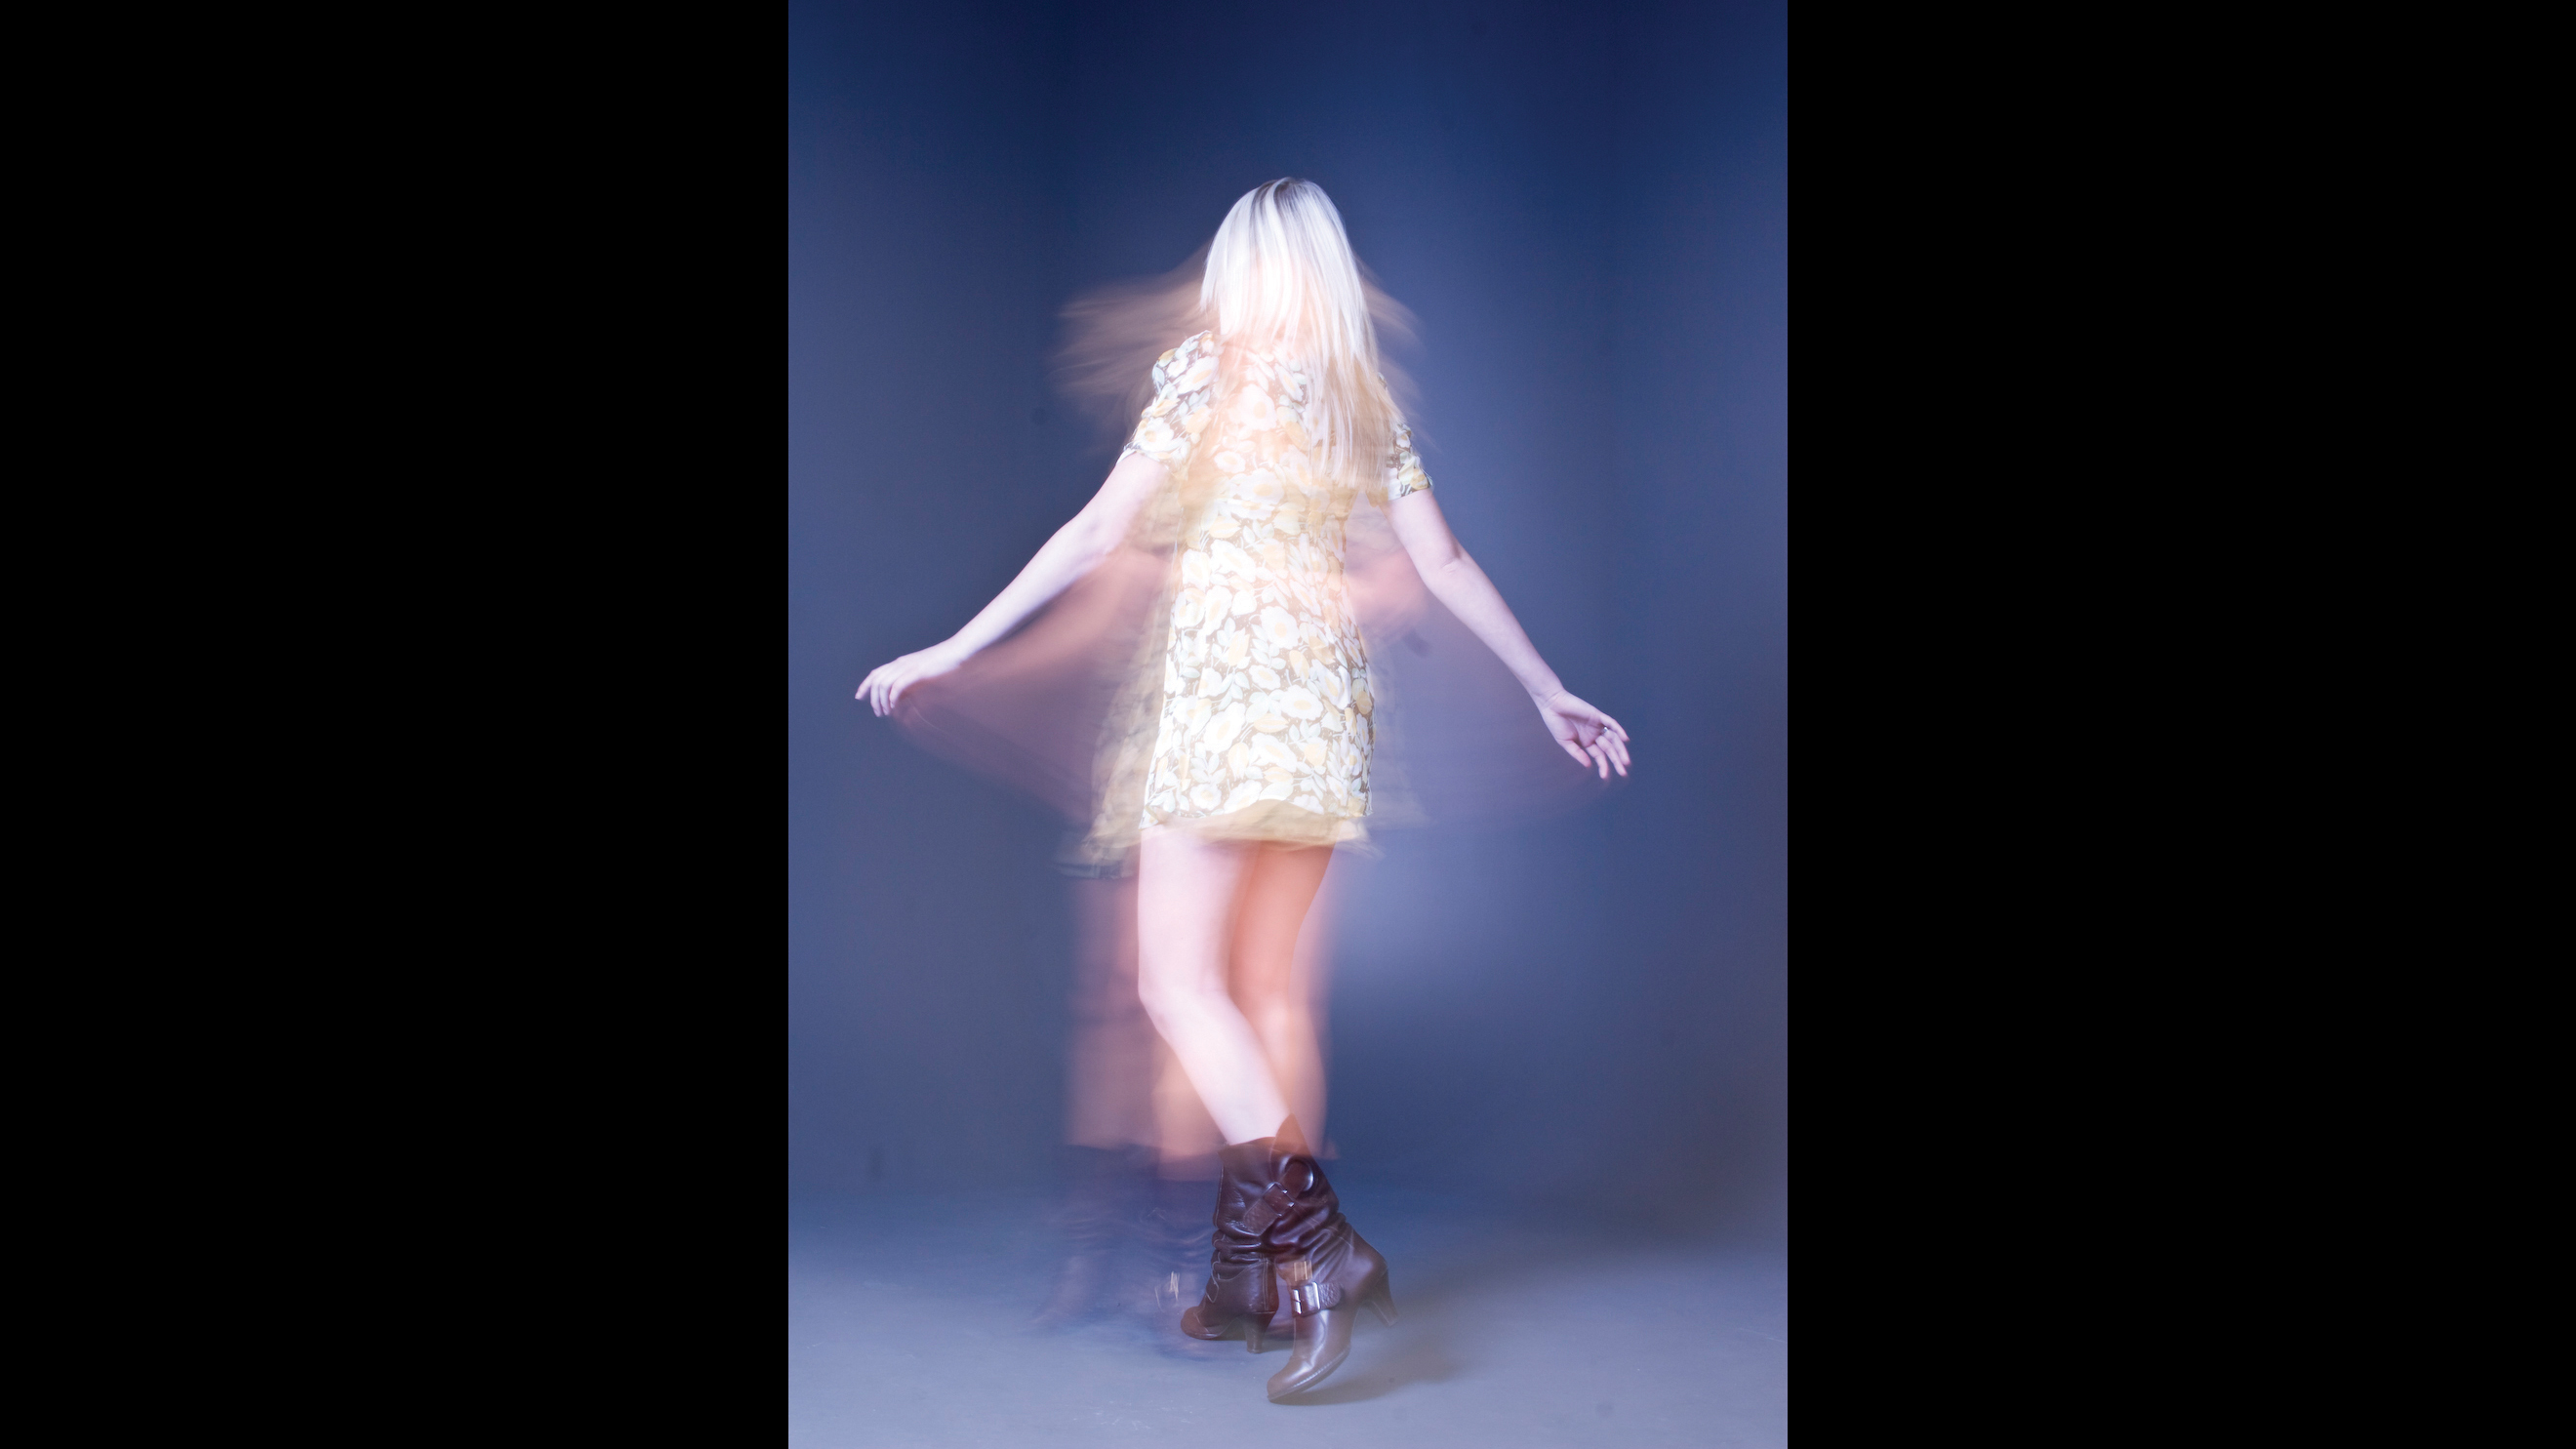
S is for Slow-sync flash
What is it? Shooting with flash is often used to freeze movement, but can also be used to capture motion blur if used with a slower shutter speed by freeze-framing your subject while the longer exposure gives them a ghostly trail.
Special kit: Flashgun, tripod.
Shooting tips: Switch to Manual mode and use a shutter speed of 1/4 to 1 sec, depending on how fast your subject is moving, adjusting your aperture for an even exposure. Normally your flash fires at the start of your exposure (known as 1st Curtain Sync) – switch to 2nd Curtain Sync to fire the flash at the end of the exposure.’
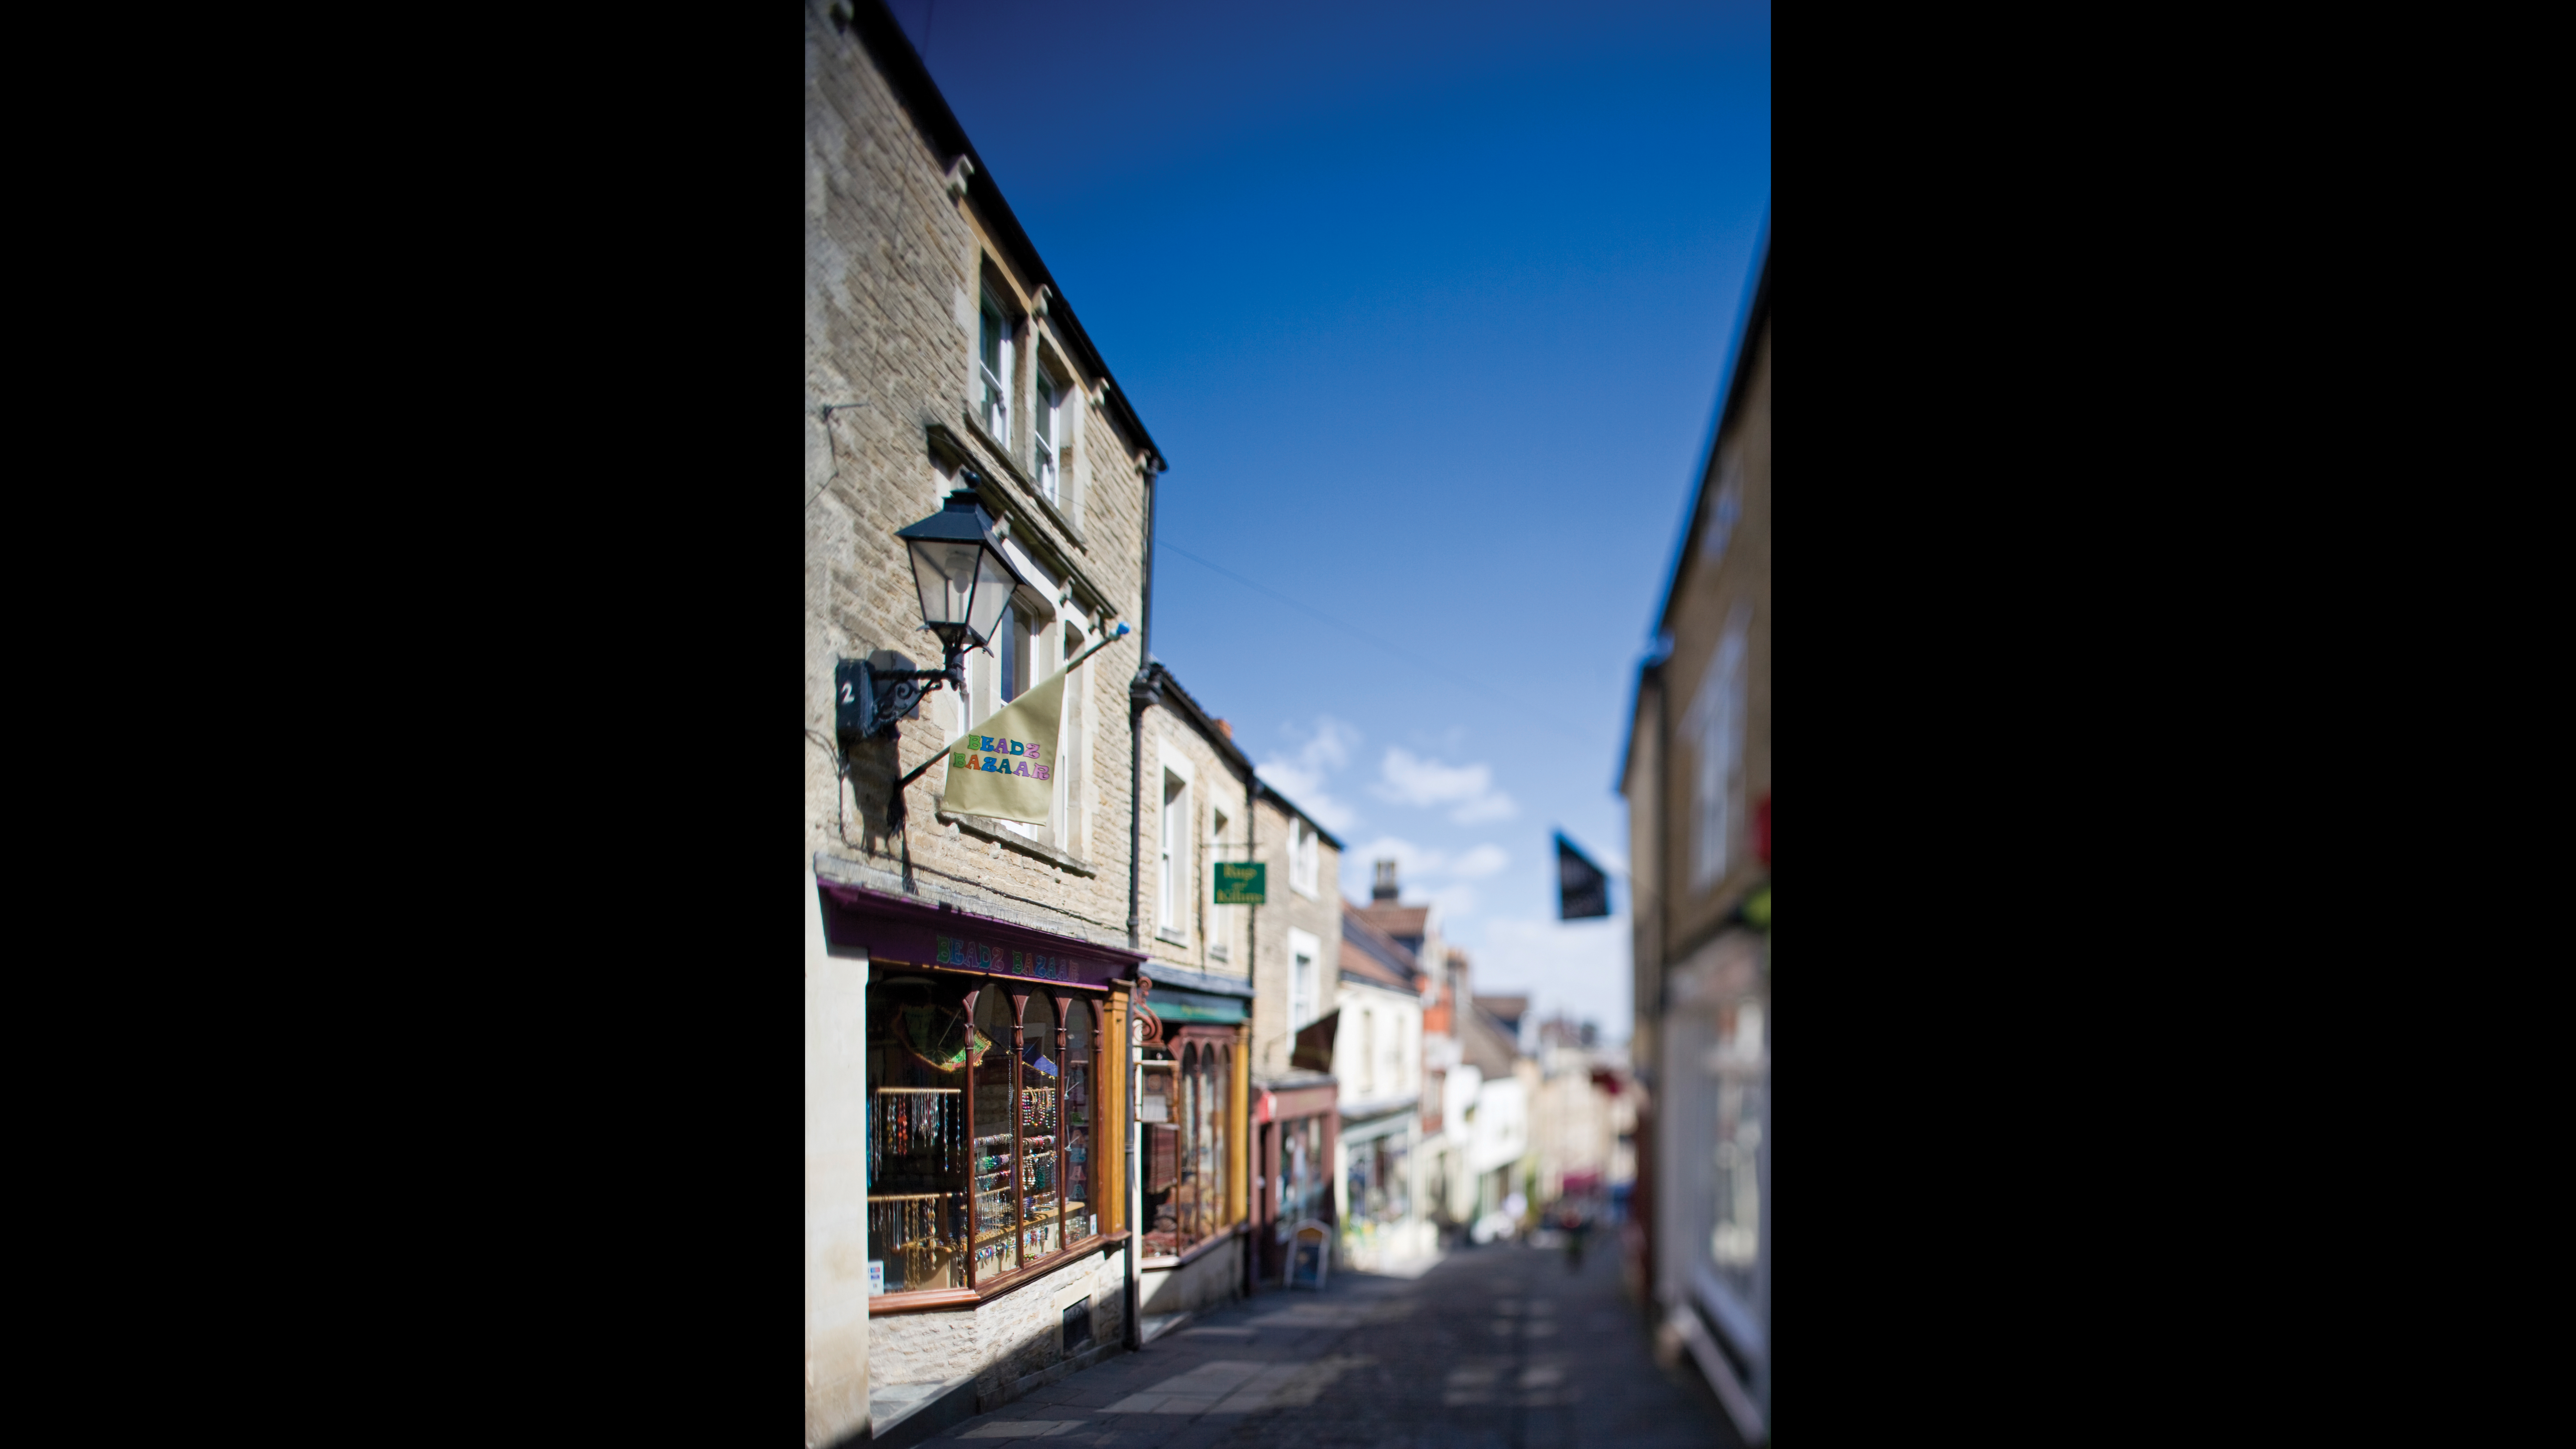
T is for Tilt-shift
What is it? Tilt-shift lenses are used in architecture for photographing tall buildings without converging verticals. Used creatively, they can be used to selectively focus on a very narrow slice of a scene, which can make real-world scenes look like tiny models.
Special kit: Tilt shift lenses tend to be relatively expensive bits of kit, but you can (like many pros) simply hire one for when you actually need one.
Shooting tips: Get high up and set an extreme degree of horizontal tilt. Use a wide aperture so the foreground and background are thrown out of focus.
See also: Best tilt-shift lenses in 2020
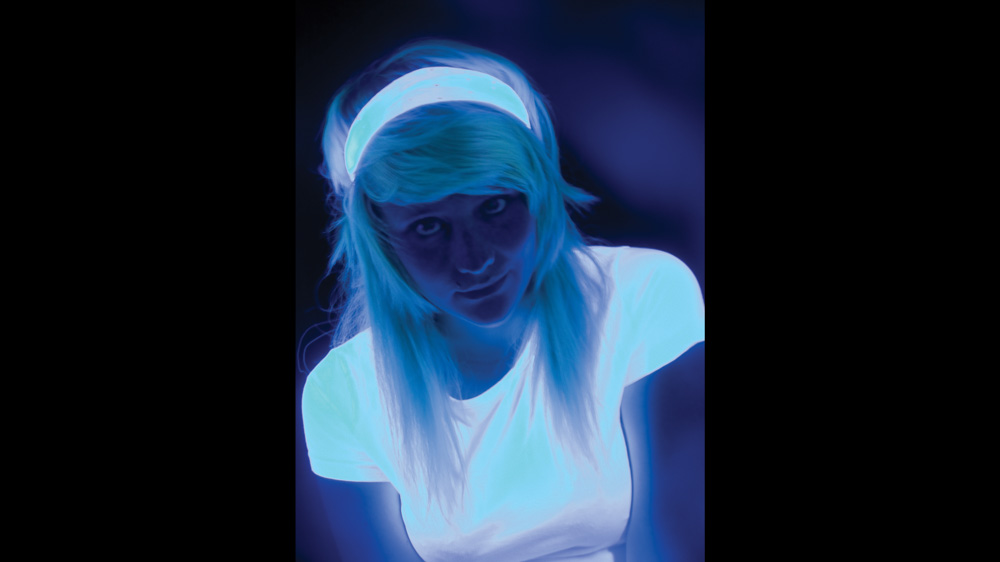
What is UV?
What is it? UV lamps or ‘dark lights’ are popular in nightclubs, their peculiar purple lighting making white clothes and other things glow in the dark. This effect can be captured with your D-SLR. The output from these lights is low, so if photographing people turn up your ISO to around 1000, use a tripod, and get your subjects to stay still.
Special kit: We used two UV dark lights designed for night clubs; you can also buy black-light bulbs.
Shooting tips: It can be hard to predict which materials show up best in UV light. White man-made fibers and fluoro plastics work well – but experiment as you can get unexpected successes (tonic water is very effective, for instance).
‘
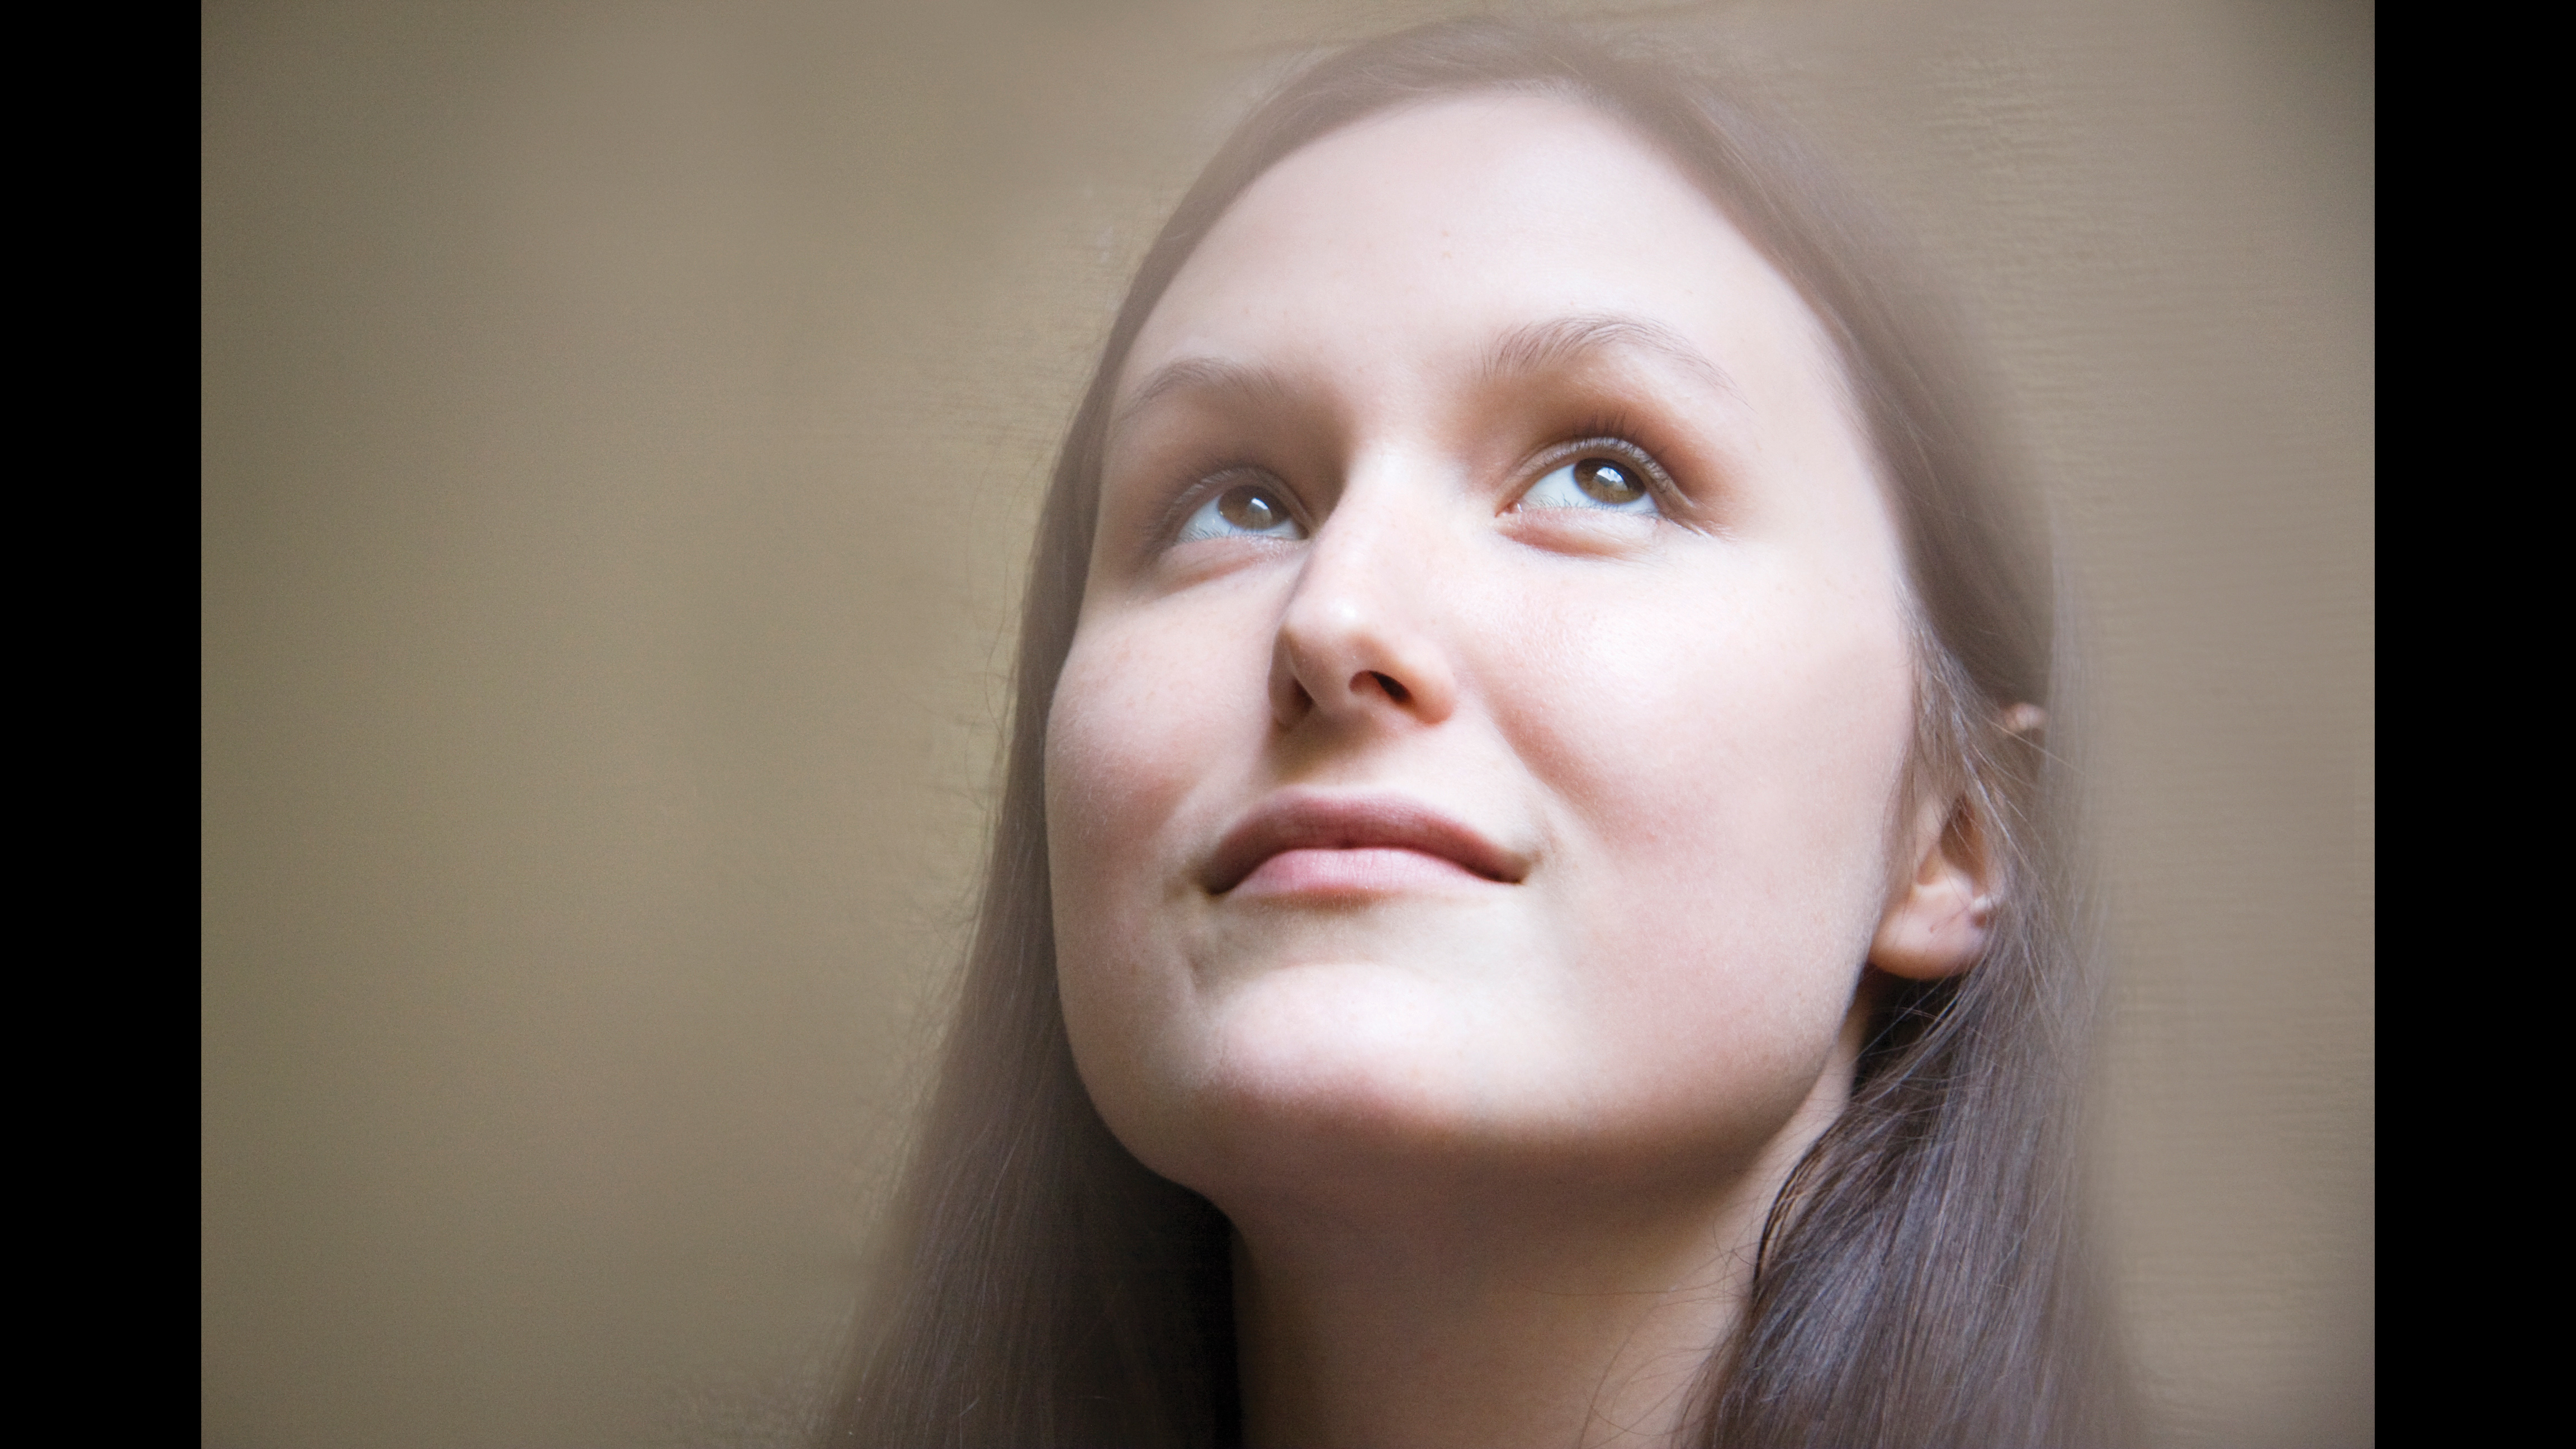
V is for Vaseline
What is it? An old-fashioned, rather crude way of producing softer shots was to coat the end of a lens with Vaseline (or petroleum jelly). It was popular with portrait photographers back in the day, and can also be used to create softness around your subjects for an artistic, romantic effect.
Special kit: A pot of petroleum jelly and a filter.
Shooting tips: Do not rub Vaseline straight onto you lens! First attach a UV or skylight filter, then use a tissue to smoothly apply a thin film over the filter, leaving a clear area in the middle.’
See also: the best protection filters for lenses
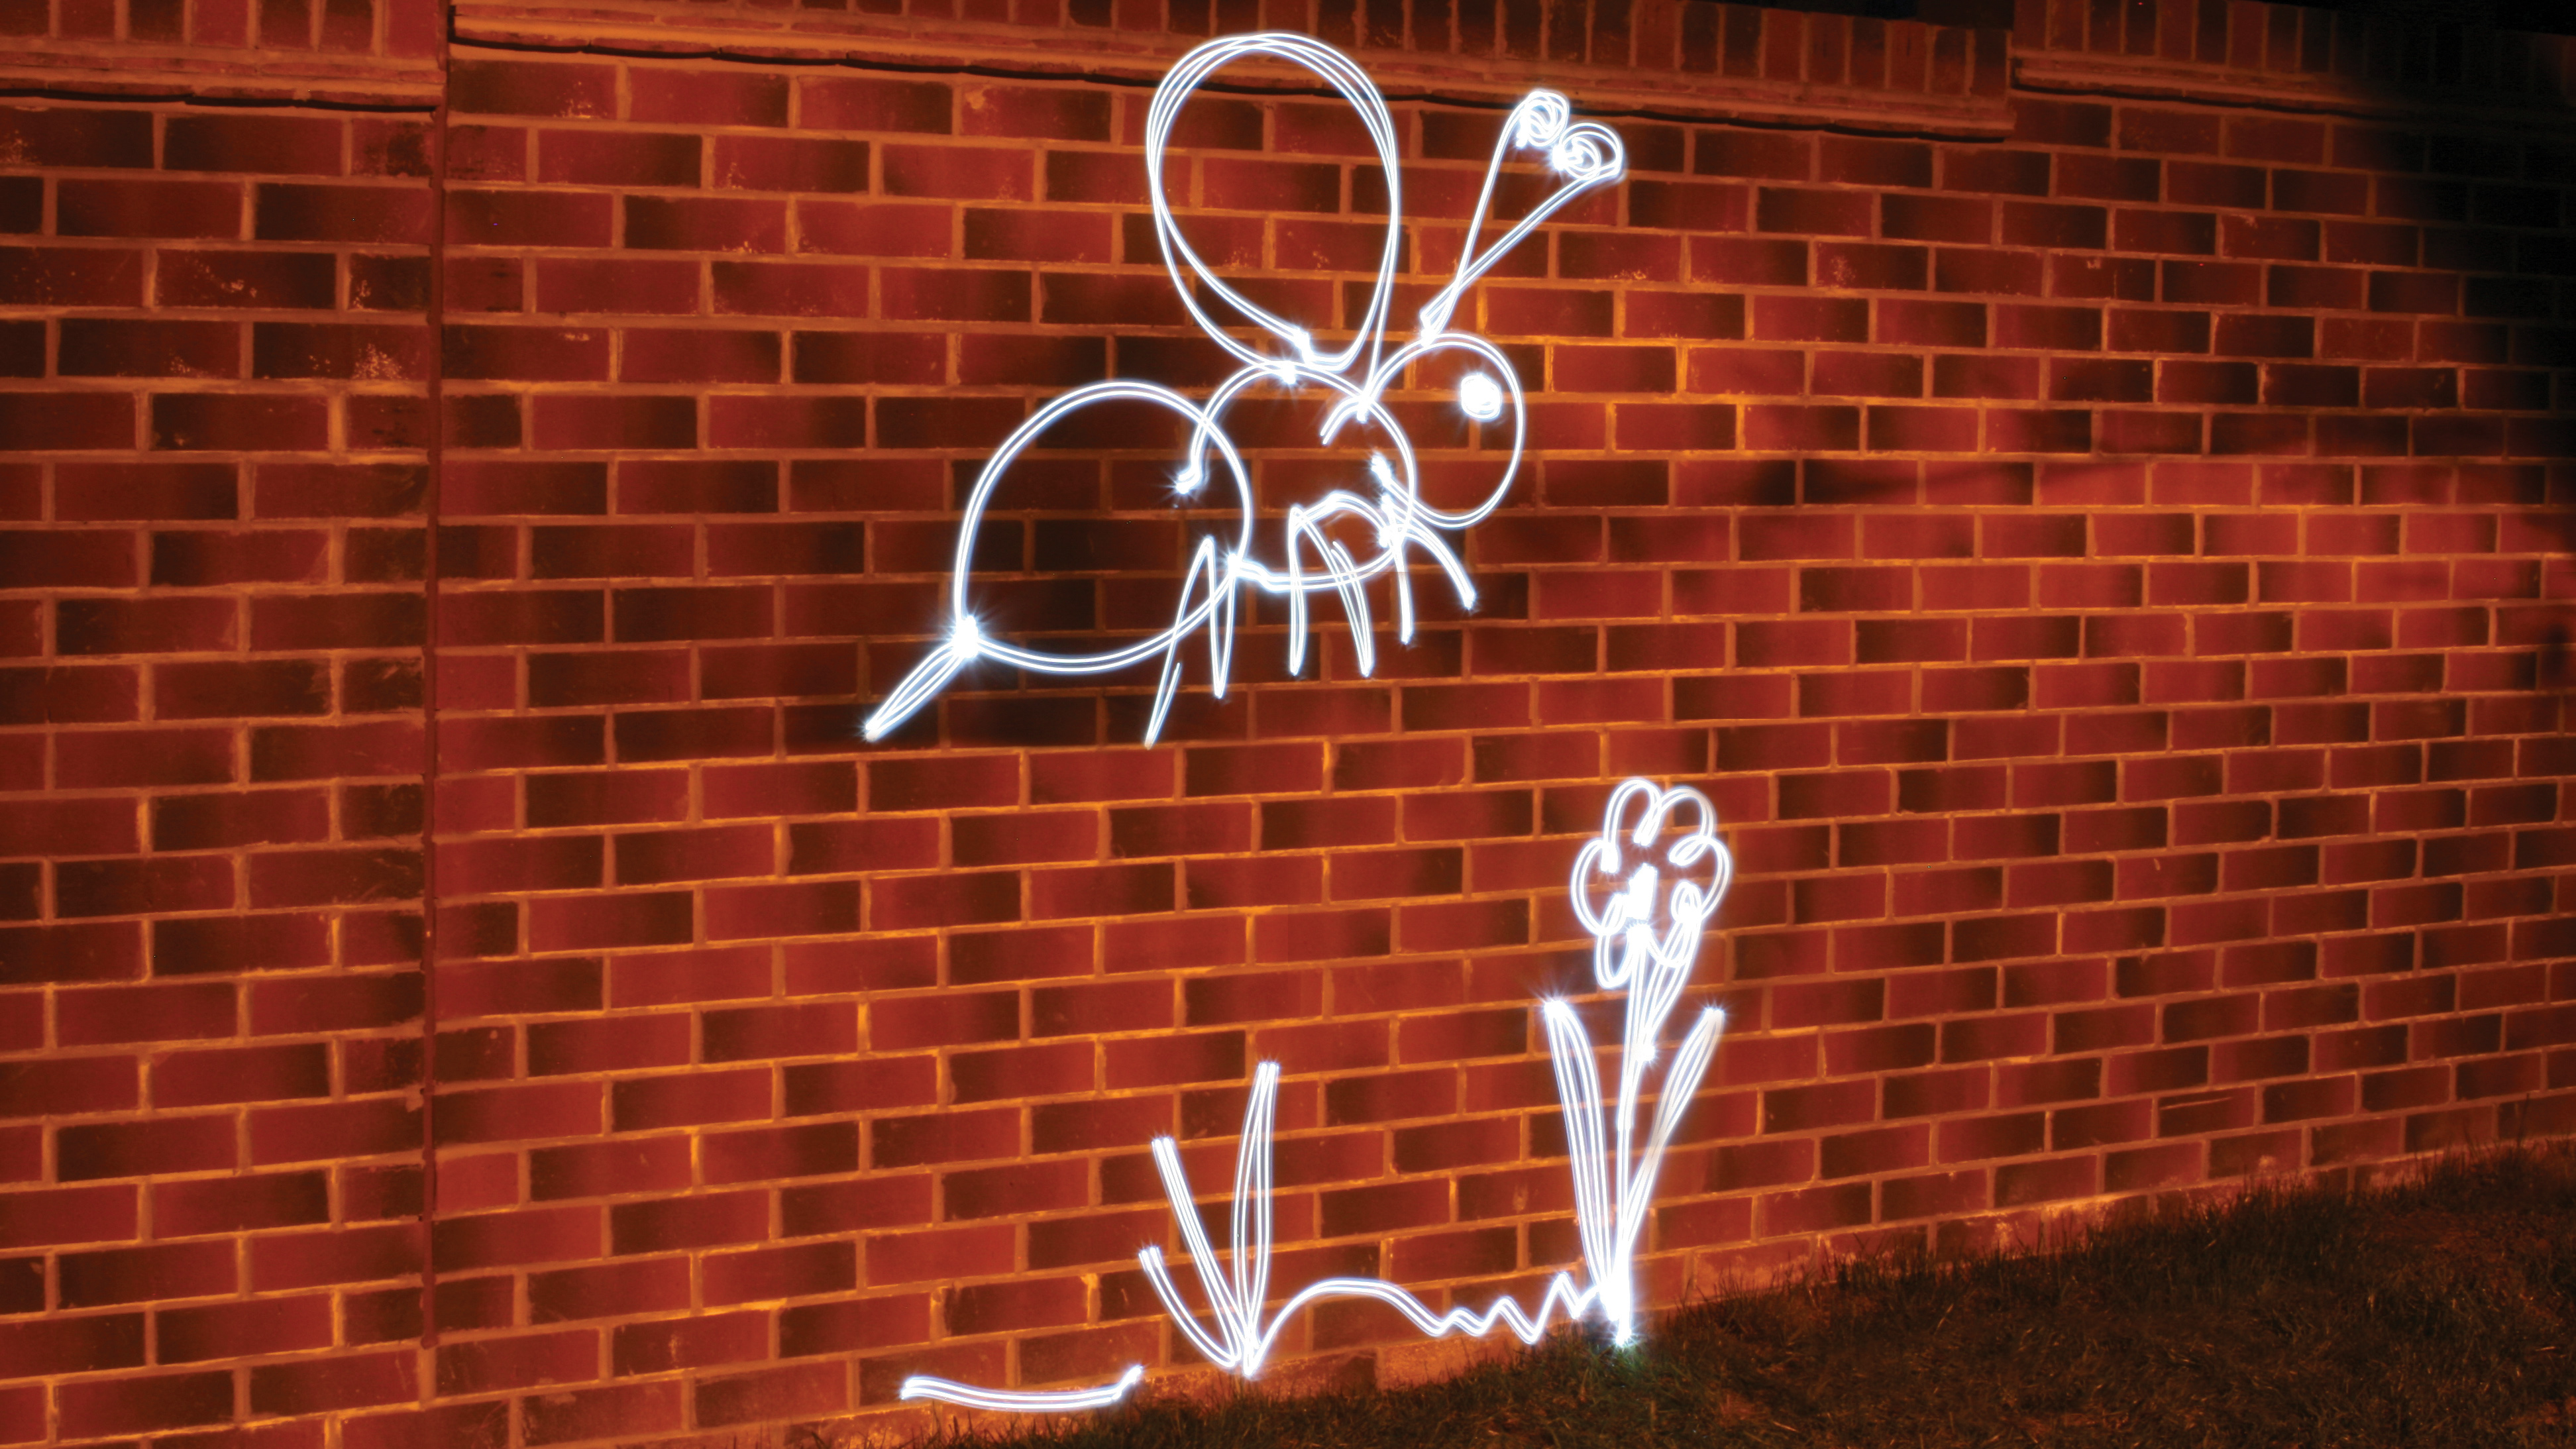
W is for Writing with light
What is it? By using a slow shutter speed in low-light conditions, it’s possible to capture light trails from almost any light source, be it car headlamps or bright fireworks. Writing with light is a little less spontaneous however, and involves using a torch to draw out an image or write a sentence during the long exposure.
Special kit: A sturdy tripod and a bright torch. We used a mini LED torch that cost just a couple of bucks and gave great results.
Shooting tips: The best backdrop for light writing is a blank wall, or a dark night sky. Make sure that your torch is facing the camera then draw, write, or run in front of your background to create different trails.
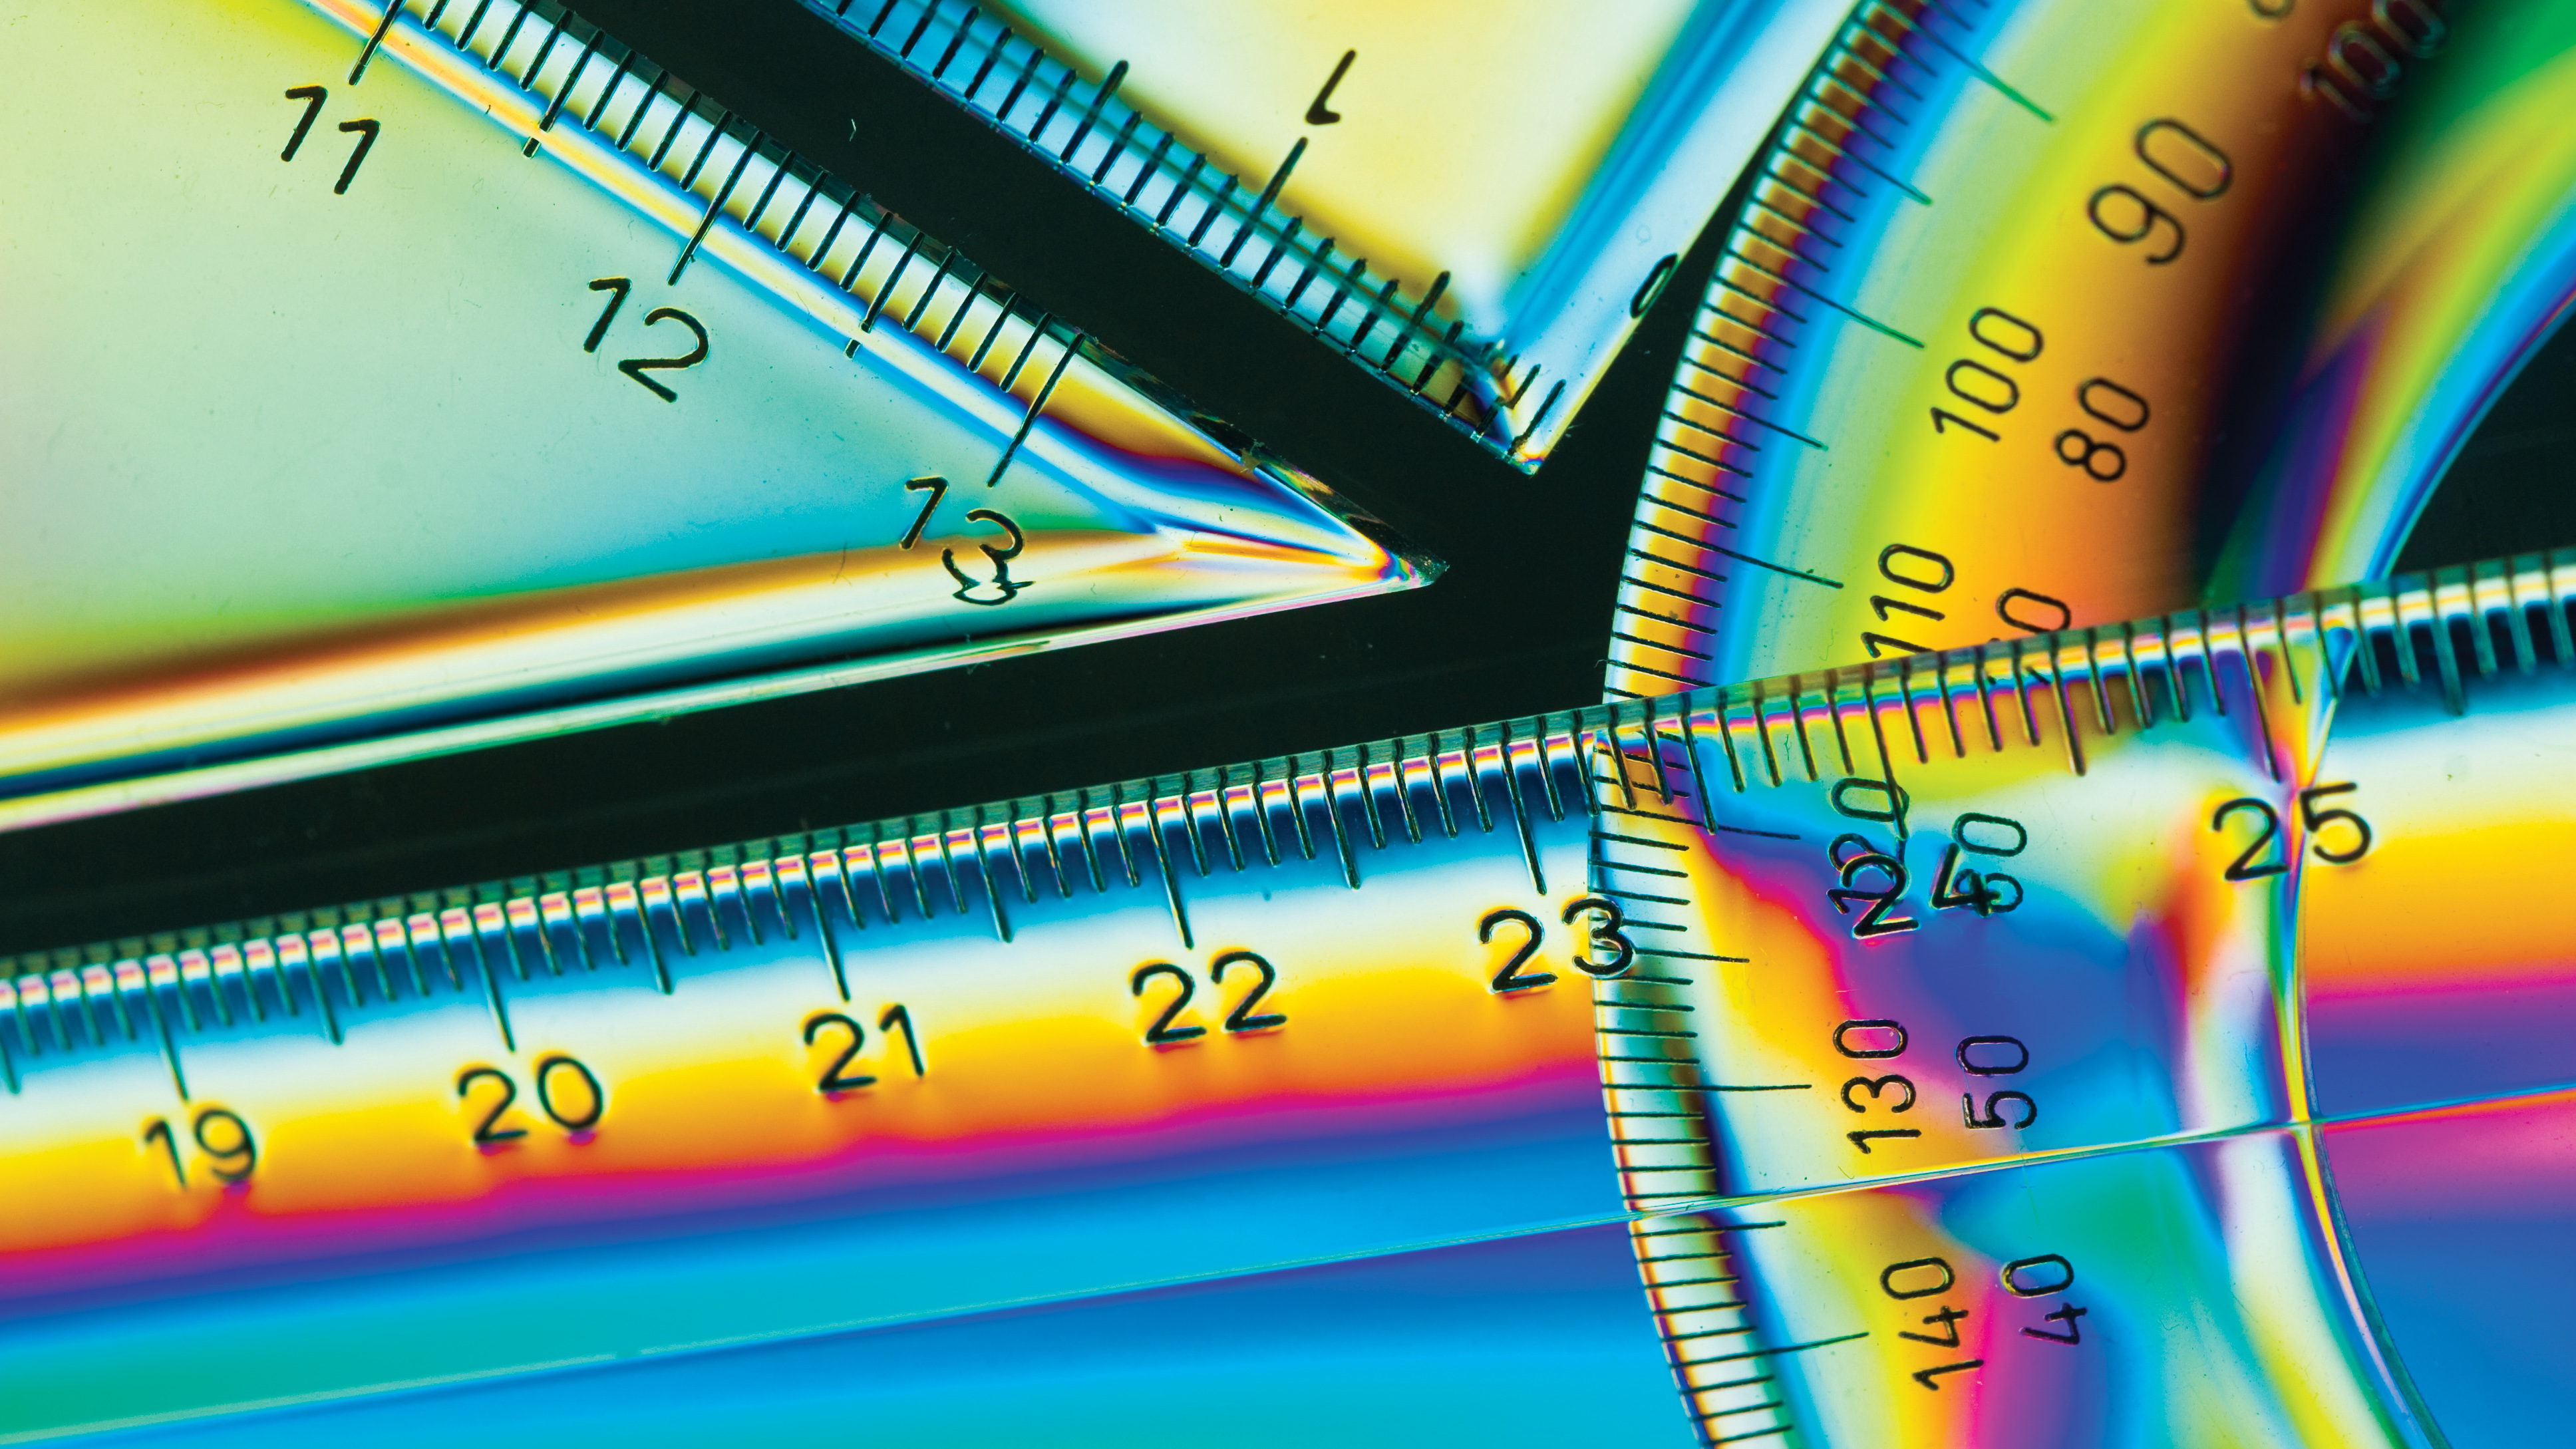
X is for X-polarisation
What is it? Cross-polarization is a way of turning the invisible stress patterns in pieces of transparent plastic into a visible rainbow pattern. Use a polarized light source, then photograph the plastic through a polarizing filter.
Special kit: A lightbox makes a great light source. Polarize the light by laying polarizing film over it (£28 for a 20x30cm sheet, www.greenweld.co.uk). You’ll also need a circular polarizing filter.
Shooting tips: As ever when using a polarizing filter, you need to rotate it to get the best effect.
See also: Best polarizing filters
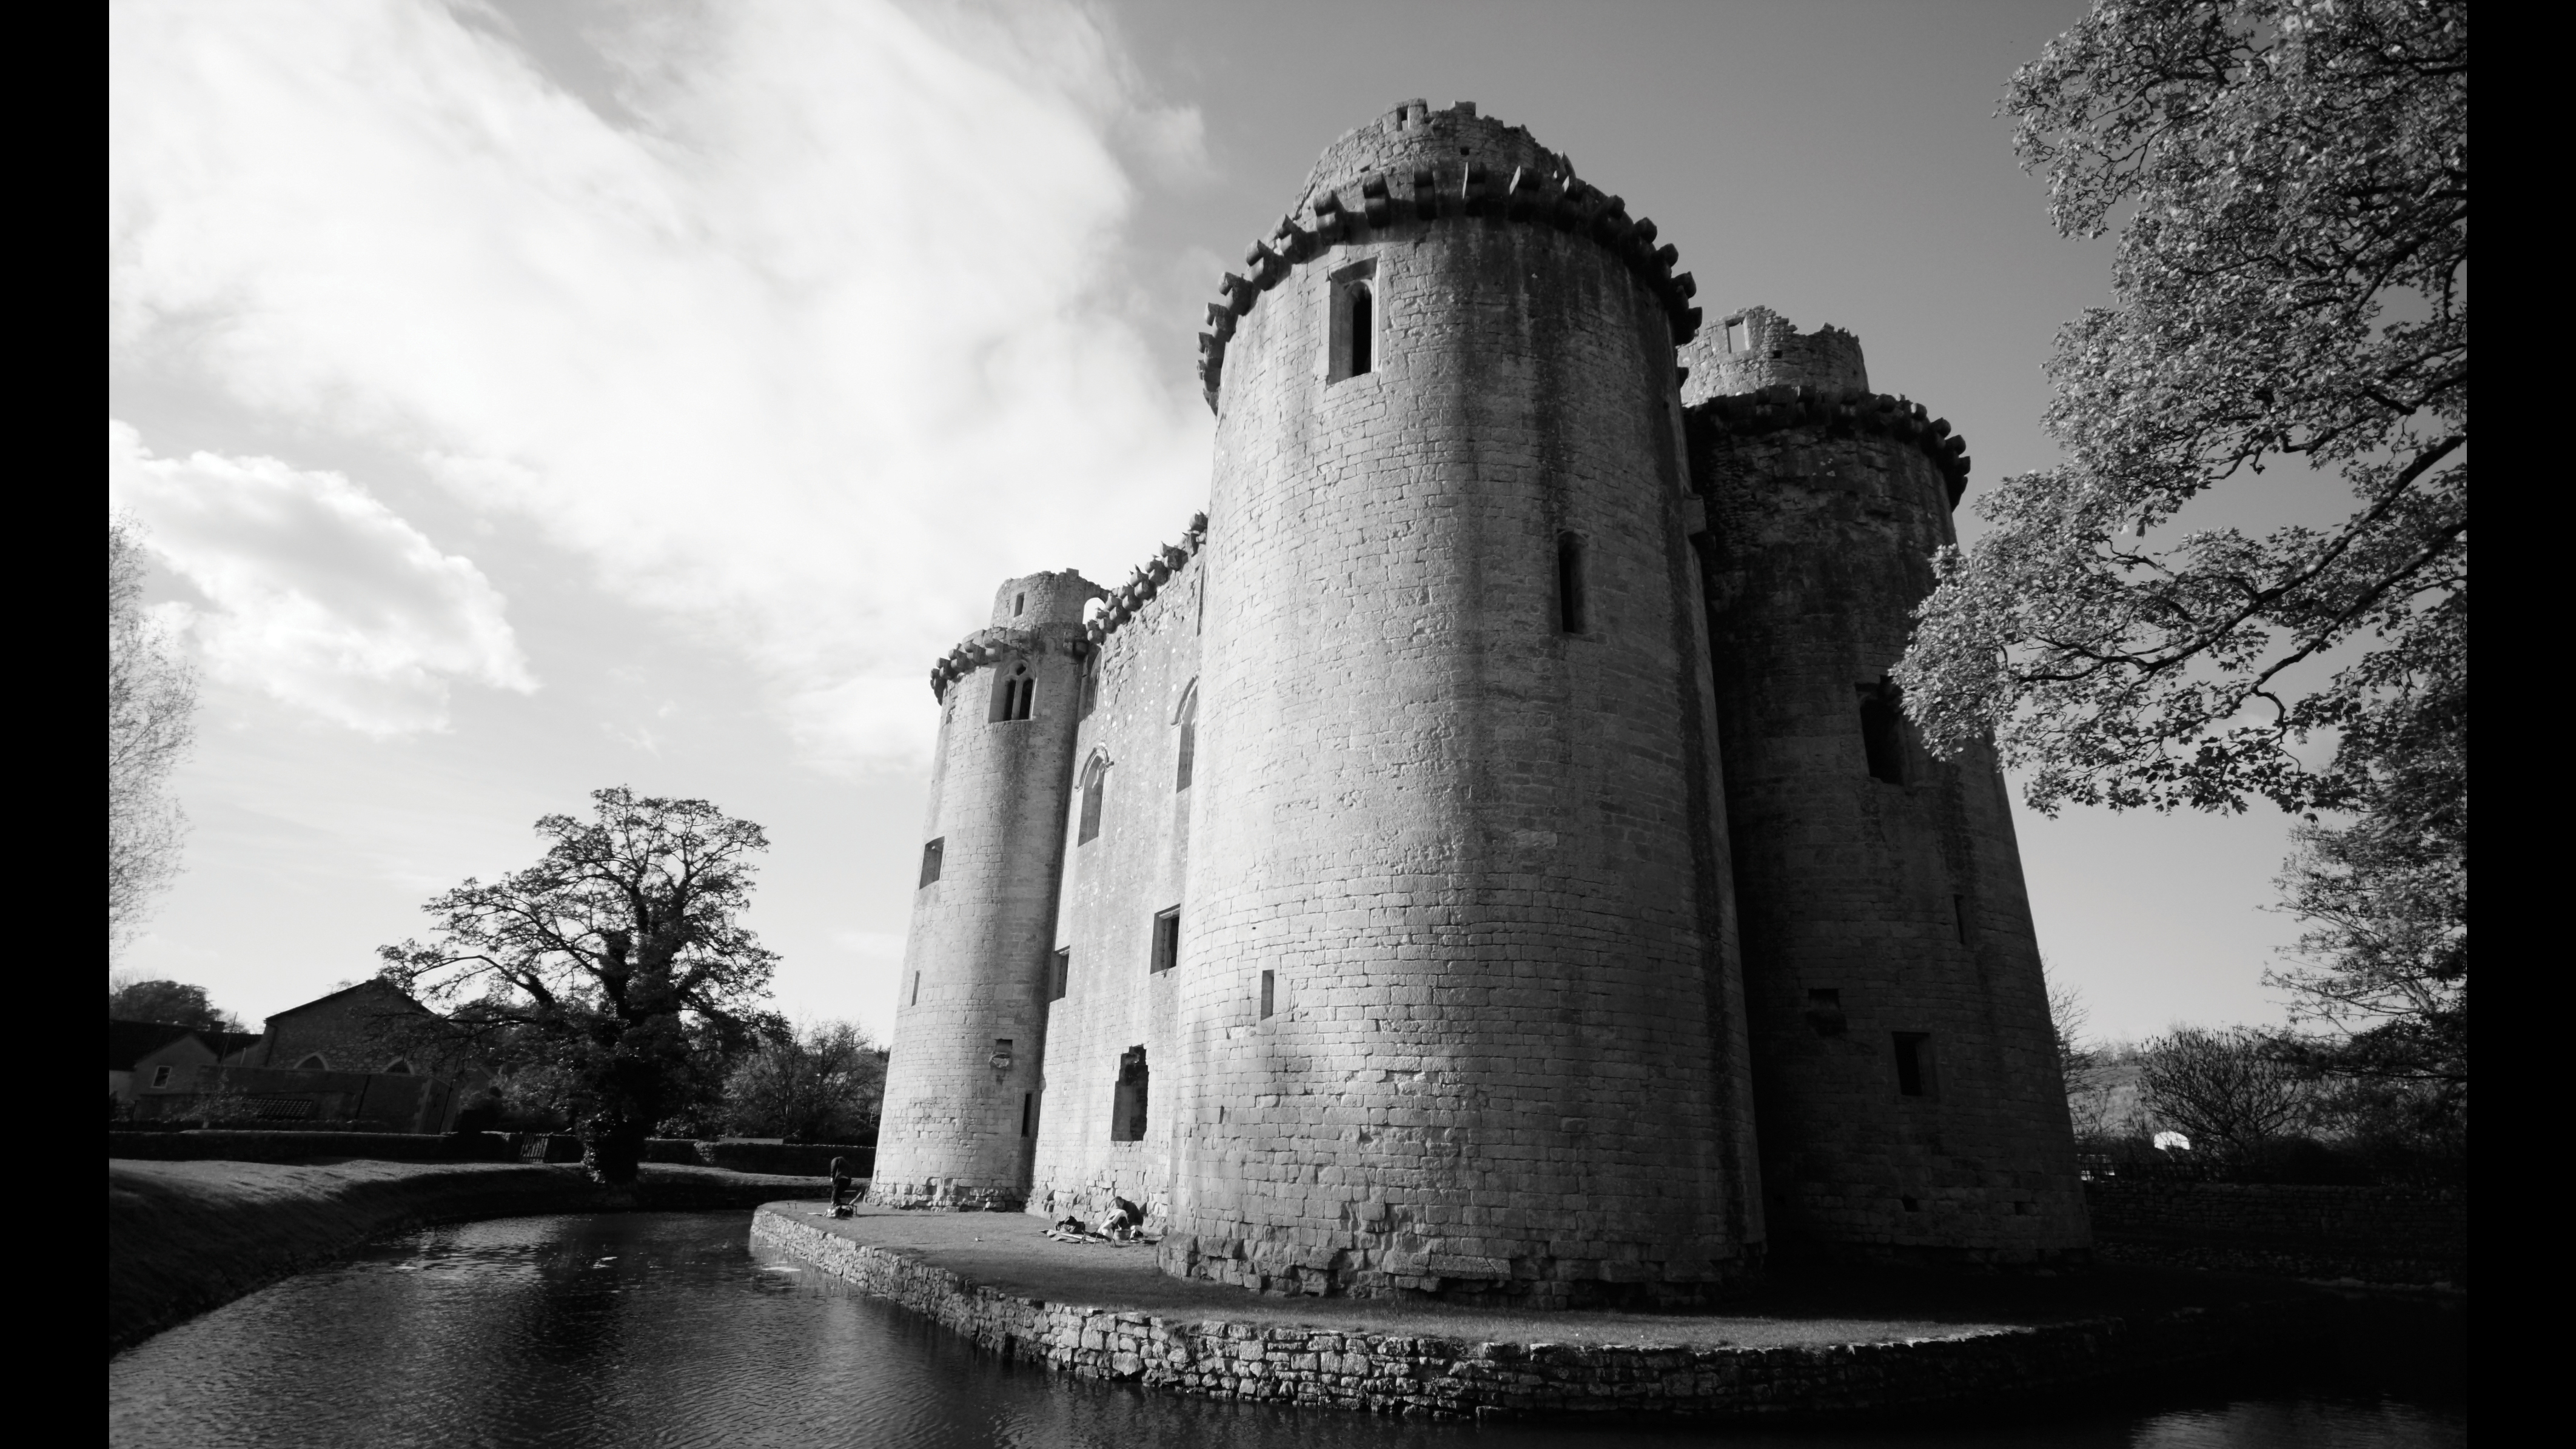
Y is for Yellow filter
What is it? With black-and-white film, color filters were used to dictate how different colors in the scene were converted to mono, ensuring the result wasn’t a wash of dull midtones. The Monochrome Picture Style you find on most cameras lets you recreate these filter effects. Choosing the Yellow Filter Effect option darkens skies and makes white clouds stand out, while producing natural-looking results.
Special kit: None
Shooting tips: Shoot in RAW, then you still get a color image to use for more precise mono conversion during editing, if necessary.’
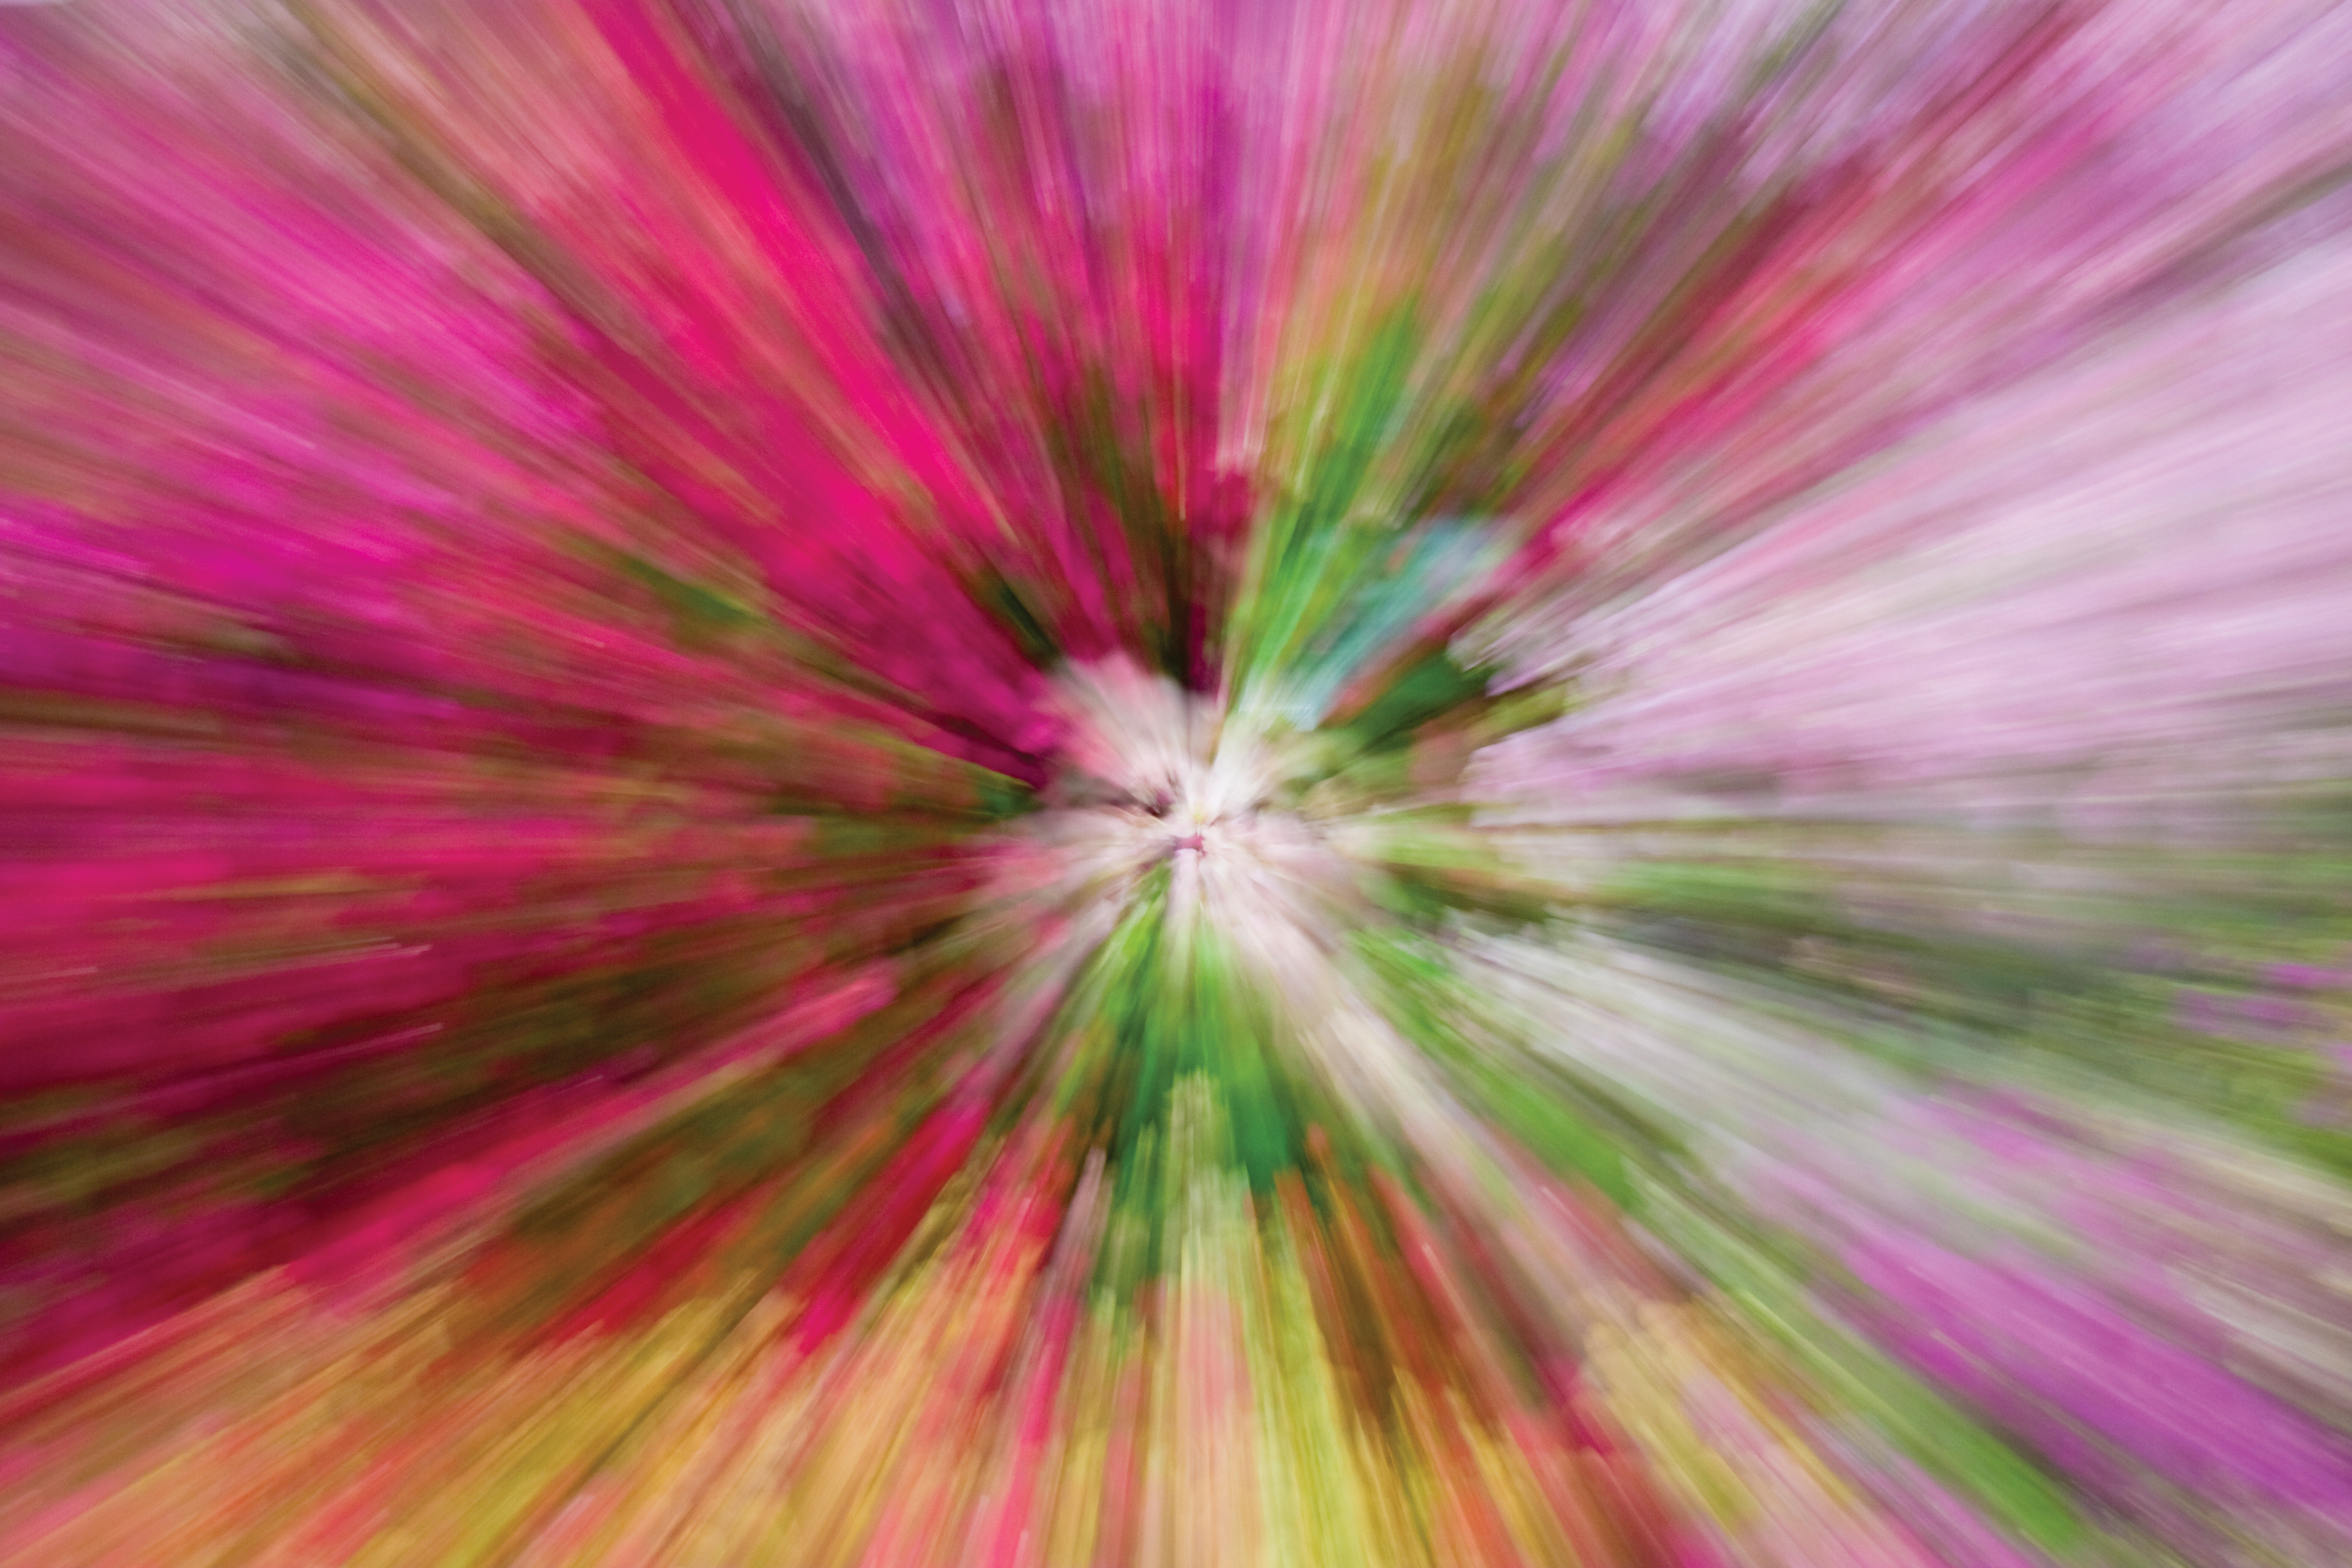
Z is for Zoomburst
What is it? Twisting your zoom as you’re taking a photo produces an explosive rush of color, drawing the viewer into your image with clever use of blur to create a sense of movement.
Special kit: A standard zoom lens (your kit lens will be perfect) and a tripod, if you want to ensure your blurred radial lines are straighter.
Shooting tips: Look for colorful subjects, such as flower beds. Set a slow shutter speed, around 1/4 to 1/15 sec, focus on the central subject and start zooming out just before pressing the shutter button, zooming smoothly throughout the entire exposure.
See more: The best standard zoom lenses
Read more:
Home photography ideas to try during lockdown
215 photography tips, video tutorials and techniques
PhotoPlus magazine
This feature originally appeared in PhotoPlus: The Canon Magazine
You can buy digital subscriptions or explore back issues of PhotoPlus using one of these apps, and then read the magazine on your phone, tablet or computer:
• Apple app (for iPad or iPhone)
• Zinio app (multi-platform app for desktop or smartphone)
• PocketMags (multi-platform app for desktop or smartphone)
• Readly (digital magazine subscription service)
Chris George has worked on Digital Camera World since its launch in 2017. He has been writing about photography, mobile phones, video making and technology for over 30 years – and has edited numerous magazines including PhotoPlus, N-Photo, Digital Camera, Video Camera, and Professional Photography.
His first serious camera was the iconic Olympus OM10, with which he won the title of Young Photographer of the Year - long before the advent of autofocus and memory cards. Today he uses a Nikon D800, a Fujifilm X-T1, a Sony A7, and his iPhone 15 Pro Max.
He has written about technology for countless publications and websites including The Sunday Times Magazine, The Daily Telegraph, Dorling Kindersley, What Cellphone, T3 and Techradar.
