How to capture atmospheric portraits at home using candle light
Get warmly lit photographs with the cheapest lighting ever

Capture atmospheric portraits at home using candlelight
Time needed: 45 minutes
Skill level: Intermediate
Kit needed: Candles or tea lights, Reflective floor, Model
Using candles is an effective way to capture nicely lit portraits, with the warm light creating an evocative atmosphere. But you need to follow a few key techniques for the best results.
First off, we’re using a wooden floor to act as a reflective surface for the candlelight. Avoid drafty locations as otherwise the flames will flicker – like a candle in the wind! Shooting at night with the lights off is best, but shooting during daytime with the curtains closed should be dark enough. We draped black material behind our model; this area doesn’t need to be totally dark as we’re exposing for candlelight, which renders the backdrop and surroundings black.
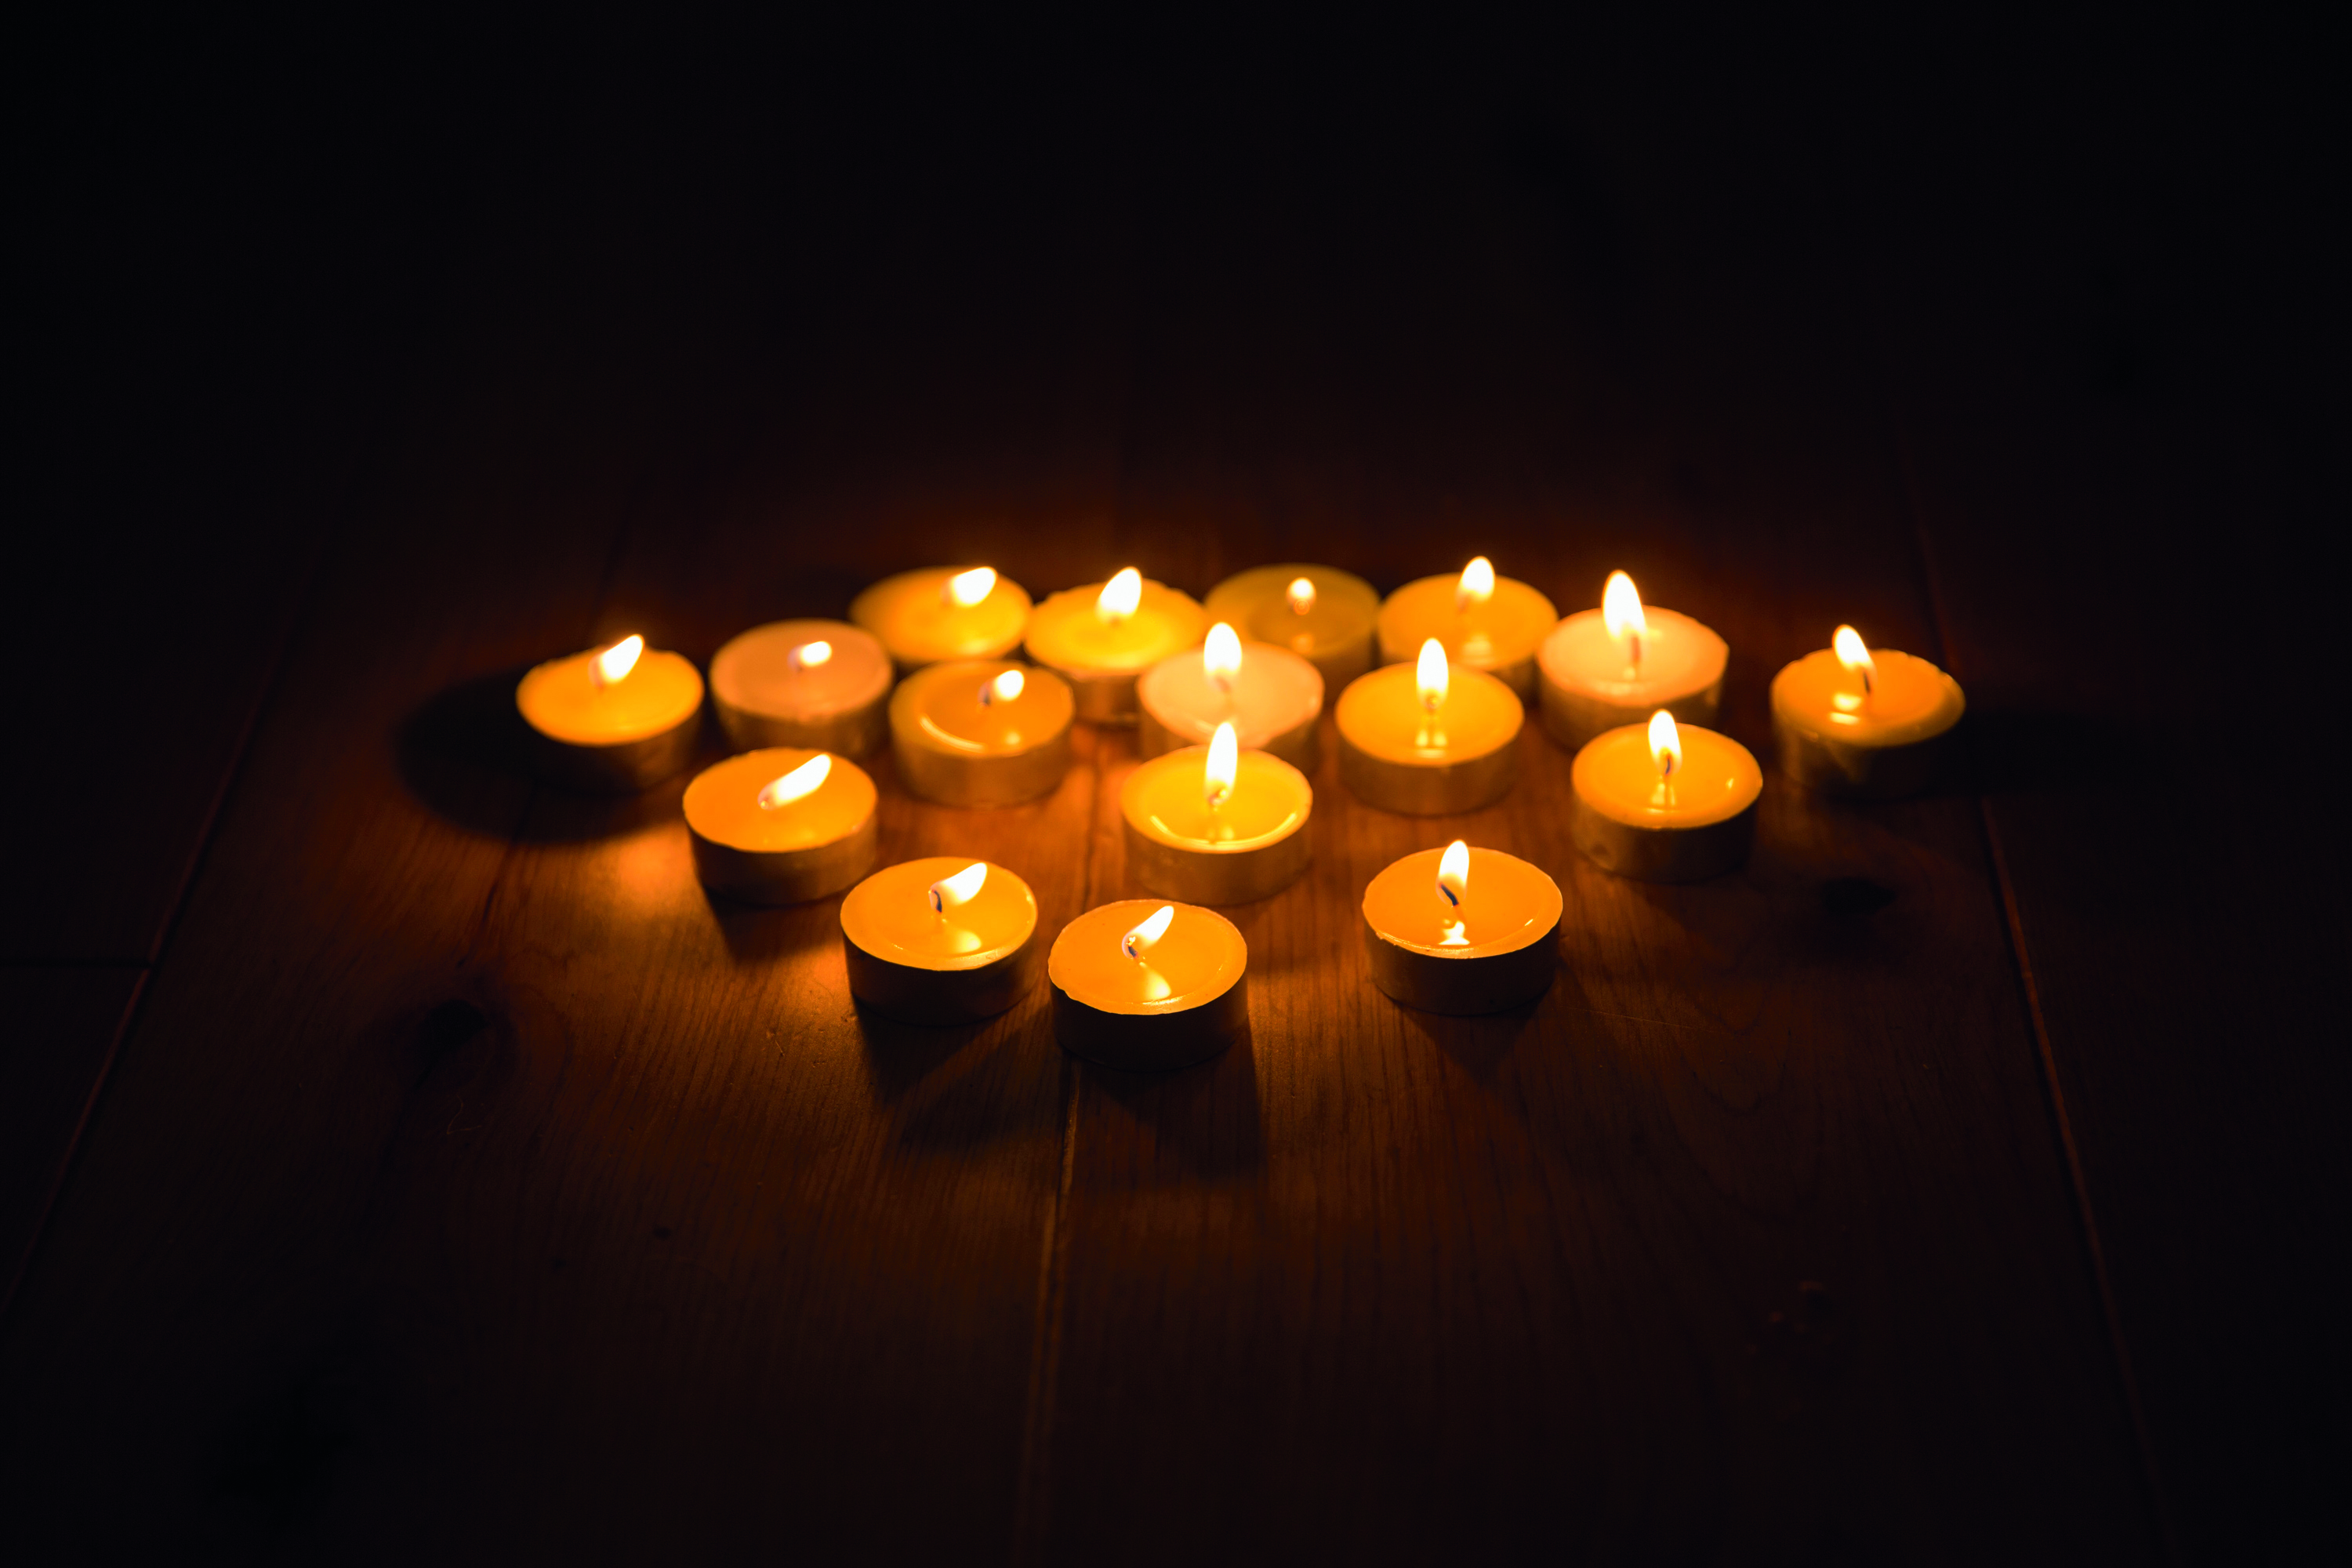
More candles throws more light onto your subject; we found around 20 tea lights worked well, placed in a rough triangle a foot in front of our model, Nadia. They produce a cooler, bluer light than regular candles, but as we were shooting in Raw, we could easily adjust the white balance and warm up the colour temperature of our image afterwards.
A focal length around 50mm works well, as you can fill the frame without being too far back from your subject – ideal when shooting in tight spaces. It’s best to shoot in Manual mode so you can control your exposure. Even so, it’s tricky to expose in one shot as there’s a marked difference in light levels from the candlelight compared to the model’s face, but there’s a quick Photoshop fix…
STEP BY STEP: Take portaits in candlelight
How to set up your candles and Canon DSLR for great indoor portraits
01 I SAID FOUR CANDLES…
We found using 20 tea lights produced enough light for our model’s face. Tea lights produce a slightly cooler tone than regular candles as the light is reflected against their silvery tins.
02 CAMERA SETUP
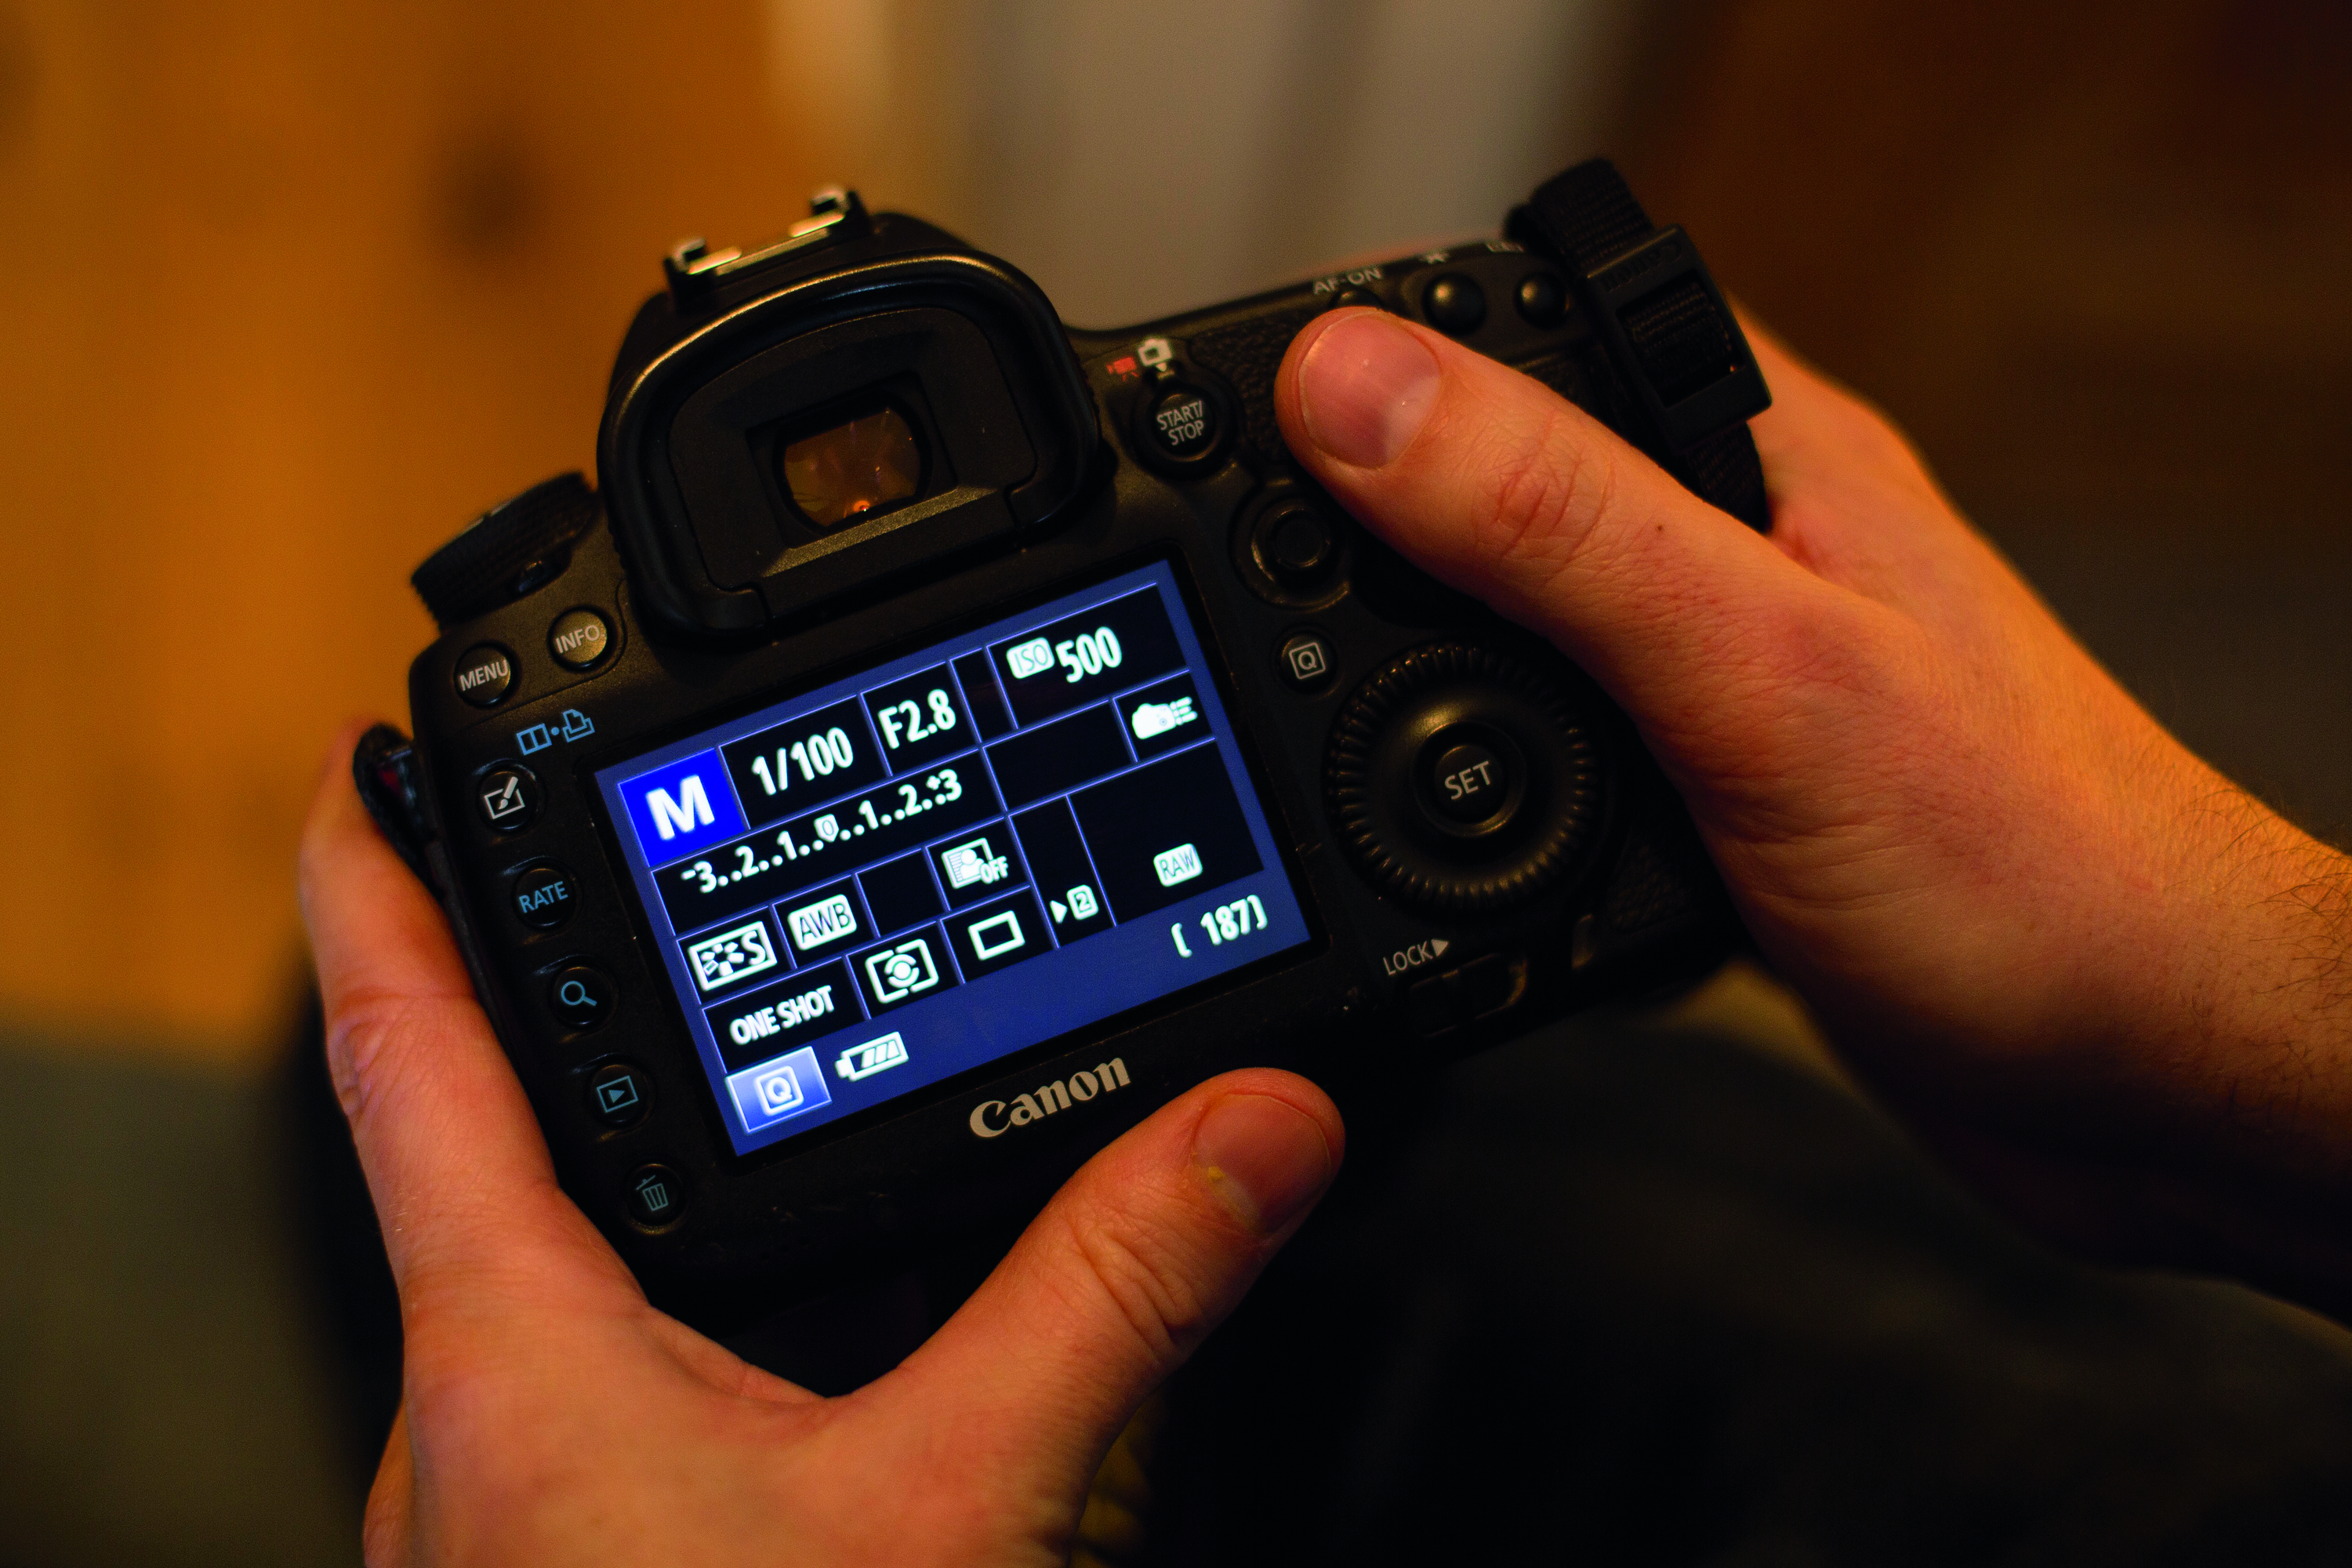
Our wide f/2.8 aperture blurred the foreground and background, a 1/100 sec shutter speed was fast enough to shoot handheld, and ISO500 captured enough light while rendering the background dark.
03 TAKE THE SHOT
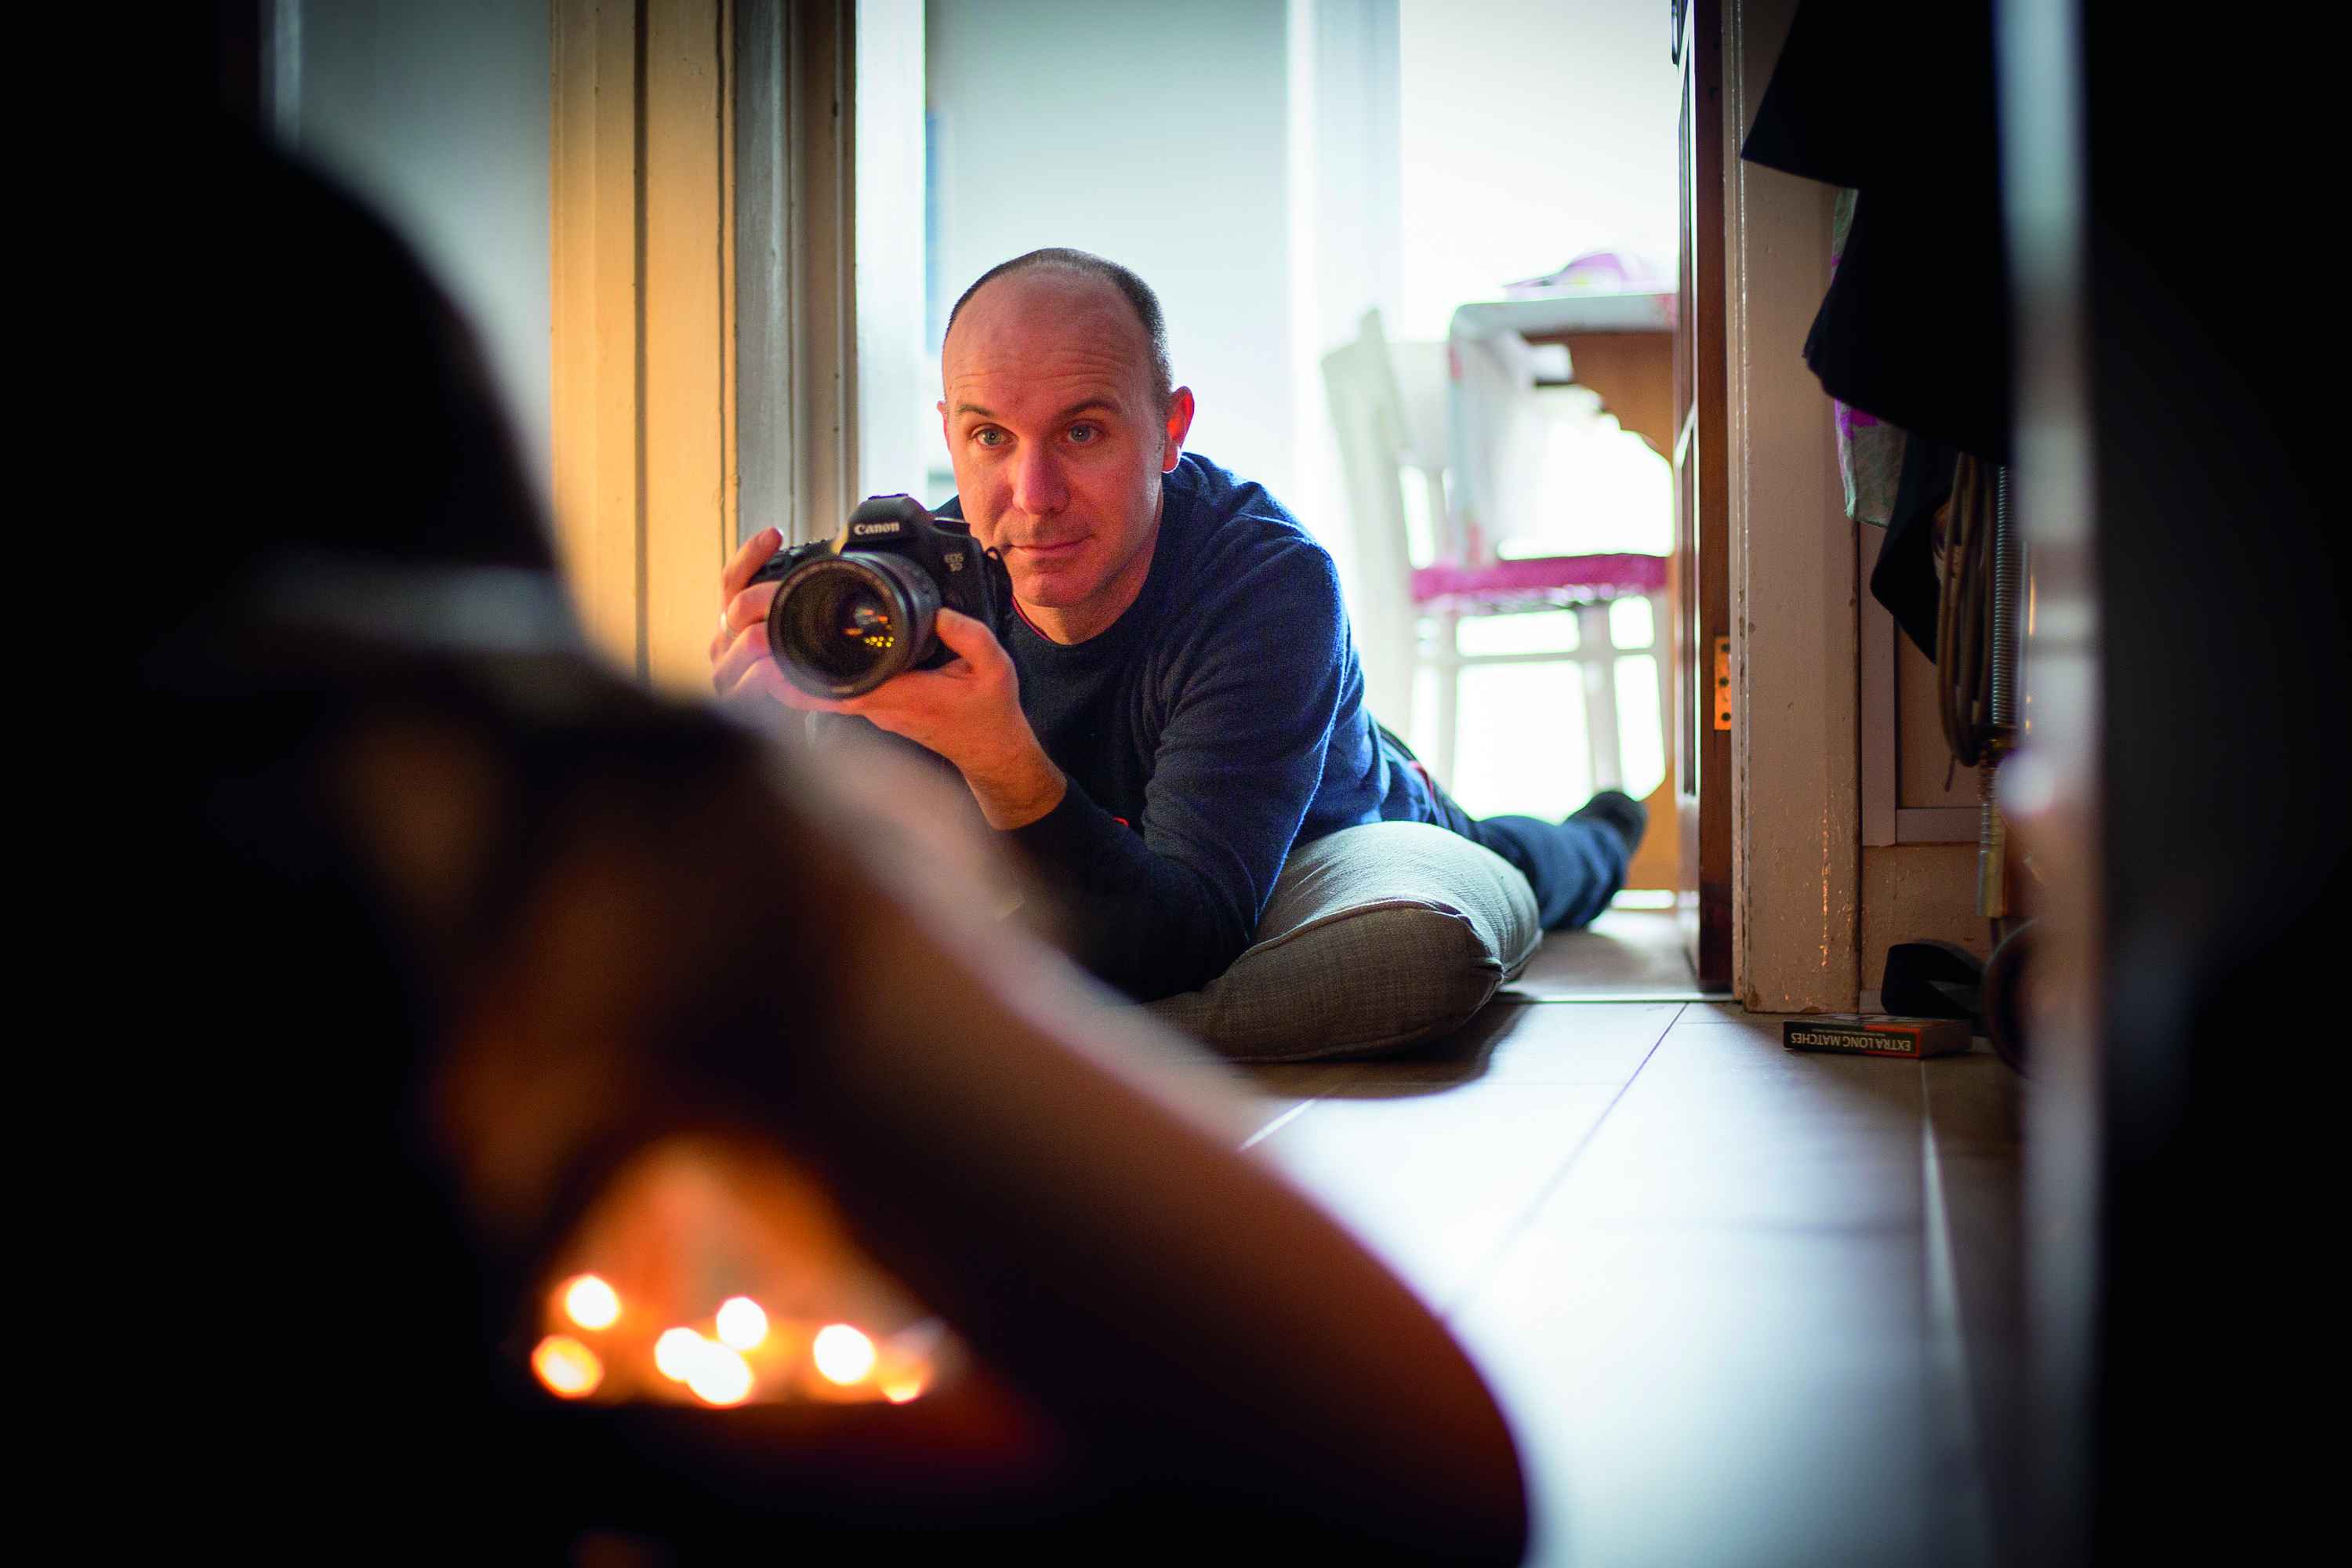
We lay down to make the most of the candlelight reflecting against the floor – shoot any higher and too much foreground will appear in your frame – then focused on our subject’s face before taking the shot.
04 LITTLE PHOTOSHOP HELP
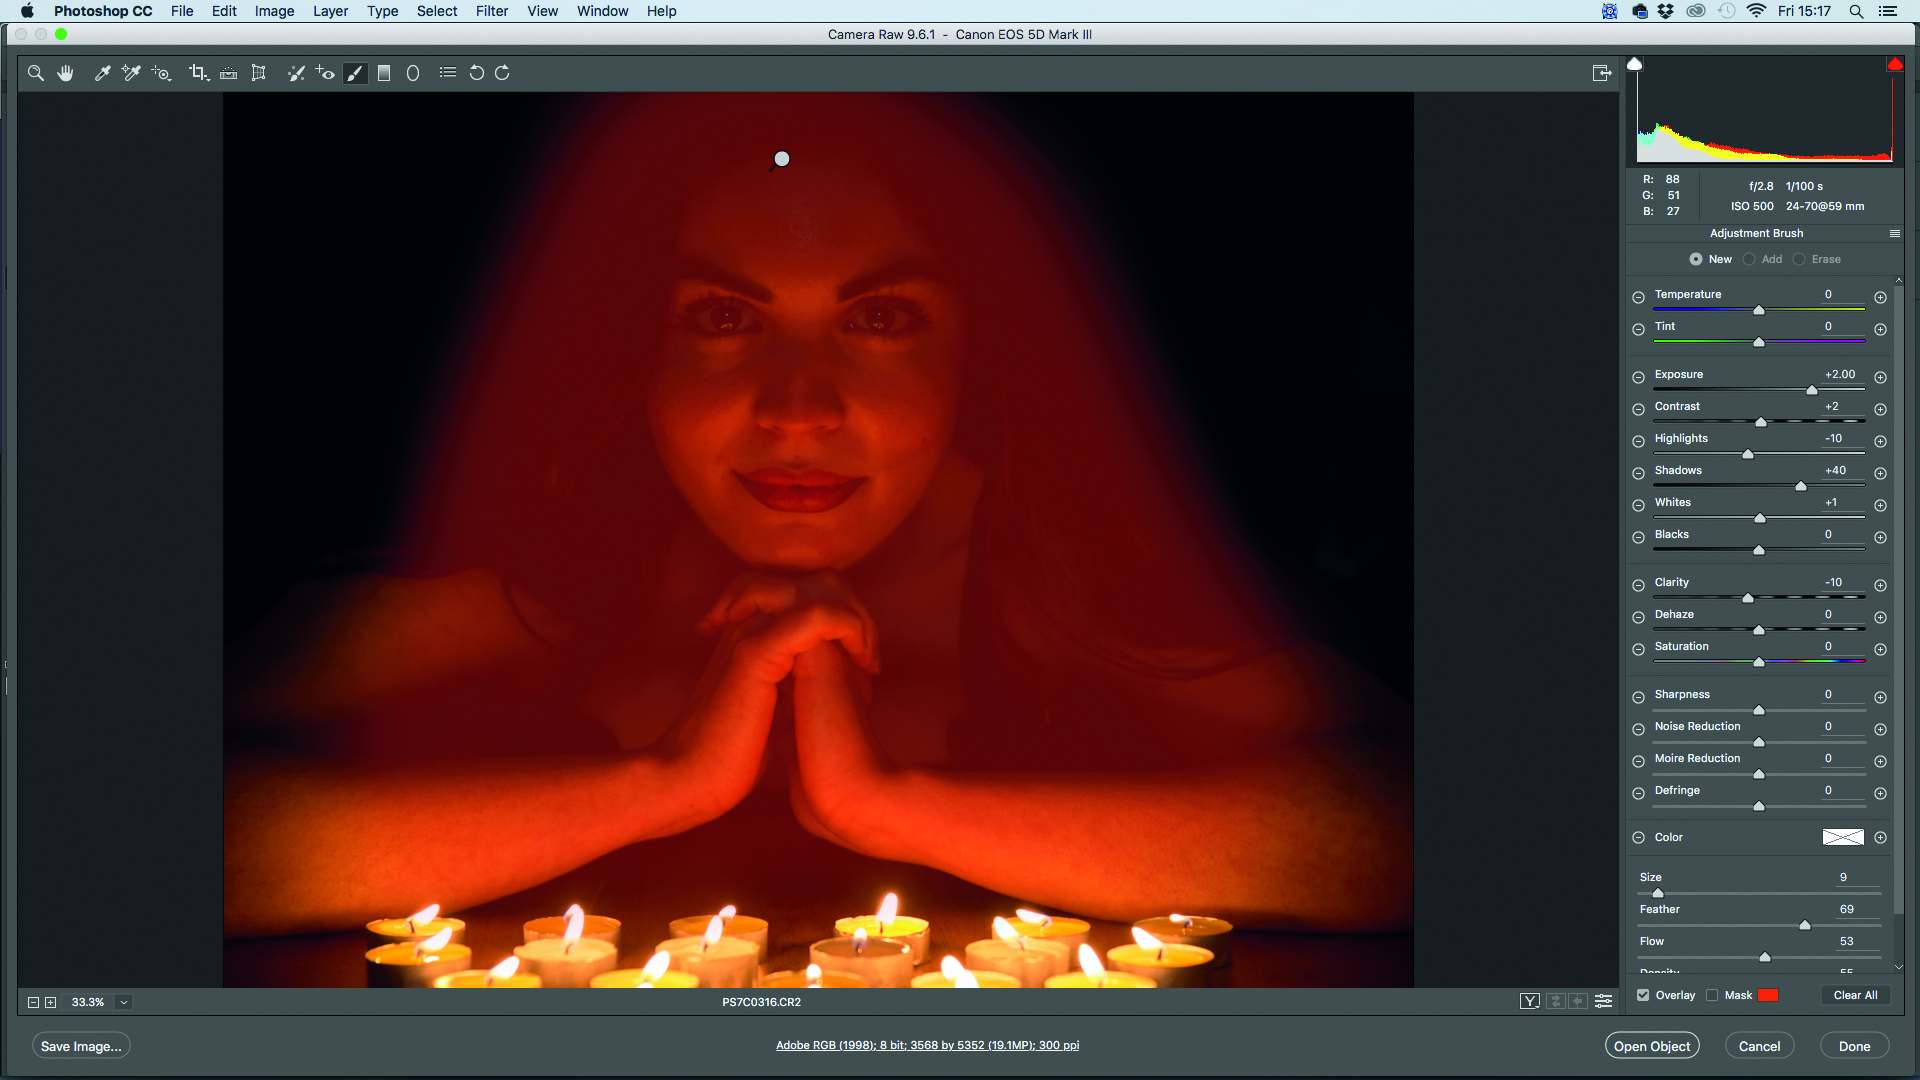
The model’s face is too dark in our Raw image, but this is easy to fix using ACR’s Adjustment Brush, with Exposure +2.00 and Shadows +40 to brighten the face, while ensuring the surroundings stay dark.
CANDLELIGHT SCENE MODE
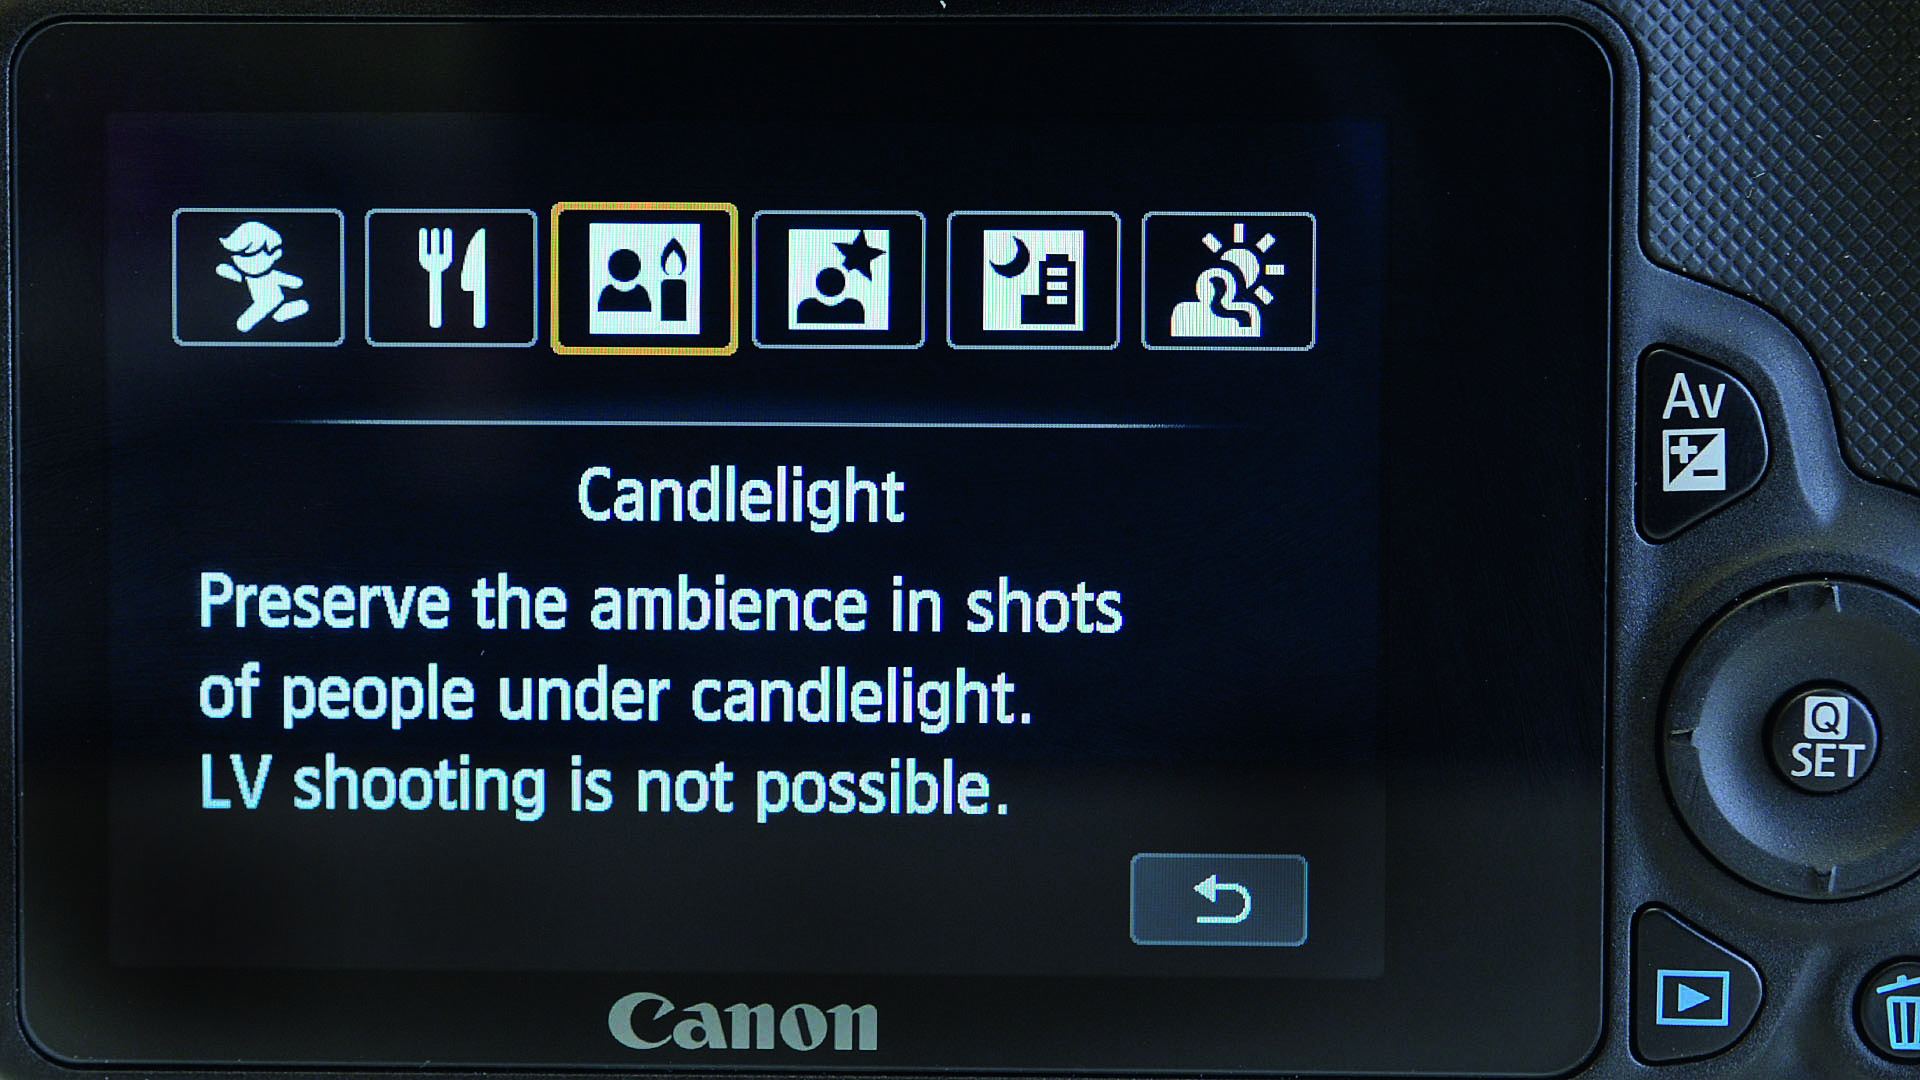
Newer Canon EOS DSLRs, like the 750D and 80D, have a Candlelight scene mode. You need to use the viewfinder when using it – you can’t use Live View – but it’s a handy preset that’s worth trying. You can change Colour Tone to increase the candlelight’s reddish tinge, if you like, by setting it towards Warm, or towards Cool tone if it’s too red already.
Get the Digital Camera World Newsletter
The best camera deals, reviews, product advice, and unmissable photography news, direct to your inbox!
The editor of PhotoPlus: The Canon Magazine, Peter 14 years of experience as both a journalist and professional photographer. He is a hands-on photographer with a passion and expertise for sharing his practical shooting skills. Equally adept at turning his hand to portraits, landscape, sports and wildlife, he has a fantastic knowledge of camera technique and principles. As you'd expect of the editor of a Canon publication, Peter is a devout Canon user and can often be found reeling off shots with his EOS 5D Mark IV DSLR.

