Capture coastal photography with Affinity Photo

Affinity Photo is available on Mac, Windows PC and iPad with one payment and no ongoing subscription. Click here for more information!
Create a blend between two or more colors, and you have a gradient. As something that makes gradients, the Gradient Tool in Affinity Photo might sound like a feature better suited to graphic designers and digital artists than photographers, but it can be put to use for a surprising variety of image-enhancing edits.
In this project we’ll explore a few of the ways in which gradients can give your photos a boost, from enhancing skies to adding depth-of-field effects. The aim here is to create a hazy sunset atmosphere in our coastal scene, but you can use these same techniques for all kinds of powerful effects.
One of the best things about gradients is how you can add different color stops along the transition. This means we can create the look of a setting sun by making a circular gradient that goes from bright yellow to deep orange. What’s more, we can use gradients in combination with other effects like Blending Modes, and even map them on to the tonal range to tint highlights and shadows with different colors. Learn these techniques and you can use gradients for all sorts of powerful effects in your own Affinity Photo projects.
Fake a gorgeous sunset in Affinity Photo
Use a Fill Layer
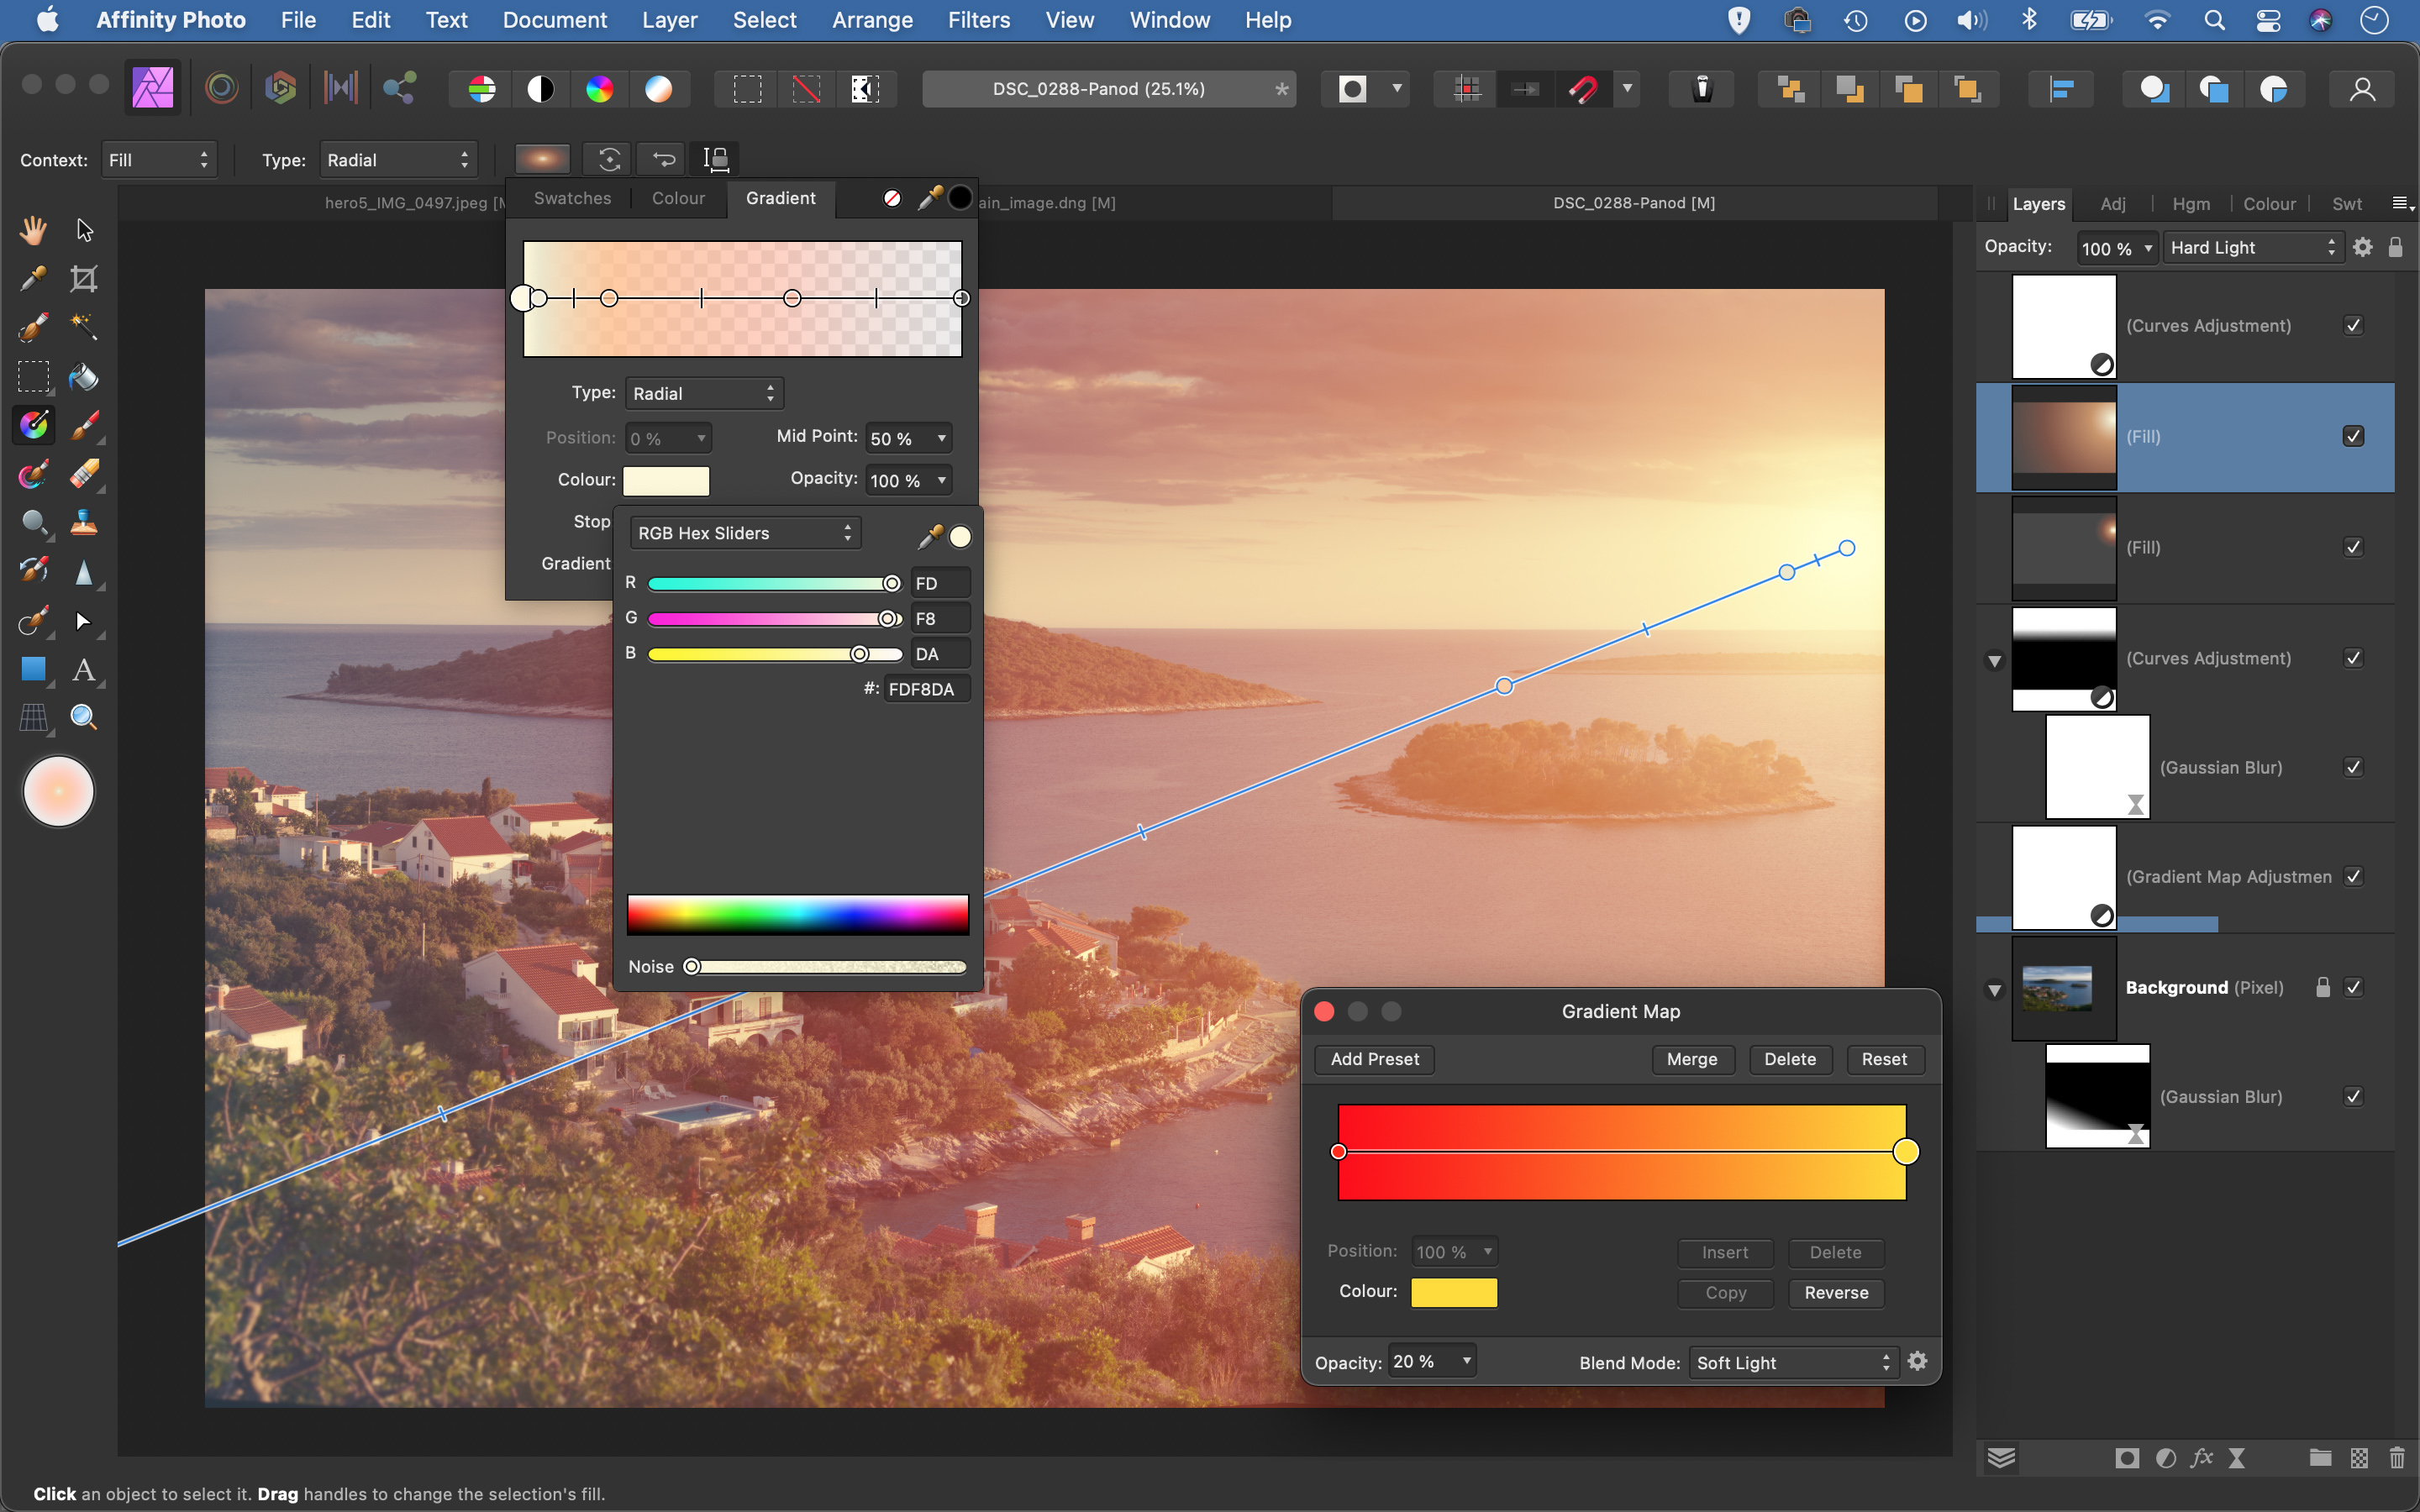
You can add a gradient to a pixel layer, but if you make one on a Fill Layer, the gradient remains editable. (To edit, grab the Gradient Tool while the layer is active.) Go to Layer > New Fill Layer to add the layer above your image, then set Type to Radial and drag within the image to add a circular gradient. The centre point controls the position; the outer handle sets the size.
Set gradient colours
With the gradient active, click the colour box at the top. Click the left point. Open its Colour box, select RGB Hex Sliders, and type ‘#FDF8DA’. Double-click on the line to add a box at position 25%, colour #ECE8CD, opacity 85%. Set a third at 50%, #FFBA80, 75%. Add a fourth at 75%, #FB9473, 40%. Set the right-side point to #838383, opacity 20%.
Create a setting sun
Once the gradient colours look right, change the gradient layer’s Blending Mode to Hard Light. Fine-tune the position and spread to make it look like low sunlight. You can drag the colour stops on the gradient to control the transitions. You can adjust the strength of the effect: if it’s too strong, lower the layer opacity. If it’s too weak, duplicate the layer.
Make graduated sky adjustments
You can also use gradients in masks to control where an effect occurs. A good example of this is when darkening skies. Add a Curves layer and drag down to darken the image, then drag up on the Red channel and down on the Blue channel to add a tint. Now we can grab the Gradient Tool, set the stops to white and black, then drag from sky towards land to constrain the darkening effect.
Tint with Gradient Maps
Gradient Maps let you map colours onto the tonal range of the image, so you can colourise the shadows with one colour and the highlights with another. We can enhance our sunset mood here. Click the Adjustment Layer icon and choose Gradient Map, then set the stops to red and yellow in the options. Set the Blending Mode of the layer to Soft Light, and lower the opacity to about 20%.
Control blur with a gradient
We can use gradients in combination with Live Filter Layers to affect parts of our image. To soften the foreground details slightly, highlight the background image layer, then go to Layer > New Live Filter Layer and add a Gaussian Blur filter. Increase the blur strength, then set Type: Linear in the options and set up a white-to-black gradient. Drag up from the bottom to add a subtle blur effect.

Make a splash with coastal photography
Coastal photography can take many forms. From landscapes and nature to documentary and abstract, there’s a whole world of photo opportunities in that strip of earth separating the land and the sea.
Although it might sound counter-intuitive, summer isn’t necessarily the best season to photograph the coast. For a start, it’s going to be busy. Even if you arrive early and leave late, beaches are going to bustling in high season. While that may be perfect if you’re looking at shooting the seaside street photography style, it’s much less of a bonus if landscape photography is more your thing. Besides, if you want to shoot during the golden hour, you’re going to have a long wait for a midsummer sunset.
For wildlife photographers, spring and autumn hold the promise of photographing young animals and migrating birds, and they are equally good seasons for scenics. Winter, however, has arguably even more potential for landscape photography. With conditions in your favour, you can expect wild seas, glorious (and early!) sunsets and moody skies – and the likelihood of sharing the beach with just a handful of hopeful gulls.
Coastline composition
When you’re taking your first steps in landscape photography, the rule of thirds is a reliable way of creating well balanced compositions. It’s a tried-and-tested technique, where you imagine a noughts-and-crosses grid over the scene in front of you, then line up the horizon with either the bottom line or the top line in the grid.
In fact, you don’t even need to imagine it, as today’s cameras can display a grid over the Live View image, either on the rear screen of a DSLR or in the electronic viewfinder of a mirrorless camera. There are essentially three elements to balance when you’re shooting a seaside scenic: the sea, the sky, and the shoreline. Which of these you give most prominence to depends on where the interest lies. If the sky has some interesting clouds, consider giving that two thirds of the space. Do the opposite if the shoreline or the sea is where the action is.
It also depends on what you want your picture to say. If you want to exaggerate the wide open feel of a location, allowing a bit more space for the sky can do this effectively.
Which lenses should you choose?
Coastal photography encapsulates a diverse range of subjects, and the best lens for your needs will be dictated by the subject you want to focus on.
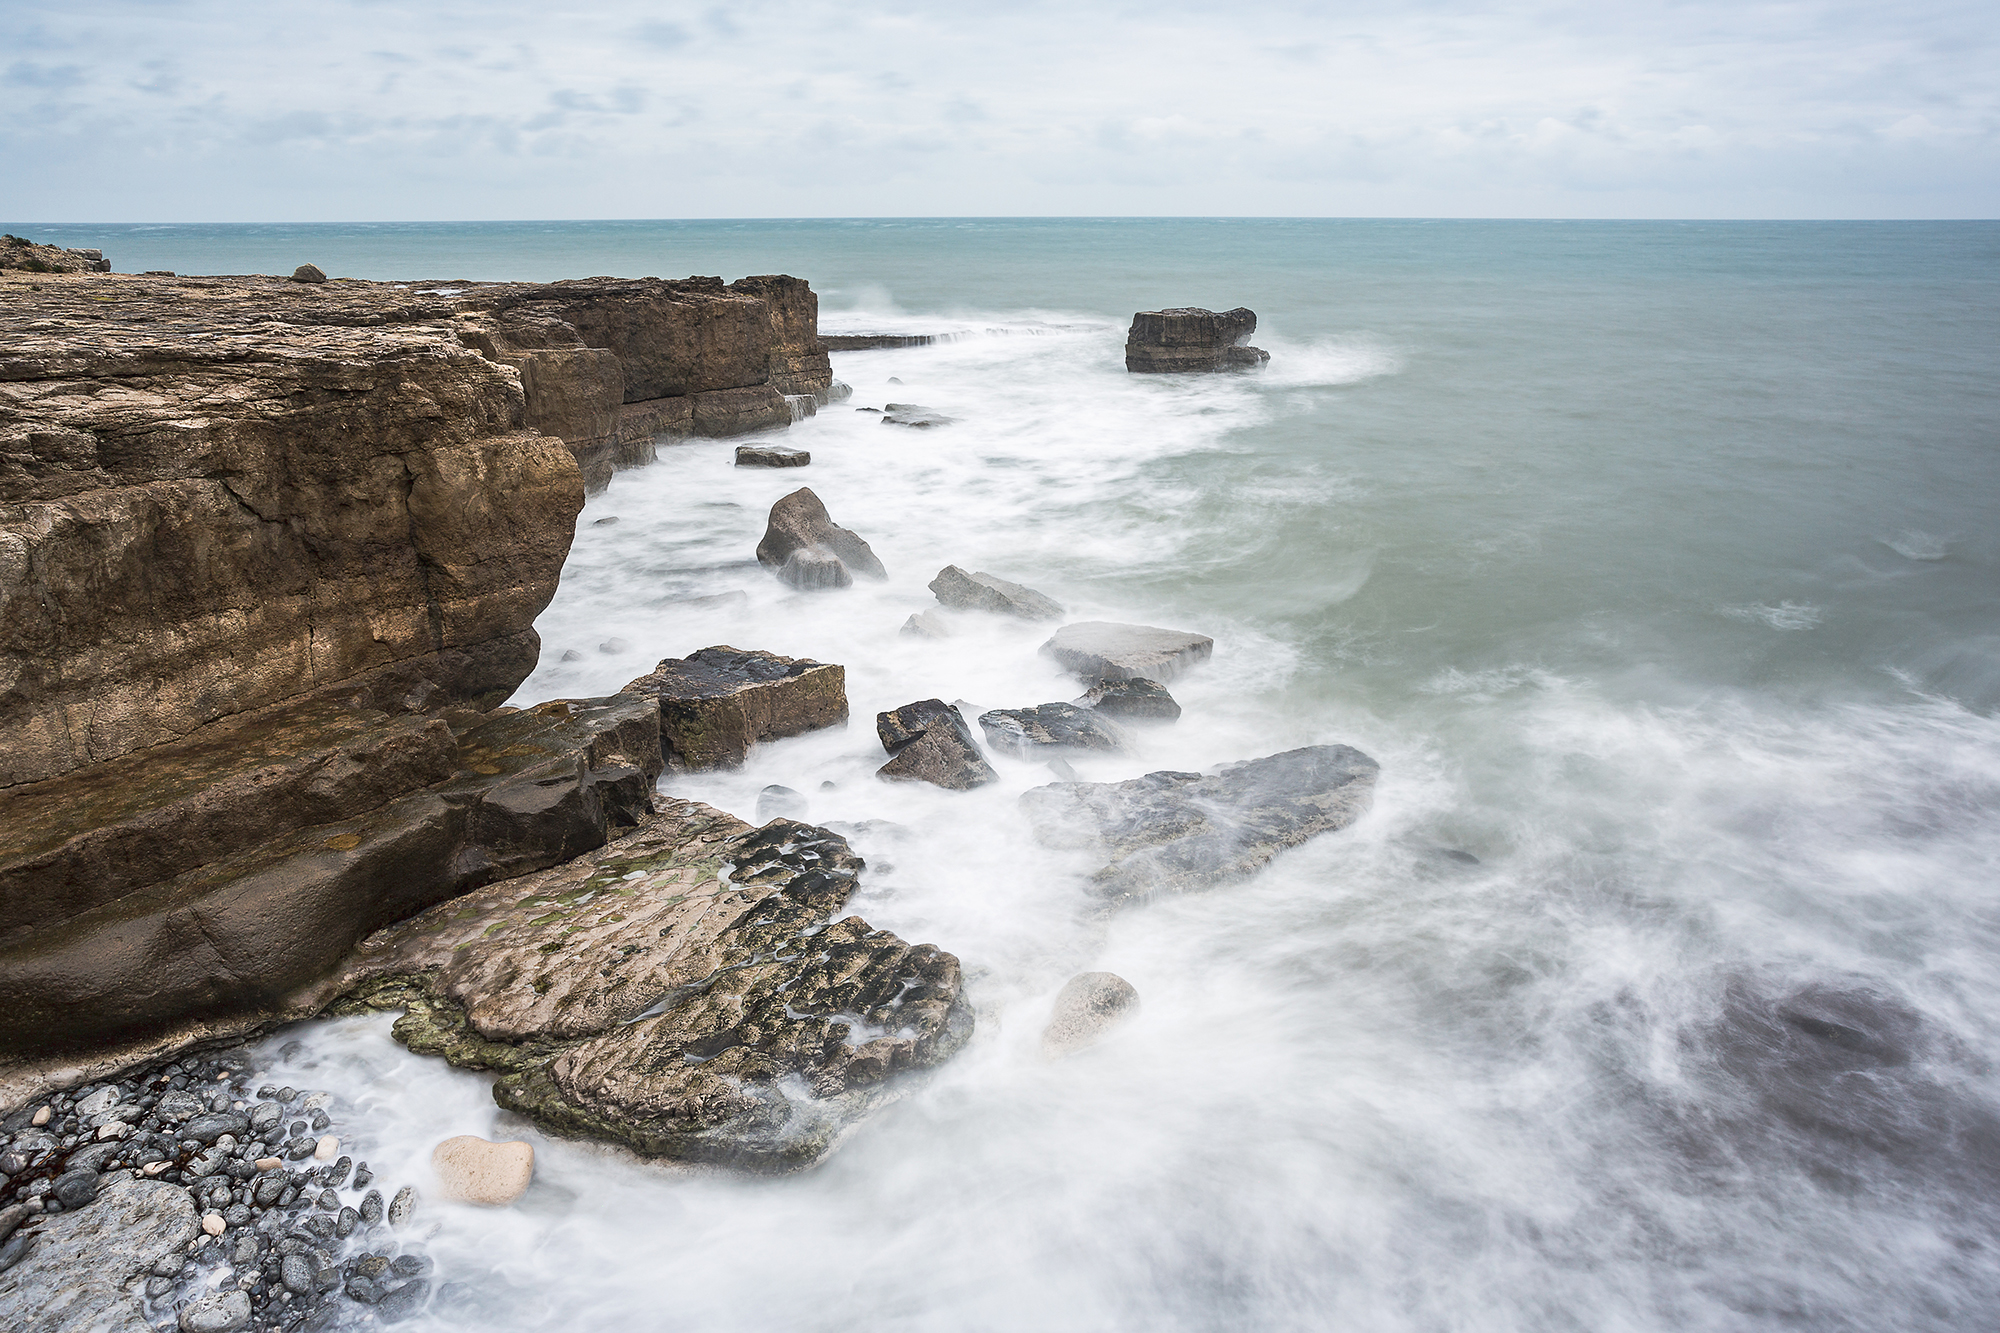
If you’re shooting scenics, a wide-angle or ultra wide-angle lens enables you to squeeze vast stretches of coastline into a single image. One of the problems with this type of lens is that the further away a feature is, the smaller it will appear in the picture, and you can end up with a large empty space in the foreground as a result. To offset this, it usually pays to find a detail that you can get relatively close to. The ‘wet foreground rock’ might have become a trope in landscape photography, but sometimes there’s nothing else for it! And there are usually plenty of wet rocks to choose from.
A standard zoom gives you a more natural look than you get from a ultra-wide or ultra-long lens, so it won’t distract viewers from the subject of the photo. Telephoto lenses are great for tighter compositions, and they’re excellent for isolating details for more abstract shots. If you’re photographing birds and wildlife, you may need something longer than the typical 70-200mm.
Fill the frame with colour
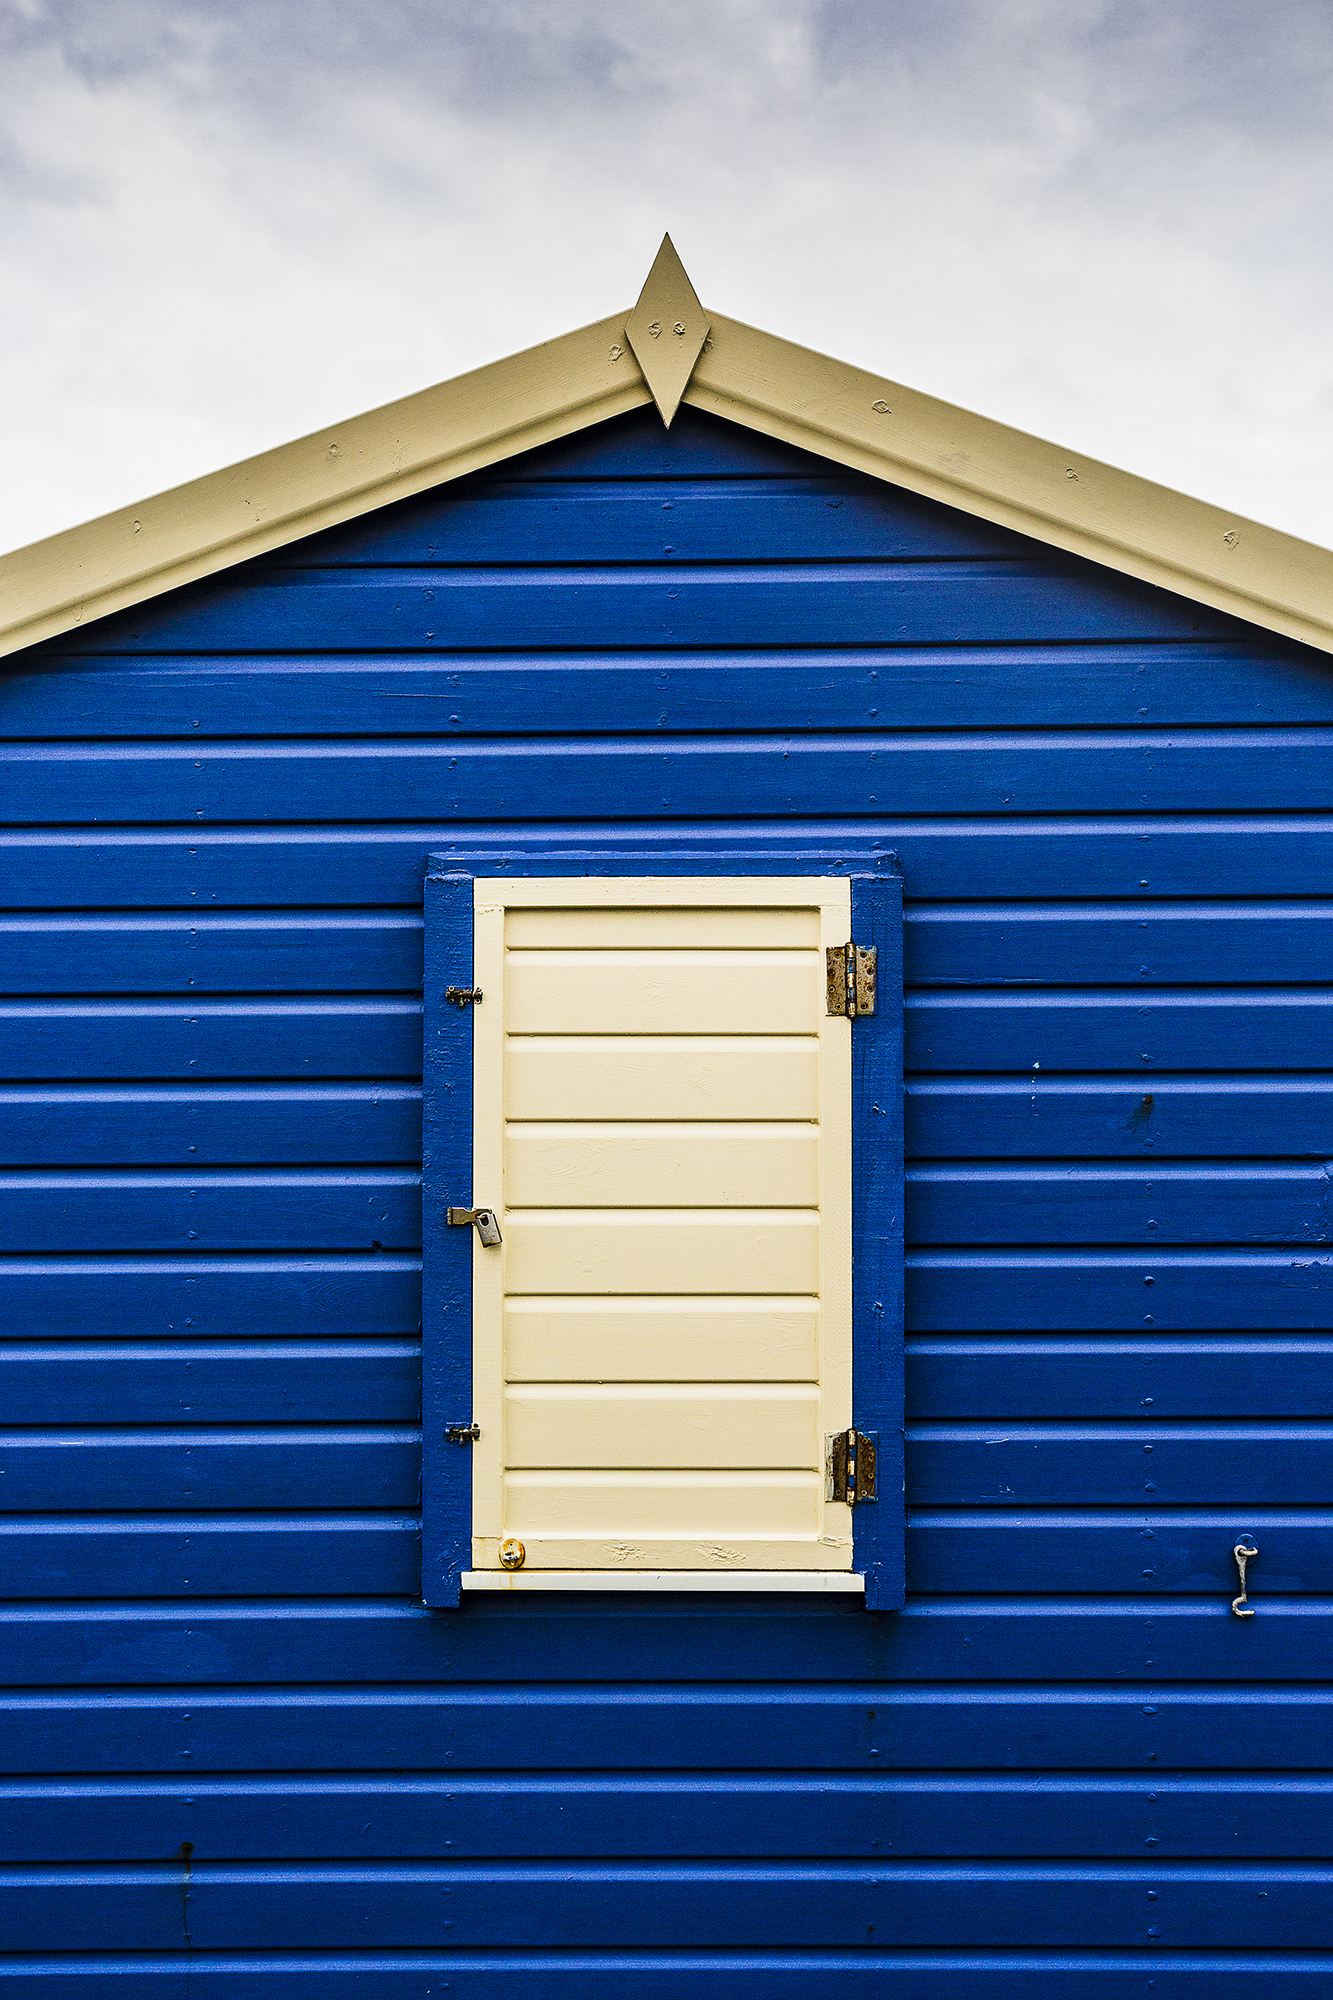
Seaside spots are often a great source of colourful subjects that can make for interesting detail studies and abstract shots. Harbours are particularly good hangouts: brightly coloured boats, peeling paintwork and rusting metal can all brighten up your shots even on a dull day. Experiment with uncluttered compositions where the colour becomes the main focus of the shot. Use a longer focal length to isolate parts of the scene from a distance – a 70-200mm lens often works well here, although you may need to increase the ISO to avoid the effects of camera shake.
Shooting seaside textures
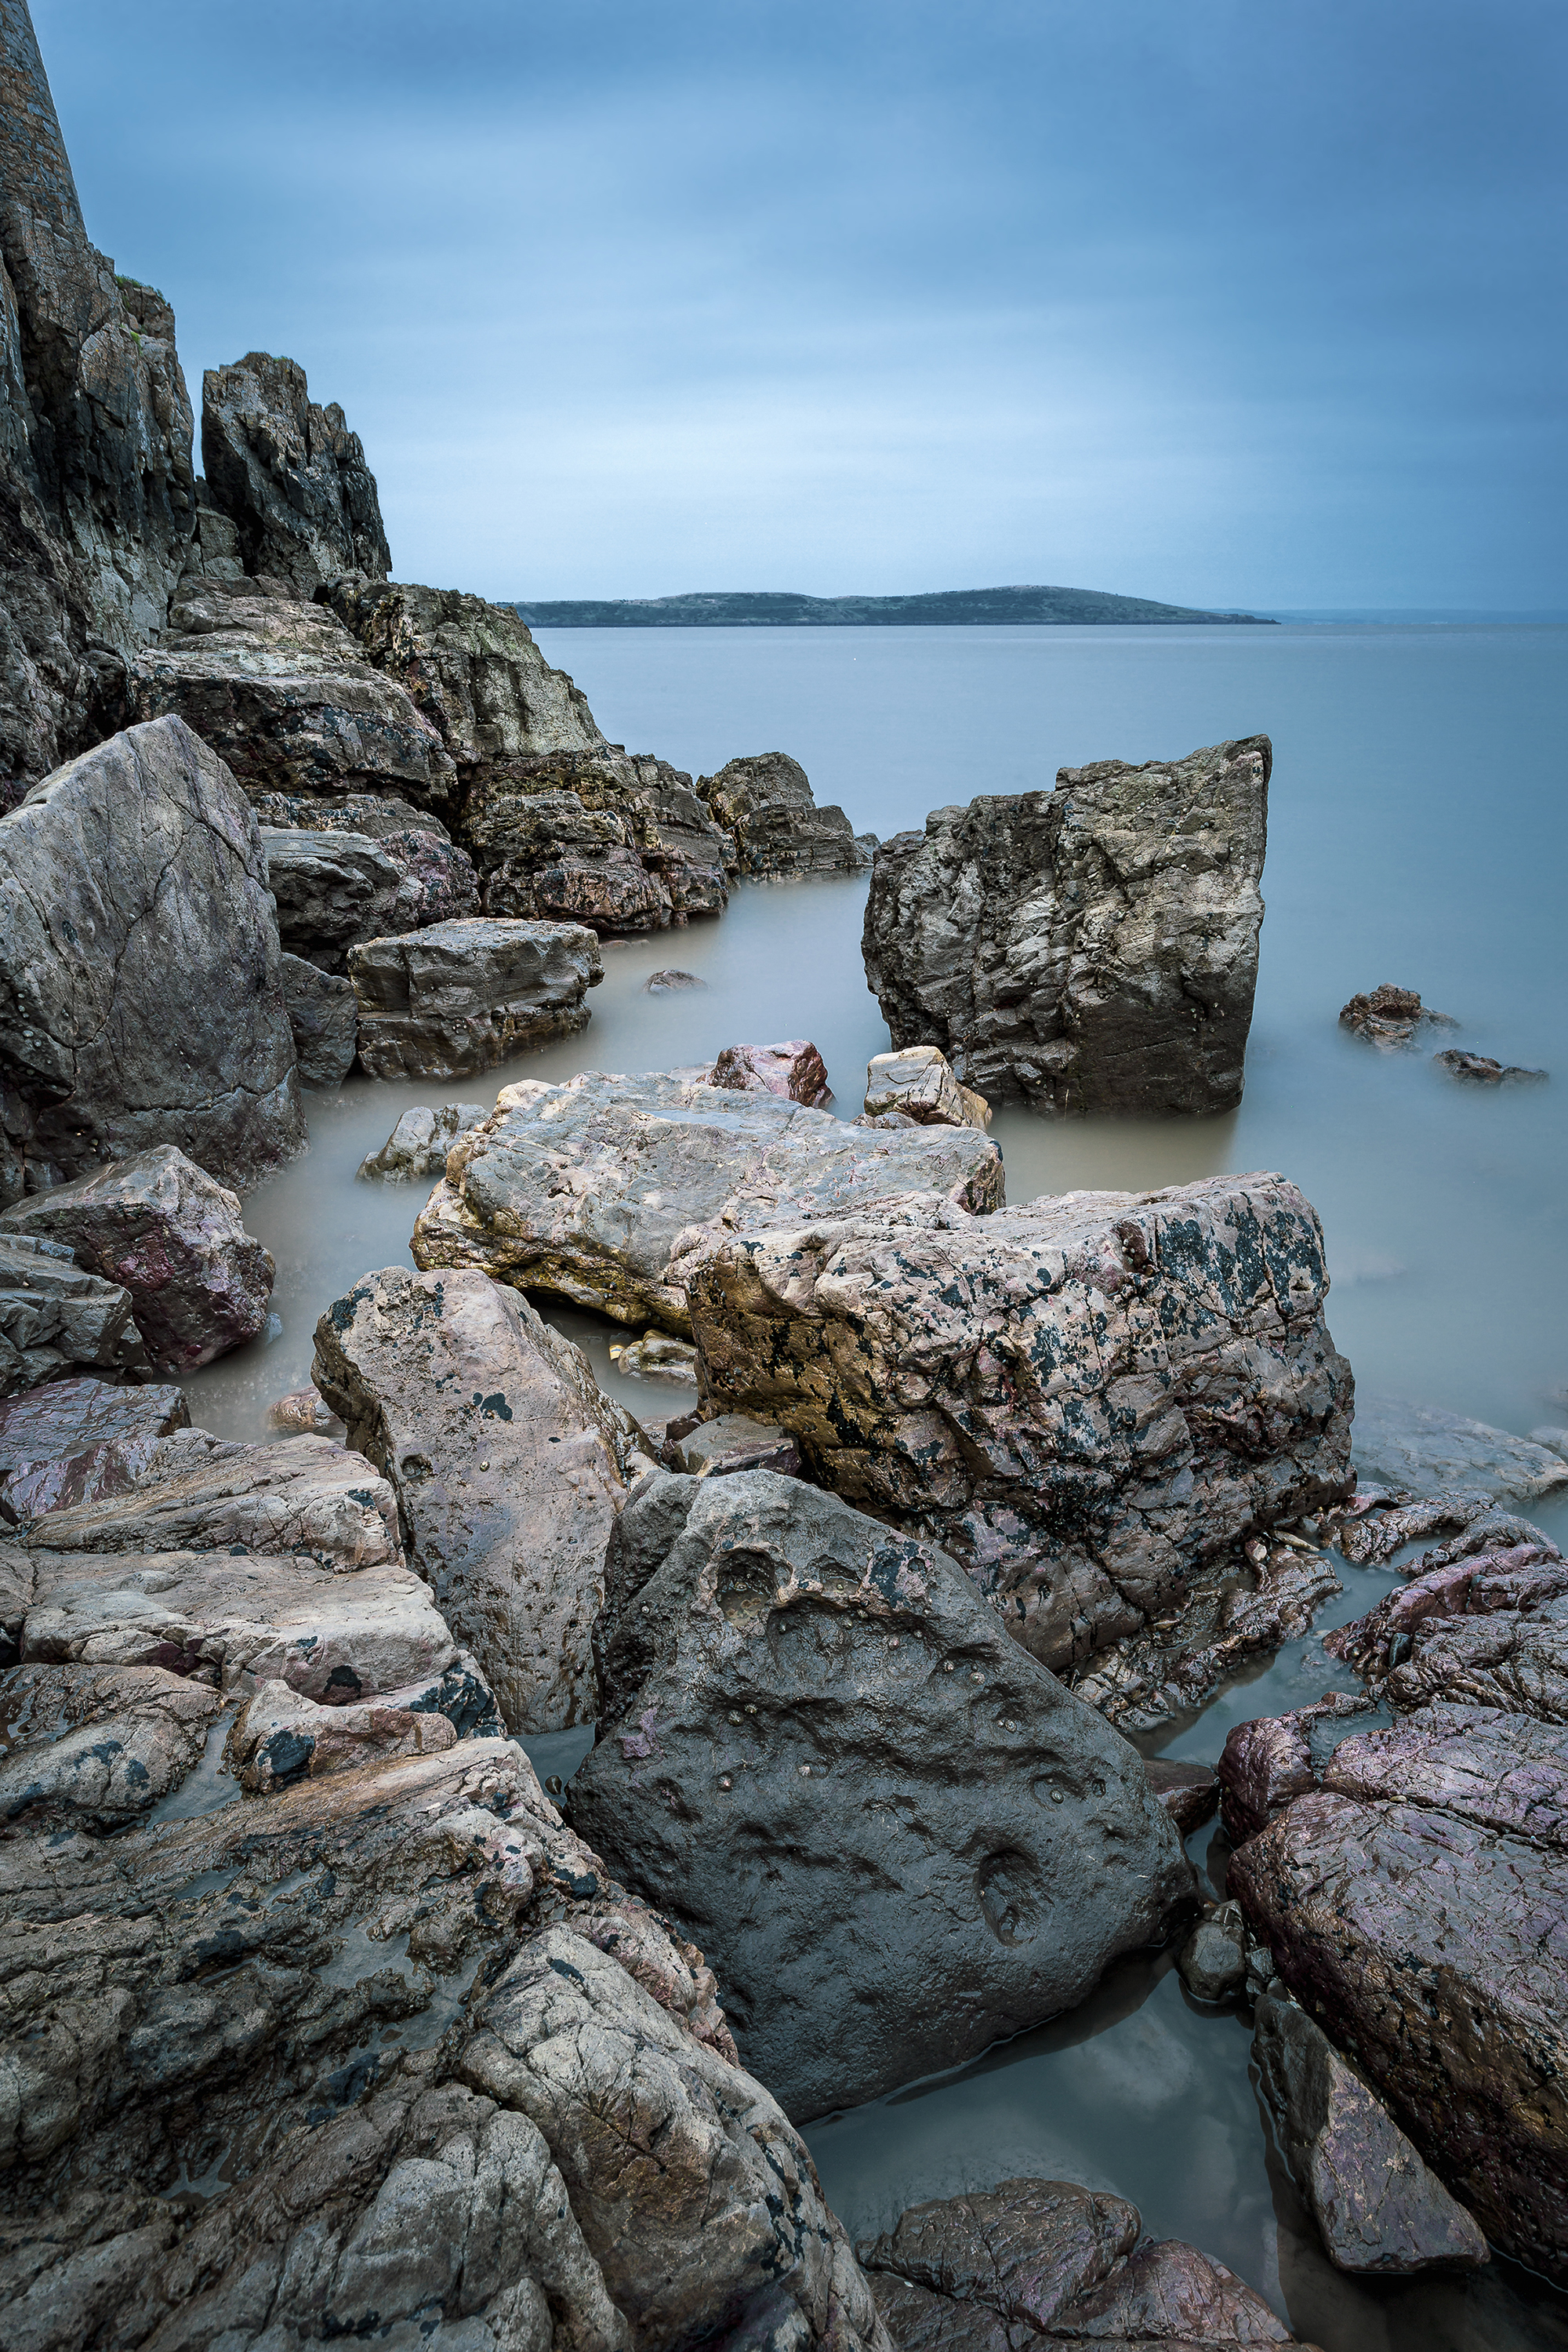
Just as you can make colour the focus of a seaside shoot (see page 75), you can do the same with texture. The coast is rich with contrasting textures, from smooth pebbles and gritty sand to the ripples and peaks formed by the wind on the sea. They can make wonderful ‘small landscapes’, which can capture a sense of place just as effectively as a squeeze-it-all-in view captured with an ultra-wide lens.
To enhance texture, relief and form, it’s usually best to shoot when the sun is relatively low in the sky at the start or end of the day. Sidelighting will provide the shadows and contrast that’s needed to bring a three-dimensional quality to an image. If there are lots of dark areas in the scene, the camera might overexpose the image: activate your camera’s highlight warning so you can remedy ‘clipped’ highlights.
It pays to fill the frame, right into the corner, as anything that interrupts the rhythm of the shot – such as patches of bright sky or a sudden change in the pattern – can be jarring.
Slow it down
Long-exposure photography is a fantastic technique to use at the coast. The visual contrast created between the glassy, slow-exposed sea and any rocks and man-made structures can lift even the most routine coastal scene.
To shoot these types of images in daylight, you’ll need a few accessories: a tripod to keep the camera still; a strong ND (neutral-density) filter rated at six or 10 stops; a way to keep the shutter held open (a simple lockable remote release will do); and a smartphone app to calculate the duration the shutter has to be open, based on the aperture and ND filter details you enter. You might also want to pack a spare battery: this technique is quite a power-hungry one.
If you’re using a DSLR, block the viewfinder so no light can leak through the eyepiece and leave ‘ghosts’ on the image.
Coastal photography tips
1. Arrive early
If you’re visiting a coastal hotspot that’s popular with photographers, arrive early to claim a plum spot. We photographers are a friendly bunch, certainly, but if someone has travelled for hours to be at the right spot at the right time, they’ll want to keep their tripod spot…
2. Cloth up!
You’ll need a stack of dry microfibre cloths to keep your camera and lens clean on breezy and stormy days, particularly if you’re shooting seascapes in exposed spots. Fit a lens hood to offer some protection to the front element – although this is more effective with telephoto lenses.
3. Check the tide times
Safety first. The last thing you want to do is be so wrapped up in taking pictures that you end up getting stranded. It’s useful to know the tide times from a photography perspective, too, as you’ll be able to plan the best time to arrive.
4. Don’t dismiss overcast days
Although you might miss out on blue-sky shots and golden sunsets, there’s a lot you can do on a grey day. Try experimenting with minimalist slow-exposure seascapes, or use the soft, diffuse light to shoot colourful abstracts.
5. Use a polariser: This filter can be used to remove reflections and glare from non-metallic objects, so it can be useful for adding punch to the colour of the sea and sky. Avoid using it on a very wide lens, as the effect can be uneven.
Reader challenge: Coastal photography
This month, we want to you to enter your best coastal shots to be in with a chance of winning a copy of Affinity Photo. With such a wide source of subjects and techniques to try – from slow-motion seascapes to tightly framed textural abstracts – this challenge is wide-open. Coastal locations are awash with picture opportunities, and it’s easy to drift from one place to the next without really thinking about what you’re doing. Choosing a subject can help to bring a bit more focus to a day at the coast. It might simply be a colour, or a theme, such as silhouettes. If you’re struggling, have a theme in mind.
To enter your best coastal image (one per reader, please), email your entry to digitalcamera@futurenet.com, putting ‘Coastal Challenge’ in the subject line. Or go to our Facebook page at www.facebook.com/digitalcameraworld, look for the ‘Coastal Challenge’ post, and upload your entry into the feed.
By entering your image into this competition, you confirm that you own the copyright to the image, and agree that Digital Camera can publish your image in relation to this competition. You retain full copyright of your image, and will be credited if it is published in the magazine. The closing date is 16 September 2021. The winner will receive a copy of Affinity Photo for Windows or macOS.
Good luck, and have fun at the seaside!
Get the Digital Camera World Newsletter
The best camera deals, reviews, product advice, and unmissable photography news, direct to your inbox!
Digital Camera World is one of the leading authorities on camera and photography news, reviews, techniques, tutorials, comparisons, deals and industry analysis. The site doesn't just specialize in cameras, but all aspects of photography, videography and imaging – including camera phones, gimbals, lenses, lighting, editing software, filters, tripods, laptops, printers, photo books, desks, binoculars and more.
Whether you're using, looking to buy or trying to get the most out of a compact camera, action camera, camera drone, cinema camera, beginner camera or professional camera, Digital Camera World has a roster of experts with combined experience of over 100 years when it comes to cameras, photography and imaging.

