Conjure up spooky edits in Affinity Photo
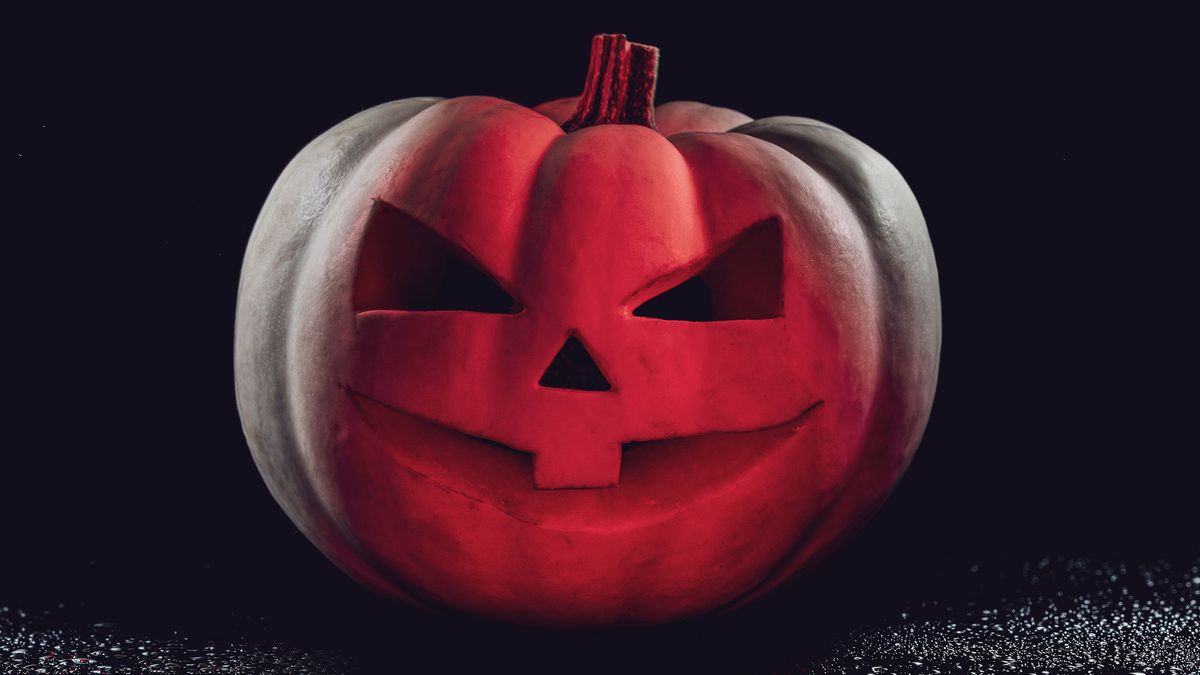
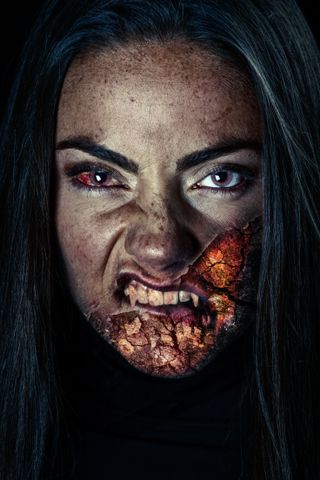
Why not transform your friends into fiendish vampires for Halloween? Not only is it a fun project to try on a dark night, it’s also a great introduction to some key toning and compositing tools in Affinity Photo.
An effect like this might seem complicated, but it’s much easier and quicker than it looks. With a cunning combination of textures and Blending Modes, we can ‘turn’ our subject in just a few minutes. Our supplied texture images can be used to create bloodshot eyes and give the skin a cracked, broken look. Then you can stretch out teeth into fangs with the Liquify command, and skew colors with a combination of Adjustment Layers.
We’ve supplied a portrait for you to practice on, but why not use your own photo as a starting point? All you need to do is photograph a person (with a suitably terrifying expression, and teeth on show) against a plain backdrop.
Get spooky with Affinity Photo
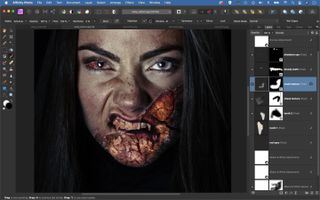
Get the grungy look
Click the Adjustment icon in the Layers Panel and choose Black & White, then click the Blending Mode dropdown and choose Luminosity. Drag down on Reds for grungy skin, then add a mask to hide any areas that look overly dark. Add a layer and change the Blending Mode to Soft Light for moody contrast, with Opacity at 50%. Add a third layer, then set Opacity to 20% to desaturate slightly.
Color the eyes
Click the Add Pixel Layer icon in the Layers Panel then go to the Blending Mode dropdown and choose Color Dodge. Double-click the color box to choose a color for the iris – we’ve chosen red – then grab the Brush Tool, zoom in, and paint over them both. Use the ] and [ keys to resize your brush. If it’s too strong, try dropping the layer Opacity. If it’s too bright, try duplicating the layer and set the copy’s Blending Mode to Multiply.
Create fangs
Grab the Selection Brush and tick Snap To Edges, then paint to select one of the teeth. (Hold Alt and paint to subtract.) Press Ctrl/Cmd+J to duplicate, then click the Liquify Persona. Use the Warp Tool to stretch the tooth into a fang. Click OK. Press Ctrl/Cmd+J to duplicate the tooth. Right-click over it, choose Transform > Flip Horizontal, and position over the other side. Add a Layer Mask and paint black to blend the fangs in.
Skin textures
Open Texture02, then copy and paste it into the portrait. Change the Blending Mode to Overlay. Grab the Move Tool and position the crack over the cheek, rotating the layer if necessary. Add a Layer Mask. Using a large, soft brush, paint with black to confine it to the cheek. Copy in Texture03, choose the Overlay Blending Mode, and paint another mask to confine it to the cheek.
Bloodshot eyes
Open Texture01 from the download. Copy and paste it into the portrait. Move it over the eye. Change the Blending Mode to Multiply. Alt-click the Layer Mask icon in the Layers Panel to add a mask. With the Brush Tool, paint with white over the whites of the eye. Duplicate the layer with Ctrl/Cmd+J, then delete the mask, position over the teeth and paint another mask with a white brush.
Creepy colors
A final Curves layer at the top of the layer stack helps to control the brightness and contrast. Drag up on the curve line to lighten, and down to darken. You can also introduce color shifts using the channels in Curves. Target Greens then drag up on the line, then target Blues and drag up. Make a new layer, then paint with black around the edges to make a vignette. Lower Opacity to suit.
Sink your teeth into Halloween photography
Other than Christmas, few calendar events provide an opportunity for such distinctive seasonal photographs as Halloween. From portraits of children in colorful costume to creepy silhouettes shot in fog, and from pumpkin-laced still-life to spooky moonlit landscapes, there are plenty of tricks and techniques to try out when it comes to creative and fun photography at this time of year.
Halloween photography is more about the ideas and execution than it is camera equipment. Technically, you can get great shots using a simple DSLR or mirrorless camera and a standard kit lens. But there are some additions that will make life a bit easier, particularly if you’re shooting in the low light of dusk, or at night. A fast 50mm or 85mm f/1.4 or f/1.8 lens will be handy for giving you beautiful blurred backgrounds for Halloween portraits, for example, as well as enabling you to achieve faster shutter speeds for sharper shots in low light without having to increase the ISO too far.
Shoot a seasonal still life
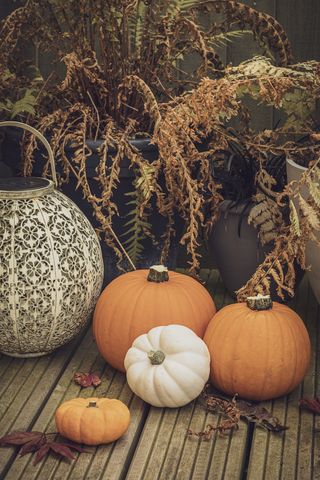
Halloween provides plenty of interesting ingredients for still-life photography. You don’t need much in the way of camera kit – a standard zoom will do just fine, and a tripod can come in handy when you want to have your hands free to tweak the arrangement.
Use the larger rear display on your camera to check the composition, as it’s
easy to miss some of the smaller details while you’re squinting into the viewfinder. Construct your still-life scene using simple shapes and lines that can be used to lead a viewer’s eye through the frame. Think in odd numbers, too, as it can be easier to balance the frame with an odd number of subjects. In the shot on the right, for example, there are five rounded objects. The lines formed by the decaying ferns in the background and by the wood in the foreground help to pull the eye towards the main subjects, too.
Use off camera flash
A remote flashgun gives you more creative control over your Halloween lighting. By placing the light at a low level and firing upwards, for example, you can give your shots the classic torch-under-the-chin horror film vibe. Of course, you’ll need a means to fire the camera remotely. A flashgun that can be triggered wirelessly is more convenient than a cable. You’ll need a transmitter device which attaches to the camera hotshoe, and a receiver that attaches to the flashgun – although some flashguns already have a transmitter/receiver built in.
Make the most of spooky settings
The location you include in your Halloween pictures is an even
more important consideration than the choice of subject, as it’s the setting and the lighting that will help to set the right mood. Obviously there’s plenty of inspiration to be had from classic horror films, with misty streets, dark forests, abandoned buildings and cemeteries being some of the staples of the genre. Or how about juxtaposing a horror costume-clad person with a more homely setting, such as a carefully staged kitchen or garden scene? You don’t even have to shoot the subject and the background at the same time: by using editing software, it’s possible to create ghostly images by blending figures from one photo with a location you’ve shot on a different occasion.
Shoot in raw for the most flexibility during the post-production stage, and think about the perspective and lighting angle when you shoot each element, so that they knit together more easily. If there’s a color mismatch, you can add a color tint to the entire image or simply go black-and-white. It’s a fun way to revisit old photos that you’re looking to do something new with.
Shoot for the moon
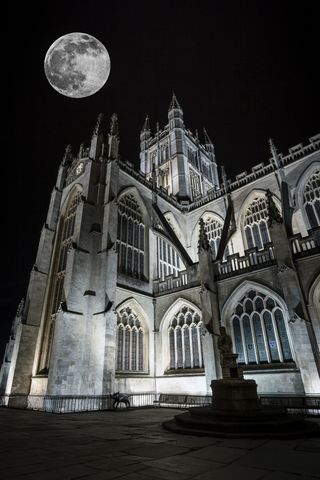
Including the moon in your Halloween shots is certainly one way to capture an evocative image. The trouble is that it can be hard to capture it at a size that will do it justice when you’re shooting a wider scene. You need a lens of around 300mm when you’re using a camera with an APS-C sensor, or 500mm with a full-frame camera.
One option is to shoot a close-up of the moon separately, then add it to your shots, either by using the multiple-exposure option on your camera (if it has one), or, more commonly, by blending it with a wider shot in editing software. Use the Screen Blending Mode for the moon layer.
To shoot the moon, attach your camera and lens to a tripod, set the lens to manual focus and use the magnified Live View image to focus on the moon’s surface.
Select Manual exposure mode and try an exposure of 1/250 sec at f/5.6, ISO 800 to start with. Take a test shot and check the histogram. If it’s overexposed, set a faster shutter speed (such as 1/500 sec), or either a narrower aperture (such as f/8) or a lower ISO. If it’s underexposed, increase the ISO or set a wider aperture (if available). Avoid using a shutter speed that’s any slower, as this can lead to blurred shots. To get the sharpest results, fire the camera using a remote shutter release or the built-in timer.
5 Halloween photography tips
1) Don’t wait for nightfall
By starting to shoot when there’s some color left in the sky, you’ll find it easier to create more balanced exposures. Frame your subject against the sky and underexpose for the ambient light, then use an off-camera flashgun to create creepy lighting effects.
2) Take inspiration from horror films
Study how cinematographers and directors frame and compose sequences – whether that’s using low-key lighting and dense shadows across the frame to increase the tension, or using a low, tilted camera angle to make the subject appear more imposing. Borrow some of their ideas to take your Halloween shots up a gear.
3) Use props
You don’t have to spend a fortune on detailed costumes. A little goes a long way when it comes to capturing the Halloween spirit: candles, cobwebs, creepy dolls…
4) Play with color: Color has a psychological impact, and you can use it to stir the emotions of viewers. Try giving your photos a digital tint: blue and green will have a ‘chilling’ effect, for example, whereas orange and yellow will evoke seasonal colors.
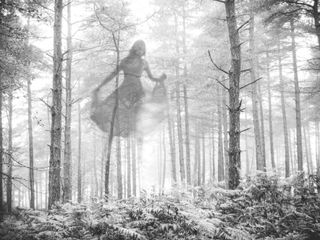
5) Experiment with silhouettes: Like old-school horror films, it’s often what you can’t see within the frame that creates a sense of unease. Use shadows and silhouettes to obscure details and give everyday scenes a bit more menace.
Reader challenge: Halloween
This month, we want to see your best Halloween shots for a chance to win a copy of Affinity Photo. It might only be one evening of the year but, like any commercialized calendar event, the run-up to Halloween seems to stretch for months! So there should be plenty of subjects to train your lens at over the next couple of weeks. From poltergeist portraits to spooky still-life shots, anything goes!
To enter your best Halloween shot (one per reader, please), either email your entry to digitalcamera@futurenet.com, putting ‘Halloween’ in the subject line; or go to our Facebook page at www.facebook.com/digitalcameraworld, look for the ‘Halloween’ post, and upload your entry into the feed.
By entering your image into this competition, you confirm that you own the copyright to the image, and agree that Digital Camera can publish your image in relation to the ‘Halloween’ competition. You retain full copyright of your image, and will be credited if published, The closing date is 11 November 2021. The winner will receive a copy of Affinity Photo for Windows or macOS. Good luck!
Get the Digital Camera World Newsletter
The best camera deals, reviews, product advice, and unmissable photography news, direct to your inbox!
Digital Camera World is one of the leading authorities on camera and photography news, reviews, techniques, tutorials, comparisons, deals and industry analysis. The site doesn't just specialize in cameras, but all aspects of photography, videography and imaging – including camera phones, gimbals, lenses, lighting, editing software, filters, tripods, laptops, printers, photo books, desks, binoculars and more.
Whether you're using, looking to buy or trying to get the most out of a compact camera, action camera, camera drone, cinema camera, beginner camera or professional camera, Digital Camera World has a roster of experts with combined experience of over 100 years when it comes to cameras, photography and imaging.
