Create stunning abstract art with Affinity Photo
90-DAY FREE TRIAL:
Try Affinity Photo and get 50% off if you decide to purchase. Click here for more information!
If you’ve never explored the Affinity Photo Brush Tool controls before, you’re in for a treat. While the Brush Tool does everything you’d expect it to, look a little closer and you’ll see it can also do an awful lot more.
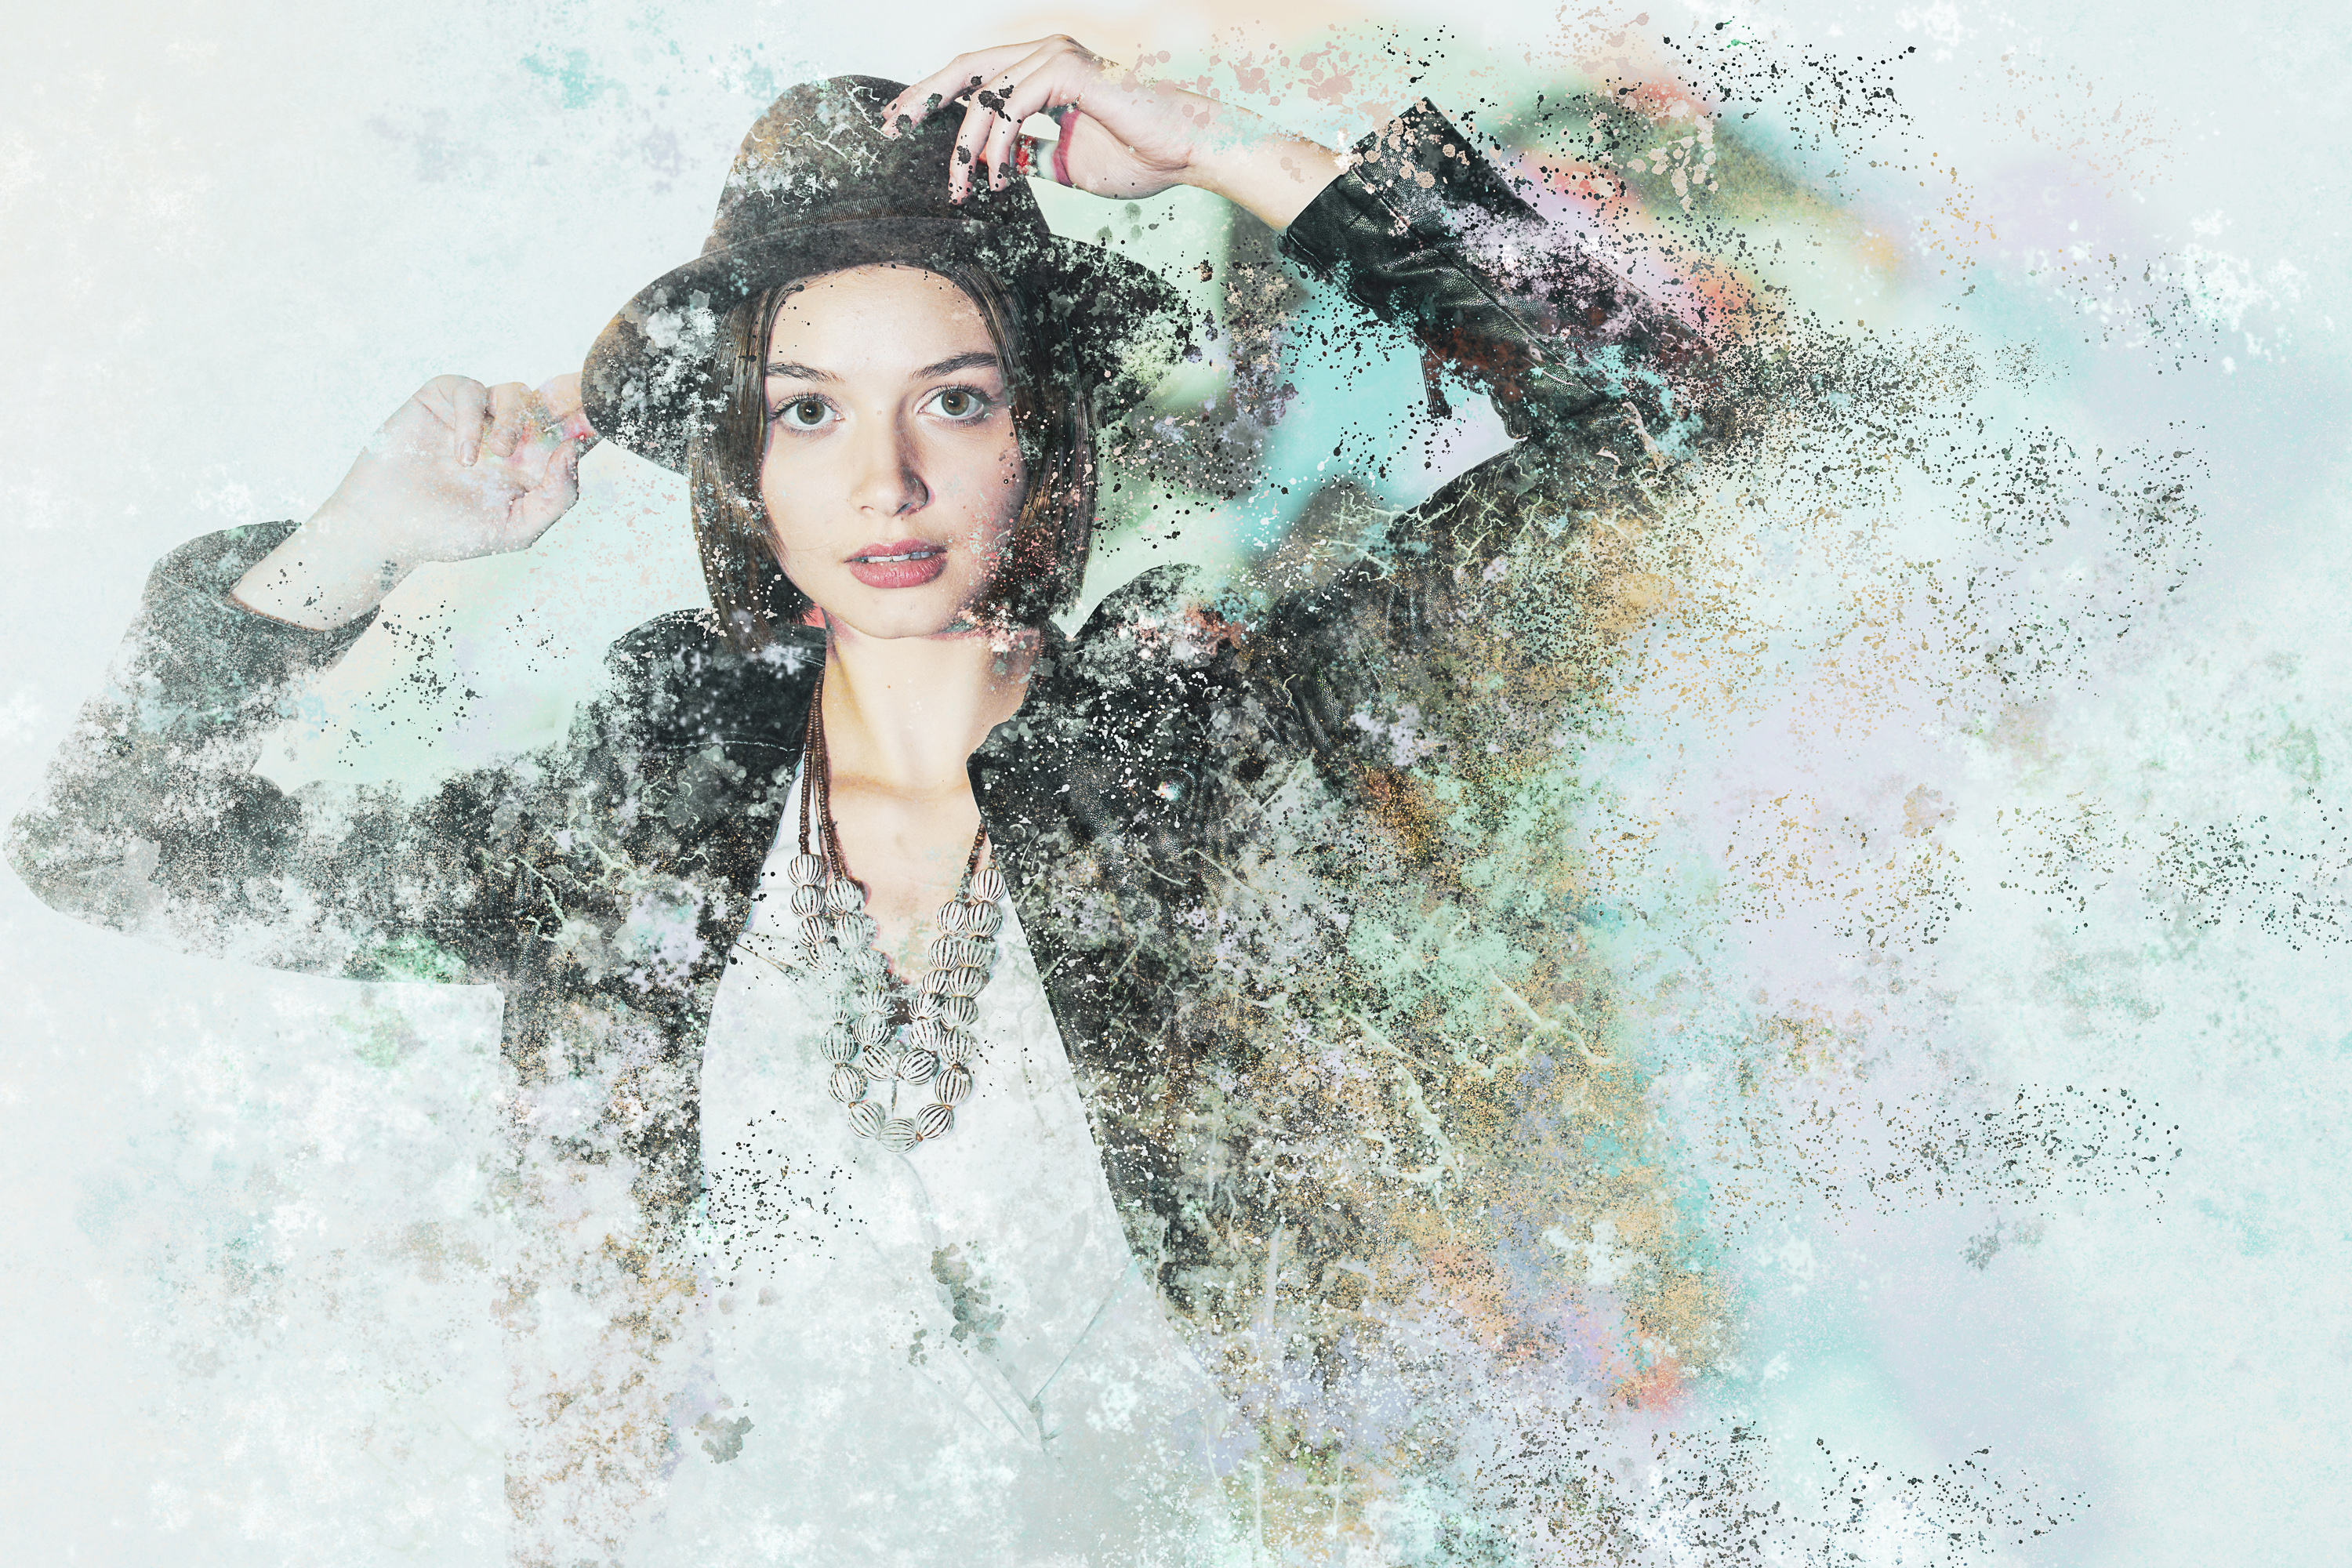
For starters, there’s the vast library of brush tips. These go beyond the standard circular brushes we use day to day, to include all manner of shapes, textures, painterly strokes and other fun effects. Here we’ve made use of the excellent scatter and texture brushes to create our portrait effect.
Whether you want to create digital art, replicate traditional painting styles, make advanced composites or simply open a blank document and start painting, you’ll find plenty of useful settings within the Brush Tool. Not only can these give you a range of effects, they can also speed up your brush work.
An image like this might look complicated, but by utilizing these brushes in combination with powerful scattering and sizing jitters, it’s surprisingly easy to
come up with an effect like this in a matter of minutes. We’ll look at the key Brush Tool settings here.
Get to grips with the Brush tool
Essential brush shortcuts
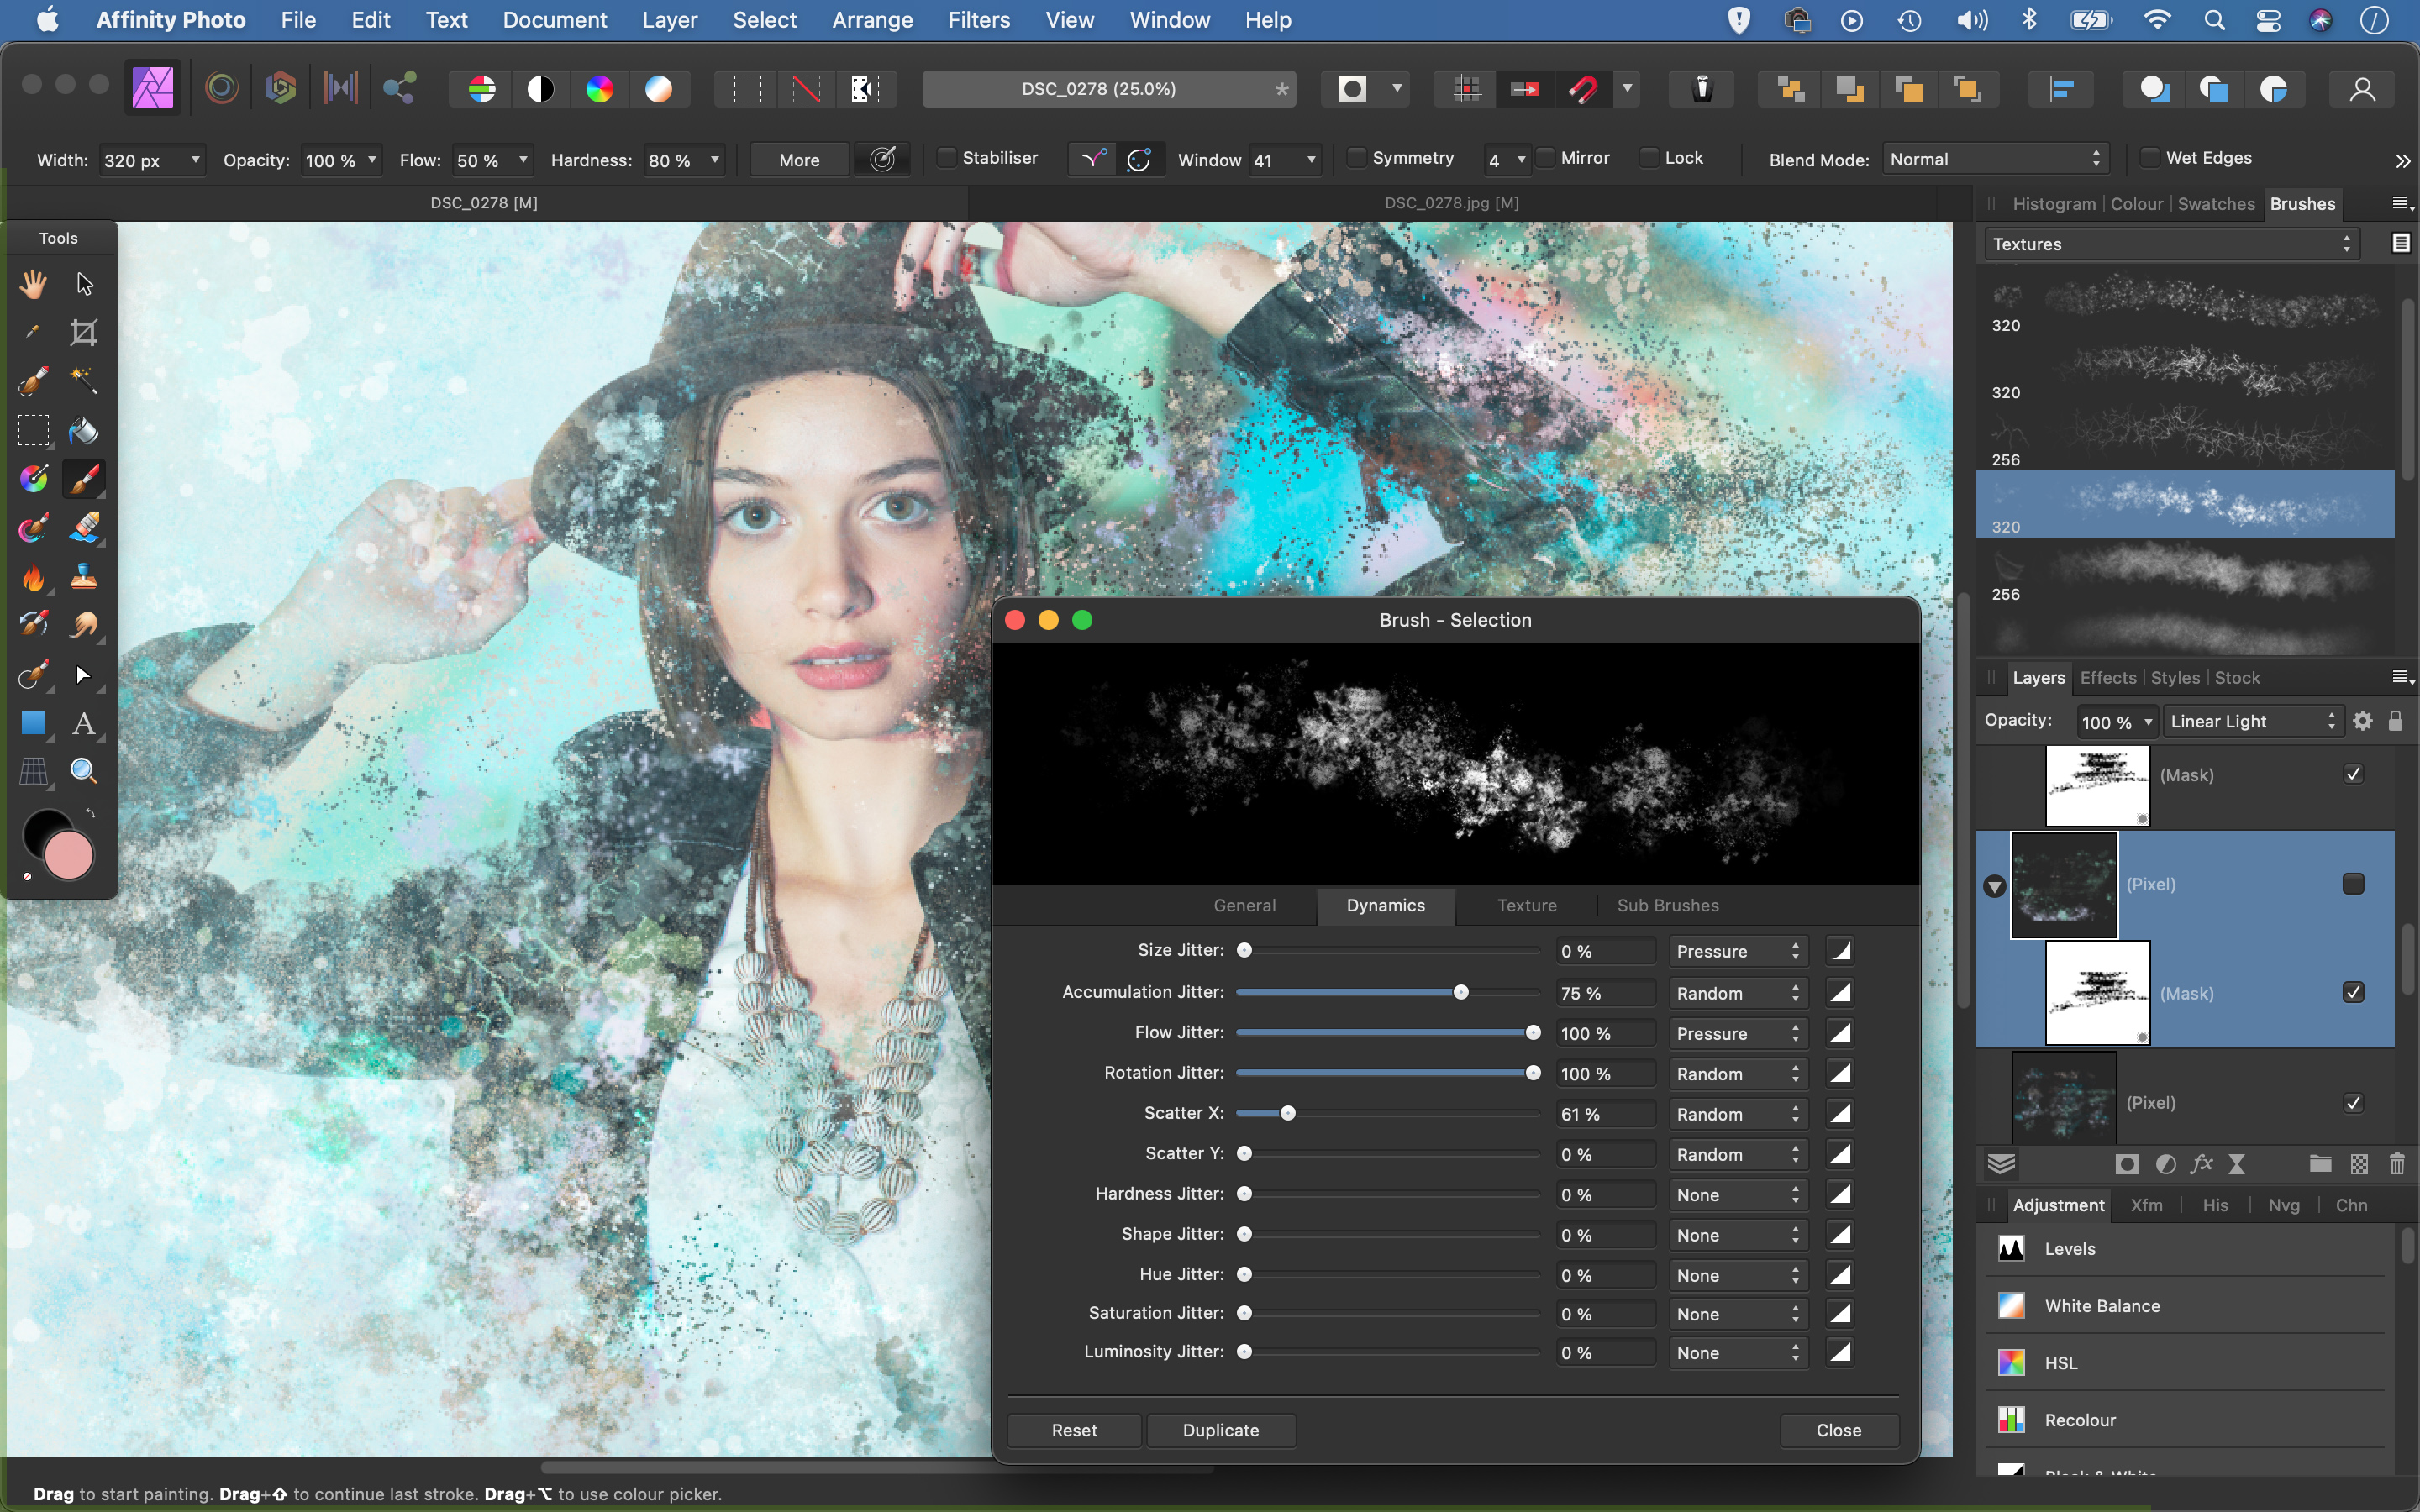
Tool options at the top let you resize your brush tip, but keyboard shortcuts are quicker. Press the ] and [ keys to change the size, Ctrl+Alt-click (macOS) or Alt-left-click+right-click (Windows) and drag left/right to change brush size or up/down to alter brush hardness. Alt-click to sample colors from your image, and change the opacity with the number keys.
Brush stroke features
Stabilizer helps to smooth out your brush strokes, which is useful for making smooth curved lines while painting with a mouse. (Adjust Window to control the strength of smoothing.) Wet Edges affects the edges of your brush tip, allowing colors to blend with one another. Turn Symmetry on and set a number of segments, then start painting to create wonderful symmetrical patterns.
The Brushes Panel
As well as the standard round brushes, you’ll find a huge array of different brush tips, accessed via the dropdown at the top. We used the Textures and Sprays And Scatters sets to create our effect. You can also import sets and make your own using the flyout menu. It’s worth investing in a pen and tablet so you can make use of pressure and angle sensitivity for more control over your painting.
Scatter settings and more
Click the More button for a host of wonderful brush settings. The Dynamics tab is particularly useful for our scattered effect: its sliders let you randomize your brush tip by increasing scattering, size and angle jitters. You can even adjust the ramp chart next to each slider to determine how the effect builds up, and set controls for things like brush pressure and angle (when using a pen and tablet).
Paint on Layer Masks
Brushes aren’t just for painting pixel layers: they can work wonders on Layer Masks, too. Here we cut out our subject and filled the area behind here (with the Inpainting command) then added a mask to the cut-out layer. We can paint black onto the mask with scatter brush tips to hide parts of the subject. Opacity sets how see-through the brush is, while Flow controls how quickly it lays down paint.
Paint on pixel layers
For a scatter effect, it’s best to add an empty layer above your image layer, then paint with various brushes while sampling colors from the image. You can also experiment with Blending Modes for interesting effects. Here we’ve used the Linear Light Blending Mode to mix our colors. Blending Modes can also be applied to your brush tip – the brush tip preview shows how the effect will work.
Explore motion blur in photography
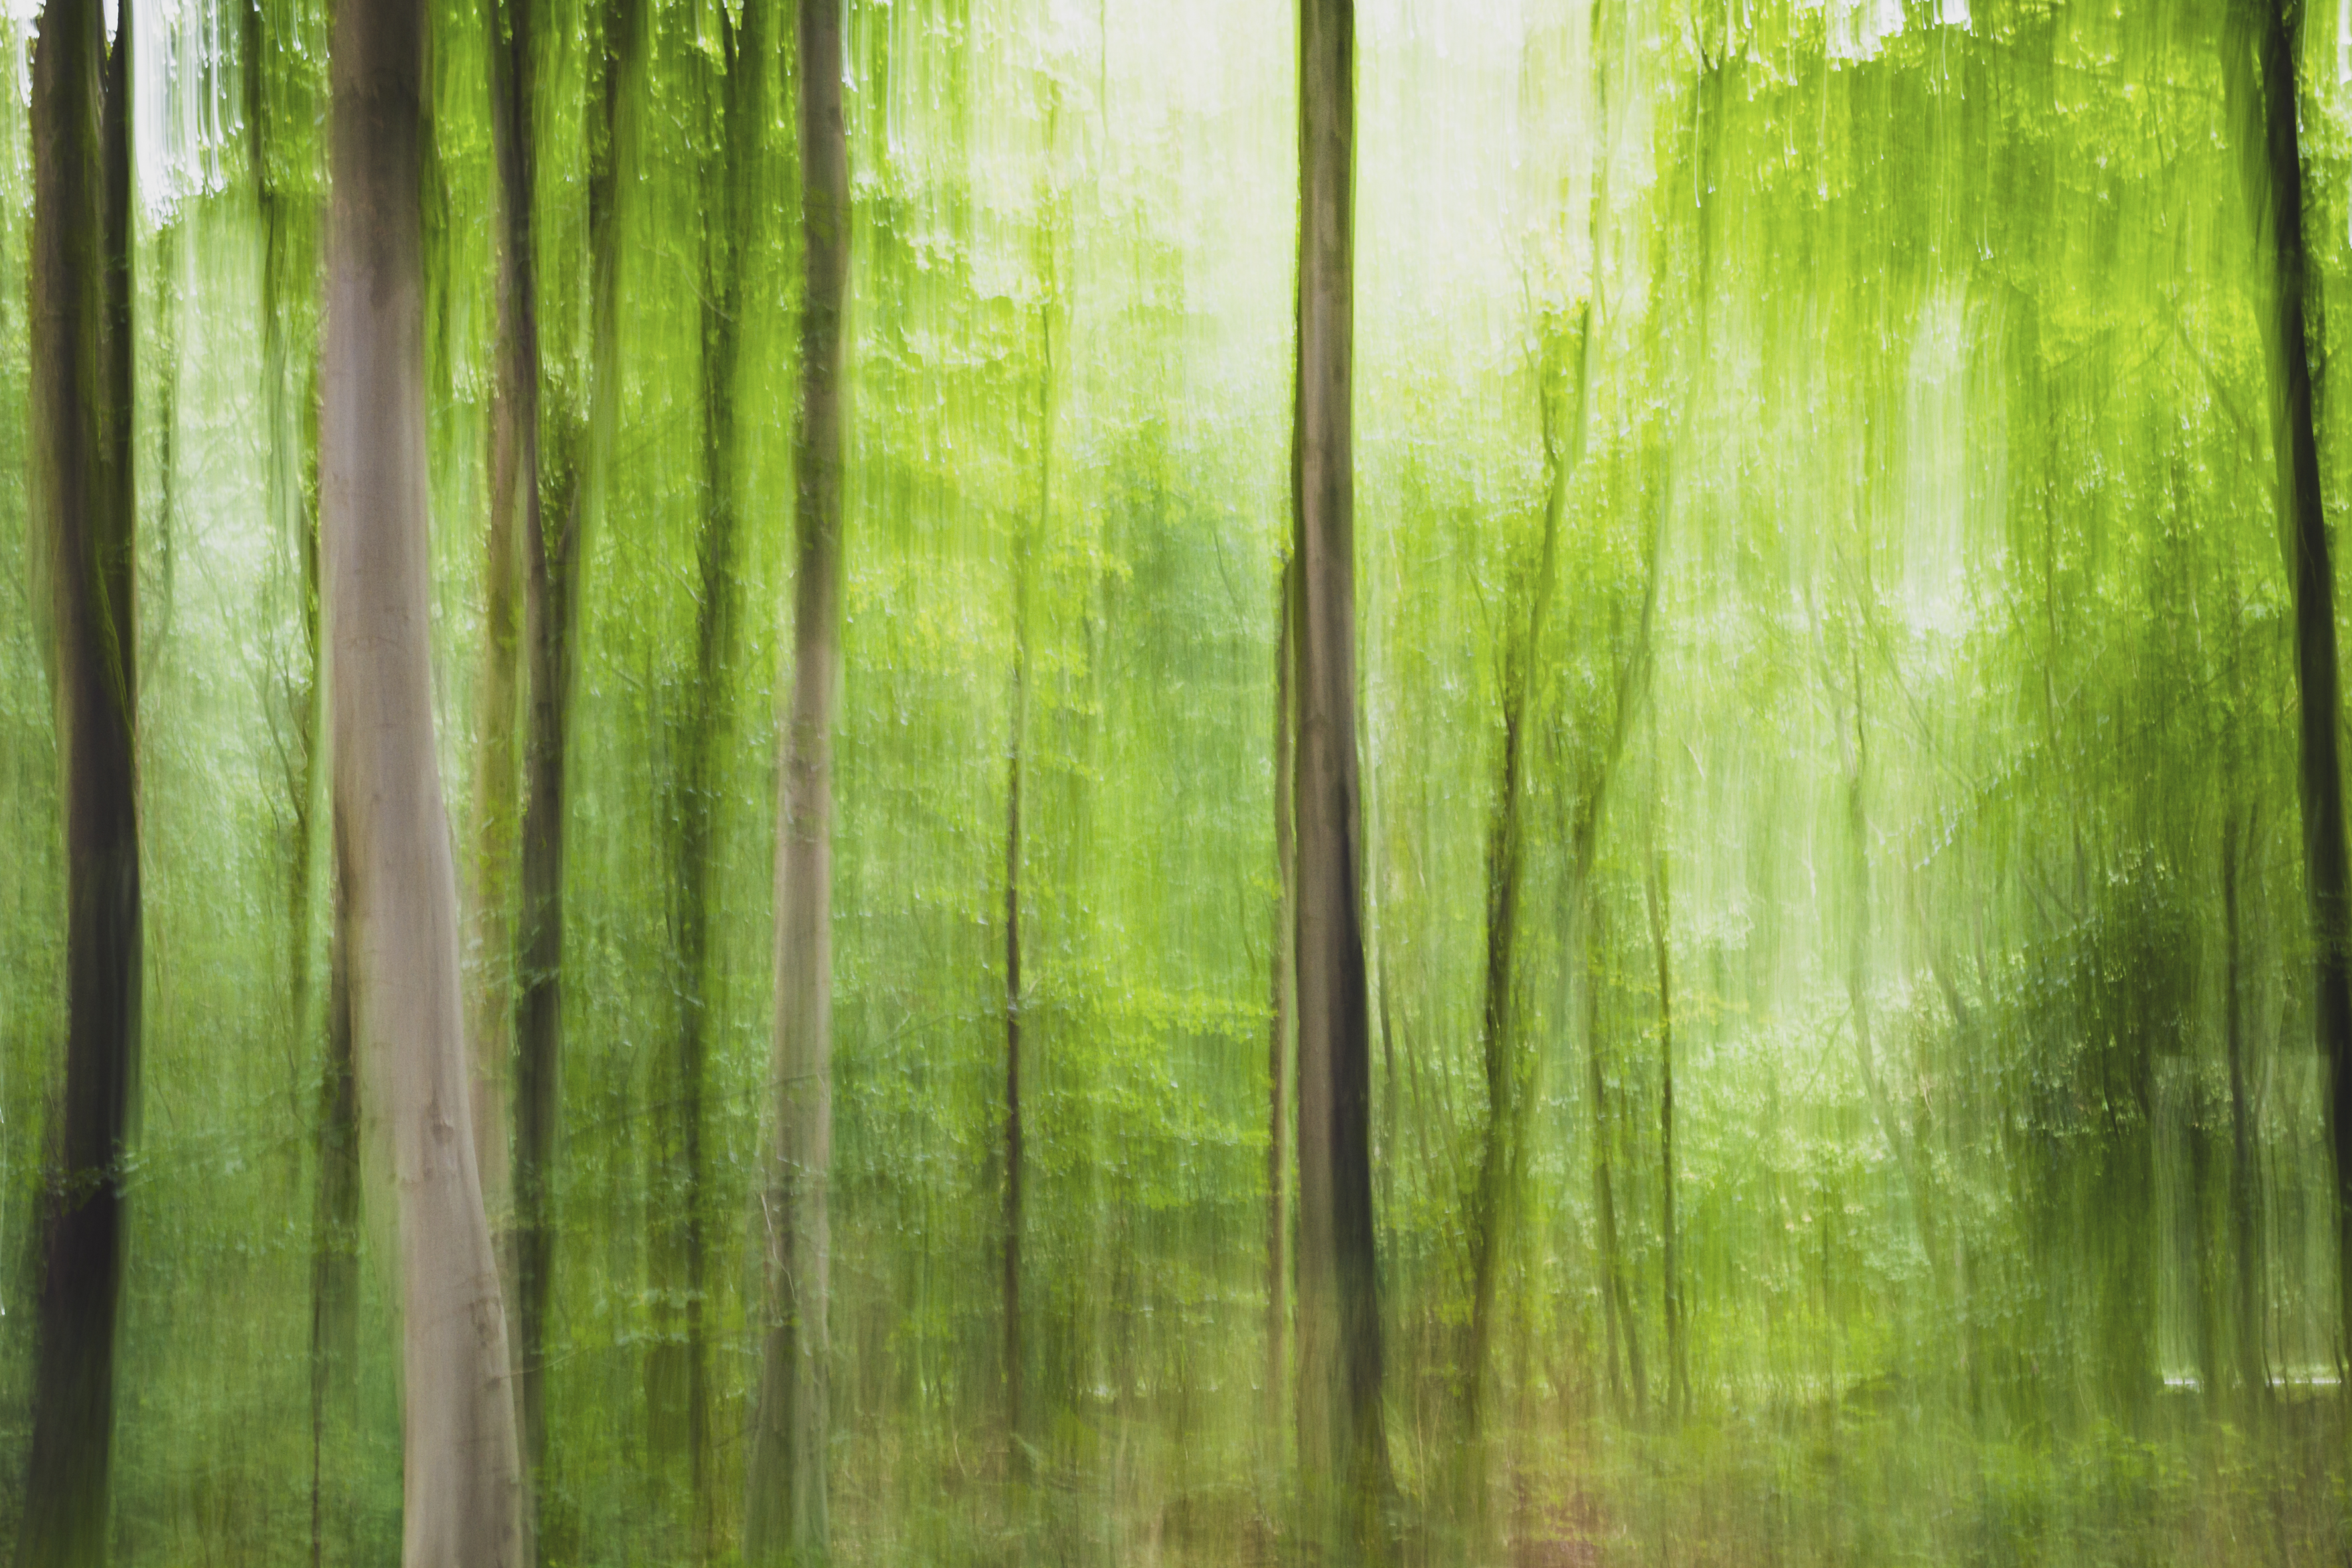
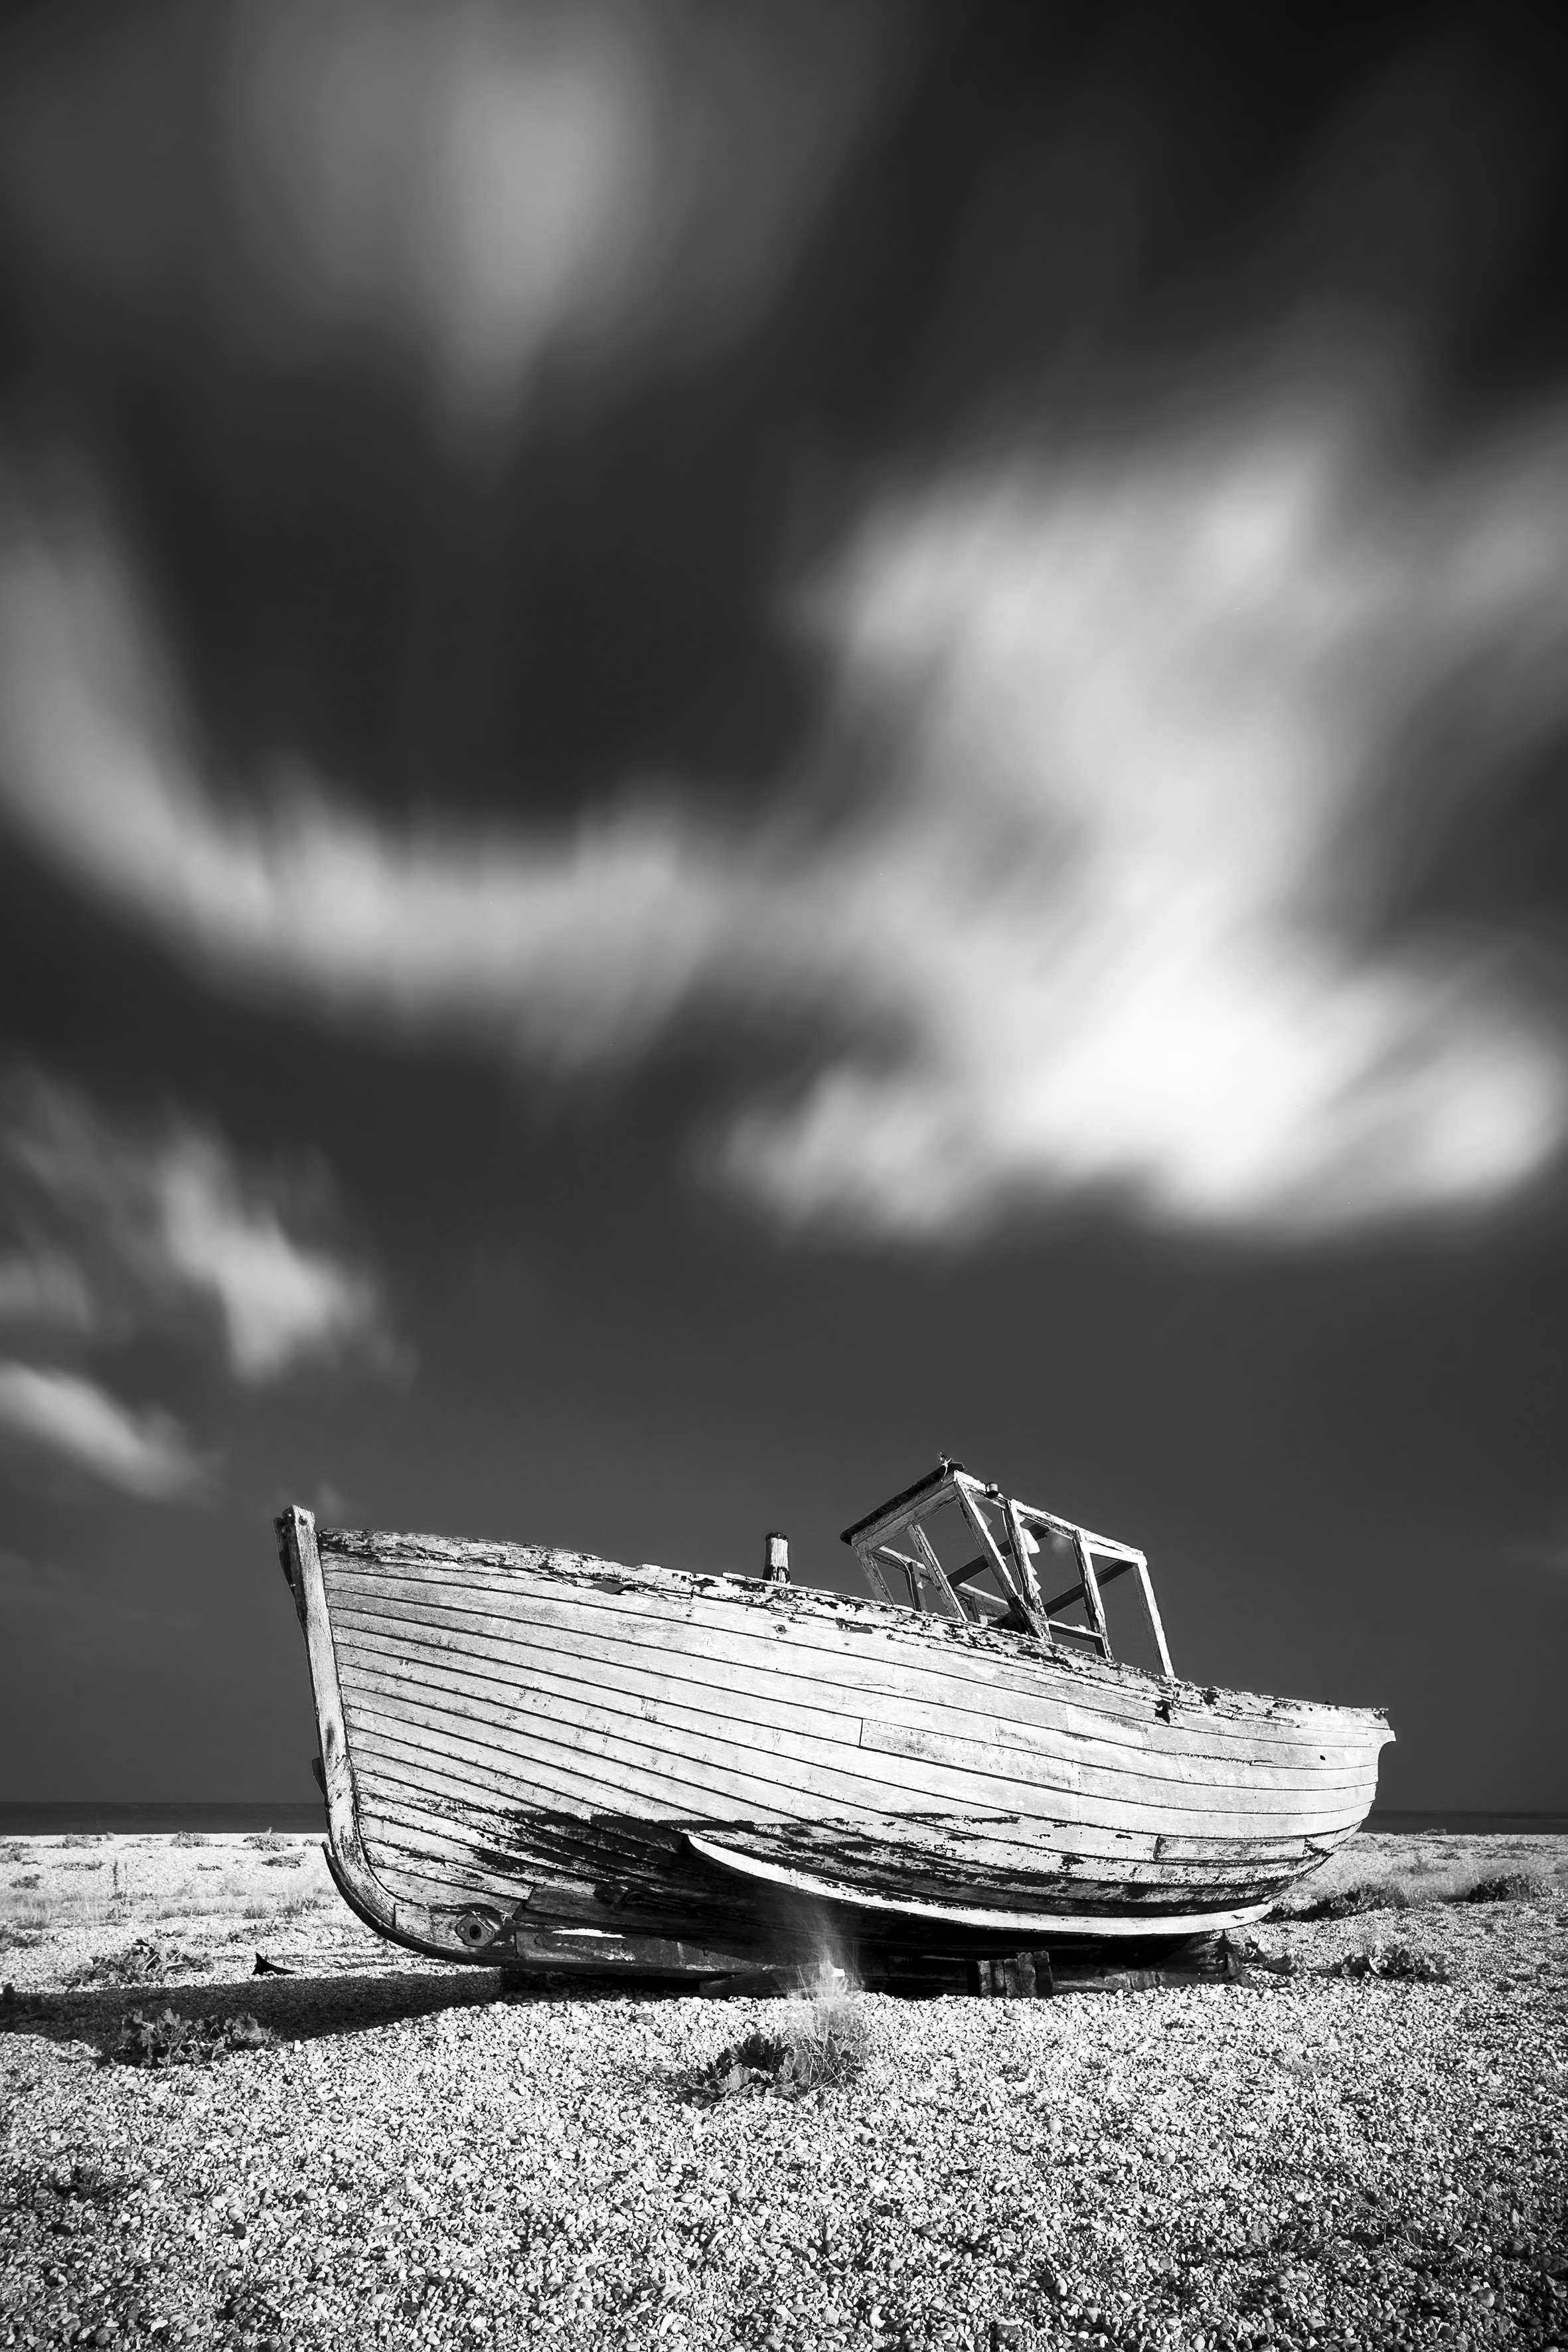
Motion blur is music to the eyes. (Bear with me.) One minute it can be used to pump up and energize a picture; the next it can help to slow down the pace of things and create a more relaxing mood. It’s a technique that can be applied to any subject, even ones that are stationary – or moving so slowly that it’s impossible to discern in real time.
Generally speaking, when it comes to motion blur, you need to make sure there’s enough of it to make it look intentional rather than just bad photography. While motion blur on the wheels of a motorbike will enhance the sense of speed, for example, if the rest of the bike and the rider are indistinct, it will probably look as though you’ve made a mistake.
Moving camera, or moving subject?
To create motion blur you obviously need a moving element. That can be either the subject or your camera, or a combination of both.
If you’re moving the camera to track a moving subject, try to pan the camera smoothly so that the motion blur ‘streaks’ in one direction: this enhances the sense of speed. Using an image-stabilized lens or camera that can detect panning will help to stabilize the camera for movement in the opposite plane – so it will reduce vertical camera shake if you’re panning left to right, for example. This feature can also be useful when you’re shooting stationary subjects. Minimizing the side-to-side movement meant that the trunks stayed well defined.
Finally, there’s the option of keeping the camera still and allowing the scene to move. Use a tripod to keep the stationary parts sharp.
Making long exposures
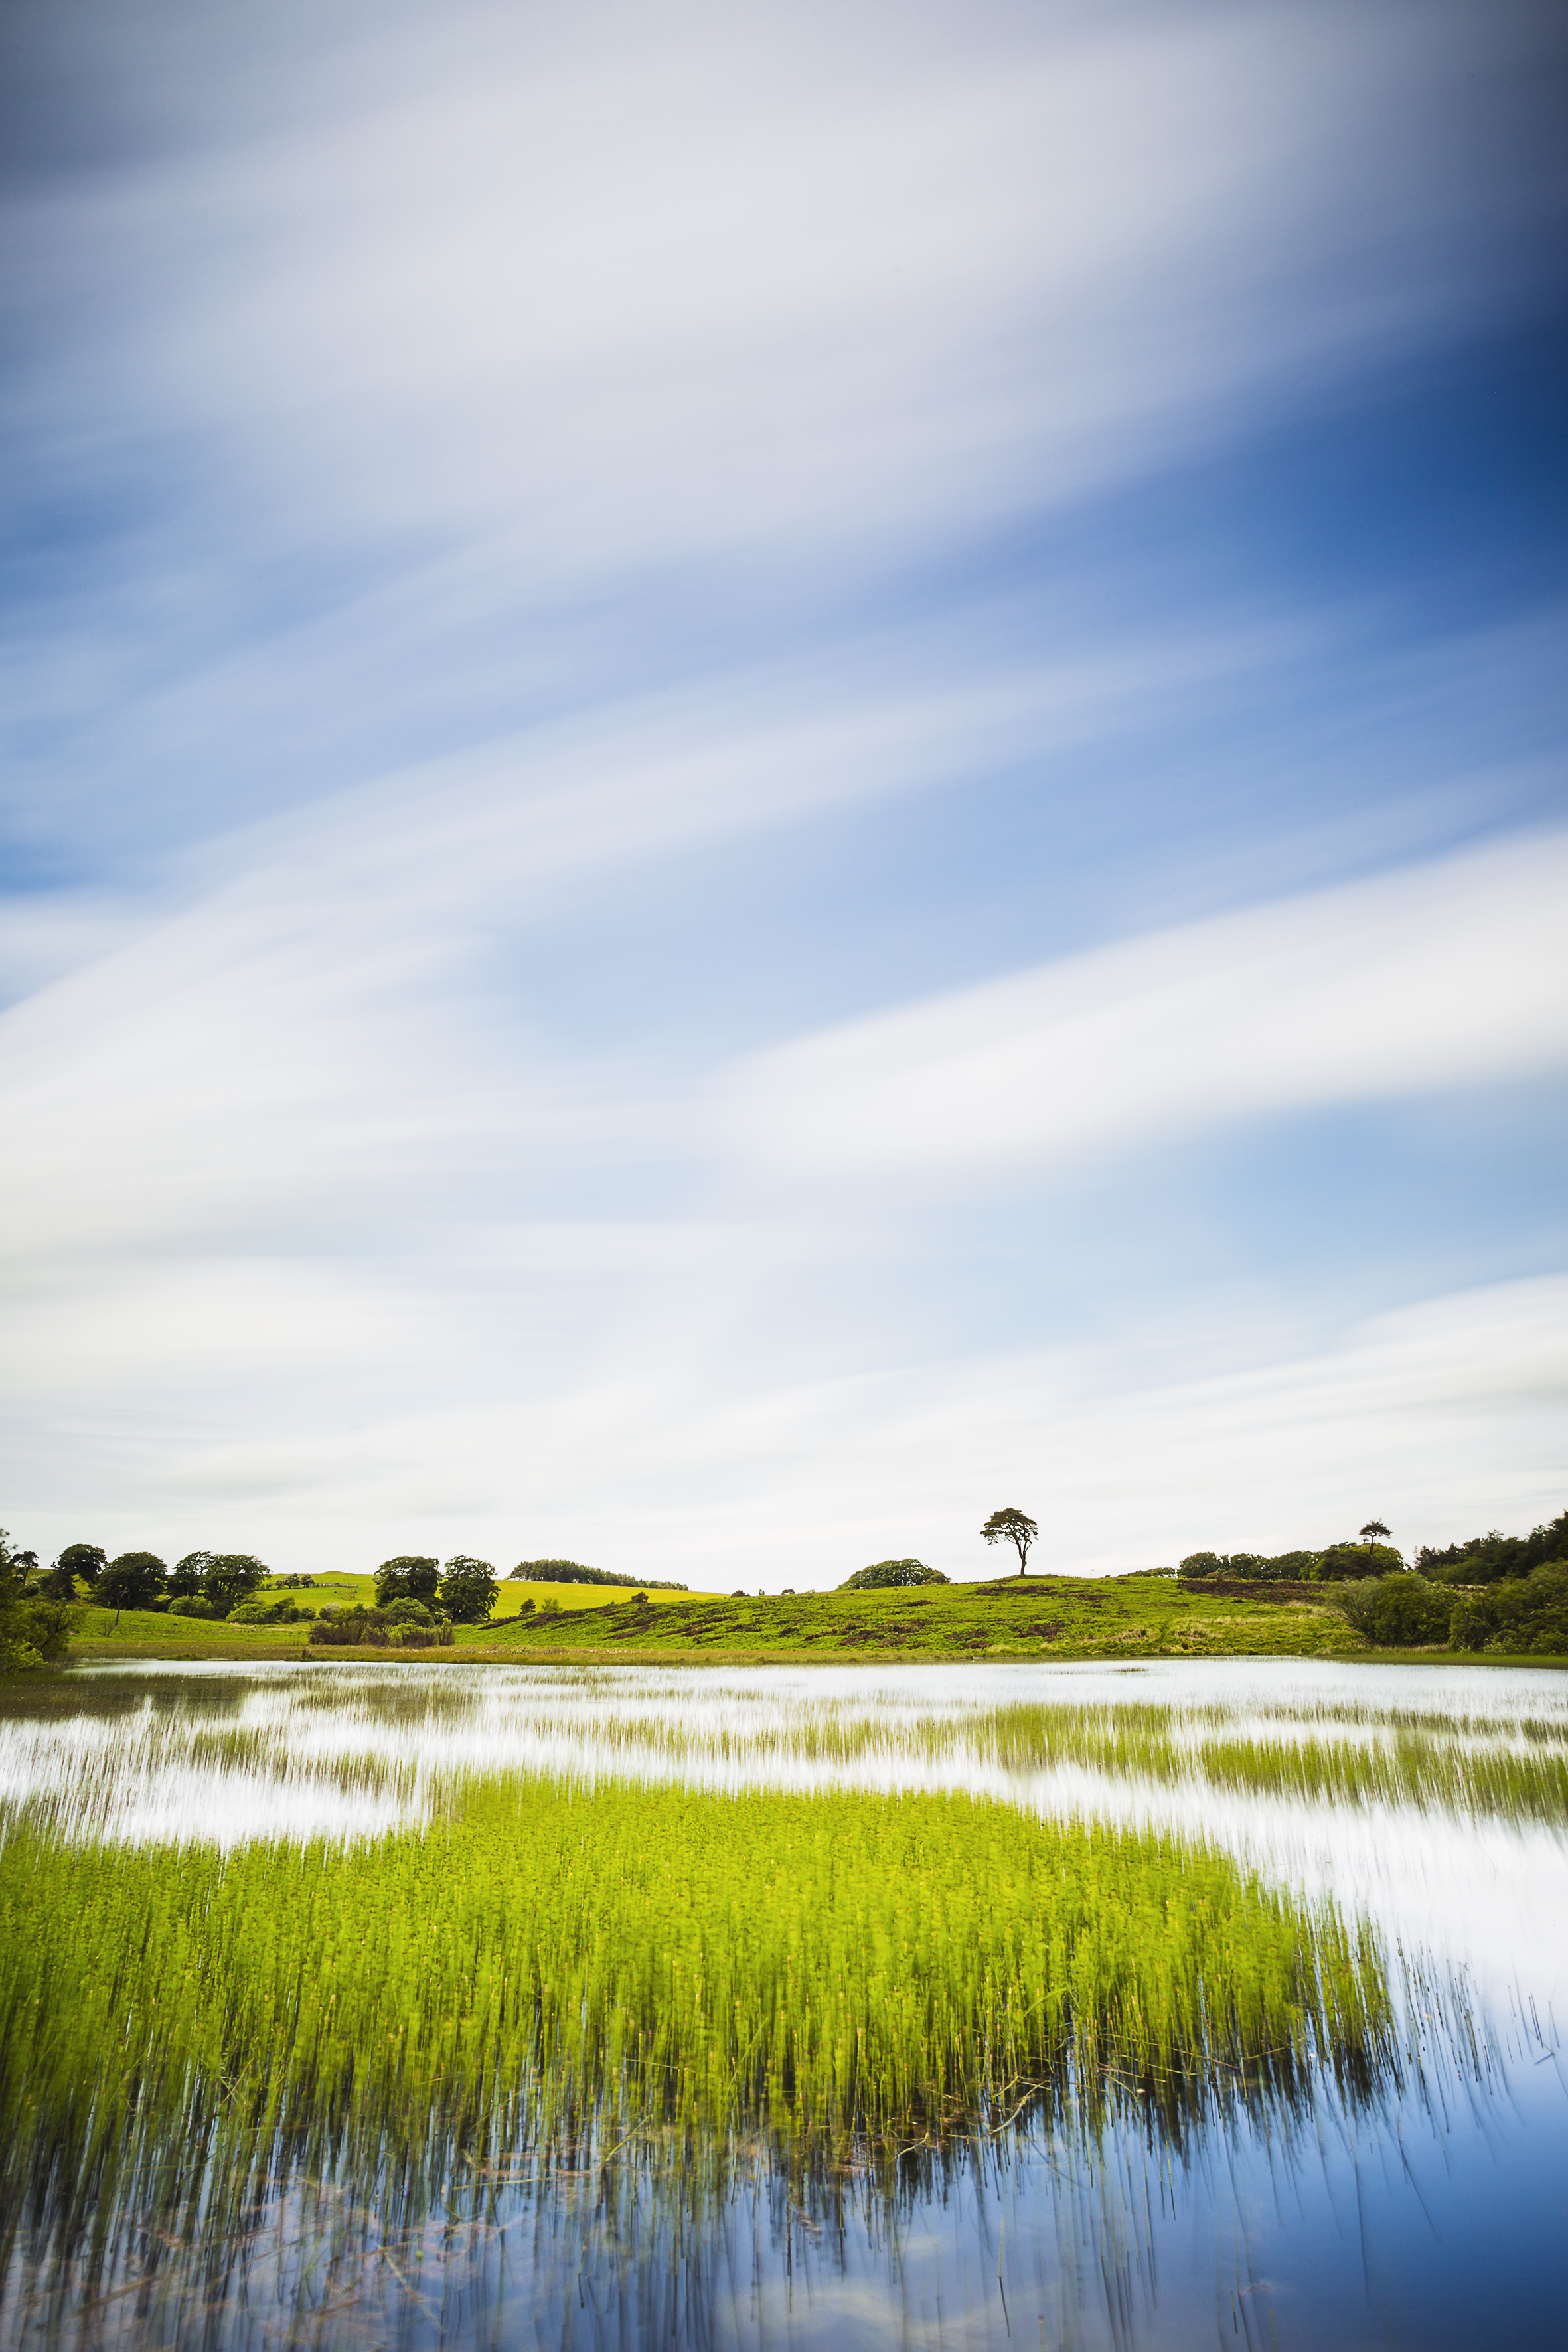
In order to drag out the exposure for multiple seconds or minutes, you need to cut the amount of light coming into the camera. While you can set a narrower aperture to do this, that’s unlikely to give you the sort of ultra-slow shutter speeds you typically need to blur clouds moving across a landscape – especially if you’re shooting in the middle of the day. This is where a neutral-density filter comes in handy.
An ND filter is essentially a very dark piece of plastic or glass that reduces the amount of light entering the lens. There are various densities or strengths available, each measured by the ‘stops’ of light that they block. Each stop requires the duration of the exposure to be doubled. So a ‘naked’ exposure of 1/60 second becomes an exposure of 1/8 sec with a three-stop ND filter in place (the first stop is 1/60 sec to 1/30 sec, followed by 1/30 sec to 1/15 sec, and 1/15 sec to 1/8 sec).
Your camera can automatically take care of exposures up to 30 seconds long, but you’ll need to work out exposures longer than this. There are plenty of smartphone apps available that will spit out a suggested exposure once you’ve entered the current exposure and filter strength, though.
Problems to avoid
It’s always a good idea to do some final checks before starting a long exposure with a strong ND filter, to make sure your images are going to be technically spot-on. After all, it’s one thing to spot a mistake when the exposure is 1/500 second, but quite another when you’ve been standing there for five minutes. As with any tripod-based shot you take, it’s always worth double-checking that the tripod leg and head locks are tightly fastened.
Dust can be a problem with long exposures. The small apertures and large expanses of soft blur a long exposure can create make any sensor spots stand out a mile. If your camera has an automatic sensor-cleaning system, run it before you shoot.
If there’s a strong ND filter on the front of the lens, there’s a greater risk of lens flare, too, particularly if you are unable to fit a hood on your lens. To remedy this, make sure that the filter is free of dust, then stand next to the lens to cast a shadow over it and shield it from the sun.
Combine shorter exposures
Taking a sequence of shots of a subject or scene, then combining them in a final multiple exposure composite image, can create a sense of motion that’s similar to a single longer exposure.
Many cameras have a built-in multiple-exposure mode that can work out all the exposure adjustments required to stop the final image being too bright, as well as blending all of the frames together. You can also achieve the same effect in editing software such as Affinity Photo.
So what’s the advantage of shooting several shorter exposures rather than one long one? It can save time, for a start. If you don’t have an ND filter to hand when you’re shooting in bright light, it can still give you that long-exposure look. It also retains more definition in the built-up ‘blurred’ areas than is achieved using a long exposure, which can work well with waves, waterfalls and trees blowing in the wind, for example.
The drawback to this technique is that slow-moving features may appear more than once in the final image, although you may be able to mask out unwanted elements.
Motion blur photography tips
1. Try to combine sharpness and blur
The most effective motion blur shots are invariably those where there’s a contrast between stationary elements and moving, blurred ones. Even more abstract, intentional camera movement-style photos tend to work better when there’s a discernible ‘entry point’ into the shot.
2. Free up some memory card space
Shooting successful motion-blur shots can take some experimentation, plus it’s also one of those addictive techniques where it’s hard to resist just one more go… it takes practice to get the right balance of shutter speed and movement, and practice can quickly fill a memory card!
3. Move the camera smoothly
Perfecting your panning skills pays off. Not only does it improve your chances of recording a sharp moving subject amongst all the blur, but motion blur in one direction is often more pleasing. This is true whether you’re tracking a tiger or panning up the trunks of trees.
4. Use Manual exposure mode
While it’s perfectly possible to make creative blur shots with any of the advanced shooting modes, selecting Manual exposure mode gives you more time to focus on your technique. When it comes to action shots, though, the automation of Shutter Priority may be easier.
5. Use second-curtain sync
When you’re shooting with flash and timing isn’t critical, experiment with the second-curtain sync option. It’s especially effective for shooting cars at night, as the light trails will stream from behind the flash-lit vehicle.
Reader challenge: Motion blur
Enter our latest photo challenge and win a copy of Affinity Photo! This month we’re looking for your best motion blur shots. You can choose any subject for this challenge, from long-exposure landscapes to fast-paced sport, as long as there’s a degree of motion blur to lift the image.
To enter your motion blur shot (one per reader, please), either email your entry to digitalcamera@futurenet.com, putting ‘Motion Blur’ in the subject line; or go to our Facebook page at www.facebook.com/digitalcameraworld, look for the ‘Motion Blur’ post, and upload your entry into the feed.
By entering, you confirm that you own the copyright to the image, and agree that Digital Camera can publish your image in relation to the ‘Motion Blur’ competition. You retain full copyright in your image, and you will be credited if published. The closing date is 27 May 2021. The winner will receive a copy of Affinity Photo for Windows or macOS. Good luck!
Get the Digital Camera World Newsletter
The best camera deals, reviews, product advice, and unmissable photography news, direct to your inbox!
Digital Camera World is one of the leading authorities on camera and photography news, reviews, techniques, tutorials, comparisons, deals and industry analysis. The site doesn't just specialize in cameras, but all aspects of photography, videography and imaging – including camera phones, gimbals, lenses, lighting, editing software, filters, tripods, laptops, printers, photo books, desks, binoculars and more.
Whether you're using, looking to buy or trying to get the most out of a compact camera, action camera, camera drone, cinema camera, beginner camera or professional camera, Digital Camera World has a roster of experts with combined experience of over 100 years when it comes to cameras, photography and imaging.

