Create your best landscape photos using Luminar AI
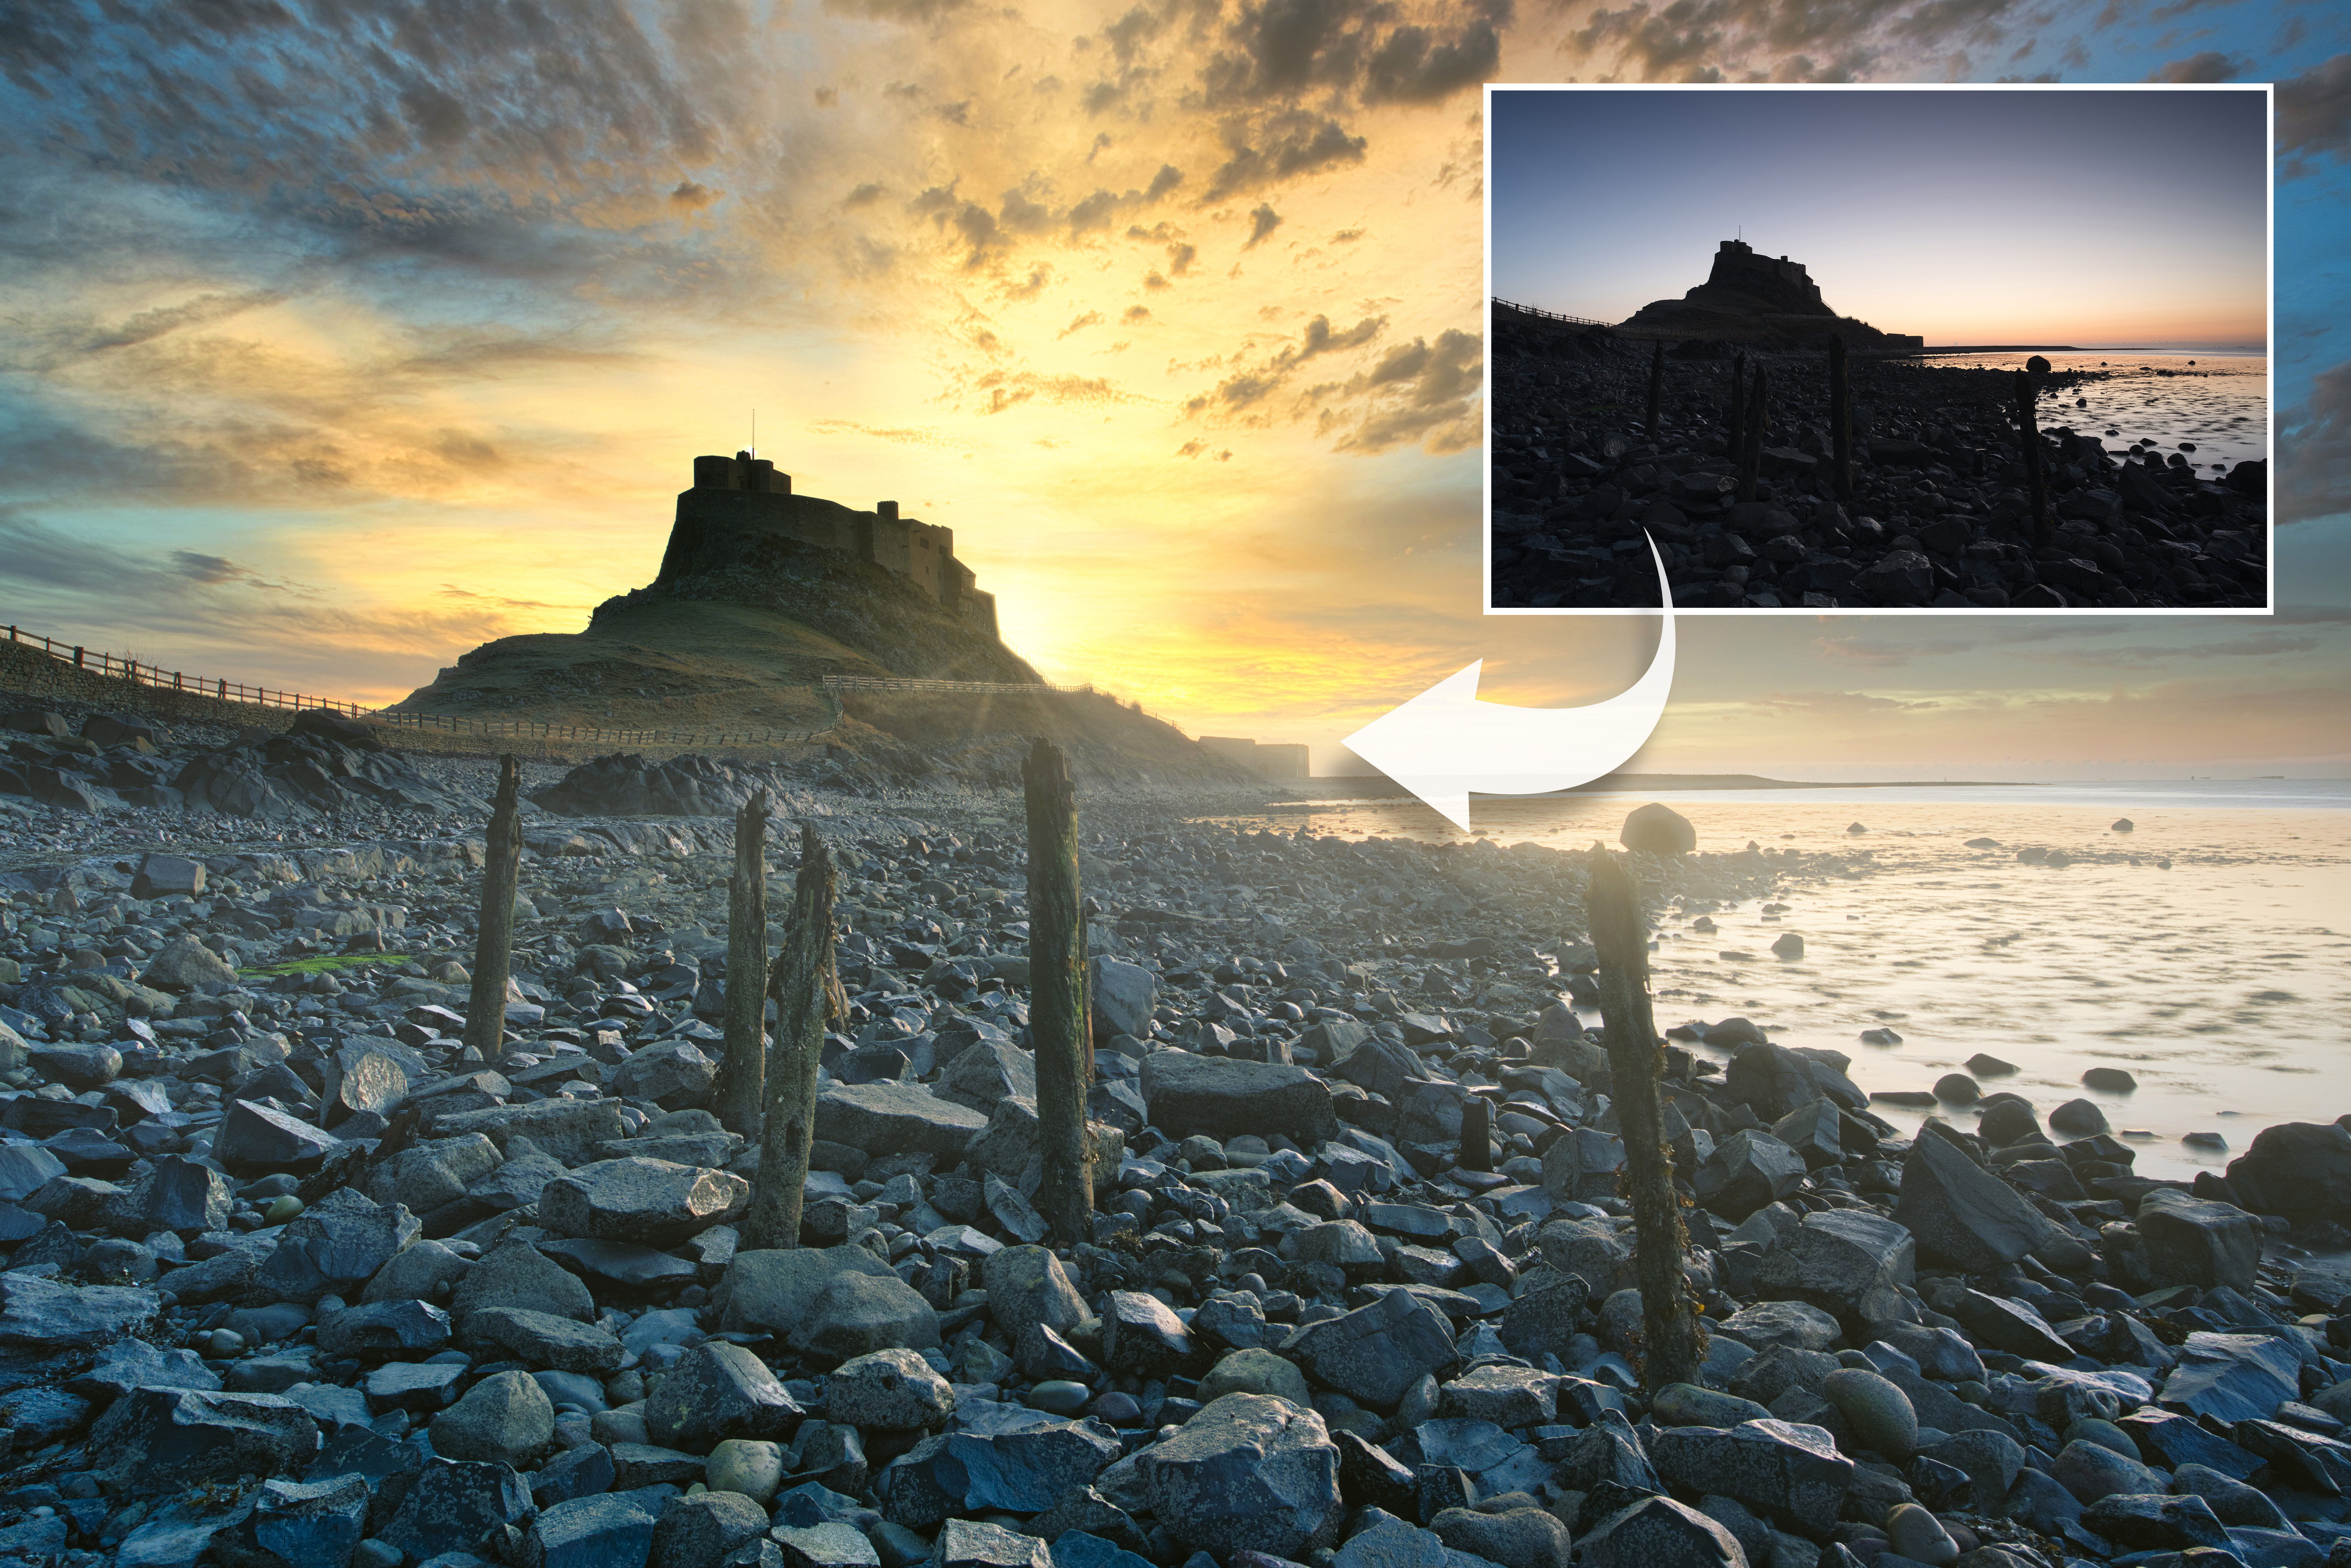
Creating a great landscape photo is a fine balancing act between location, light, exposure, weather, the time of day and, of course, editing. While most of those elements are outside of your control, one part of the image-making process you can always rely upon is editing. And thanks to Luminar AI, every single landscape image you take can be transformed into a masterpiece with no editing experience at all.
Thanks to the awesome power of Luminar AI, you can take your landscapes from zero to hero in less than a minute. We all aim to get our landscape shots perfect in-camera all of the time, but when this isn’t possible due to a boring sky or dull light, Luminar AI has the ability to rescue a landscape and make it look the way you hoped – and much better in many cases.
Luminar AI features templates designed specifically to enhance landscape images; using artificial intelligence, it suggests the most appropriate options for every individual image. But once you’ve applied the best template for your image, it’s the tools in the Edit tab where the real magic happens.
Many controls are fantastic for editing landscapes and other types of images besides, but there are also some powerful controls tailor-made for shots of the great outdoors. Foliage Enhancer boosts foliage saturation; Sunrays is a great way to add mood and drama; and Sky AI allows you to change boring skies into something spectacular. Let’s look at all these, and more!
Make lacklustre landscapes look amazing in minutes
Take advantage of Luminar AI’s powerful landscape-focused tools
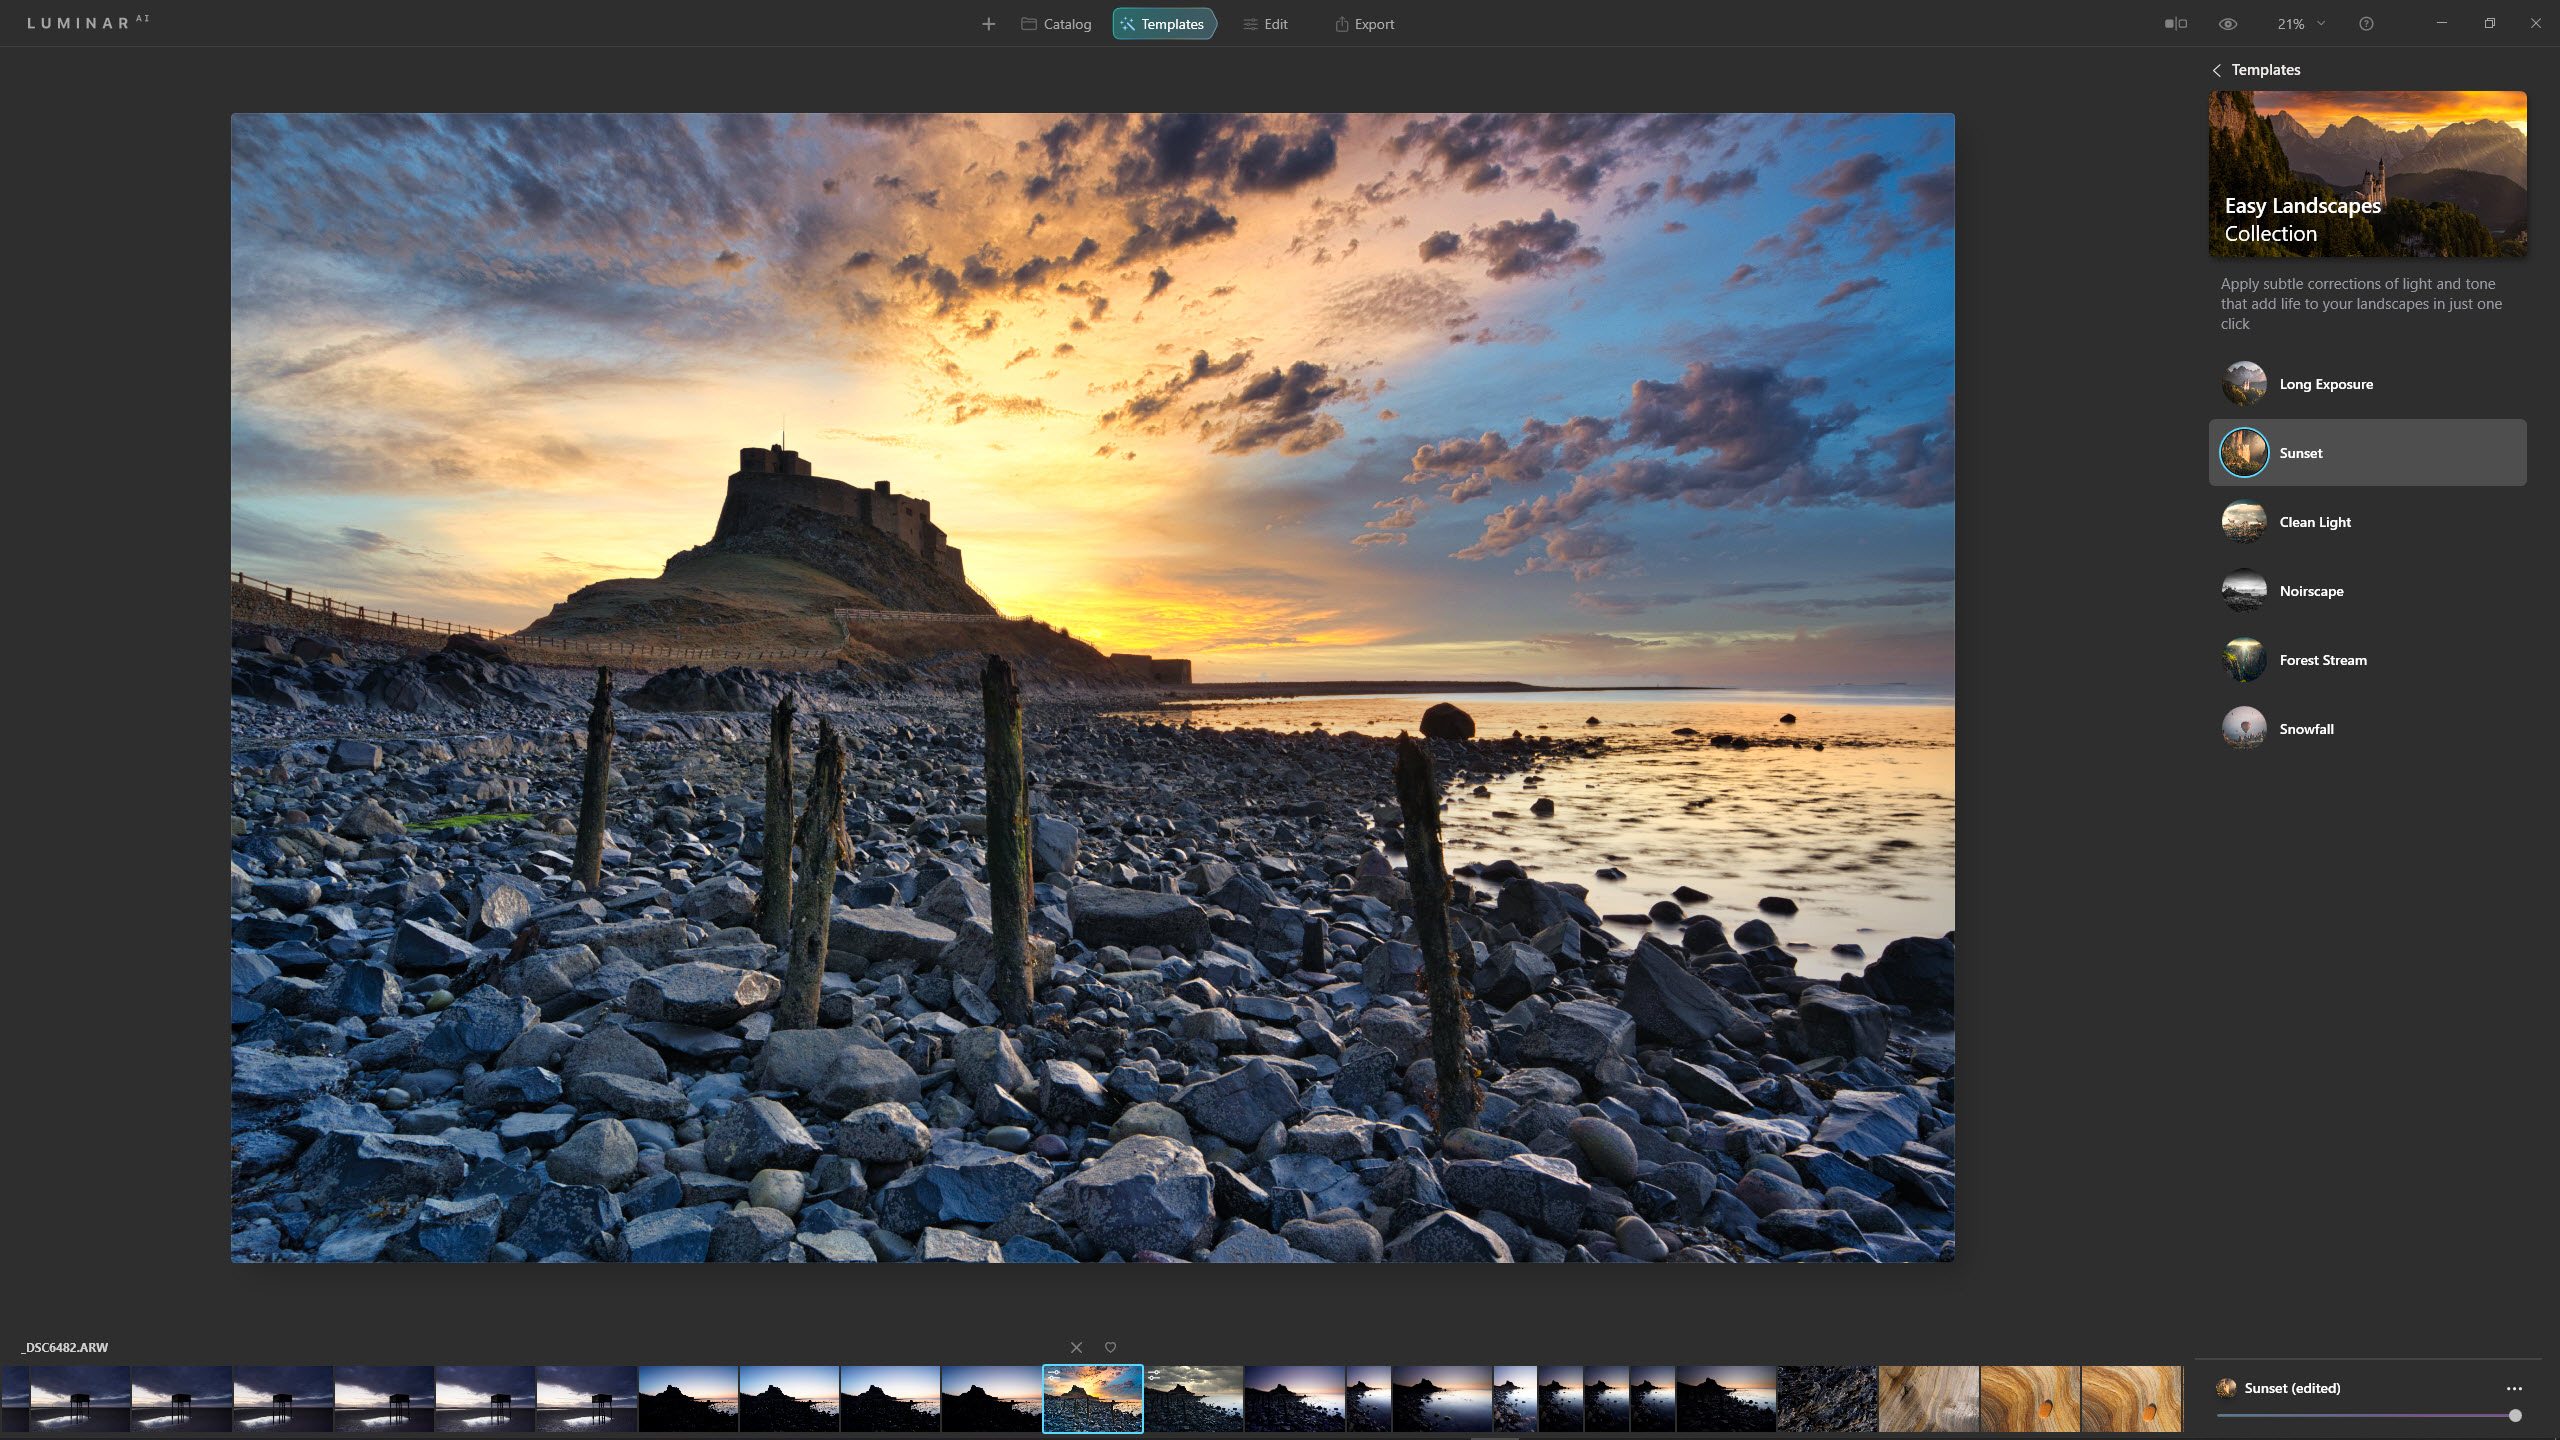
1) Select a Template
Select your image to edit in the Catalog before clicking on the Templates tab: Luminar AI will suggest the most useful Templates to select from based on the content of the image. For this shot, the Sunset Template from the Easy Landscapes Collection was used to enhance the warmth that was already present in the scene thanks to the rising sun.
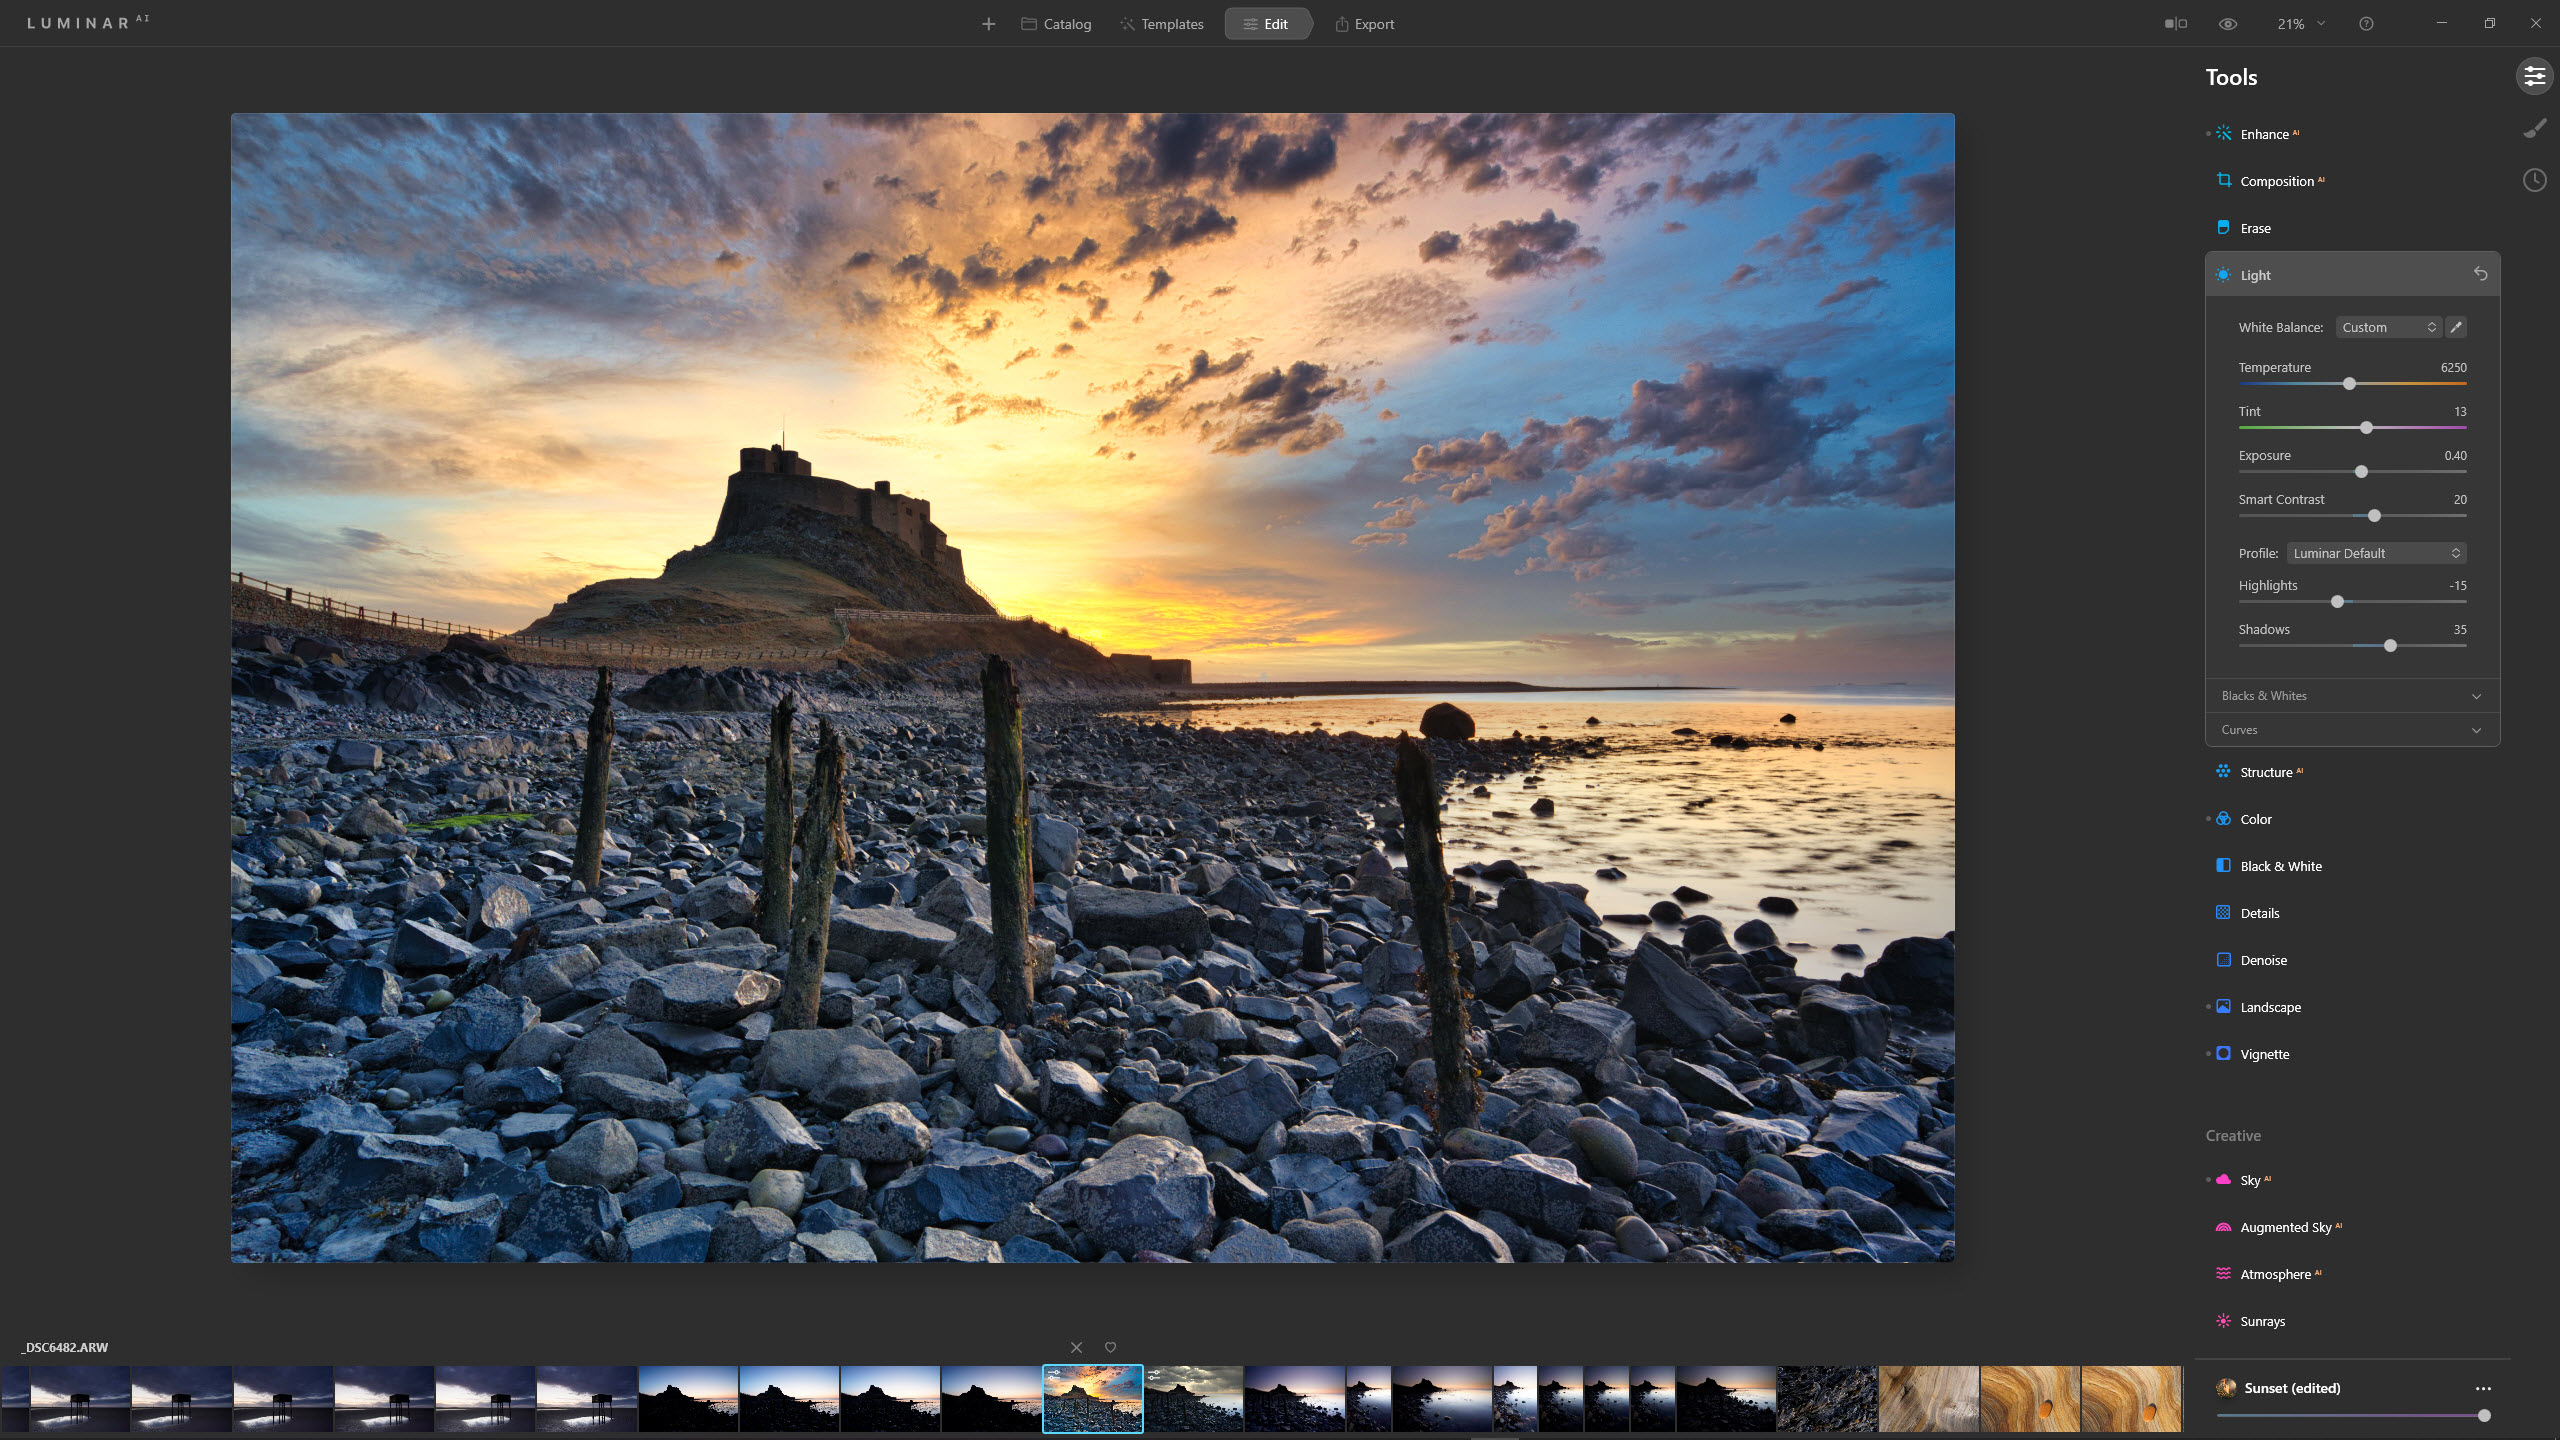
2) Improve the light
Click on the Edit tab so that you can apply any adjustments required from the Essentials section on the right. Enhance AI was expanded to increase the power of the Template, then adjustments were made to White Balance, Exposure, Highlights and Shadows. Smart Contrast was applied automatically; the result looked great so this was left at the setting applied.
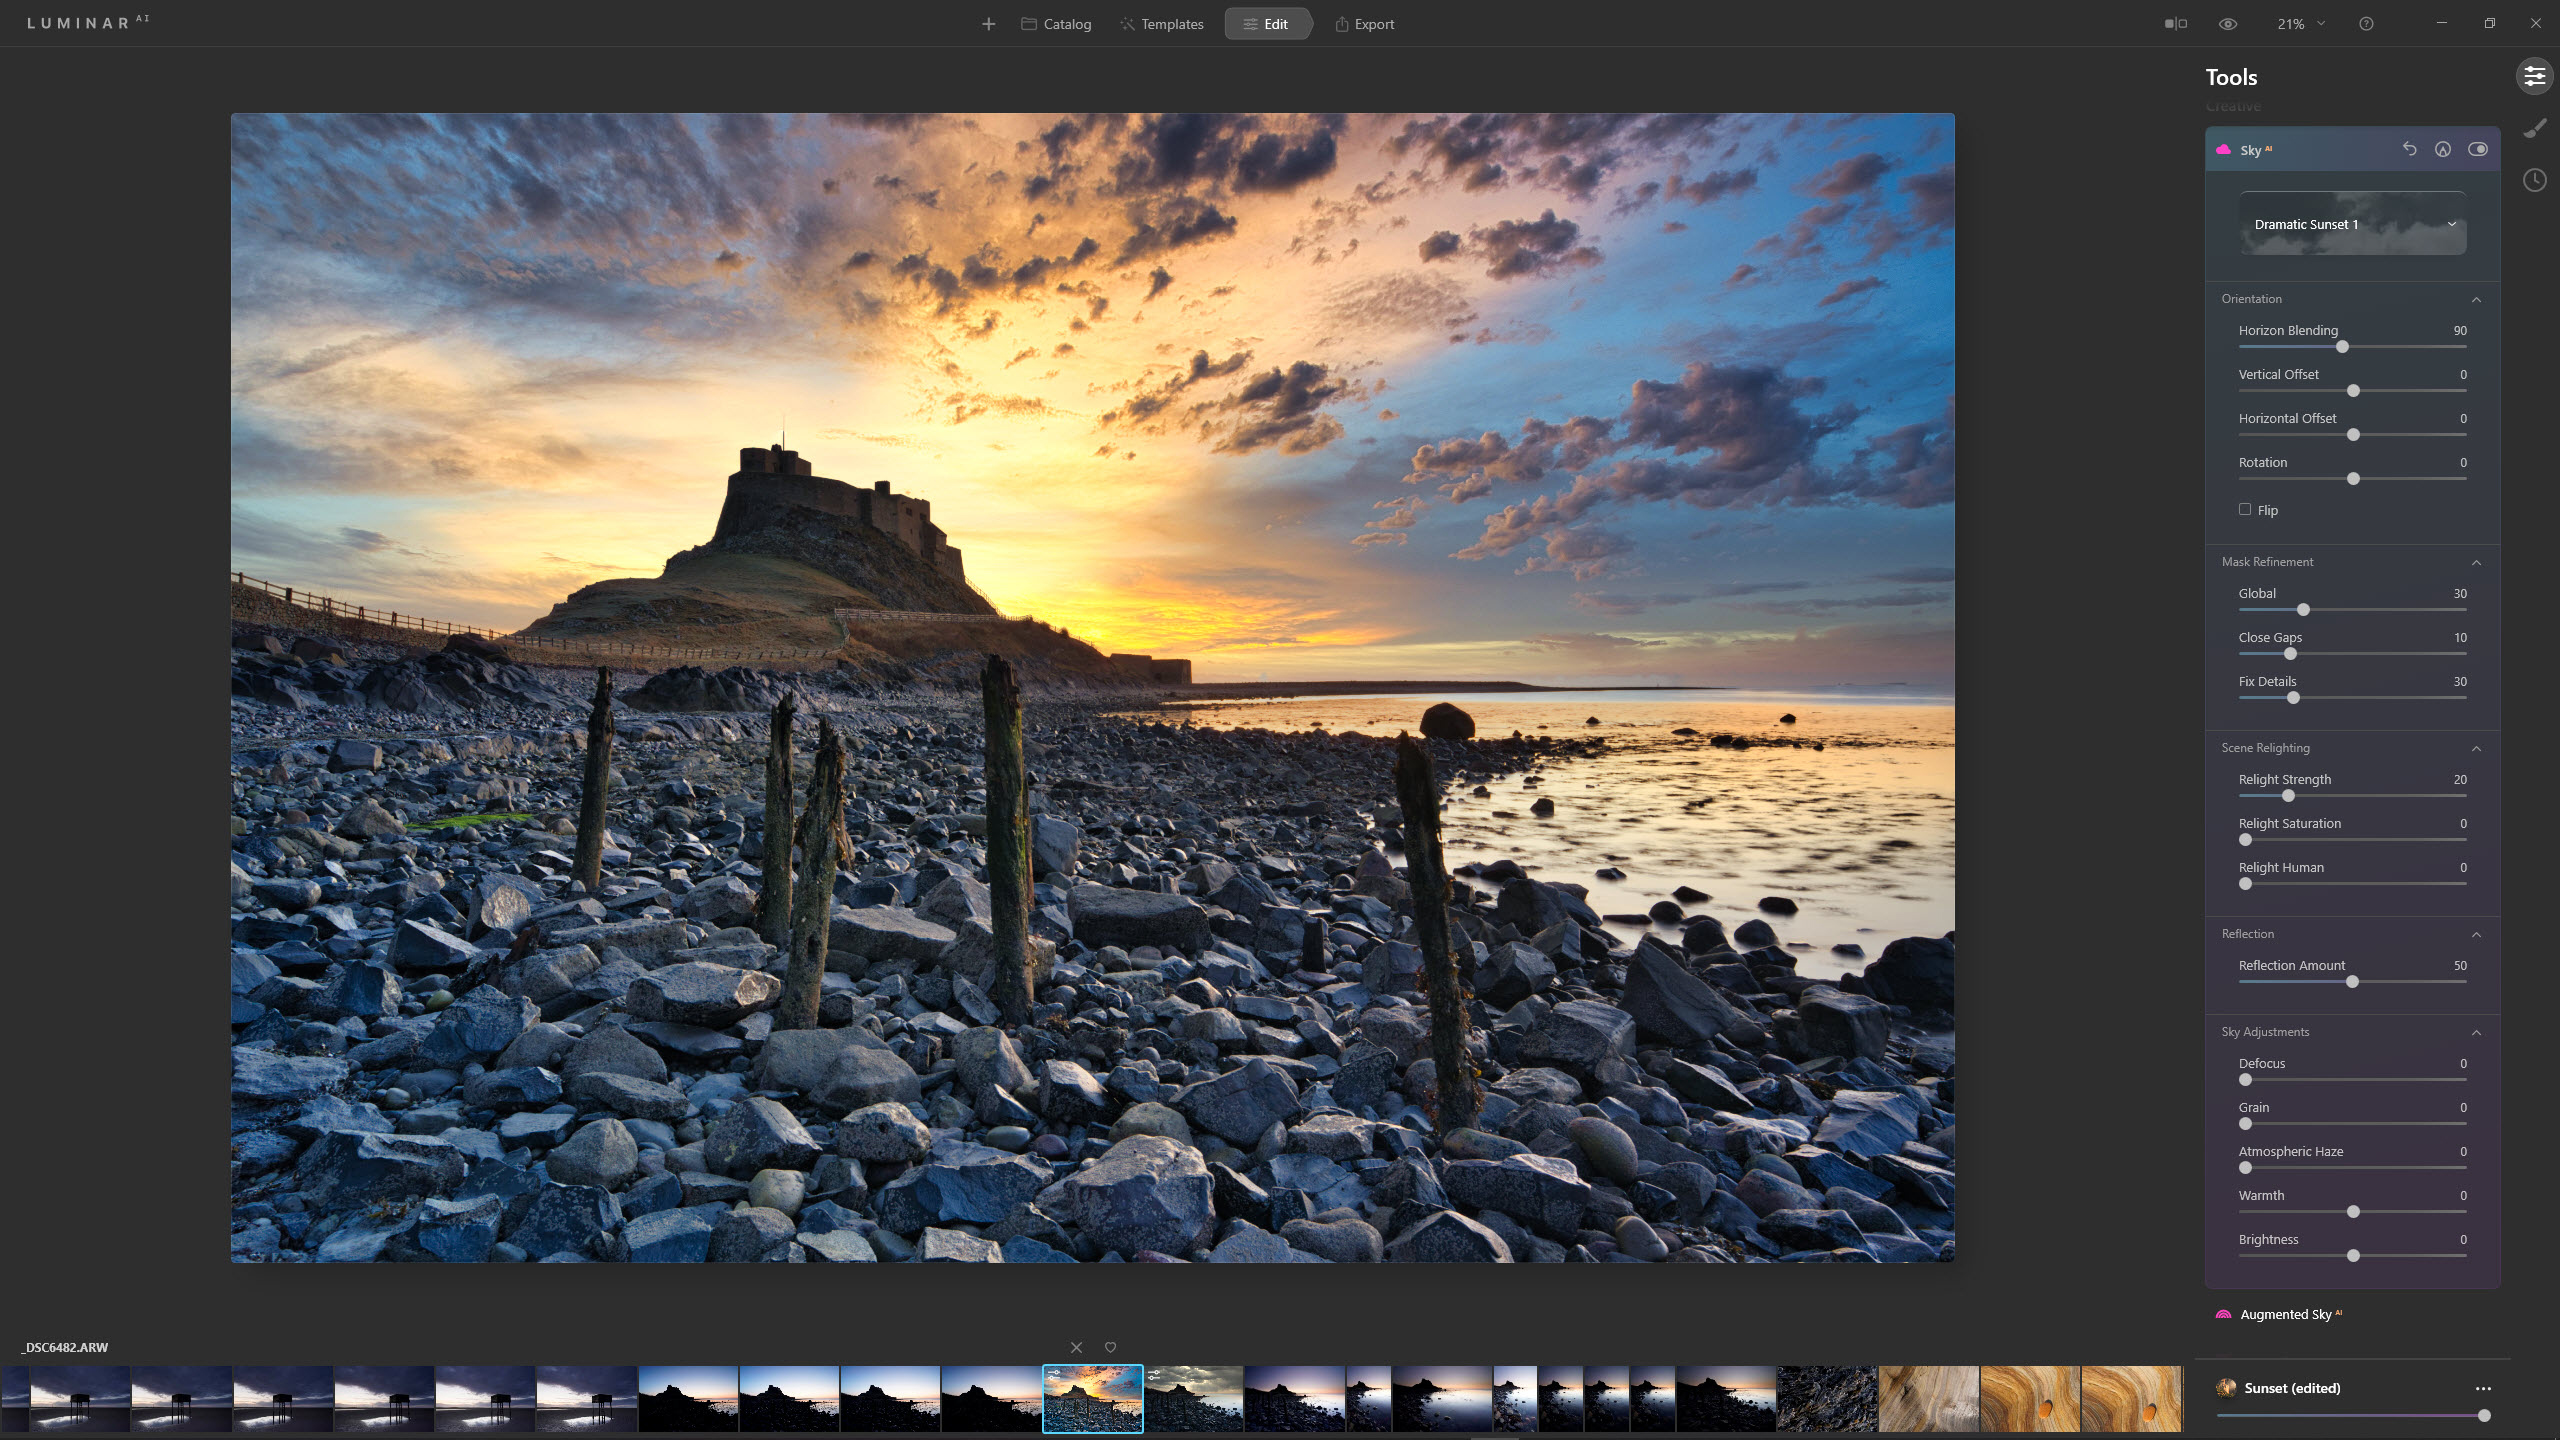
3) Replace the sky
Everything in the scene was perfect, except that there were no clouds in the sky, which makes it look boring and lifeless. Sky AI was expanded and after selecting the Dramatic Sunset 1 sky preset, the image immediately improved. You can adjust the result to blend the new sky with the original scene.
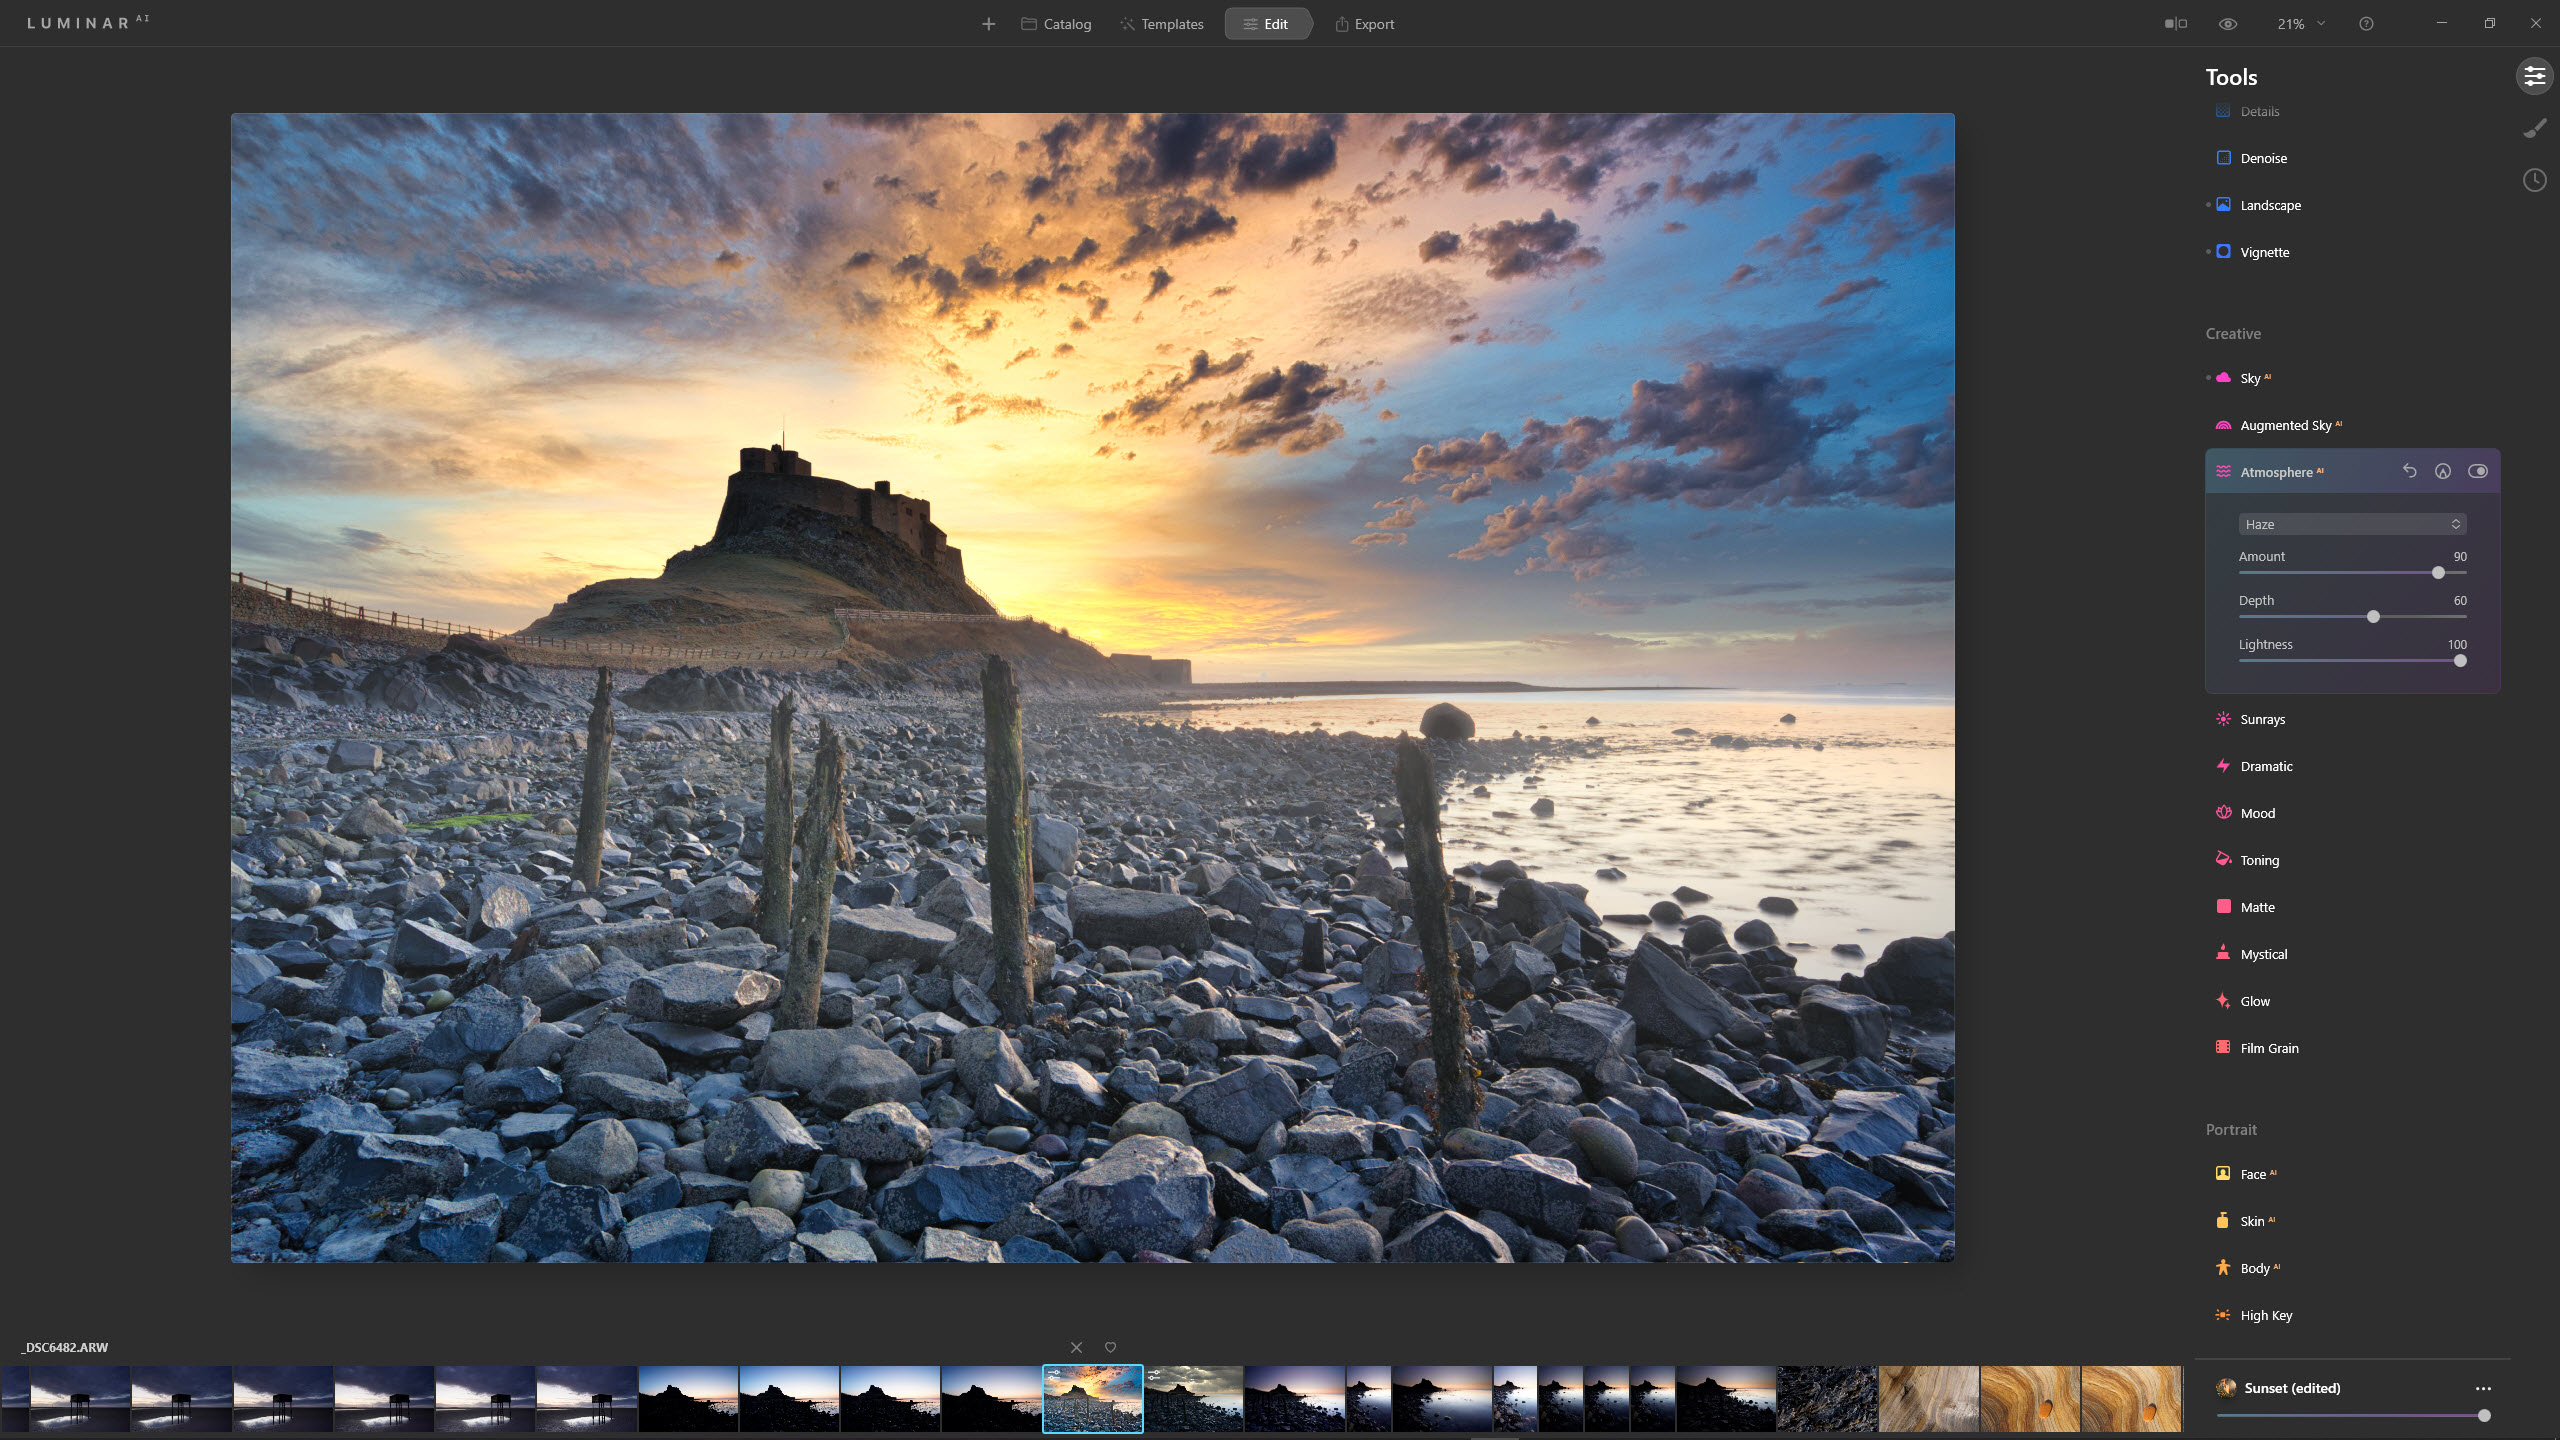
4) Add mist
The image is coming together but it needs more atmosphere so using Atmosphere AI, Haze was added to the foreground to make it look like a light mist was rolling in from the sea. Other options include Fog, Layered Fog and Mist. Each of these can be customised to make them look perfect for your images using the provided sliders.
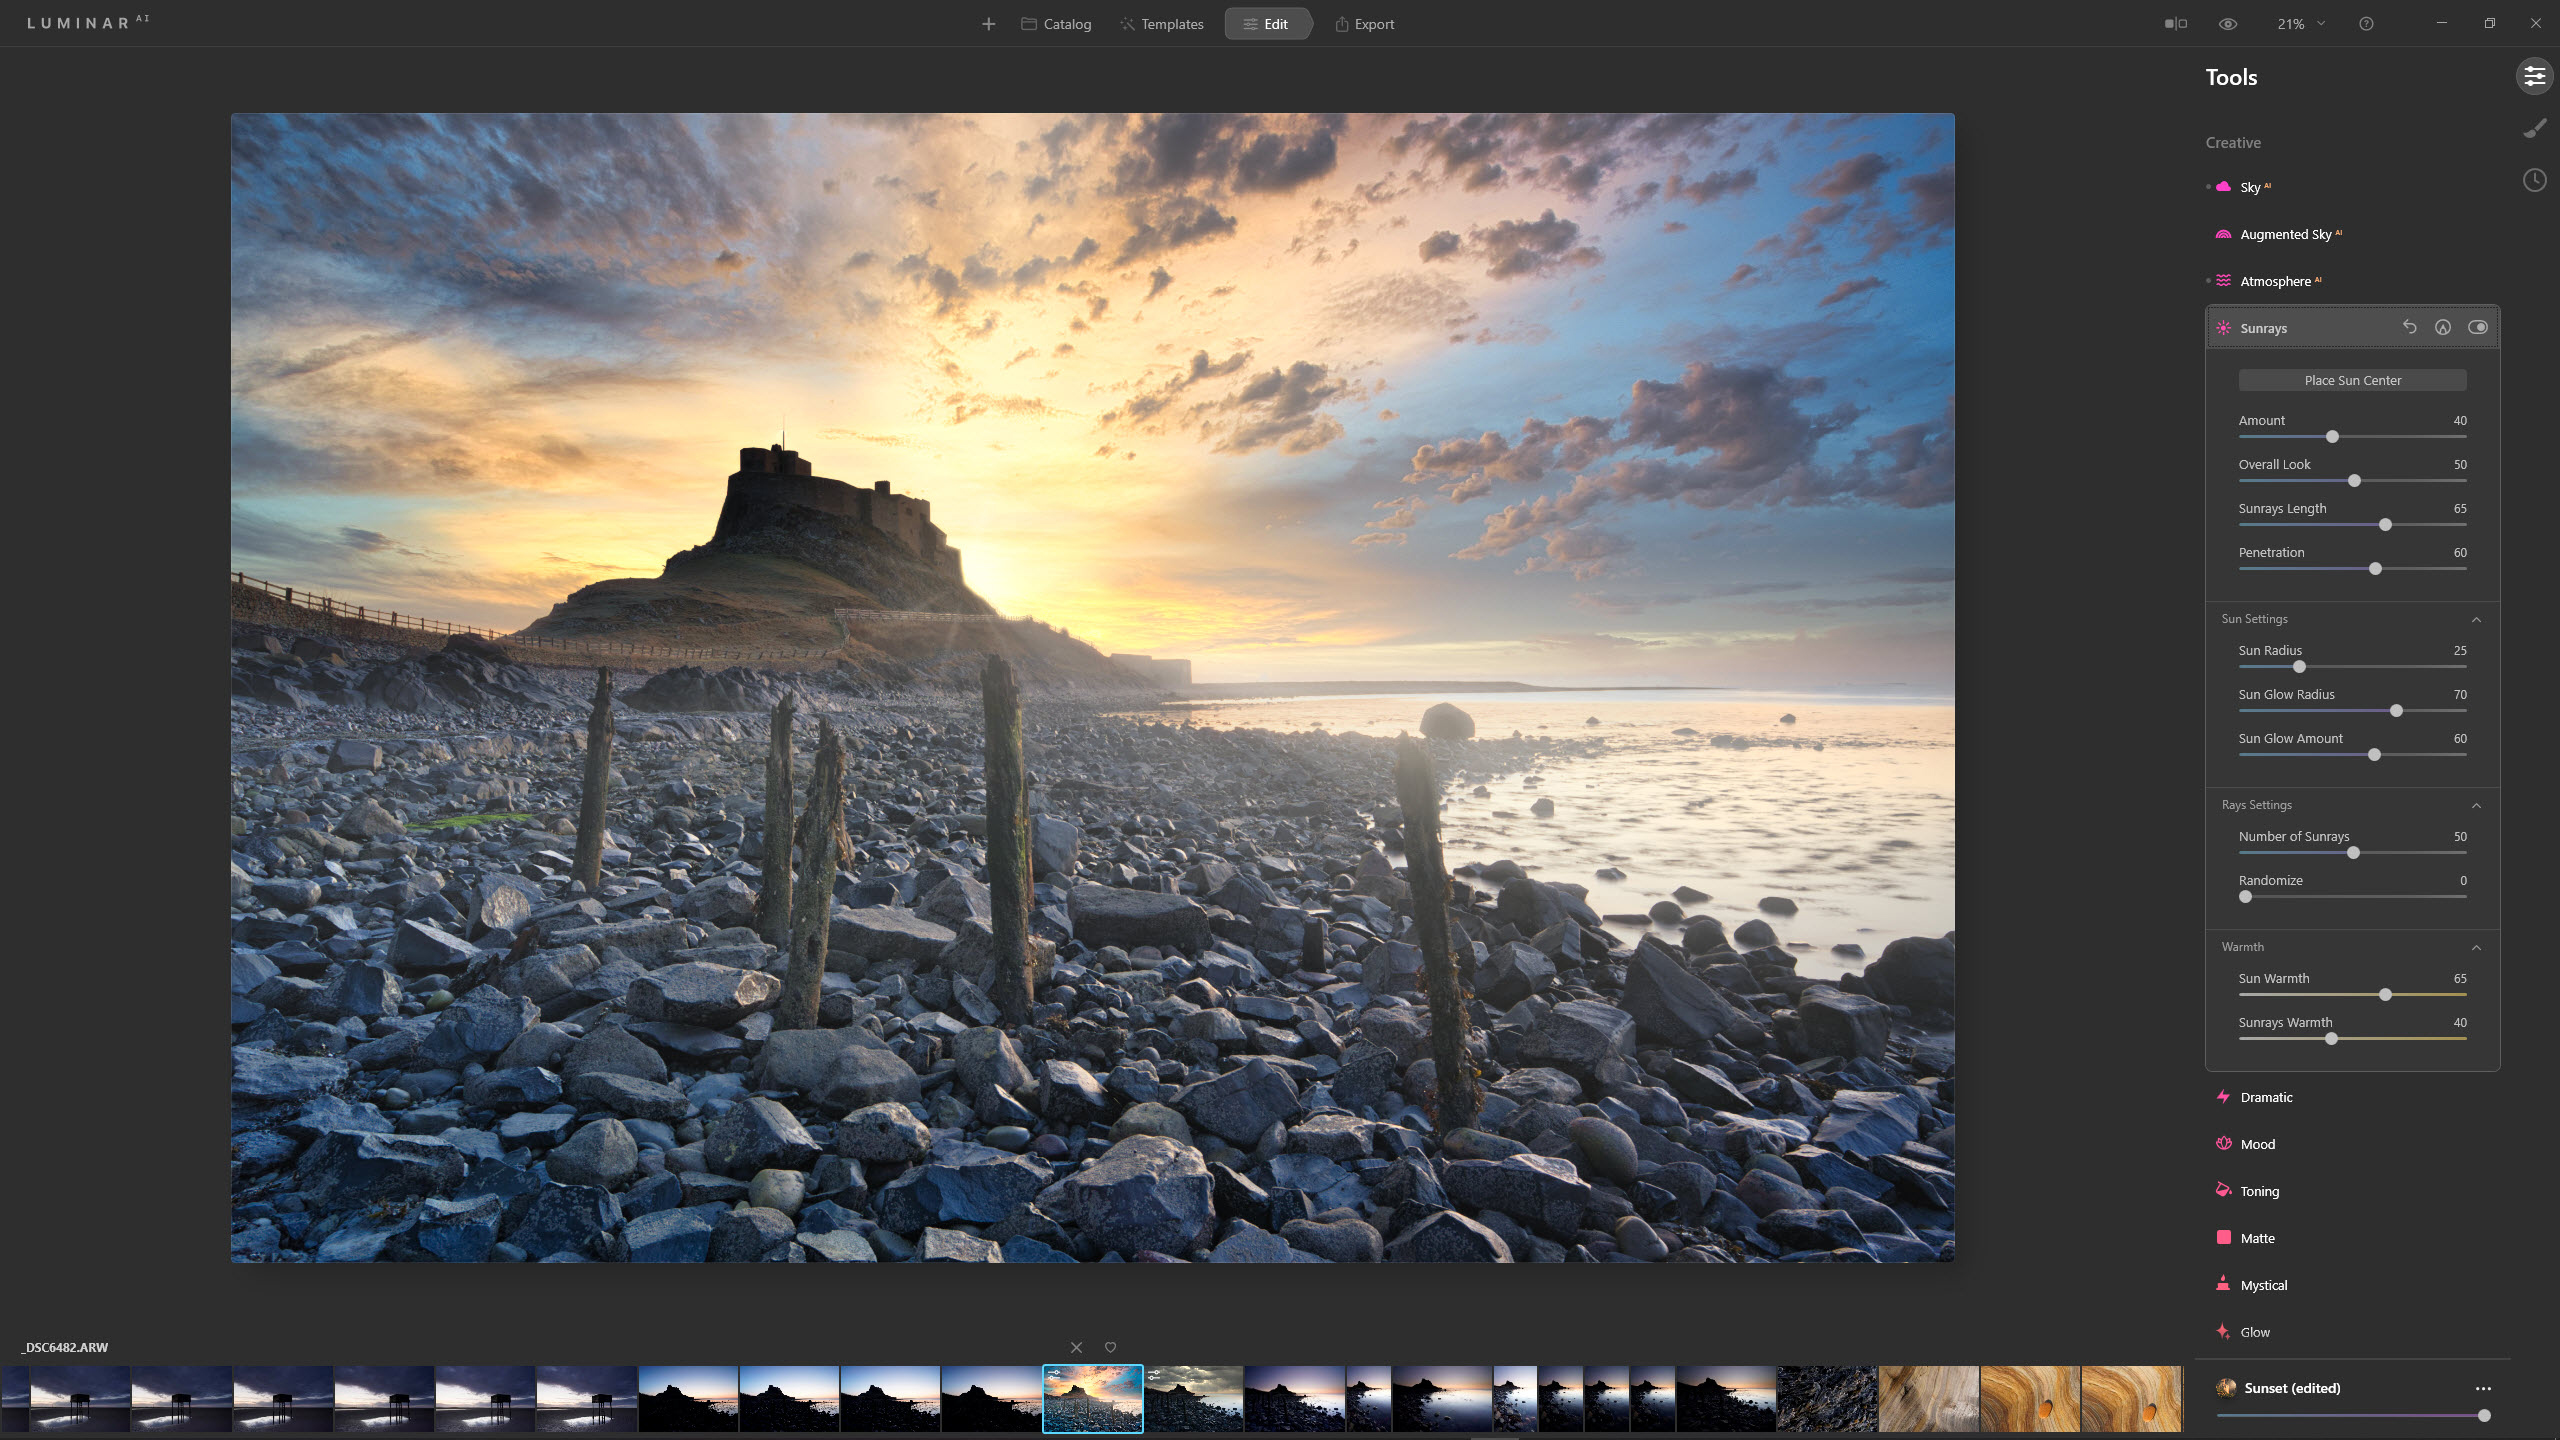
5) Boost sunlight
With the castle naturally backlit, and the selected Sky AI replacement sky mimicking this, adding Sunrays was the logical next step. Click on the Place Sun Centre button and move the point to the desired position, then expand the additional three sections of sliders to take complete control over the look of the sunrays. Click the Sunrays left arrow to reset if you’re unhappy, and you can easily start again.
Explained: Controls designed for editing landscapes
Luminar AI includes several intelligent controls aimed specifically at editing landscape images. Apply stunning AI-powered looks at the touch of a button and give your landscape images a professional makeover!
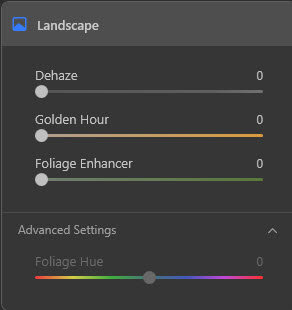
Landscape
The Landscape controls provide intelligent adjustments over haze removal with the Dehaze slider, add golden hour warmth with Golden Hour, and use Foliage Enhancer to boost foliage saturation.

Sky AI
Sky AI is where you can effortlessly replace dulla skies with something much more interesting. Powerful AI seamlessly blends in the new sky, with additional controls to fine-tune the result.
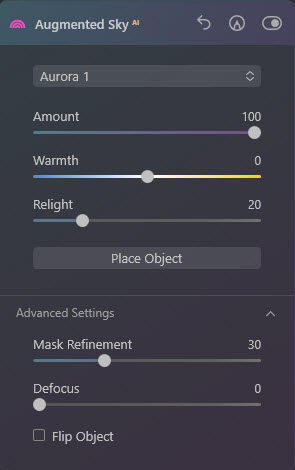
Augmented Sky AI
Place new visual elements such as aurora, fireworks, lightning and many more in the skies of your images. A series of controls is on offer to help you create a seamless blend with the original image.
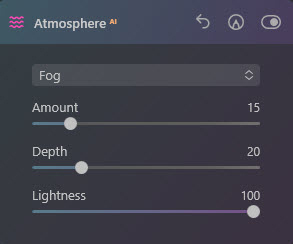
Atmosphere AI
Add realistic fog and mist effect to scenes to add atmosphere using Atmosphere AI. Three of the four fog and mist options can be masked, providing a great amount of control over the final effect.
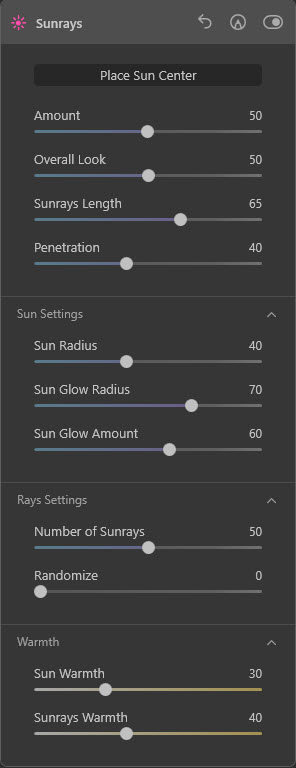
Sunrays
If you would like to add a burst of bright sunlight and light rays to your images, Sunrays is a powerful adjustment that enables you to do just that in a matter of seconds, with as little or as much control over the look of the light rays as you like.
3 exciting effects using landscape adjustments
Effortlessly edit your landscapes with spectacular effects
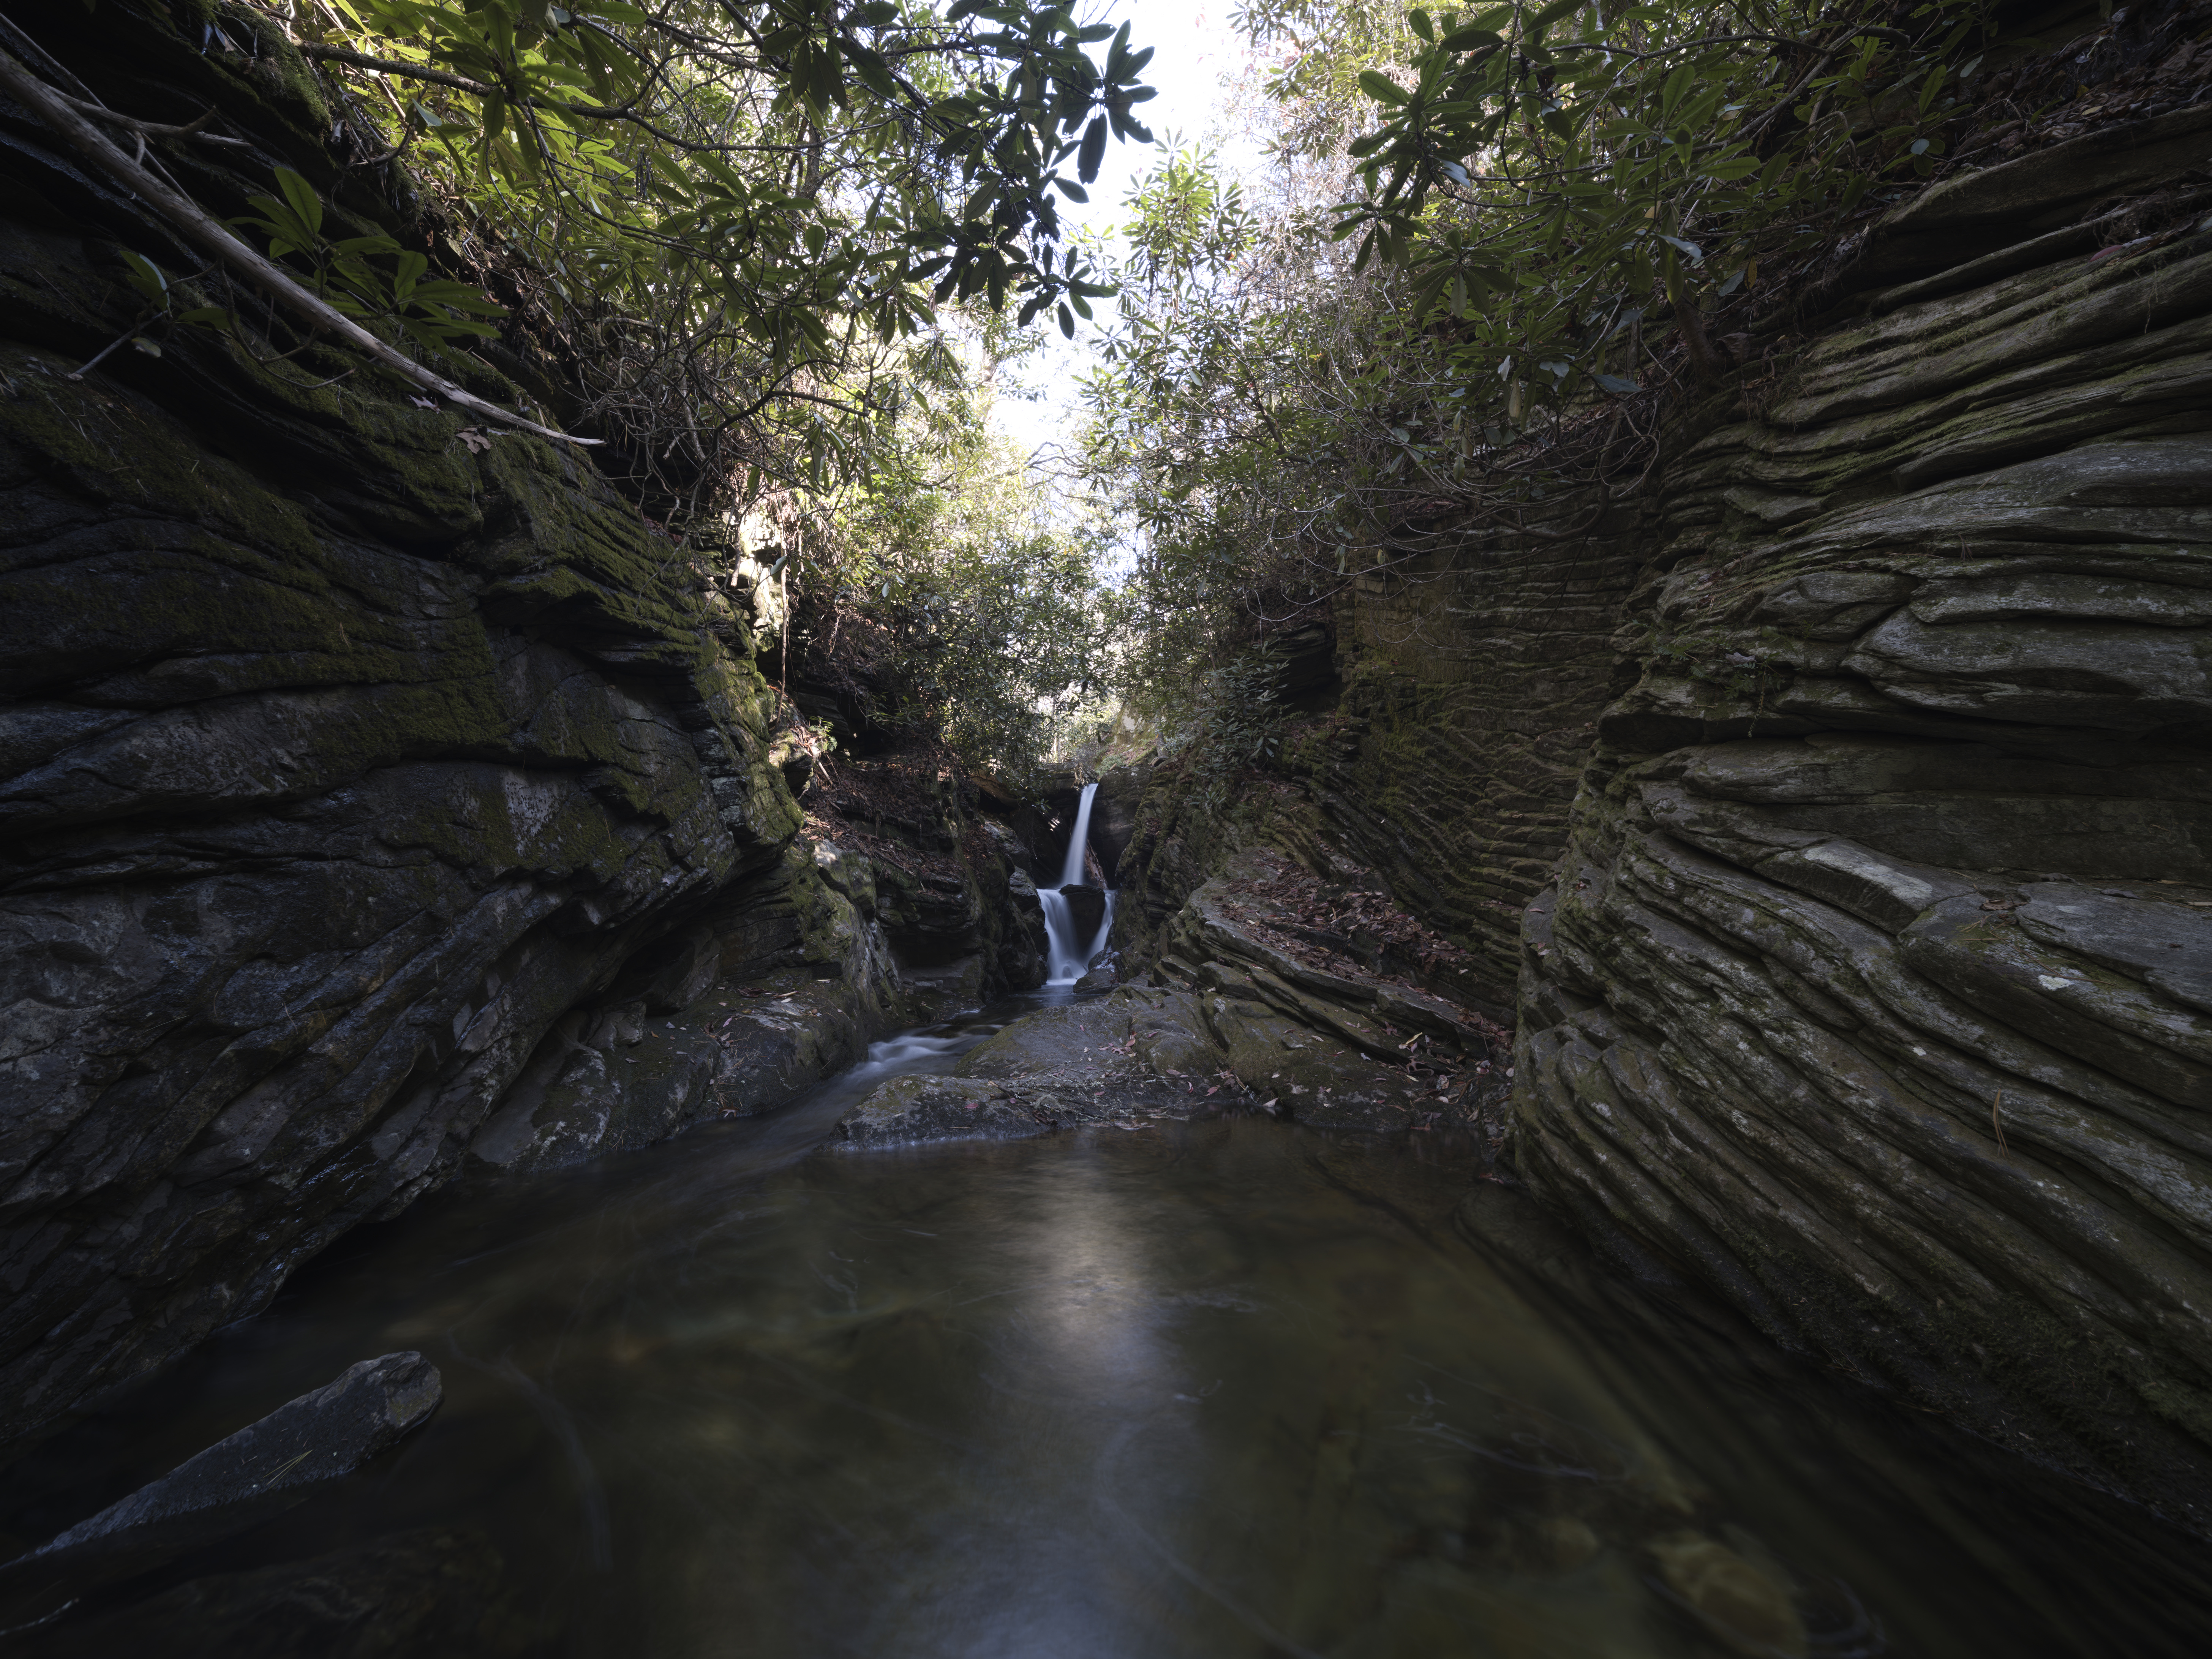
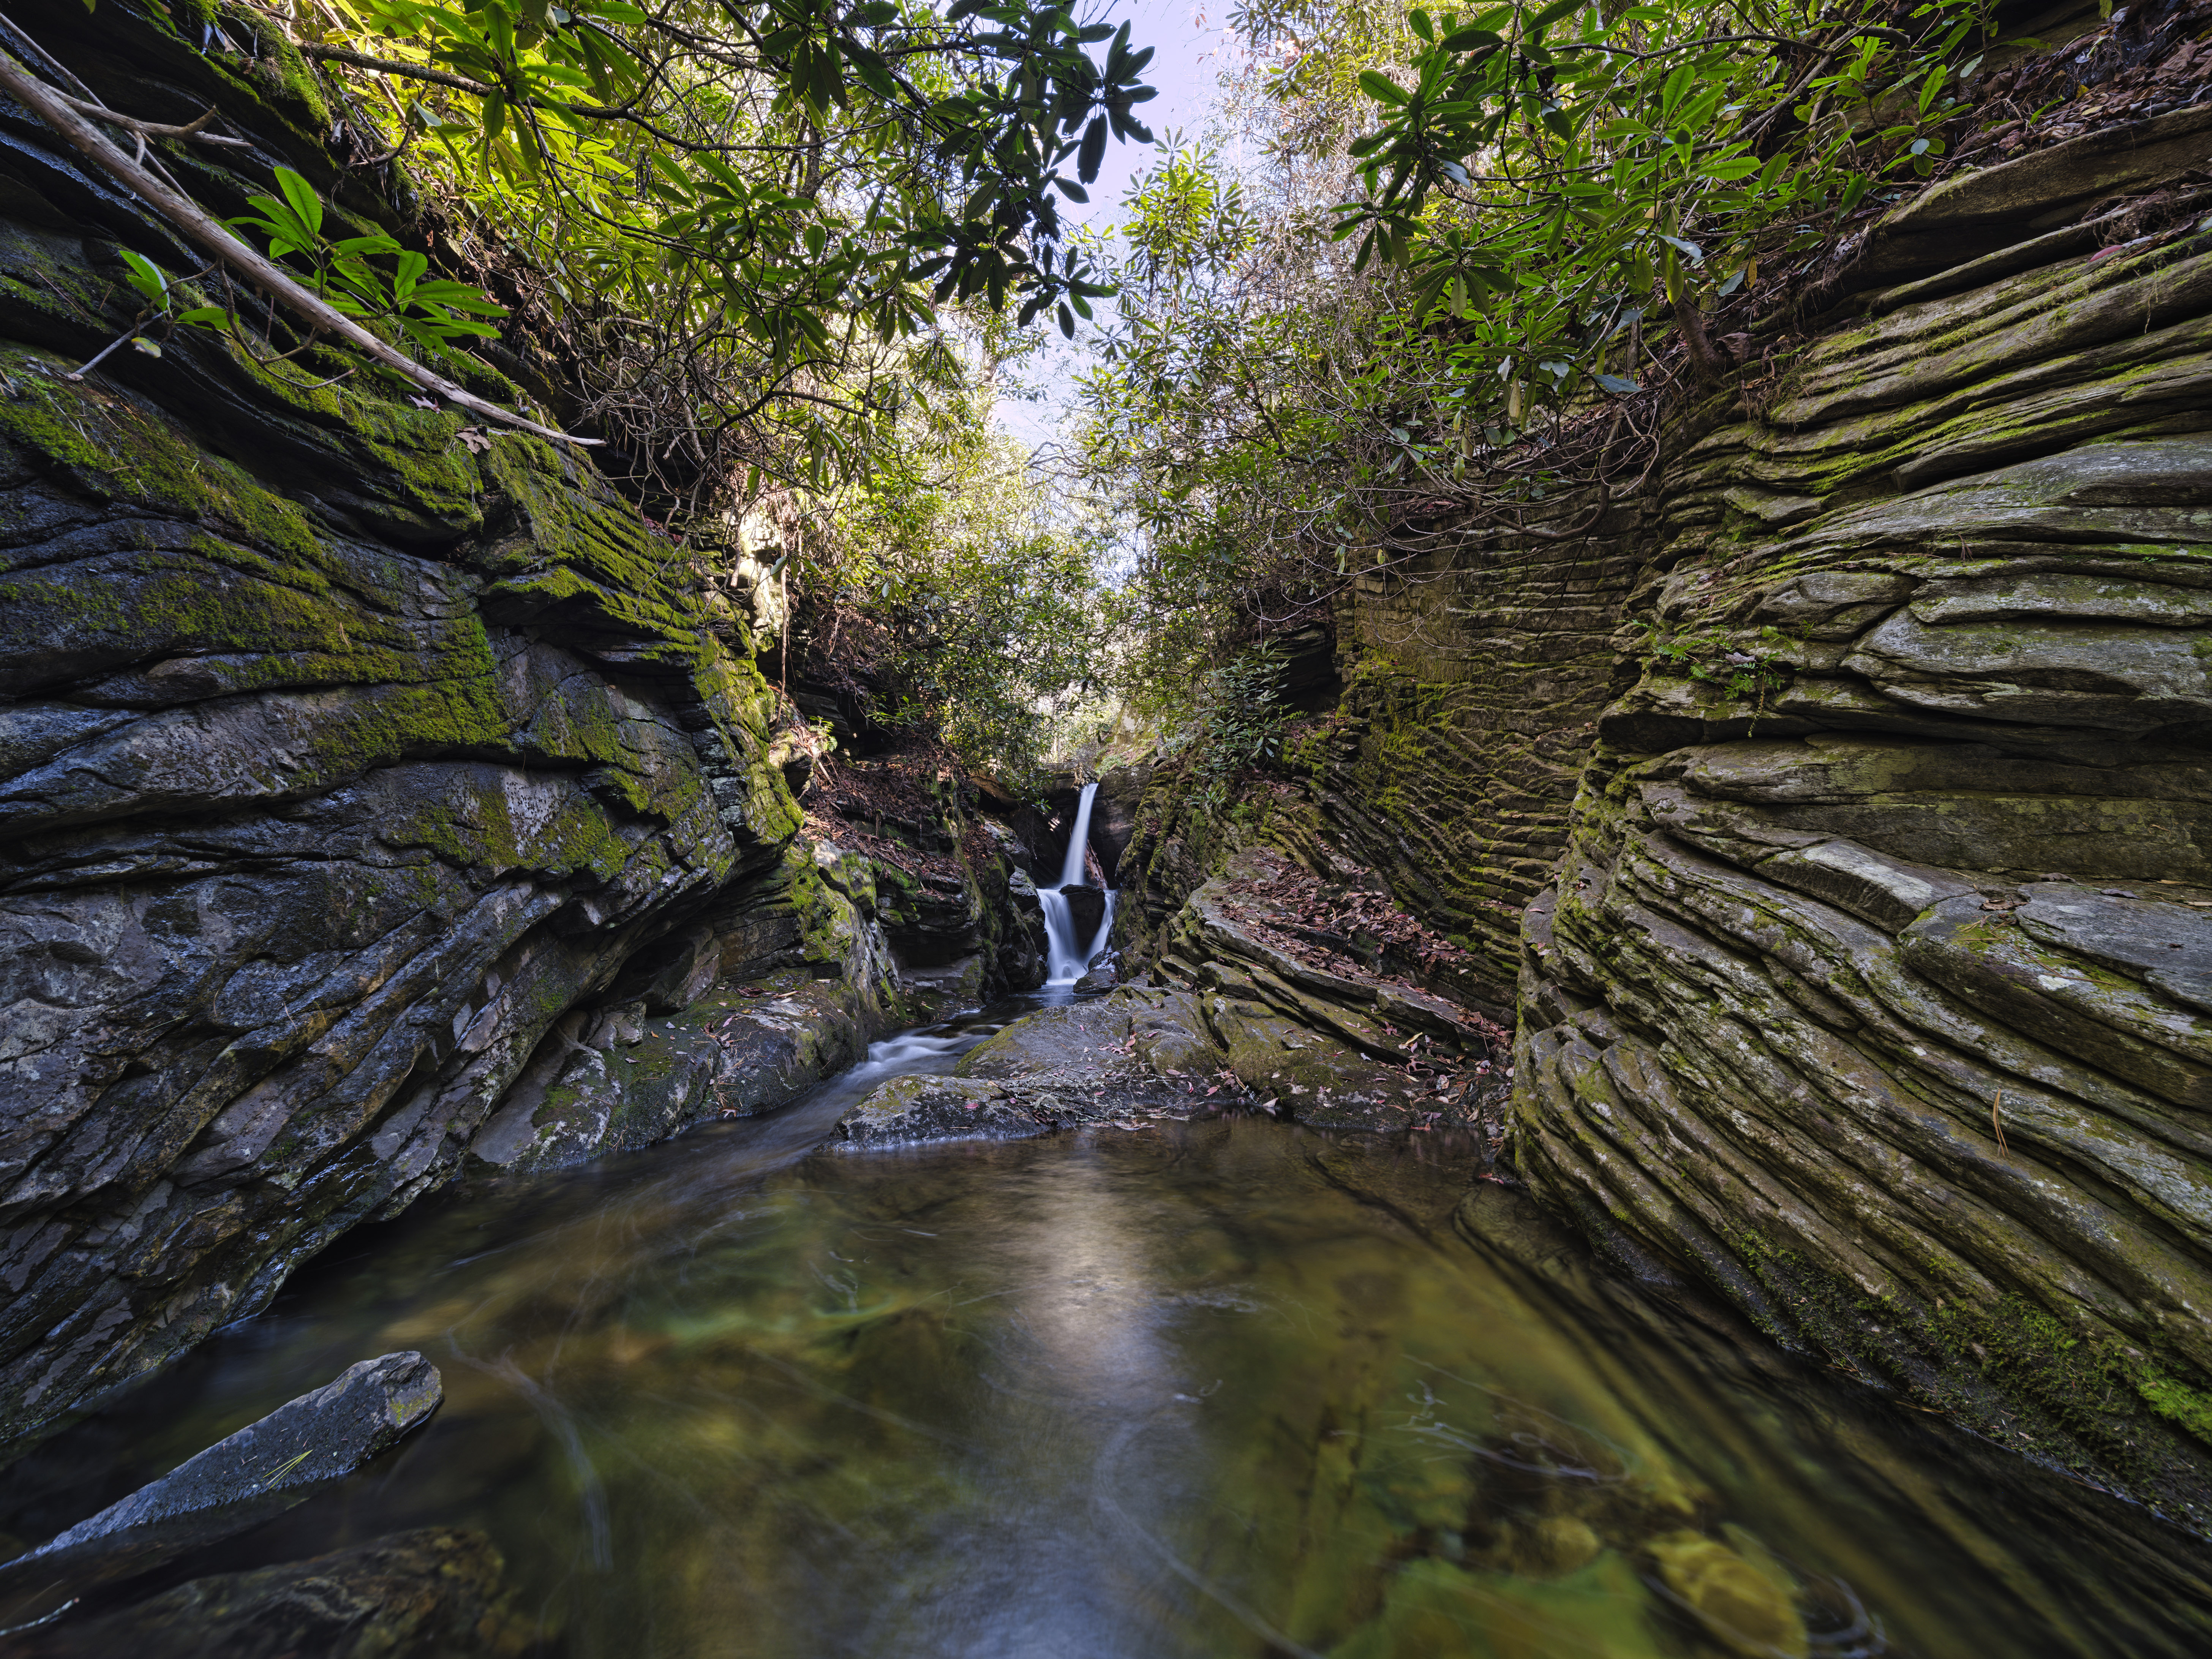
1) Work with foliage
Foliage Enhancer is one of the controls found in the Landscape adjustments, and provides the ability to increase the saturation of just the foliage in images, making trees and plants more prominent. Not only this, by expanding the tab to show the Advanced Settings, you can also change the hue of foliage, which means you have a great deal of control over how foliage looks using two simple sliders.
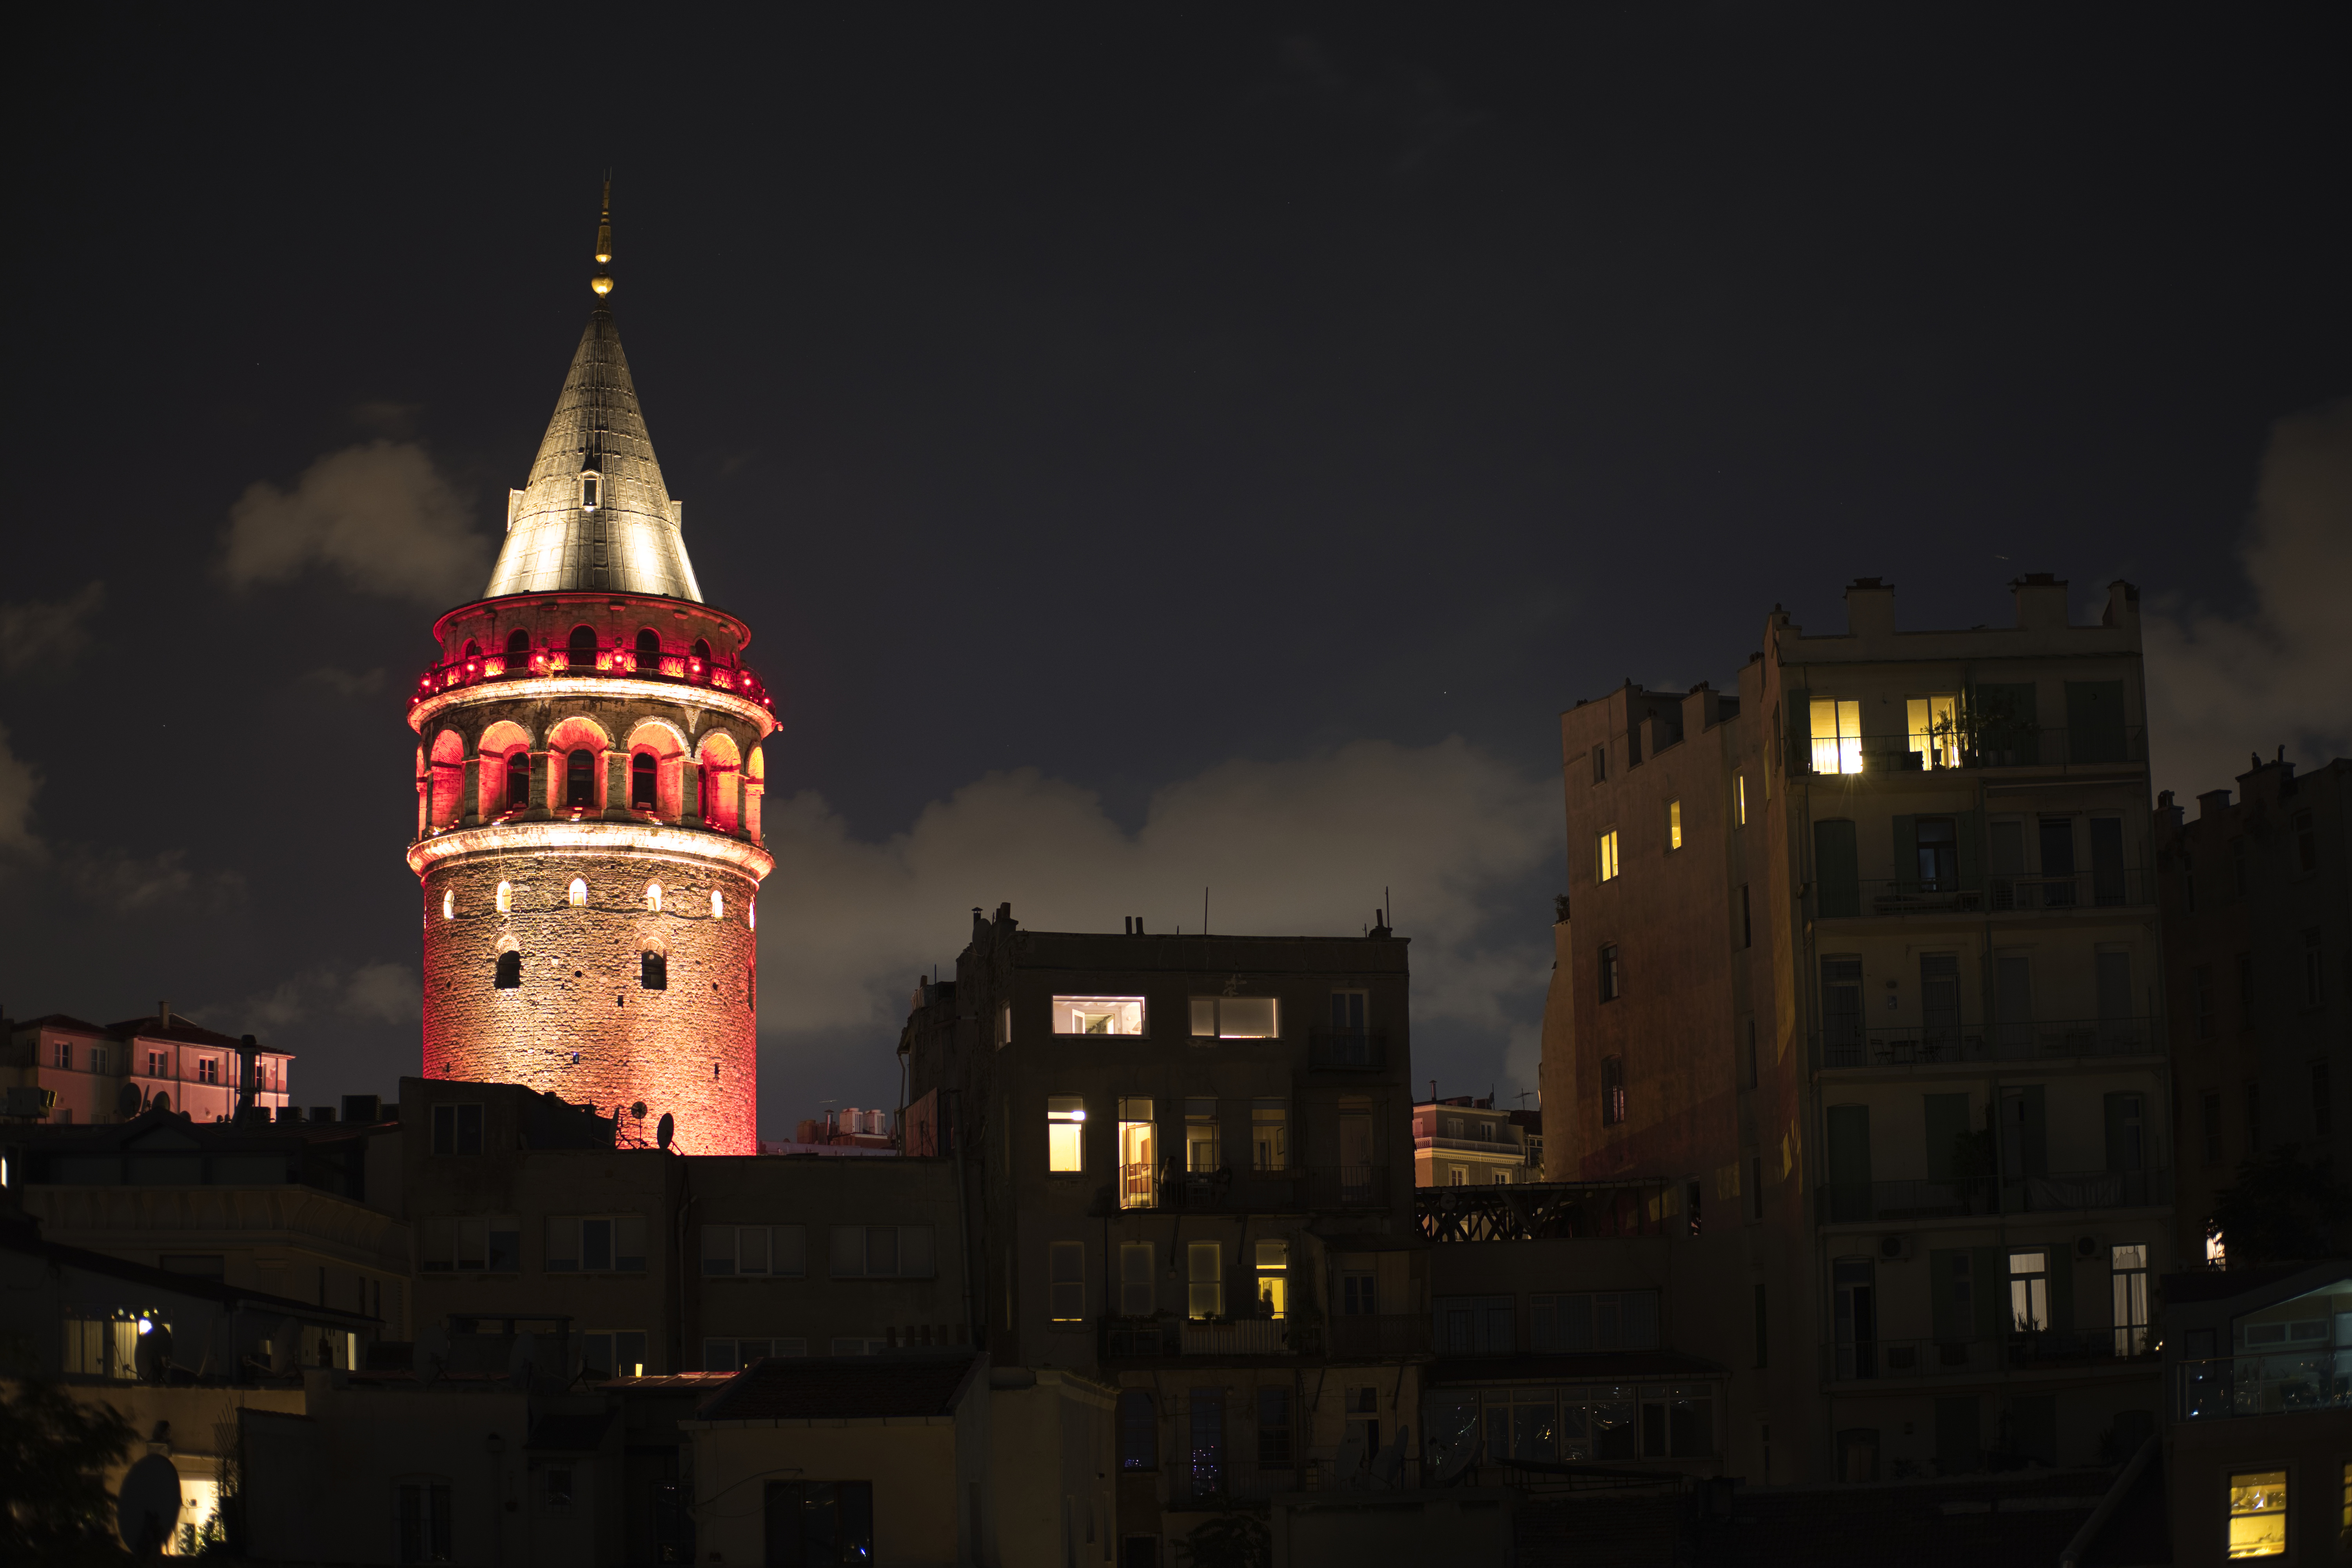

2) Add sky elements
Adding visual elements to skies is a great way to add interest to boring skies, or to make a great sky look even better. There are 23 default options with the ability to download more, and the level of control available to seamlessly blend effects is impressive yet easy to use. These fireworks were added to the sky in this image; the AI system made light work of blending them with existing elements.

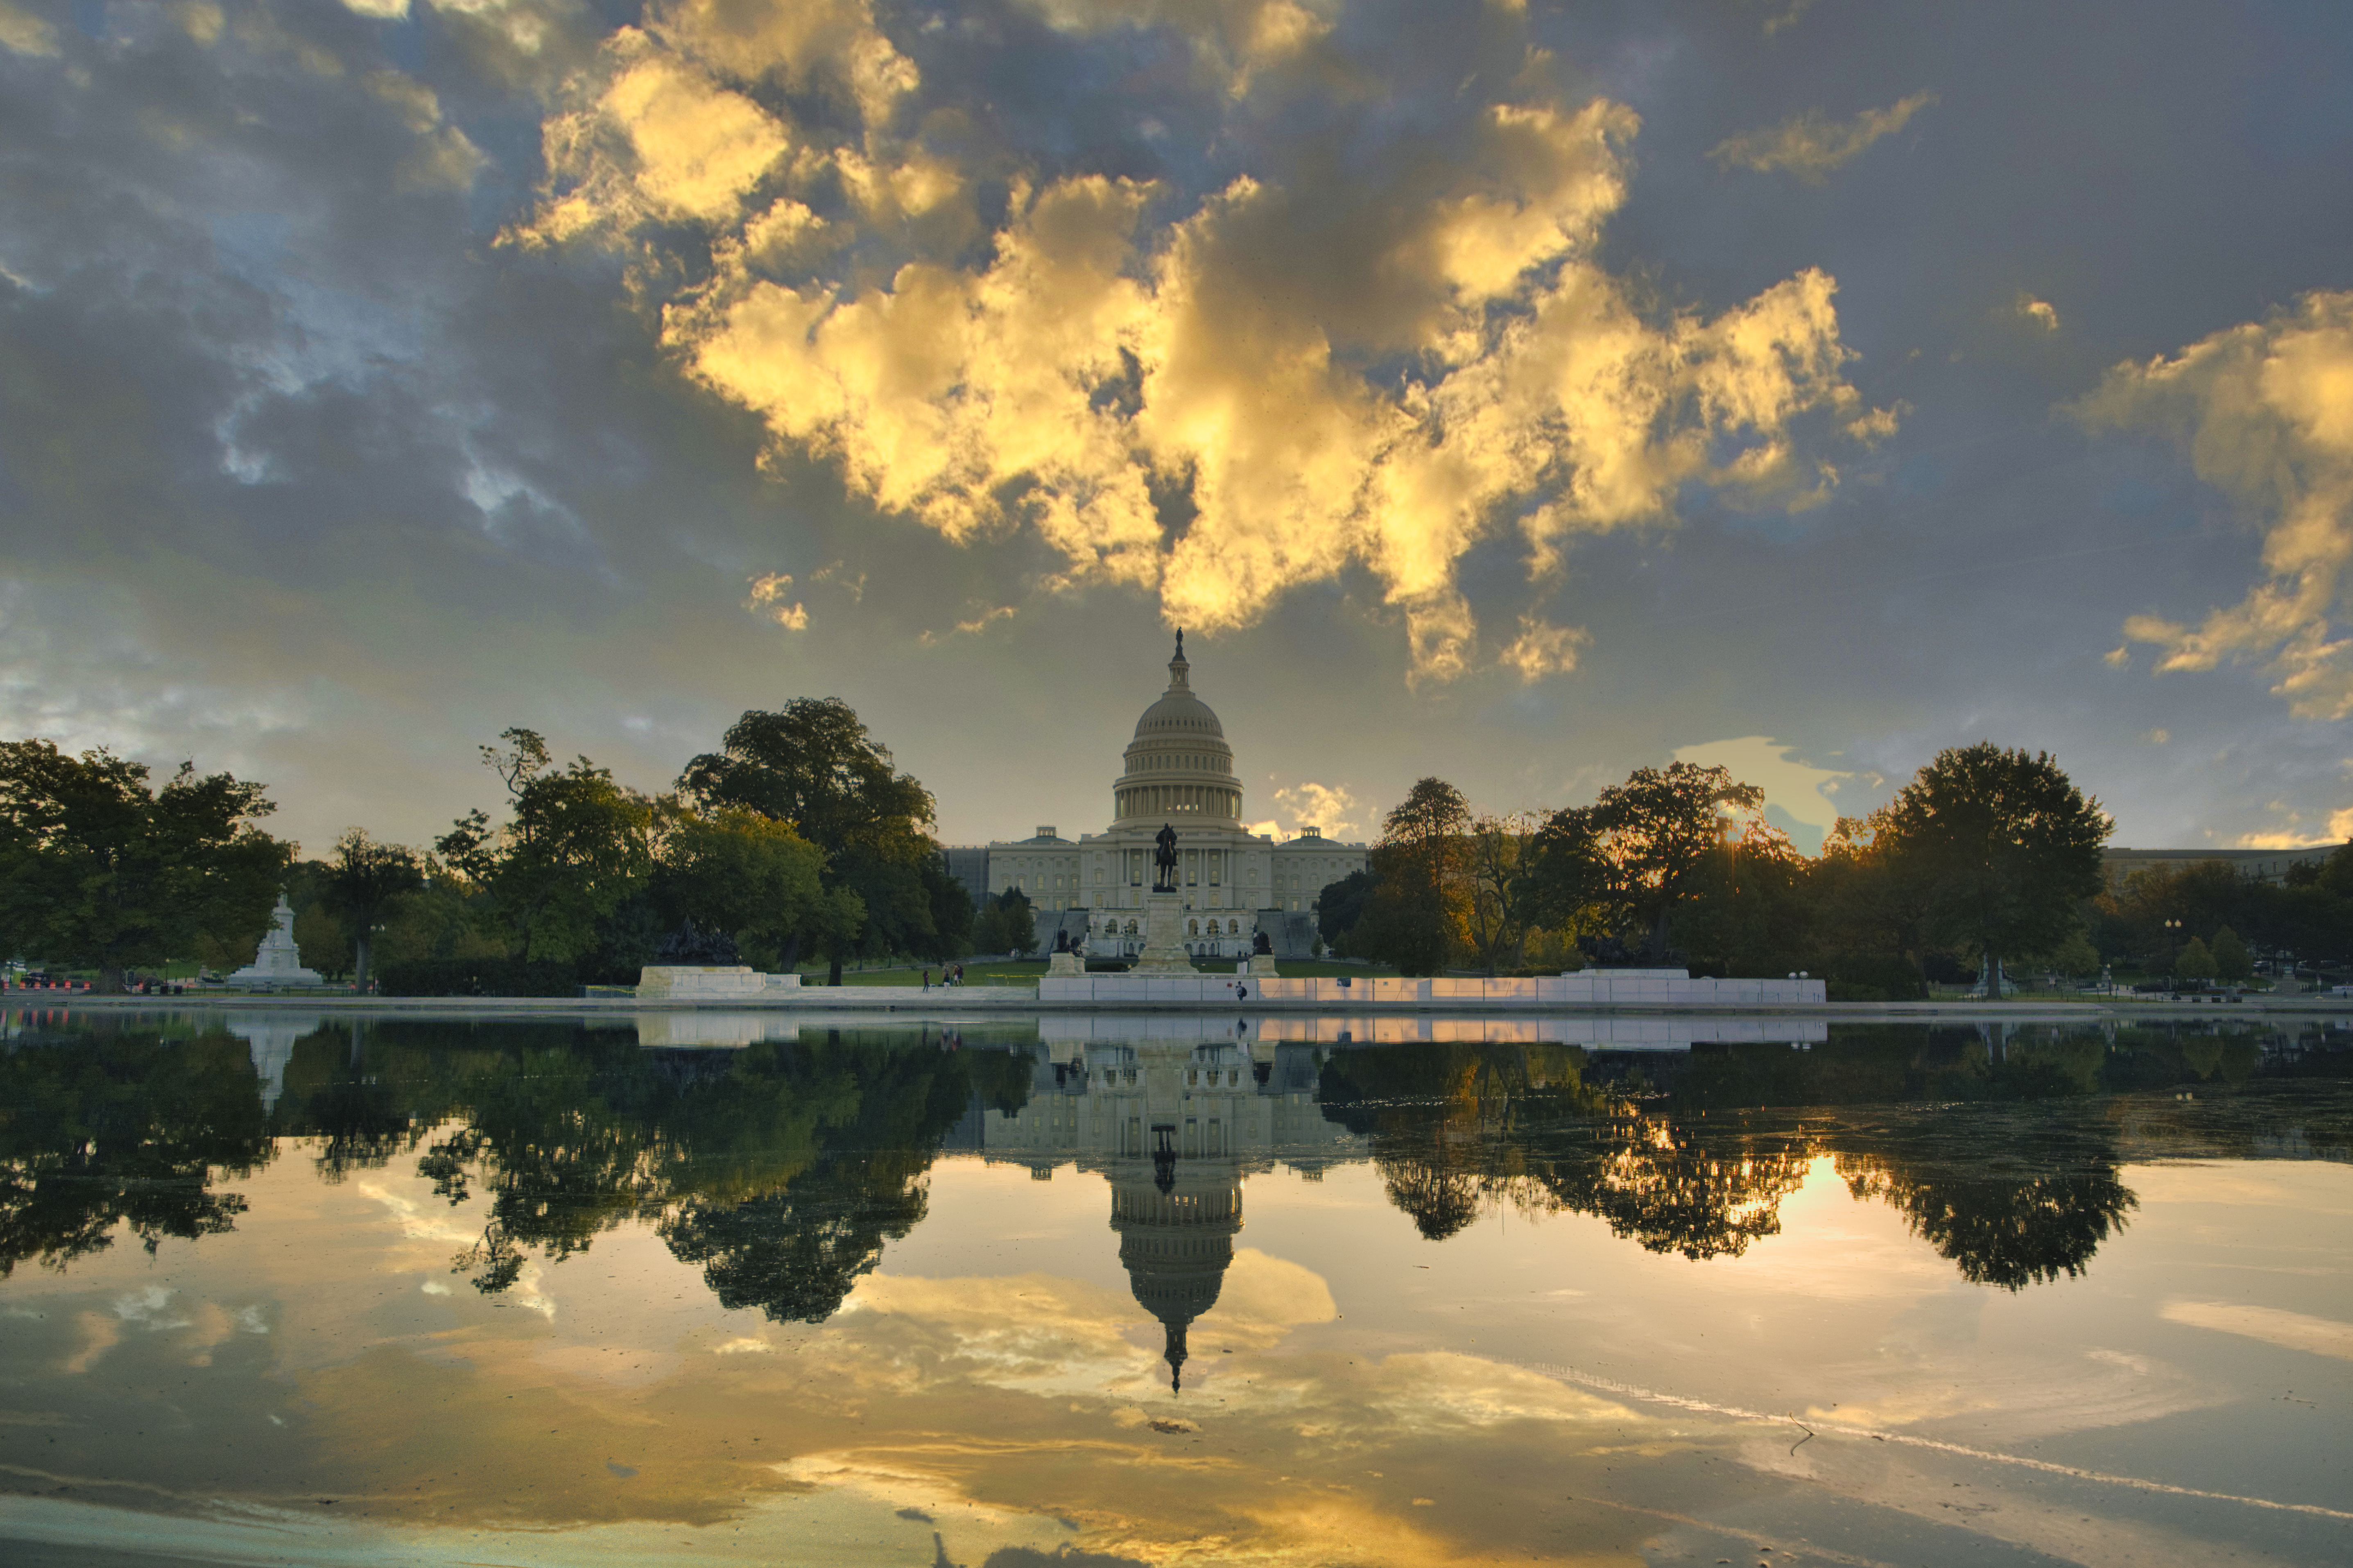
3) Replace skies
Replacing skies manually is a time-consuming task, which is why many photographers choose not to embark on the process. With Sky AI, however, the process couldn’t be simpler, with Luminar AI perfectly blending new skies with the existing elements of the scene for you! What’s more, if there’s water in the scene reflecting the existing sky, Luminar AI will mimic this natural effect.
5 great tips for editing landscapes
The Luminar AI adjustments available specifically for landscape photography provide professional quality results of complex effects, without the need for time-consuming techniques. Everything can be applied in seconds, and the results are guaranteed to make your landscapes look their best.
Here are five ways to get more from the amazing adjustments on offer, from the use of Templates to set the look of your images to AI-powered adjustments that make complex tasks achievable at the click of a button.
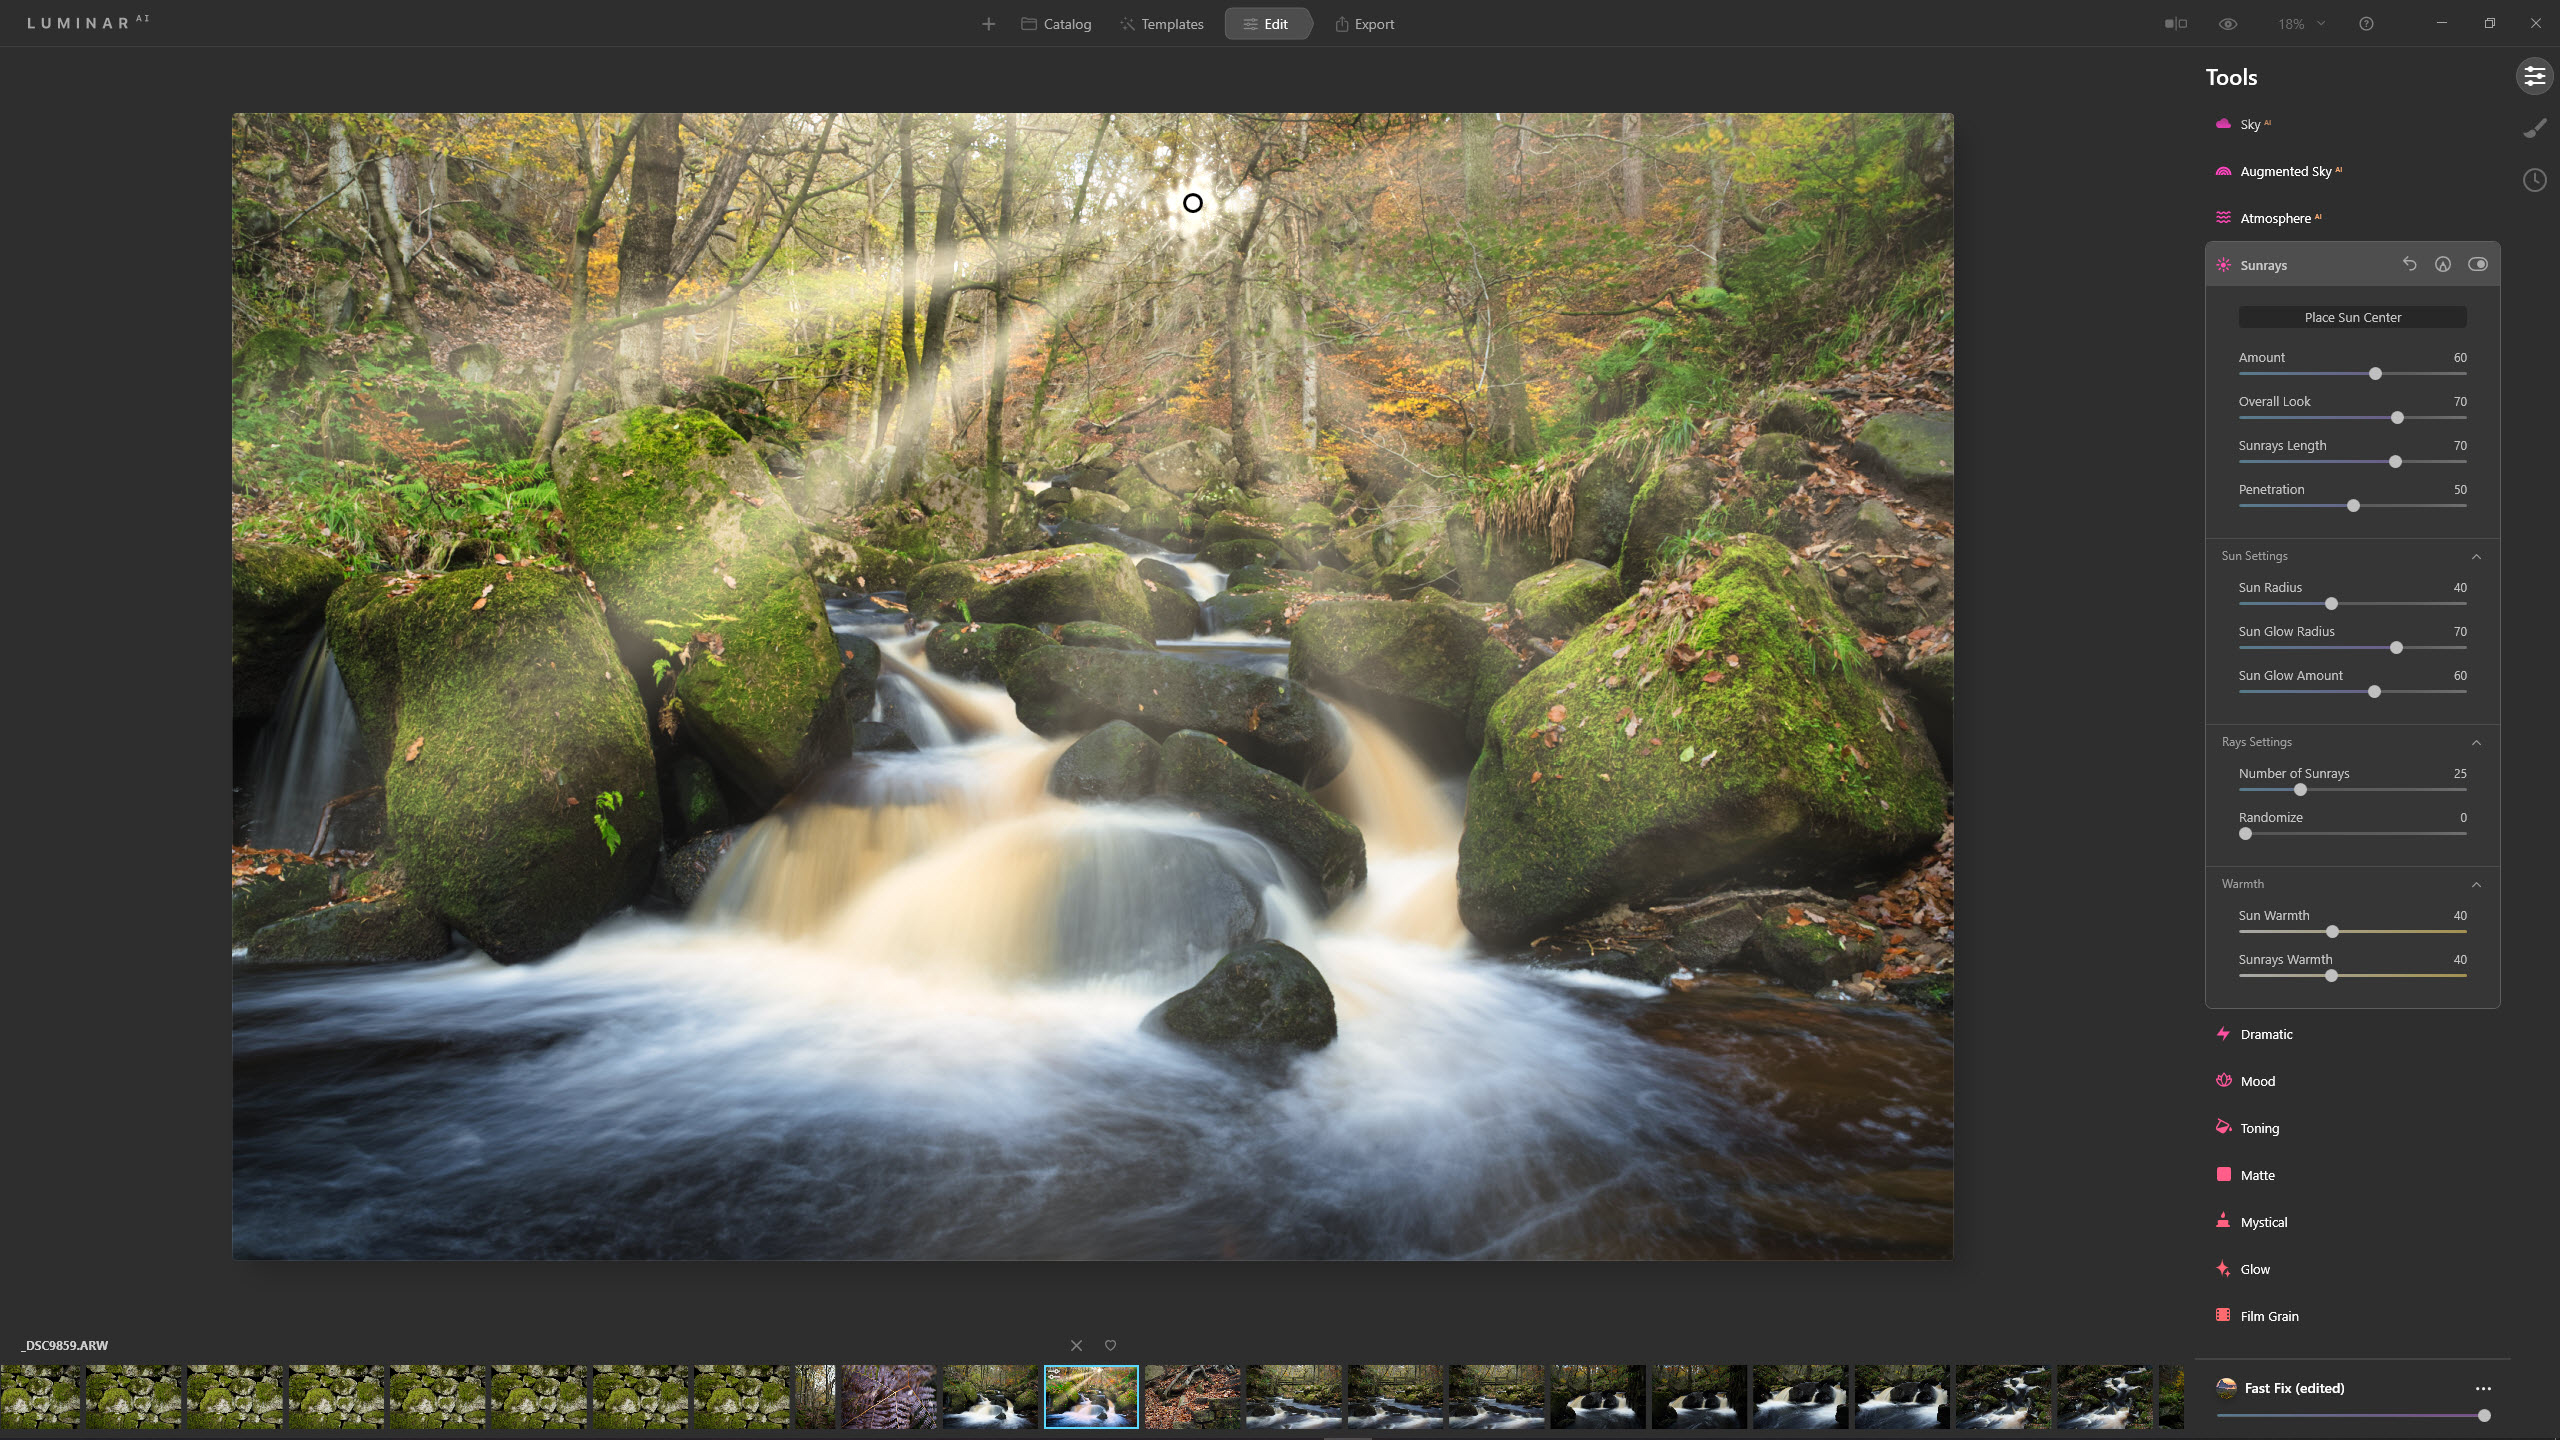
1) Sunrays
When you add sunrays, you can change the warmth of the sun and the rays so they match the existing light in the scene, or even contrast with it if that’s the effect you’re aiming for.
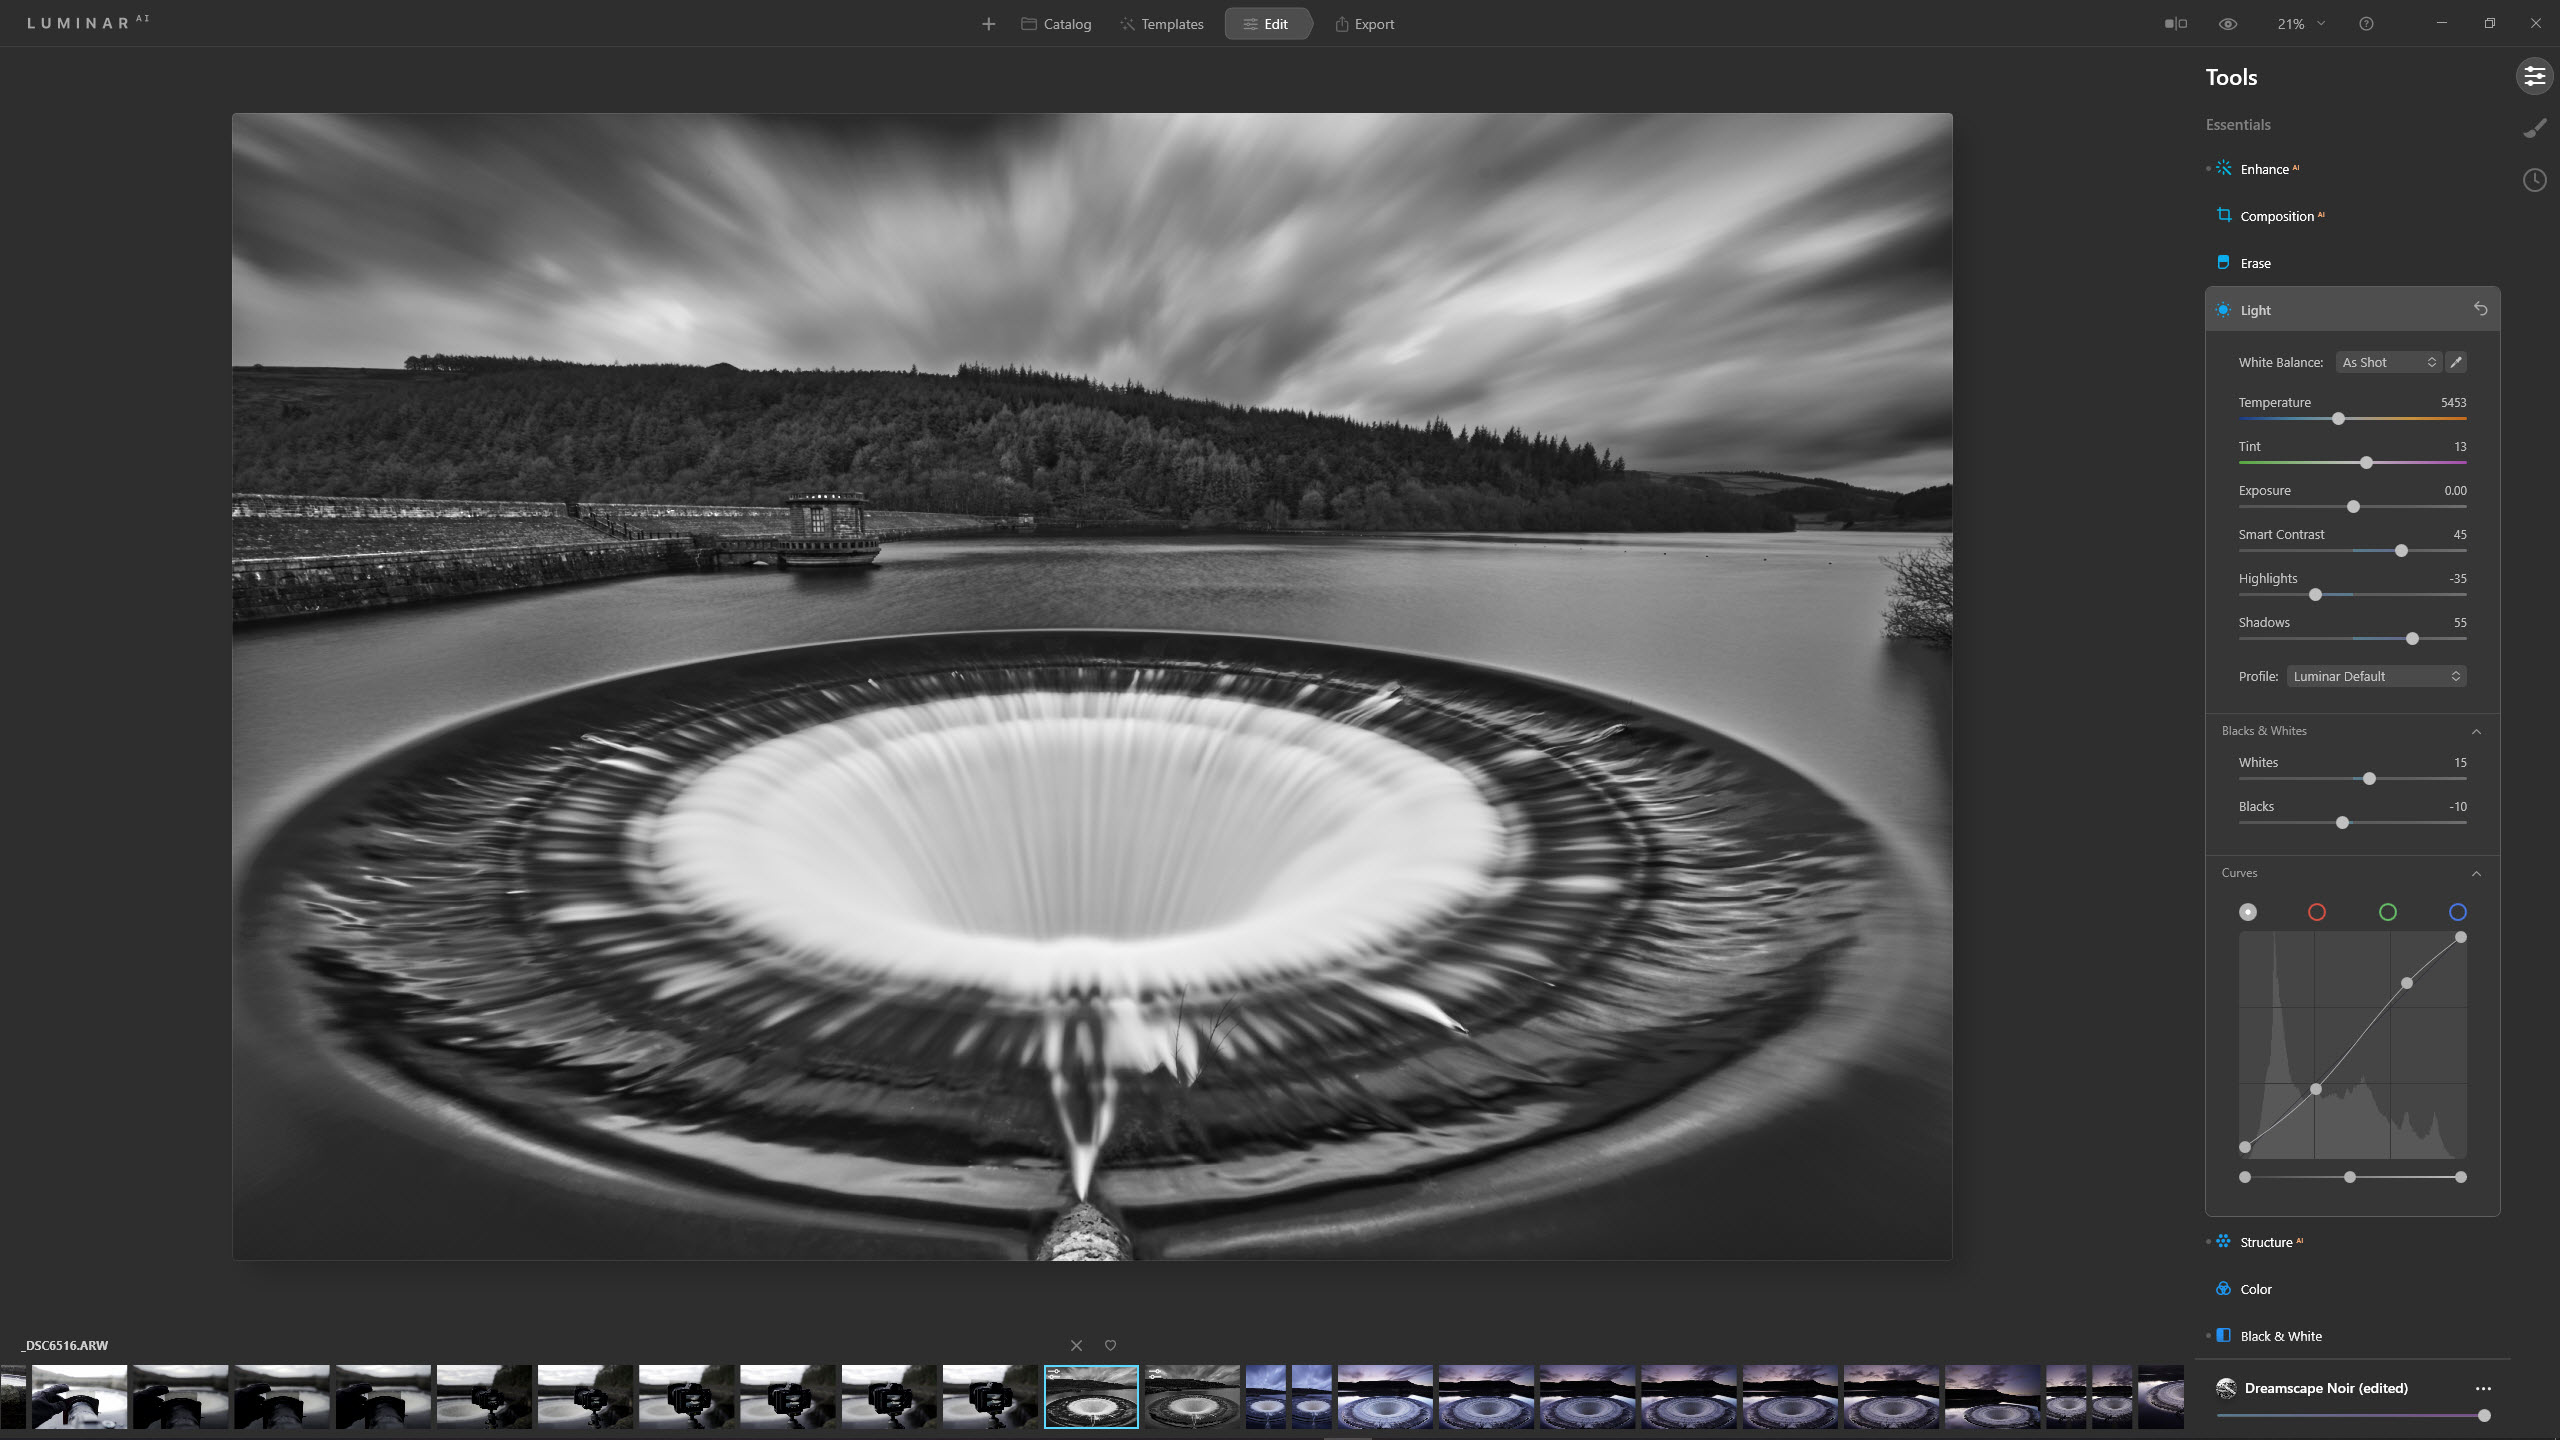
2) Light
The Light controls provide all the basic adjustments you need to apply to landscape images, including White Balance, Exposure, Smart Contrast, Highlights and Shadows.
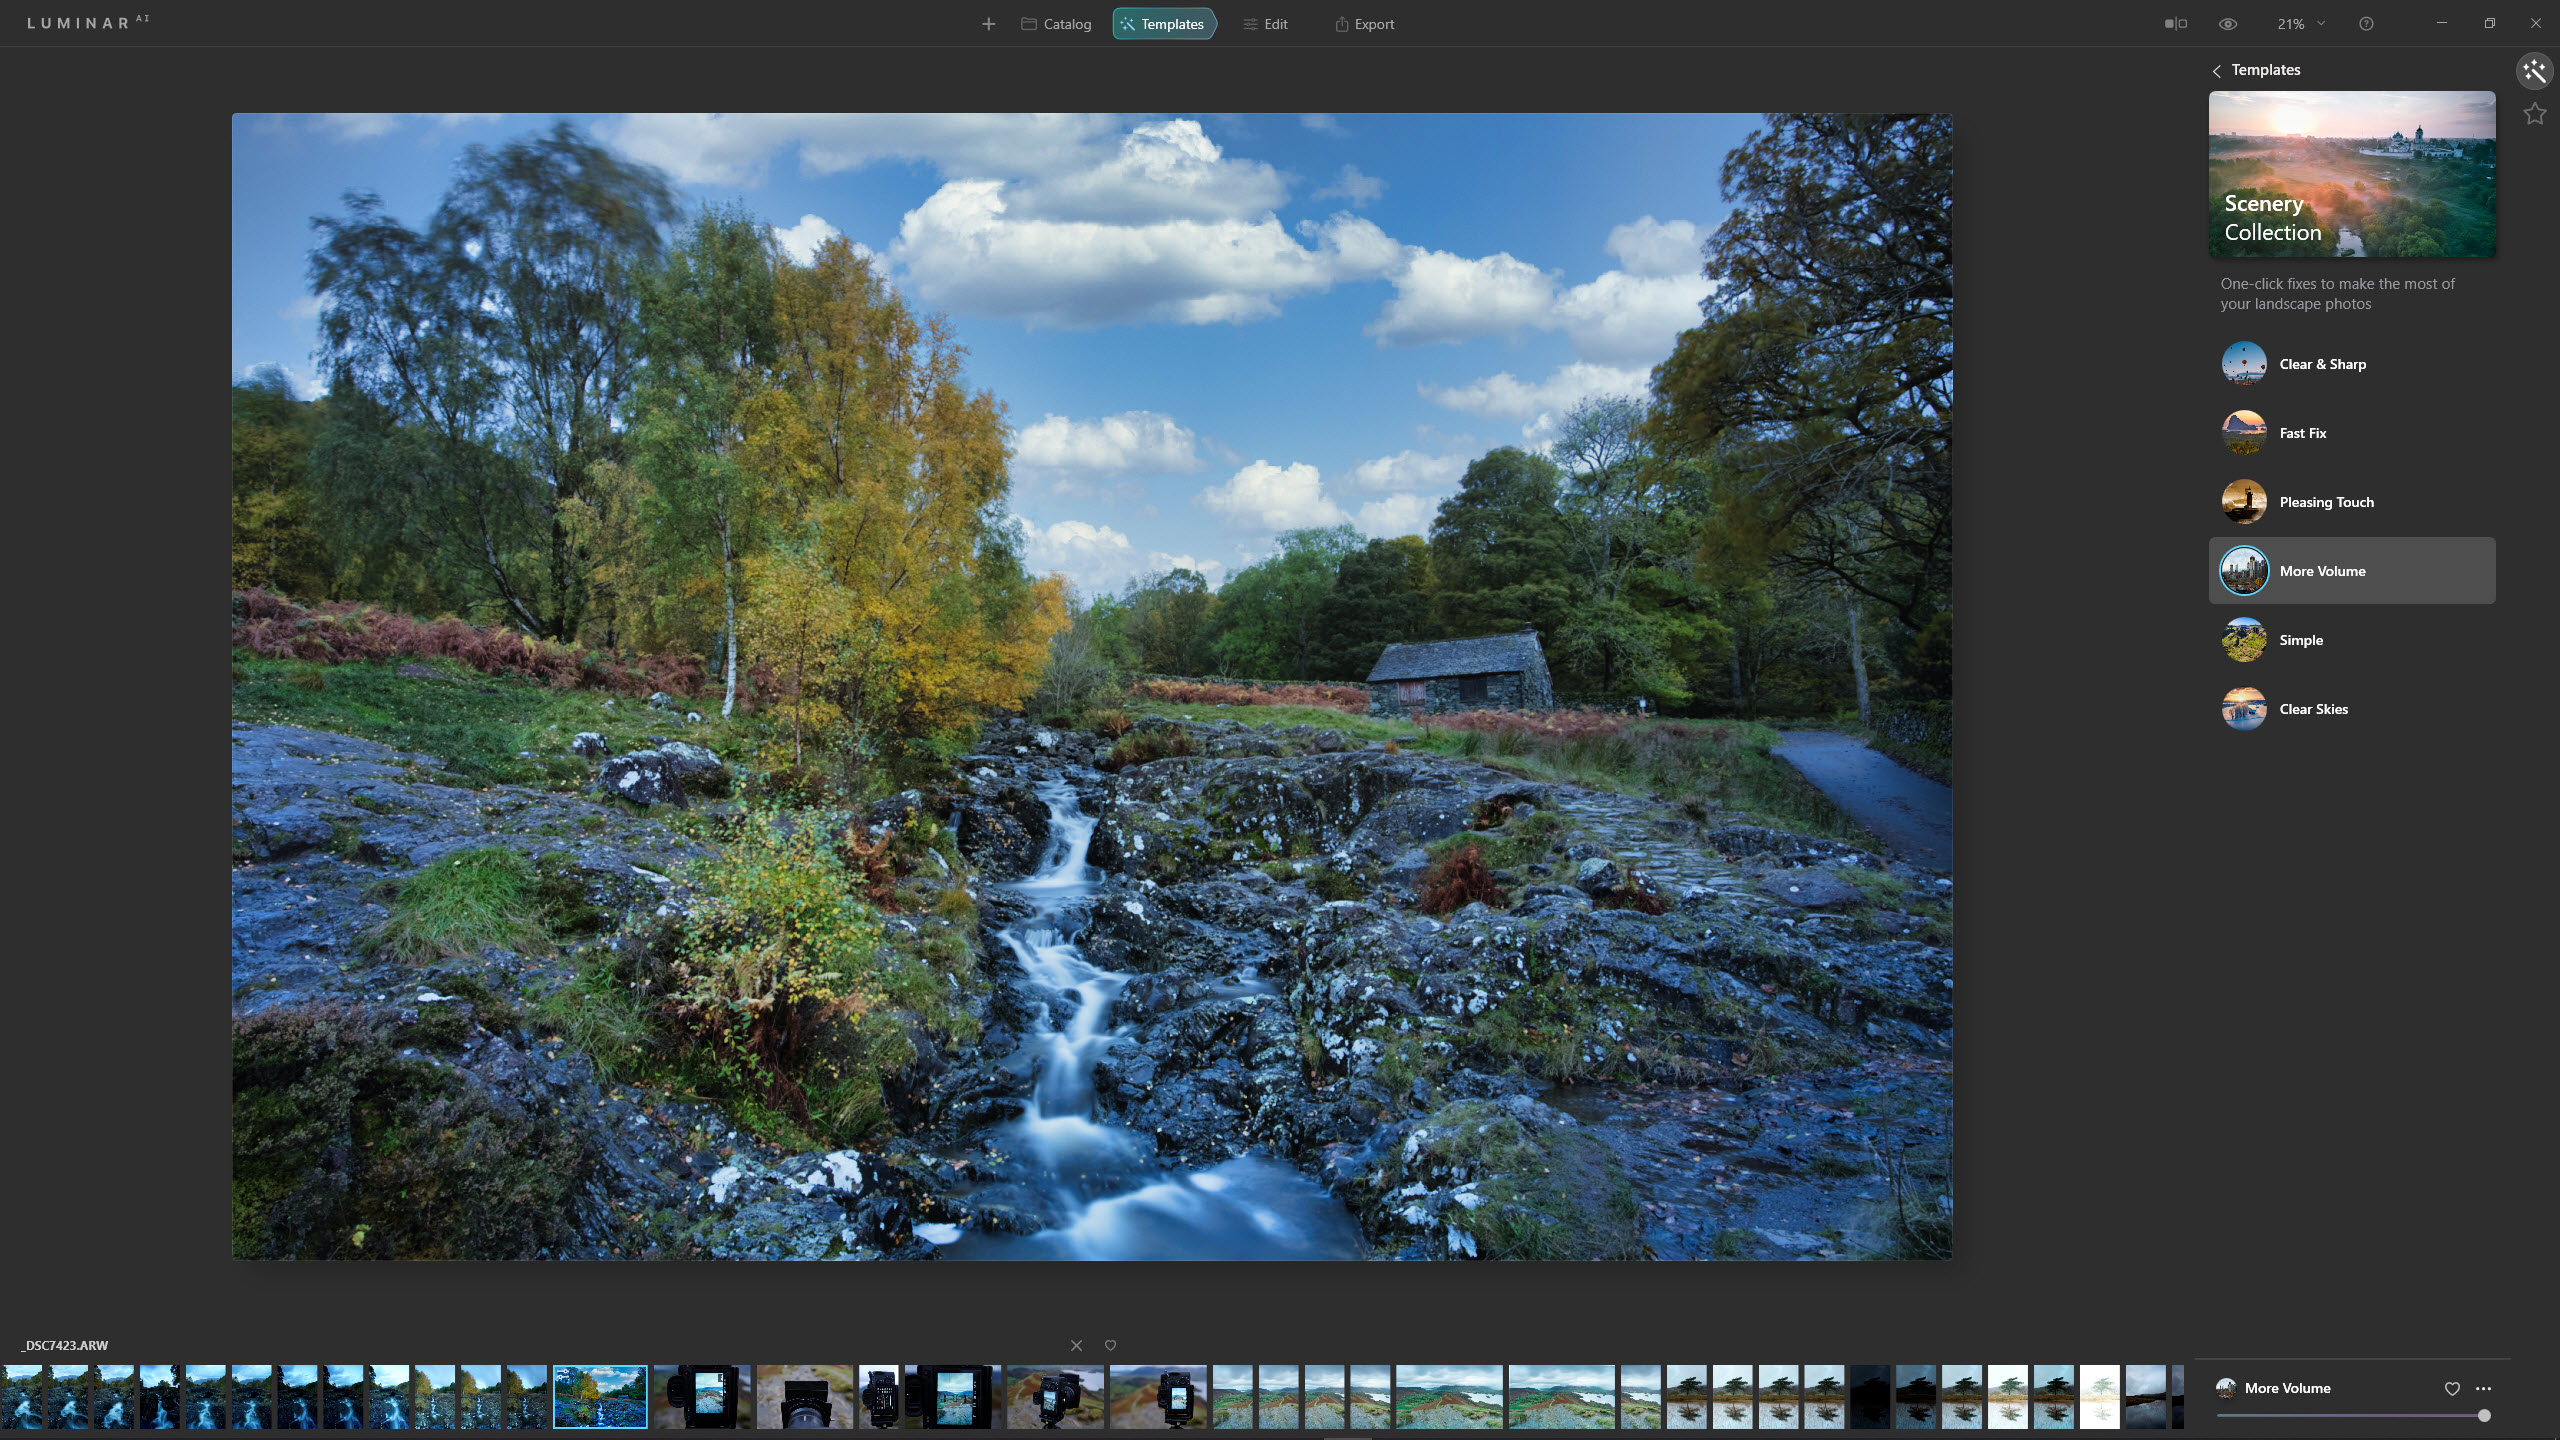
3) Templates
The template you choose forms a starting point for applying further adjustments. Some Templates, such as More Volume, automatically replace the sky; this Template adds a blue sky with clouds.
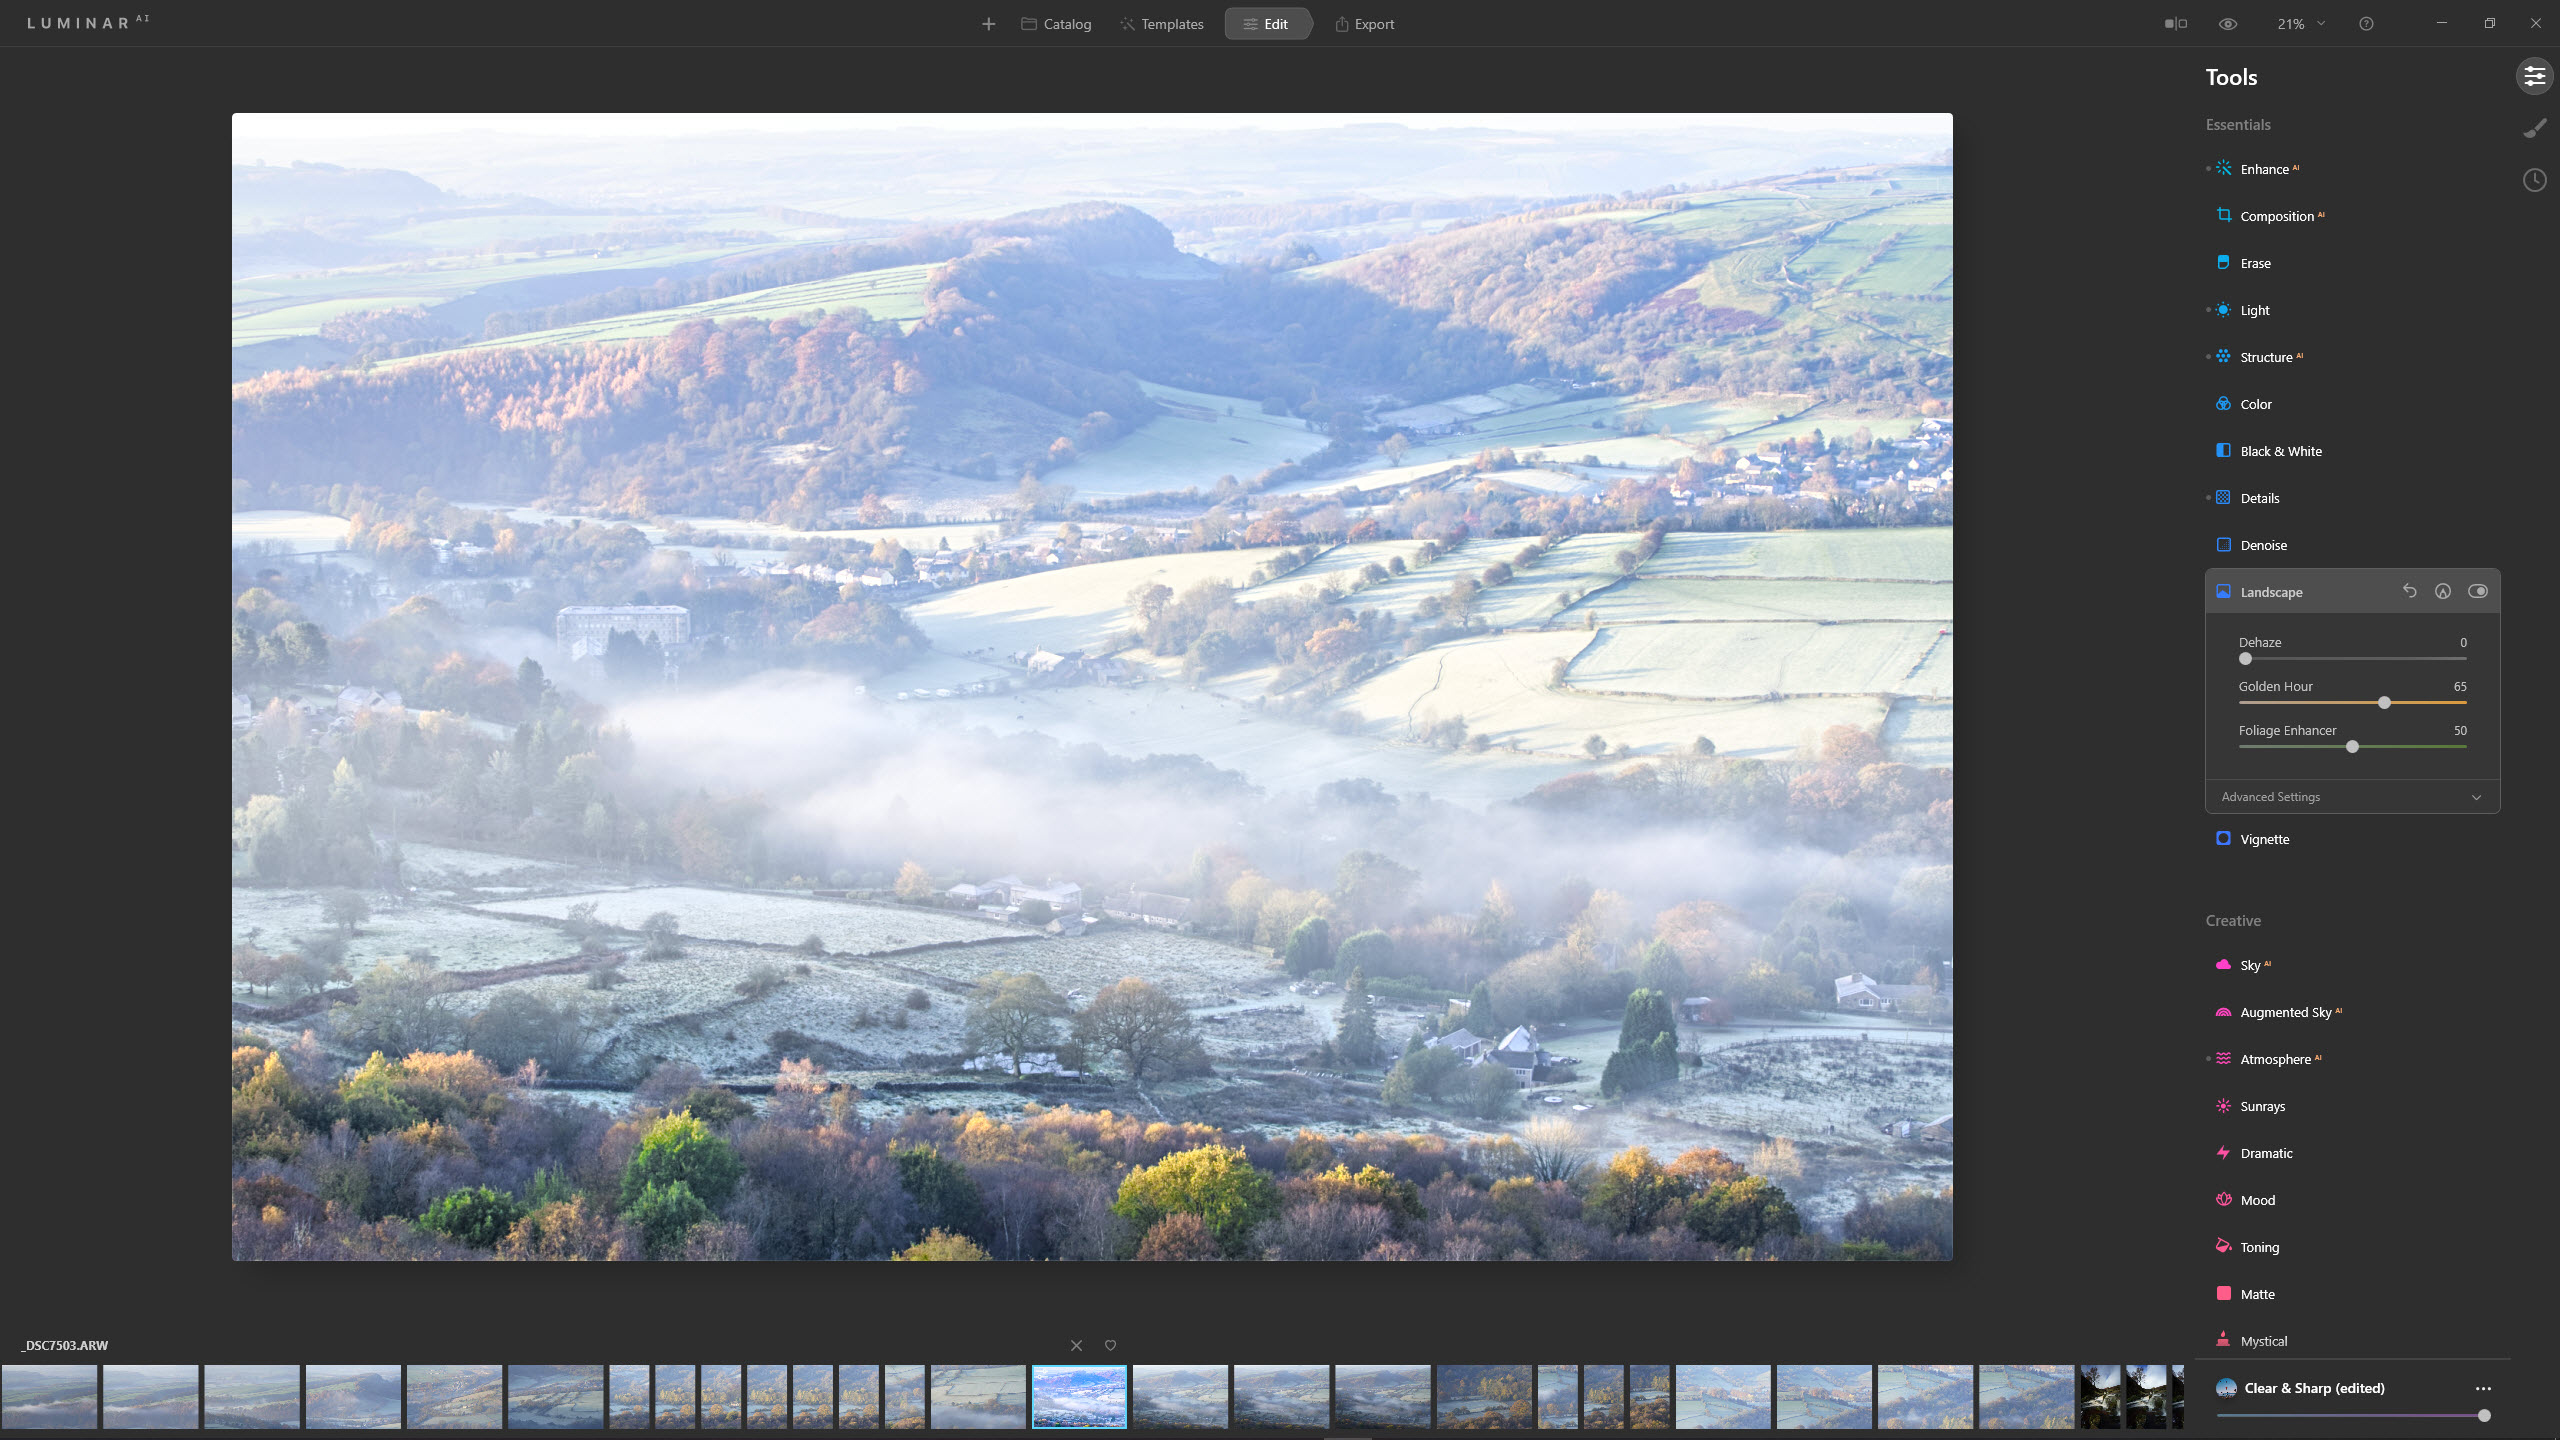
4) Golden Hour
Within the Landscape adjustments, Golden Hour provides the ability to gently warm up the scene. Combine it with Foliage Enhancer to bring classic landscape vistas to life.
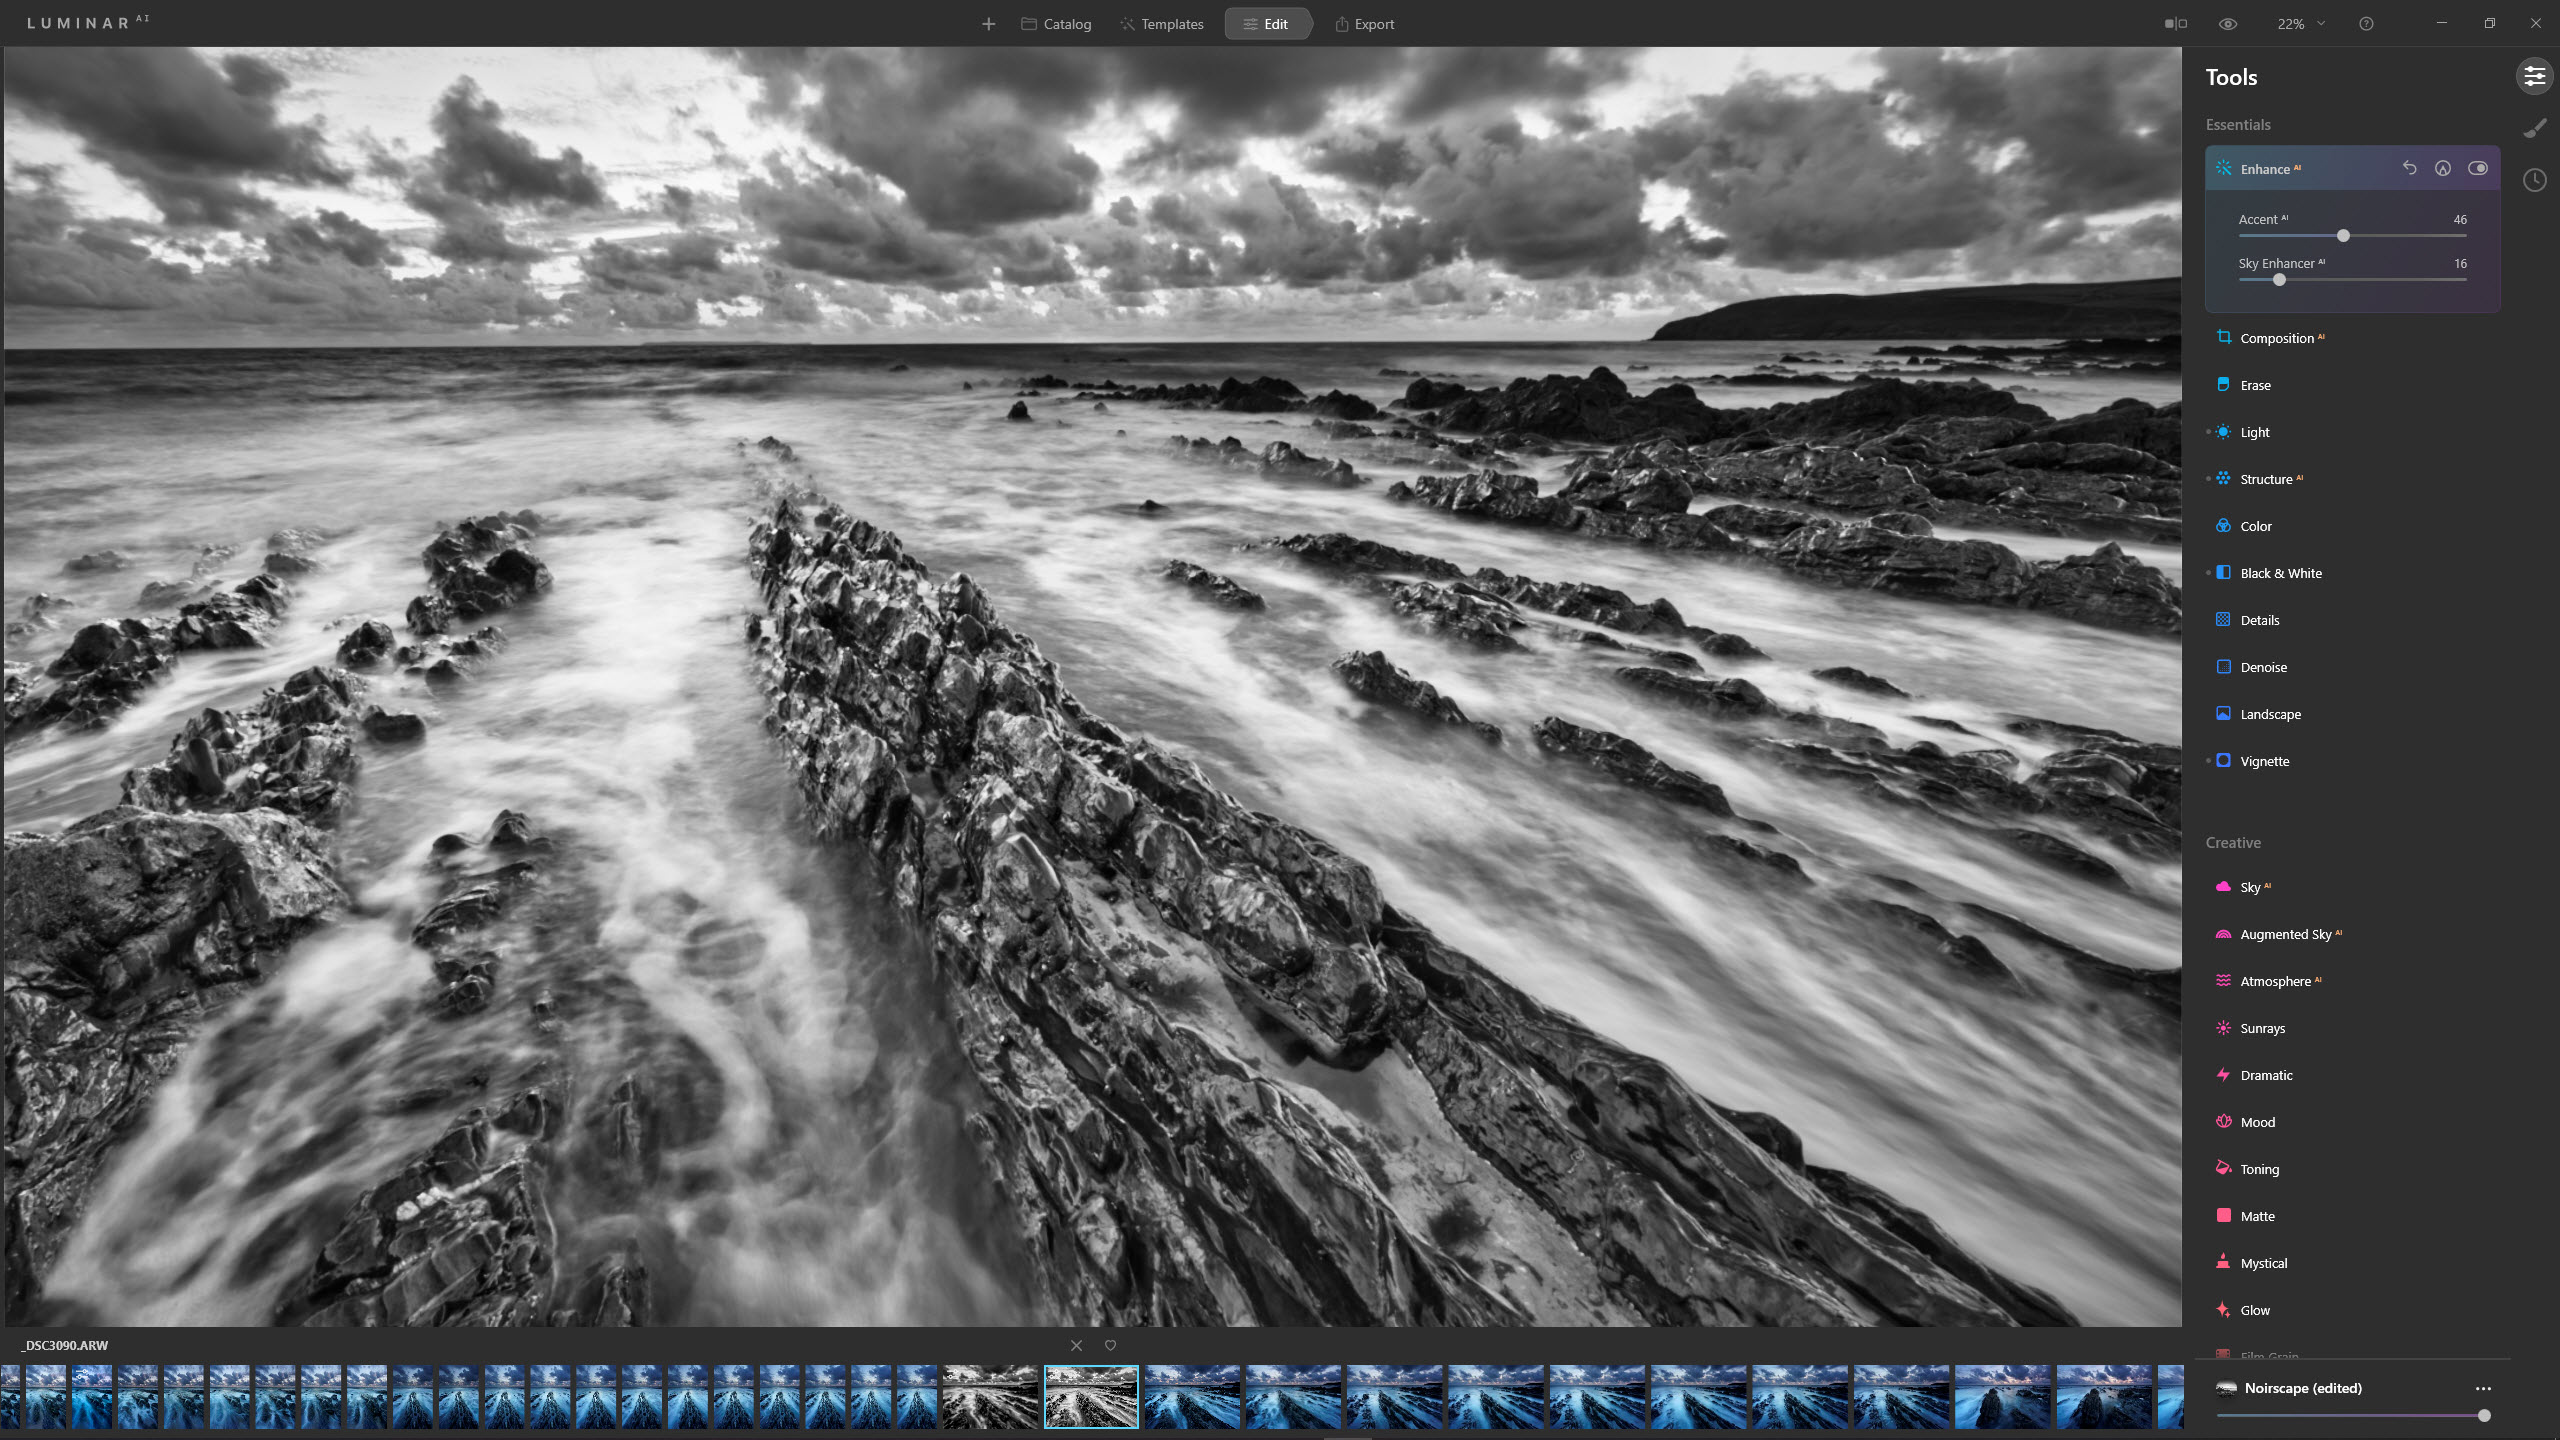
5) Enhance AI
Enhance AI enables you to increase the strength of the template alongside enhancing the sky, if one is present in the image. Increase the drama of a black-and-white shot using Accent AI.
How to get your copy of Skylum Luminar AI

If you don’t have Luminar AI already, you can get it at www.skylum.com – it’s available for both macOS and Windows. Luminar AI will revolutionise your editing workflow by simplifying professional techniques and making complex tasks quick and fun. When you purchase Luminar AI, you can use the exclusive discount code DCW21* to save £10/$10 on the price of the software, which is available with single or dual computer licences.
*Cannot be used in conjunction with other sale offer
Get the Digital Camera World Newsletter
The best camera deals, reviews, product advice, and unmissable photography news, direct to your inbox!
Digital Camera World is one of the leading authorities on camera and photography news, reviews, techniques, tutorials, comparisons, deals and industry analysis. The site doesn't just specialize in cameras, but all aspects of photography, videography and imaging – including camera phones, gimbals, lenses, lighting, editing software, filters, tripods, laptops, printers, photo books, desks, binoculars and more.
Whether you're using, looking to buy or trying to get the most out of a compact camera, action camera, camera drone, cinema camera, beginner camera or professional camera, Digital Camera World has a roster of experts with combined experience of over 100 years when it comes to cameras, photography and imaging.

