Essential RAW tools for landscape photography in Affinity Photo 2
Landscape photography regularly tops our surveys of the most popular photographic genres, and it’s easy to see why. Here, we'll share some top tips for creative landscape photography, plus RAW tools for better editing in Affinity Photo 2!
Spending time in wild and beautiful locations, photographing subjects that can be relied upon to always deliver, is inspiring stuff. You can tread in the footsteps of the masters of landscape photography if you wish, fill your lungs with fresh air – and fill memory cards with fantastic images of your favourite places.
Photographing the great outdoors is, like many types of photography, easy to learn but tricker to become proficient in. In some ways, it’s like sports photography. You know where to stand to get the best view, but there can be a lot of waiting around for the action to happen – which can be over all too quickly once it takes place. For landscapes, it’s the window of best light that can open and close within just a few minutes.
Whether it’s ‘God’s fingers’ breaking through the clouds to spotlight a feature in the landscape, or a sinking sun bathing the scene in golden light, you need to be set up and ready and know how to quickly adjust your camera settings to make the most of the opportunity.

Out now, Affinity Photo 2 is the brand-new version of the only fully-loaded photo editor integrated across macOS, Windows and iPad. The first choice of millions of creative and photography professionals around the world who love its speed, power and precision, Affinity Photo 2 has everything you need to edit and retouch images, create multi-layered compositions, beautiful raster paintings and so much more. It's also equipped with hundreds of time-saving tools and a completely redesigned UI to make your editing experience more seamless than ever. Affinity Photo 2 is available for a one-off payment with no subscription, or try the 30-day free trial.
There are some easy-to-follow technical considerations that can help to get you off on the right track. Getting to grips with aperture is a good place to start, as the choice of f-number has an impact on how much of the scene will appear sharp.
Set the camera to Aperture Priority or Manual (or Flexible Priority on a few cameras) and you’ll be able to choose the aperture directly. High f-numbers make more of the scene appear sharp, but avoid the highest couple of settings (such as f/32 and f/22) as these will lead to fuzzy details. Many cameras now come with diffraction correction that is designed to digitally counter the softness at higher apertures, so you may want to run some tests with your lenses to see whether this makes a significant difference. It’s worth noting that it will have no effect if you shoot raw files.
The higher the f-number, the smaller the aperture in the lens becomes, and smaller apertures let less light into the camera. This can lead to longer exposure times, and the risk of blurred pictures. You can increase the ISO to combat this, as higher ISO settings mean the camera needs less light to record a picture. But you’ll probably want to keep the ISO as low as possible in order to get the best image quality.
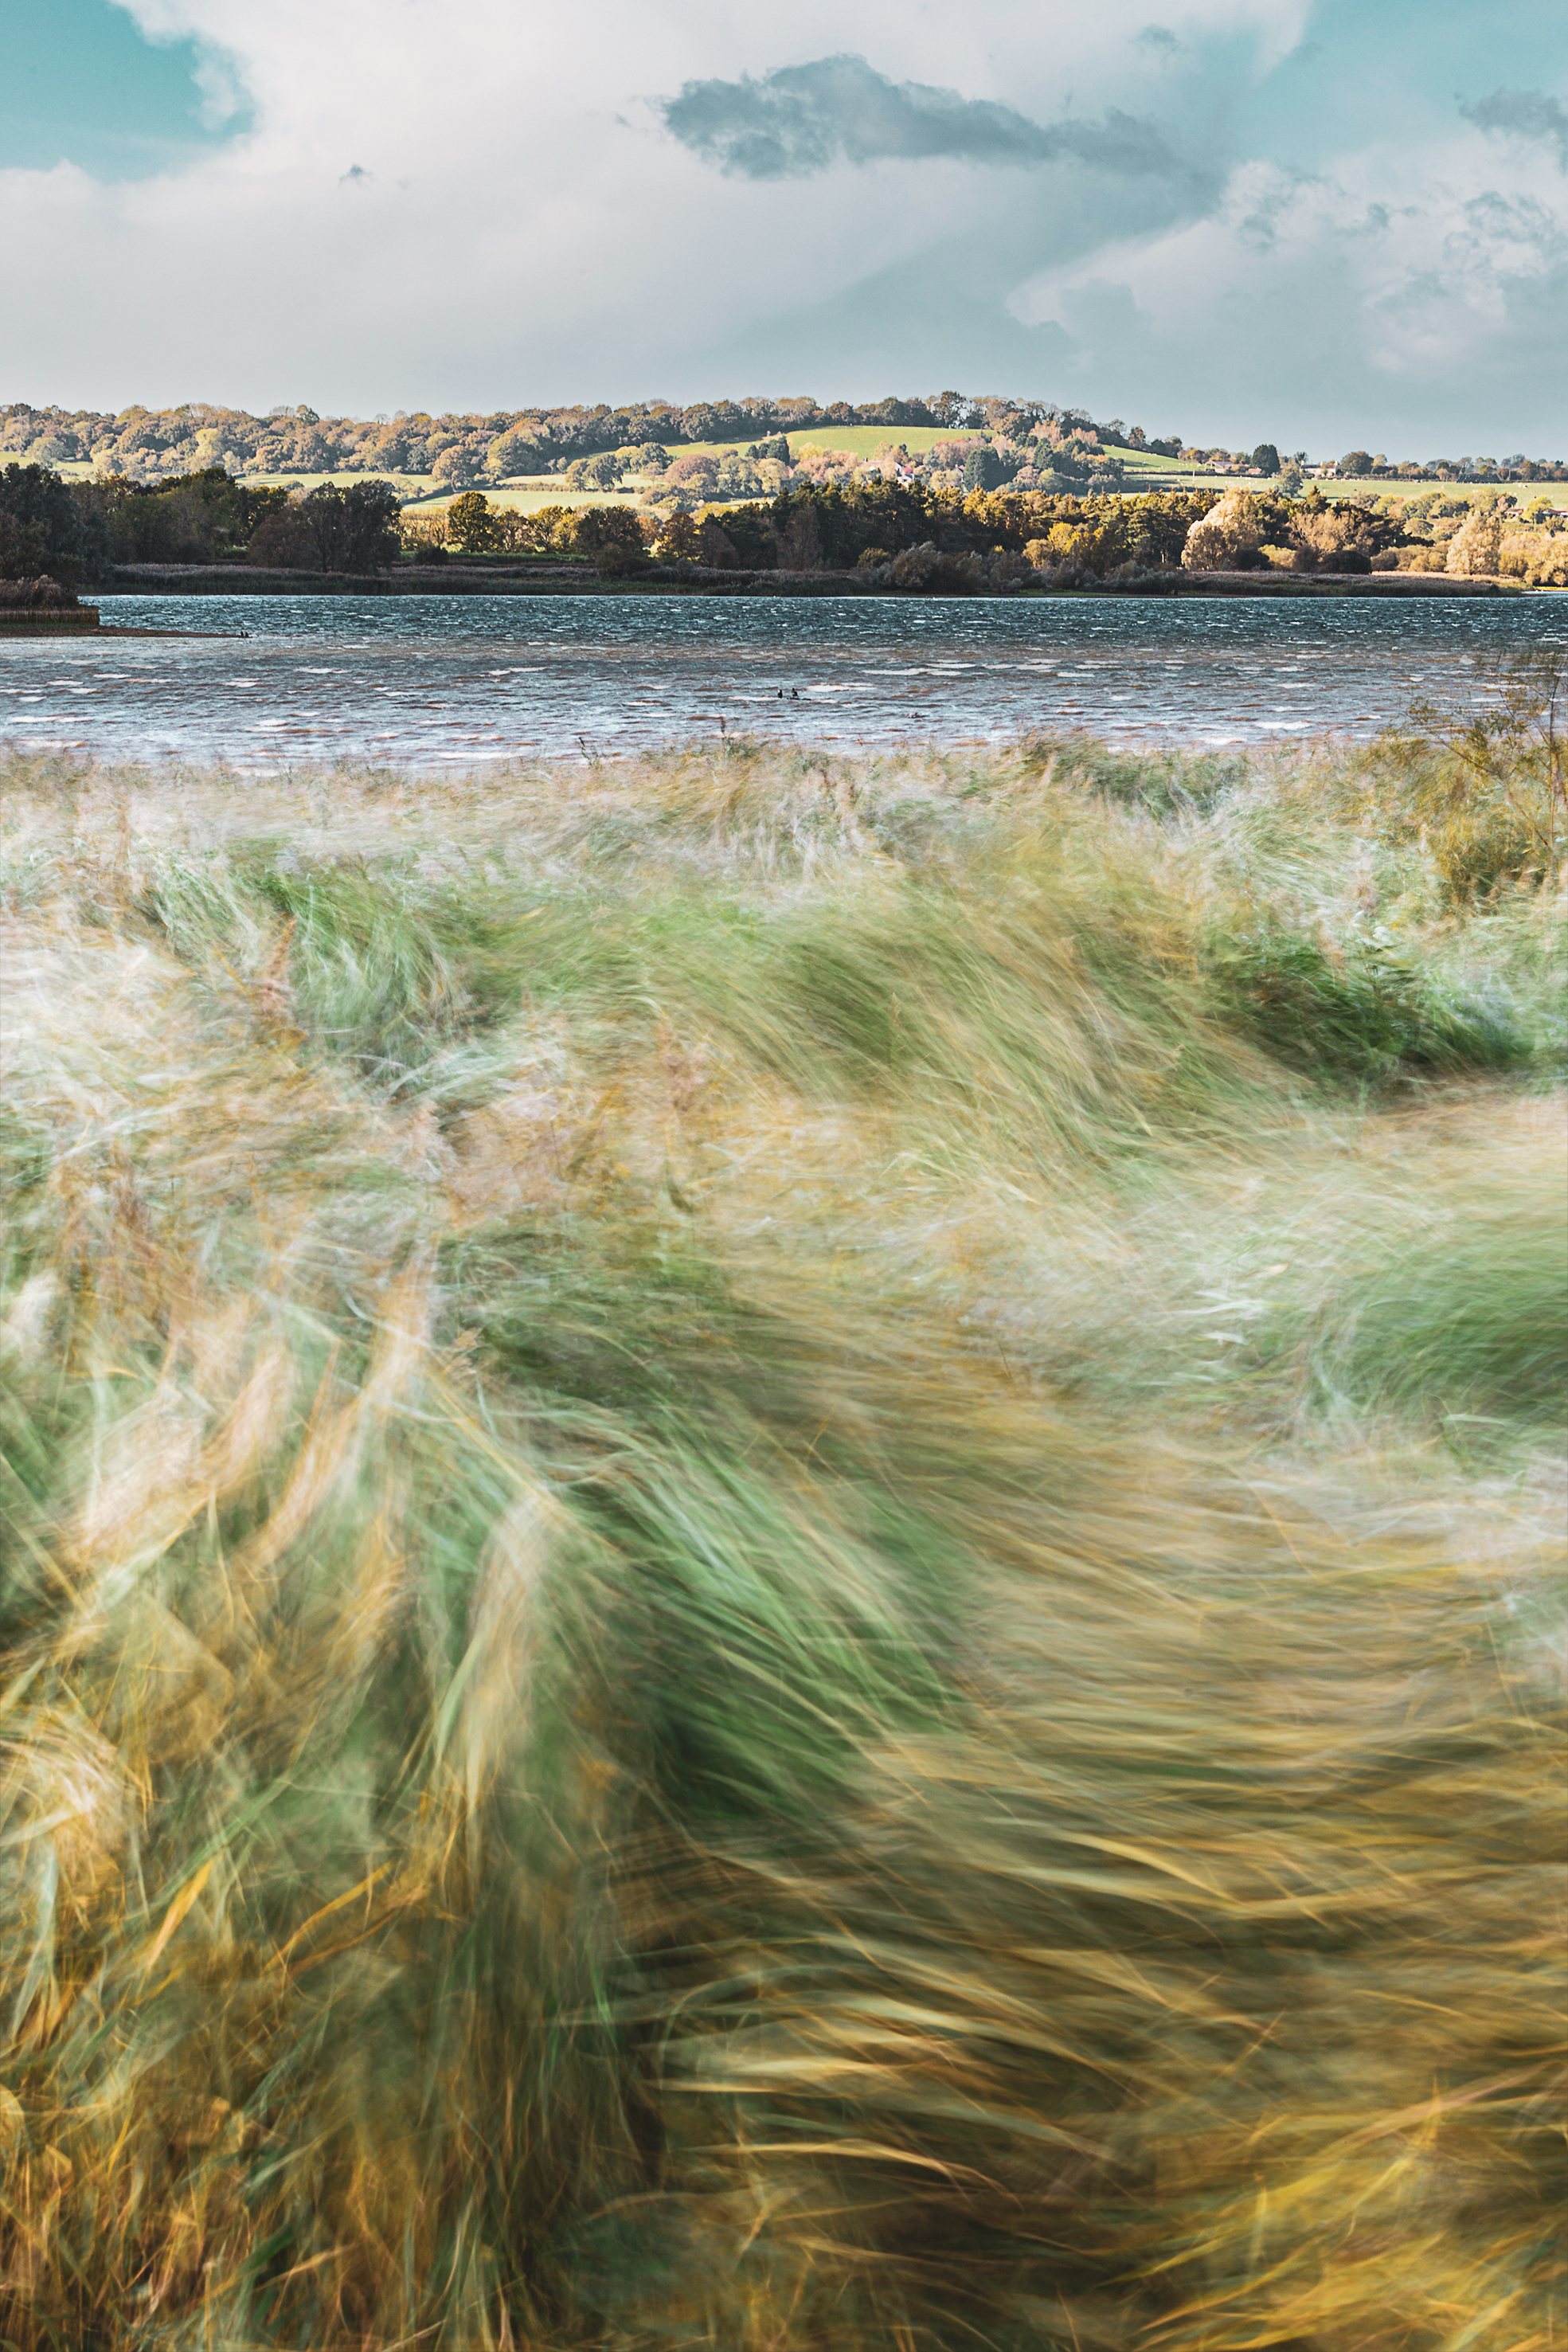
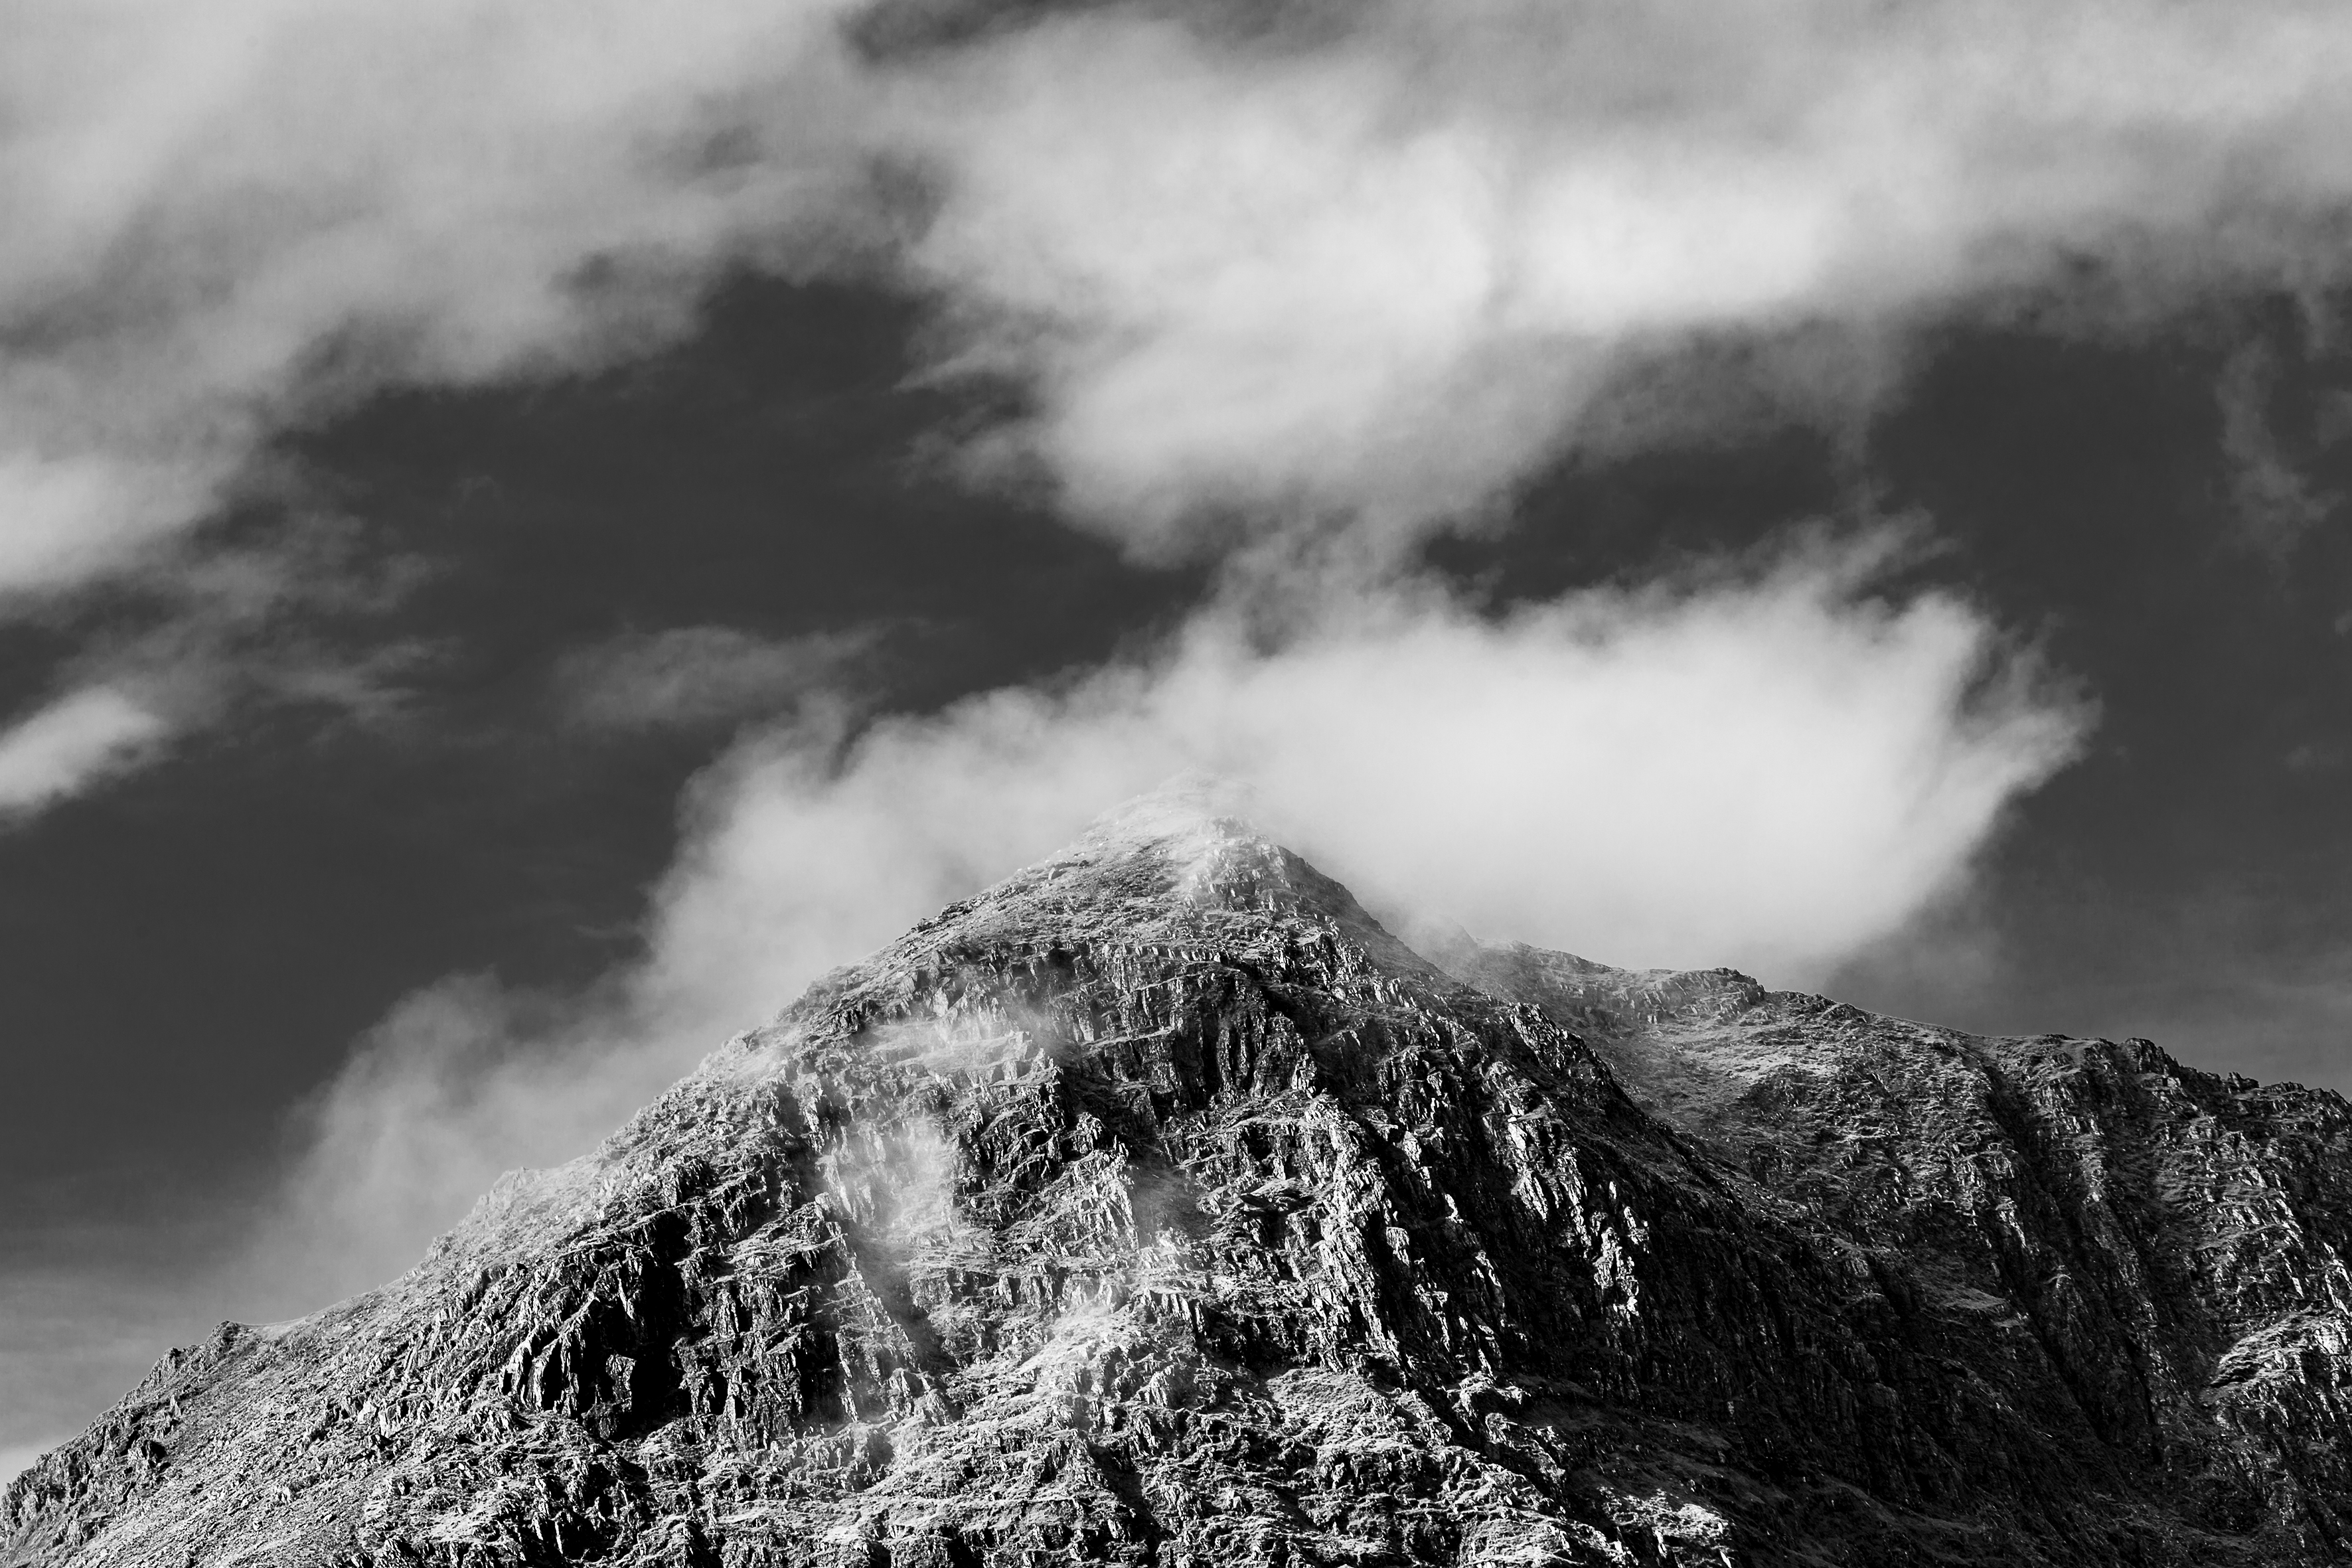
As a result, the third ingredient of exposure – the shutter speed or exposure time – is going to get slower as the aperture decreases in size. In bright conditions, this is unlikely to be a problem, but if you’re shooting in low light then it’s something to be mindful of. Clouds, flowing water, and other moving elements within a scene could potentially be blurred, although on many occasions this can enhance an image.
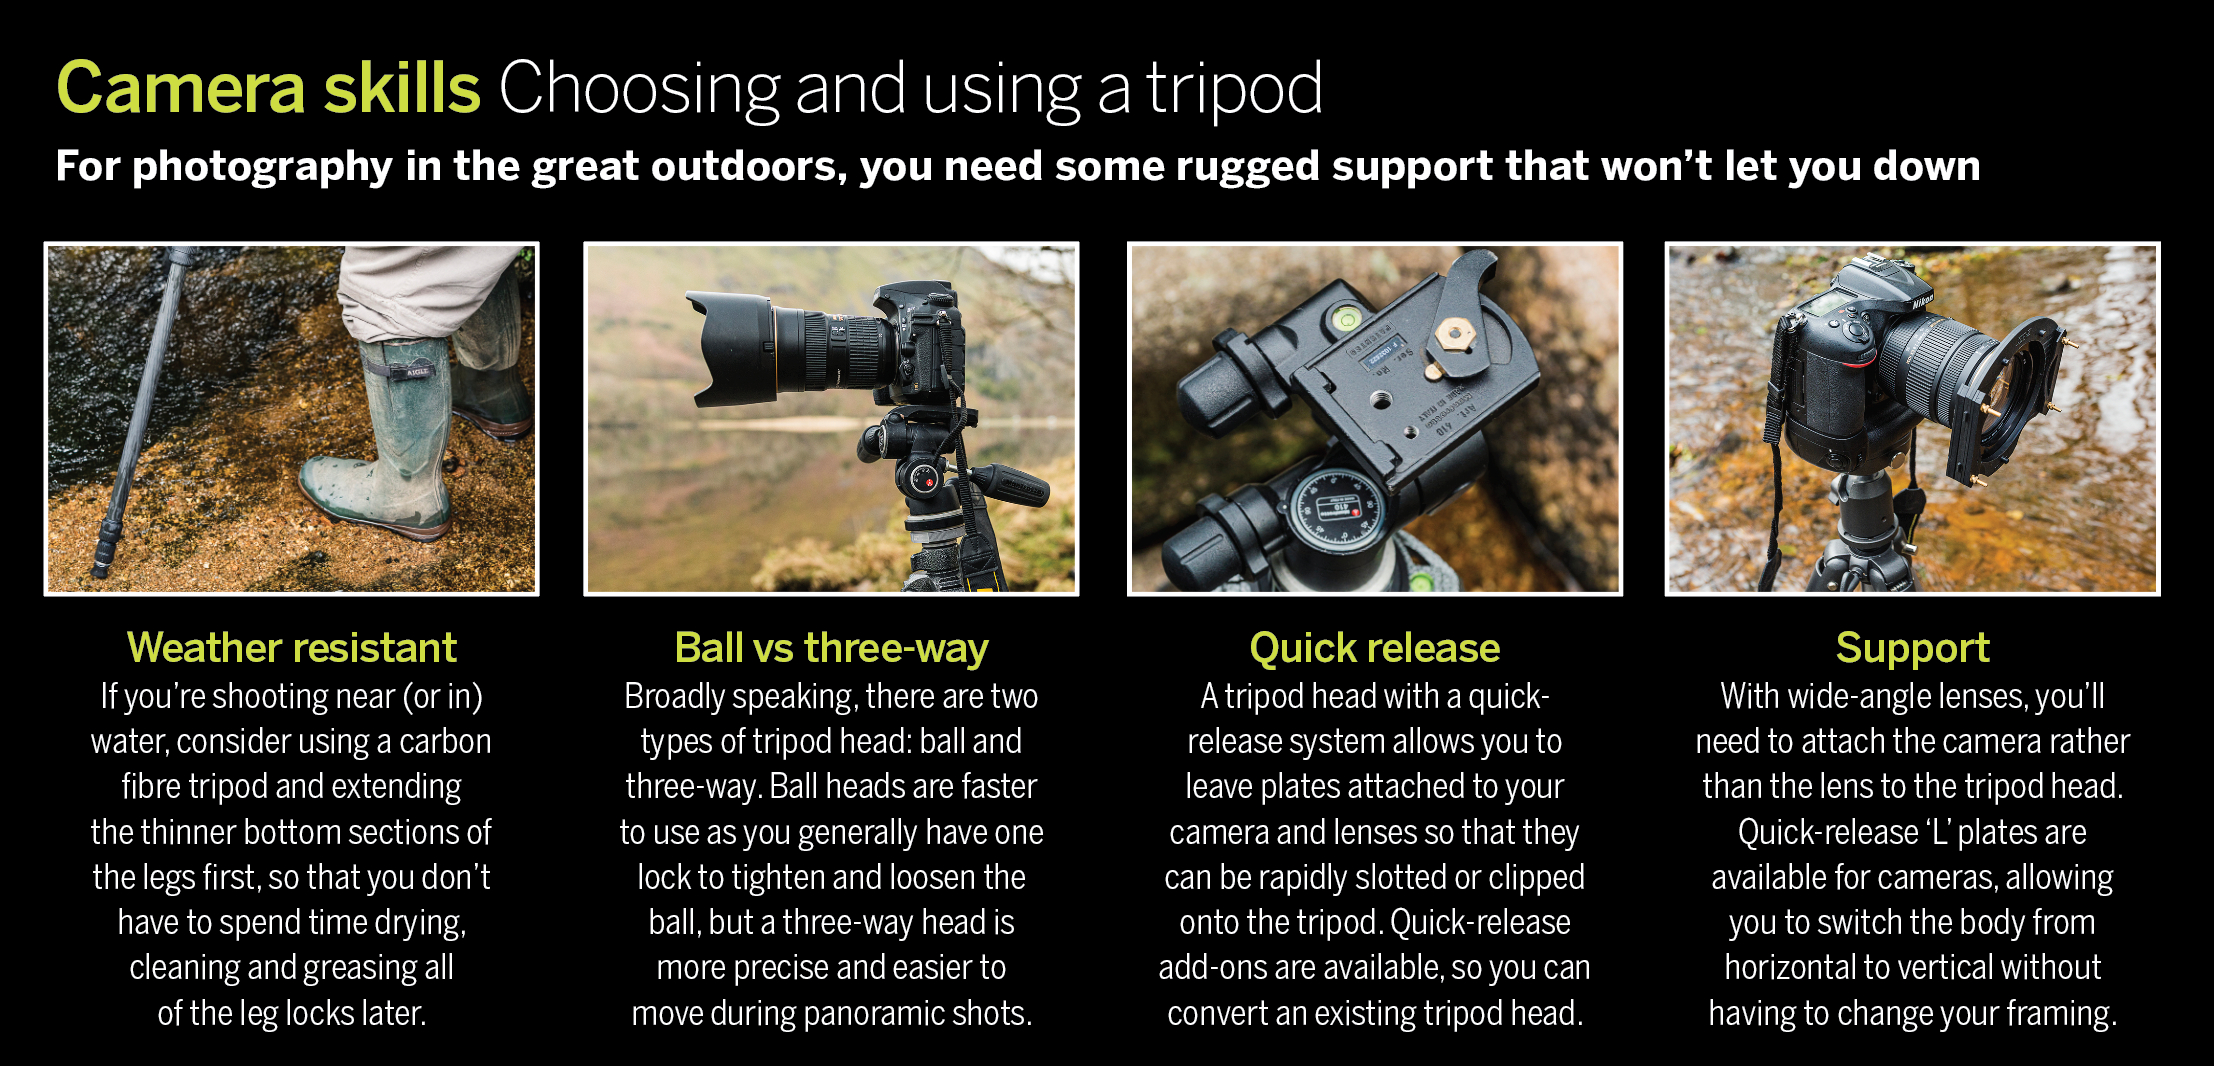
What is more of a concern is the camera moving during the long exposure, leading to pictures where even the stationary elements are rendered soft or completely blurred. The traditional way of getting around this is to use a tripod, although the development of mirrorless cameras that feature IBIS (in-body image stabilisation), including the Canon EOS R5, Nikon Z7 II and Sony A7 IV, has changed the game somewhat.
Using a compatible stabilised lens and taking a picture via the self-timer so that you can concentrate on supporting the camera with both hands, it’s now possible to take handheld pictures where the exposure is 1-4 seconds long.
A tripod still has its place, though: if you’re going to add a strong neutral density filter to the lens to reduce the light and purposely blur moving elements in your picture, then you may be looking at exposures lasting 30 seconds or longer. Having a stationary camera also gives you the space to stand back and consider the composition, and it makes it much easier to shoot images that will be stitched together to create a panoramic photo.
The technical side of landscape photography is one thing, but timing is quite another. From the time of year to the time you get up in the morning to the time you choose to leave a location, being in the right place at the right moment will make more of a difference to your landscape photos than many of the technical choices you make. There is of course a seasonal element to photographing the great outdoors, so it’s worth planning ahead.
Autumn colour is an obvious event to plan around, but there are more subtle differences between the seasons that can play their part. If you want to shoot a specific view from a particular viewpoint, for example, then it’s worth checking that the scene isn’t obscured by summer foliage.
Will the sun or moon be in the right position in the picture at the time of year that you want to shoot? Is the location likely to be crowded with coaches and throngs of tourists (at least one of whom will be wearing an eye-catching red cagoule) at weekends? Is it ‘forest weather’ (overcast) or ‘lake weather’ (blue skies)? These are the types of questions that are worth doing some research on before you pull on your walking boots.
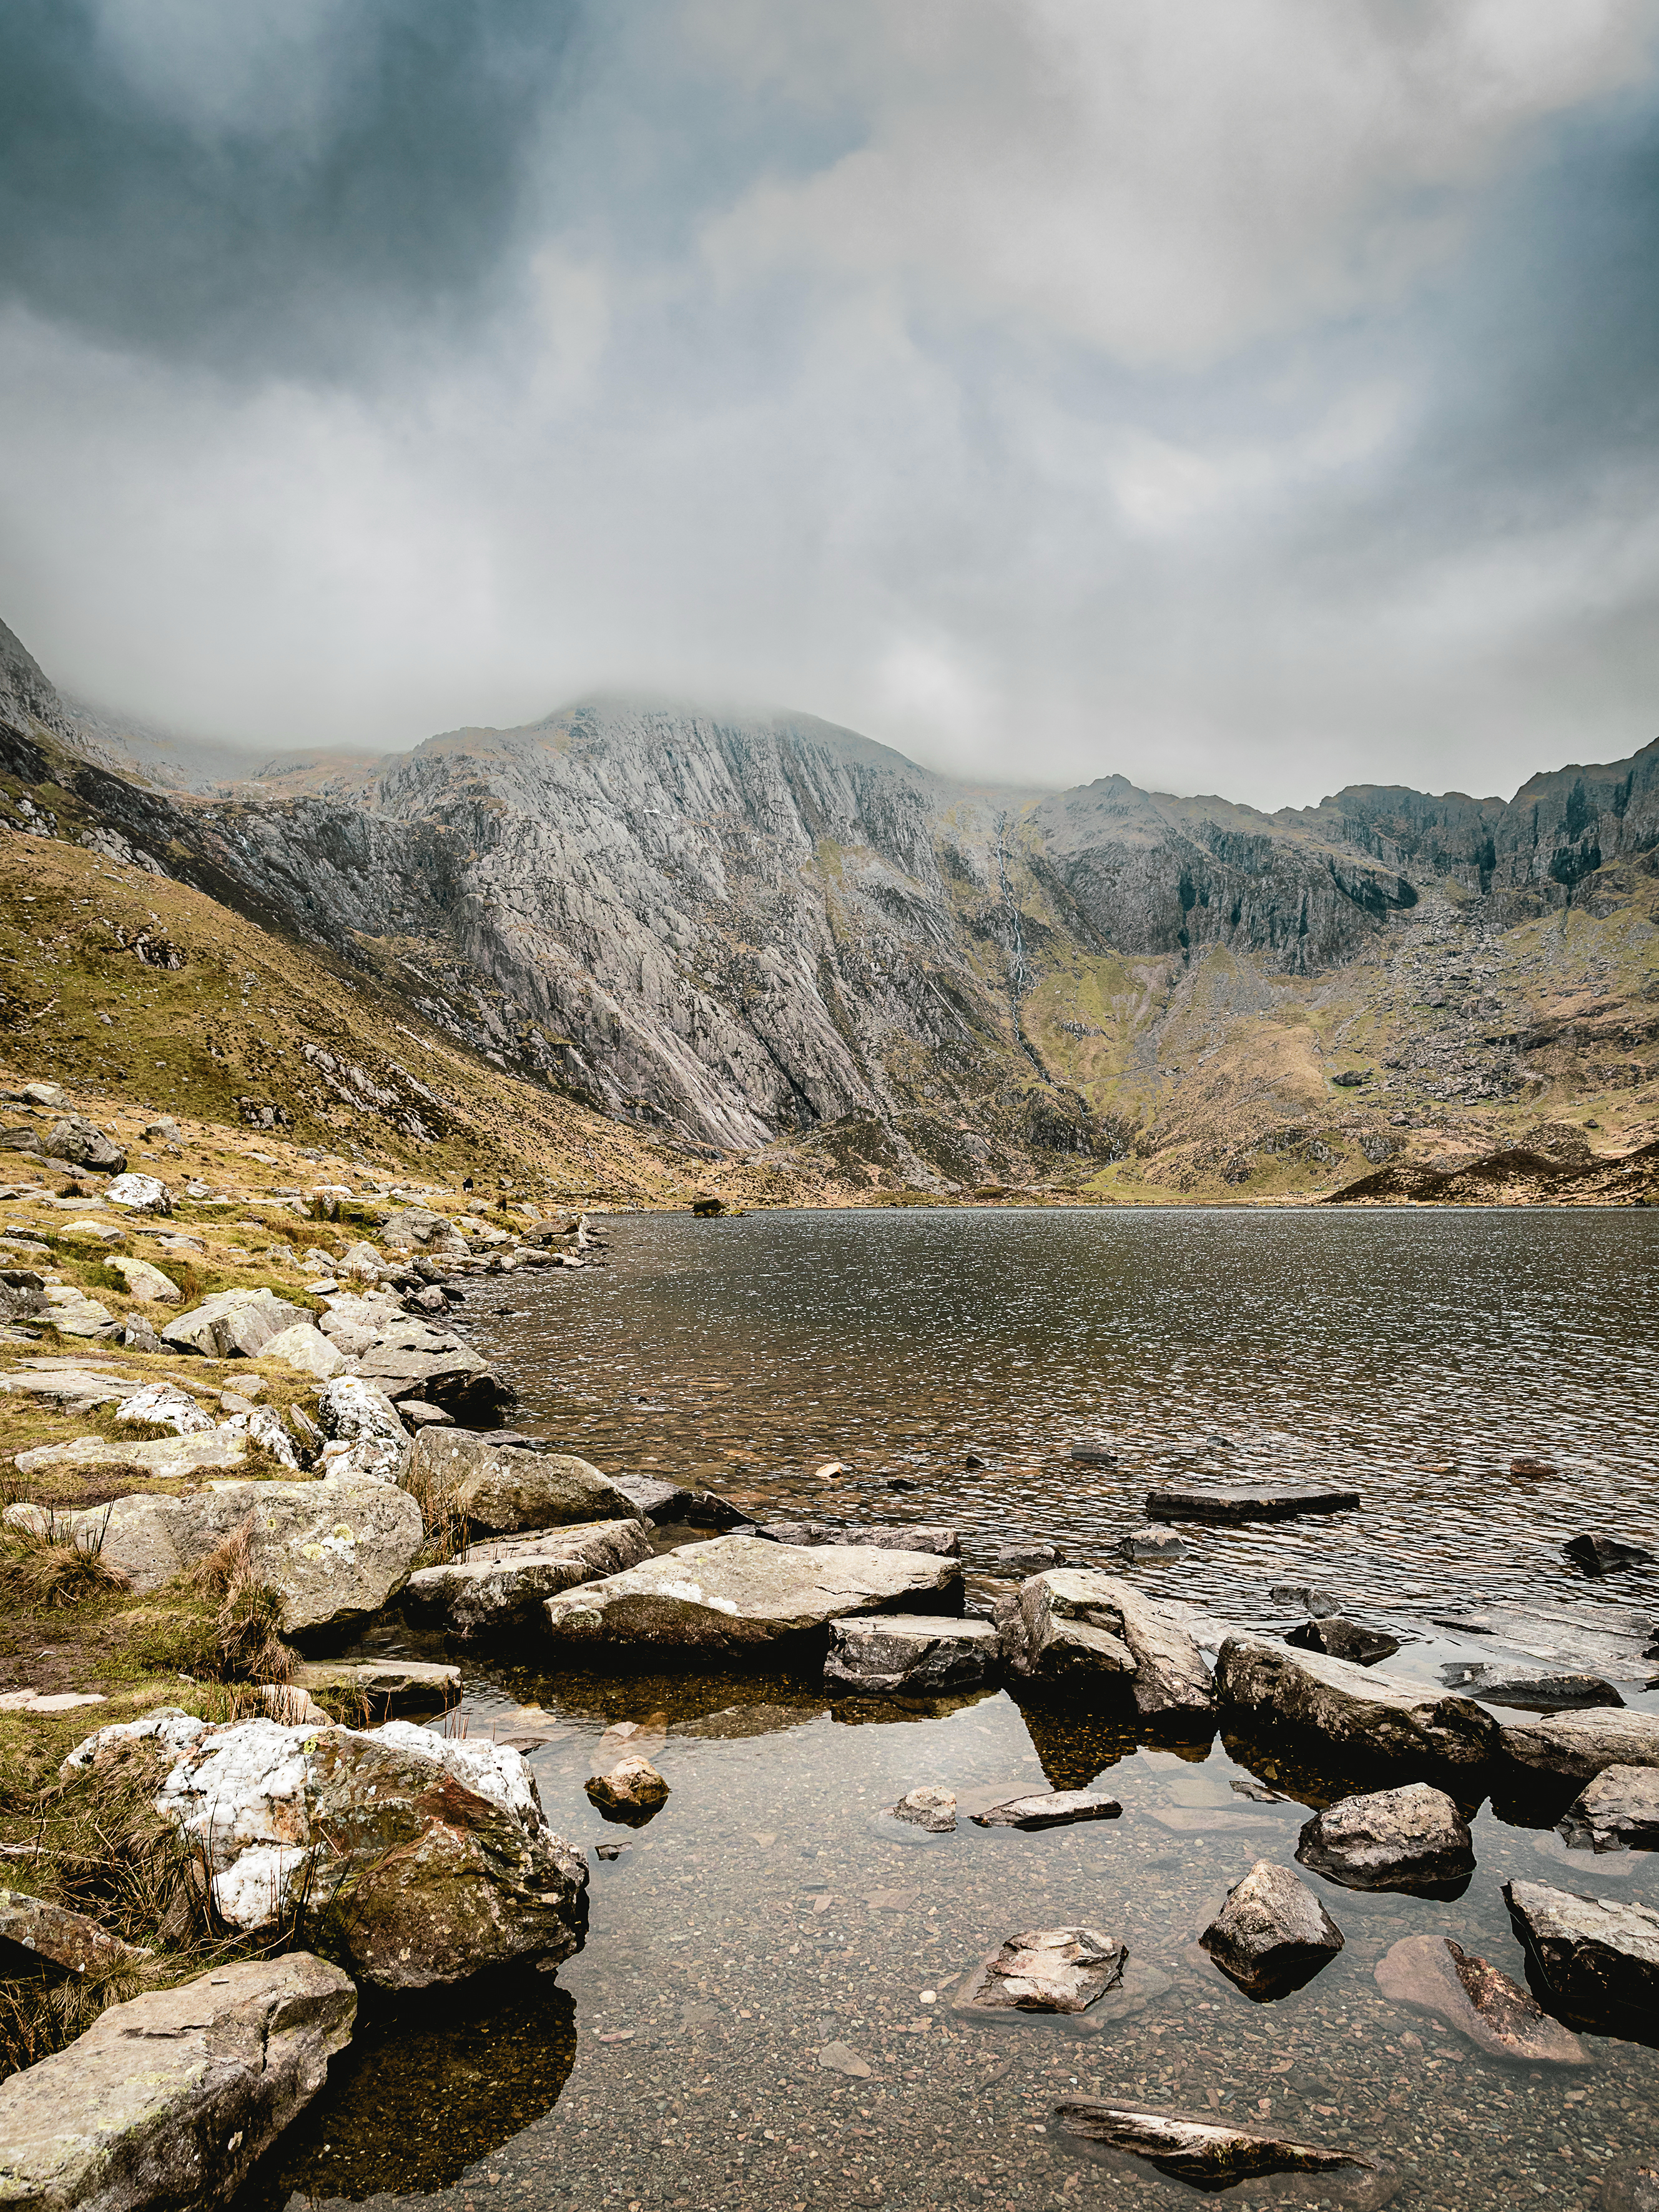
5 landscape photography tips
1) Get your timing right
Timing is everything in landscape photography. Time of year is crucial if you want to capture seasonal colour or shoot a sunset at a reasonable hour. Time of day is important if you need the sun to be in a specific position to illuminate a feature.
2) Try an alternative focal length
You might instinctively reach for a wide-angle optic to capture a landscape, but what would the scene look like if you move back and shoot with a telephoto lens? Familiar views can take on a different look and feel when they're shot with a longer (or shorter) focal length than they are typically photographed with.
3) Embrace gloomy weather
Clear blue skies can be dull. Stormy conditions can produce moodier or more dynamic shots, so get a rain cover for your camera and get out there!
4) Bracket your shots
To capture detail in all areas, you might need to bracket your exposures and combine the results in software. Your camera can take three pictures at different exposure levels (look for a function called ‘Auto Exposure Bracketing’ or similar).
5) Have fun in the edit
A creative crop, colour change, or selective exposure adjustment can give landscape photos a breath of fresh air. You might prefer the authentic, natural look, of course, but even that will require a little computer love to achieve.
Six essential RAW tools for landscapes in Affinity Photo 2
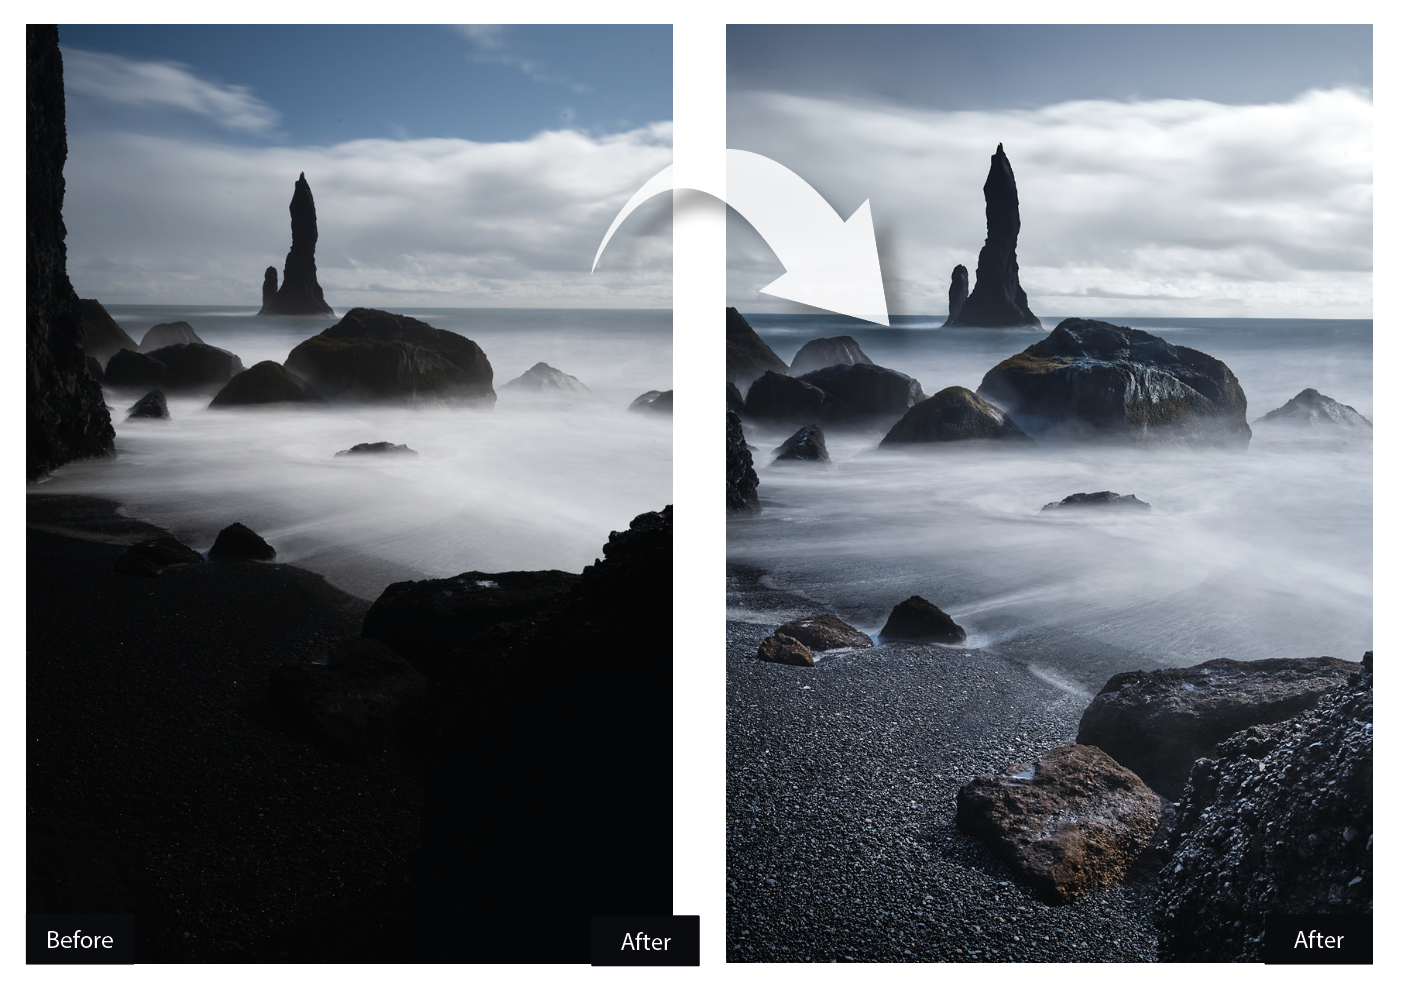
The tools in Affinity Photo 2 let you harness the power of the raw format. This can be invaluable at times when your exposure may not be spot on, or when the contrast in the scene is too great to achieve a balanced exposure.
In this tutorial, we’ll look at six of the best raw tools and controls for perfect landscapes. Raw files hold a greater dynamic range than their JPEG counterparts, which means more headroom for pulling detail out of very bright or very dark areas. The benefits of raw are clear to see here in this scene, captured at the famous Reynisfjara beach in Iceland.
A combination of strong sunlight, black rocks and a slightly miscalculated long exposure (taken using a 10-stop ND filter) initially left the rocks and beach looking almost pitch black. But because it’s a raw file, there is plenty of detail there; we just need to know how to tease it out.
The Develop Persona offers an array of powerful raw tools to help us do so. We can use tonal controls to perfect the exposure and colours, fine-tune the white balance and more. These raw tools are invaluable for all sorts of images, but landscapes in particular – where technical perfection, crisp detail and natural colours are requisite – will often benefit hugely from a few simple raw adjustments.
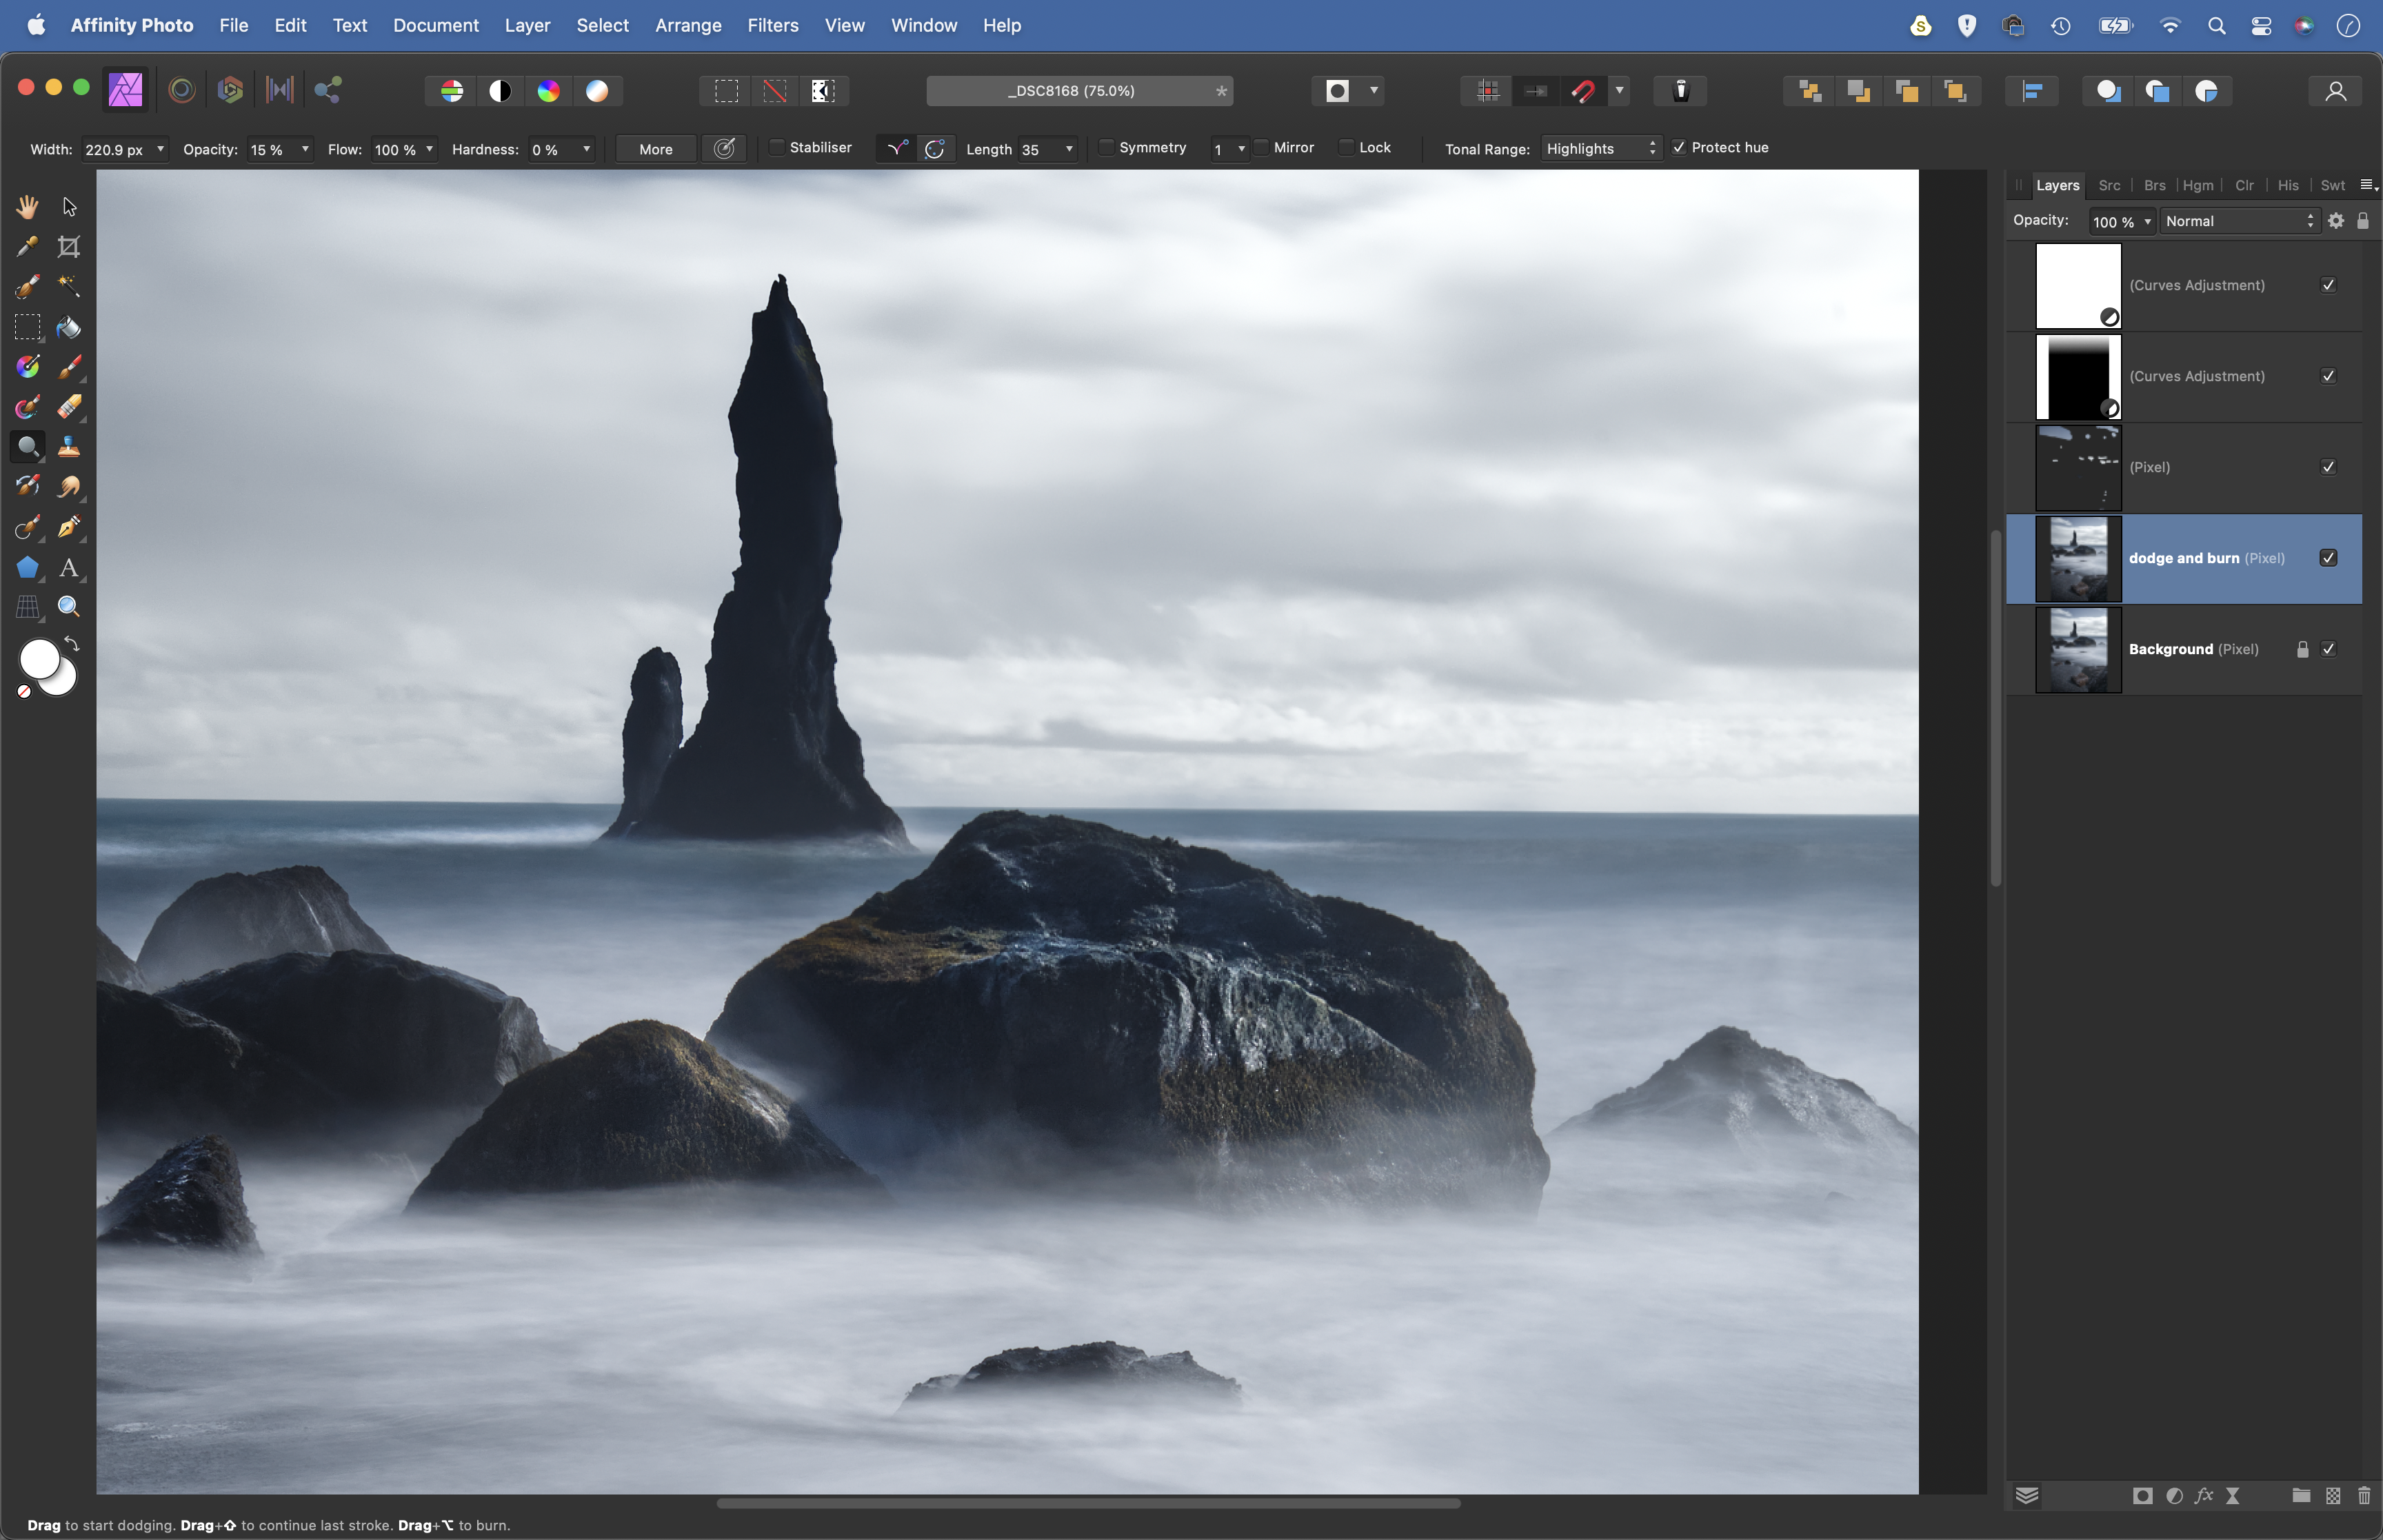
After you’ve finished working on the raw image in the Develop Persona, click the Develop button to progress to the Photo Persona, where you can make use of Affinity Photo’s vast array of image-enhancing tools, filters and effects to perfect your photos. Here, we’ve used the Dodge and Burn tools to add extra definition to the rocks and water. We’ve also removed a few of the clouds using the Inpainting tool – which lets you simply paint over objects to remove them – in order to create a simpler sky that better suits the composition.
1) The Basic panel
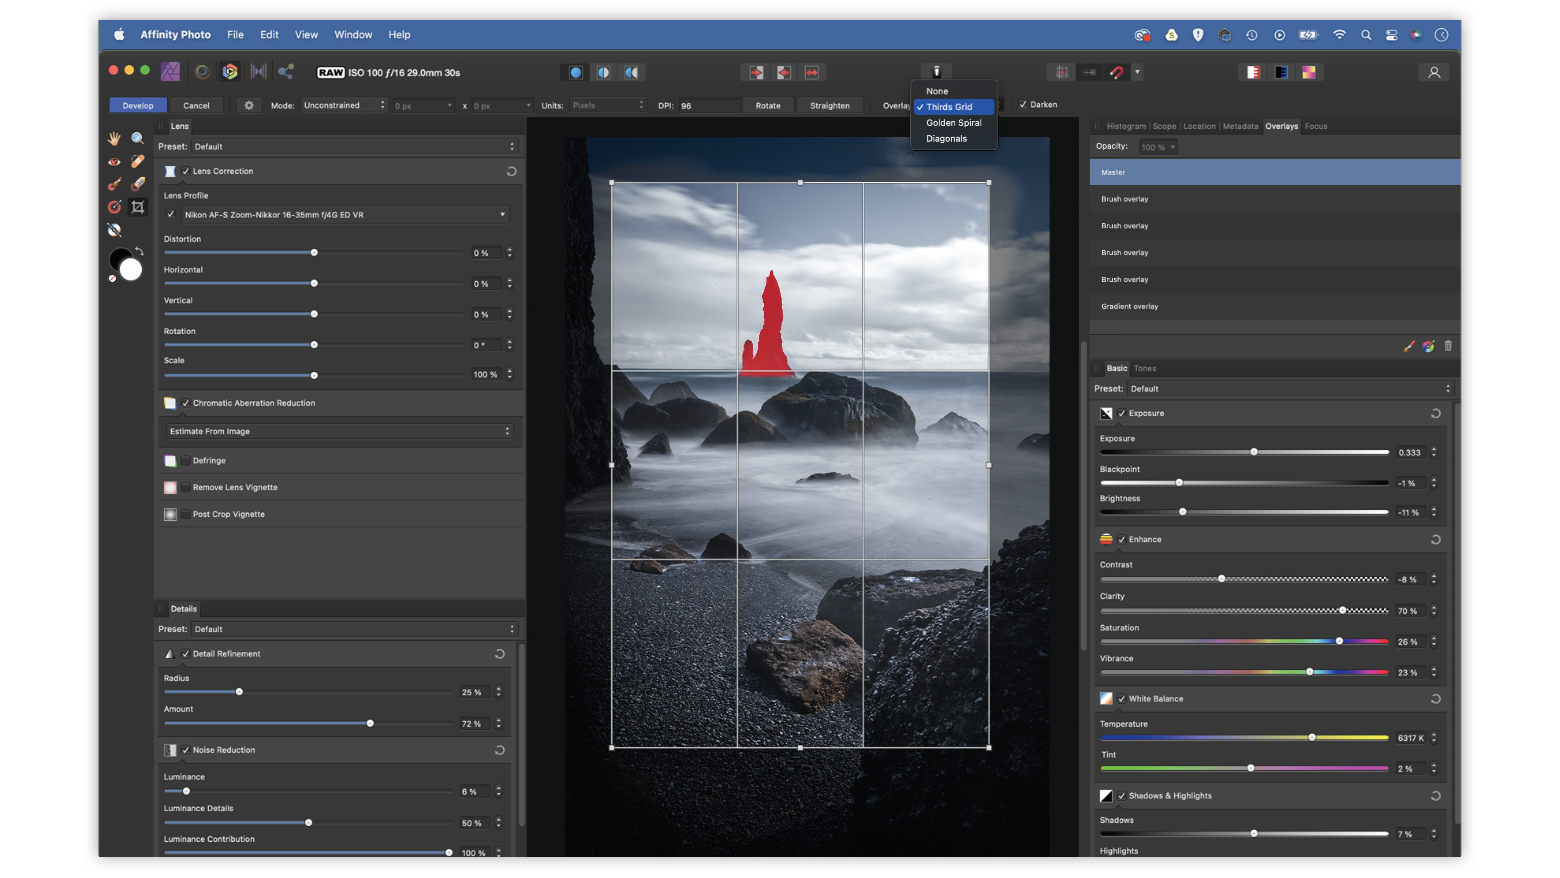
When you open a raw file in Affinity Photo, it’ll appear in the Develop Persona. The best place to begin is with the Exposure and Enhance panels (these can be dragged and docked around the interface). While adjusting the sliders, it can be helpful to turn on the clipping warning buttons to ensure details are not clipped to pure black or white. Here, the Exposure slider lifts the image, and Clarity enhances the texture of the rocks.
2) Crop tool guides
Affinity Photo’s Crop tool offers three overlay guides that conform to different compositional rules. The most well-known is the rule of thirds (shown here). The idea is to place points of interest along the third lines in the image, creating a pleasing composition. The two other guides are diagonals and the golden spiral. With the golden spiral guide, hit Shift+O to change the position of the centre point.
3) White balance
With raw files, we can alter white balance after shooting. This is useful for outdoor photos, as fine-tuning the colour temperature can impact the scene’s atmosphere. Either use the Temperature and Tint sliders or the White Balance tool. With this, we sample from a neutral point. Shift-click to add sample points to take an average, or Alt+drag a box to sample an average of the colours.
4) Detail refining
When shooting in raw plus JPEG mode, the JPEG version may
look sharper. This is because JPEGs are sharpened in-camera. With raws, we can control our sharpening. In the Detail Refinement panel, you’ll find sharpening Radius and Amount sliders. The Amount slider controls the sharpening strength, while Radius determines the spread outwards from edges where the sharpening occurs.
5) Brush Overlays
Local adjustments can enhance areas or pull detail from under-exposed objects. Brush Overlay lets us paint to define an area in pink. Use the ] and [ keys to resize the brush tip, and adjust the hardness in the options. ‘Edge Aware’ forces the brush to seek out edges as you paint, so it’s easier to isolate objects. To remove parts of the overlay, use the Overlay Erase tool.
6) Gradient Overlays
Gradient Overlay lets you create graduated adjustments. You can change the gradient style between linear, radial and elliptical. New overlays will be active in the Overlay panel. Changes made to tonal sliders will affect the defined area. We’ve added overlays to lift the foreground, desaturate the sky and boost the rock formations.
Get the Digital Camera World Newsletter
The best camera deals, reviews, product advice, and unmissable photography news, direct to your inbox!
Digital Camera World is one of the leading authorities on camera and photography news, reviews, techniques, tutorials, comparisons, deals and industry analysis. The site doesn't just specialize in cameras, but all aspects of photography, videography and imaging – including camera phones, gimbals, lenses, lighting, editing software, filters, tripods, laptops, printers, photo books, desks, binoculars and more.
Whether you're using, looking to buy or trying to get the most out of a compact camera, action camera, camera drone, cinema camera, beginner camera or professional camera, Digital Camera World has a roster of experts with combined experience of over 100 years when it comes to cameras, photography and imaging.

