Experiment with creative composites in Affinity Photo

90-DAY FREE TRIAL:
Try Affinity Photo and get 50% off if you decide to purchase. Click here for more information!
When you want to craft a creative composite, Affinity Photo offers all the tools that you will ever need. In the past, this kind of action was best done using Photoshop, but these days Affinity Photo can give you results that are just as good, as long as you learn a few simple skills. In this project, we’ll explain a workflow for creative composites that you can use time and again. No matter what images you want to combine, you’ll be able to apply the same techniques.
Our composite workflow begins by copying layers on top of one another, in preparation for blending them. This usually means using one image as a base on which to add elements from other images. Here, our toy dinosaur scene forms the base on to which we add our portrait to create our pint-sized figure (we’ve also used a third image here with a toy figure to create realistic shadows).
Once our images are in place, the next stage is to select the area we want to cut out – here it’s the portrait. Initially, we can use the Selection Brush, but then we usually need to improve the selection using the Refine command. Once our subject is cut out, we tidy up any mistakes and apply finishing touches to perfect the composite.
Creative composites in Affinity Photo
Use the Selection Brush
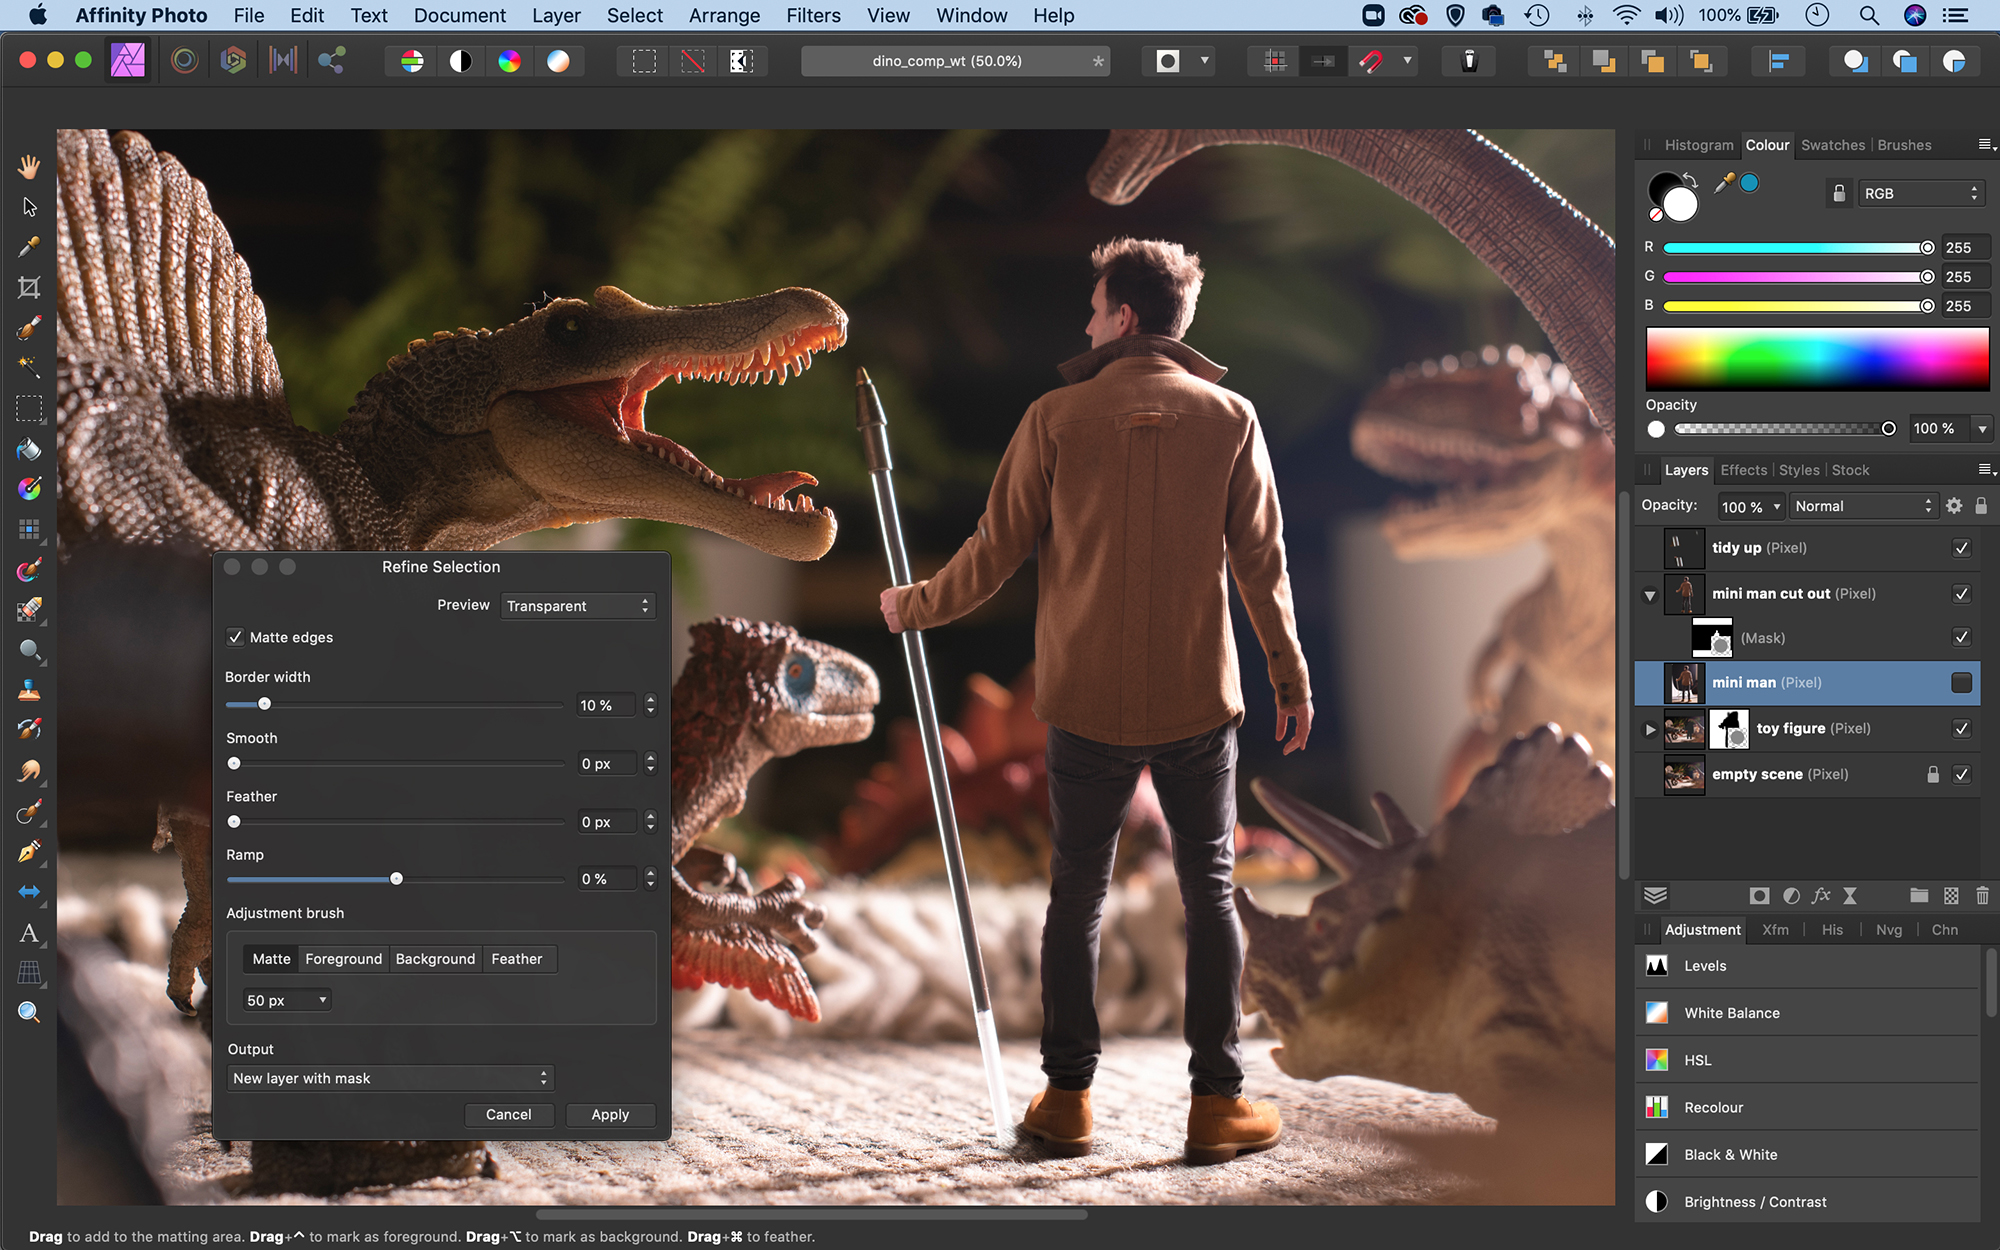
Once our portrait is in position we can start to remove the background. The best tool to use for this is the Selection Brush. Check ‘Snap to Edges’ in the options then paint over the figure to select the area, using the ] and [ keys to resize your brush tip as you paint. Sometimes the tool picks up the wrong edge or includes parts of the background, if this occurs, hold Alt and paint to subtract the areas.
Get to grips with Refine
Now we have a selection, click the Refine button at the top to improve the edge. In the Refine settings, set the preview to Transparent, to view the layer against the backdrop we’re trying to blend it with. Next, increase Border Width to expand the refinement. The tool will seek out similar pixels to include or exclude along the selection edge; this is handy when selecting intricate details like hair.
Tidy up and fix small problems
There may be rough patches that need to be tidied up once the images have been combined, like the gap here where the pen doesn’t match up with the hand. The best way to fix it is to make a new layer at the top of the layer stack, then grab the Clone tool and set it to Current Layer and Below in the tool options. Hold Alt to sample a clean area next to the problem and then simply clone to tidy it up.
Use Refine brushes
The Refine command within the Refine Selection dialog box offers three brush options that enables us to fine-tune what is included or not. The Matte brush is selected by default. Just paint over areas of the cut out where the background is bleeding through. We can also use the Foreground and Background brushes to pick areas to include (Foreground) or exclude (Background) from our selection.
Choose your output
The Refine box gives us several output options that we can use to convert our selection into a cut-out. Mask will simply hide everything outside the selected area behind a mask. We’ve used New Layer with Mask here. This not only creates a duplicate layer, but also automatically applies color decontamination, which gets rid of unwanted color fringing or halos around the cut-out’s edges. New Layer option also does this.
Arrange your images
To build up a composite like this we have to copy the images on top of one another. Open the images you’d like to use then copy; go to another image and paste. We’ve used three images here (on top is our portrait, below this is our scene with the toy, and at the bottom is our scene with no toy). Once copied on top of one another, use the Move tool to position the portrait so that it matches up with the toy figure below.
Create smoke photography composites
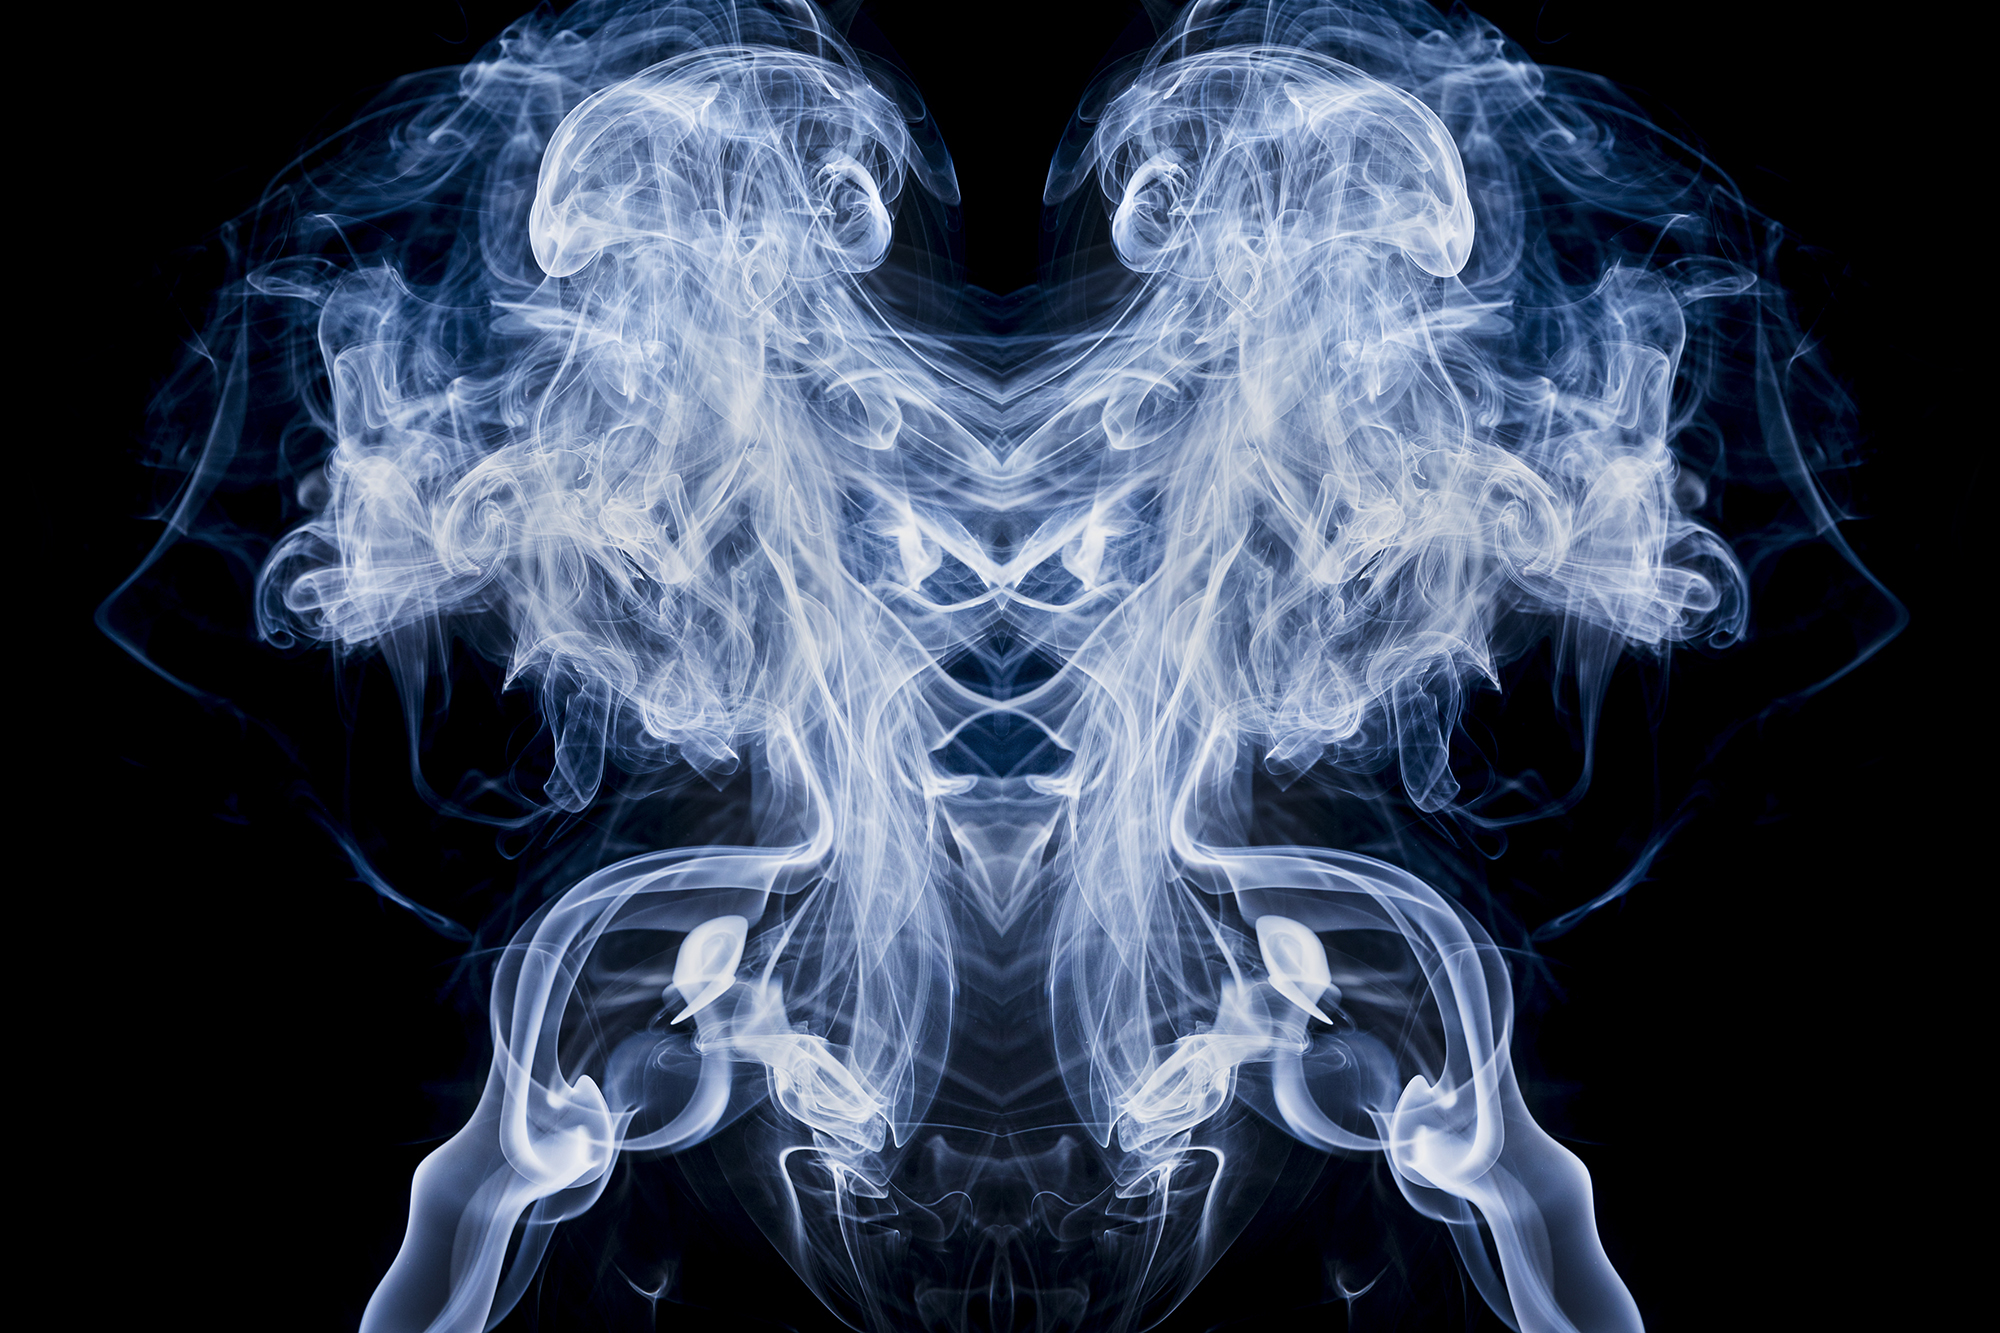
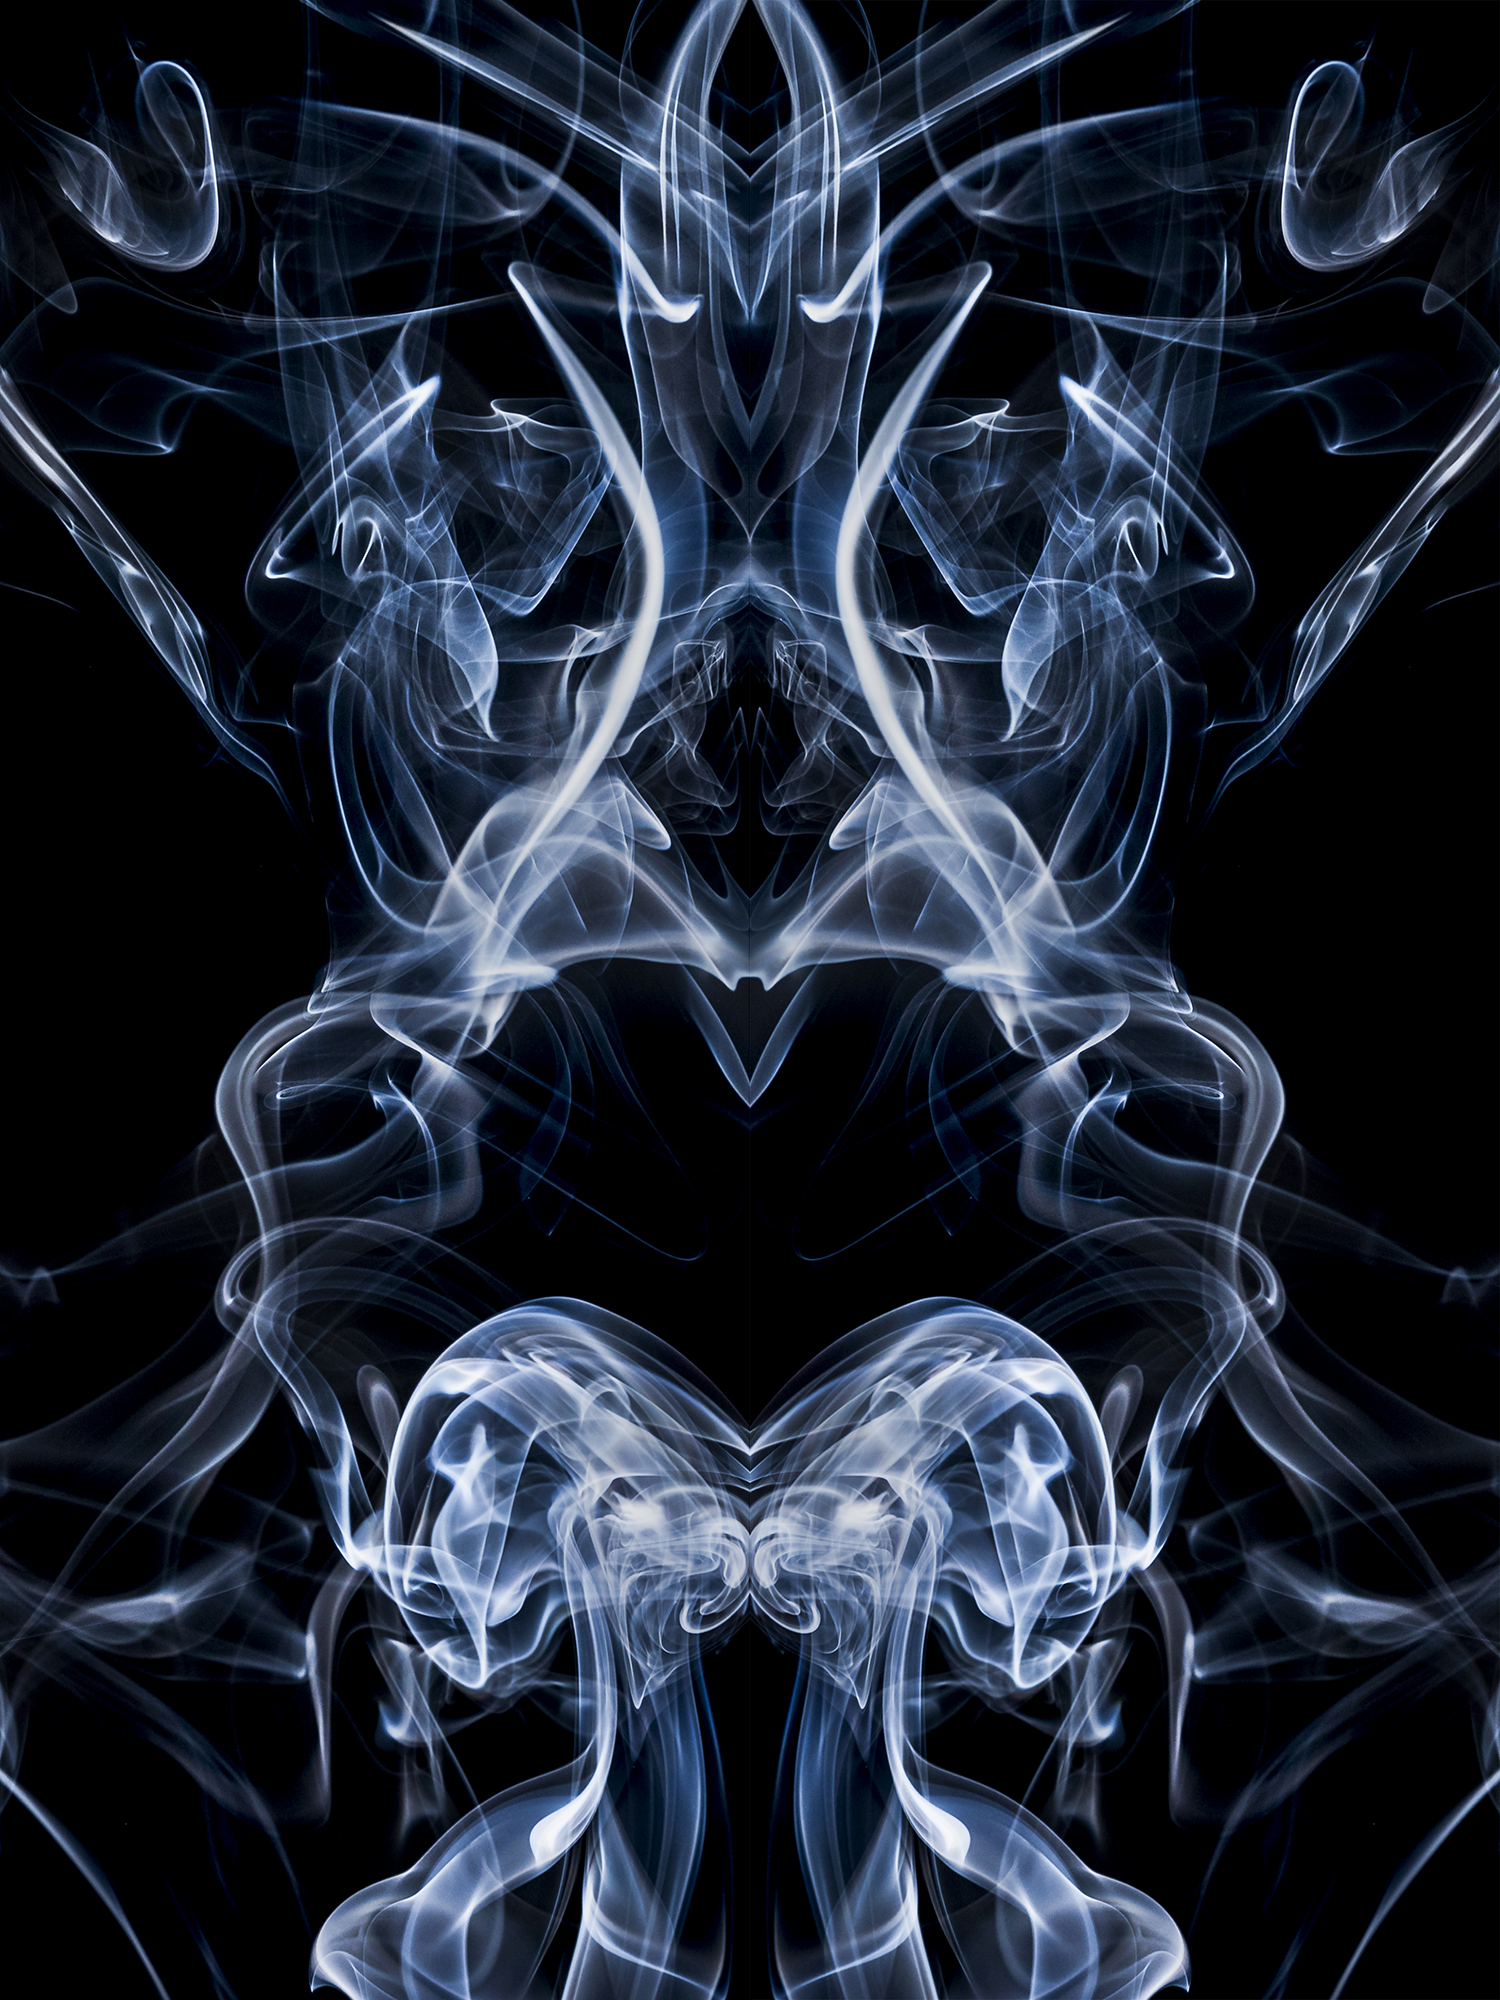
Smoke photography is a challenging but rewarding way to spend some time shooting indoors. It’s also a great way to familiarize yourself with a few photography basics: you’ll learn how to set your camera and flashgun manually, as well as how to fine-tune your shots when you process and edit them. It’s amazing the shapes and forms that a few curls and licks of smoke can take on with a simple crop and a rotation – free your mind, and soon you’ll be spotting faces, aliens, dinosaurs and (possibly) cowboys…
An incense stick gives you a slim and relatively manageable plume of smoke, although you’ll need to work in a room where you can open a window to clear the build-up of smoke – and the smell – at regular intervals.
A macro lens will allow you to focus very close to the smoke and pick out sections of the plume, but you’ll be able to get good results with any standard zoom or prime lens. In fact, it’s better to frame your shots a little wider so that you have room to crop them when you process them.
Set up the shot
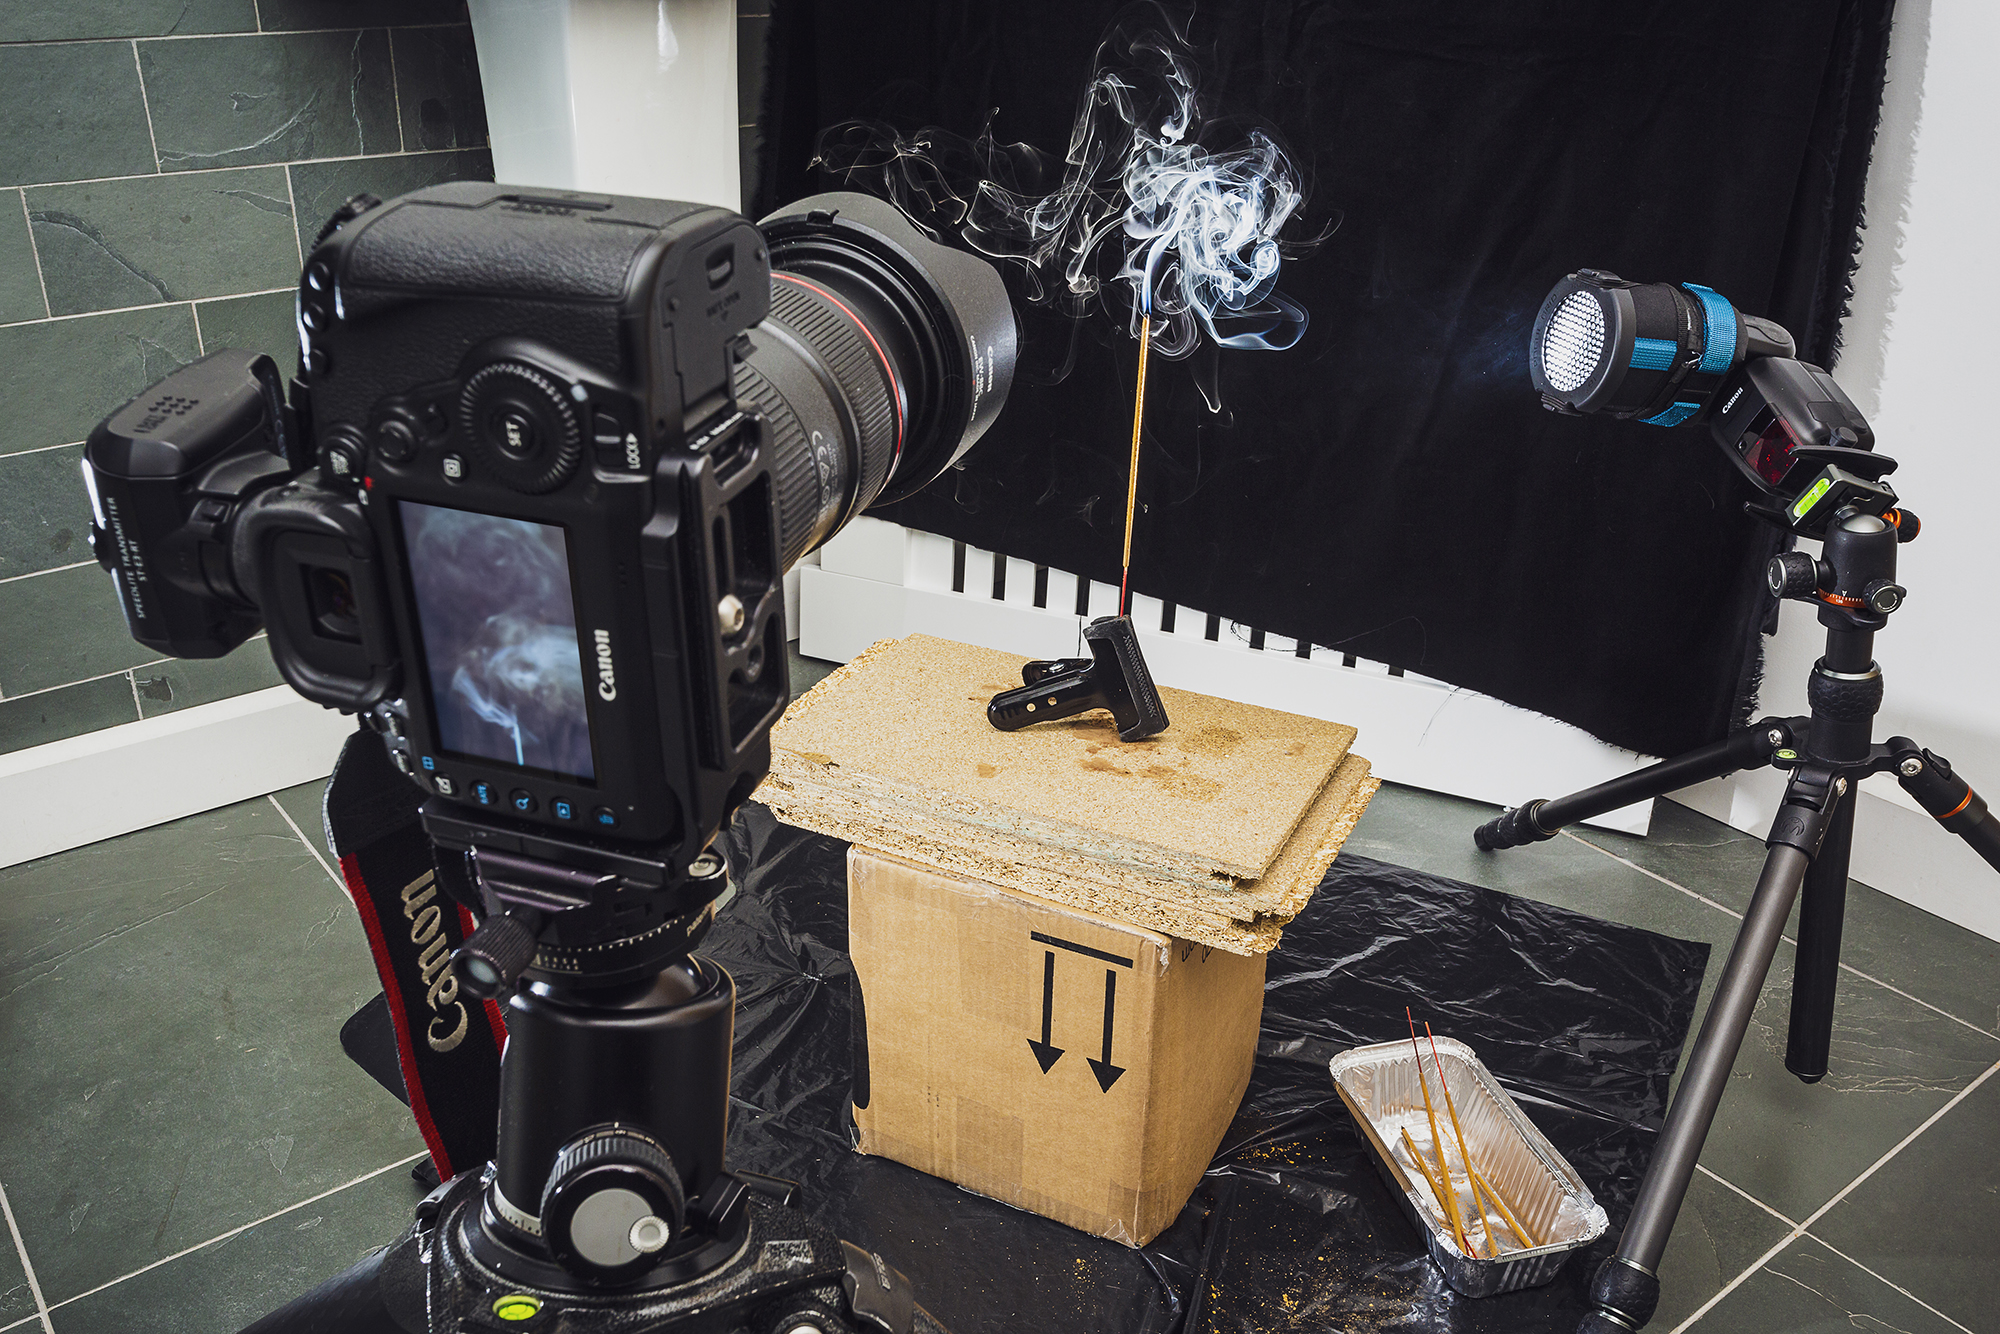
You don’t need a lot of space to take smoke shots, but you do need to work in a room with a window, so that you can let fresh air in at regular intervals. I set up in a bathroom; I blocked the gap under the door with a towel to prevent draughts pushing the smoke around, but opened the window and operated the extractor fan between takes.
A piece of black cloth draped over some scrap wood formed the backdrop, with an incense stick as the smoke generator. I didn’t allow the stick to burn right down, as the thicker wisps of smoke would have been too far out of shot. Having a sink to hand meant I could extinguish the lit stick when needed.
Some photographers prefer to shoot this type of shot handheld: when you work with fast shutter speeds and flash in a darkened room, camera shake is rarely a problem. I prefer to use a tripod, though: that way I can manually focus in the right place and set the optimum aperture for the depth of field I need, achieving consistent results.
Work with off-camera flash
To capture sharp shapes, you’ll need to work with a flashgun in a darkened room. That way, it’s the brief burst of flash that will control the exposure rather than the ambient light.
I set the flashgun to Manual, as this gives repeatable results and means that the exposure won’t change with the amount of smoke in the shot. I also set the camera to Manual for the same reasons. Your final settings may vary slightly, depending on how close you position the flashgun to the smoke; after taking a few test shots, I settled on 1/8 power for the flash. On the camera, I set the shutter speed to the flash sync speed (1/200 sec in my case), with an ISO of 200. I shifted the aperture between f/8 and f/11 to quickly make the exposure slightly darker or brighter, depending on how much smoke was in the shot, and whether it was drifting towards or away from the flashgun.
You can control your own flashgun using an off-camera cord from the hotshoe on your camera, or go wireless using a compatible flashgun and remote transmitter.
Add or remove color
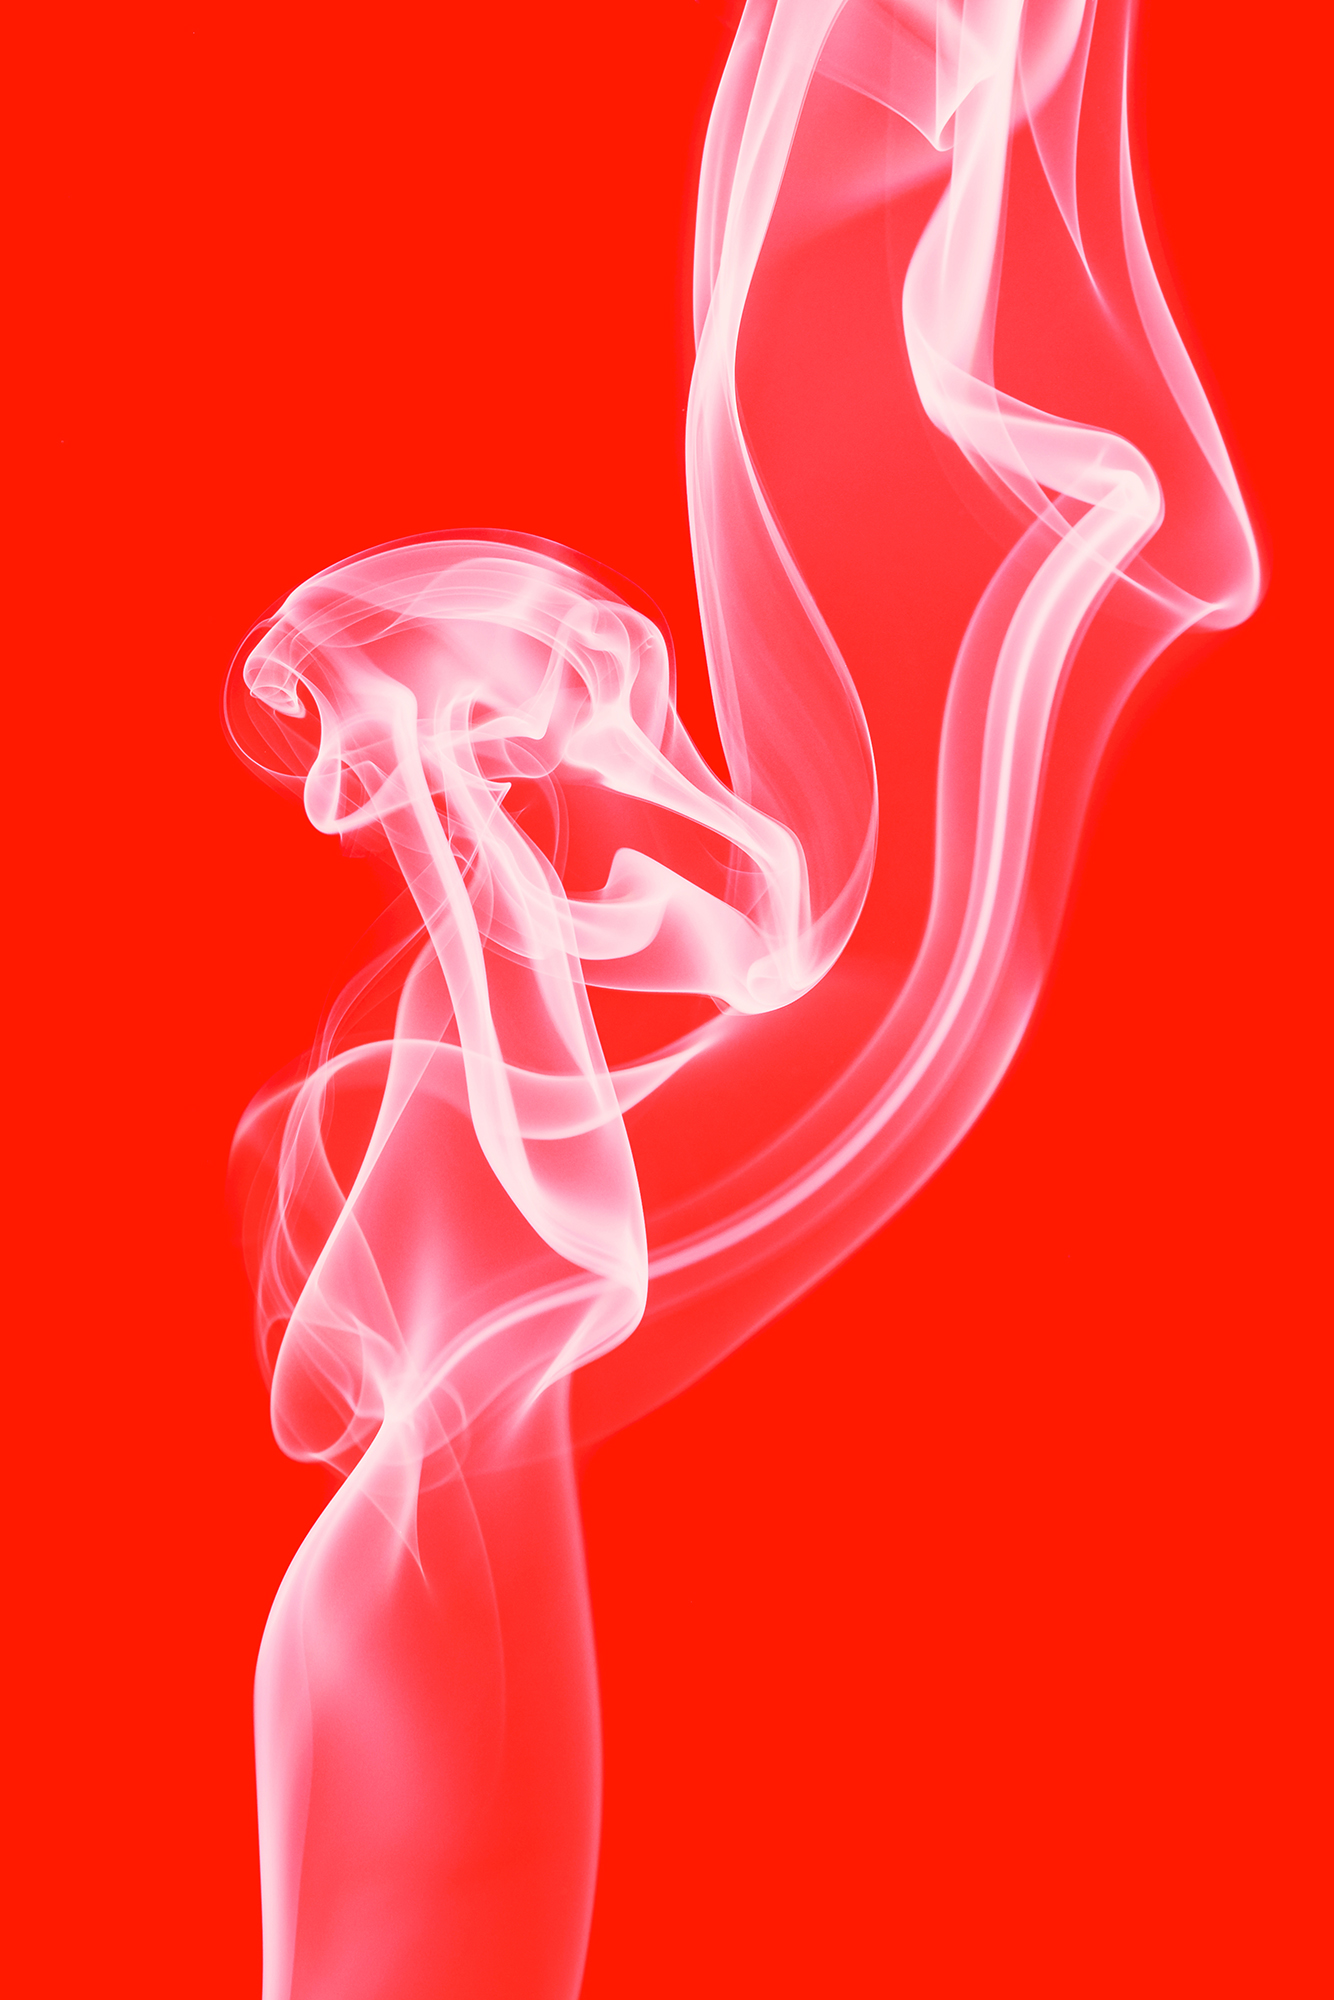
If you set the camera’s white balance to the flash preset, you’ll end up with a neutral color scheme – after all, this is white or blueish smoke against a black backdrop. But there is a number of ways that you can add some color – or go ‘fine-art’ mono – in software. When you process your raw file, you can change the white balance to add a color cast to the whole image, or apply it selectively to the smoke with a brush. You can also split-tone the image, giving different color treatments to the darker and brighter areas.
When it comes to editing, one option is to use a Hue/Saturation (HSL) Adjustment Layer and drag the Hue slider to colorize the image. This can work particularly well with an inverted image.
Take it further
There are lots of creative treatments you can apply to smoke images – even the ones that you think don’t work well as stand-alone shots. If the smoke has billowed along the edge of the image, for example, try making a mirrored image.
To do this, open the image in an editor such as Affinity Photo. Choose Select All, then copy the image. Resize the canvas so that it’s twice the width, with the original image anchored to the left or right accordingly. Now paste the copied image back in, flip it horizontally and line it up.
Top smoke art photography tips
1. Make sure the air is still
Although you’ll need to ventilate the room regularly, try to block any draughts. Still air will give you a focused smoke plume, but you can deliberately create eddies in the smoke by moving your hand towards and away from it, or by tapping on the base of the incense stick.
2. Experiment with the flash position
Take some time at the start of the session to find the optimum distance and angle to backlight the smoke. Begin with the flashgun position behind and to the side of the smoke, but also try lighting it from below and angled down, from a slightly higher position.
3. Start with the flash sync speed
You’ll find this in your camera manual; it’s typically 1/200 sec or thereabouts. By working in a darkened room, this reasonably fast shutter speed will prevent the ambient light from being recorded. Keep a torch with you, or use the light from your smartphone, so that you can check the smoke pattern or change batteries on your camera or flashgun.
4. Use a black background
Black velvet or similar material will make it much easier to retouch your images later. To avoid light hitting the backdrop, make a snoot for your flashgun. Check that the light from the flash is illuminating enough of the smoke when the snoot is in place.
5. Have fun with editing
A large part of the pleasure with this type of photography comes from cropping, rotating, mirroring, warping and adding color (or removing it) later.
Reader challenge: Smoke art
This month we’re looking for your creative pieces of smoke art. You really don’t have to go to town on the editing work, but we will be looking for shots that combine technical excellence with a pleasing aesthetic quality.
To enter your smoke art shot, either email your entry to digitalcamera@futurenet.com, putting ‘Smoke Art’ in the subject line; or go to our Facebook page at www.facebook.com/digitalcameraworld, look for the ‘Smoke Art’ post, and upload your entry into the feed. By entering, you confirm that you own the copyright to the image, and agree that Digital Camera can publish your image in relation to the ‘Smoke Art’ competition.
You retain full copyright in your image, and will be credited if published. The closing date is 5 April 2021. The winner will receive a copy of Serif Affinity Photo for Windows or macOS. Good luck!
Get the Digital Camera World Newsletter
The best camera deals, reviews, product advice, and unmissable photography news, direct to your inbox!
Digital Camera World is one of the leading authorities on camera and photography news, reviews, techniques, tutorials, comparisons, deals and industry analysis. The site doesn't just specialize in cameras, but all aspects of photography, videography and imaging – including camera phones, gimbals, lenses, lighting, editing software, filters, tripods, laptops, printers, photo books, desks, binoculars and more.
Whether you're using, looking to buy or trying to get the most out of a compact camera, action camera, camera drone, cinema camera, beginner camera or professional camera, Digital Camera World has a roster of experts with combined experience of over 100 years when it comes to cameras, photography and imaging.

