Get perfect tones with Affinity Photo
90-DAY FREE TRIAL:
Try Affinity Photo and get 50% off if you decide to purchase. Click here for more information!
When you first add a Gradient Map adjustment in Affinity Photo, the default effect is a psychedelic mix of red, green and blue that will be of no use to anyone. But don’t let that fool you into thinking the command is worthless – in fact, it’s one of the most powerful tools in Affinity Photo for tinting your images.
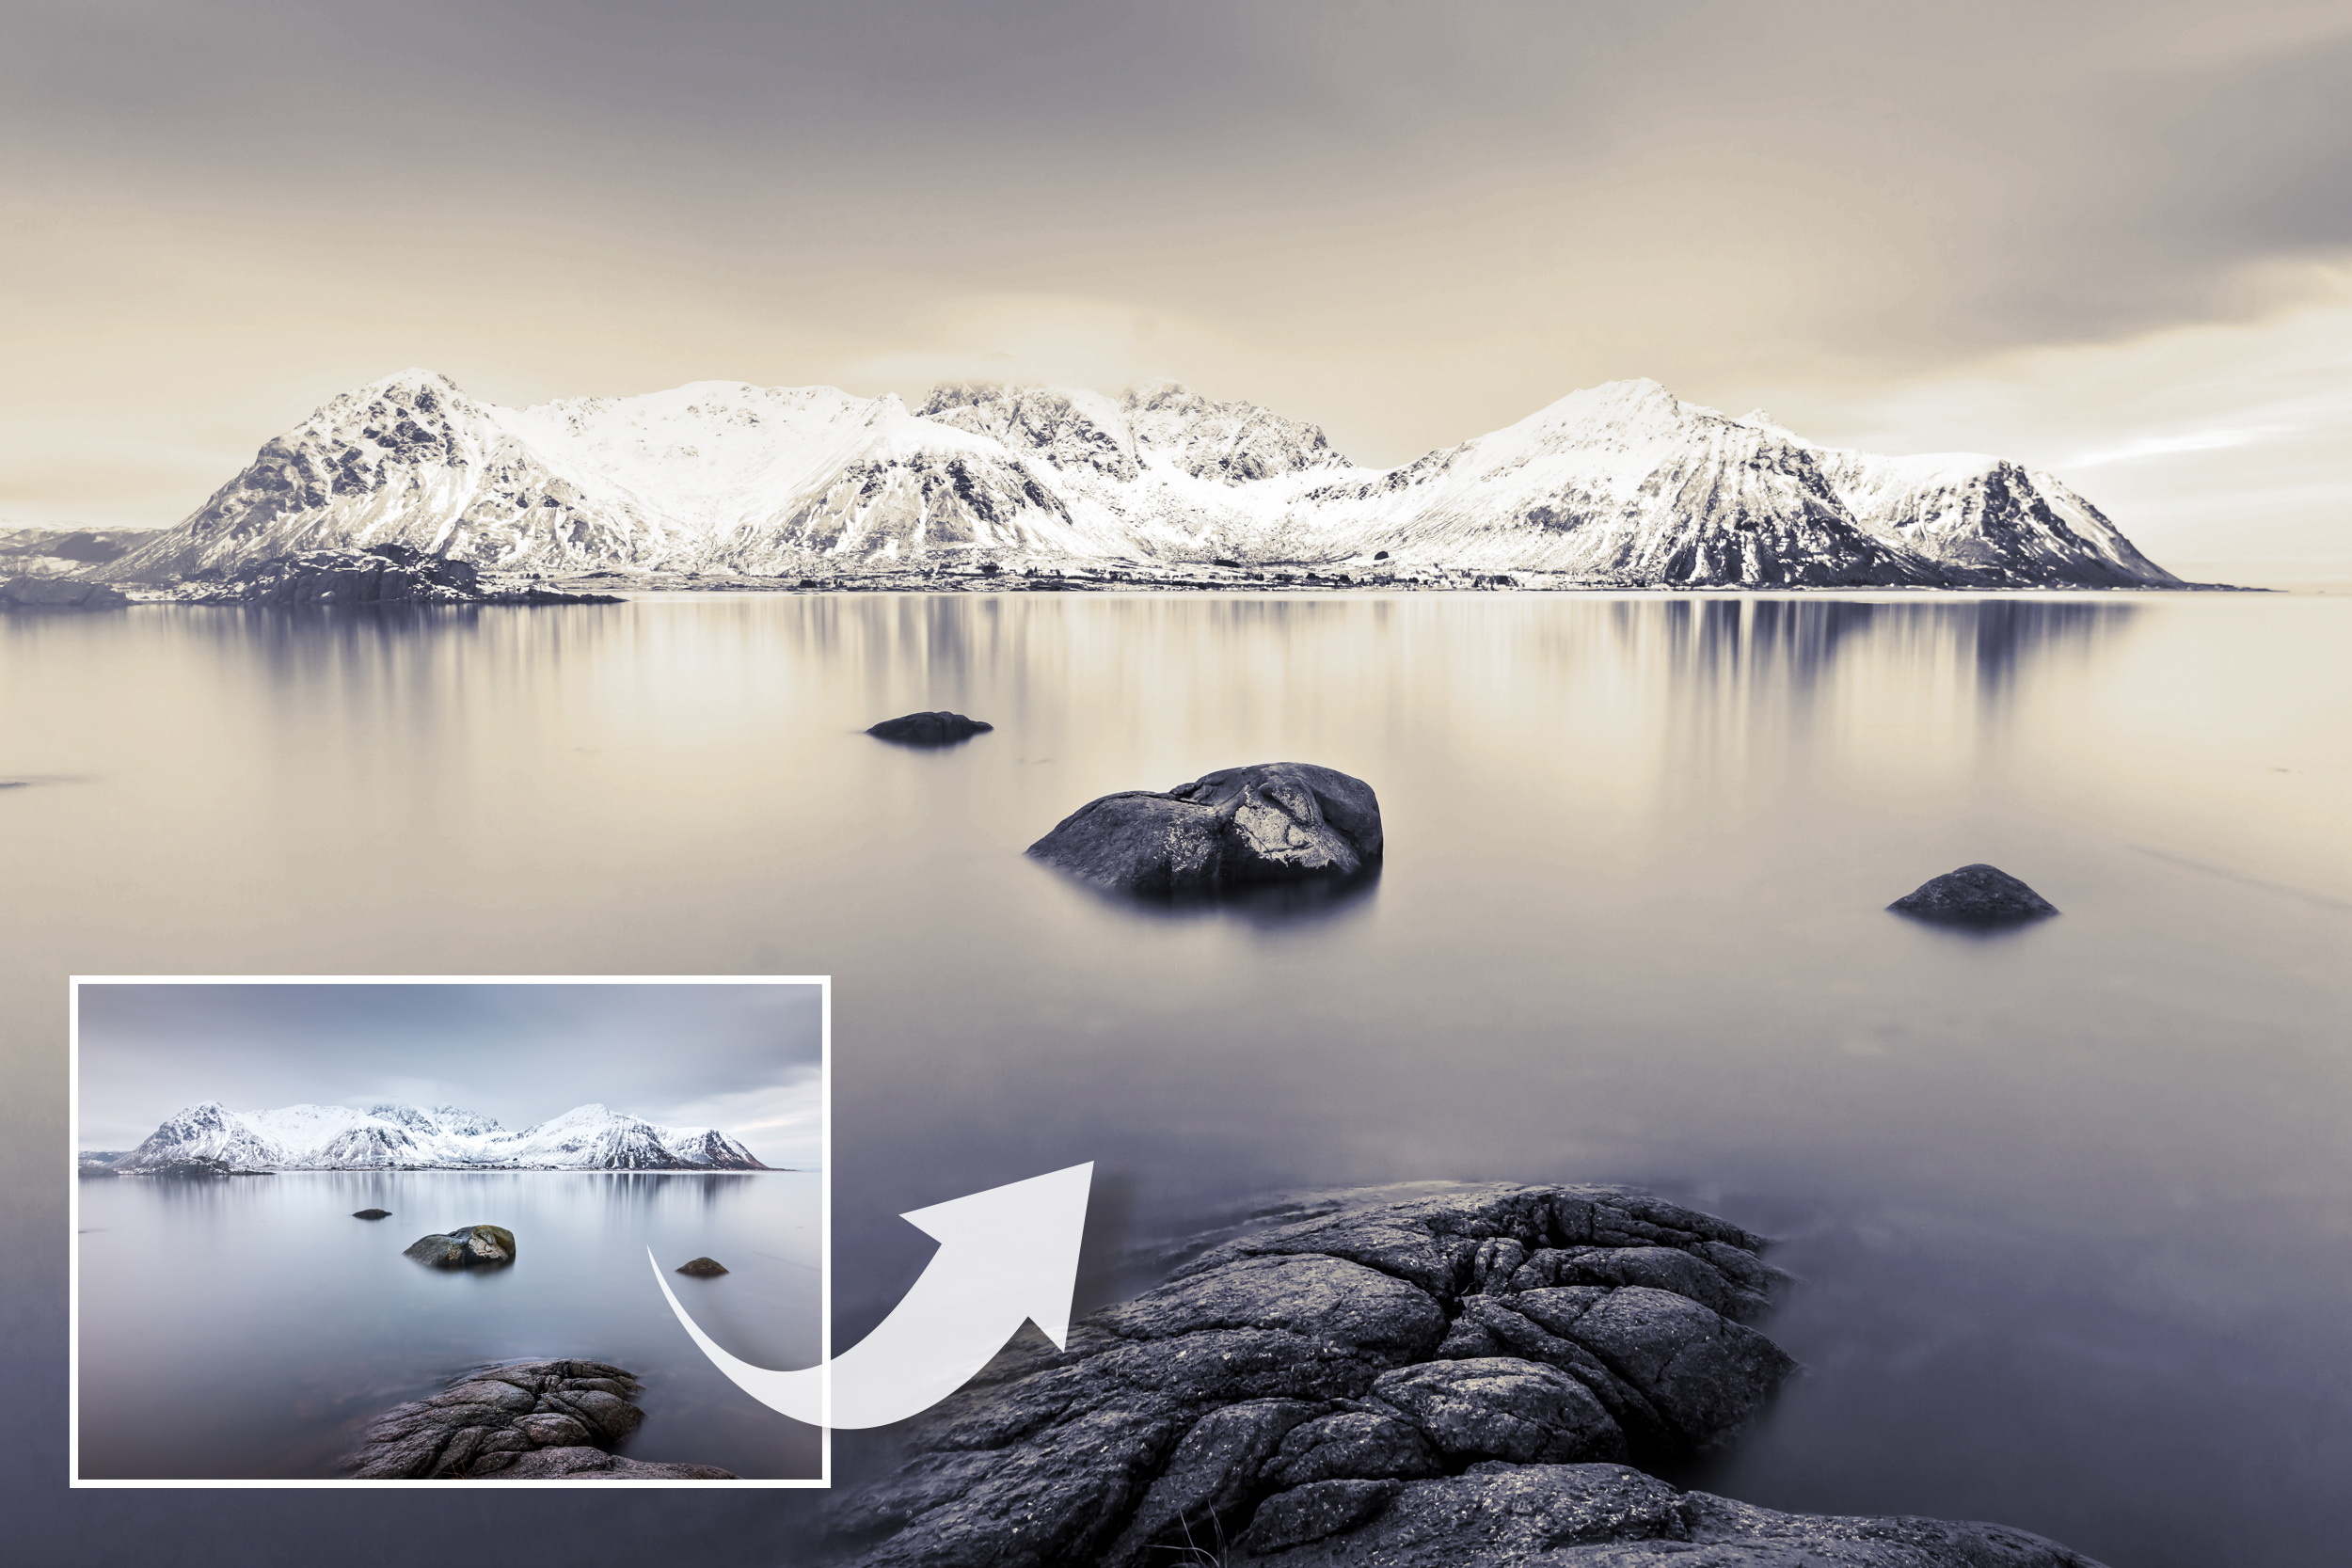
A Gradient Map adjustment enables you to add colours to your highlights and shadows, as well as any part of the range in-between. Whether you want to add a split-tone treatment to a black-and-white image like this, or skew the shades in a colour image, the Gradient Map is one of the best tools for the job.
In this tutorial we’ll explore some of the key features of Gradient Maps. We’ve opted for a retro gold-blue treatment here, but you can use the same techniques to replicate all kinds of other analogue effects, like a sepia tone, selenium colouring or a bold blue cyanotype.
Along the way we’ll also look at several powerful features in Affinity Photo that apply to all kinds of adjustments, like the Blend Options box and Adjustment Layers…
Gradient Maps in Affinity Photo
1. Presets
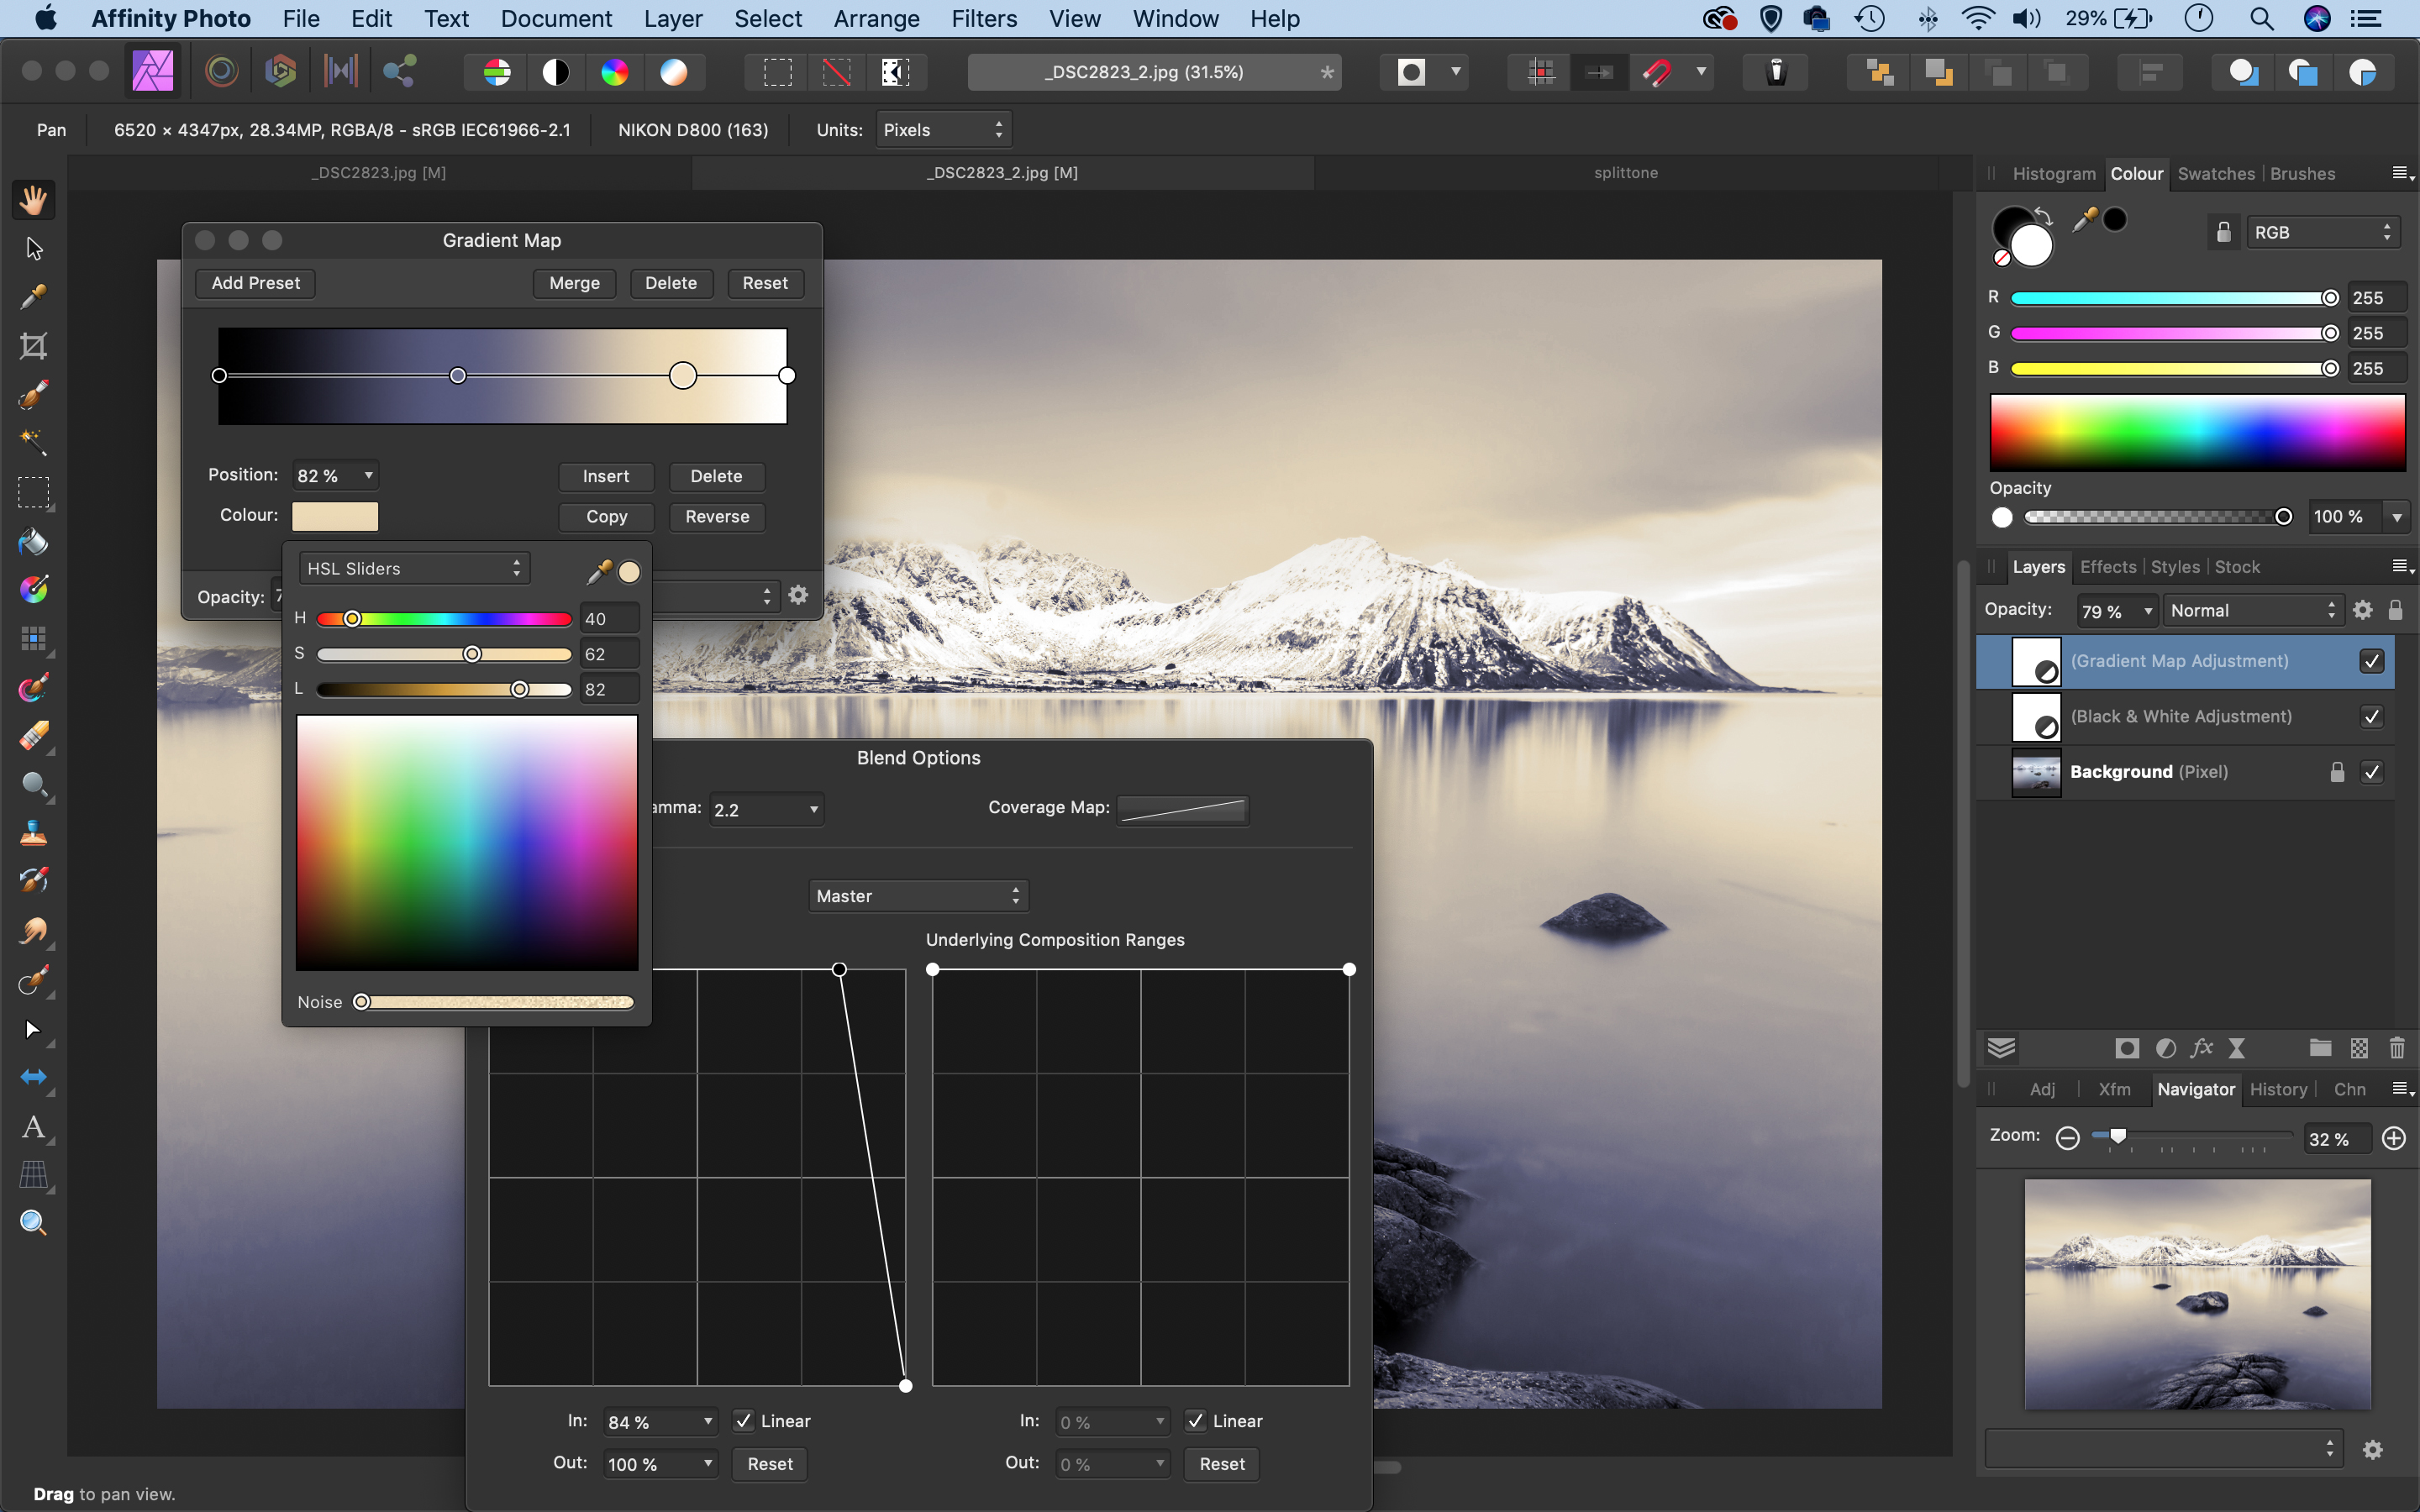
It can be fiddly to work through the Gradient Map settings and pick colours every time you want to use the command. If you hit upon a toning treatment you like, take a few seconds to save the settings as a preset. Simply click the Add Preset button, give it a name and click Save. The new preset will appear in the Adjustment Panel under Gradient Map, ready to be applied to other images.
2. Gradient Maps
To add a Gradient Map, click the Adjustment icon at the bottom of the Layers Panel. The command lets you map colours to different parts of the tonal range. You can choose any blend of colours you like and add them to shadows, midtones, highlights or any other part of the tonal range. The left of the gradient shows the colours added to the shadows; the right side displays the highlights.
3. Adjustment Layers
After adding a Gradient Map layer, you can take advantage of all of the benefits of working with layers. If the colours look a little strong, for example, you can lower the layer opacity to tone it down. You can also add a mask to make it work selectively in areas of the image. (Click the mask icon, then paint with black over the image to hide any area.) You can also apply Blending Modes.
4. Colour stops
Click on a colour stop (a circle over the gradient) to select it, then click on the colour box below to choose a colour. You can add as many colour stops as you like by double-clicking along the line; your gradient will adapt to include the new colours in the blend. It’s usually best to use the H (hue) and S (saturation) sliders to pick a colour and leave L (luminance) as it is, otherwise you might find the effect introduces unwanted changes in brightness.
5. Blend Options
Blend Options can be used in combination with any Adjustment Layer; click the cog icon in the bottom-right of the dialog to open it. The two graphs let you finesse the toning effect by fading it out in different parts of the tonal range. The left graph controls the source layer, while the right graph controls what shows through from layers beneath. By dragging the right side down here, we can fade out the effect in the brightest areas.
6. Black & White layer
Before tinting your image with a Gradient Map, it’s a good idea to first convert it to mono using a Black & White Adjustment Layer; click the adjustment icon in the Layers Panel to add one. Its sliders let you control the brightness of different colour ranges. Building up your adjustments on different layers is a great way to work, as you can go back to each layer and fine-tune the settings later.
Get started in water-drop photography
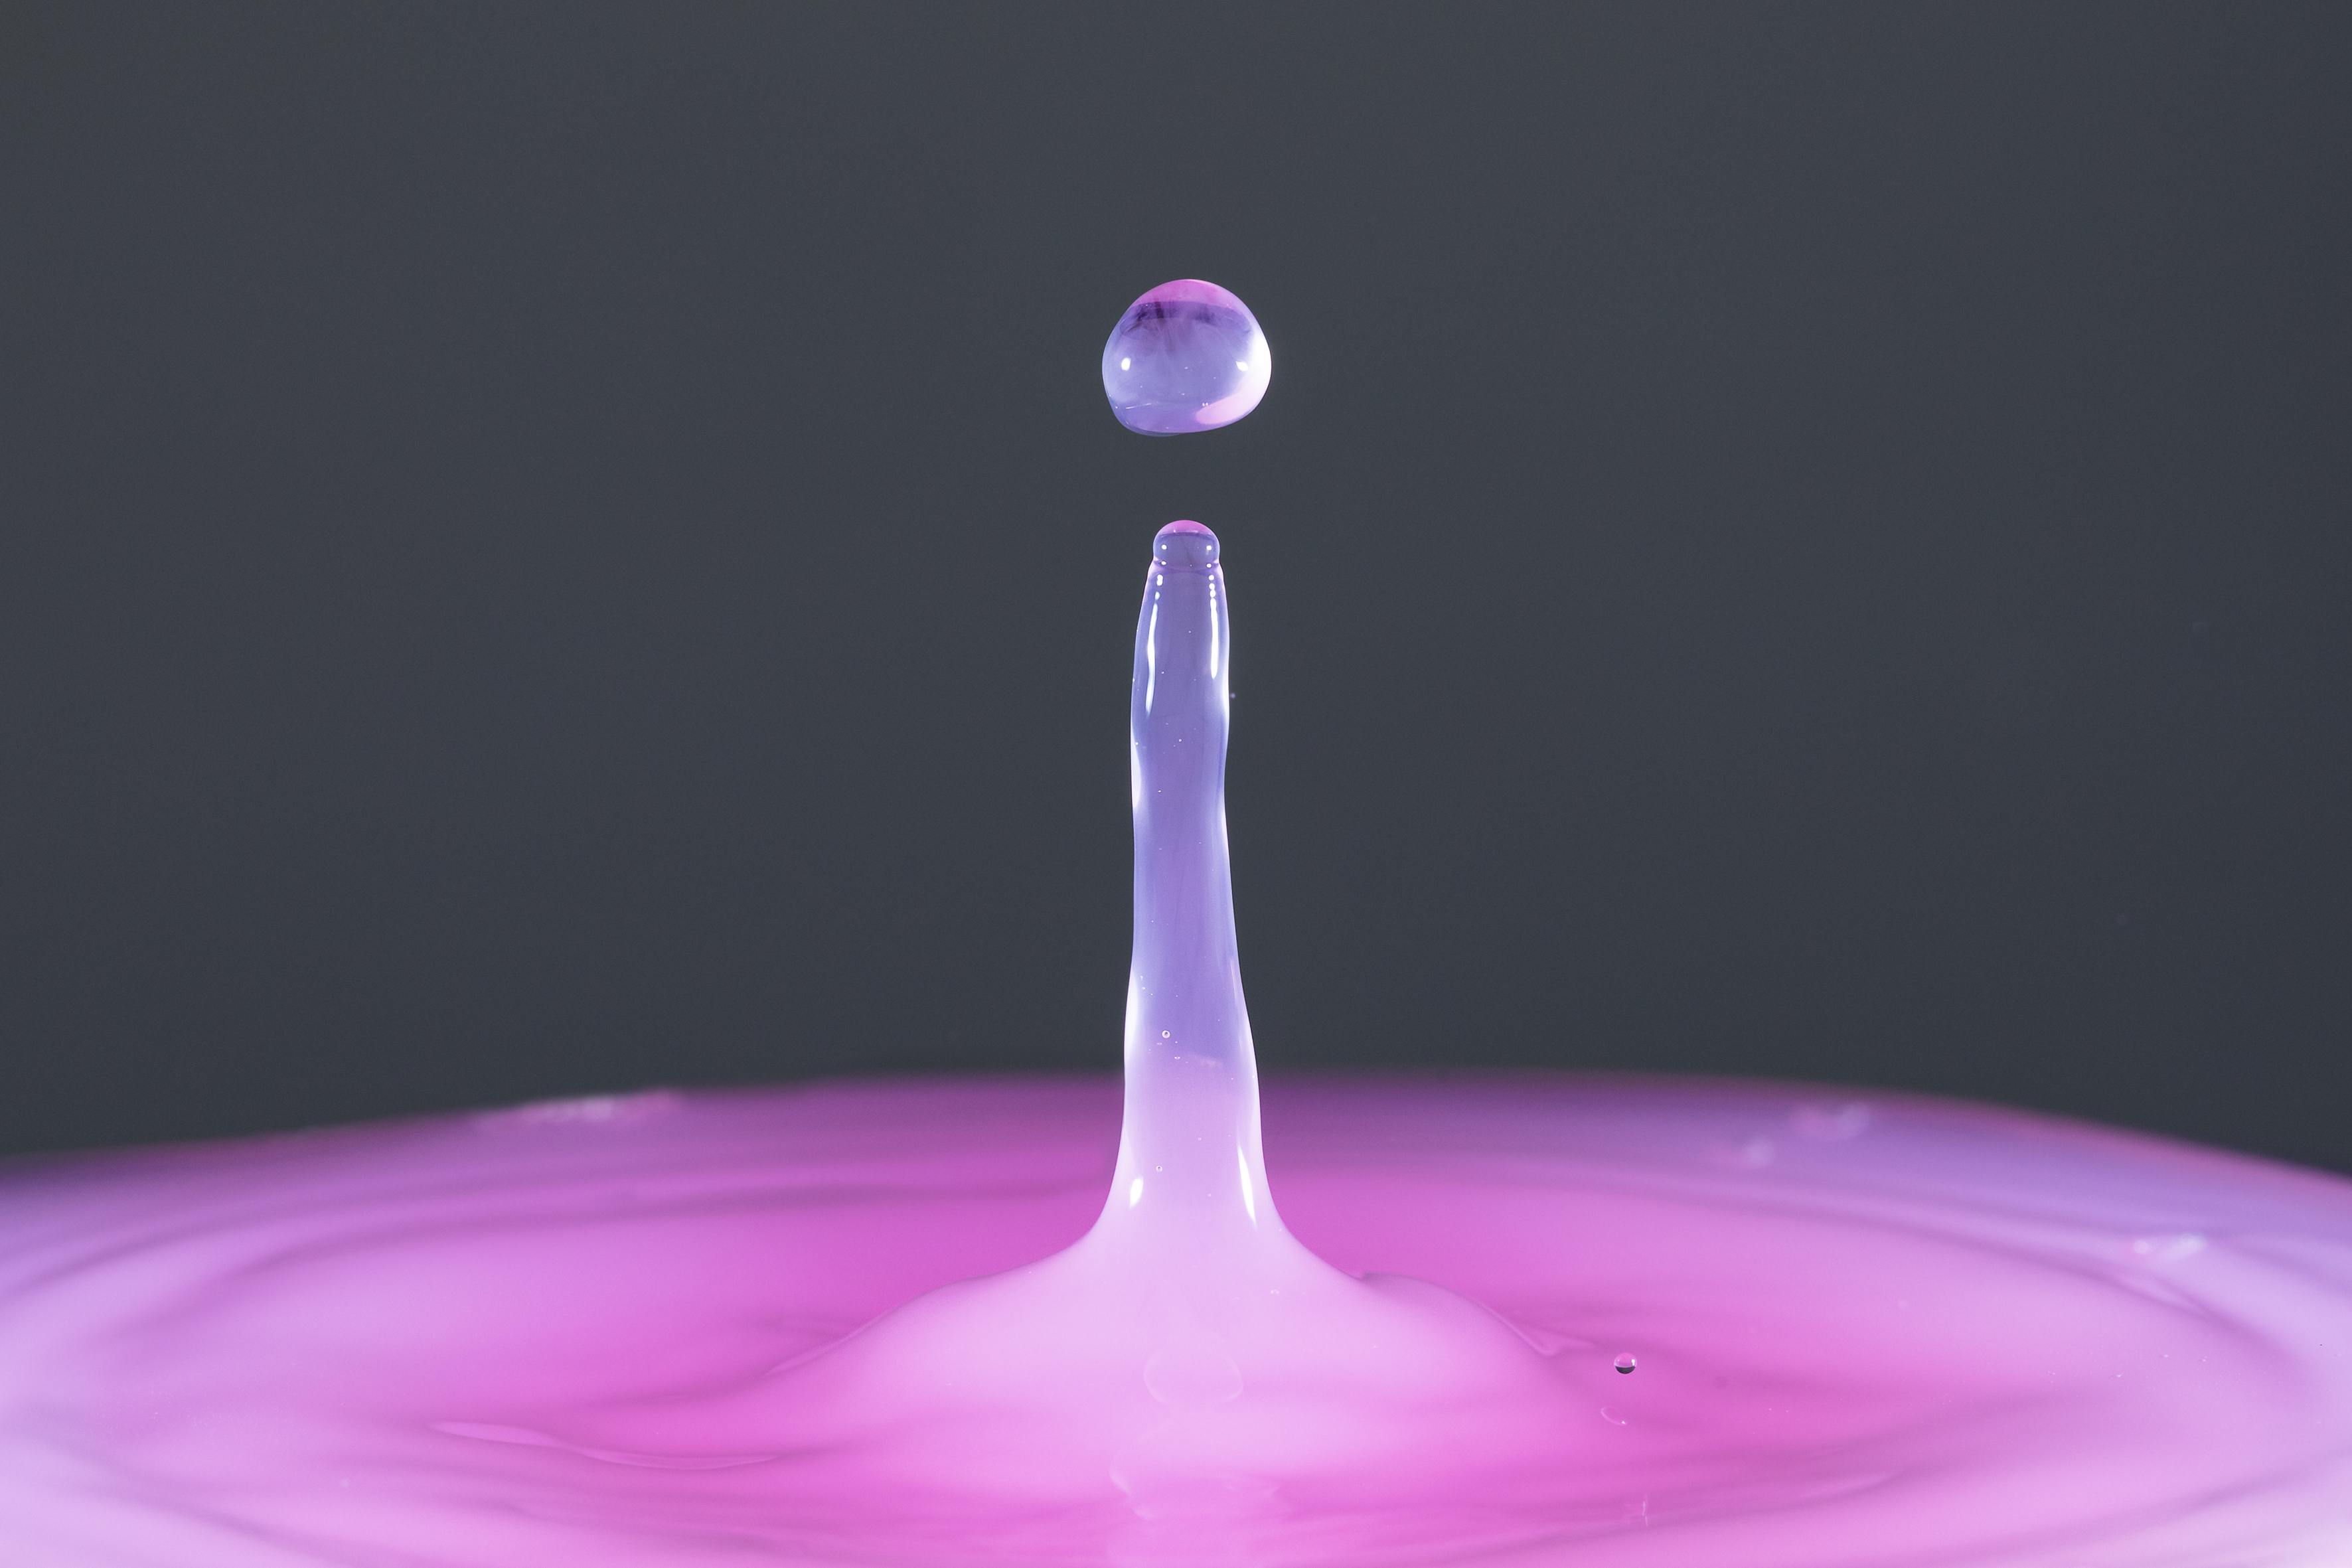
Few home photography projects require you to channel your inner Henri Cartier-Bresson as much as water-drop and splash photography. Capturing the moment that a droplet hits a pool of water below it needs the same feel for finding ‘the decisive moment’ that features in street or sports photography.
To freeze the elegant and interesting shapes formed when the water splashes, you’ll also need patience, a powerful light (in the form of an off-camera flashgun) and some way of creating drops that have a reasonably predictable frequency. There is a range of commercially available electronic options that give you control over the size and timing of the drops, but you can achieve a lot with a simple home set-up…
TIME YOUR SHOTS
Like telling a joke, the key to water-drop photography is getting your timing right! Whether you’re going for water drop collisions, ‘dancing domes’ or a more ‘solid’, sculptural take on the subject, the moment you trip the shutter and fire the flash is important.
Be prepared to fill multiple memory cards when you’re shooting water drops, as the misses will definitely outnumber the hits. Set your camera to its continuous drive mode and switch off any features that may slow down your shooting rate (you may achieve a faster burst if you use a DSLR viewfinder rather than the Live View screen, for example). To avoid inadvertently nudging the camera, use a remote release to take the pictures.
The trick is to capture the ‘up-splash’ as the drop hits the liquid below. Once you’re in sync with the rhythm of the drops, fire in short bursts to improve your chances of capturing the peak moment. Don’t delete images in-camera, though: some of the ‘misses’ can be interesting, too.
CONTROL THE WATER DROPS
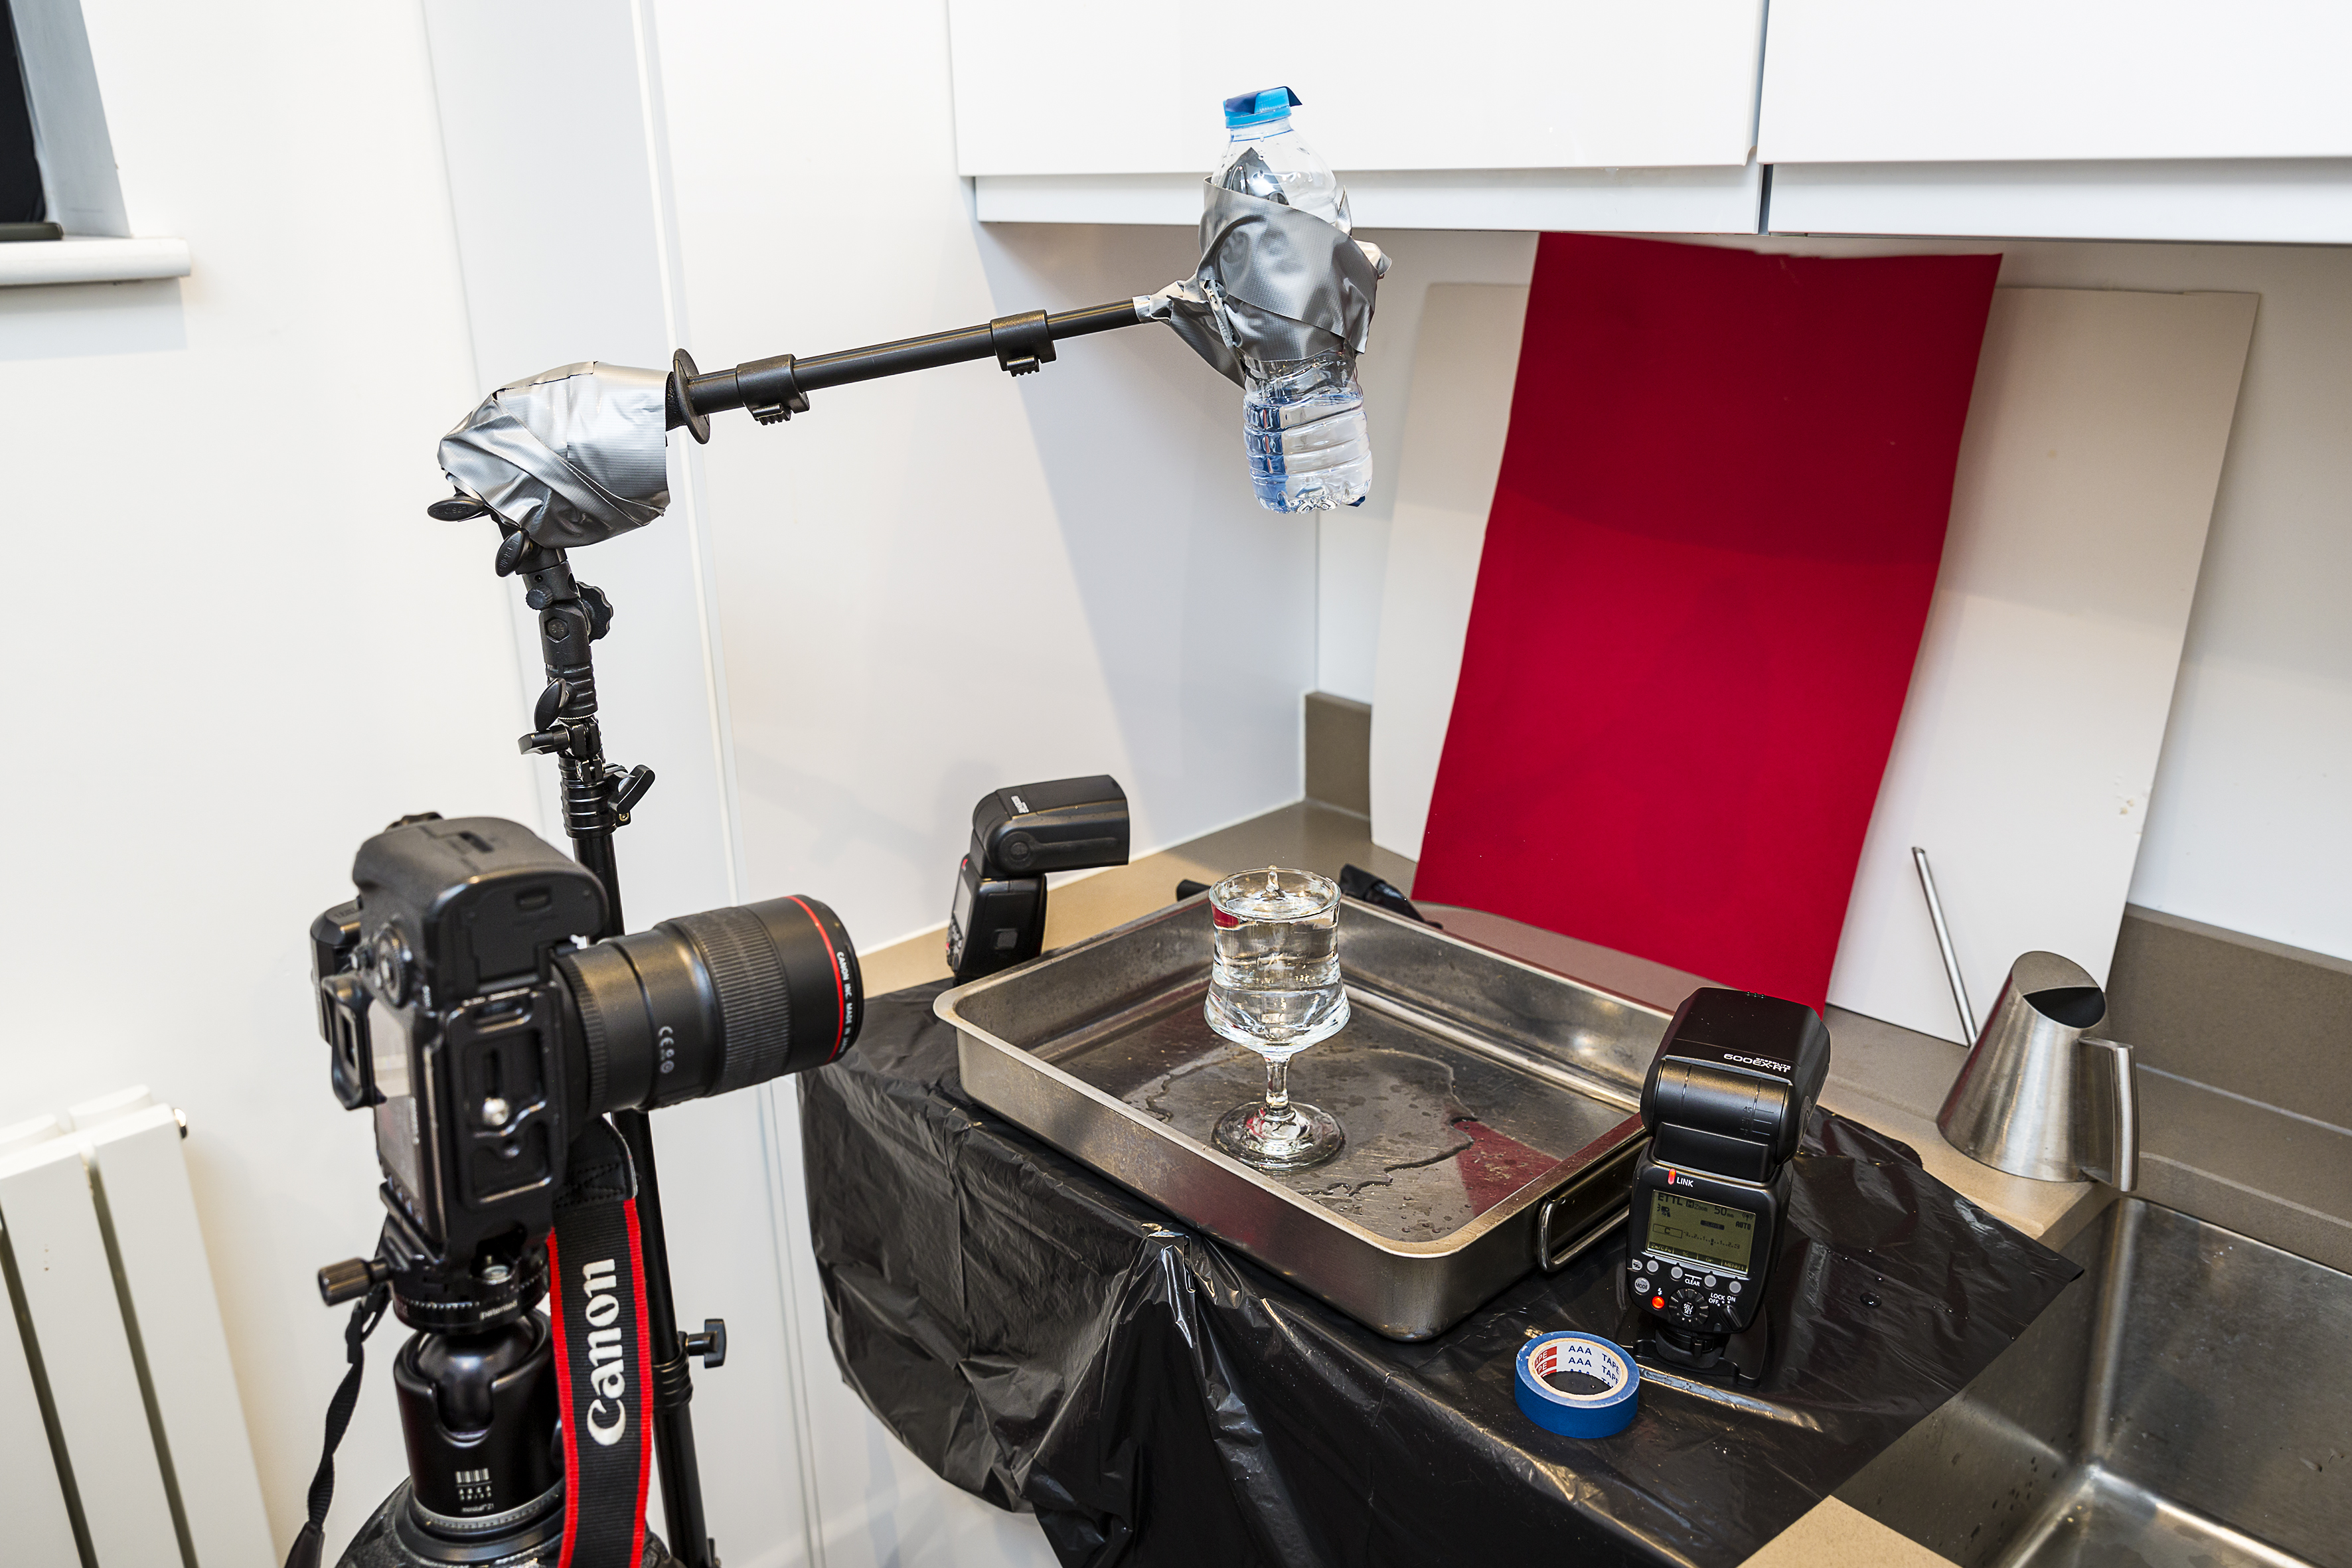
There are several commercial options that enable you to control the drops, and to regulate factors such as the interval between drops and the lag between the water dropping and the flash being fired. You don’t need that sort of kit when you’re starting out, though: a water bottle with a pinhole in the base, or a pipette suspended above a glass or a bowl, will do just fine.
To regulate the flow of water when you’re using a bottle, stick a piece of electrical tape over the hole. Make a hole in the lid and stick a piece of tape over that, adjusting its position to speed up or slow down the flow of drops.
SET A MANUAL FLASH EXPOSURE
To get the rapid flash rate you need for this type of photography, you’ll need to use a remote flashgun. It’s even better if you have two, as you can position one on each side of your set-up for a balanced result. You can achieve a similar result using one flashgun, though, by placing a sheet of crumpled kitchen foil on the opposite side to act as a reflector.
Set the flashgun to Manual (M), as this will give you consistent control over the flash power. A low power rating means that the flash will fire and recycle more quickly. Not only does this give you crisp splashes and drops, it allows you to fire rapid bursts of shots.
You’ll need to work in a dark room, as this will ensure that the water is only illuminated by the flashgun. The light from the flash is fired and extinguished so quickly that the shutter speed doesn’t have any effect on the exposure, as long as you’re shooting at the flash sync speed or slower.
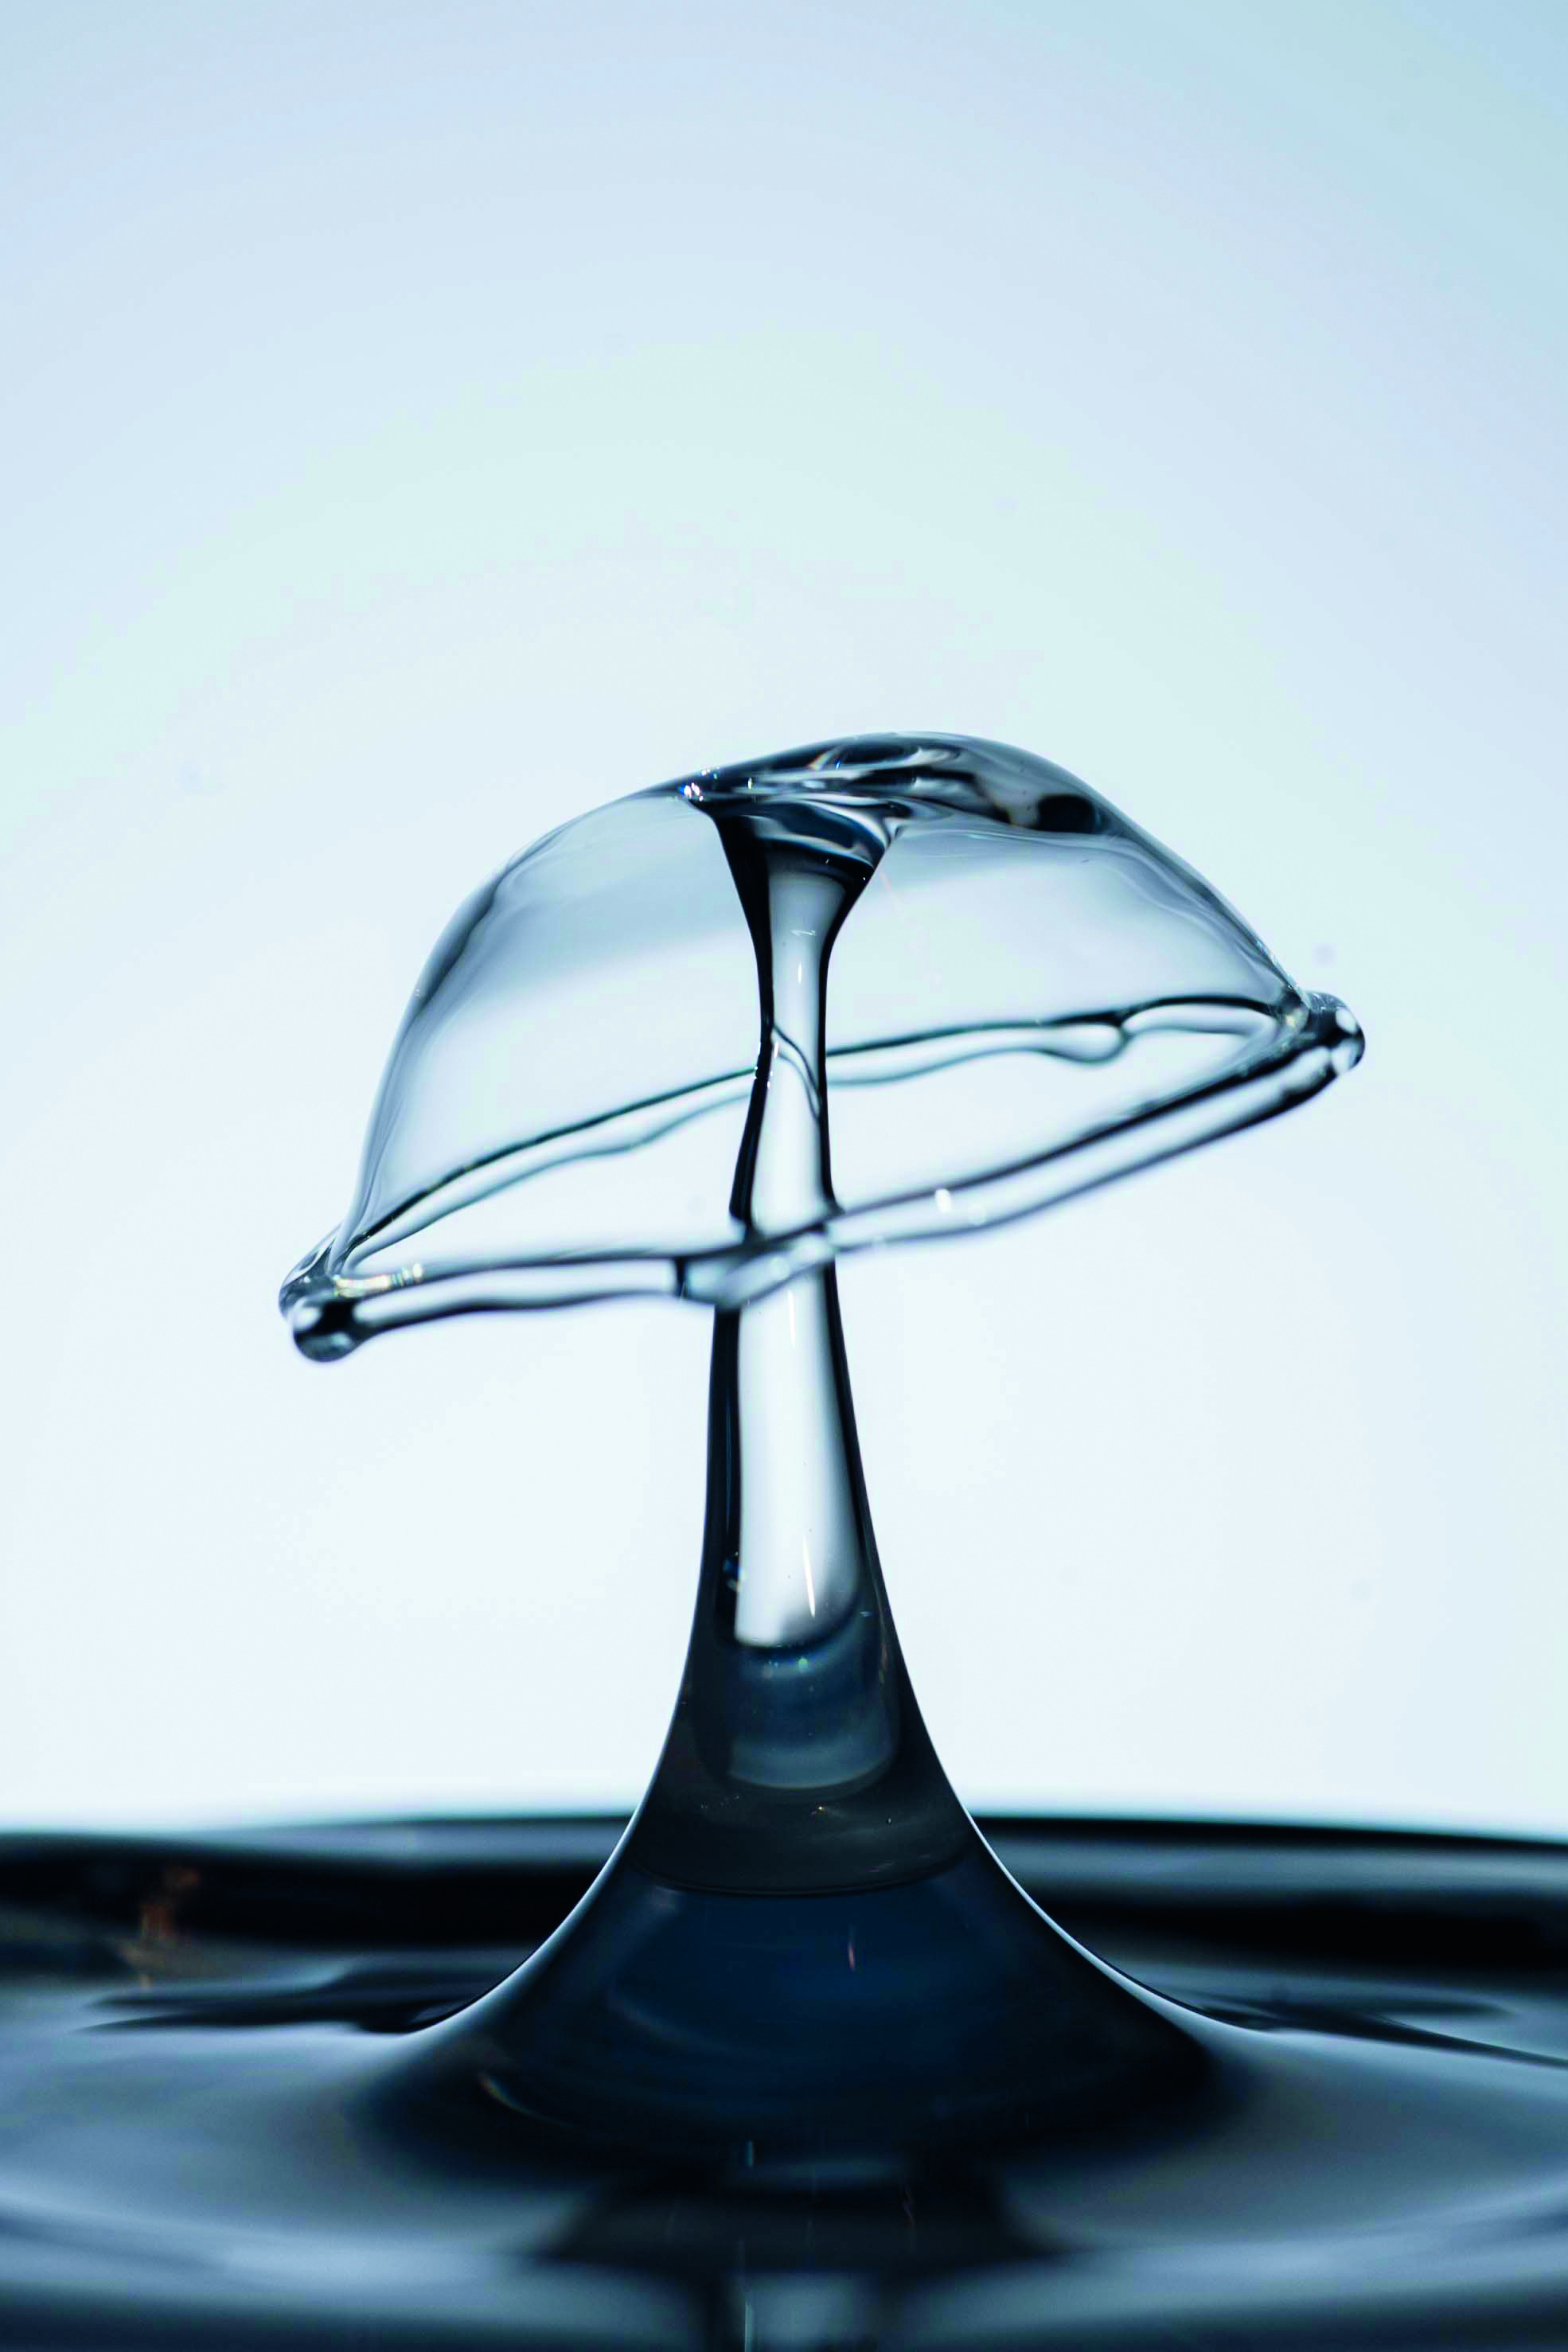
ADD A SPLASH OF COLOUR
As well as using different backdrops or adding lighting gels to the flashgun to introduce colour to your drop shots, you can, of course, use coloured liquid – although this does mean you’ll have to take extra precautions to protect everything nearby from splashes.
Fruit cordial, food colouring and even paint can be used to good effect. Milk can provide a good base for the colour, but clear liquids offer a more subtle rendering. Once you’re happy with your set-up, try mixing the colours, using drops that are a different colour to the liquid they are falling into. Milkshake flavouring was used to create this shot. A little milk was added to the water in the jug to turn it cloudy and make the colour stand out more.
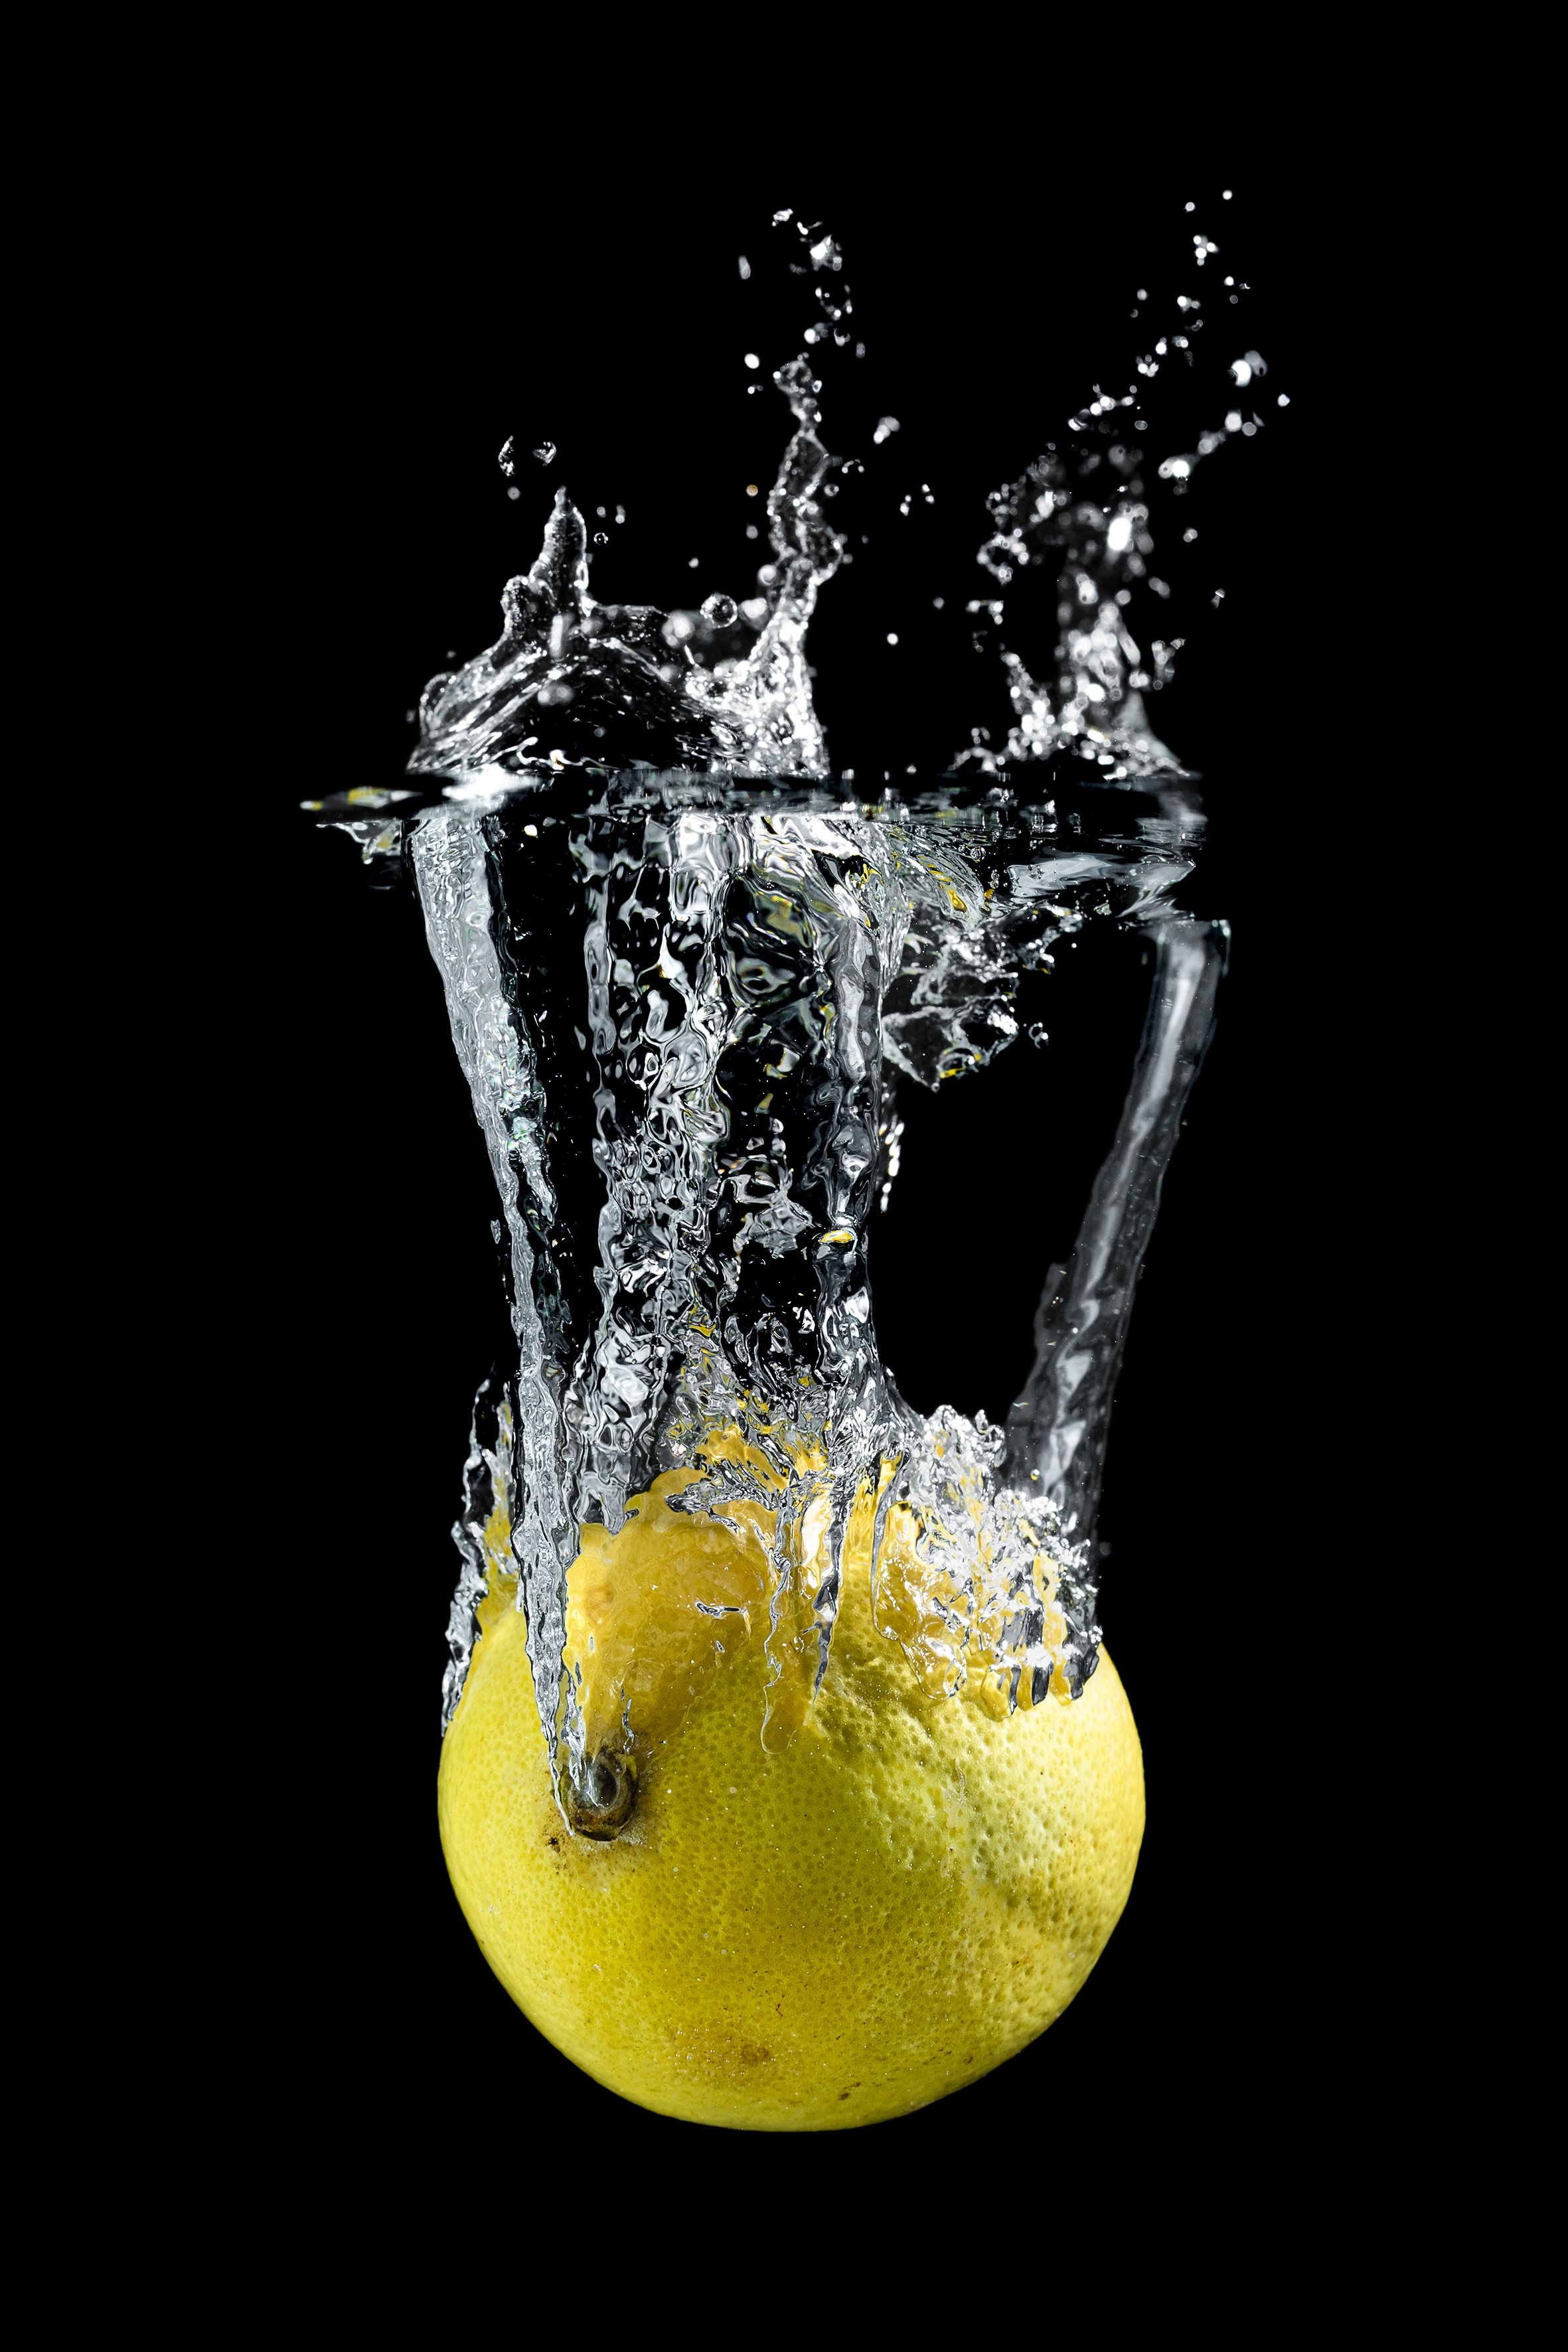
FRUIT SPLASH PHOTOGRAPHY
While you’ve got your water studio set up and ready to go, why not try your hand at the classic ‘fruit splash’ shot? Although you can use a glass for this style of image, a small fish tank or a glass container with flat sides will ensure there are no distortions. It will also lead to less mess and allow you to capture a cleaner splash without the edges of the container in the frame.
We recommend using a piece of black velvet or card for the background when you’re starting out, as it’s much easier to remove any unwanted air bubbles, drips and debris when you process the image. (See the opposite page.)
Fill the tank to half or three-quarters level. Change it regularly during the photo session, particularly if you’re using ‘fuzzy’ items such as kiwi fruit, which can soon dirty the water.
Top water-drop photography tips
1. Be prepared
Have plenty of camera consumables to hand: this type of photography eats up memory card space in no time. Shooting at home does mean your computer is likely to be close by for copying the files when your cards are full, though. Having an extra set of batteries around for your flashgun may also come in handy.
2. Protect your stuff
Set up near a sink, and protect nearby objects and surfaces with plastic or similar waterproof coverings. Check the front element of your lens regularly, too, as any drops that make it that far will leave marks that can be tricky to remove.
3. Take your time
Spend some time studying the behaviour and timing of your drops and splashes. Take some test shots so you can work out if you need to adjust the camera position before settling on the final composition. Avoid framing your shots too tightly, as some splashes will inevitably be larger than others.
4. Light makes right
Work on your lighting. Bouncing the light from your flashgun off a piece of card in the background will both soften the light and make the drop visible. You may see the background being refracted in the water drop, too, so make sure that the edge of the card or any unwanted objects aren’t visible.
5. Keep the water clear
Make sure the water is clean when you’re shooting fruit-splash shots. The liquid can end up a little cloudy with particles in it, especially if you’re working with soft fruit or segments. Cut down the amount of touching up you need to do in software by changing the water regularly.
Reader challenge: Liquid art
Enter our latest photo challenge and win a copy of Affinity Photo! This month we’re looking for your finest water-drop and splash shots. Whether you opt for simple water drops, fruit splashes or something more elaborate, we’re looking for pictures that capture the decisive moment. We’ve set out the basics for the main techniques you’ll need, but there are lots of creative ways you can approach this challenge.
All we’d ask is that the images need to be relatively small in scale – we’re not chasing images of waves crashing onto a beach, but pictures that have been shot in your own makeshift desktop studio at home. We’d love to see some of your behind-the‑scenes set-up shots, too.
To enter your best liquid art shot (one per reader, please), email your entry
to digitalcamera@futurenet.com, putting ‘Liquid Art’ in the subject line; or go to www.facebook.com/digitalcameraworld and find the ‘Liquid Art’ post, then upload your entry there.
By entering your image, you confirm that you own the copyright to the image, and agree that Digital Camera can publish it in relation to the competition. You retain full copyright of your image, and will be credited if published. The closing date is 04 March 2021. The winner will receive a copy of Affinity Photo for Windows or macOS. Good luck!
Get the Digital Camera World Newsletter
The best camera deals, reviews, product advice, and unmissable photography news, direct to your inbox!
Digital Camera World is one of the leading authorities on camera and photography news, reviews, techniques, tutorials, comparisons, deals and industry analysis. The site doesn't just specialize in cameras, but all aspects of photography, videography and imaging – including camera phones, gimbals, lenses, lighting, editing software, filters, tripods, laptops, printers, photo books, desks, binoculars and more.
Whether you're using, looking to buy or trying to get the most out of a compact camera, action camera, camera drone, cinema camera, beginner camera or professional camera, Digital Camera World has a roster of experts with combined experience of over 100 years when it comes to cameras, photography and imaging.

