How to capture city landmarks at night
Make the most of those long winter evenings by capturing local landmarks as they light up at night
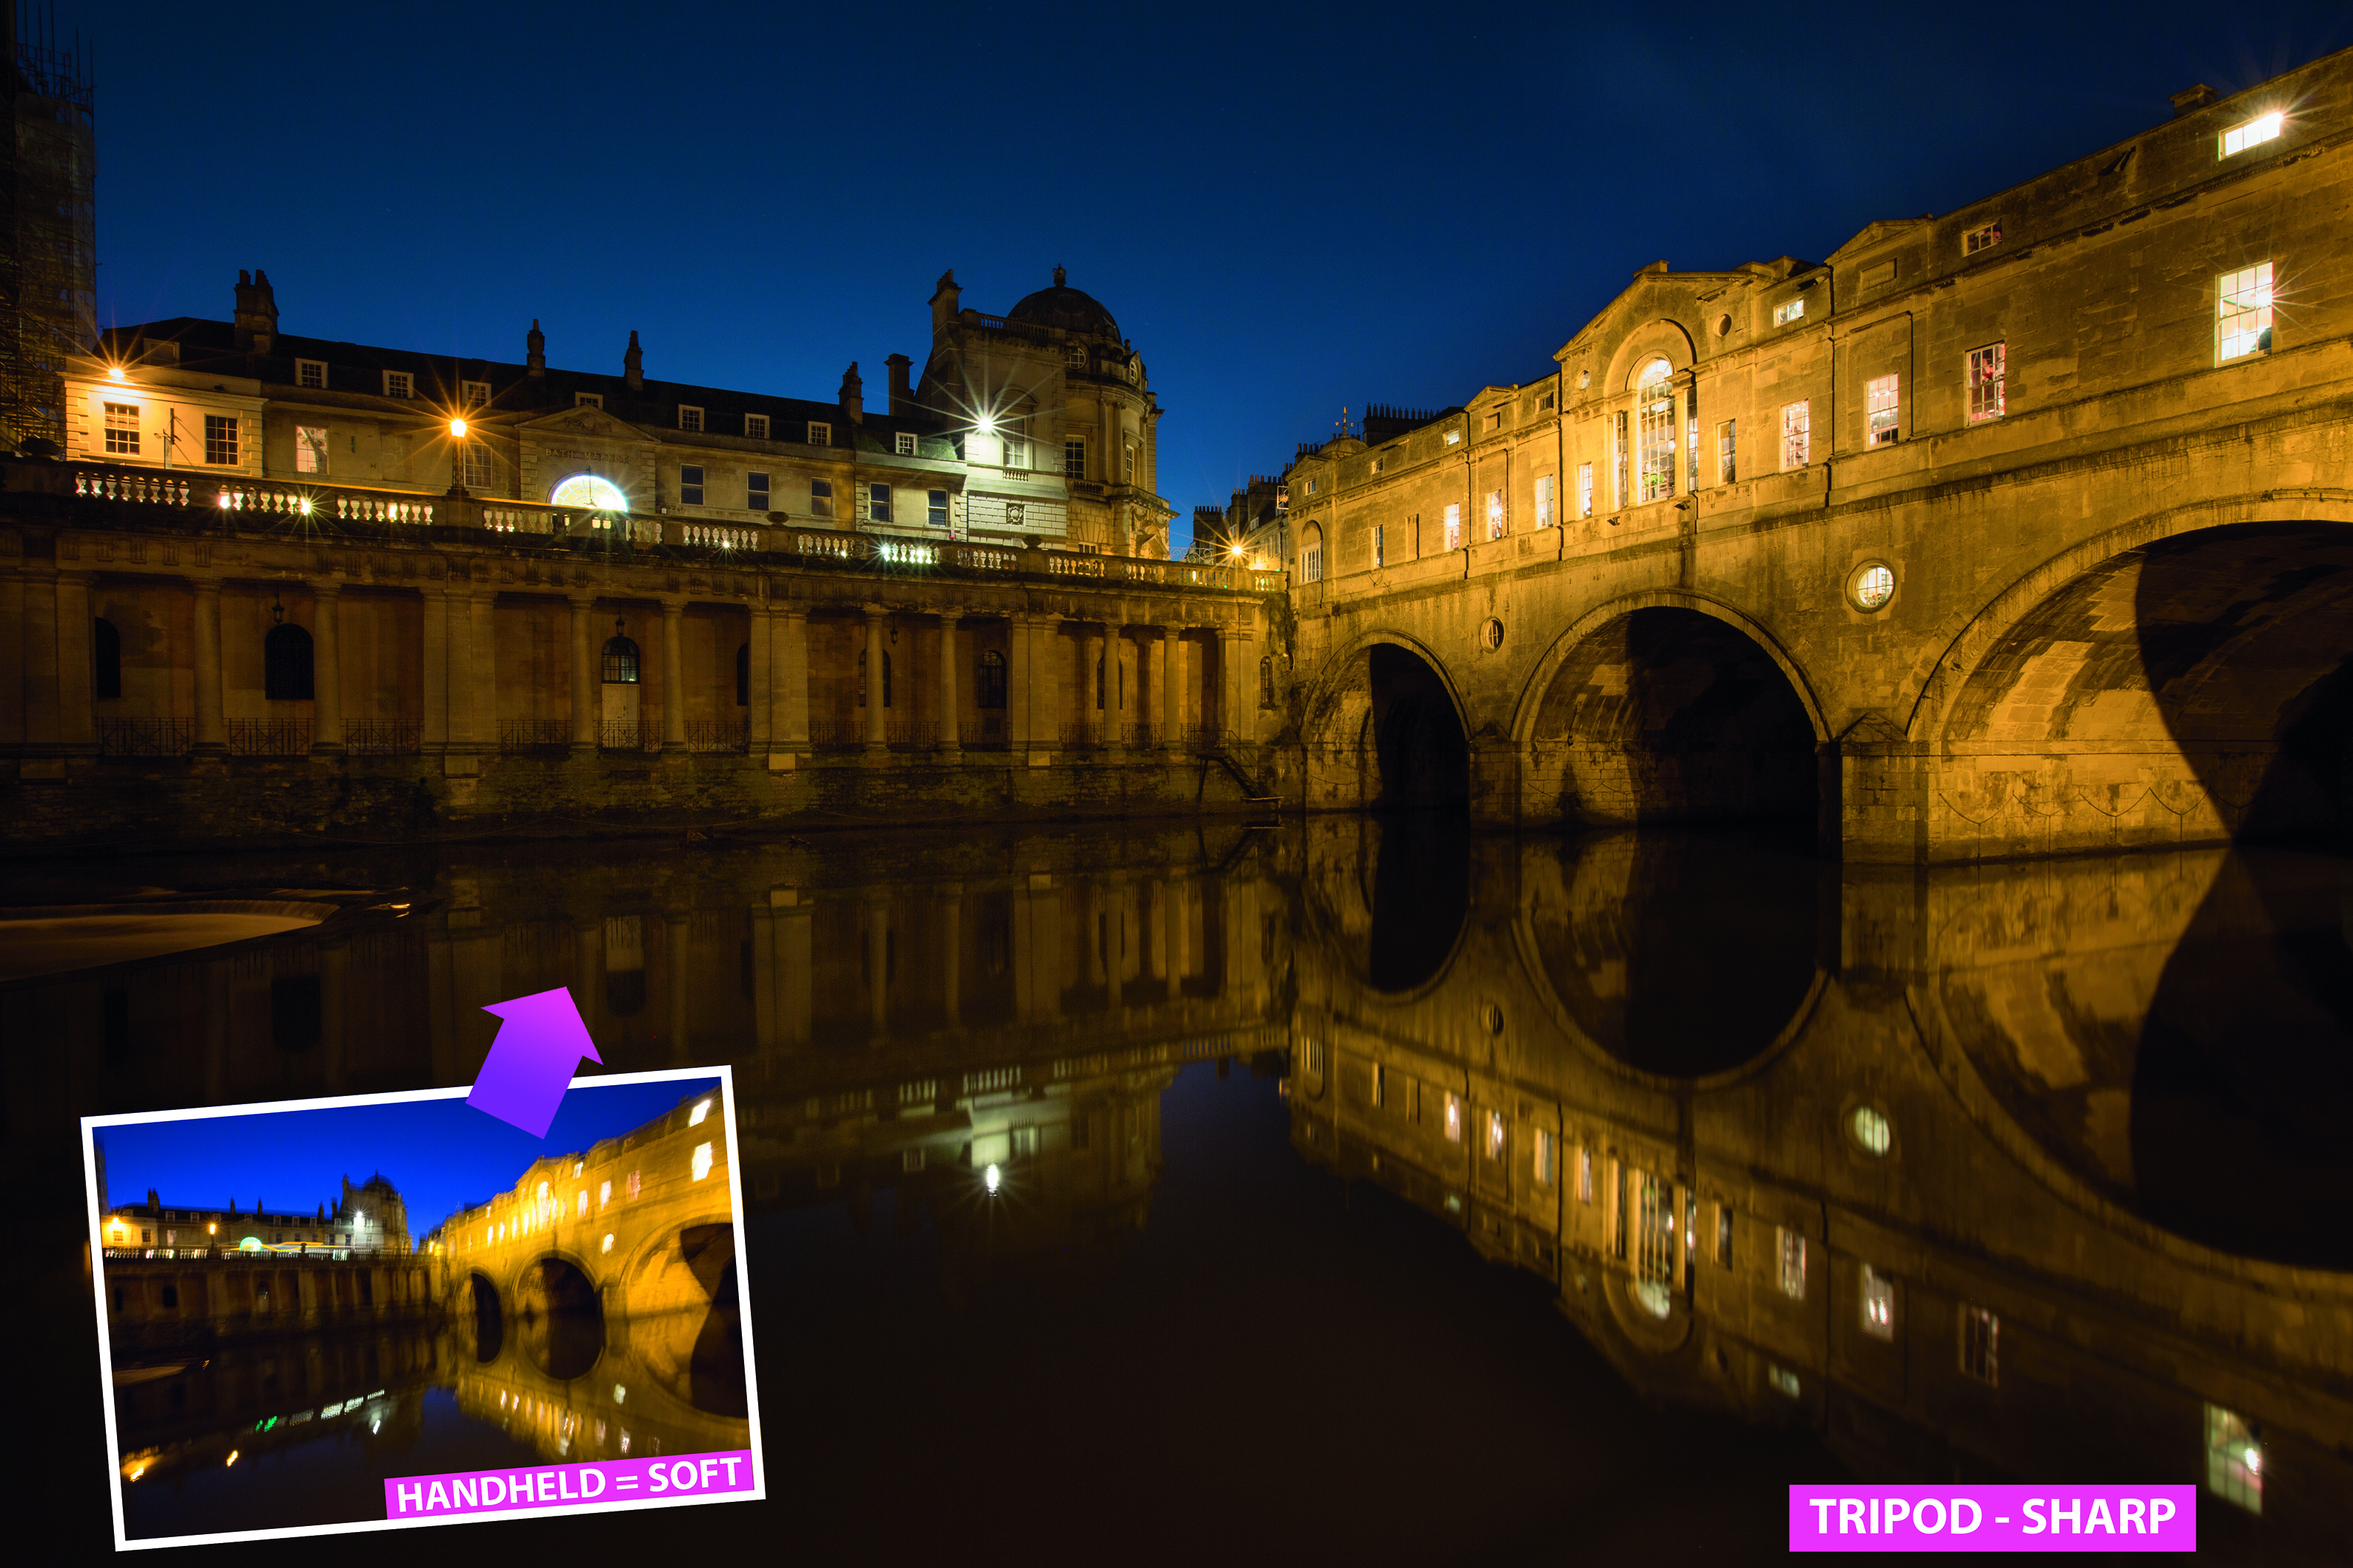
Capture city scenes at night using a combination of long exposures and narrow apertures
Time needed: Two hours
Skill level: Intermediate
Kit needed: Tripod • Remote release • Wide-angle lens
We love photographing cityscapes during the winter months. Whereas wintry landscapes can end up looking rather bare once the trees have shed their leaves, cities transform into beautiful scenes by late afternoon, with brightly lit buildings contrasting with atmospheric dark shadows. And after the shoot there’s always somewhere nearby to escape the cold for a warm cup of coffee…
But capturing city night scenes in-camera requires a few essential techniques. First of all, to show the cityscape off in all its glory, you’ll need a wide-angle lens strapped to your camera. Then, to capture the scene sharp from the foreground to the horizon, you’ll need to set a narrow aperture. As you’re shooting at night, light levels will be very low (depending on how bright the building lights are, and how much sky you’re including in shot) so you’ll need a long exposure; with the resultant slow shutter speed, you won’t be able to shoot handheld as you’ll end up with blurry shots, so you’ll need a tripod. We go in more detail on these settings on the right, while over the page we reveal killer Photoshop skills for boosting your Raw image.
So, dressed in our warmest winter gear, and with our tripod over one shoulder, we spent a night out in beautiful Bath to capture some classic cityscapes.
• See also Best light-light cameras
STEP BY STEP: Settings for night city shots
Learn essential camera settings, and how to get set up for shooting at night
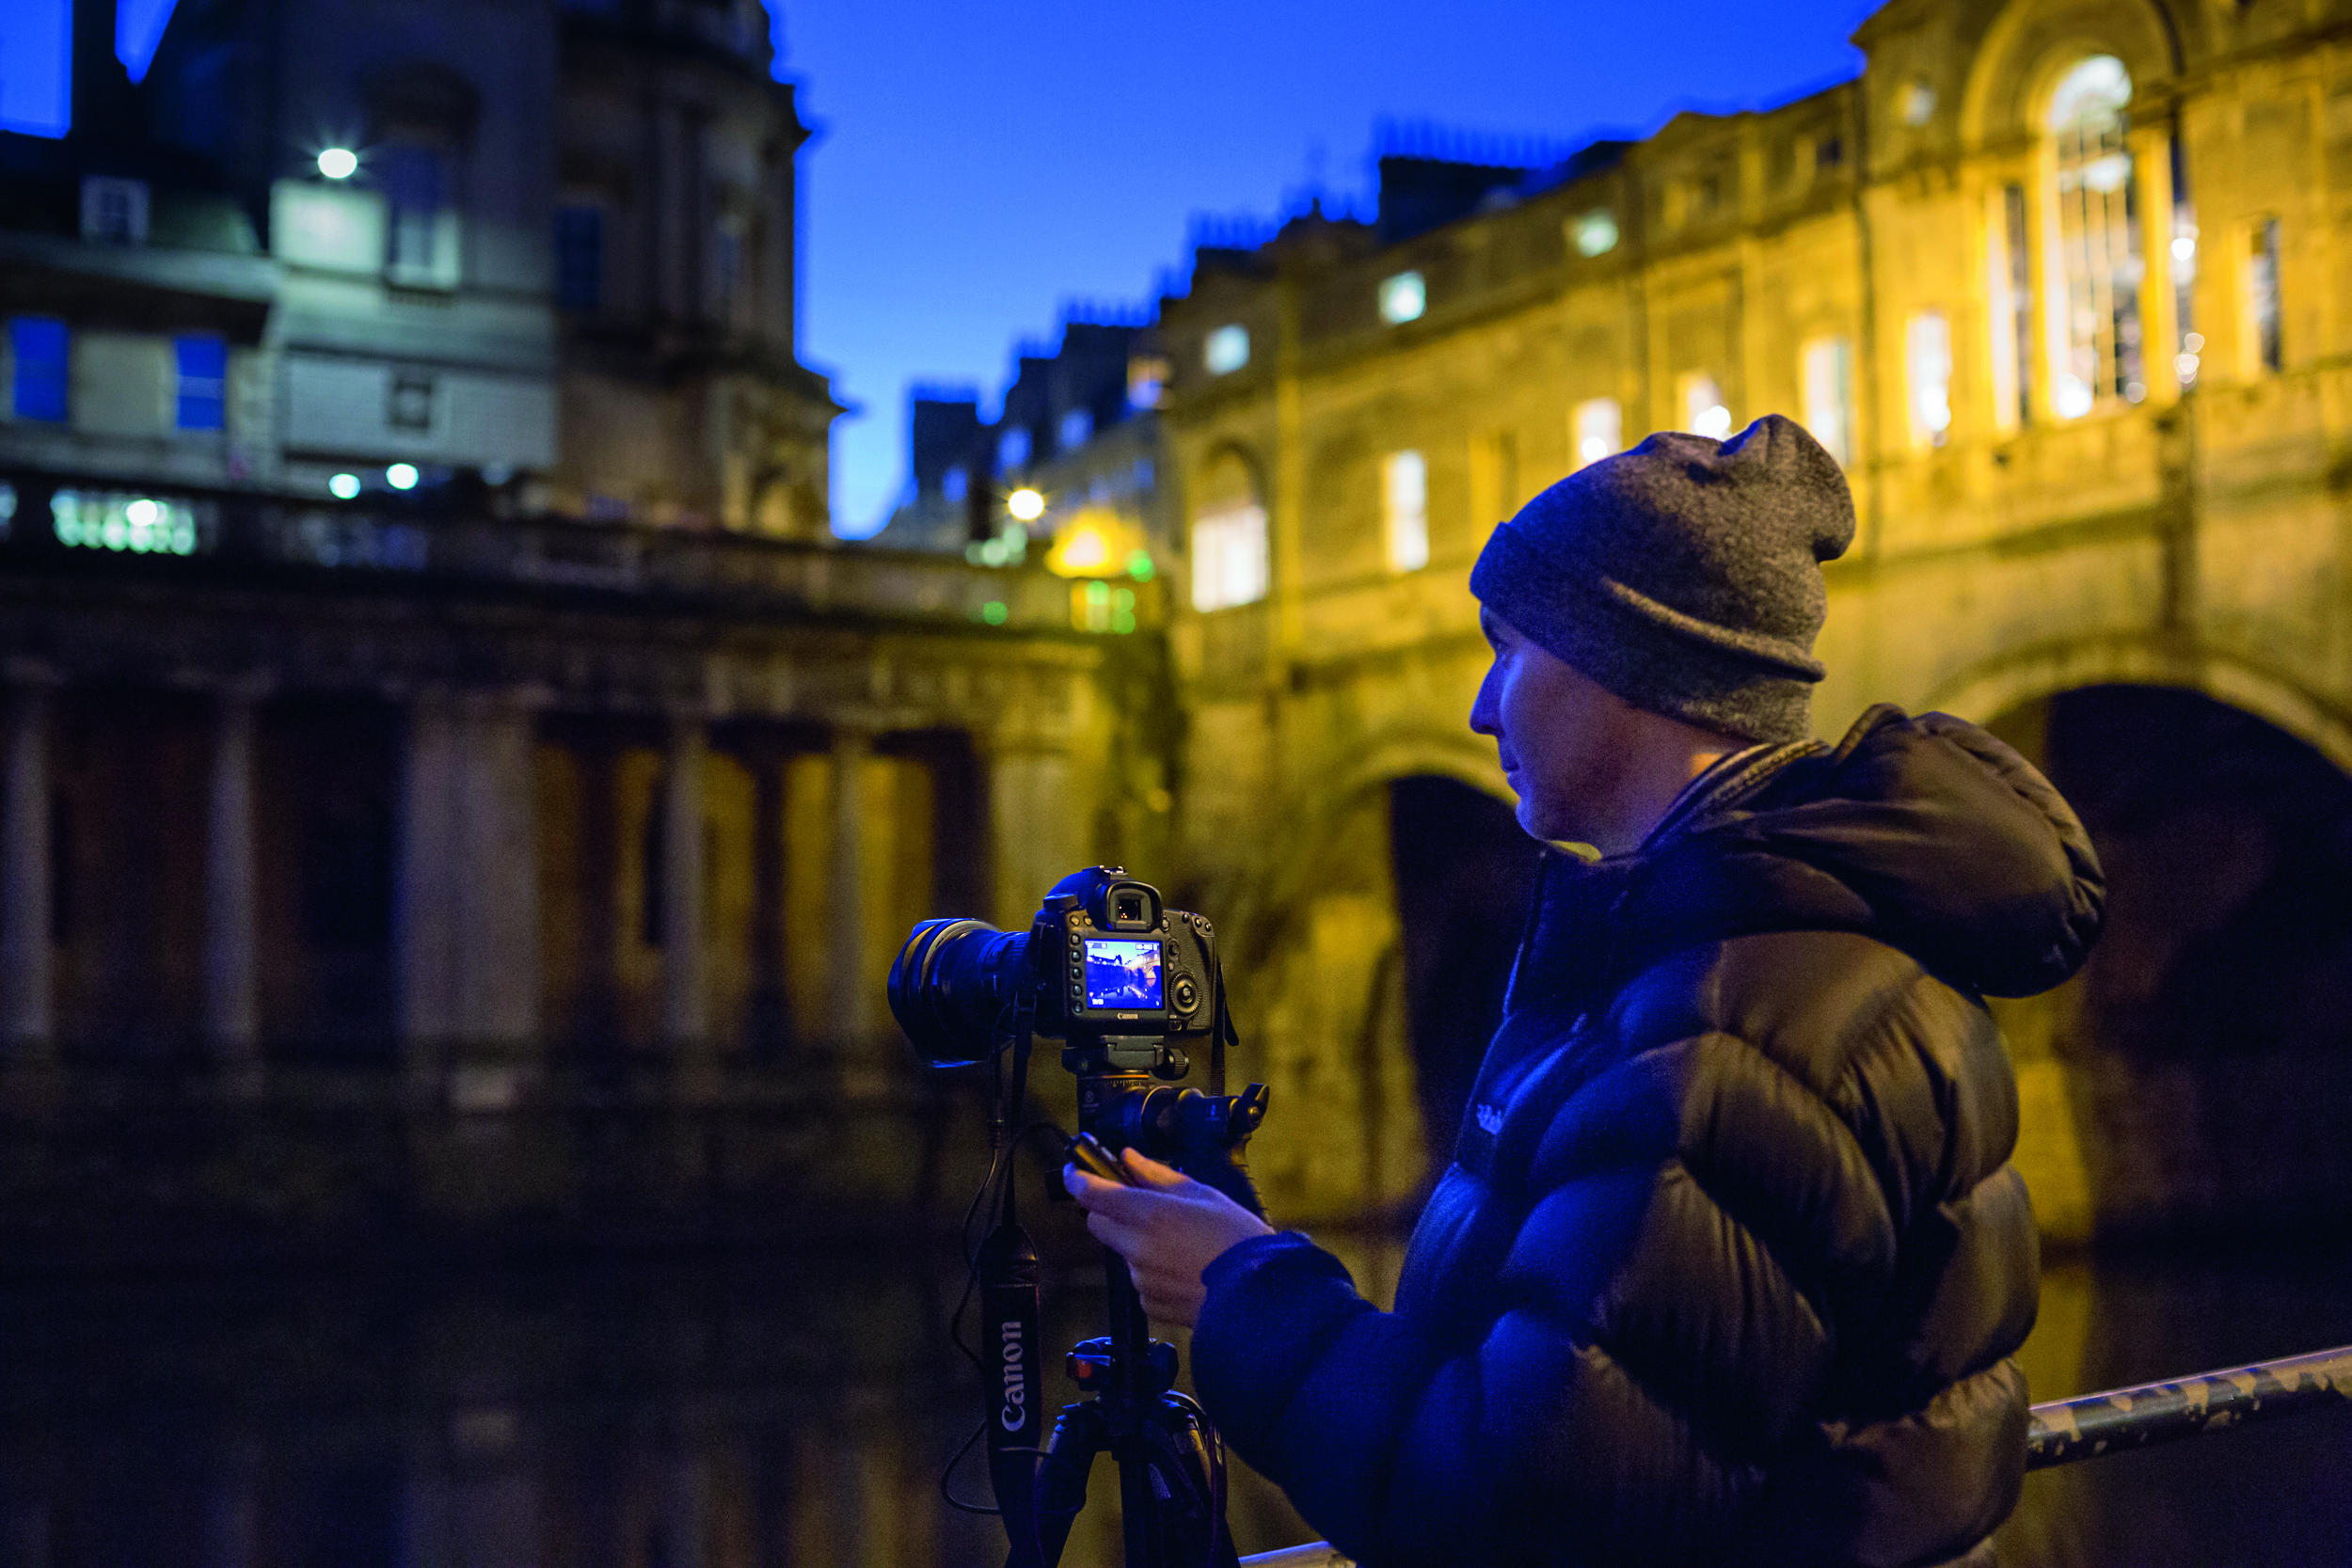
You’ll need a combination of a narrow aperture and slow shutter speed when shooting city scenes at night, so it’s best to use Manual mode
01 LONG EXPOSURES
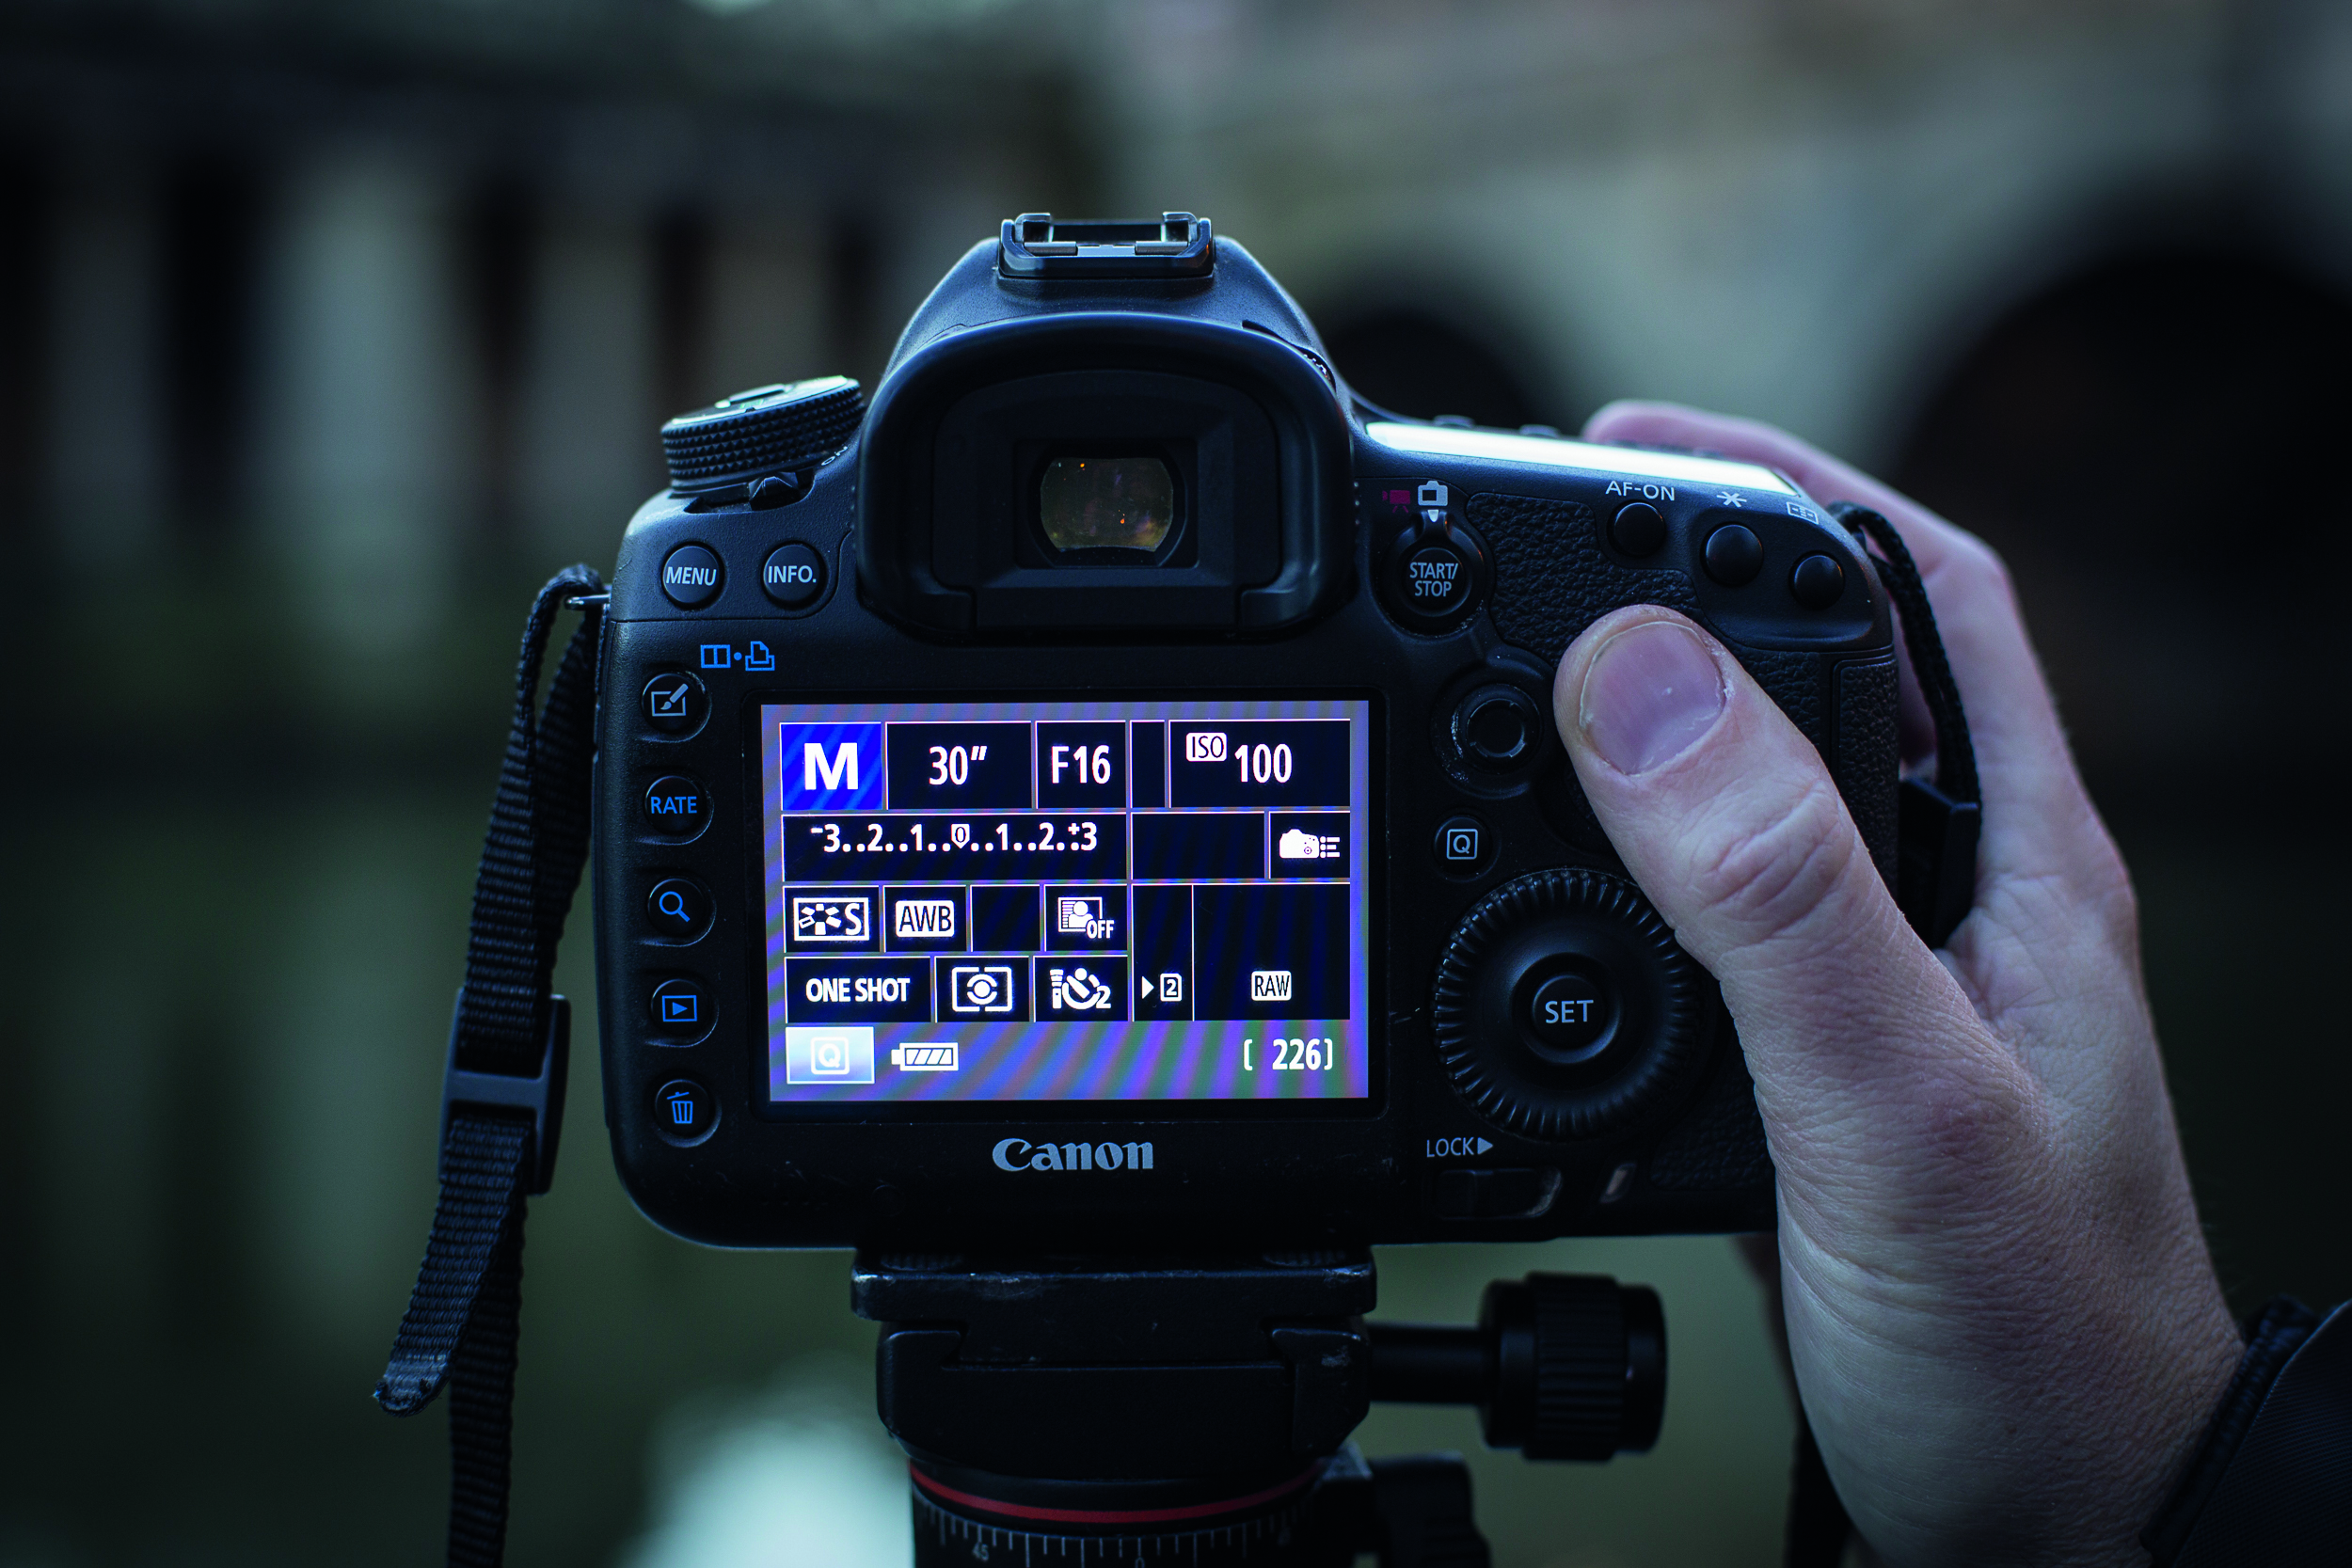
The darker it gets, the slower your shutter speed will be for a good exposure. At night this could be 10 to 30 secs, depending on light levels. By using Manual mode you can control shutter speed and aperture.
02 DEPTH OF FIELD
Use a narrow aperture (such as f/16) to capture a good depth of field through the scene. Going narrower will slow the shutter speed further, but at the potential cost of loss of sharpness at the edges of your frame.
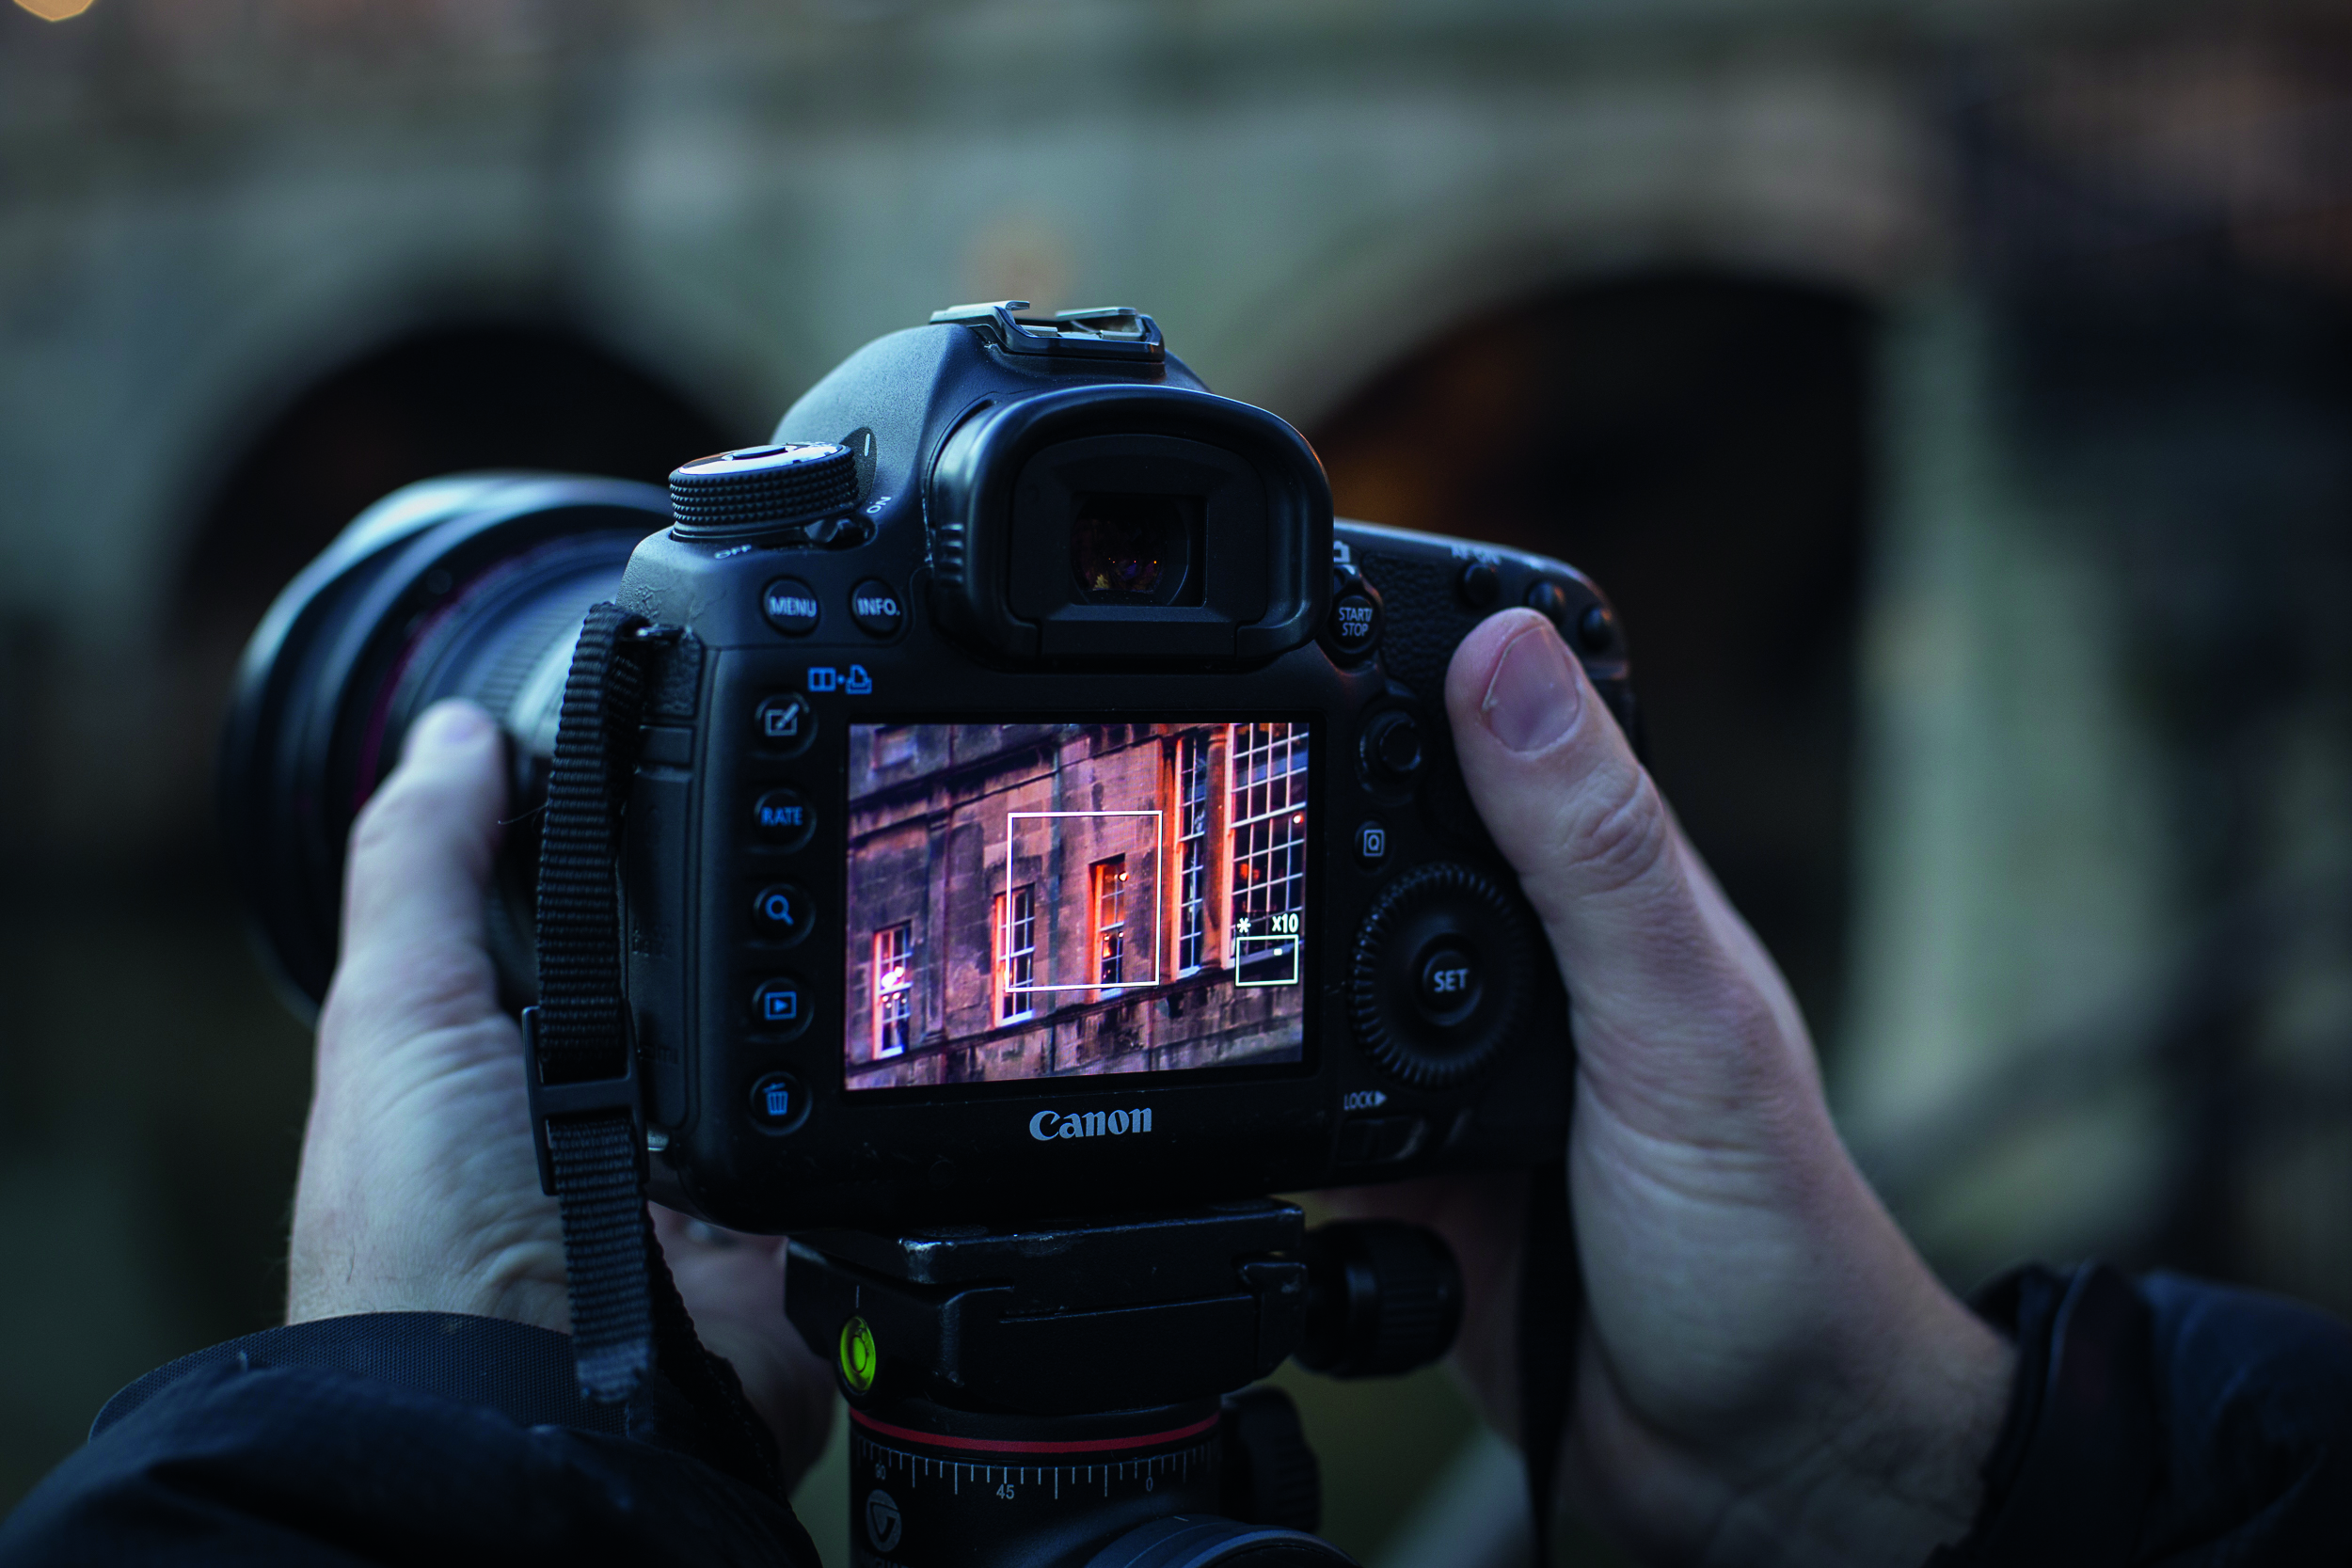
03 SEE IN THE DARK
Your camera may well struggle to autofocus when it’s dark. Use Live View’s Exposure Simulation mode so you can see your scene, then zoom in to 10x view and manually focus your lens for guaranteed sharp shots.
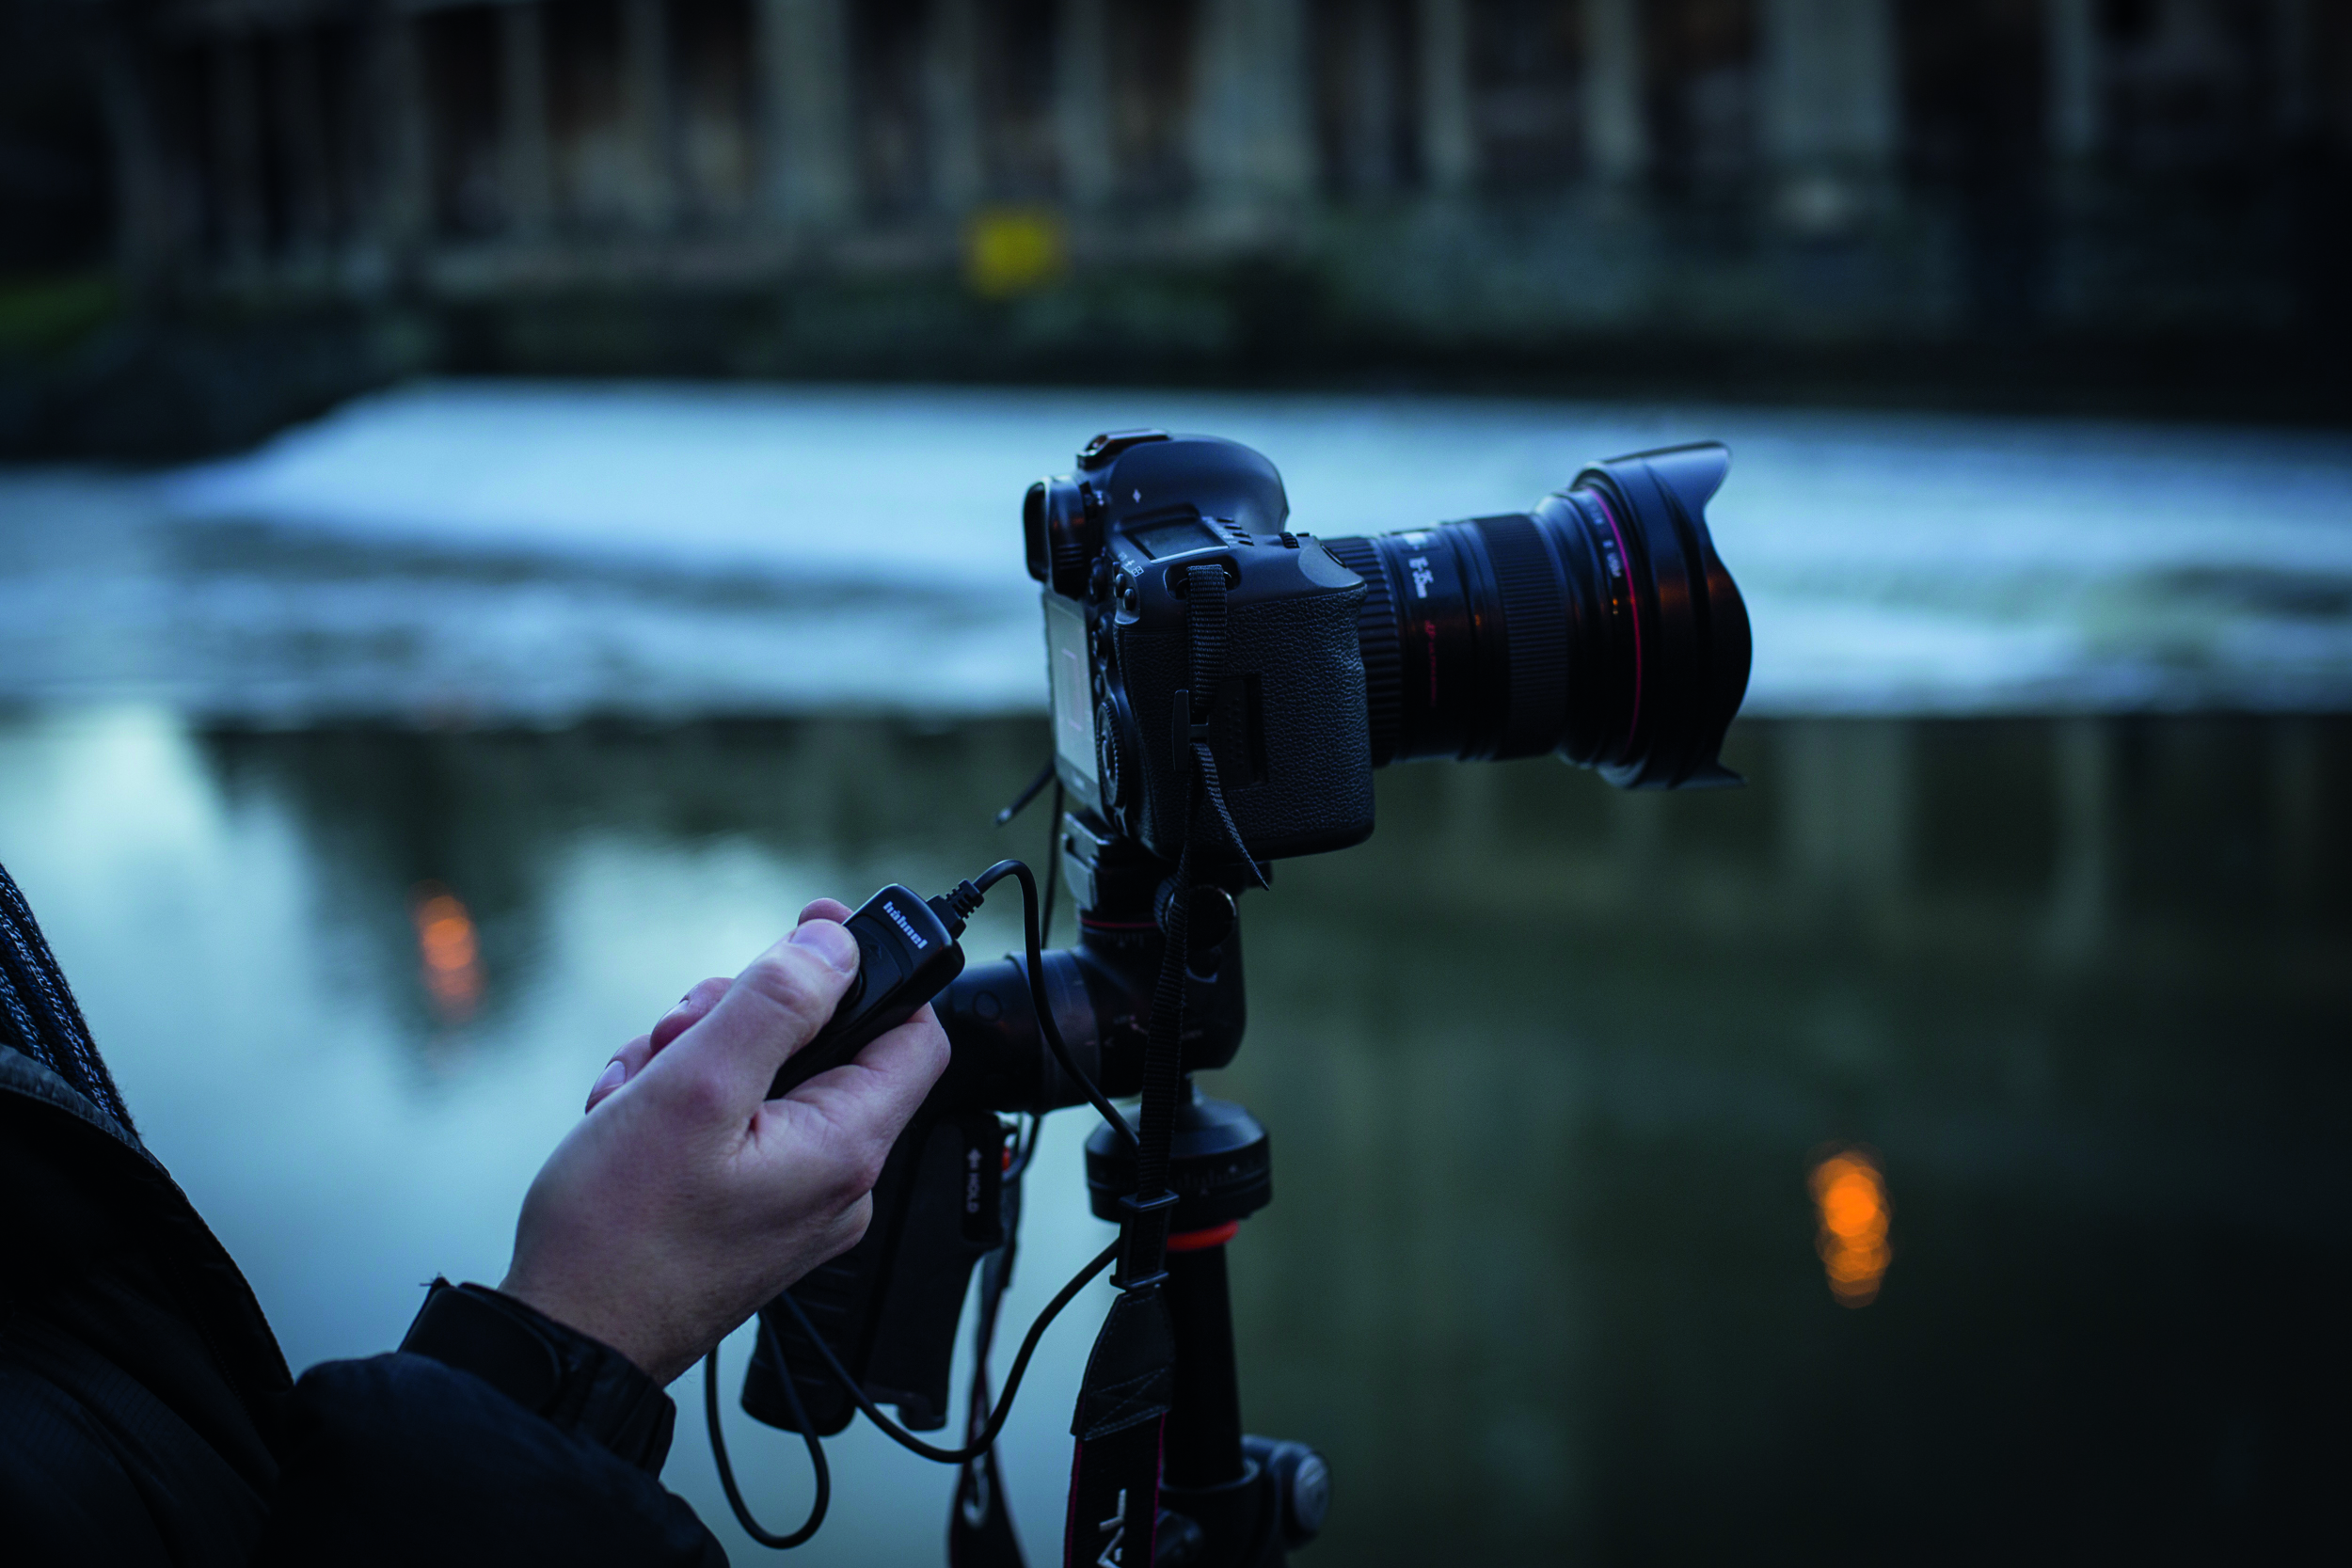
04 TRIPOD & REMOTE CONTROL
Use a sturdy tripod to keep your camera still during the long exposure for a pin-sharp shot, and a remote shutter release to fire the camera without potentially nudging it as you press the shutter button.
HOW TO SHOOT CITIES AT NIGHT
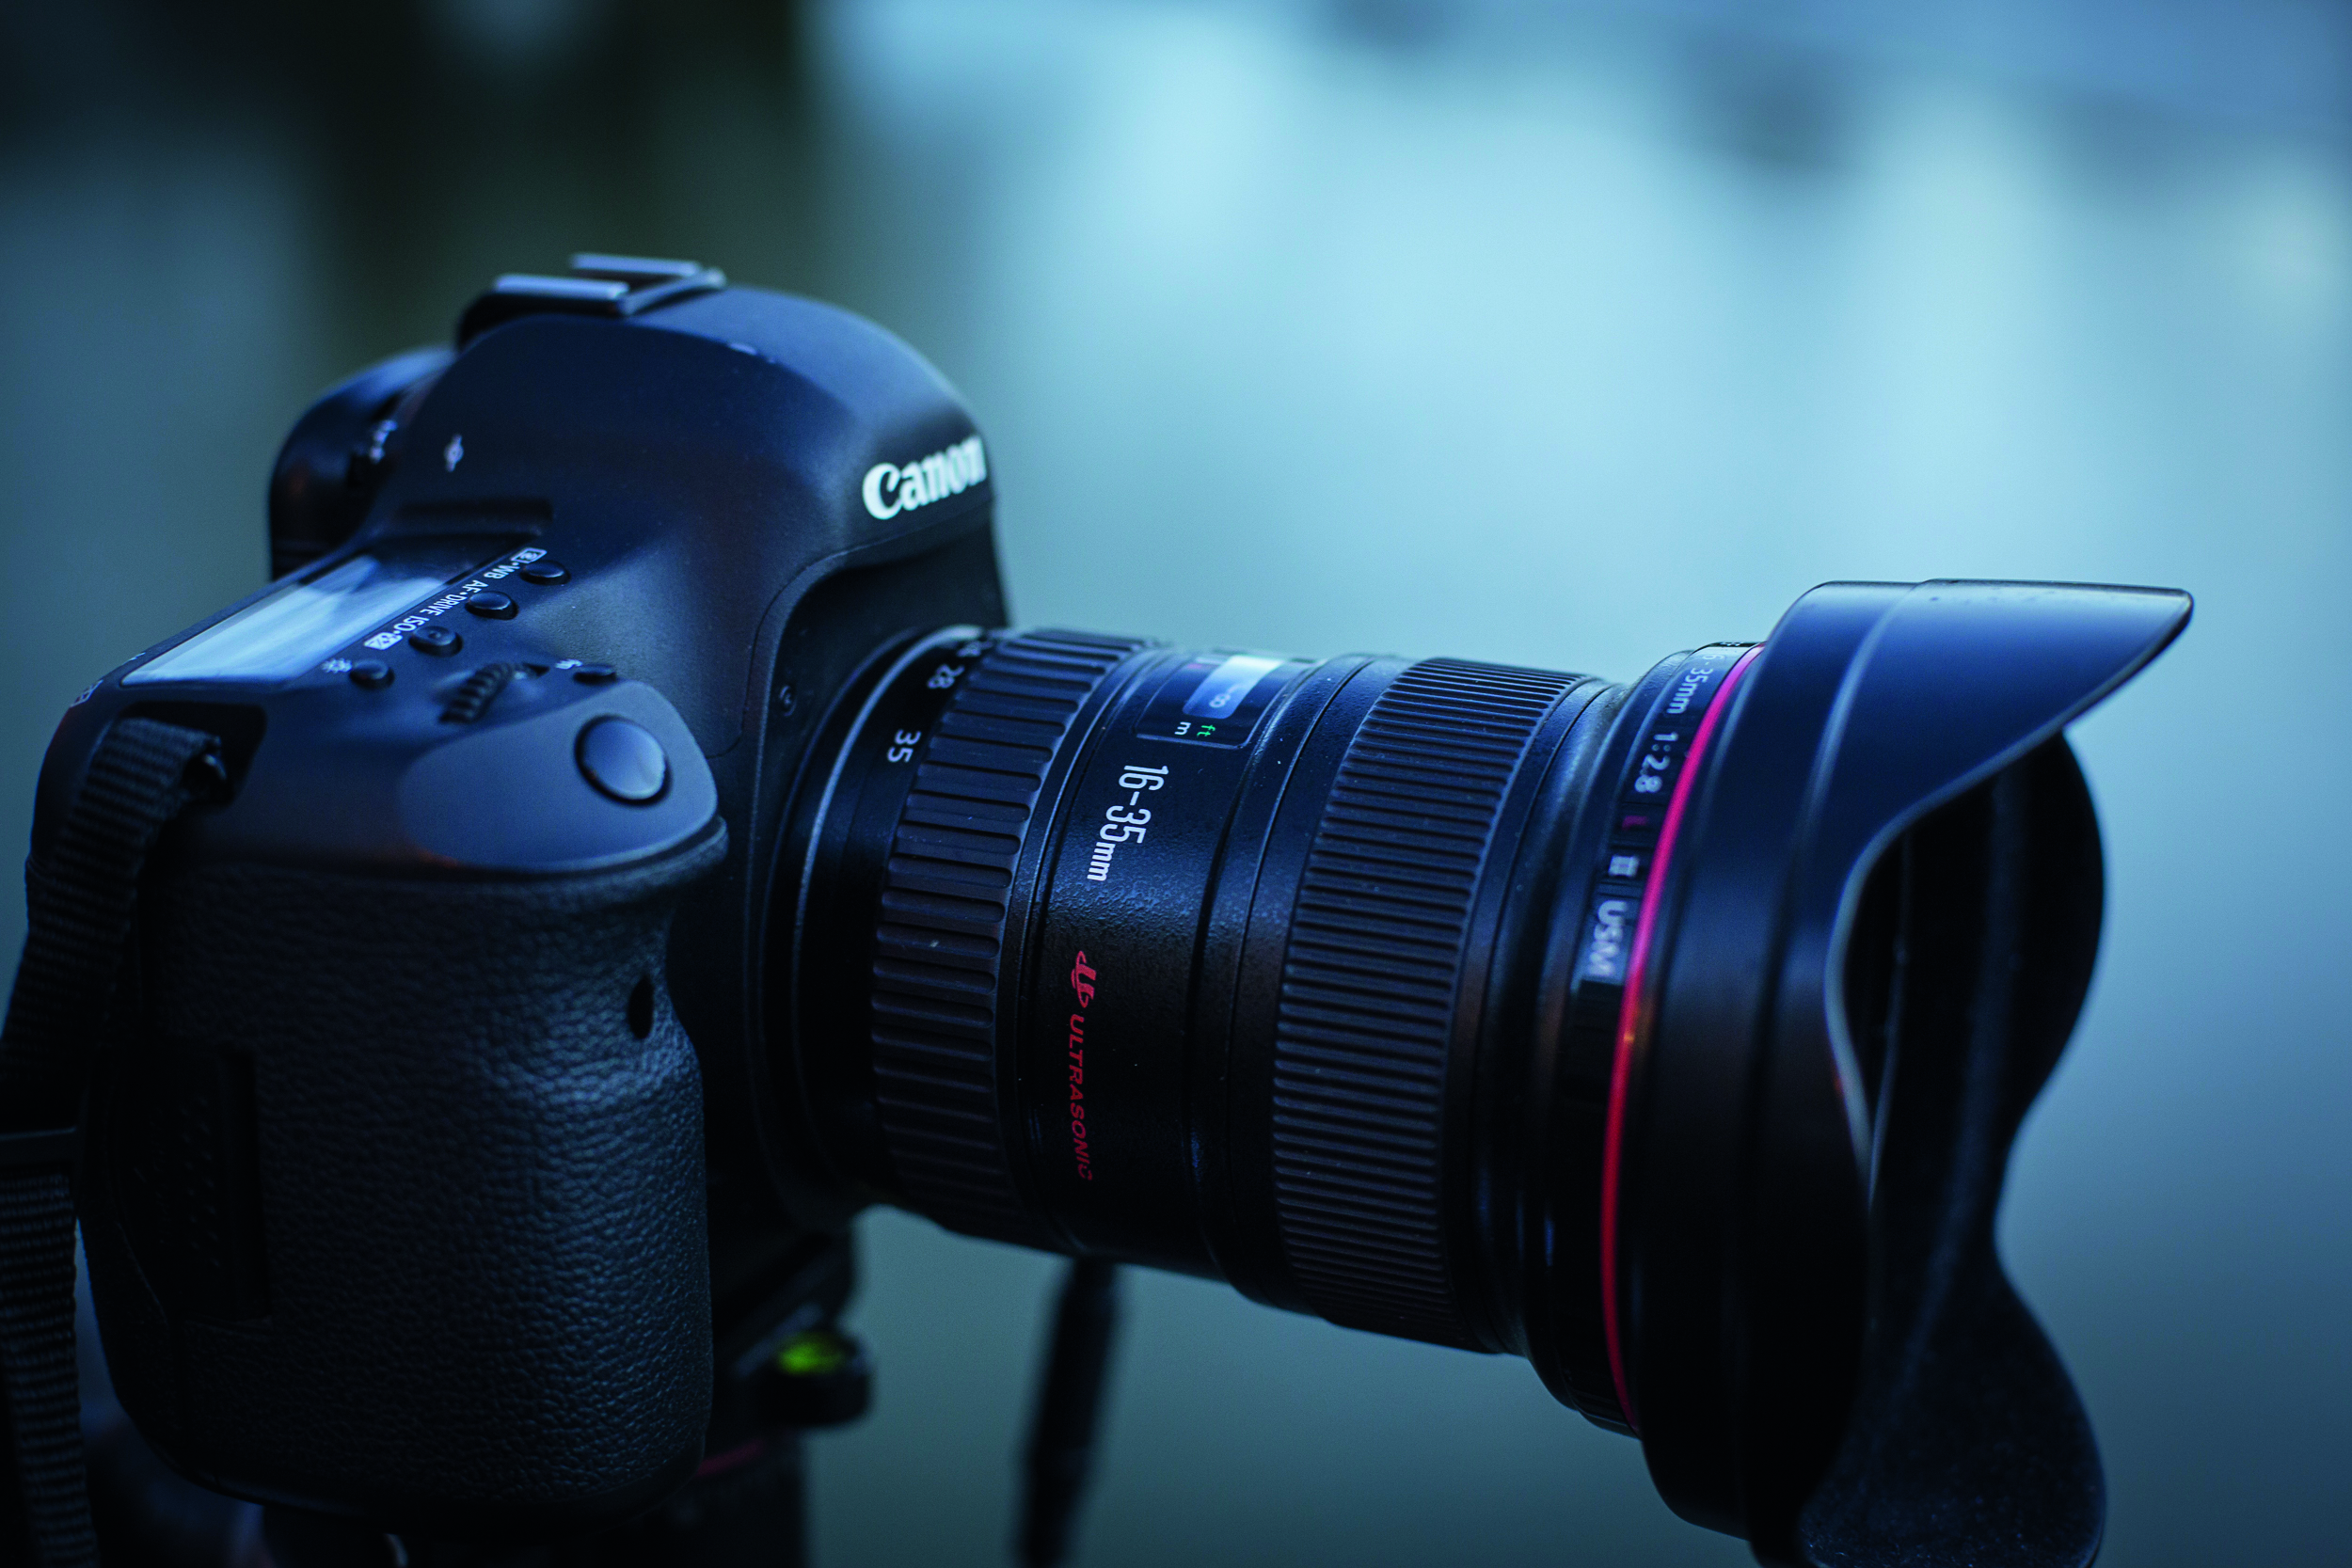
01 WIDE-ANGLE LENS
A wide-angle lens means you can include more of your city night scene in shot. For a camera with an APS-C sensor, such as the 750D, 80D or 7D Mk II, you’ll need a lens with a focal length of around 10-20mm. For full-frame, like the 6D and 5D series, 16-35mm is wide enough.

02 STAR BURST
As well as ensuring you are capturing a large depth of field for front-to-back sharpness, an added benefit of using a narrow aperture of around f/16 (see Step 4, above) is that diffraction caused by the aperture blades turns street lights into striking star bursts.
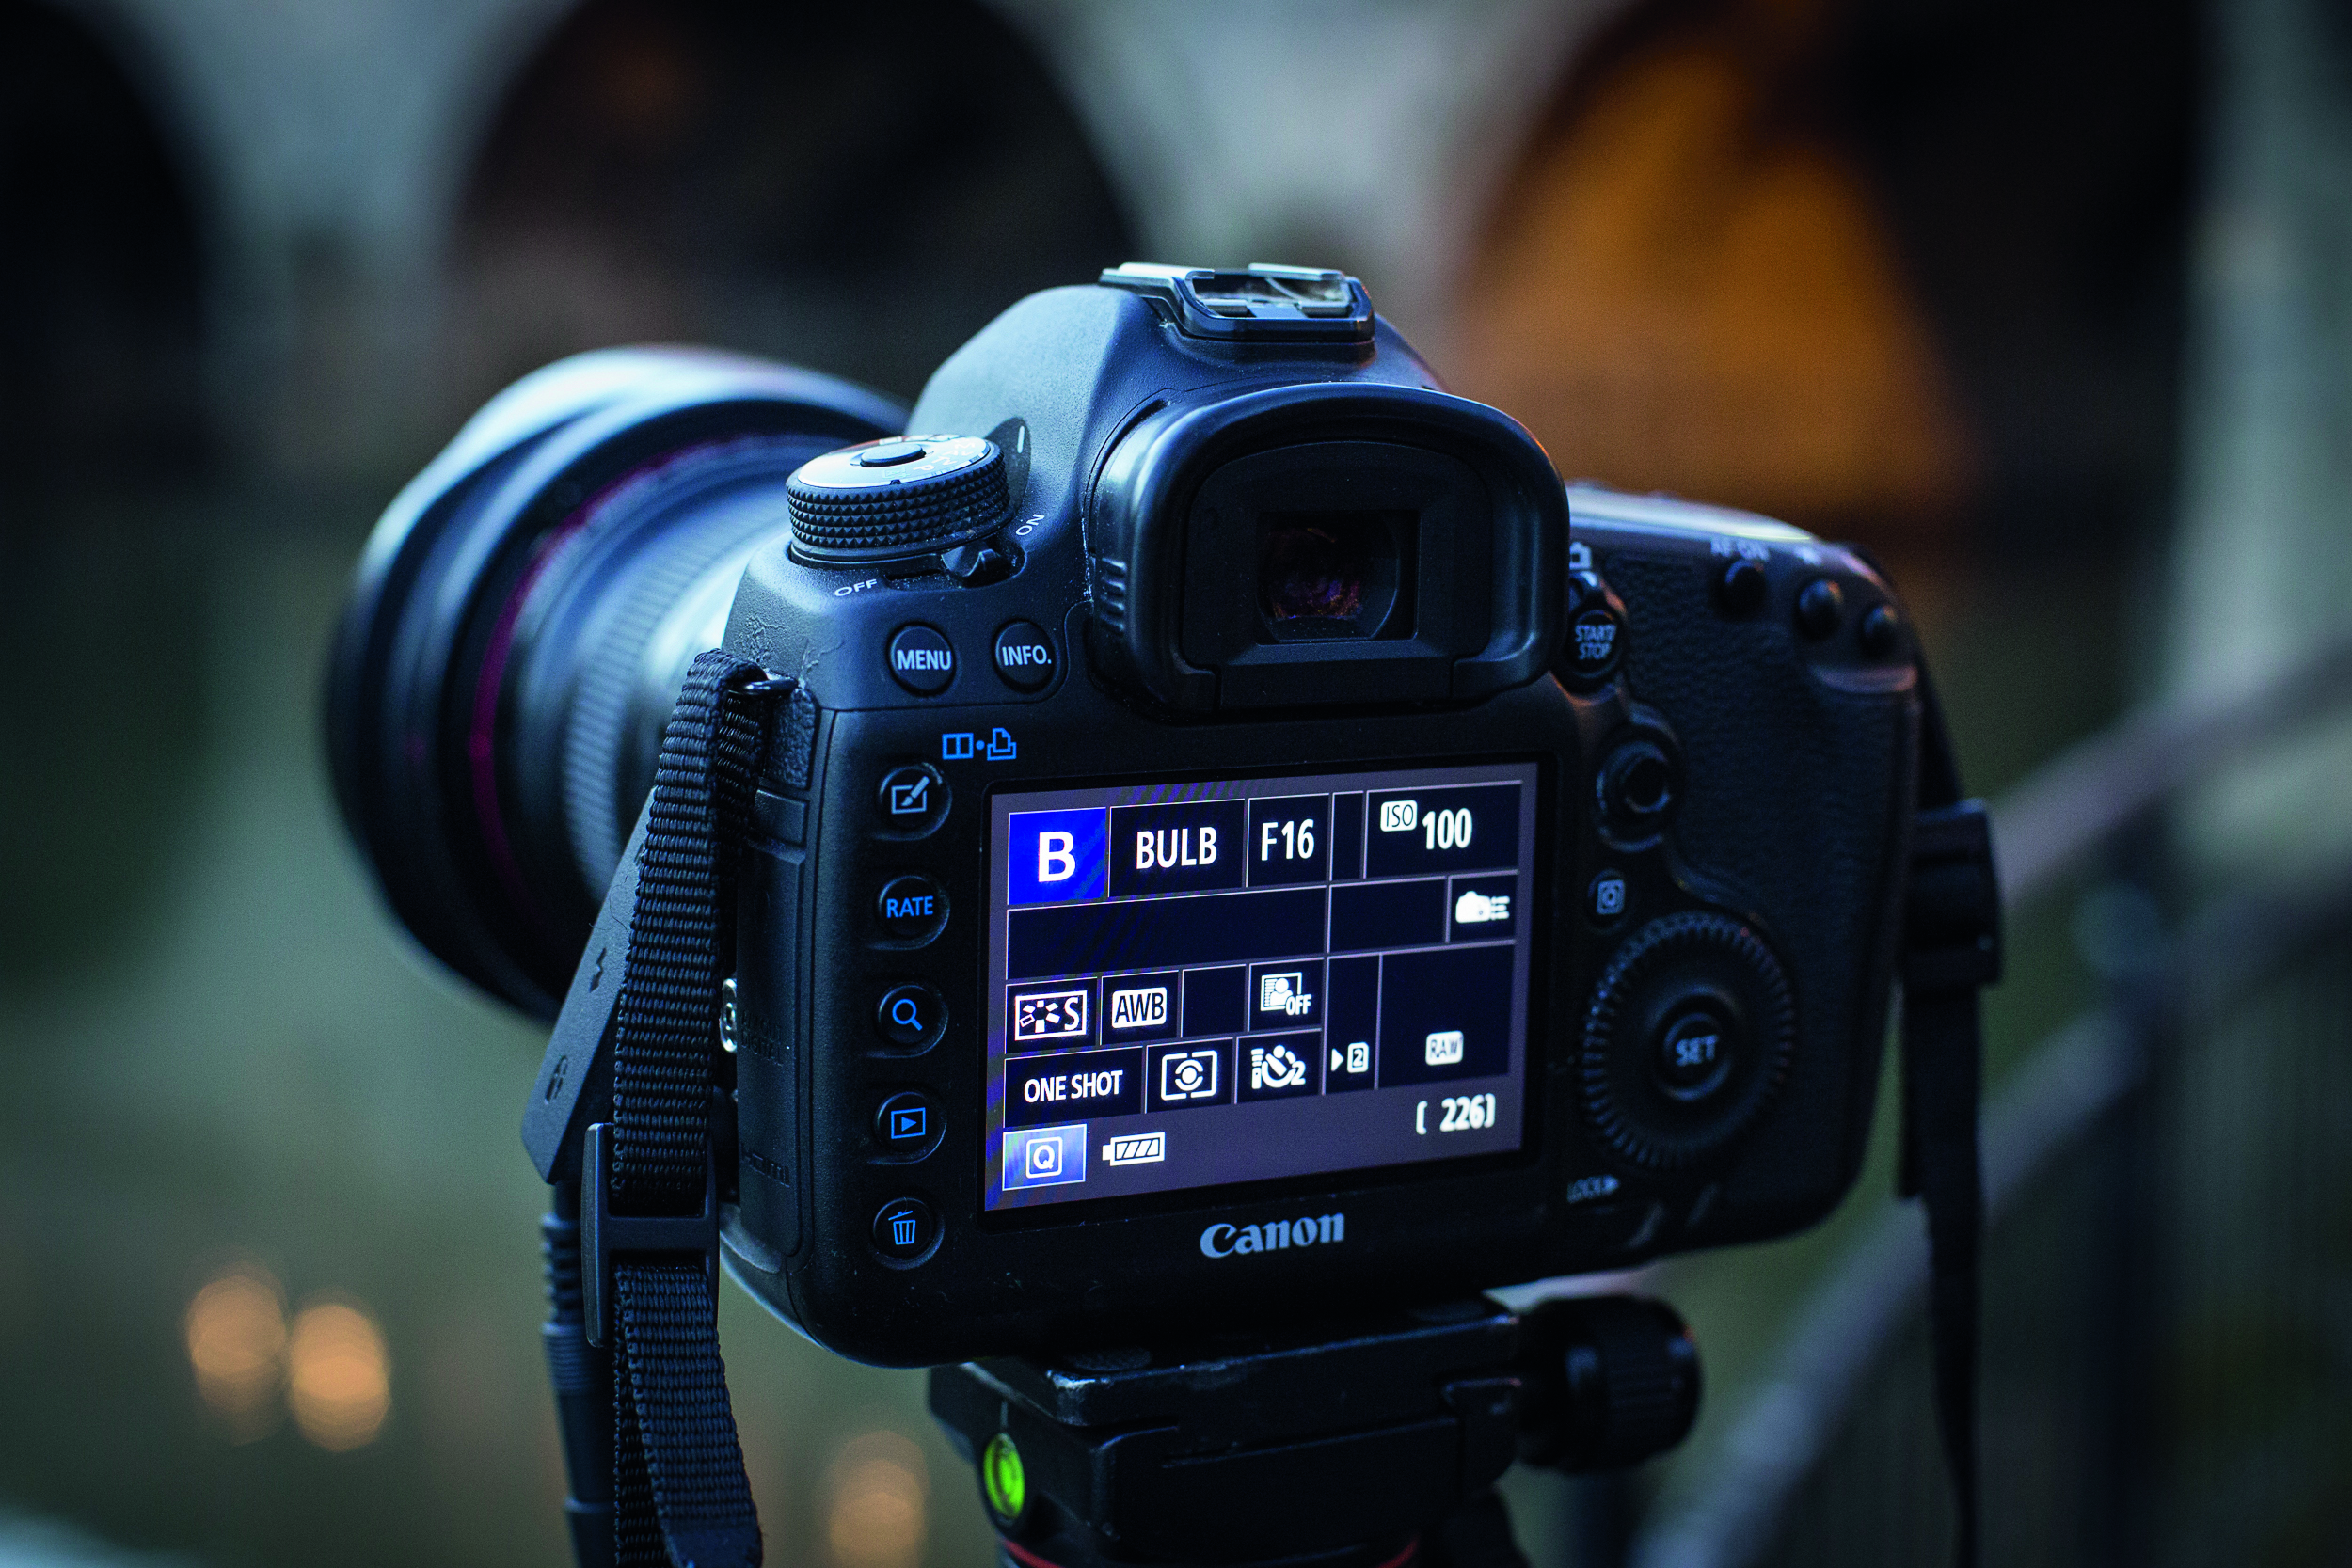
03 BULB MODE
If your city scene has very little light and you need an exposure time longer than 30 secs, you’ll need to use Bulb mode (B on your Mode dial, or in Manual mode dial ‘past’ 30 secs, depending on your camera) so you can keep the shutter open for as long as you like.
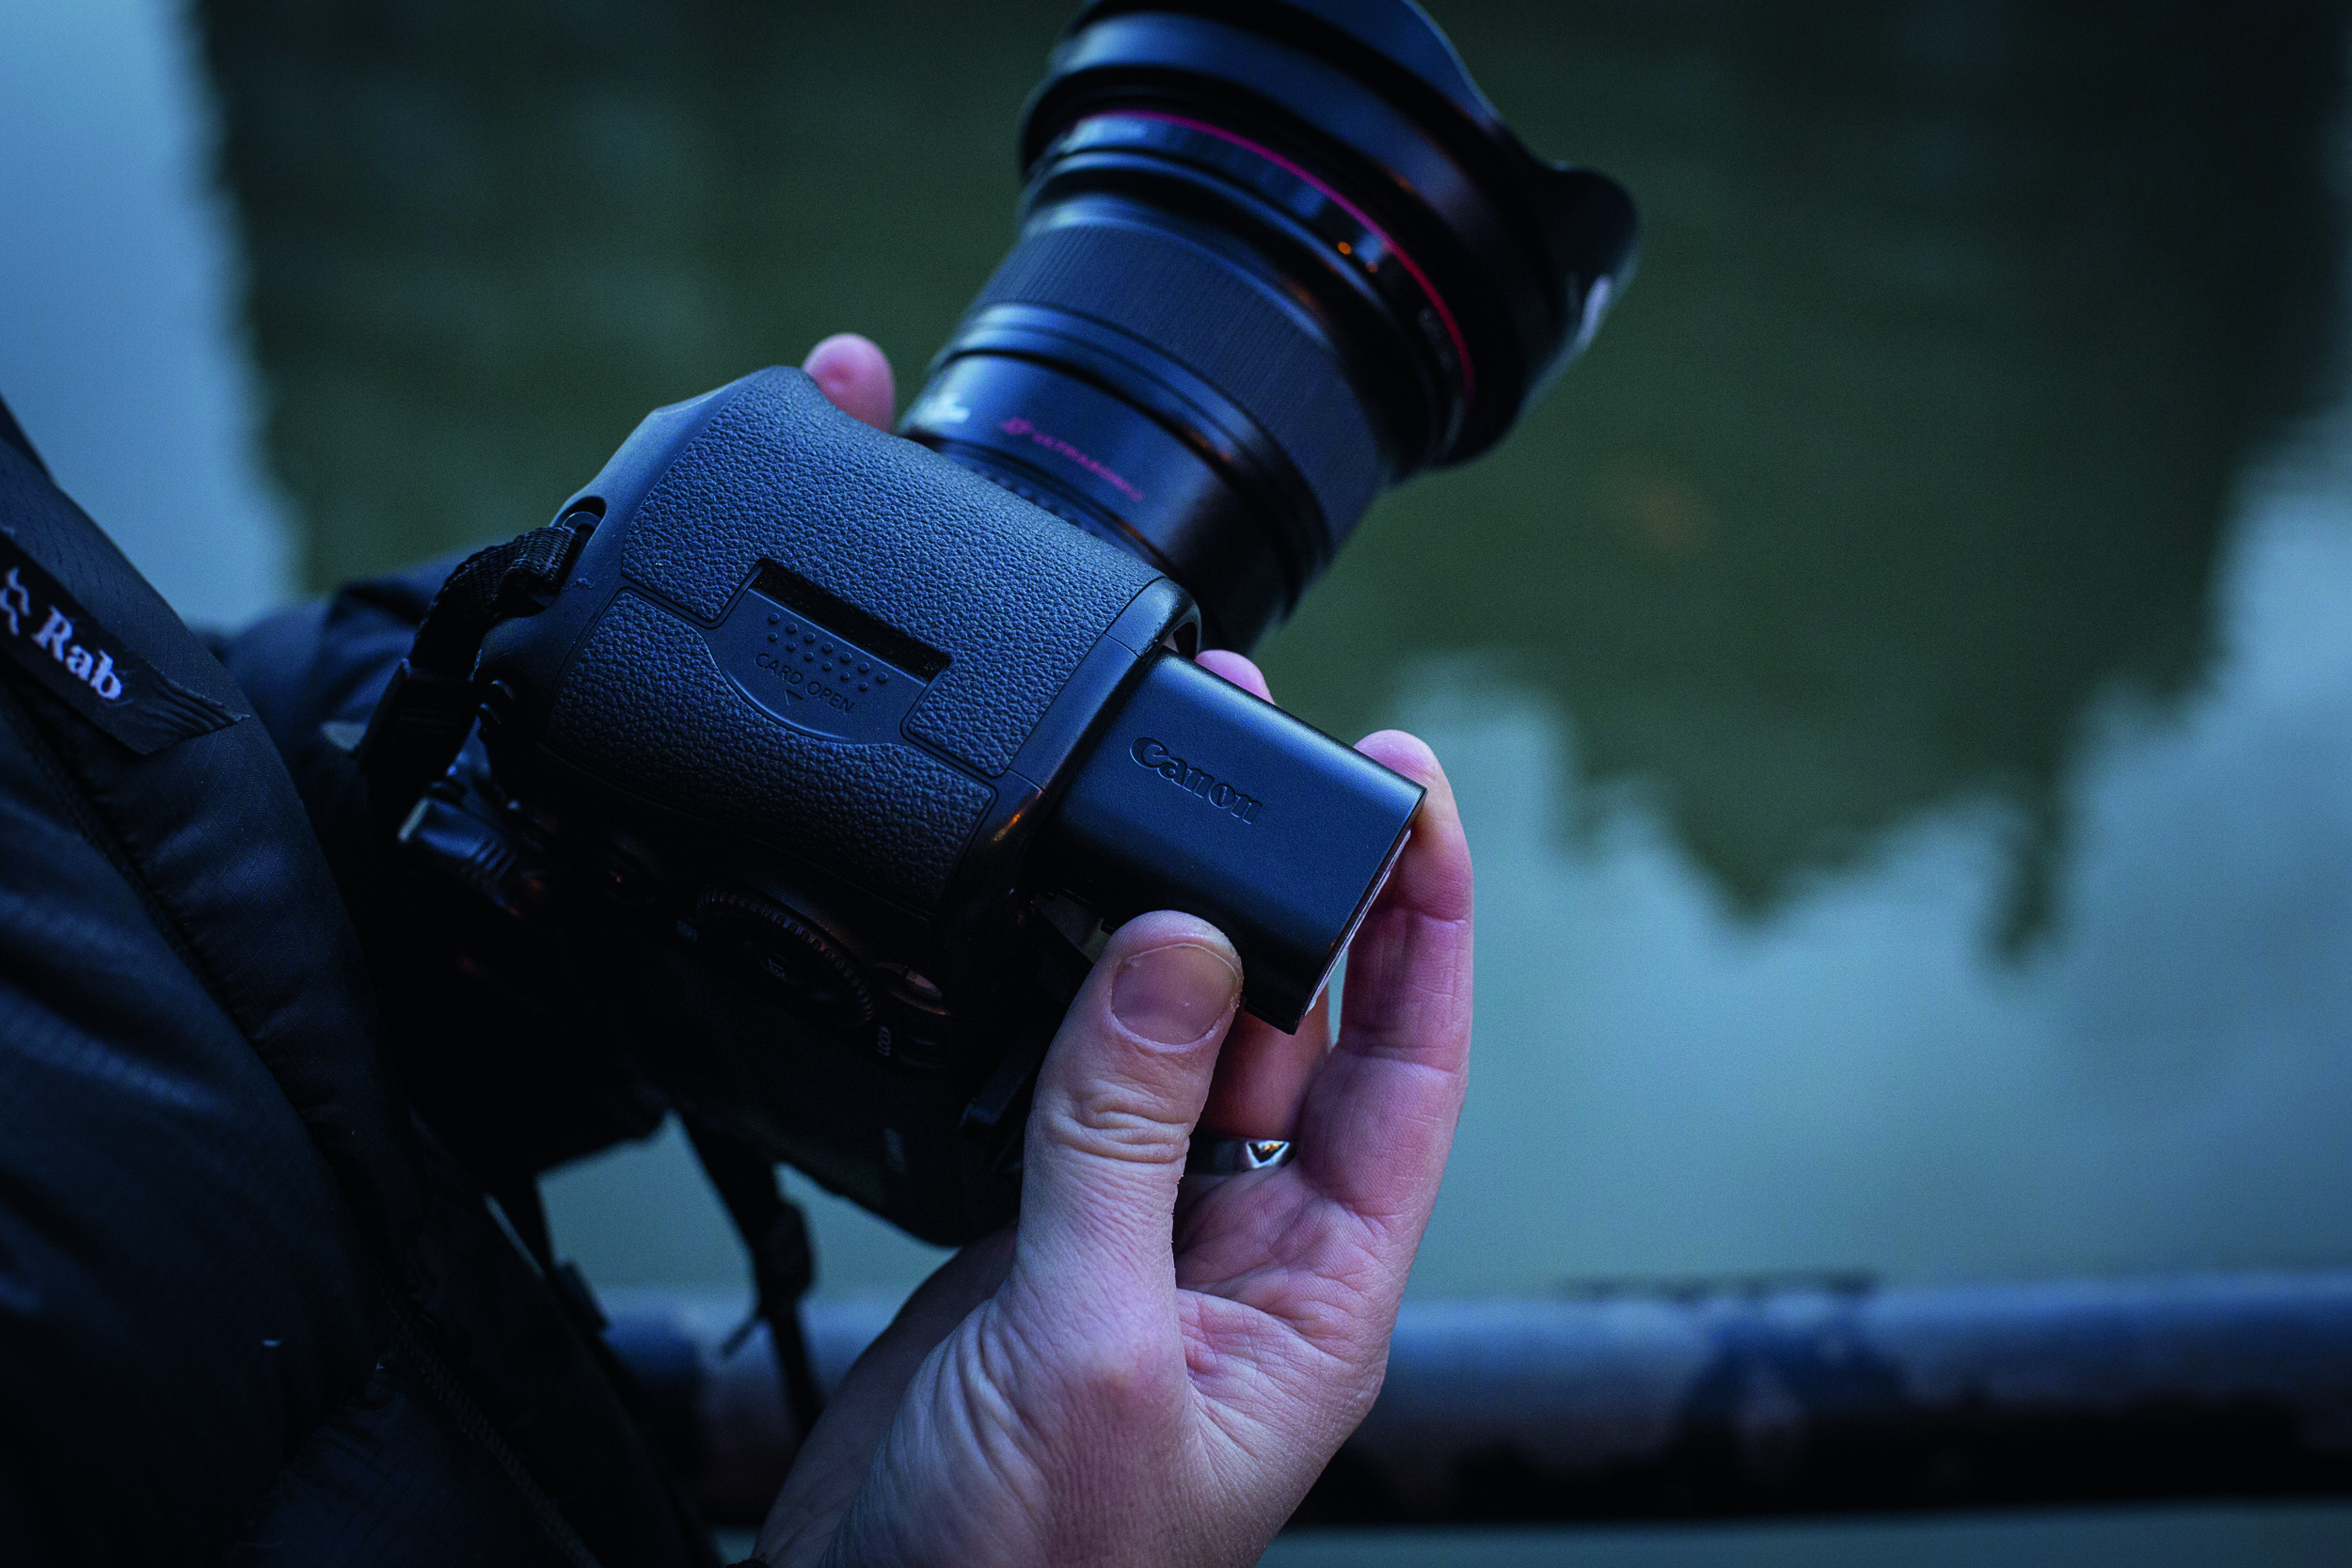
04 BATTERY POWER
Batteries run out of juice much more quickly in cold conditions, and Live View drains power too. Keep a spare or two in a warm inside coat pocket, ready to go when needed. You may find that the cold dead battery has some life left once you warm it back up again.
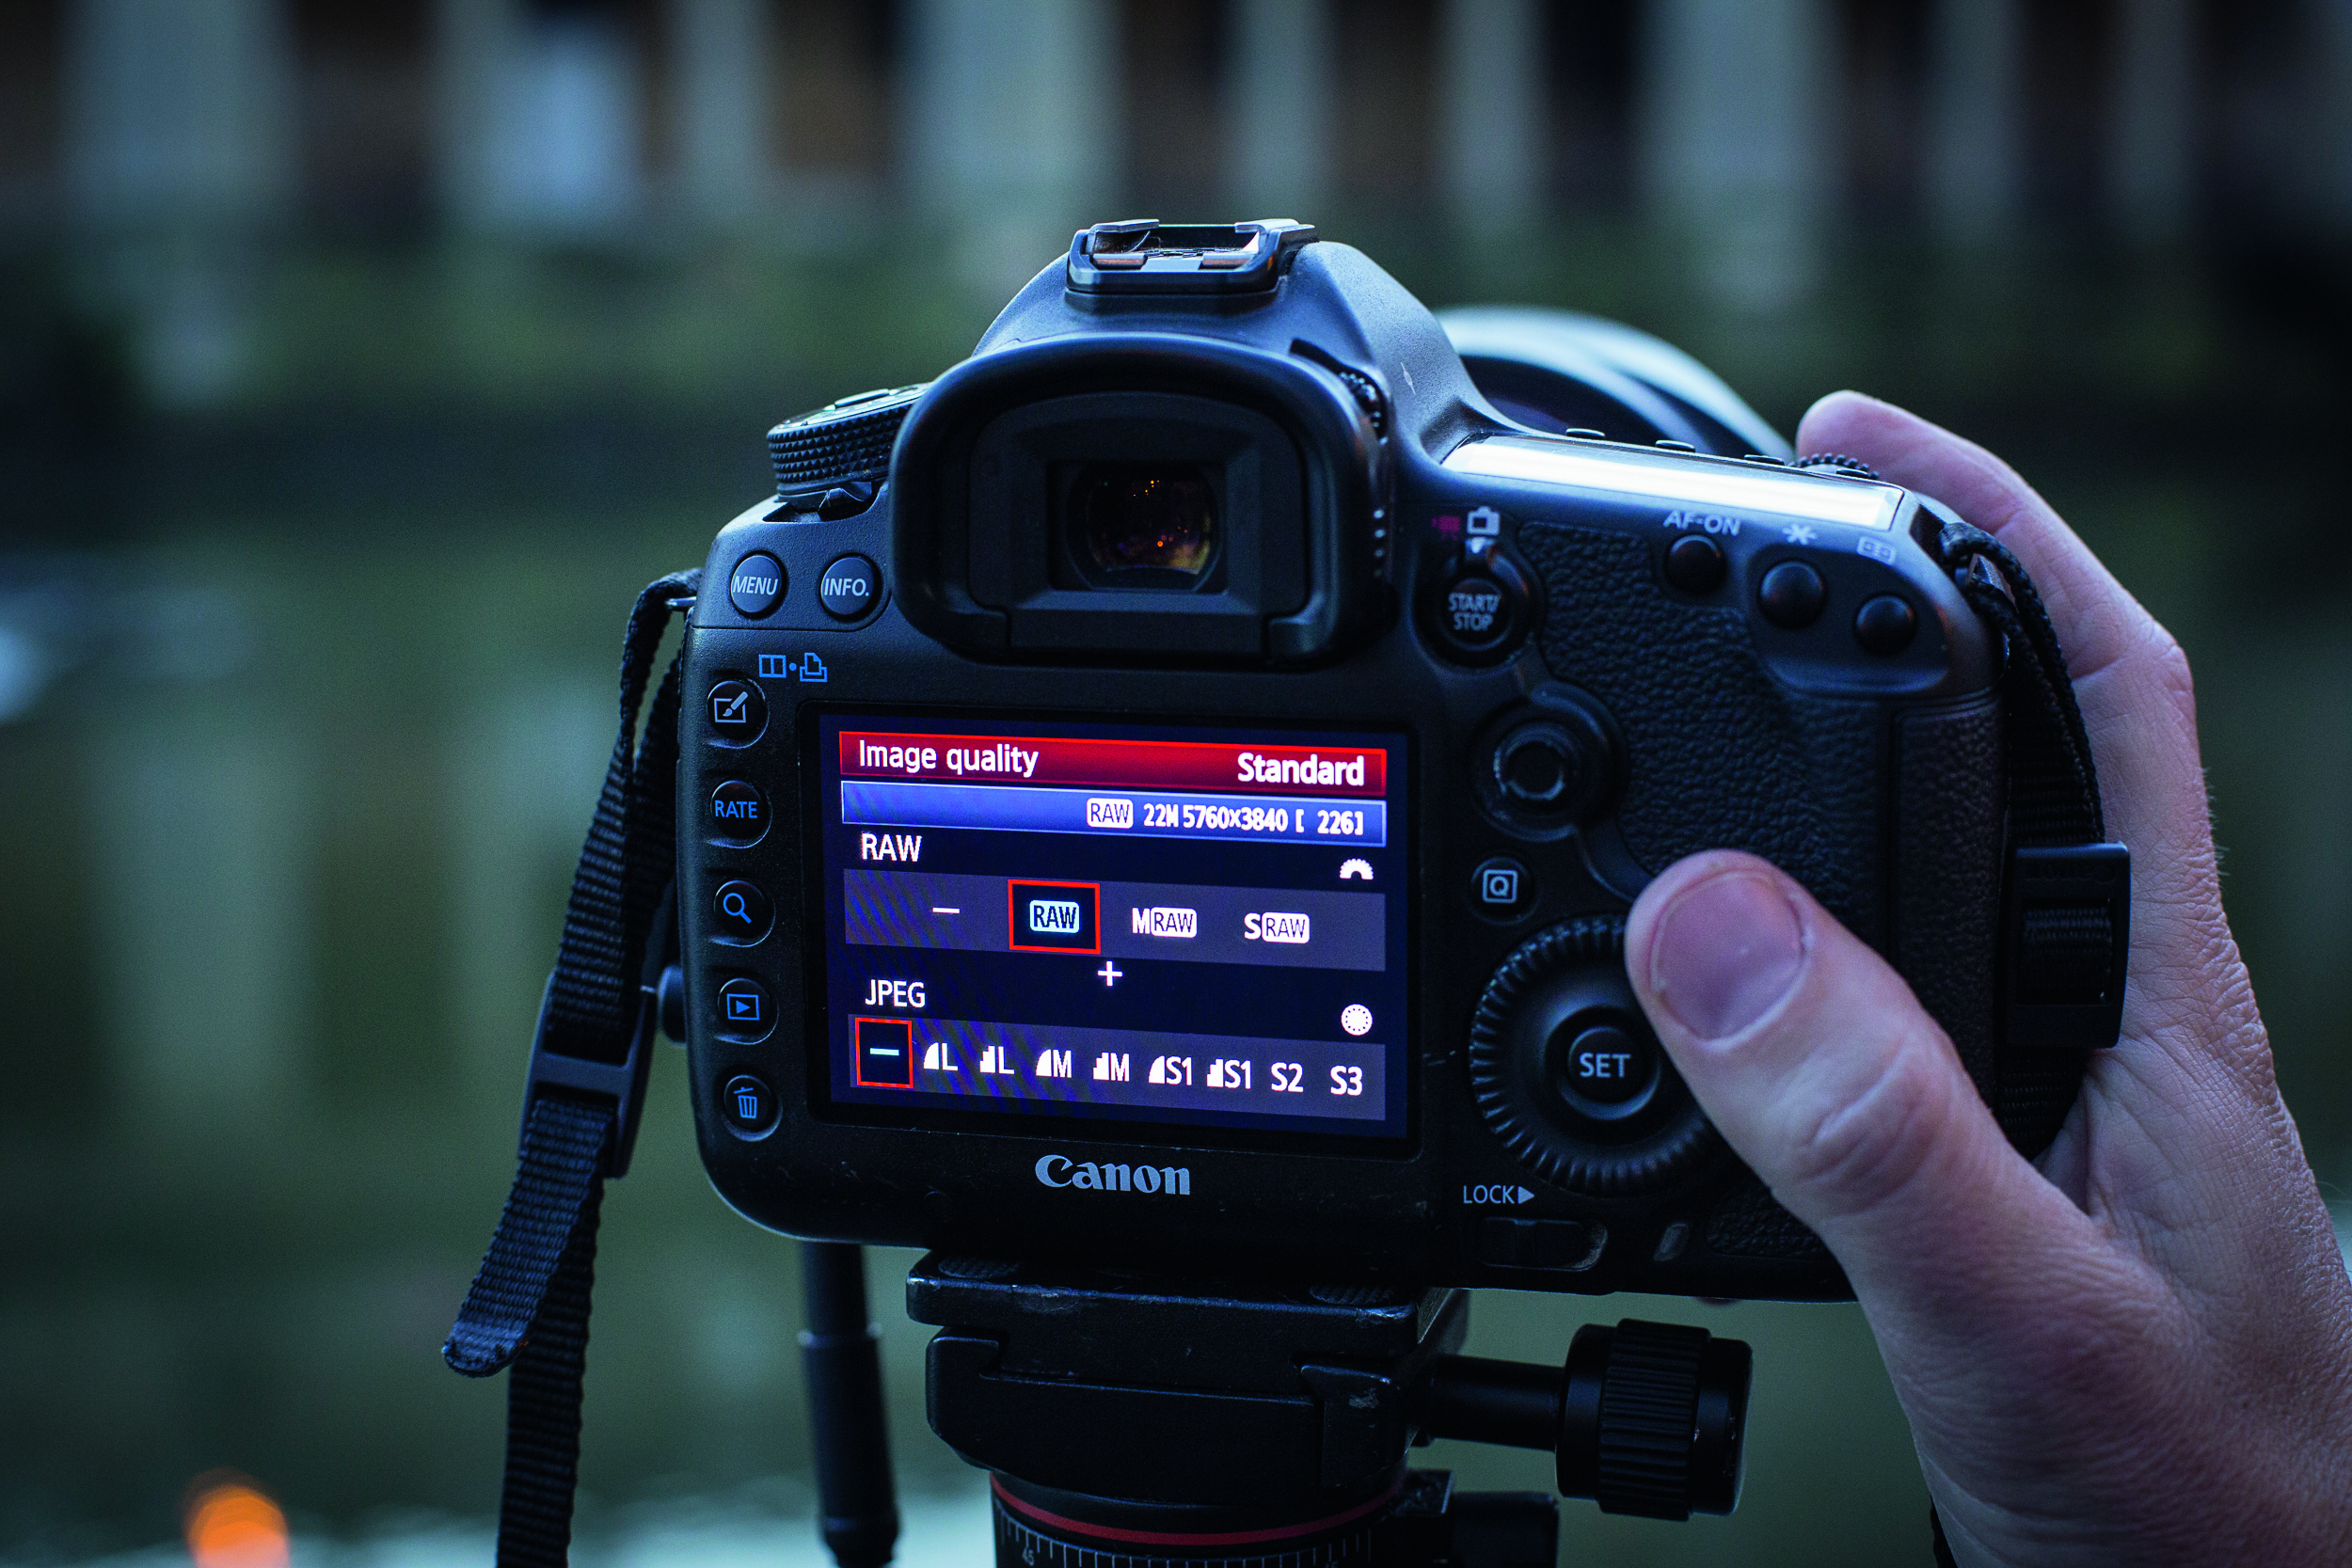
05 RAW POWER
It’s usually best to shoot with the Raw image quality setting on your camera regardless of what you’re shooting – but this goes double for when shooting night scenes, so you can reveal more detail in the shadows, as well as adjust tones, colours and white balance easily.
PHOTOSHOP TIPS: Boost your image
Once you’ve captured the city at night, now enhance the Raw file in Photoshop
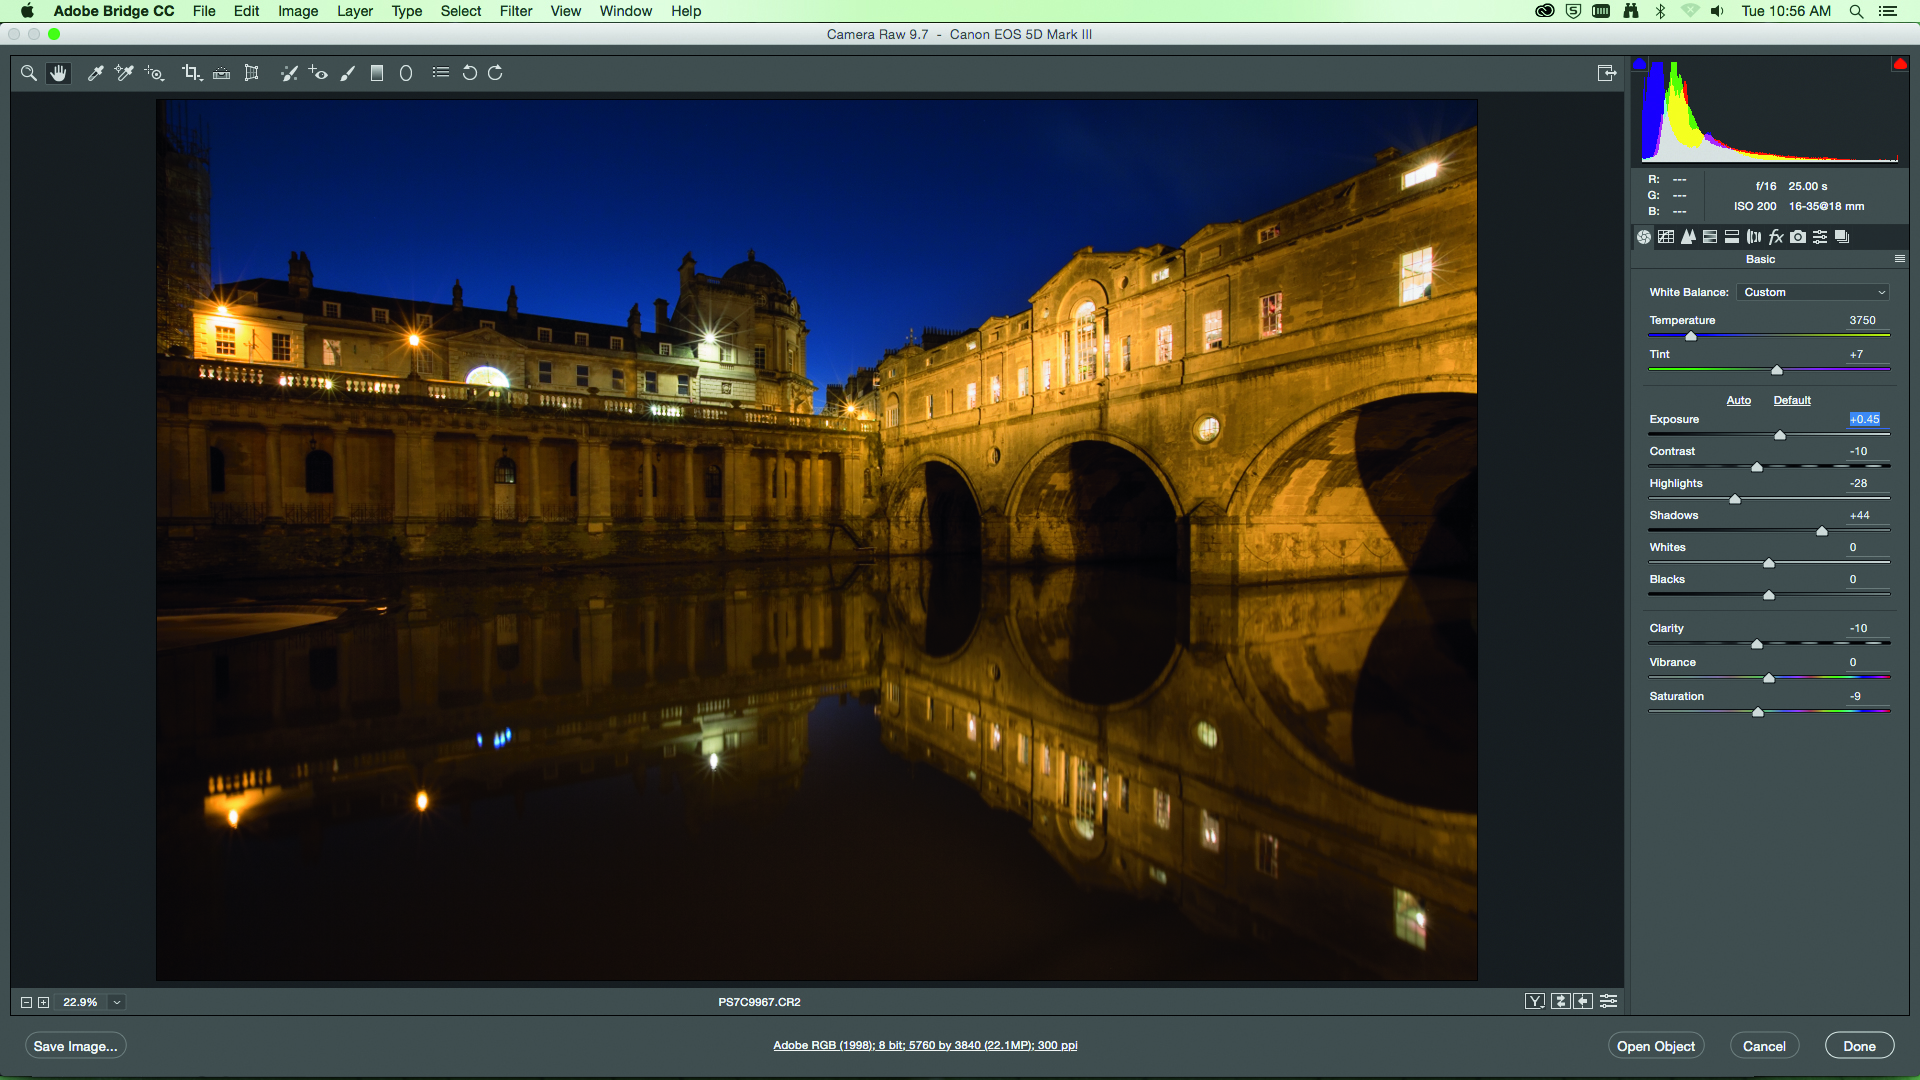
01 PROCESS YOUR RAW
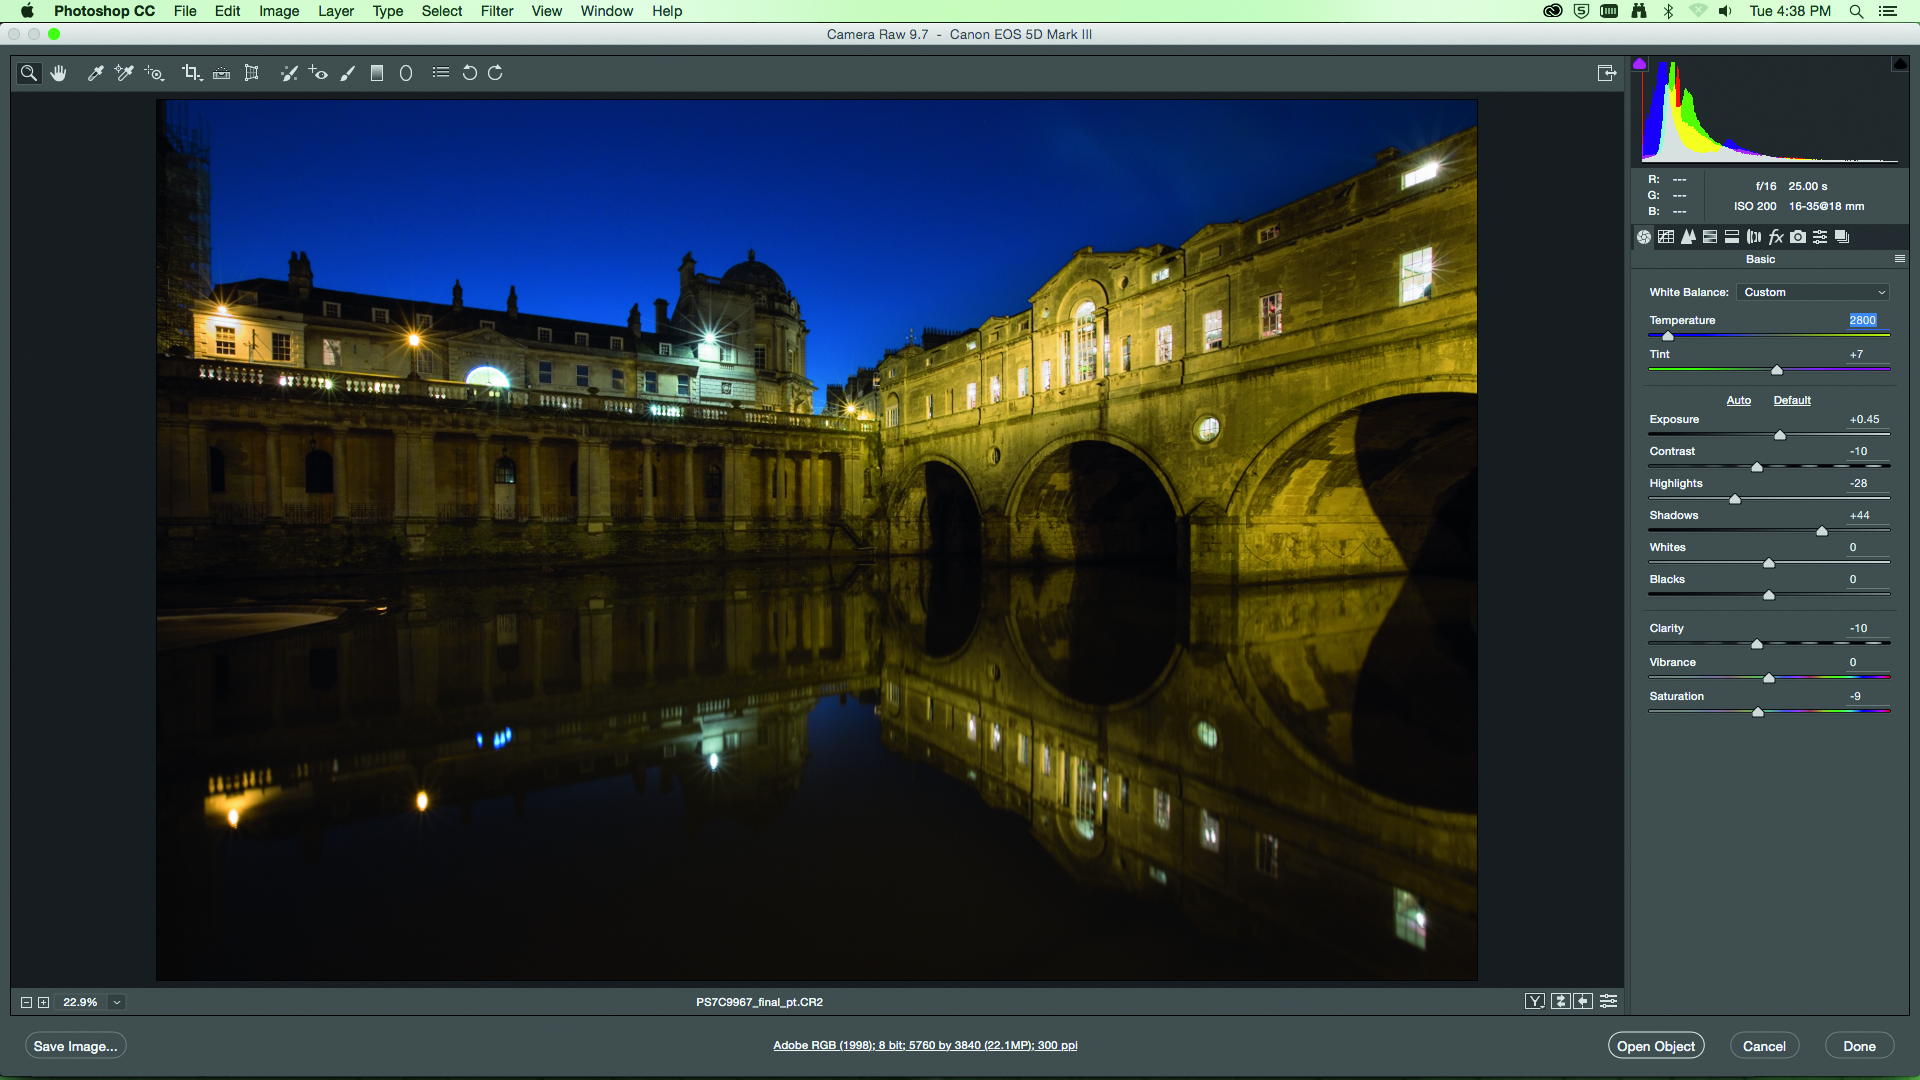
We opened our Raw image in Adobe Camera Raw. From here quickly adjusted our Exposure (we set it to 0.45), Contrast (reduced to -10 as it’s already a high-contrast scene), boosted Shadows to +44 and reduced Highlights to -28.
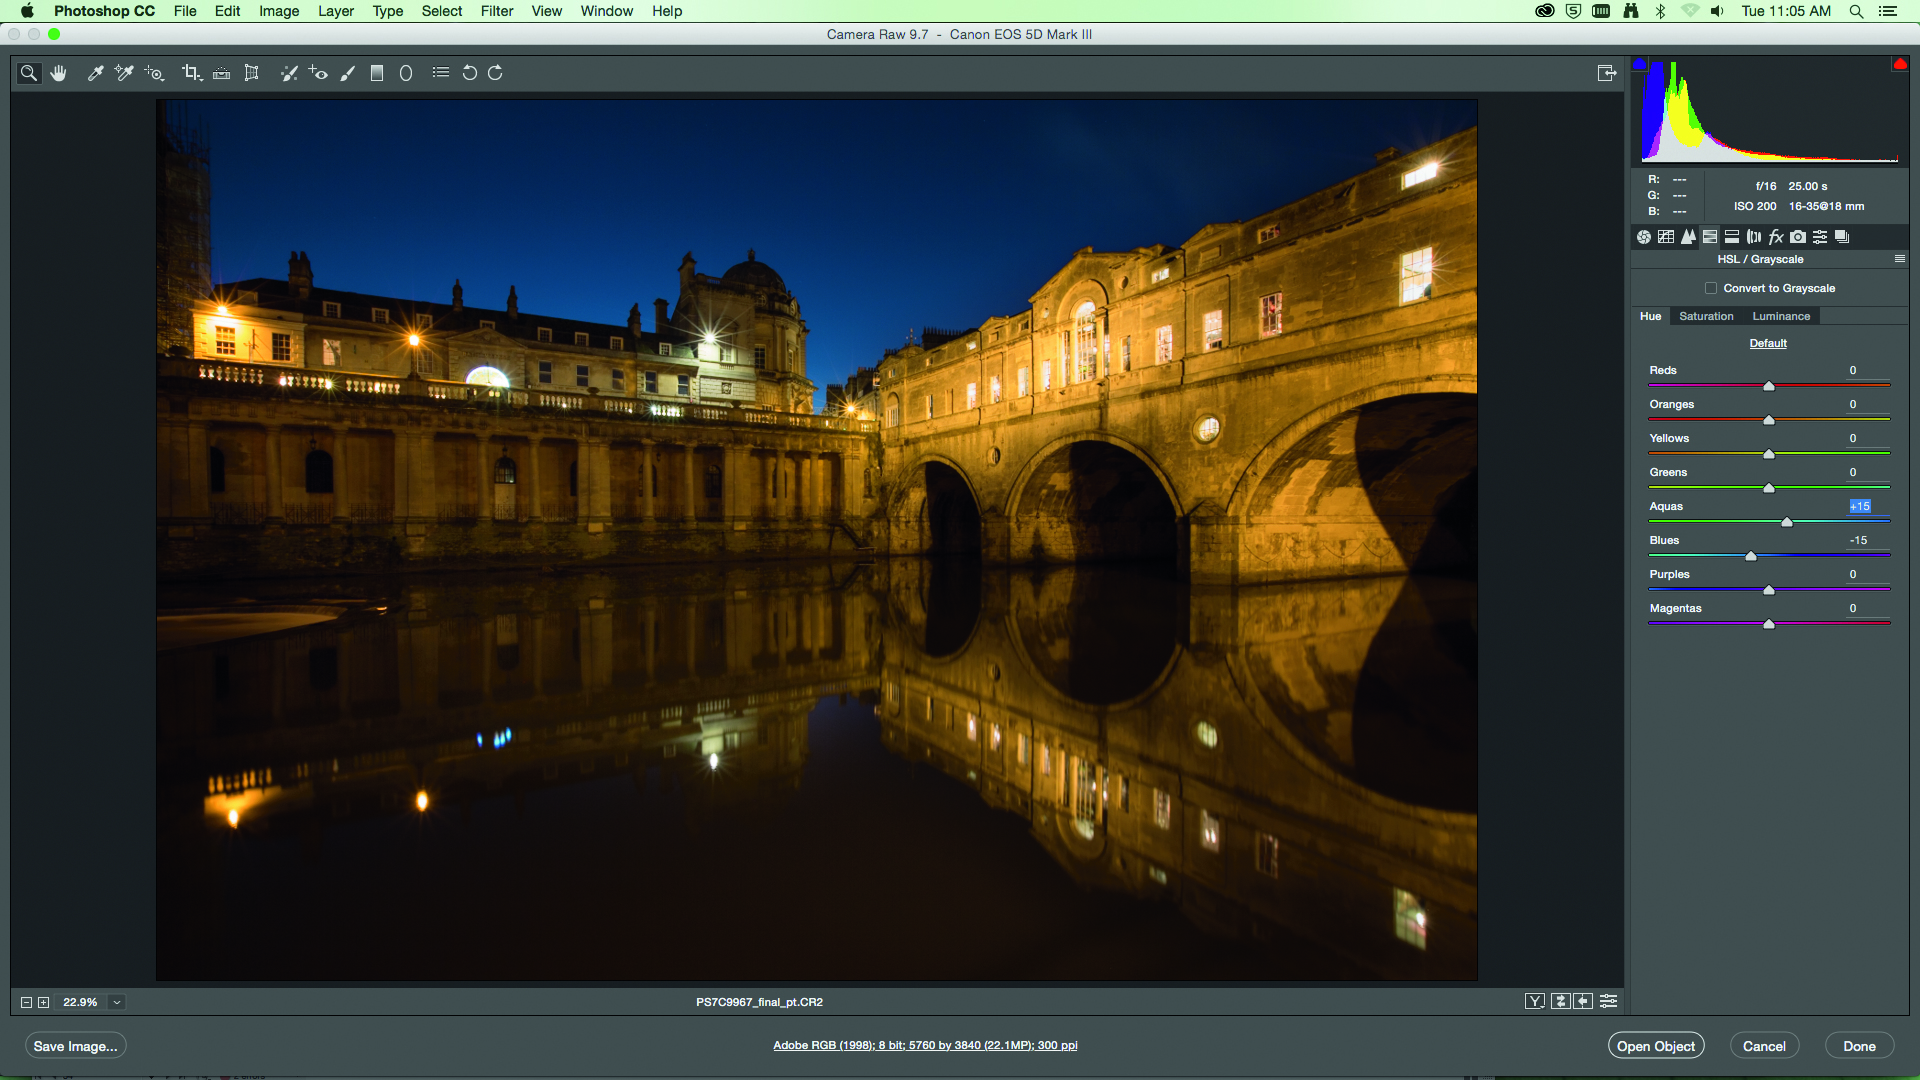
02 ENHANCE THE BLUE HOUR
Click on the HSL/Grayscale tab, we wanted our image to have a cooler feel so we set Aquas to +15 and Blues to -15. The Sky looks a better blue now. To further enhance this look, see below for how to adjust the white balance – using the Temperature slider.
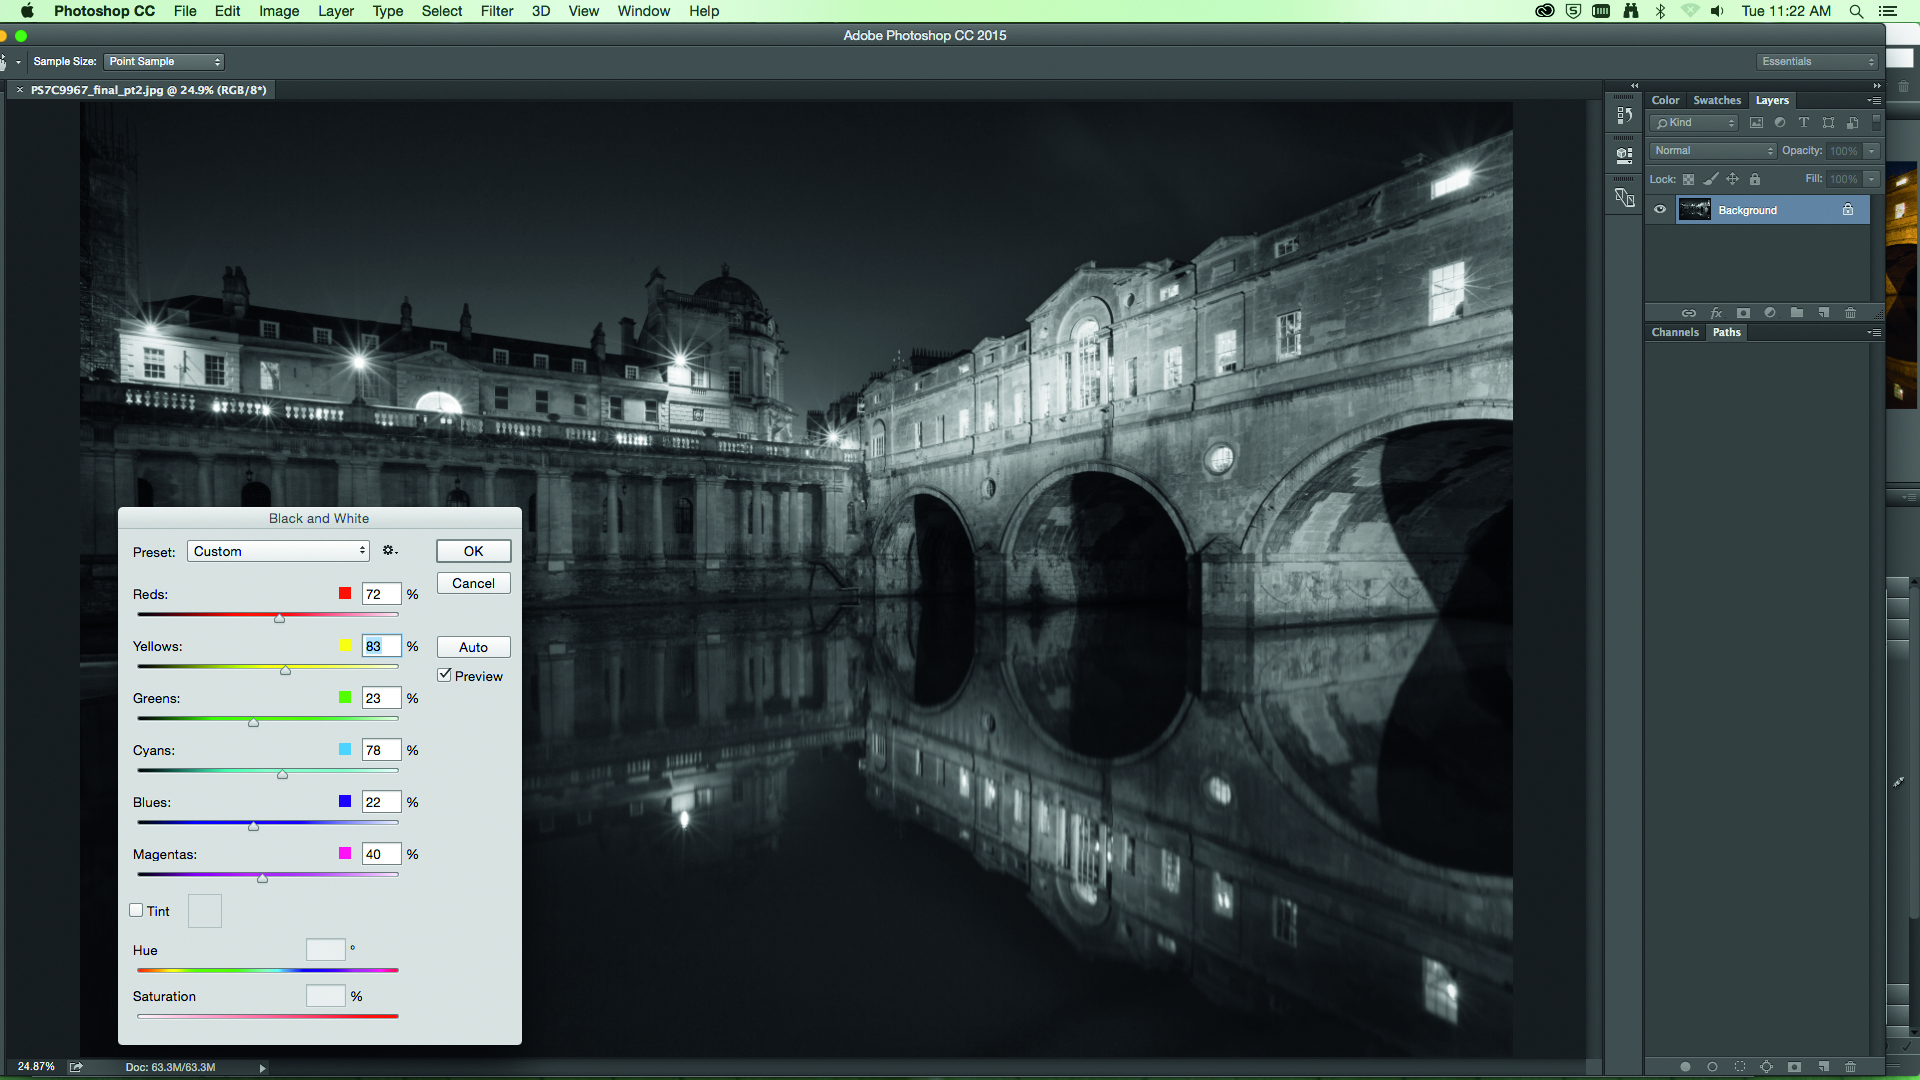
03 IS BLACK & WHITE BEST?
Open your Raw image in the main Photoshop workspace, perhaps a mono conversion will improve the image? Go to Image>Adjustments>Black & White, try clicking Auto first, then adjust each colour slider to adjust tones in your cityscape image.
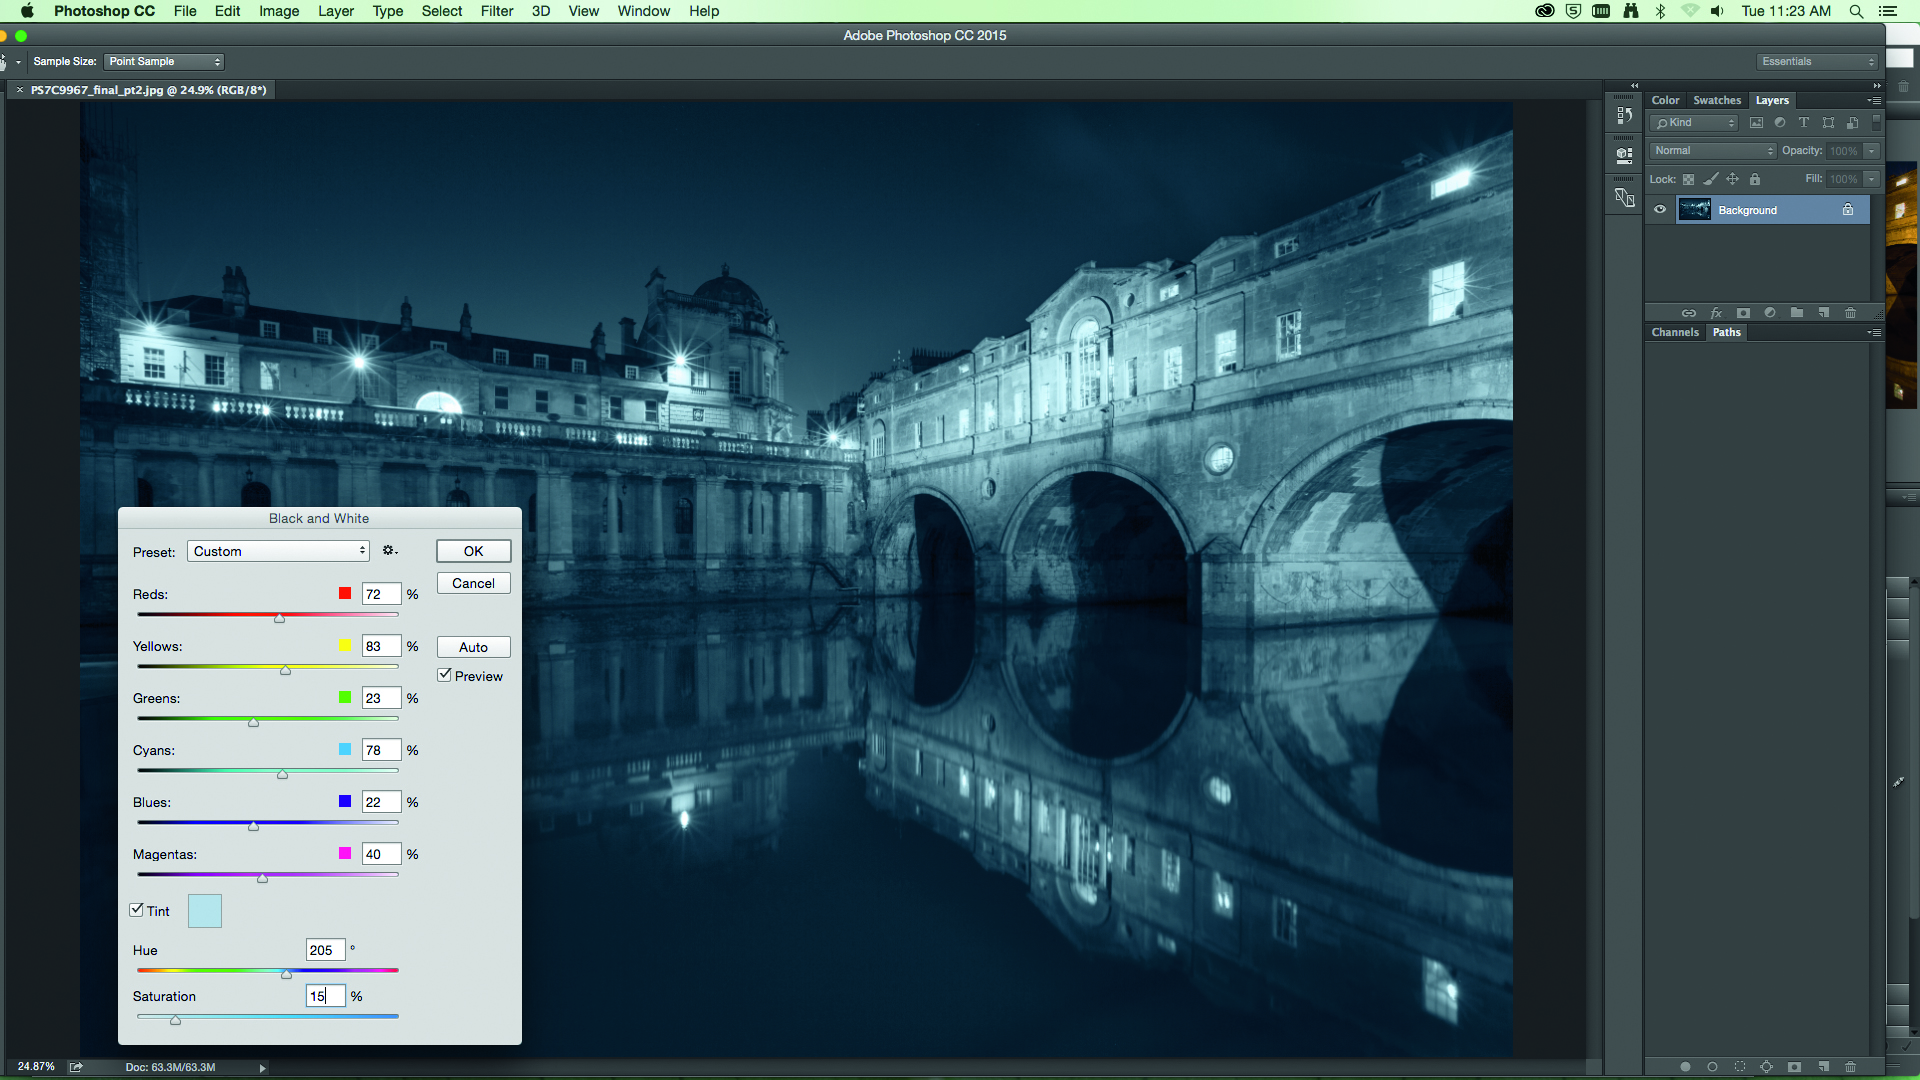
04 ADD A TINT
Still in the Black & White control panel, click the Tint box; now you can add a tint to your mono shot. Use the Hue slider to pick which colour (we went with a light blue at 205), and then the Saturation slider; use this subtly for the best results, we set ours to 15%.
SELECTIVE RAW TWEAKS
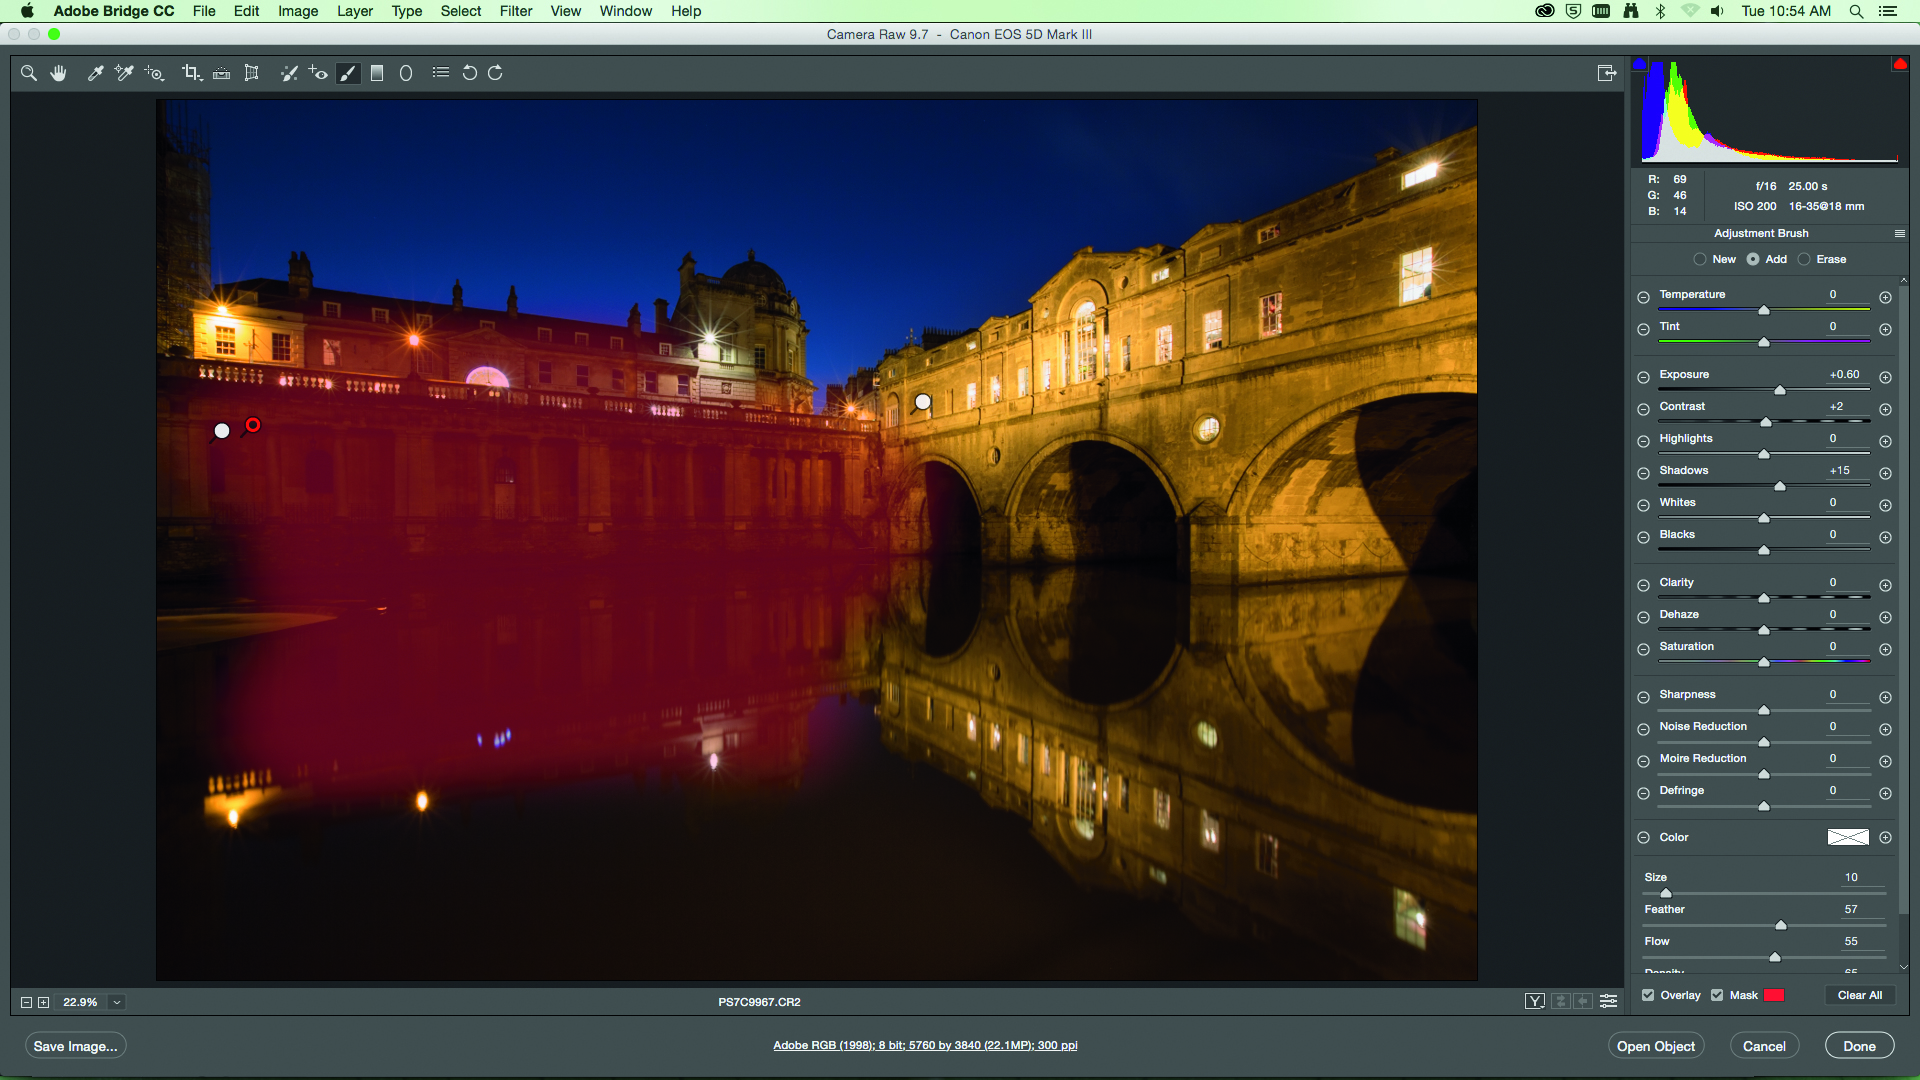
In the Photoshop CC version of Adobe Camera Raw, and also in Lightroom, you can selectively adjust areas within your Raw images using the Adjustment Brush tool. We used this to lighten the unlit buildings in our image to help it feel more balanced with Pulteney Bridge, which is brightly lit by the city lights.
STEP BY STEP: White balance at night
Shoot in Raw and adjust your white balance easily in Photoshop ACR
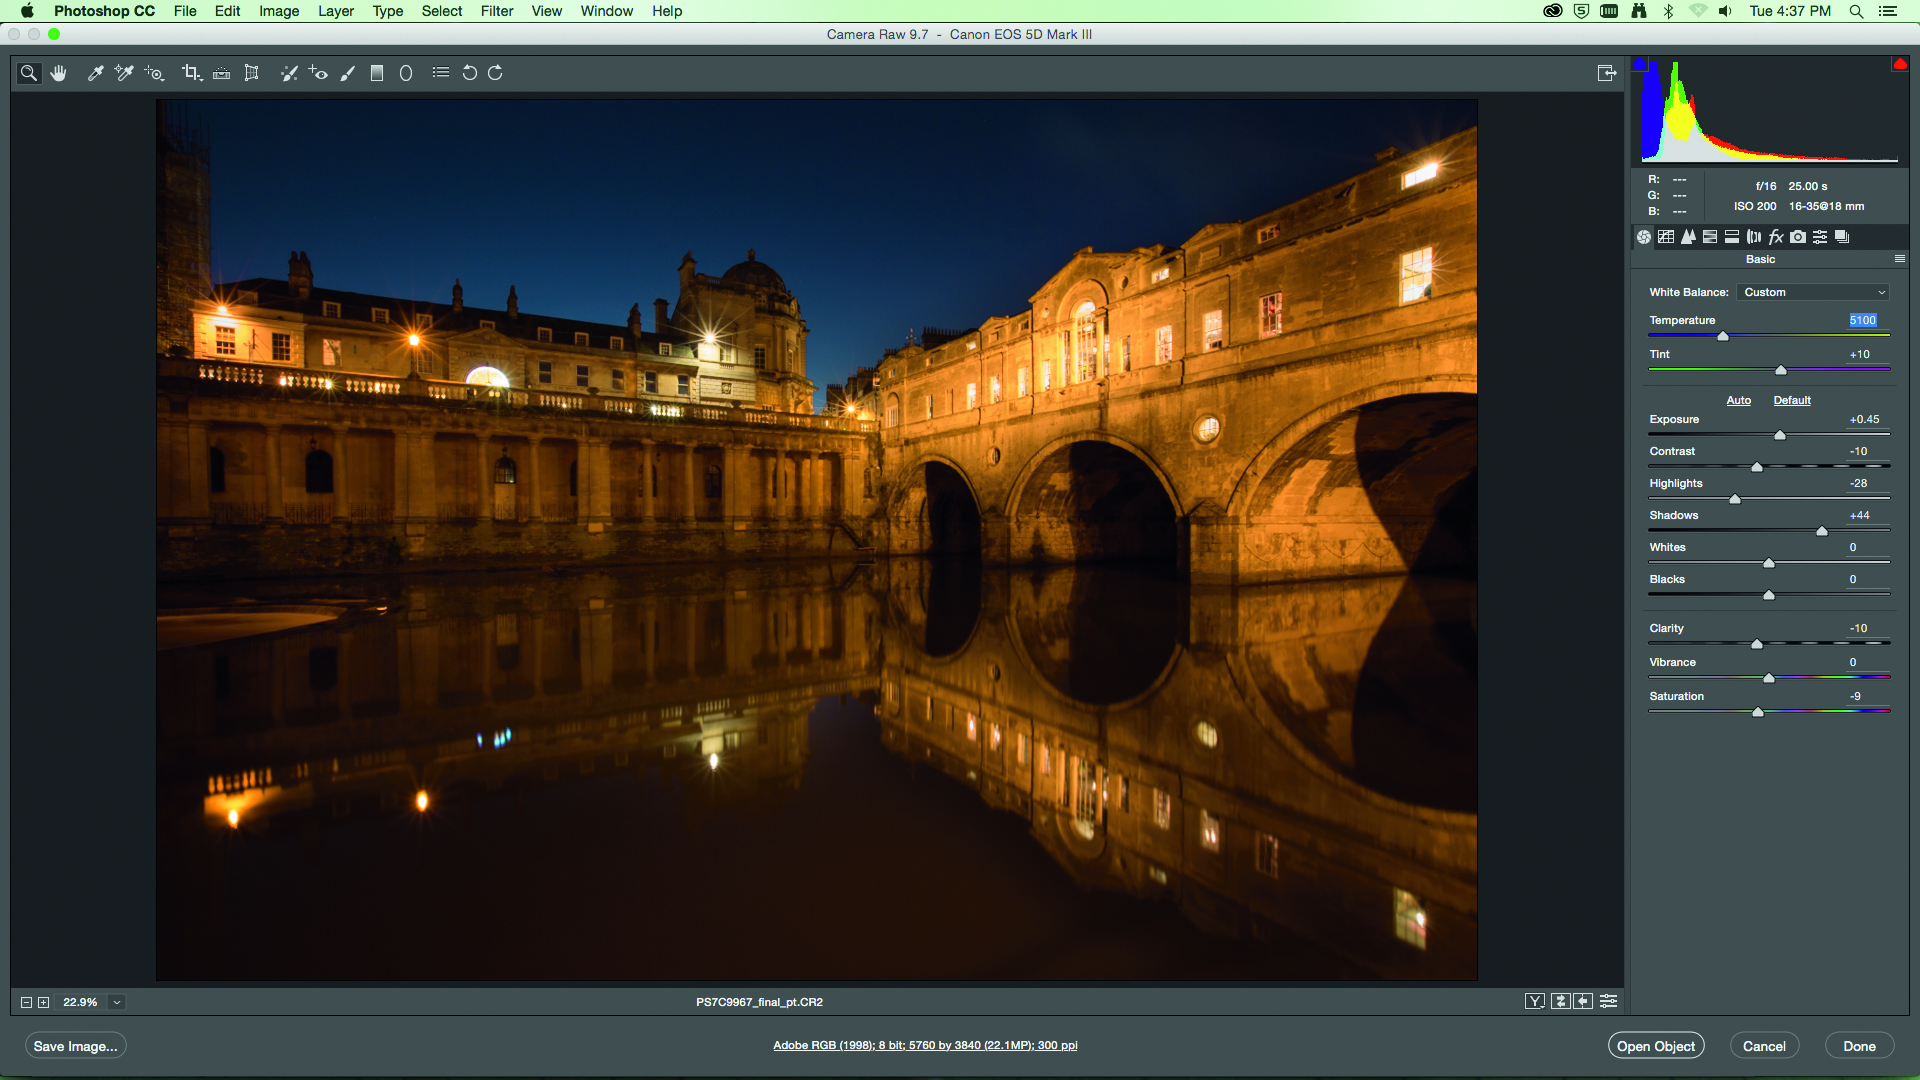
WARM IT UP
With your Raw image open in ACR you can instantly tweak the white balance with the Temperature slider. Use a higher number, over 5000 K, for warmer tones and colours – good for summertime and people photos.
COOL IT DOWN
A setting below 3000 K gives a blue tinge – good for wintertime when you want your images to have a cooler feel. We found that a happy medium of 3750 K reproduced the warm colours of the Bath stone but cooled the sky down.
Get the Digital Camera World Newsletter
The best camera deals, reviews, product advice, and unmissable photography news, direct to your inbox!
The editor of PhotoPlus: The Canon Magazine, Peter 14 years of experience as both a journalist and professional photographer. He is a hands-on photographer with a passion and expertise for sharing his practical shooting skills. Equally adept at turning his hand to portraits, landscape, sports and wildlife, he has a fantastic knowledge of camera technique and principles. As you'd expect of the editor of a Canon publication, Peter is a devout Canon user and can often be found reeling off shots with his EOS 5D Mark IV DSLR.

