How to sharpen images to perfection in Photoshop Elements
The amazing High Pass filter in Photoshop Elements excels at sharpening details and softening skin
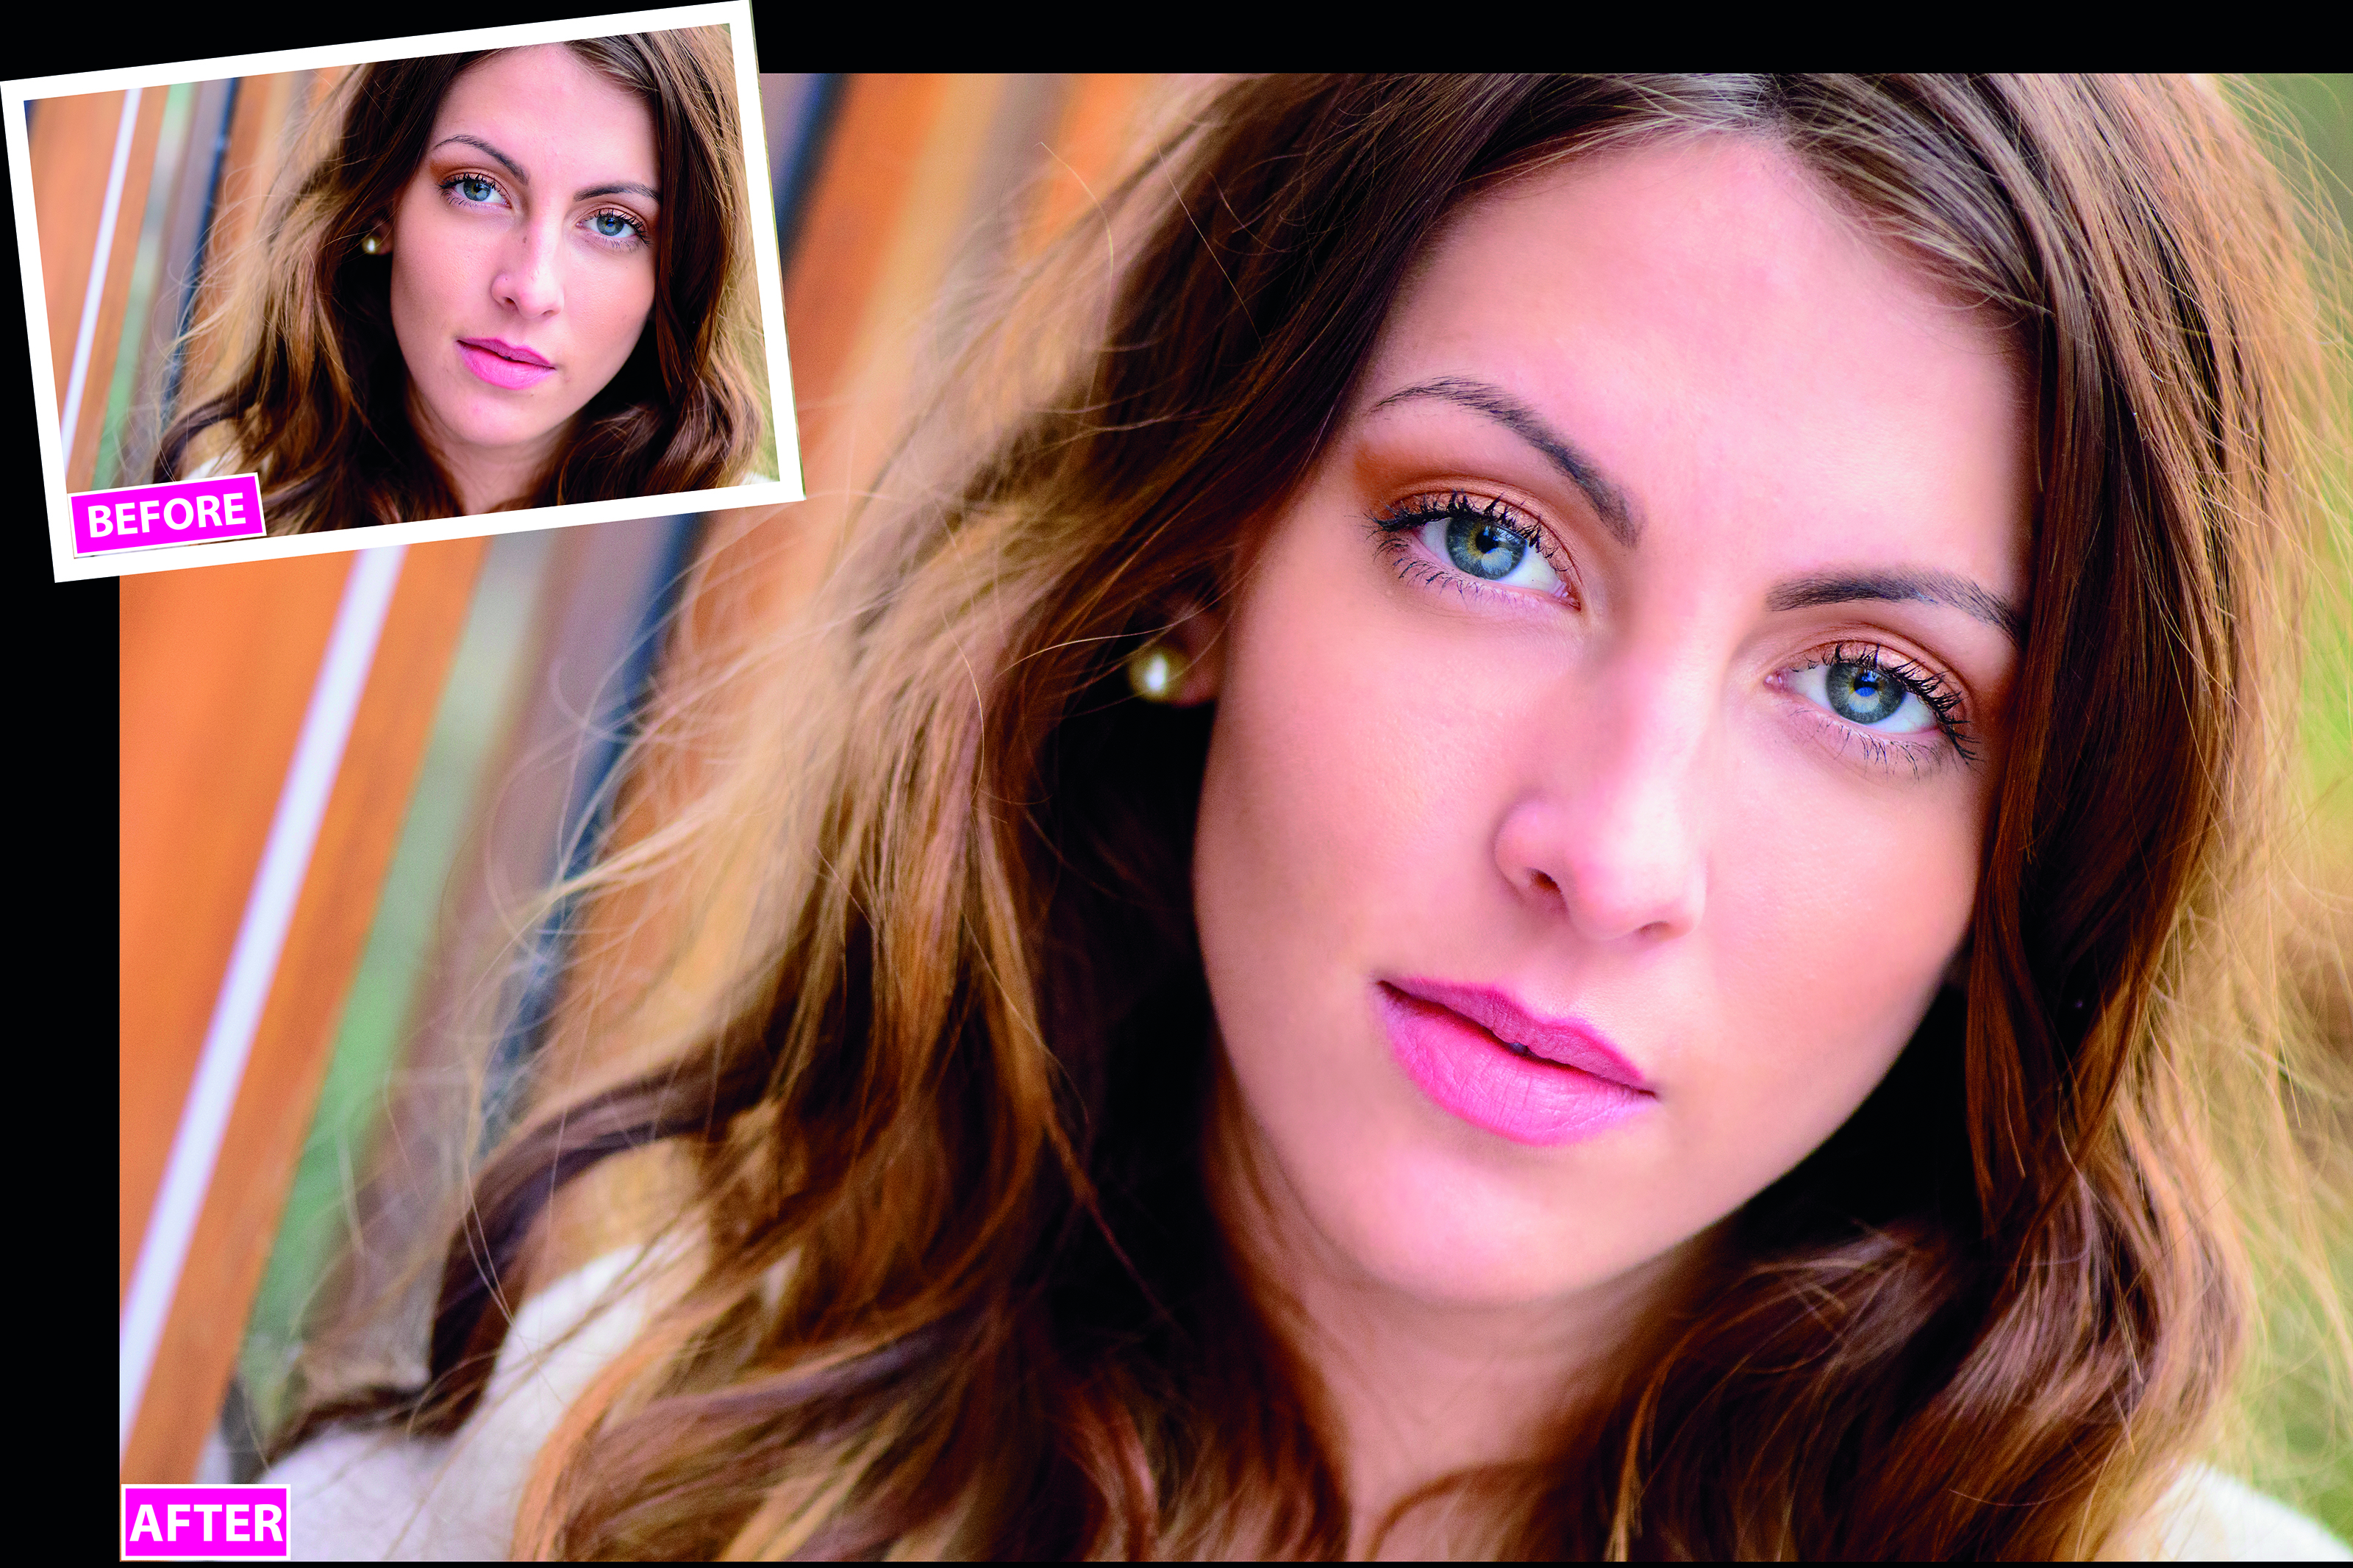
Learn how to sharpen images and soften skin with the High Pass filter
Time needed: 10 minutes
Skill level: Beginner
Kit needed: Photoshop Elements
Is there any Photoshop crime worse than plastic skin? We’ve all seen it – that ghastly mush of skin tones that achieves the opposite effect of what, fundamentally, a good portrait should do – make the subject look human. The flip side is that, of all subjects, people tend to benefit most from a few selective enhancements in Photoshop. The key thing is that these enhancements should be barely perceivable. Think pixel-smoothing, not pixel-bruising.
Few tools are more suited to the job than the High Pass filter. It performs not one, but two essential tasks, and does them very well. First and foremost it excels at sharpening. Many prefer it to more conventional sharpening filters, like Unsharp Mask, for the way it crisps up details. It’s a sharpening method that works for all kinds of images, from landscapes to architecture. But with portraits we rarely want to apply sharpening uniformly. Instead we can make it work selectively across the image. What’s more, that sharpening effect can instantly be turned into a wonderful softening effect. It works beautifully over skin, and without a hint of plastic.
At first glance the High Pass filter creates a flat, grey image that appears to have no artistic or practical use. However, within that mass of grey is the fine detail of our photo. High Pass works by targeting the edge contrast that occurs where one colour meets another. This detail is sometimes called ‘high-frequency’. All other detail – the ‘low-frequency’ detail – is suppressed. That suppressed detail is the expanse of grey that covers most of the image. To remove the grey we simply change our layer blending mode, then control how the effect plays across the image with a layer mask.
STEP BY STEP: Sharpening and softening
Learn how to use a combination of layer skills and filters to enhance a portrait
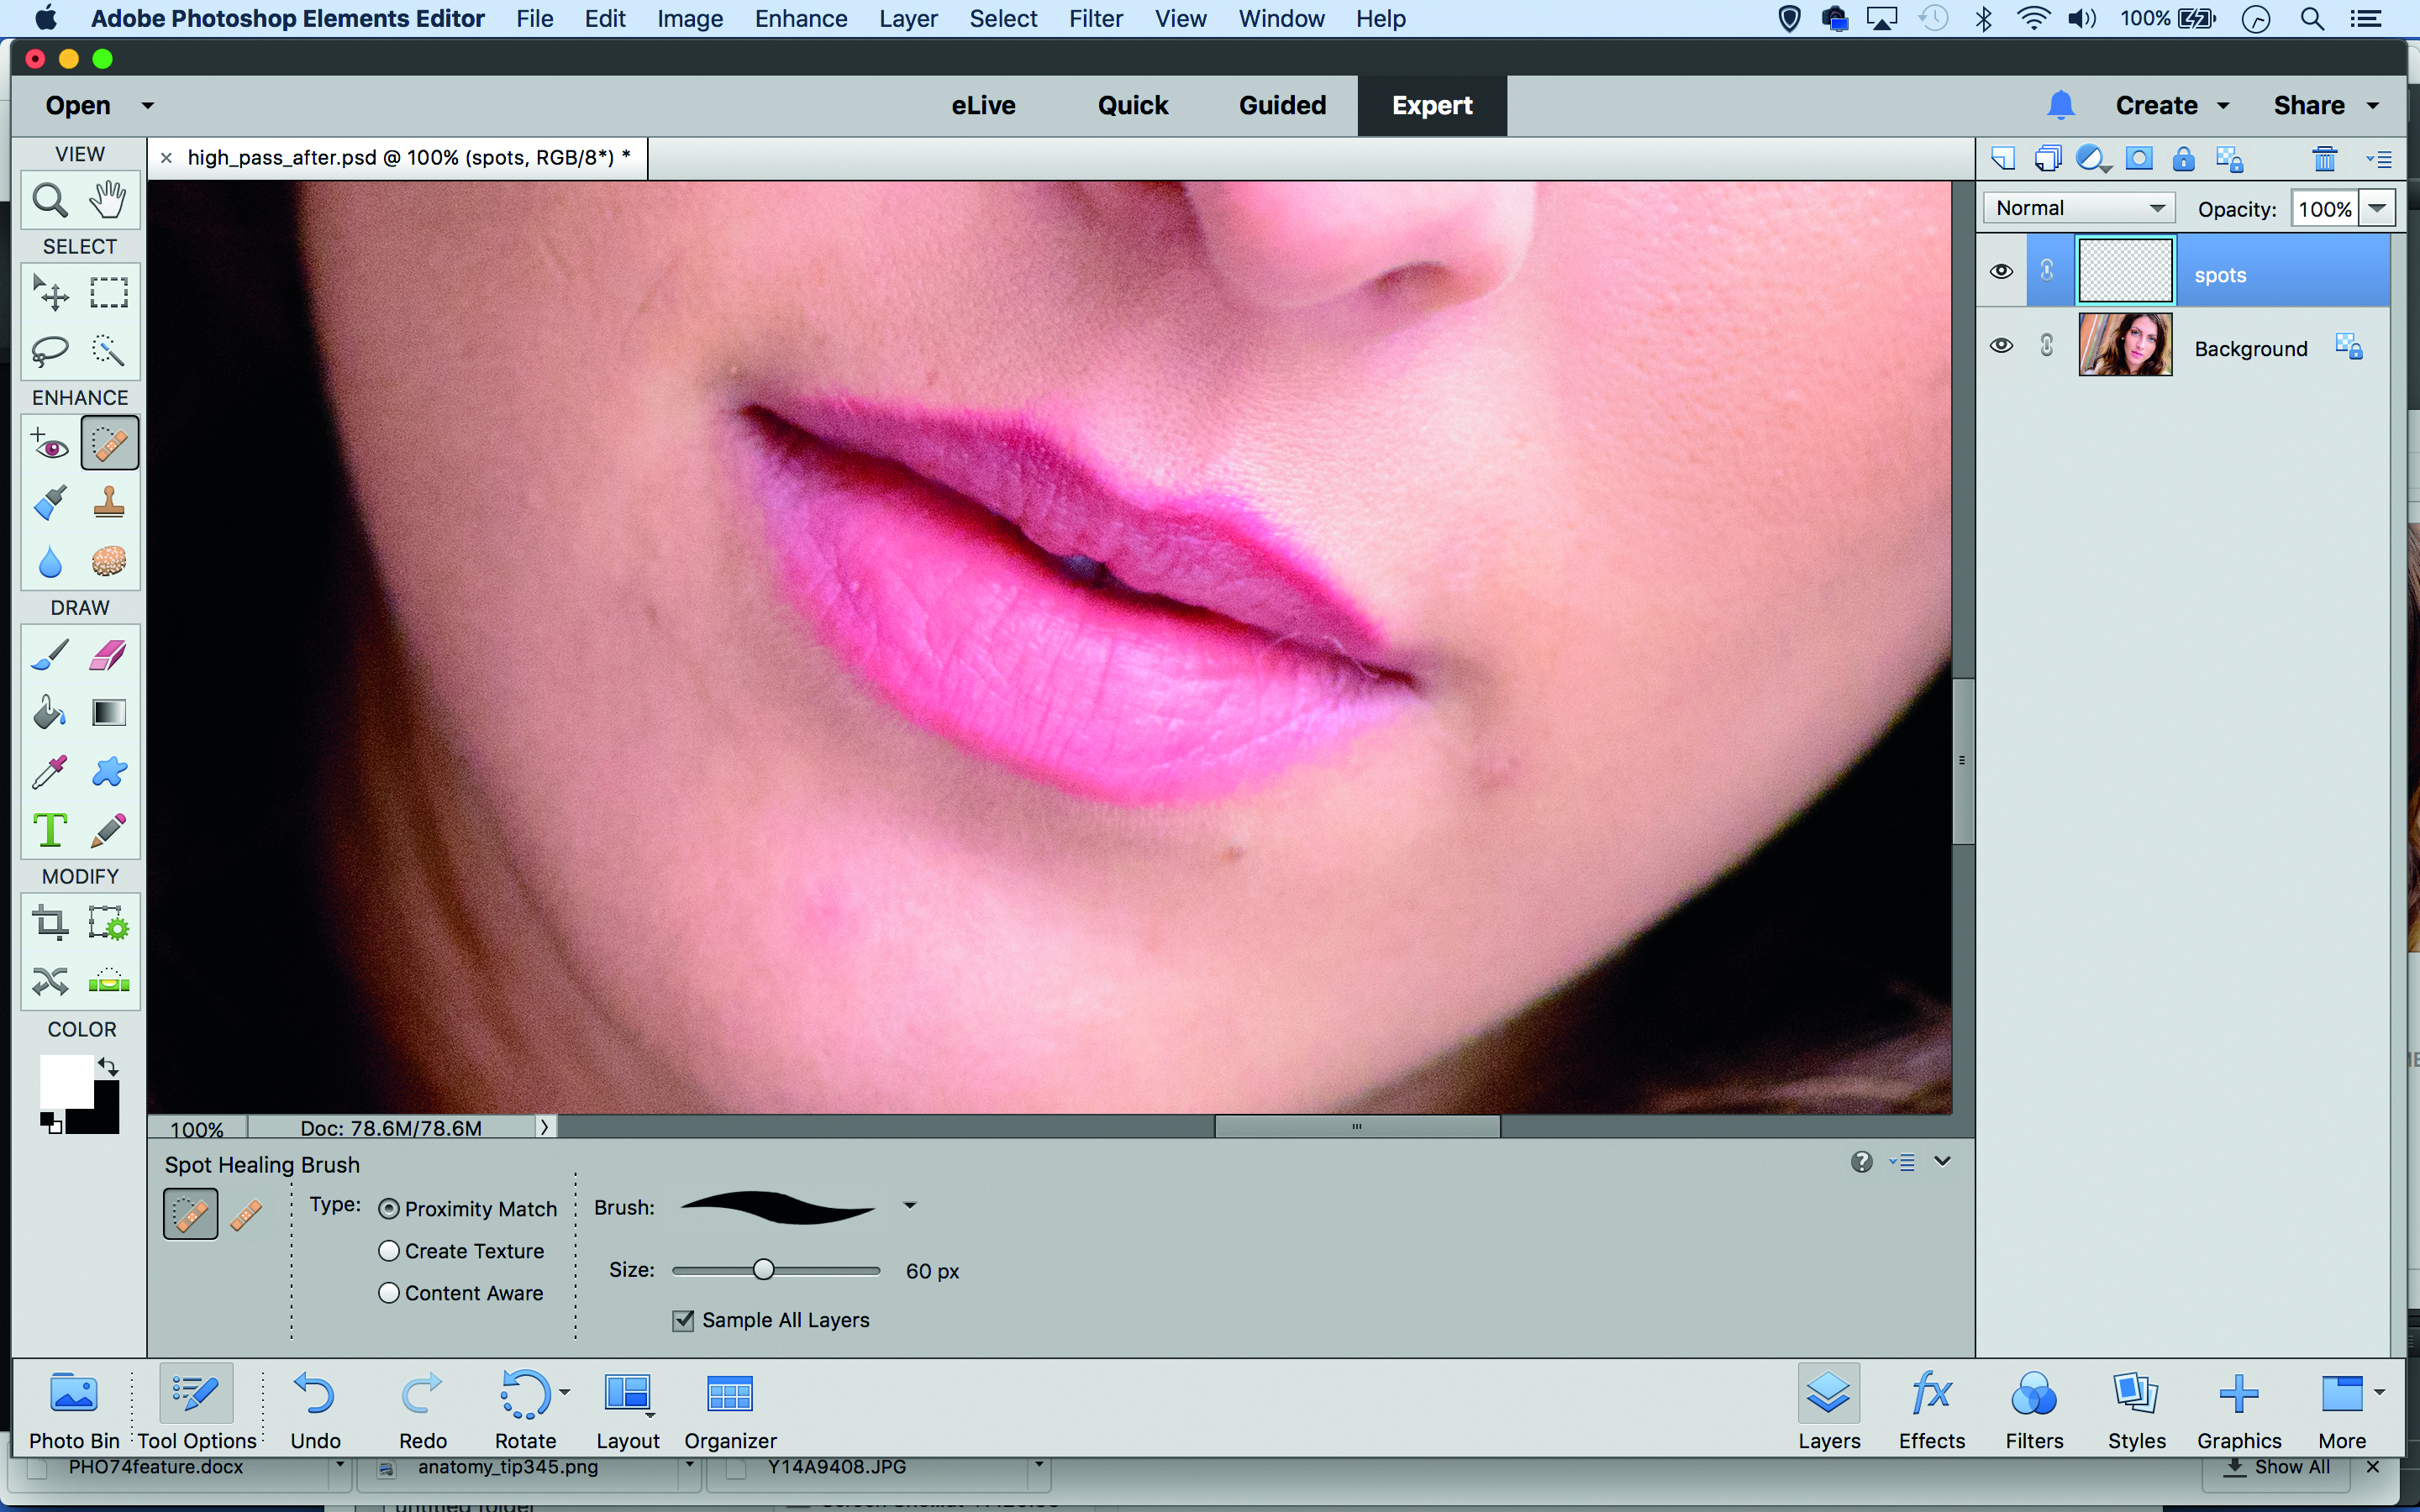
01 REMOVE BLEMISHES
Open high_pass_before.jpg. Click ‘Expert’ at the top to go into Expert Mode. Go to the Layers panel and click the New Layer icon. Grab the Spot Healing Brush tool from the toolbar, check ‘Sample All Layers’ in the tool options then paint over marks to remove them.
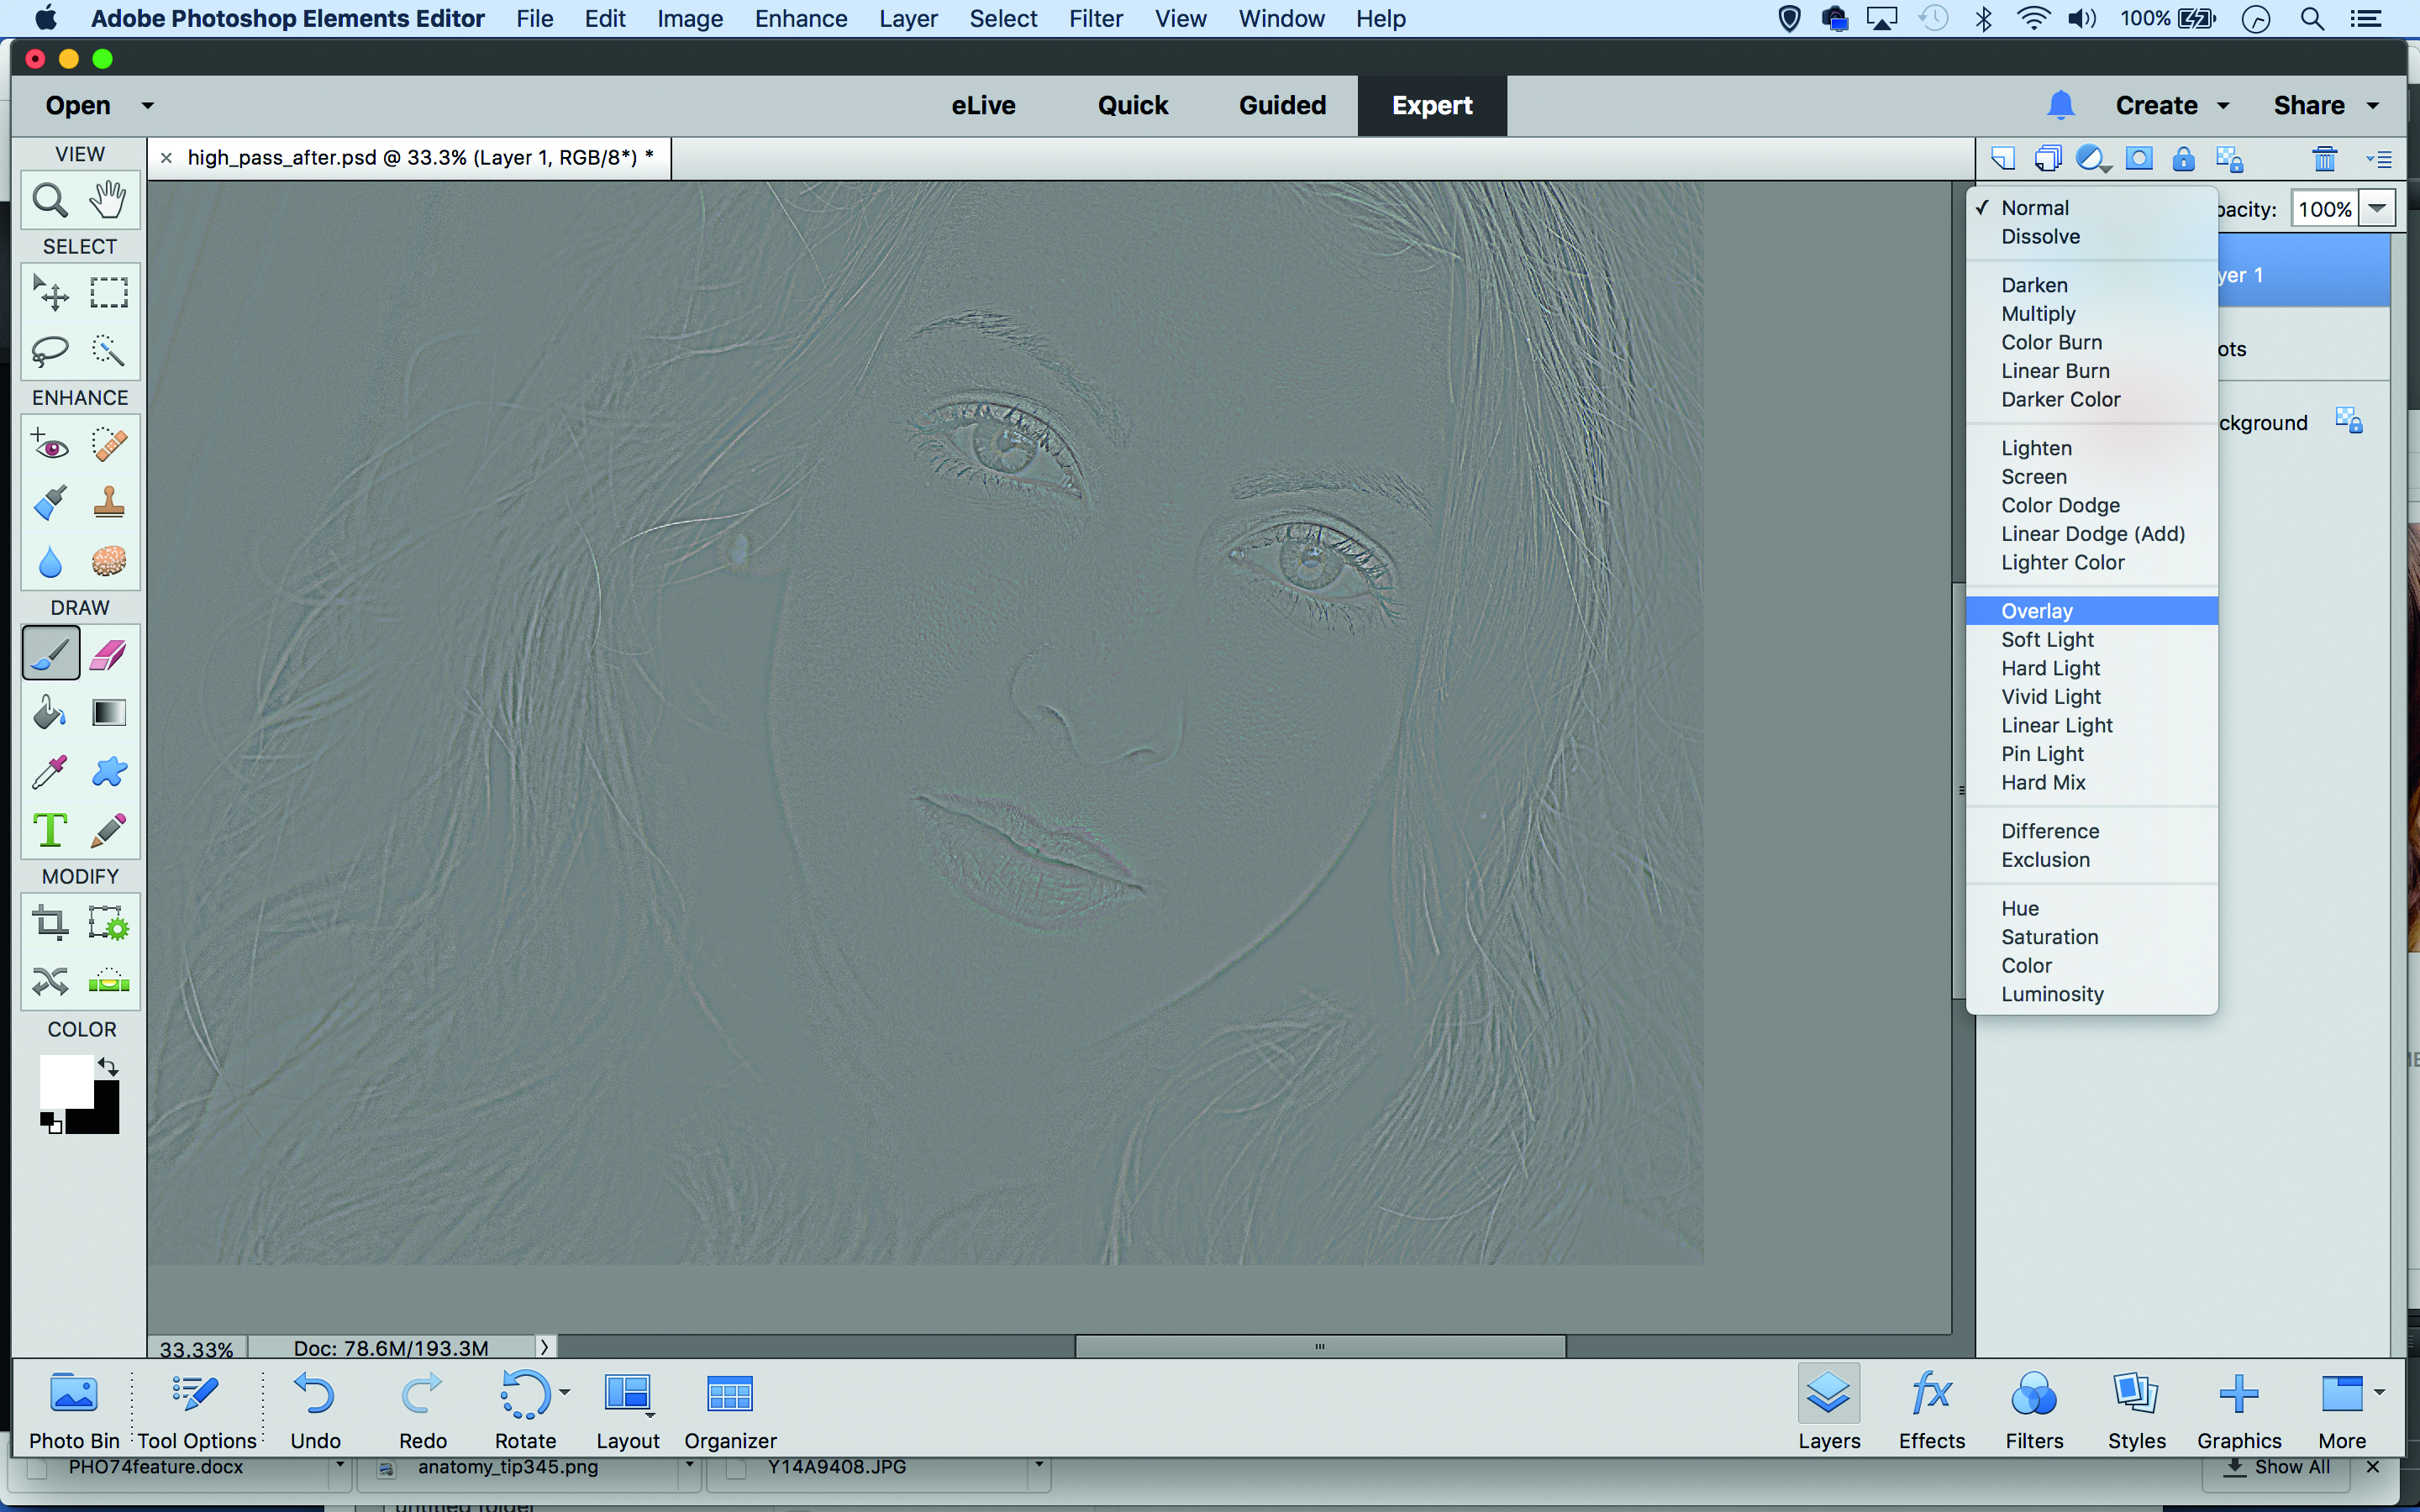
02 APPLY HIGH PASS
Hit Cmd/Ctrl+Shift+Alt+E to merge the layers. Go to Filter>Other>High Pass. The right strength depends on your image and resolution, but begin around 8. Hit OK. In the Layers panel change the blending mode from Normal to Overlay. This creates a sharpening effect.
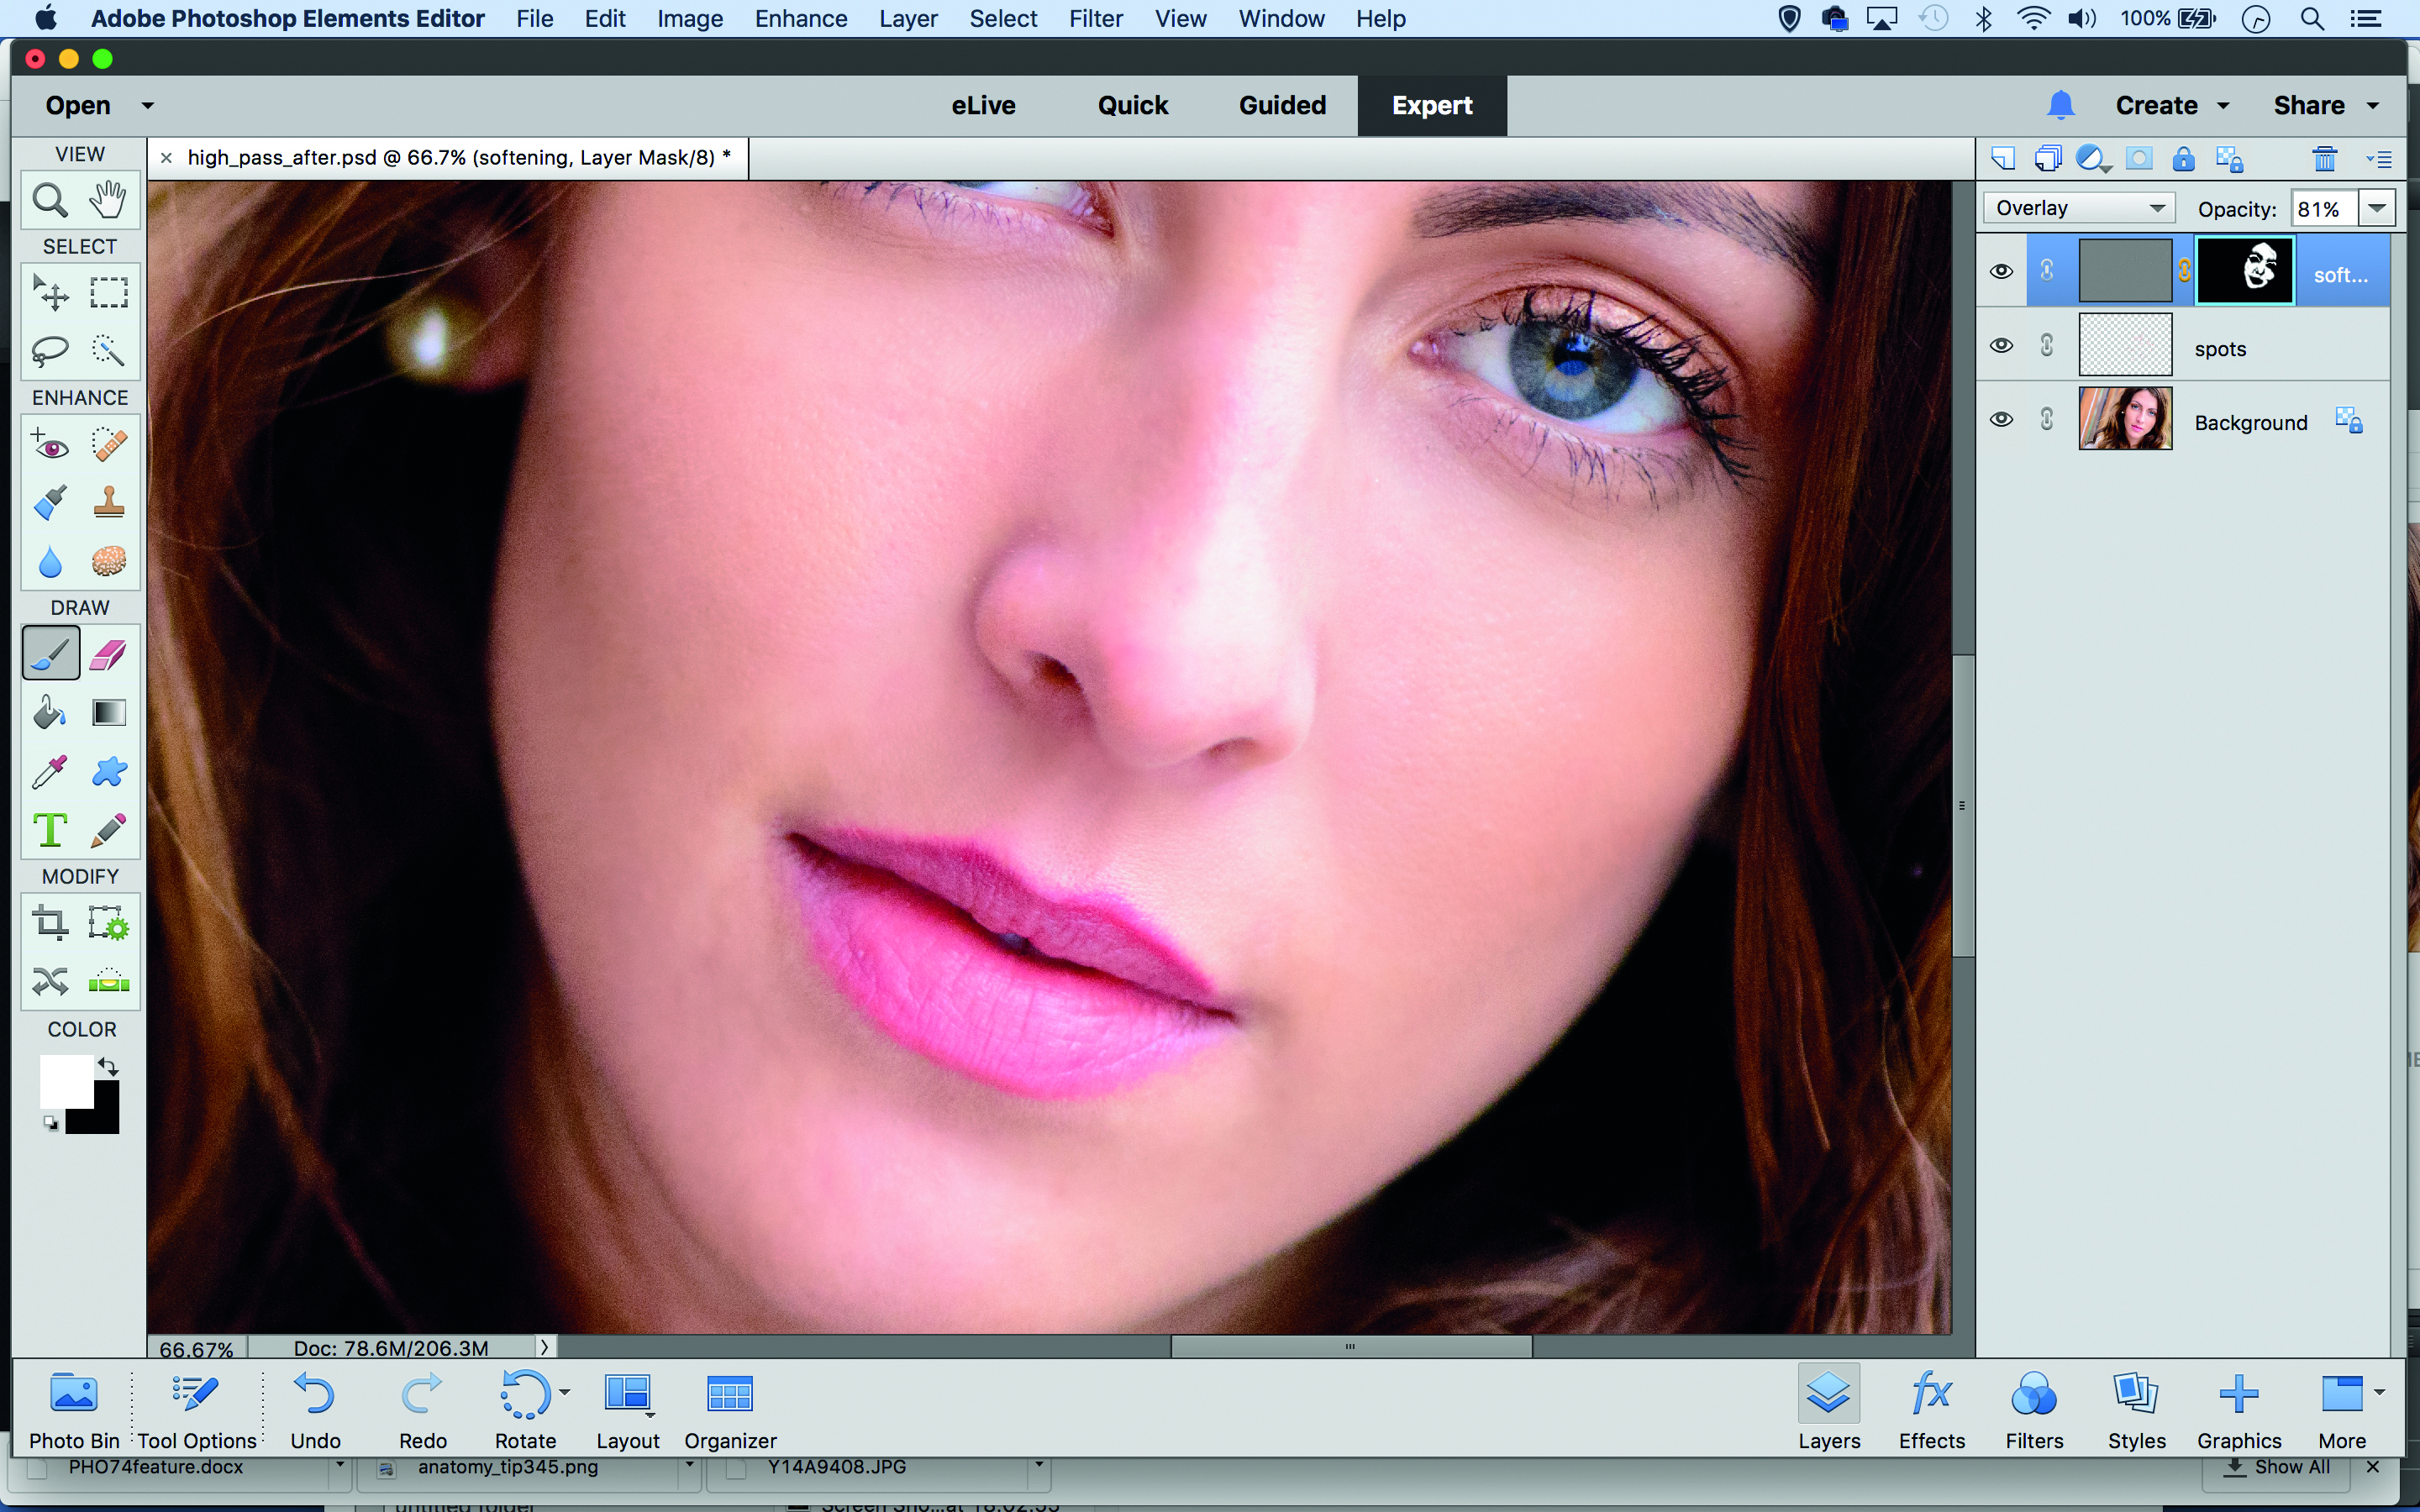
03 SOFTEN THE SKIN
Hit Cmd/Ctrl+I to invert the layer to change the effect from sharpening to softening. Click the Add Mask icon in the Layers panel, then Cmd/Ctrl+I again to invert the mask to black. Grab the Brush tool, set colour to white, then paint to reveal the softening effect over the skin.
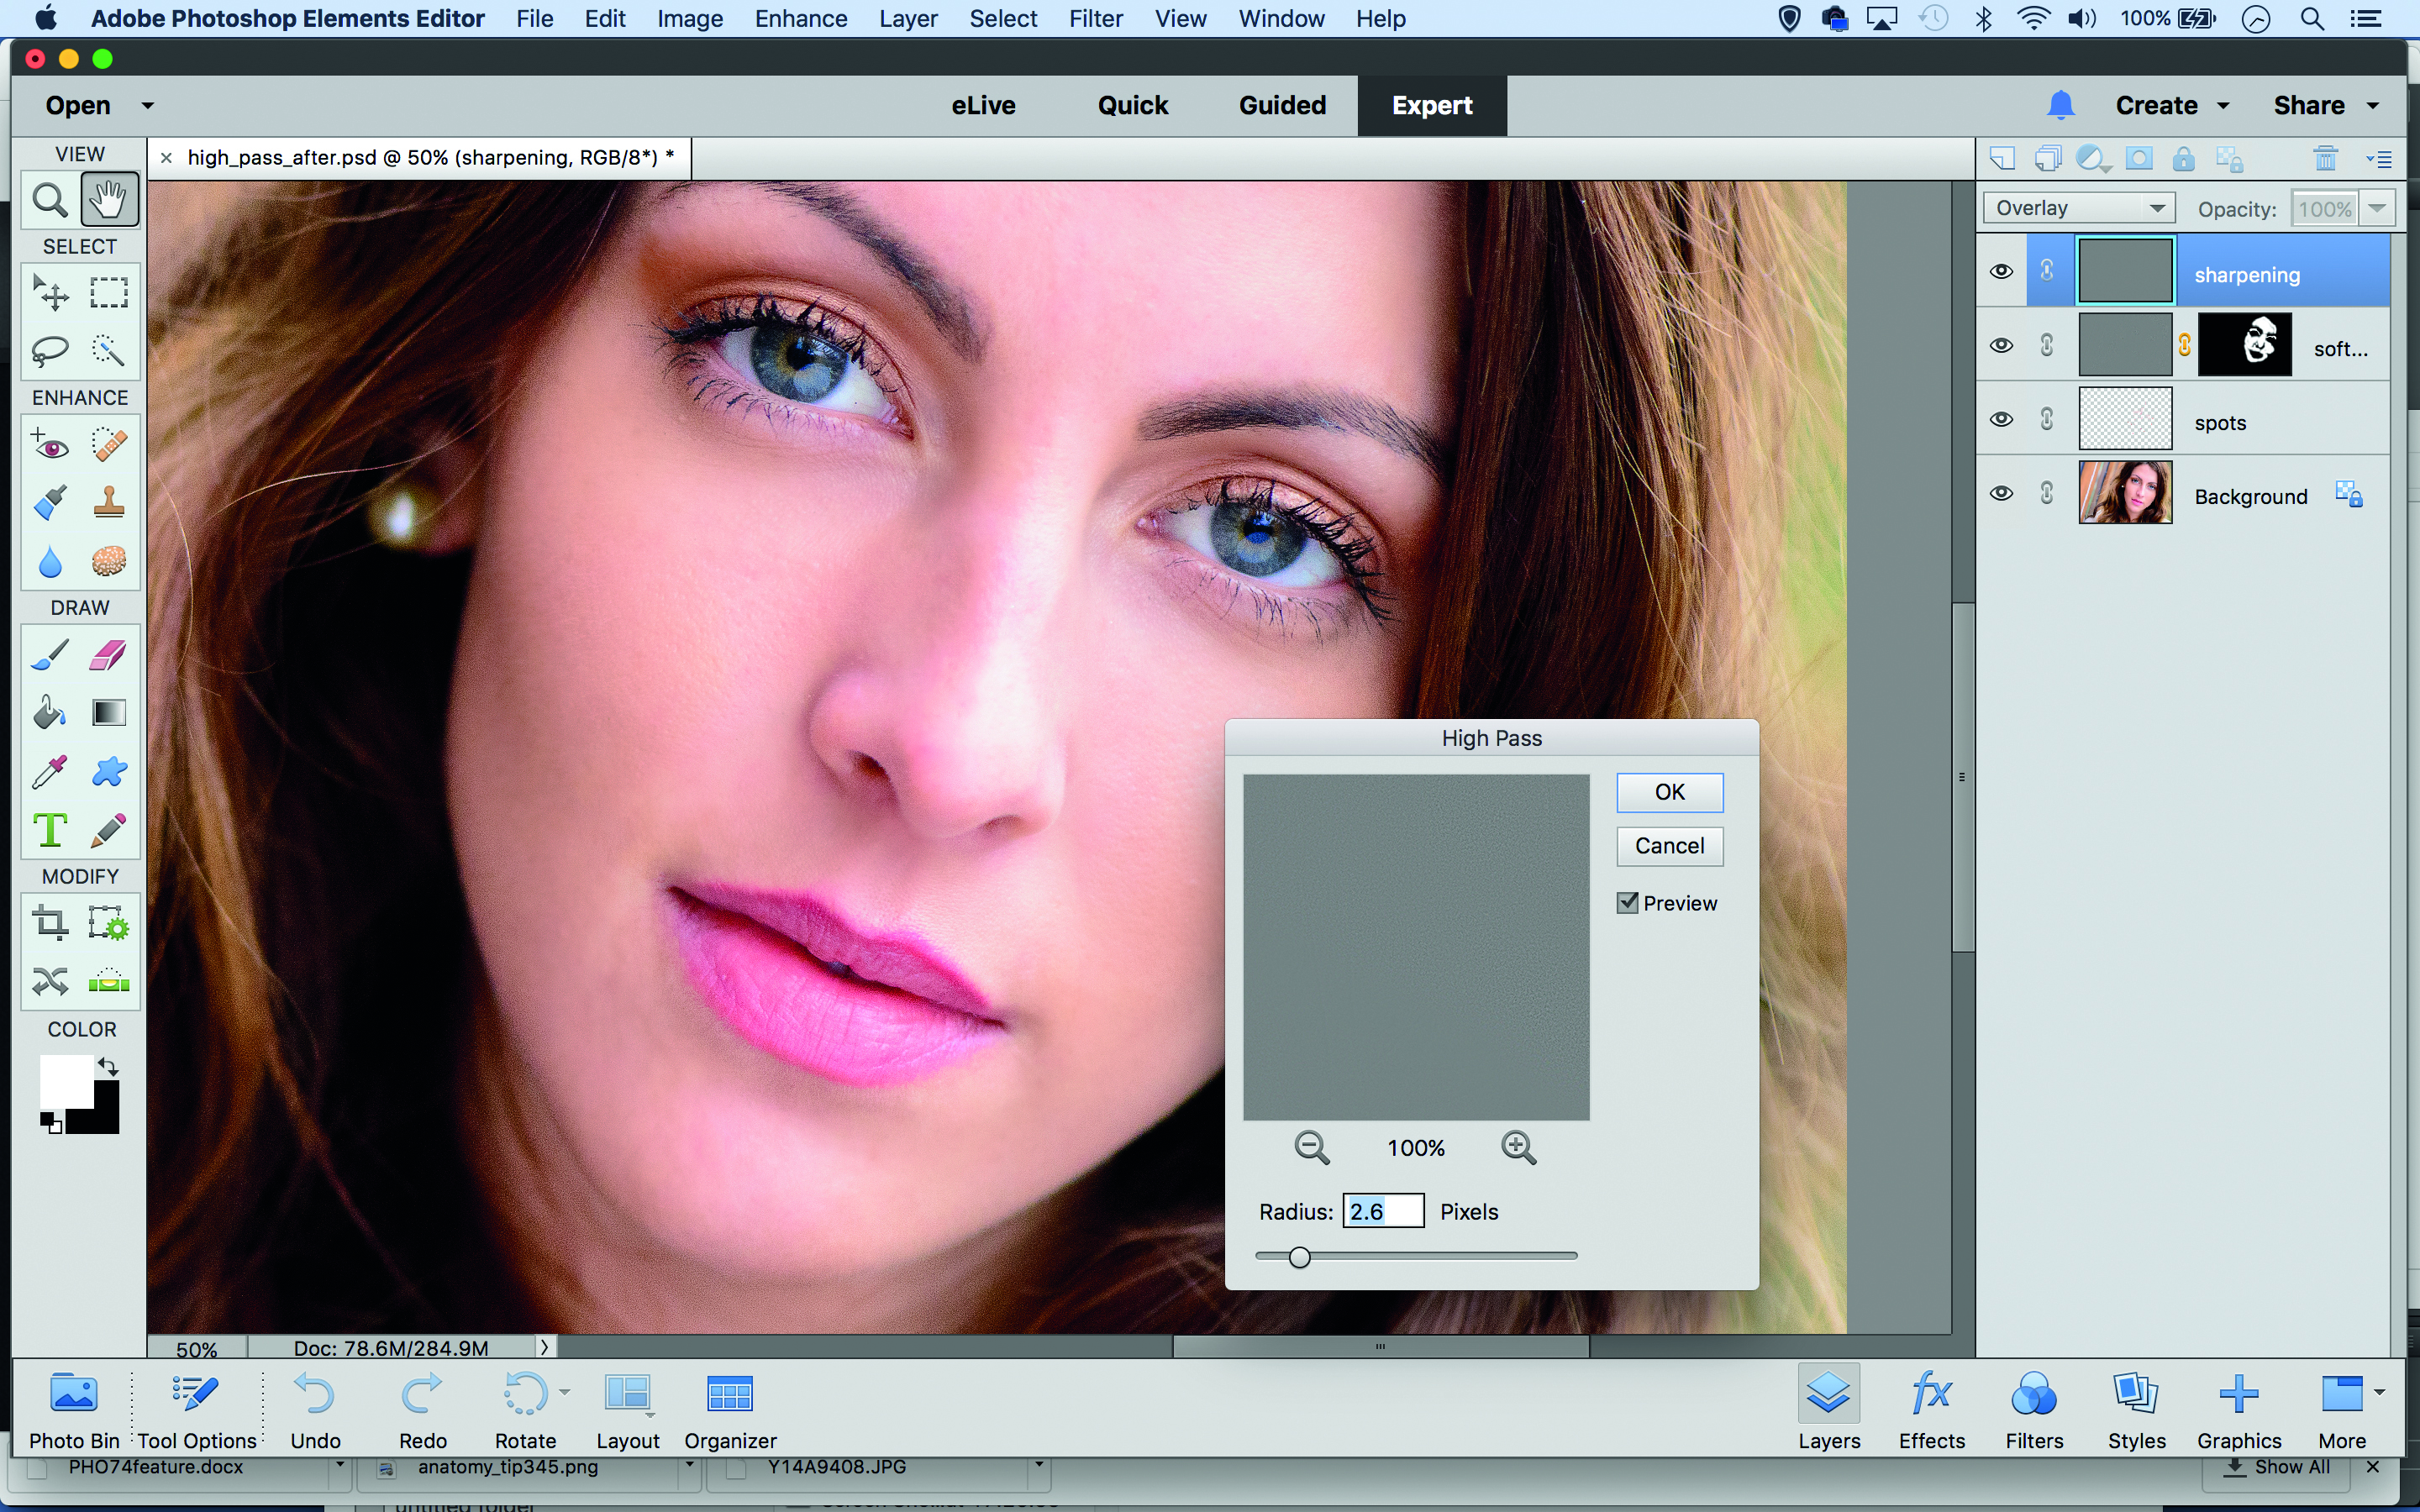
If you need to tone down either the sharpening or softening effect created with High Pass, simply lower the layer opacity
04 SHARPEN THE LASHES
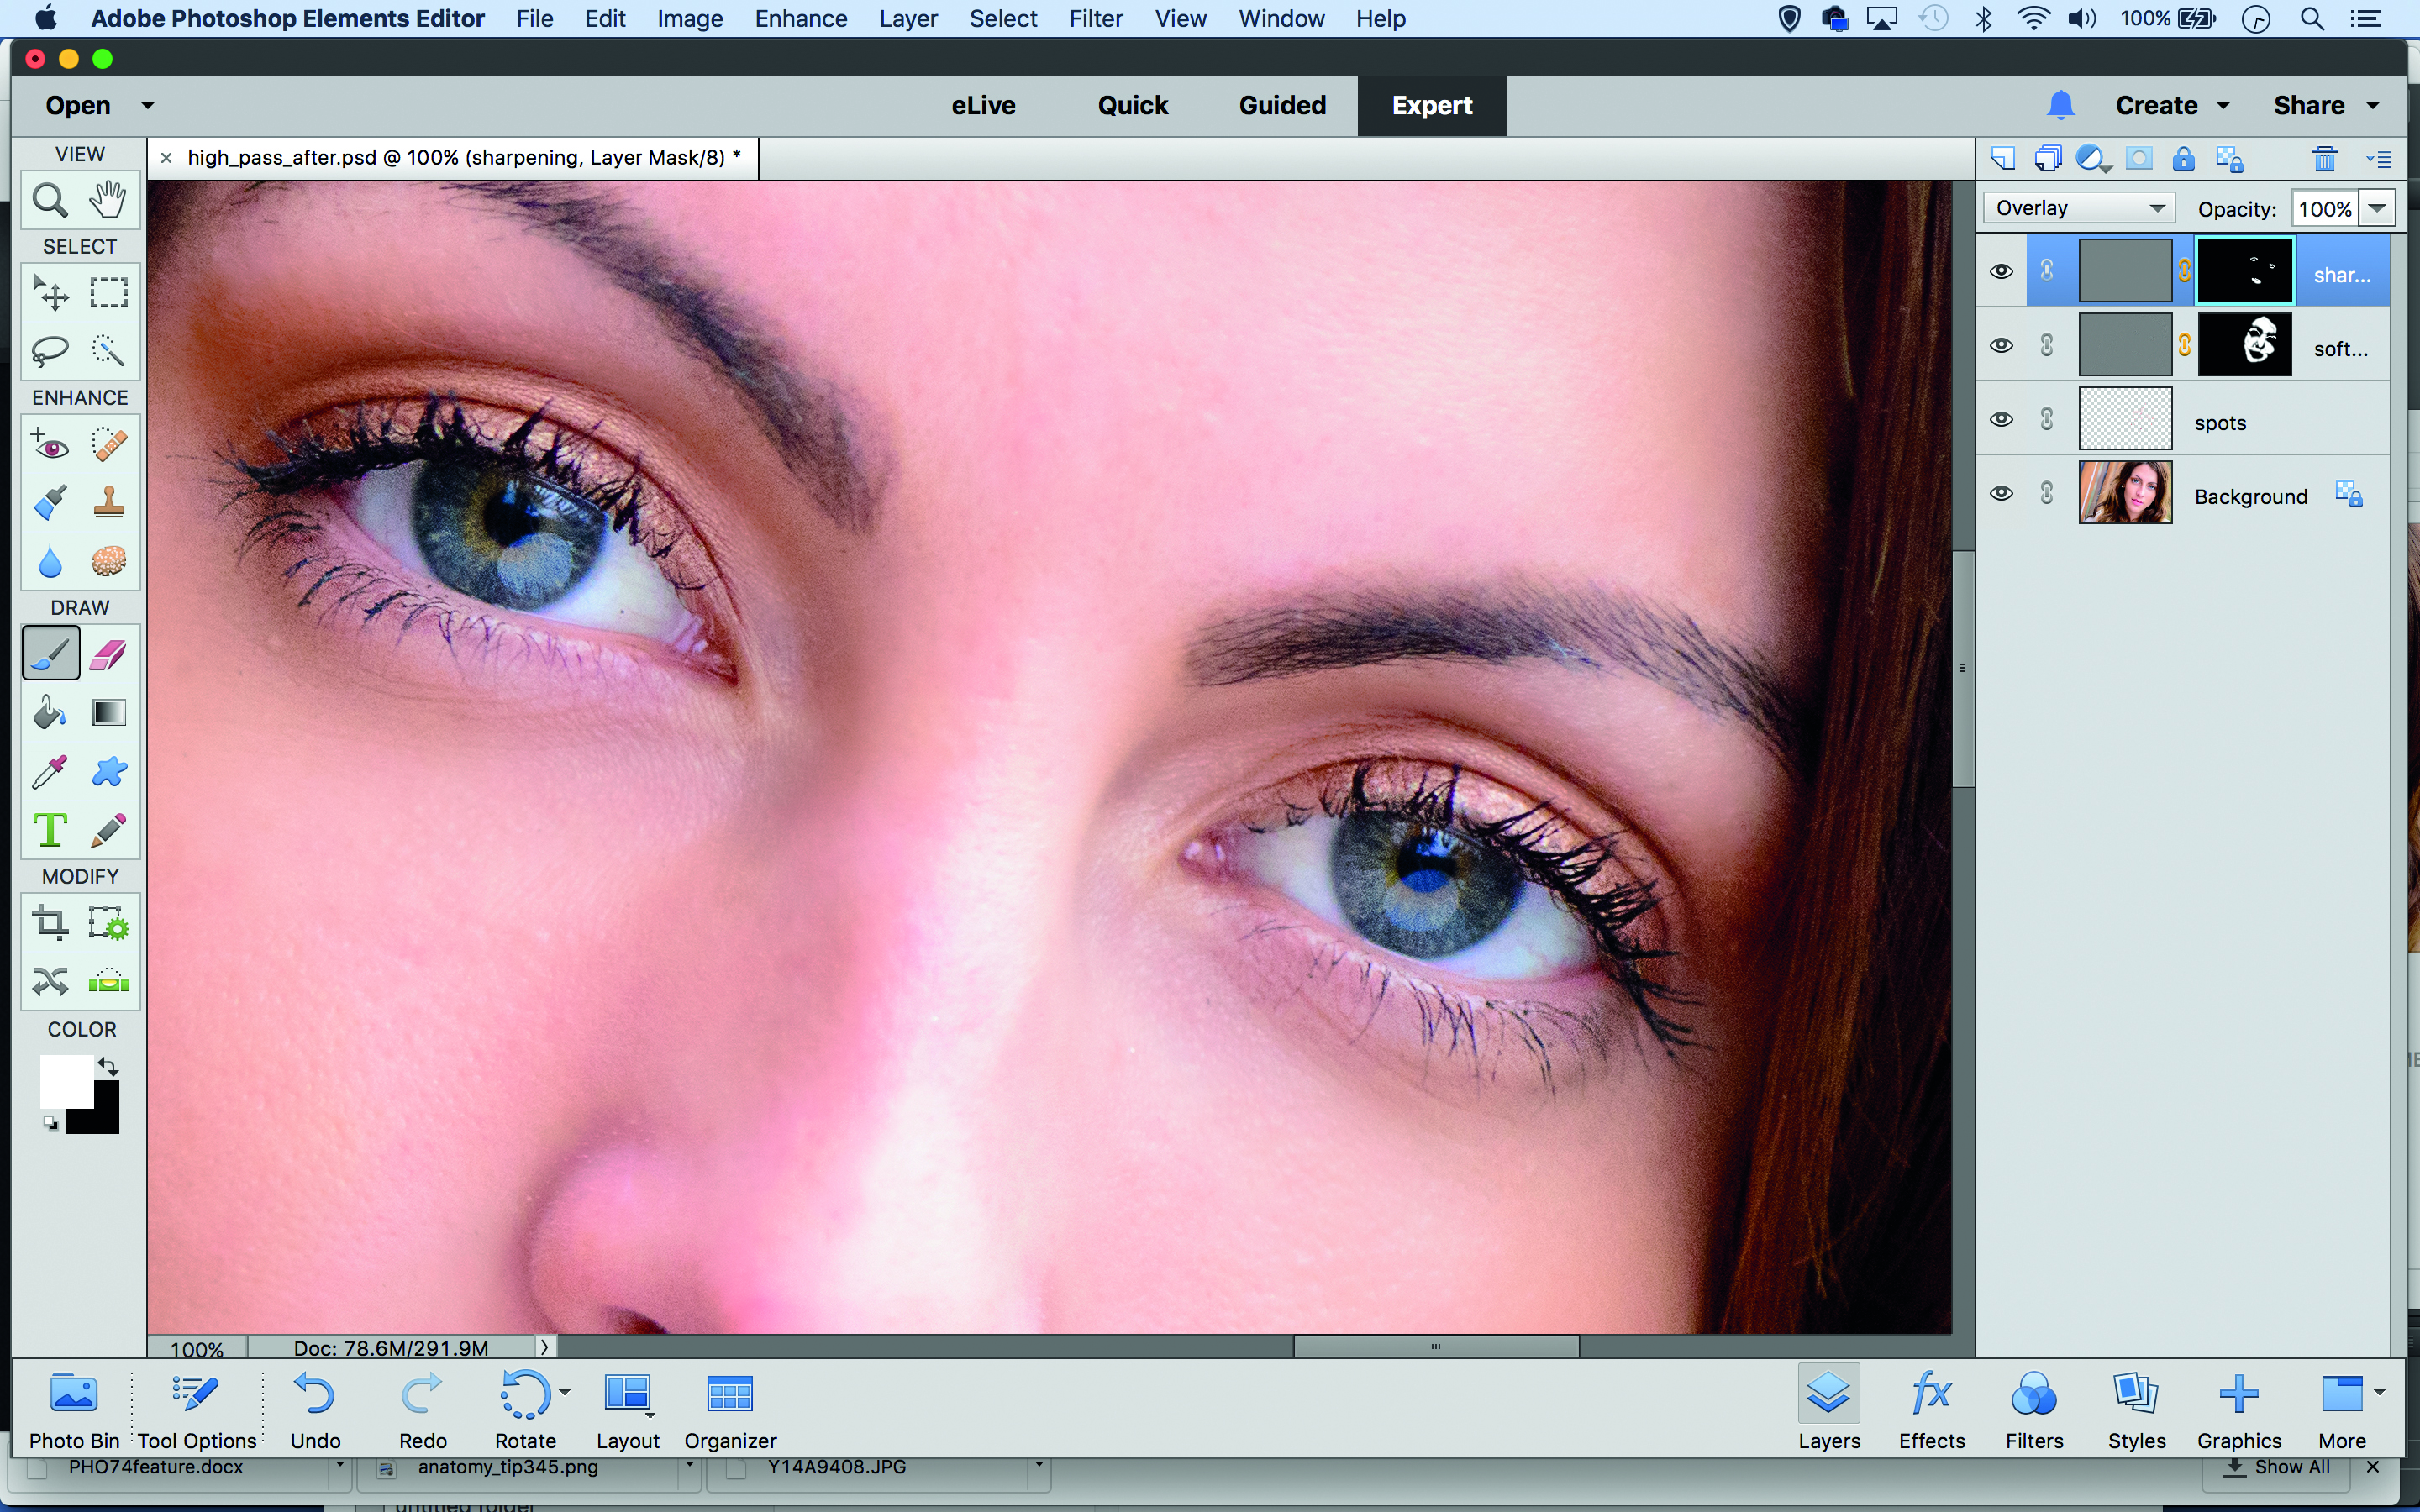
Hit Cmd/Ctrl+Shift+Alt+E to make another merged layer. Go to Filter>Other>High Pass. This time we’ll use the filter for a sharpening effect, so we’ll need a lower amount; try 2-3. As before, change the blending mode of the layer to Overlay, then add a layer mask.
05 SHARPEN SELECTIVELY
With portraits it’s better to apply sharpening selectively to certain areas rather than uniformly to the entire face. Hit Cmd/Ctrl+I to invert the layer mask to black, hiding the effect. Use the Brush tool to carefully paint white over the eyes, lashes and lips to reveal the sharpening.

Many portraits will benefit from a little selective lightening and darkening to lift certain areas or add depth to the features. You can use the method described in Step 6 to create your own custom dodge and burn layer. From here, we can paint with white or black to lighten or darken (best to do this with the brush set to a low opacity of around 10%). We would usually lighten the tops of the cheekbones, irises, ridge of the nose and chin. Then darken the hairline, under the cheekbones, edge of the iris, and under the chin.
06 DODGE & BURN
Use the Layer Opacity control to adjust the sharpening strength. Finally, we’ll dodge and burn the face. Alt-click the New Layer icon in the Layers panel. Choose Mode: Overlay and check the ‘Fill with...’ box. Grab the Brush tool and paint white to lighten areas, black to darken.
Get the Digital Camera World Newsletter
The best camera deals, reviews, product advice, and unmissable photography news, direct to your inbox!
The lead technique writer on Digital Camera Magazine, PhotoPlus: The Canon Magazine and N-Photo: The Nikon Magazine, James is a fantastic general practice photographer with an enviable array of skills across every genre of photography.
Whether it's flash photography techniques like stroboscopic portraits, astrophotography projects like photographing the Northern Lights, or turning sound into art by making paint dance on a set of speakers, James' tutorials and projects are as creative as they are enjoyable.
He's also a wizard at the dark arts of Photoshop, Lightroom and Affinity Photo, and is capable of some genuine black magic in the digital darkroom, making him one of the leading authorities on photo editing software and techniques.


