Learn how to apply vintage effects to photographs in Photoshop
Photoshop techniques to give your modern images the classic look
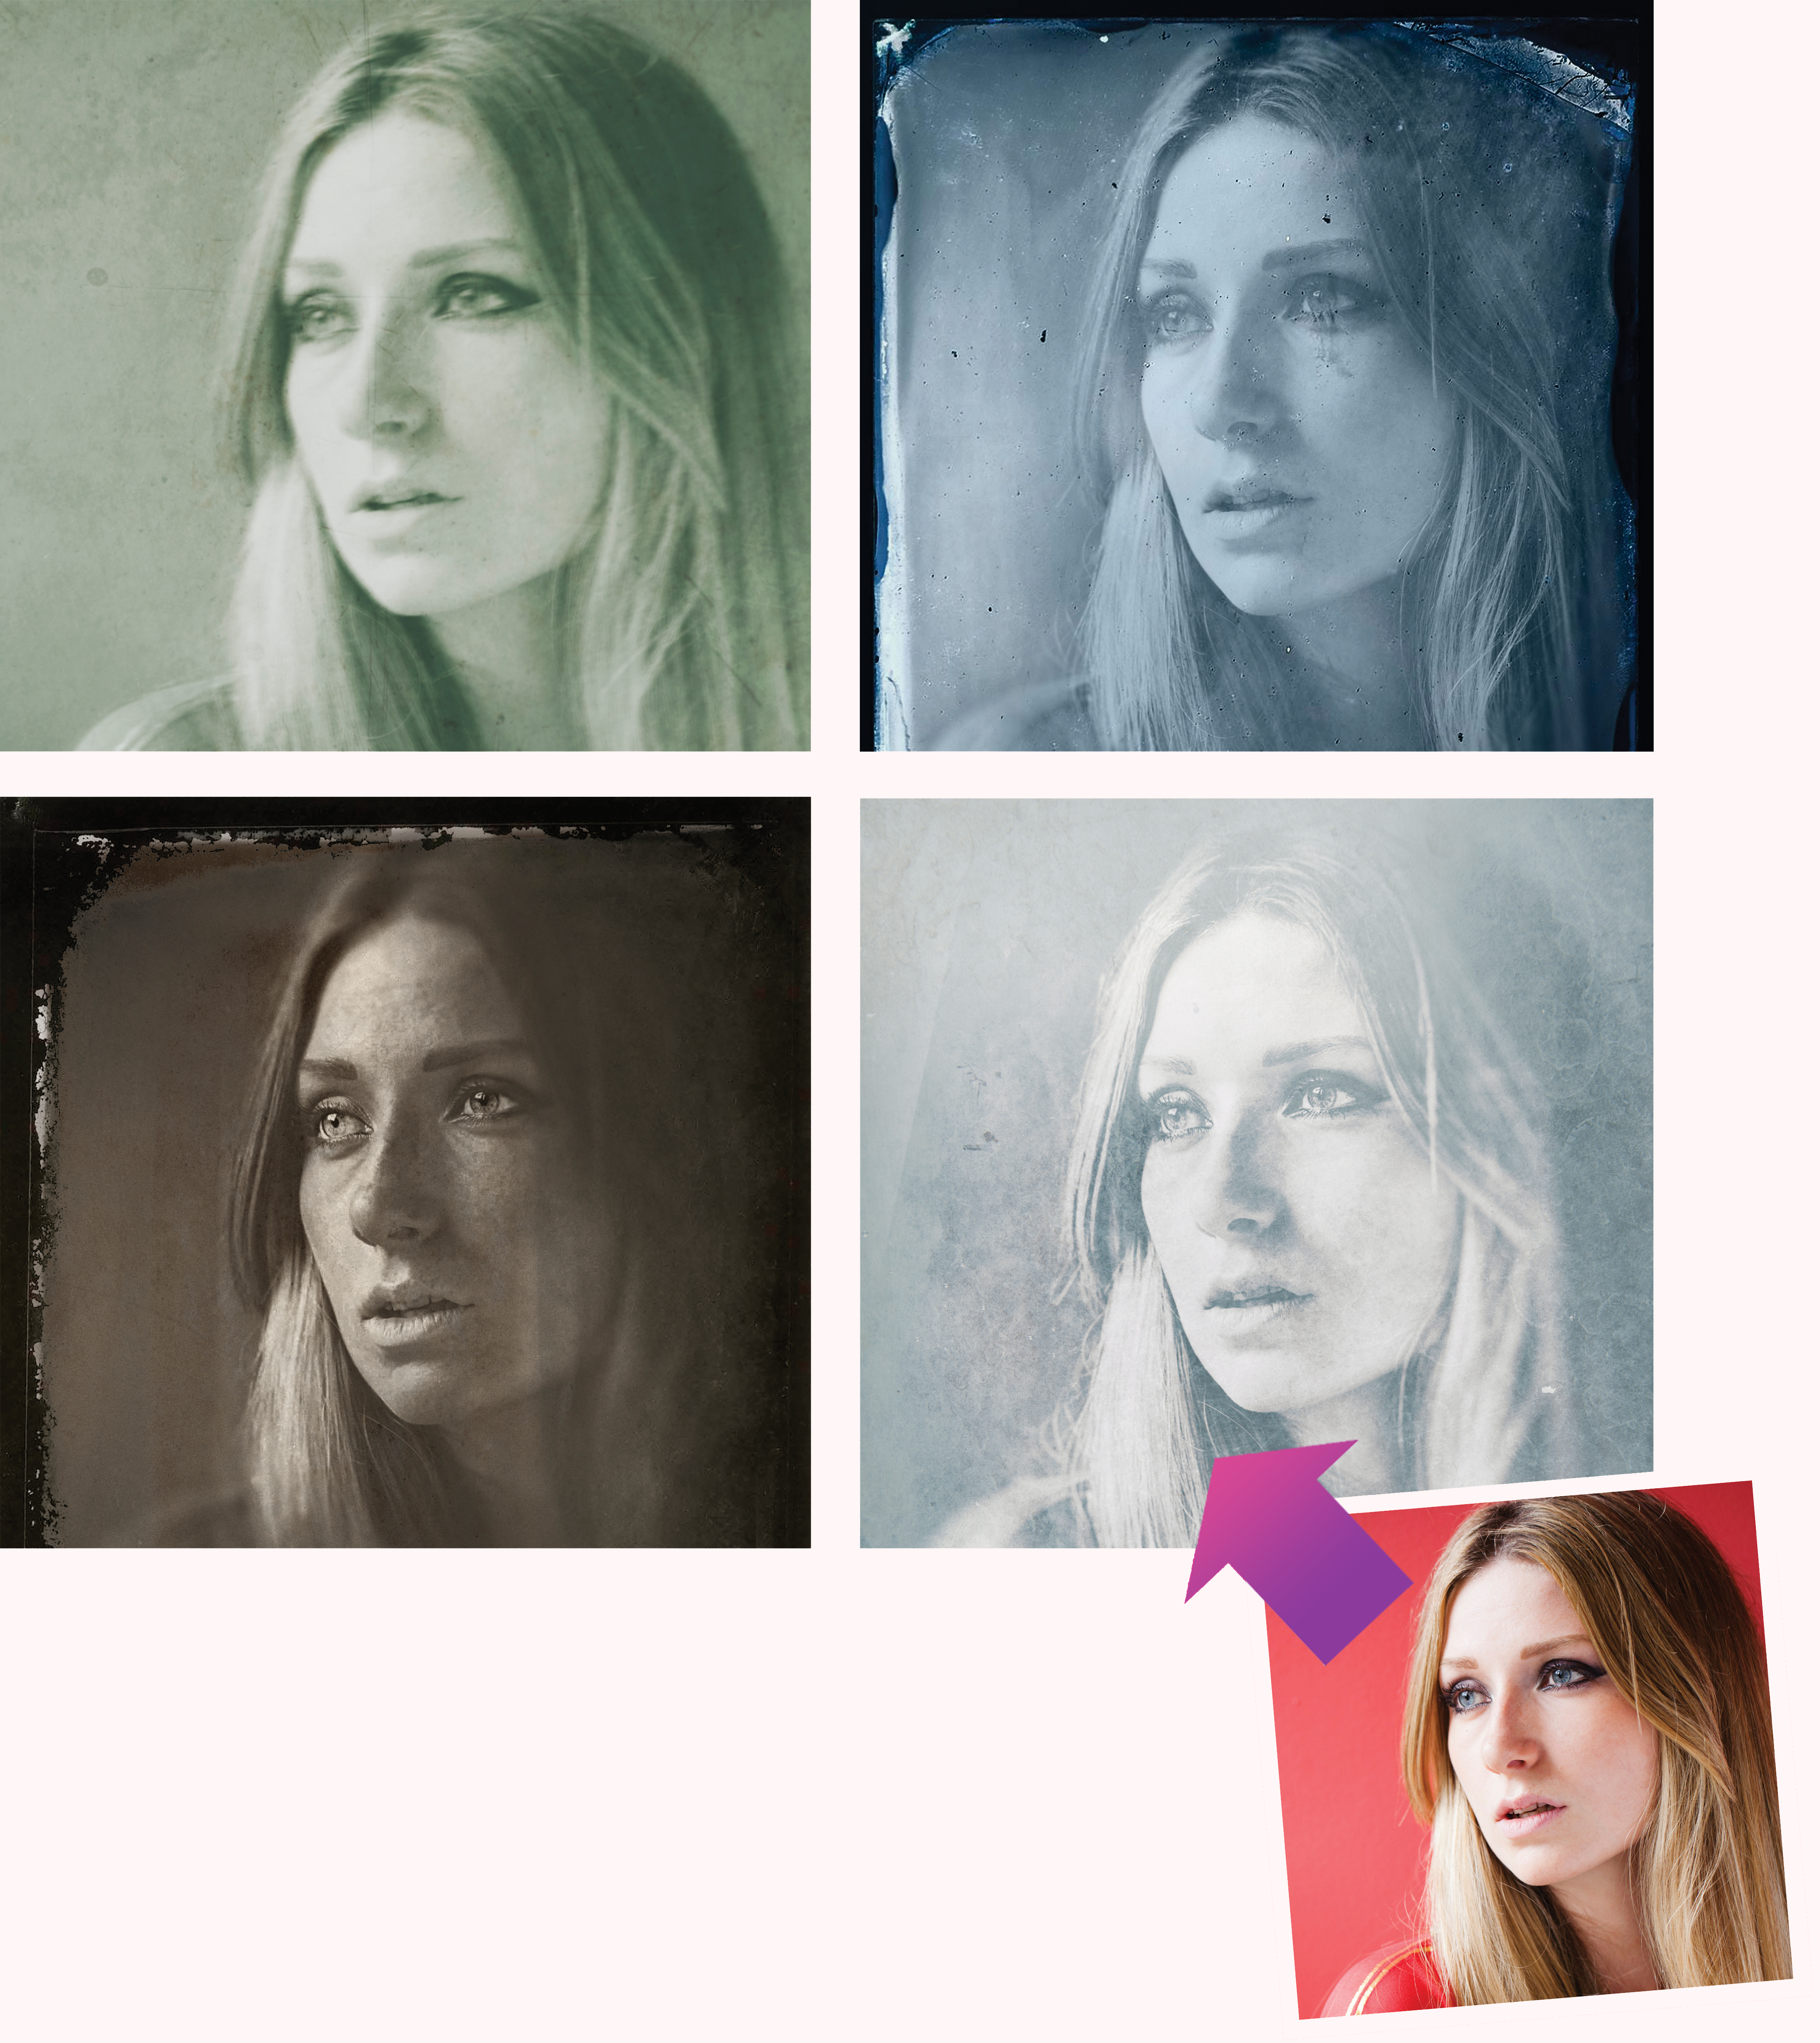
Photography tips for ageing your images
Time needed: 30 minutes
Skill level: Intermediate
Kit needed: Photoshop CC
DOWNLOAD TO YOUR COMPUTER FROM: http://downloads.photoplusmag.com/pp123.zip
STEP BY STEP: Ageing your photos
01 CREATE A TINTYPE EFFECT
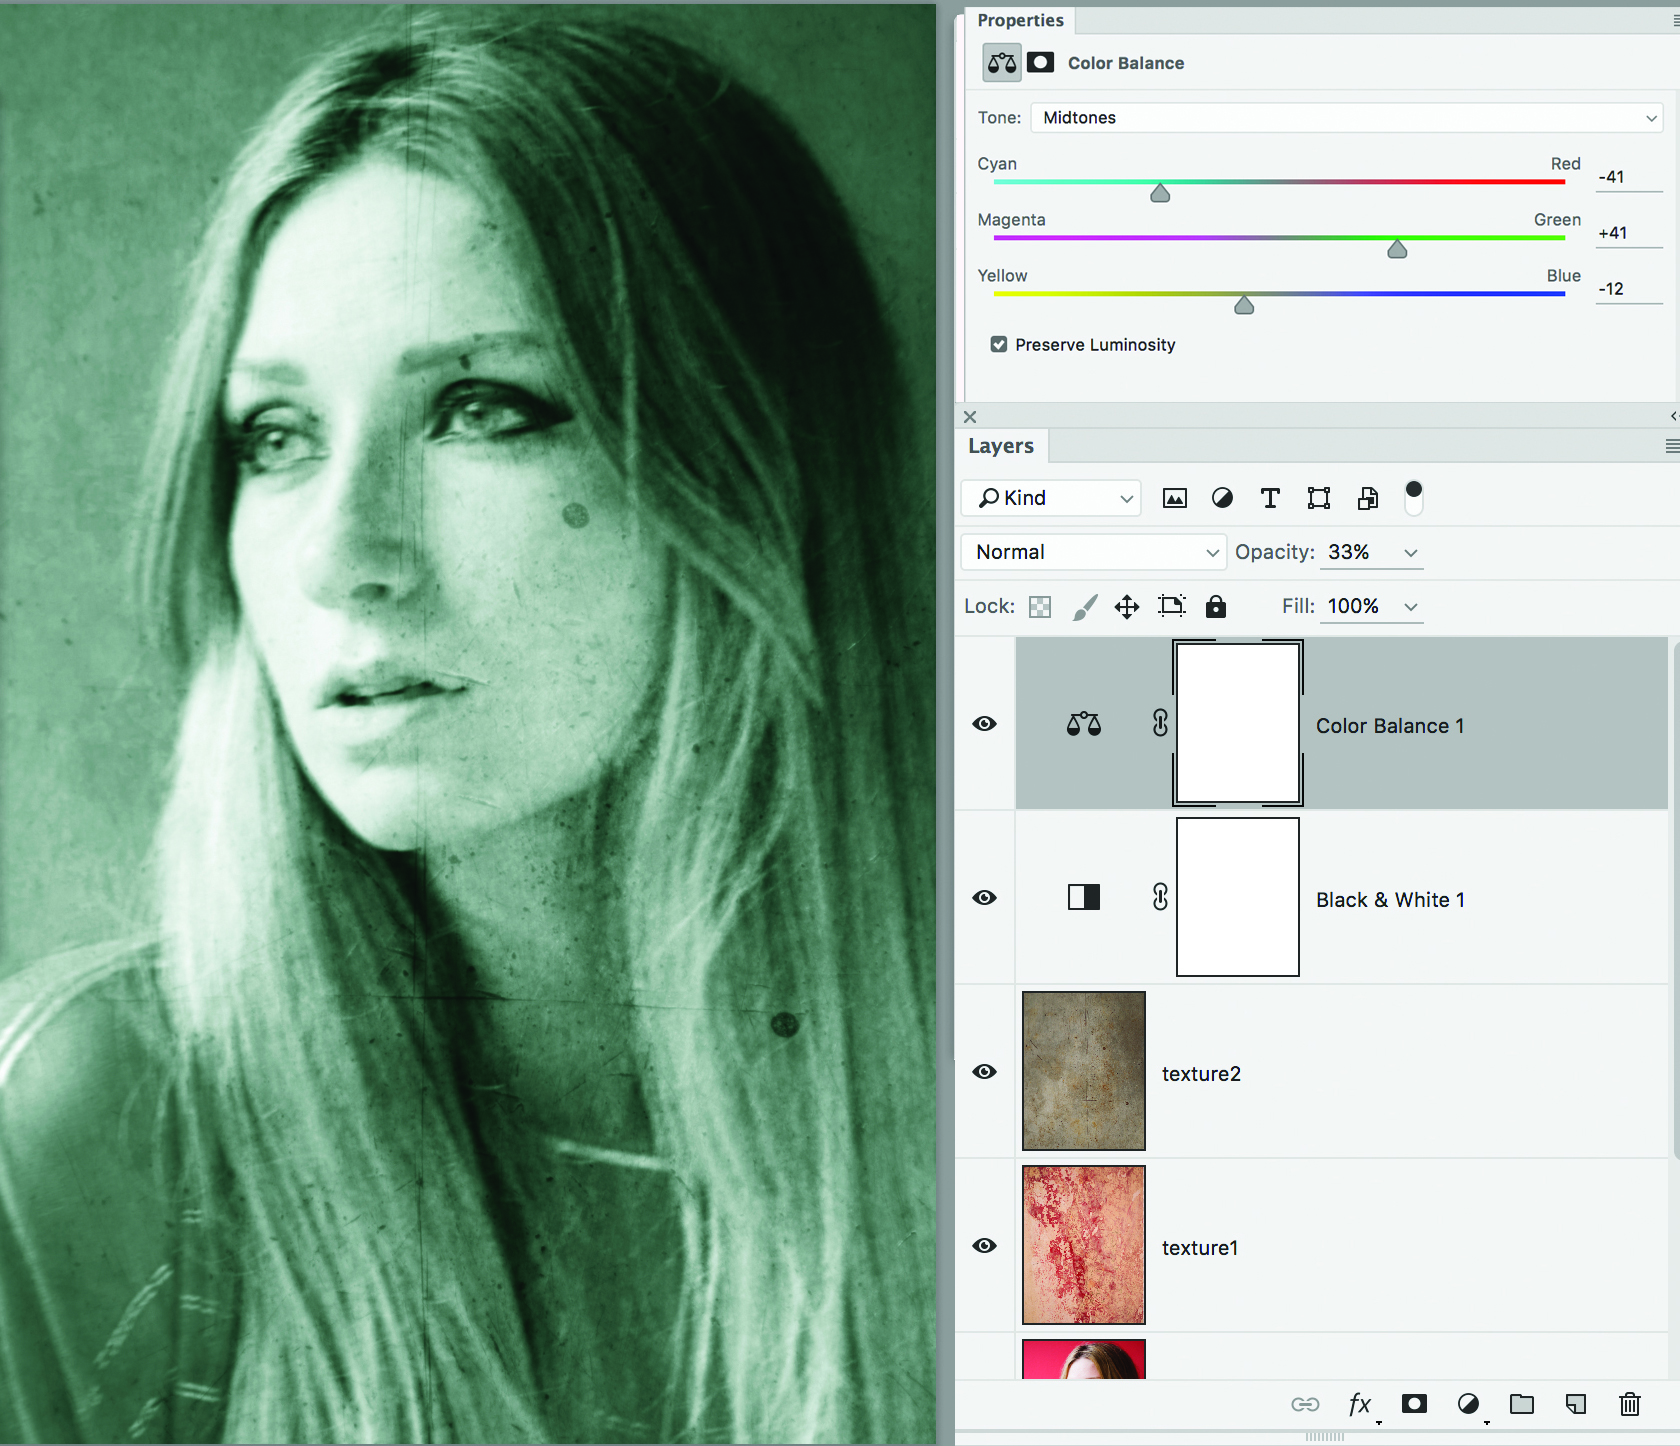
Duplicate the ‘Background’ layer with Ctrl+J, then go to Filter>Blur to apply a touch of Gaussian blur and motion blur. Next, add a Black & White adjustment layer. Drop in texture01 and 02 and drag them below the black and white layer. Set them both to the Overlay blending mode and lower the opacity slightly. Finally, add a Colour Balance layer at the top and dial in cyan, green and yellow. Adjust the layer’s opacity until you’re happy with the look of it.
02 BLEND A MESSY BORDER
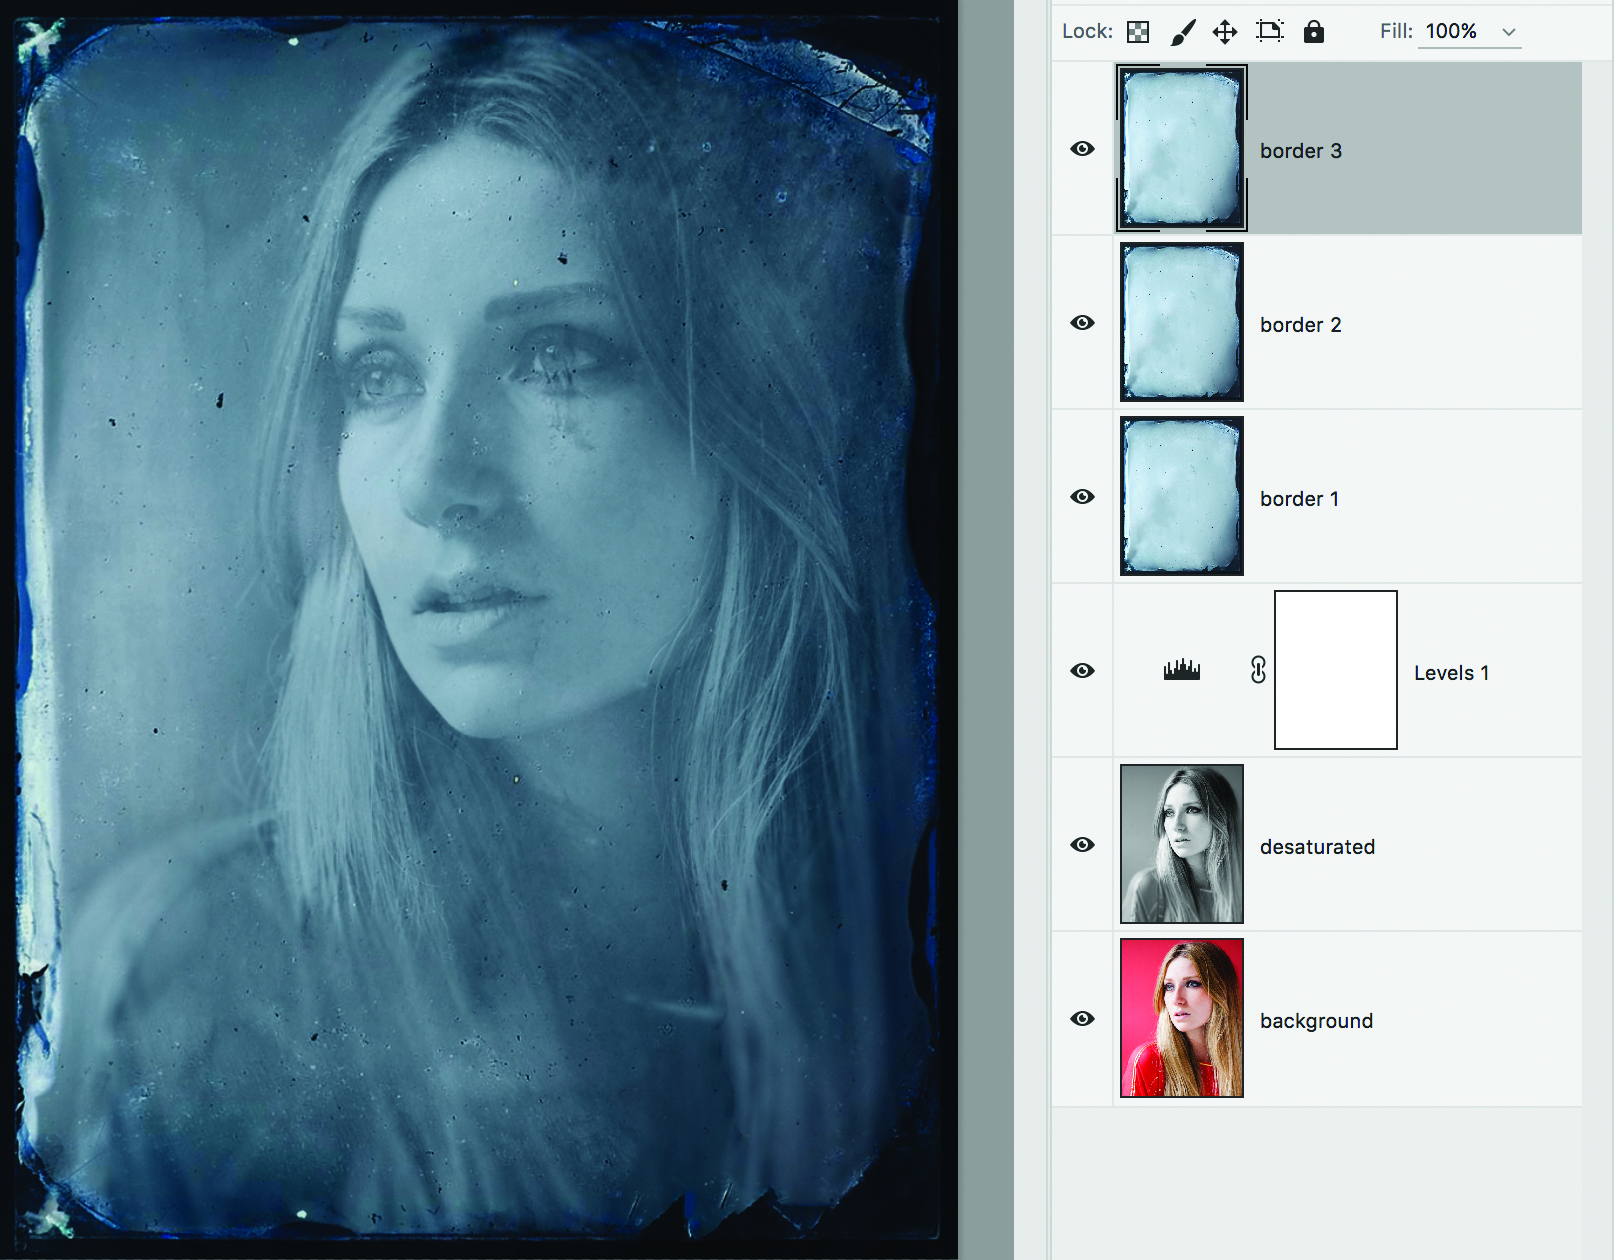
Press Ctrl+J then Ctrl+Shift+U to desaturate. Add a Levels layer and drag the Output Levels whites and blacks inwards to reduce contrast. Download a border (see the tip on the right for our suggestions) then use the Spot Healing tool to remove the subject. Copy the border to the main image and resize with Ctrl+T, then make two extra copies of the border layer. Set the lowest one’s blending mode to Pin Light, opacity 75%. Set the middle one to Multiply and the top one to Color.
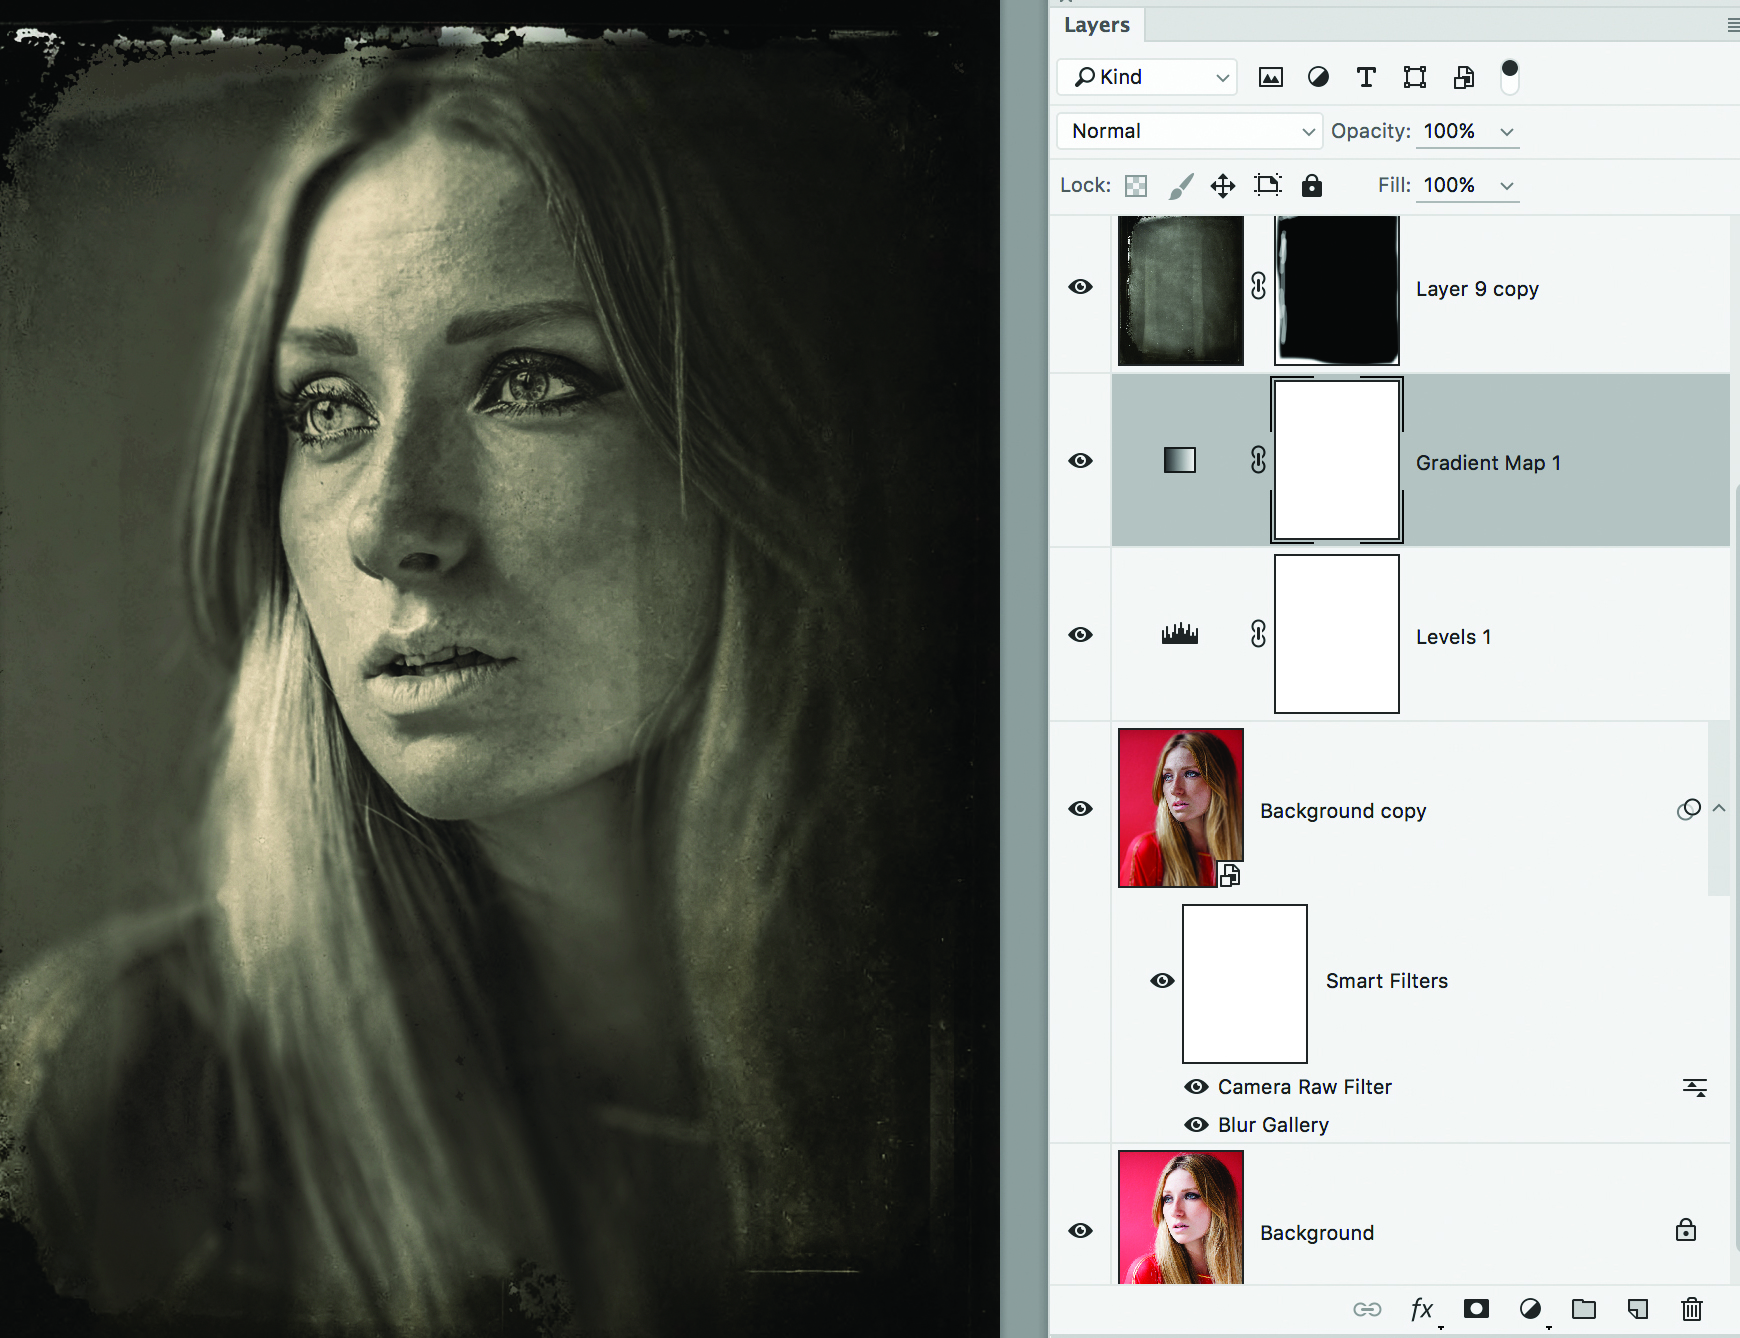
03 COLLODION EFFECTS
Press Ctrl+J then go to Filter>Camera Raw Filter. Decrease Highlights, increase Clarity, then select the Targeted Adjustment tool, target Luminance and drag over the face to darken the reds. Go to Filter>Blur Gallery>Iris Blur, and blur all but the face. Add a Gradient Map layer, load the Photographic Toning Map set and choose Sepia-Selenium 3. Finally, drop in an old border – see Step 2, above, for more on this.
The best camera deals, reviews, product advice, and unmissable photography news, direct to your inbox!
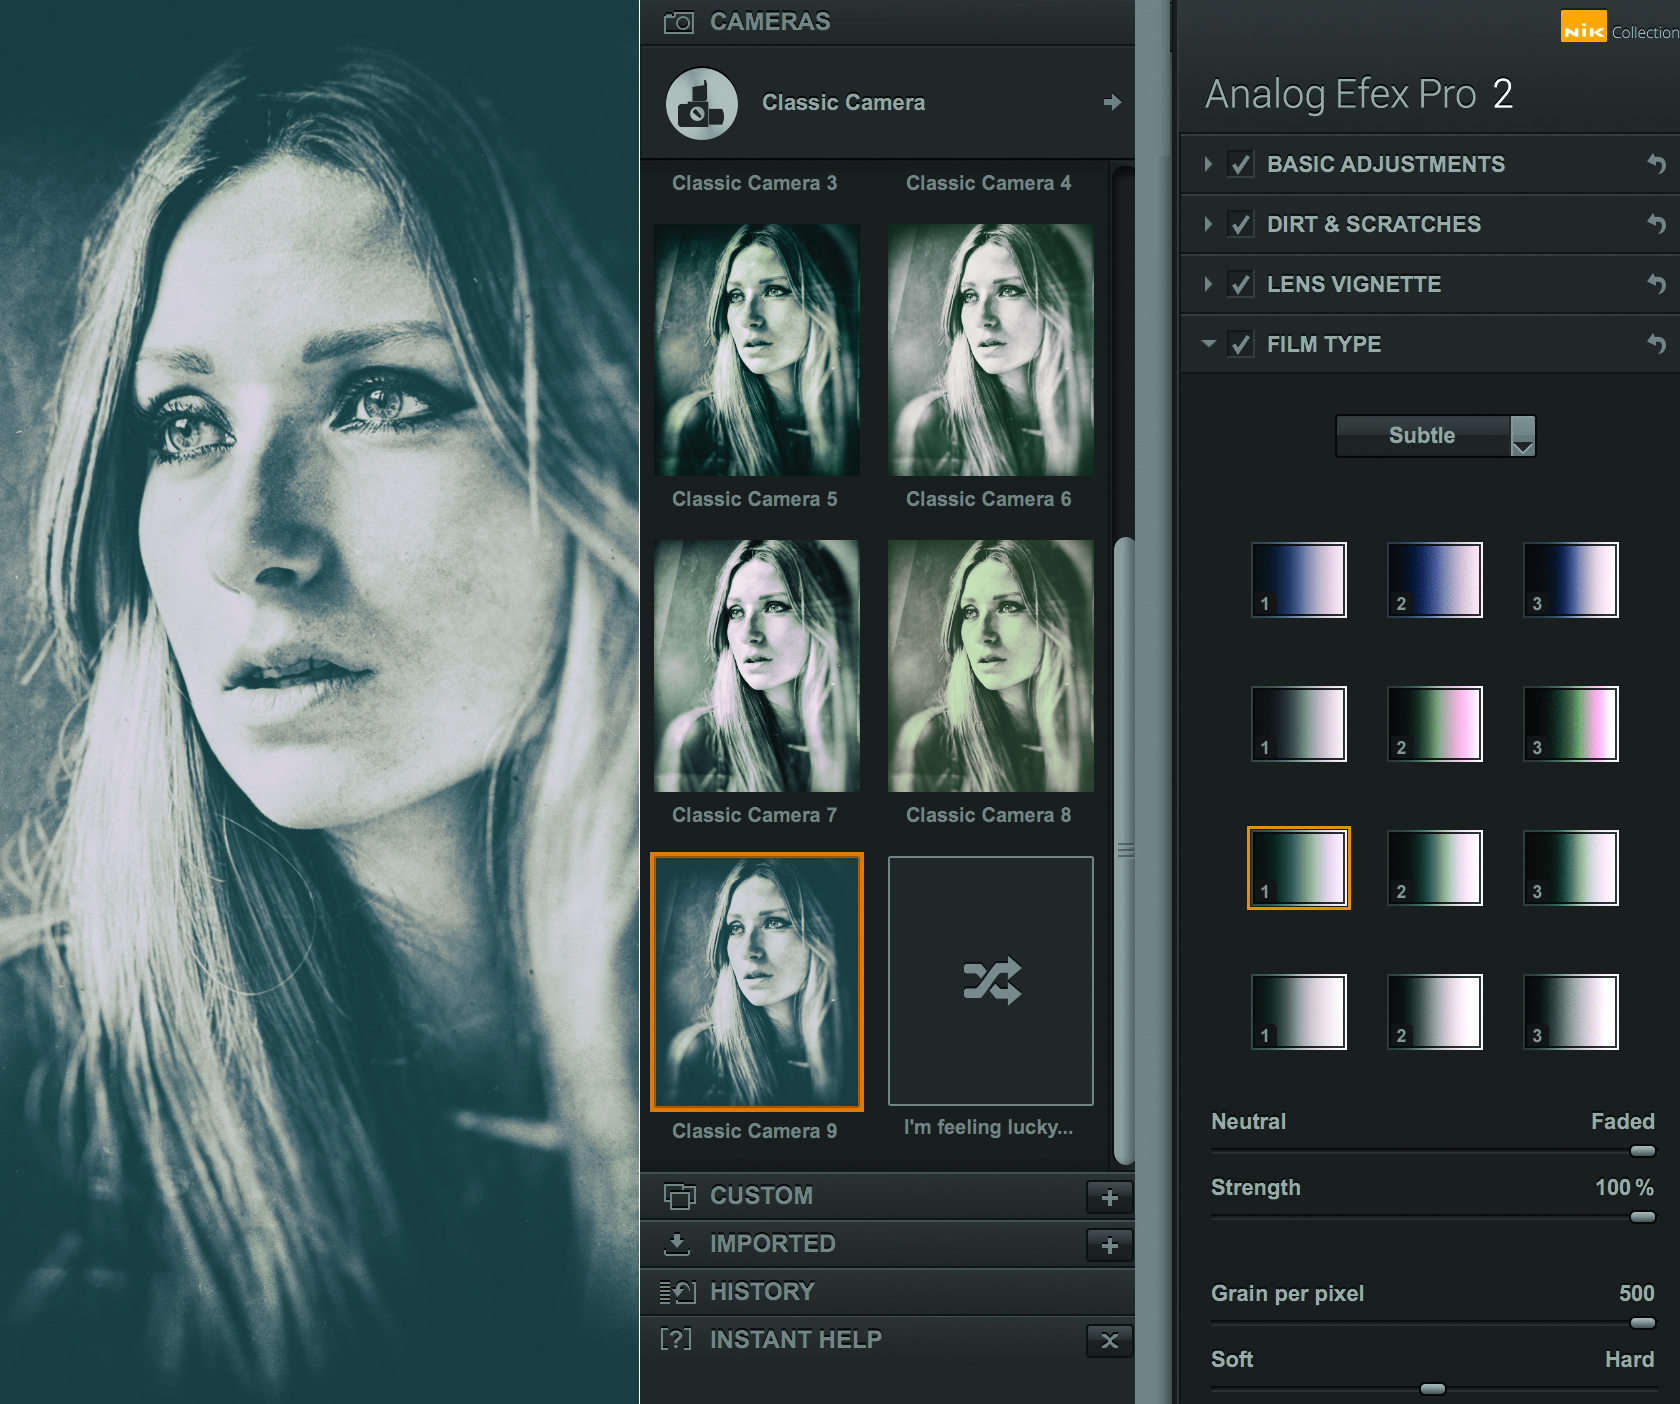
04 TRY ANALOG EFEX
Available for free as part of Google’s Nik Collection, Analog Efex is a great plug-in for retro effects. Download it from www.google.com/nikcollection and install it, then go to Filter>Nik Collection>Analog Efex. Here we first applied a Wet Plate preset, then a Classic Camera preset. We finished by adding texture03.jpg and set this layer’s blending mode to Screen, with opacity set to 77%.
FINDING OLD BORDERS
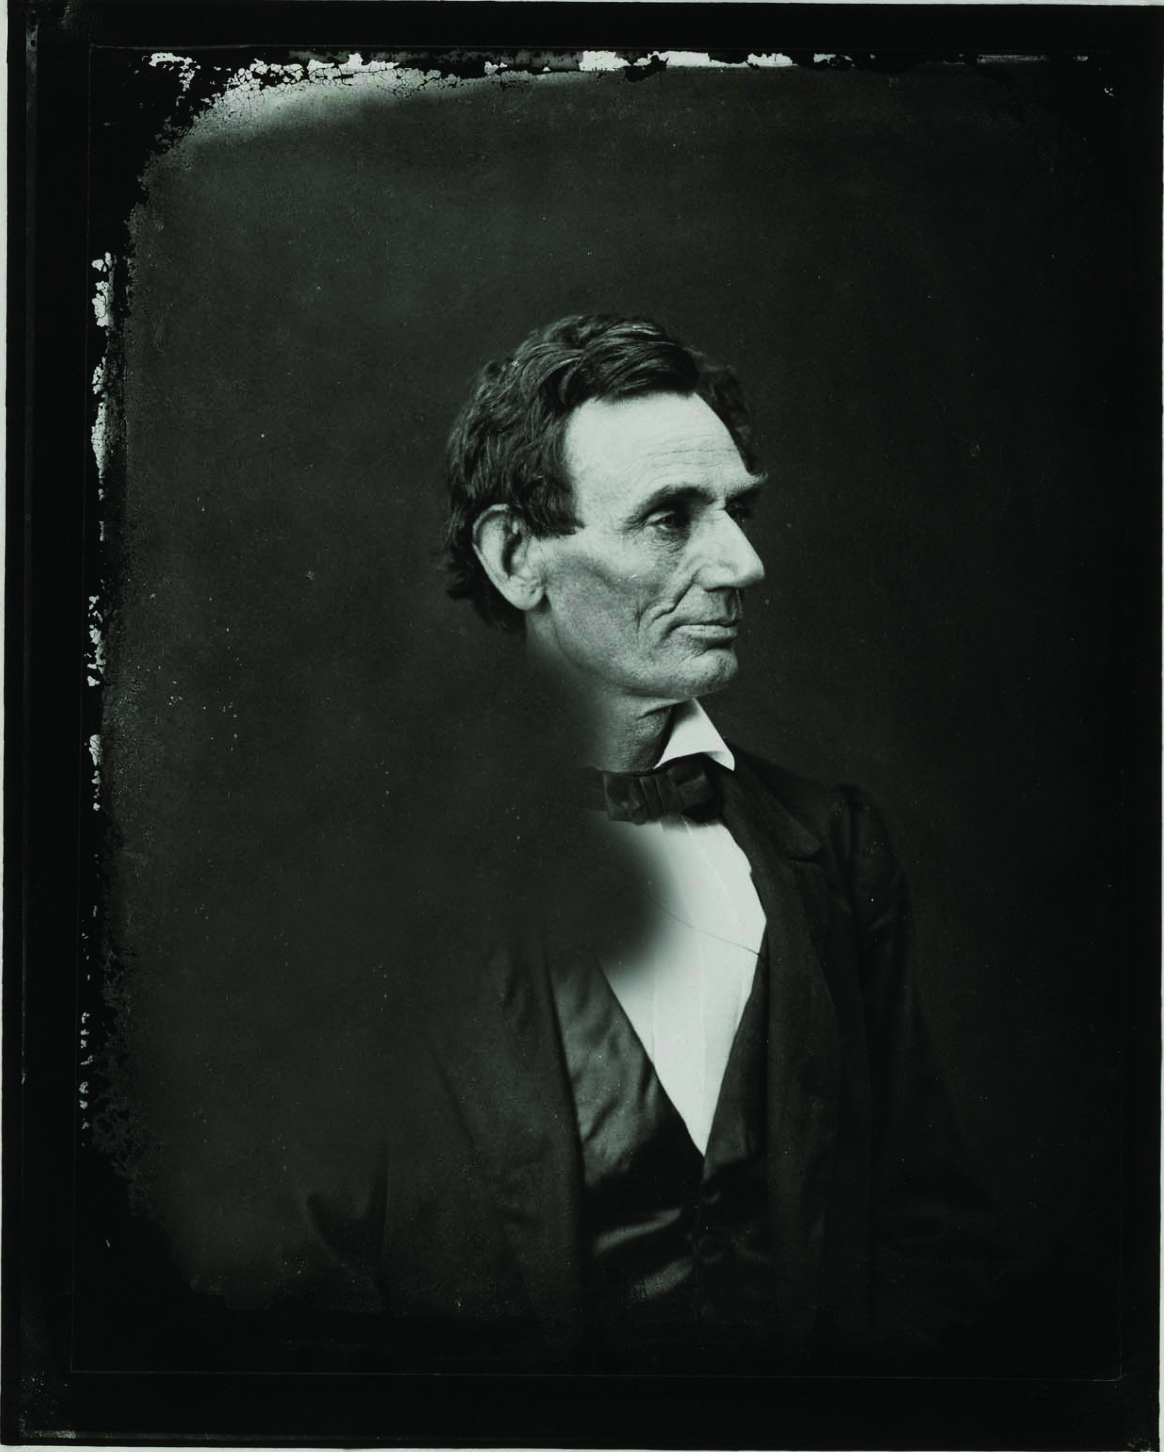
When it comes to adding messy, chemical-stained borders to your images, there are plenty of good resources online. You’ll find a really good source of copyright-free images, for example, at the Wikimedia Commons site (commons.wikimedia.org). For the border in Step 2 we used an old photo from www.bit.ly/dc184border, and for Step 3, an old plate of Abraham Lincoln. Once a border has been located and prepared, you’ll need to blend it with your chosen image. You could experiment with blending modes (try Multiply, Darken, Overlay or Soft Light), or add a layer mask then paint with black to hide the centre part of the frame, leaving just the border.
The lead technique writer on Digital Camera Magazine, PhotoPlus: The Canon Magazine and N-Photo: The Nikon Magazine, James is a fantastic general practice photographer with an enviable array of skills across every genre of photography.
Whether it's flash photography techniques like stroboscopic portraits, astrophotography projects like photographing the Northern Lights, or turning sound into art by making paint dance on a set of speakers, James' tutorials and projects are as creative as they are enjoyable.
He's also a wizard at the dark arts of Photoshop, Lightroom and Affinity Photo, and is capable of some genuine black magic in the digital darkroom, making him one of the leading authorities on photo editing software and techniques.


