Monochrome magic in Affinity Photo
90-DAY FREE TRIAL:
Try Affinity Photo and get 50% off if you decide to purchase. Click here for more information!
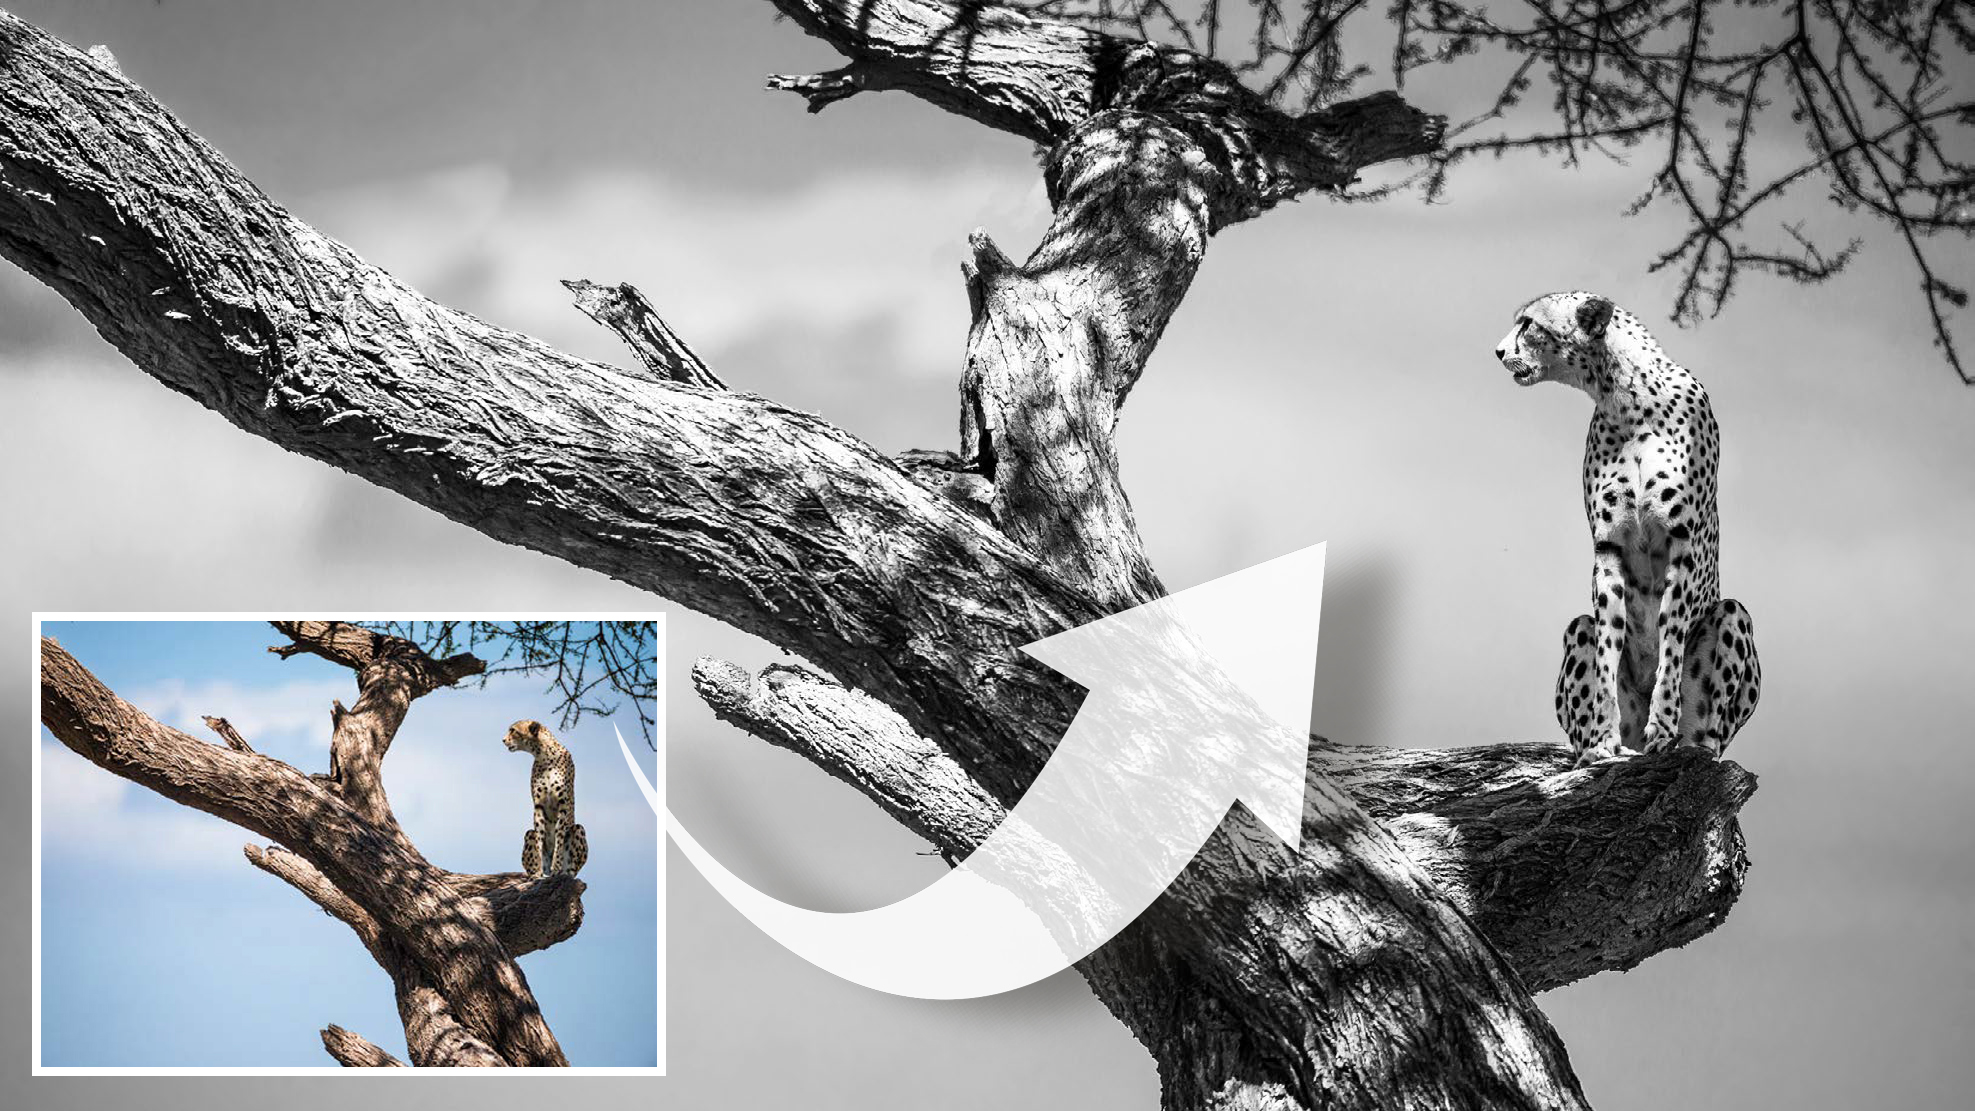
There’s more to a successful black-and- white conversion than simply removing color. If you want to take control of your black-and-white photos, you need to tailor your conversions to the image. Colour, even in its absence, is important for this control, because the best black-and-white conversion tools let you fine- tune the brightness of colours as you remove them.
Affinity Photo’s Black & White layer is one such tool. Much like a lens-mounted monochrome filter, it enables you to control colour brightness so you can, for example, darken blues and lift greens so that a tree stands out against a blue sky. Simple and intuitive to use, it gives us the ability to craft finely nuanced mono conversions in seconds.
One of the benefits of converting to mono is how you can push the contrast more than might be acceptable in a colour image. You can do this either universally – using the Curves command (the most intuitive tool for boosting contrast in Affinity Photo) or selectively, by lightening and darkening areas with the Dodge and Burn tools. We’ll look at the tools and techniques you need for mono conversions here…
Contrast control
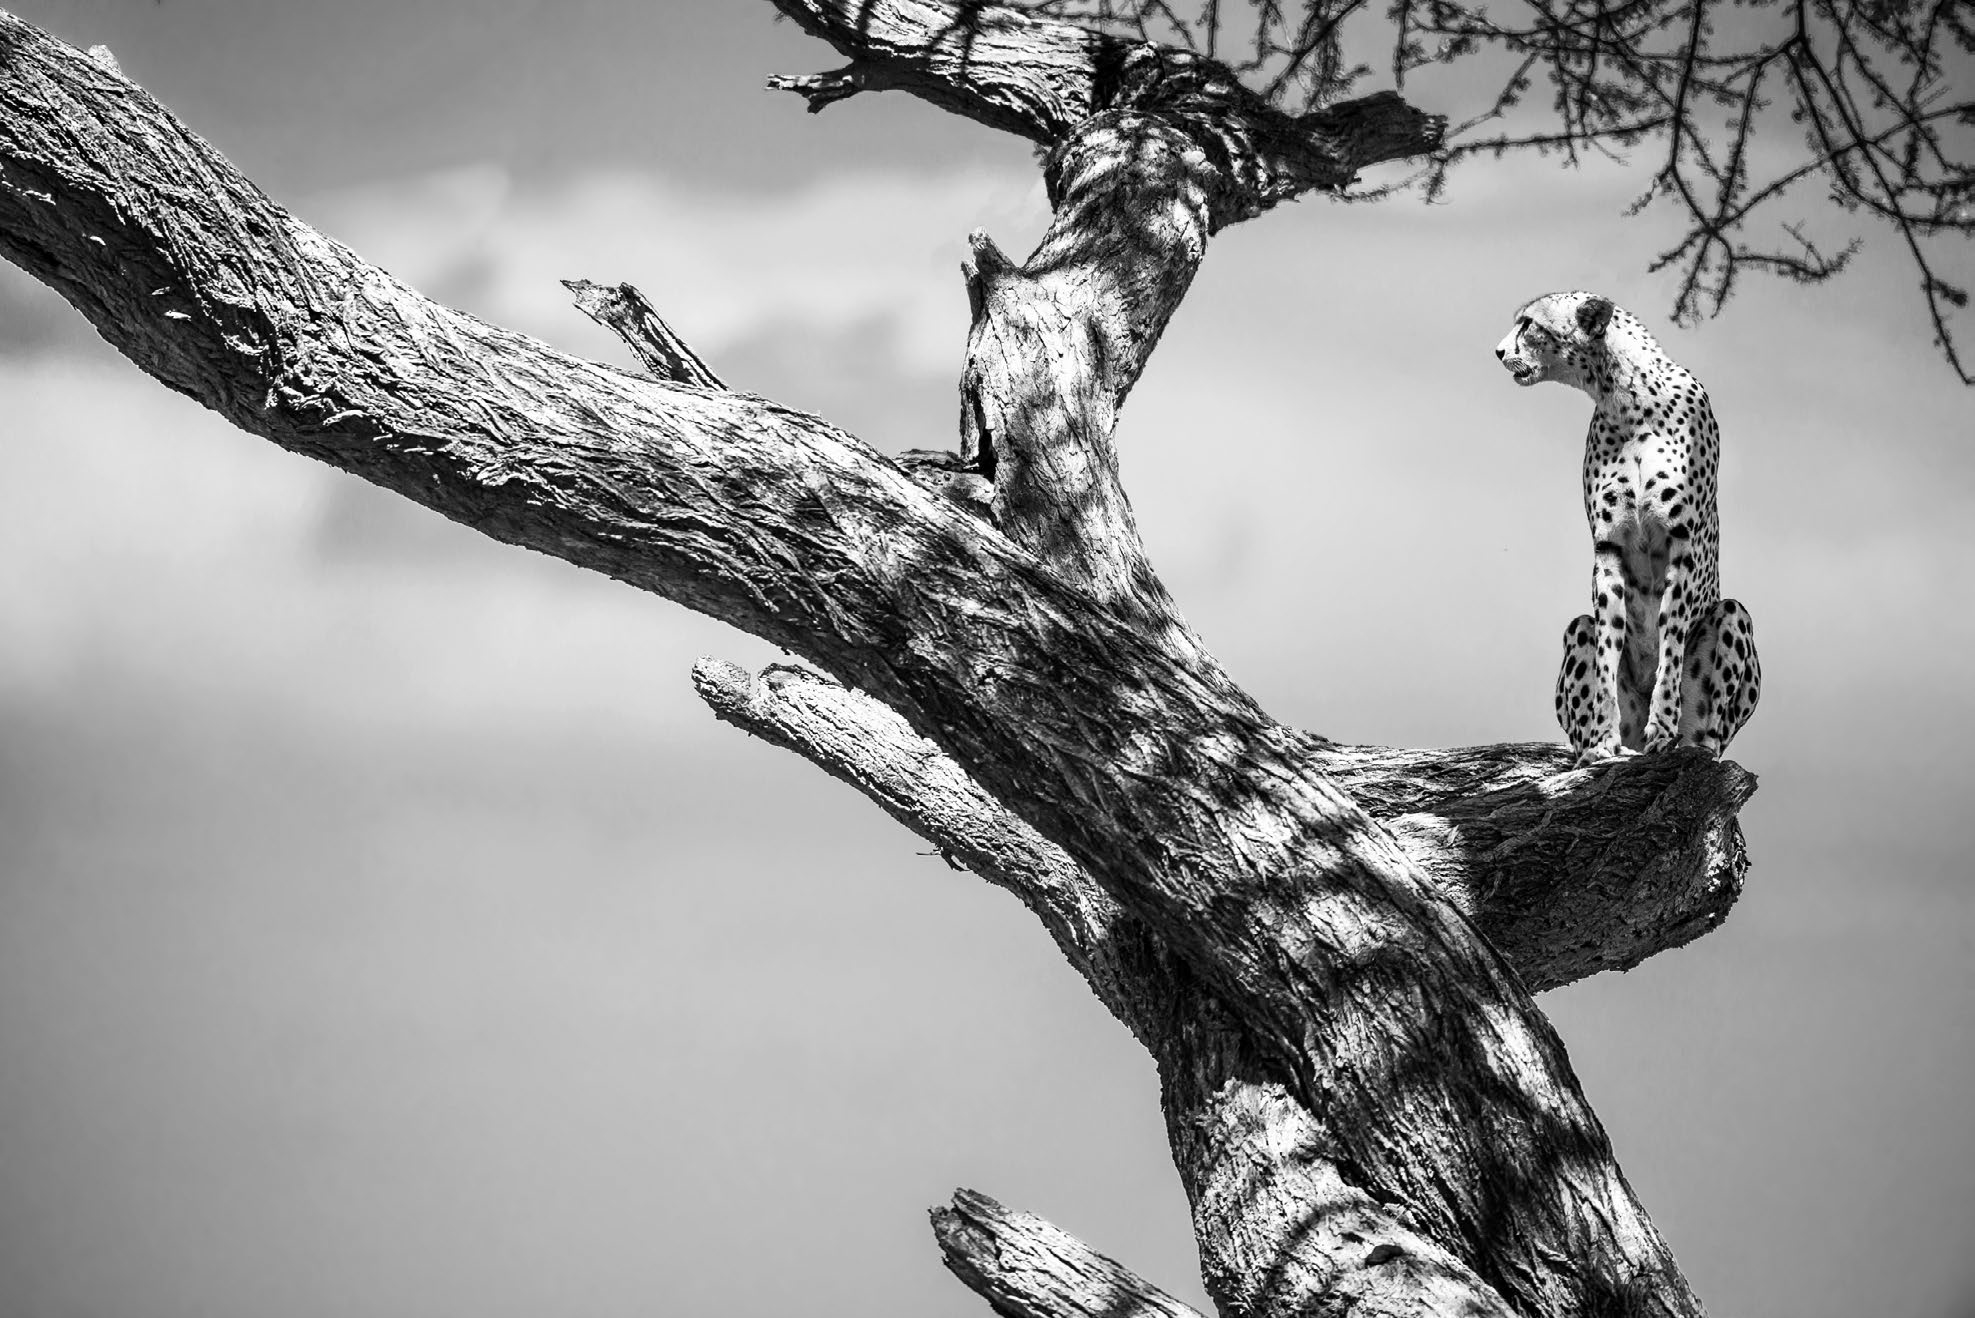
The key to crafting great black-and- white conversions often boils down to one simple element: contrast. If you think about it, when you strip away colour, all that’s left is contrast; the way that the brightness of one set of pixels makes them stand out from another.
Of course, contrast control begins when you actually take the shot. So if you know that you will want to convert to mono later, it helps to seek out subjects that contrast with their surroundings. When you bring your shots into Affinity Photo, you can enhance the contrast – with Curves and with Dodge and Burn – to make bold black-and-white images.
Make mono magic in Affinity Photo
1) B&W layer
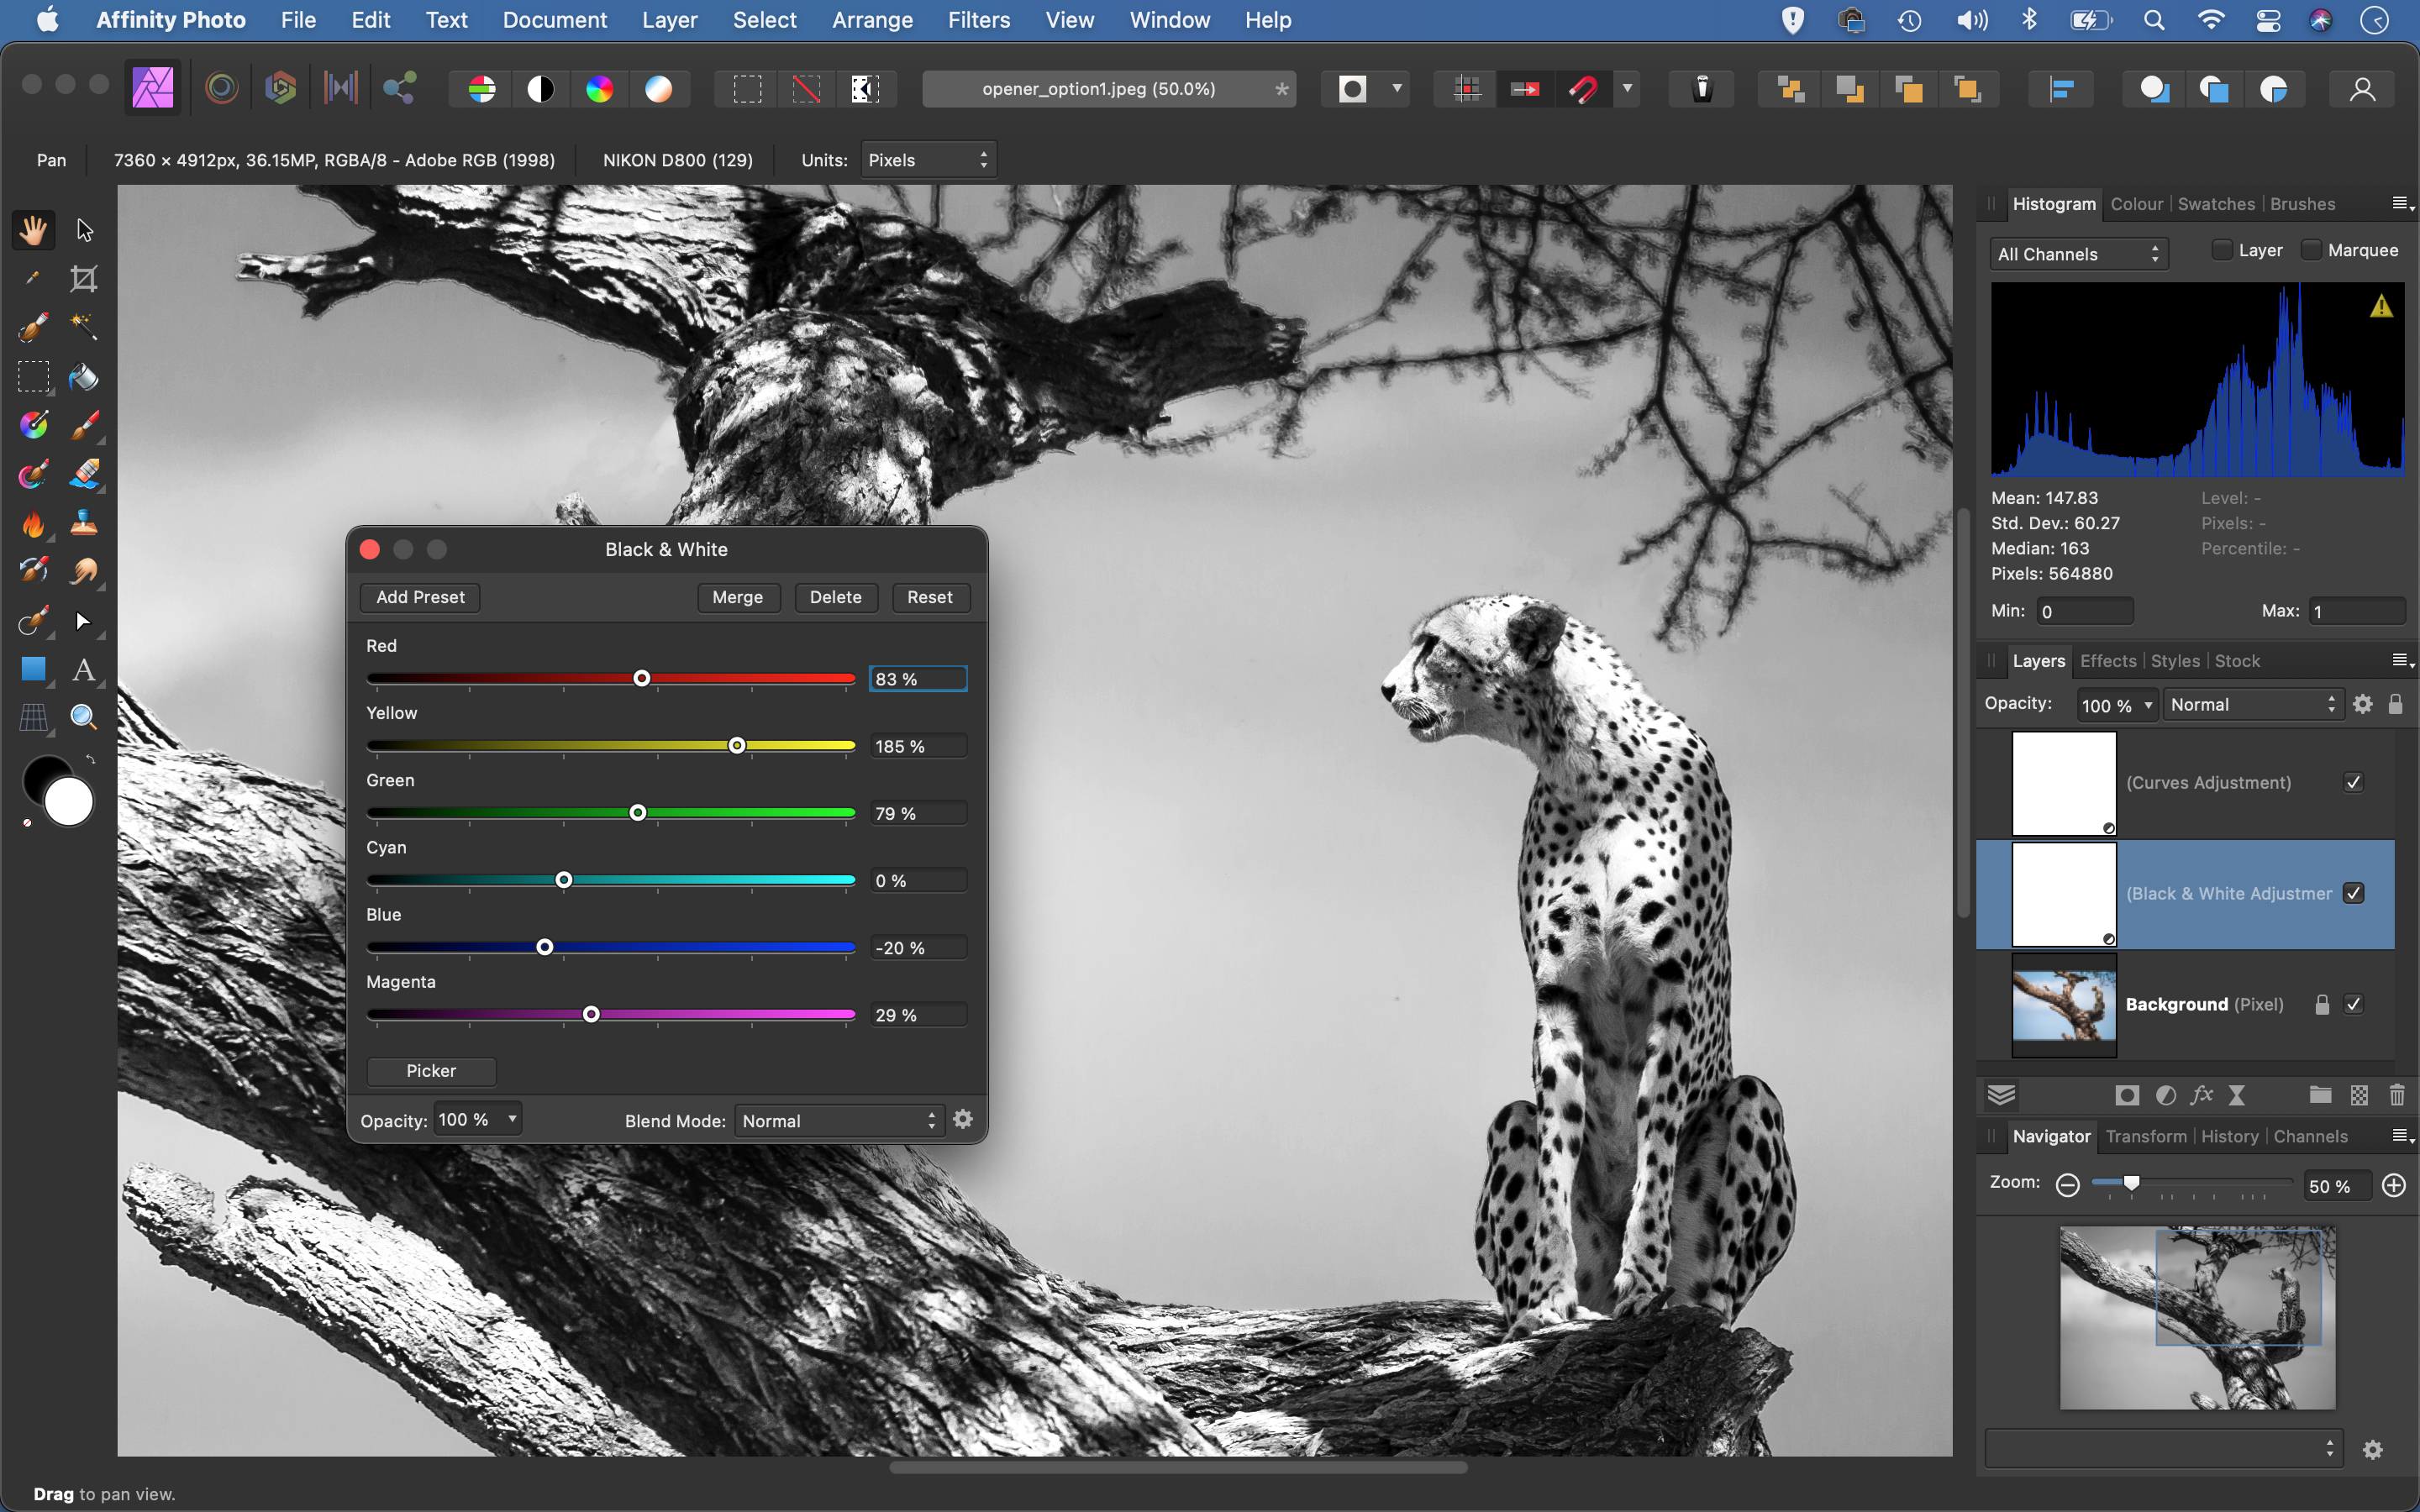
One of the best ways to convert to black and white in Affinity Photo is the Black and White layer. Like all Adjustment Layers, it works by affecting those layers below it in the stack. It keeps our black-and- white effect non-destructive and editable, and also gives us extra options to alter the monochrome effect, perhaps by painting a Layer Mask so that it works selectively over parts of the frame, or by altering the layer opacity.
2) Colour sliders
The six sliders within the Black & White Adjustment Layer let you control the luminance of each colour range as the image is converted to mono. This kind of control enables you to make black-and-whites that are tailored to the contents and colours in your image. Here, by lifting the yellows, we can lighten the cheetah’s fur and the tree; then, by dropping the blues and cyans, we can darken the sky for added contrast.
3) Picker
This handy tool enables you to drag left or right over parts of the image to adjust the brightness of individual colour ranges within the frame. It offers similar control to the colour sliders, but it’s often more intuitive and quicker to use, as you can quickly target and tweak luminance simply by dragging over areas and objects in the image. If you need to reset a colour range to its default, double-click the slider in the Black & White settings.
4) Curves for contrast
At first, black-and-white conversions can look rather flat. You can add much- needed punch with a Curves Adjustment Layer. Plot an S-shaped curve line by dragging one point upwards near the top of the diagonal line to lift the highlights, and another downwards near the bottom to anchor the shadows. The steeper the S-shape is, the greater the contrast.
5) Dodge and Burn tools
The Dodge and Burn tools go hand in hand with black-and-white conversions. They let you lighten (dodge) or darken (burn) areas by painting over the image. You can target shadows, midtones or highlights. It’s best to work on a duplicate of your original layer to keep things non-destructive. Like most painting tools, you can use the number keys 1-9 to set a strength for the tool.
6) Presets
If you come up with a black-and-white look that you like, why not save it as a preset? Simply click this button, choose a name and click Save. Then, while you’re editing another image, you can go to the Adjustment Panel (View > Studio > Adjustment) and you’ll find your preset within the Black & White tab here. If the effect needs tweaking, simply go to the Black & White settings.
Get creative with multiple exposures
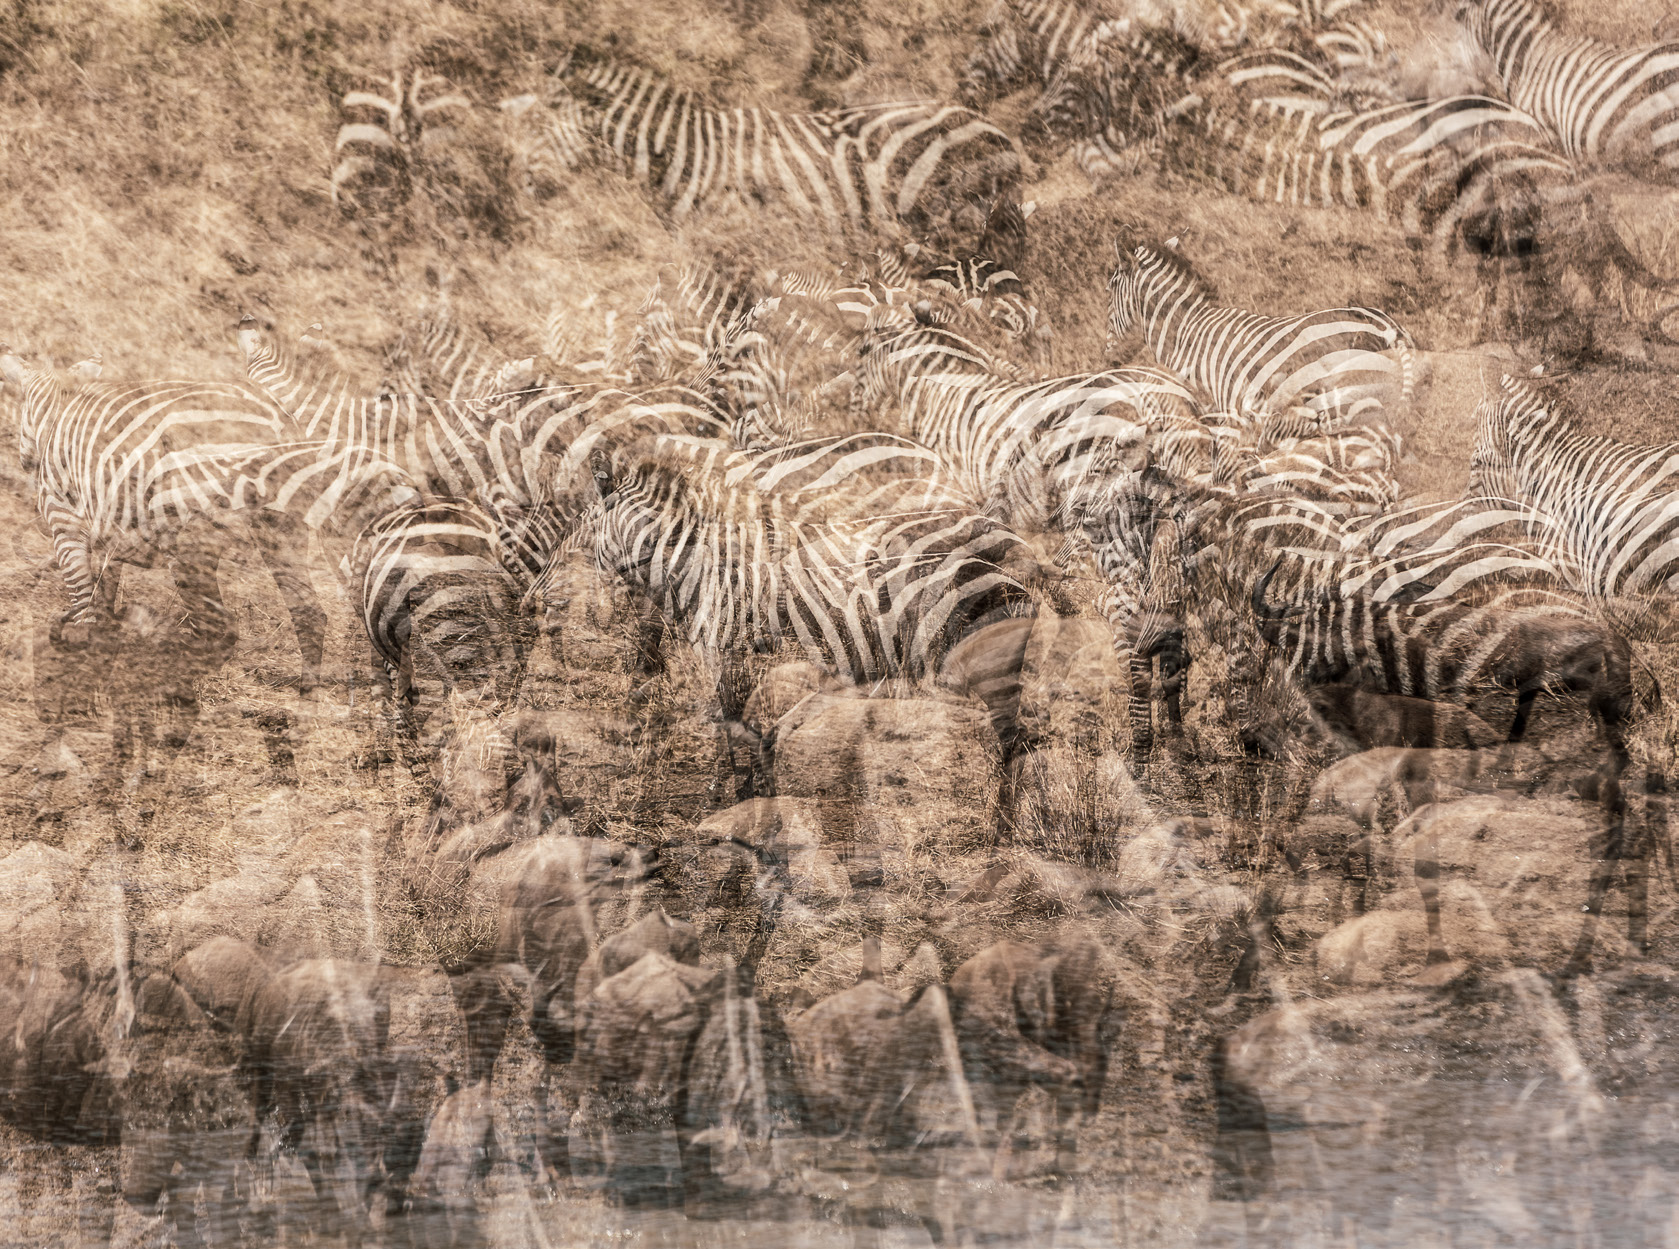
Multiple-exposure photography has been around since the days of film, but it didn’t actually become a widespread feature in digital cameras until relatively recently. Even now, it’s not available on all DSLRs and mirrorless cameras – which is surprising, as it’s such a versatile facility.
You can use multiple exposure as a creative workaround tool, for example superimposing a shot of the full moon taken on a long telephoto lens on a scene taken with a wide-angle lens. With a fast shutter speed and a high-speed drive setting, you could record an entire sequence of an athlete in motion, with each of their different positions exposed in a single image.
Alternatively, you can combine a series of images taken over a longer timeframe to recreate the effects of a single, much slower exposure in order to blur white water and clouds.
Still, this does rely on your camera having a multiple exposure feature – which not all cameras do, and some limit you strictly to double exposures. However, you can also achieve the same effect – and arguably to greater effect – using editing software.
Multiple exposures with layers and blending modes
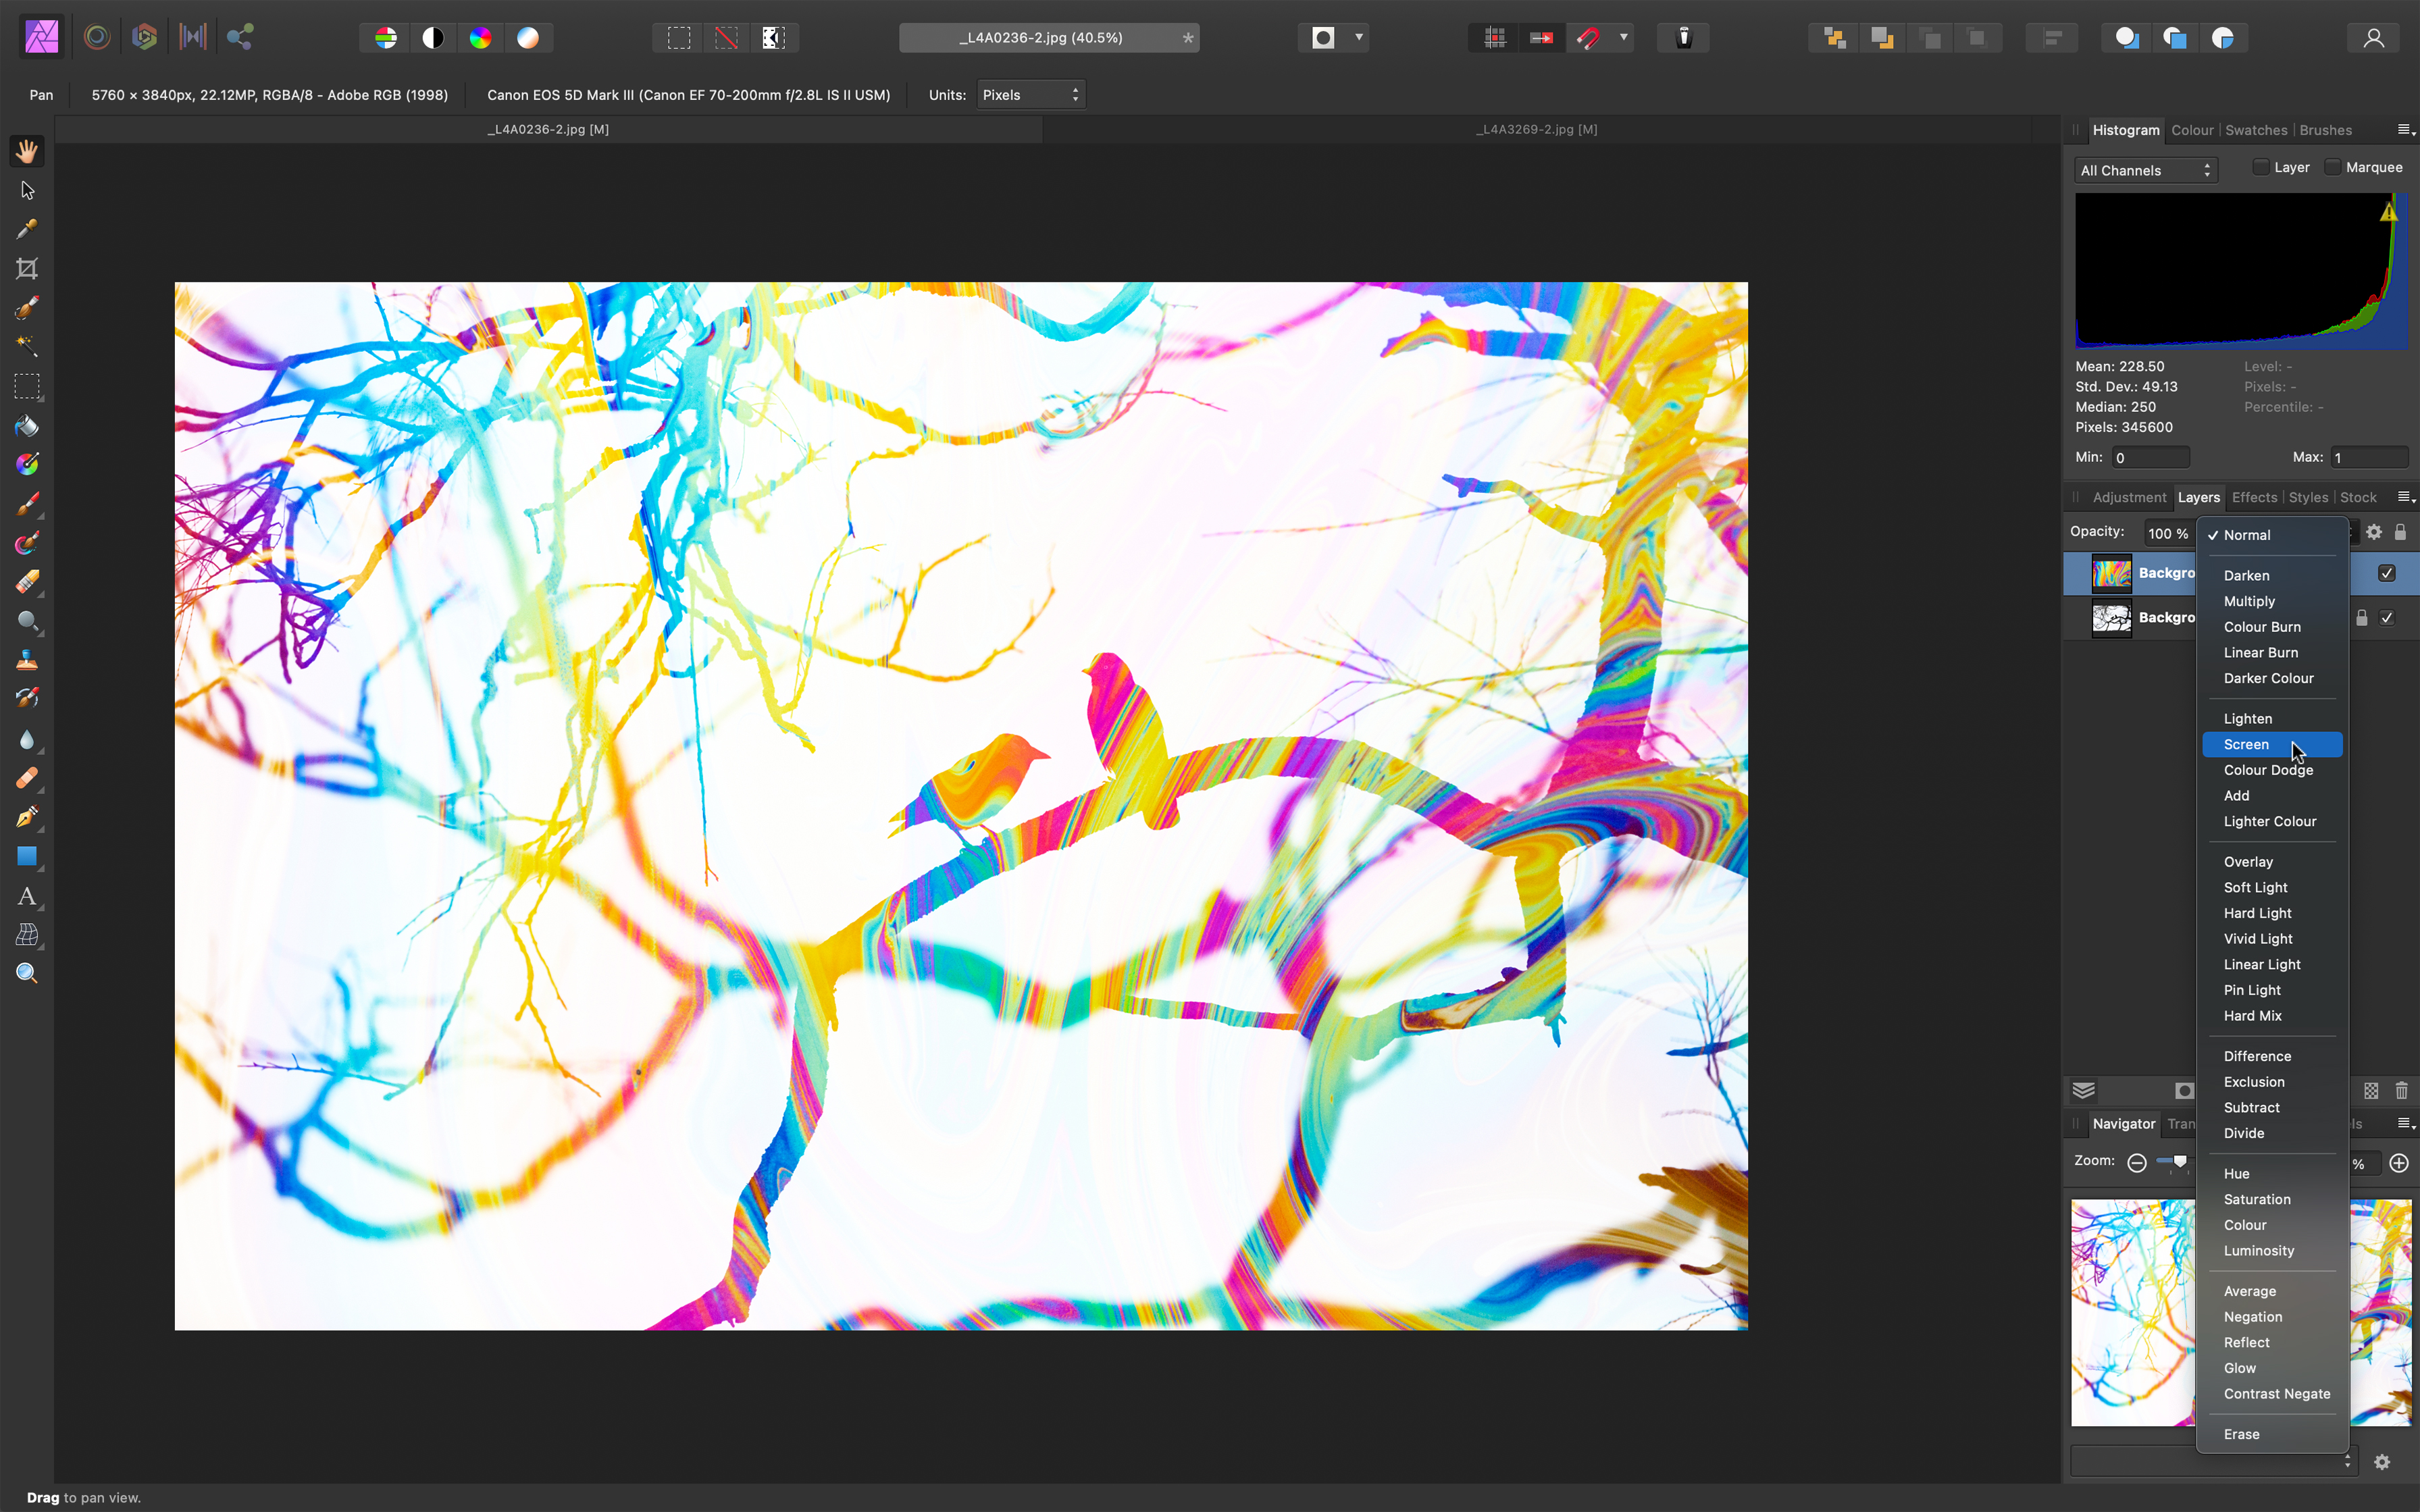
You don’t need a lot of technical knowledge to be able to pull off multiple exposures in software such as Affinity Photo. It’s simply a case of cutting and pasting each image you want to use, so that they are stacked above each other as layers. You can then use the layer blending drop-down menu to change the way in which the layers interact with one another.
The default Blending Mode is Normal, but Darken, Multiply, Screen and Lighten will make different parts of each image to show through. Darken and Multiply allow the darker parts of the layer below to show through, with the top layer only visible in the lighter areas. Screen and Lighten, meanwhile, have the opposite effect, with the top layer only visible in the darker areas of the image below it.
Top 4 multiple exposure photo tips
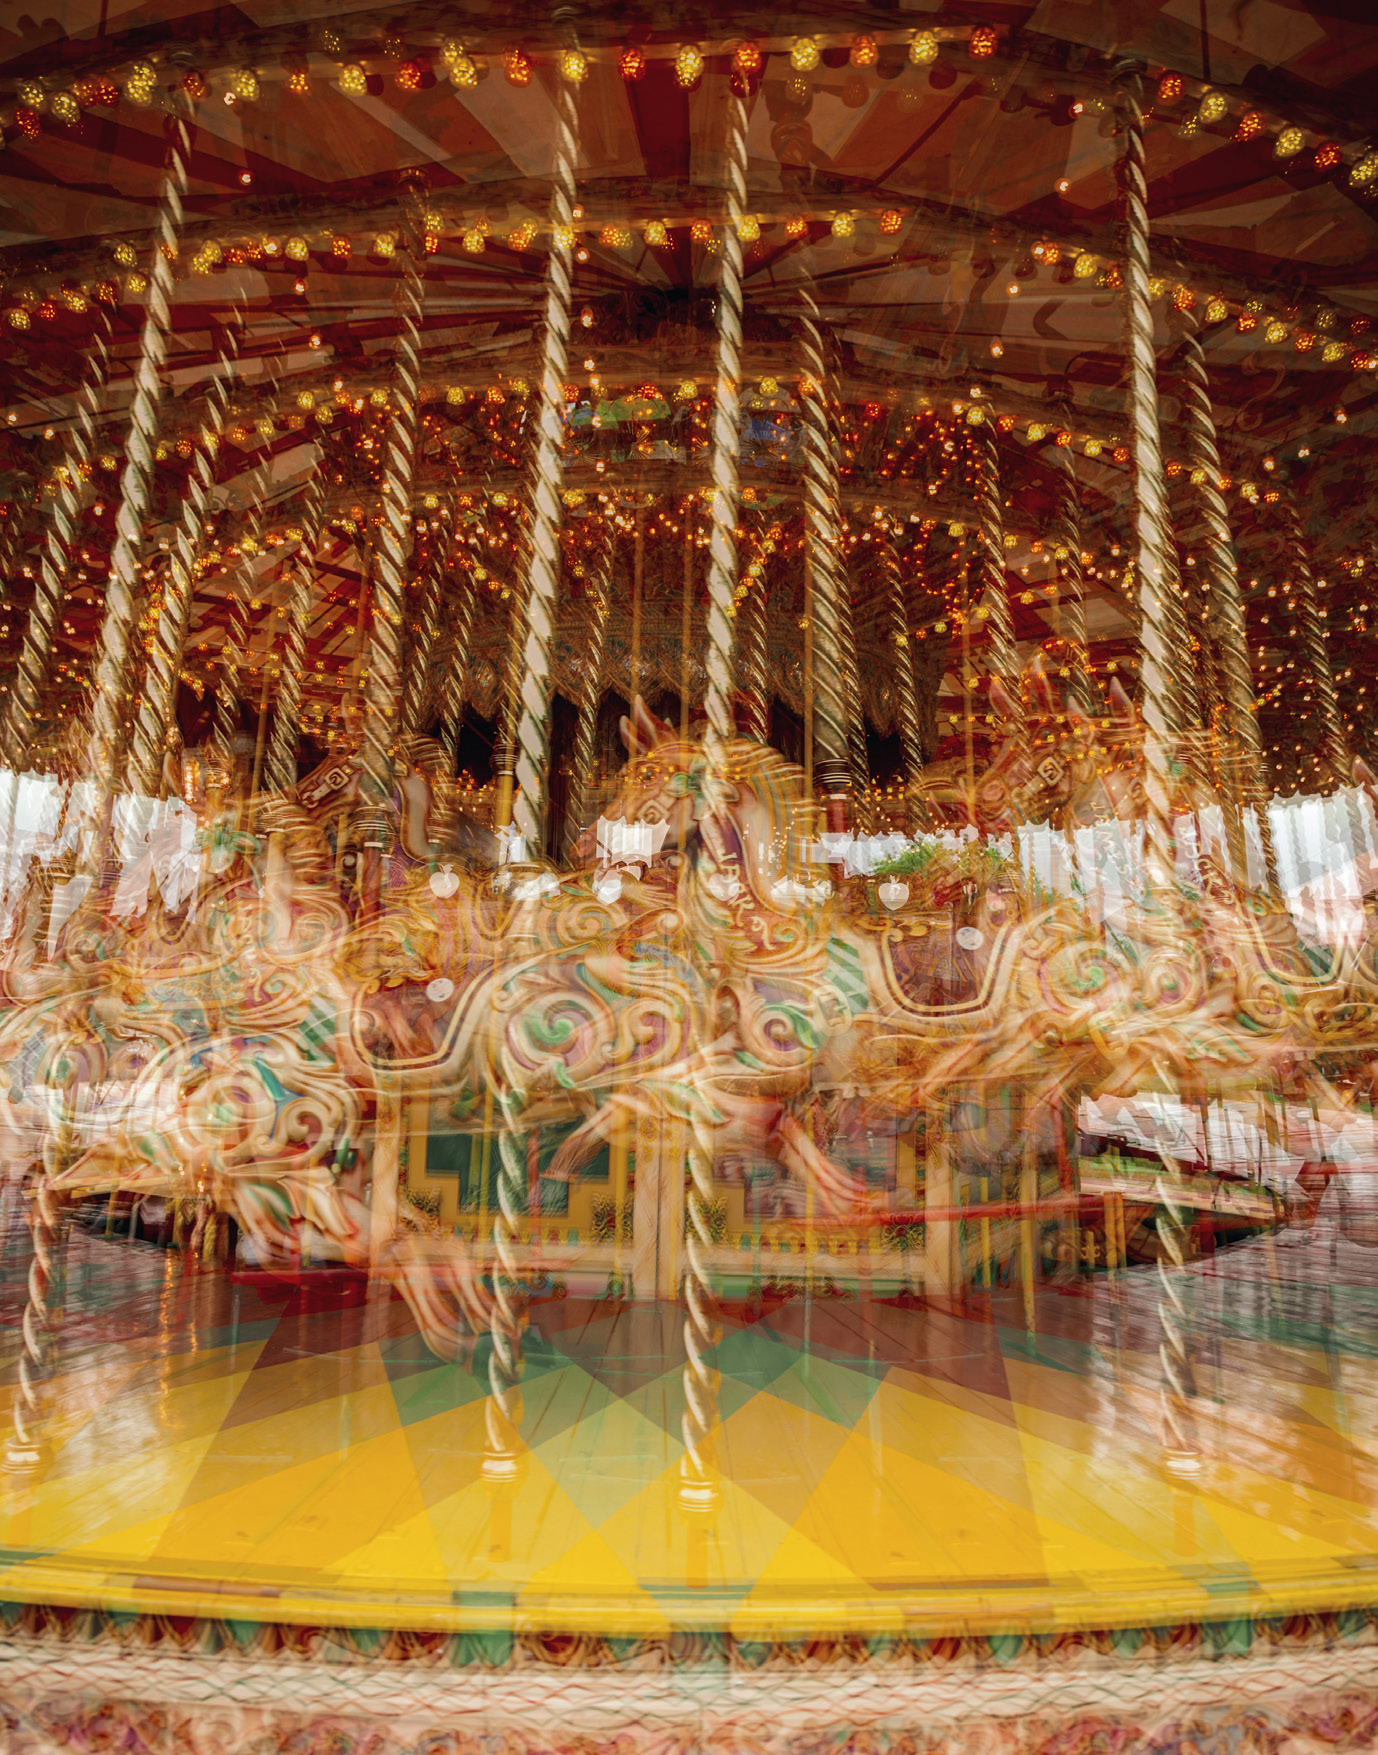
1) Look for a clean background
When you’re experimenting with multiple exposures, start with a subject against a white or clear background (such as a pale sky). Now look for a subject that will look good when it ‘fills’ in the dark areas of your base layer.
2) Change the angle to suit the subject
Don’t feel that you need to shoot every subject as you find them. Try twisting the camera to change the angle of different ‘layers’ in your multiple exposure, or moving the camera to intentionally position the key elements of each shot so that they ‘interact’ with each other.
3) Come up with a concept
If you have a story or a theme, it gives you a starting point and brings more focus to your picture-taking when you’re out and about. You’ll be more aware of the scenes, subjects, textures and patterns that could work as potential layers.
4) Experiment in software
Try Lighten, Screen, Multiply, Overlay and Soft Light blending modes to change the way in which each image in the multiple exposure is combined. Use masks and brushes to hide and reveal details.
Reader challenge: Multiple exposure
Enter our latest photo challenge and win a copy of Affinity Photo worth £49 / $50! This month, we want to see your best double- and multiple-exposure shots, whether they’ve been taken in-camera or worked up in software.
There’s so much scope for creativity with this challenge. A simple image made up of two shots that you’ve plucked from your library, and which hang together beautifully, can be just as effective as one where you’ve gone all-out, building up a 40-layer work of art. The world is your oyster – especially if you combine them in a multiple exposure!
To enter your best multiple exposure image, either email your entry to digitalcamera@futurenet.com, putting ‘Multiple Exposure Challenge’ in the subject line; or go to www.facebook.com/digitalcameraworld and find the ‘Multiple Exposure Challenge’ post, and upload your entry to the feed.
By entering your image, you confirm that you own the copyright to the image, and agree that Digital Camera can publish it in relation to the competition. You retain full copyright of your image, and will be credited if published. The closing date is 24 June 2021. The winner will receive a copy of Affinity Photo for Windows or macOS. Good luck!
Get the Digital Camera World Newsletter
The best camera deals, reviews, product advice, and unmissable photography news, direct to your inbox!
Digital Camera World is one of the leading authorities on camera and photography news, reviews, techniques, tutorials, comparisons, deals and industry analysis. The site doesn't just specialize in cameras, but all aspects of photography, videography and imaging – including camera phones, gimbals, lenses, lighting, editing software, filters, tripods, laptops, printers, photo books, desks, binoculars and more.
Whether you're using, looking to buy or trying to get the most out of a compact camera, action camera, camera drone, cinema camera, beginner camera or professional camera, Digital Camera World has a roster of experts with combined experience of over 100 years when it comes to cameras, photography and imaging.

