Perfect skies with AI Sky Replacement in Luminar 4
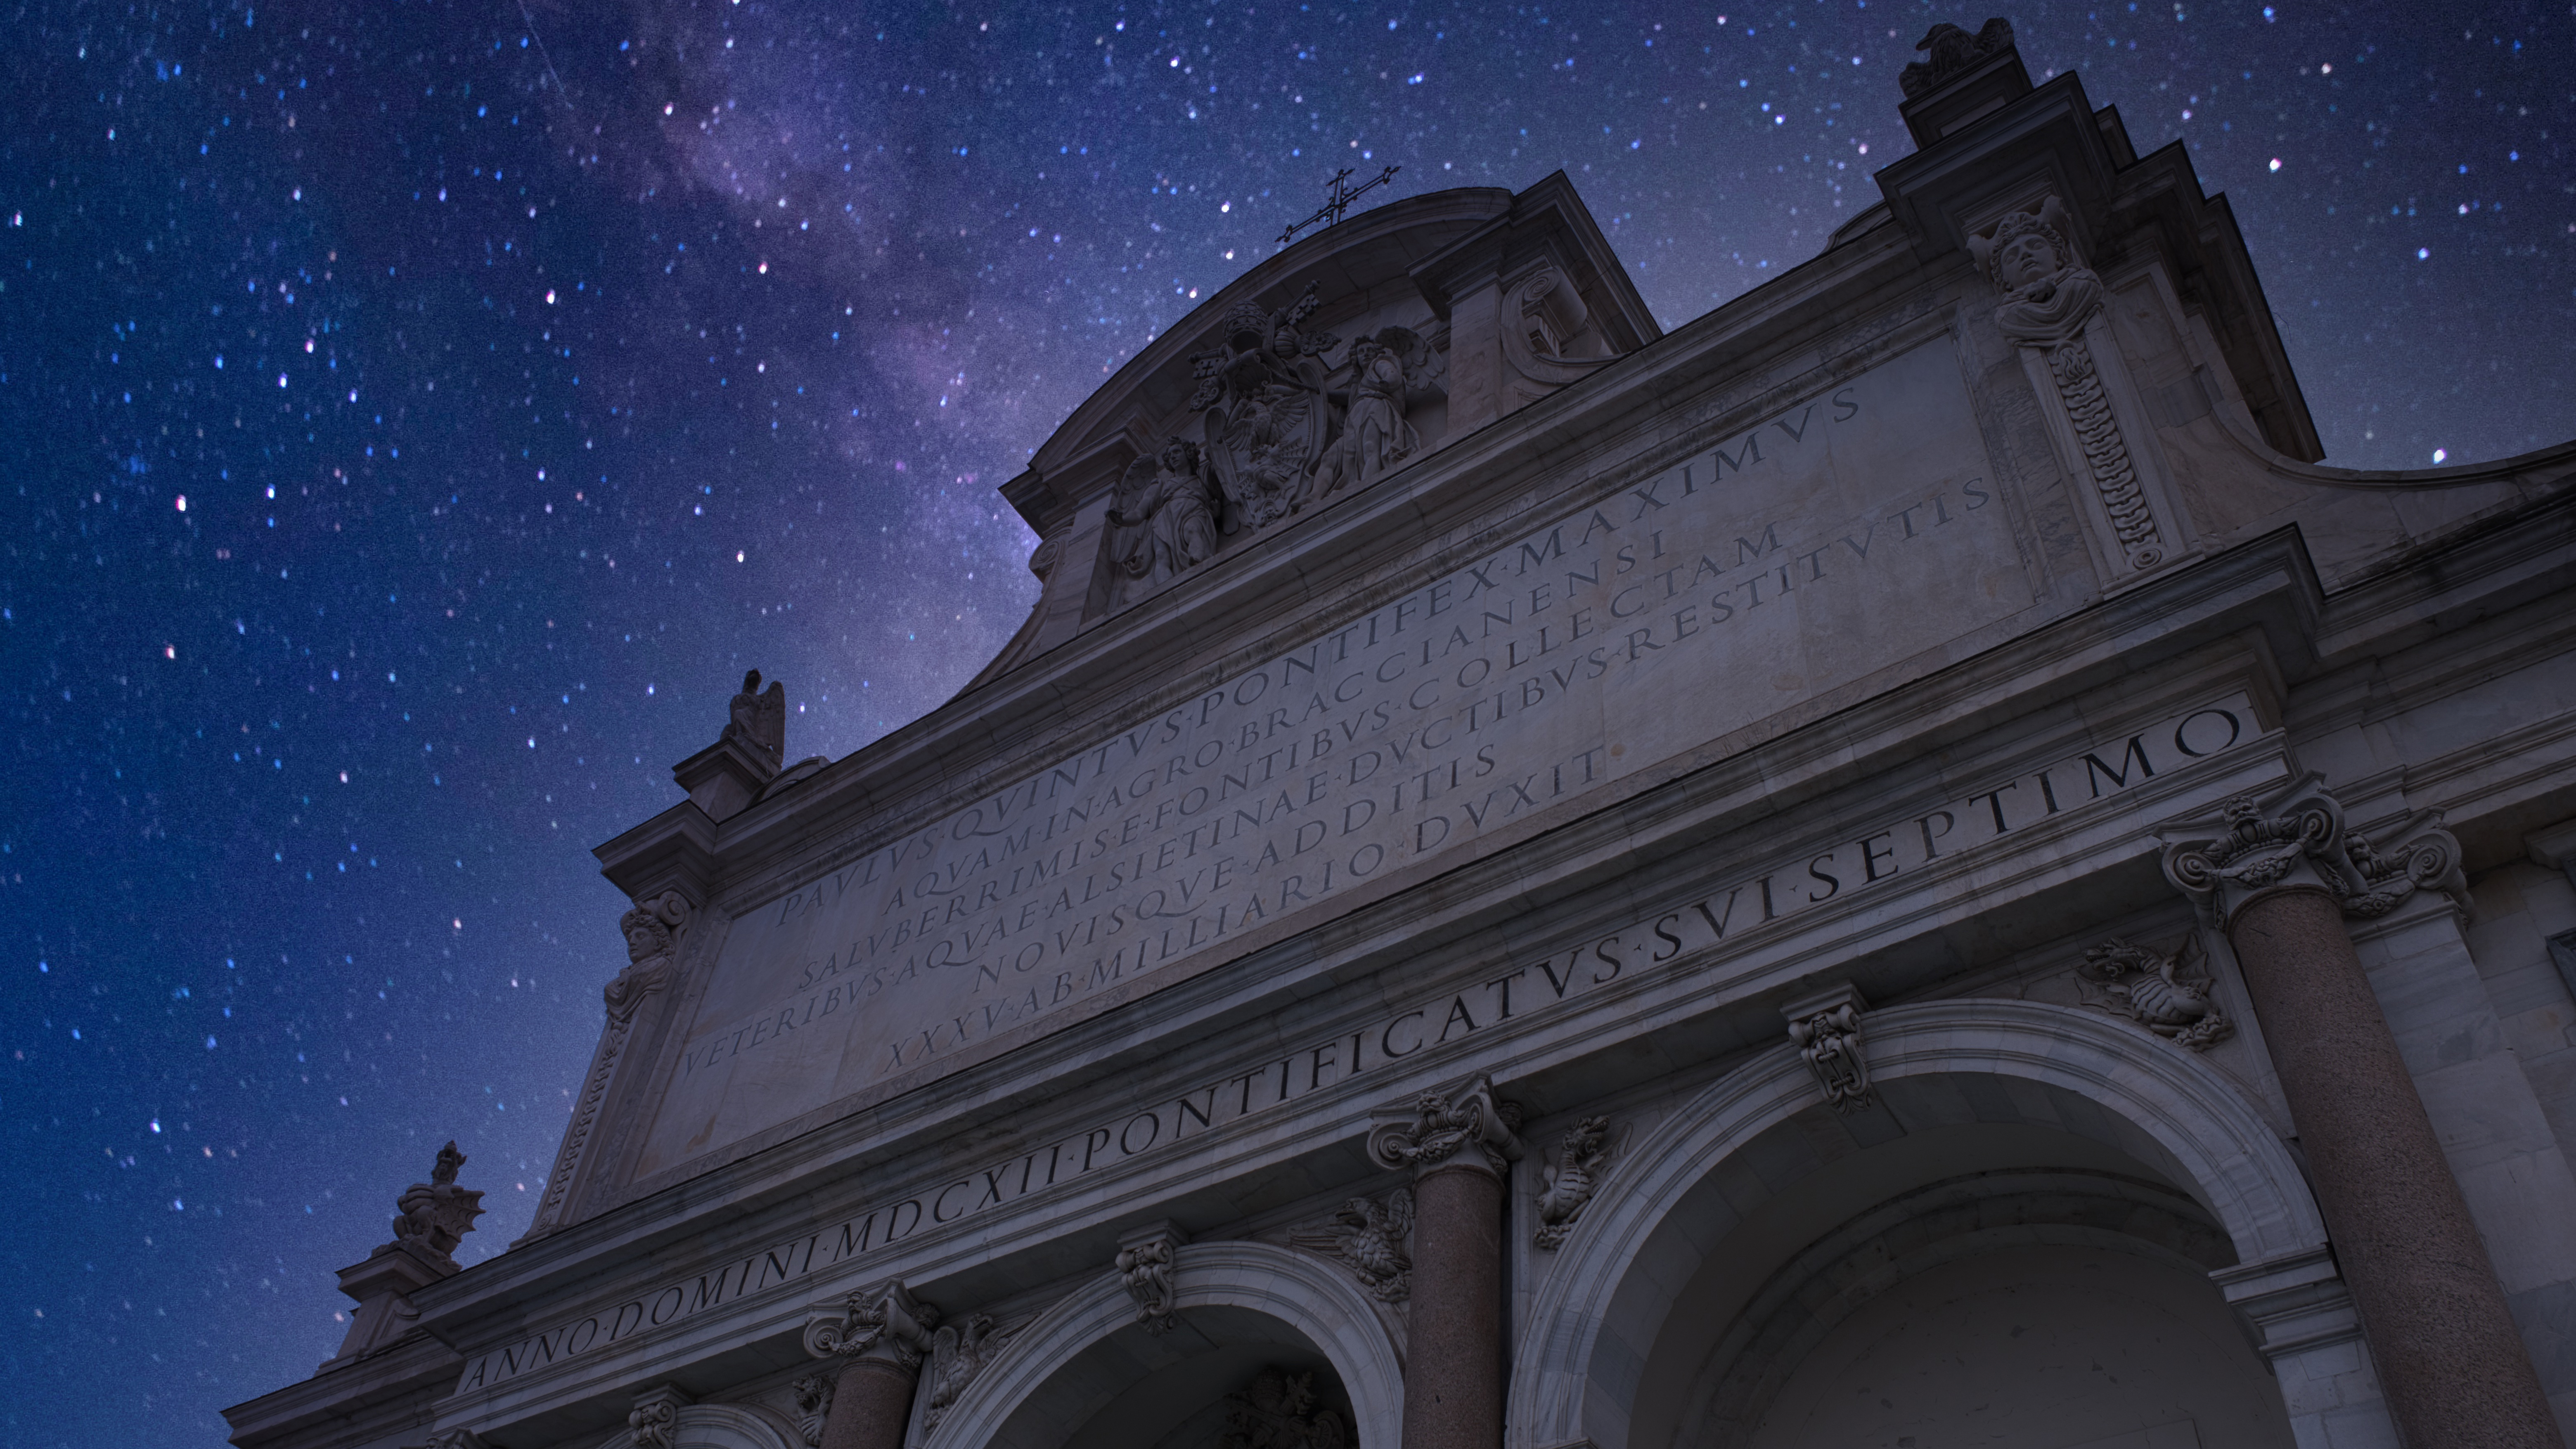
The AI Sky Replacement filter is one of the major new tools in Luminar 4 and has been enhanced in version 4.1. It does a job that photographers have been doing manually for a very long time, and it does it so effectively that it almost feels like cheating.
You can replace skies in Photoshop and other image editors, of course, but it often requires a good deal of skill, patience and expertise. If you have a nice, uncomplicated horizon line it’s not too difficult, but if you have a highly detailed treeline or city skyline, with lots of fine edges, gaps and ‘holes’, making a perfect selection can be so time-consuming that eventually it’s easier to give up.
Luminar’s AI Sky Replacement tool changes that complicated process.
It can automatically identify and separate the sky area in your original image. This is impressive enough, but it can also mask the sky area so effectively that it’s actually quite difficult to find any faults in the selection. AI Sky Replacement follows even the most detailed treelines perfectly and finds the gaps between trees that a regular Magic Wand tool would miss. There are sliders for fine-tuning the results to make the masking even better, but you usually don’t need them.
To make replacement skies look how you want them to, so they truly feel like part of the shot, you need to pay attention to the lighting, the colours and the exposure. We’ll show how this process works, and how a few simple tricks and techniques can make a big difference to the final result.
How to replace a sky in five simple steps
Turn a regular daytime photo into a surreal nightscape!
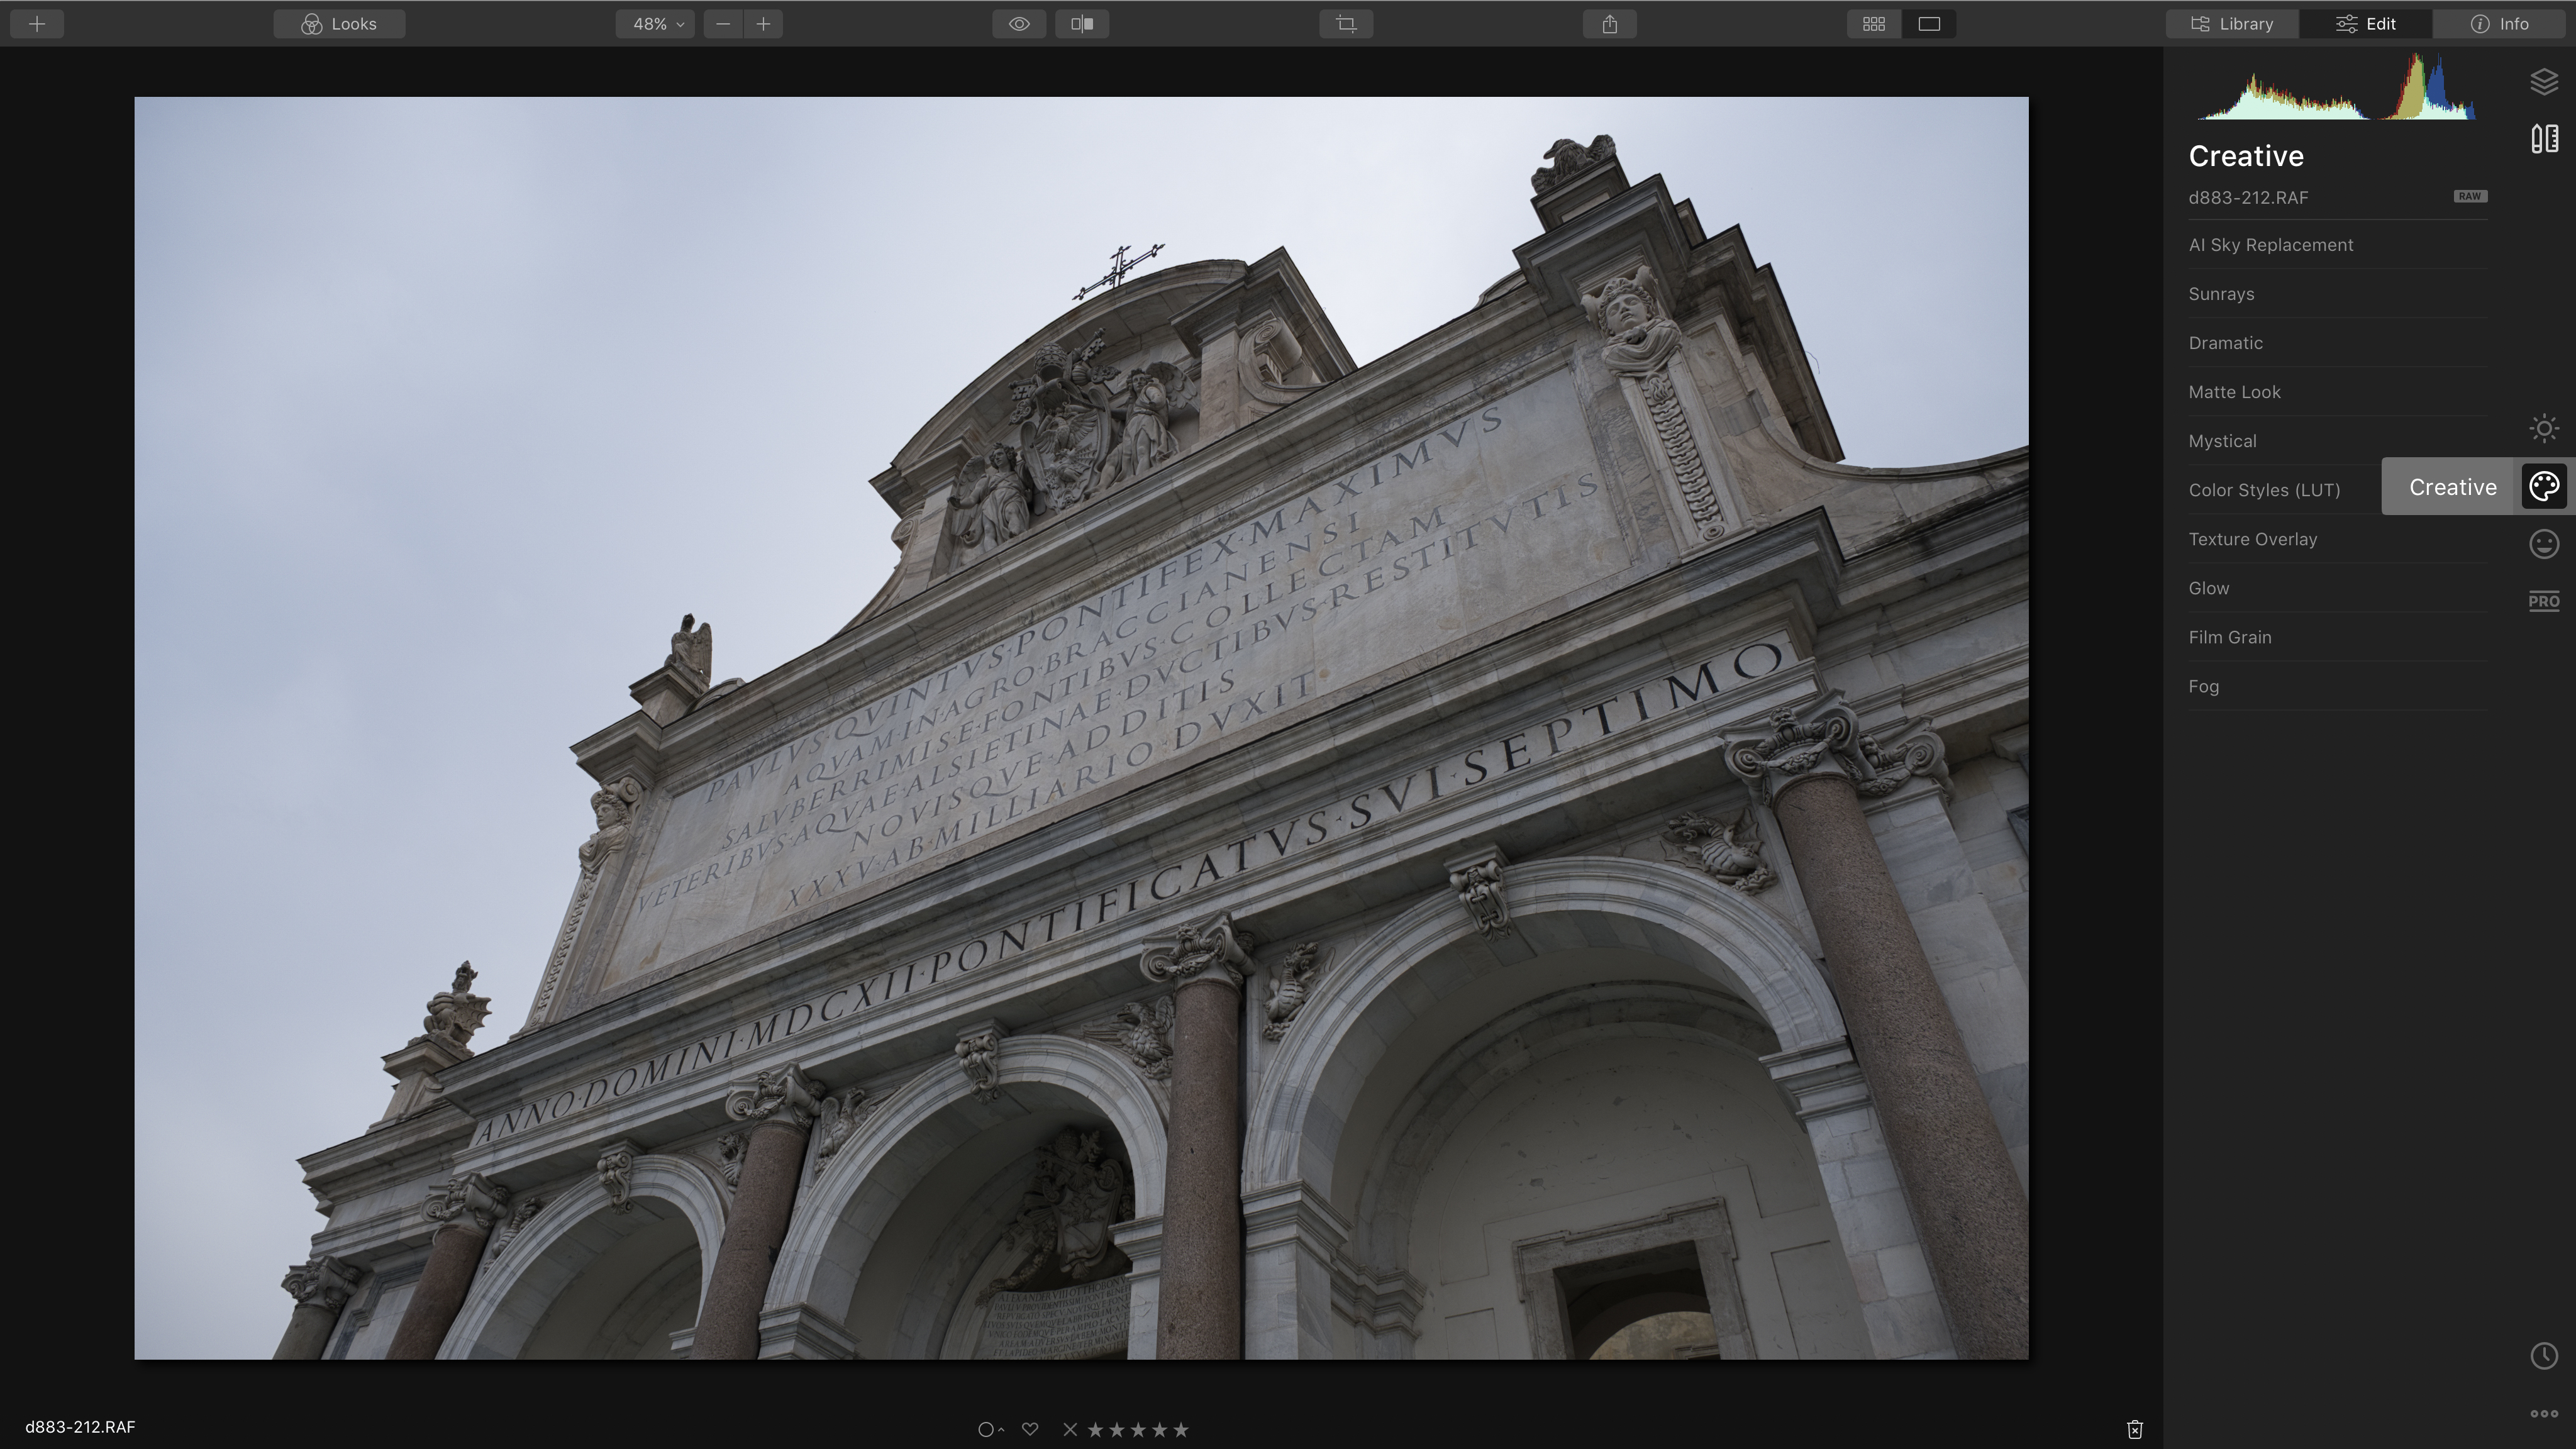
1. The Luminar layout
First, select Luminar’s Edit panel. This shows a set of four icons for the four main filter panels, over on the far right of the screen: Essentials, Creative, Portrait and Professional. If you’ve used Luminar 3 or earlier versions, these are equivalent to the old Luminar preset workspaces. The AI Sky Replacement filter lives in the Creative section.
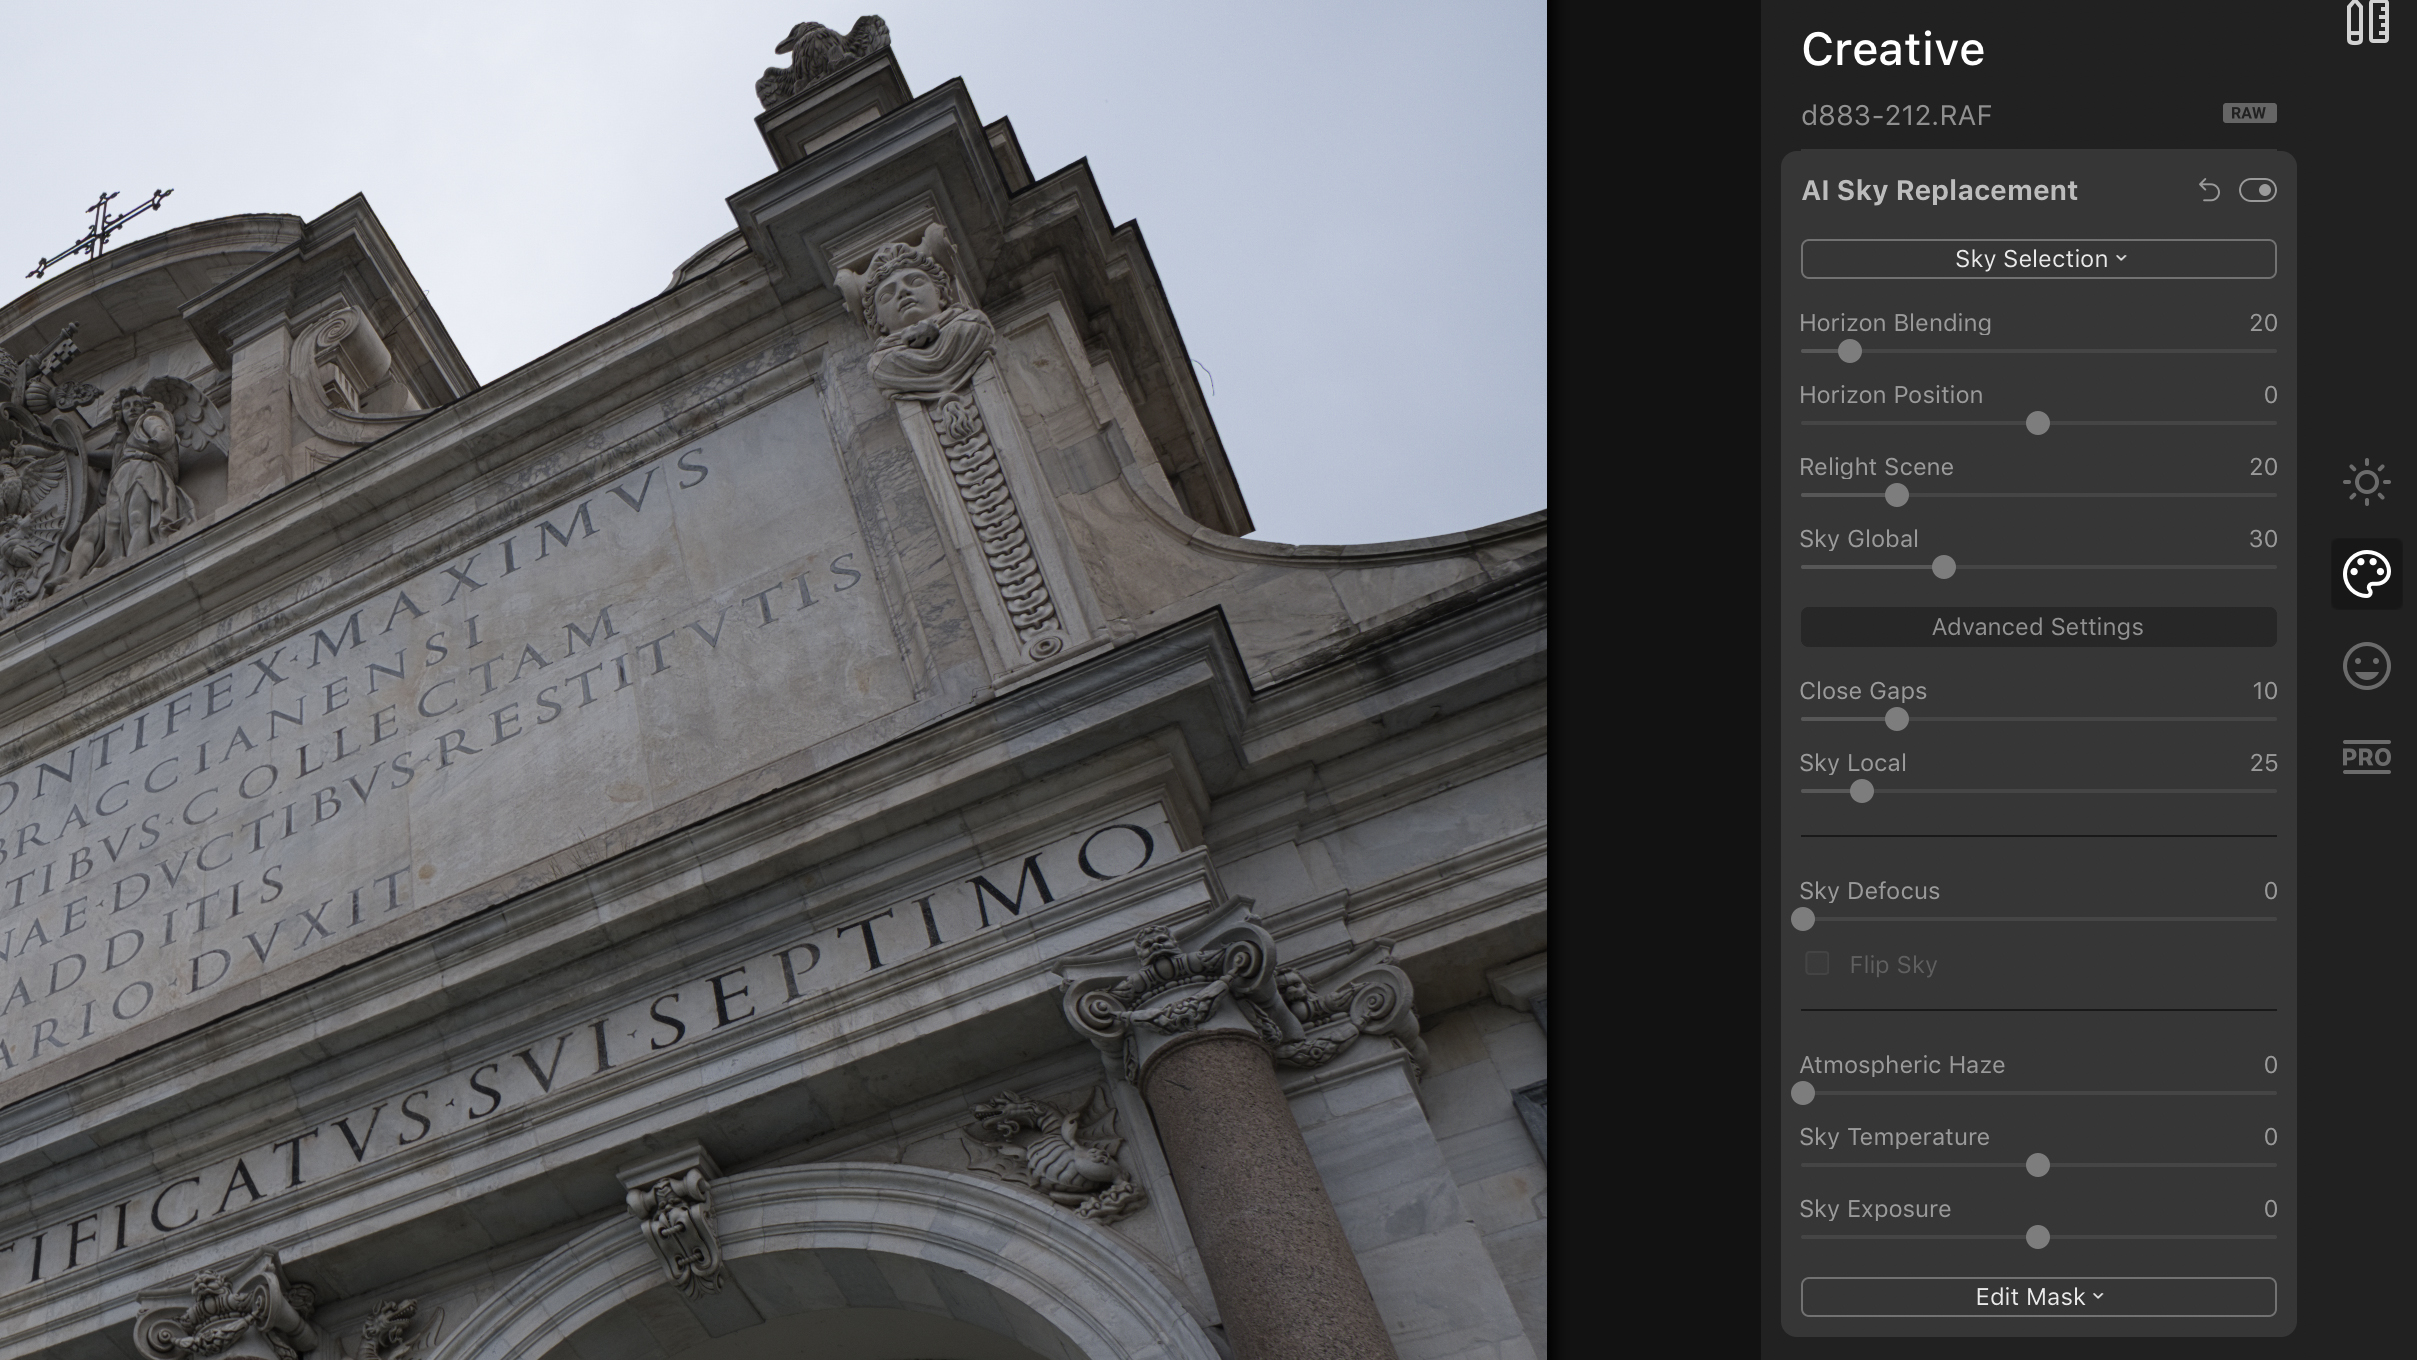
2. AI Sky Replacement panel
The AI Sky Replacement panel has three sections. Use Sky Selection to choose a new sky and make basic adjustments. Advanced Settings shows additional options for refining your results. You won’t need Advanced Settings on every image – the results are usually really good right from the start – but they can help you get a better blend.
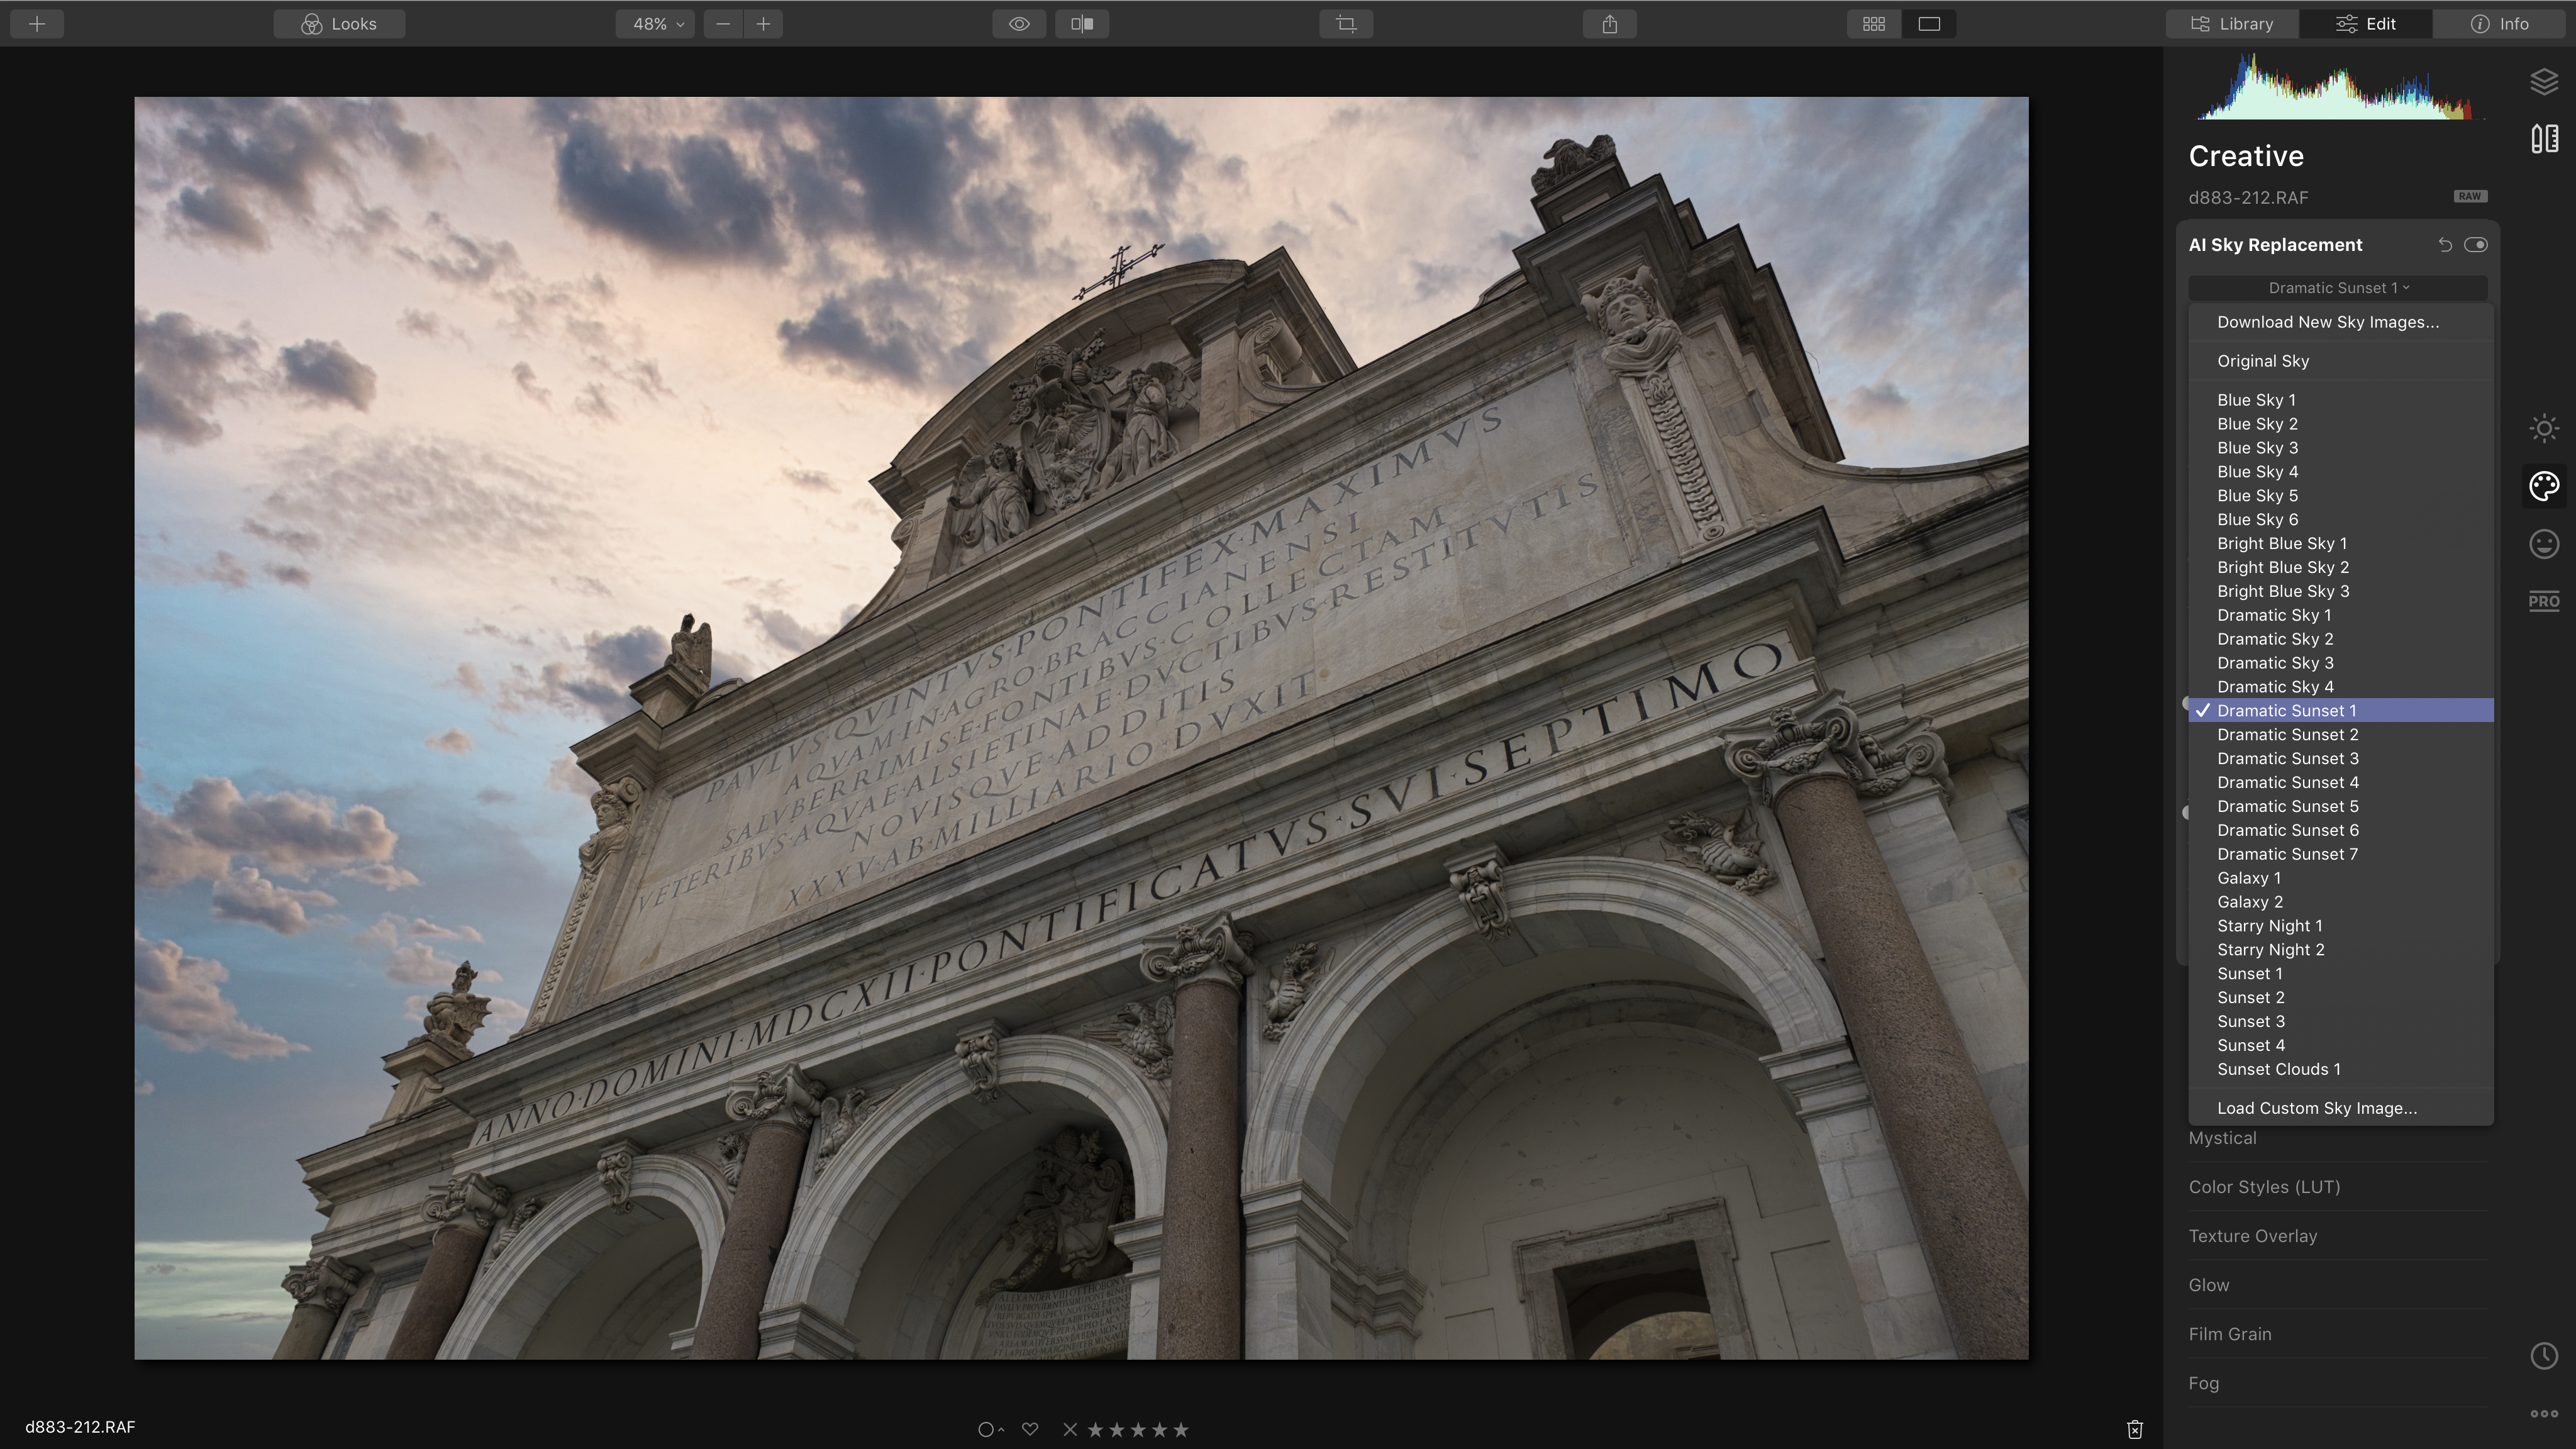
3. Choose your sky
If you click the Sky Selection dropdown menu, you’ll see a long list of replacement skies that come with Luminar 4. Just pick a sky and see what it looks like. At first, the novelty of having a new sky added perfectly to your photo can distract you from the details, but it is important to find a sky that harmonises with your photo.
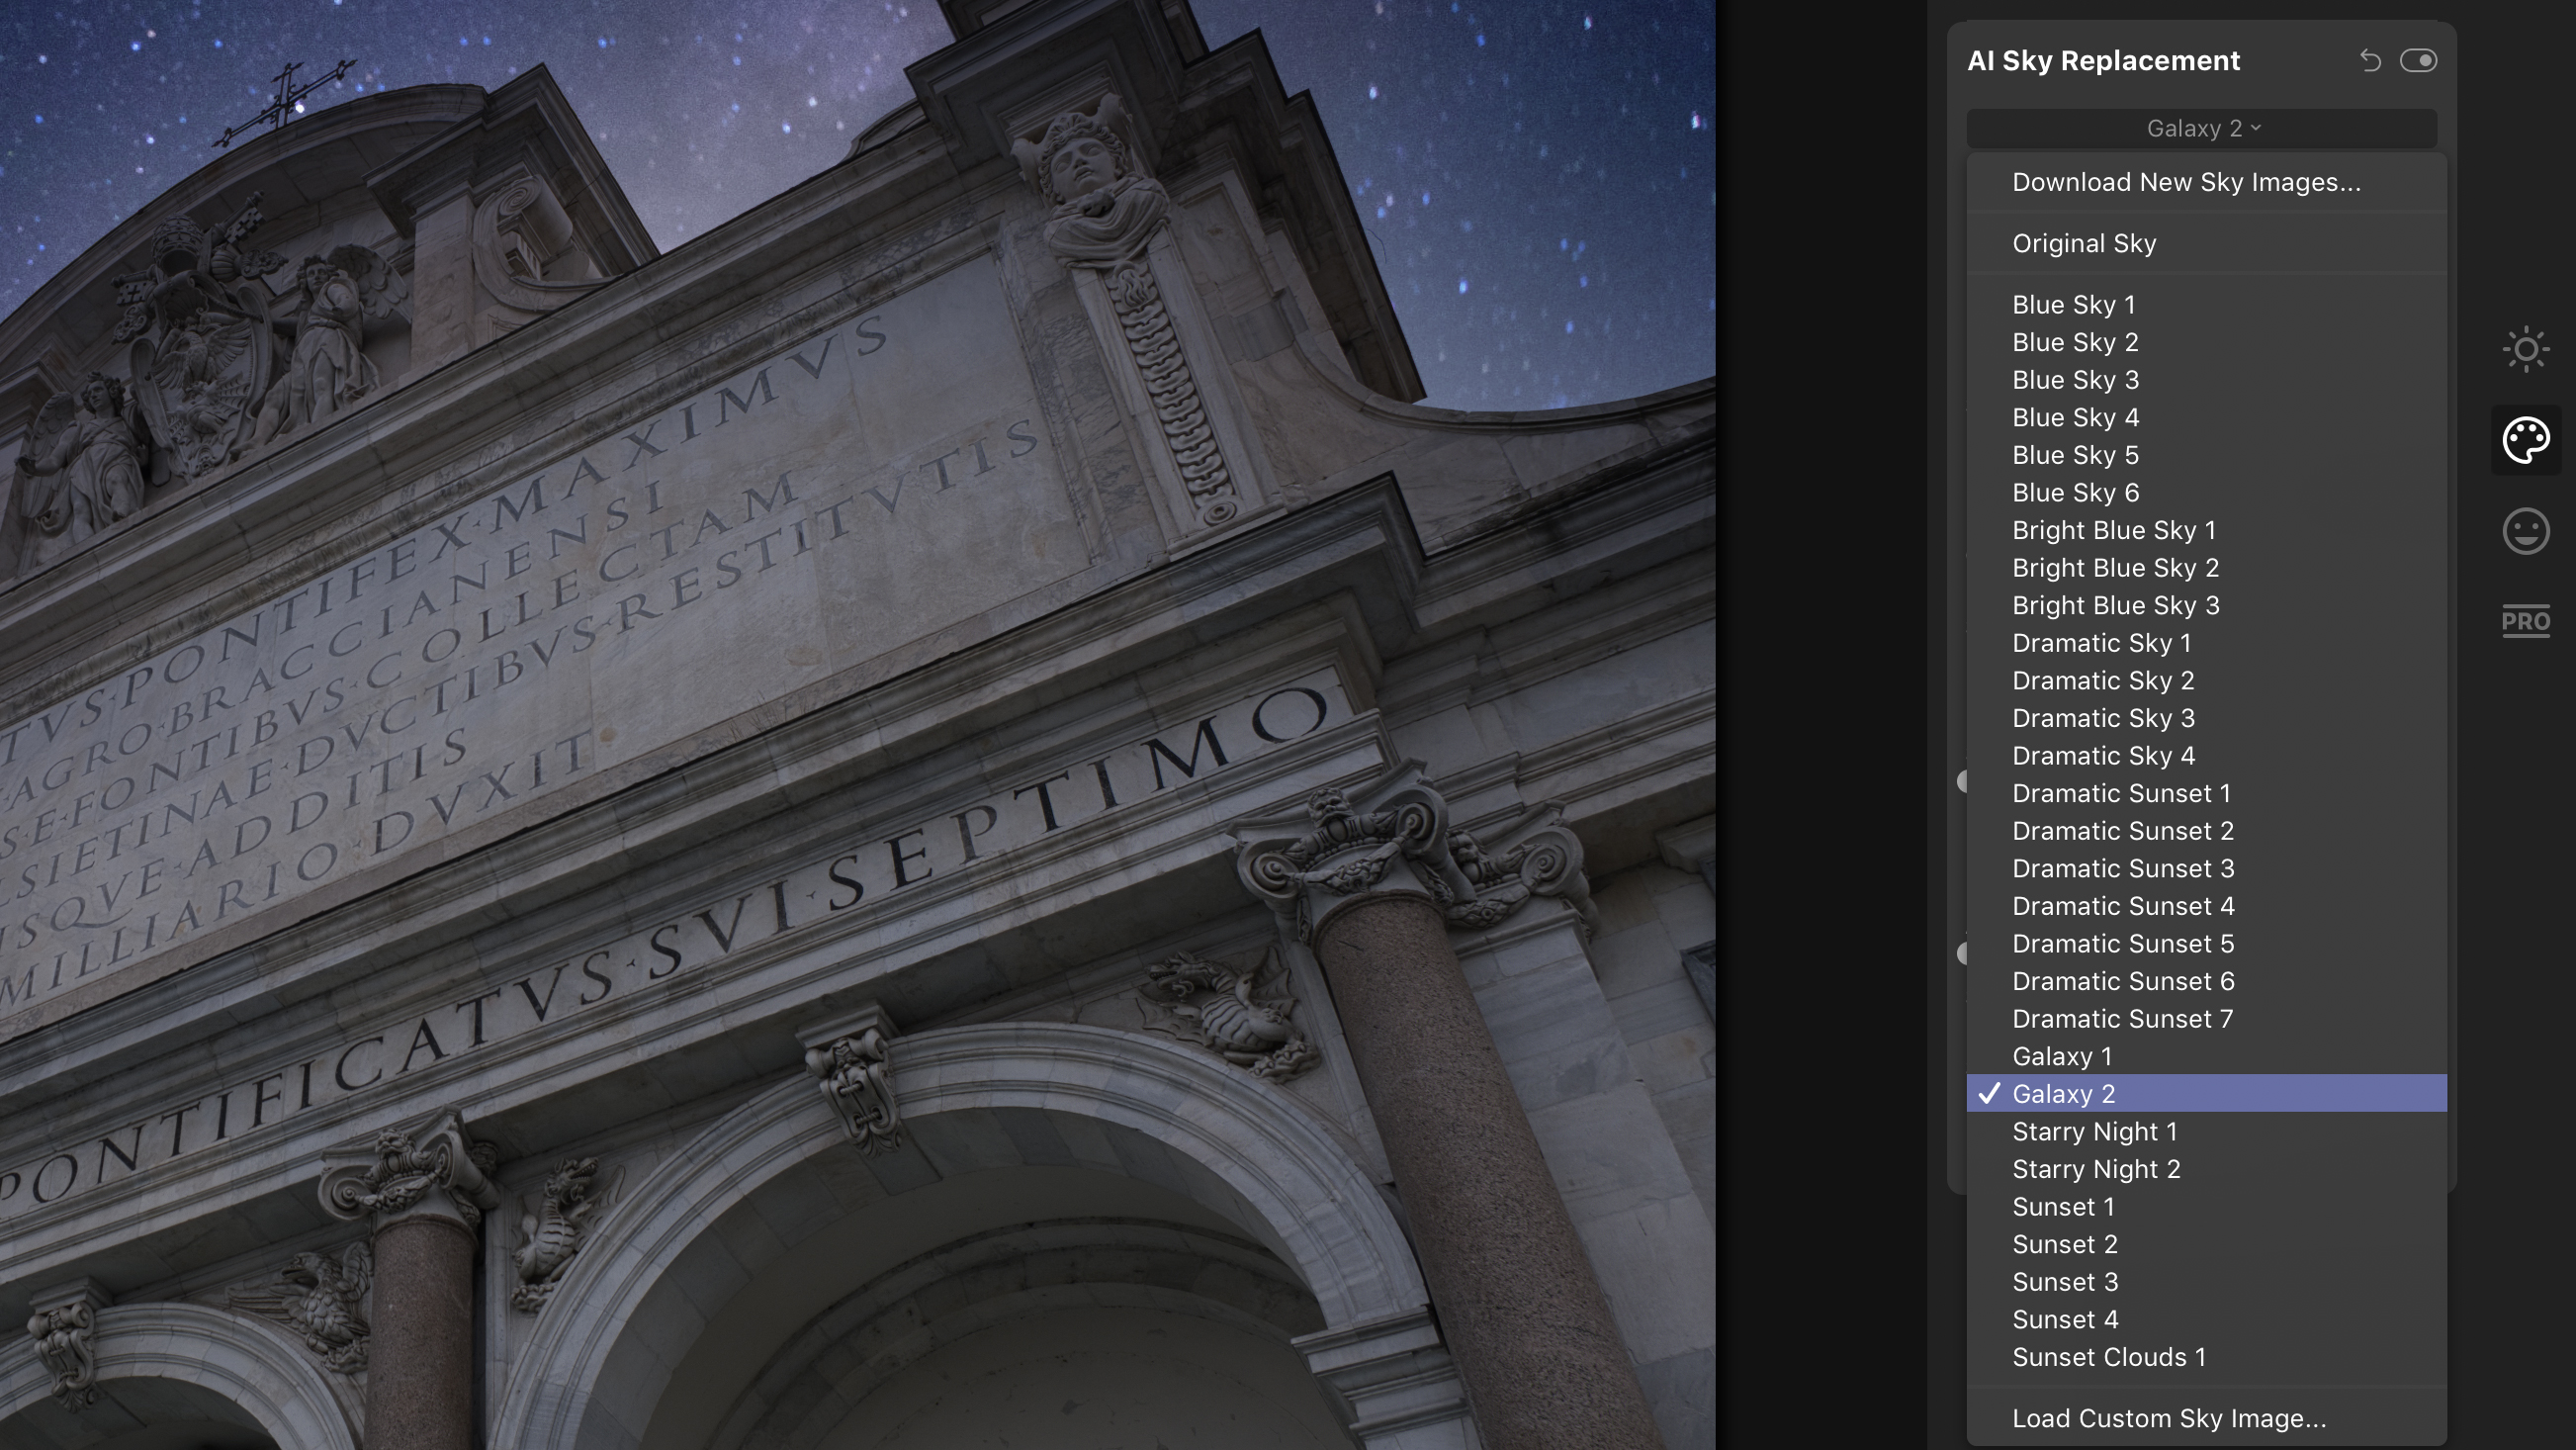
4. Turn day into night!
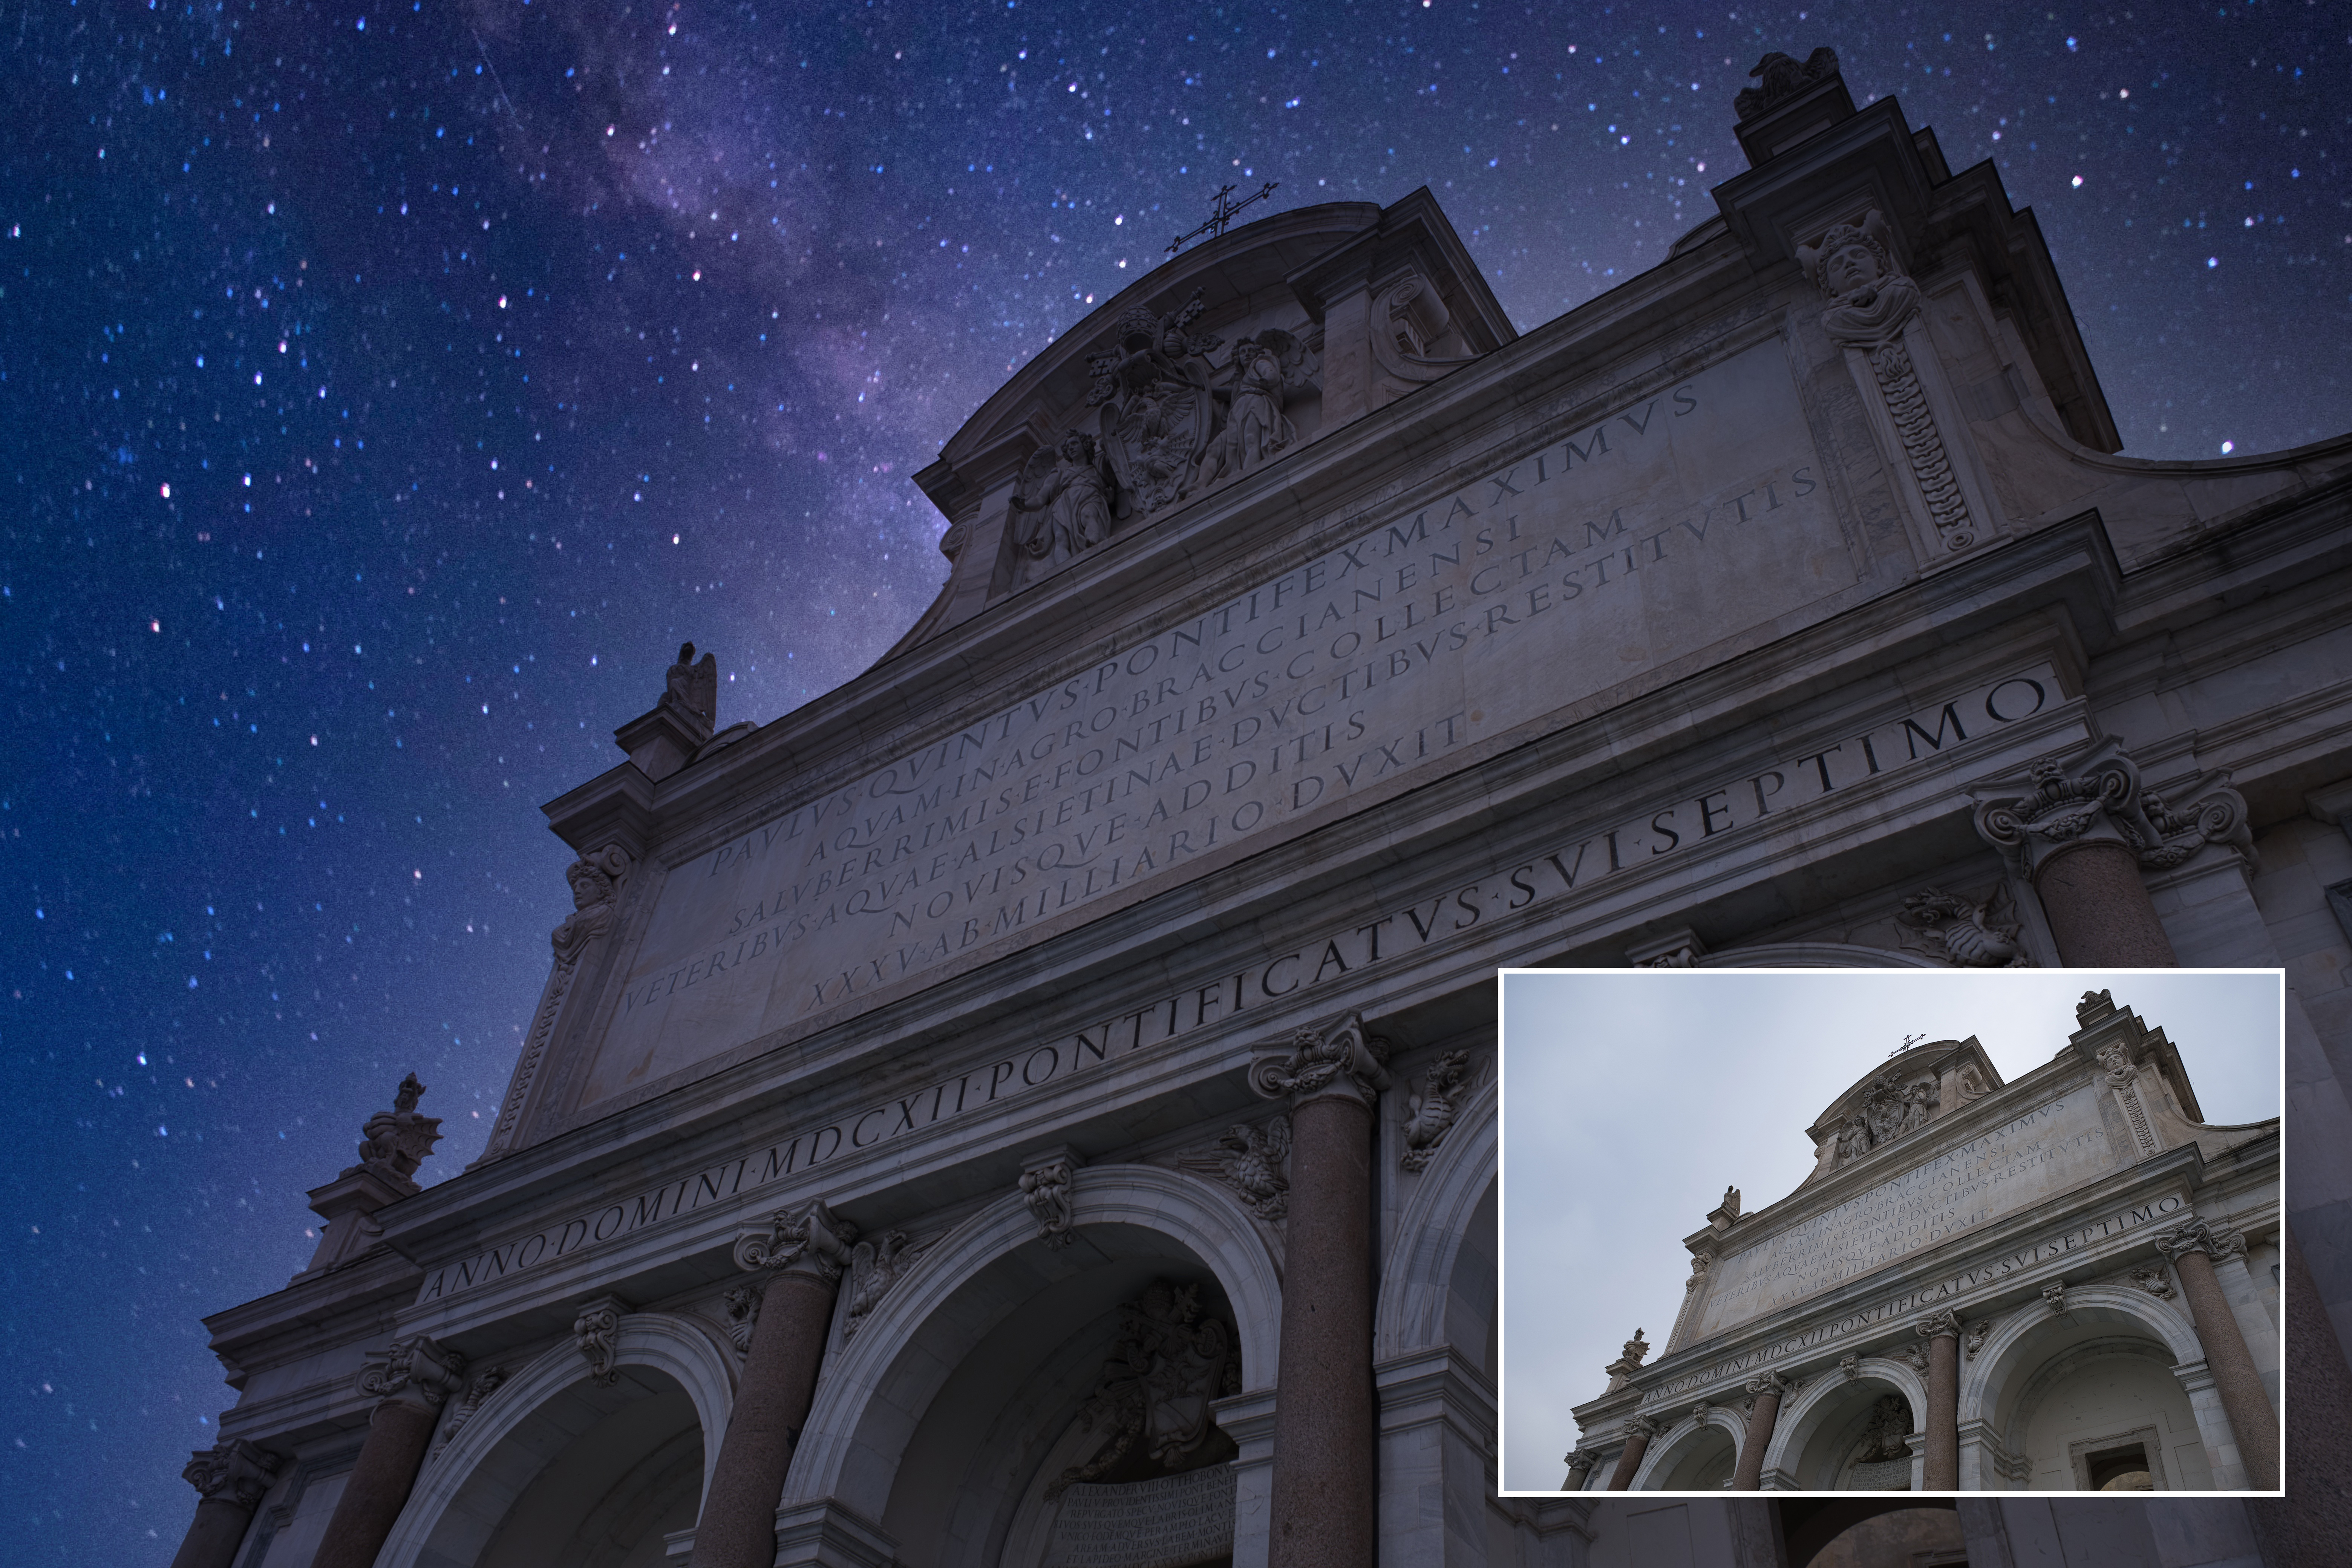
Don’t be afraid to try something dramatic. The ‘Galaxy’ and ‘Starry Night’ skies in Luminar 4 are amazing, and they can work really well with regular daytime photos. Here we’re going to use the ‘Galaxy 2’ sky to turn a dull overcast travel shot into a glittering night time scene. It looks pretty good already...
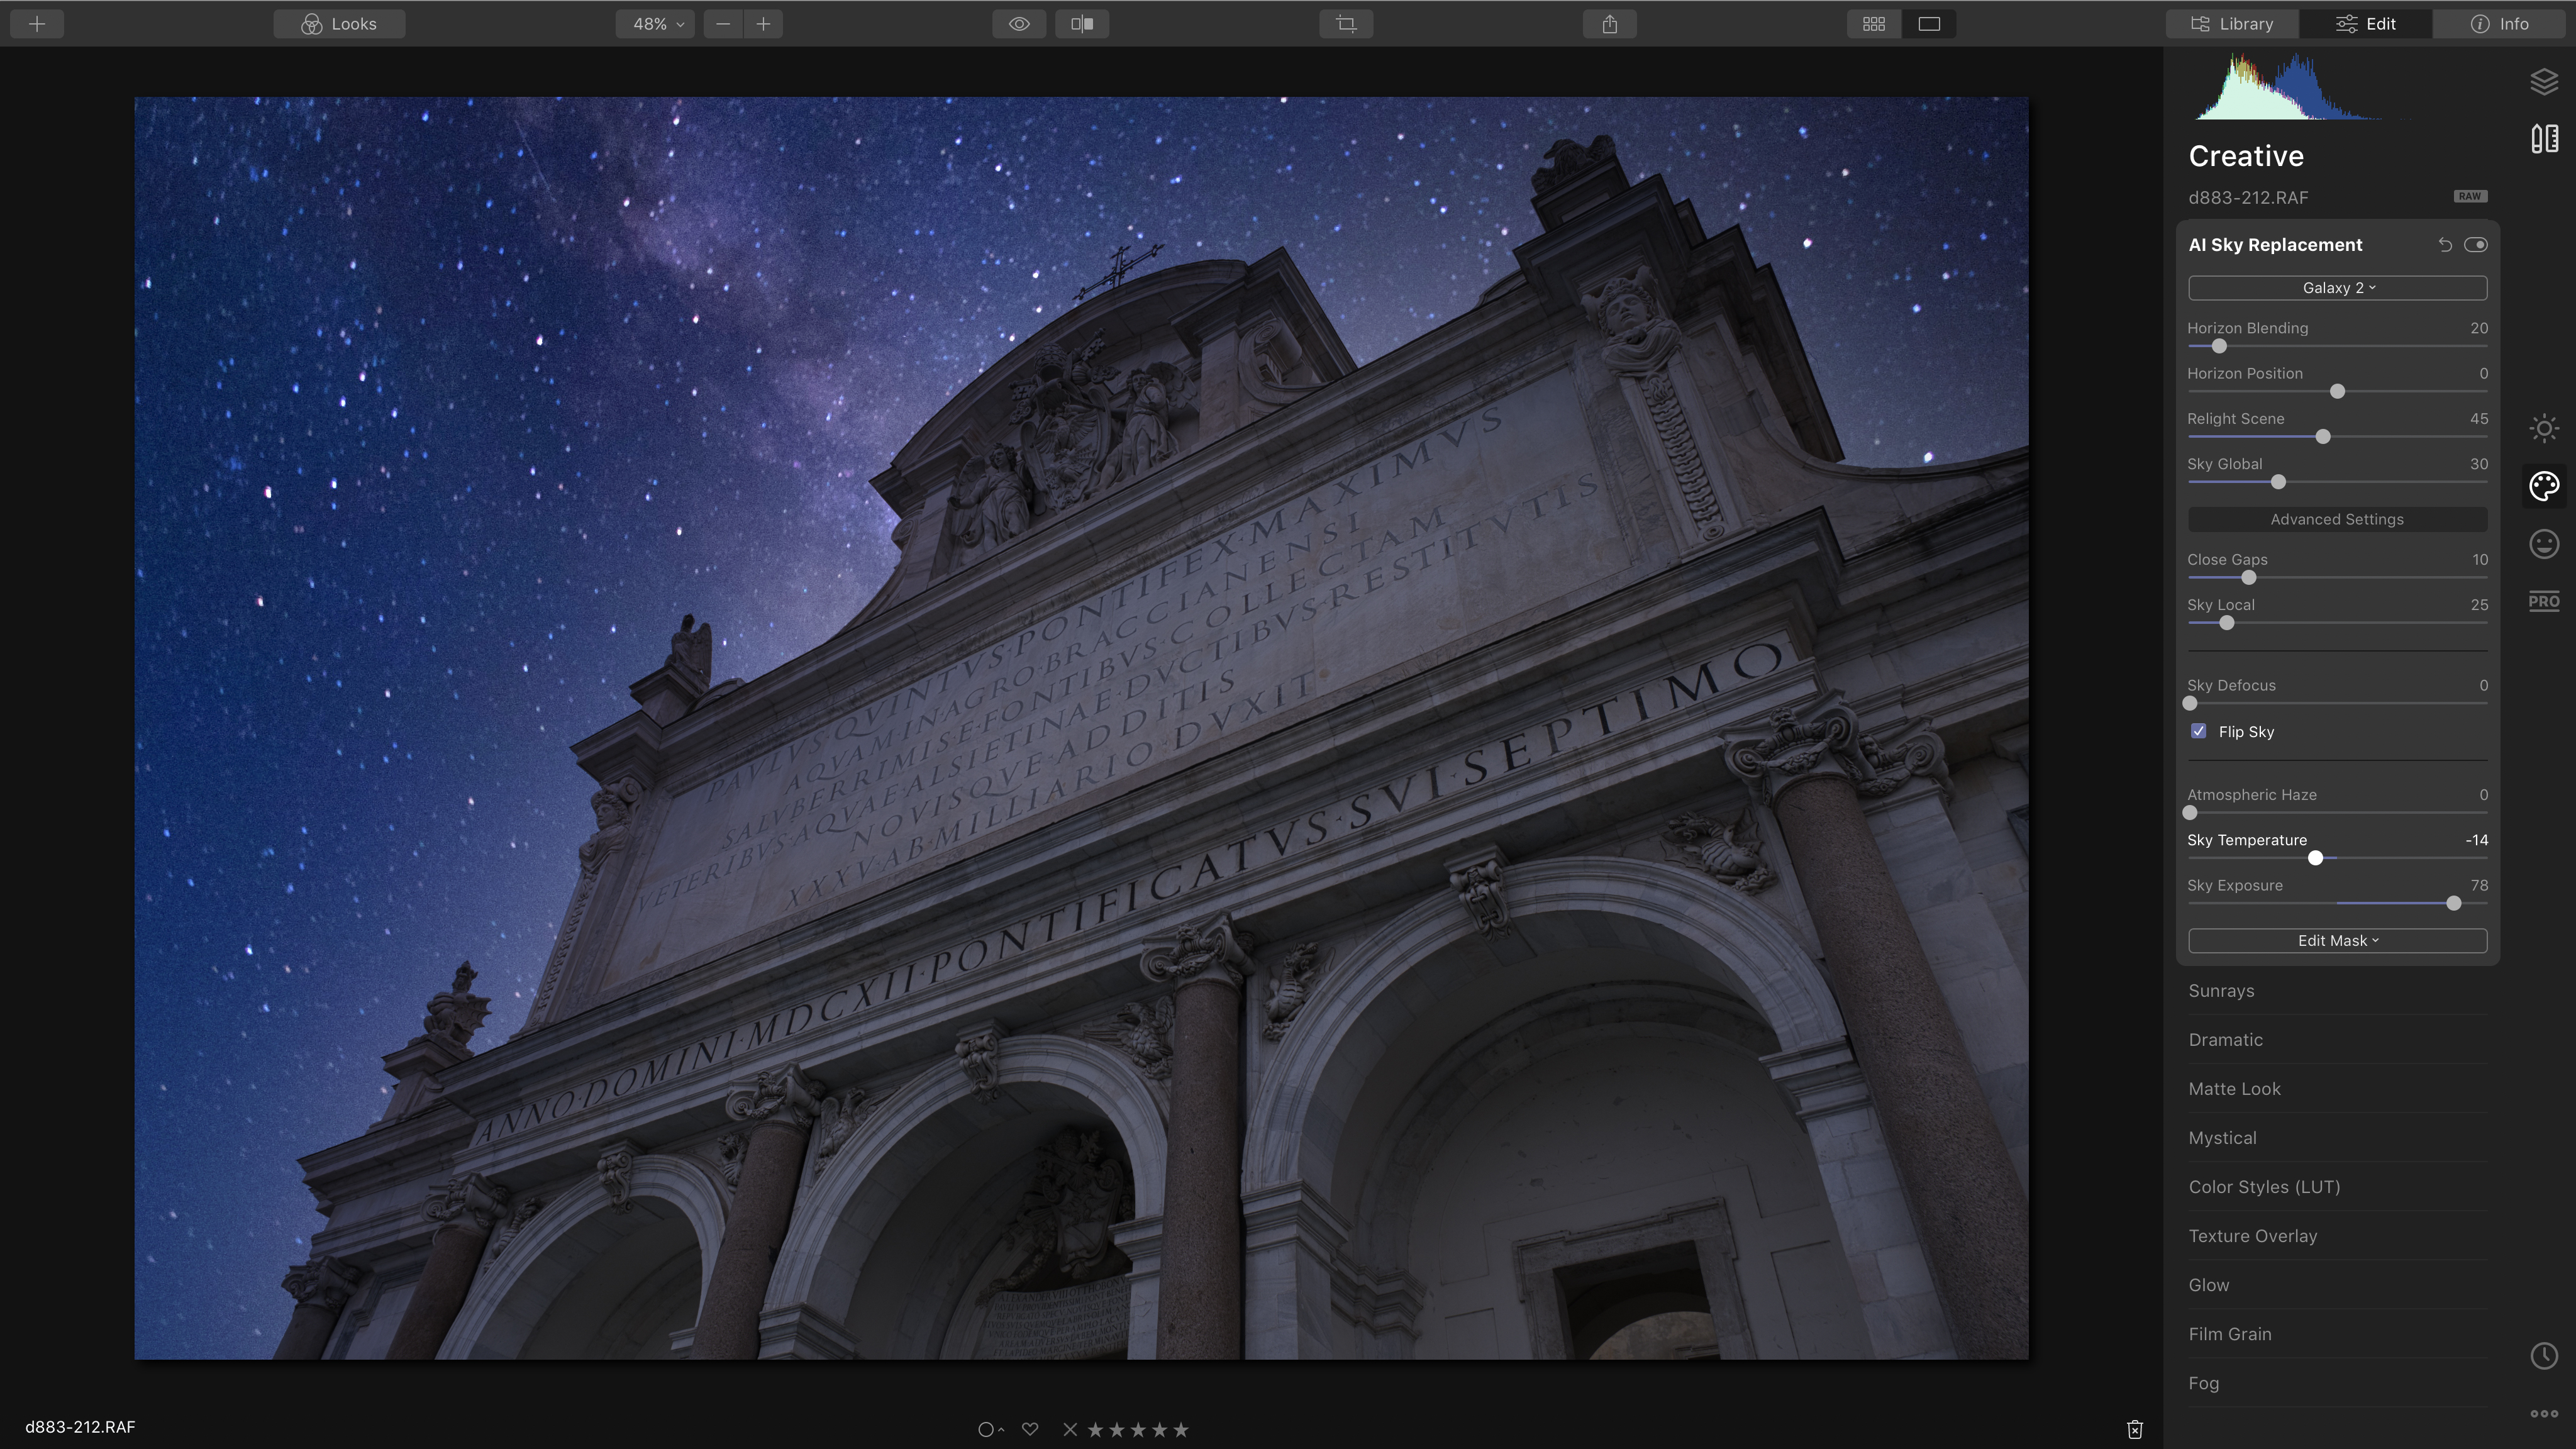
5. Finishing touches
This is where the sliders in the AI Sky Replacement panel can help. One of the most useful is the Relight Scene slider: this progressively applies the replacement sky’s tones and colours to the rest of the image to produce a much more natural blend. We didn’t quite like the way the ‘galaxy’ was hidden behind the temple, so we used the Flip checkbox to flip the sky over. Finally, we increased the Sky Exposure to make the image brighter.

The AI Sky Replacement panel
Your guided tour of the tools you can use to swap out your skies…
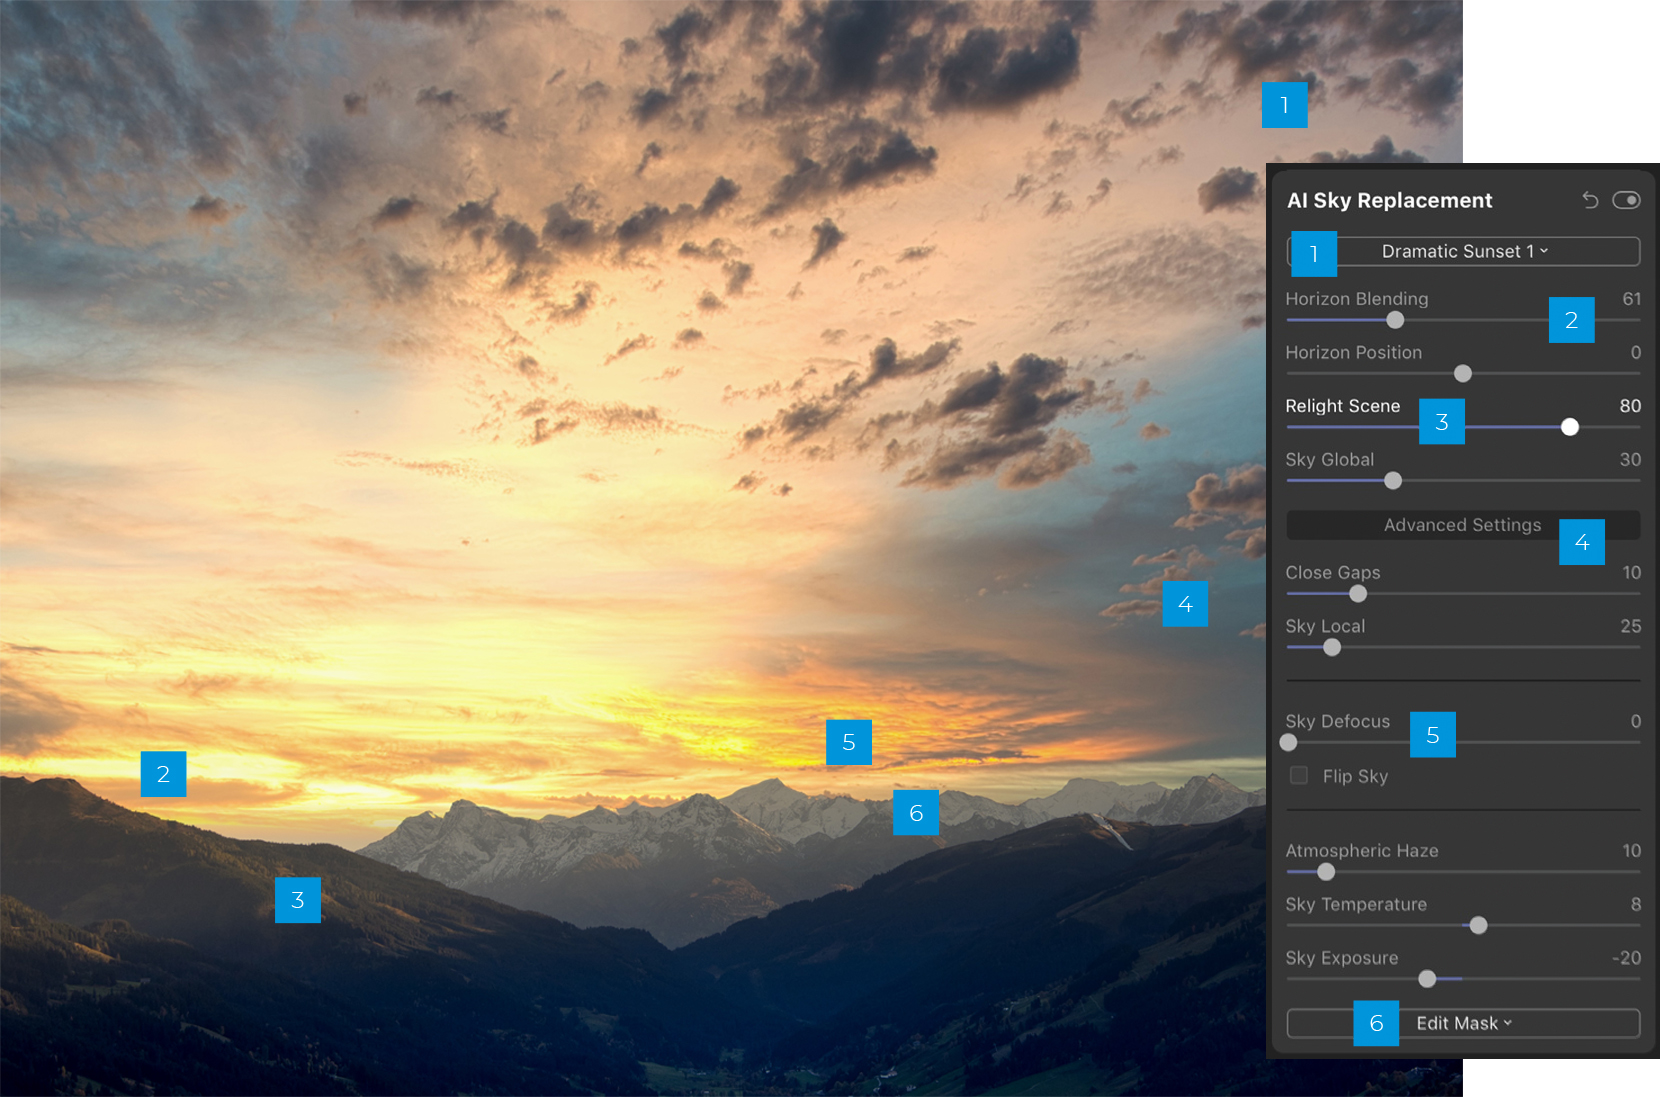
1. Choose a sky
Luminar 4 can add any sky you like, but try to choose one that harmonises with the scene. You choose the sky you want to use from this dropdown menu, but you can also insert a sky image you’ve shot yourself.
2. Horizon Blending
If the join at the horizon looks unnatural, you can soften it with the Horizon Blending slider, just one of a number of tools for making sky replacements look more natural.
3. Relight Scene
The original photo had a cooler tone than the sky we used, so we used the Relight Scene slider: this gradually shifts the tones and colours of your original photo to match those of the sky you’ve added.
4. Advanced Settings
You may not need the Advanced Settings section at all, but it’s here if you need it, and it can be handy. We’ve used some of the Advanced Settings options to give the sky a darker, warmer tone and a little atmospheric haze to blend it into the photo.
5. Sky Defocus
Sky Defocus slider is handy for close-ups or portraits with blurred backgrounds. We haven’t used the Flip Sky option below, but it can be used to flip skies horizontally for better positioning.
6. Edit Mask
This picture works well without a mask adjustment, but these can be useful for subtler blends. If you want to make the sky paler near the horizon, use the Edit Mask button and add a gradient mask.

Three great Sky Replacement examples
Here are more Sky Replacement experiments we did in Luminar 4
Black-and-white
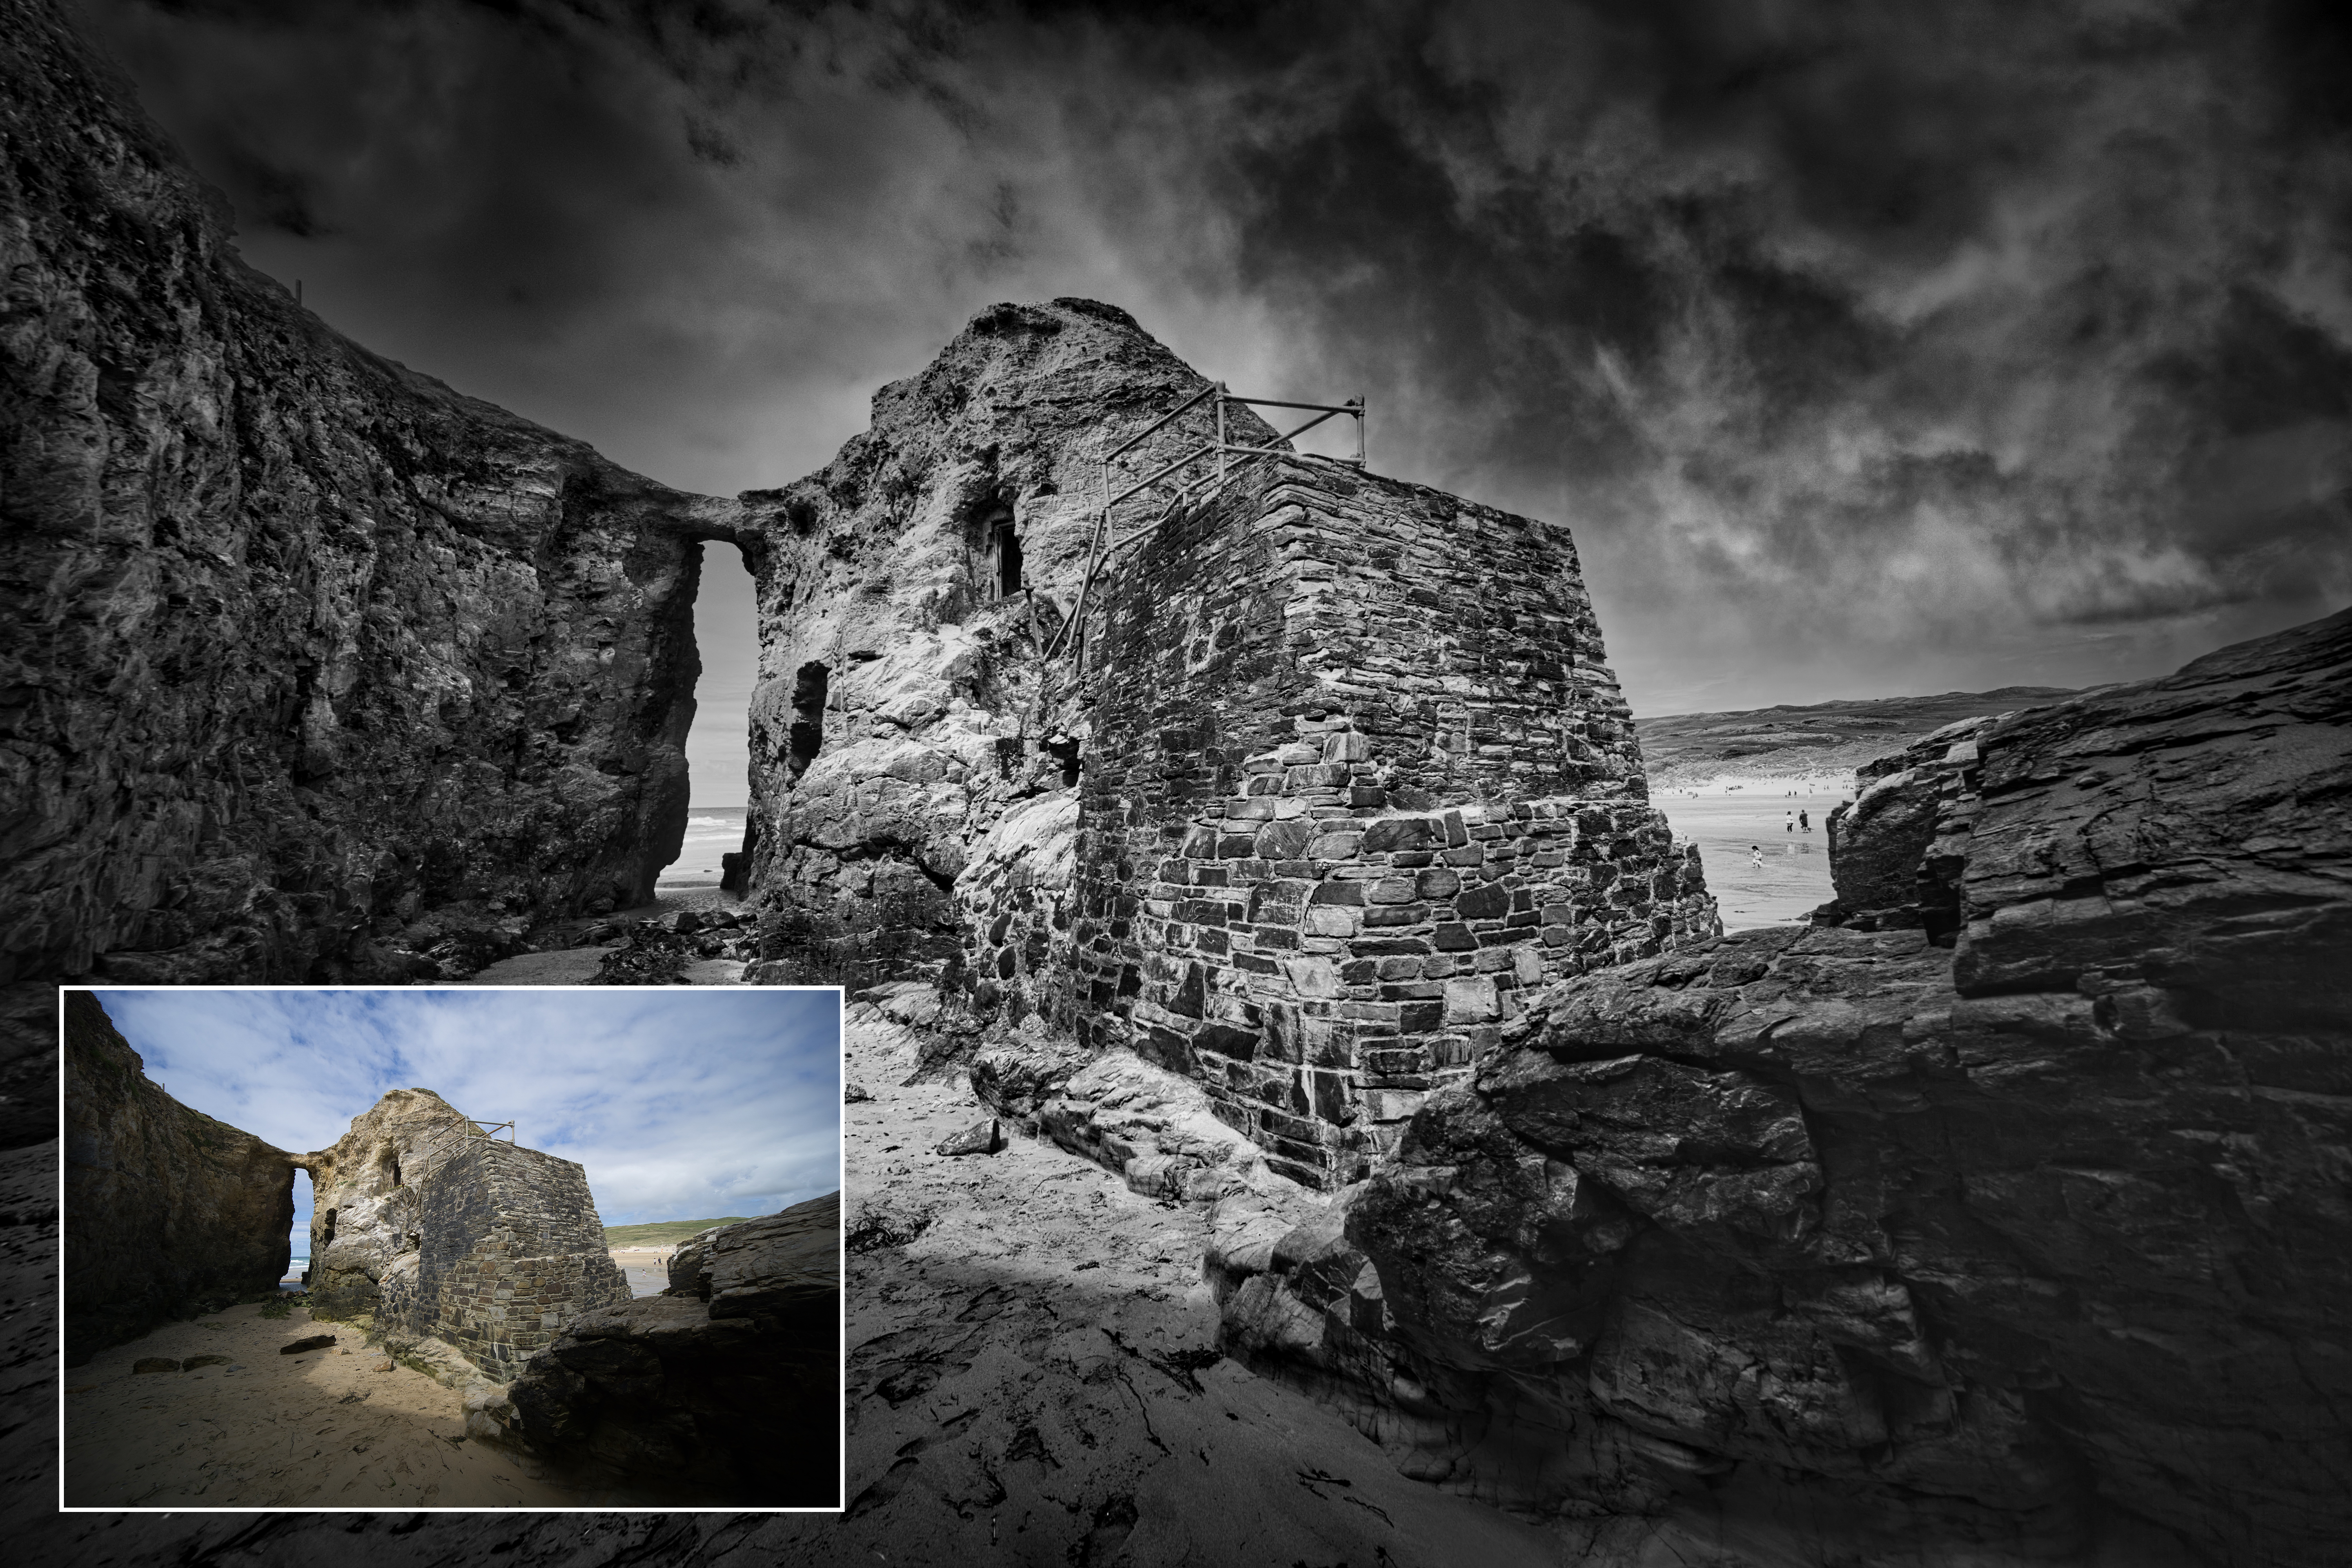
Sometimes black-and-white is the perfect medium for dramatic skies. We created this photo by using a dramatic sky of our own, then adding a new Adjustment Layer (see our tips below) to apply a ready-made Luminar black-and-white Look. You can use other adjustments freely alongside the AI Sky Replacement tool.

Sunset
This sunset effect was created using one of Luminar’s ‘Sunset’ replacement skies, with the Relight Scene slider turned up to maximum to spread the yellow glow across the image. We added a vignette to exaggerate the lighting, and applied Luminar’s Sun Rays filter to produce the appearance of rays from the setting sun.
Stormy skies
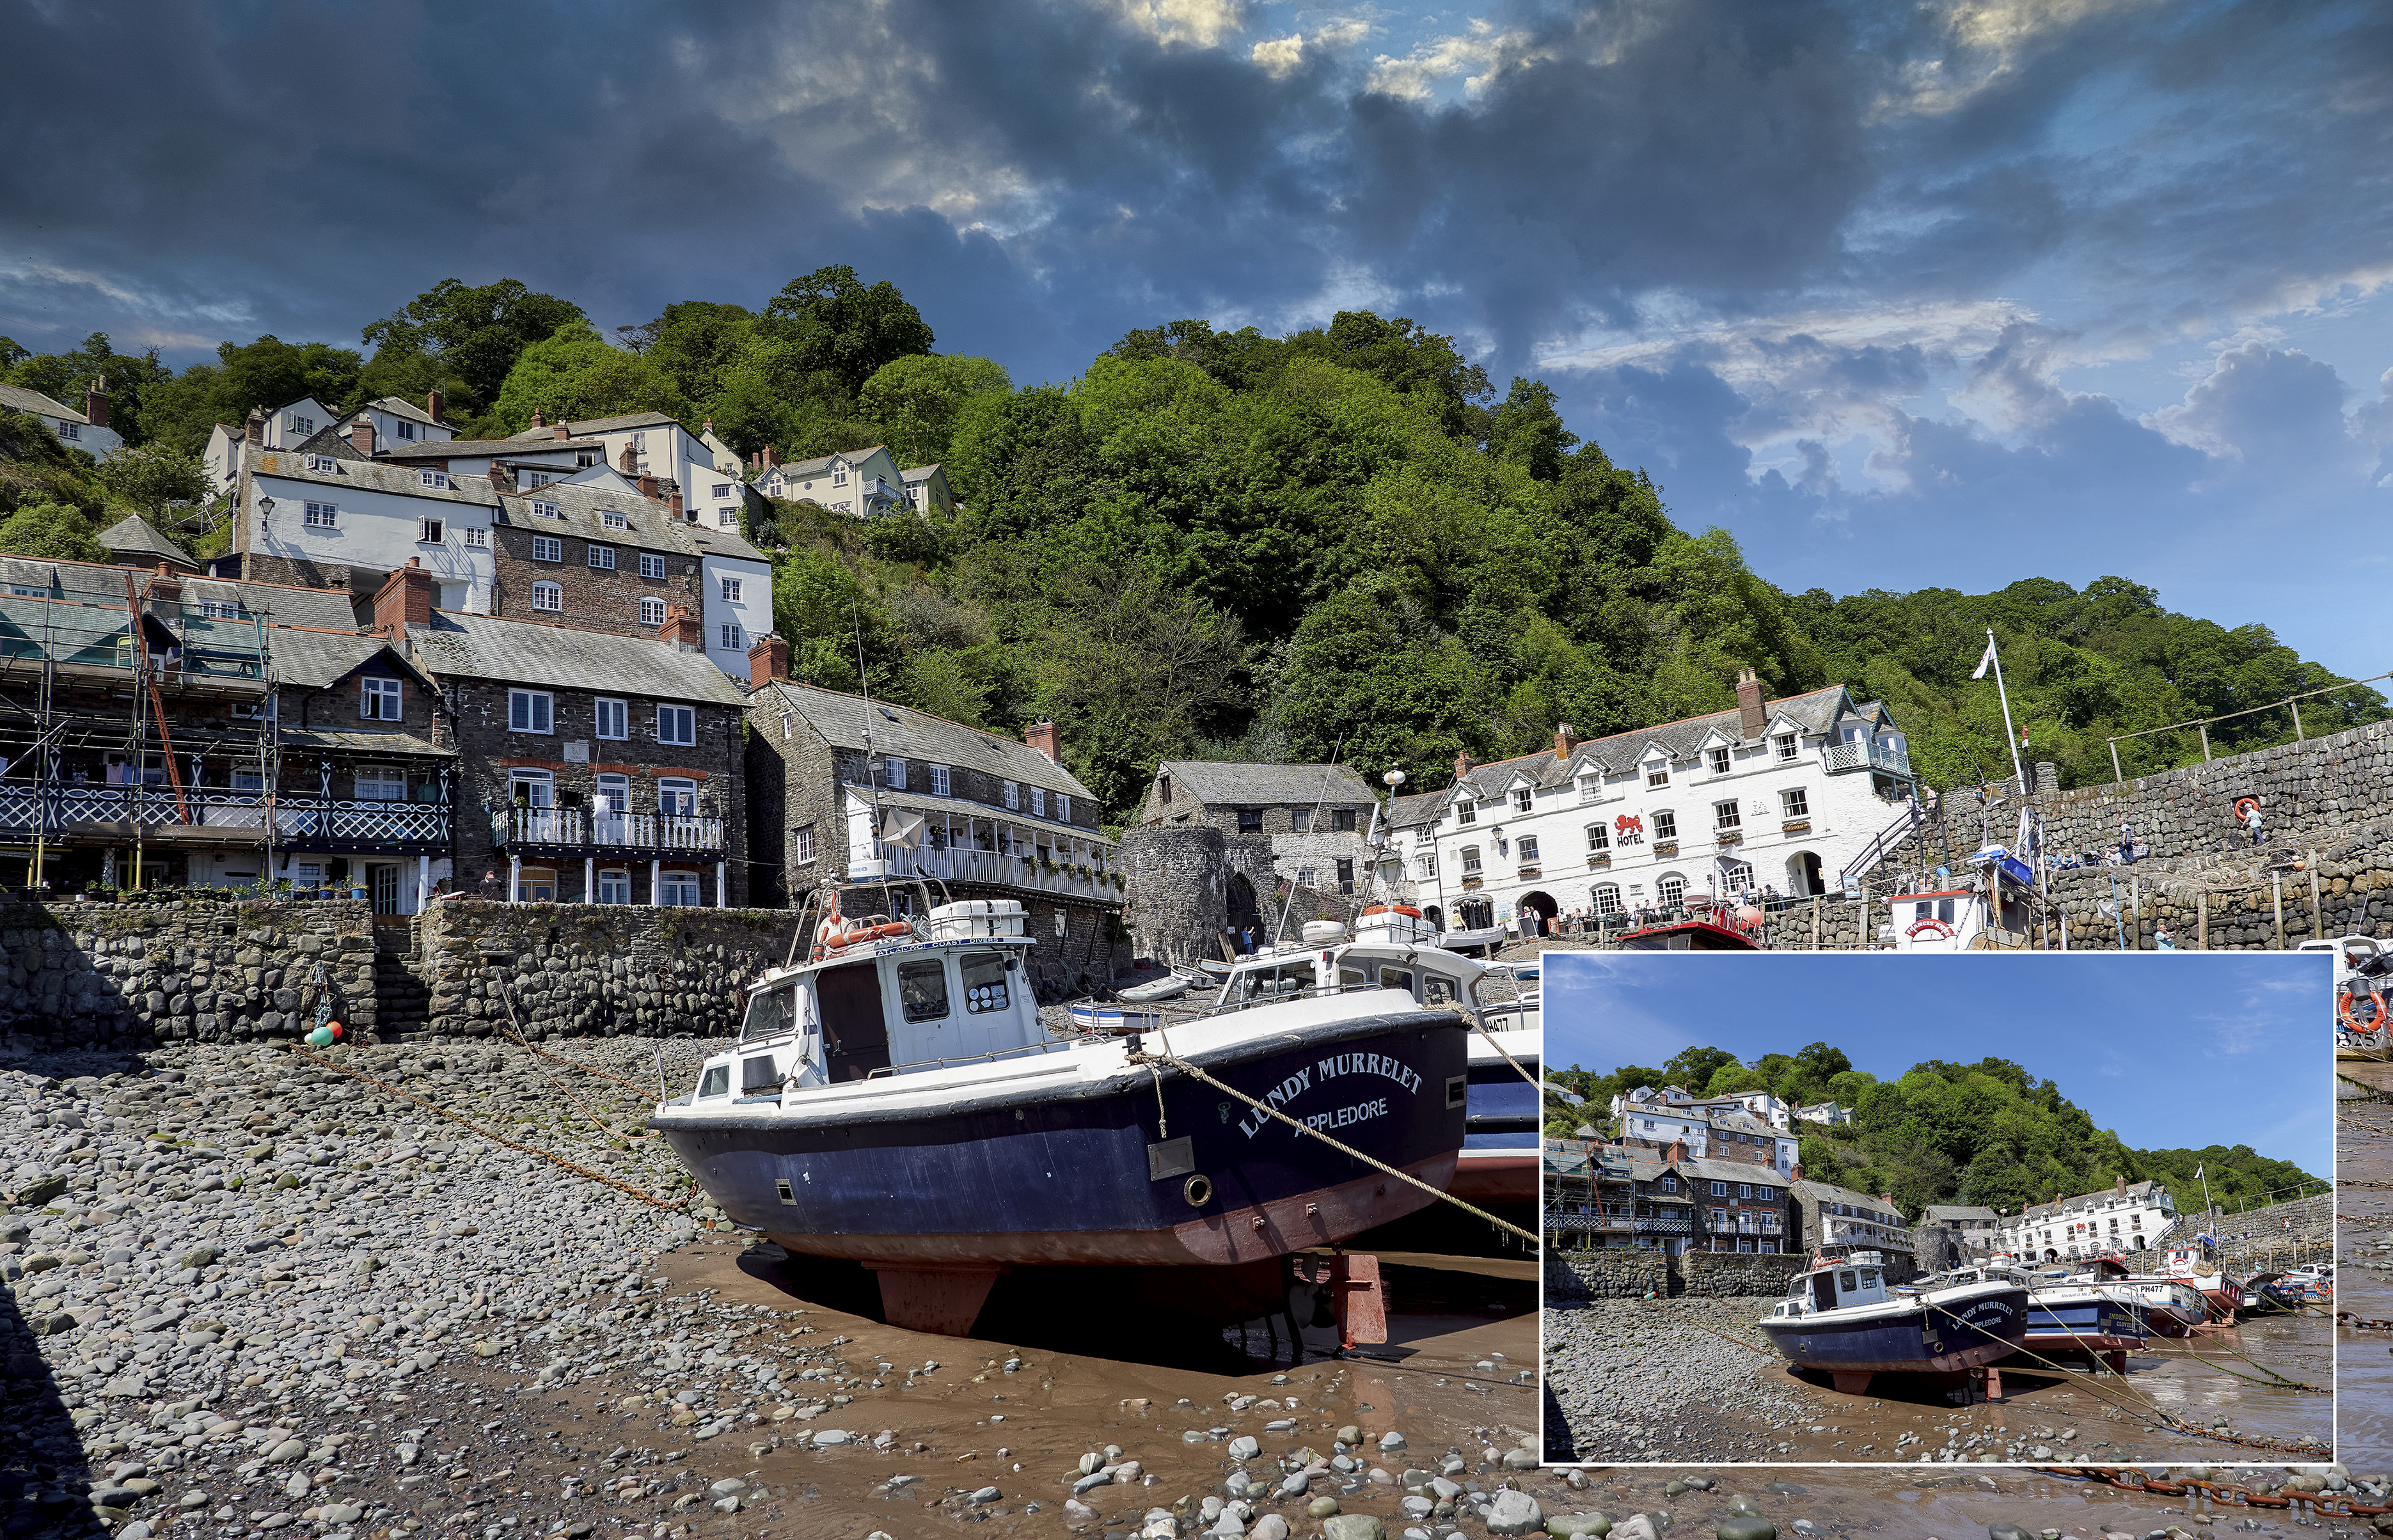
From a photographic point of view, flat blue skies can be almost as boring as dull grey overcast, so we decided to replace the blue sky in this scene with a more stormy version. The new sky needed a subtler gradation towards the horizon, so we used the Edit Mask button in the AI Sky Replacement filter panel (see the tips below).

Five great tips for enhancing skies with AI Sky Replacement
Sometimes you can get lucky and find a replacement sky that blends with
your image perfectly first time out. Often, though, you need to spend a little time getting exactly the right sky and combining it with a few tweaks and adjustments. Here are a few ideas for getting your sky replacements to come out exactly as you imagined them – and you can do them all very easily in Luminar.
1. Collect pictures of skies
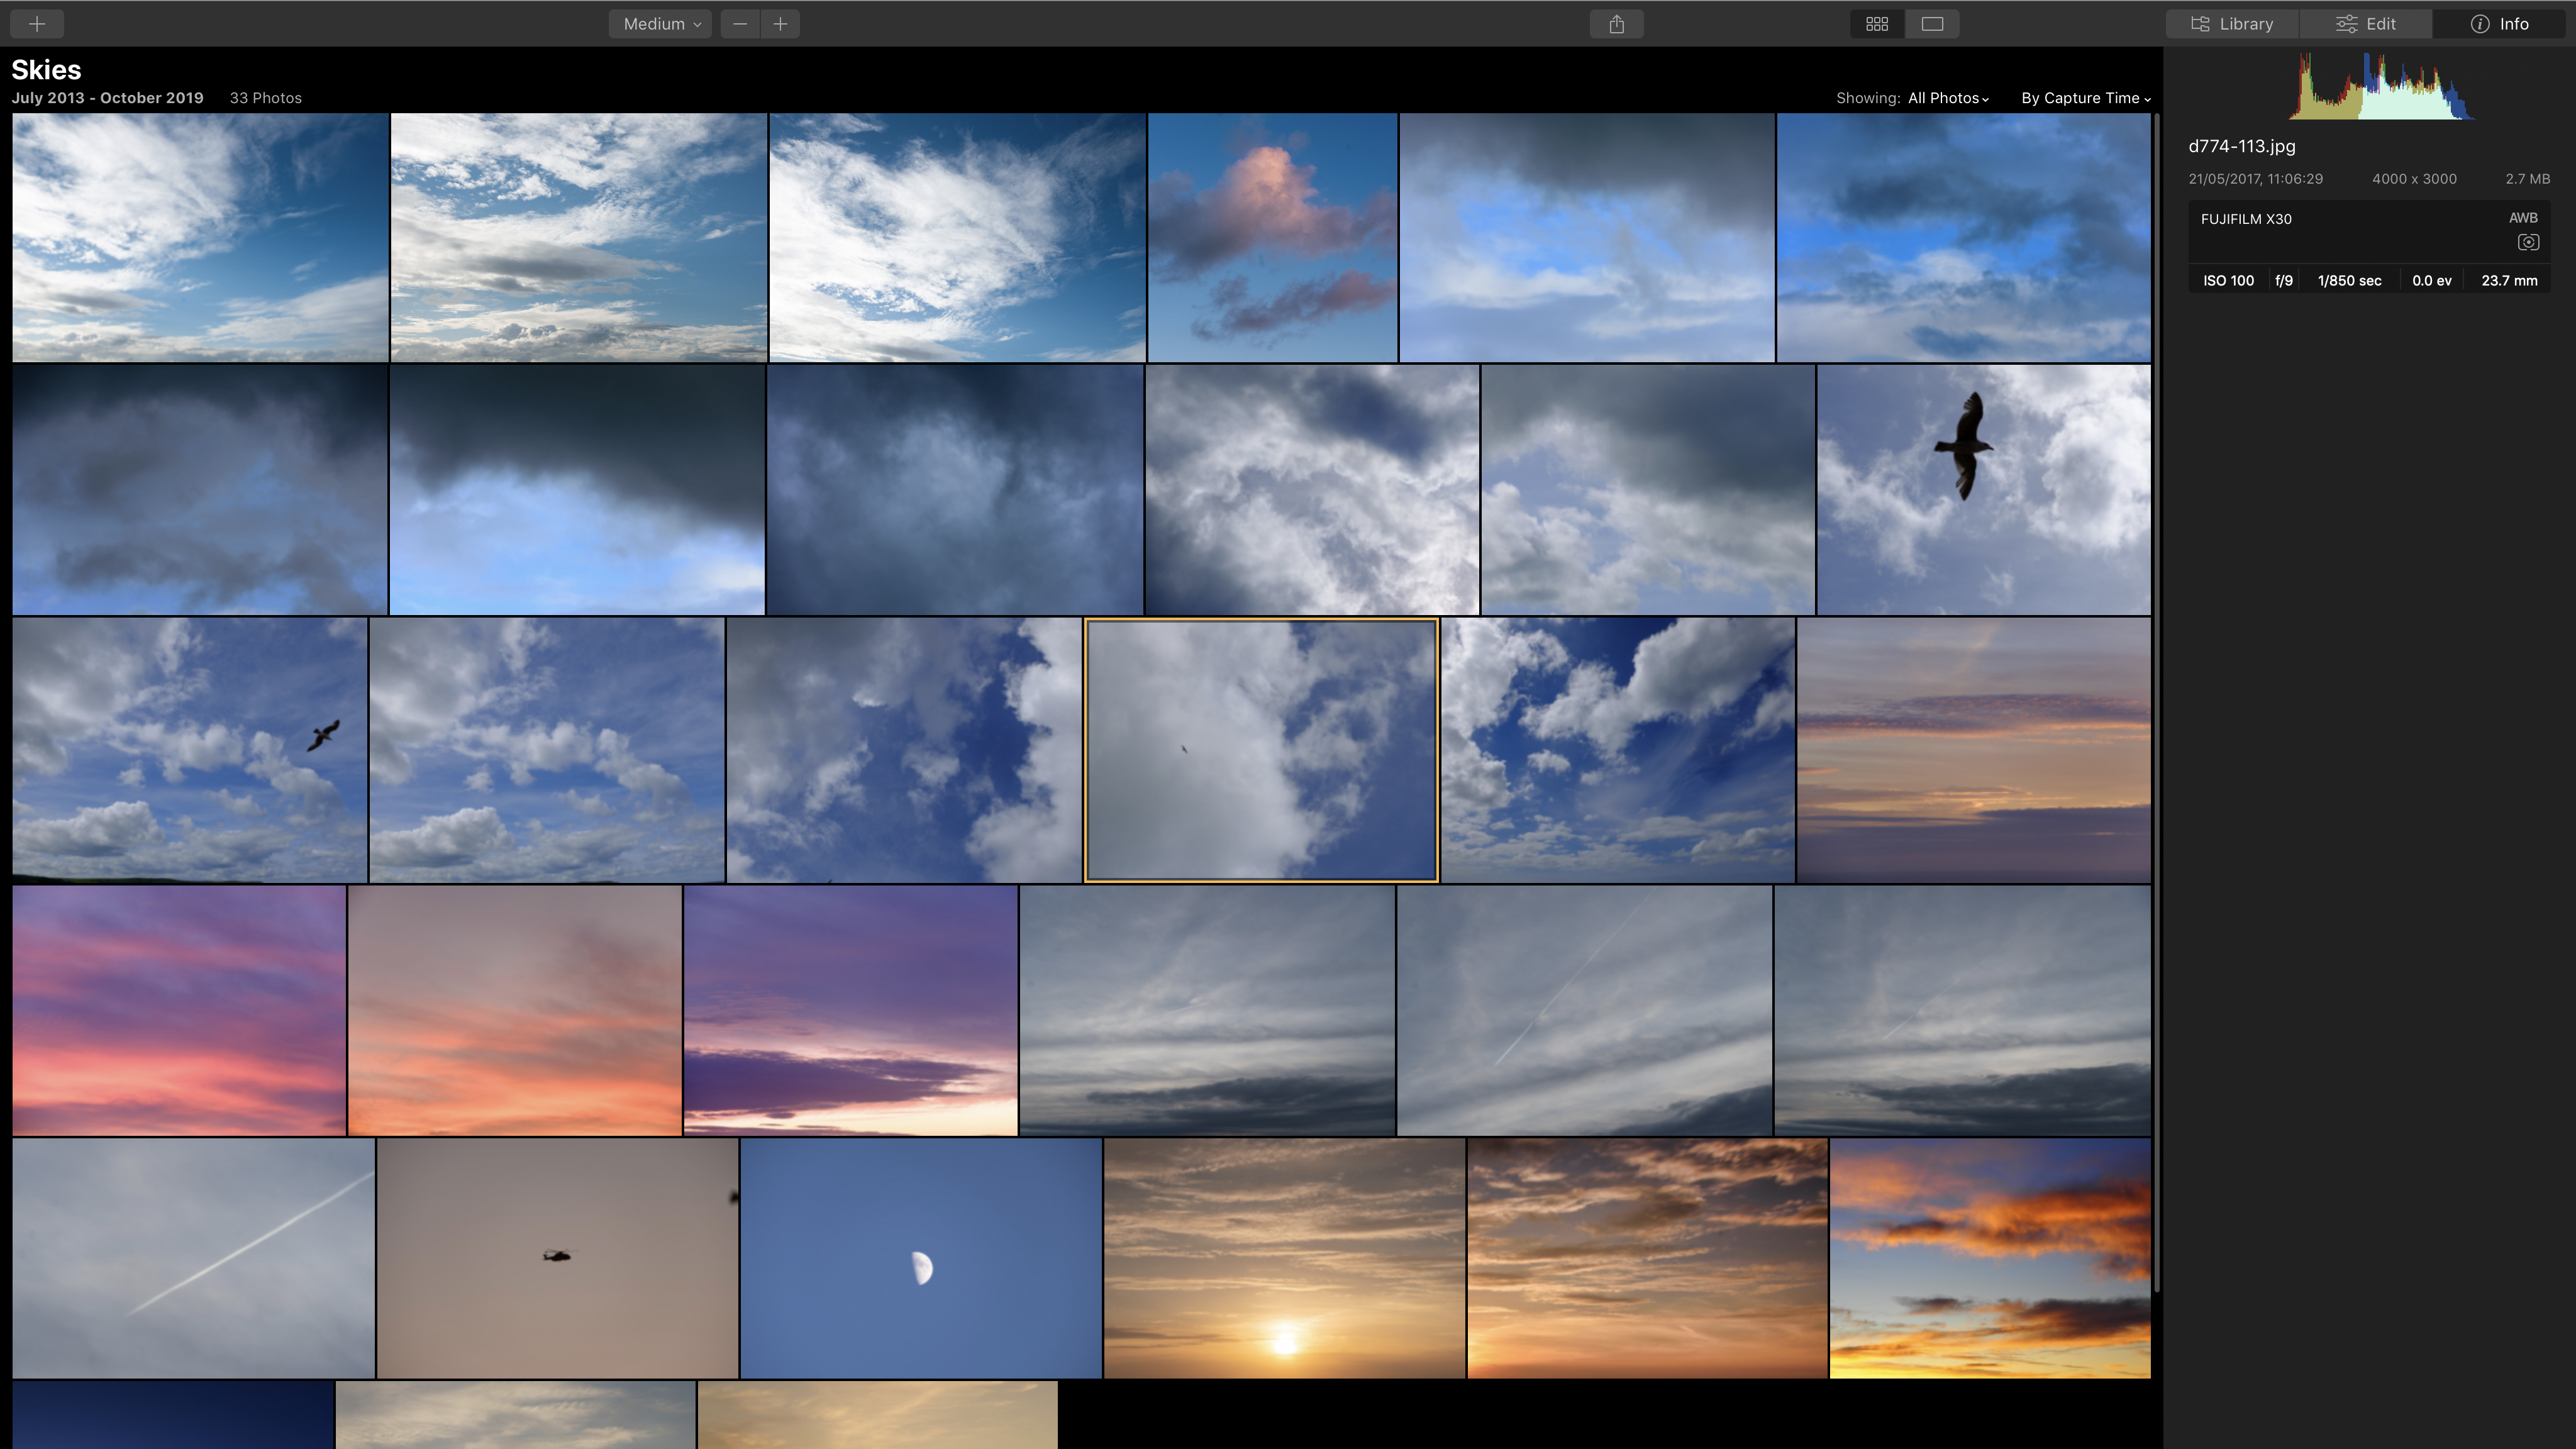
Luminar 4.1 comes with a wide selection of skies you can drop straight into your images, but it’s just as easy to add your own – so start taking photos of skies you like and save them.
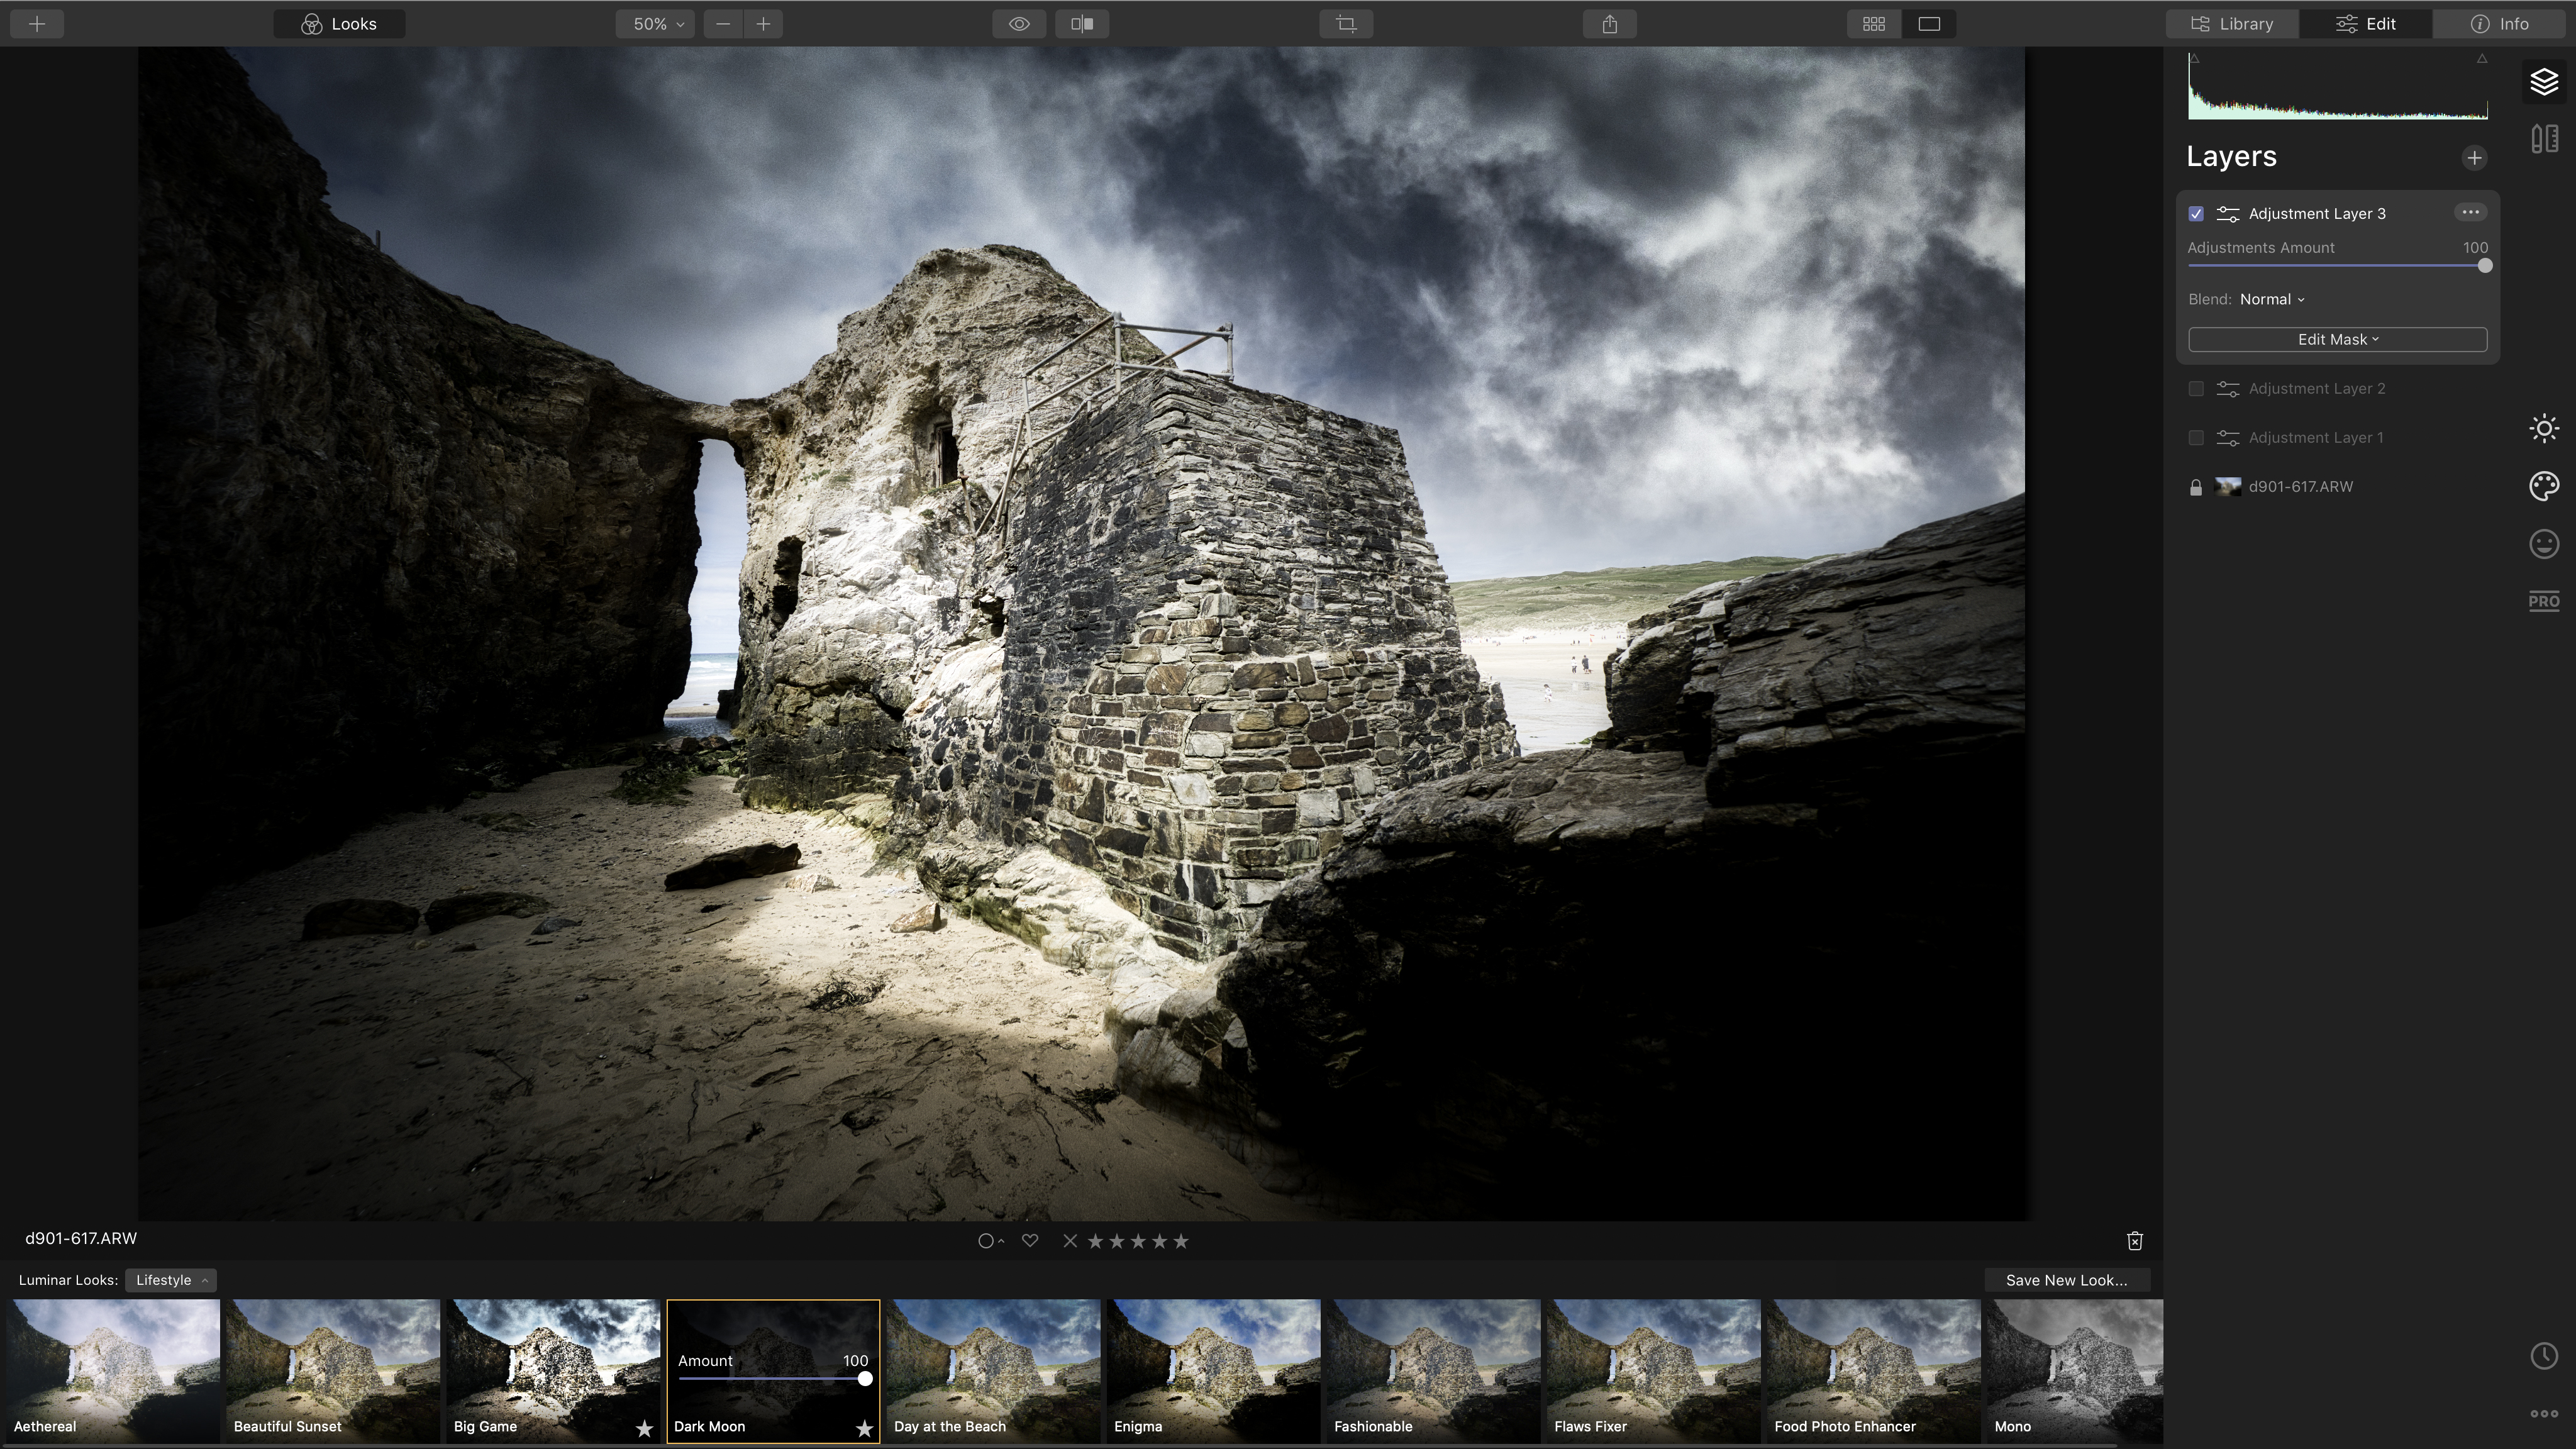
2. Add Looks to layers
Sometimes you need a little something to bring your new sky and your image together visually, and Looks are a great way to do it. Add an Adjustment Layer and choose a Look that complements your picture.
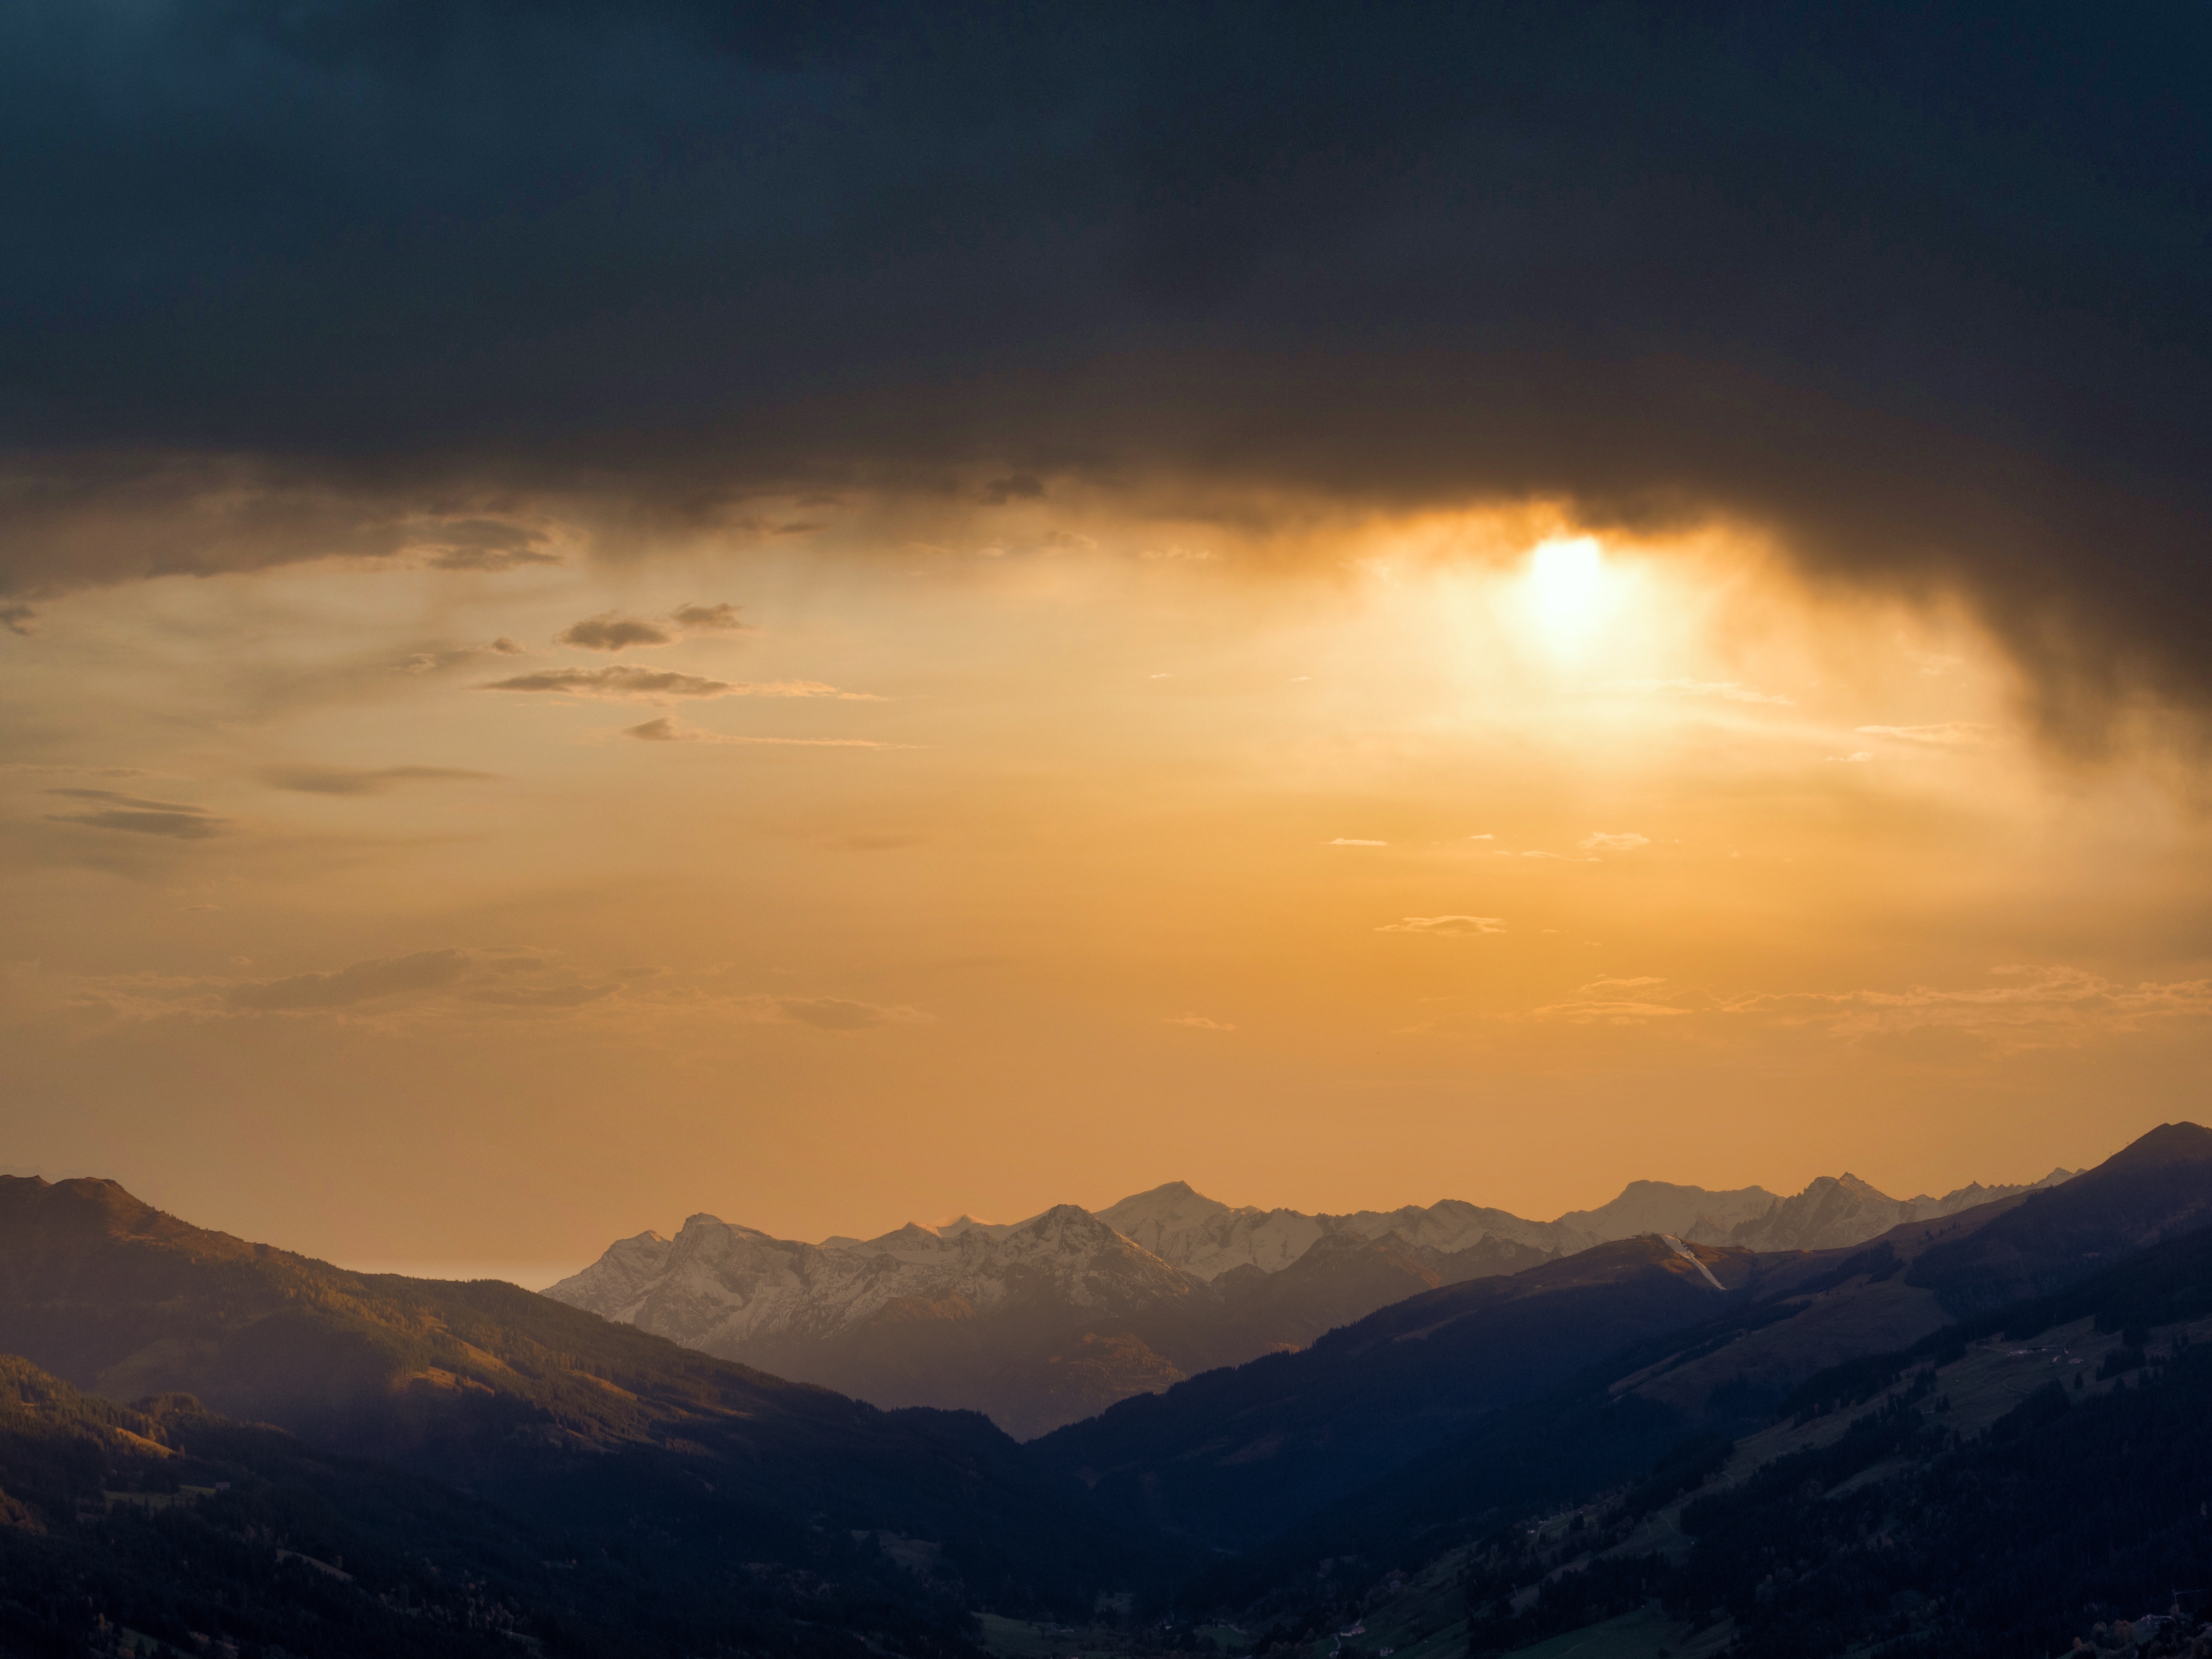
3. Match the lighting
Pay attention to the lighting in the original scene, then try to find a sky that matches it. Here, the position of the sun in the sky matches the way the light is falling on the landscape below.
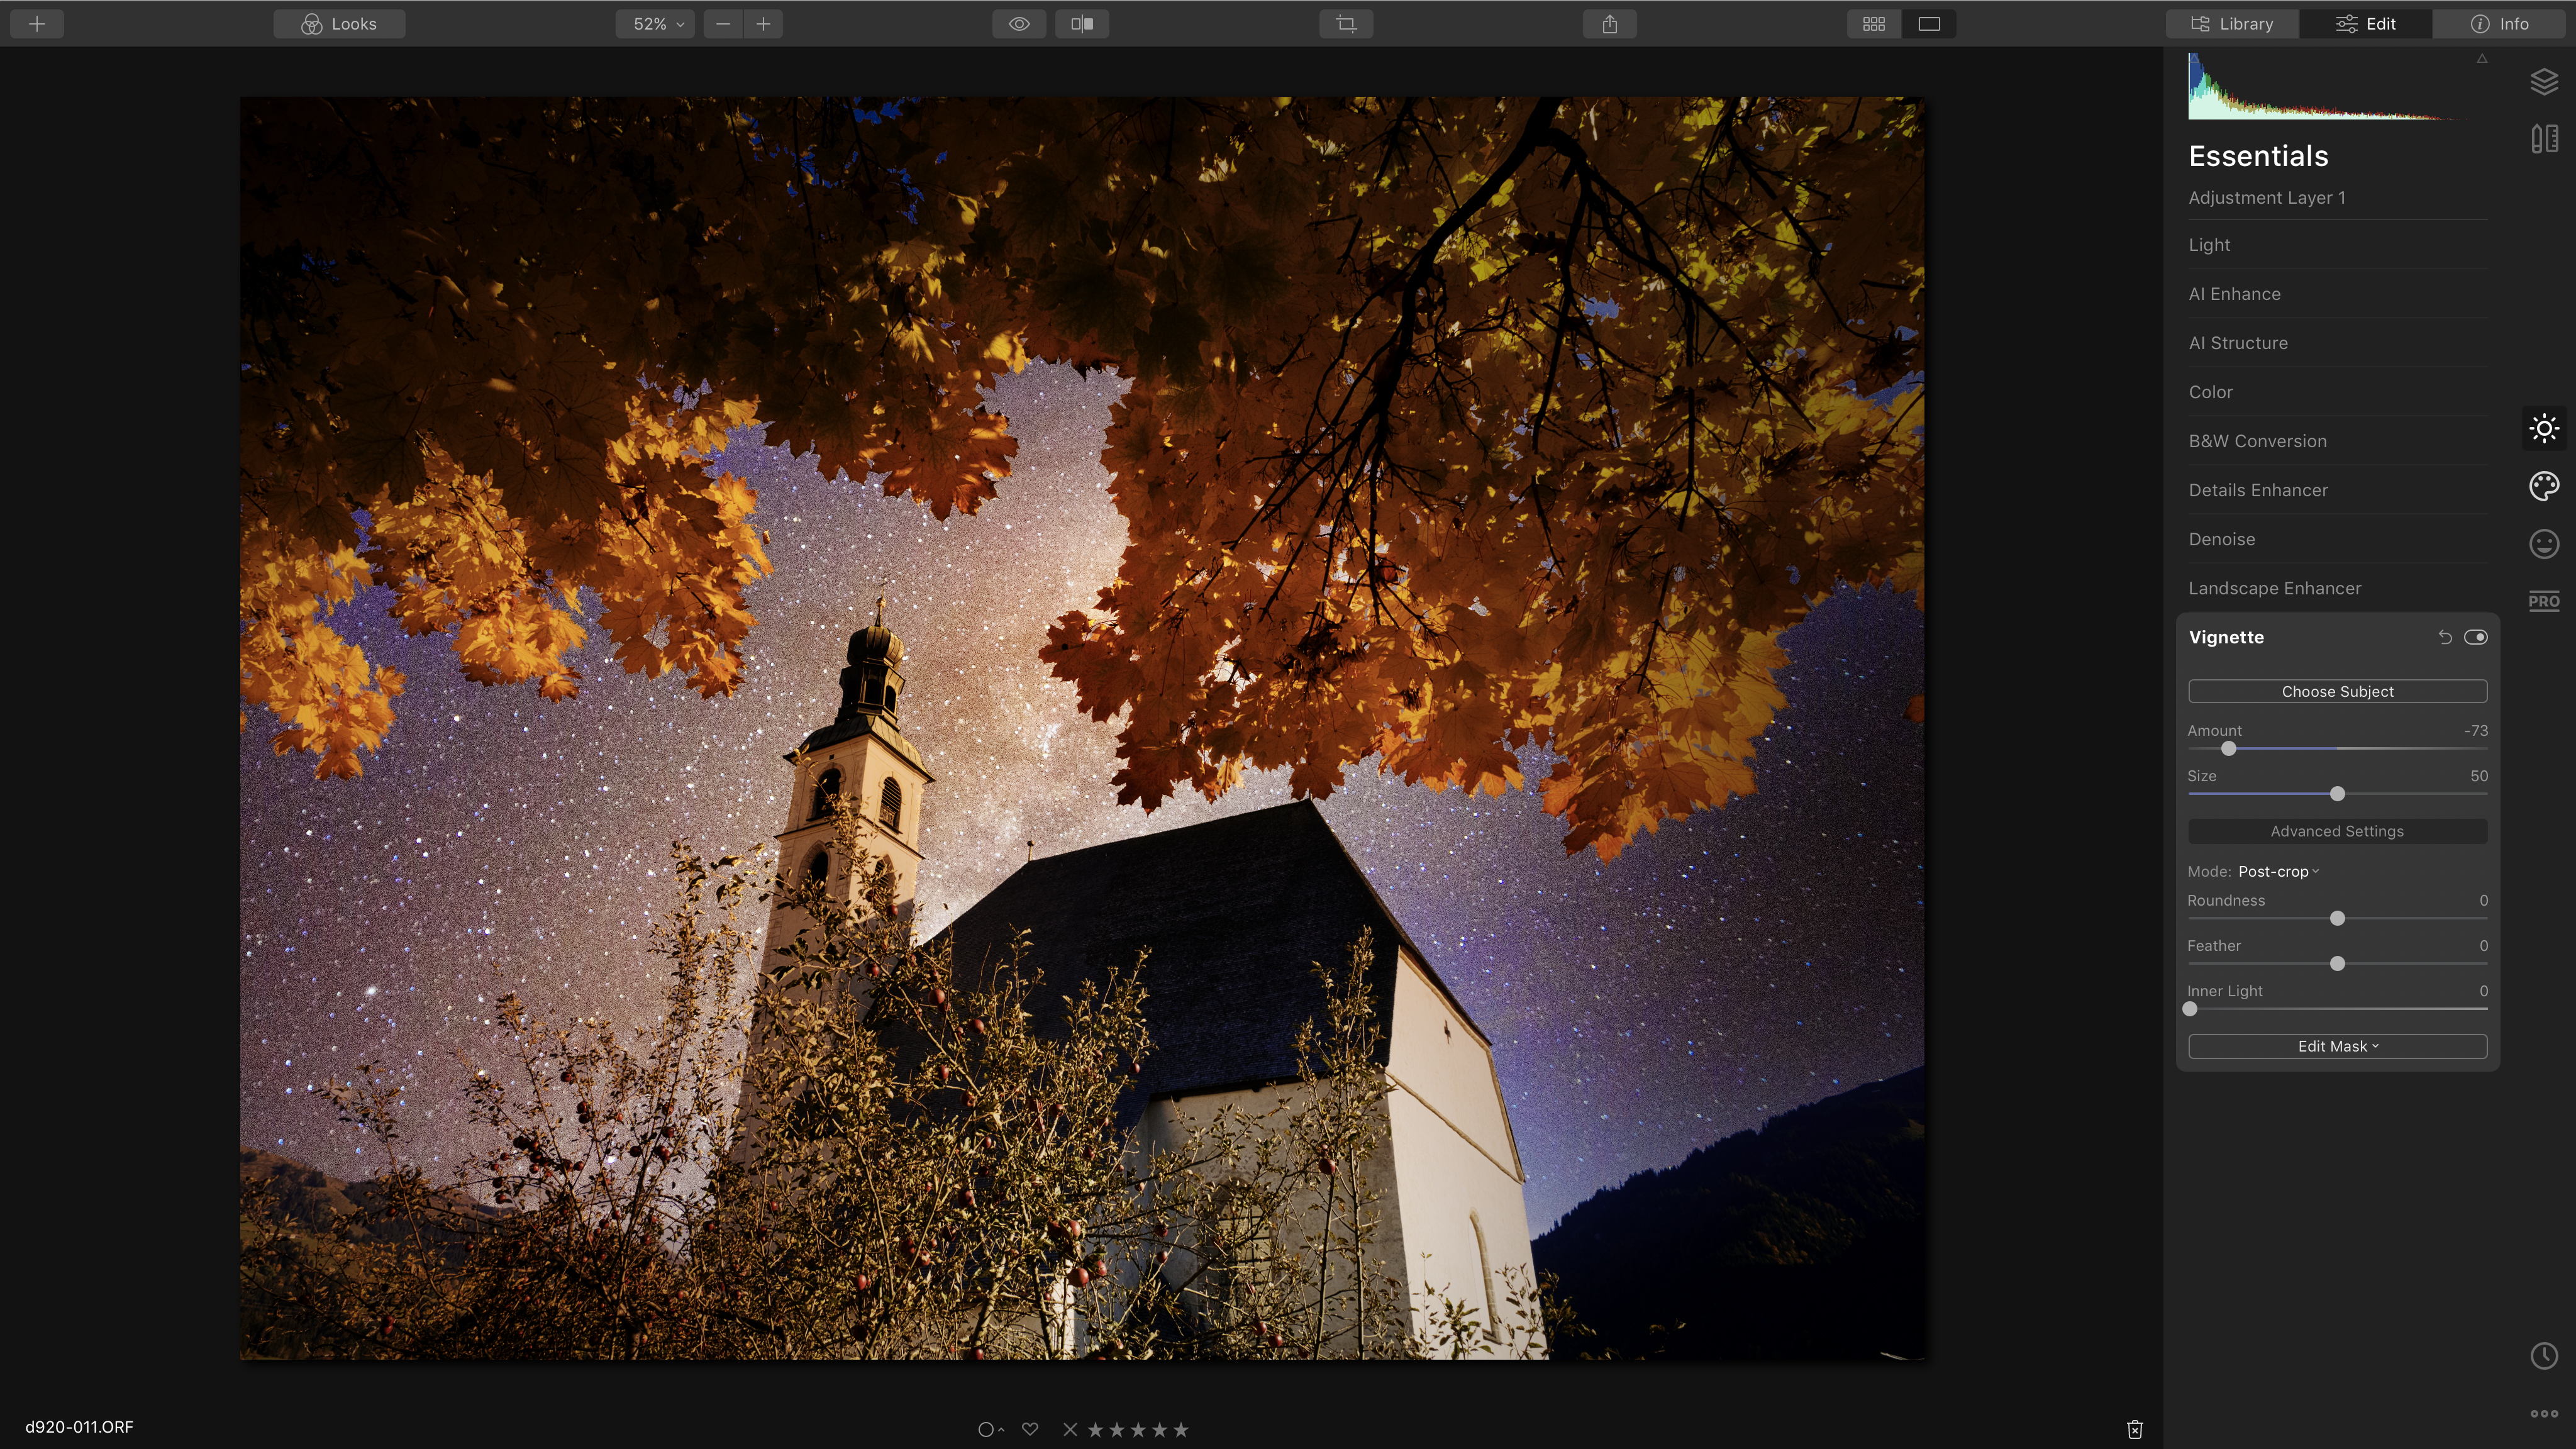
4. Add a vignette
If you’re adding a dark sky to a bright scene, it can be hard to balance the brightness. One quick and easy solution is to apply a vignette, as the edge-darkening effect helps draw the image together.
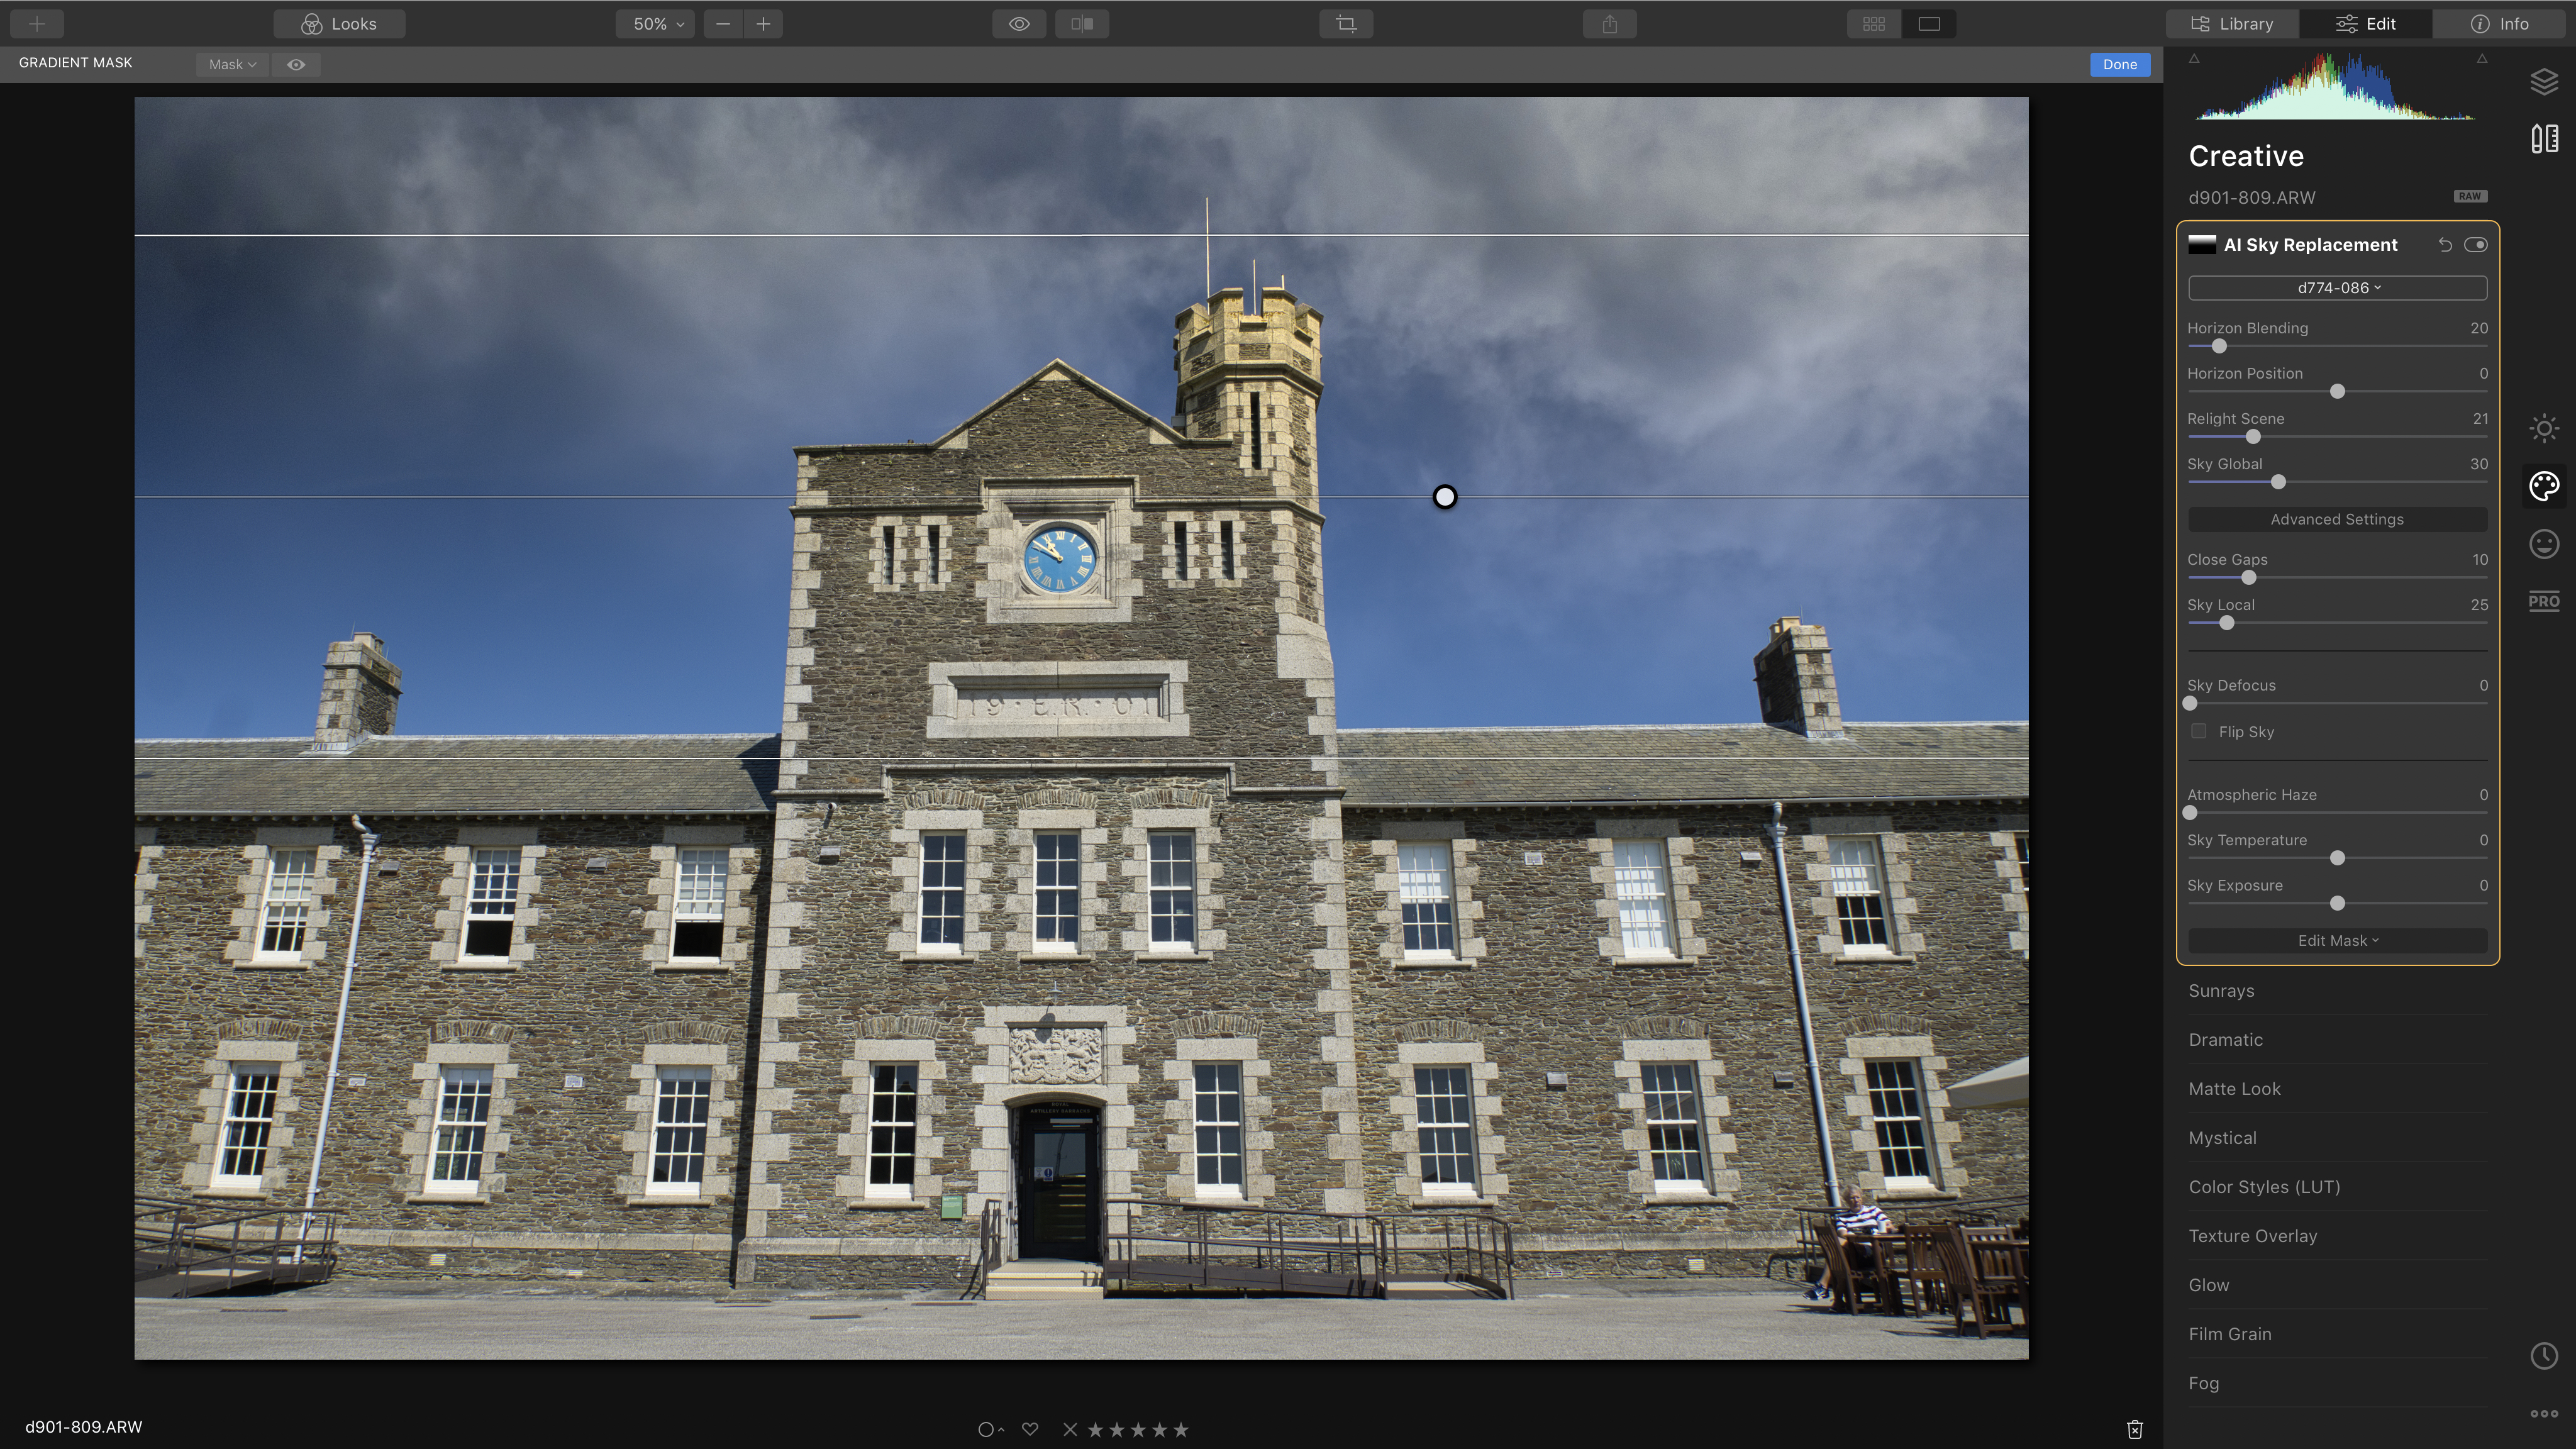
5. Blend with a gradient
In nature, skies have a lighter tone near the horizon, and a replacement sky won’t always have that. Click the Edit Mask button to add a gradient mask that blends in the replacement sky more gradually.

How to get a copy of Skylum Luminar 4
If you don’t have Luminar 4 already, you can download a free 14-day trial from the Skylum website. It’s available in both macOS and Windows versions and as all the features are fully functional, you can follow this tutorial yourself. If you decide to go ahead and buy Luminar 4, you can use the exclusive discount code DCW20 to save £10 / $10 on the full purchase price.
The best camera deals, reviews, product advice, and unmissable photography news, direct to your inbox!
Digital Camera World is one of the leading authorities on camera and photography news, reviews, techniques, tutorials, comparisons, deals and industry analysis. The site doesn't just specialize in cameras, but all aspects of photography, videography and imaging – including camera phones, gimbals, lenses, lighting, editing software, filters, tripods, laptops, printers, photo books, desks, binoculars and more.
Whether you're using, looking to buy or trying to get the most out of a compact camera, action camera, camera drone, cinema camera, beginner camera or professional camera, Digital Camera World has a roster of experts with combined experience of over 100 years when it comes to cameras, photography and imaging.

