Take your photos to the next level with Luminar AI’s Templates
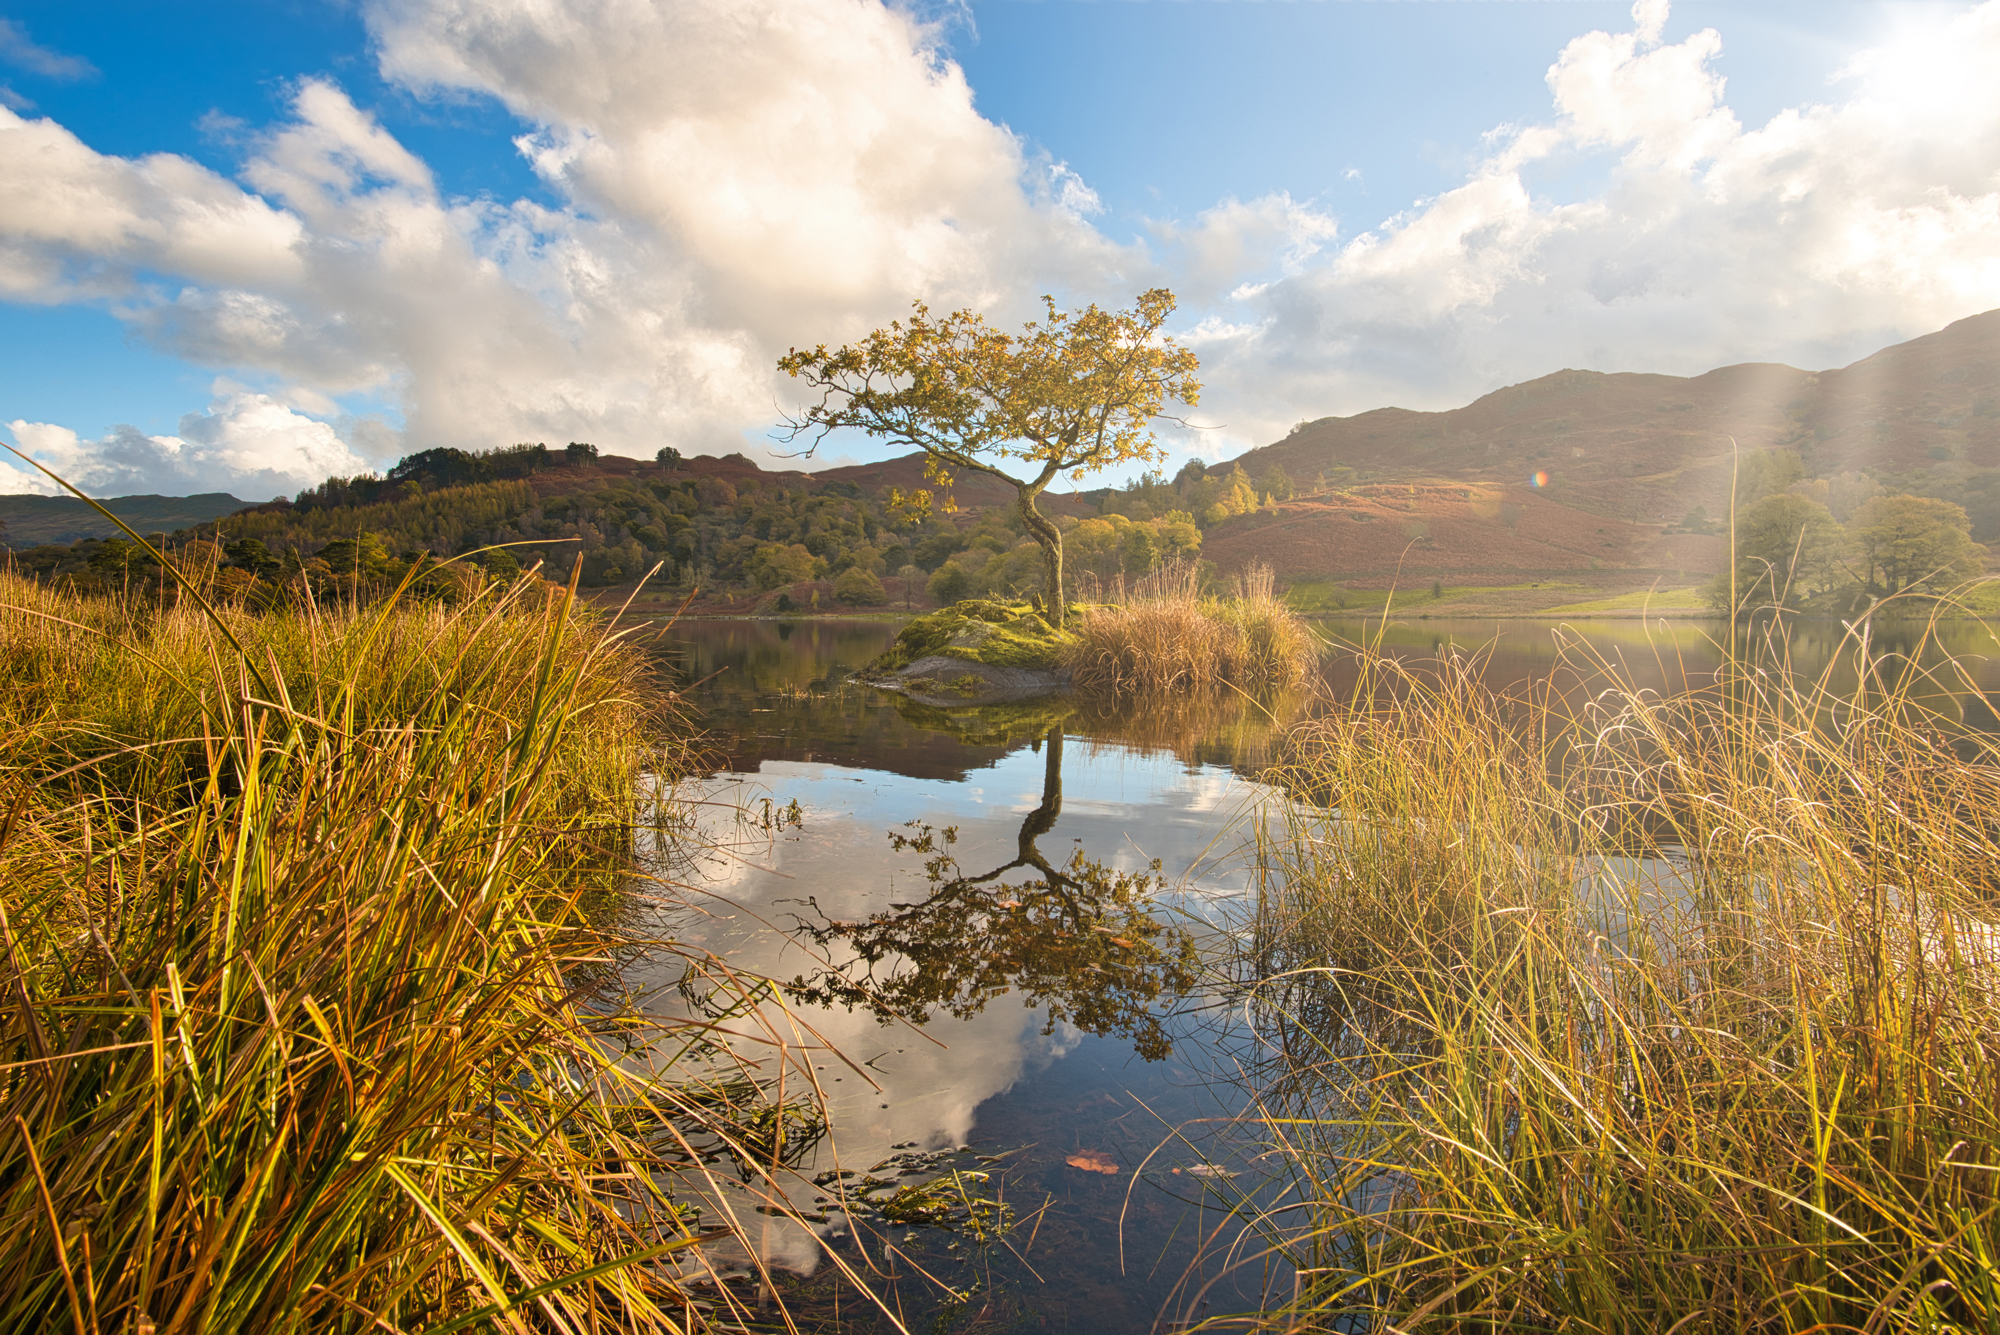
No matter what genre of photography you shoot, there’s no denying that editing large batches of images can get repetitive sometimes. Painstakingly ensuring that each photo is correctly exposed, composed and enhanced can take up a lot of time that you might prefer to spend shooting. However, there are ways that you can get perfectly-edited results without having to spend all of your time in front of your computer.
Luminar AI has a template-based editing process that’s equally suited to batch-editing your photos as it is honing one specific shot to perfection. Luminar AI includes a variety of Templates collections that the program will recommend based on an analysis of your images. Using artificial intelligence, Luminar AI will identify the contents of your photos, analyze the potential problems and calculate specific editing suggestions.
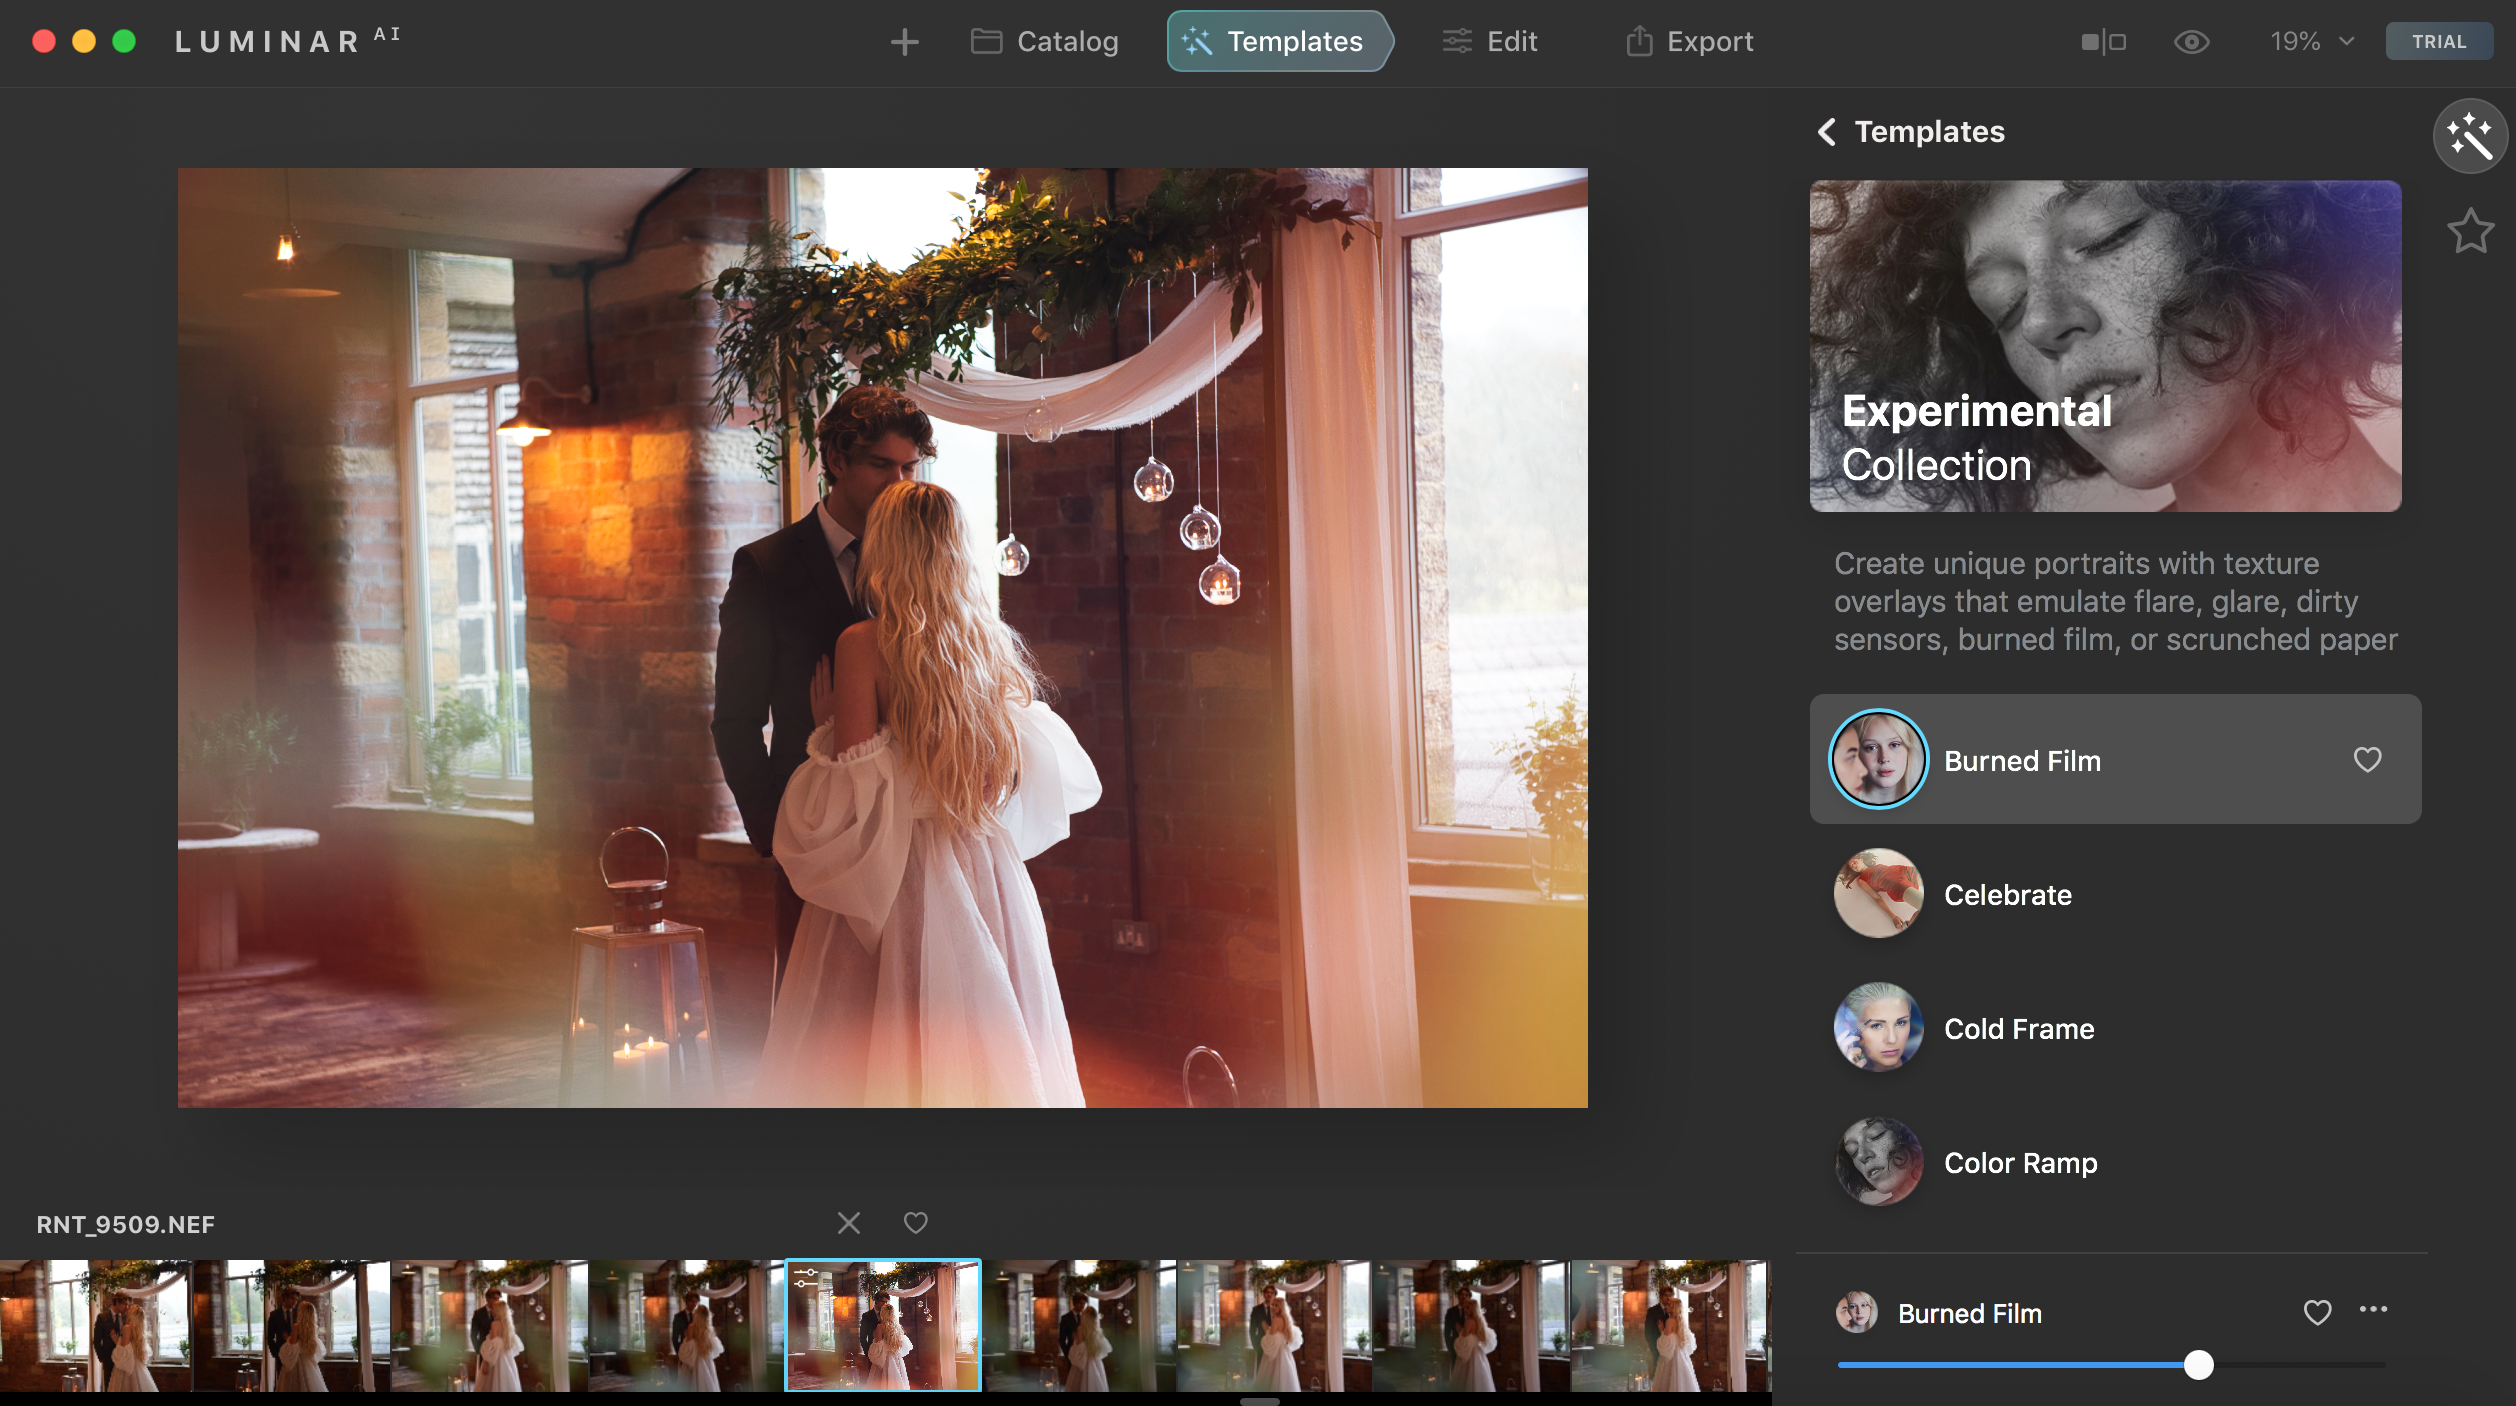
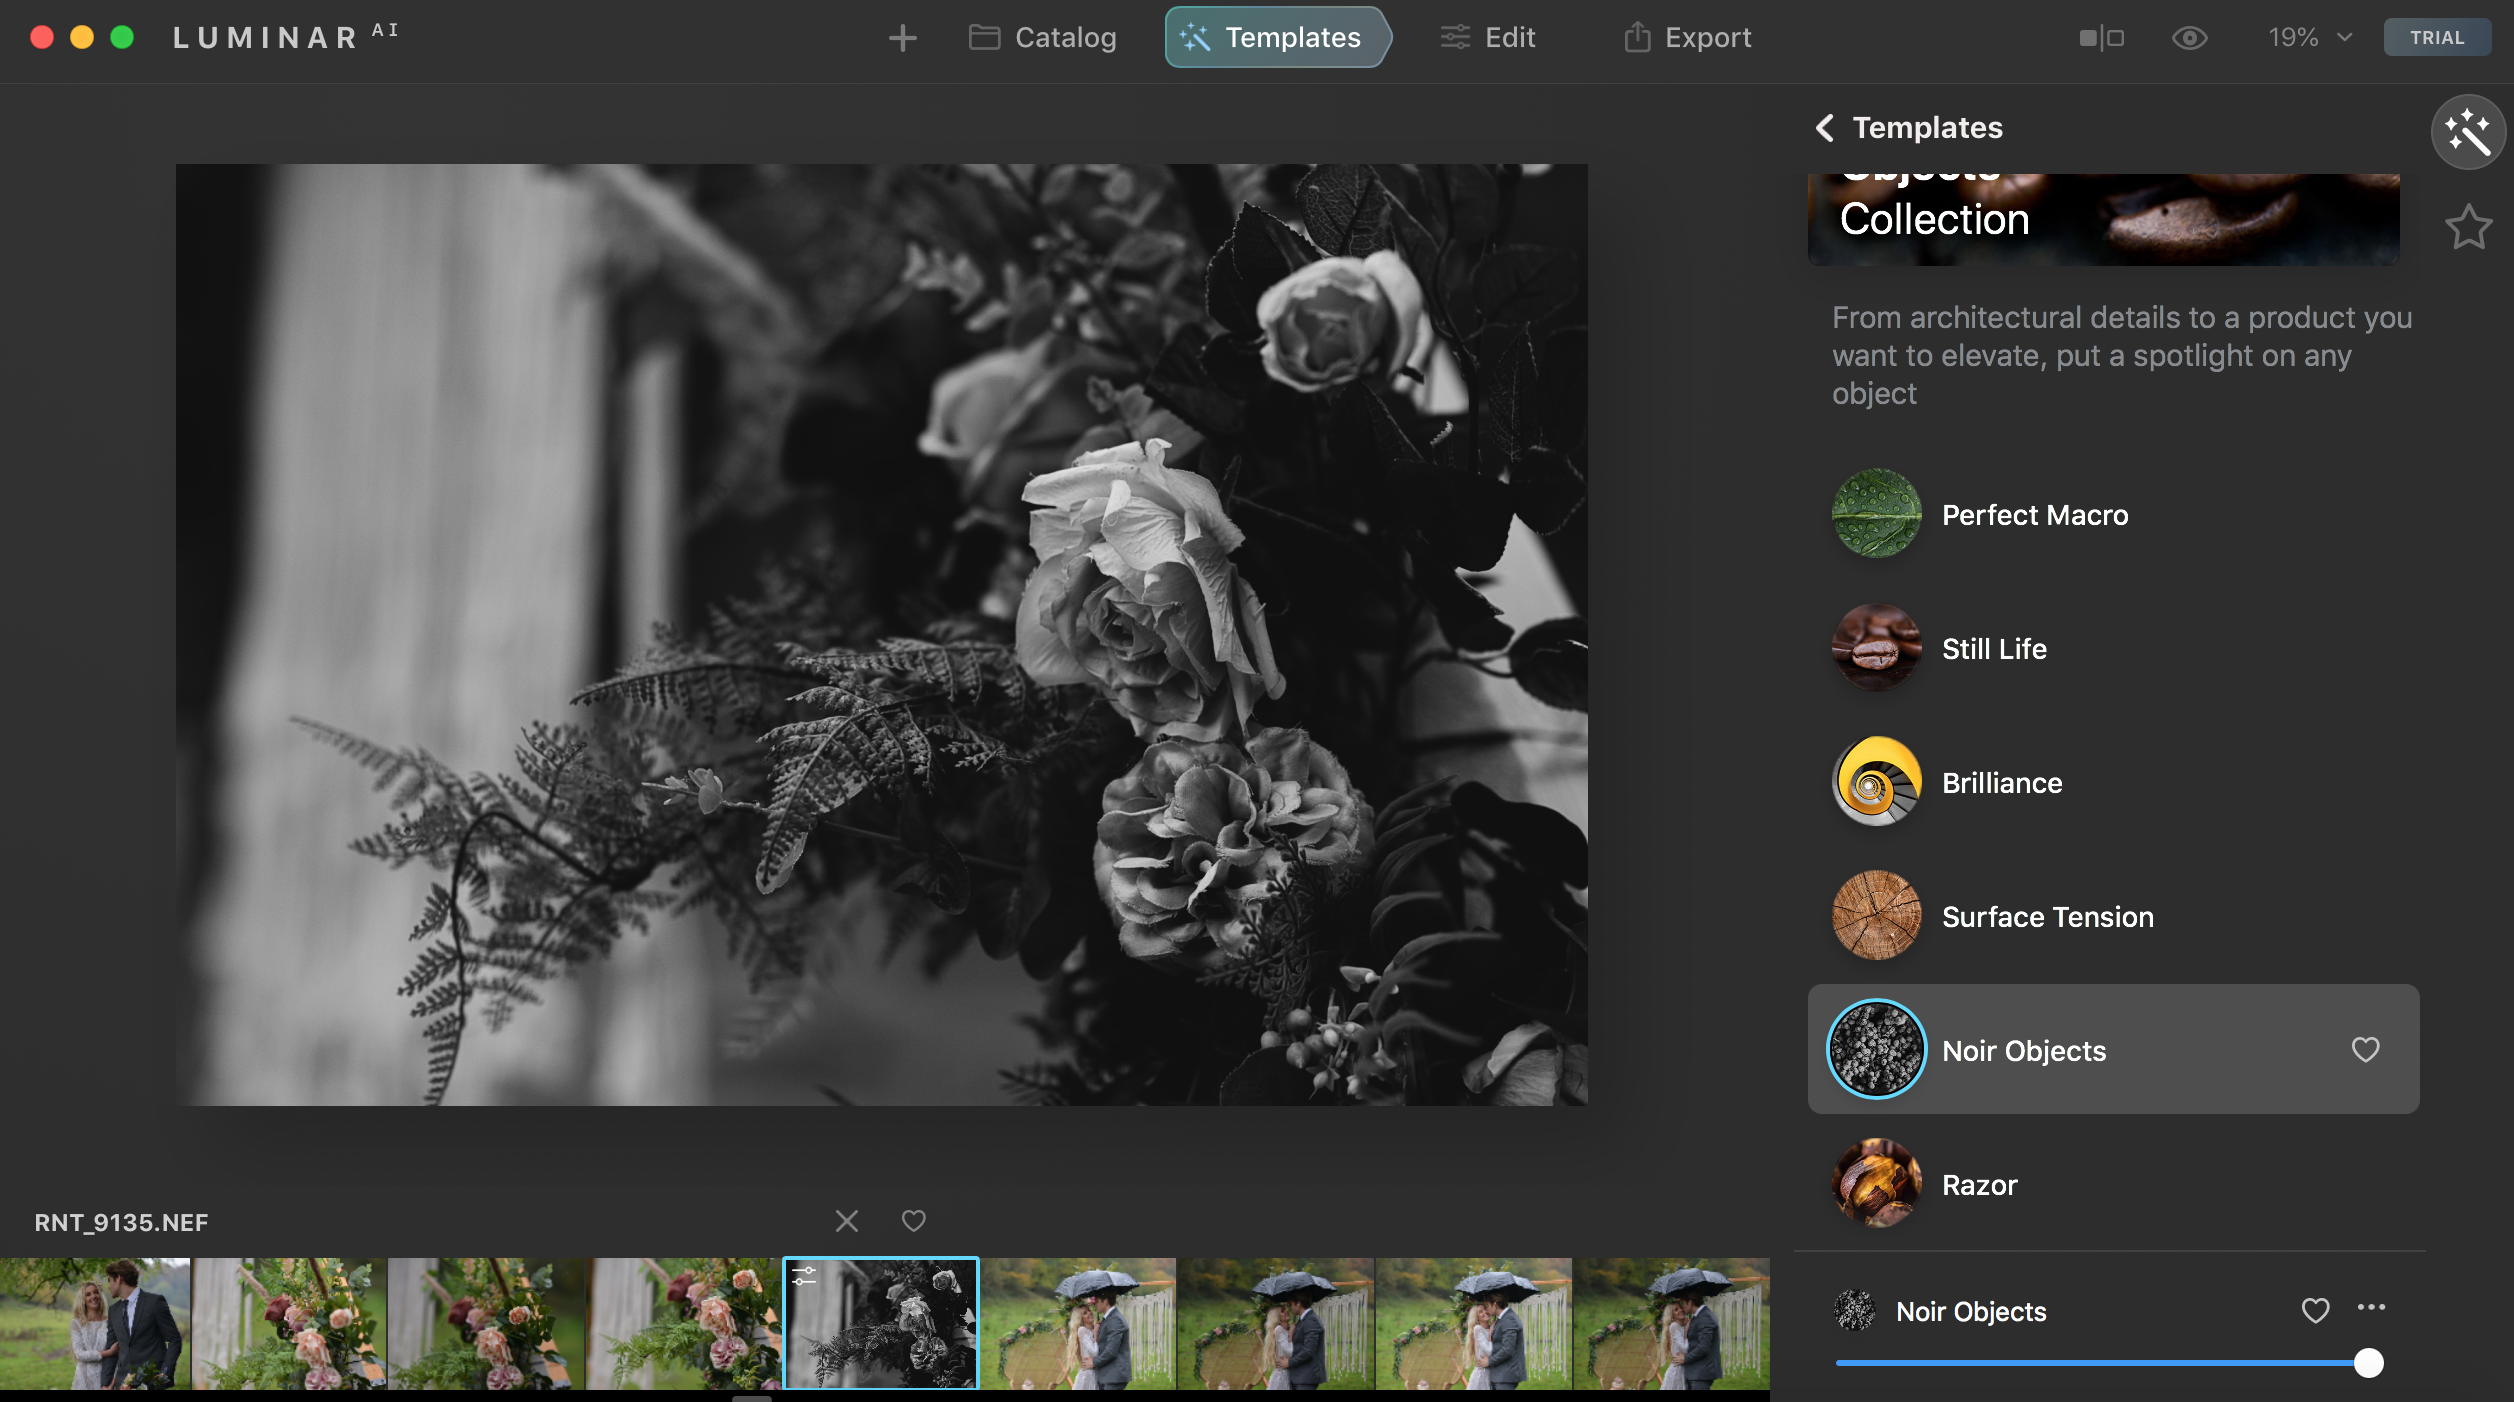
For example, if you’ve shot a dramatic landscape, then Luminar AI might recommend its ‘Landscape Collection’. Alternatively, if you’ve captured a portrait, then the ‘Blockbuster’, ‘Portrait’ or ‘Analog’ collections might be put forward instead. The strength of these specially-designed Templates can be adjusted from 0 to 100%, which means that you can customize the effects to each specific image.
However, Luminar AI also gives its users the ability to create their own Templates from scratch. This means that you can adjust your image’s exposure, color temperature, saturation and more – and then you simply save all of your adjustments as a Template that can then be applied to as many photos as you like.
Available for macOS and Windows as an application and plug-in, Luminar AI is perfect for helping content creators reach their editing goals – whether that’s creating a unique on-brand style for their images, giving a client exactly what they’re looking for, or simply taking their favorite image to the next level.
How to create your own Luminar AI Template
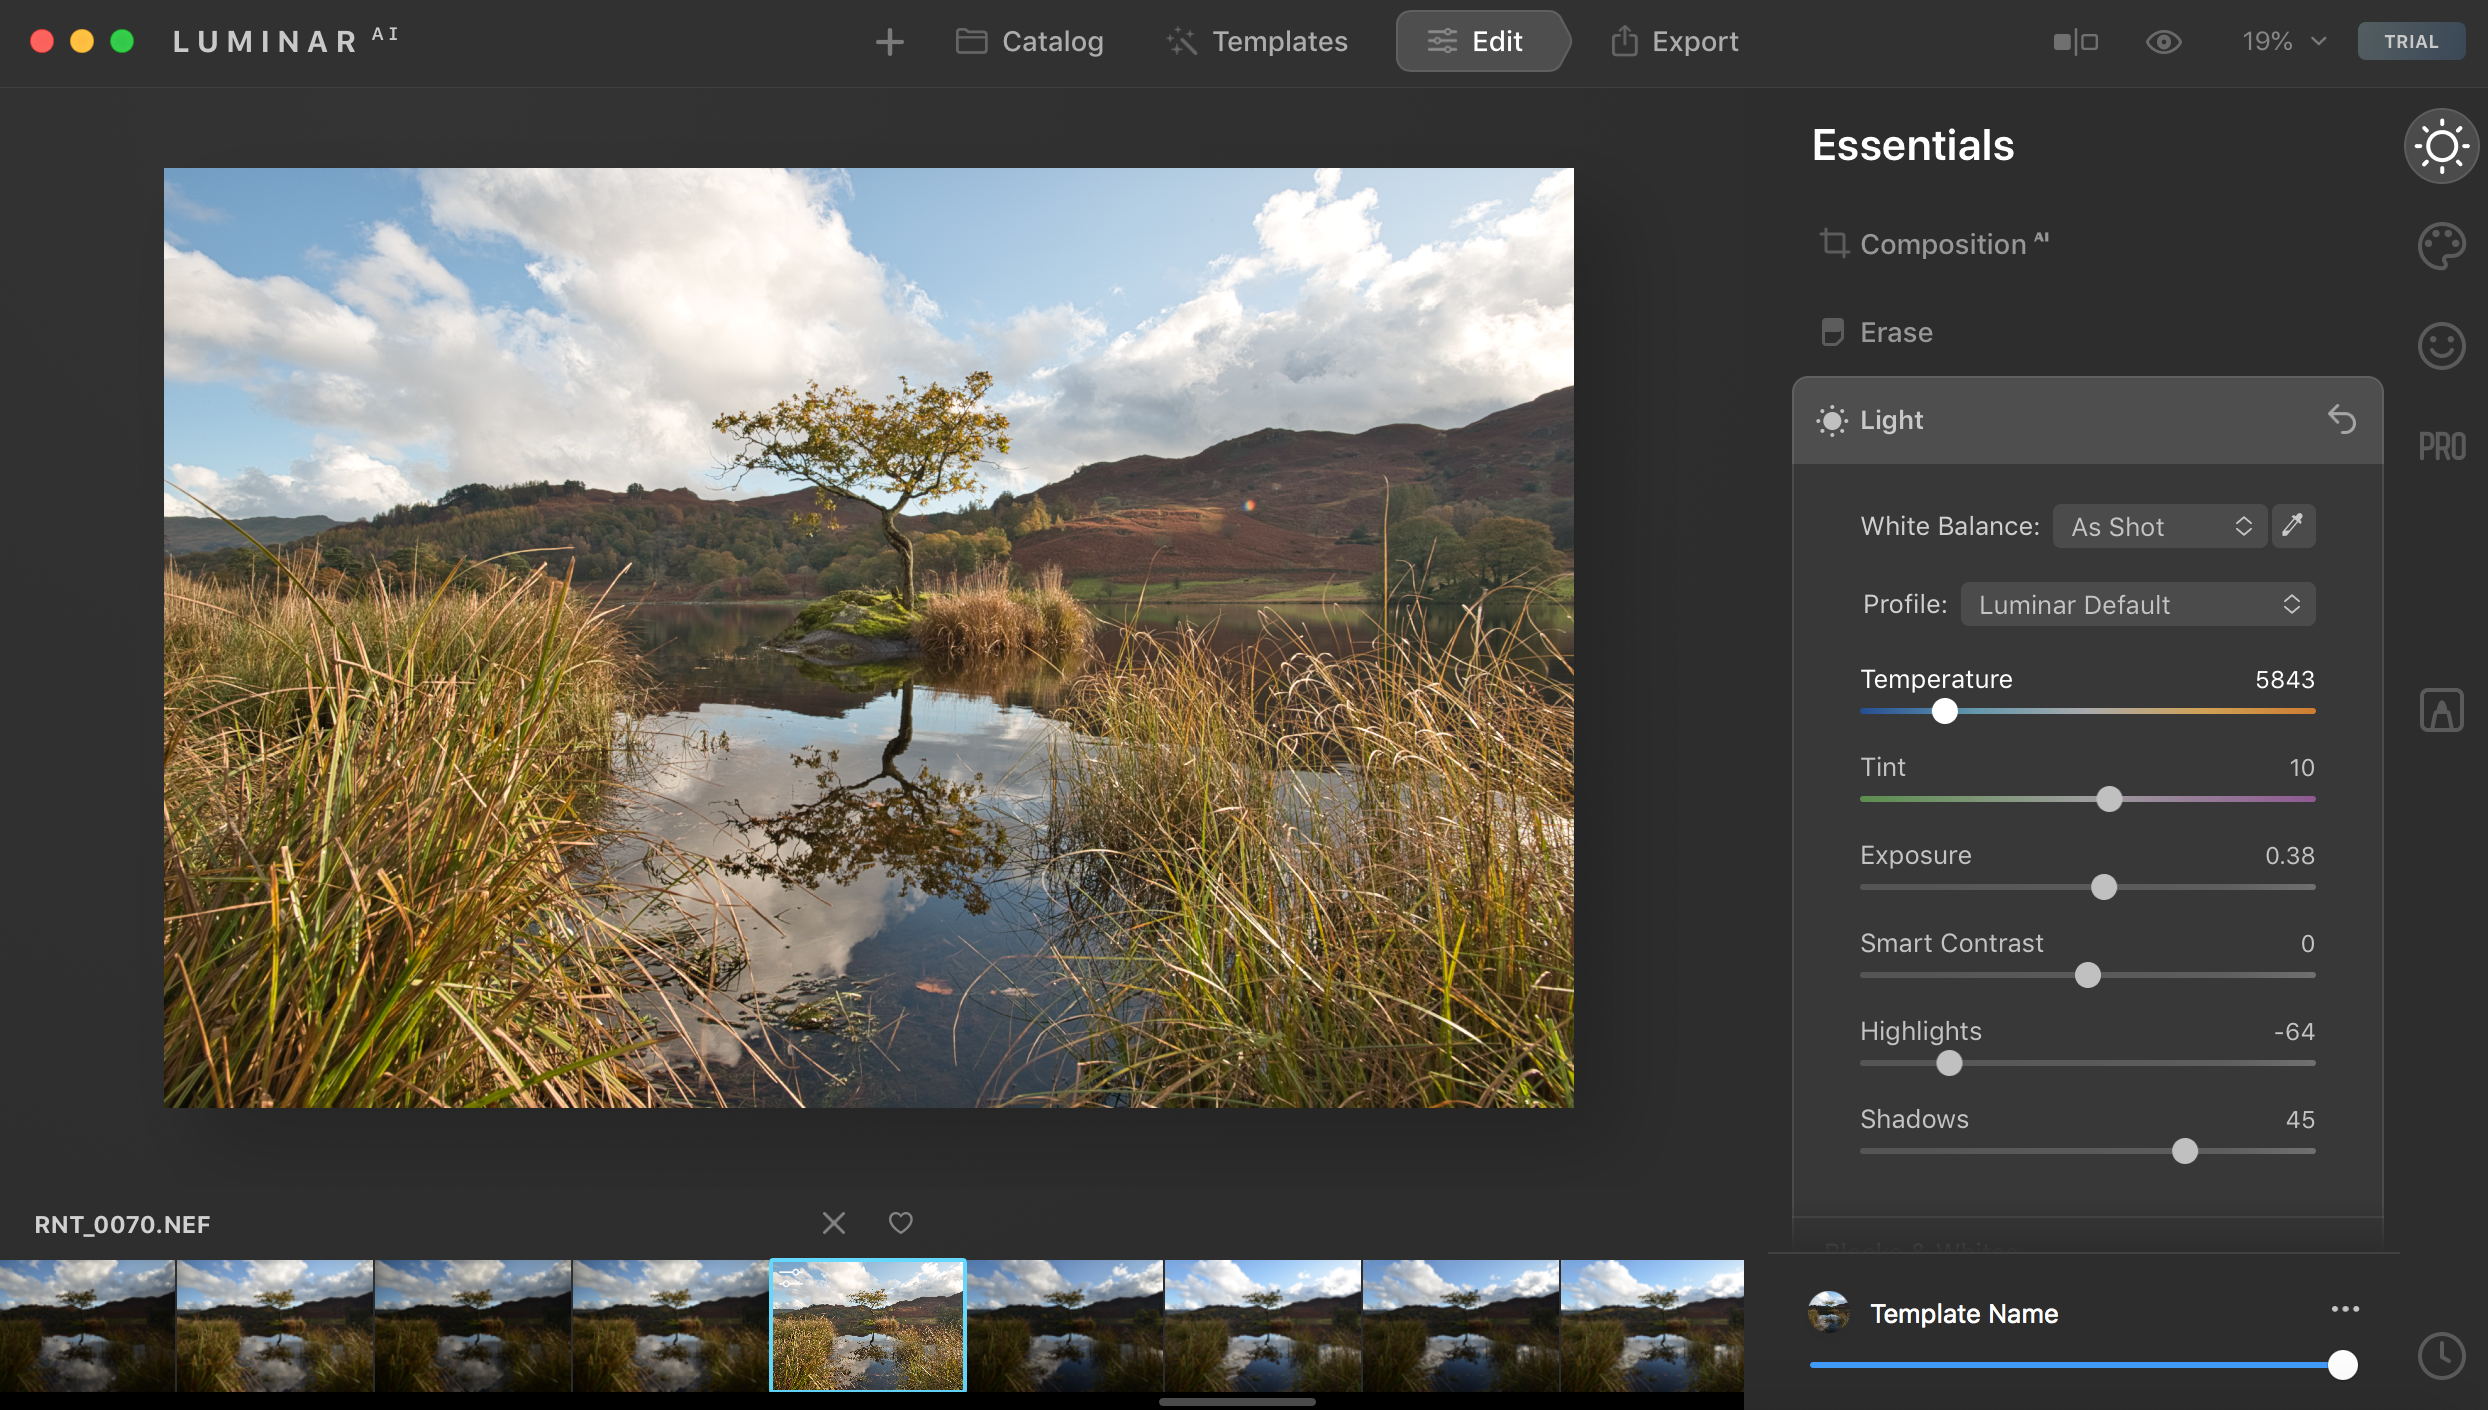
1. Adjust the exposure
Go to the ‘Edit’ tab at the top of the program and ensure that you’re working on the ‘Essentials’ panel (the sun symbol on the right hand side of the screen). From there, click on the ‘Light’ tab and adjust the exposure settings as needed.
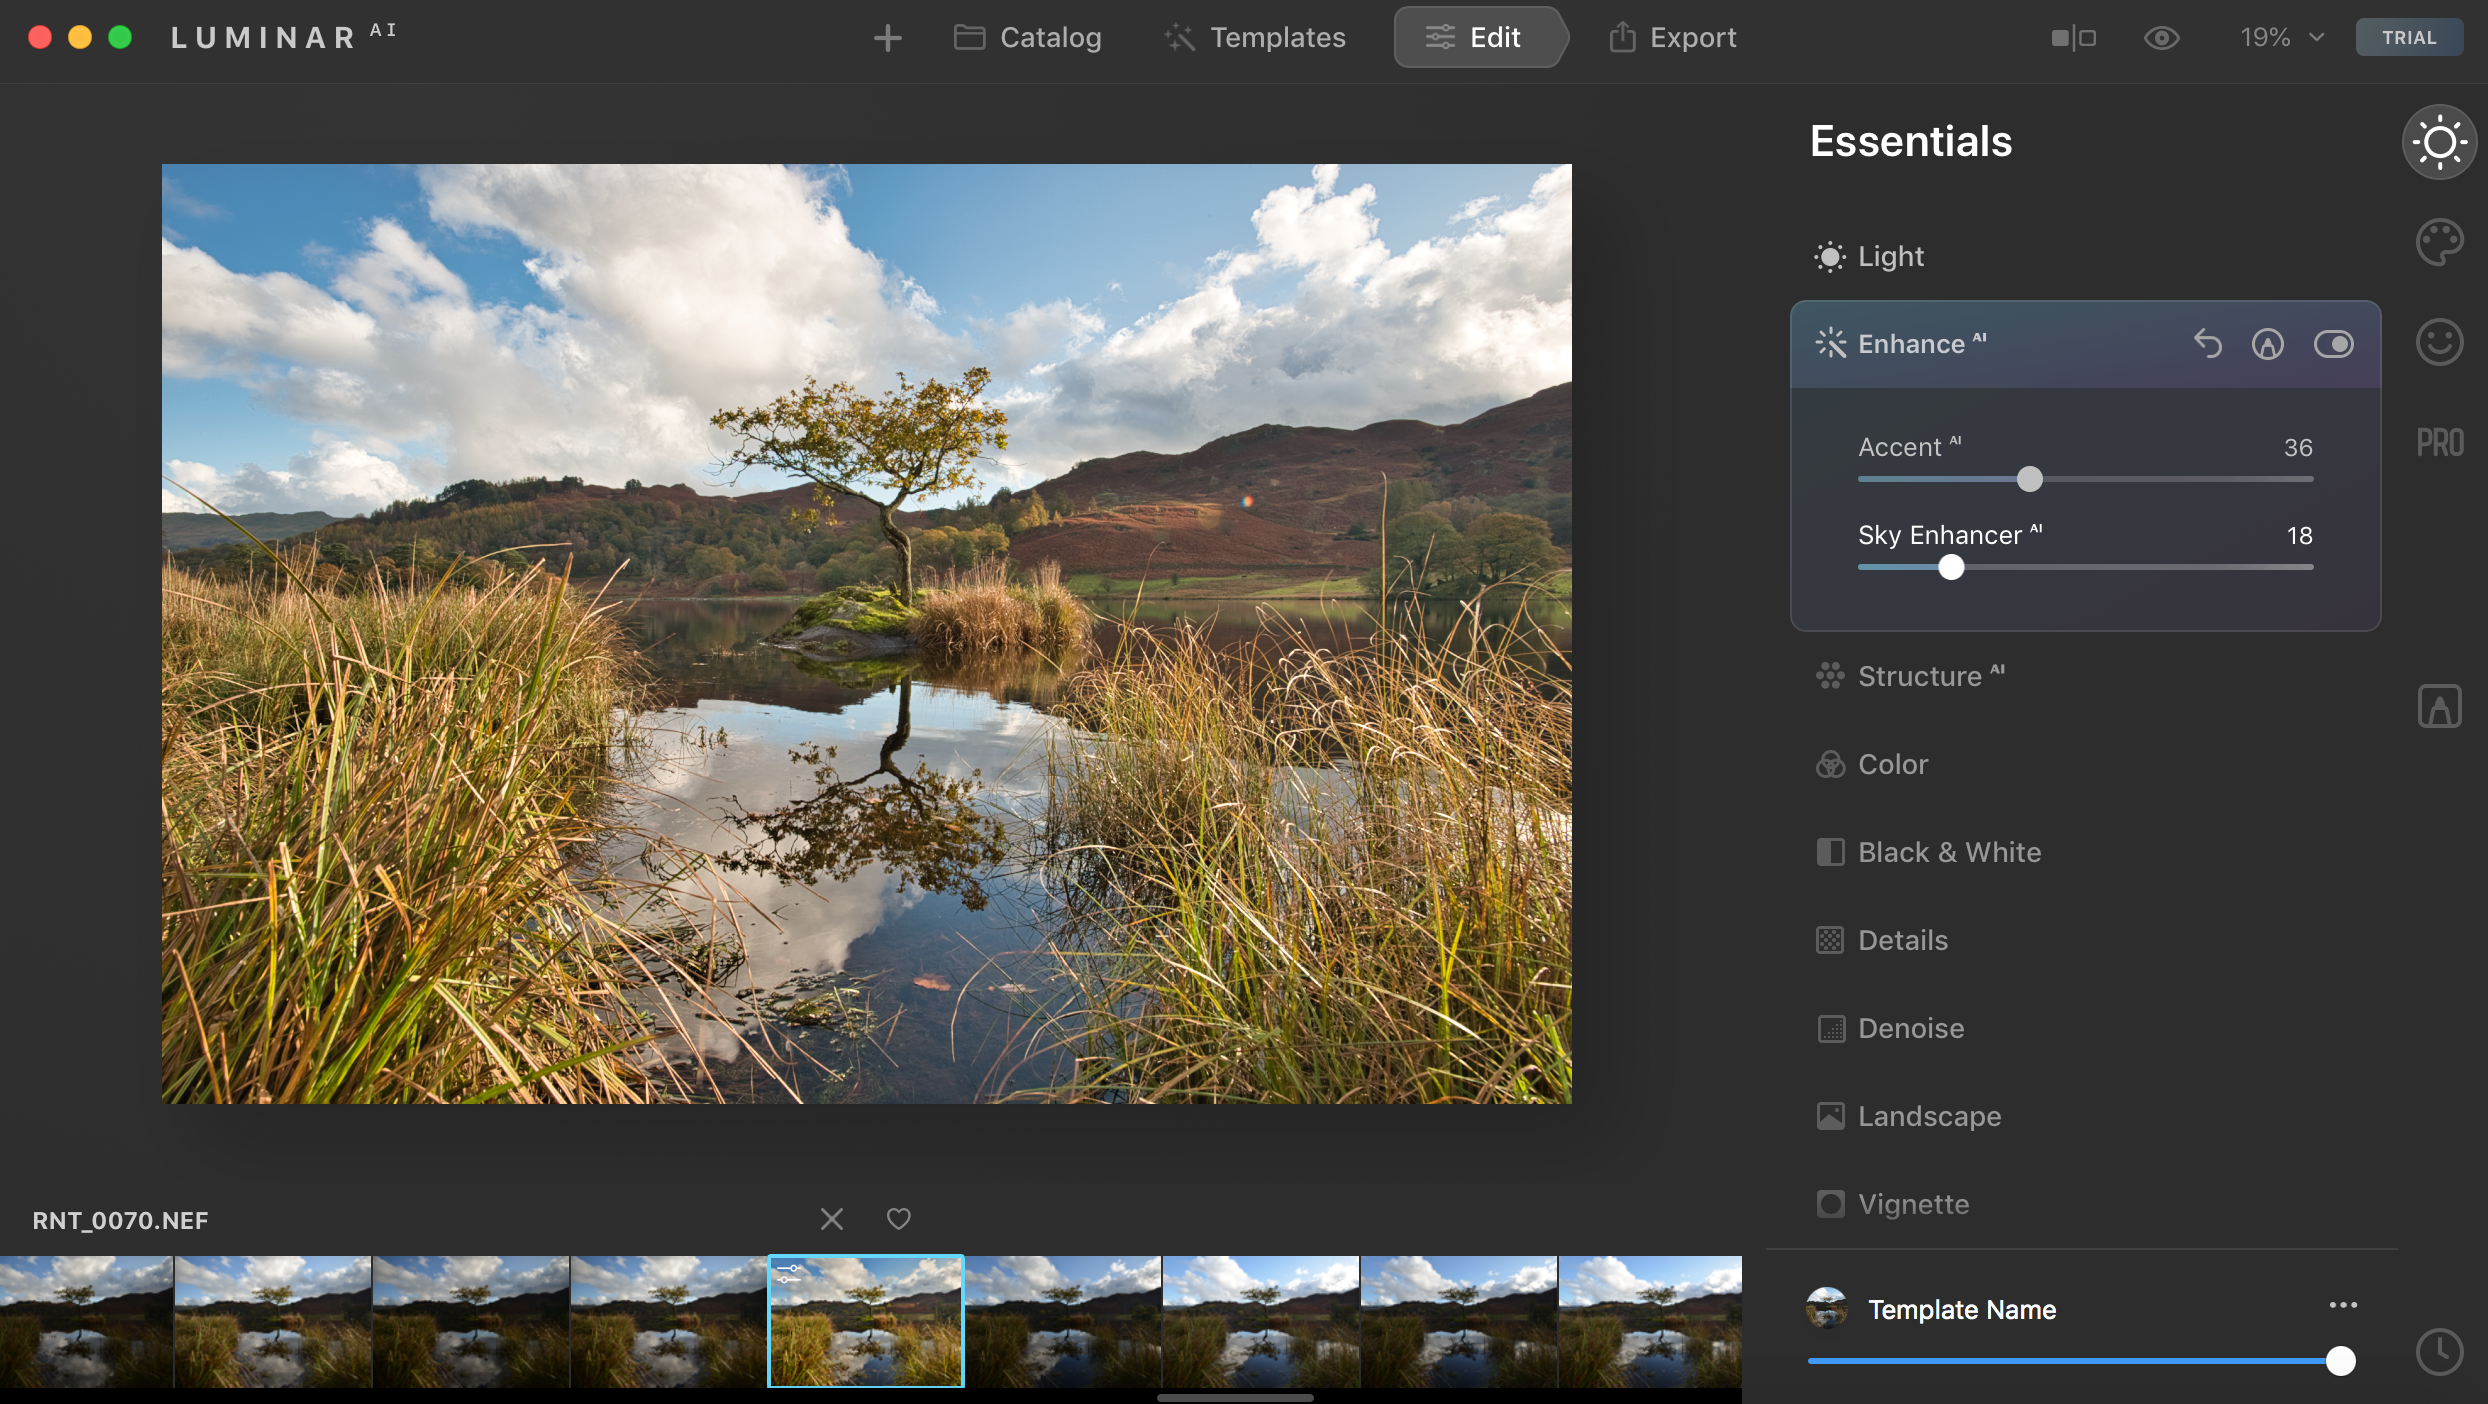
2. Experiment with Enhance AI
The ‘Enhance AI’ tab includes Accent AI and Sky Enhancer AI. Both of these functions intelligently enhance aspects of your image to give it a ‘wow’ factor. Remember that you can toggle each tab on and off to check how it’s affecting your image.
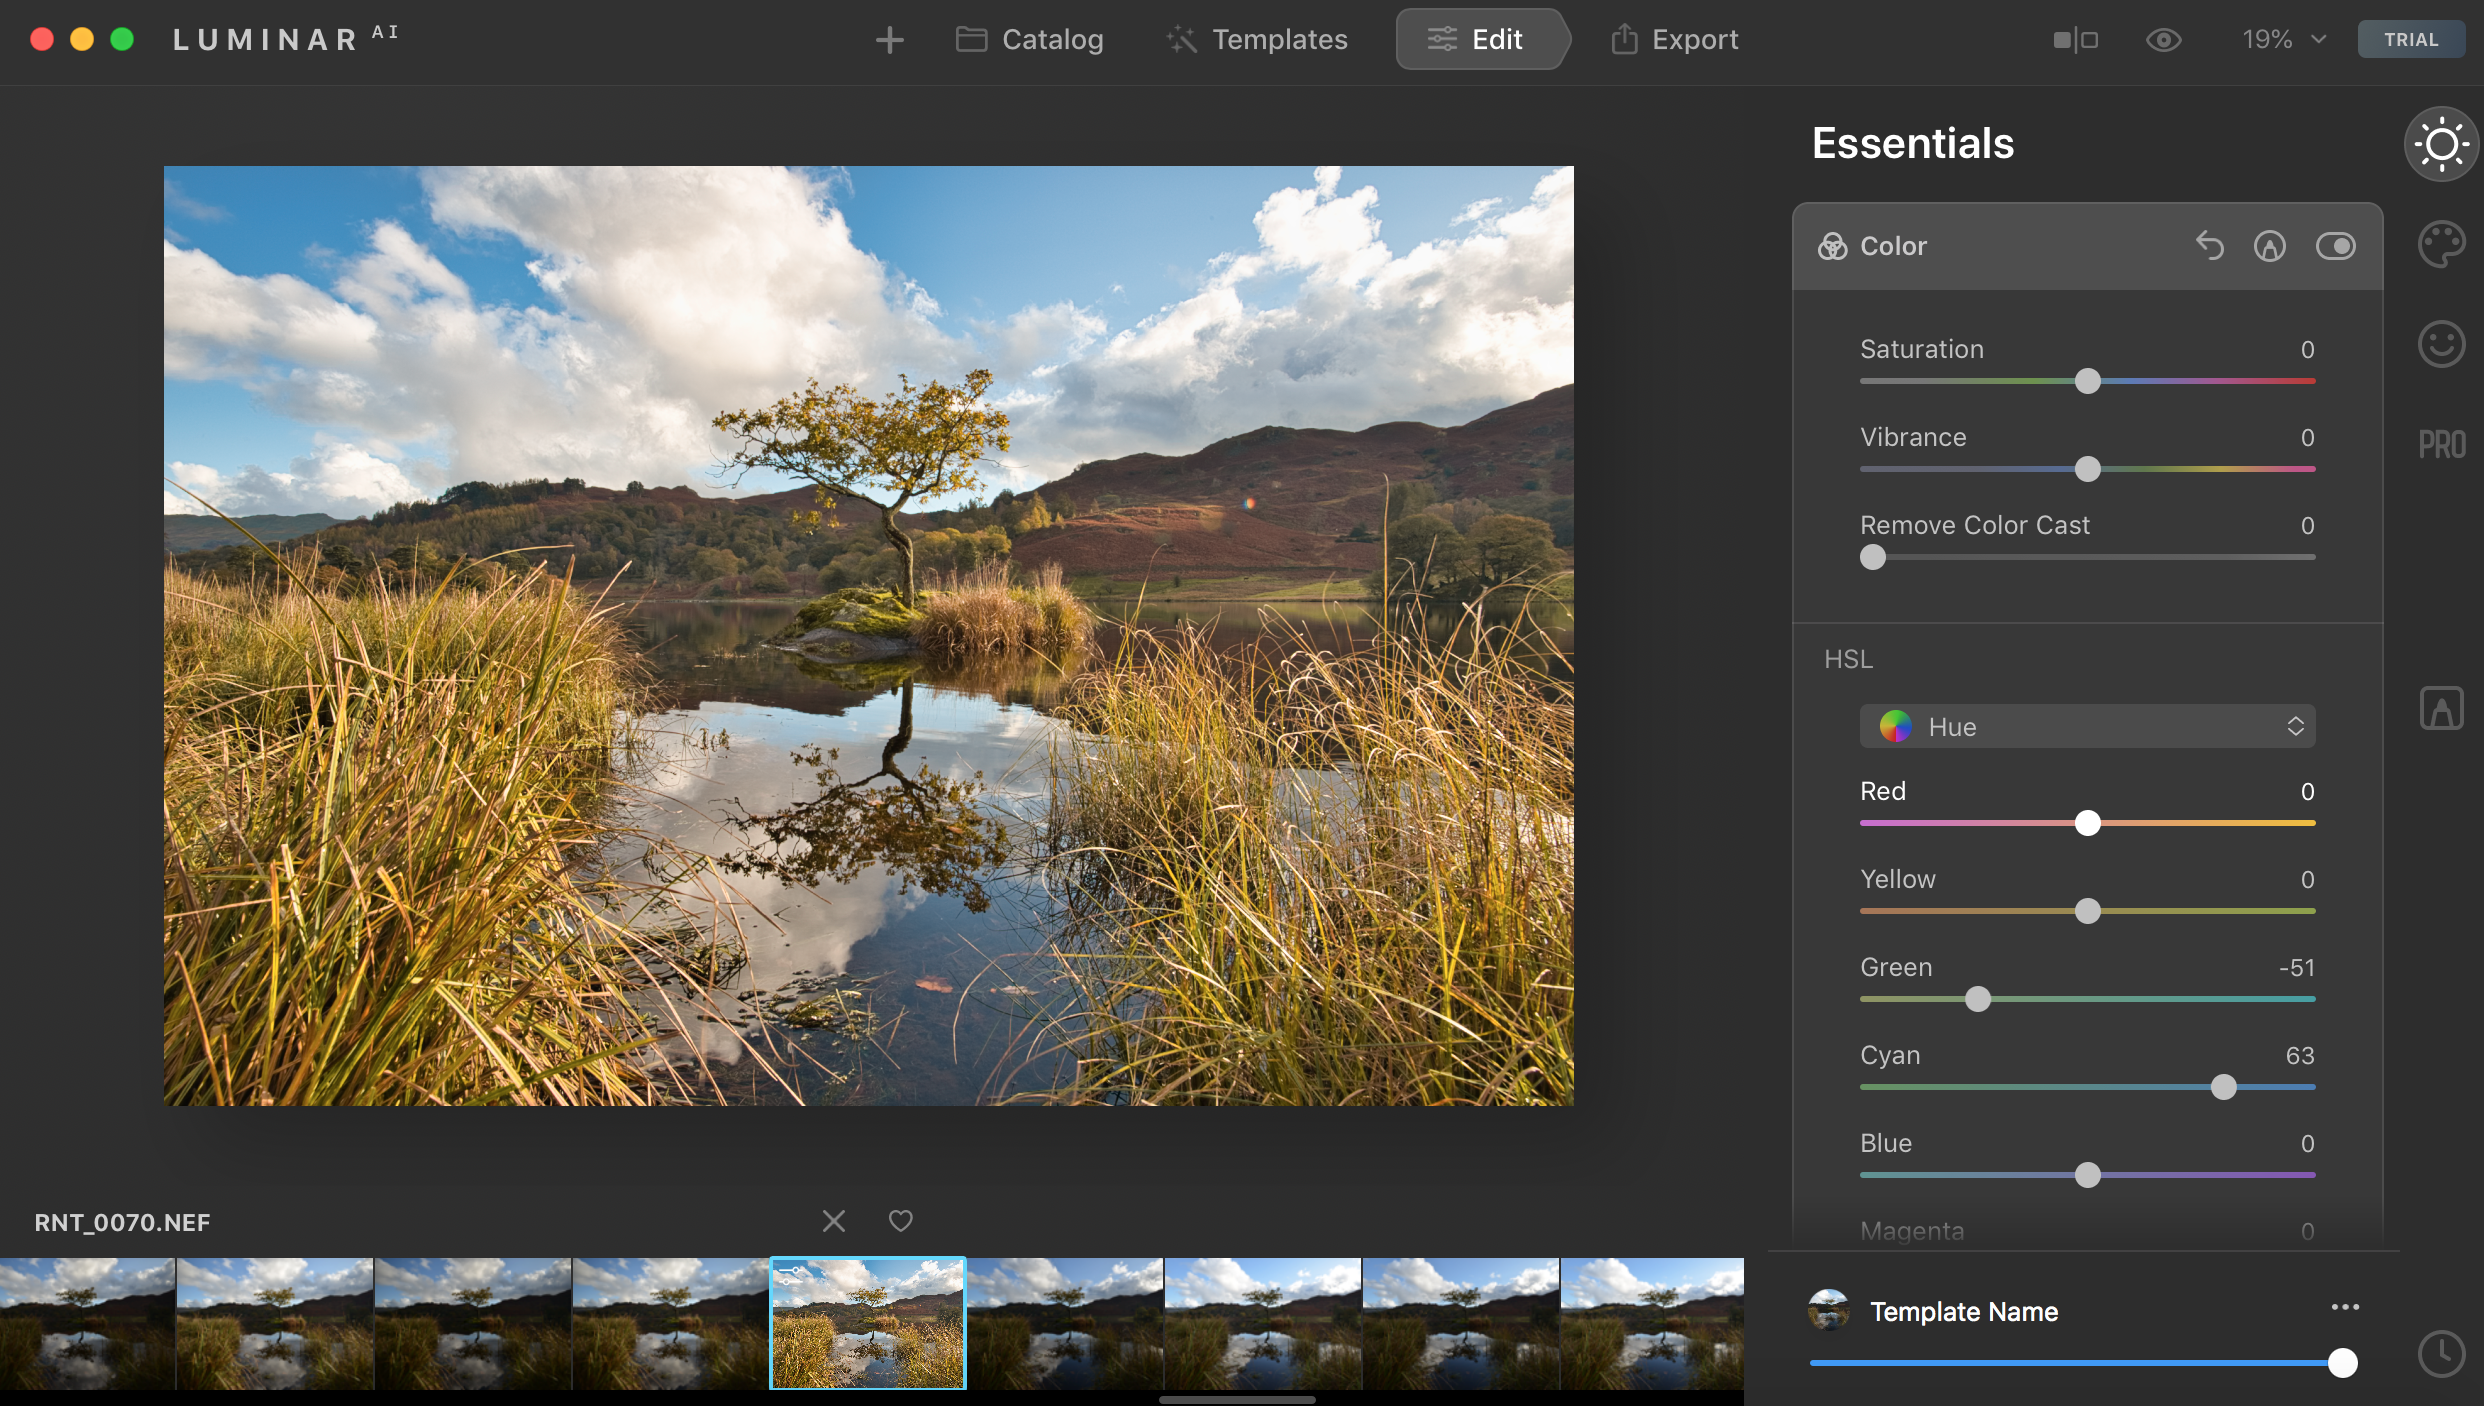
3. Perfect your colors
One of the most useful aspects of the ‘Essentials’ panel is the ‘Color’ tab. Not only can you change the saturation and vibrance of your shot, you can also individually edit the hue, saturation and luminance of each tone.
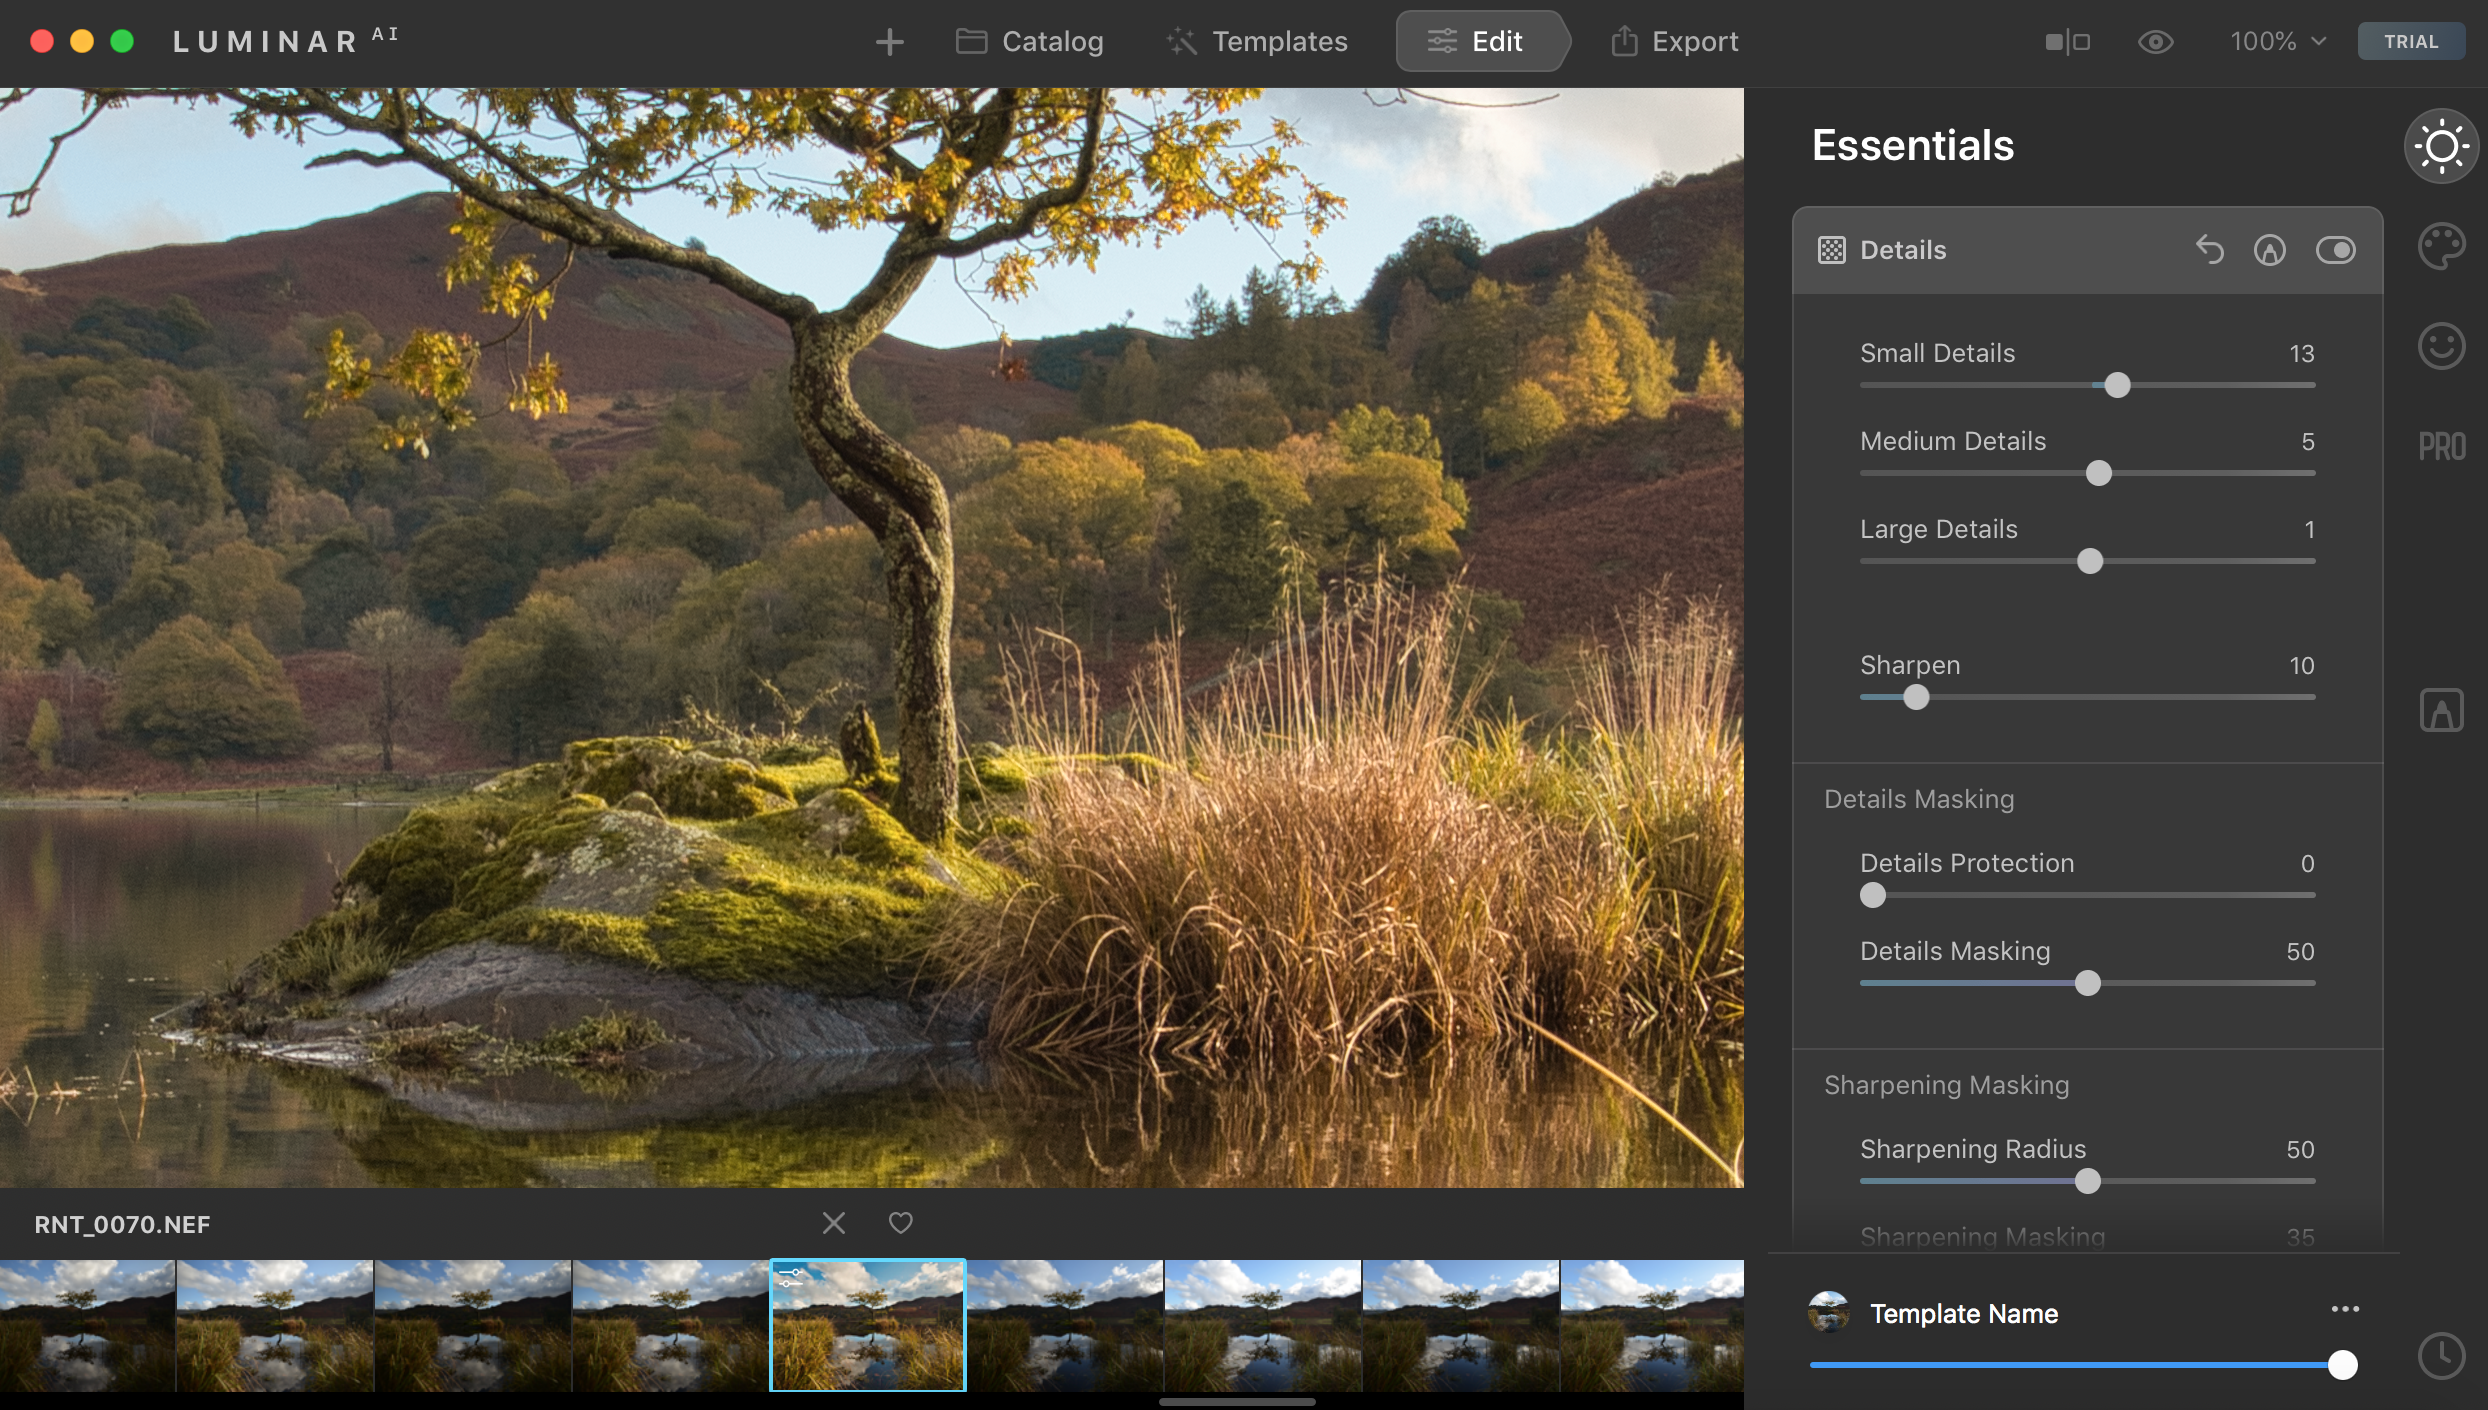
4. Sharpen your photo
There’s no one-size-fits-all approach to sharpening with Luminar AI. Instead, the application allows you to individually sharpen details according to their size. Don’t forget to zoom in closer to ensure you haven’t over-sharpened your image.
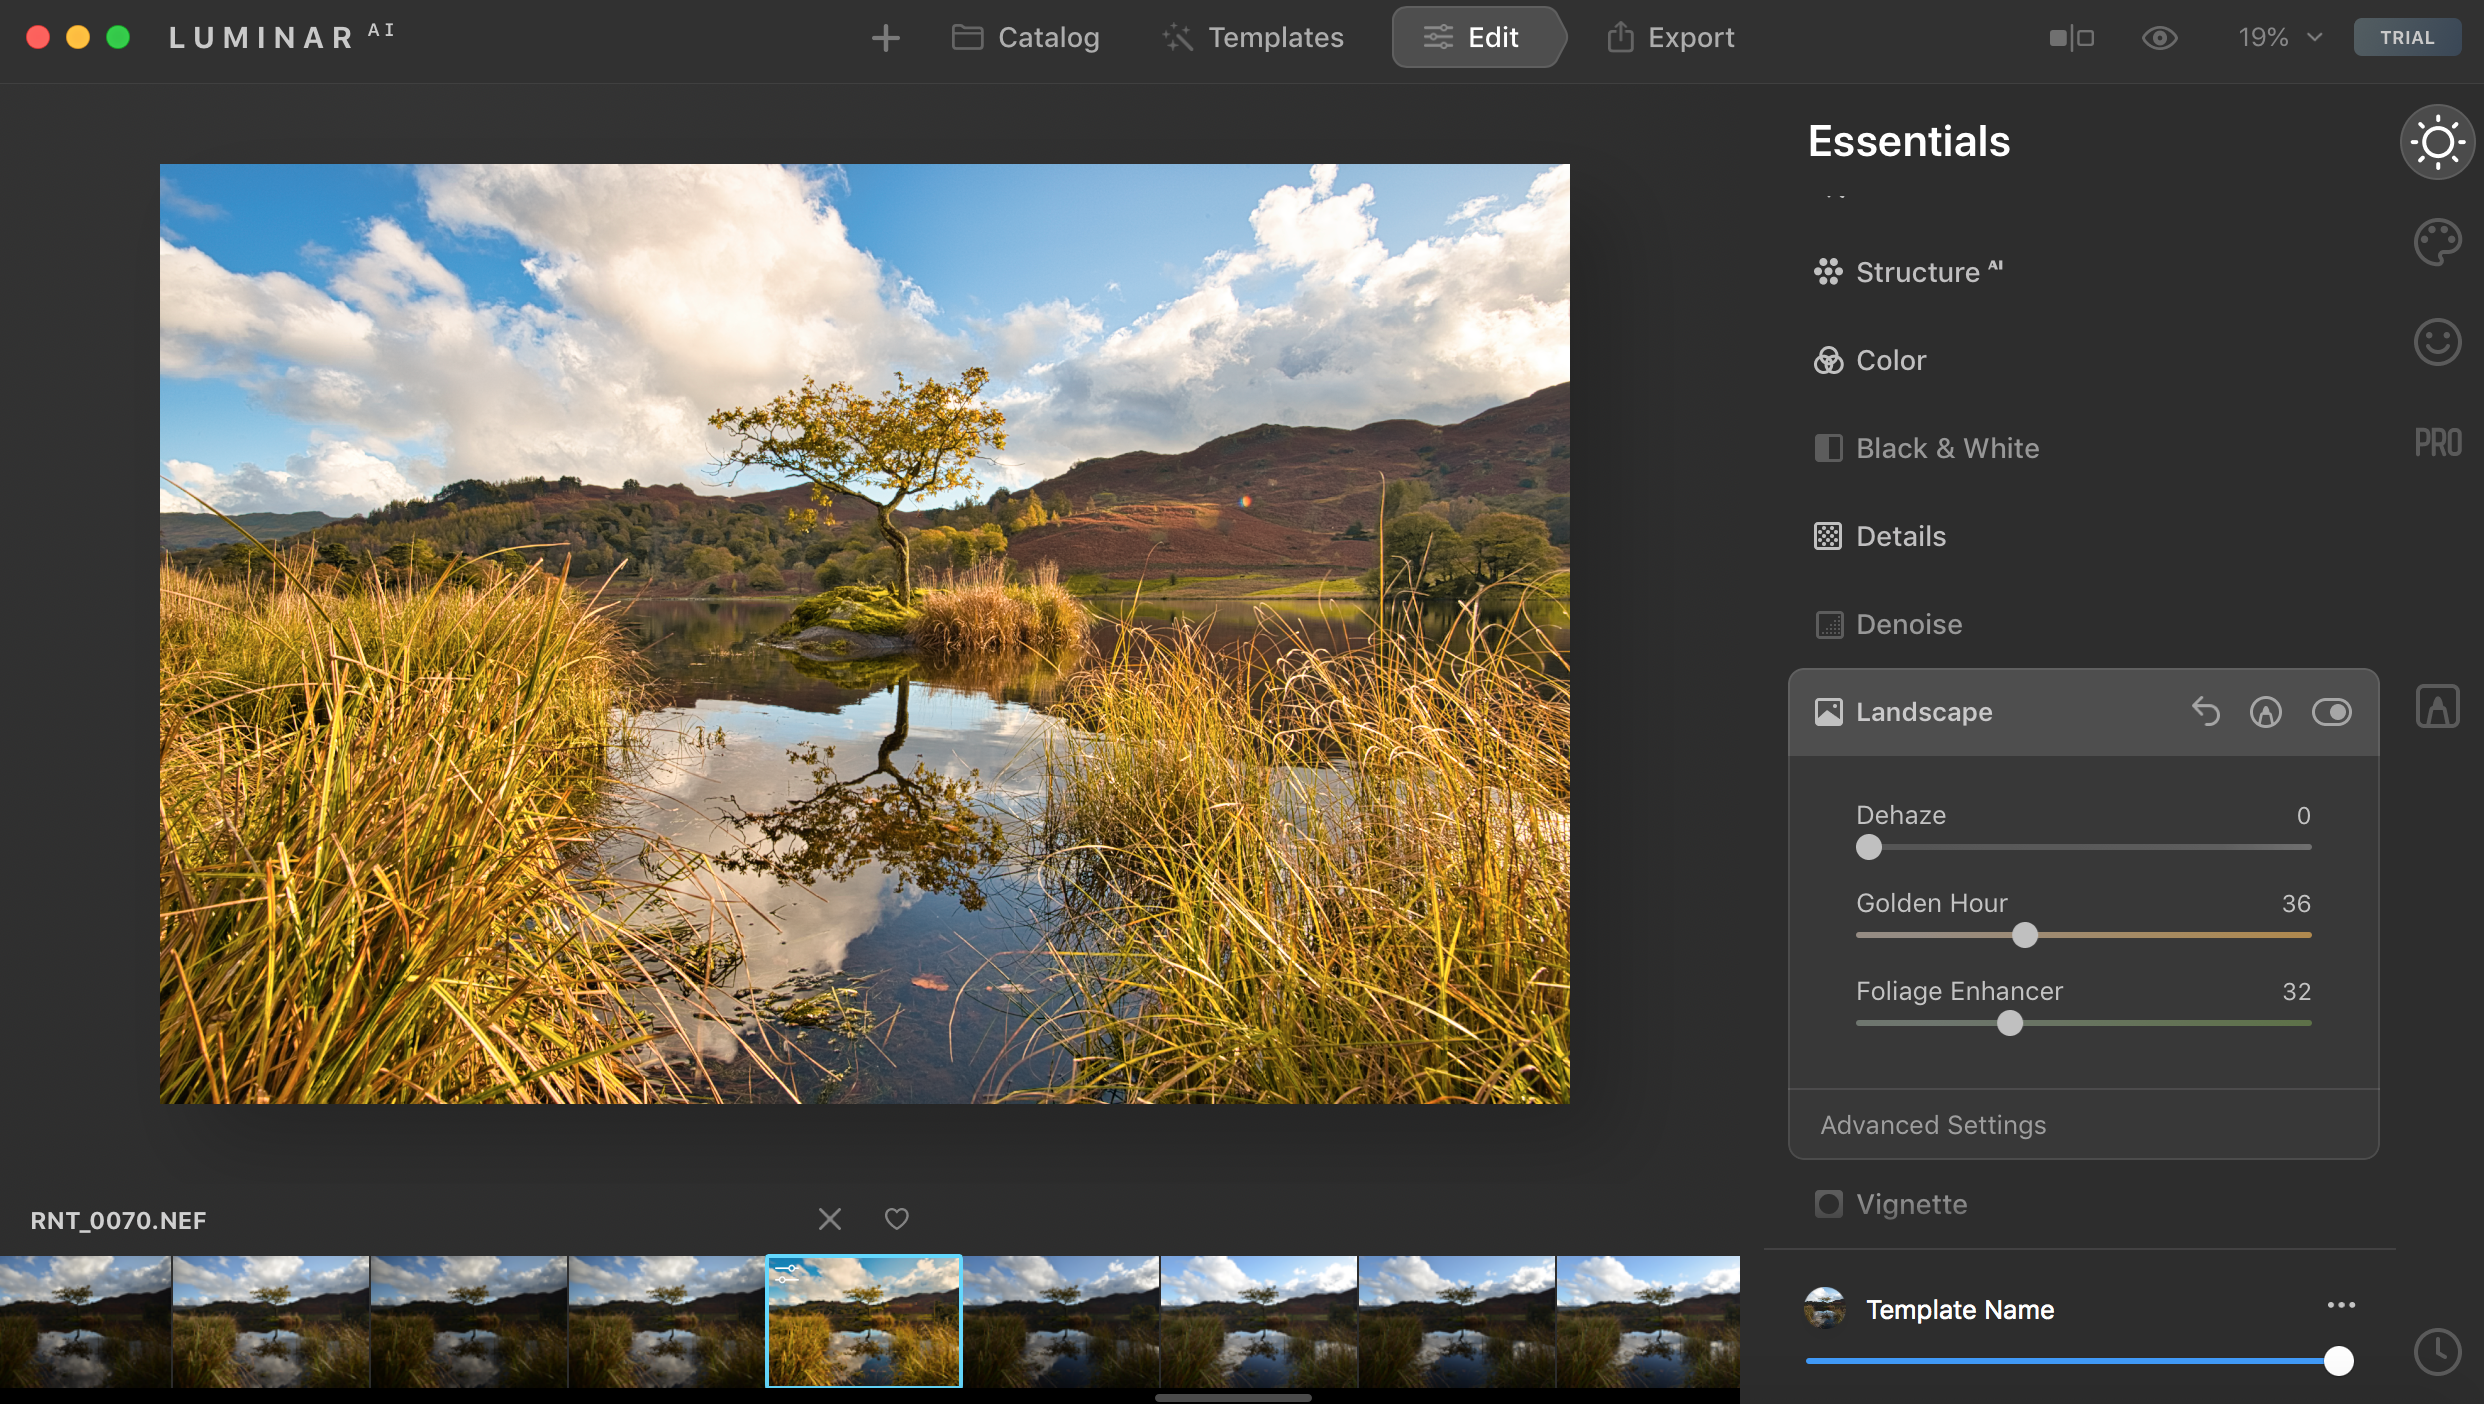
5. Add the finishing touches
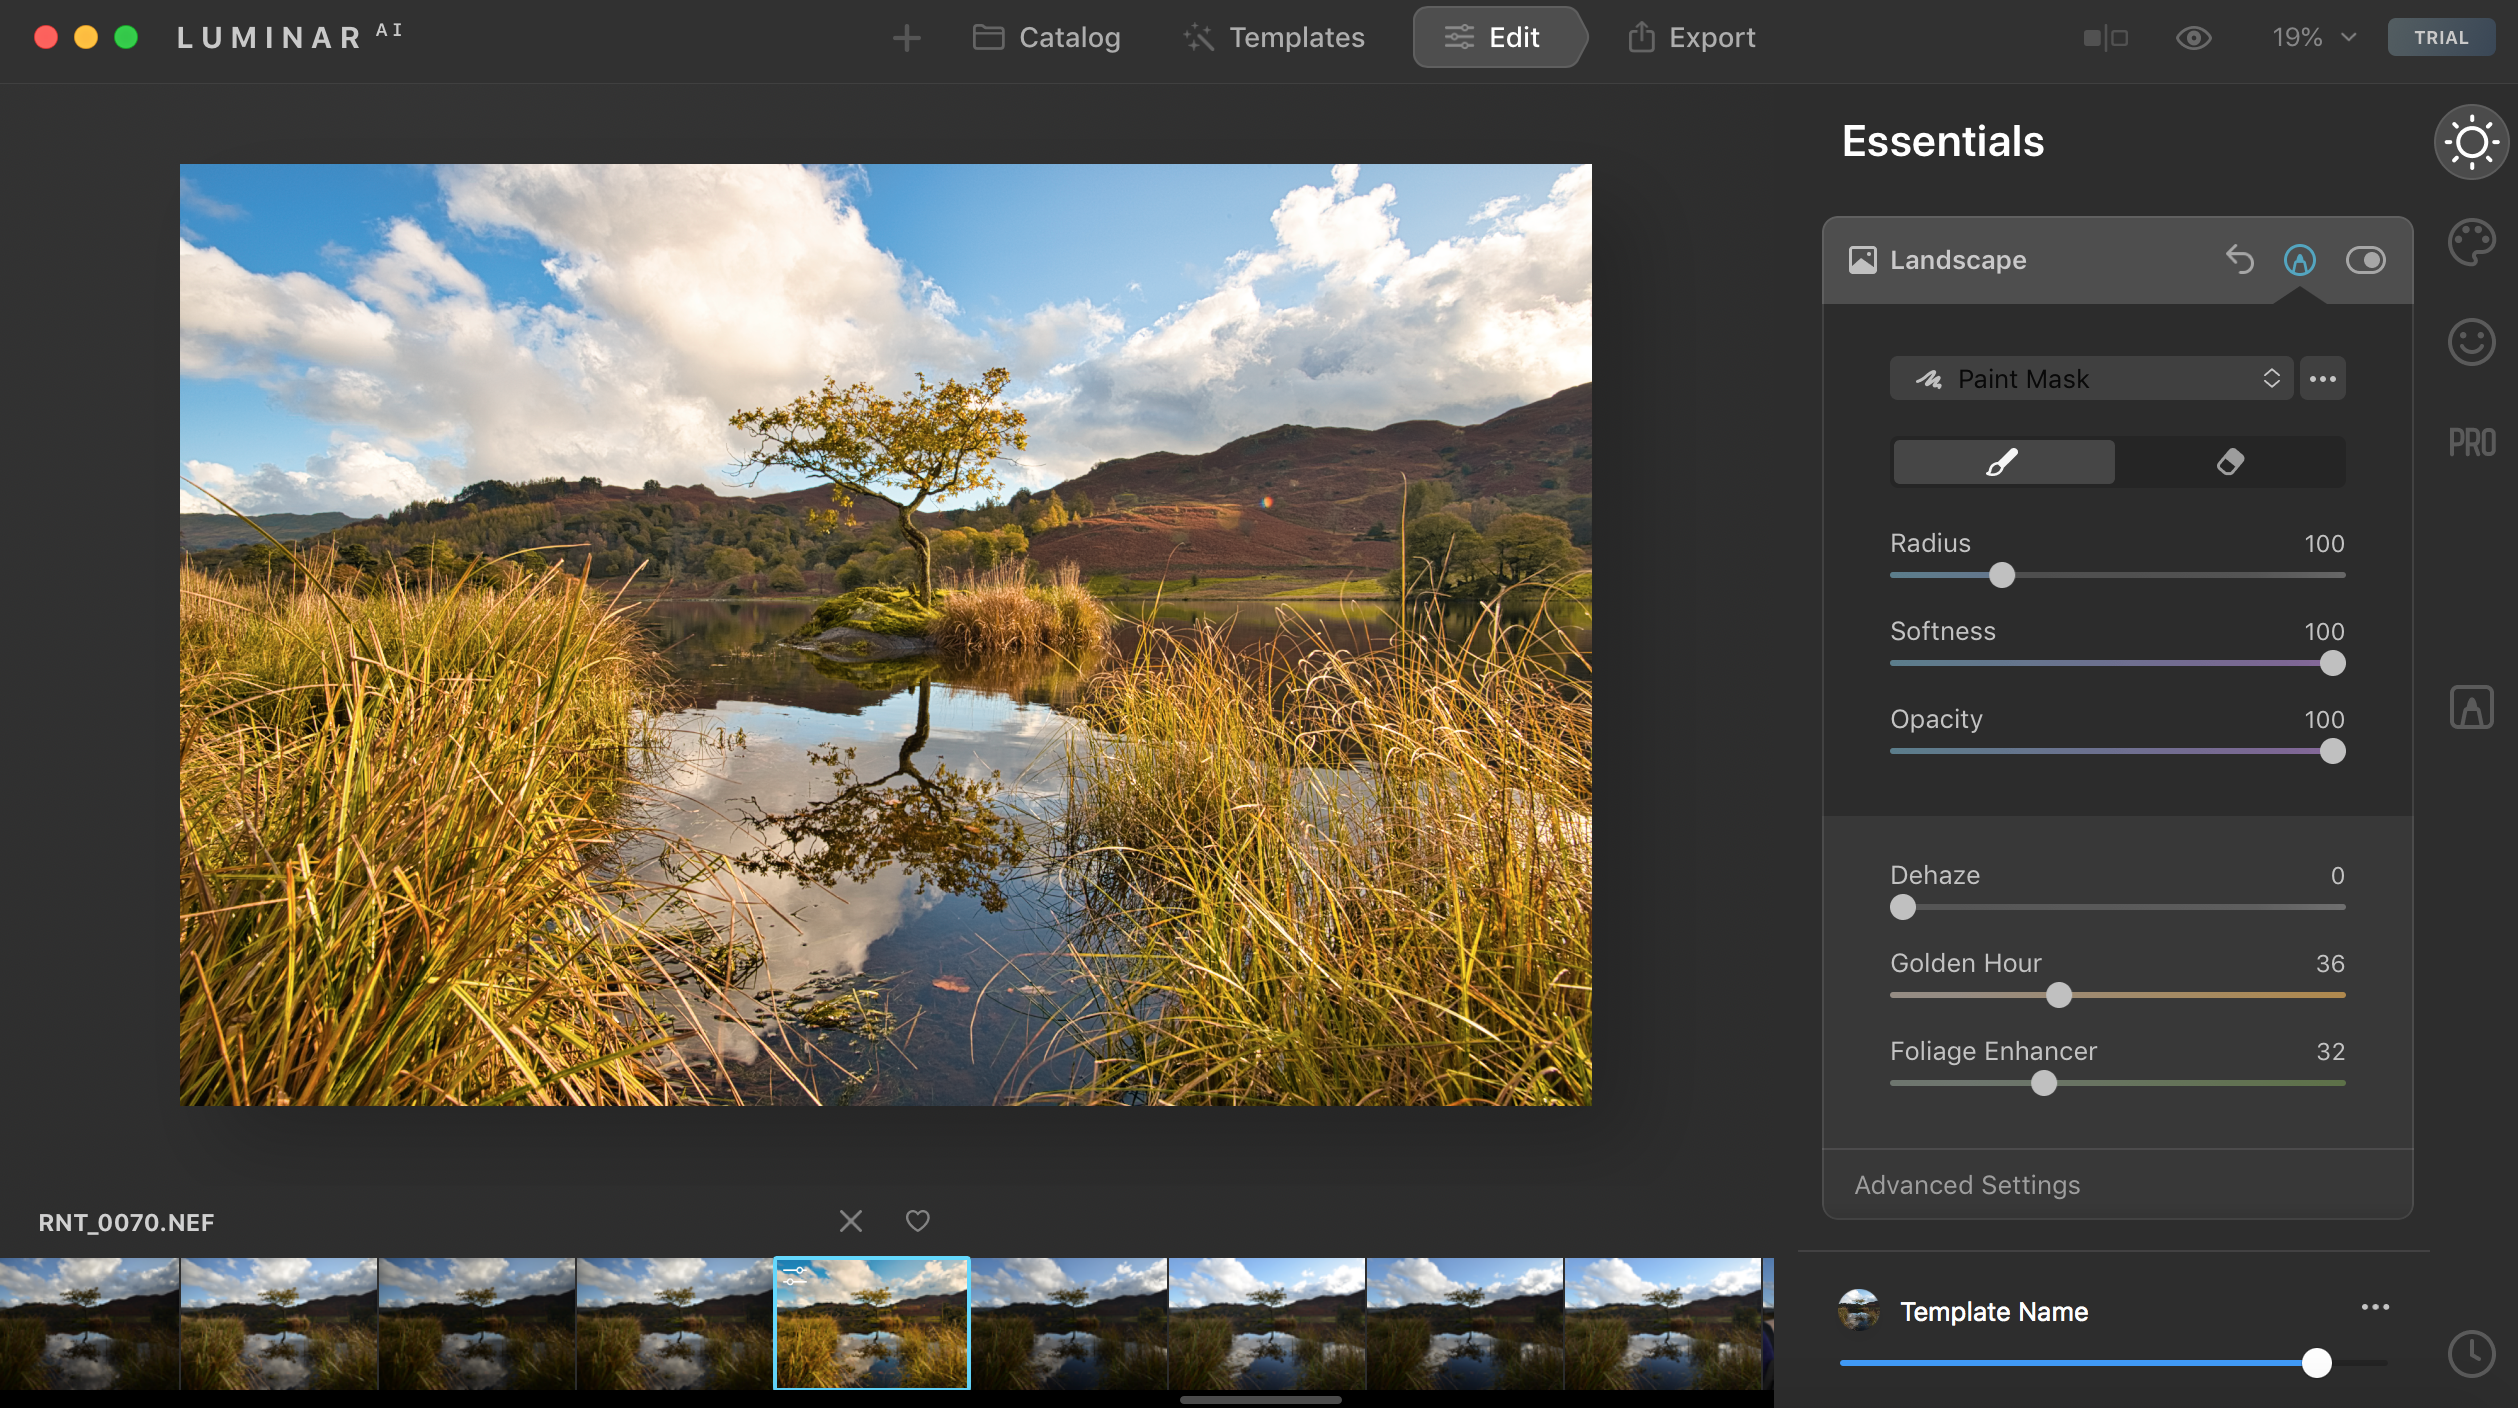
Whether you shoot landscapes, portraiture or something in between, everyone loves a bit of golden hour sunlight. One of our favorite aspects of the ‘Essentials’ panel is the ‘Landscape’ tab where you can add a golden hour glow to your photo.
6. Mask out imperfections
If you’re happy with the overall look of an adjustment, but there’s one aspect that doesn’t look quite right, you can easily mask it out on your photo using the pen icon at the top of the adjustment panels.
7. Save your adjustments as a Template
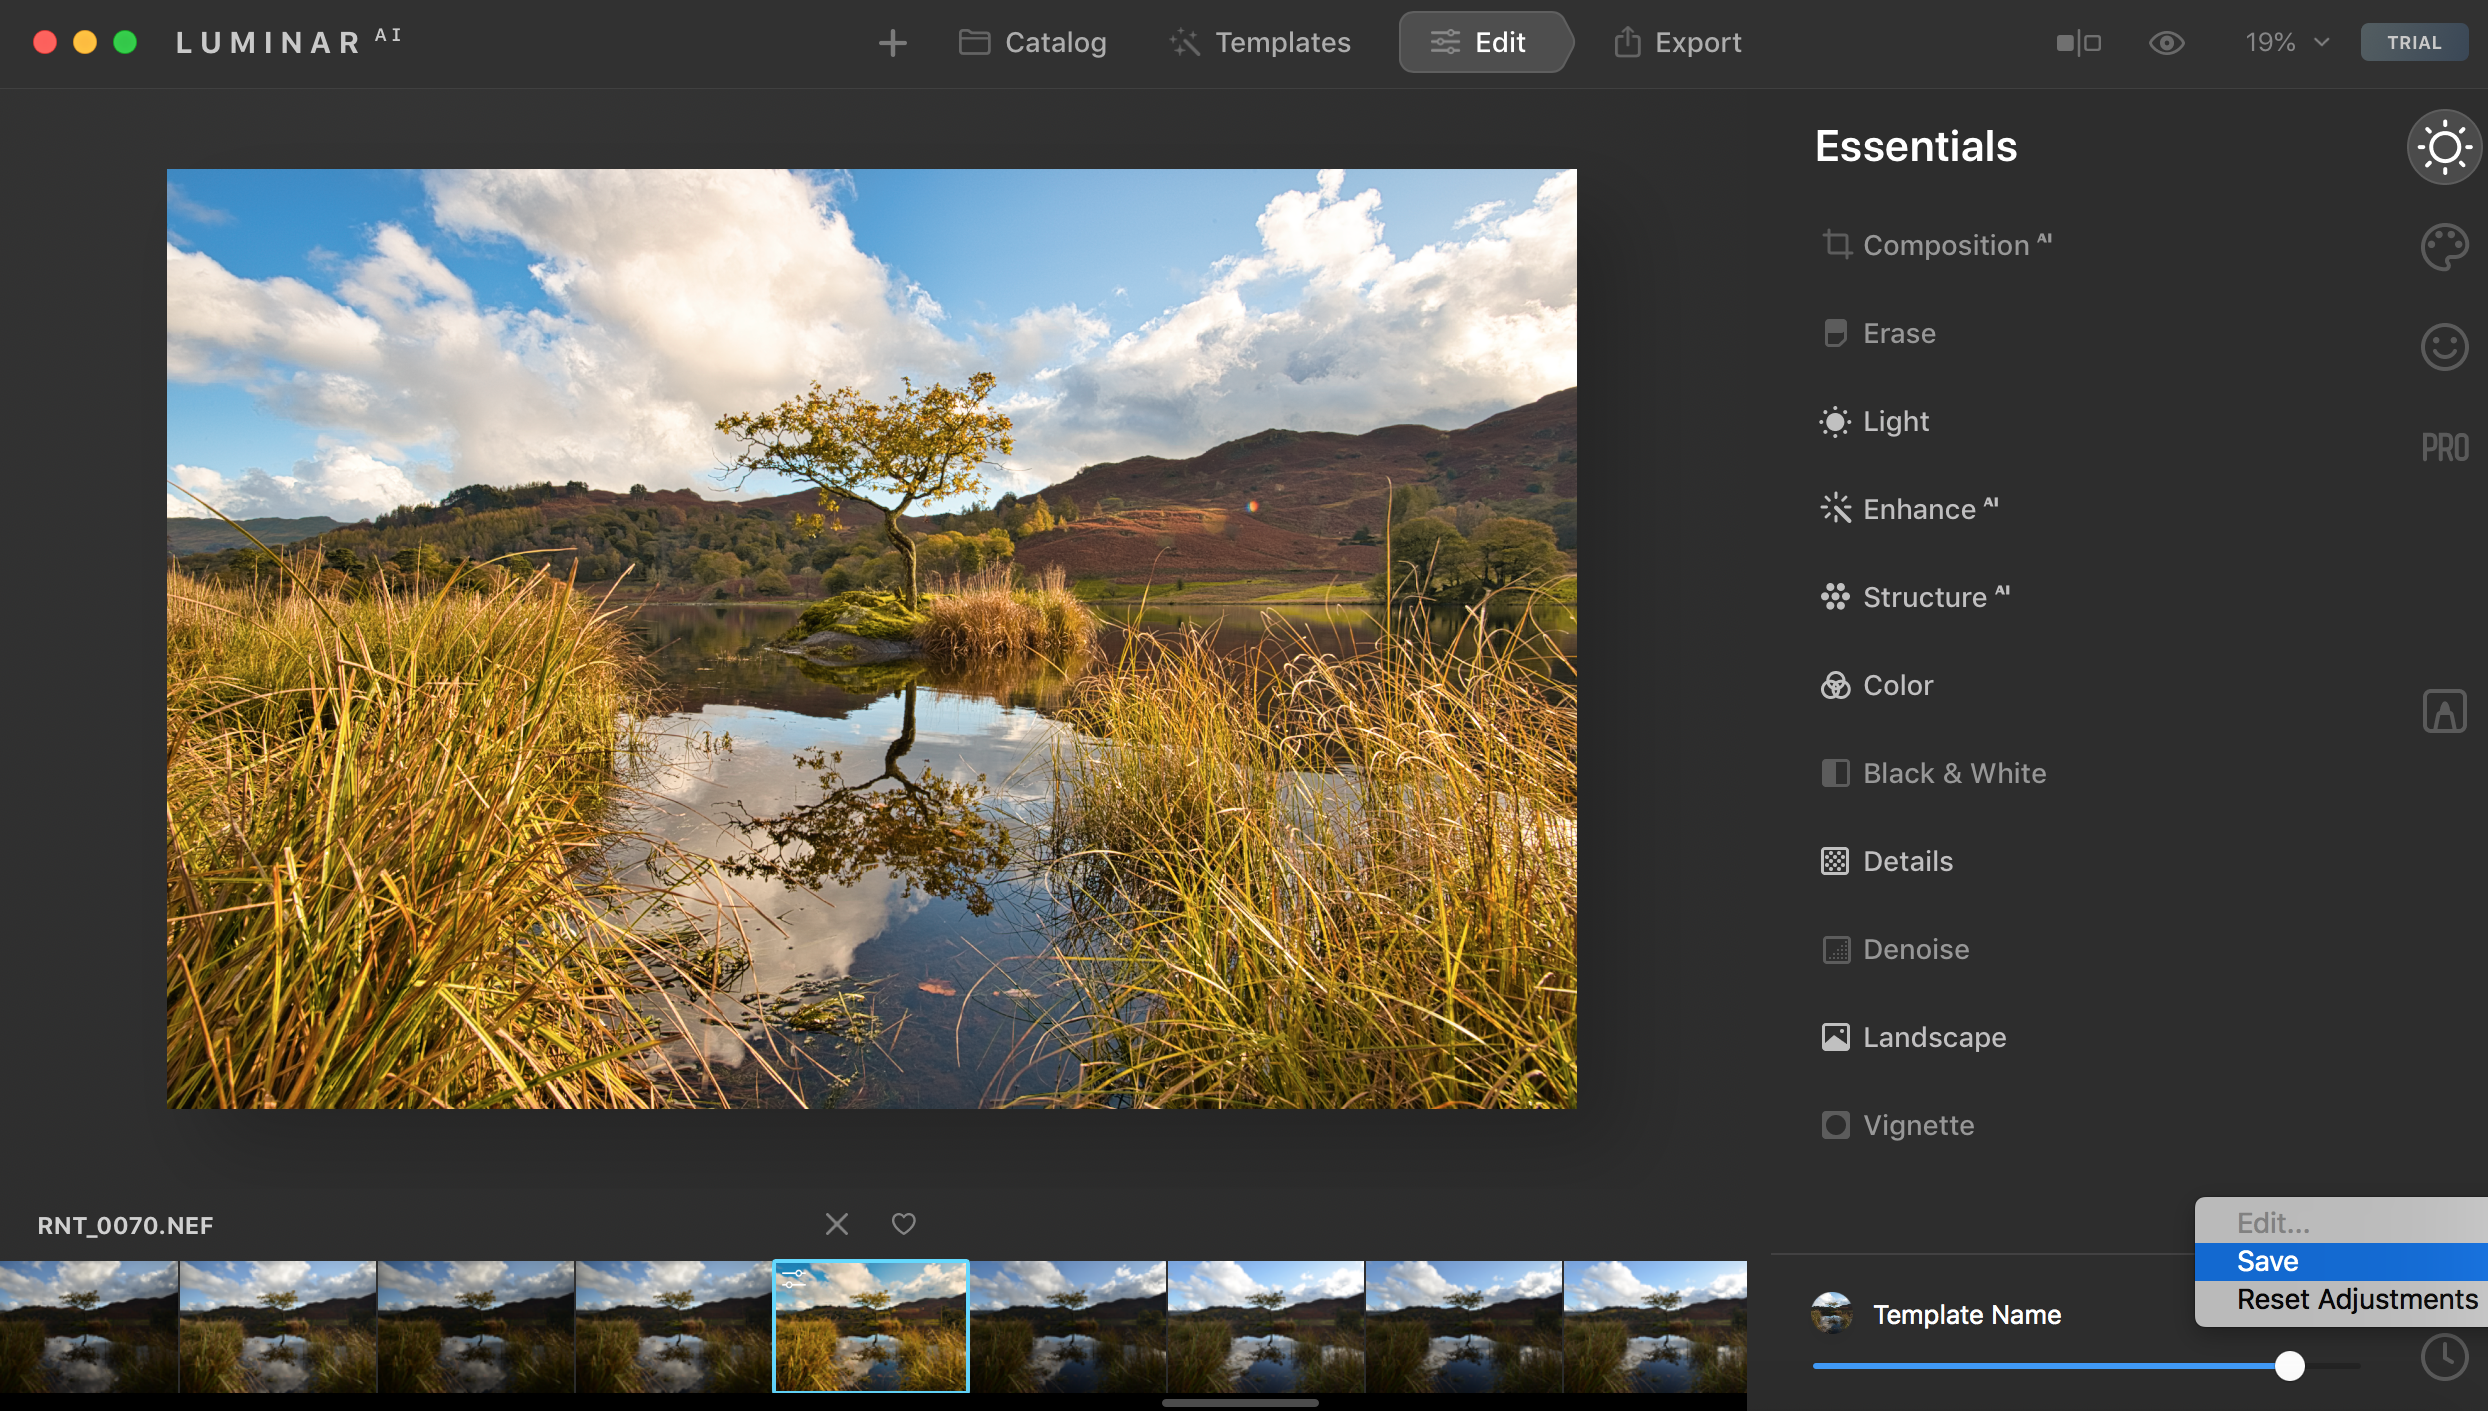
When you’ve finished editing, simply go down to the bottom right corner of the application, click on the ‘…’ and select Save to collate all of your adjustments as your very own Template. You can then go to the ‘Templates’ tab at the top of the screen and go to the star icon on the right of the screen called ‘My Collection’ to apply this Template to other photos.
If you want to apply the Template to multiple images at once, all you need to do is apply the desired Template to your first photo and make any required adjustments until you're happy with the effect. Then, go to the top of your screen and select Image > Adjustments > Copy Adjustments. Choose the photos that you'd like to apply this Template to and then go to Image > Adjustments > Paste Adjustments (or simply use the keyboard shortcut Command/ Control + V). This will apply the Template across all of the shots you've selected, dramatically cutting down your editing time.

Get creative with Luminar AI Templates
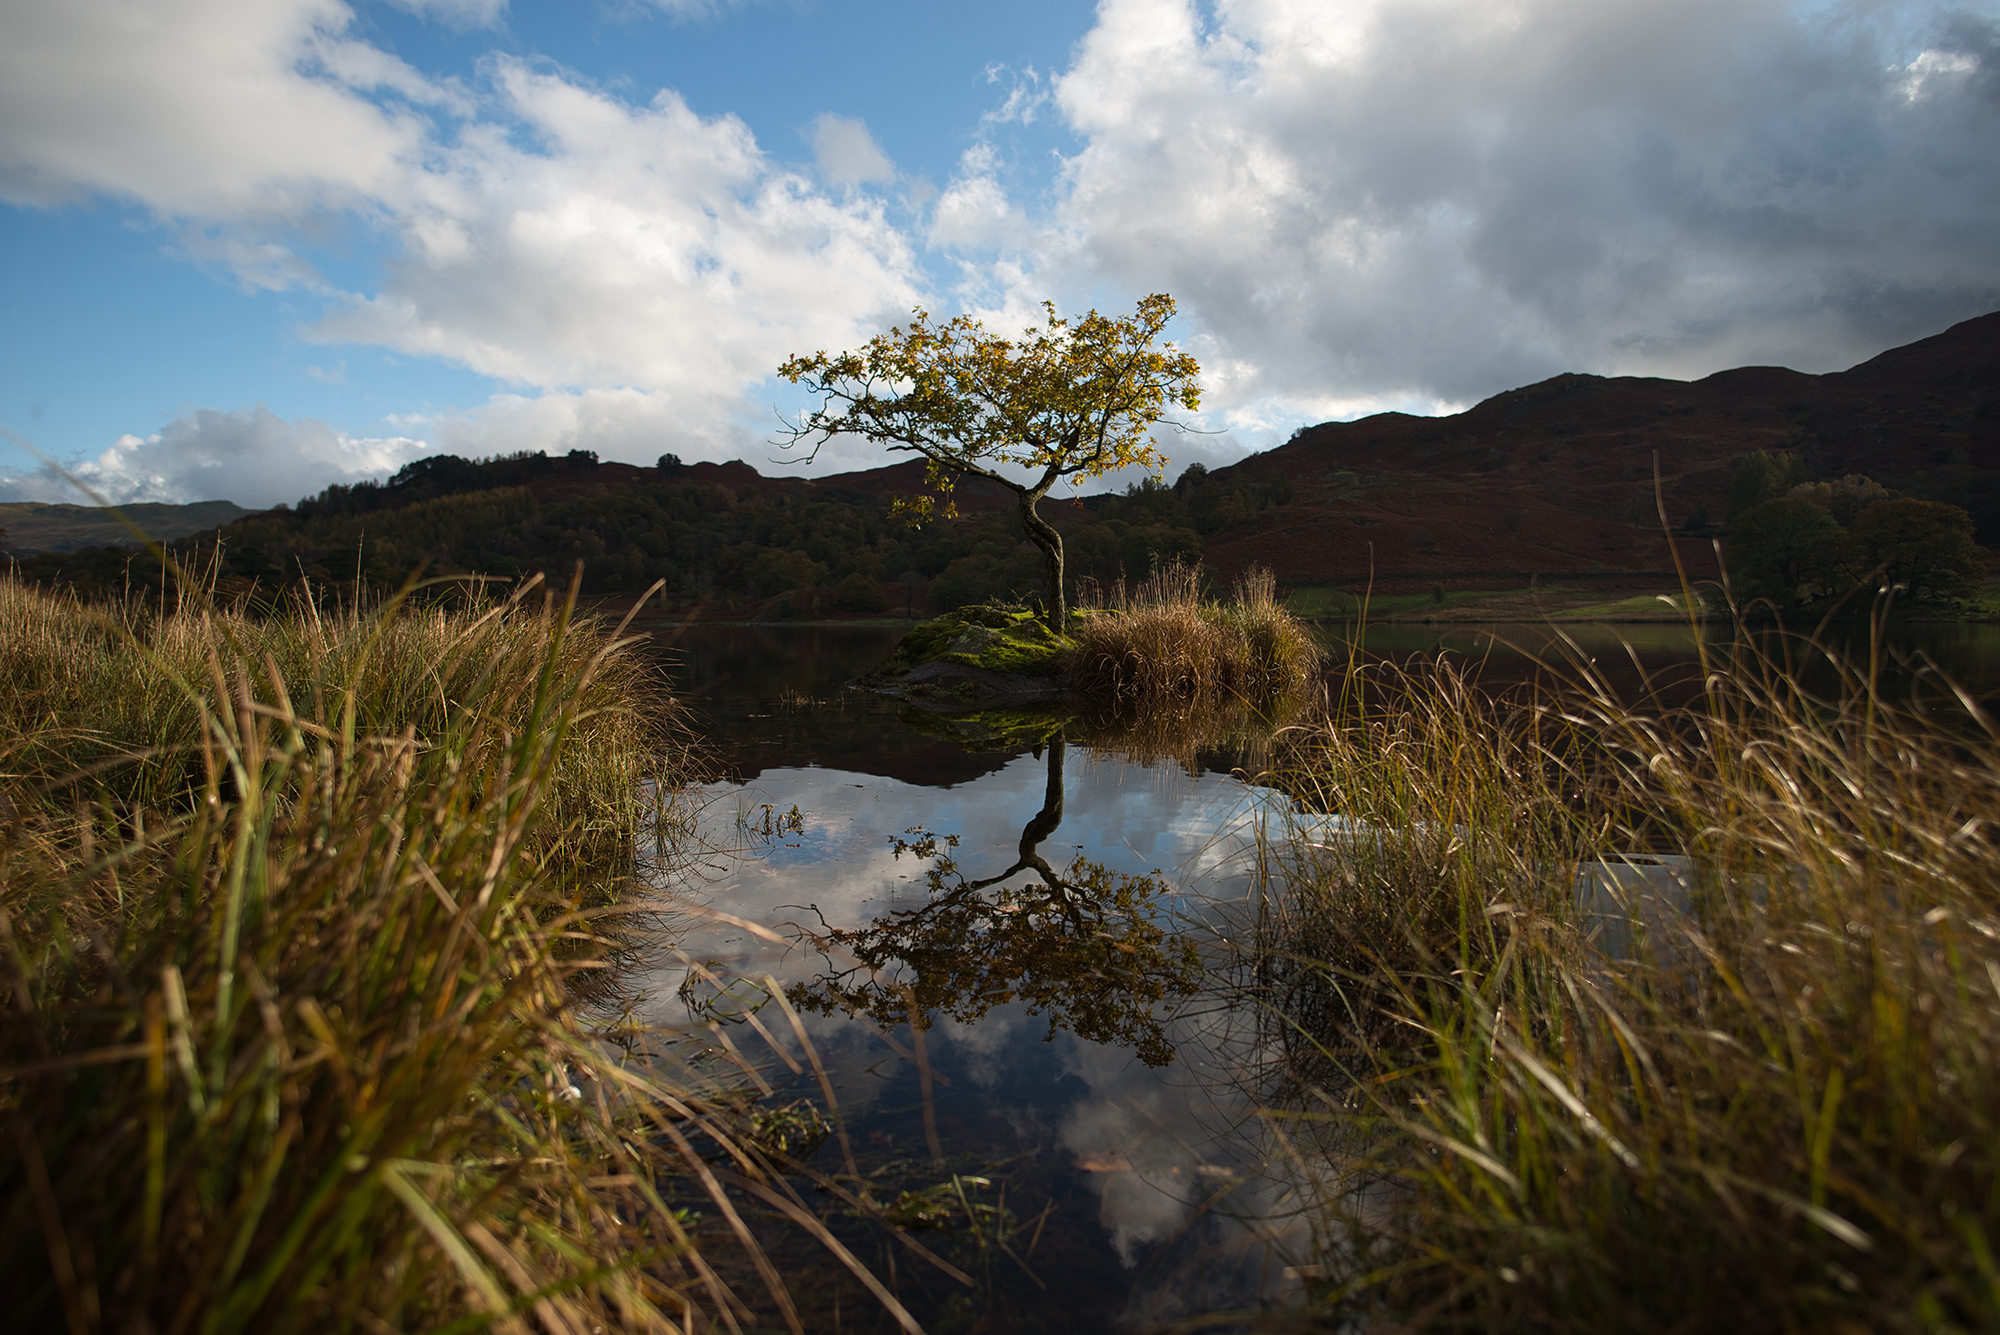
Basic exposure and color adjustments will usually be the best way to take advantage of Luminar AI’s Templates. However, you can also save some of Luminar AI’s more creative processes as a Template as well, including its Sky AI, Atmosphere AI and Sunrays adjustments.
Sky AI
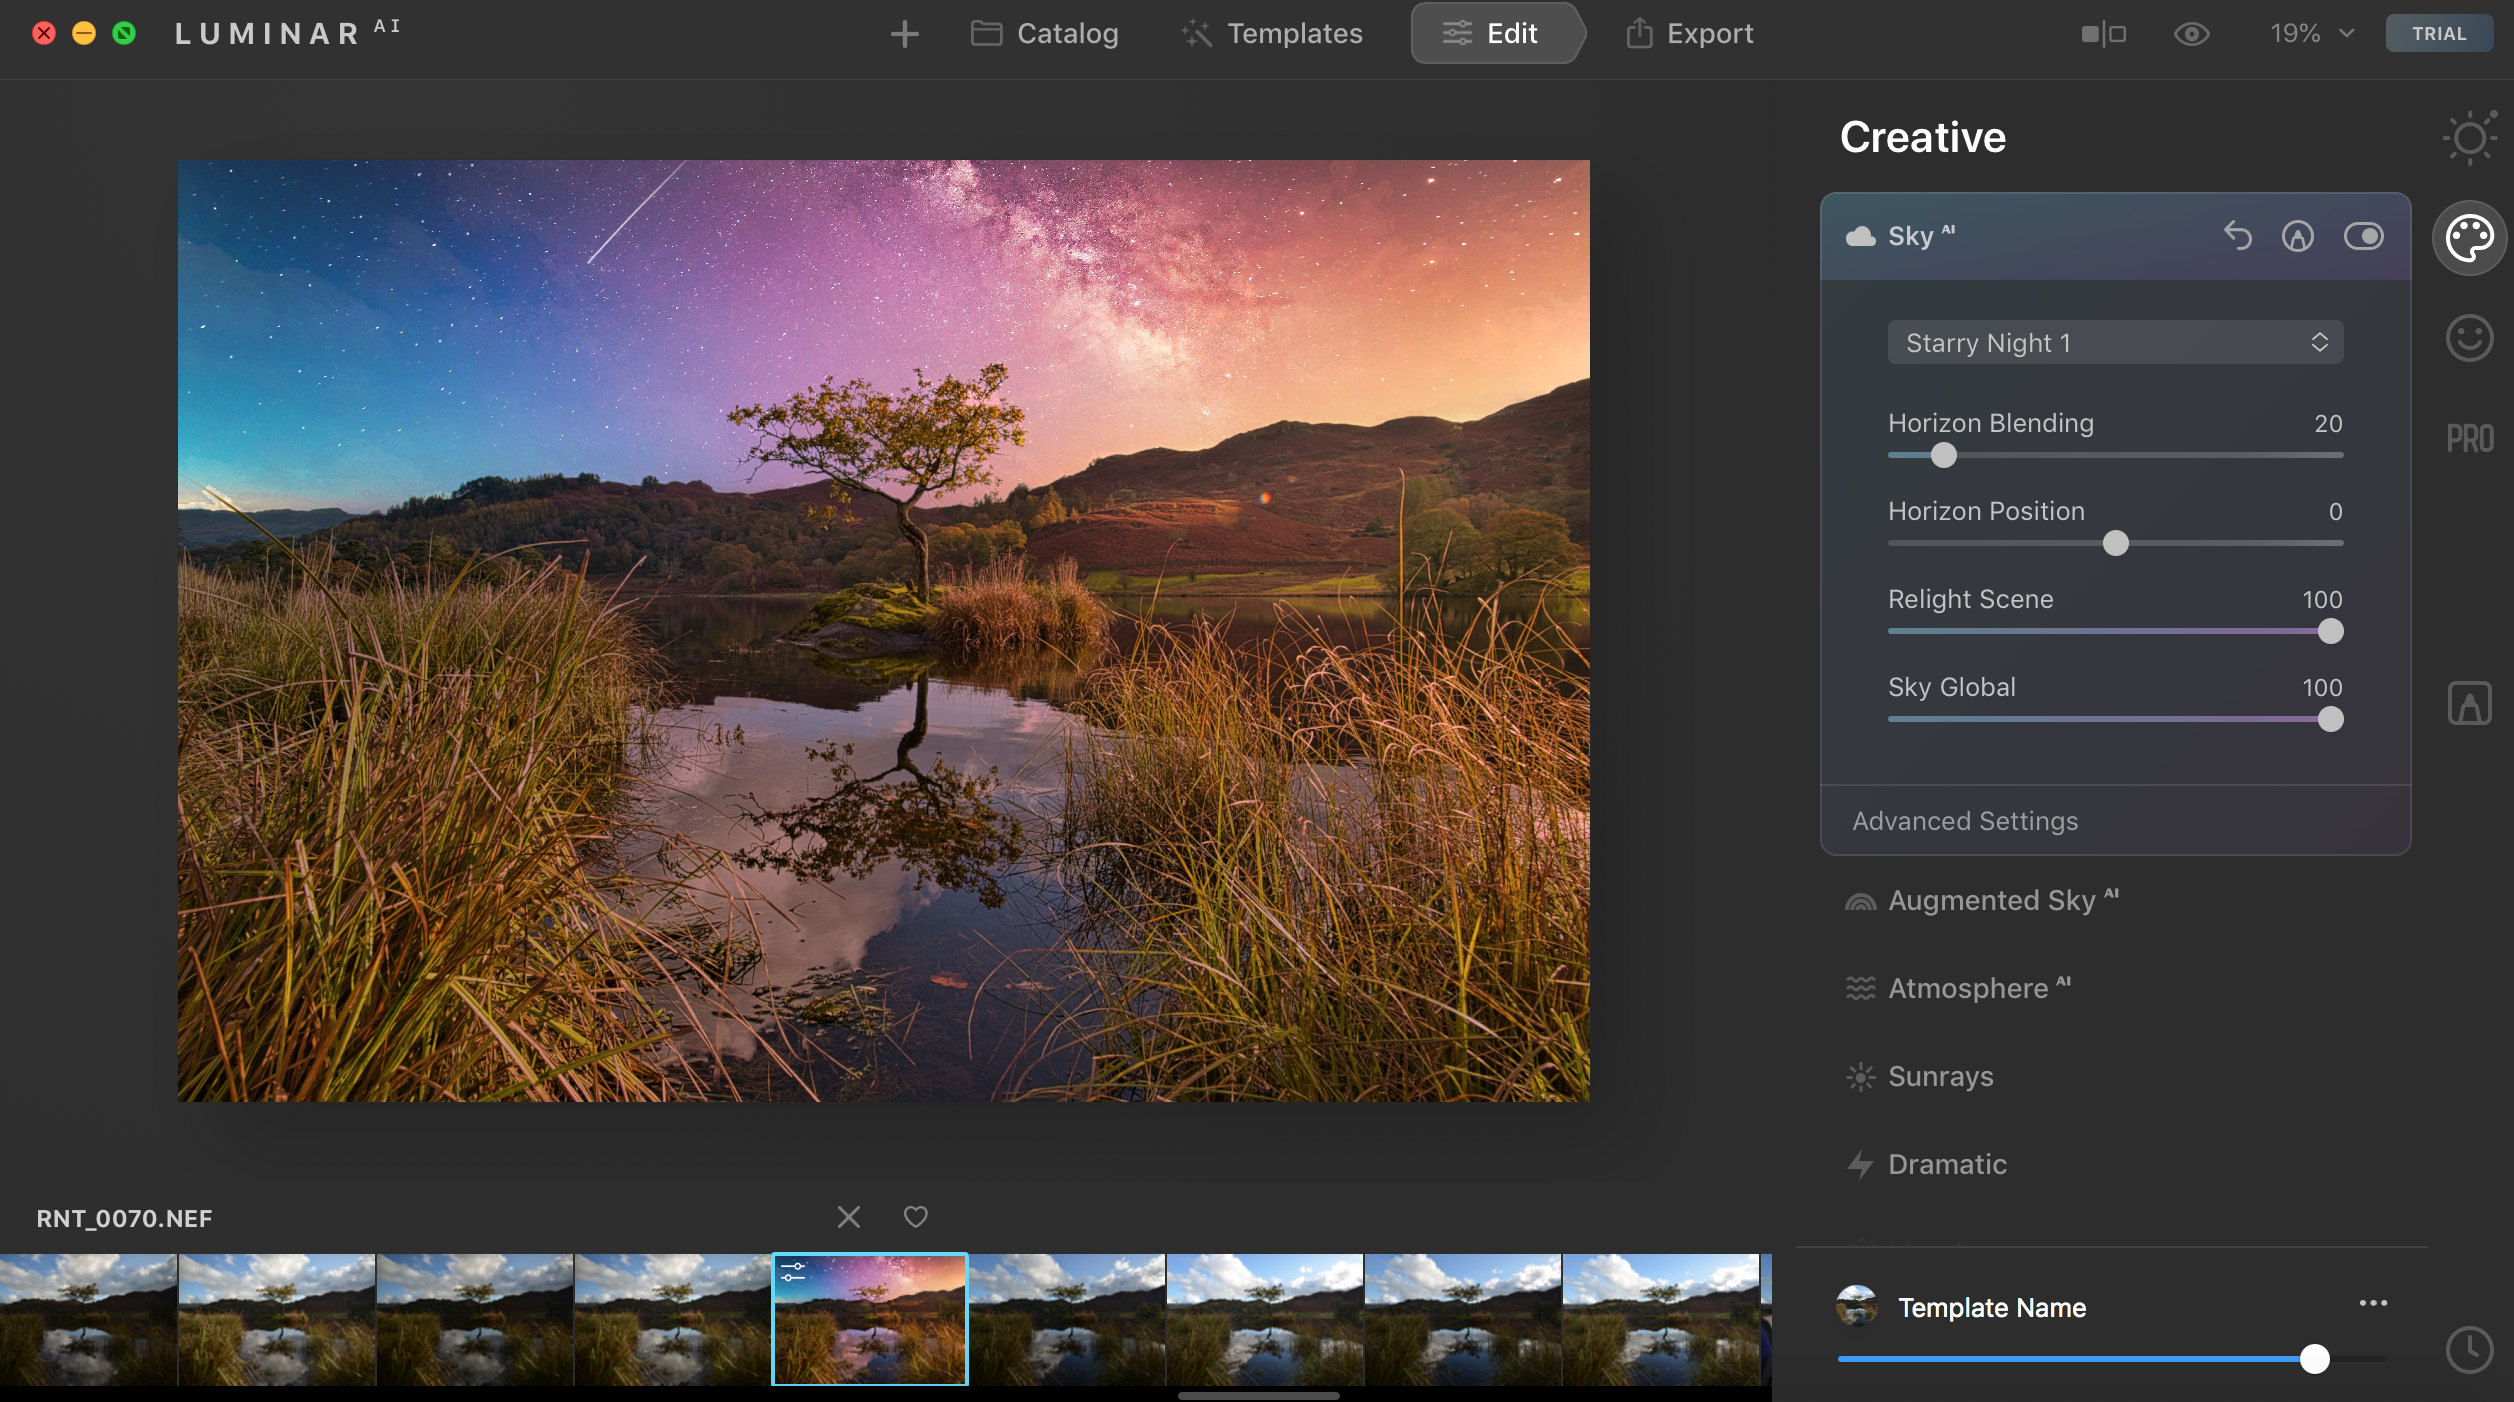
Whether you simply want to use some fluffy cotton clouds to replace a dreary grey sky, or you’re looking to add a dramatic Milky Way to your landscape, the Sky AI tab is equal parts useful tool and genuinely good fun. You can find it under the ‘Creative’ panel on the ‘Edit’ tab.
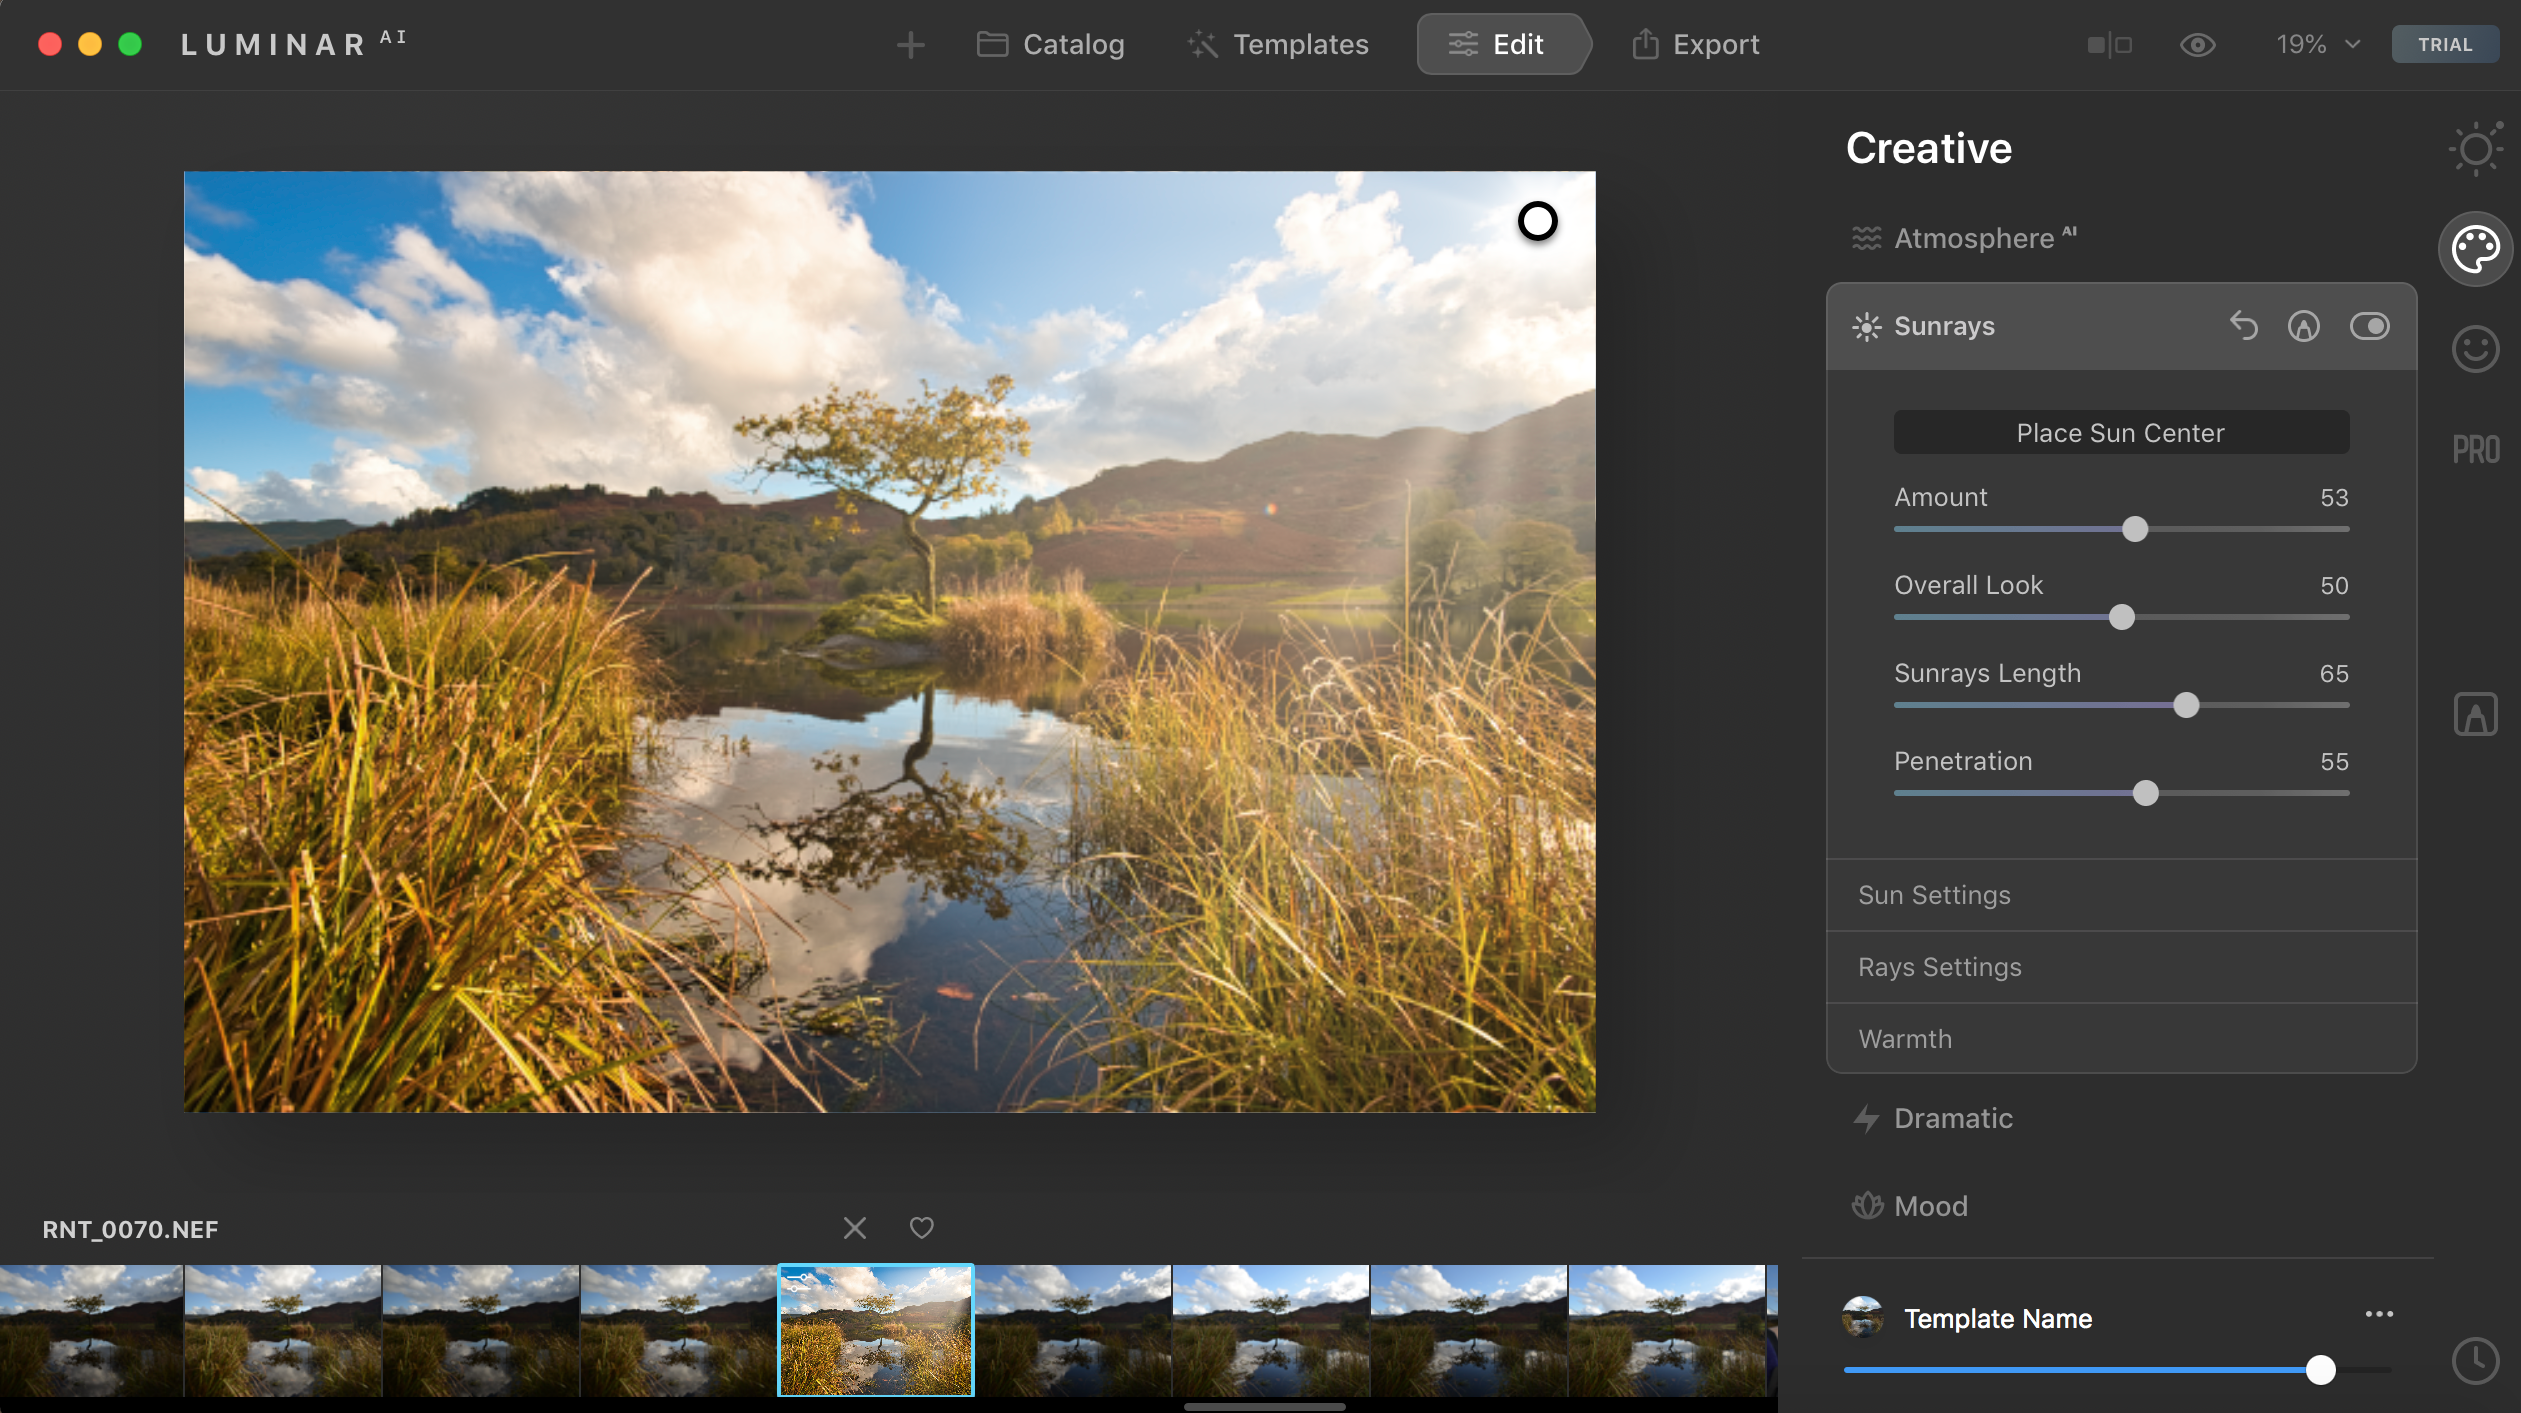
Sunrays
Want to add a little extra spice to your sunset shot? The Sunrays tab gives you the ability to place your sun center anywhere in your photo (or even outside of the frame), control how much flare appears, how long the sun rays will be and how wide they are as well.
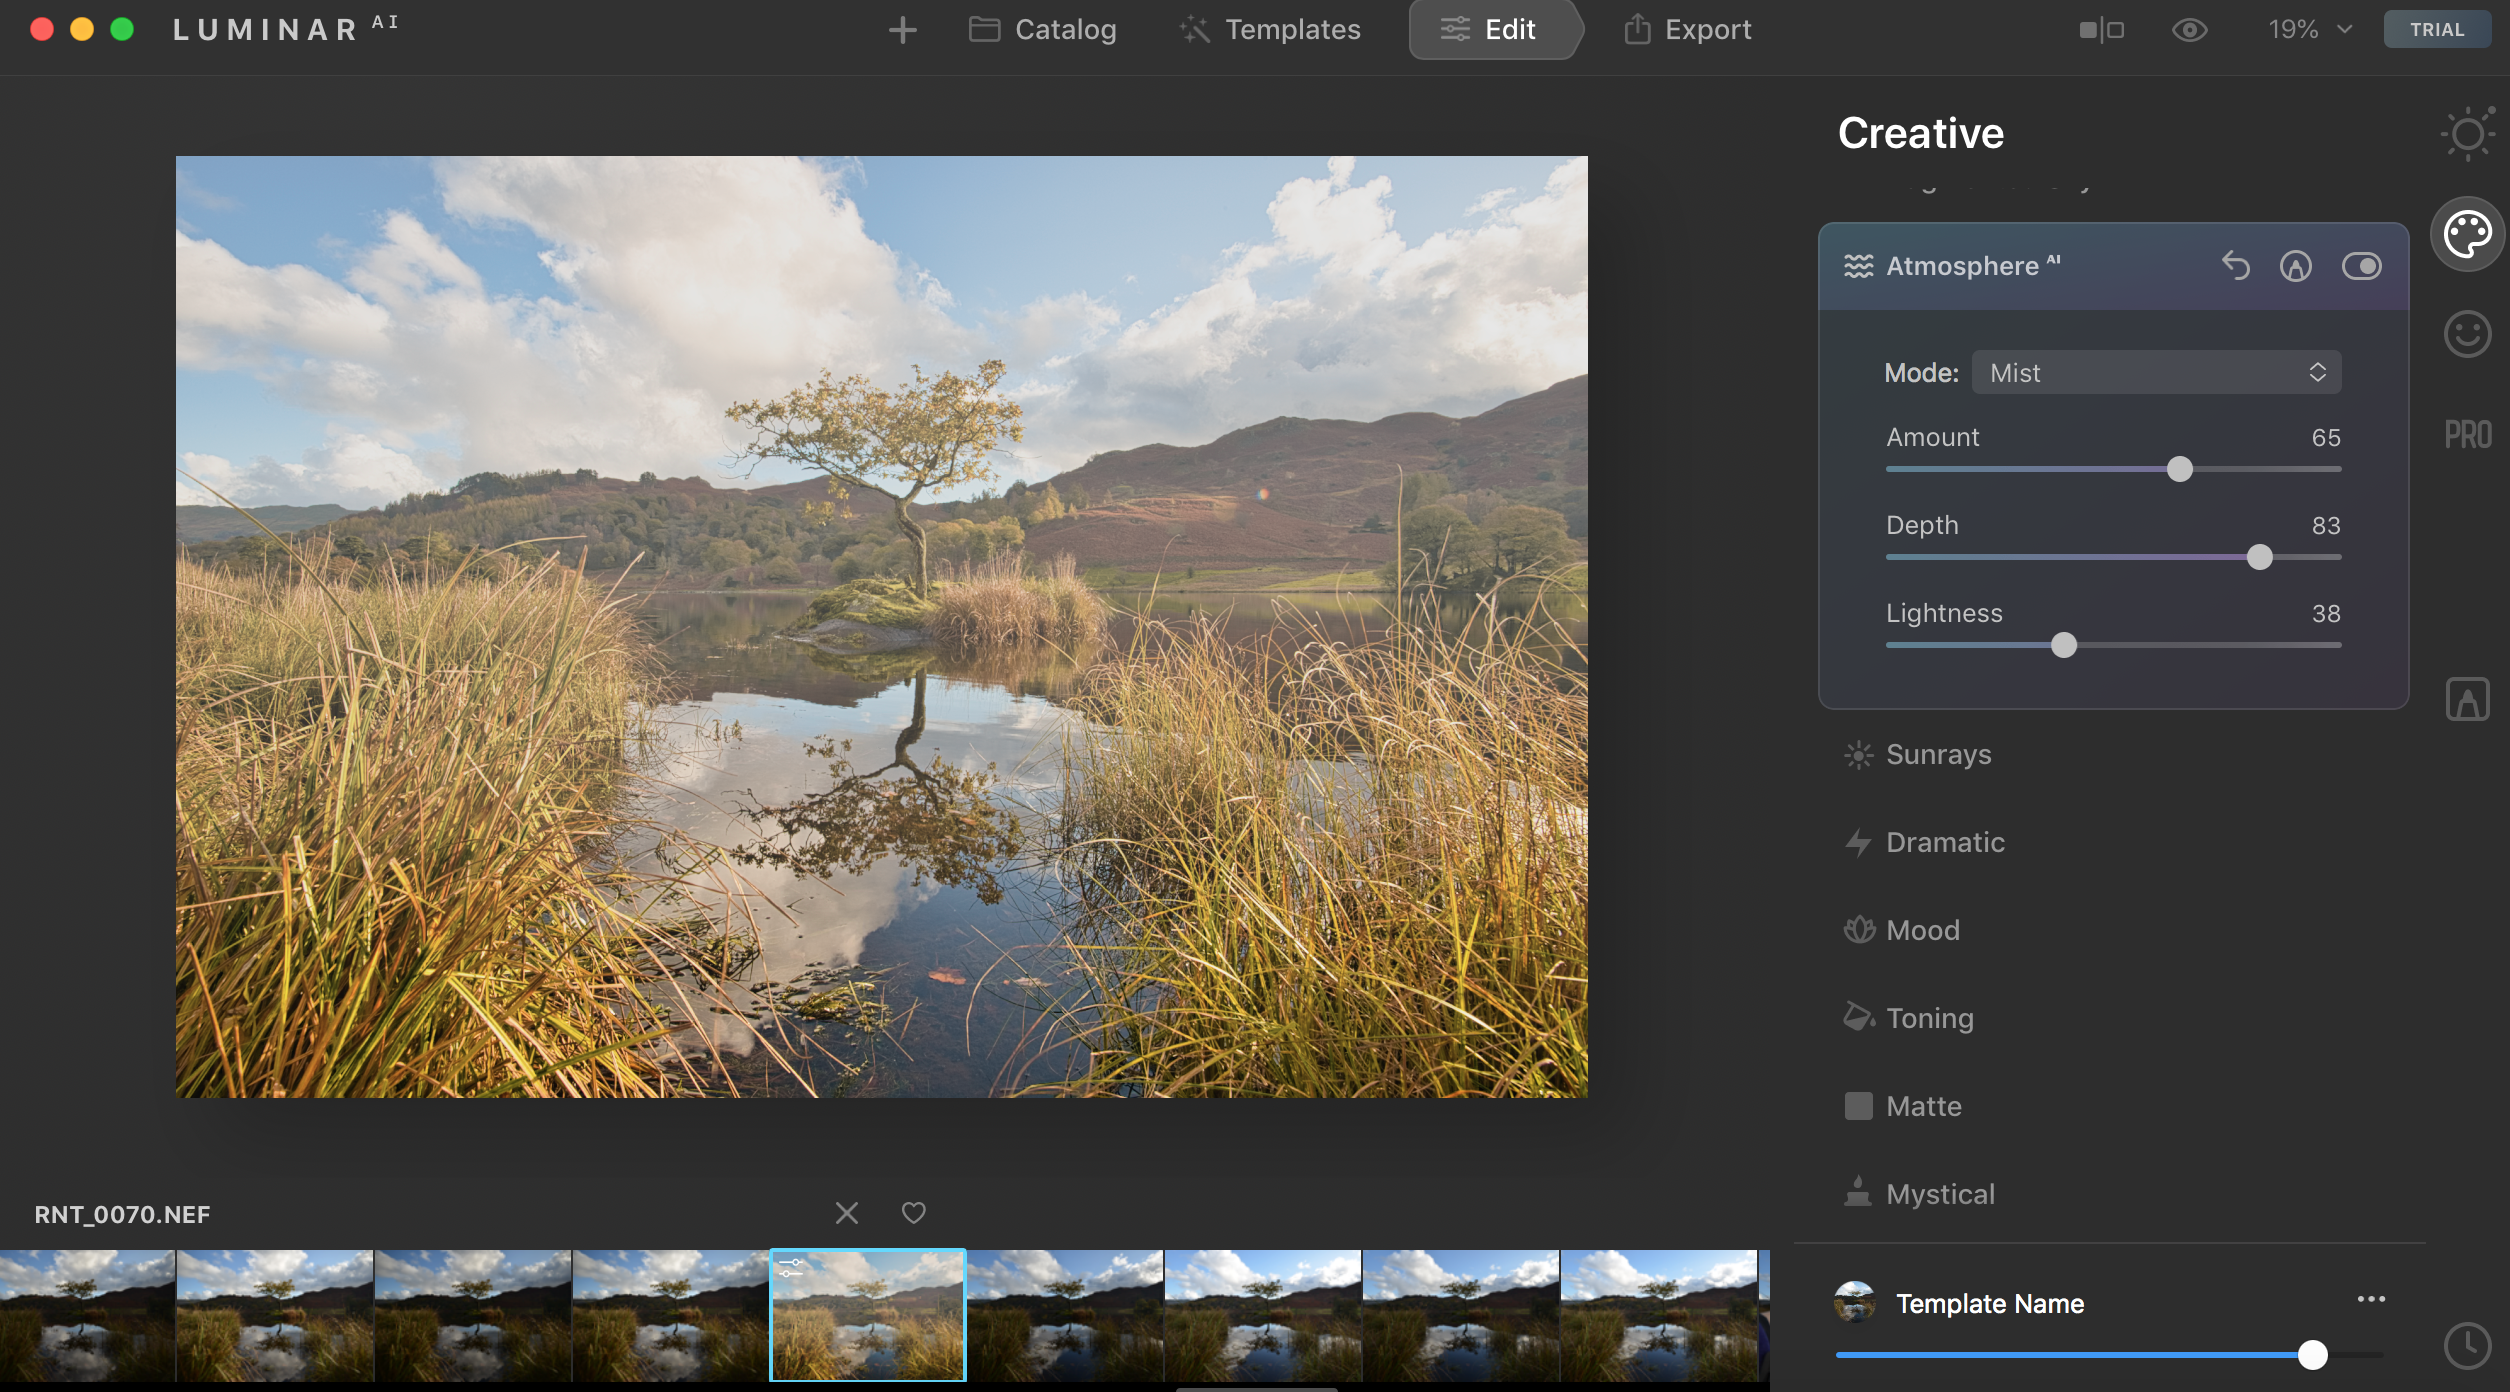
Atmosphere AI
If you’re looking for a real sense of mystery in your photo, then Atmosphere AI makes it easy to add realistic-looking mist, fog and haze to your image. Select which effect you’d like from the drop-down menu and then control the amount, depth and lightness using the sliders.
Reserve your copy of Luminar AI today to access a special price and get exclusive access to the Luminar AI Insiders, a private community solely for those who pre-order Luminar AI. Not only will you enjoy exclusive access to the Luminar AI team, but there will also be new tutorials, special events and even a few surprises too for no additional charge. After you’ve made your purchase, you’ll receive your invitation to join this special community.
Get the Digital Camera World Newsletter
The best camera deals, reviews, product advice, and unmissable photography news, direct to your inbox!
Digital Camera World is one of the leading authorities on camera and photography news, reviews, techniques, tutorials, comparisons, deals and industry analysis. The site doesn't just specialize in cameras, but all aspects of photography, videography and imaging – including camera phones, gimbals, lenses, lighting, editing software, filters, tripods, laptops, printers, photo books, desks, binoculars and more.
Whether you're using, looking to buy or trying to get the most out of a compact camera, action camera, camera drone, cinema camera, beginner camera or professional camera, Digital Camera World has a roster of experts with combined experience of over 100 years when it comes to cameras, photography and imaging.

