Learn to use composites to bring objects to life
Make light work of composites in Photoshop Elements with selections and layer masks
The best camera deals, reviews, product advice, and unmissable photography news, direct to your inbox!
You are now subscribed
Your newsletter sign-up was successful
Download project files to your computer from:
http://downloads.photoplusmag.com/pp125.zip
Build a composite by combining several images with layer masks
Time needed: 30 minutes
Skill level: Intermediate
Kit needed: Photoshop Elements
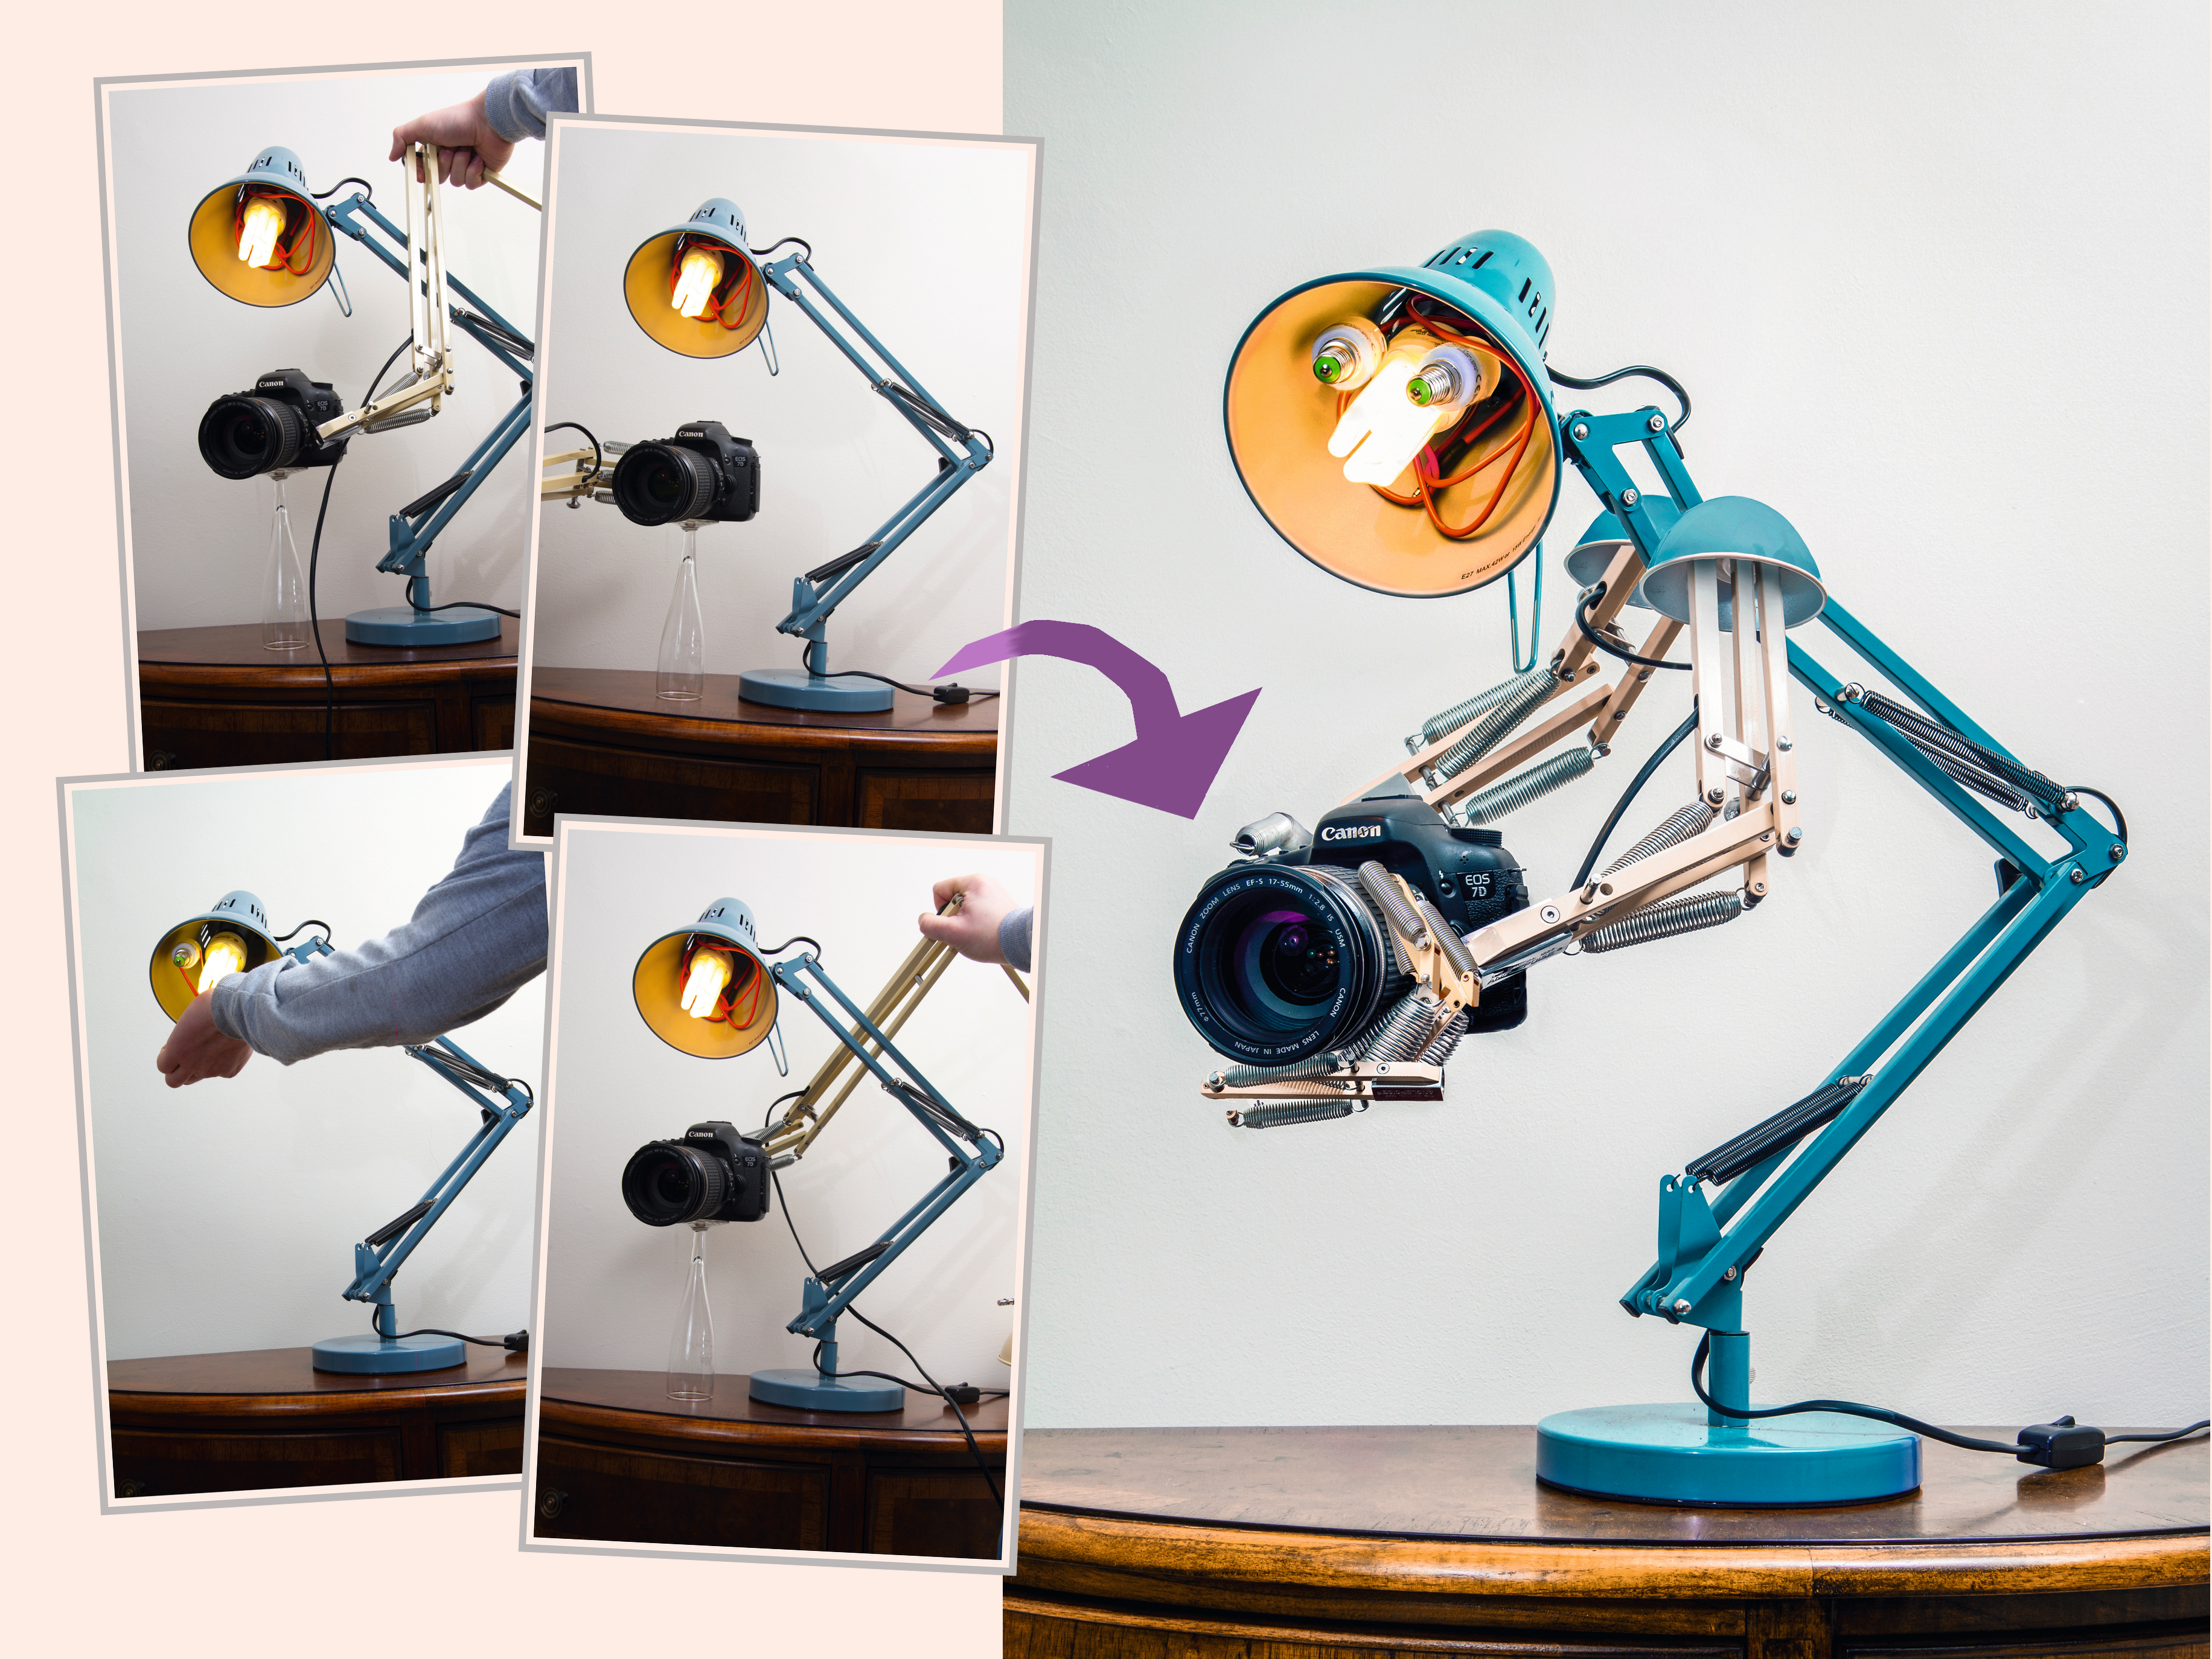
Photoshop Elements may have a reputation for being a little lightweight in comparison to its big brother Photoshop CC, but its compositing tools are just as powerful. Like a mad professor with a welding torch, you can create all manner of mechanical mash-ups with a few simple skills. So why not fuse together a character like our lamp-robot here? In this tutorial, we’ll show you how it’s done. Along the way you’ll learn essential Photoshop techniques, from making precise selections to painting layer masks – a key skill for many Photoshop tasks.
We’ve provided several start images for you to use, but the real joy is in shooting your own. As our lamp-robot demonstrates, electrical items make for good subjects as the clean lines and hard edges mean they’re both easy to cut out and simple to combine. We used two anglepoise lamps, and simply held one up next to the other in various positions to form the arms and hands while the camera sat on an upturned glass.
Article continues belowSo why not give it a go? A lamp is a fun choice, as its shape lends itself well to the human form (much obliged, Pixar). But why stop there? We’d like to see what other inanimate objects you can turn into photographers. Perhaps a tripod-toting vacuum cleaner, or a laptop with a light meter. Or – at the risk of going completely meta – a camera holding a camera…
TAKE YOUR OWN SHOTS
If you want to shoot your own pictures, keep in mind three things. First, all the elements should be shot under the same lighting and angle, so use a tripod. The second key factor is to use a simple backdrop, like the white wall here. This makes it so much easier to bring everything together, as you don’t need to be so precise with your selections. Thirdly, follow the rules of light. Keep the lighting direction consistent, and add shadows where necessary. If these follow the real shadows within the scene (in direction and hardness/softness), they’ll look more natural.
STEP BY STEP: Light, Camera, Action!
Discover how to bring inanimate objects to life with simple Photoshop compositing skills
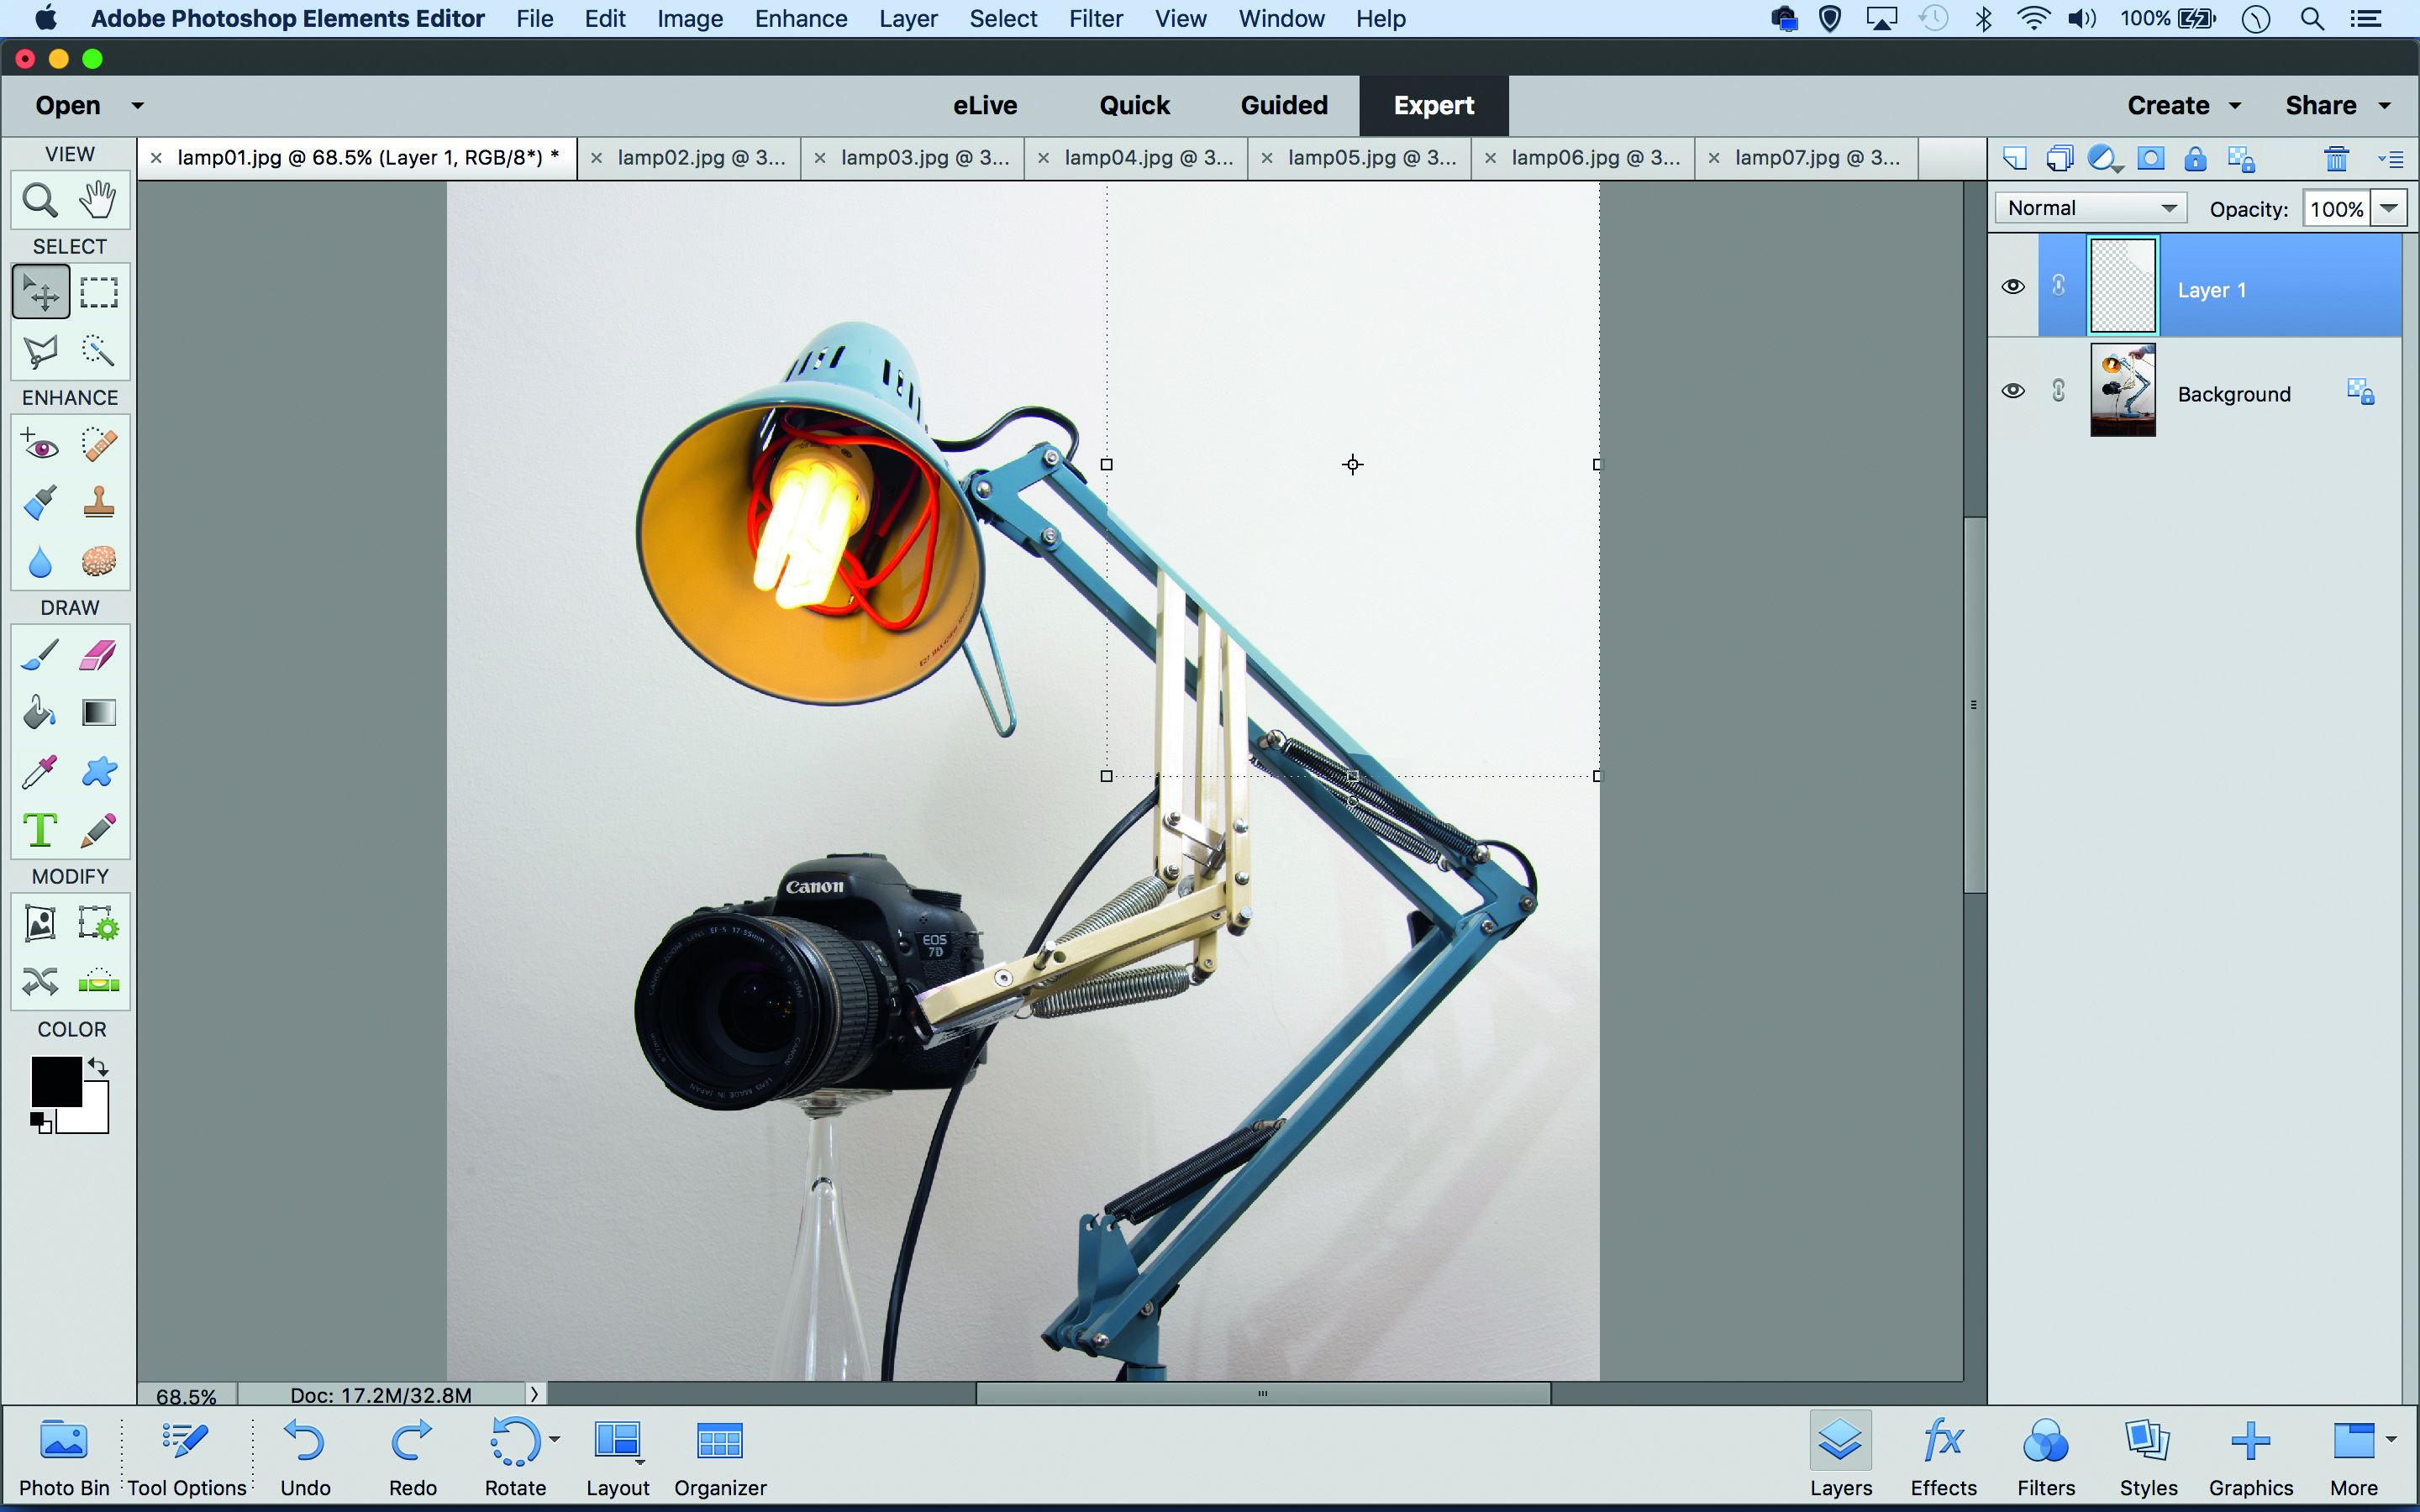
When using the Move tool, check Auto-Select Layer and Show Bounding Box for easy access to transform
controls
01 SELECT, COPY AND PASTE
The best camera deals, reviews, product advice, and unmissable photography news, direct to your inbox!
In Expert mode, open images lamp01-07 and go to lamp02. Grab the Polygonal Lasso tool. Make a rough selection over the wall in the top right corner then hit Ctrl+C. Go to Lamp01 and Ctrl+V to paste. Grab the Move tool and drag the piece into place.
02 ADD AN ARM
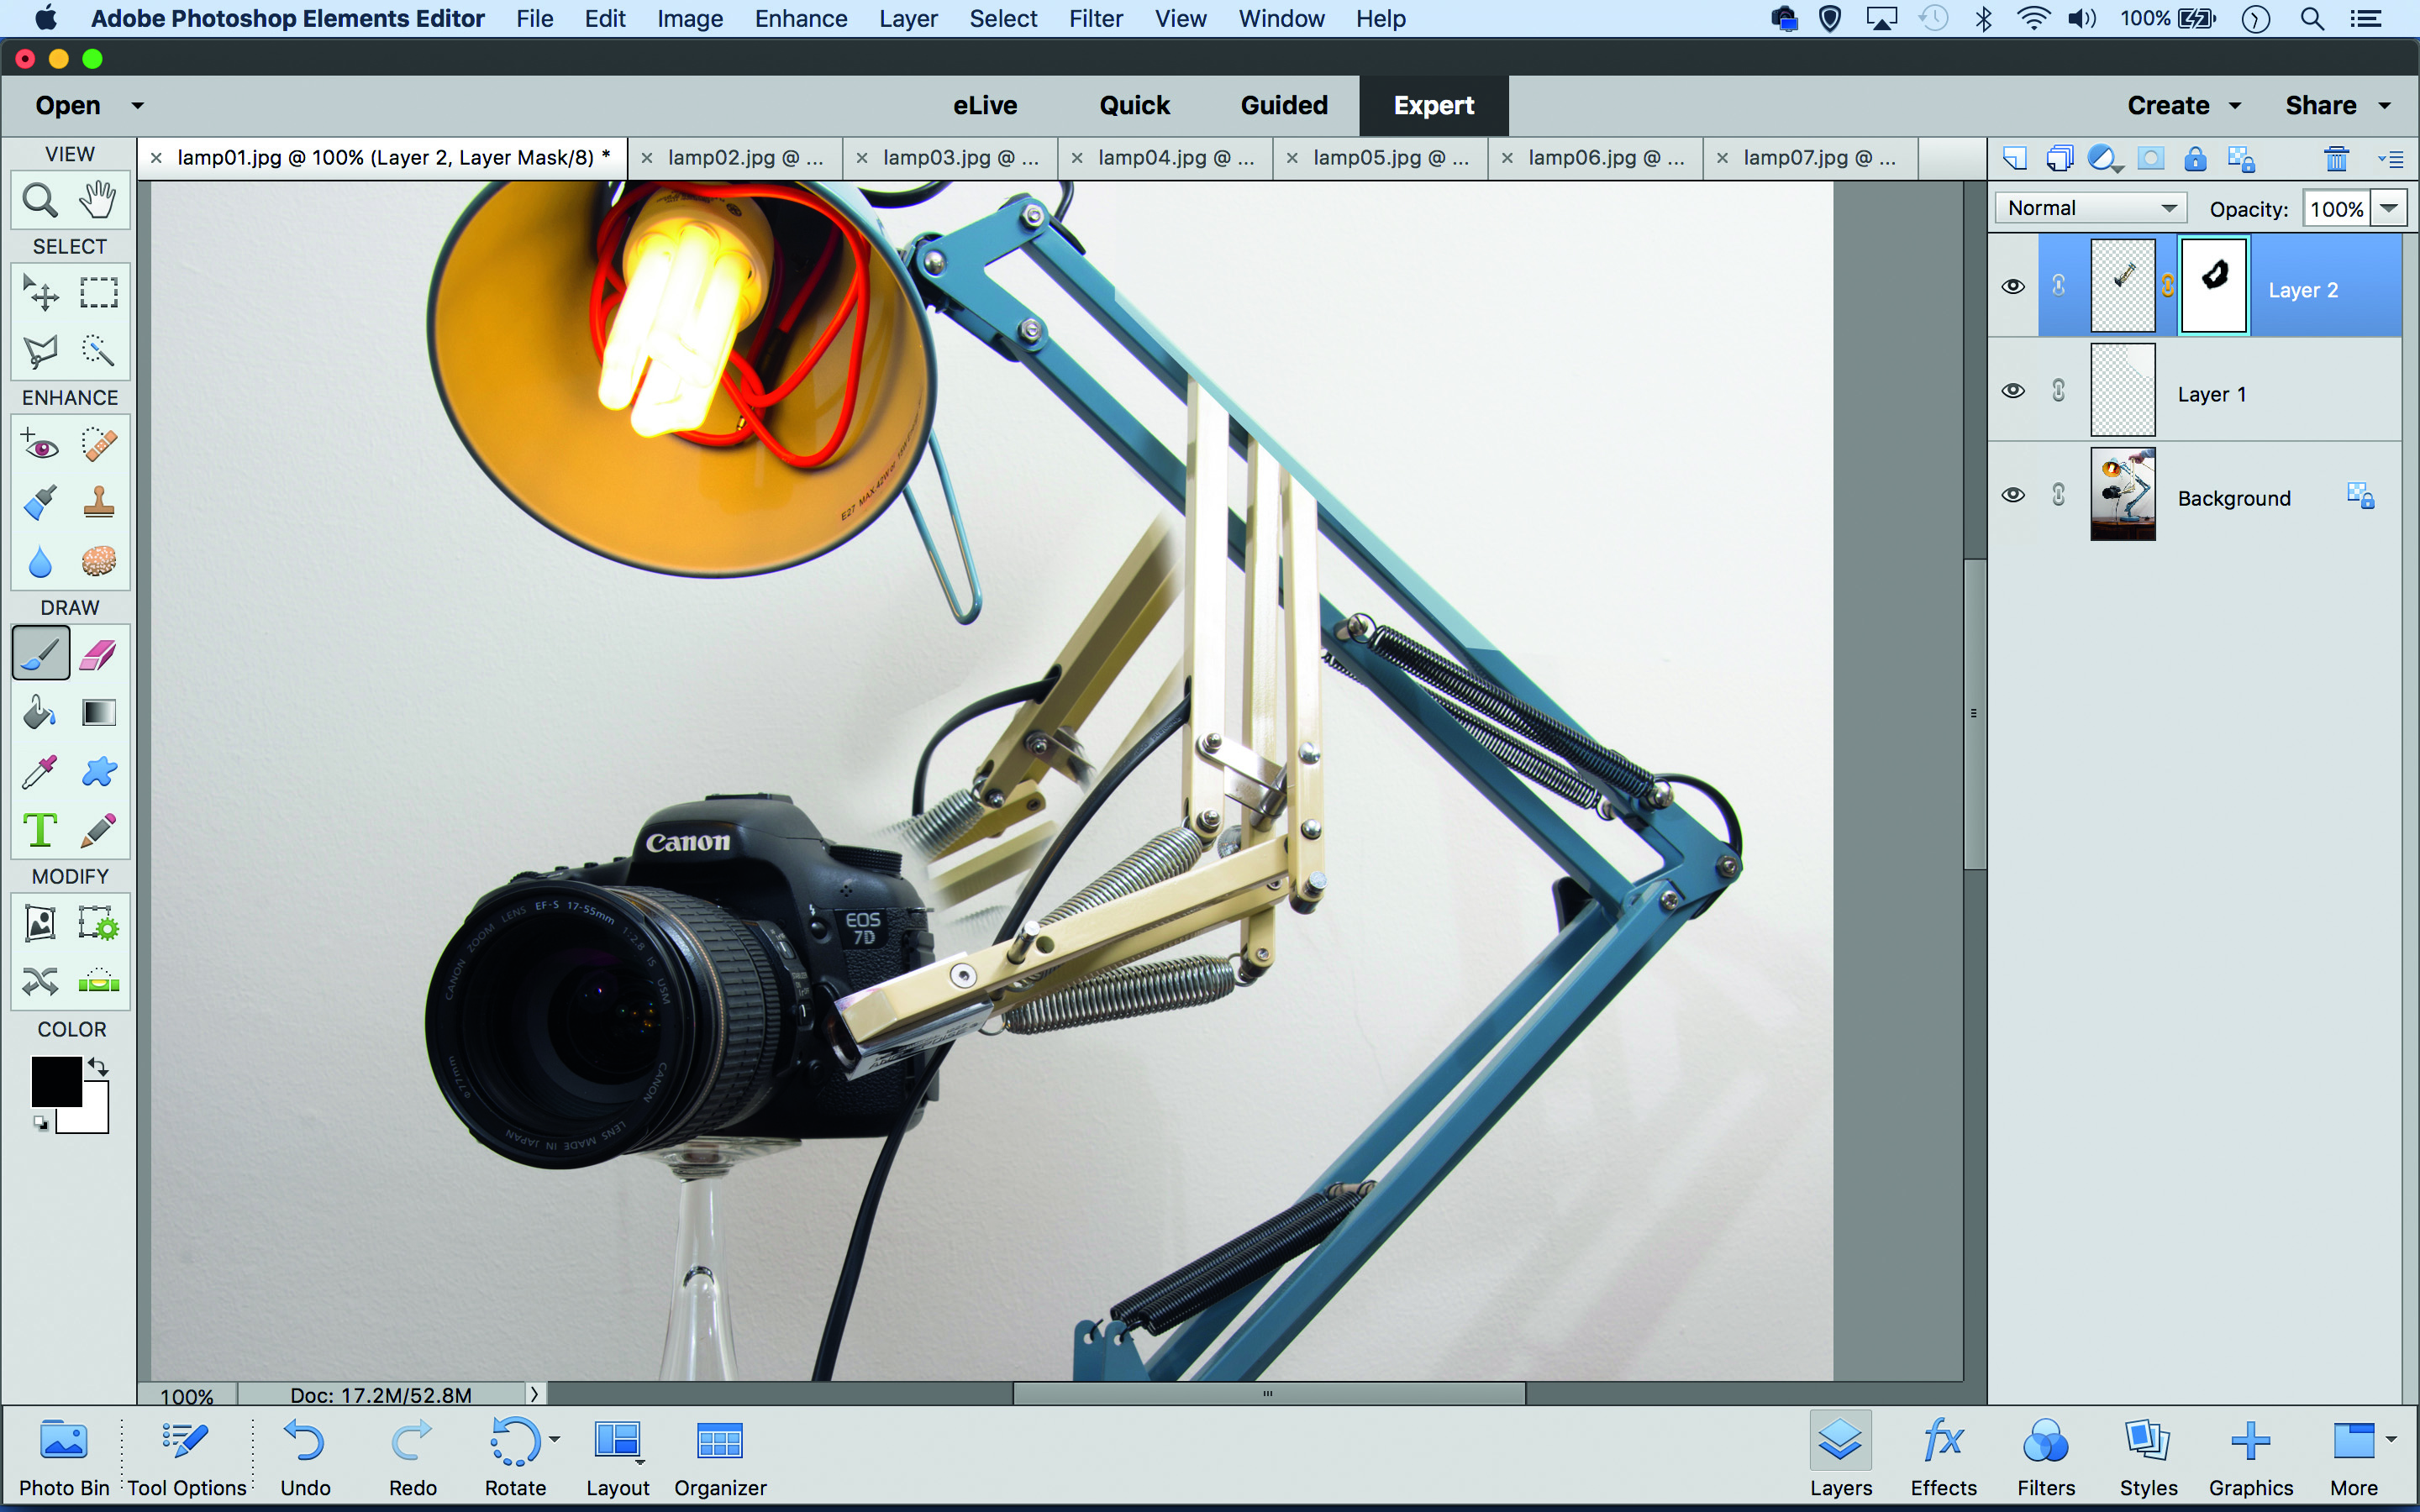
Go to Lamp07 and make a rough selection of the ‘arm’ then copy and paste it into Lamp01. Move it into place then add a layer mask. Grab the Brush tool, set colour to black and use a soft-edged brush to hide parts of the layer that would be behind the other elements.
03 PERFECT THE BLEND
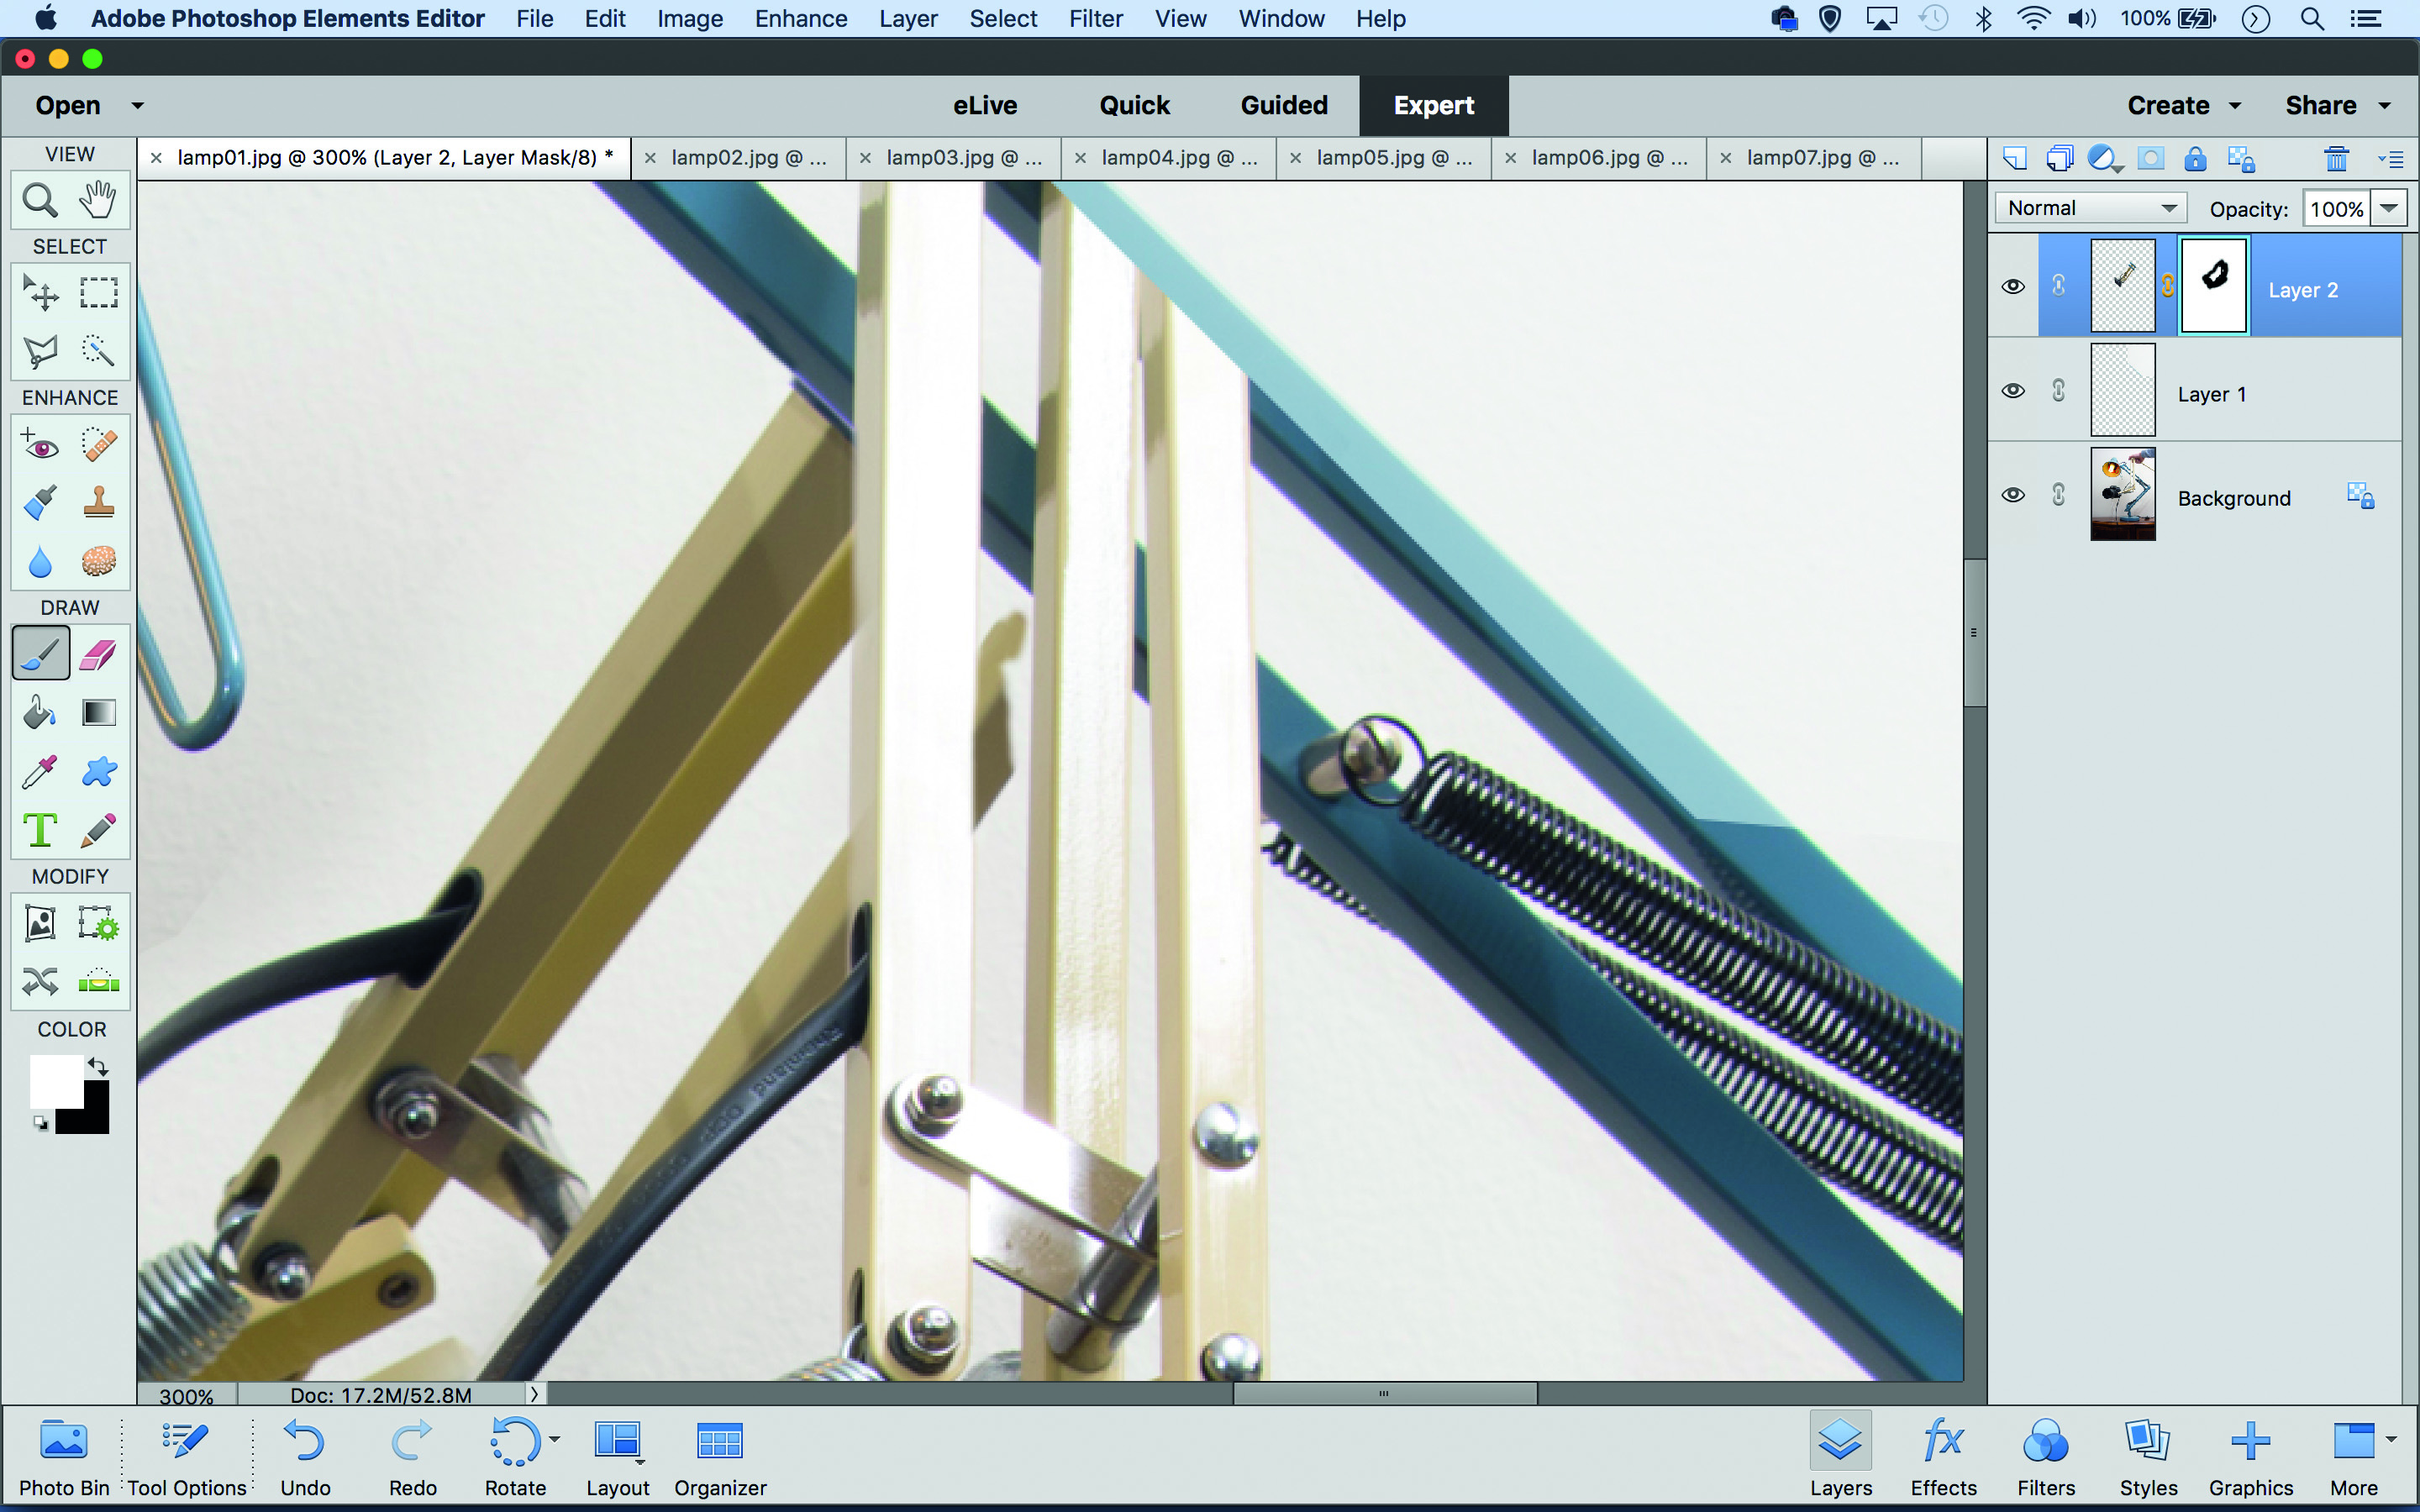
Next we can perfect the mask with more precise painting. Black hides, and white reveals. Zoom in close and paint to reveal or hide the layer where necessary. Use ] and [ to resize the brush as you paint, and Shift-click to paint a straight line between two points.
04 BUILD THE SHOULDER
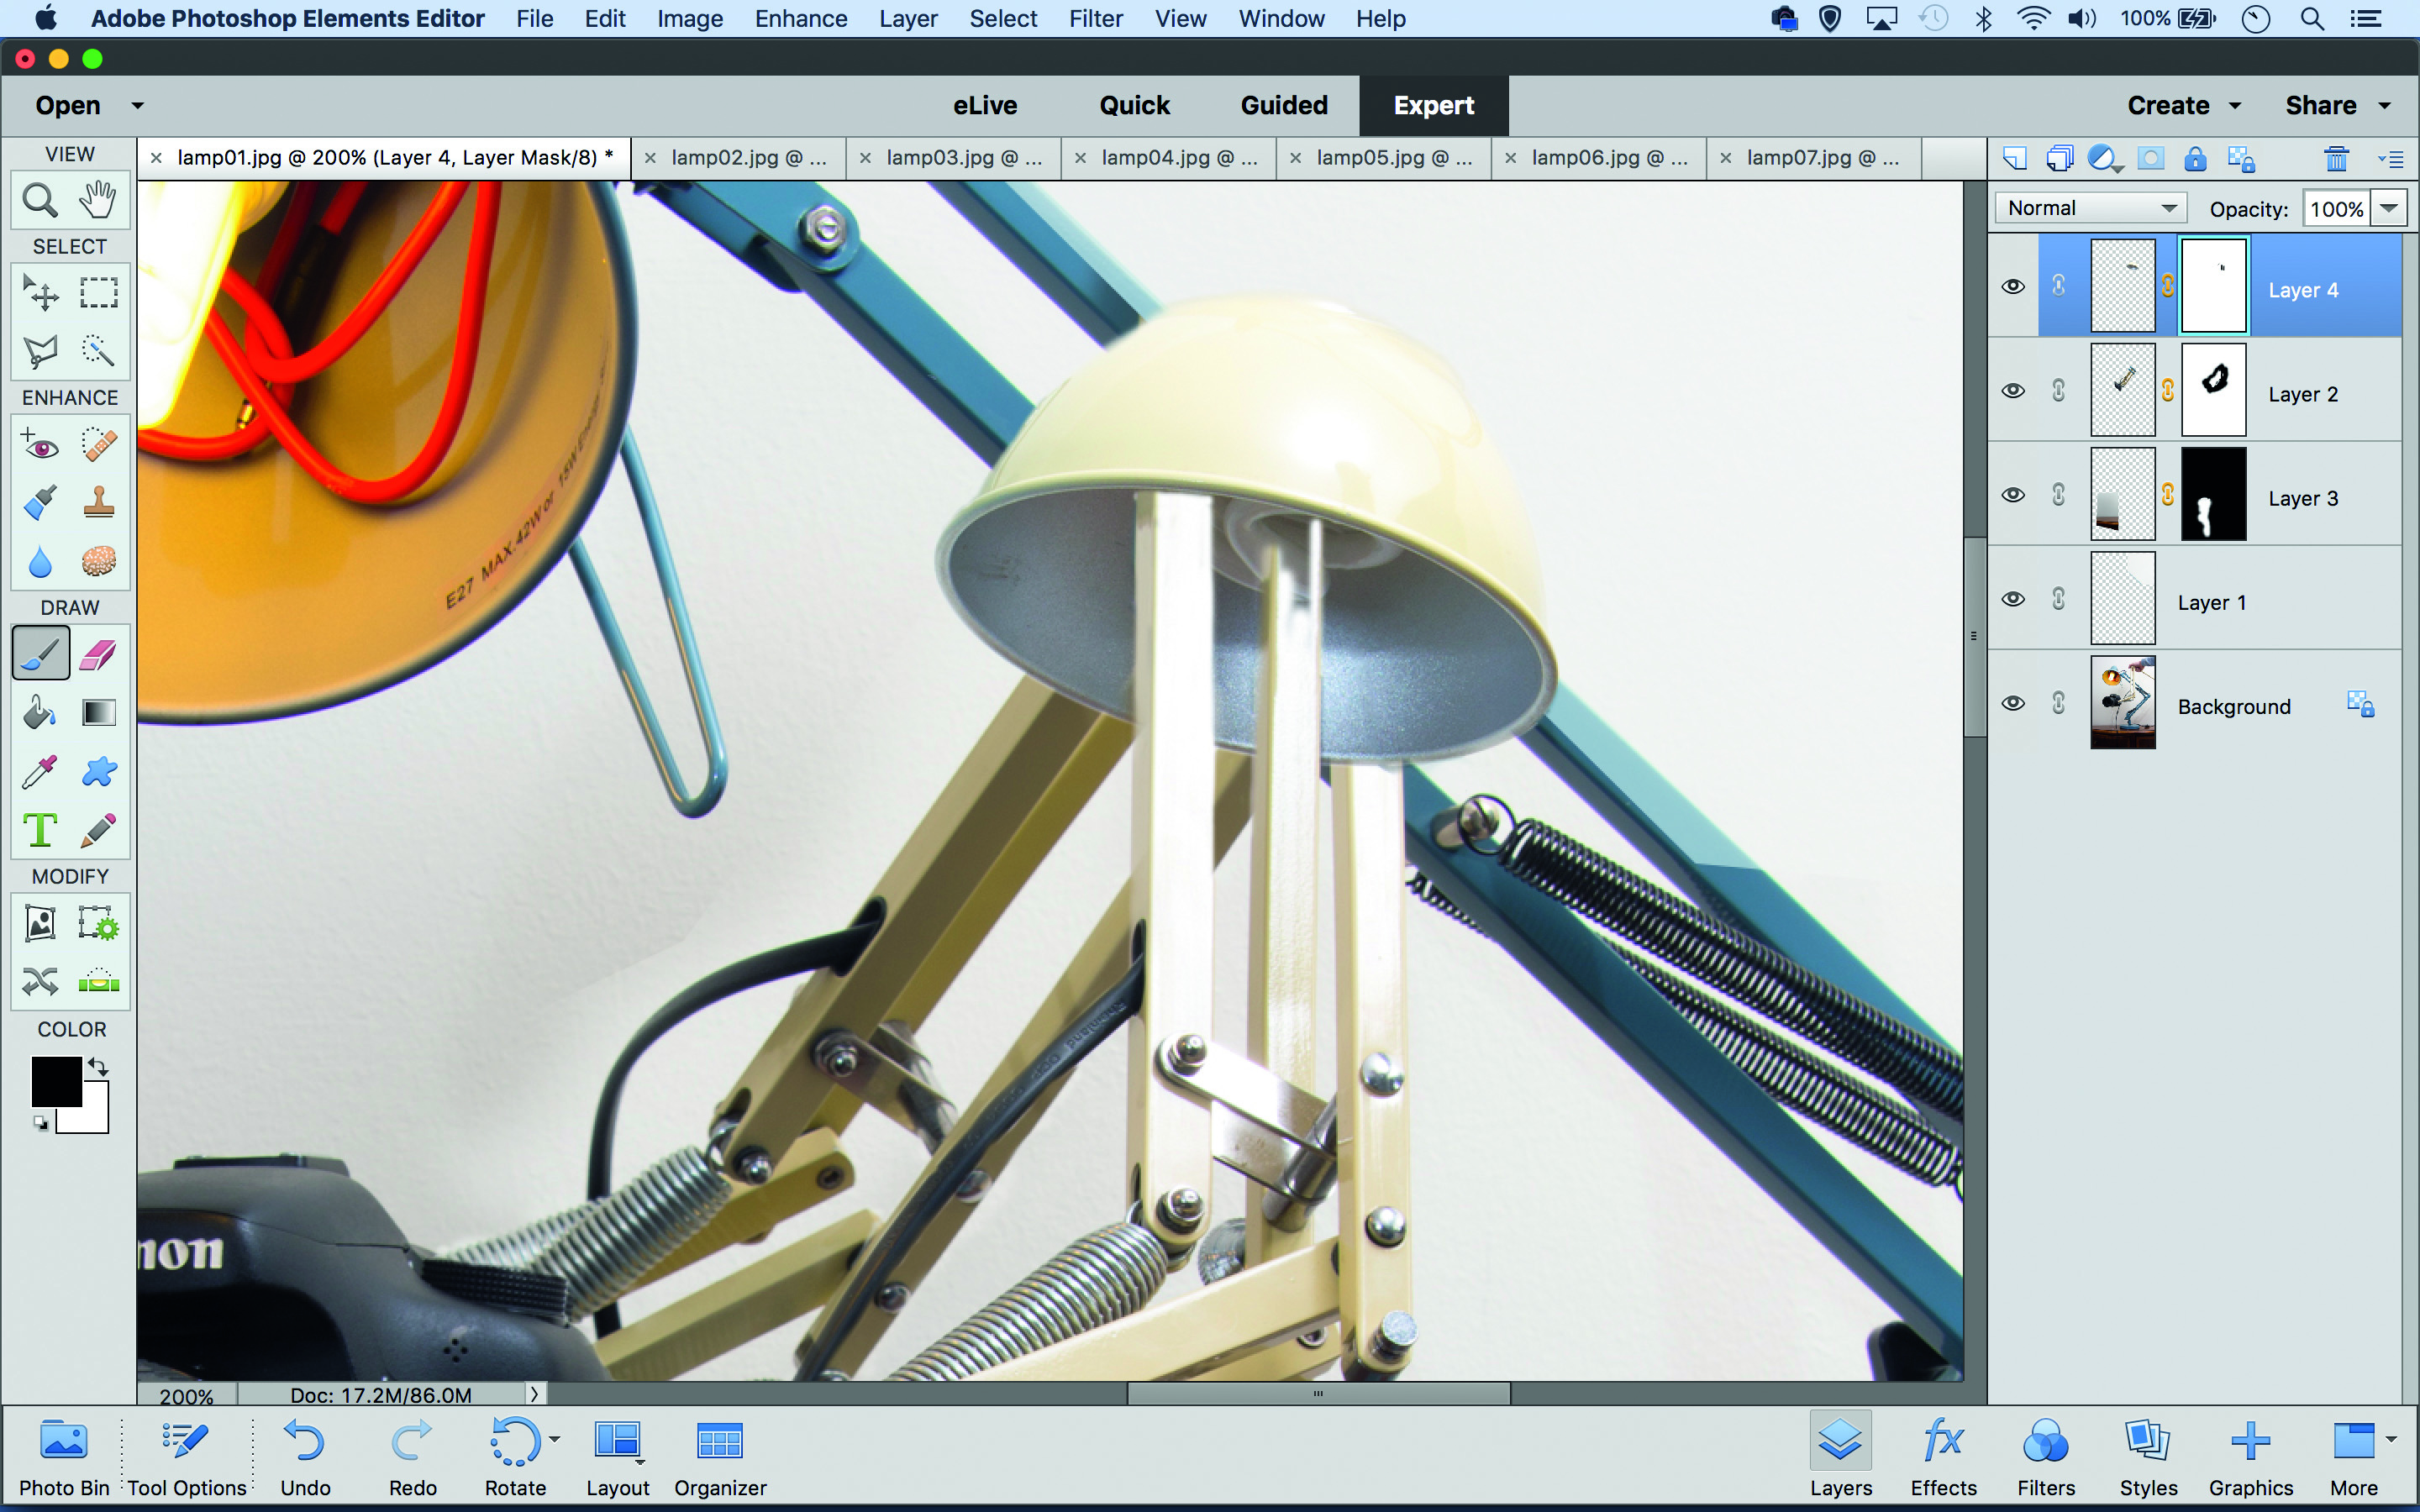
Go to Lamp06. Grab the Quick Selection tool and paint over the bottom part of the lampshade. Click Refine Edge and increase Smooth and Radius. Copy and paste it into the main image. Hit Ctrl+T to resize, then paint a layer mask to blend it, creating a shoulder.
05 PAINT IN SHADOWS
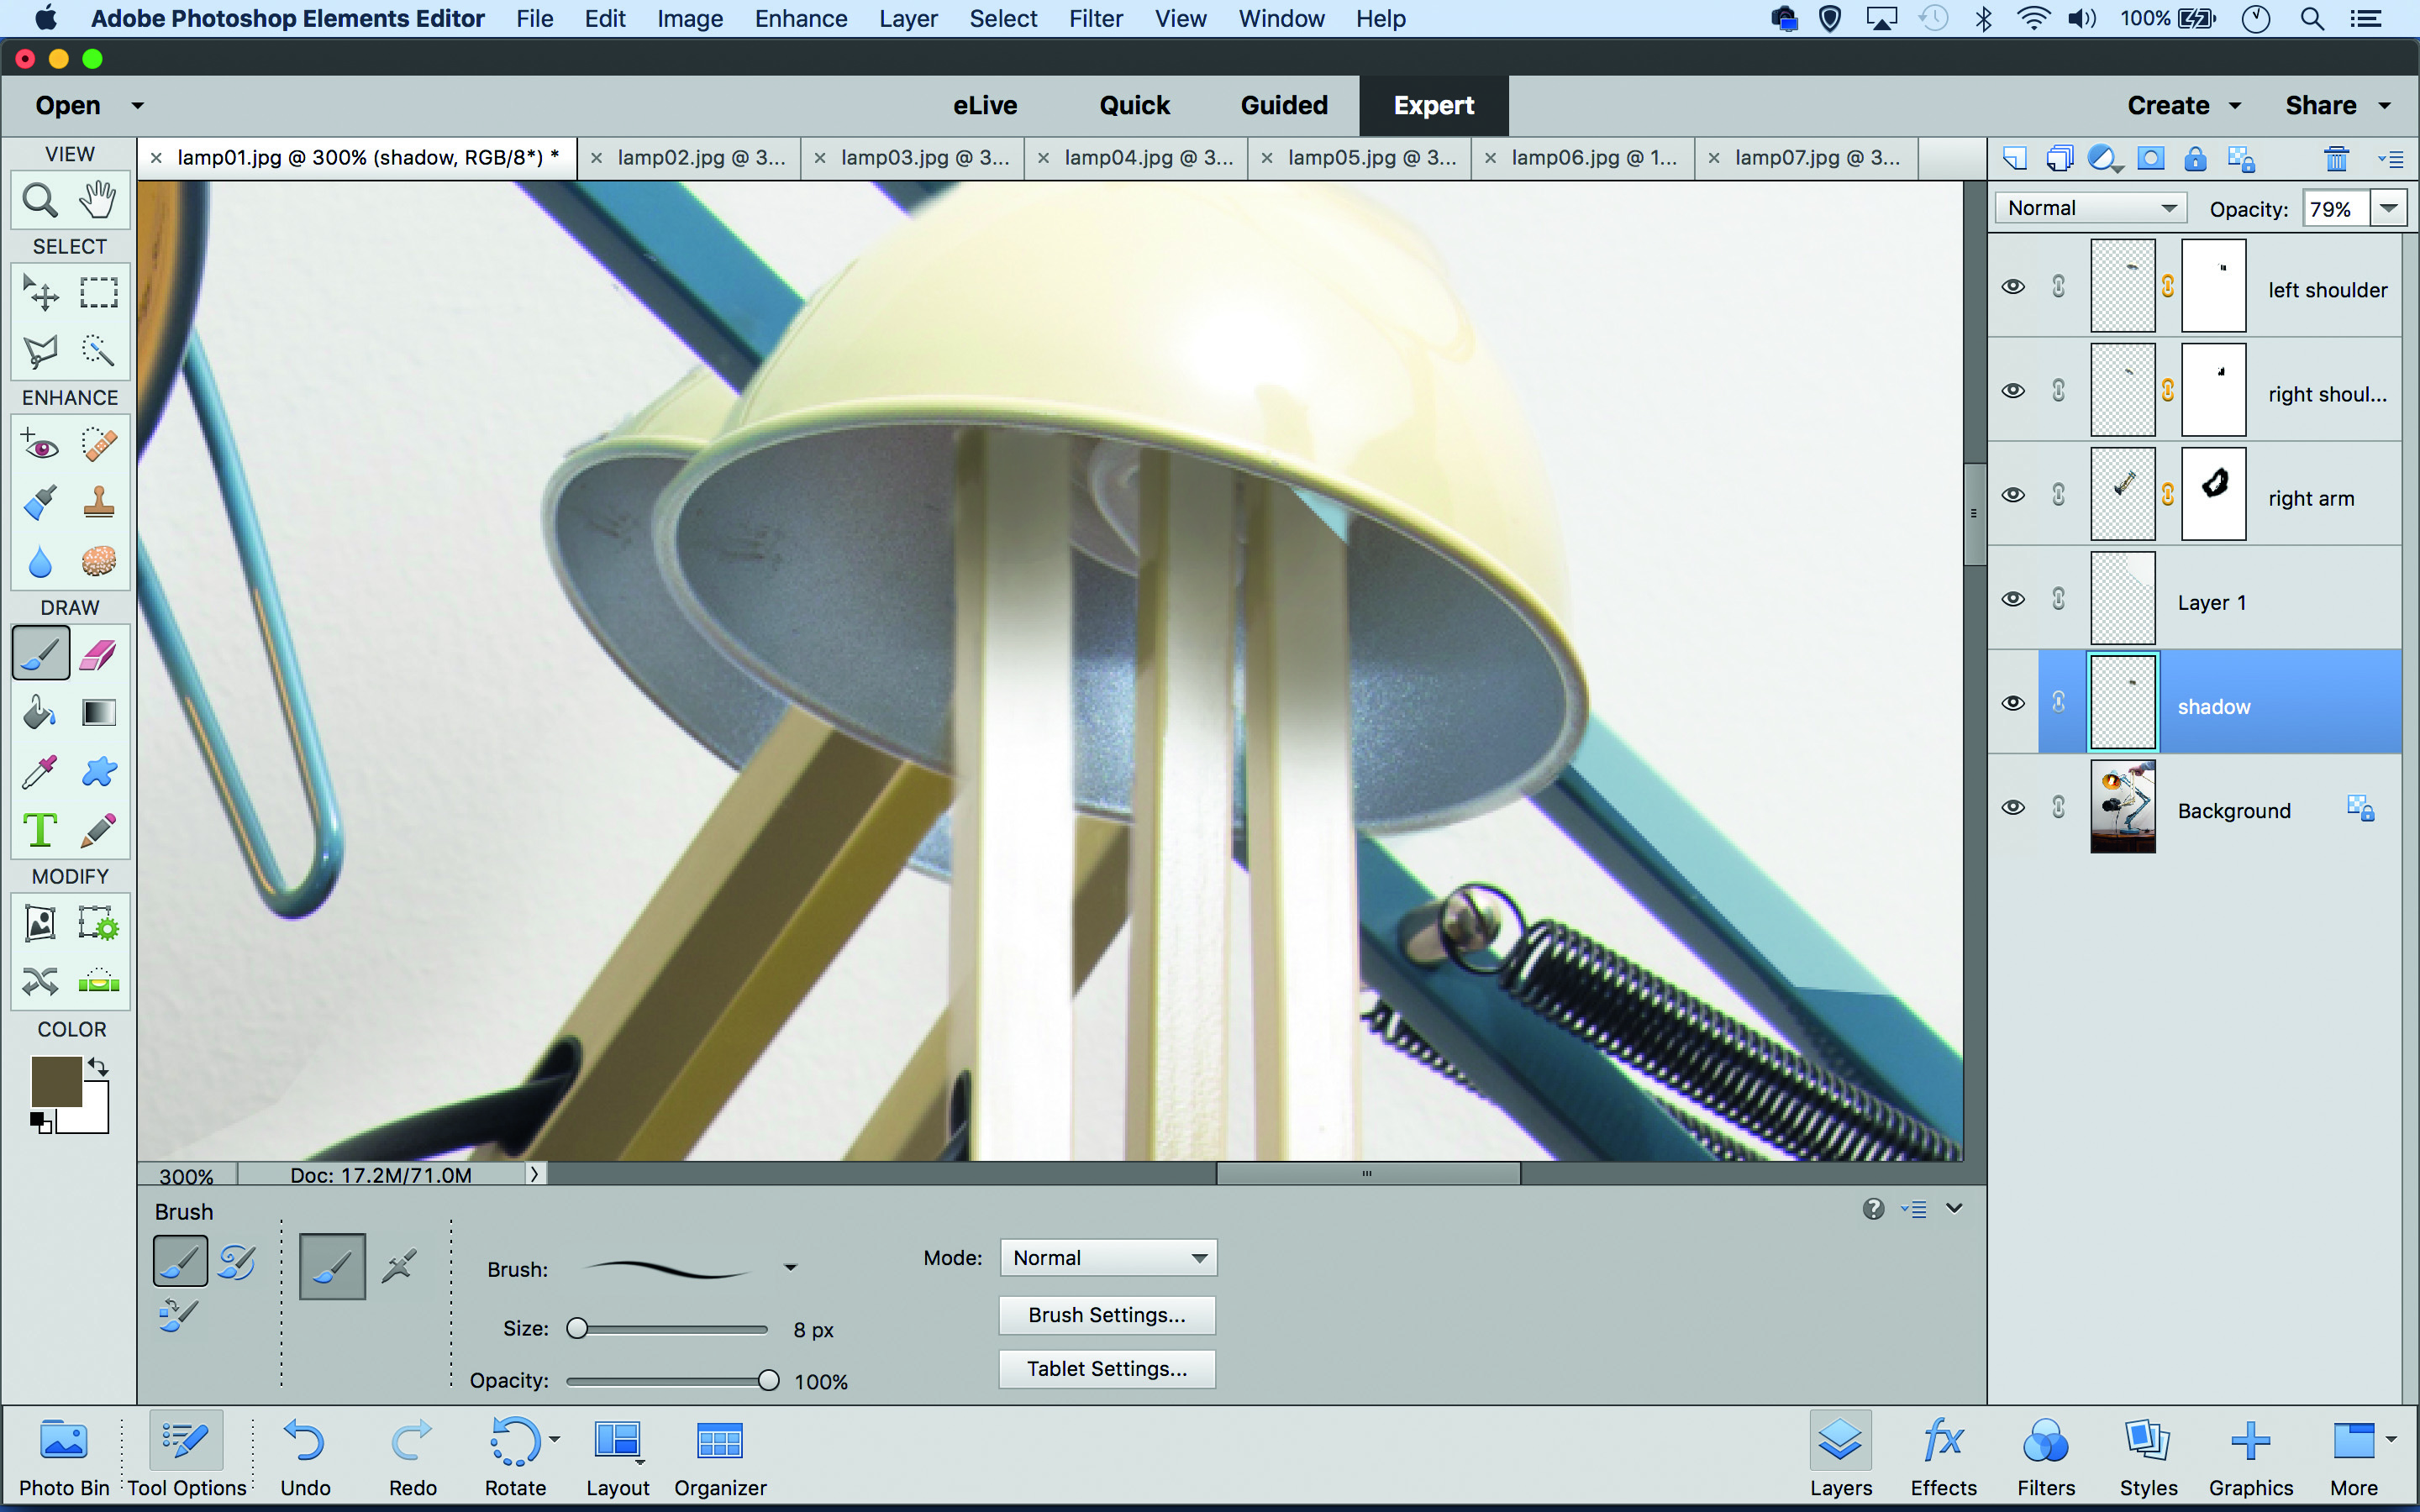
Hit Ctrl+J to copy the shoulder. Highlight the lower layer, delete the layer mask and mask it to make a new shoulder behind the first. Add a new layer above the ‘Background’ layer. Alt-click to sample a shadow area then paint in shadows where the arm meets shoulder.
06 BUILD THE BODY
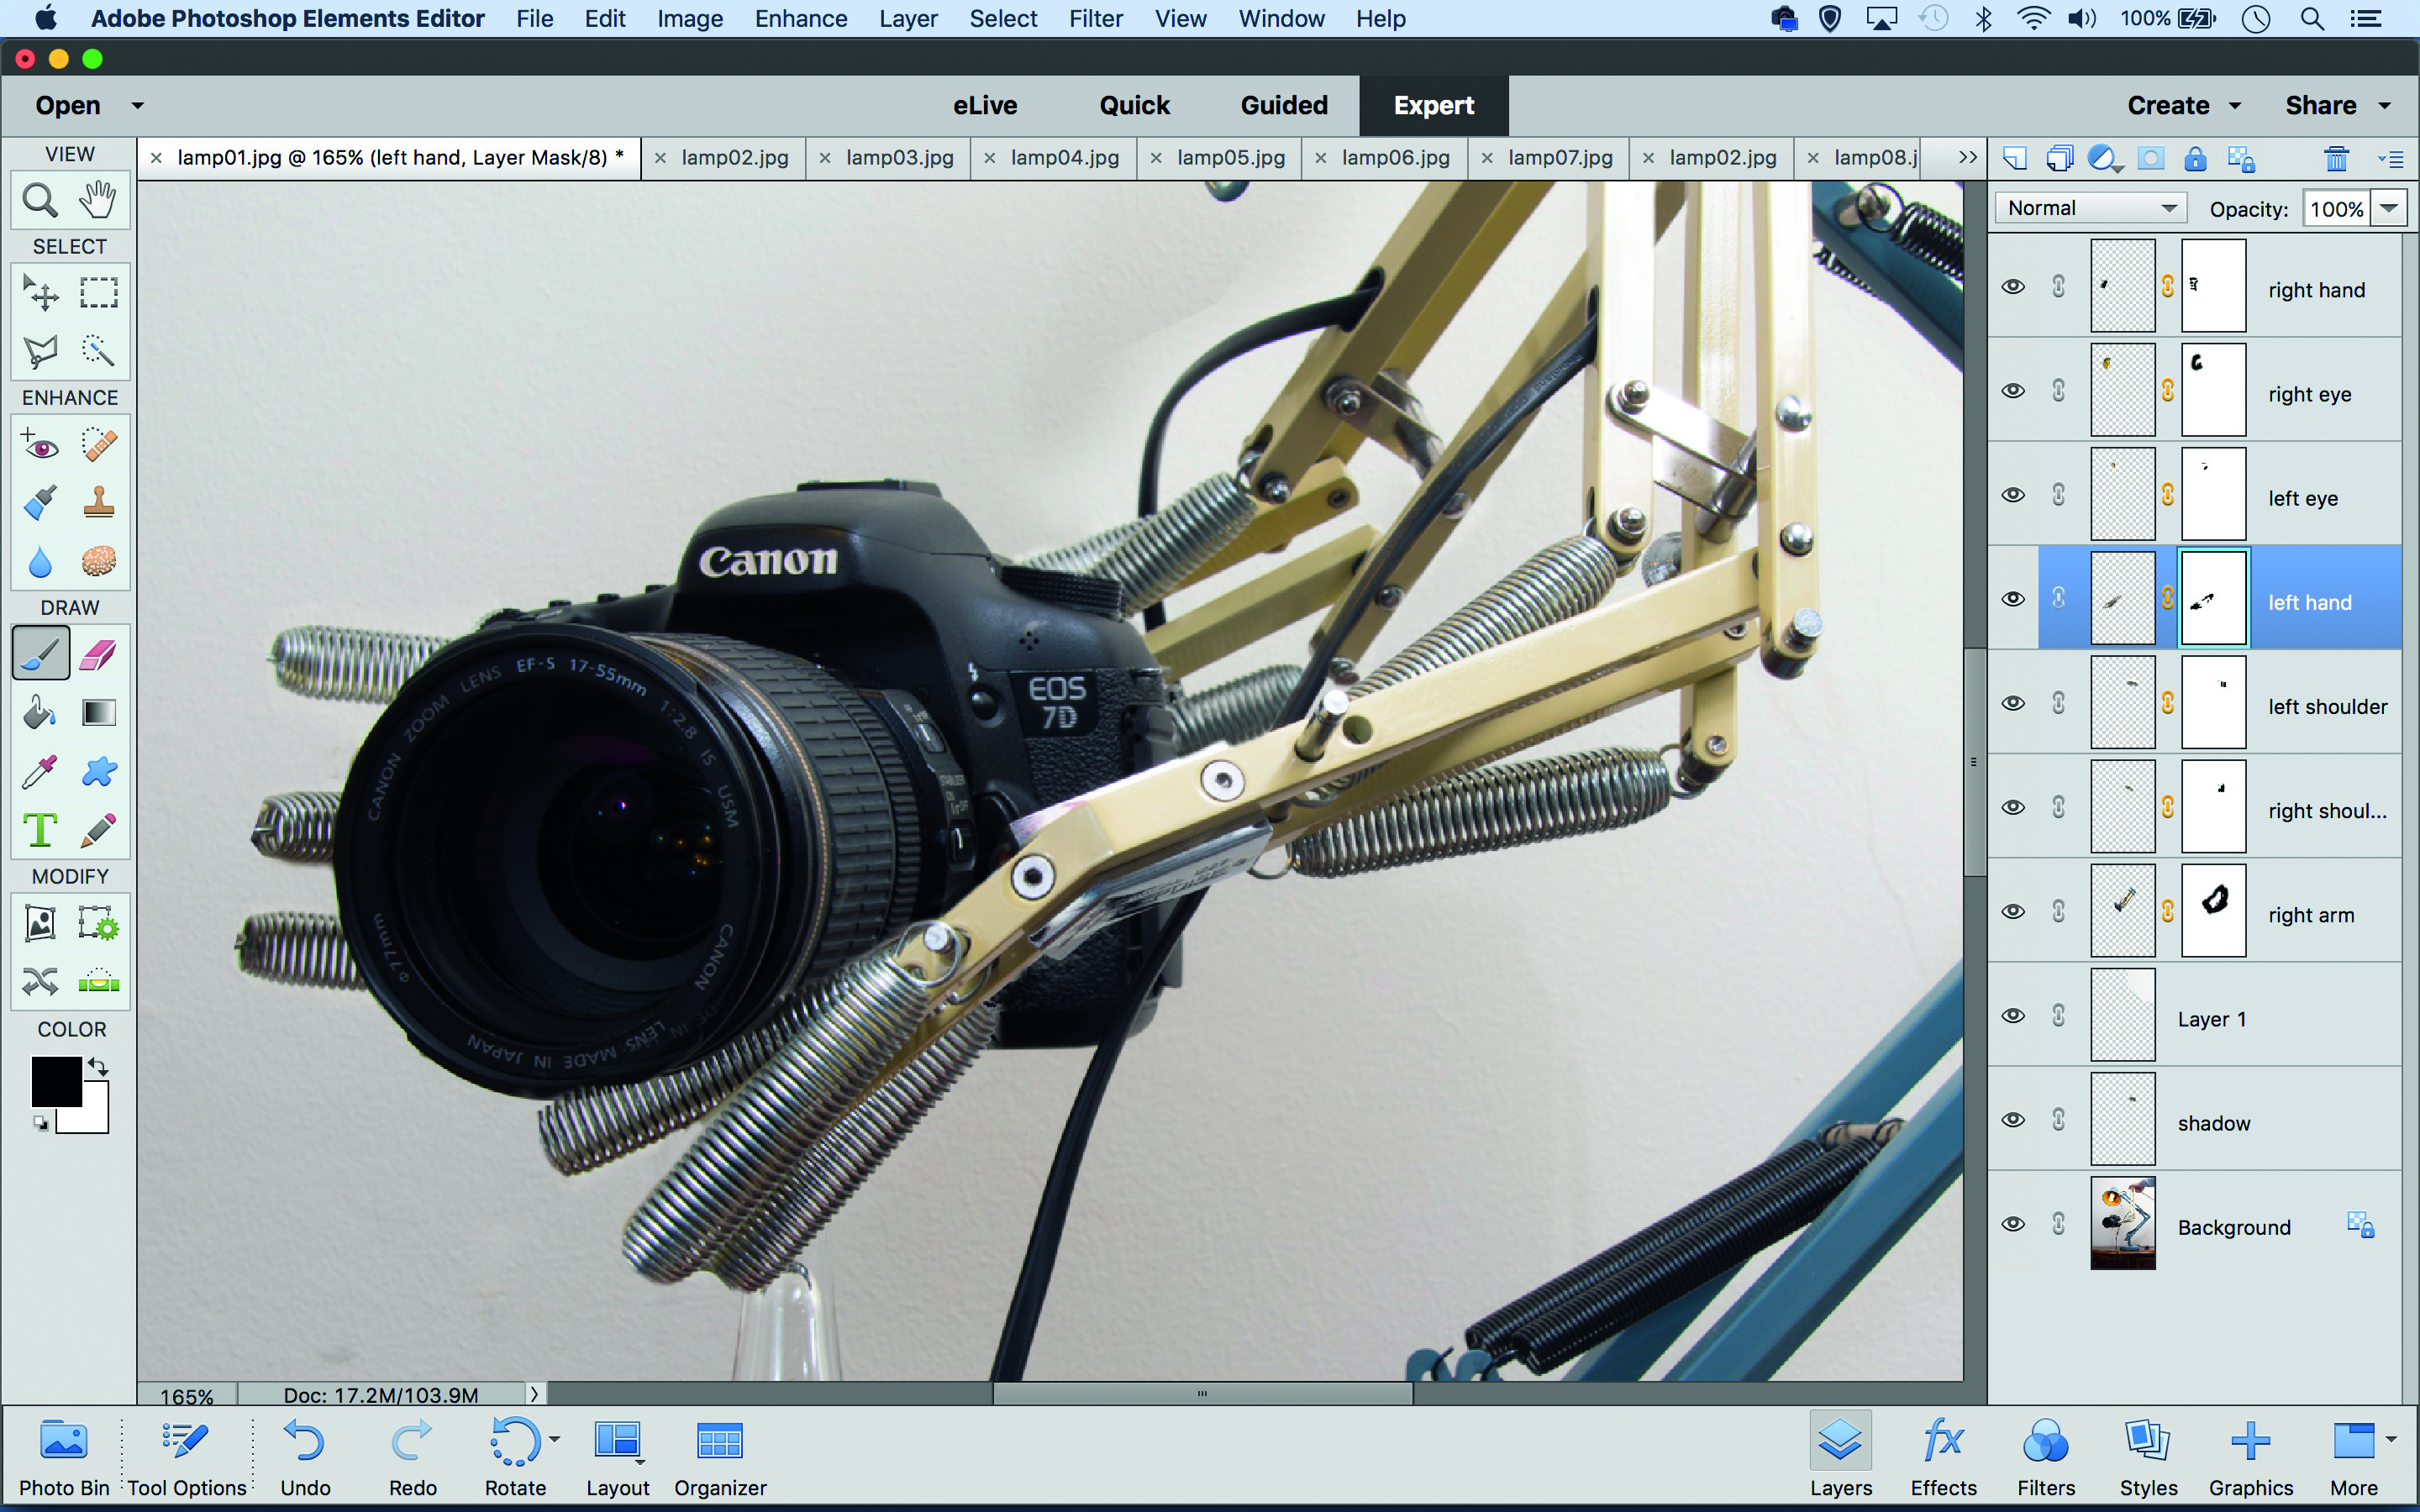
Copy and paste in the ‘eyes’. Then make a selection of the ‘hand’ in lamp02, paste it in, transform it to fit and blend with a mask. Repeat for the other hand. Next, make a new layer. Use the Spot Healing and Clone tool (set to ‘Sample All Layers’) to tidy any messy areas.
The lead technique writer on Digital Camera Magazine, PhotoPlus: The Canon Magazine and N-Photo: The Nikon Magazine, James is a fantastic general practice photographer with an enviable array of skills across every genre of photography.
Whether it's flash photography techniques like stroboscopic portraits, astrophotography projects like photographing the Northern Lights, or turning sound into art by making paint dance on a set of speakers, James' tutorials and projects are as creative as they are enjoyable.
He's also a wizard at the dark arts of Photoshop, Lightroom and Affinity Photo, and is capable of some genuine black magic in the digital darkroom, making him one of the leading authorities on photo editing software and techniques.


