Learn how to unlock stunning natural colors in your photos
Get the maximum impact in your landscapes while retaining a natural look and feel
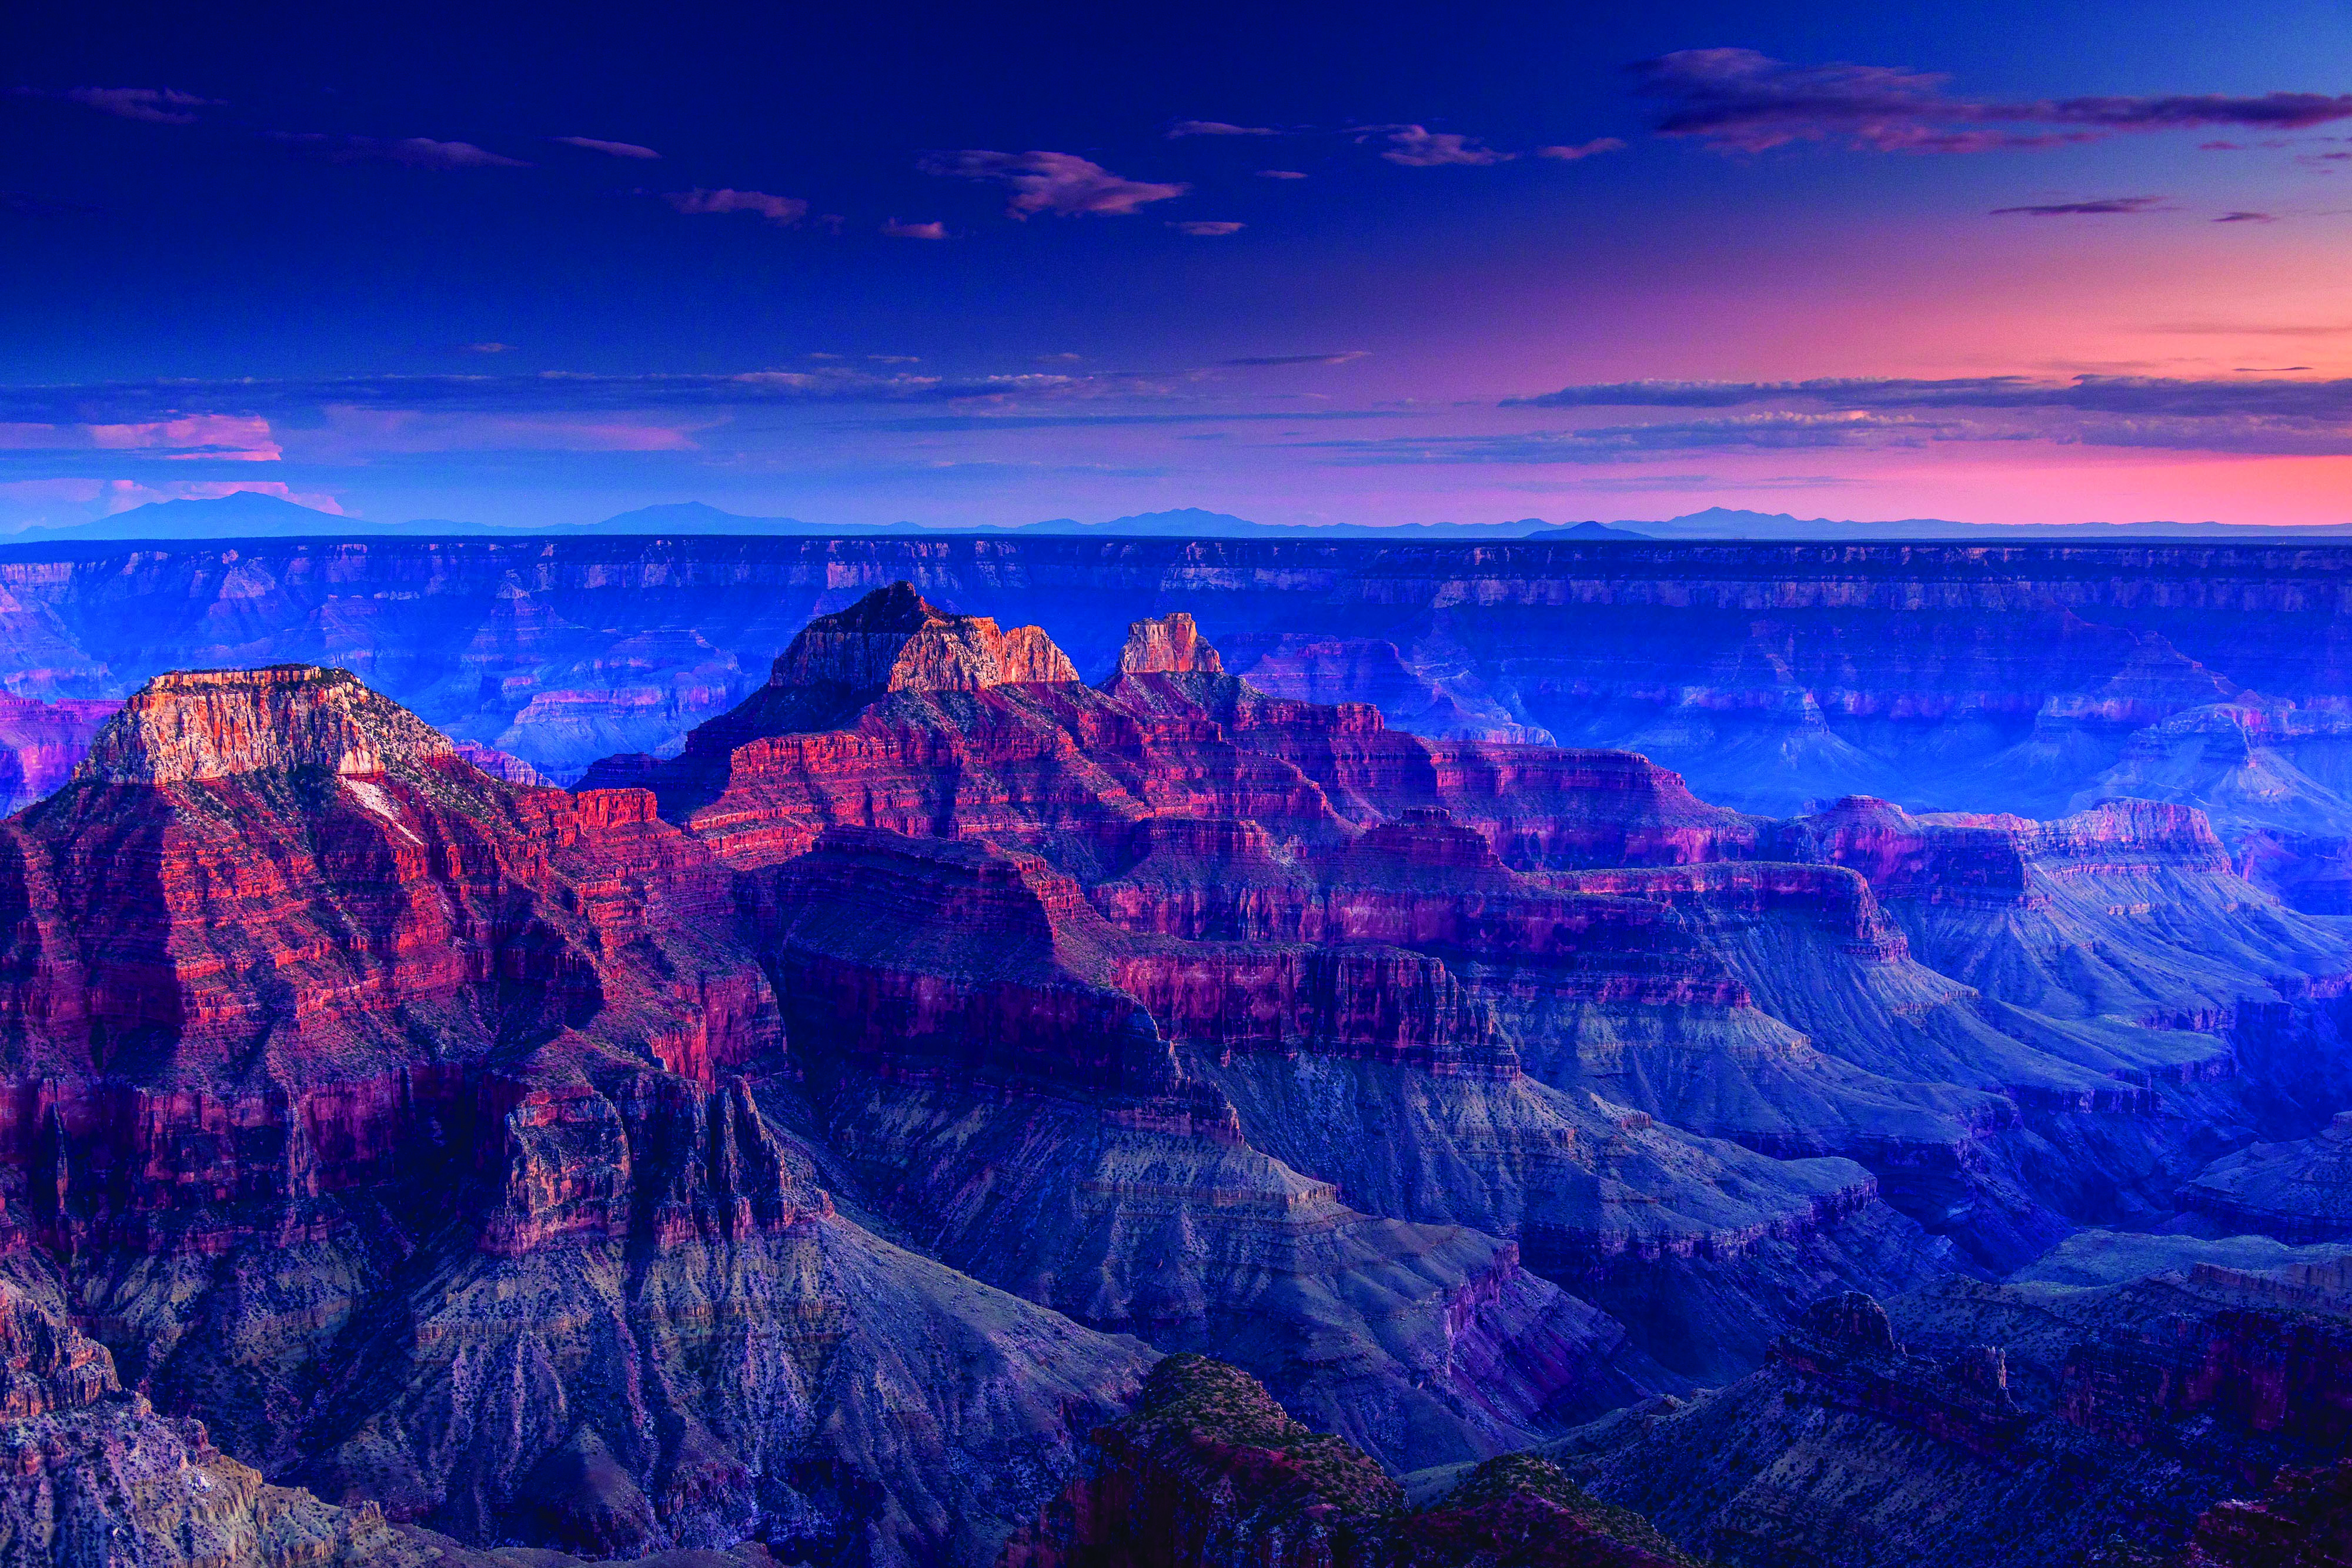
© Daniel Holmes
Keep it real
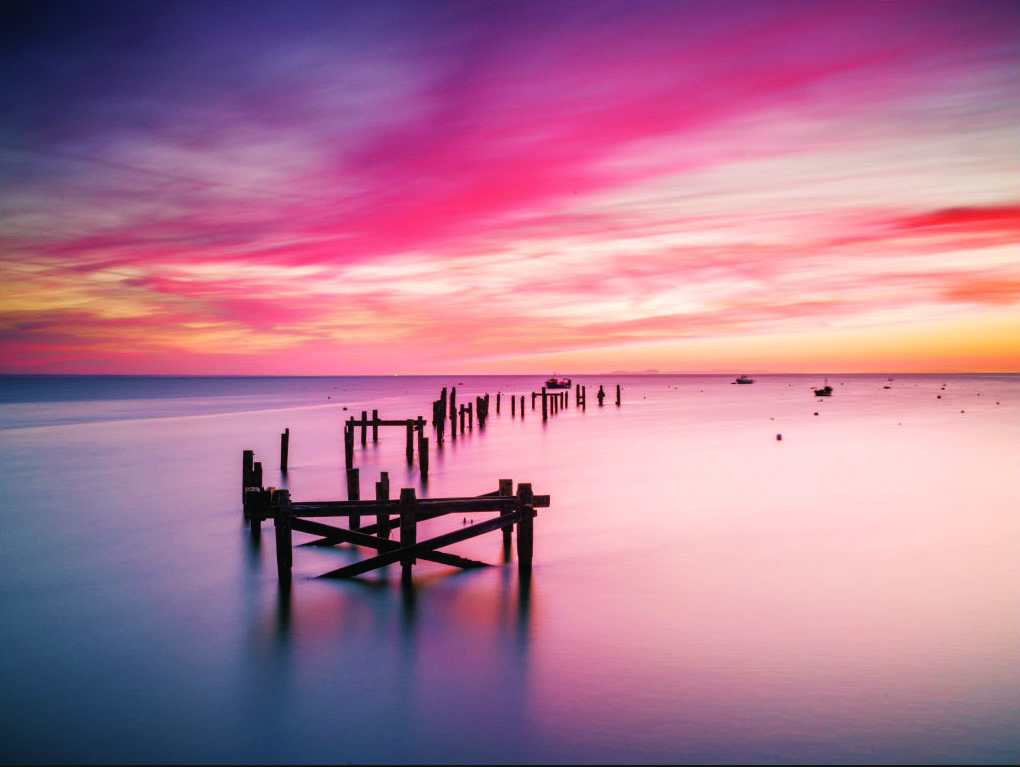
The sun creates stunning colorful effects on the landscape that, when captured correctly, will create a strikingly beautiful capture
Color is a constant presence, and many photographers strive to capture the multitude of hues our eyes are able to see. Color photography can be more difficult than black and white because there are so many variables to consider: so many variations of color and so many compositional implications and hurdles that including color in your frame will cause.
The human eye is able to see a certain range, or gamut, of colors. However, there is a completely different gamut that your camera is able to see, and a different one again that you are able to print – the range gets smaller the further through the process you go. This is why it is so important that you take the time to understand the colors that you are shooting and how to get the most out of them.
Through the following photography tips, you’ll learn how the nature and quality of light, as well as the time of day, affects the color you are able to capture. You’ll find out what part the weather plays in your color photography, and discover the importance of capturing complementary and harmonising colors for the most striking and impactful imagery. Of course, you’ll also learn how to edit your photos to produce the most punchy yet natural color images.
INTERPRET THE LIGHT
Discover how this essential element influences the colors that you can capture
Many photographers choose to use a polariser to combat the high-contrast situations that the harsh midday sun can create. However, this can often make the sky look unrealistically dark and too blue, so keep an eye on this if you do use them.
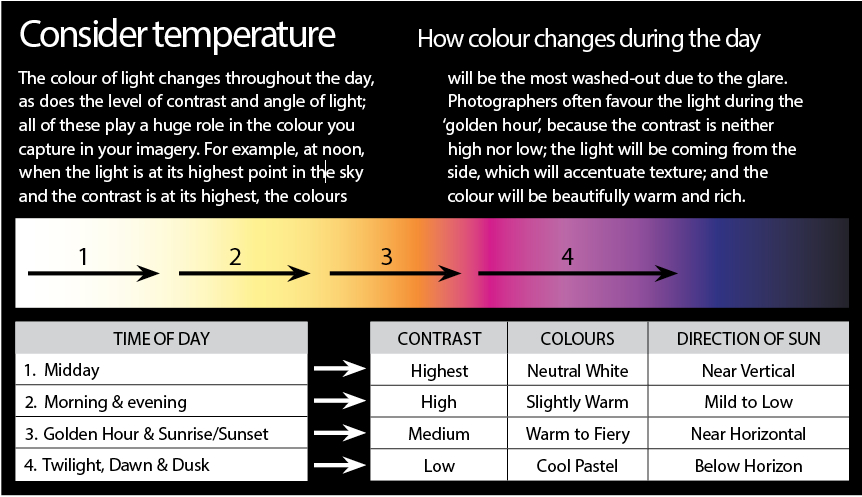
Light plays a huge role in the color that we see, and the colors that we capture in our imagery. Light intensity and the color of the light itself are the main factors to consider. As the sun moves in the sky, the nature, quality and intensity of the light also changes, which affects how we perceive the color in a scene.
“As night changes into day, the color evolves from cold dark blues through to warm sunrise colors, and then into cooler blues as the sun rises above the horizon,” explains landscape and events photographer Daniel Holmes. “Midday colors are a bit overwhelmed by the harsh light beaming straight down from the sun.
“The process reverses itself as the sun goes down and the atmosphere filters out many of those scattered light rays, leaving blues, reds, oranges and yellows. The break of day and night provide the most pleasing and dramatic color. This is when the atmosphere filters out many of the shorter blue rays of light, leaving cleaner and more saturated primary colors.
“The quality of color is also affected by the direction of the light. As one turns in a circle, the most pleasing combination of colors and shadows are found by looking perpendicular to the sun; the least interesting by looking directly away from the sun; and the most dramatic by looking directly at the sun.”
The color of the light in your scene will also affect how the colors look in the capture. Light is measured in color temperature, with a low color temperature producing a more yellow quality of light and a high colur temperature producing a bluer light. Low color temperatures will generally warm the colors in the scene, and a high color temperature will cool them. When the color temperature is higher, the contrast is also reduced, so there is less of a difference in the colors of highlights and shadows than with an image shot at a lower color temperature.
“Green is green all day long, but our perception of the color of a patch of grass will be different at noon than it is at sunset,” says landscape and nature photographer Alexis Coram (500px.com/alexiscoram). “As a result, the camera needs a point of reference to understand the light changes to interpret the color as we see it – this is where white balance comes in.
“The best test to understand how color changes is to photograph the same scene at multiple times of the day. One scene never looks the same twice, which is what makes photography so powerful.”
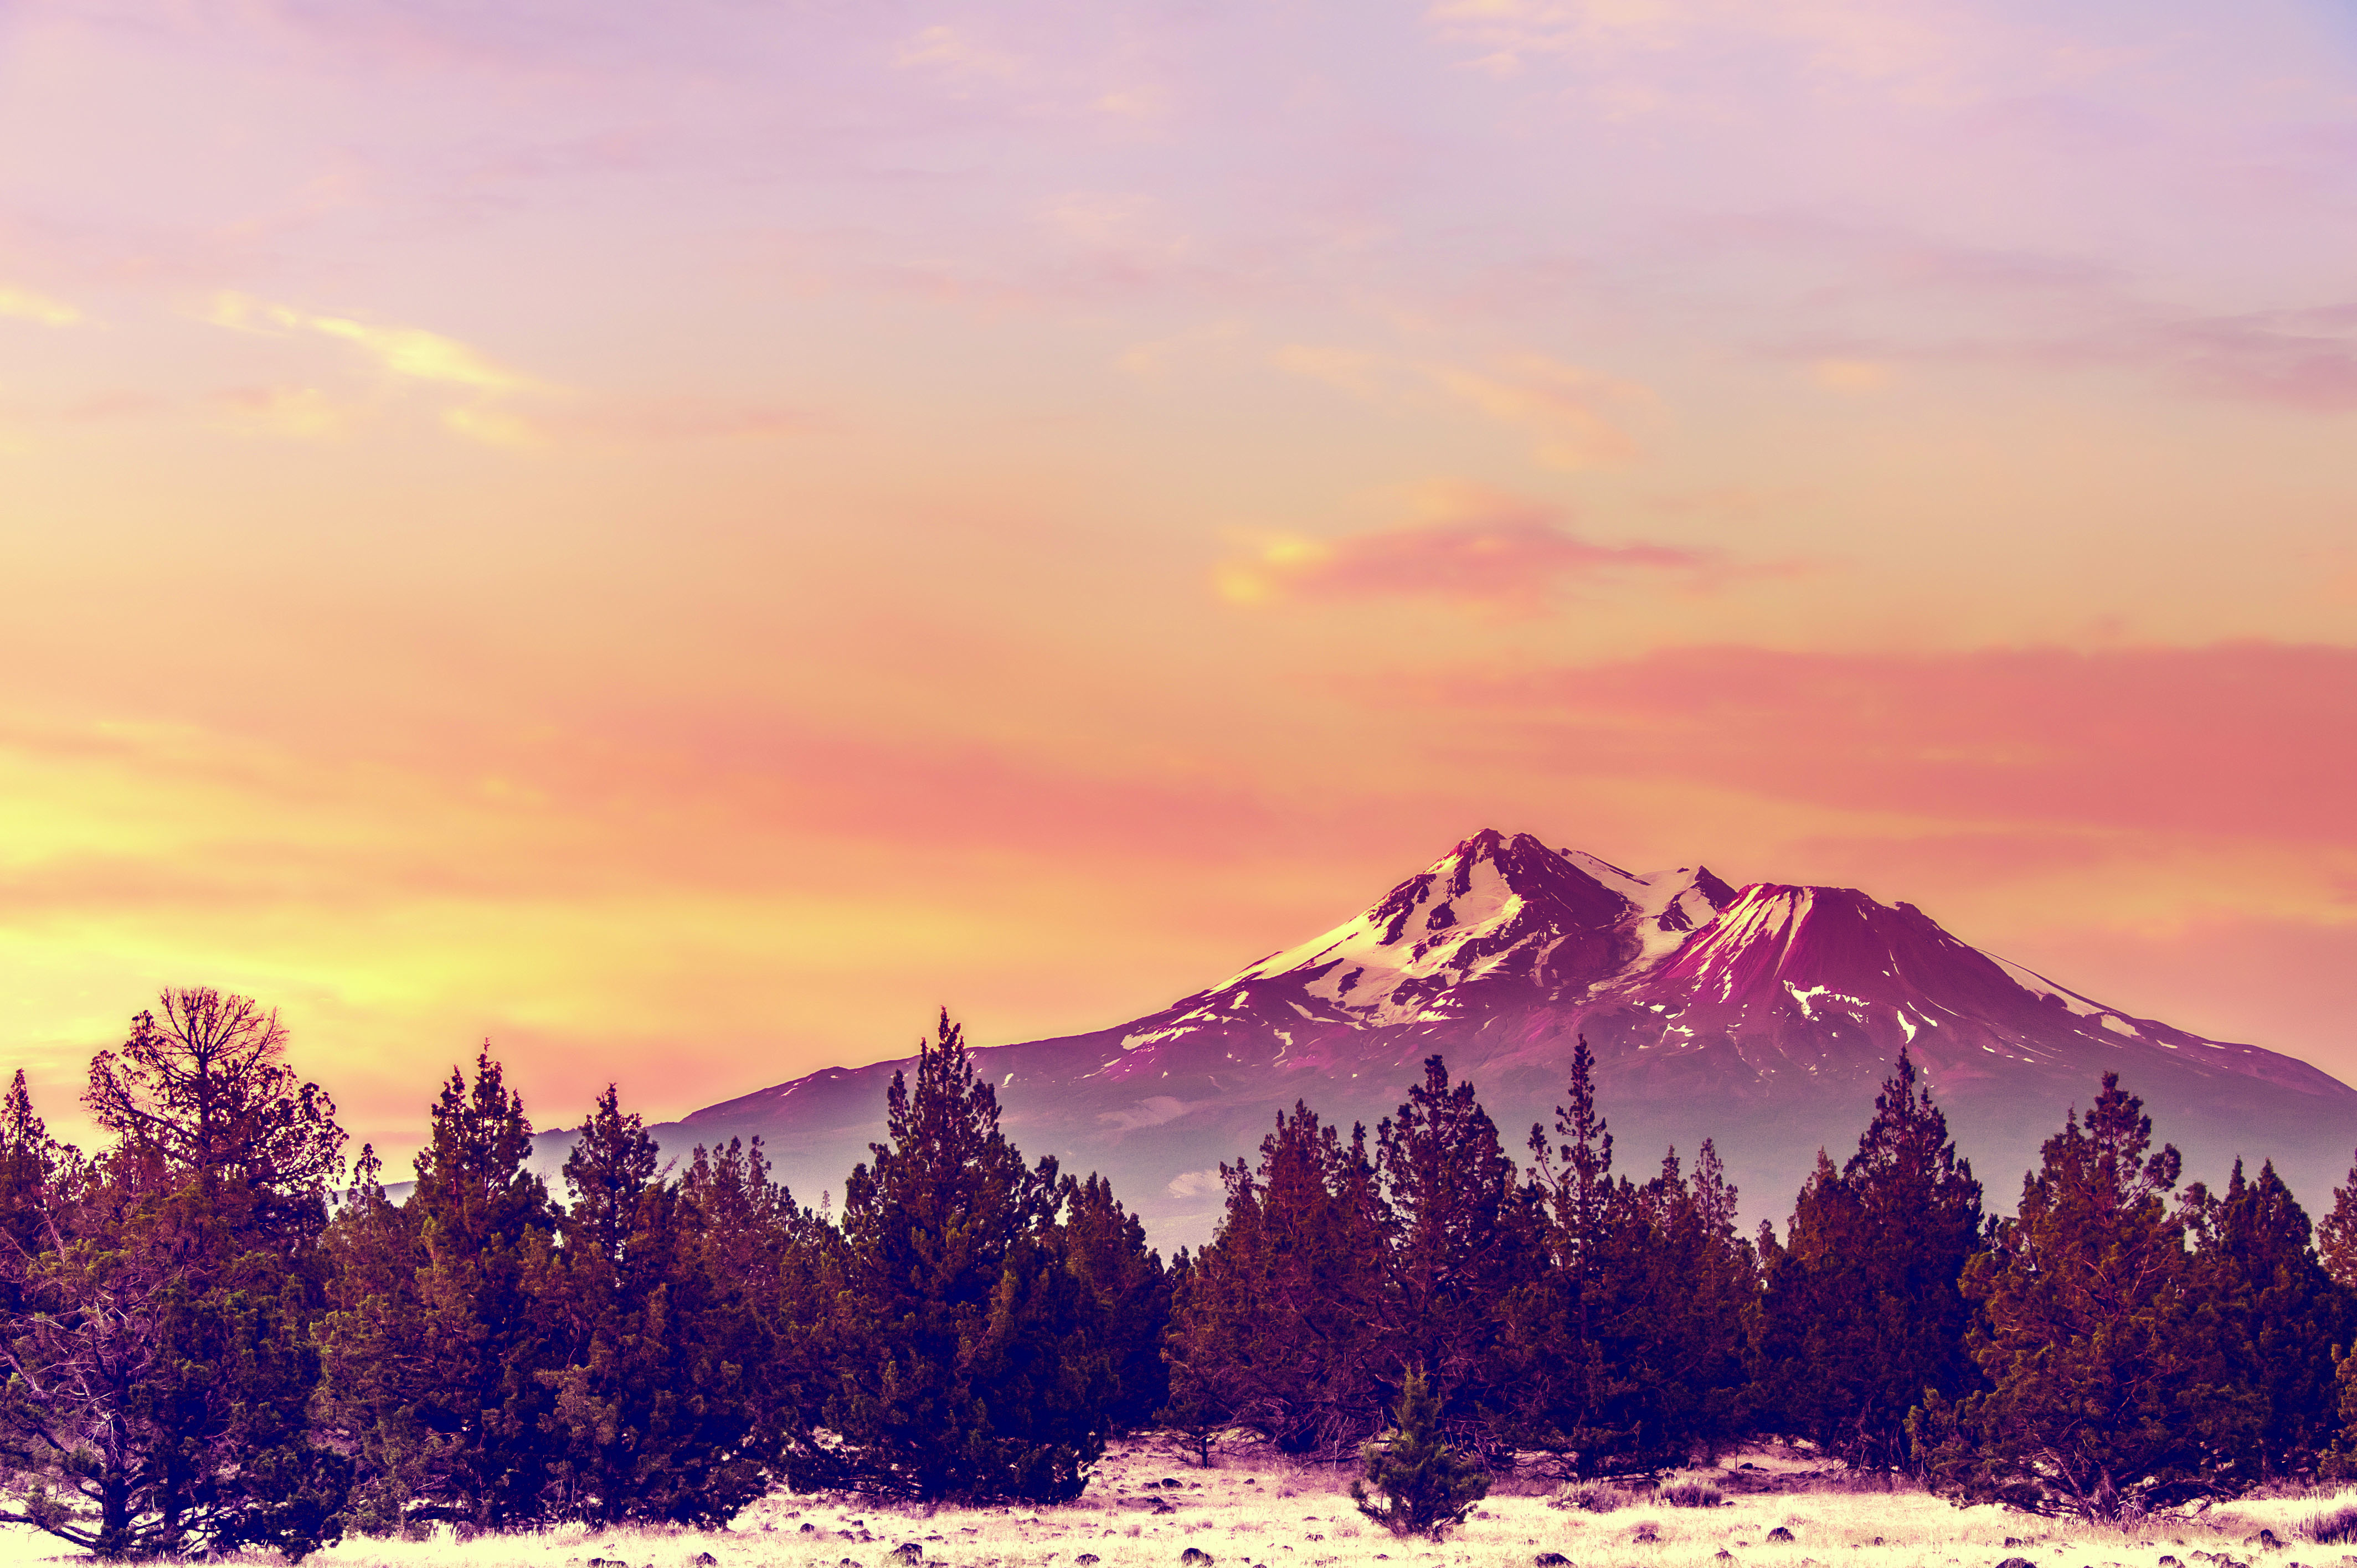
Pre-dawn: Just before the sun rises above the horizon, the light is often a mix of pastel blues and yellows, and often pinks
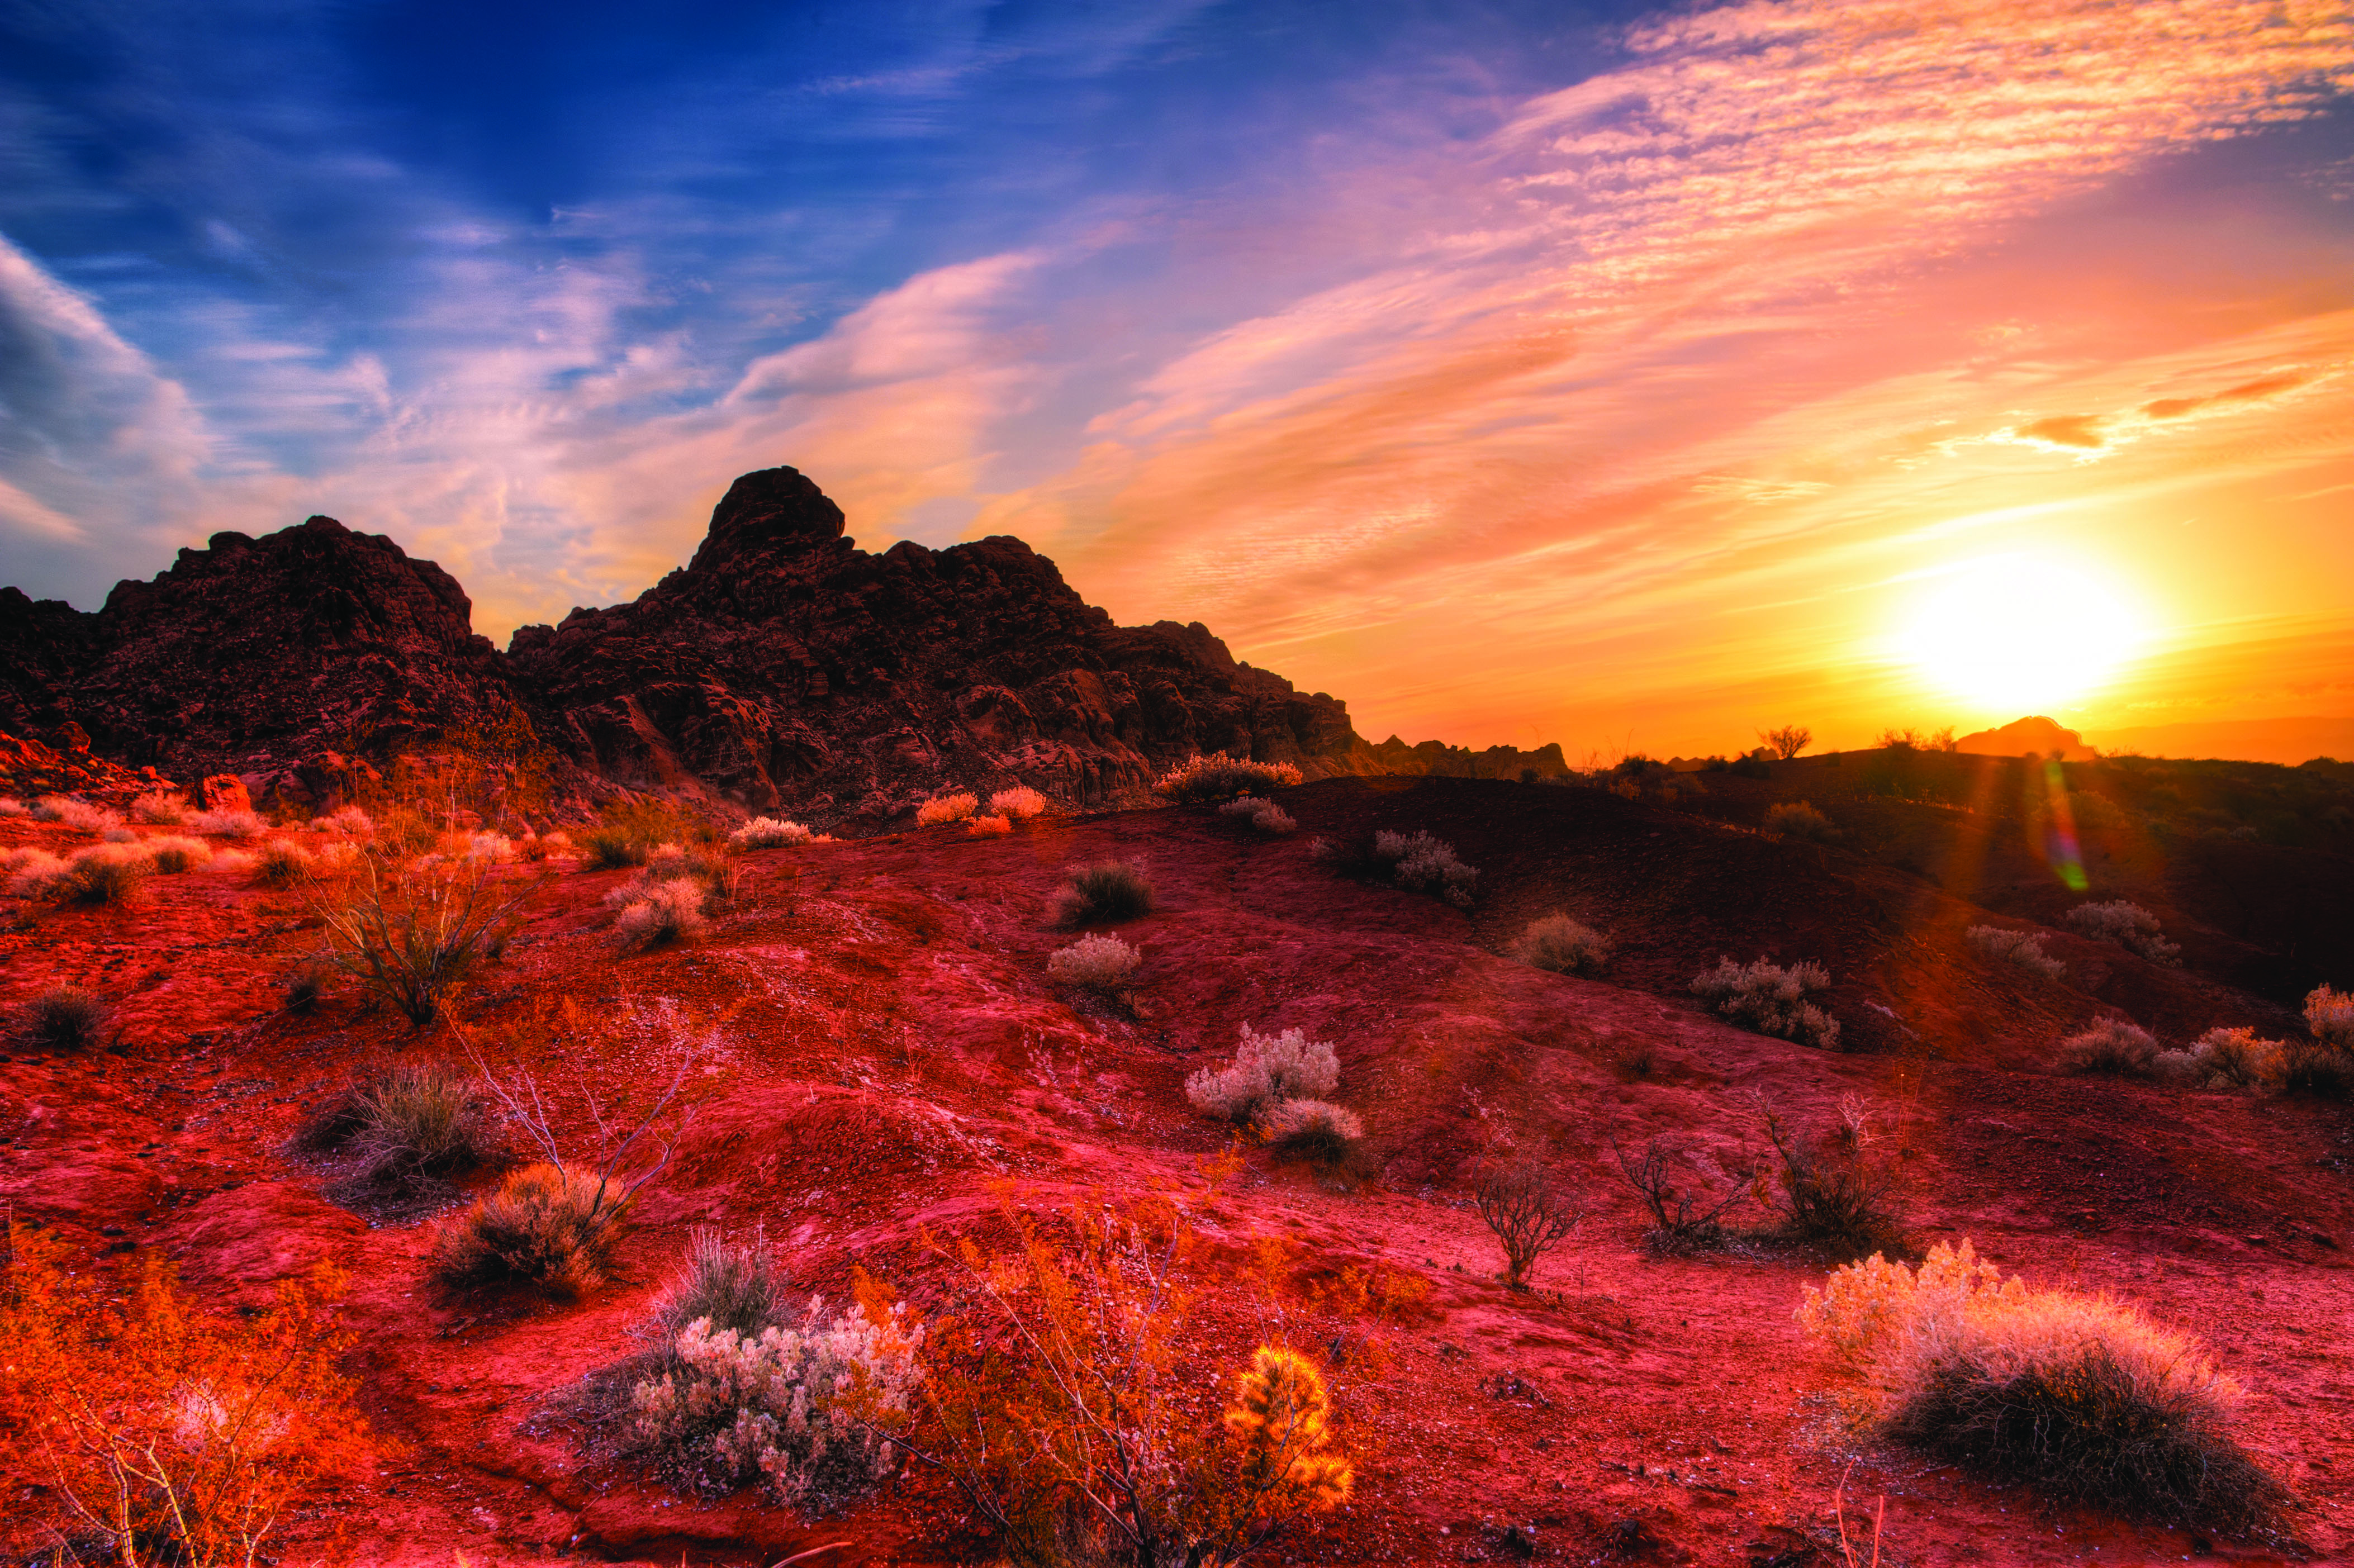
Sunrise: As the sun comes over the horizon, colors become more intense and the contrast rises. The angled light creates attractive shadows
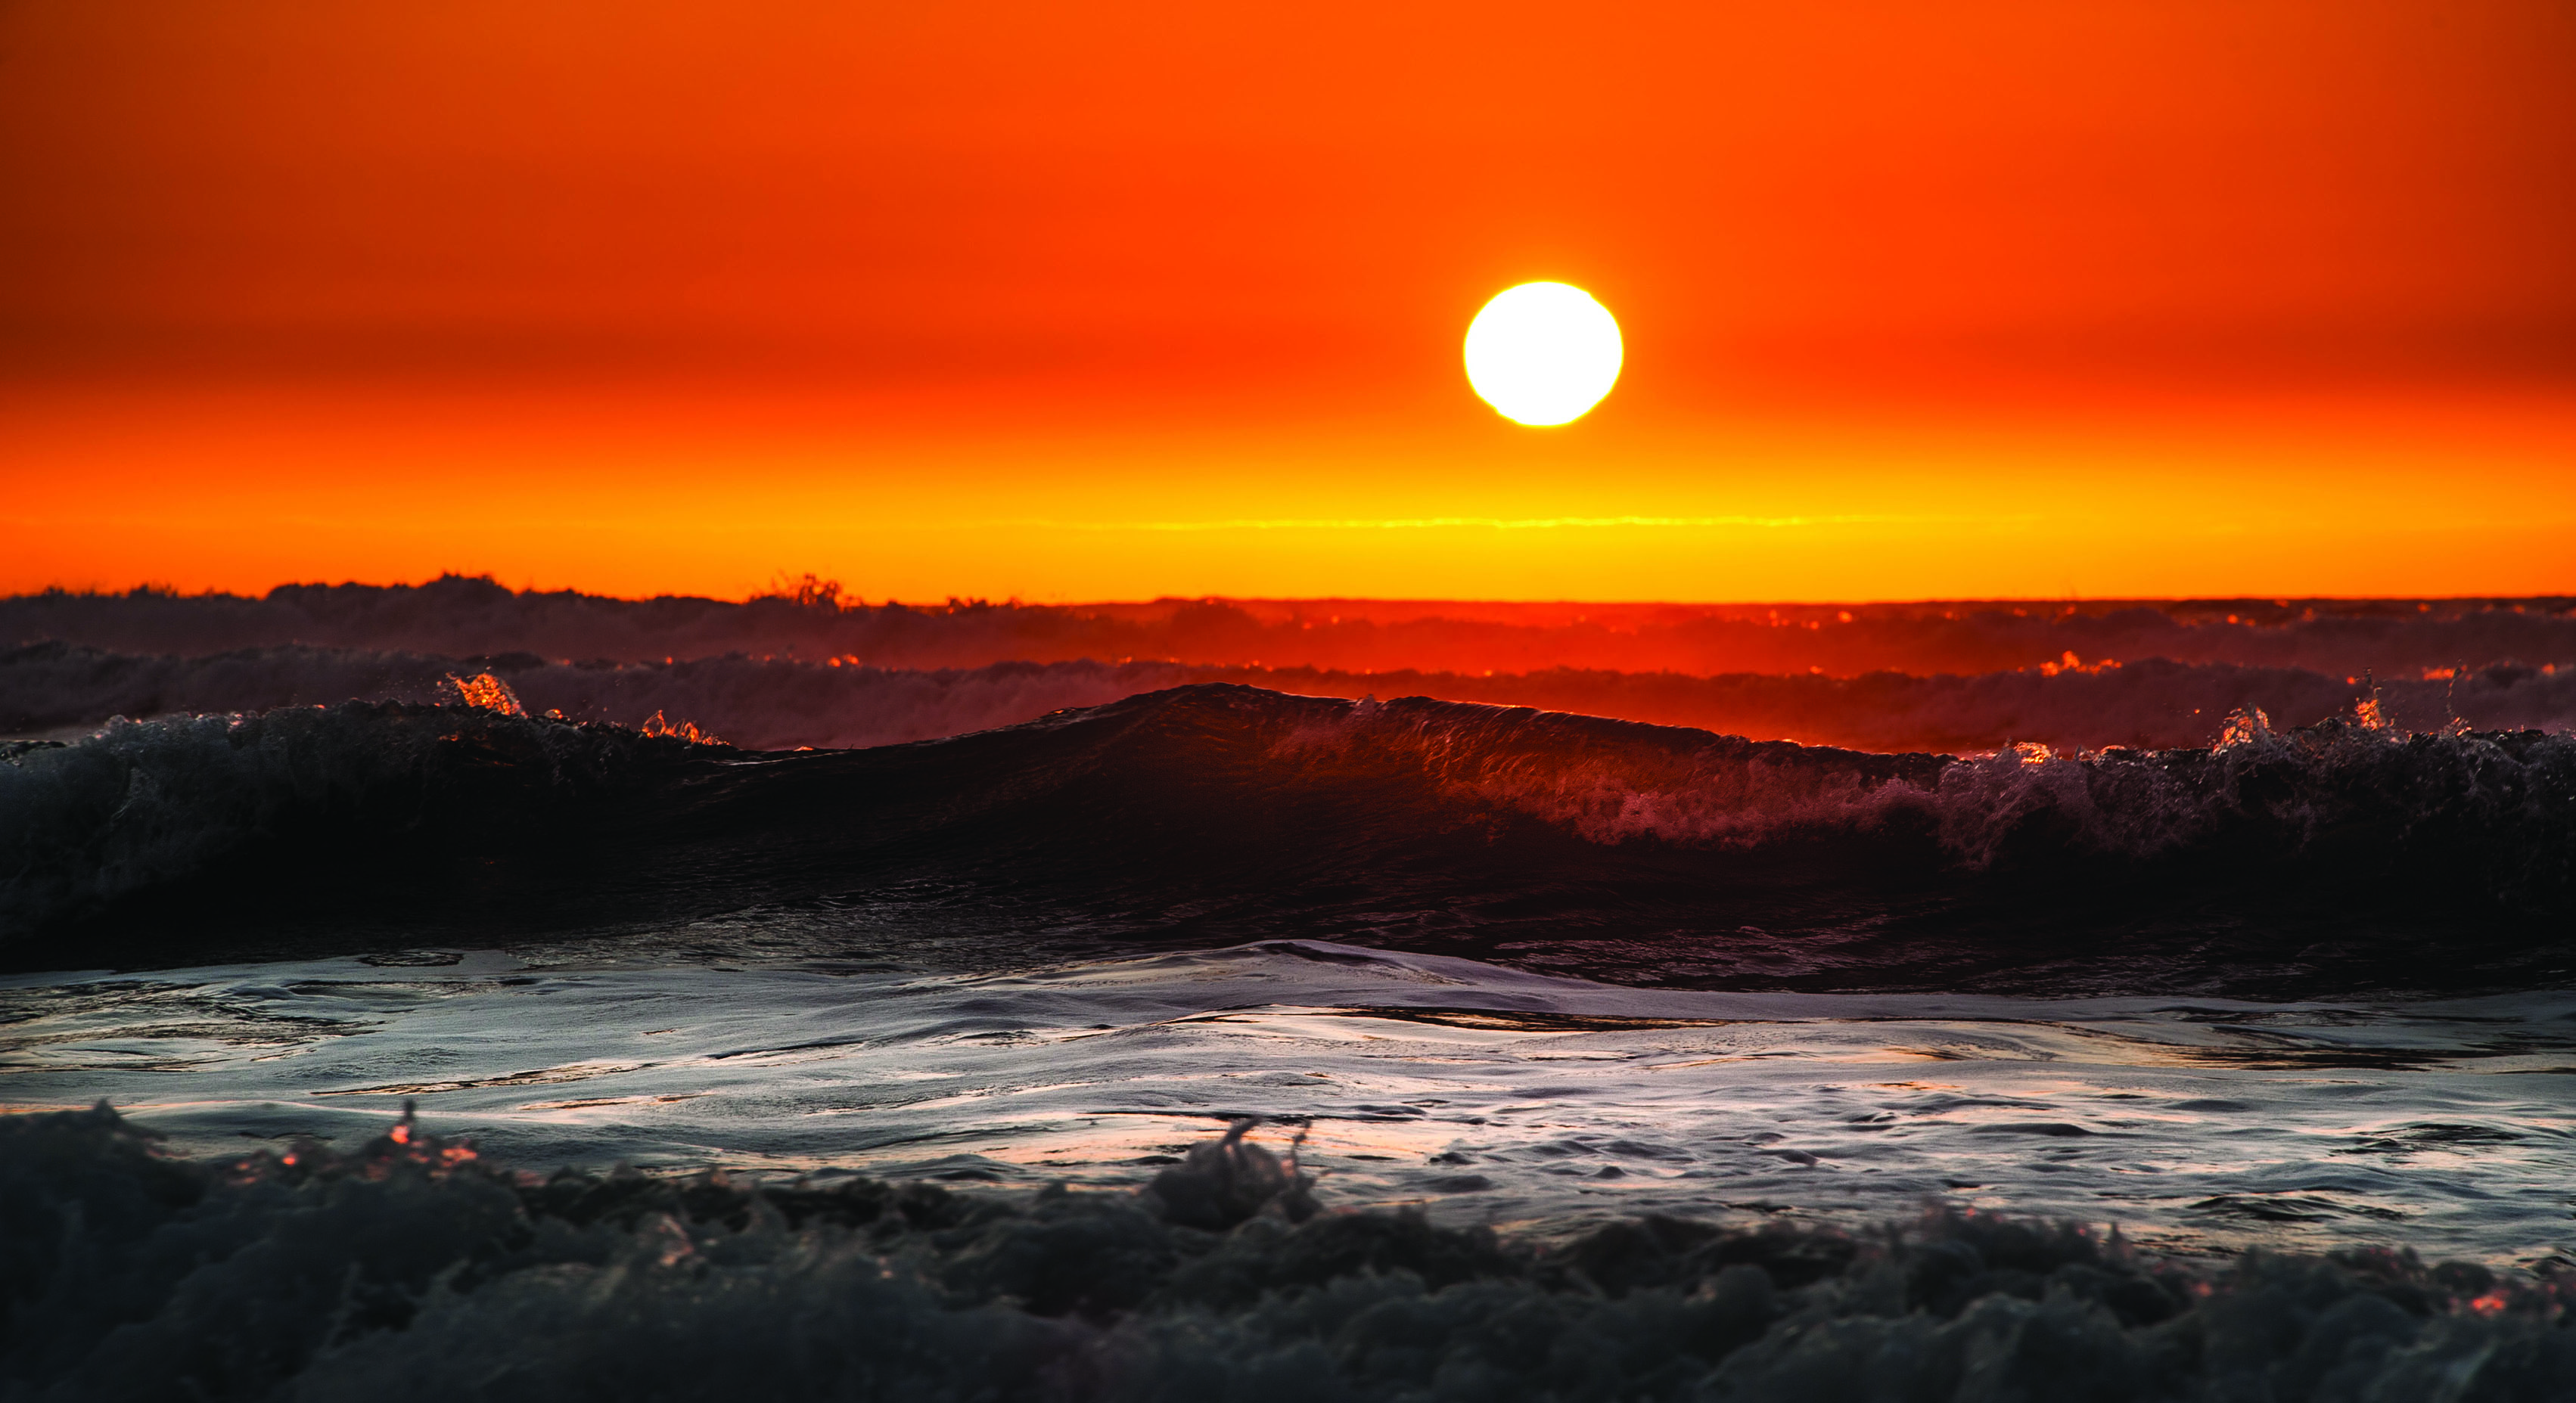
Sunset: An advantage at sunset is the ability to set your camera and tripod up in relatively bright light, but the air can be less clear than at sunrise
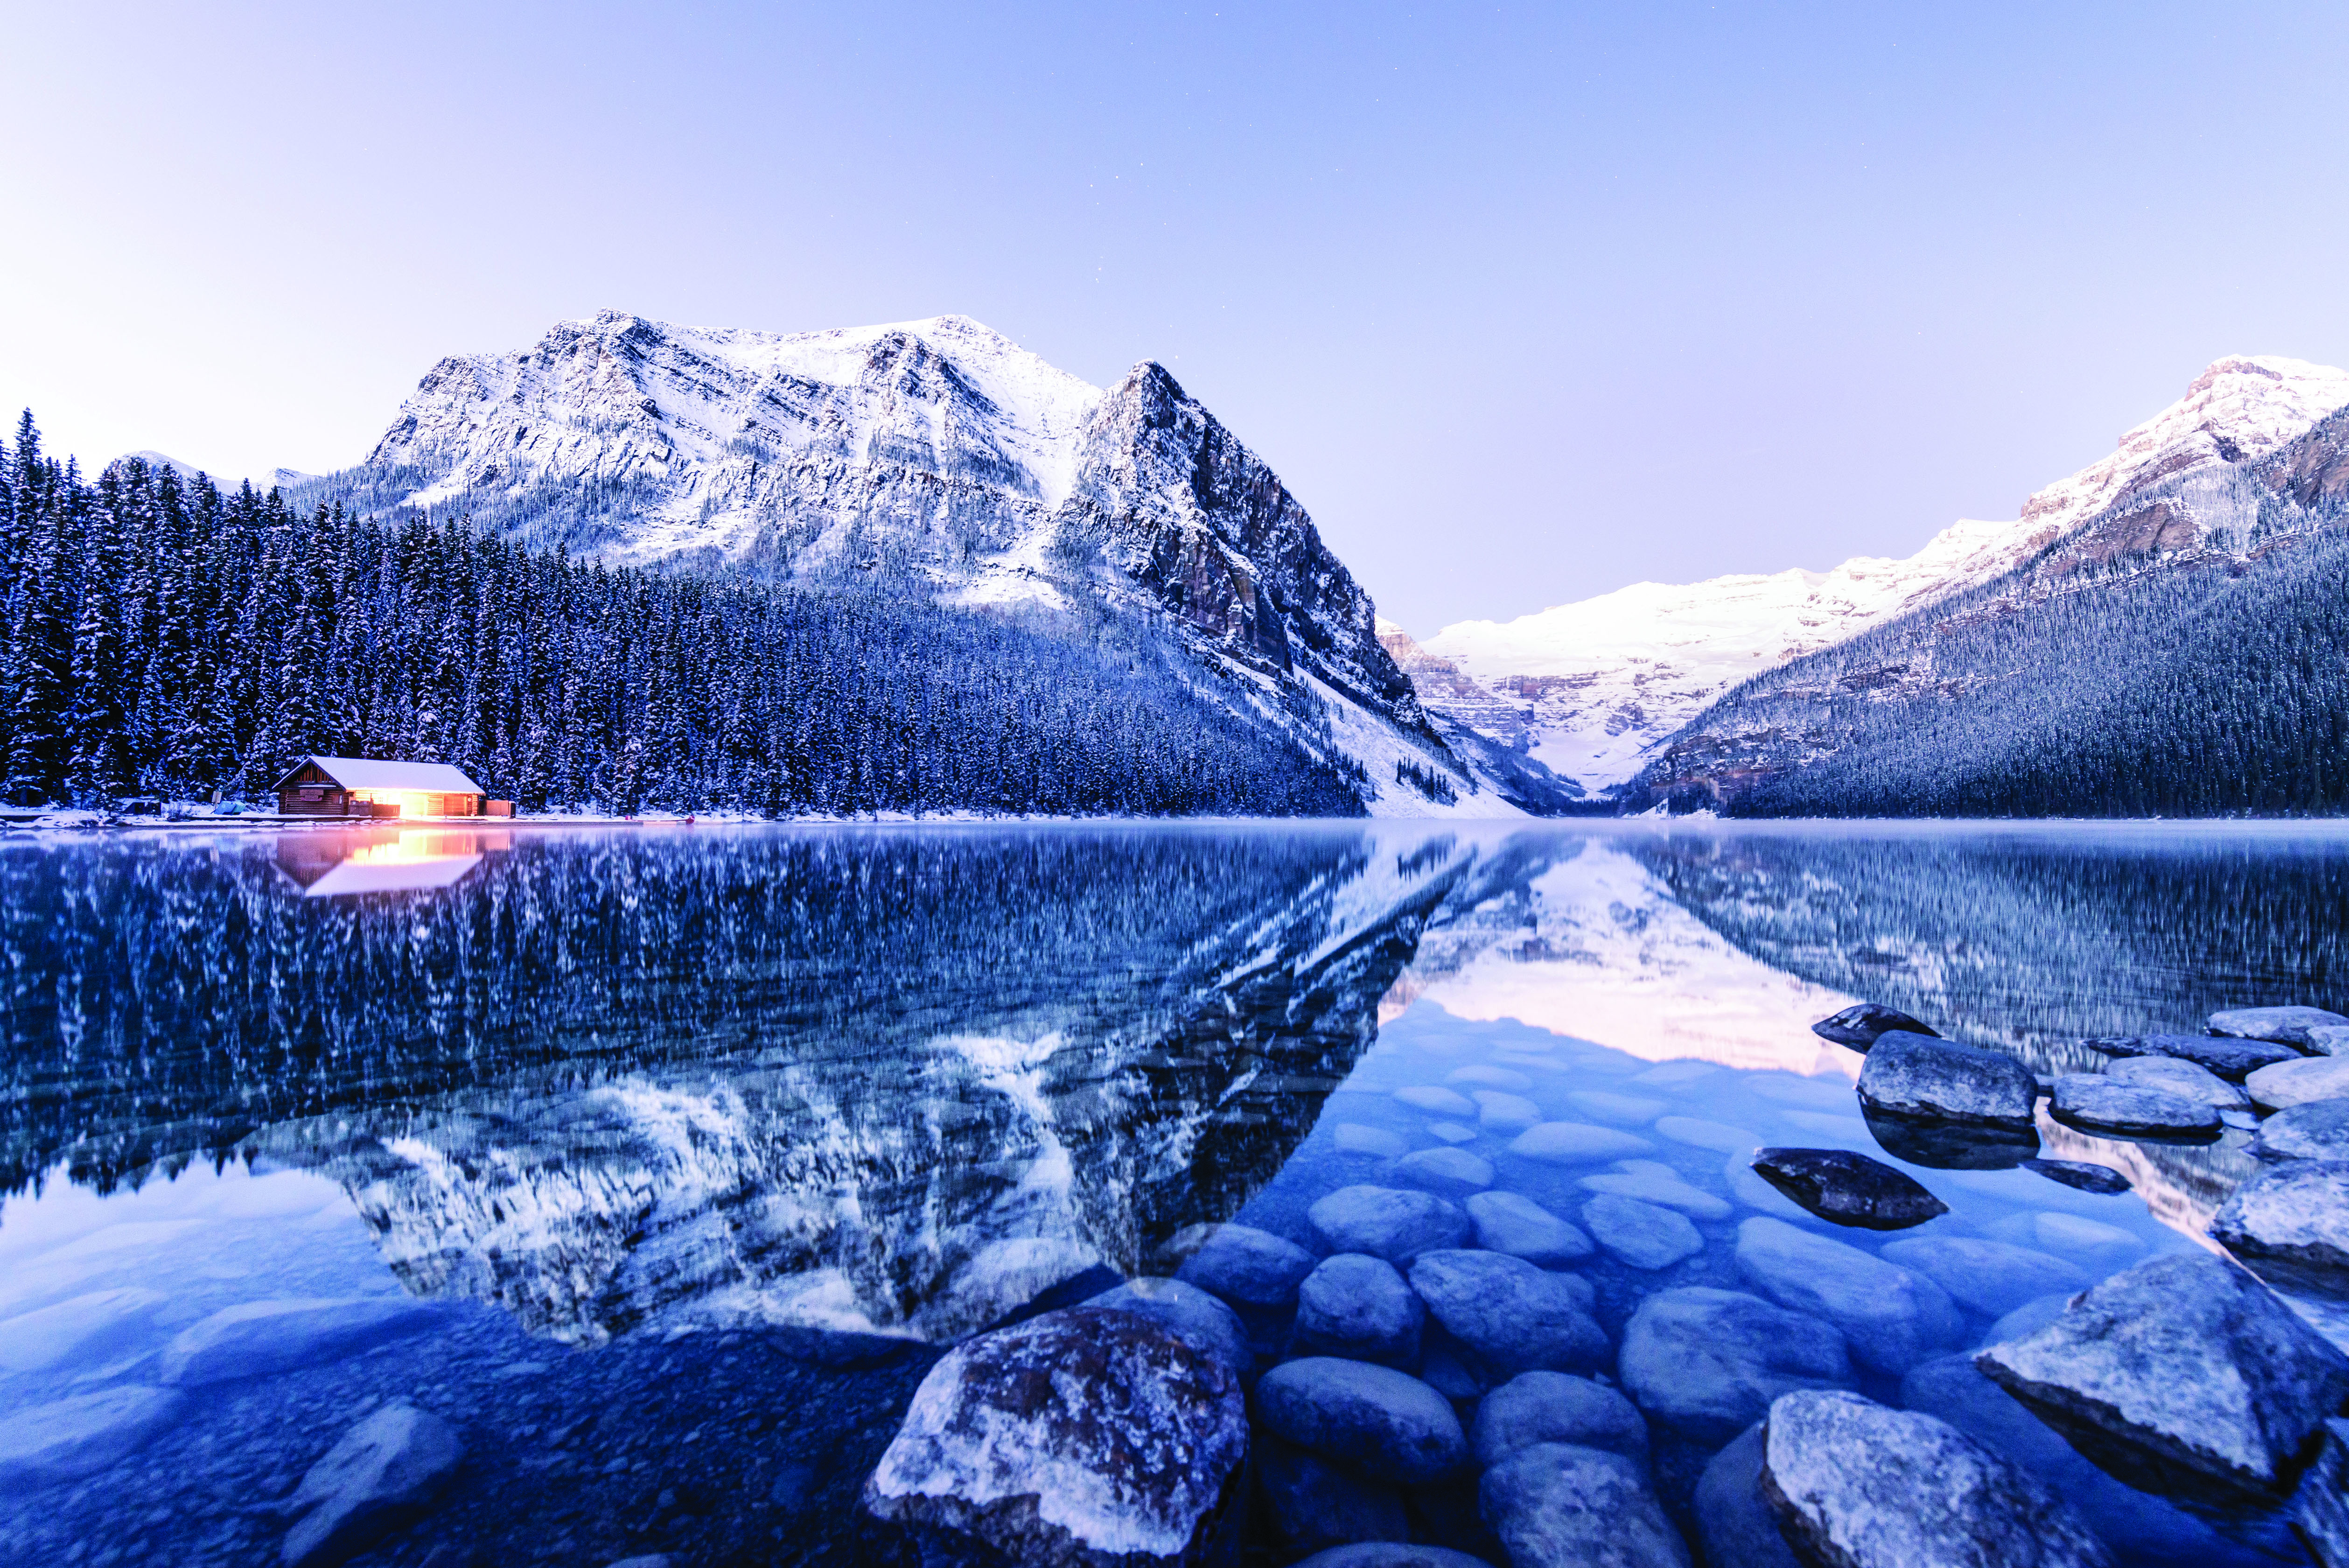
The blue hour: Contrast is very low during the blue hour, and the subjects captured will generally take on a cool blue tint
HOW KIT AFFECTS COLOR
Discover how tone can differ between various camera sensors and lenses
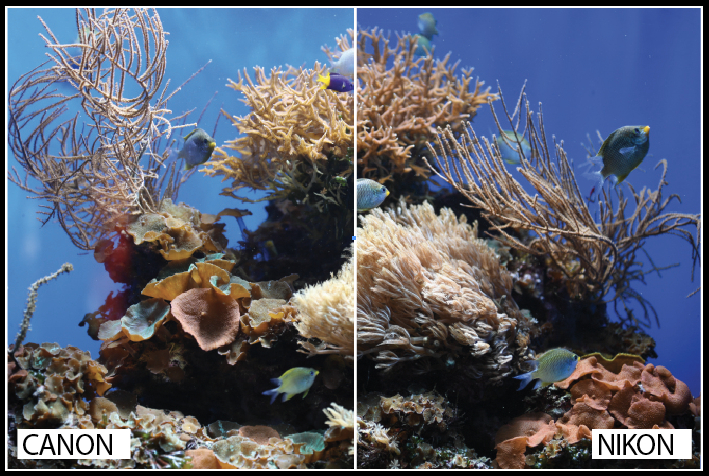
Photographers often discuss the color variations that can be seen between different cameras. When film was used, the main variables that affected the color captured were the film and lens. However, now the camera, sensor and processor probably play the biggest part. This is perhaps best illustrated by comparing Nikon and Canon products. Their cameras use different sensors, which means that they will see the light differently and send different information to the processor.
Some lenses produce brighter, more colorful images than others – Canon’s lenses have a reputation for producing vivid, contrasty images and Nikon’s lenses lean towards more neutral colors. The lens you choose can affect the contrast you capture – and when there is more contrast present in a scene, the color will appear more saturated.
LOOK FOR BACKLIGHT
When the sun is lower in the sky, magical effects are available
Backlight can have two effects on trees. You can either meter for only the light to create silhouettes, which will remove the color from your subject and focus on the color of the light; or you can use it to create an ethereal translucent effect. Light beams will shine through the leaves and create an almost see-through effect, which will also tint the light slightly.
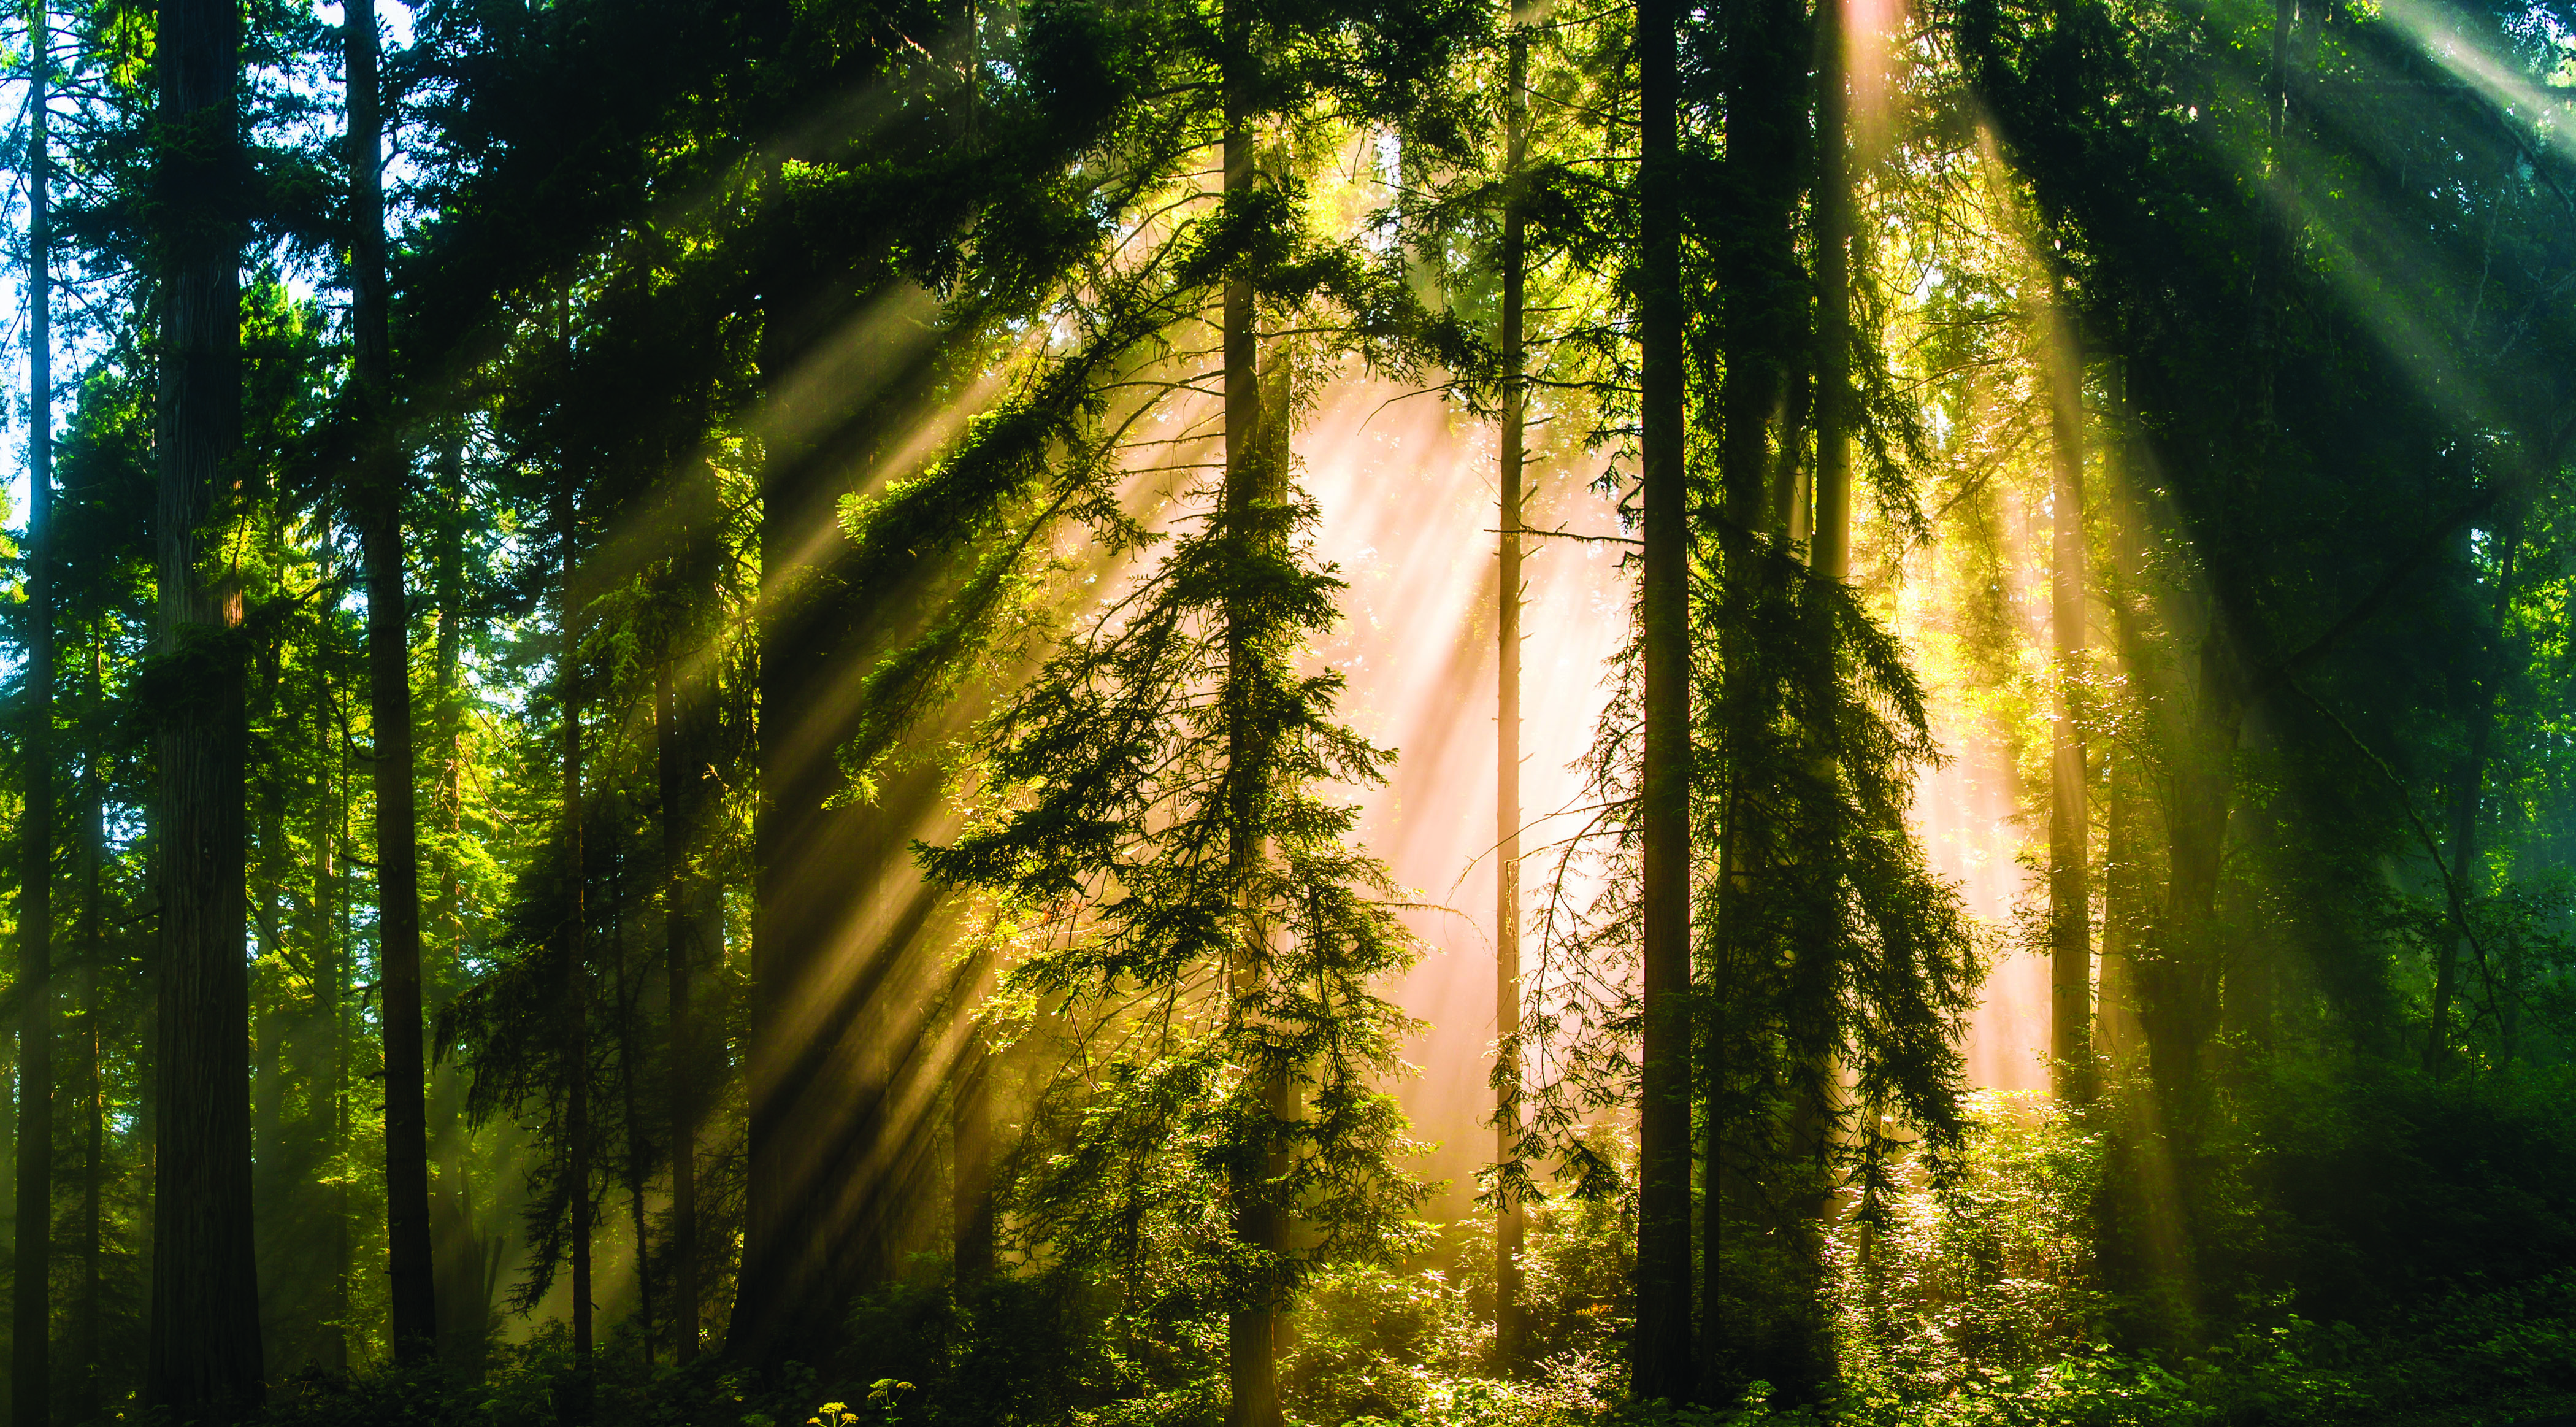
Beams of light: Here the trees shape the light beams, with some parts silhouetting them and others making patches of color
CAPTURE RAINBOWS
Alexis Coram reveals how to shoot a spectrum of colour
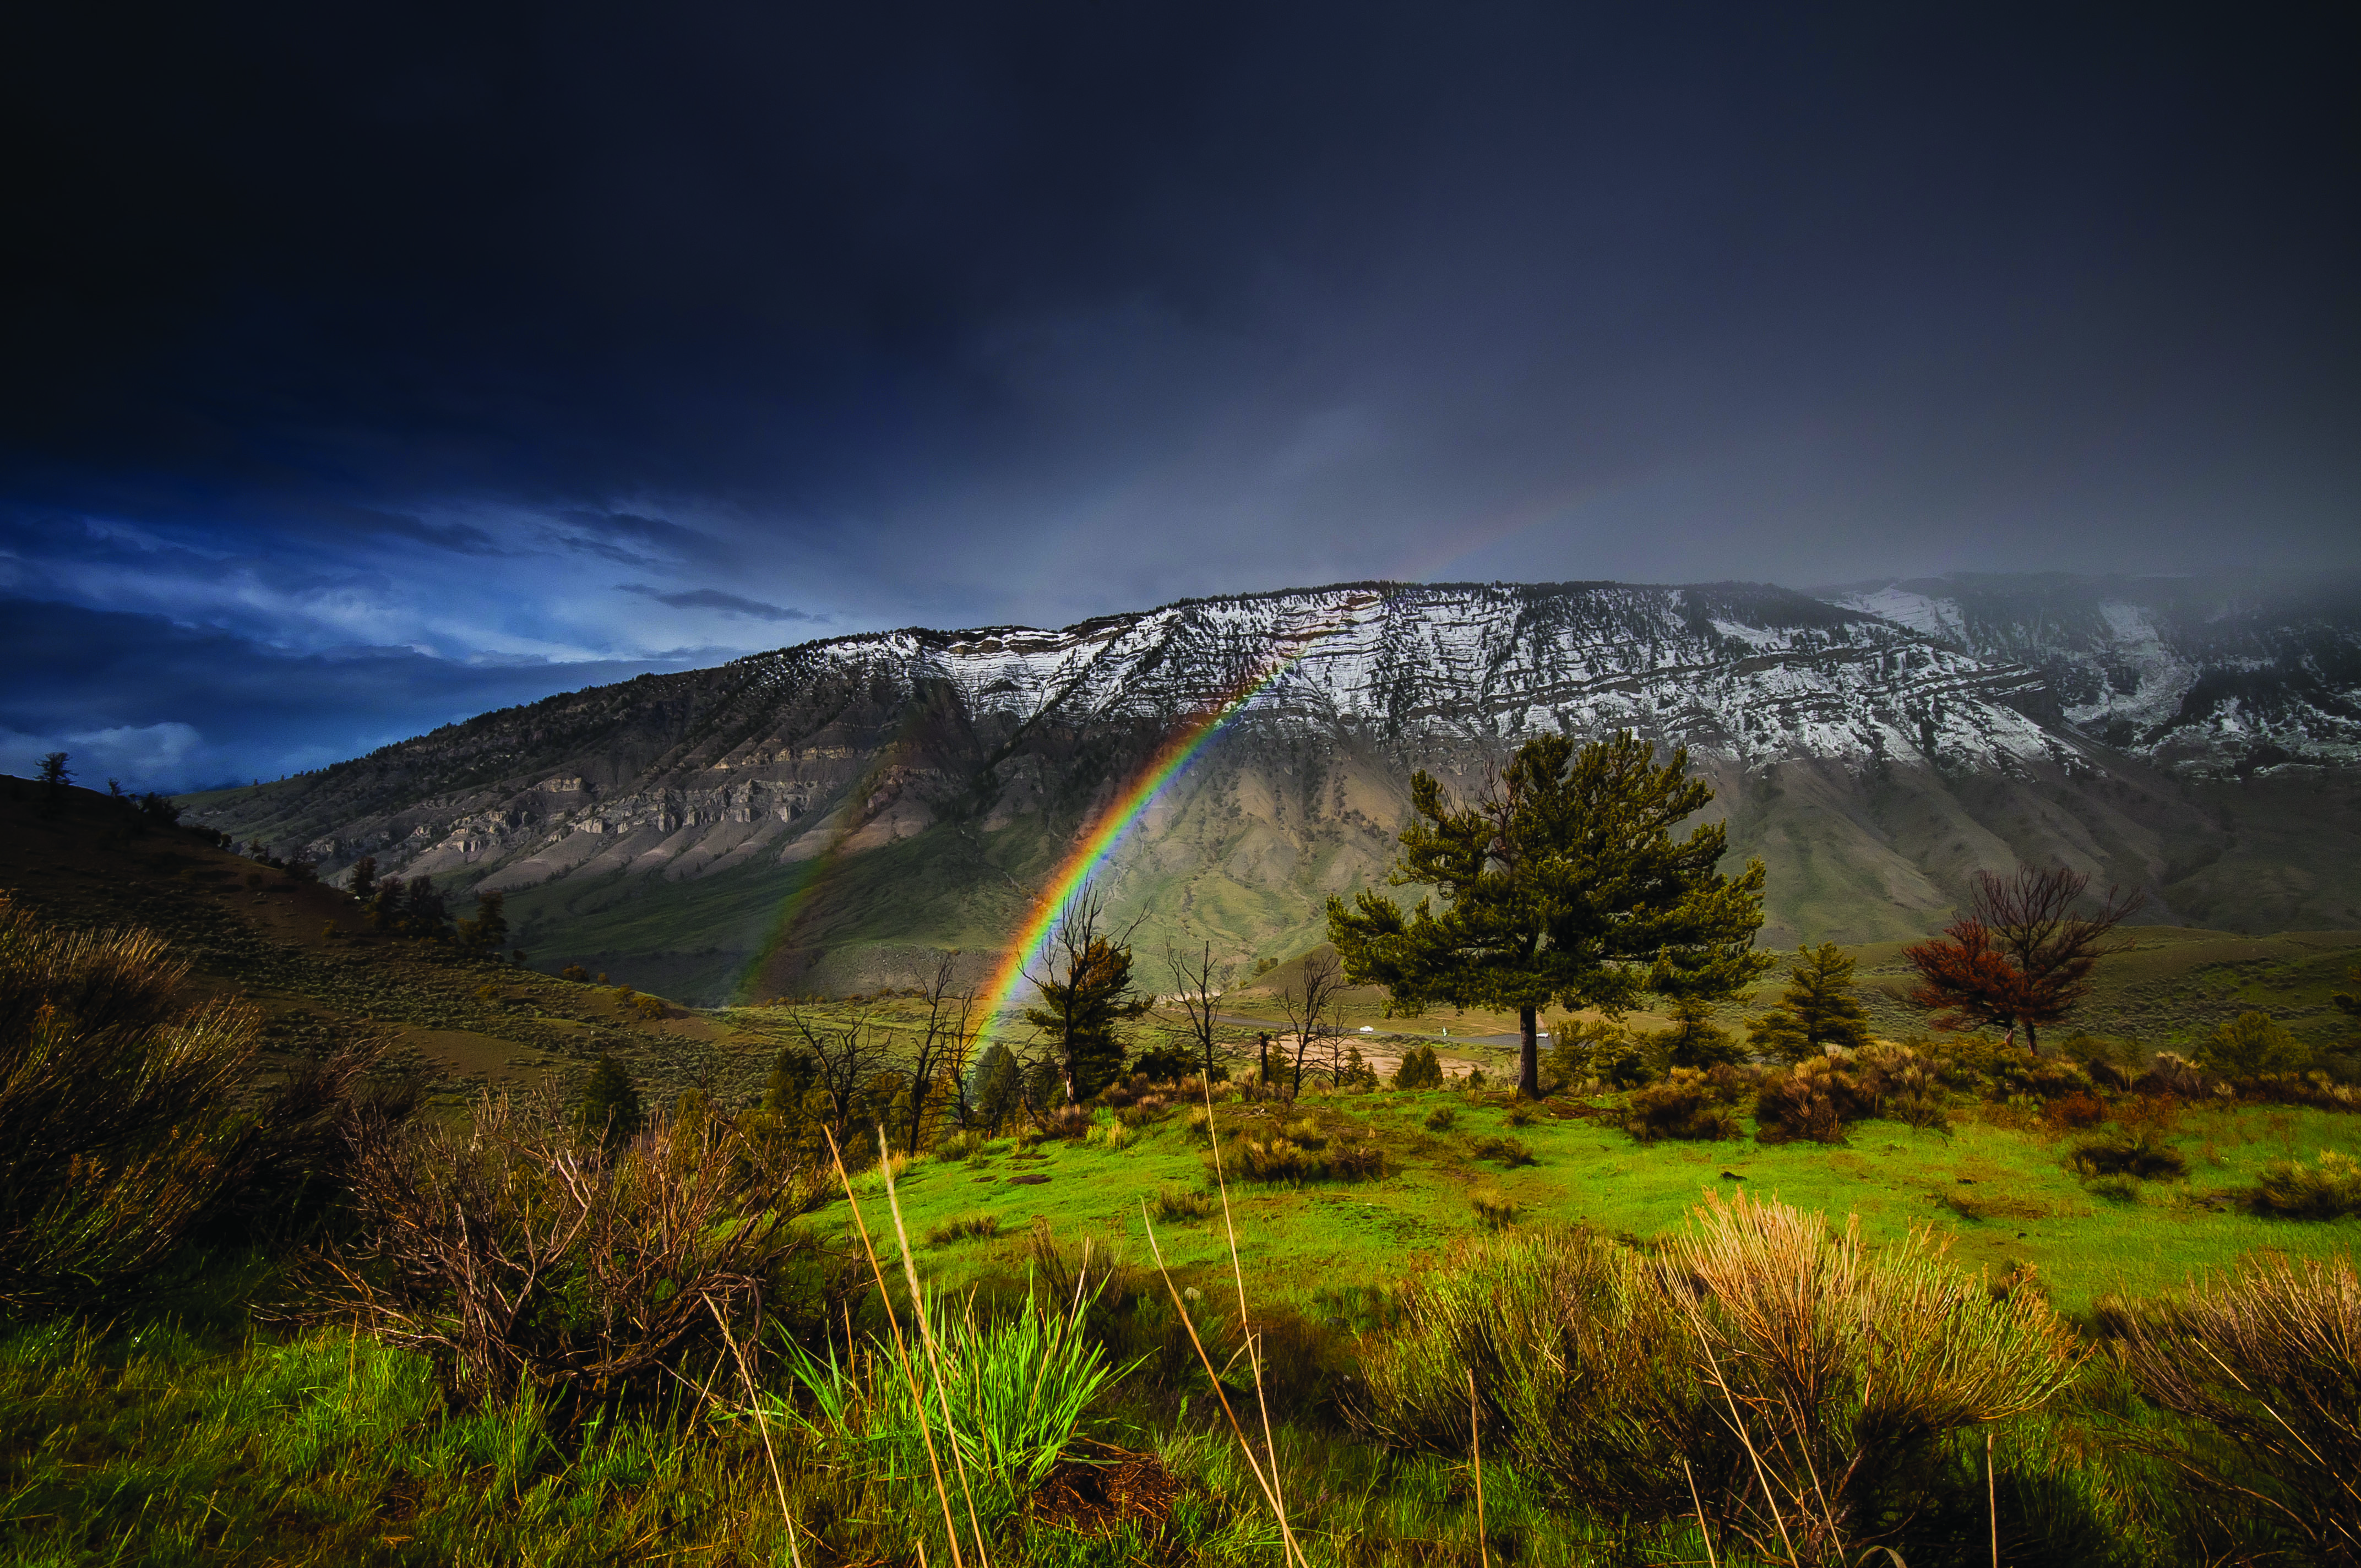
“It depends greatly on the light whether I will even attempt to capture a rainbow or if I’ll just sit back and enjoy it. If I decide the distraction is worthy, I focus on speed: there’s nothing worse than letting a magical rainbow slip through your fingers.
“The polariser is a great tool to bring out the depth of colour, particularly if the sun is bright, but I won’t stop to put one on my lens if it’s not already there. I’ll often underexpose to capture more depth in the colours. Sometimes shooting in HDR mode is preferable because it means making fewer decisions in the moment, allowing me to pick the best exposure later on.”
WORK WITH THE WEATHER
Understand how the conditions can affect colour
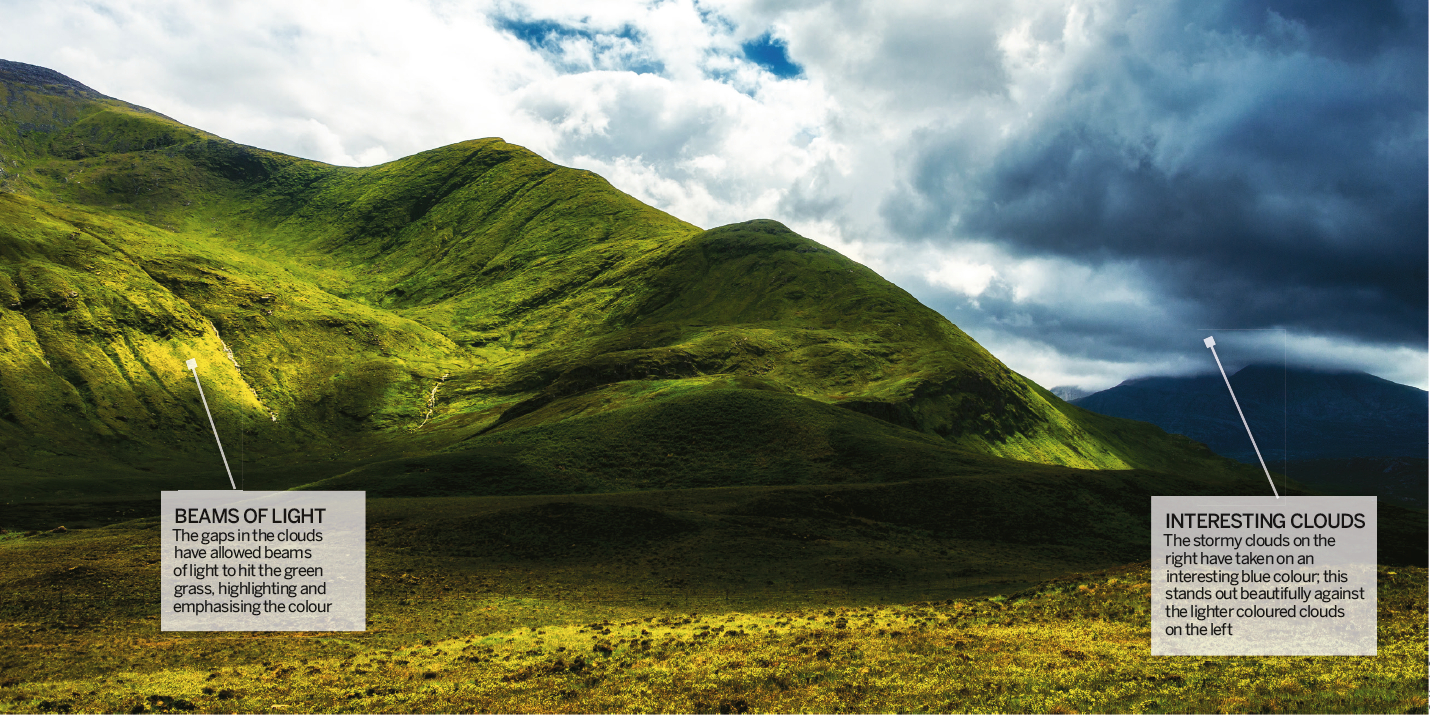
The weather can dramatically influence the colour in a scene. The weather conditions will primarily affect the spread of light, but also the apparent contrast in the scene and the colour temperature of the light.
The characteristics of clouds and their relationship with the light can have a huge impact on the colours you are able to capture. The combination of the time of day and the type and extent of cloud cover will have an influence. Diffused sunlight through a densely overcast sky will generally result in a cooler, more even light, which means that textures will appear more subtle and reflections on smooth surfaces will be more diffused. Often the colour of this softer light is influenced by bounced light. This means that the green of trees and other foliage is often bounced onto the ground, into shadows and other elements, creating a green tint across parts of the image.
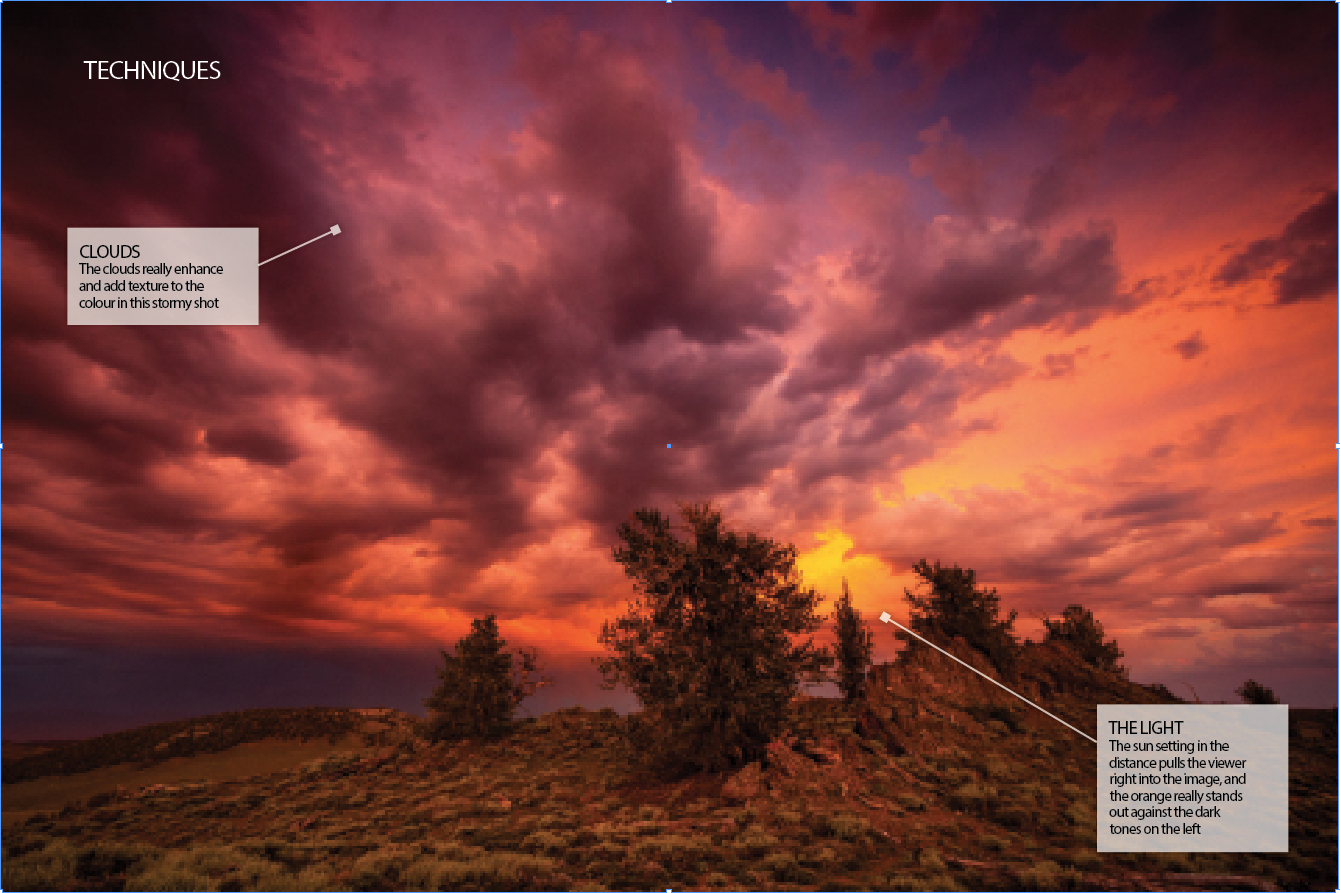
Stormy clouds can produce extremely high-contrast light: the rain clears the air of dust and haze, giving a far more dramatic effect. Colours captured at sunset in this kind of weather are more dramatic and punchy, because the sky will often be darker than the land. Clouds are essential for creating a striking landscape: they add texture and interest to the sky, and help to reflect and carry the colour produced by the light.
“Light is strictly related to weather conditions,” explains Marco Saracco (fotografietorino.it). “Clouds, air clarity, sun and moon positions, and of course the season heavily influence the colours of the scene. For instance, some of the most dramatic sunsets happen when there are low, scattered clouds in the sky, which reflect and spread the sunlight and create marvellous orange-pink-red tones. Or the dense, dark grey-coloured threatening clouds that announce an intense storm can give the scene a very moody atmosphere when they occur at sunset.”
“Cloud is a natural filter,” adds Alexis Coram. “It can flood a scene with glorious soft light that brings out deep tones without the glaring highlights of the sun, or it can cut out too much natural light and make a scene look flat and dull. Rain can mess up a day of shooting entirely or, if you’re very patient, it can bring glorious dark clouds, discrete breaks of light that make parts of the landscape sparkle in rich contrasty colour, and best of all, rainbows.”
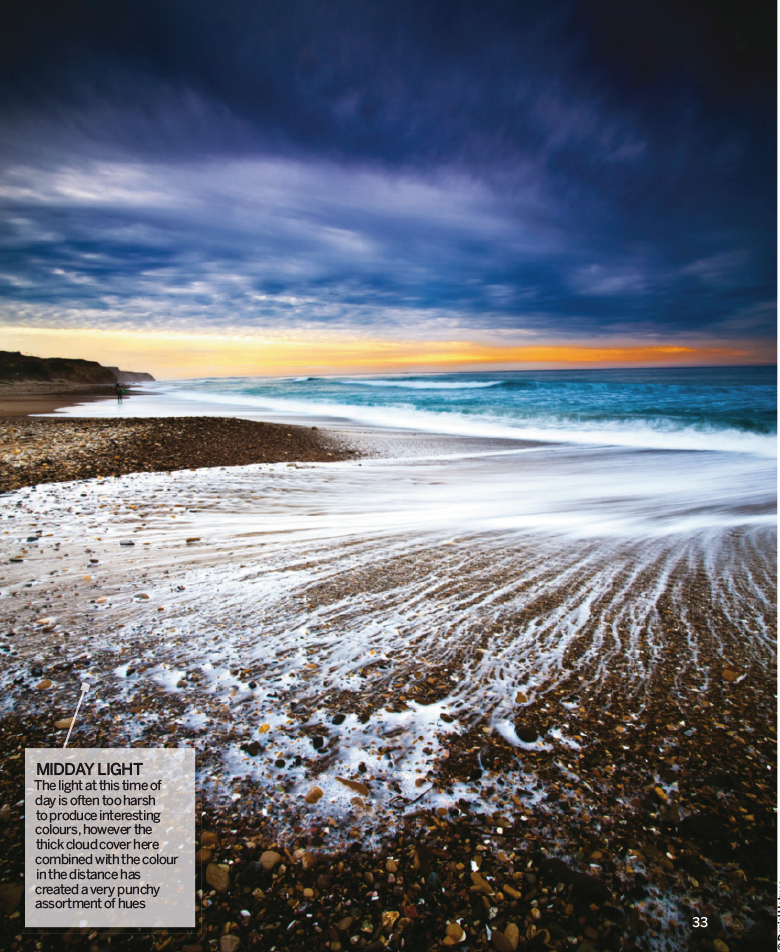
“A dry, windy day can be uncomfortable, but that hot dusty day will provide high contrast, deep shadows and warm golden tones, with nice potential for dramatic backlighting,” explains Daniel Holmes. “A fresh, clear, day after a rainstorm, with puffy clouds in a deep blue sky, can be exhilarating. Moist air after a storm gives bright saturated colours with deep blues, bright whites and vibrant colours. It is uplifting and pleasing. A wet, grey morning can be moody and quiet. Colours will be muted, with cool blue tones and low contrast.
“High overcast skies can provide some of my favourite colours. The light will be diffused, leaving some shadows, with nice contrast and surprisingly vibrant colours. I have been very pleasantly surprised with midday overcast light during times when I would not have thought to take out my camera.
“Approaching storms can provide some of the most dramatic light, colour and emotion – especially at sunrise or sunset. The light can be rich, with deep blues, bright reds, yellows and oranges. If one is fortunate, the sun will break out and ignite the sky with colours.”
SET A WHITE BALANCE
A look at how this factor influences the colour you capture
The human brain handles colour differently to your camera – we are able to identify white tones no matter what the lighting conditions are, but your camera needs help.
A lot of photographers leave their camera on Auto White Balance – but when you are in difficult or mixed lighting situations, a custom white balance may be needed. If you are unsure which setting to use, shoot in RAW, as you will be able to completely change the white balance post-capture.
CAPTURE COLOUR IN HARMONY
Learn how complementary tones will help strengthen your composition
An impressive and professional-looking image will contain harmonising and complementary colours that have been thought about and considered carefully. The way you compose with colour will also have an impact on how successful your final capture is.
Seeking out complementary colours and including them in your imagery will help you strengthen the overall impact of your shots. Humans are programmed to react positively to complementary colours as they are pleasing to the eye – similar to our reaction to symmetrical shapes. Different colours trigger different colour receptors in our eyes that send signals to our brain, which creates different feelings. Sometimes complementary colours are soothing; sometimes they are powerful.
Complementary colours sit opposite each other on the colour wheel and are a blend of two primary colours. They create a natural contrast, which means there is less need for heavy editing later, and they help to increase the visual impact of your image. Orange is the complementary colour of blue, purple complements yellow, and red complements green; seeking out these colour combinations will really boost your colour photography.
Because complementary colours are opposites, they help to add impact and contrast – highly contrasting images help to pull the viewer in. “Impact is usually made by contrast and oppositions,” says travel photographer Christophe Faugere (500px.com/zx-6r). “When you think about contrast, you think of luminosity contrast; but there are other forms of contrast, like softness versus sharpness, or colour contrast. In architecture photography, it’s always interesting to shoot details that have opposite colours.
“When shooting landscapes, the colour contrast is often the same: warm sun versus blue shadows. When shooting sunsets, I like to compose my image with the sun to one side and the beginning of the night on the opposite. I emphasise the yellow on one side with a vertical graduated yellow filter, and the same with the blue on the other side.”
Taking control of your camera’s white balance is important when you shoot complementary colours. Mixed lighting situations can often create complementary colours, particularly at sunset. Parts of the
scene will appear warmer than the elements that fall in the shadows, which will be illuminated by light reflected from the blue sky, making those areas cooler. If you correct the white balance for the blue in the shadows, you’ll lose the cool hues and destroy the complementary colour scheme.
“Colour is a compositional element which works with all the other elements like S-curves, diagonals, leading lines and balance to create the photograph,” says Daniel Holmes. “If they work well together, the photograph will have impact; if they clash, the photograph won’t.
“Colour can help draw the eye to the subject, add emotion, increase tension, or give feelings of calmness. A picture of just beautiful colour doesn’t make a strong photograph, but combined with a strong subject in a strong composition, it will be dramatic. A nice thing about photographing landscapes is that colours in nature tend to harmonise. Earth tones of browns, greens and yellows work with the blues, oranges and reds of sunset skies.”
UNDERSTAND COLOUR AND MOOD
Discover how different tones can change the feel of your imagery
Colours are split into first order, second order and third order colours. The first order colours, also known as primary colours, are blue, yellow and red. They are referred to as first order colours because they are the basis of all other colours. Second order colours are created by a mix of two first order colours and fill the gaps between the primary colours in the colour wheel.
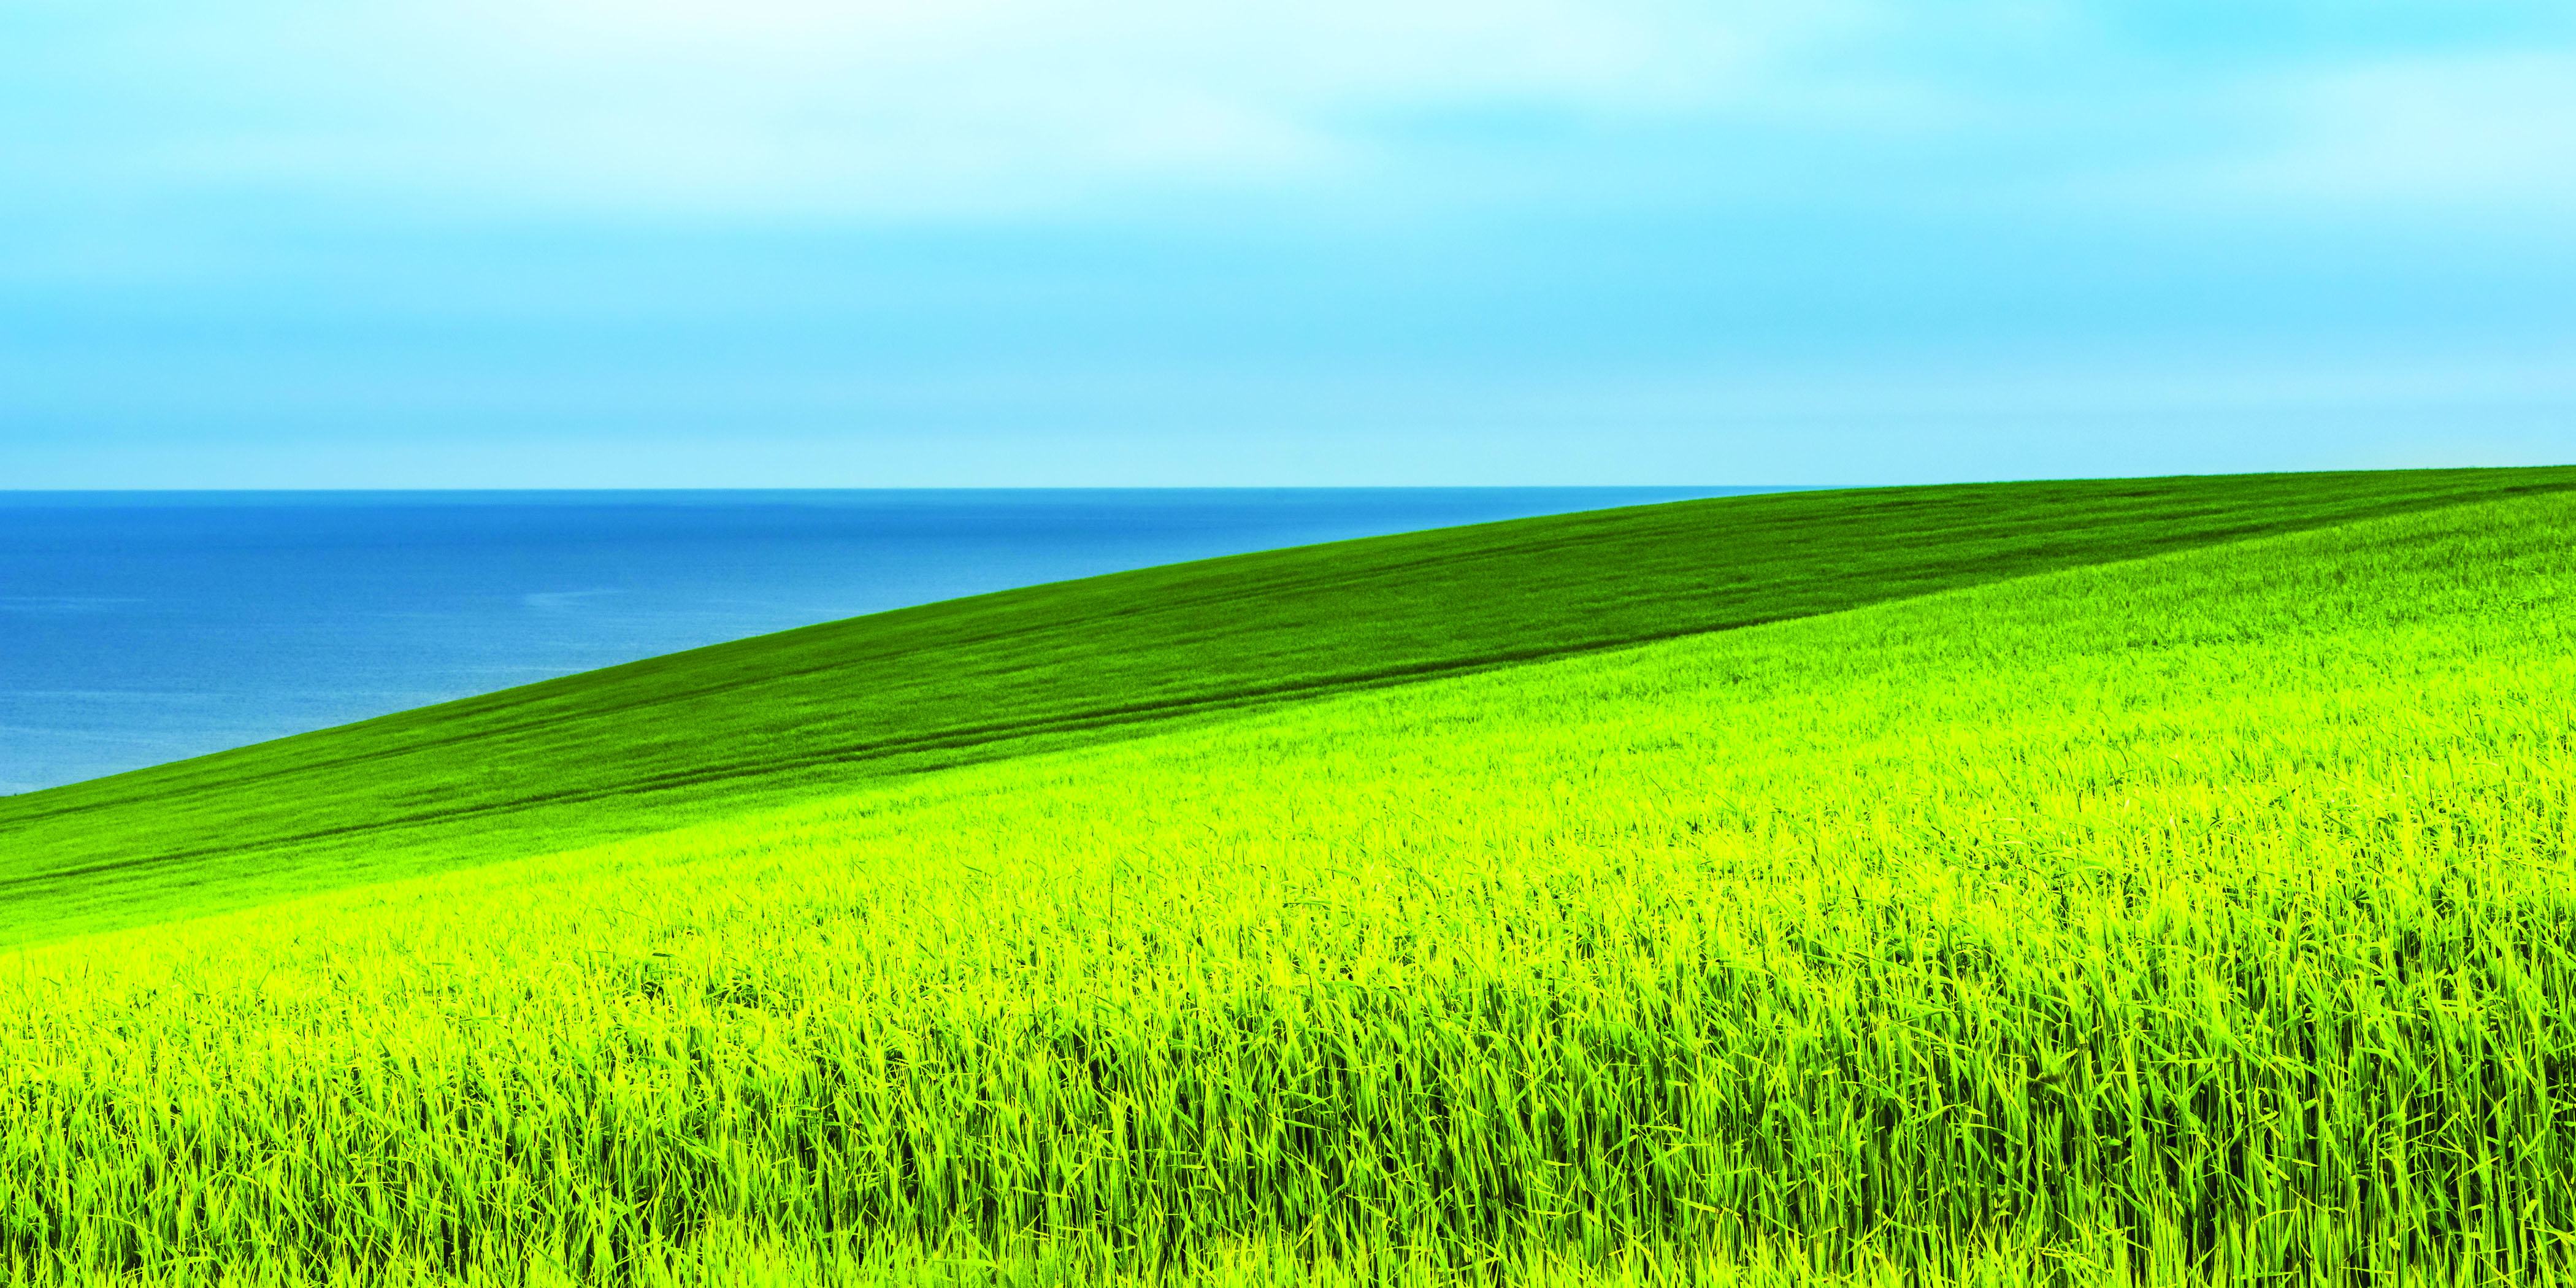
Blue and green The colour blue envelops us on a daily basis – it is the colour of the sky and is reflected in bodies of water. It is inviting as well as calming and conveys feelings of restfulness and serenity. Similarly, green is very stable and is probably the most balanced colour.
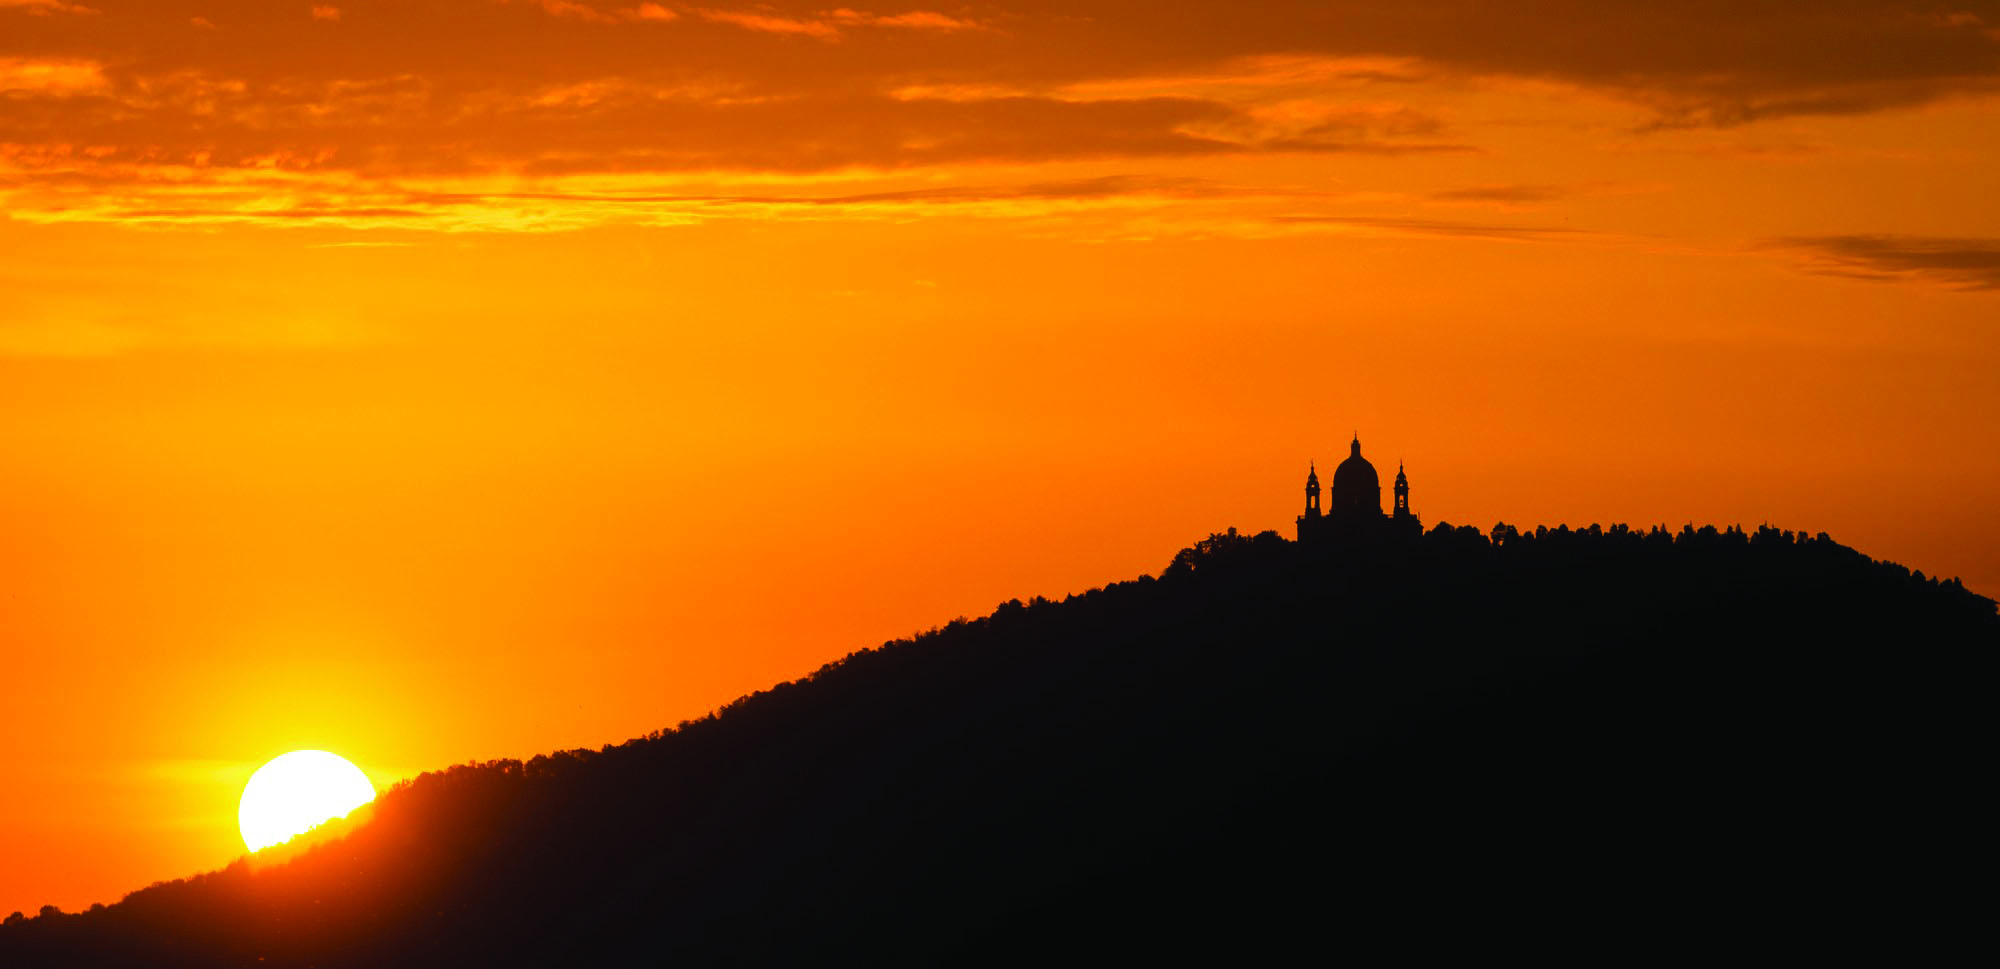
Yellow and orange Yellow is the brightest colour and the most attention-grabbing – think of high-visibility clothing. It is also a very positive colour, and will evoke feelings of happiness. Both yellow and orange are the colours of the sun, so are associated with ideas of life and vitality.
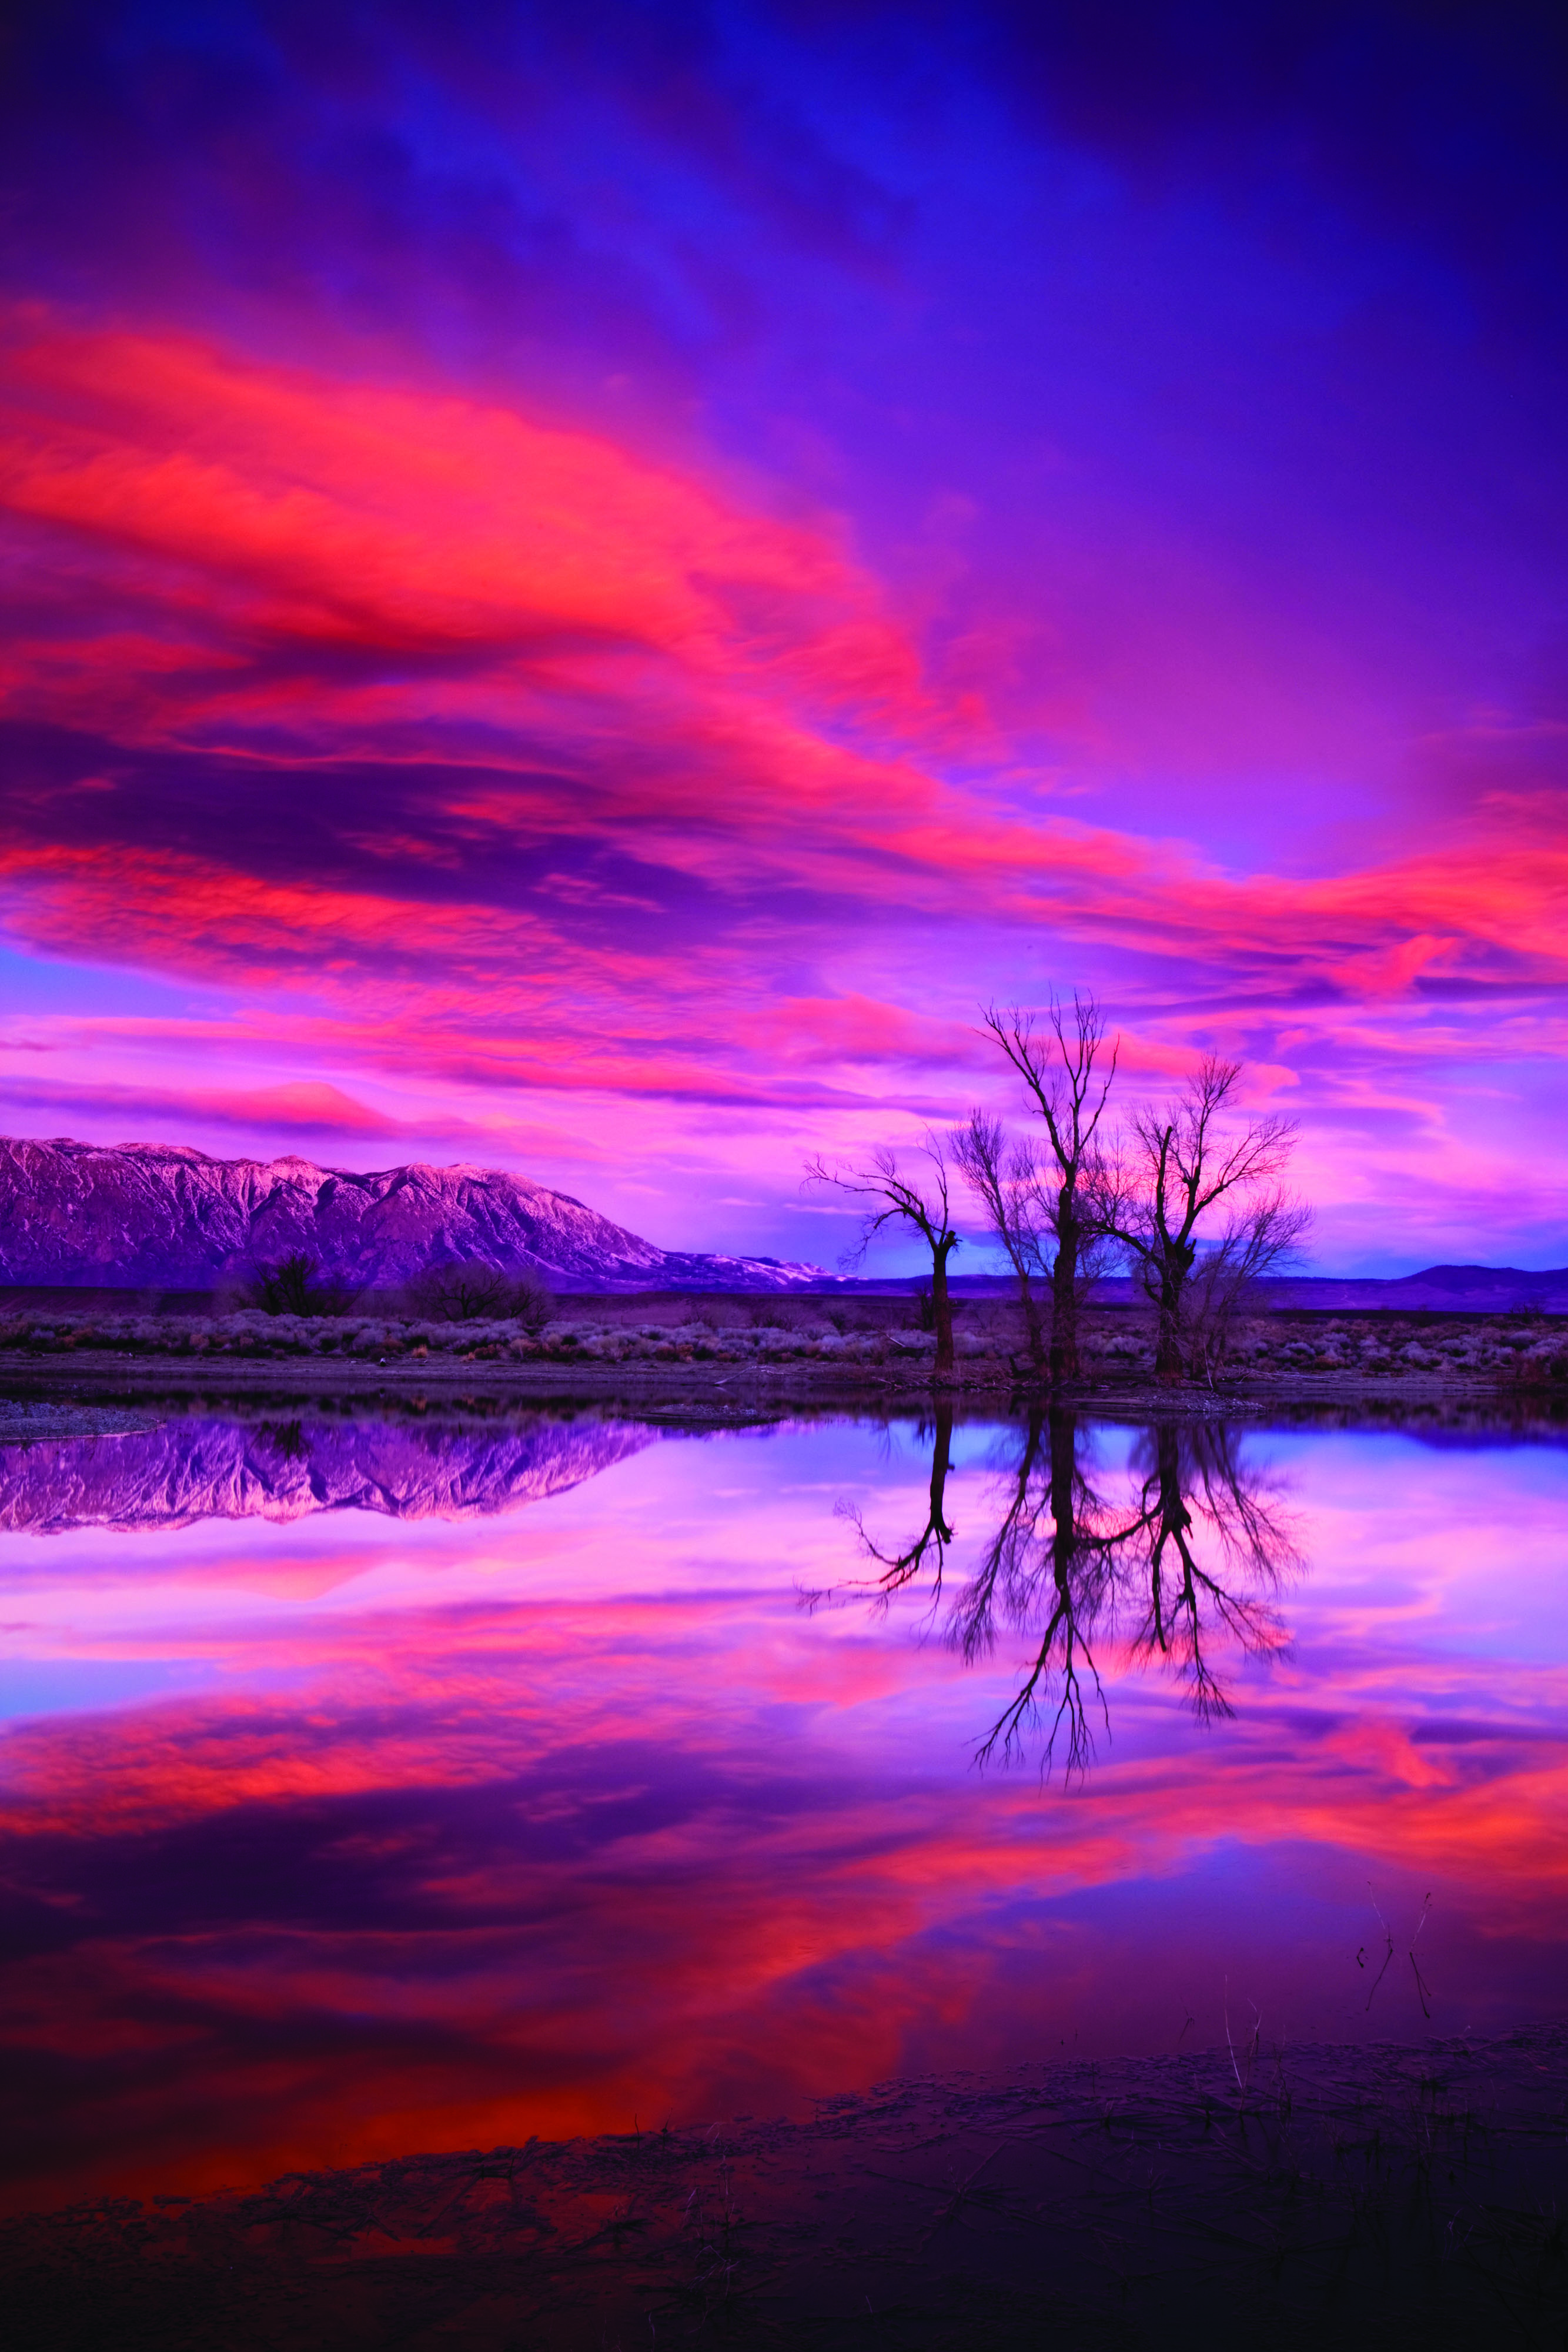
Red and purple Red is more intense than other primary colours; it is often best used sparingly unless dominance and impact is your goal. Red can mean both anger and passion as well as romance. Purple is also associated with romance, as well as royalty and wealth.
EXPOSE FOR COLOUR
Discover how to nail the exposure of your most colourful captures
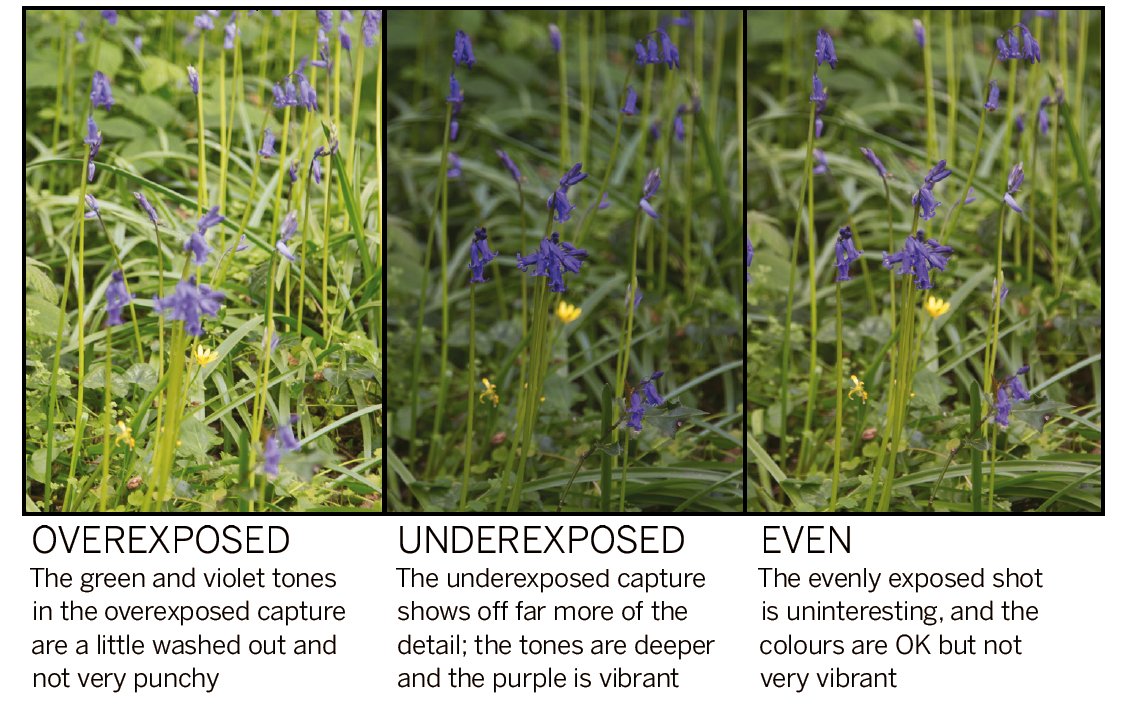
When you shoot landscapes and nature, or just any colourful image with green present, it is often recommended that you take an exposure reading for the green elements then underexpose the shot by two thirds of a stop. In most cases, this simple technique will result in a pleasantly exposed and detailed capture.
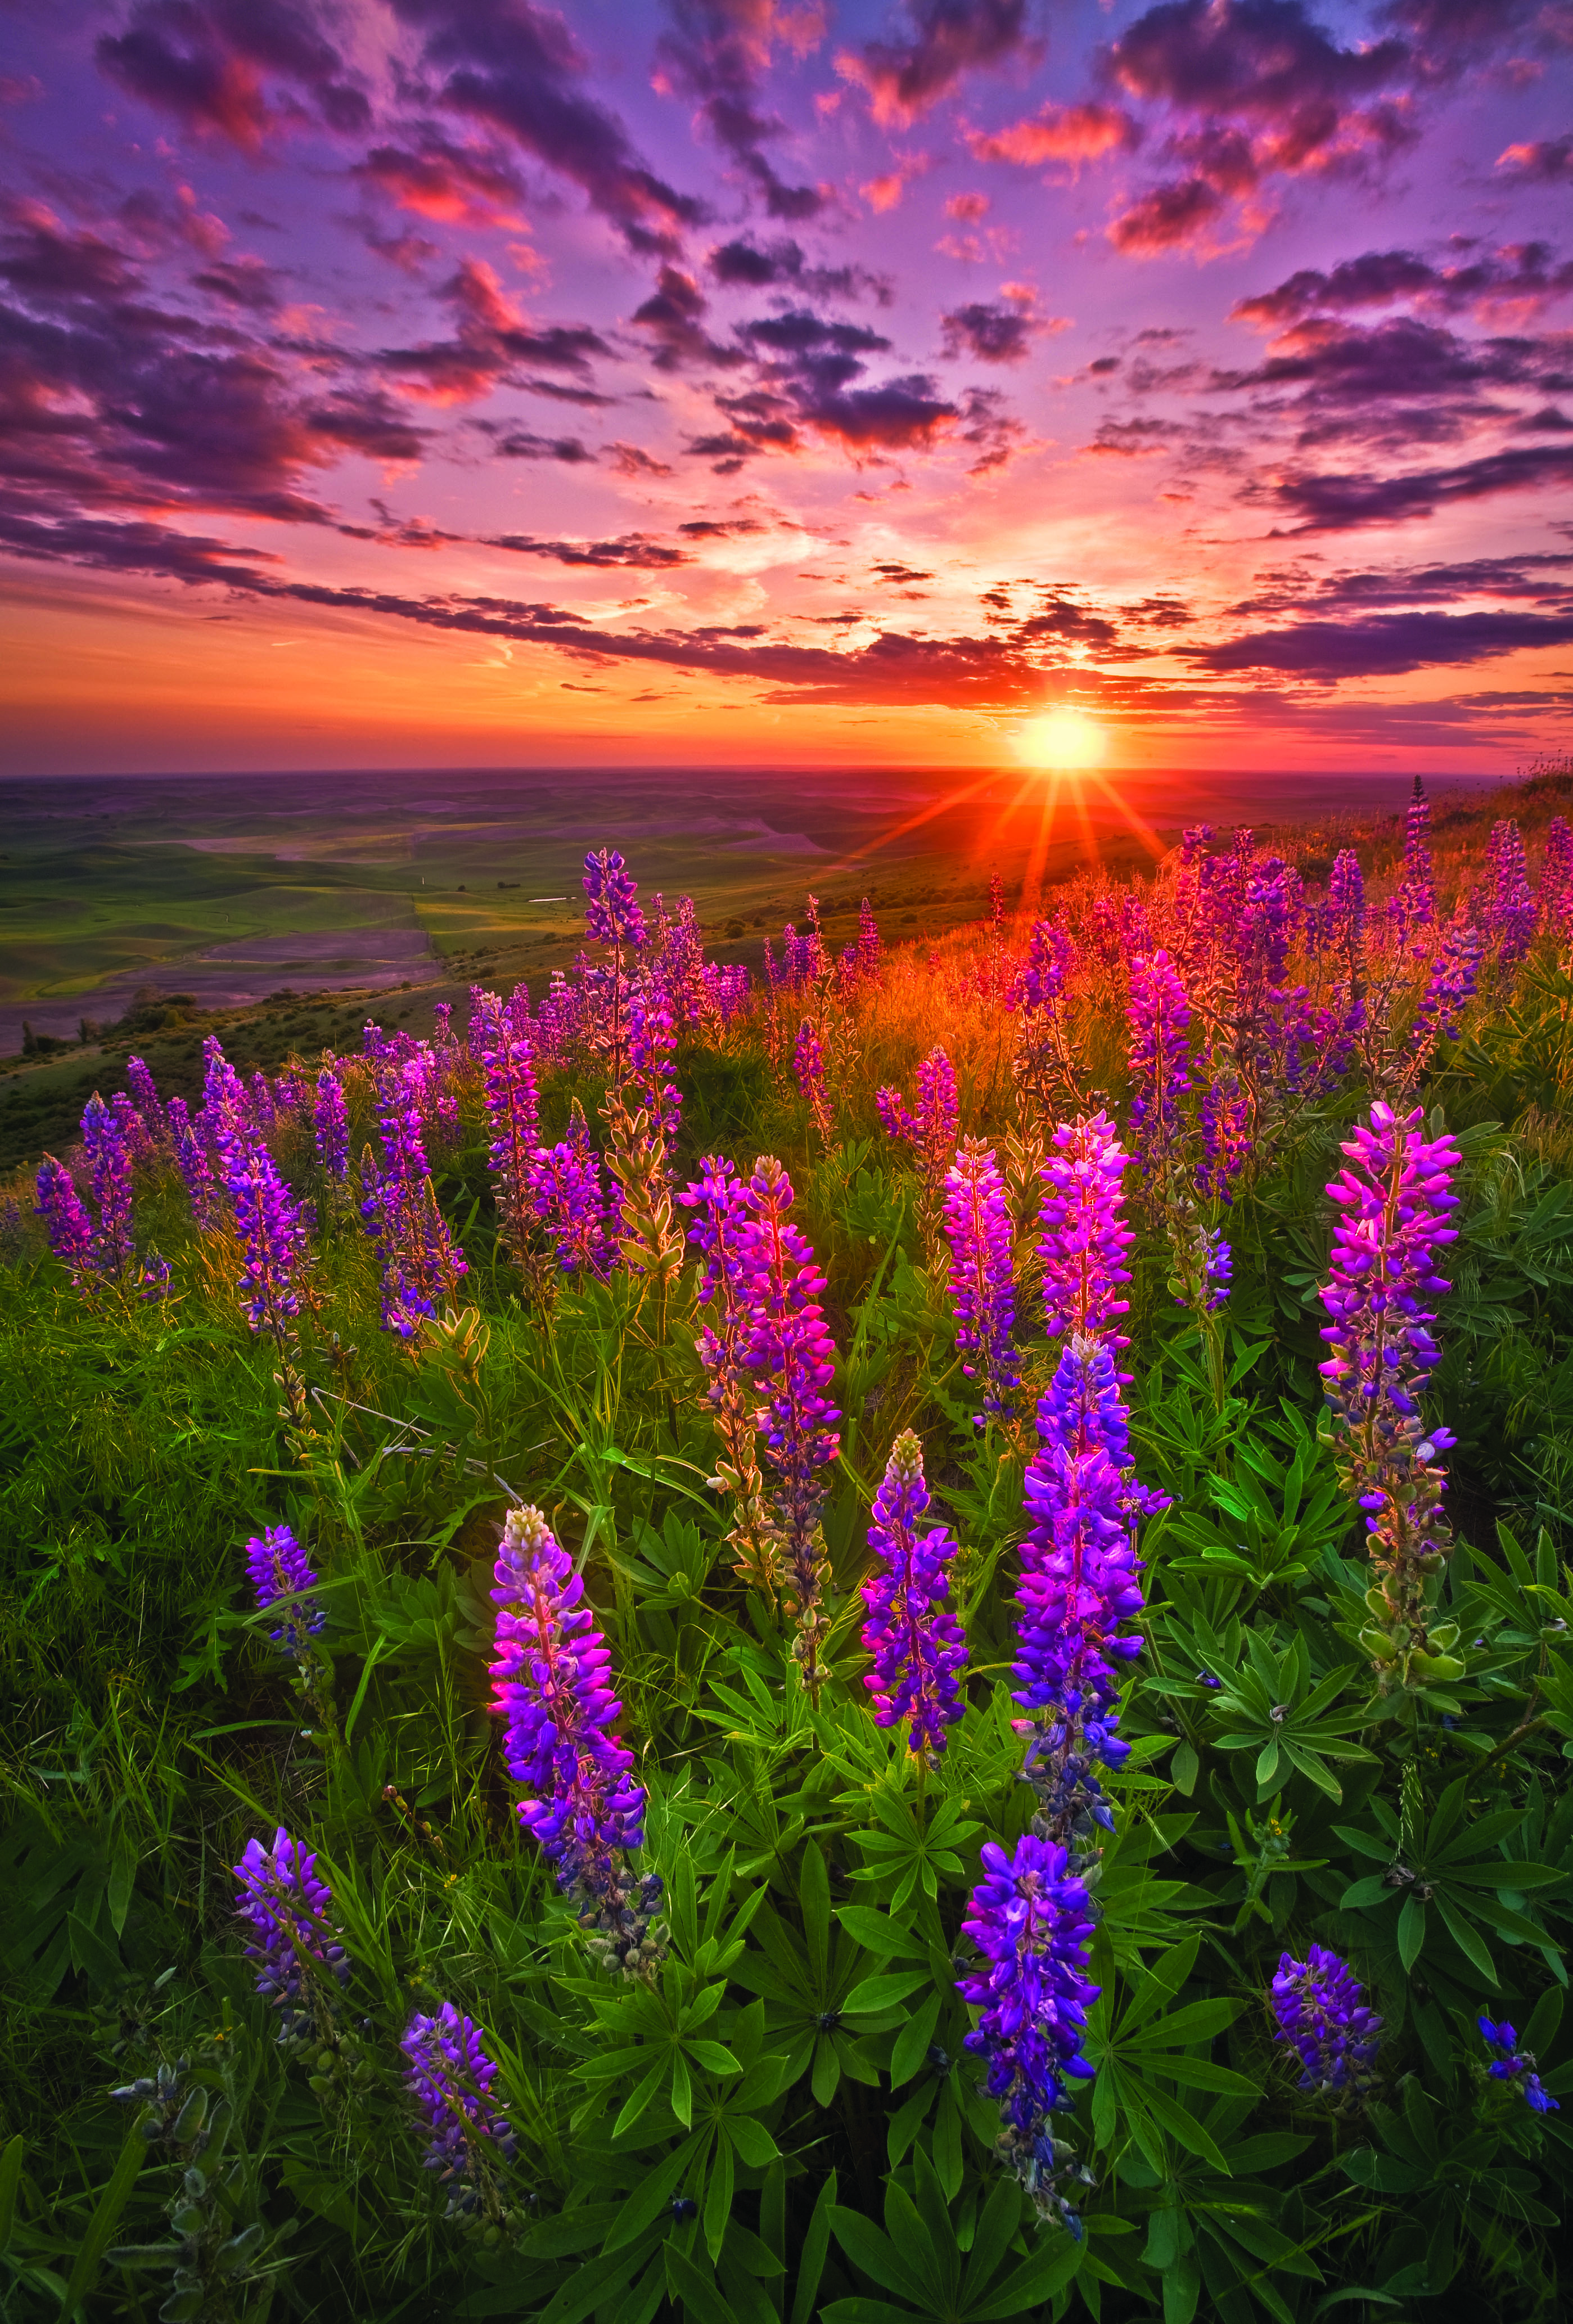
Natural hues
Nature has a habit of delivering pleasing colour palettes: you just have to find them
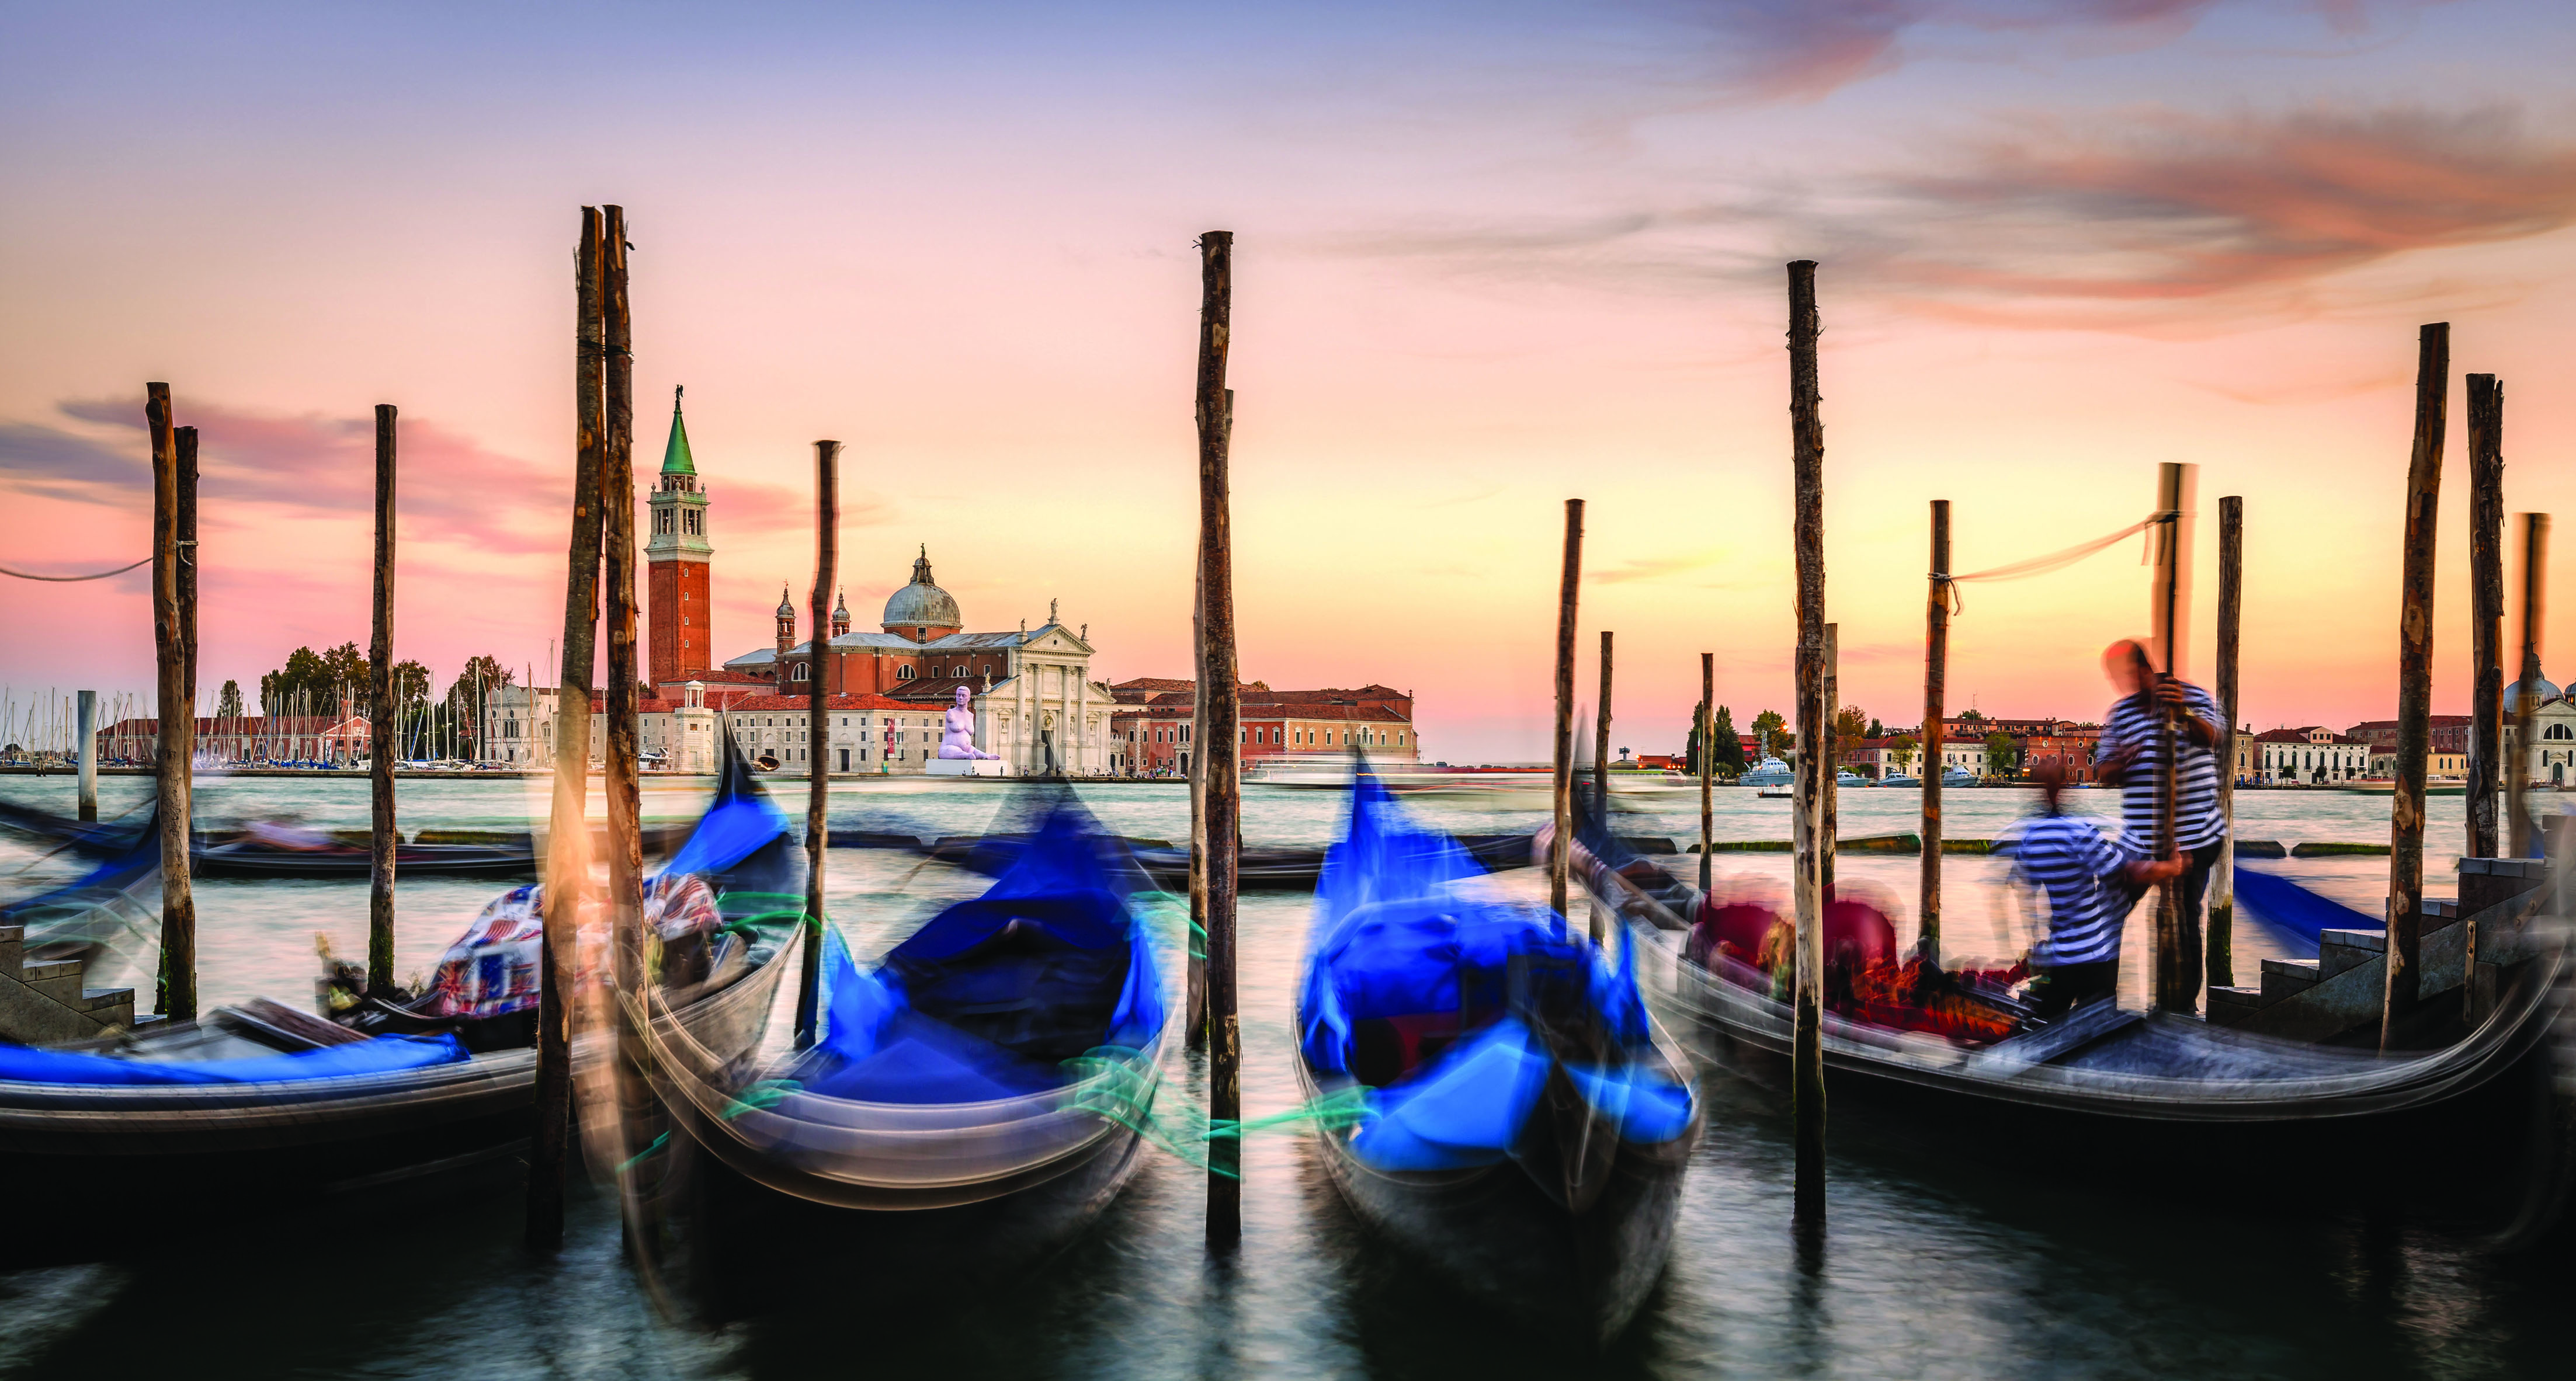
Venice
Here the blue tops of the gondolas complement the soft peach in the sky and water
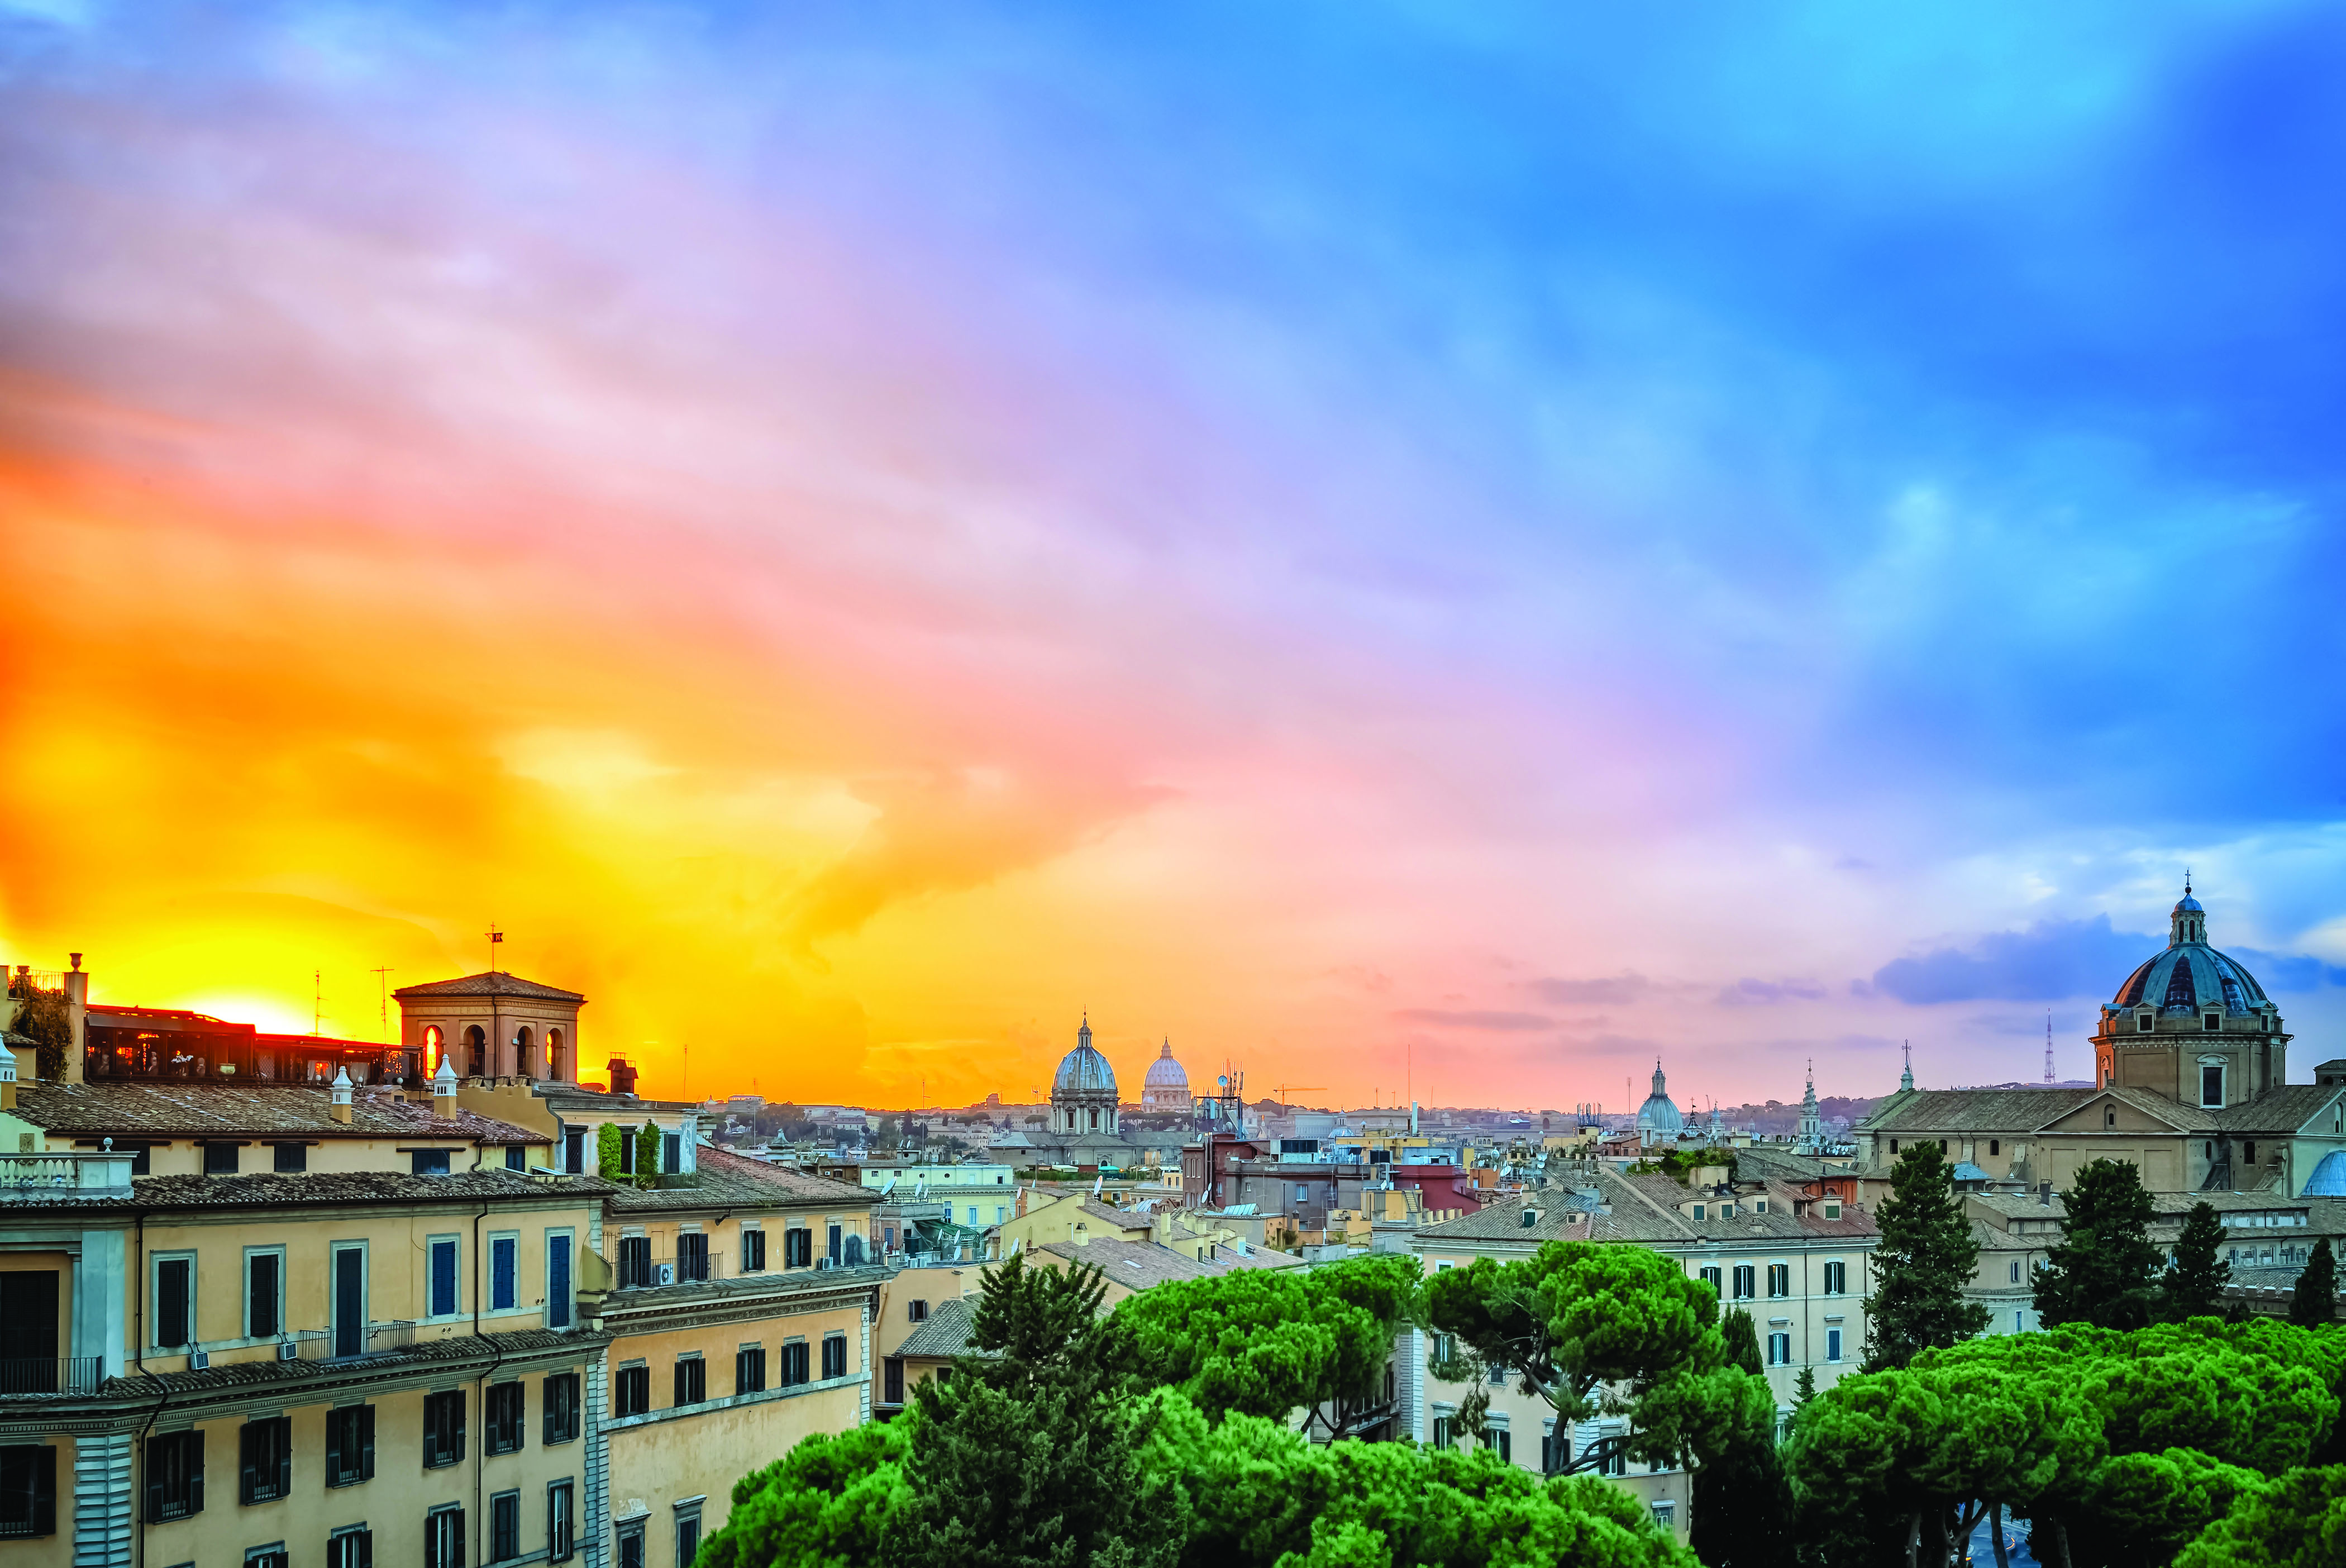
Sky on fire
In this capture the bright blue sky beautifully complements the bright yellow hues
EDIT FOR COLOUR PERFECTION
Optimise your editing process so the colours you produce remain realistic
It is important when you are editing your shots that you don’t take the colours too far and make your imagery look badly over-processed and false – a bright and vibrant image is one thing, but you will lose all impact and intrigue if it is overdone and unrealistic. A good way to monitor the changes you are making is to frequently switch back to the original unedited shot to check exactly how far you have taken it.
When it comes to colour, it can be very tempting to just pump up the saturation of all the colours without too much thought and consideration – but this is usually where photographers fall down. It will make your greens greener and your reds redder, but probably not in the most realistic way. It is better to take a more measured approach, carefully considering exactly which colours you want to give more prominence to.
In Lightroom or Adobe Camera Raw, consider using the Vibrance slider instead of Saturation for a slightly more realistic enhancement of colour. Instead of just increasing the saturation of every colour, Vibrance intelligently increases the colours that are less saturated more than those that are already saturated. This means that the colours in the final image should look far more realistic – unless you take it too far, of course.
“If the image has been shot under the right light conditions, there is no need for great adjustments during editing,” explains Marco Saracco. “Usually I proceed with a very basic digital processing of my RAWs, with the goal of making the scene as close as possible to the one I saw when I took the picture. I also apply some subtle regulation, such as dodging and burning, or some little changes to the white balance, to make the overall image more appealing and enhance the mood; but I never alter the original completely.”
“In a way, the editing process begins before I click the shutter,” explains Daniel Holmes. “When the potential for dramatic light and colour presents itself, I’ll start looking for elements to put into the photograph: a centre of interest, compositional elements, an interesting mid-ground and background. This can happen quickly and can be a lot of fun! As the light gets stronger, the colours become more brilliant, shadows become deeper, and contrast becomes more dramatic. Those strong and vibrant colours are what I want to pull into the photograph.
“I’ll shoot various exposures to make sure that I capture the colours and information that I’ll need when editing. I have my LCD set to show strong colours and contrast, which is fairly close to the way my edited photographs will look.
CALIBRATION
Before you think about editing your imagery, it's important that you calibrate your kit to ensure that the colours that you see on your computer screen are accurate. The lighting in the environment that you are editing in can also have a huge impact.
“I use a custom preset in Lightroom, which applies universal colour correction to each file. I work with Exposure, Highlights, Shadows, Whites, and Blacks; add a touch of Vibrance, just a bit of Saturation; apply High Contrast; and then work with Luminance and Saturation on individual colours. I don’t like to overuse the Saturation slider, as it is very easy to over-saturate and lose any sense of realism.
“I’ll then take the photo into Photoshop for some additional work on contrast, spot cleaning, blending, and local adjustments. When shooting in very high-contrast situations, I’ll shoot multiple exposures and hand-blend them in Photoshop.”
“I believe that the appetite for colour in photography and the definition of ‘natural’ is very subjective,” says Alexis Coram. “The artistry and emotion of photography is what appeals to me the most, and I think rules limit our ability and freedom to create. Each of my photographs represents an experience and a series of choices that go into creating a visual rendition of a unique moment in my life.
“What I strive for as I edit is to go back to that moment, understand how I felt, what I saw and how I saw it, and to bring that back to life. Sometimes this means toning colours and contrast down; other times it means boosting them up. The constant is that the end product always depicts the way I saw the world at the time, and that’s my ultimate goal.”
RETAIN A NATURAL LOOK
Follow these simple editing steps to carefully boost the colour in your images
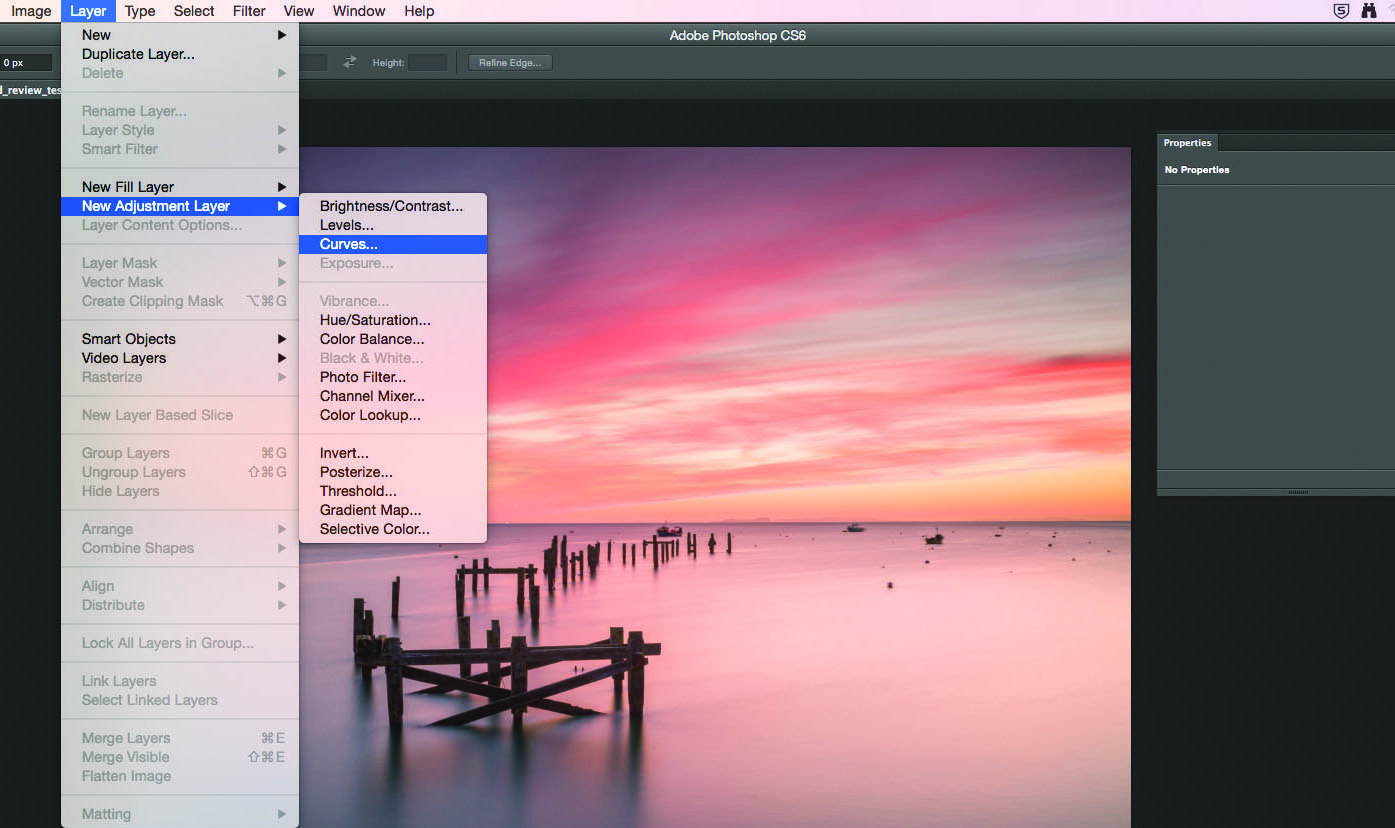
1 Do a Curves adjustment Go to Layer>New Adjustment Layer>Curves and make a slight S-curve to boost the contrast while bringing out the shadows and highlights.
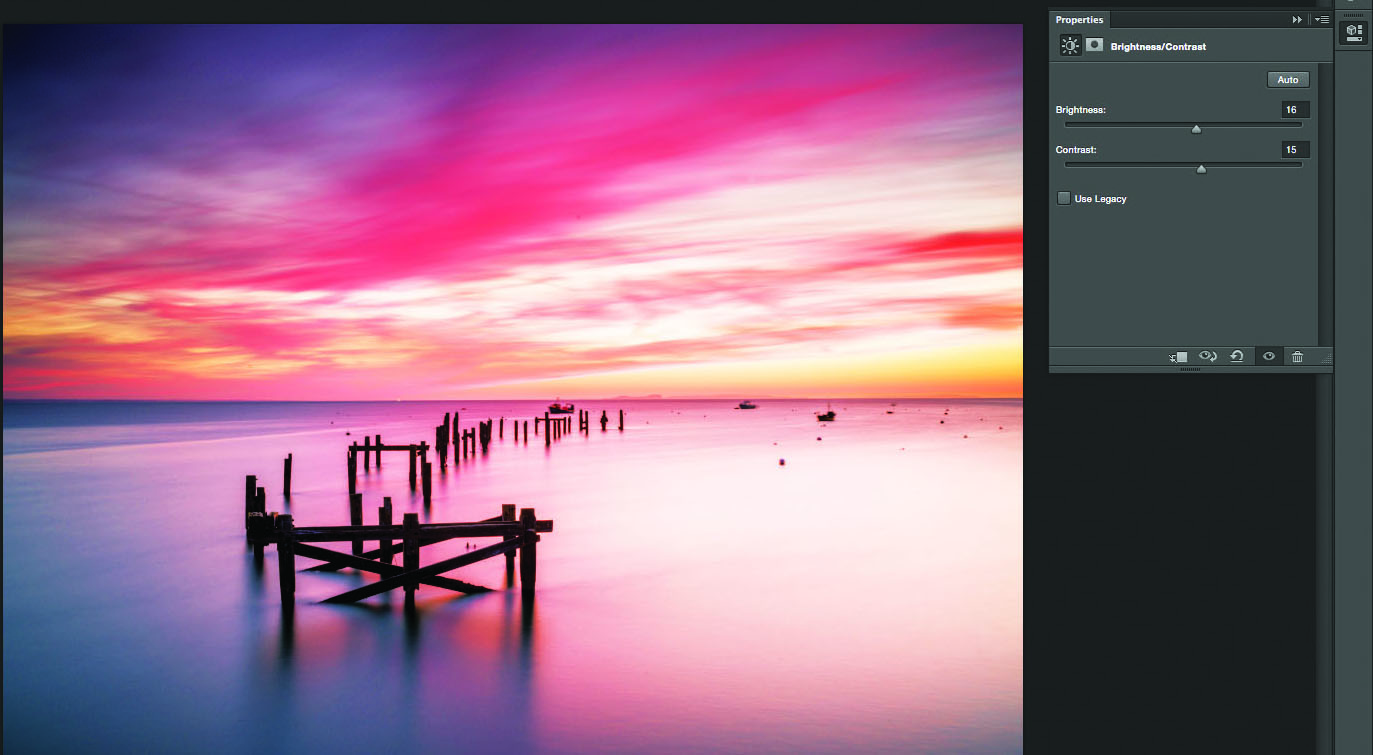
2 Adjust the brightness Add a Brightness/Contrast Adjustment layer to tweak the colour. Increase both sliders slightly – we increased Contrast to 10 and Brightness to 13.
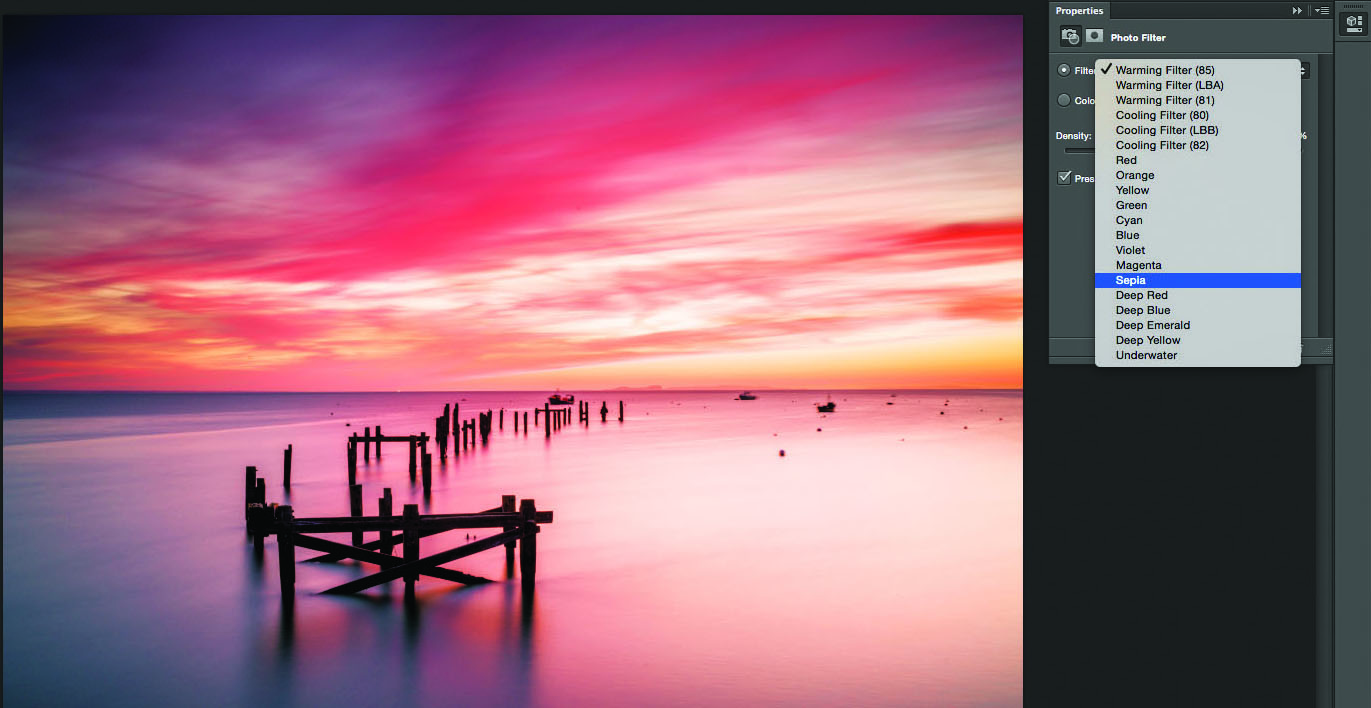
3 Add a Photo Filter Add warmth and depth with a Photo Filter. Go to Layers>
New Adjustment Layer>Photo Filter. Click the Filter drop-down menu and select Sepia.
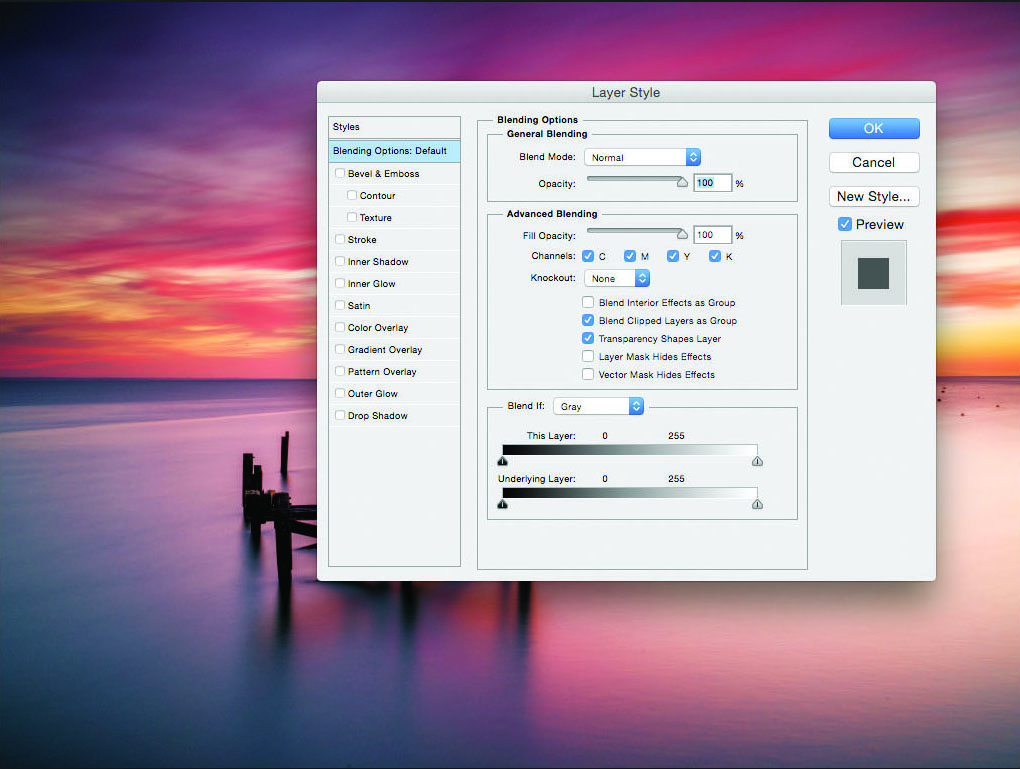
4 Adjust the Opacity To make the effect a little more subtle, double-click the Photo Filter layer to alter the Layer style and change the Opacity to 45%.
5 Add Saturation Create a Hue/Saturation adjustment layer. Instead of adjusting everything at once, choose individual colours. We increased Yellow, Cyan, Blue and Magenta.
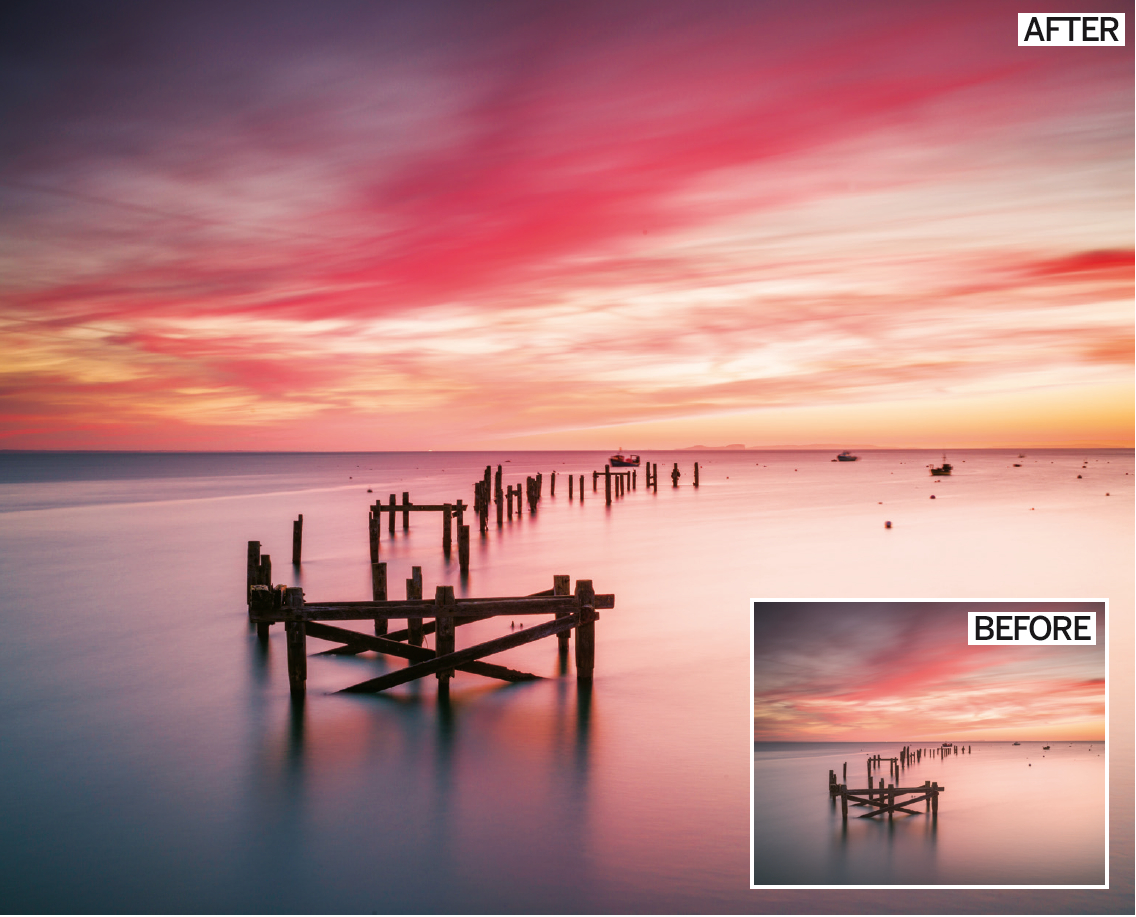
Check back
As the final step, turn off each of the adjustment layers so that you can see the original image and identify that you haven’t taken it into the realms of improbability and that it still looks acceptably natural
Get the Digital Camera World Newsletter
The best camera deals, reviews, product advice, and unmissable photography news, direct to your inbox!
Digital Photographer is the ultimate monthly photography magazine for enthusiasts and pros in today’s digital marketplace.
Every issue readers are treated to interviews with leading expert photographers, cutting-edge imagery, practical shooting advice and the very latest high-end digital news and equipment reviews. The team includes seasoned journalists and passionate photographers such as the Editor Peter Fenech, who are well positioned to bring you authoritative reviews and tutorials on cameras, lenses, lighting, gimbals and more.
Whether you’re a part-time amateur or a full-time pro, Digital Photographer aims to challenge, motivate and inspire you to take your best shot and get the most out of your kit, whether you’re a hobbyist or a seasoned shooter.

