Use the Erase and Clone & Stamp tools in Luminar

Some of the world’s most interesting places are, not surprisingly, some of the most popular. If you’re there, so are a lot of other people – and they’re all in your shot!
This is just one example. We’ve all got lots of photos with annoying tour buses, ugly signs or power lines we don’t want in our shots. Amazing interiors are often spoilt by ropes, signs or modern equipment, and otherwise perfect portraits can be ruined by things you don’t want in the background.
The traditional solution to this challenge is a cloning tool. Luminar 4 has a Clone & Stamp tool that works in the same way as regular clone tools everywhere, and is especially effective on repeating patterns, fine details and man-made objects.
Getting tones and colors to match is difficult with clone tools, however, unless your clone ‘source’ has the same texture, pattern or tone and is nearby in the same lighting. The bigger the object you’re trying to remove, the less likely this becomes.
This is where Luminar 4 has a secret weapon – the Erase tool. This removes objects intelligently, taking textures, patterns and tones from the surrounding image to cover up the object you want to get rid of – automatically. It’s far more effective on larger objects than regular cloning, and it’s far quicker, too.
Often, the results are spectacular and immediate. Sometimes, though, a trickier subject will produce a result that’s better, but still not quite right. These manual tidy-ups are where Luminar’s regular Clone tool comes into its own.
How to remove objects from a photo in five steps
Luminar’s Erase tool is simple once you understand the process
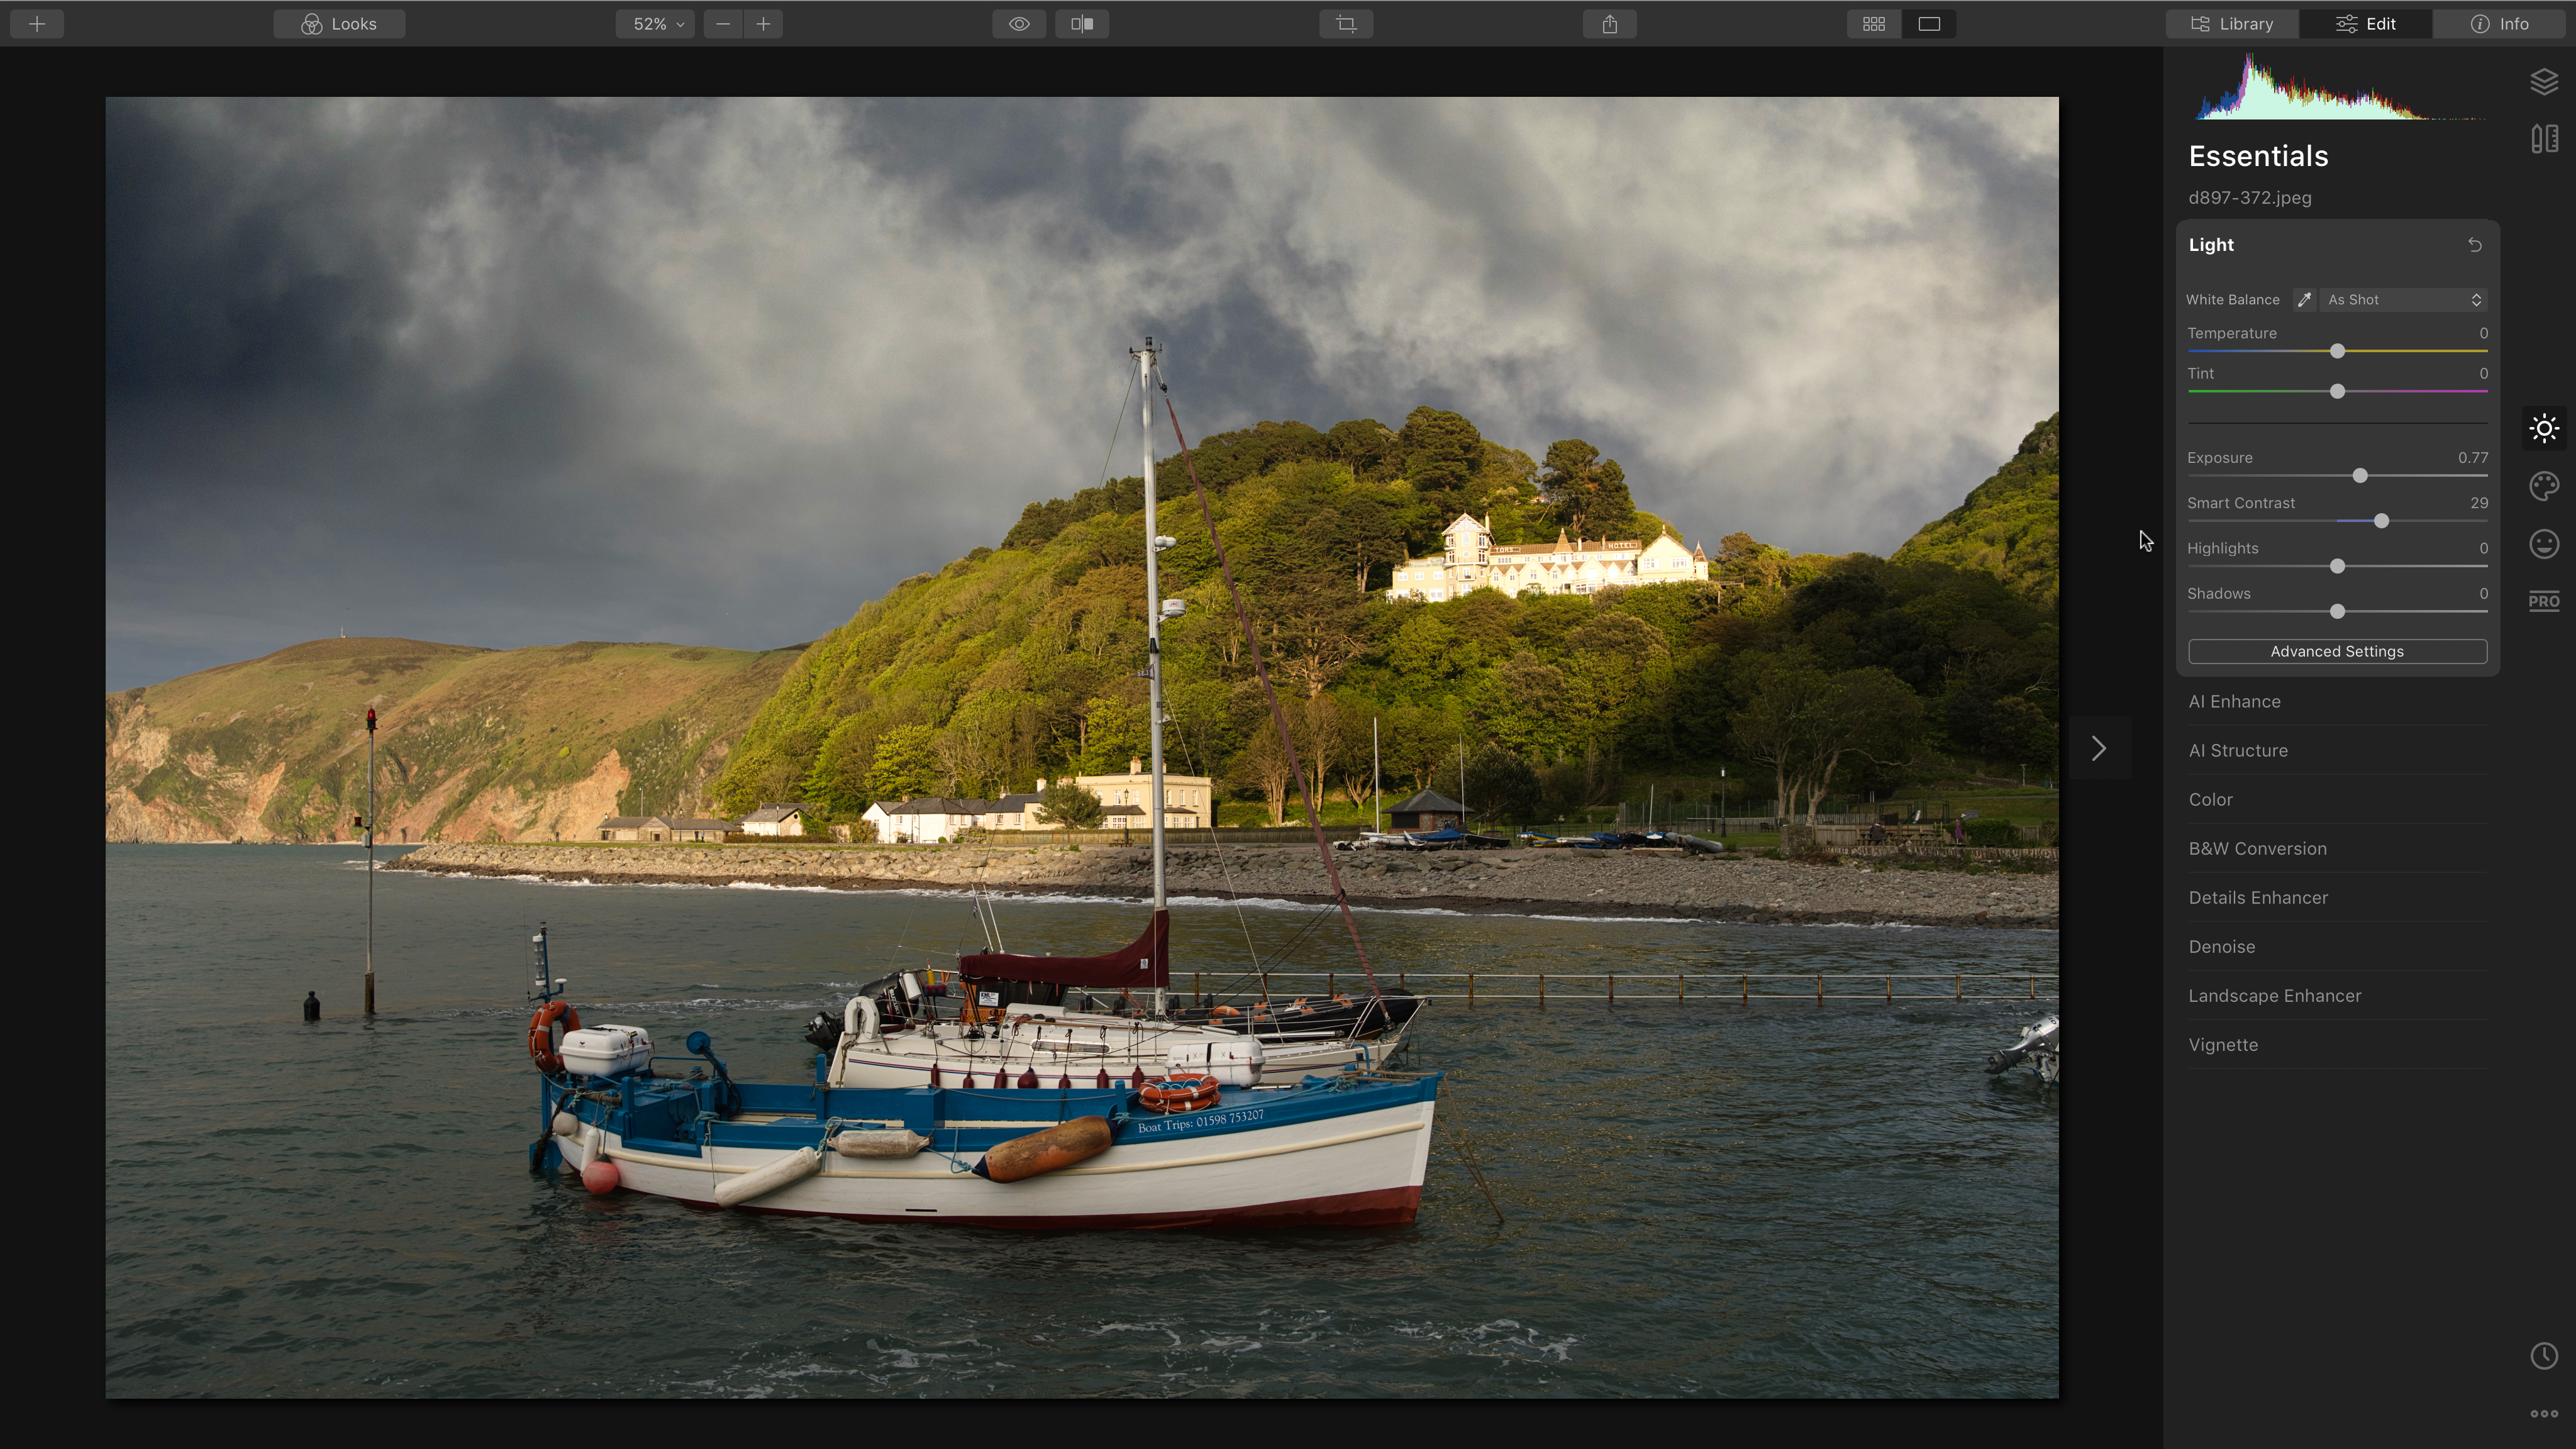
1. Make necessary adjustments
Luminar’s Erase tool creates a composite layer from all the image layers below it, so if you need to carry out any image enhancements to the exposure, do this first. If you do it later, your adjustments won’t show up. (The alternative is to erase unwanted objects, then apply enhancements in an Adjustment Layer above the Erase layer.)
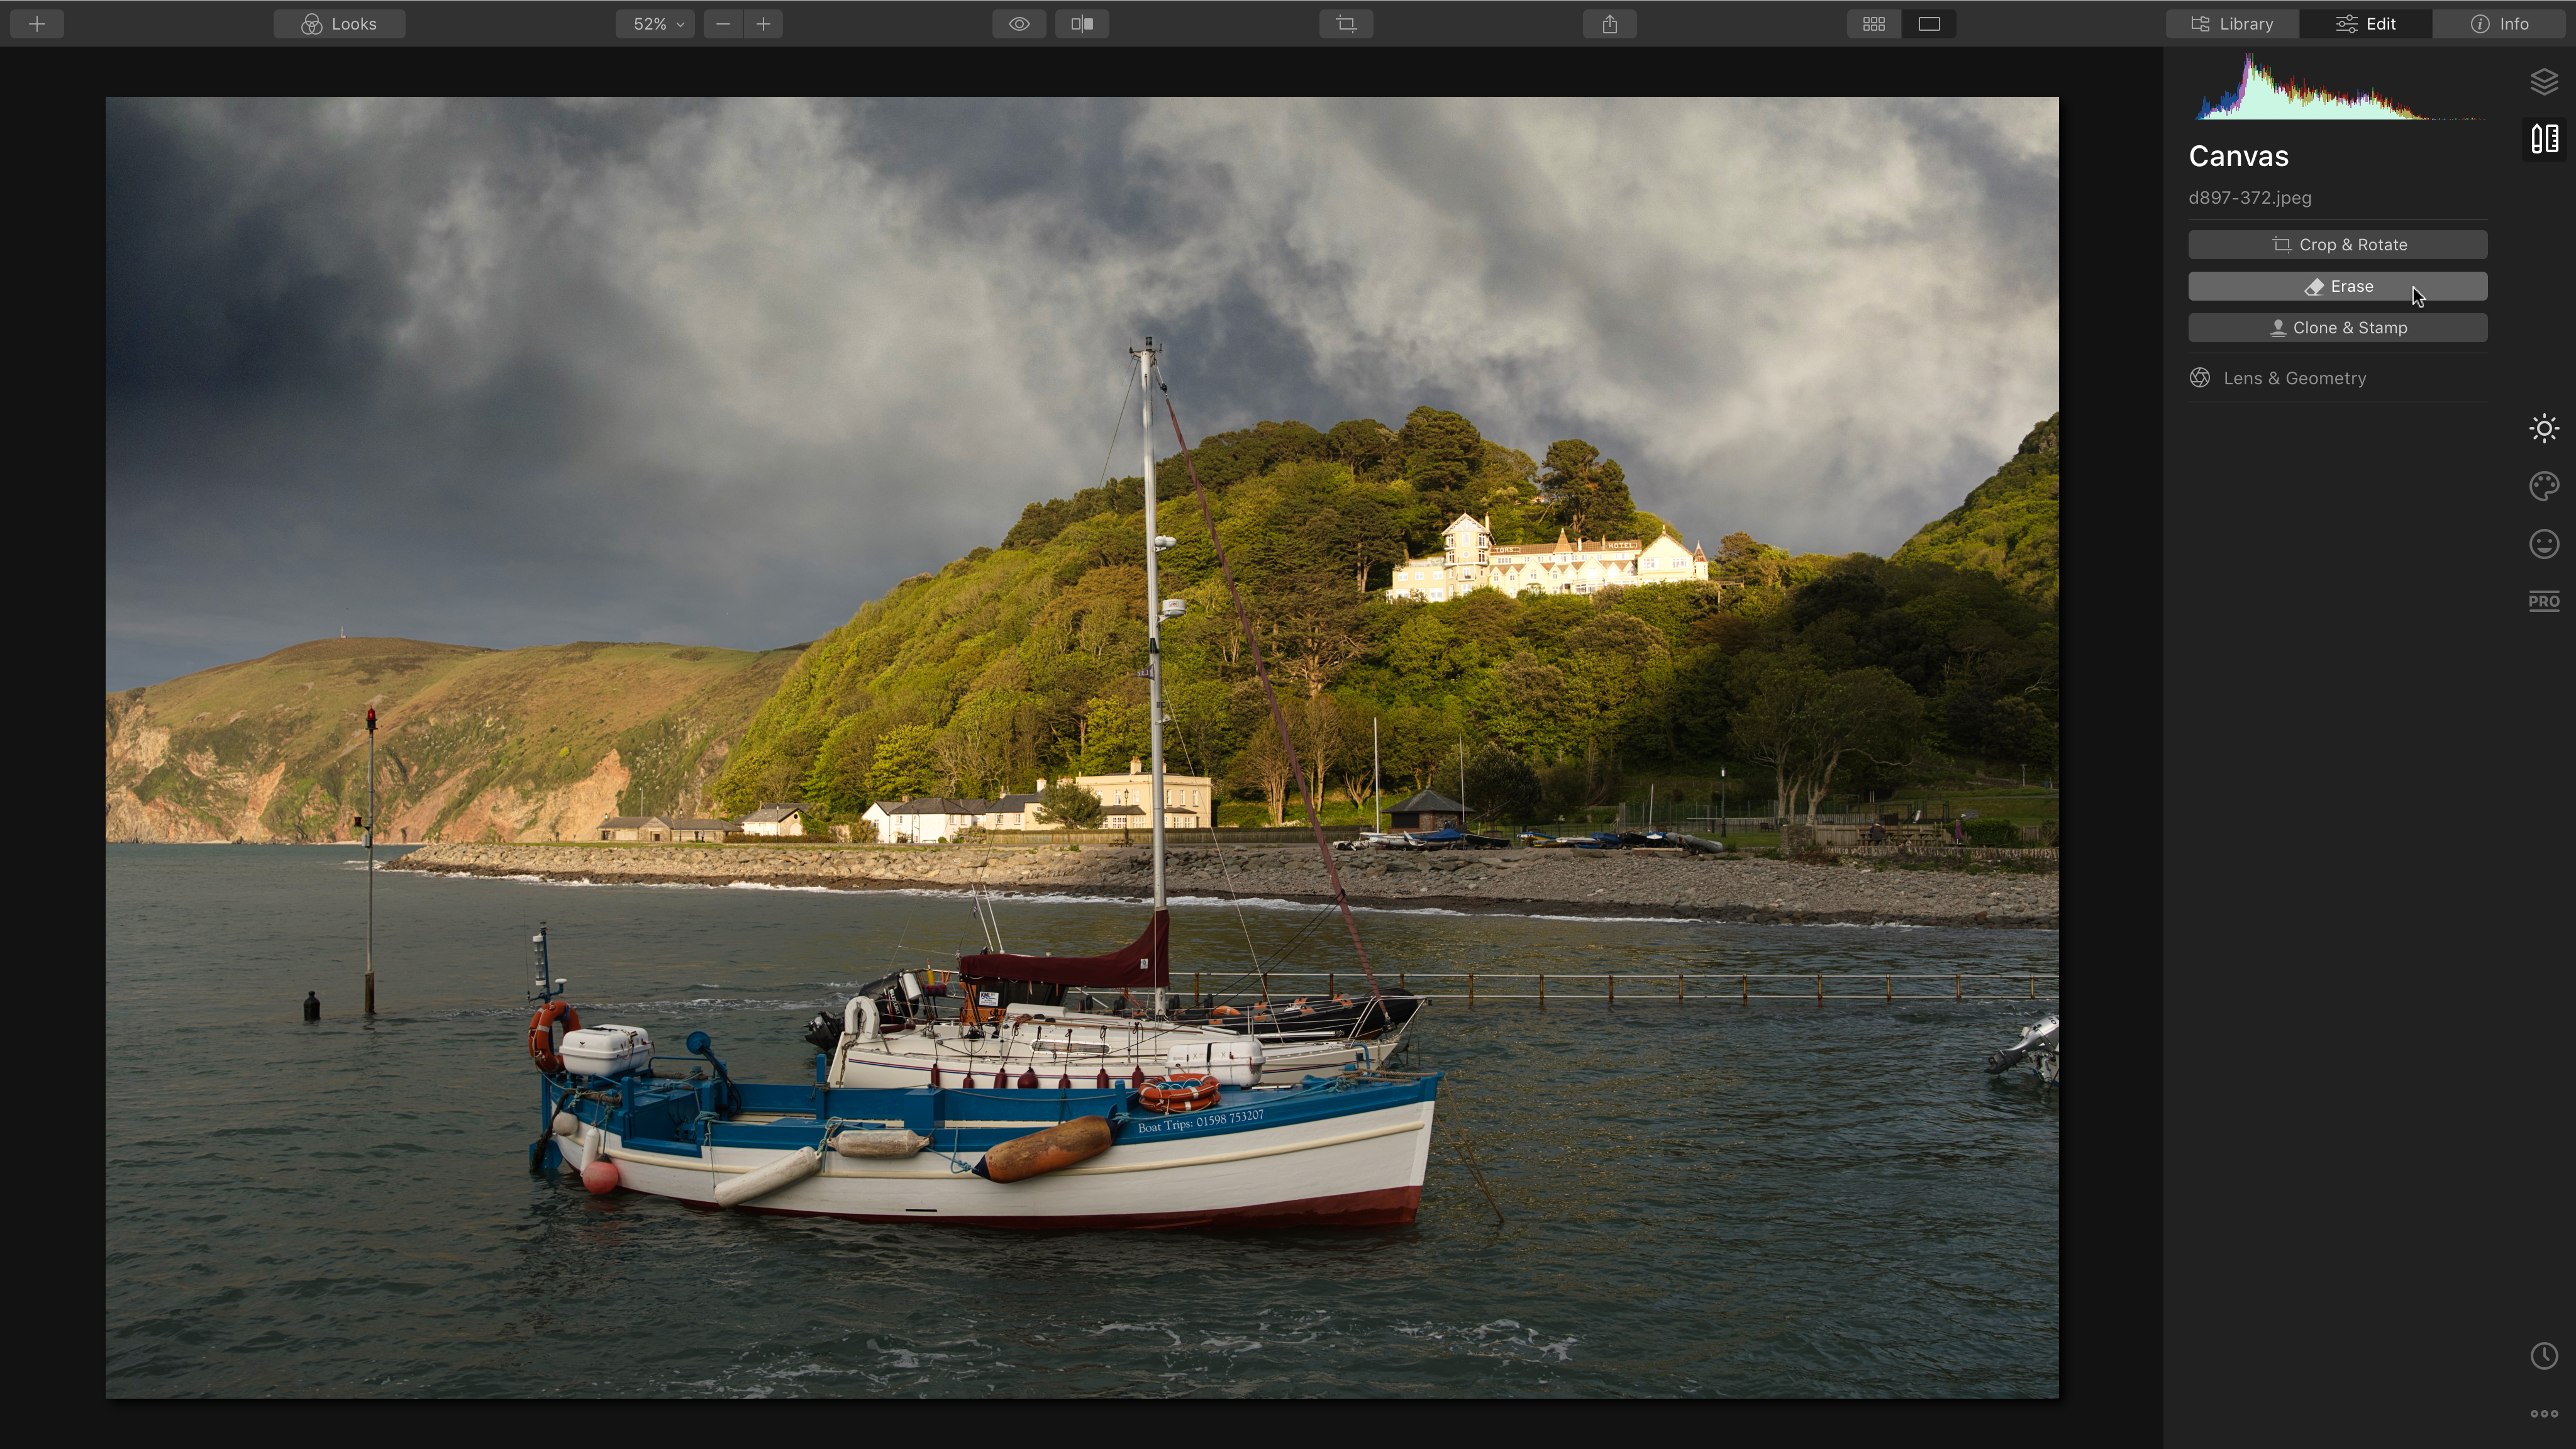
2. Select the Erase tool
Select the Canvas workspace using the button towards the top-right corner. This workspace contains all sorts of useful tools, including Crop & Rotate and Clone & Stamp. If you’re in the image’s base layer, this is where you find the Lens & Geometry tools too. For now, click the Erase button. This creates a new layer where the Erase tool is activated.
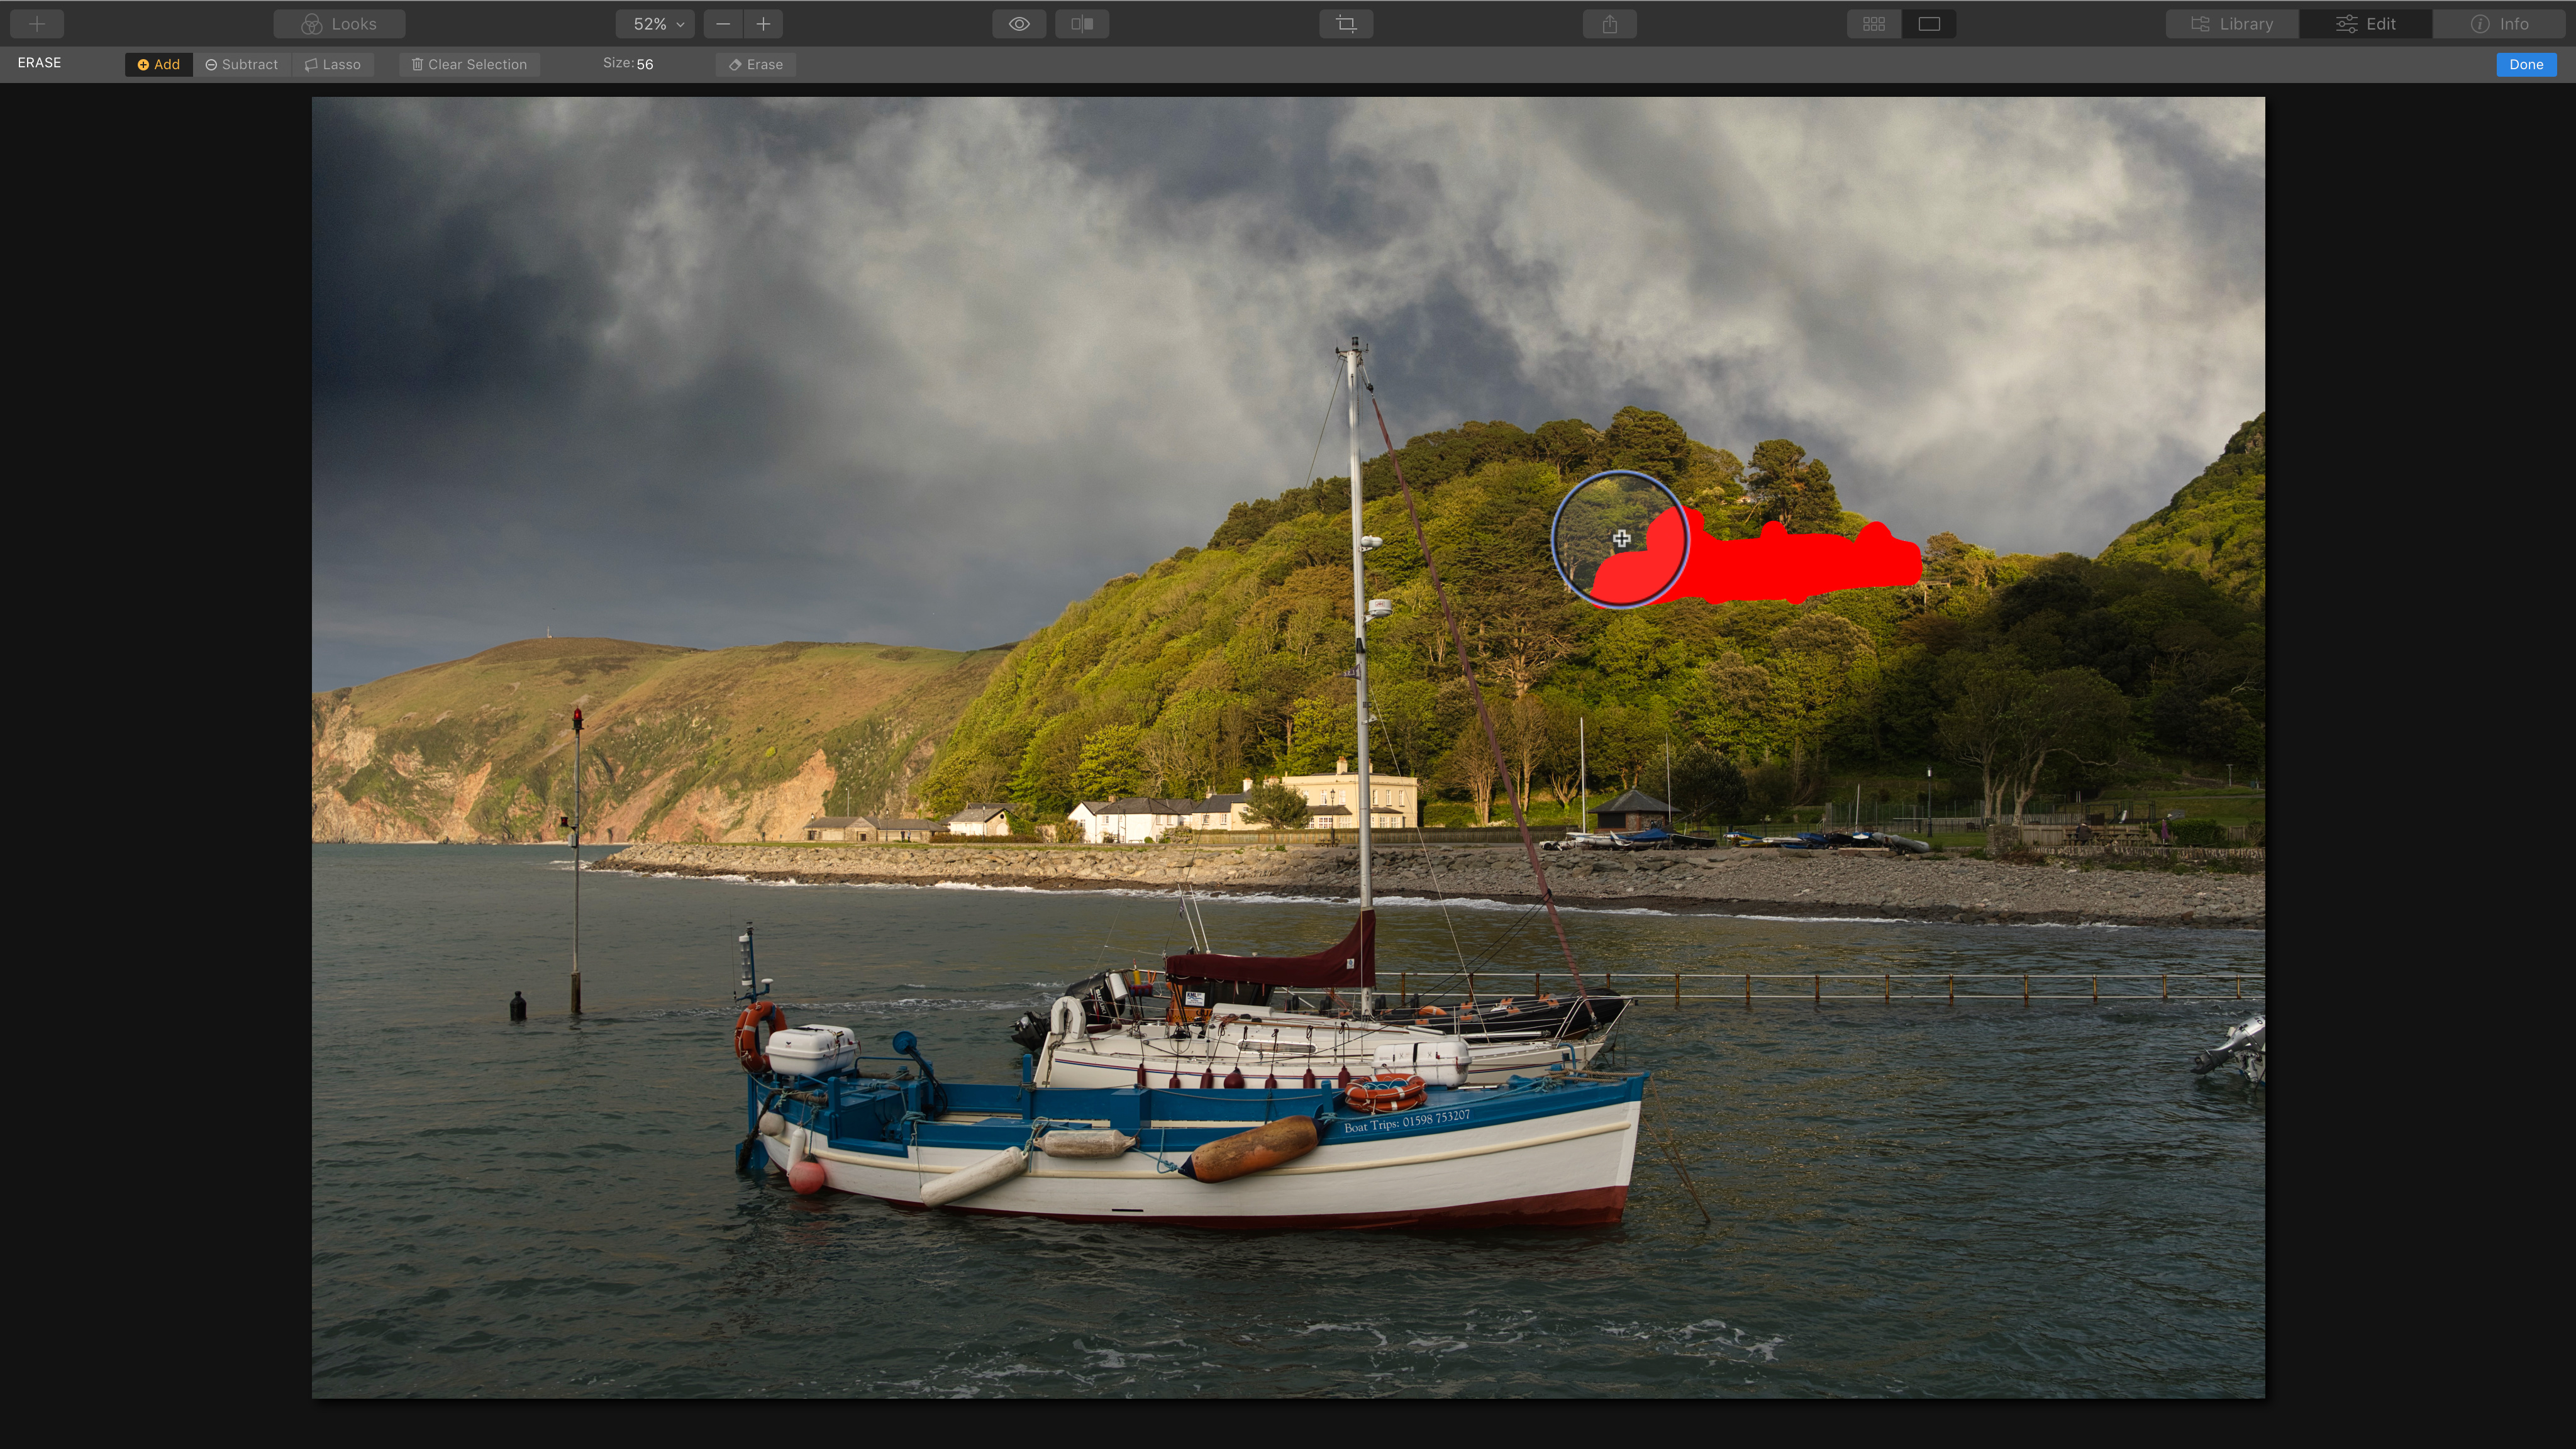
3. Erase an object
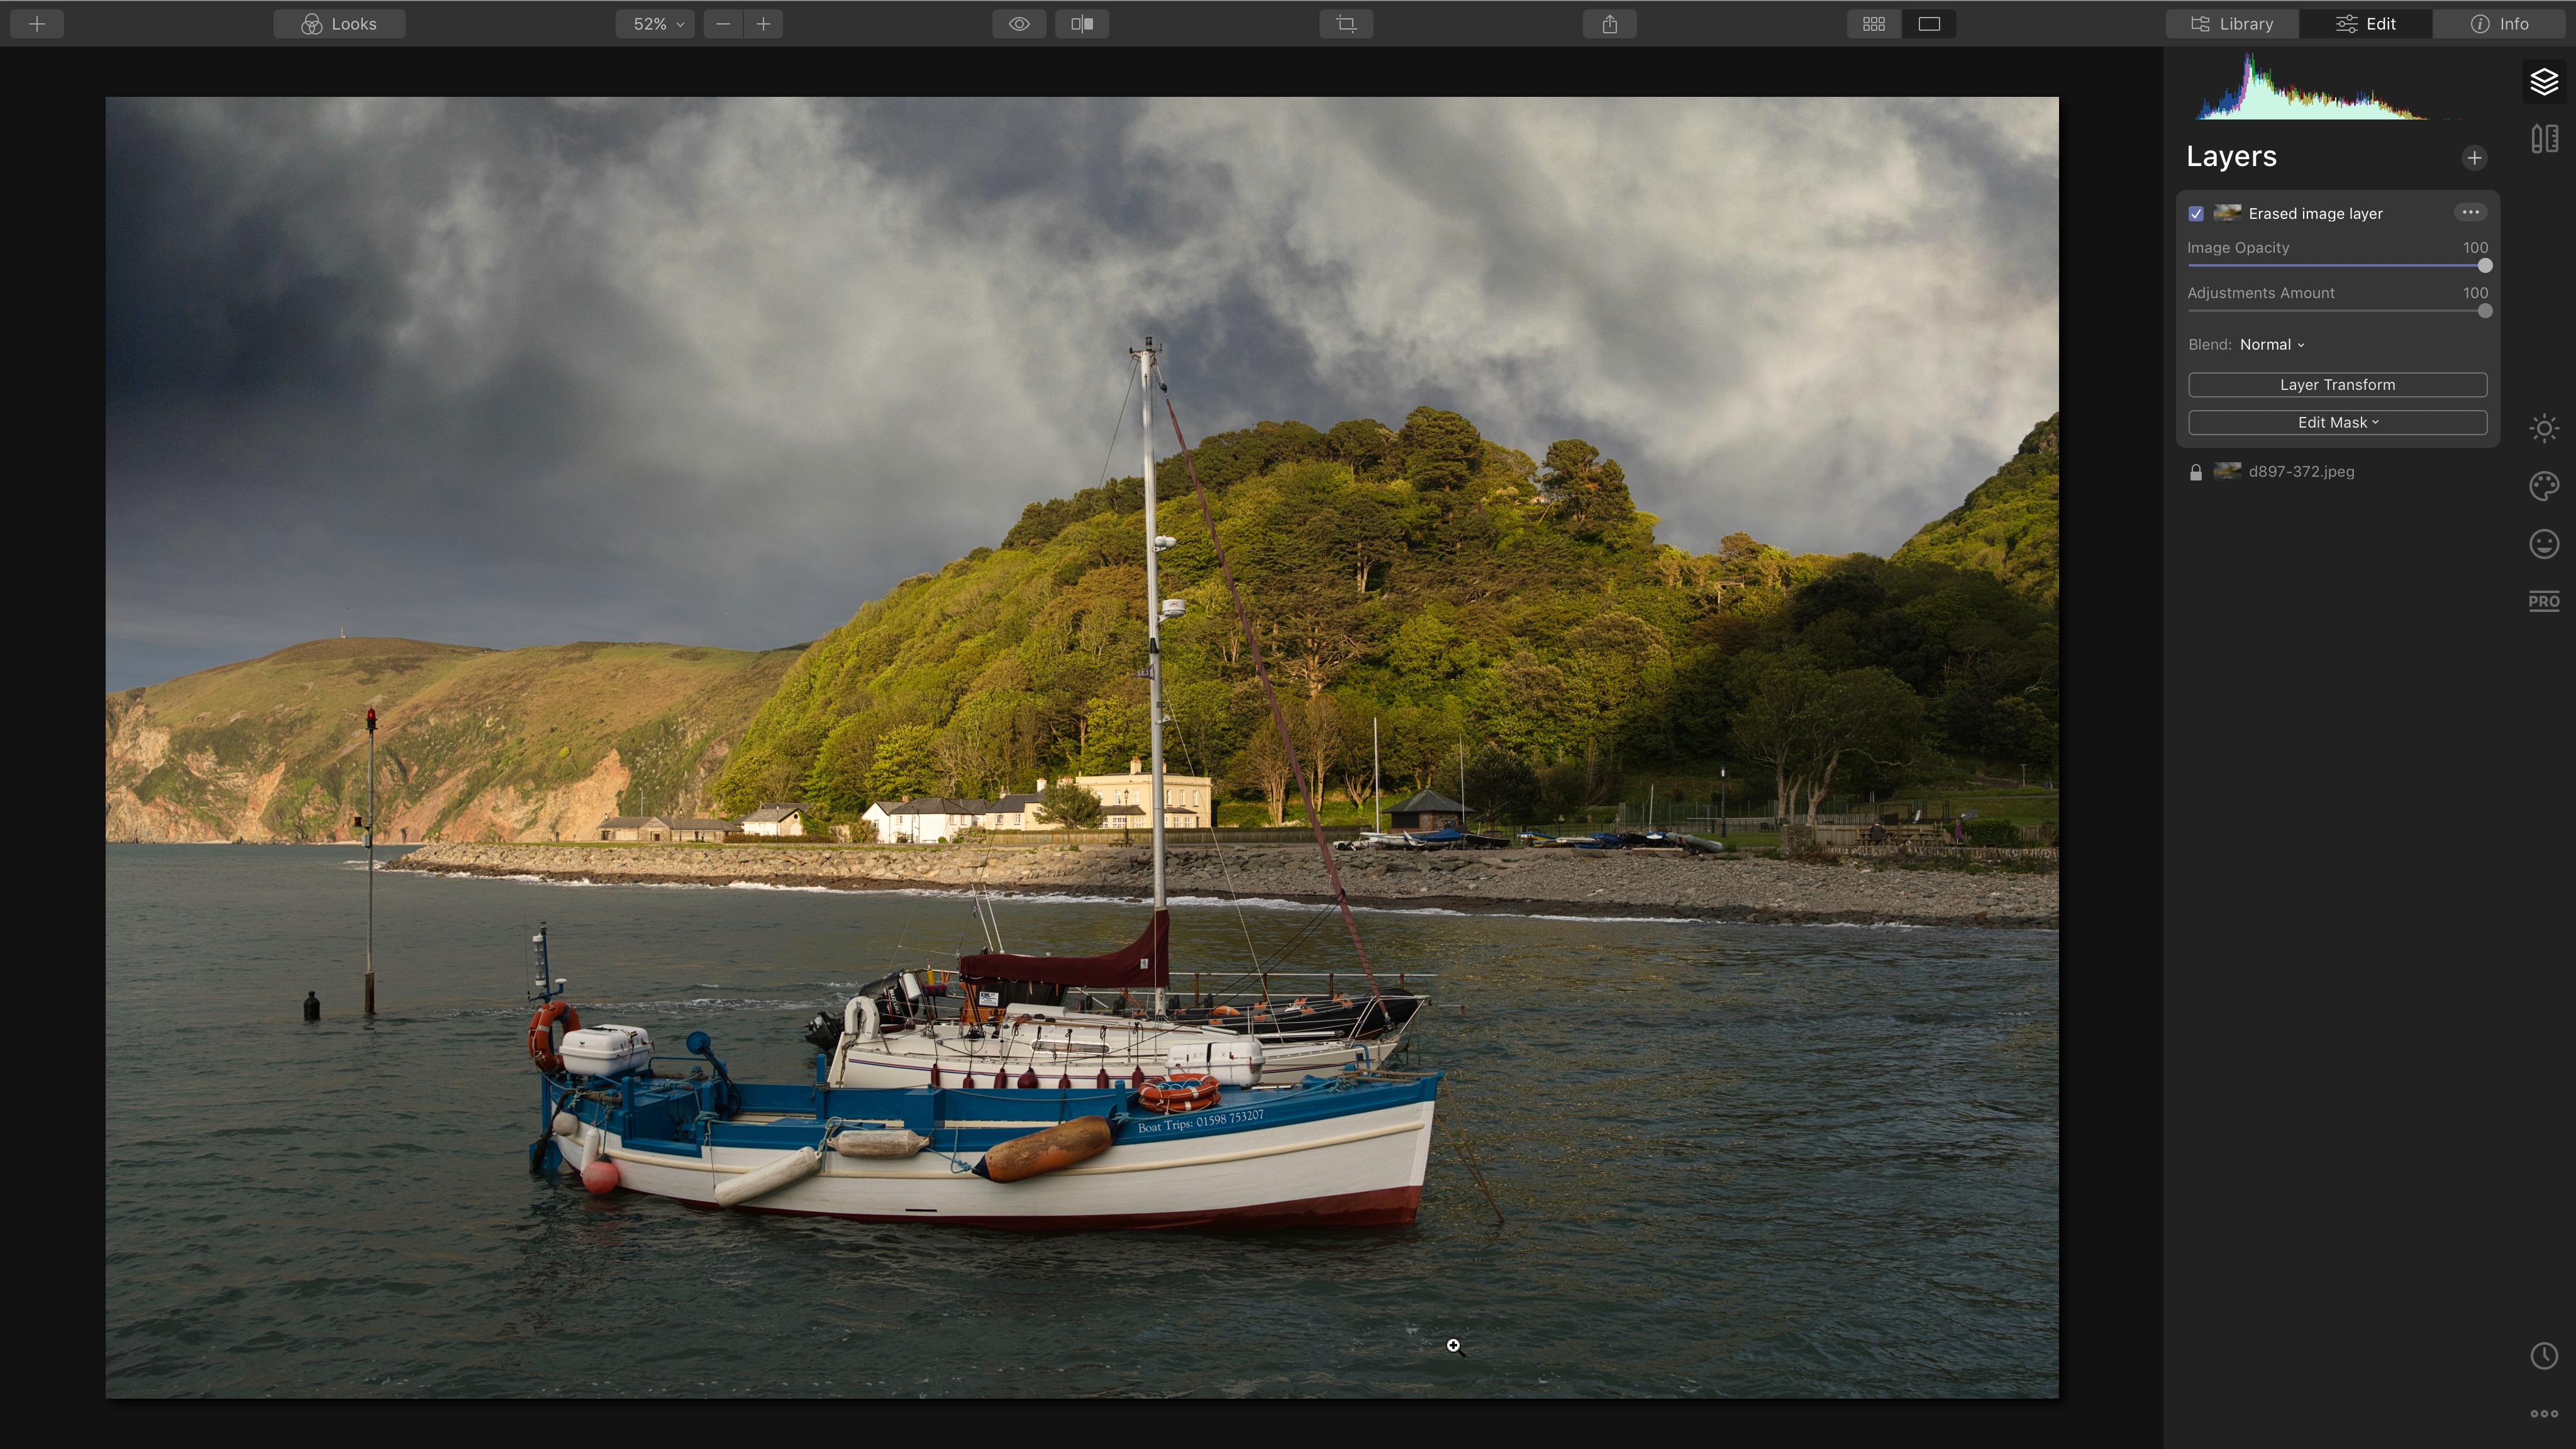
The Erase tool is a circular brush with a size you can adjust with a slider. To erase an object, simply paint over it. You don’t have to be exact, but the less of the background that’s included, the better. You don’t have to keep the brush held down – it’s not like a lasso selection tool. Let’s get rid of that distracting sunlit building on the hillside in the background.
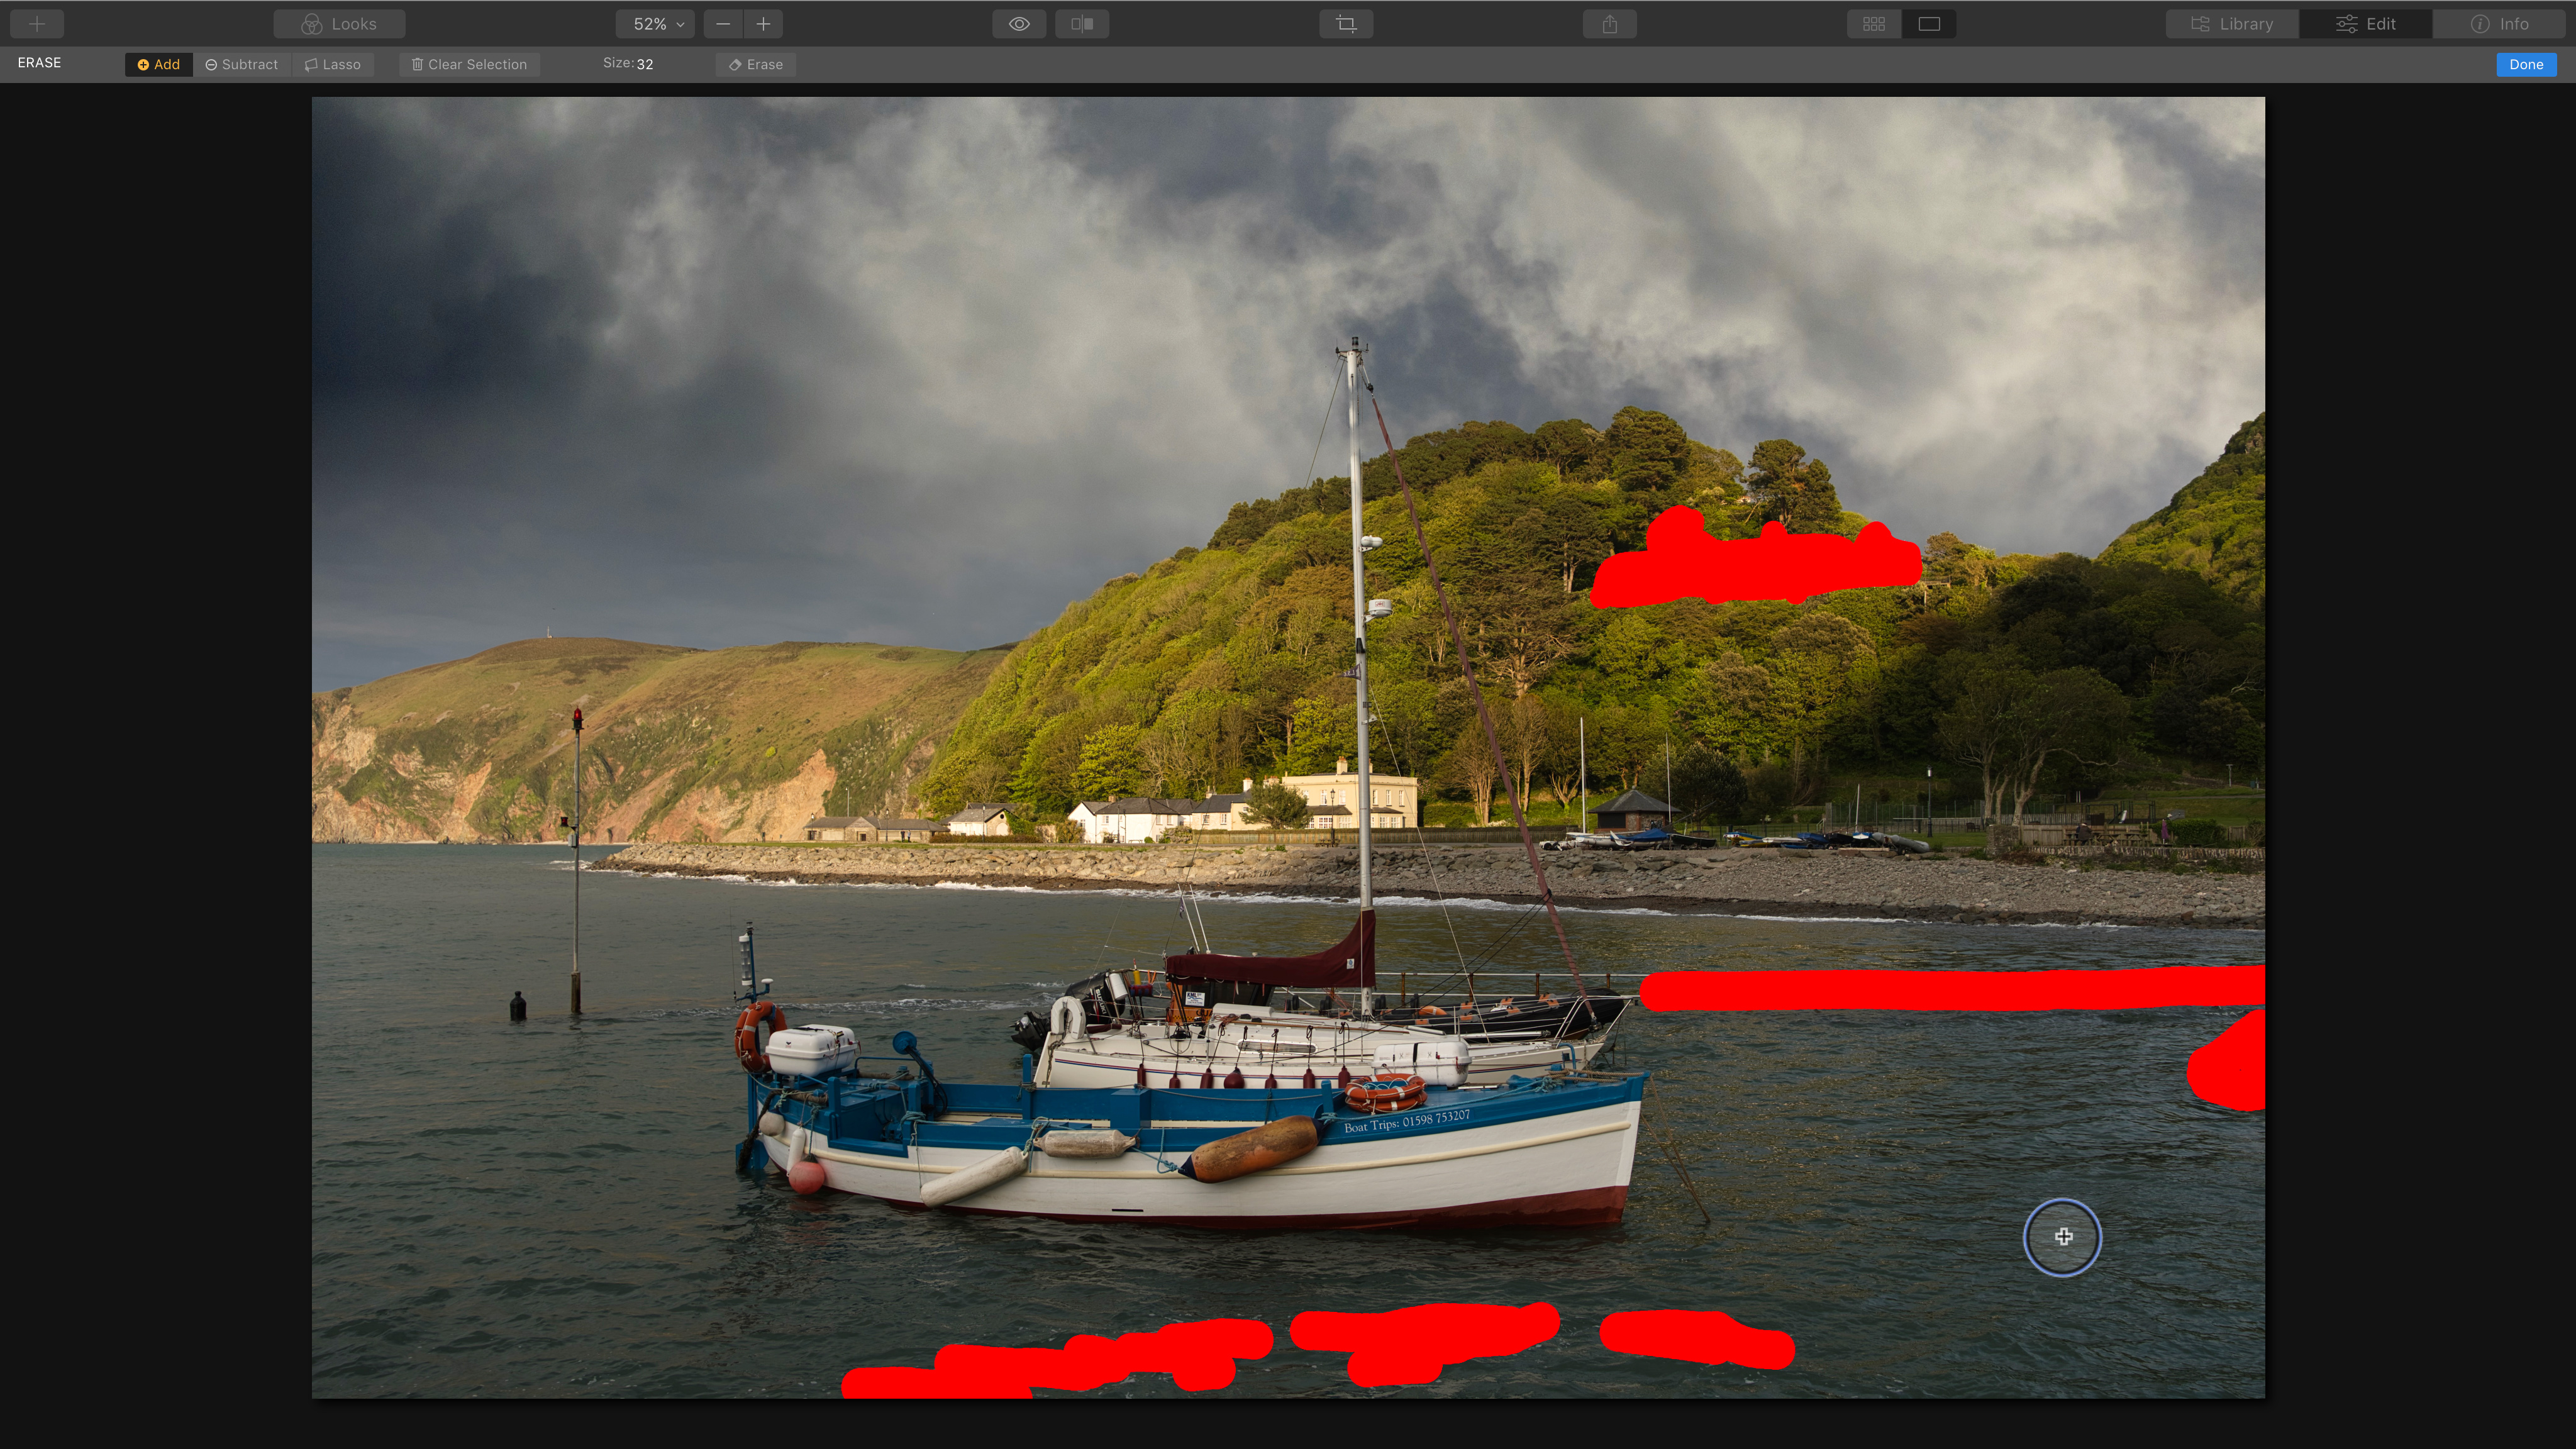
4. Erase other objects too
The Erase process can remove lots of objects at the same time. Just release the brush and paint over another object you want to get rid of, changing the brush size to suit. Let’s remove the outboard motor just appearing on the right edge of the picture, the half-submerged railings in the water, and some of the foam in the sea in the foreground.
5. Clone & Stamp
When you’re satisfied you’ve got everything, click the Done button. Luminar will now generate the Erase layer above the original image. You can switch its visibility on and off in the Layers panel to see the difference. If it doesn’t produce a perfect result first time around, you can try again with any areas that still look wrong, or switch to the Clone & Stamp tool to make manual repairs. There’s more on the Clone & Stamp tool overleaf.

The Clone & Stamp tool
Learn how Luminar’s regular cloning tools work
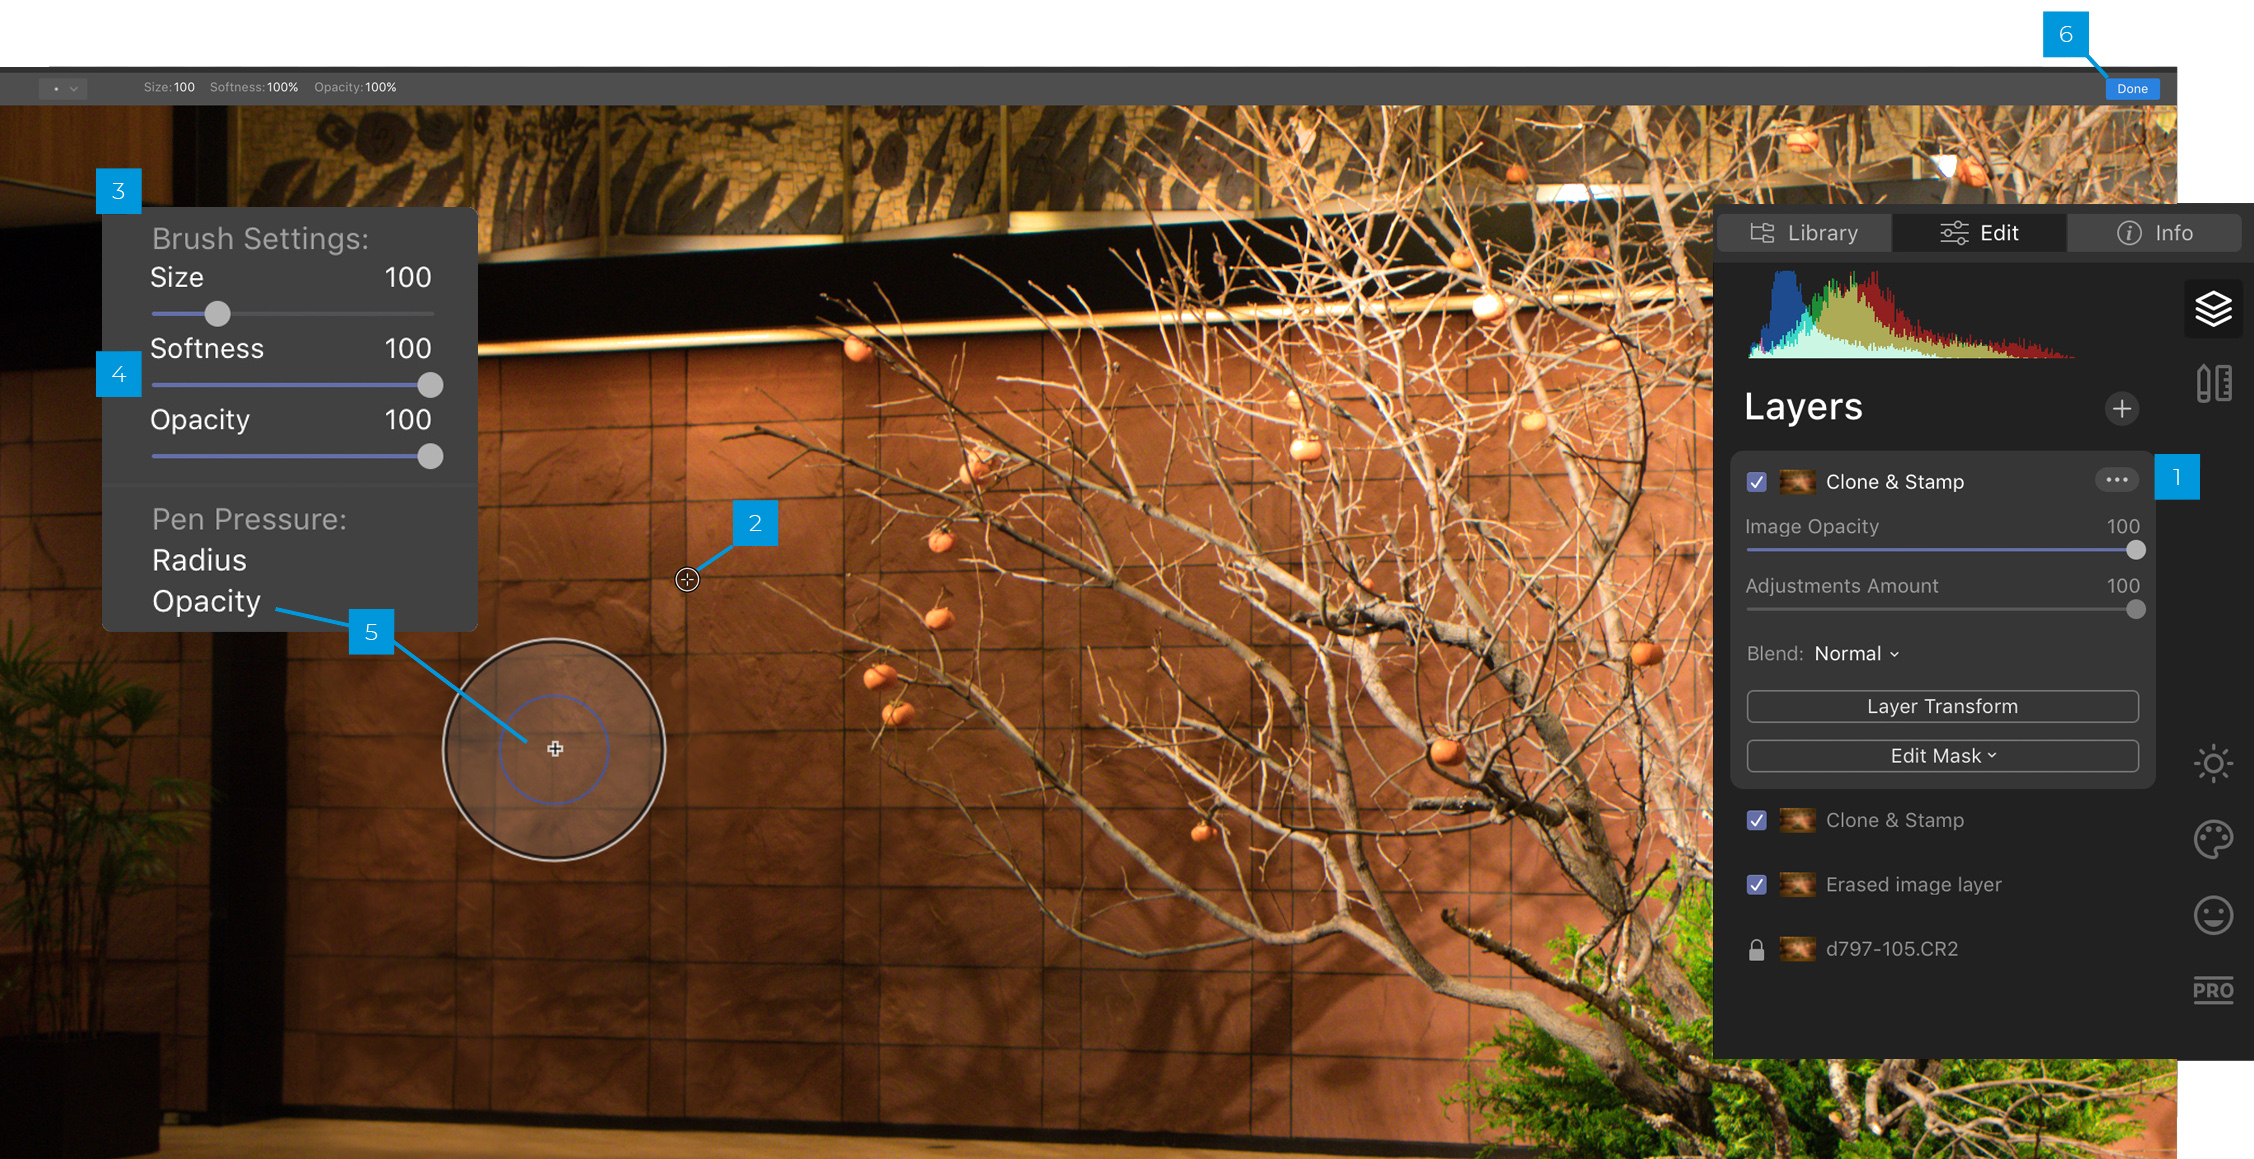
Sometimes the Erase tool is enough on its own, sometimes you just need the Clone & Stamp tool – and sometimes you need both!
1. Clone & Stamp layer
When you click the Clone & Stamp button in the Canvas workspace, Luminar creates a new, composite layer to work on, just like the Erase tool.
2. Clone target
First you click to select the clone source, then you can start dabbing or painting over the area you want to repair – Alt-click to choose a new source as you work.
3. Brush Settings
You can change the clone brush size using the menu on the top toolbar or right-click on the image to bring up this floating brush properties panel.
4. Softness
You can adjust the brush softness. A hard brush works well on hard-edged patterns, but a soft brush is better at blending in areas of softer, shaded tones.
5. Opacity
For complex areas where it’s difficult to get a convincing repair, try reducing Opacity and using a larger, softer brush to disguise the repair.
6. Done
When you’ve finished, click the Done button to generate the layer. If you need to make more repairs, you can do them on a new Clone & Stamp layer.

Removing unwanted objects
Here are three image repairs we carried out in Luminar 4


Hotel lobby
This hotel lobby had a beautiful persimmon tree on display, but the lobby always had people in it during the photo shoot. It took the Erase tool to remove the person, a grille on the wall behind them and the signs at the base of the tree. The Clone & Stamp tool was used to restore the geometric pattern on the wall afterwards.


River boat
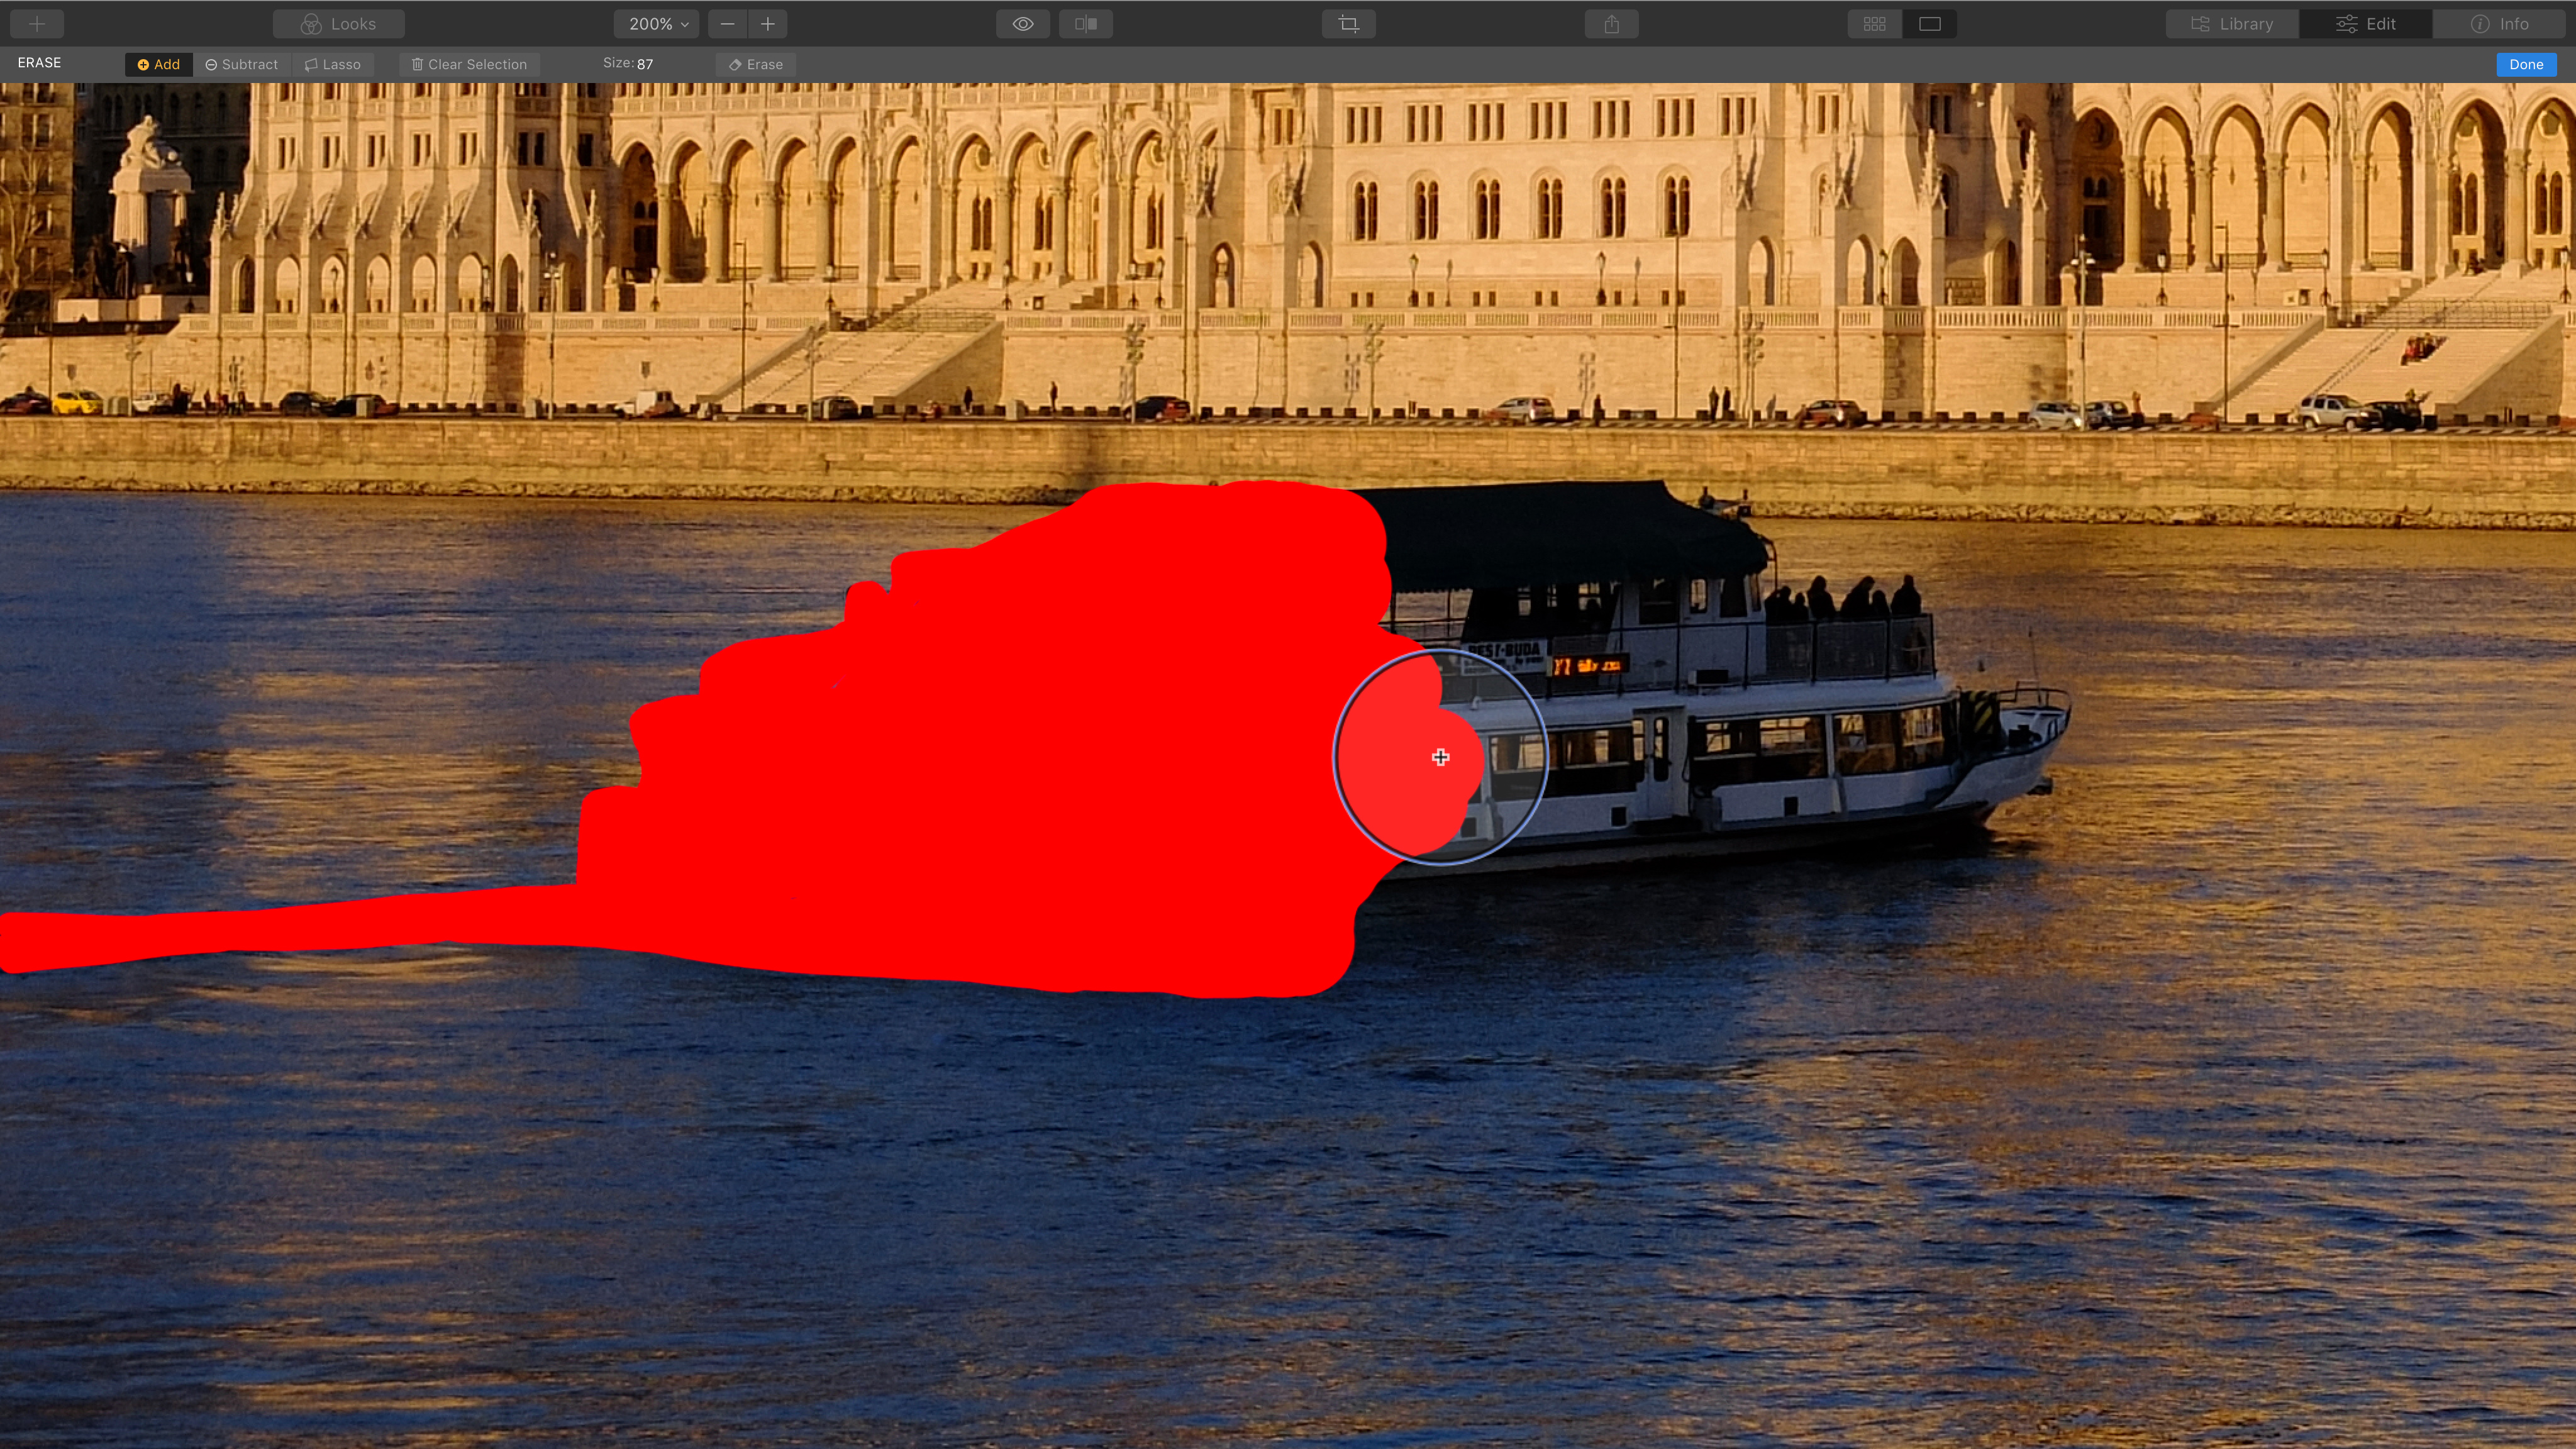
This busy river was never entirely free of boats. Removing this one was a challenge because of its size and reflection, but the Erase tool did all the heavy lifting ,and the Clone & Stamp was used to add back the patterns in the water and the reflections from the sunlit building across the river.


Dog leash
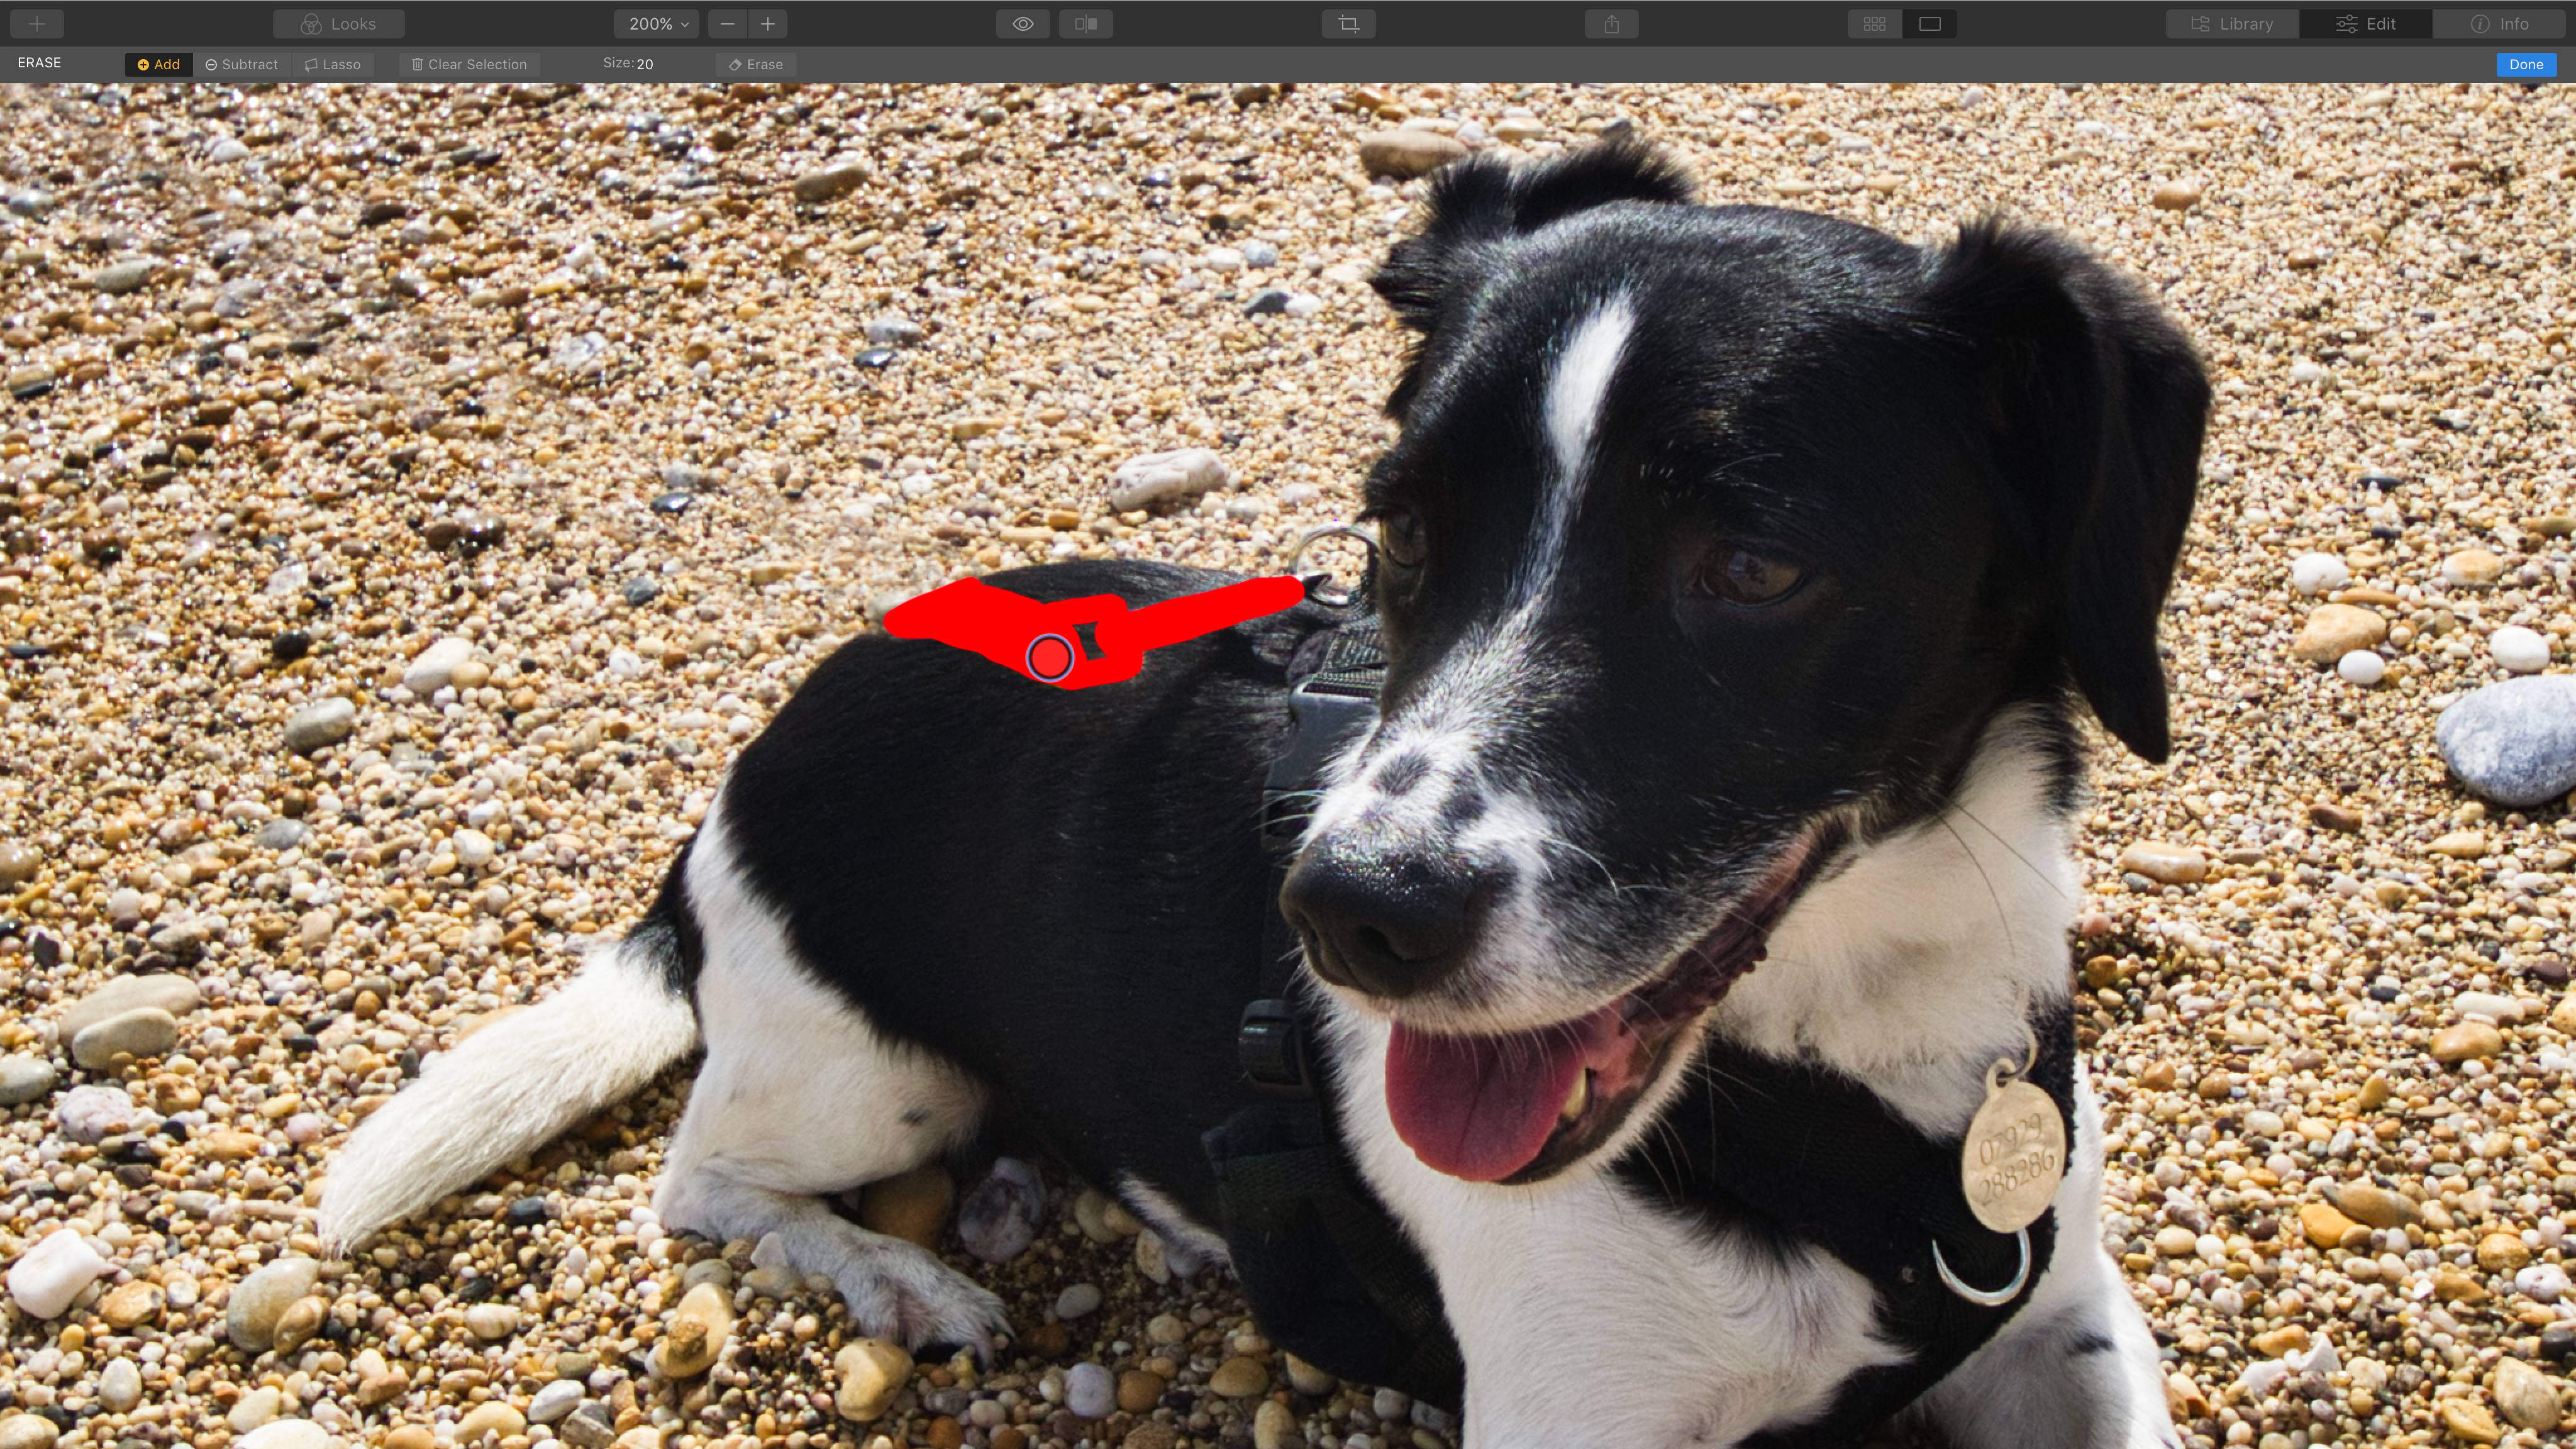
This dog couldn’t be let off its leash in the real world, but we were able to remove it digitally. The closer you zoom in on an object (the leash, in this case), the tighter you can be with the Erase tool, and the better the repair is. A little work with the Clone & Stamp tool finished the job.

Five tips for repairing and retouching photos in Luminar 4
Repairing and retouching images is a delicate art. It’s often not possible to achieve a ‘perfect’ repair, and you can waste a lot of time trying. But you can quite quickly get to the point where nobody else will notice what you’ve done, and only you can still see the signs! Here are some other tips for quick and effective object removal with the Erase tool and the Clone & Stamp options.

1. You can erase one object at a time
In Erase mode, there’s an Erase button for erasing the currently selected object without closing the window. You can check repairs as you go along without clicking Done.
2. Don’t forget shadows
When you’re removing an object from a scene, it’s not just the object itself that you need to remove, but its whole effect on the scene. This applies to both shadows and reflections.
3. Quit while you’re ahead!
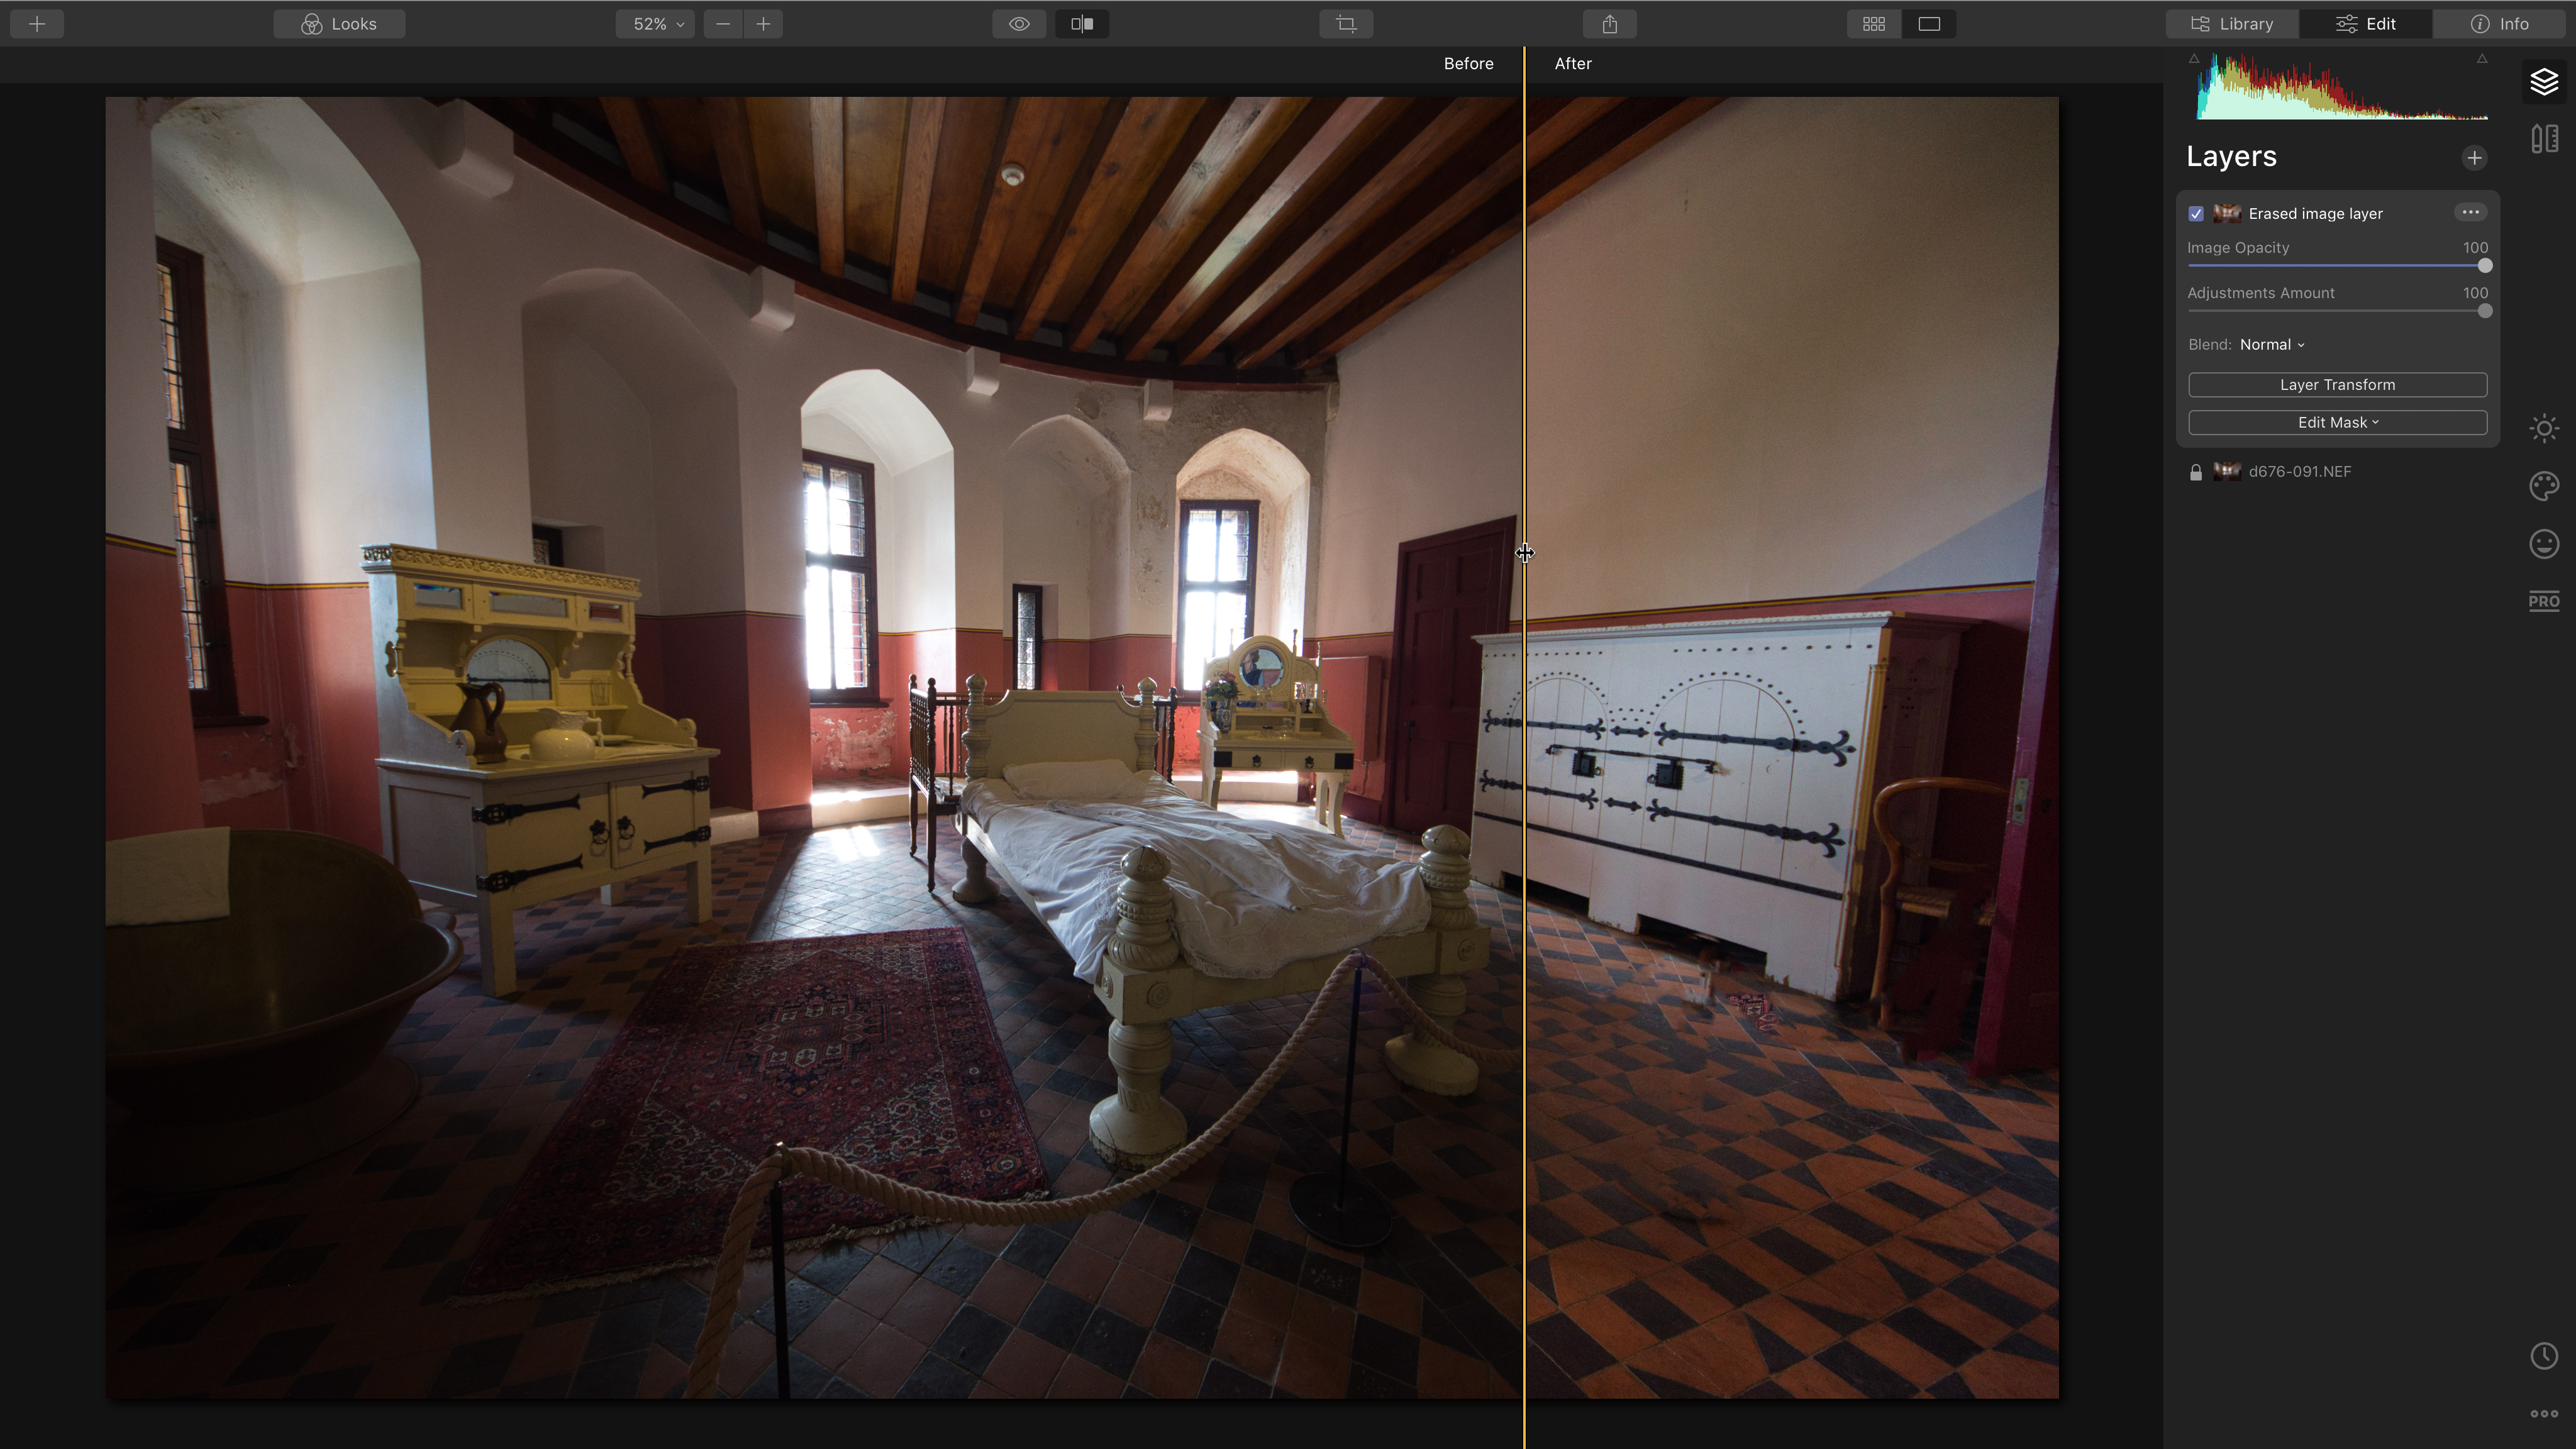
The Erase tool has removed the rope barrier, but it has broken up the pattern on the floor. You have to decide when you’ve done enough for people not to notice!
4. Mix it up
Clone & Stamp is essential in some instances, but watch out that you don’t start repeating recognizable details and patterns. The secret is to keep changing the clone source while you paint.
5. Use the right tool
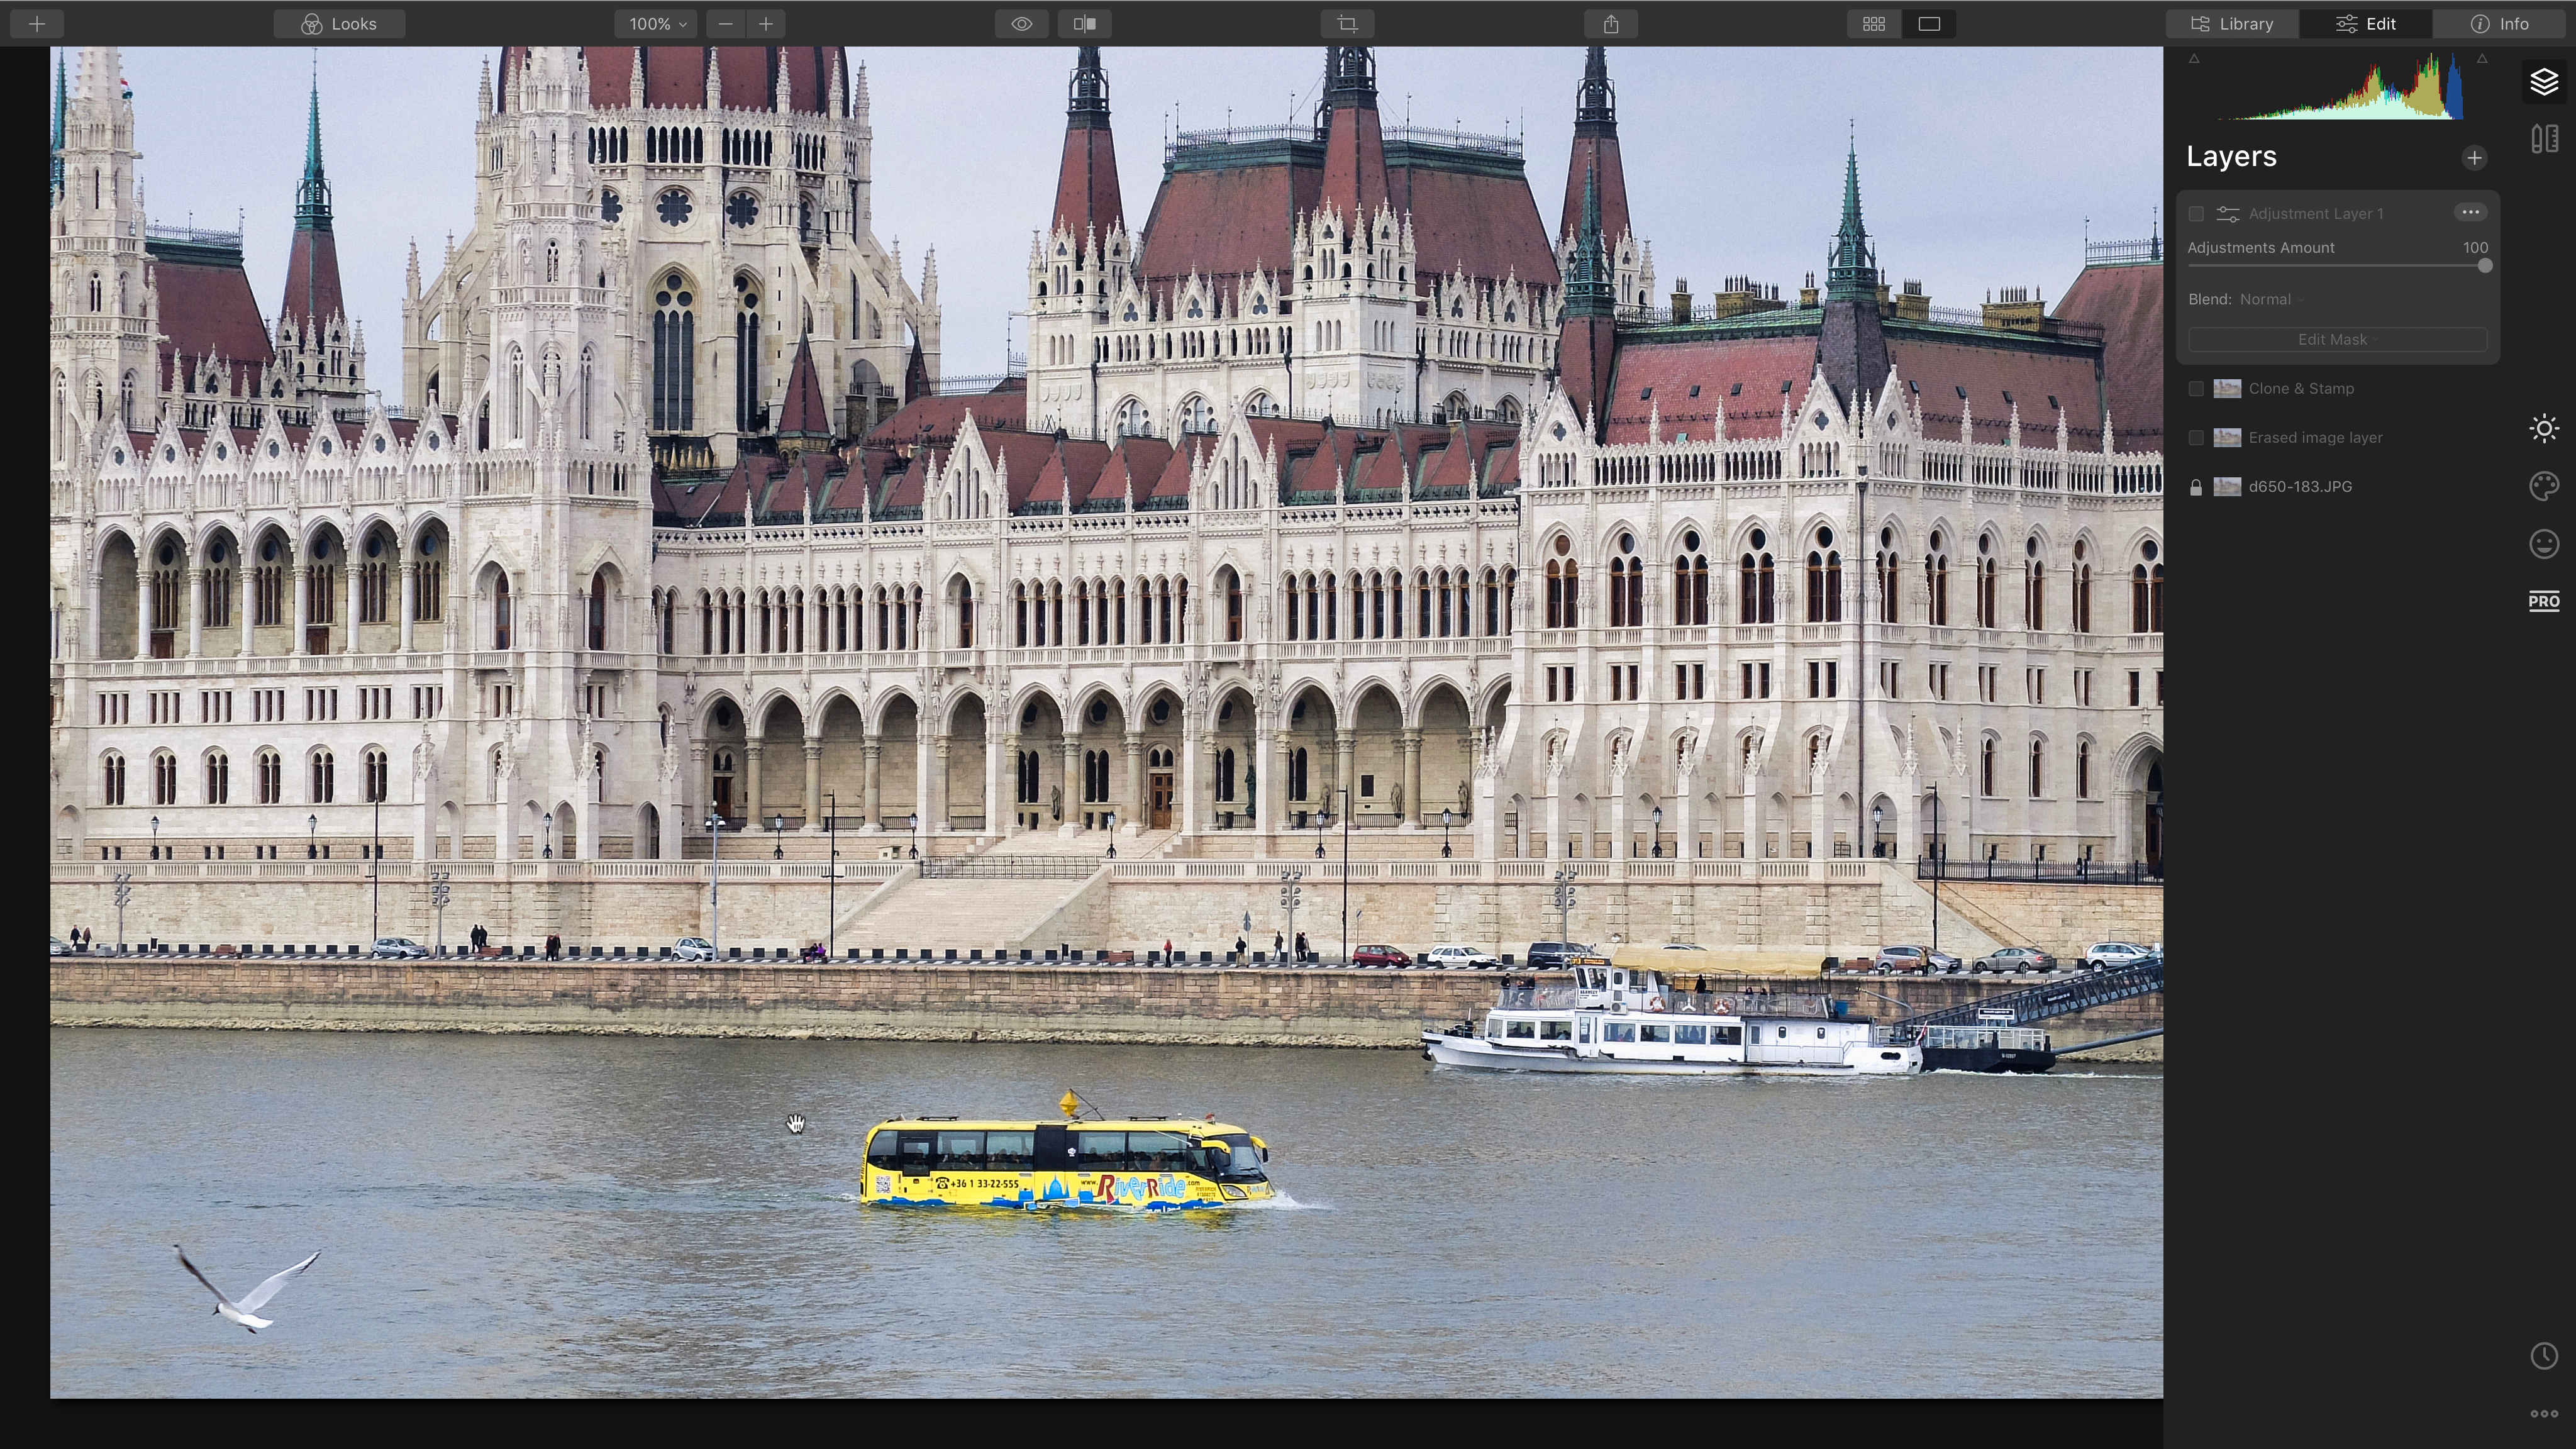
Erase will do a great job of removing the gull and the river bus because of the random, textured background. Removing the white boat will need Clone & Stamp because of the patterns around it.

How to get a copy of Skylum Luminar 4
If you don’t have Luminar 4 already, you can download a free 7-day trial from the Skylum website. It’s available in both macOS and Windows versions and as all the features are fully functional, you can follow this tutorial yourself. If you decide to go ahead and buy Luminar 4, you can use the exclusive discount code DCW20 to save £10 / $10 on the full purchase price.
Visit skylum.com to learn more.
Get the Digital Camera World Newsletter
The best camera deals, reviews, product advice, and unmissable photography news, direct to your inbox!
Digital Camera World is one of the leading authorities on camera and photography news, reviews, techniques, tutorials, comparisons, deals and industry analysis. The site doesn't just specialize in cameras, but all aspects of photography, videography and imaging – including camera phones, gimbals, lenses, lighting, editing software, filters, tripods, laptops, printers, photo books, desks, binoculars and more.
Whether you're using, looking to buy or trying to get the most out of a compact camera, action camera, camera drone, cinema camera, beginner camera or professional camera, Digital Camera World has a roster of experts with combined experience of over 100 years when it comes to cameras, photography and imaging.

