Using the AI Enhancement tools in Skylum Luminar 4
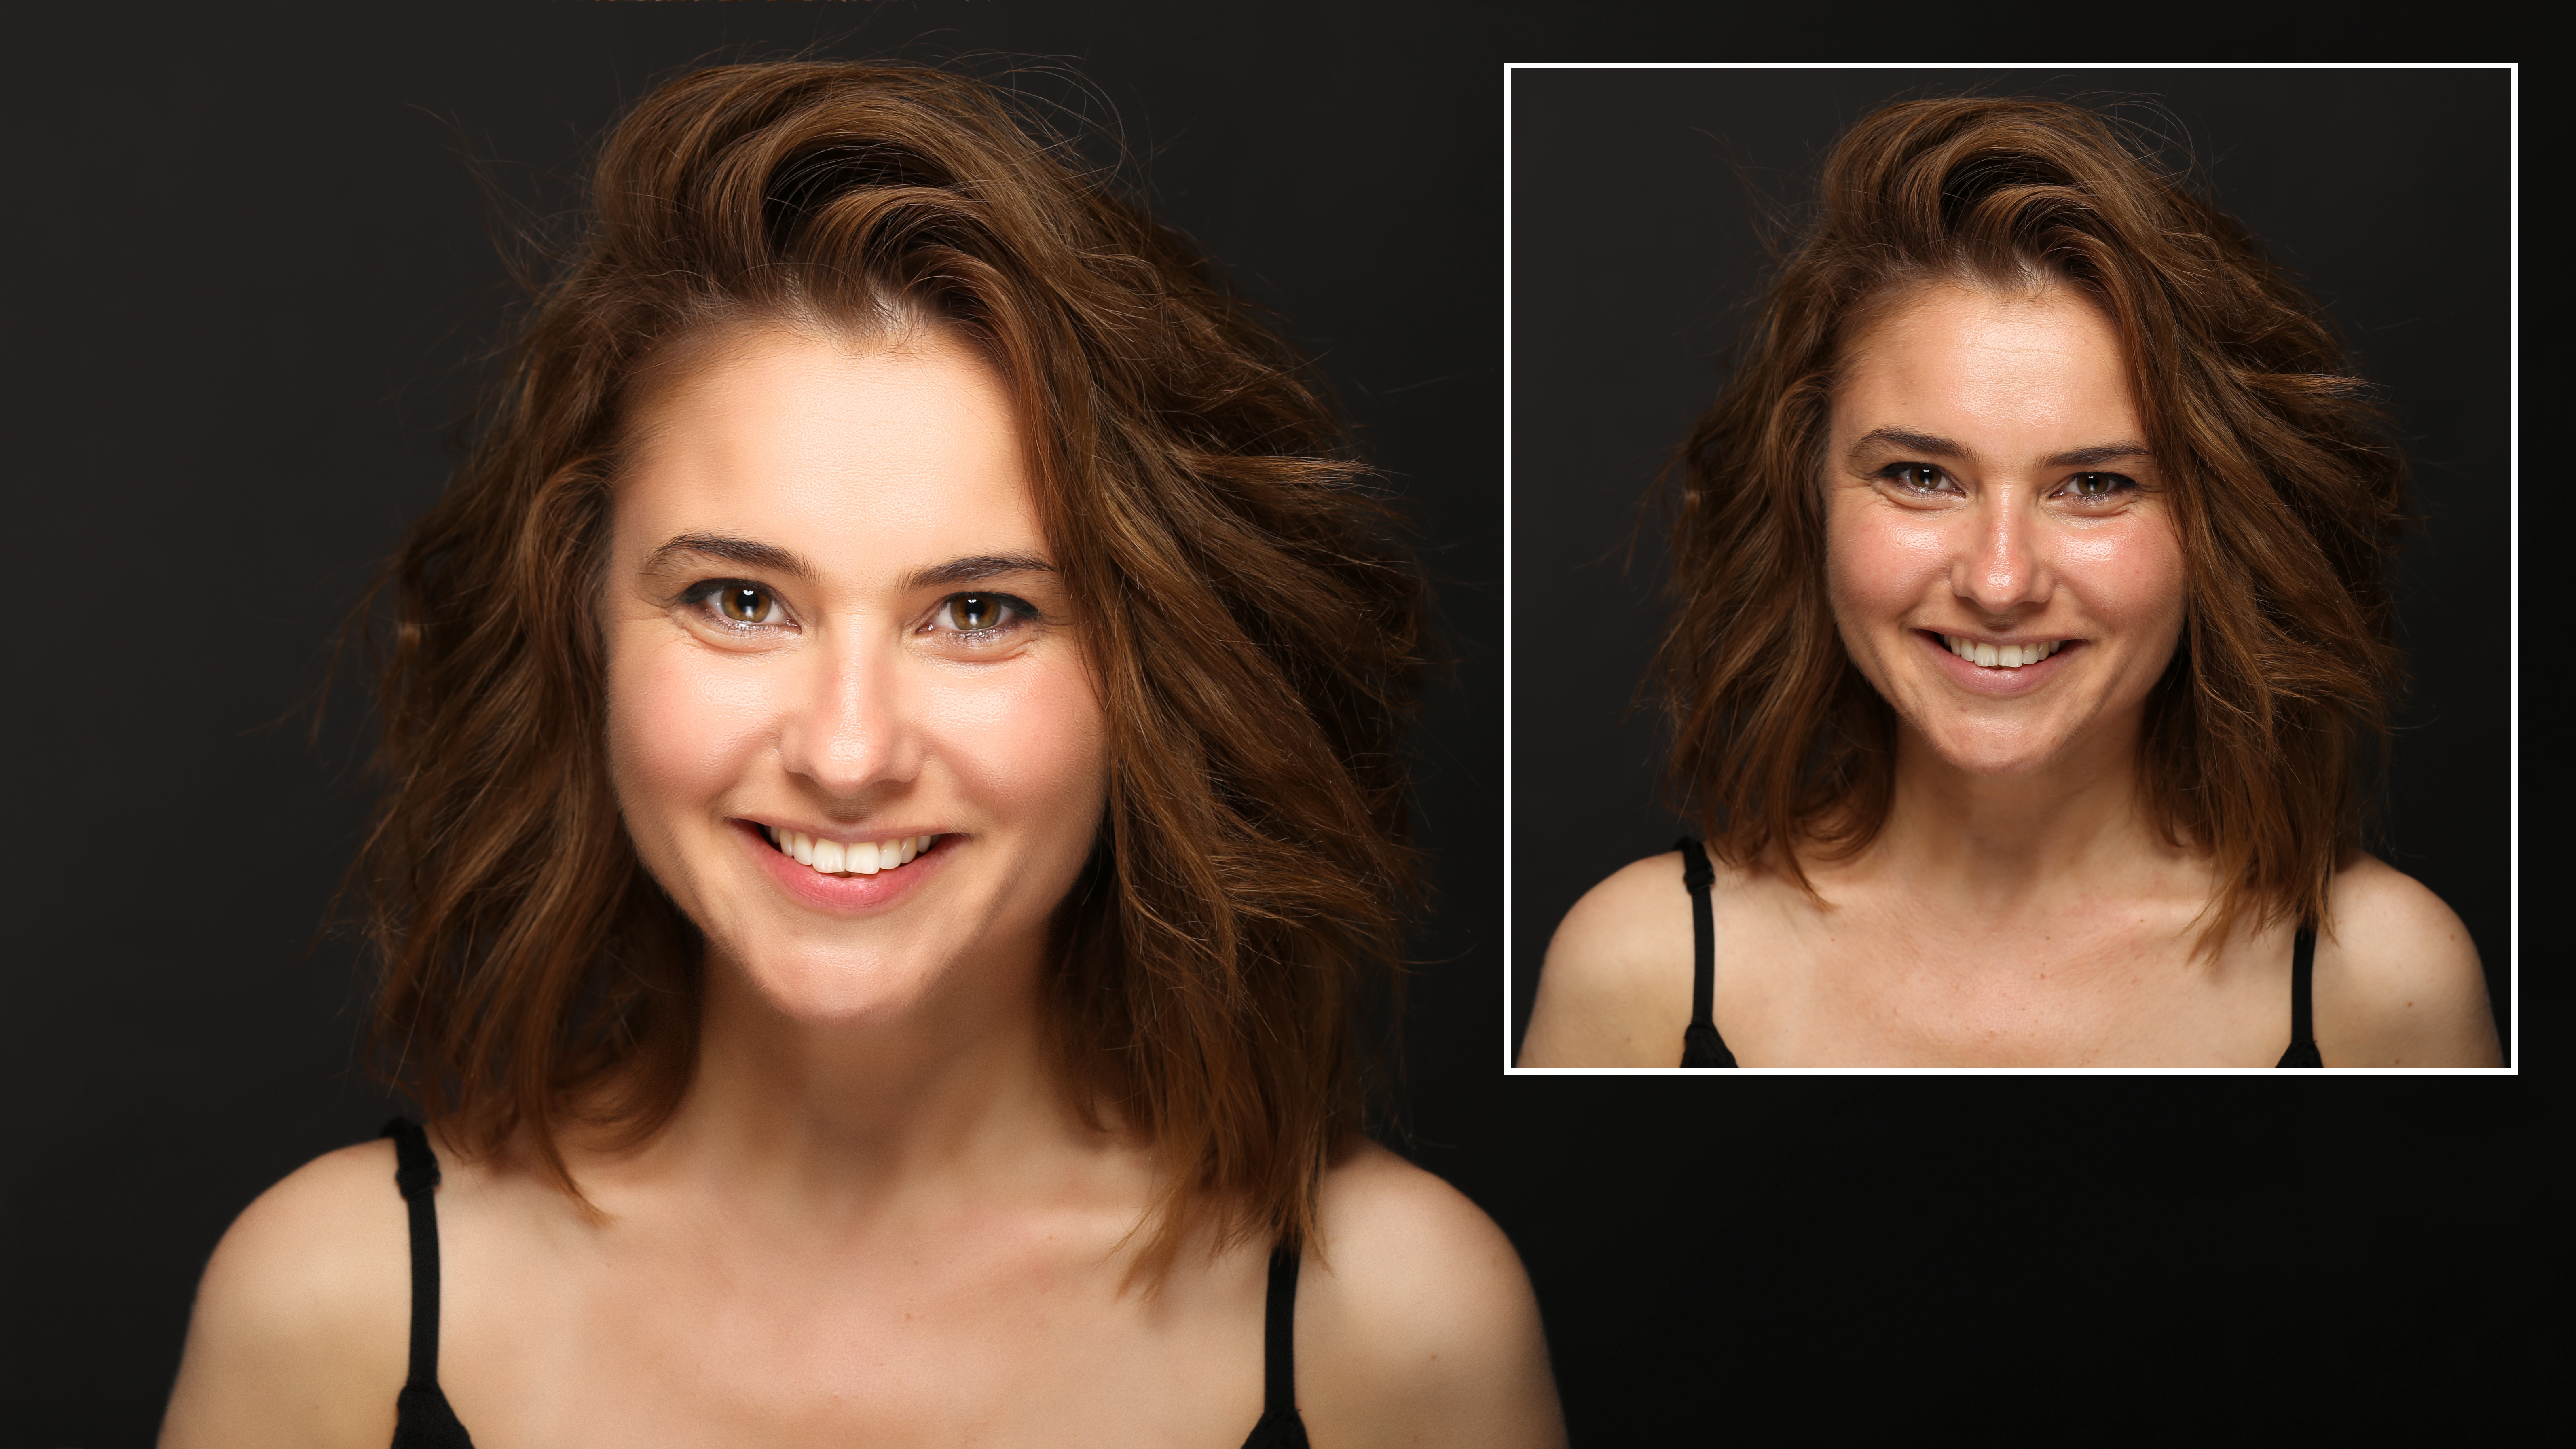
Skylum Luminar 4 can produce spectacular effects for all kinds of photography, but it has a set of tools dedicated to portrait photography and enhancing human faces. These tools have been improved in the Luminar 4.2 update, which adds a new Shine Removal tool and a more sophisticated Slim Face feature.
The tools live in Luminar’s dedicated Portrait workspace, where you’ll find two key panels: AI Skin Enhancer and AI Portrait Enhancer. Both use Skylum’s AI Neural Network technology to recognise and select human faces and their individual features, such as eyes, brows, lips and teeth. This means that the adjustments you make target these areas and leave the rest of the image untouched. If you prefer, you can use manual masking tools to select areas for enhancement yourself.
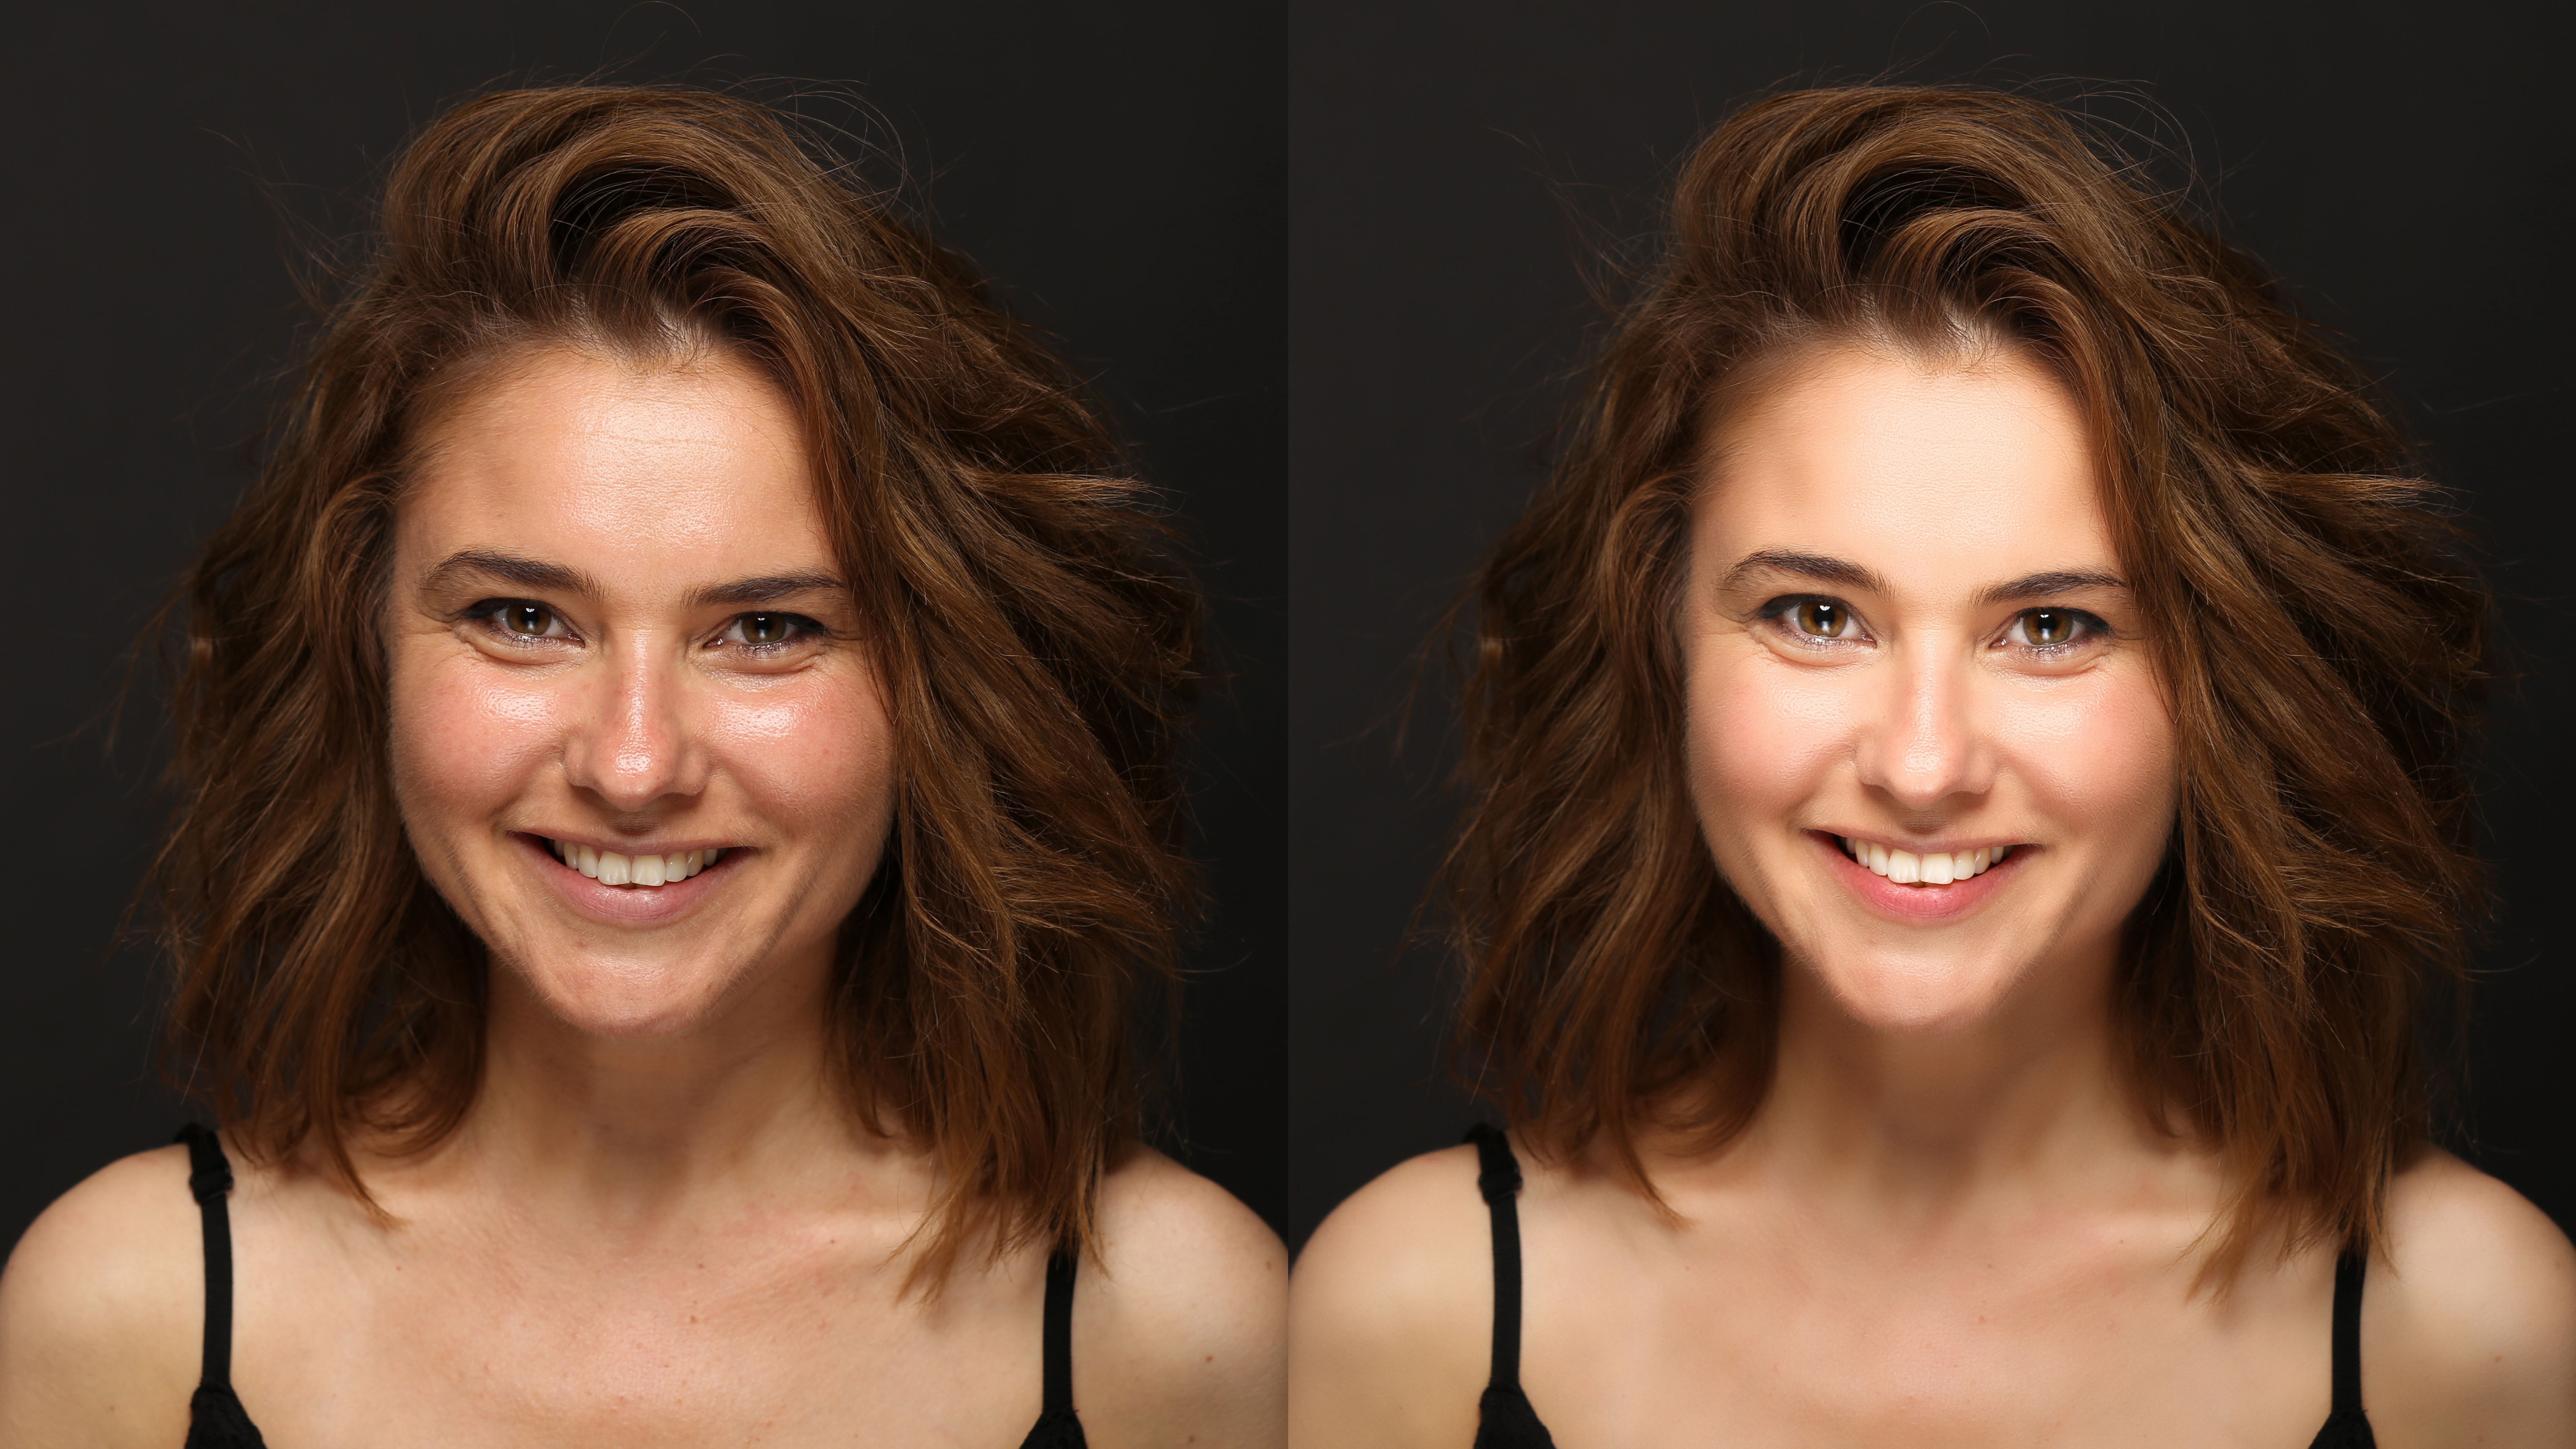
Portrait enhancement should ideally look natural and unforced, and it should respect the character of your subject and their unique features. Luminar 4 does this brilliantly. The AI adjustments never go so far that your subjects take on that dreaded ‘porcelain doll’ look or lose their individual identity. The sliders are controllable and progressive, and it’s easy to fine‐tune your enhancements.
If you’re new to working with portrait enhancement software and are worried about making your subjects’ faces look unnatural, don’t be! Luminar’s enhancement tools are effective without being overpowering, and our walkthrough, examples and tips will show you just what they can do.
Transform a portrait in five steps
Enhance your subjects, not change them!
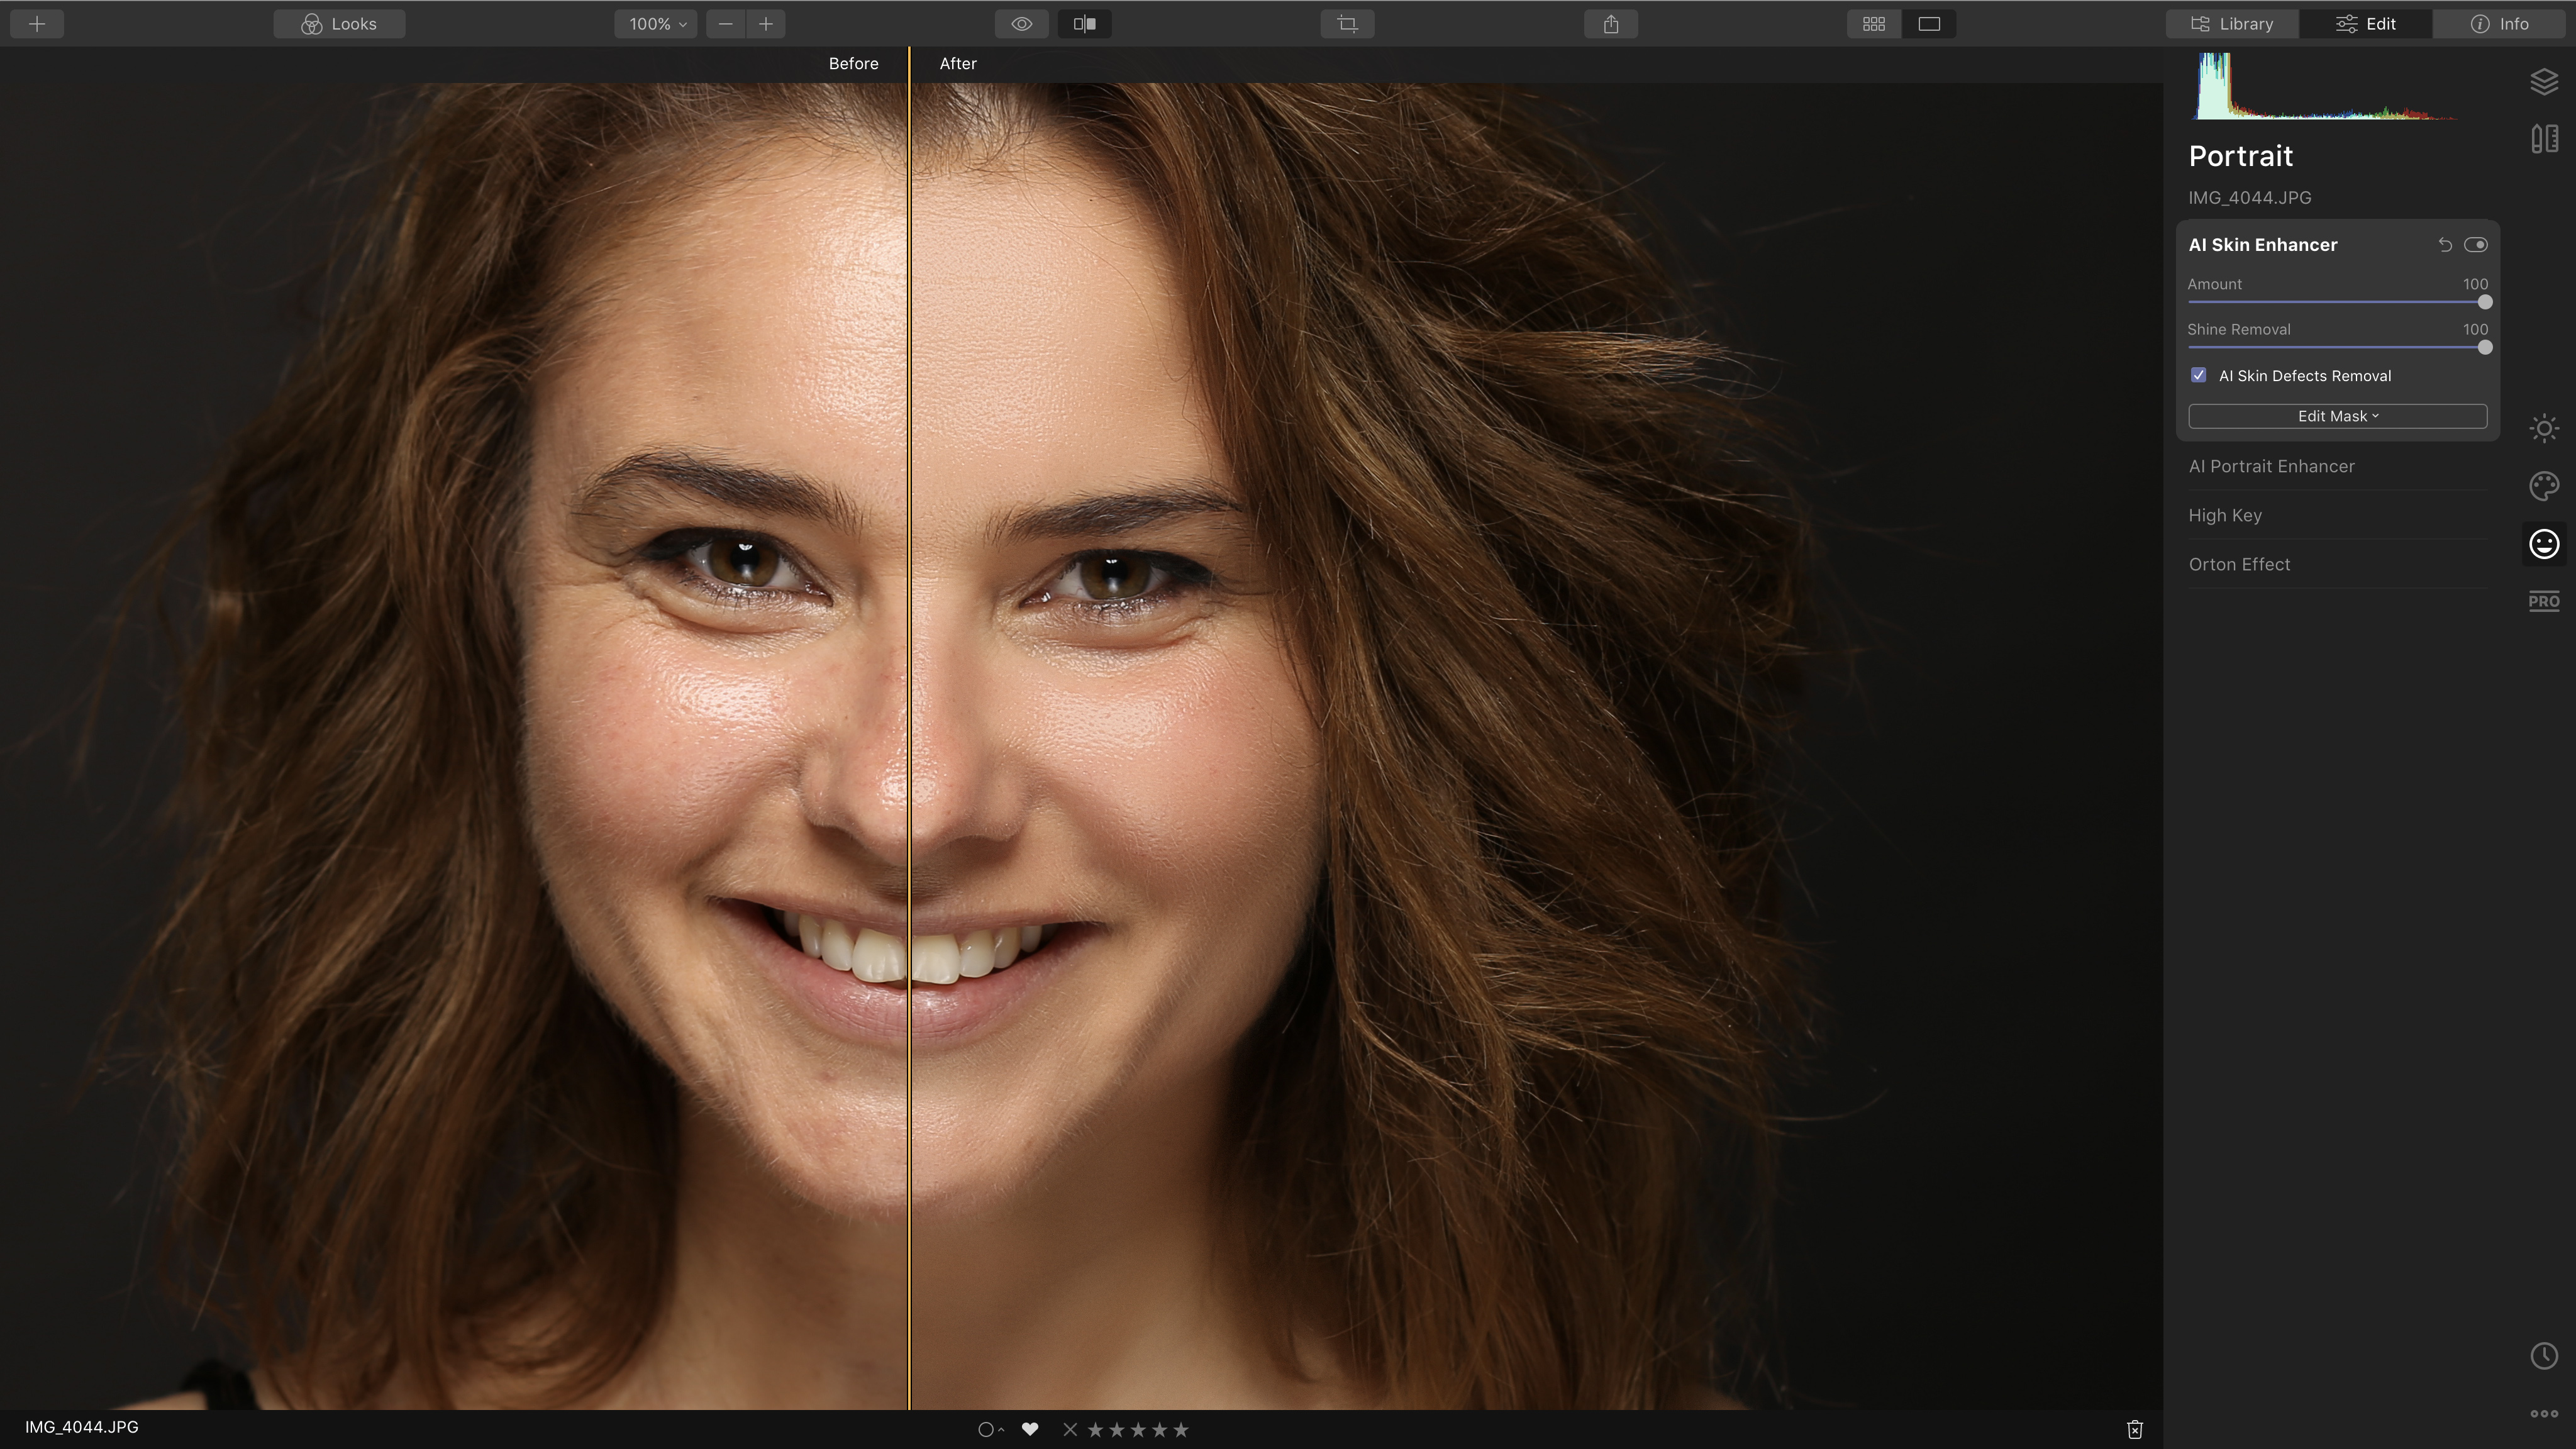
1. AI Skin Enhancer
Luminar 4’s AI Skin Enhancer is a great first step in any portrait enhancement process. It automatically identifies and selects your subject’s face. Use Amount to apply a skin smoothing effect and Shine to suppress glossy hotspots on cheeks and brows. If you tick the AI Skin Defects Removal box, small spots, freckles and moles will just disappear.
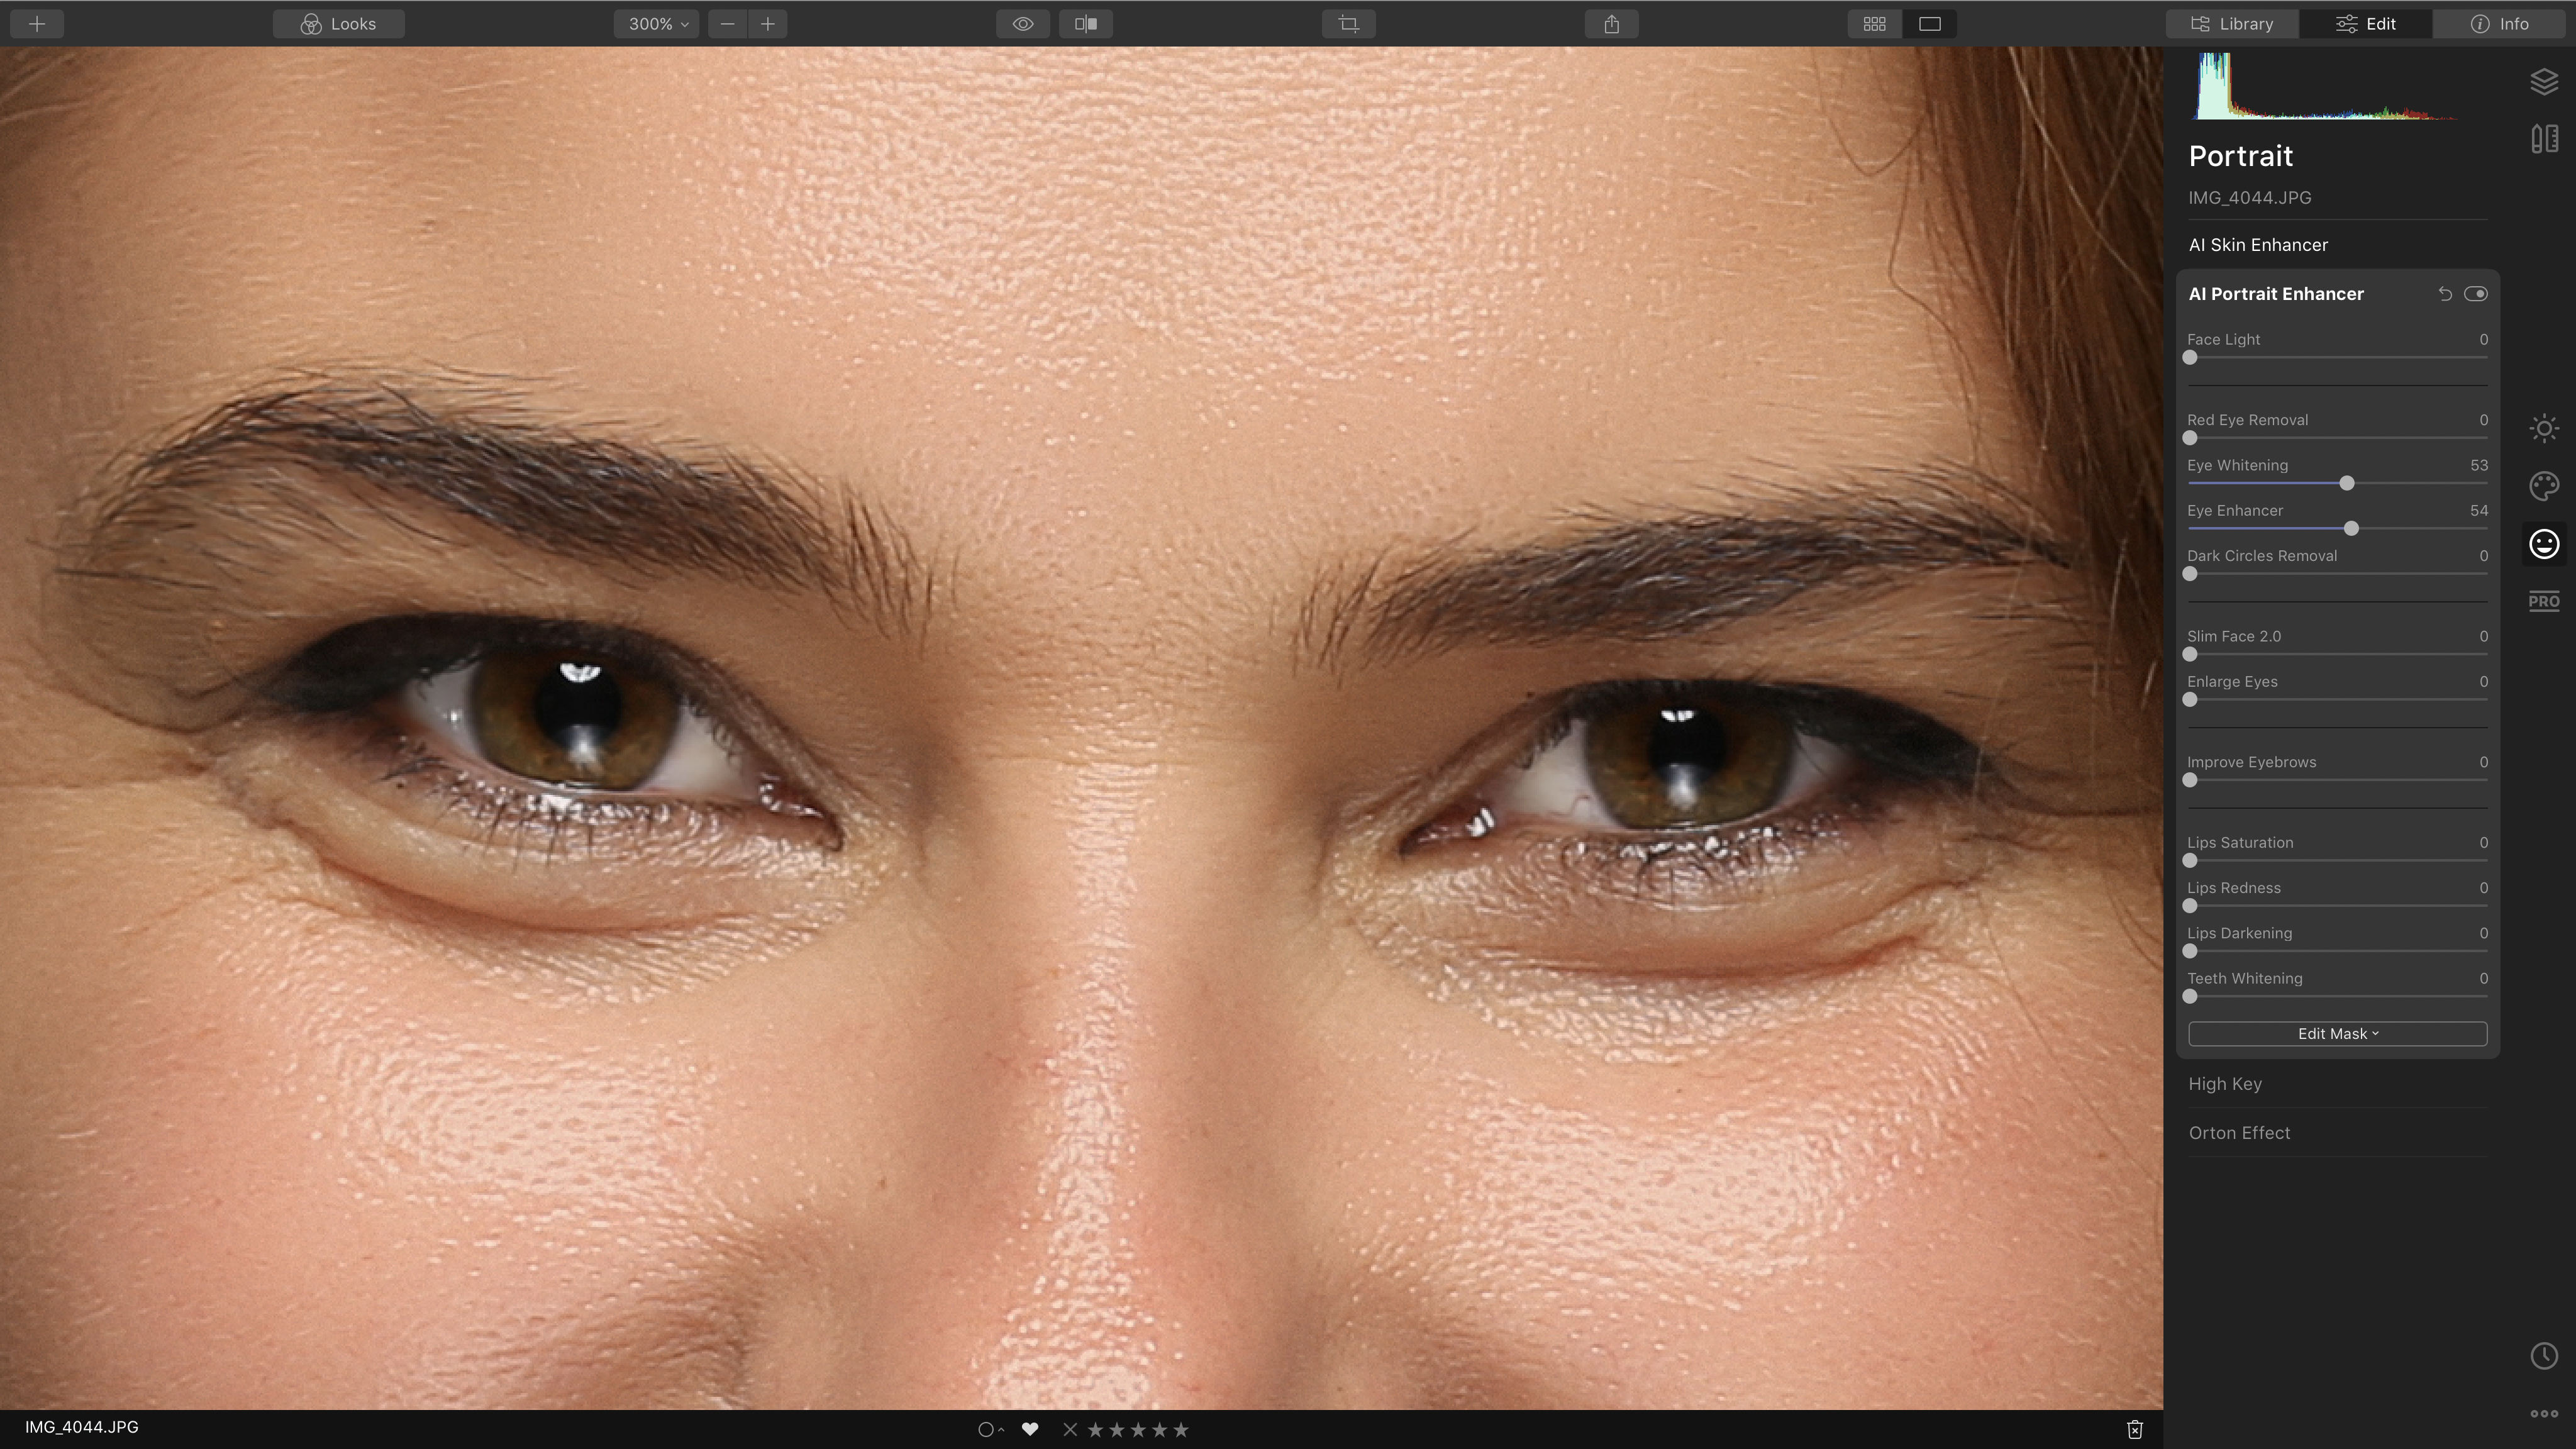
2. Eye enhancement
The rest of the work is done in the AI Portrait Enhancement panel. We’ll start with our subject’s eyes. Eye Whitening makes the whites of the eyes look clearer and brighter, but Eye Enhancer is slightly more subtle – it brightens the iris but also emphasises any catchlights. There’s no need to make selections: Luminar will mask the eyes automatically.
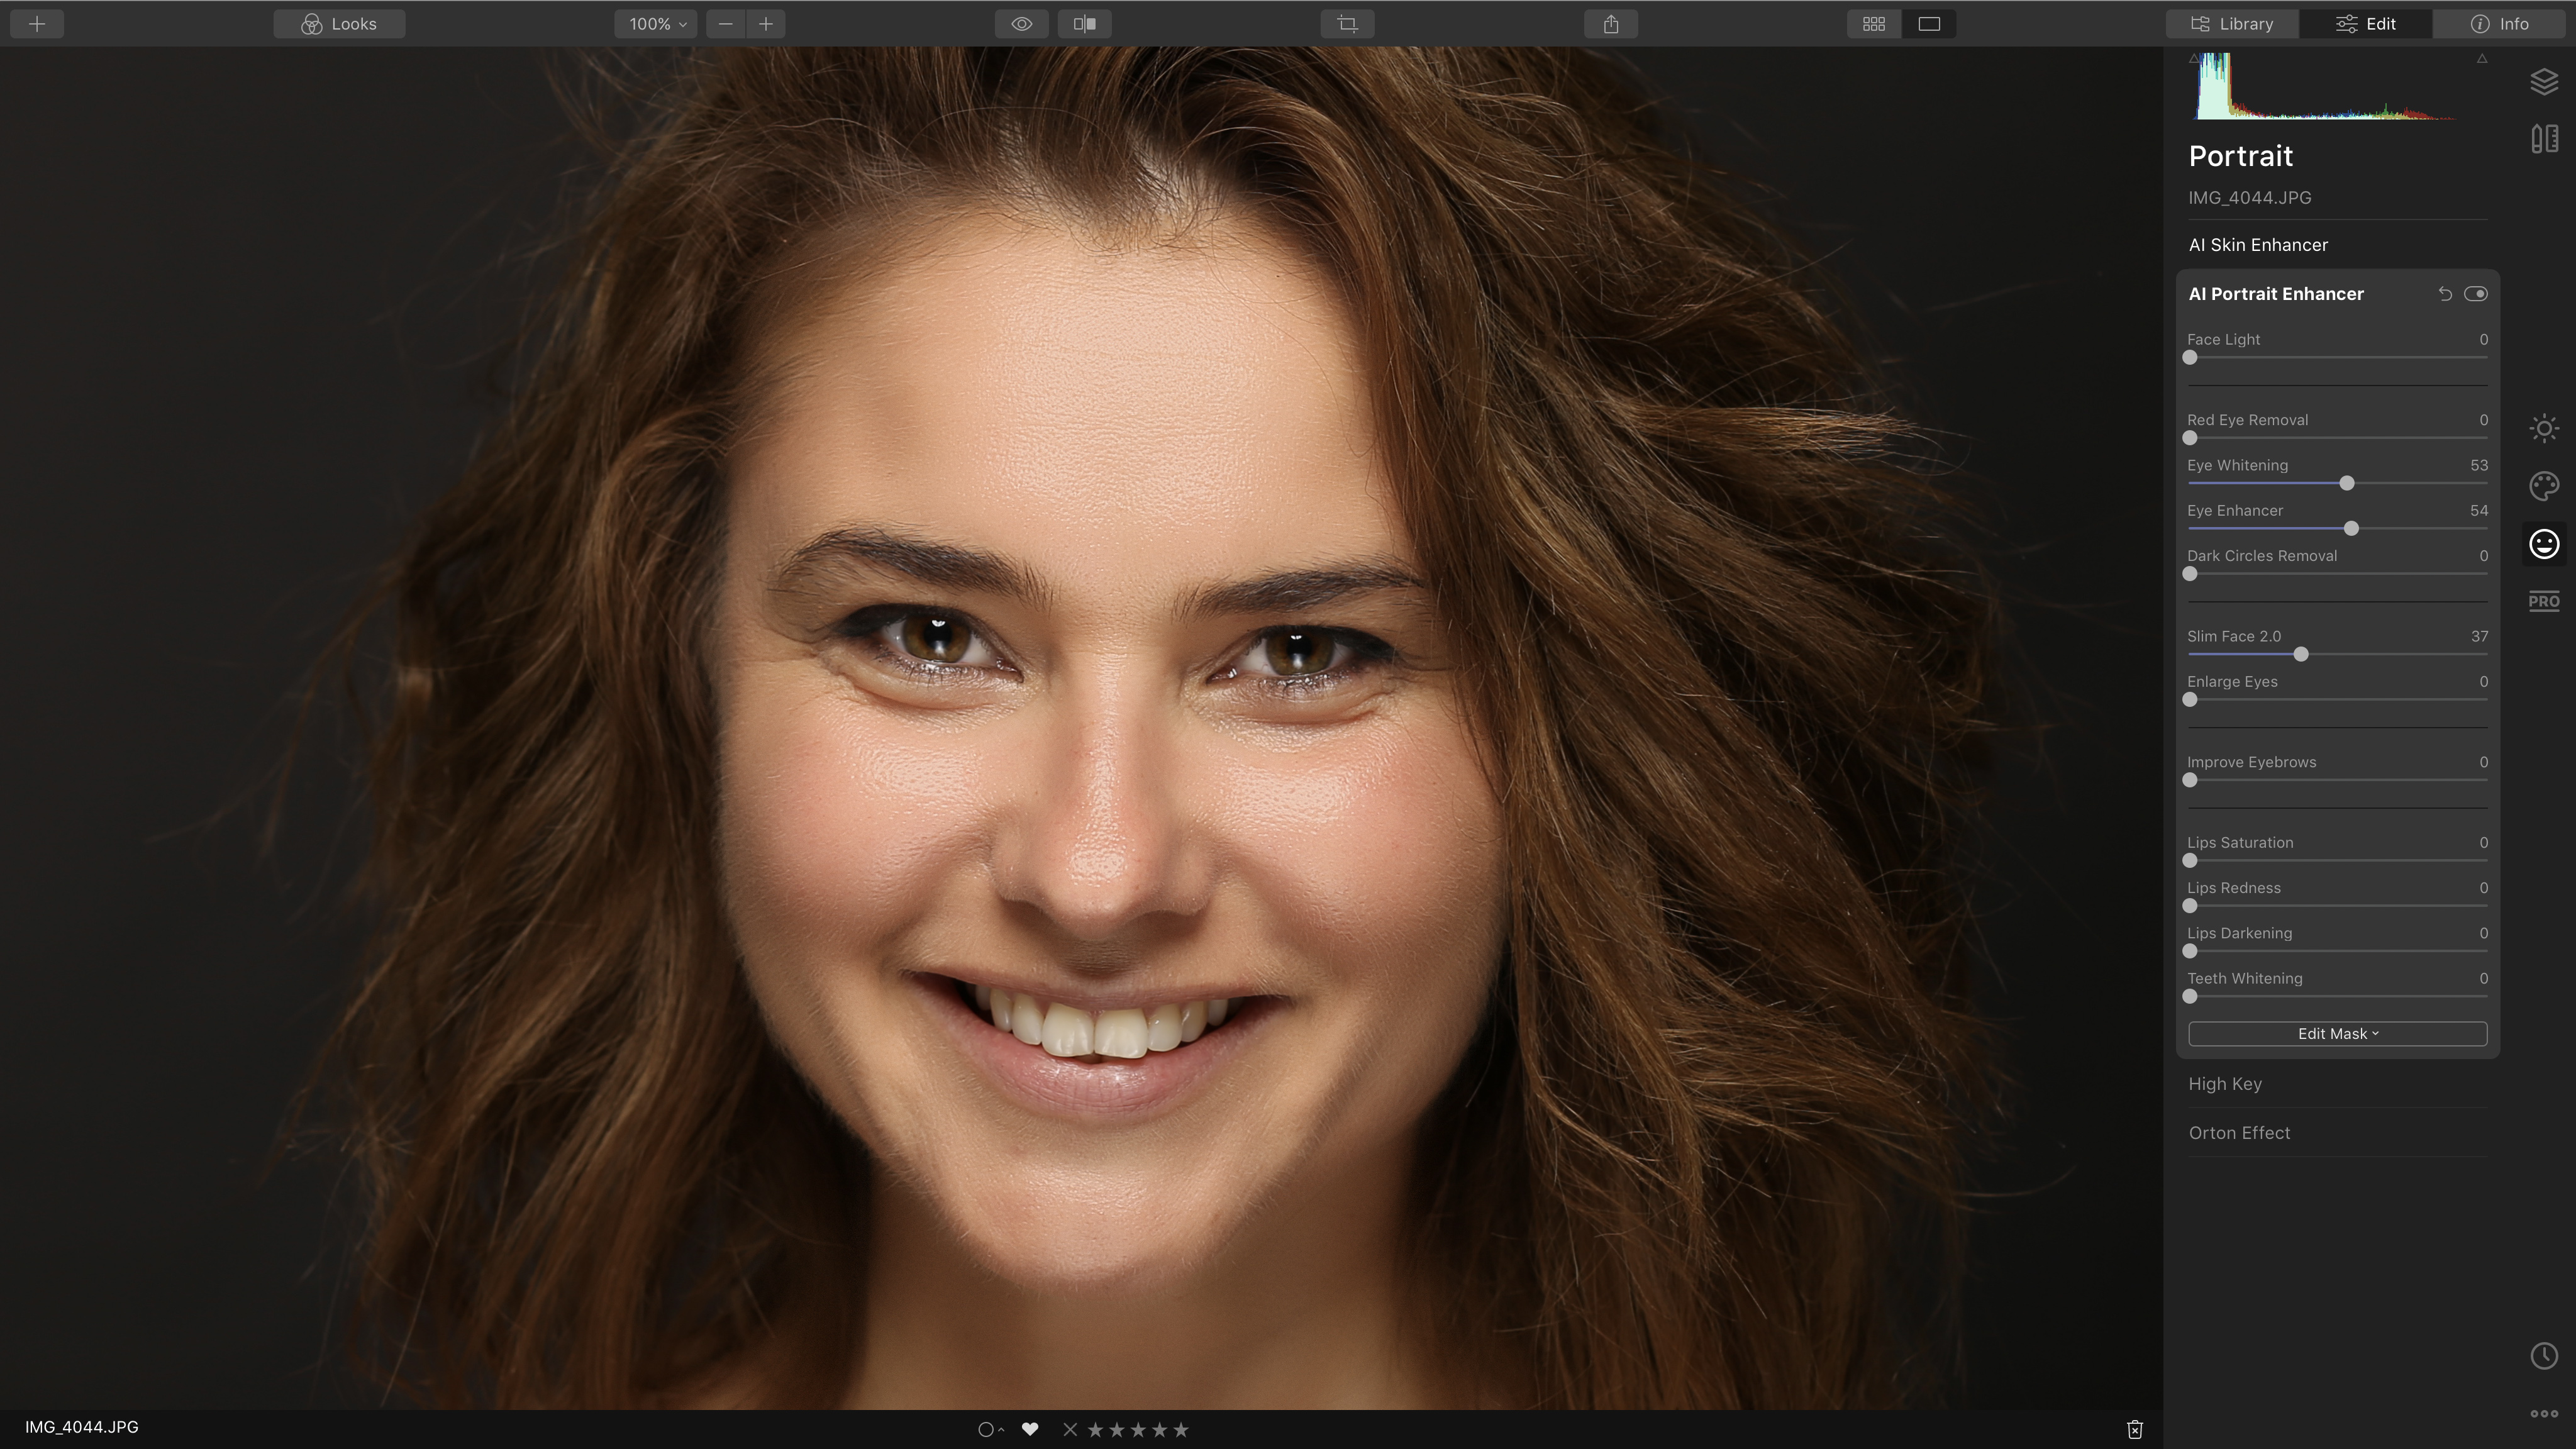
3. Slim Face 2.0
‘Face sculpting’ can go too far, distorting your subject’s face so that they no longer look like a real person. Slim Face 2.0 in the AI Portrait Enhancement panel is more subtle, making your subject’s face slimmer for a more flattering effect but never looking unnatural. The 2.0 version is new to Luminar 4 and
slims the whole face, not just the lower part.
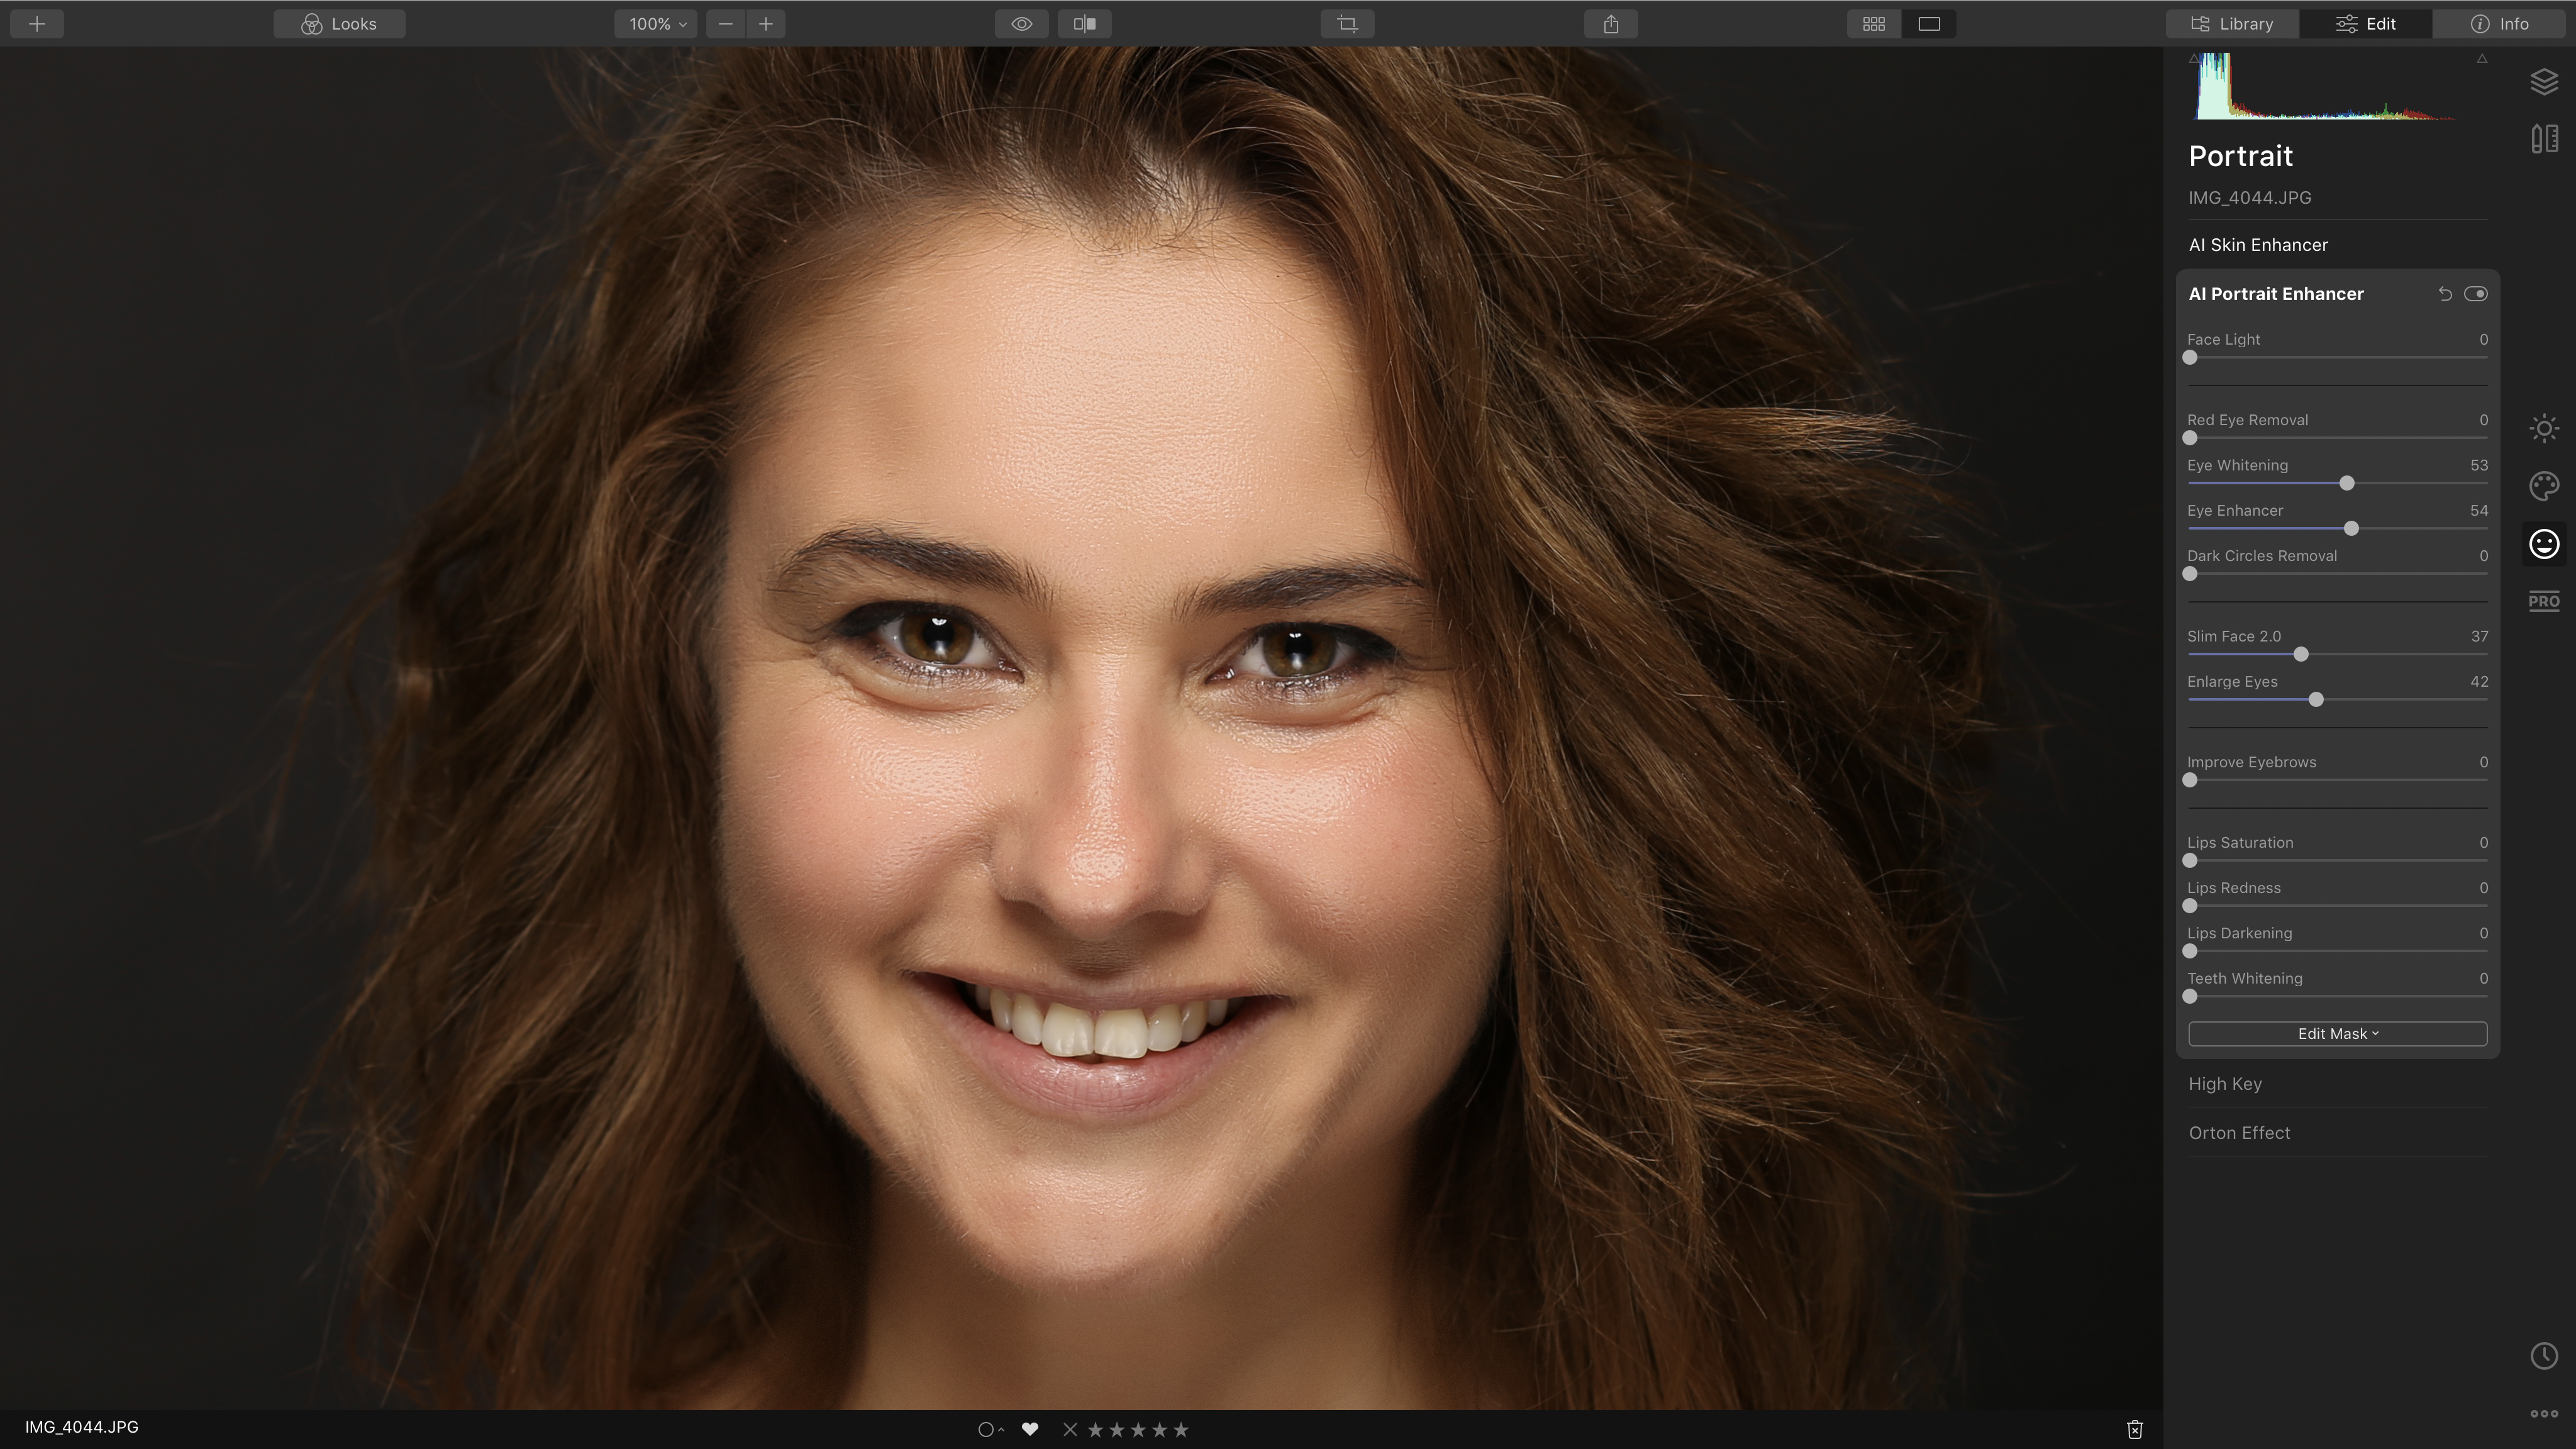
4. Enlarge eyes
Widening your subject’s eyes makes them look more alert, engaged and ‘alive’. If you push Enlarge Eyes too far, the effect can start to look a bit unnatural, but you never get the comic book ‘anime’ look sometimes seen with other software. If you have to look hard to see the difference from the last shot, that’s good – portrait enhancements should be subtle!
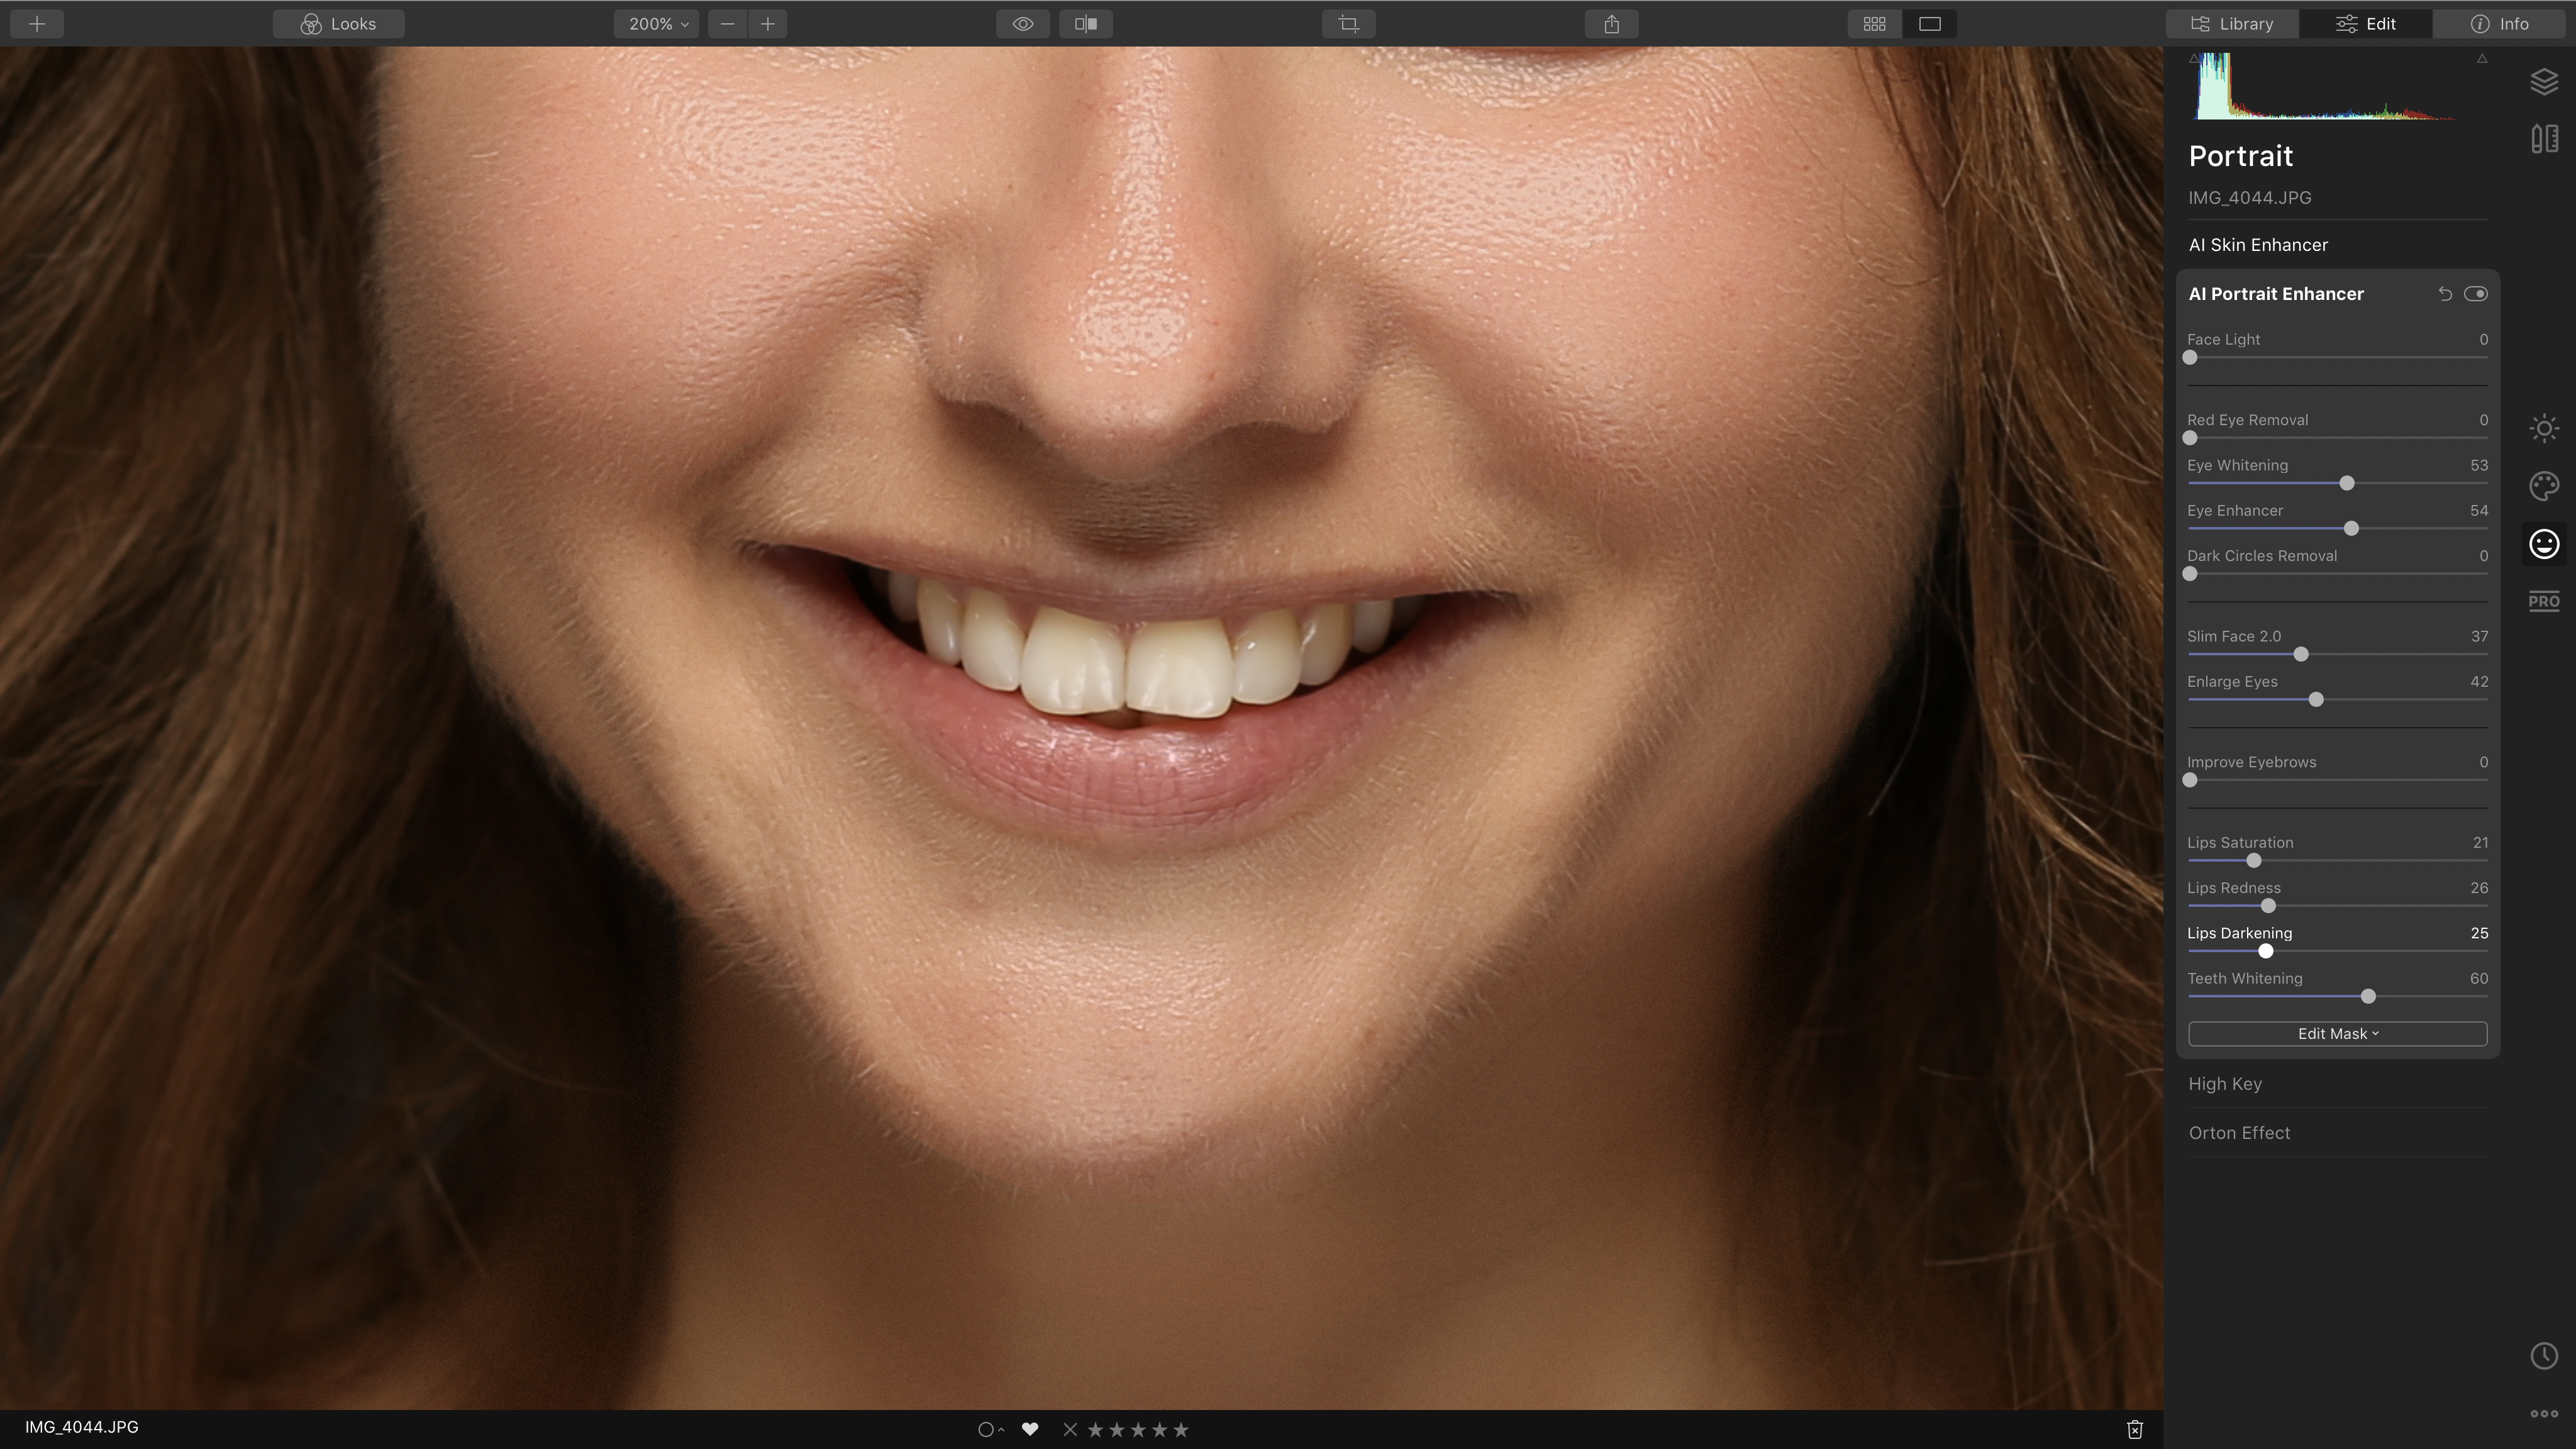
5. Lips and teeth
We’ve finished off by making our subject’s lips more saturated, redder and darker. These sliders aren’t meant to simulate lipstick; instead, they subtly enhance the natural lip colour just to make them more distinct from the other skin tones. We’ve also used the Teeth Whitening slider – and you don’t have to worry about pushing this too far, as the whitening effect never gets so strong that it looks unnatural.

AI Skin Enhancer and Portrait Enhancer
Use these two panels together to enhance your portraits
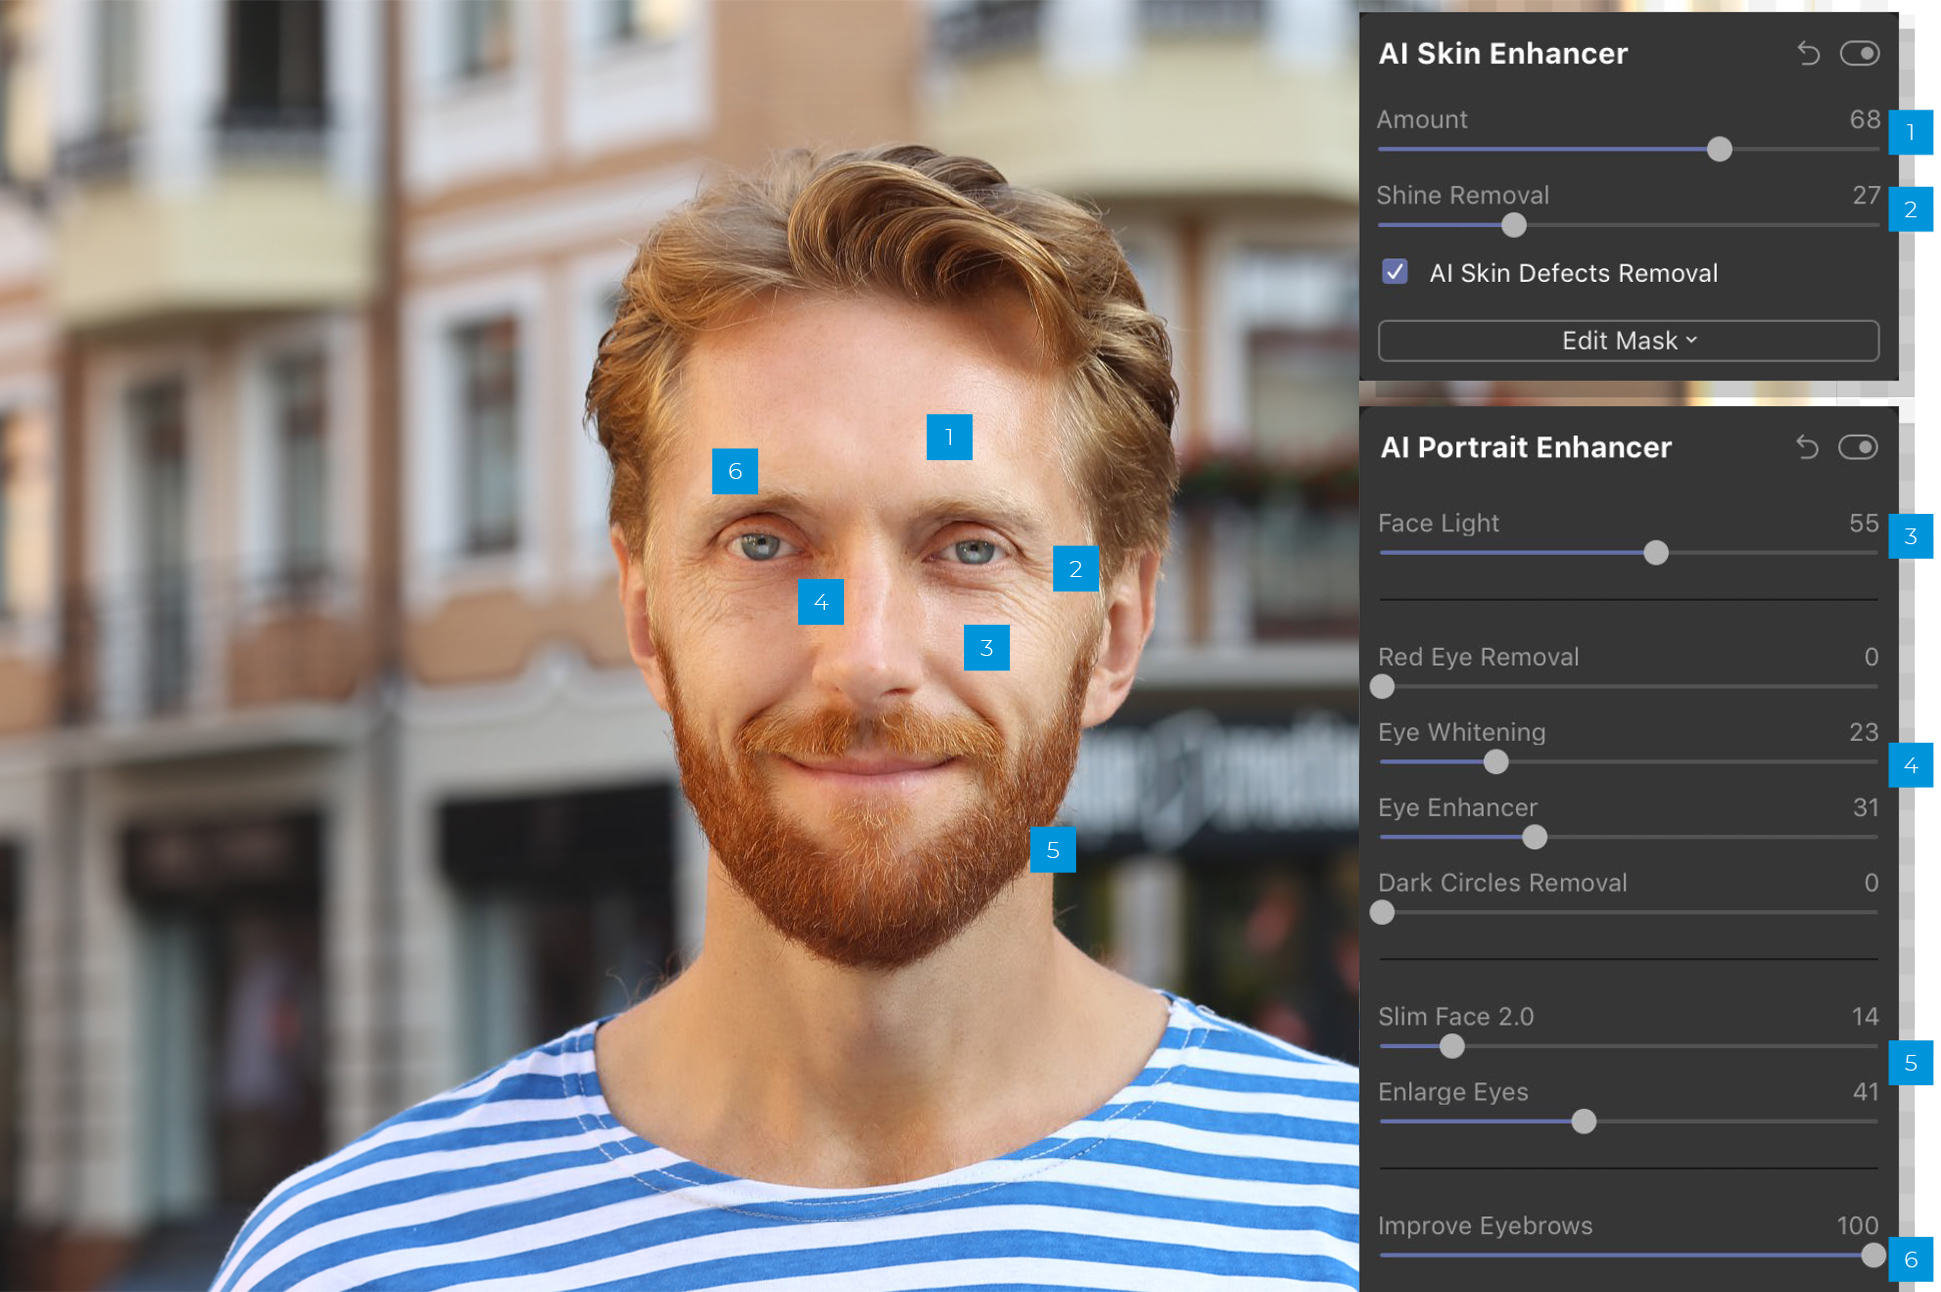
1. AI Skin Enhancer
You don’t have to push the Amount slider to maximum! Portrait enhancement should be about subtle improvements, not exaggerated retouching.
2. AI Skin Defects Removal
The AI Skin Defects Removal checkbox has no further settings but doesn’t need them – it does a great job of taking out smaller blemishes without unnatural smoothing becoming apparent.
3. Face Light
This simple slider brightens faces subtly without affecting the surroundings. It’s like taking a reflector with you on a shoot, but without all the tricky folding!
4. Eye Whitening and Eye Enhancer
These two sliders are simple and easy, but achieve a lot. You don’t need to turn them up to maximum to get a great and very natural‐ looking improvement.
5. Slim Face and Enlarge Eyes
Any reshaping of facial features should be subtle, and these two sliders work brilliantly. If you get it right, people will look great but not see what you’ve done!
6. Improve Eyebrows
This slider is so subtle that you might not think it’s doing anything – but it is! It’s like a very subtle, very well‐applied eyebrow pencil, and it’s great for men, too.

Three great Portrait enhancement examples
Here are three more portrait enhancements we did in Luminar 4
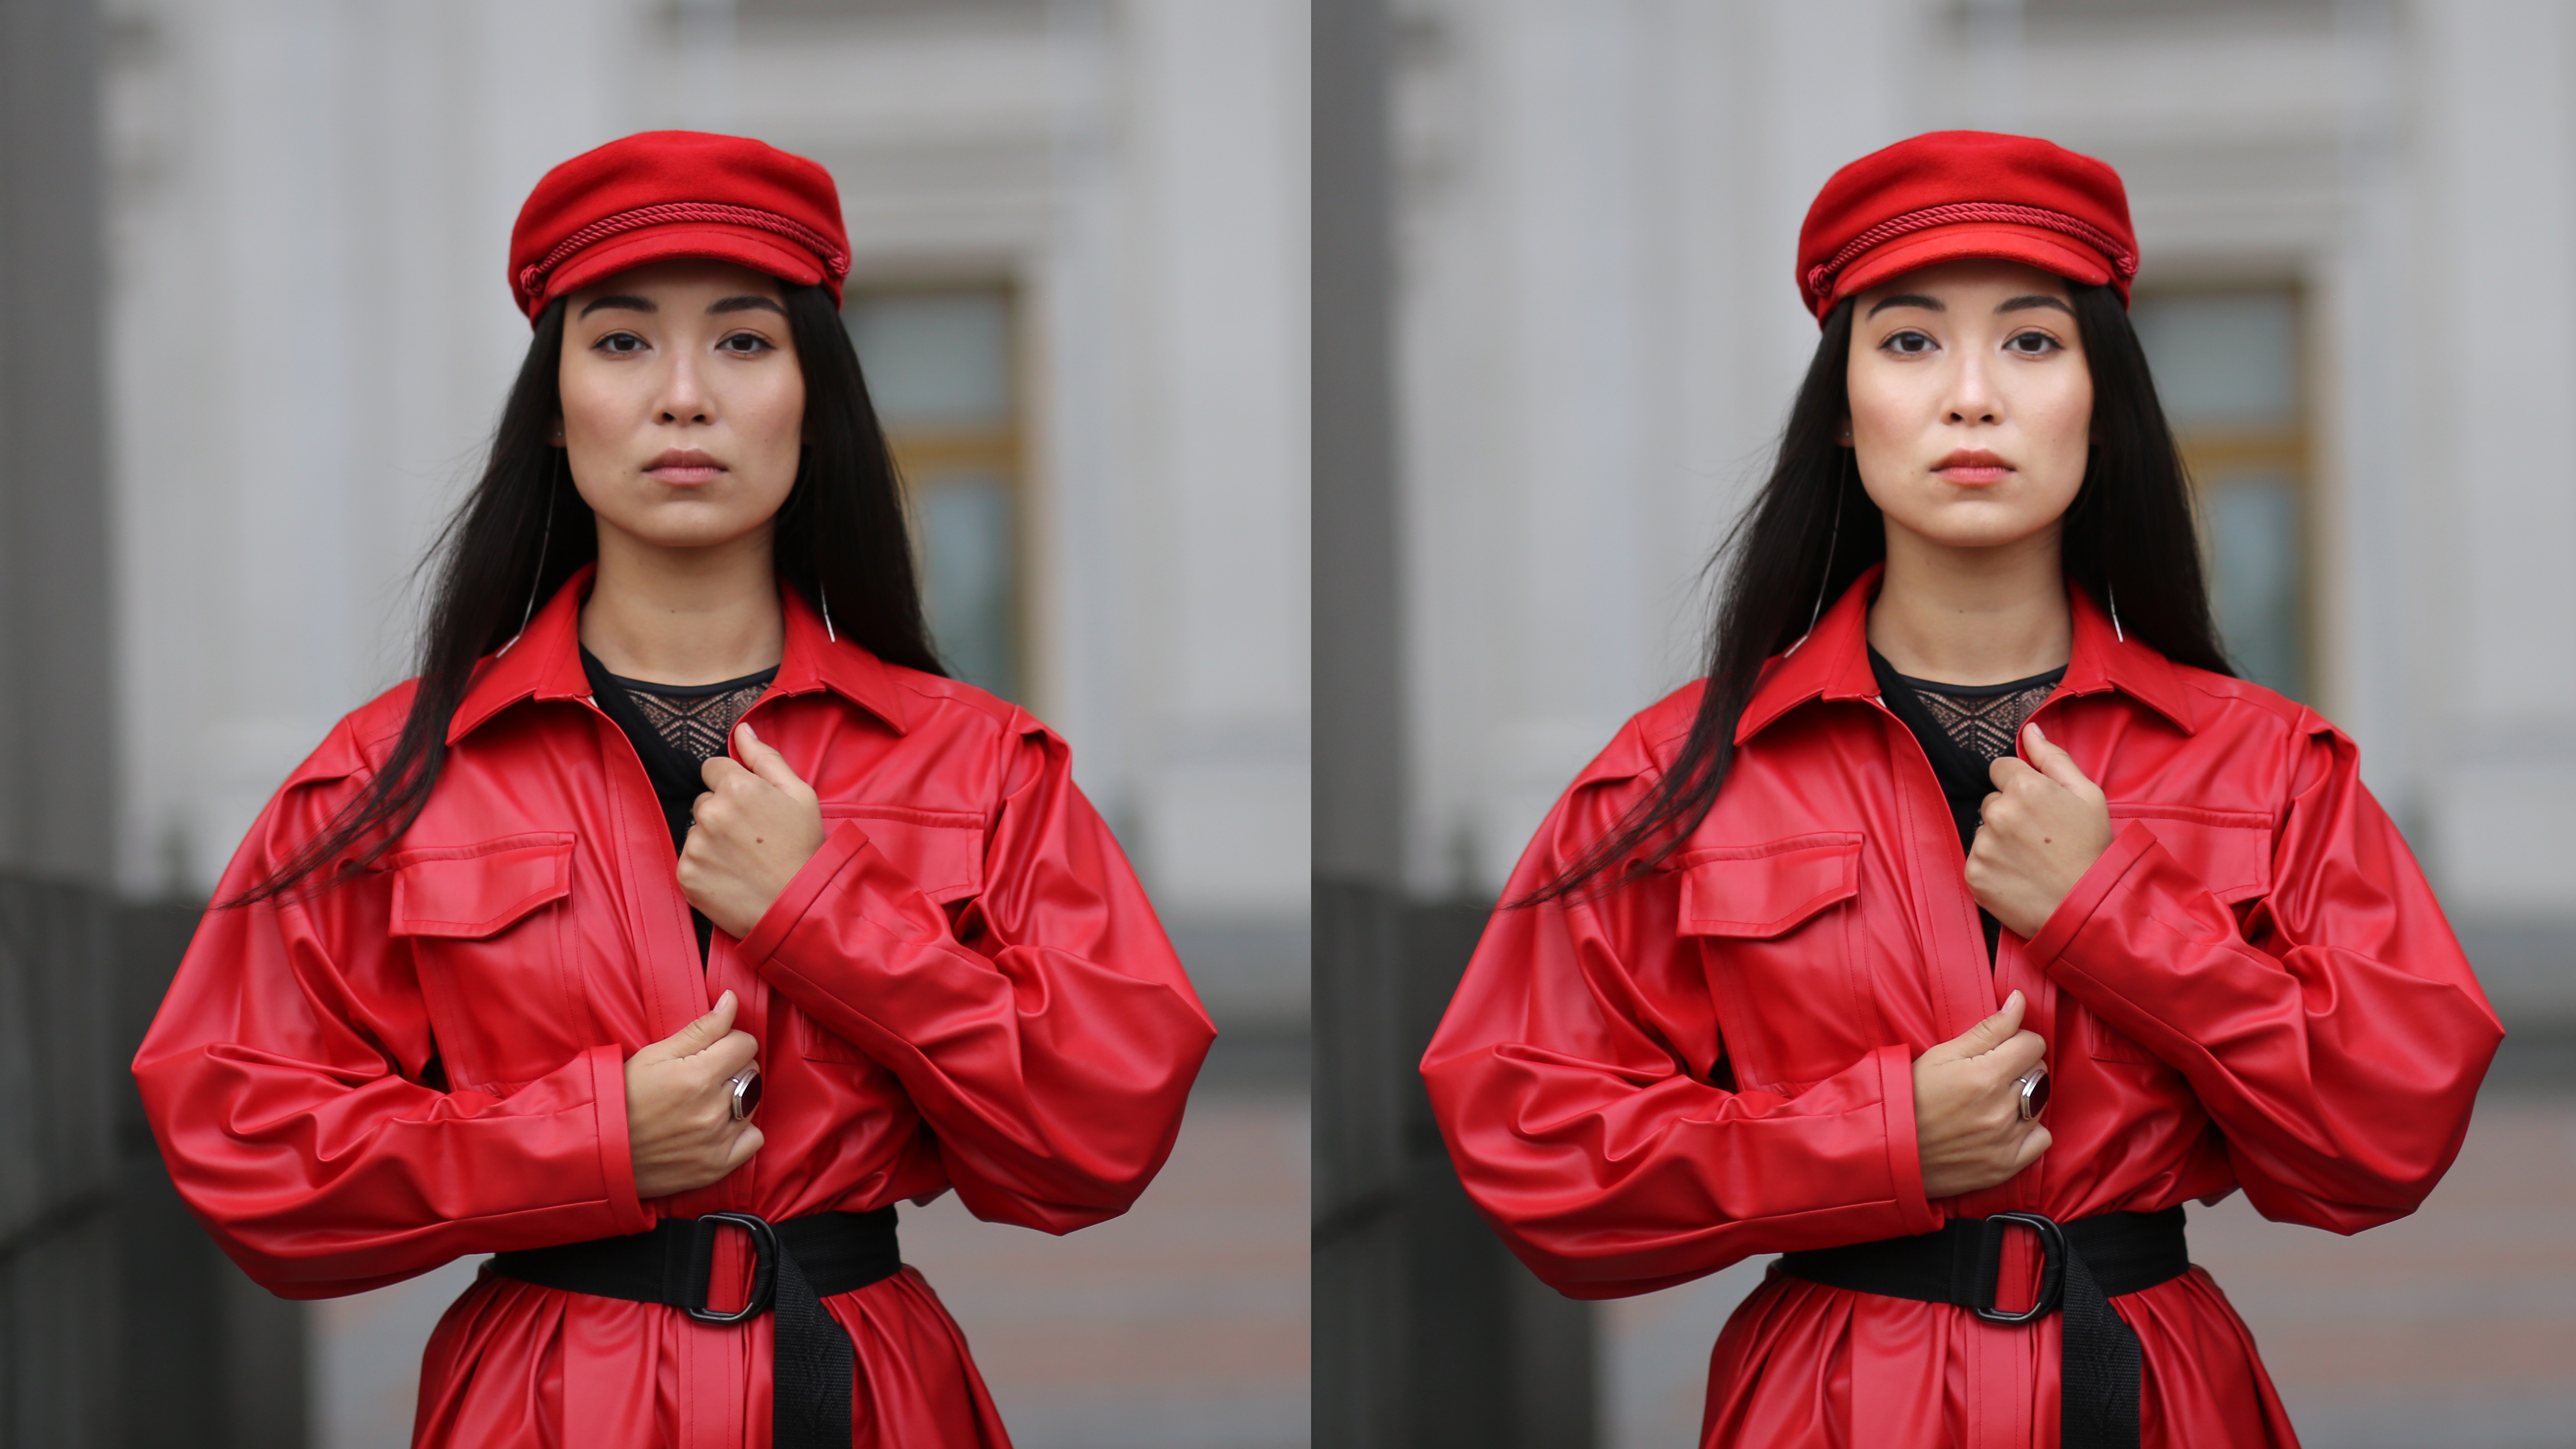
Fashion shoot
We used the Face Light slider to make our subject’s face the focal point of the picture, and the Enlarge Eyes slider to really bring out her strong facial expression. We then used the lip enhancement sliders to adjust the colour of her lips to match that striking red coat.
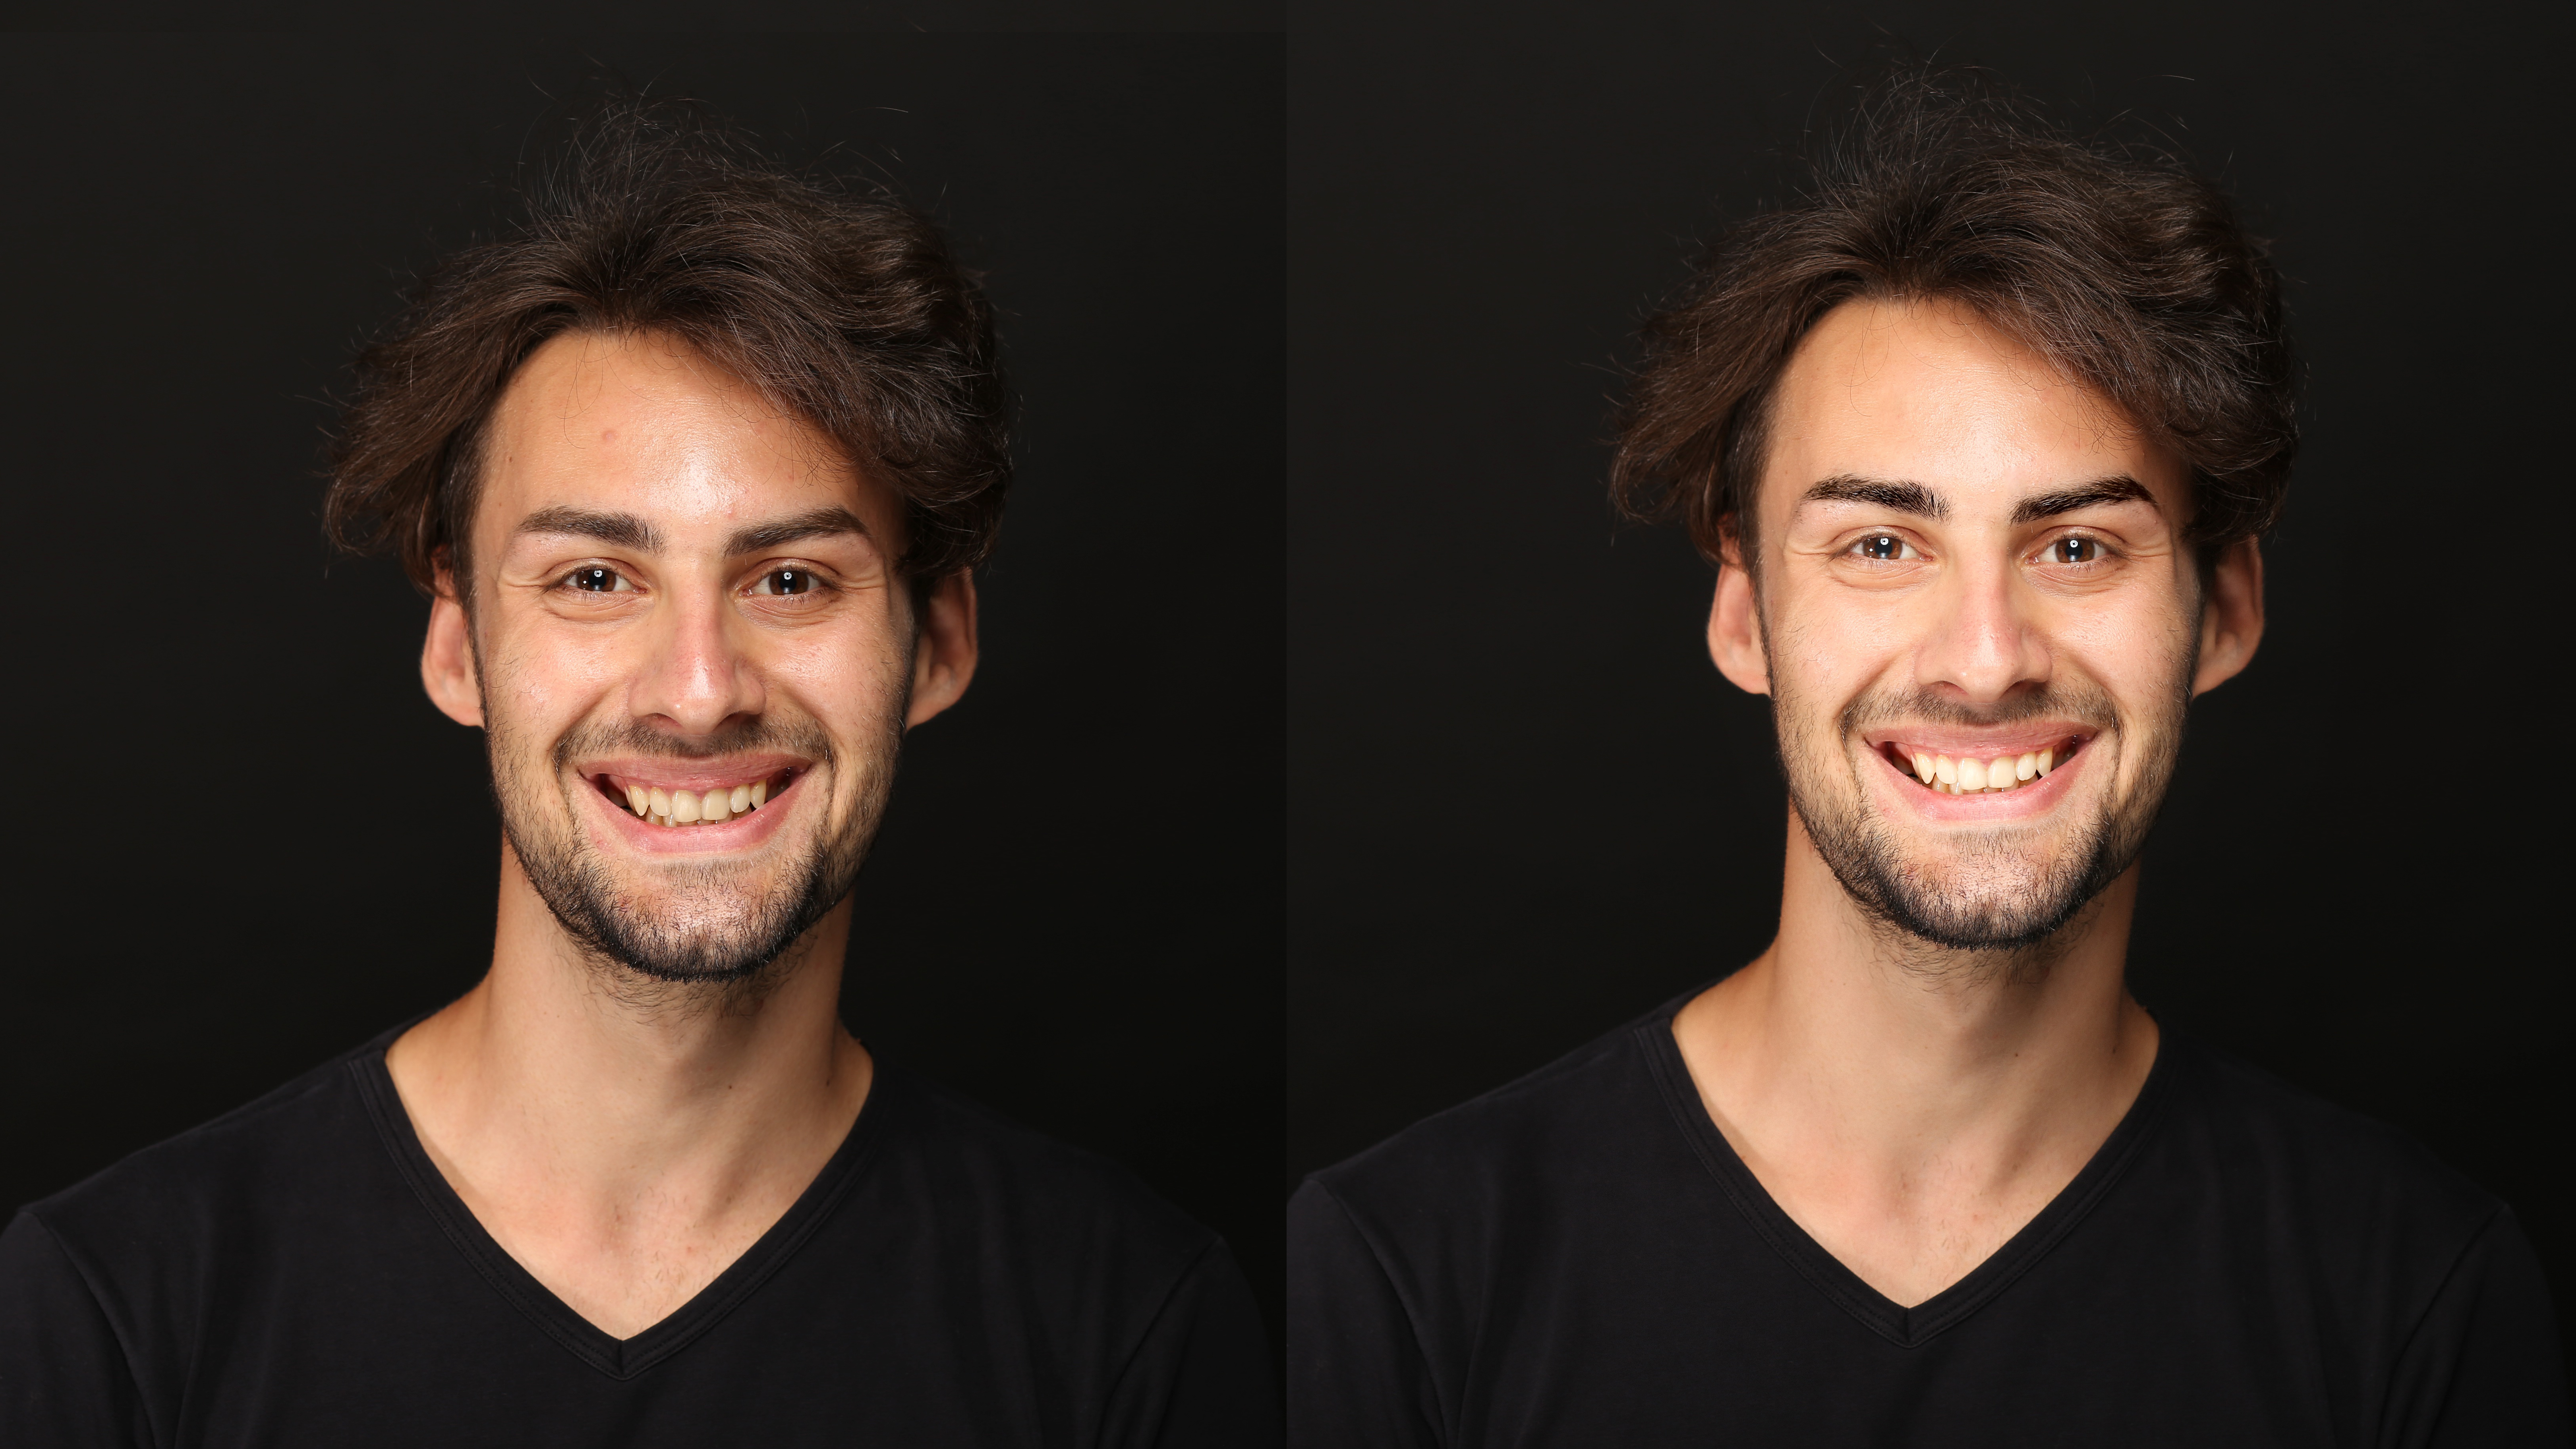
Studio portrait
The key to this studio shot was our subject’s bright, vibrant expression. The lighting wasn’t that sympathetic, so we used AI Skin Enhancer for better‐looking skintones, Face Light to add a brightening effect, and a combination of eye enhancement and teeth whitening to finish off.
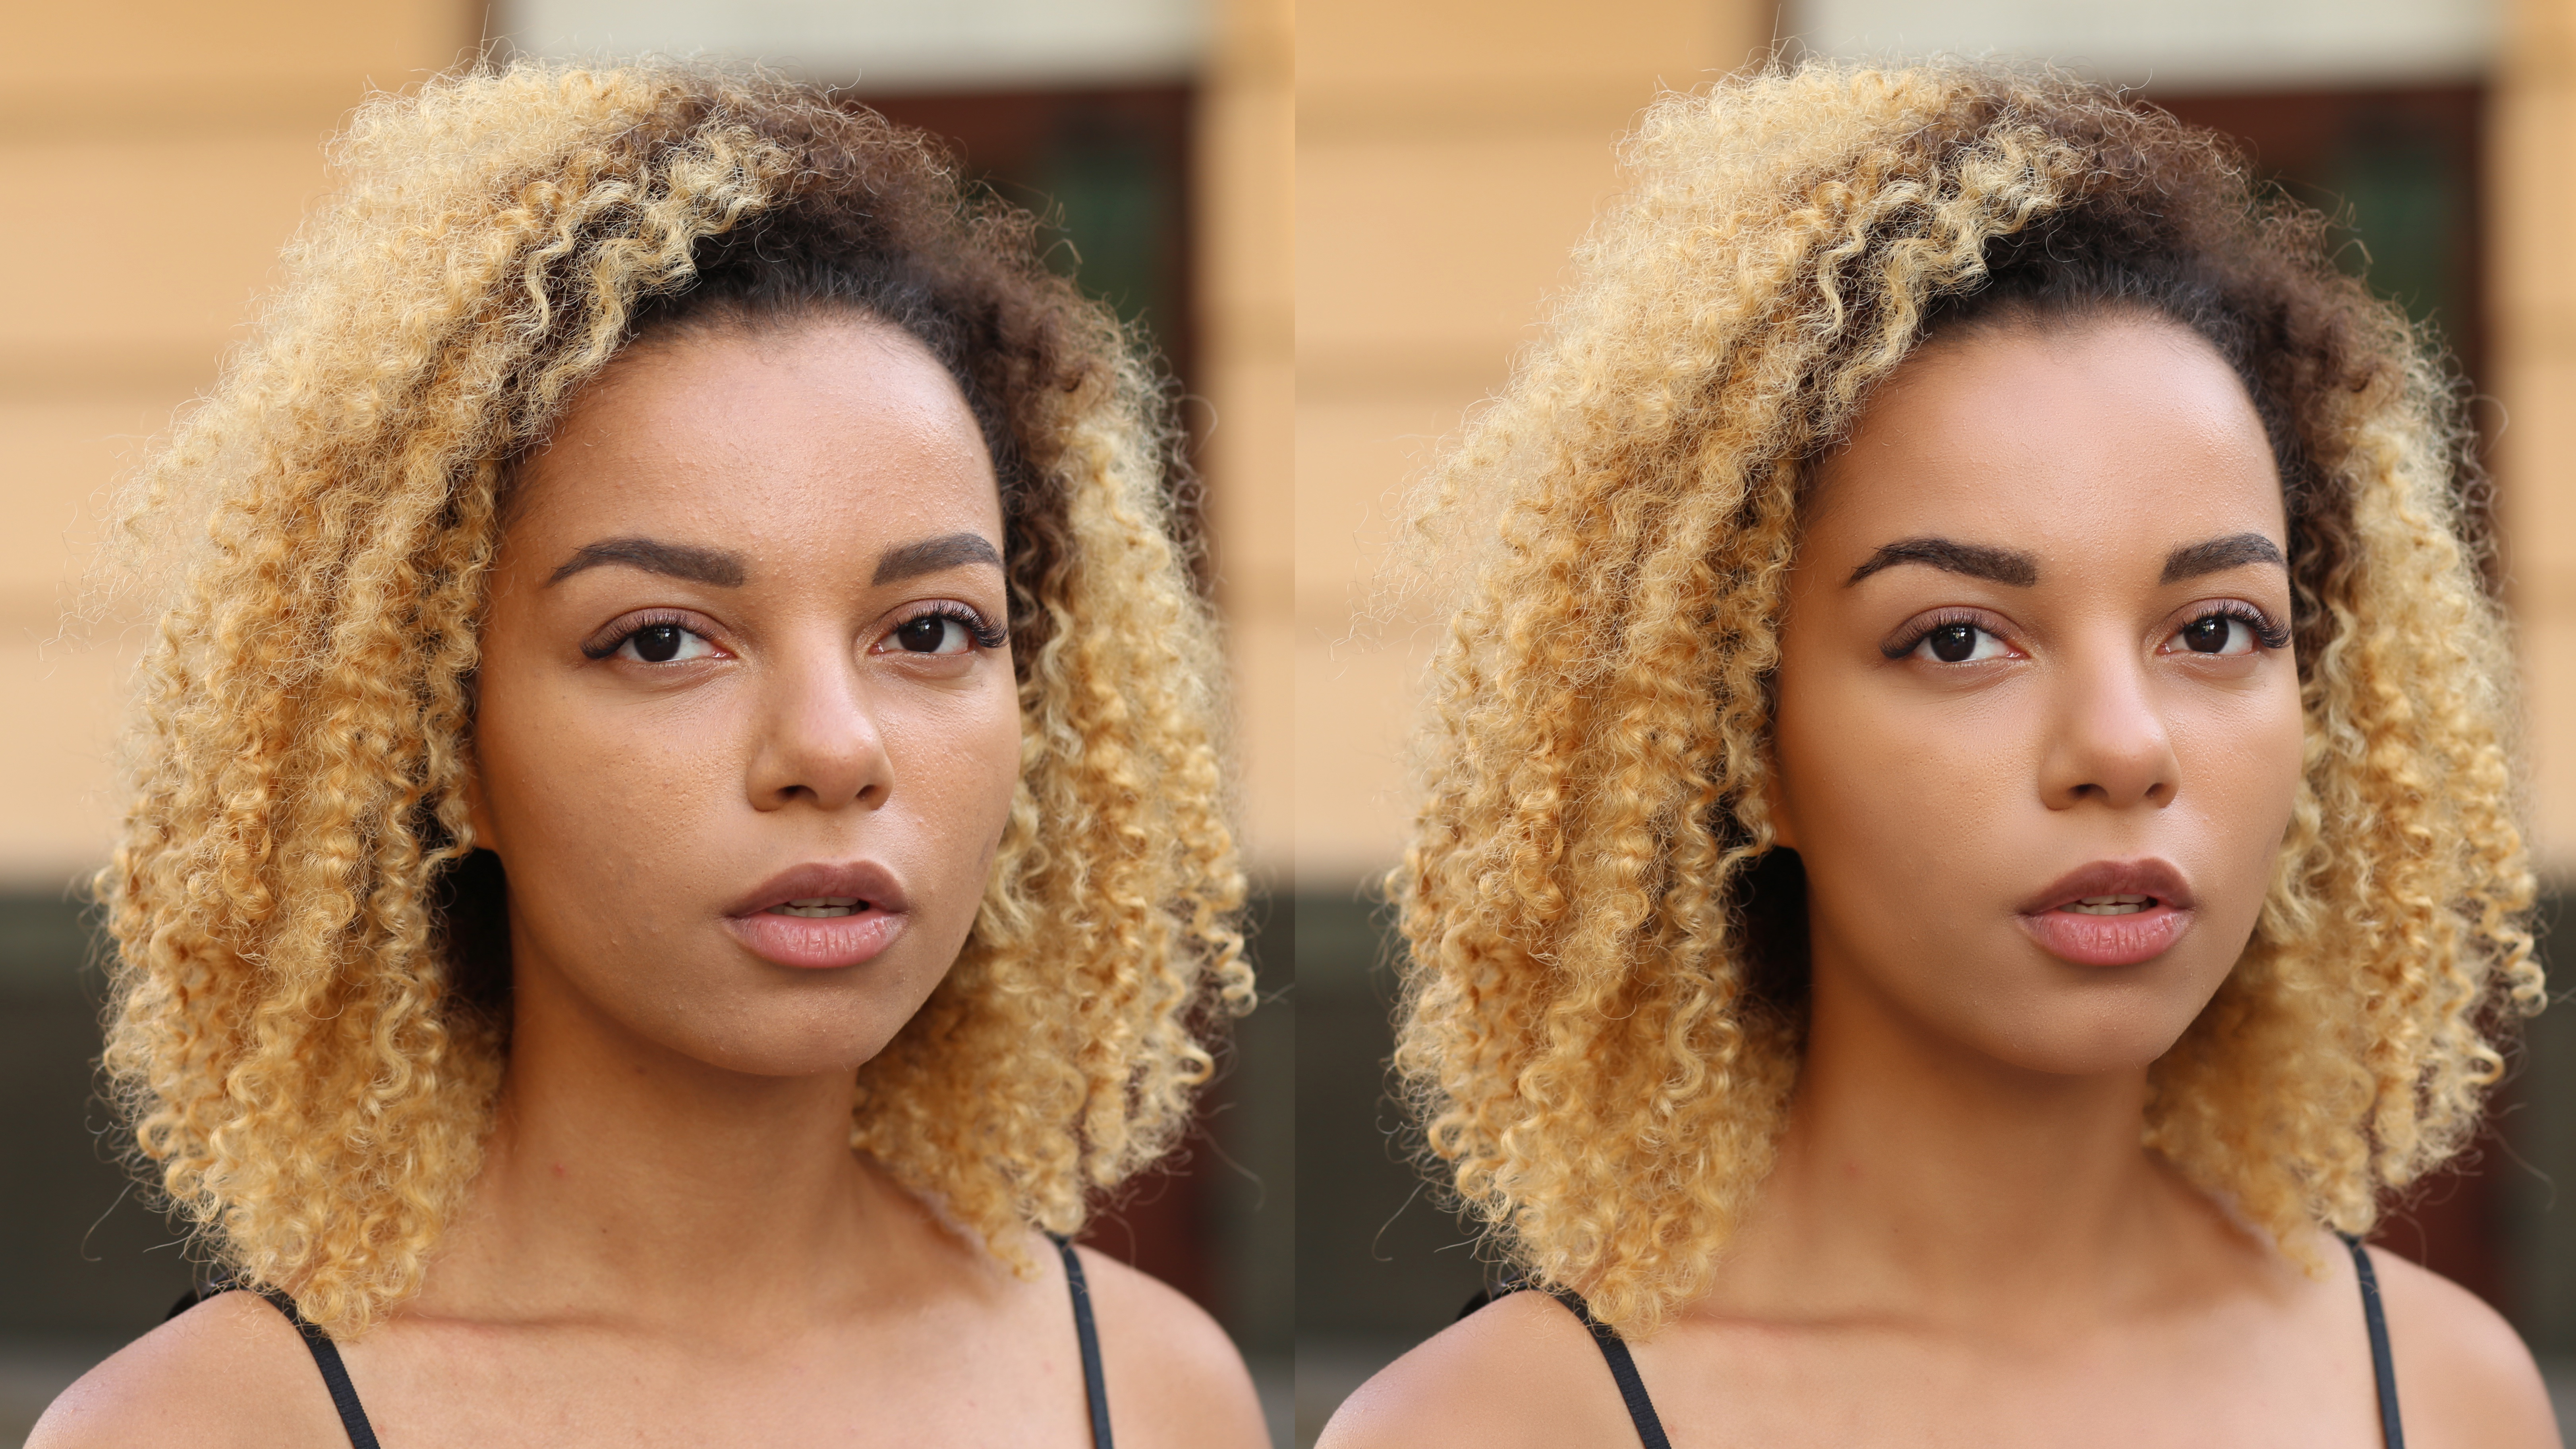
Outdoor snap
You won’t need every adjustment on every portrait! Here, we just used AI Skin Enhancer to soften our subject’s skin, the new and improved Slim Face 2.0 to give her an even more youthful look, and a little eye widening and lip and eyebrow enhancement.

Five great tips for your portraits
Luminar portrait tools are powerful, subtle and effective, and are intuitive to use. You don’t need to turn them up to maximum for every shot, of course, and very often you only need to apply one or two key adjustments to make all the difference. If portraits look great but people can’t say exactly why, then
you know you’ve done a good job!
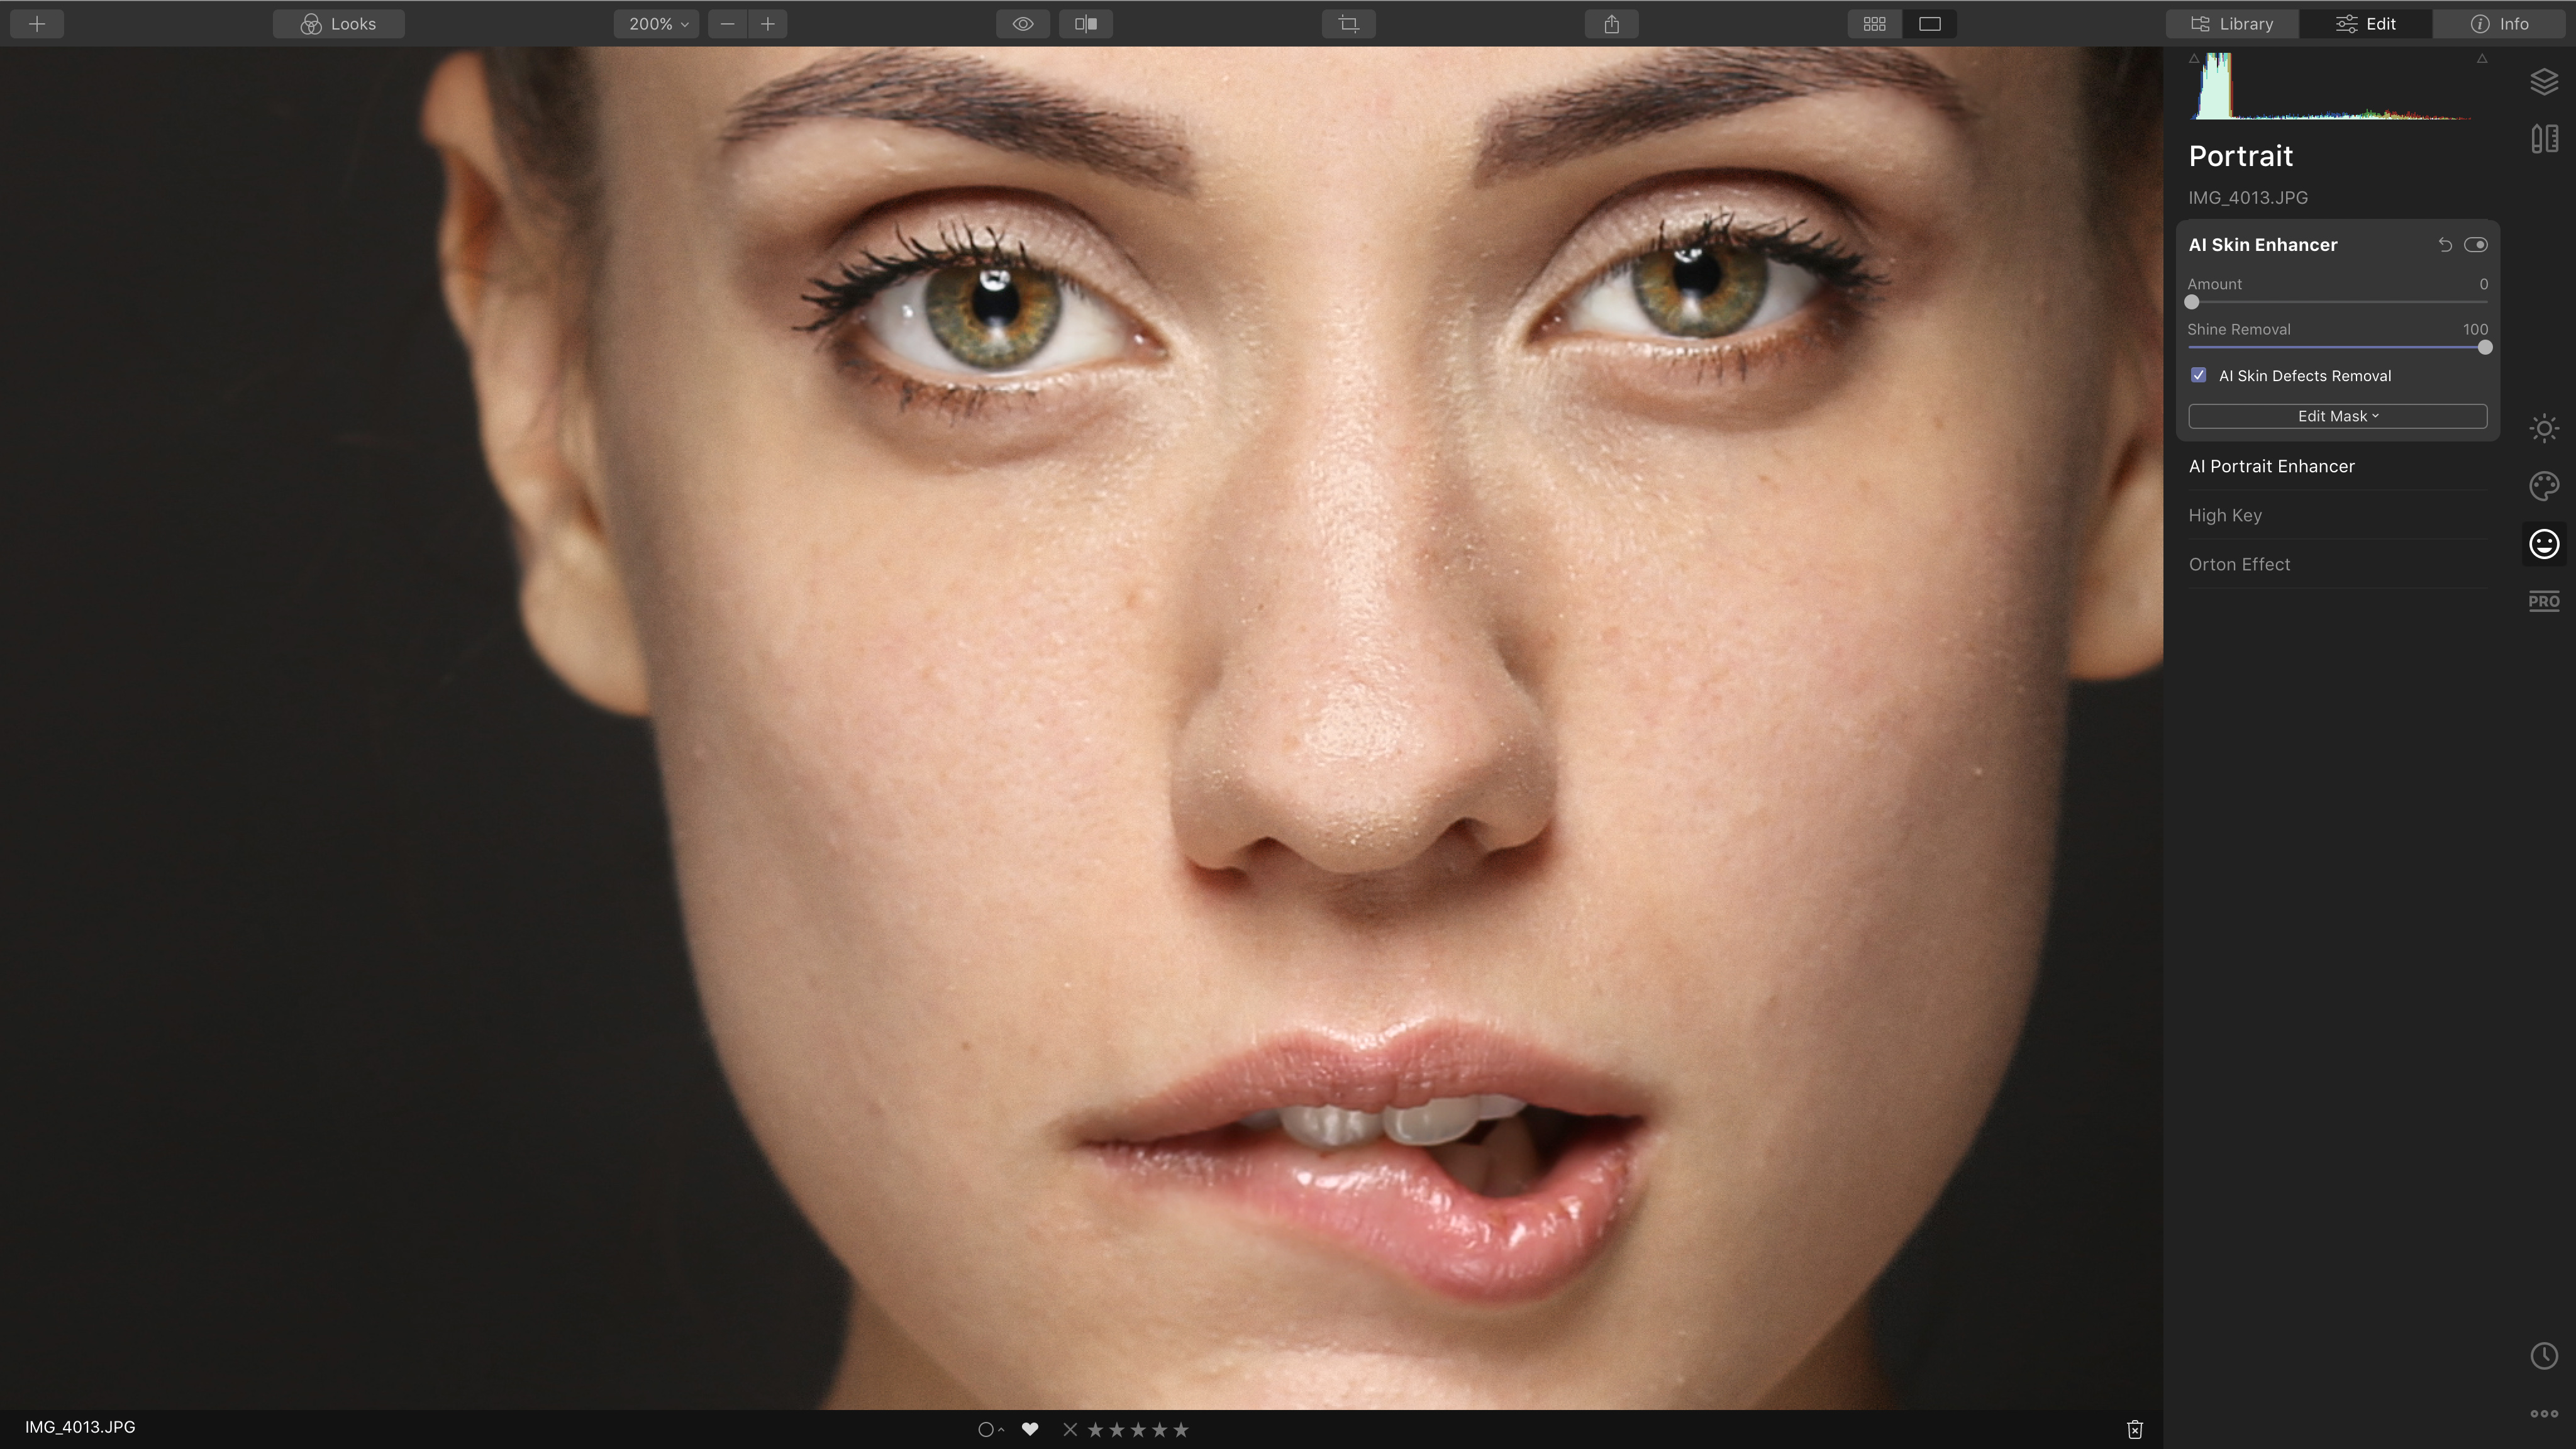
1. Apply AI Skin Defects removal first
This simple checkbox can take out many small spots and blemishes. It won’t take out larger wrinkles and creases, but sometimes they should be left in anyway.
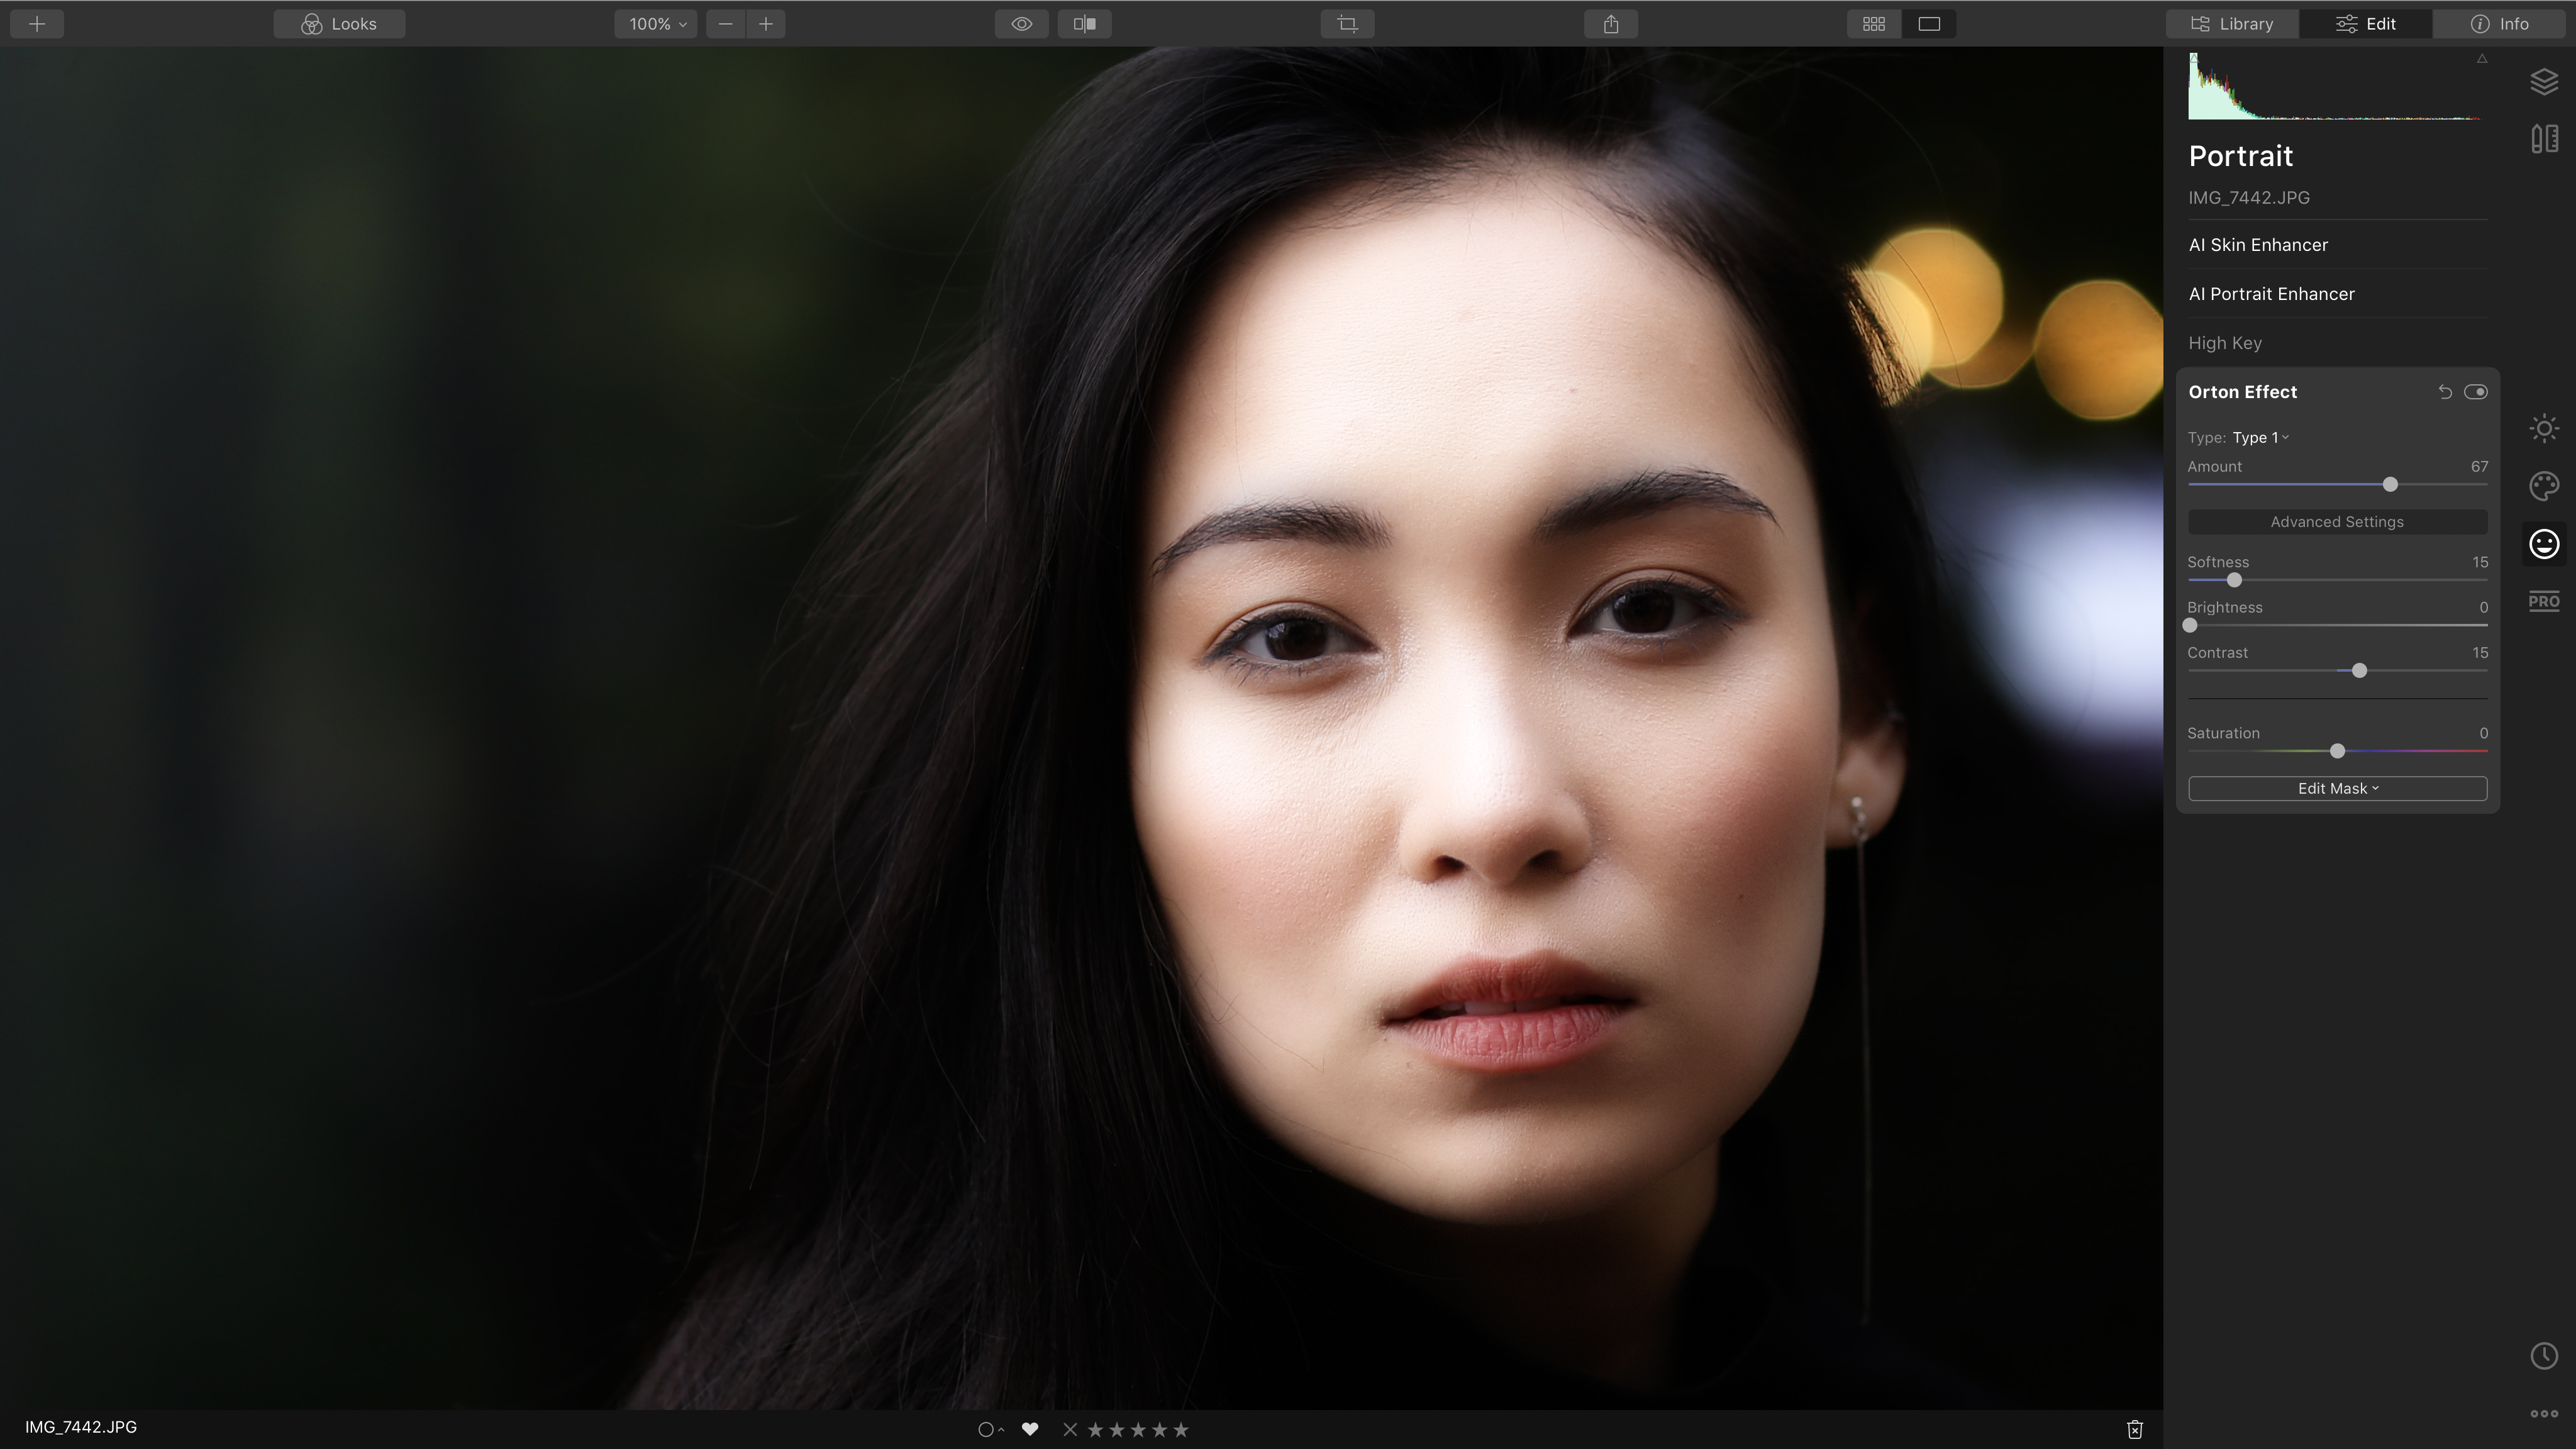
2. Try the Orton Effect
This is not strictly part of the AI portrait enhancement tools, but it’s included in the Portrait workspace as a great way to add a dreamy soft‐focus effect to portrait shots. It’s quick and simple to apply.
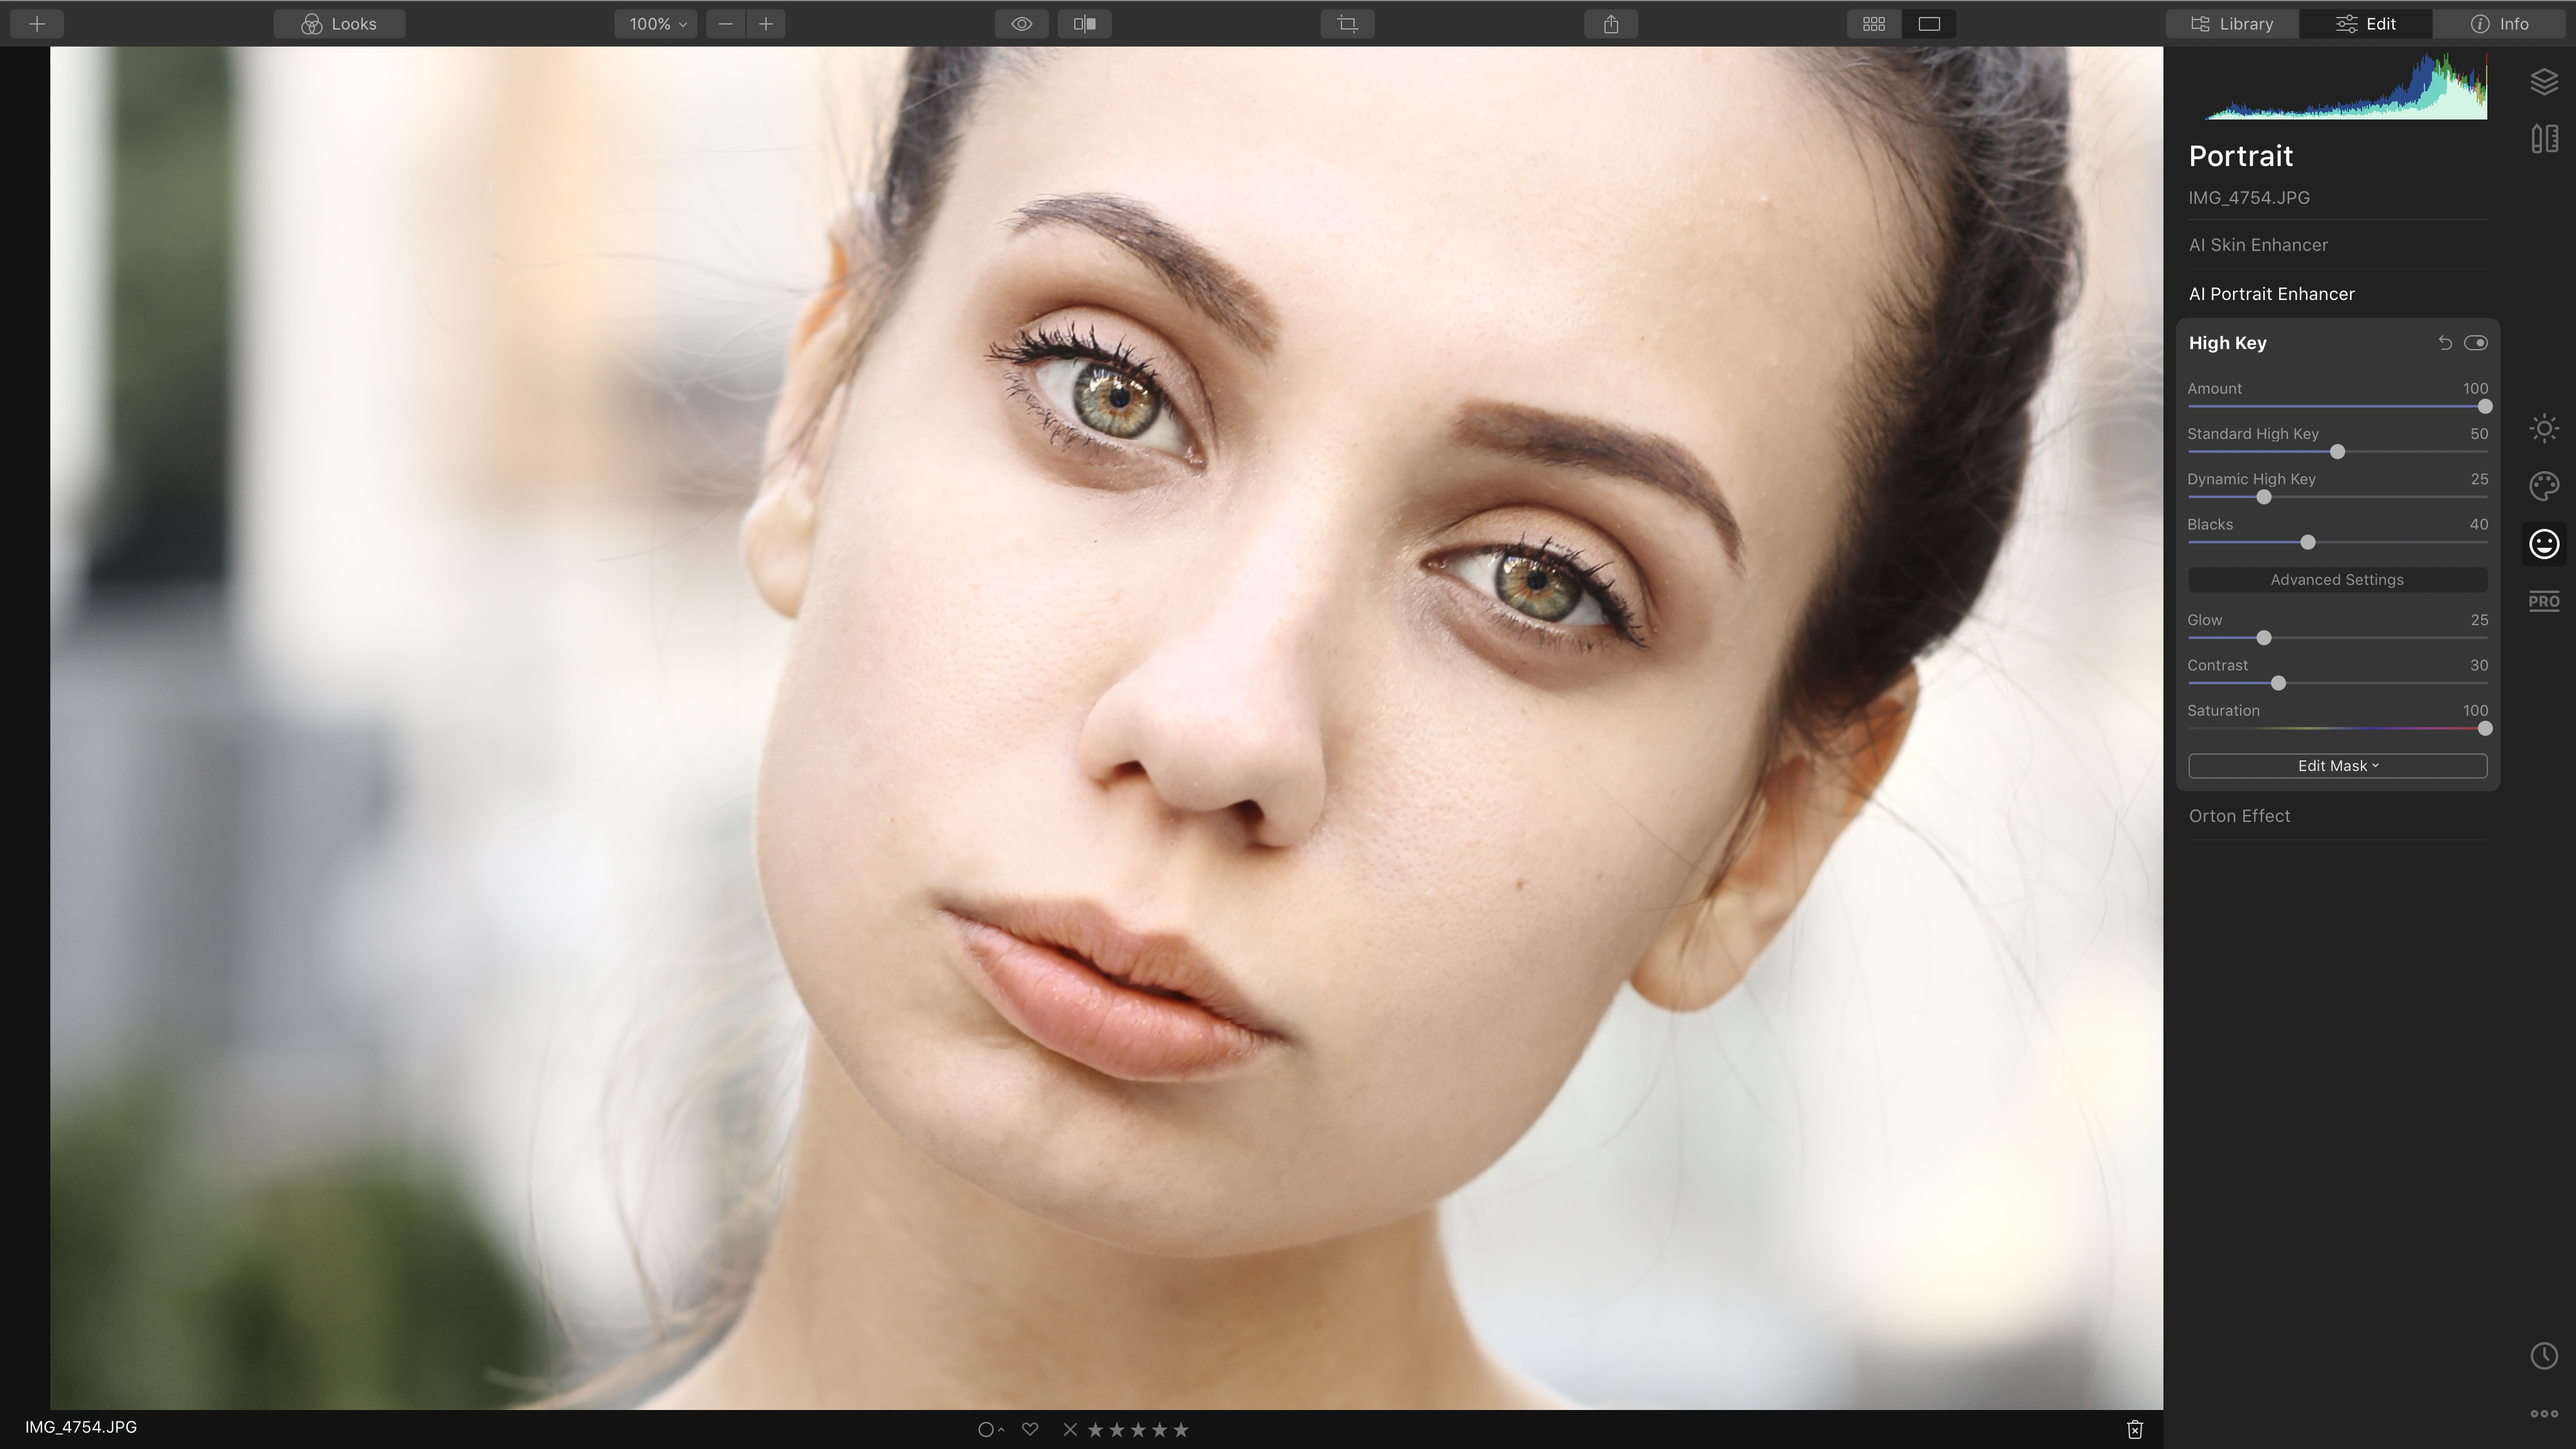
3. Try a High Key effect
This is a great way to give your portrait shots a bright, airy feel. The slider increases brightness but not saturation, but if you want more colour, you can open up the Advanced settings.
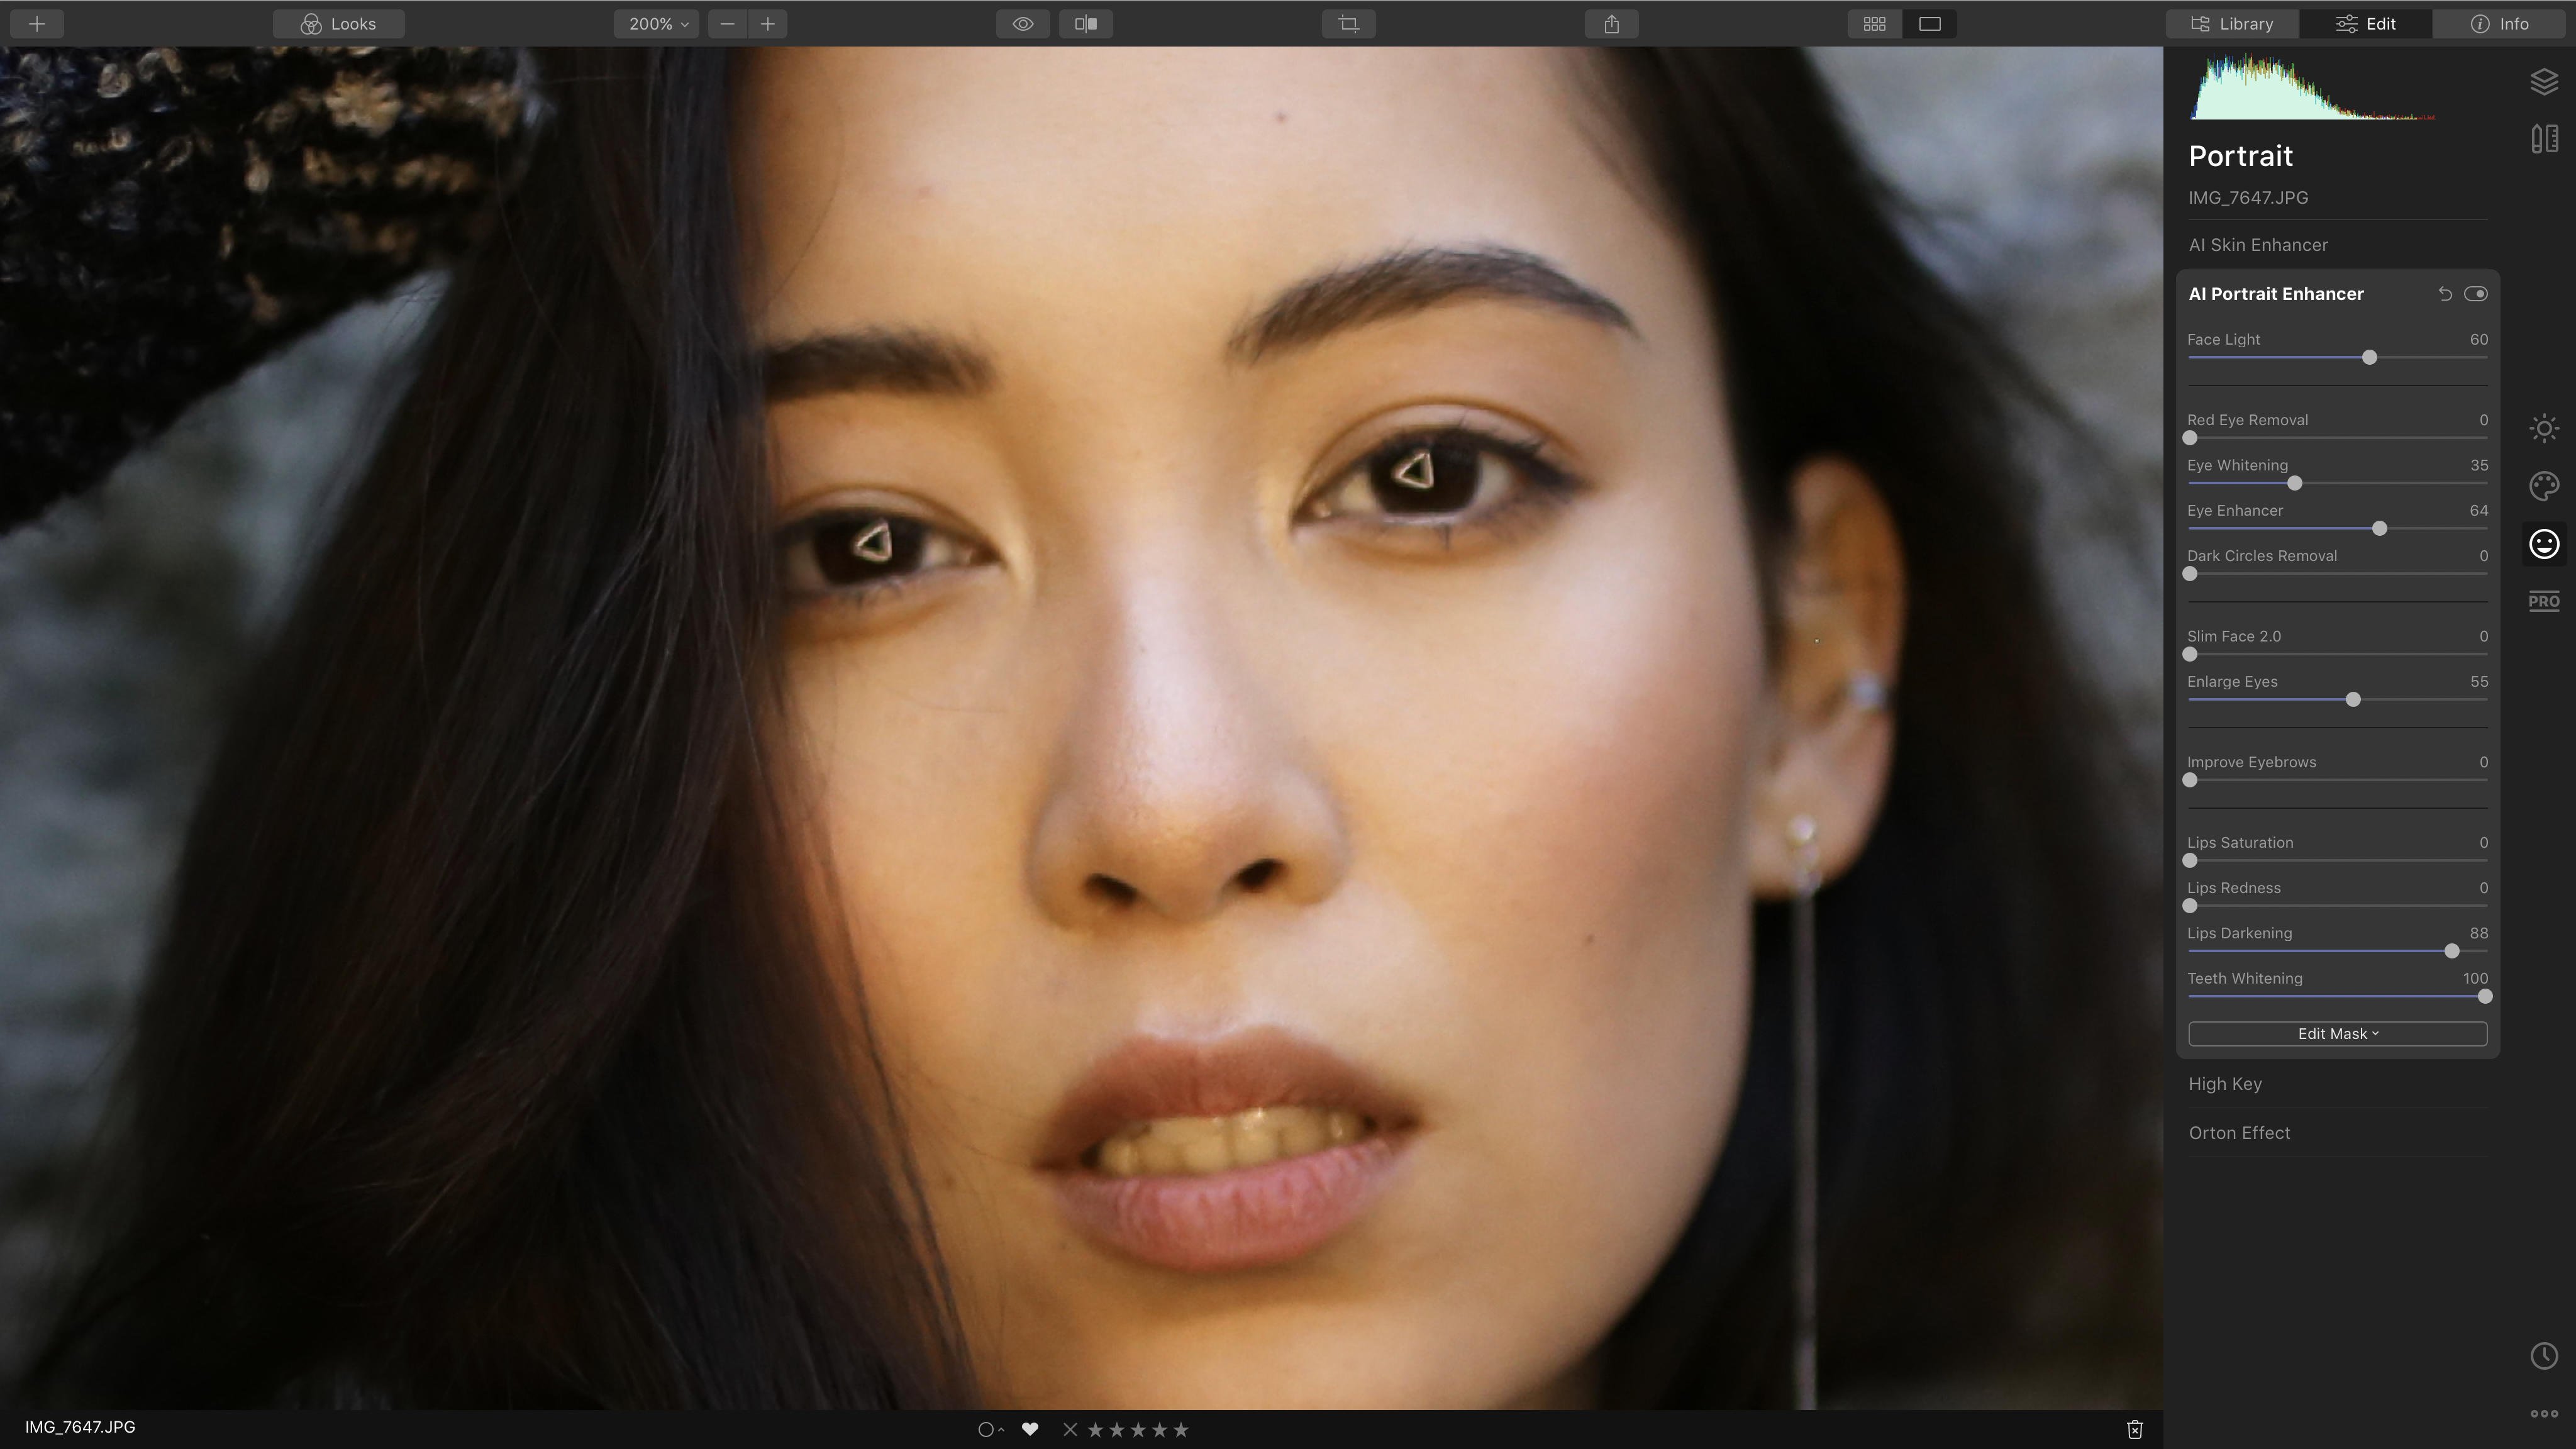
4. Watch out for catchlights
Eye Enhancer does a beautiful job of bringing out colour and detail in irises, but it will also exaggerate any catchlights, which might be too strong if you used artificial light.
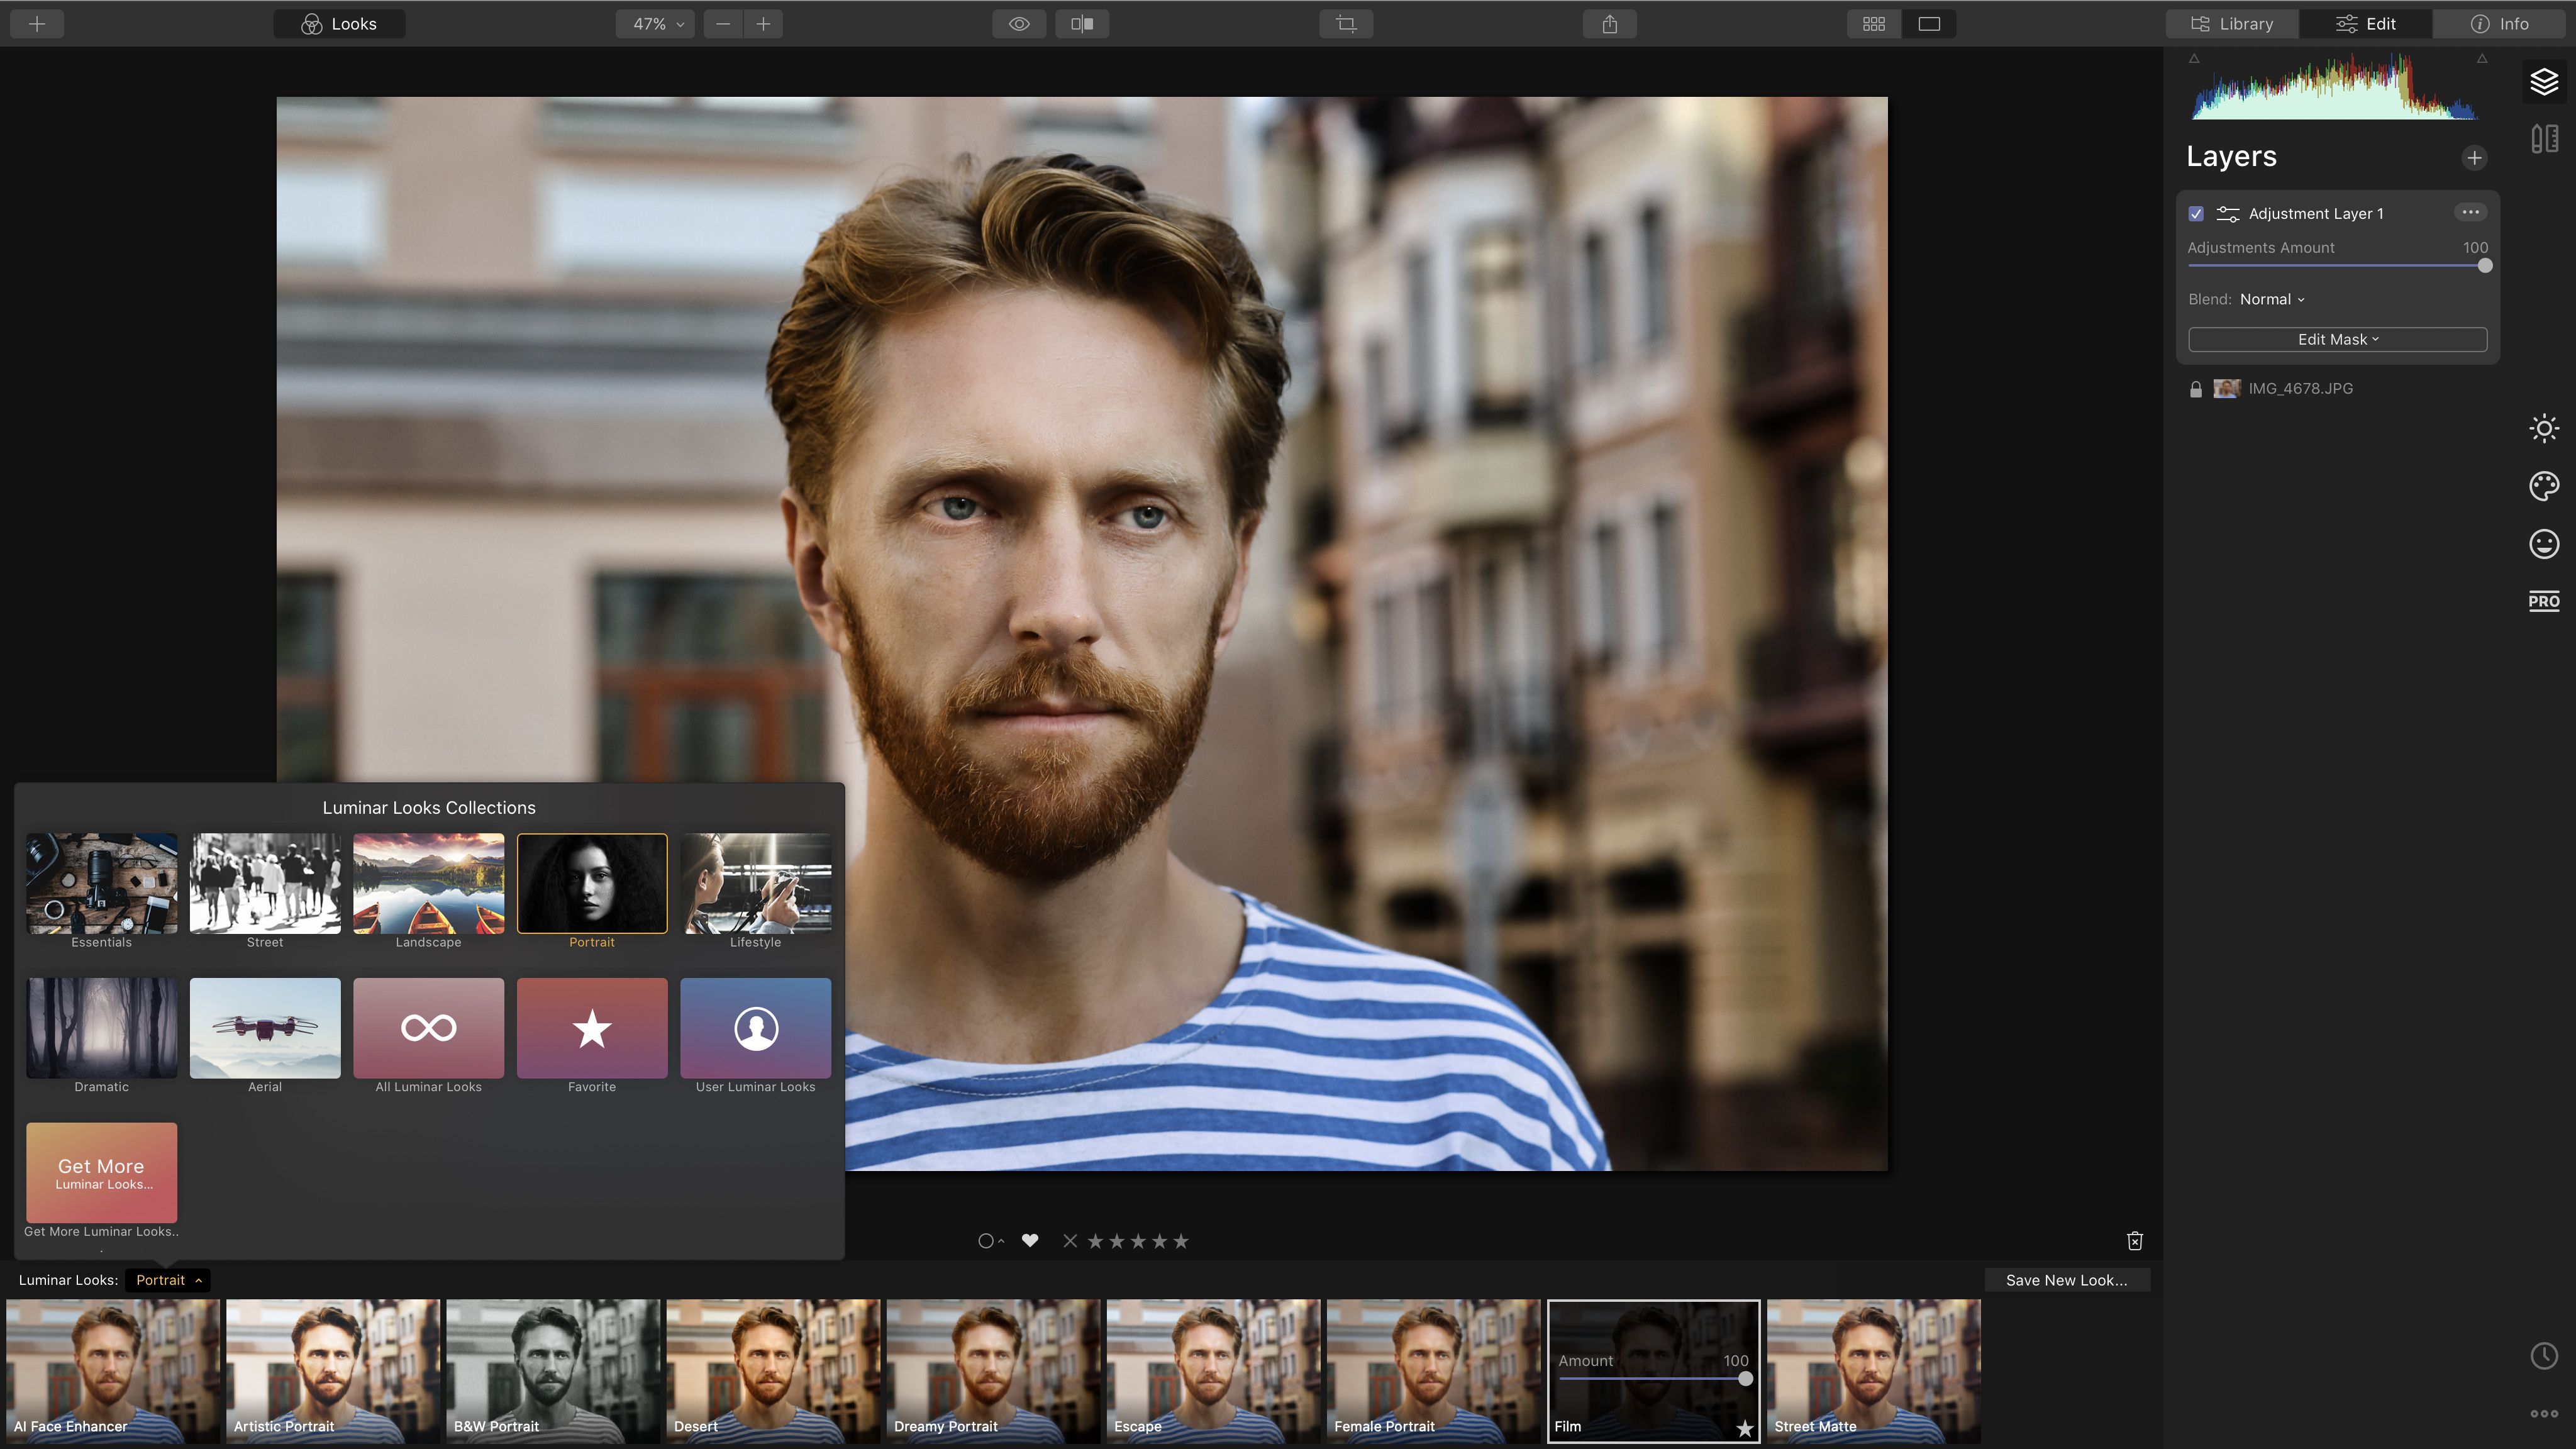
5. Add a Luminar Look
Don’t forget that Luminar has a whole library of Looks you can apply to your portraits: you can keep them separate from your existing portrait enhancements by creating a new Adjustment Layer first.

How to get a copy of Skylum Luminar 4
If you don’t have Luminar 4 already, you can download a free 7-day trial from the Skylum website. It’s available in both macOS and Windows versions and as all the features are fully functional, you can follow this tutorial yourself. If you decide to go ahead and buy Luminar 4, you can use the exclusive discount code DCW20 to save £10 / $10 on the full purchase price.
Get the Digital Camera World Newsletter
The best camera deals, reviews, product advice, and unmissable photography news, direct to your inbox!
Digital Camera World is one of the leading authorities on camera and photography news, reviews, techniques, tutorials, comparisons, deals and industry analysis. The site doesn't just specialize in cameras, but all aspects of photography, videography and imaging – including camera phones, gimbals, lenses, lighting, editing software, filters, tripods, laptops, printers, photo books, desks, binoculars and more.
Whether you're using, looking to buy or trying to get the most out of a compact camera, action camera, camera drone, cinema camera, beginner camera or professional camera, Digital Camera World has a roster of experts with combined experience of over 100 years when it comes to cameras, photography and imaging.

