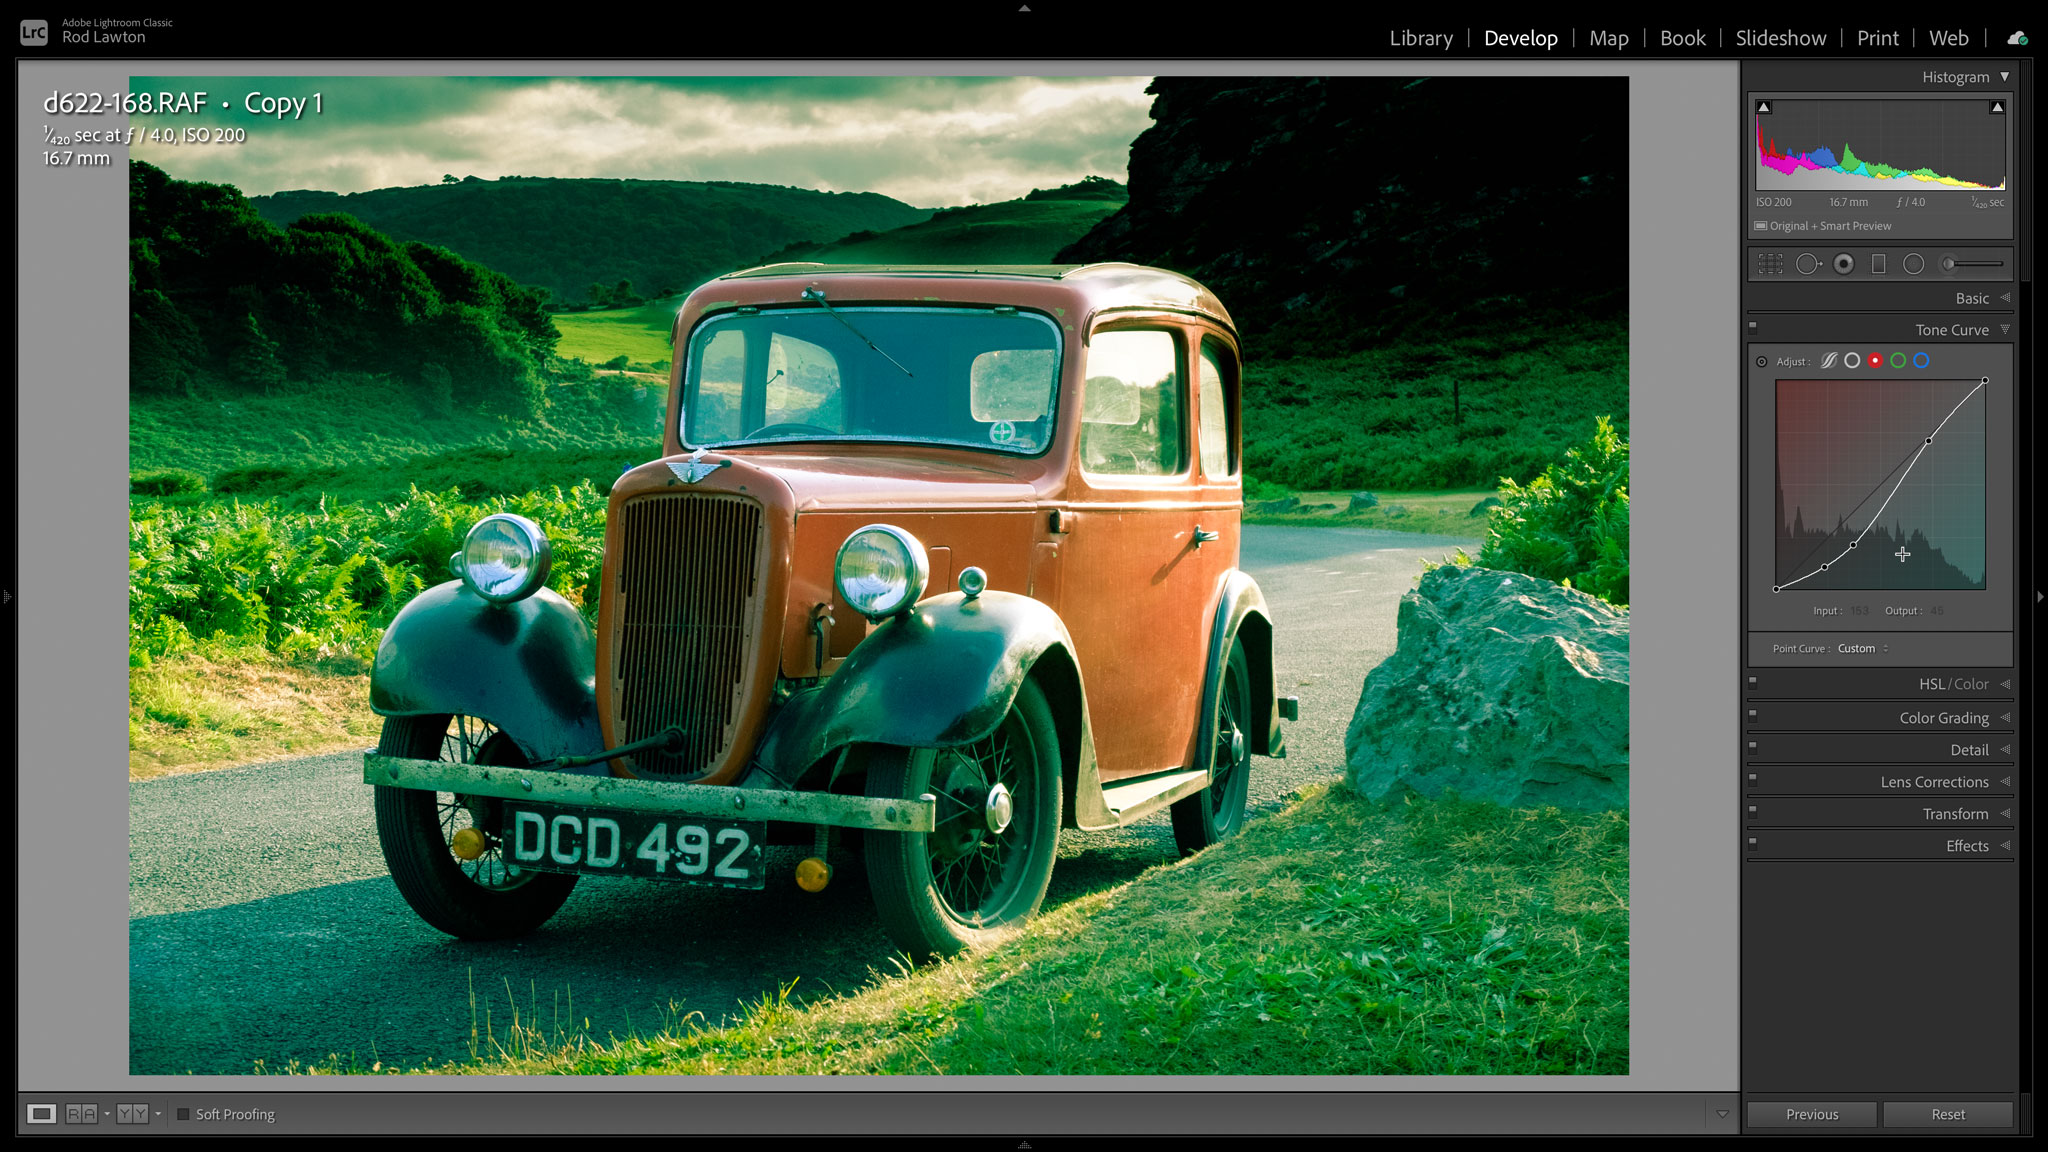
What is cross processing, and how does it work?
Discover how colours can be altered in editing software to emulate a traditional effect created when developing film

Back in the days of film, amidst all the different film formats available, there were two distinct colour film types you could get – positive film (also known as transparency film or slide film) and negative film. The former produced a colour slide for direct viewing, and the latter produced a reversed version of the scene for printing onto light-sensitive paper. The two types used different chemicals to develop the film (E6 chemicals for positives and C41 for negatives) but cross-processing involved developing slide film in the C41 chemicals designed for negatives, or negative film in the E6 chemicals for slides.
The result of this cross-processing was a marked colour shift and a change in contrast, giving a non-naturalistic finish that, while inaccurate, looked great on edgy fashion pictures or creative portraits. Different results were obtained by over or underexposing the shots, and pushing (over-developing) or pulling (under-developing) the film, so with all the variables involved, consistency was quite hard to achieve.
Cross processing in software

In the digital age, it’s quick and easy to manipulate colour and contrast in software like Photoshop, and because you can see the results on screen in real-time, there’s no waste of time or money in arriving at the desired end point. You do lose the ‘surprise factor’ that many would argue was the charm of cross-processing, but at least you don’t end up tipping expensive chemicals down the drain after a failed experiment!
Here is one way to start your cross-processing journey; open the shot you want to change into Photoshop, and then in the Layers panel, click on the Adjustment Layer icon and select Curves from the list. In the Curves palette, click where it says RGB and select the Red channel. Now bend the curve into a shallow S shape by pulling down about 25% of the way along the line and pushing up about 75% of the way along. You’ll see the red-cyan content of the image change. Now switch to the Blue channel, and do the opposite, pushing up at the bottom and pulling down at the top, so you have a reverse S curve. This will alter the blue-yellow content.
You can of course adjust the green channel data too, to affect the green-magenta tones in the scene, but you don’t have to. In fact, keeping the colour changes simple is the best way to get started. Once you’re happy with your colour shift, return to RGB in the channel box to alter the contrast, and boost it by applying a shallow S curve, or reduce it with a reverse S curve to get the look you want.
From quirky portraits to olde-worlde street scenes, cross-processing effects can add a fresh twist to shots, and while you won’t want to use it all the time, it’s a great look to keep in the creative toolbox.
Read more:
• Best film cameras
• Best photo editing software
• Photoshop CC review
• Lightroom Classic review
Get the Digital Camera World Newsletter
The best camera deals, reviews, product advice, and unmissable photography news, direct to your inbox!
Andrew makes his living as a photographer, videographer and journalist. For 26 years he was a specialist magazine editor, the last 13 of which were on Practical Photography magazine. A long-time expert in photographic techniques across many disciplines, he's a self-confessed photo generalist, and a font of creative knowledge to capturing just about any subject, although he has a strong leaning to wildlife and travel photography. Andrew's wide-ranging photography experience means he authors the long-running Photo Answers section for Digital Camera Magazine. His work as a journalist, guide and educator dovetails neatly into his commitment to Foto-Buzz - an online subscription community he founded, where Andrew writes articles, films tutorials and records blogs on all manner of photo-related subjects and techniques for enthusiast photographers.

