New Adobe Super Resolution is great… if you are ready for 400MB image files
It seems magic image resizers will never go out of fashion, so what’s the truth behind Adobe’s new Super Resolution tool?

We won’t list every app, tool or plug-in that promises to double or quadruple the resolution of your photos. Many use ‘simulations’ that are incredible in the true sense – i.e. difficult to believe. It’s very easy to start with a full-resolution image as the ‘after’ shot and then downsample it to make a ‘before’ shot.
The fact is, image upsizers can’t generate detail that wasn’t captured in the first place. The reality is typically in the small print – these tools will enlarge your images without ‘losing quality’. Now any resizing process, particularly upsizing, will tend to blur the detail that is actually there because the software is having to guess at the new ‘in-between’ pixels. What the best upsizing tools do is give you bigger images while preserving the appearance of sharp edges.
Some tools are now using AI to go a step further, analysing textures and shapes to predict what they ought to look like when upsampled. Even here, of course, they are simply extrapolating from what’s there, not magically uncovering new image detail. The results, nevertheless, can be pretty convincing.
Why would you want to upsize an image?
We can think of three reasons:
1) You no longer have the original photo just a lower resolution version shared on social media, for example, or sent from a phone.
2) You wanted a Fujifilm GFX 100S but you could only afford an X-T30.
3) You want to crop an image very heavily but still produce a big print.
Get the Digital Camera World Newsletter
The best camera deals, reviews, product advice, and unmissable photography news, direct to your inbox!
How Adobe Super Resolution works
It’s a lot more specialised than regular upsizing tools.
• First, it’s currently available only in Adobe Camera RAW, though we believe it’s coming to Lightroom in due course.
• Second, it can be used on JPEGs and TIFFs, but in our tests it works much, much better on RAW files.
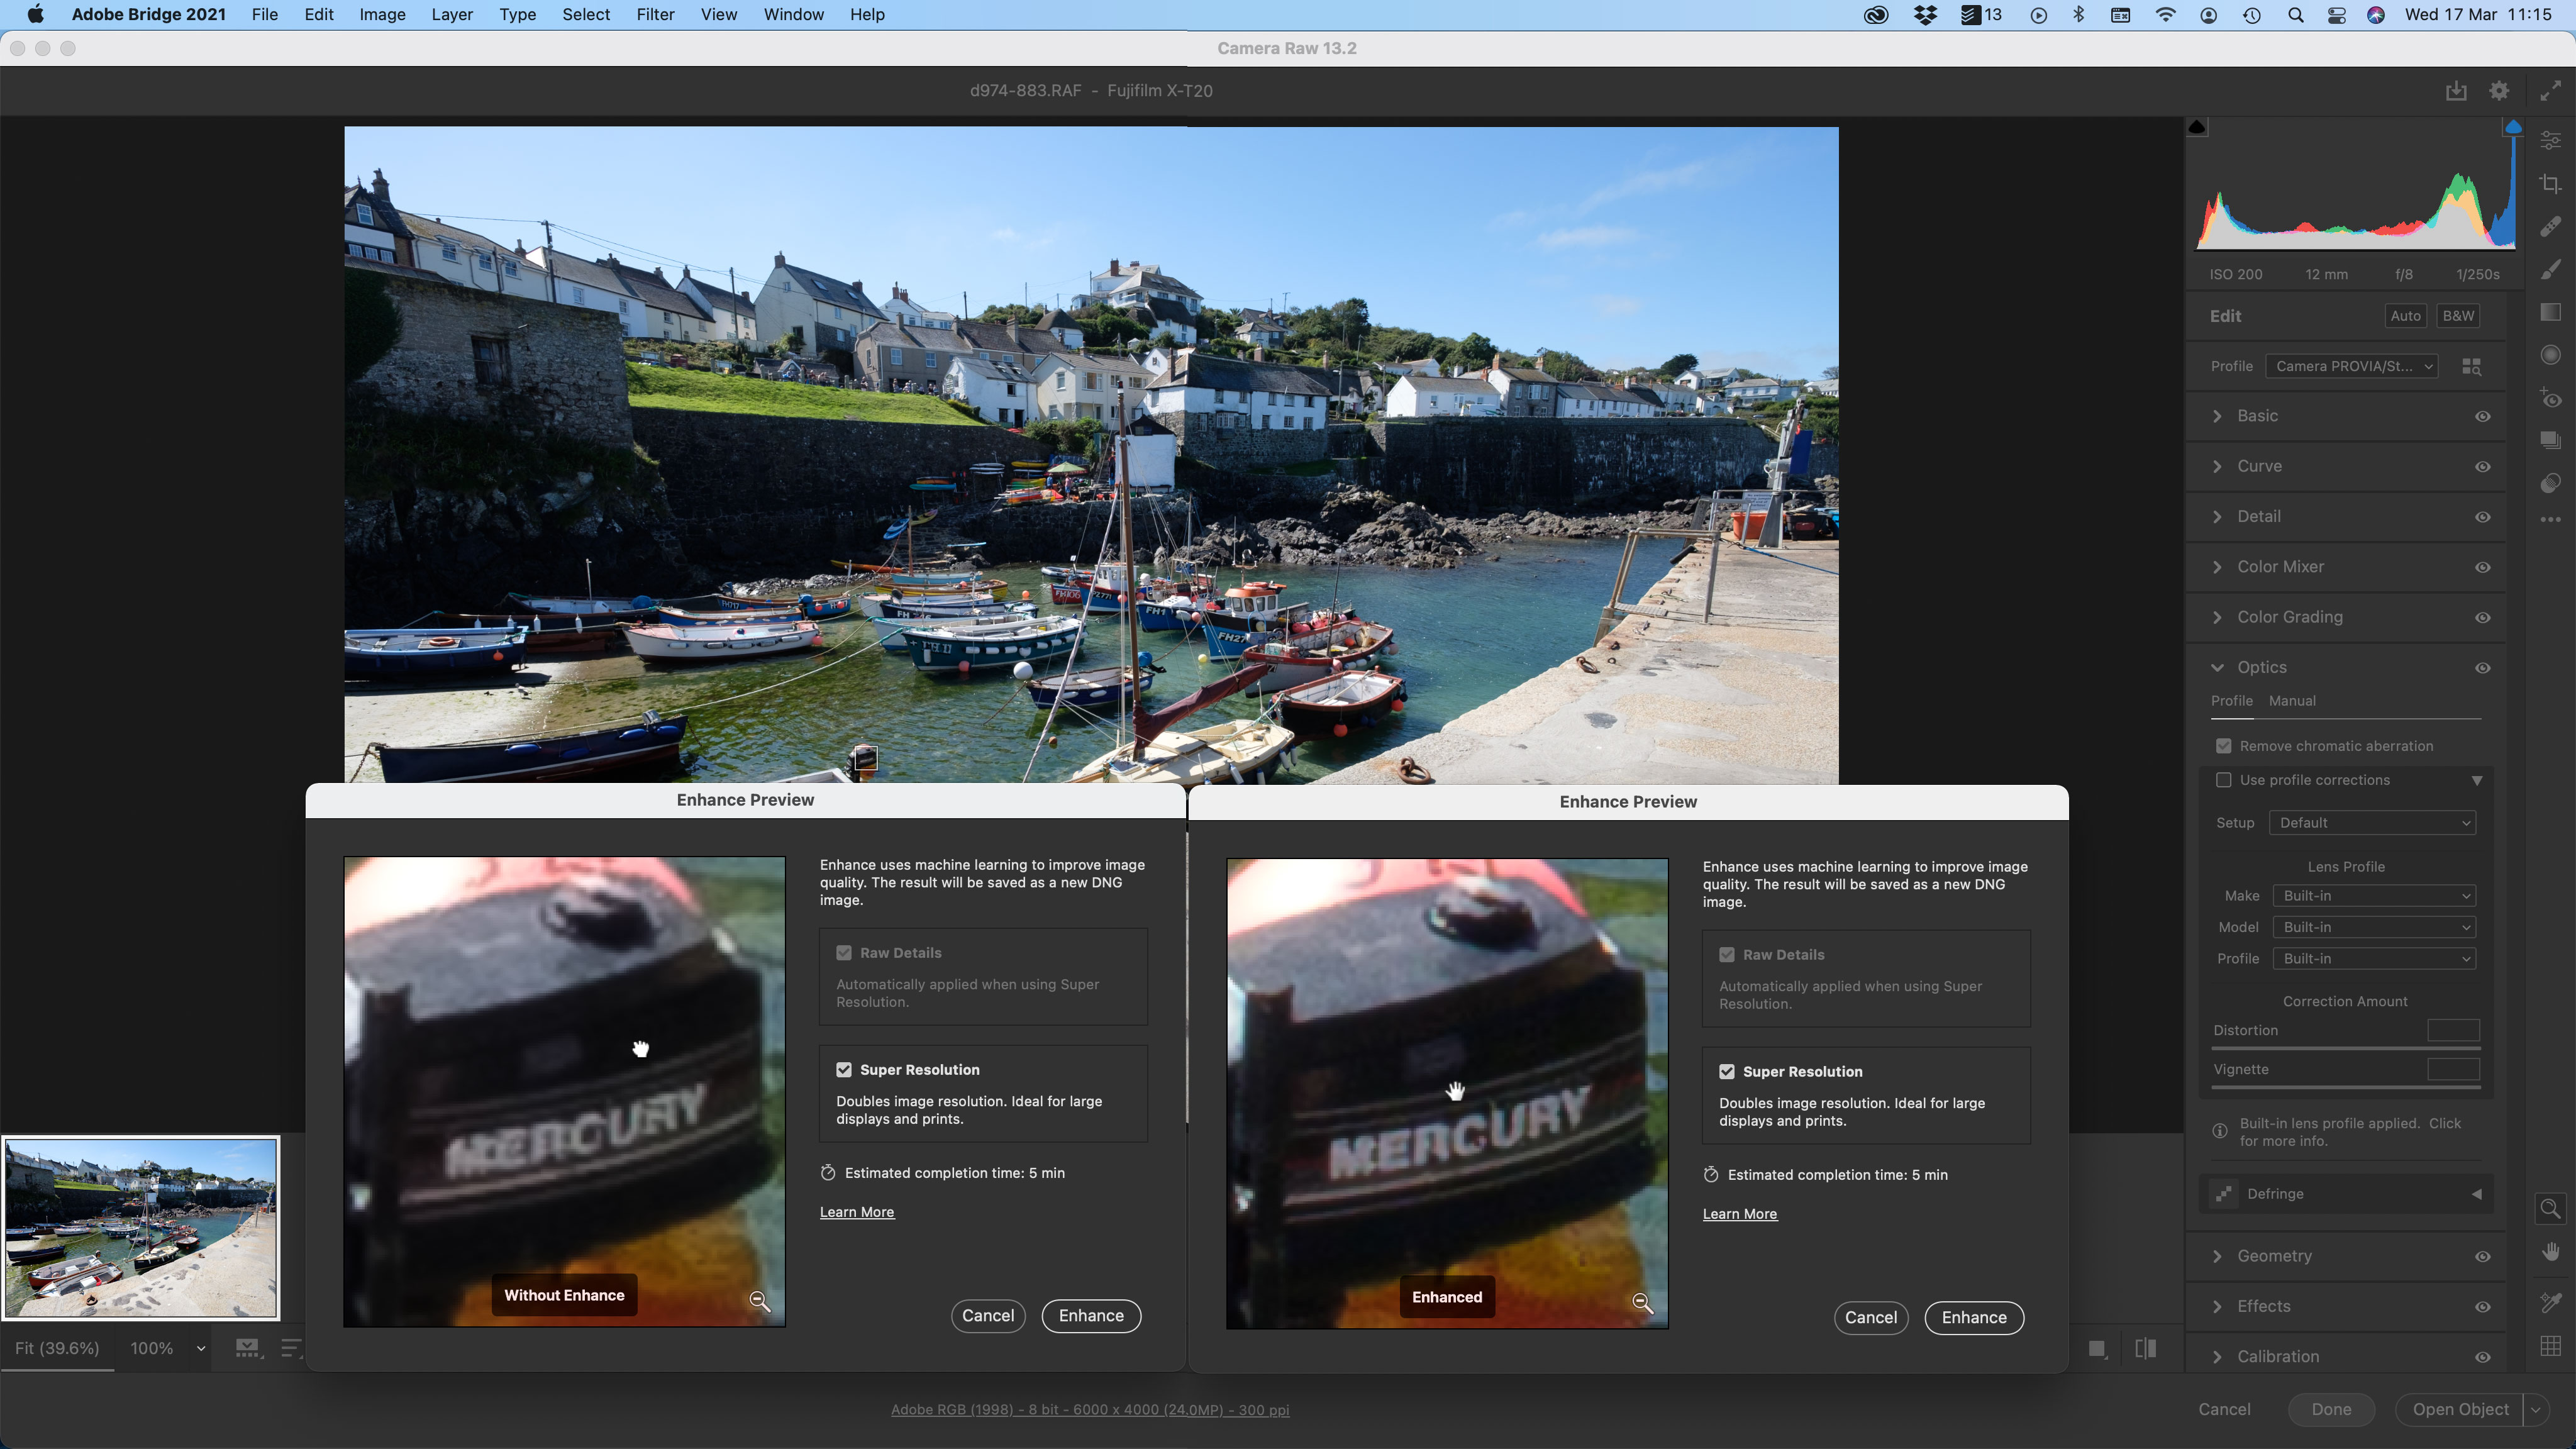
• Third, there’s no control over the settings. It gives you images twice as wide/high, and that’s it – in other words, four times the megapixels.
• Fourth, it outputs an Adobe DNG file. If you want a JPEG or a TIFF, you will then need to use Adobe Camera RAW to export one.
• Fifth, the enhanced DNG files it creates are MASSIVE. We’re not joking about the 400MB files in the headline. That’s what we got when we supersized a selection of 24MP RAW files. If you upsize a 50% crop of a 24MP image, you’re still going to get a very big output file, and if you want to upsize an image bigger than 24MP… well, good luck to you.

Is Adobe Super Resolution any good?
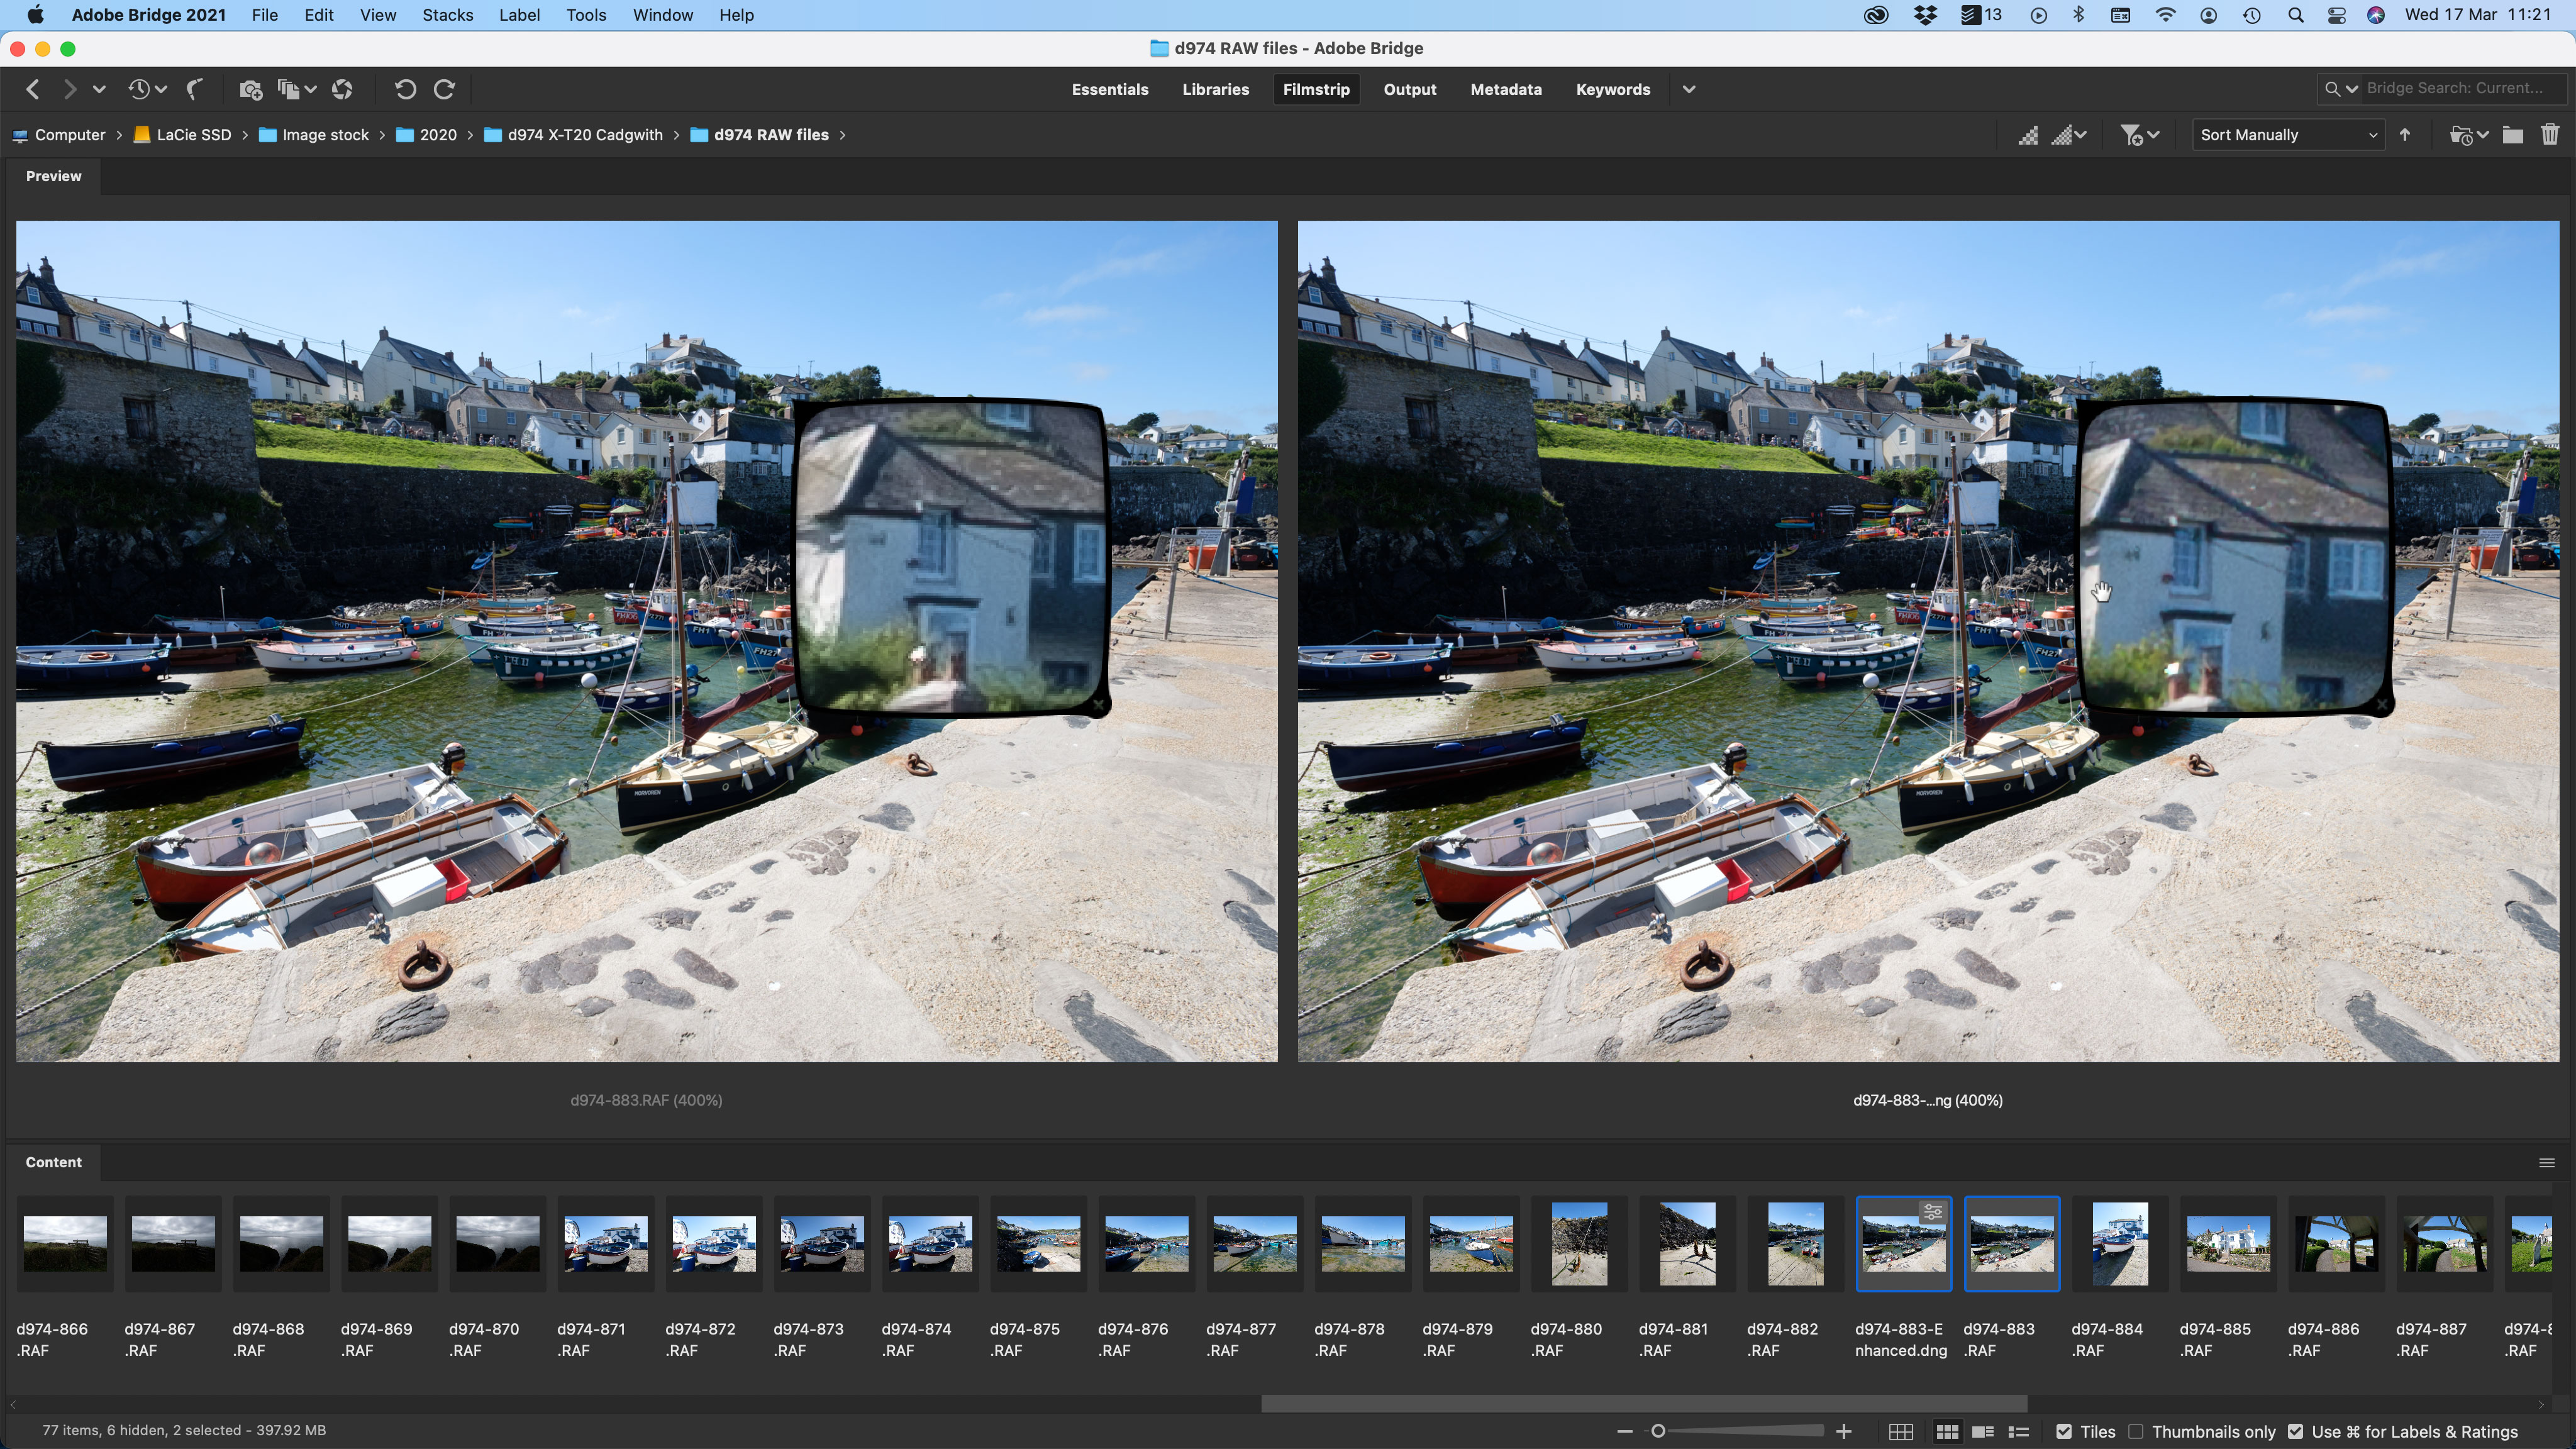
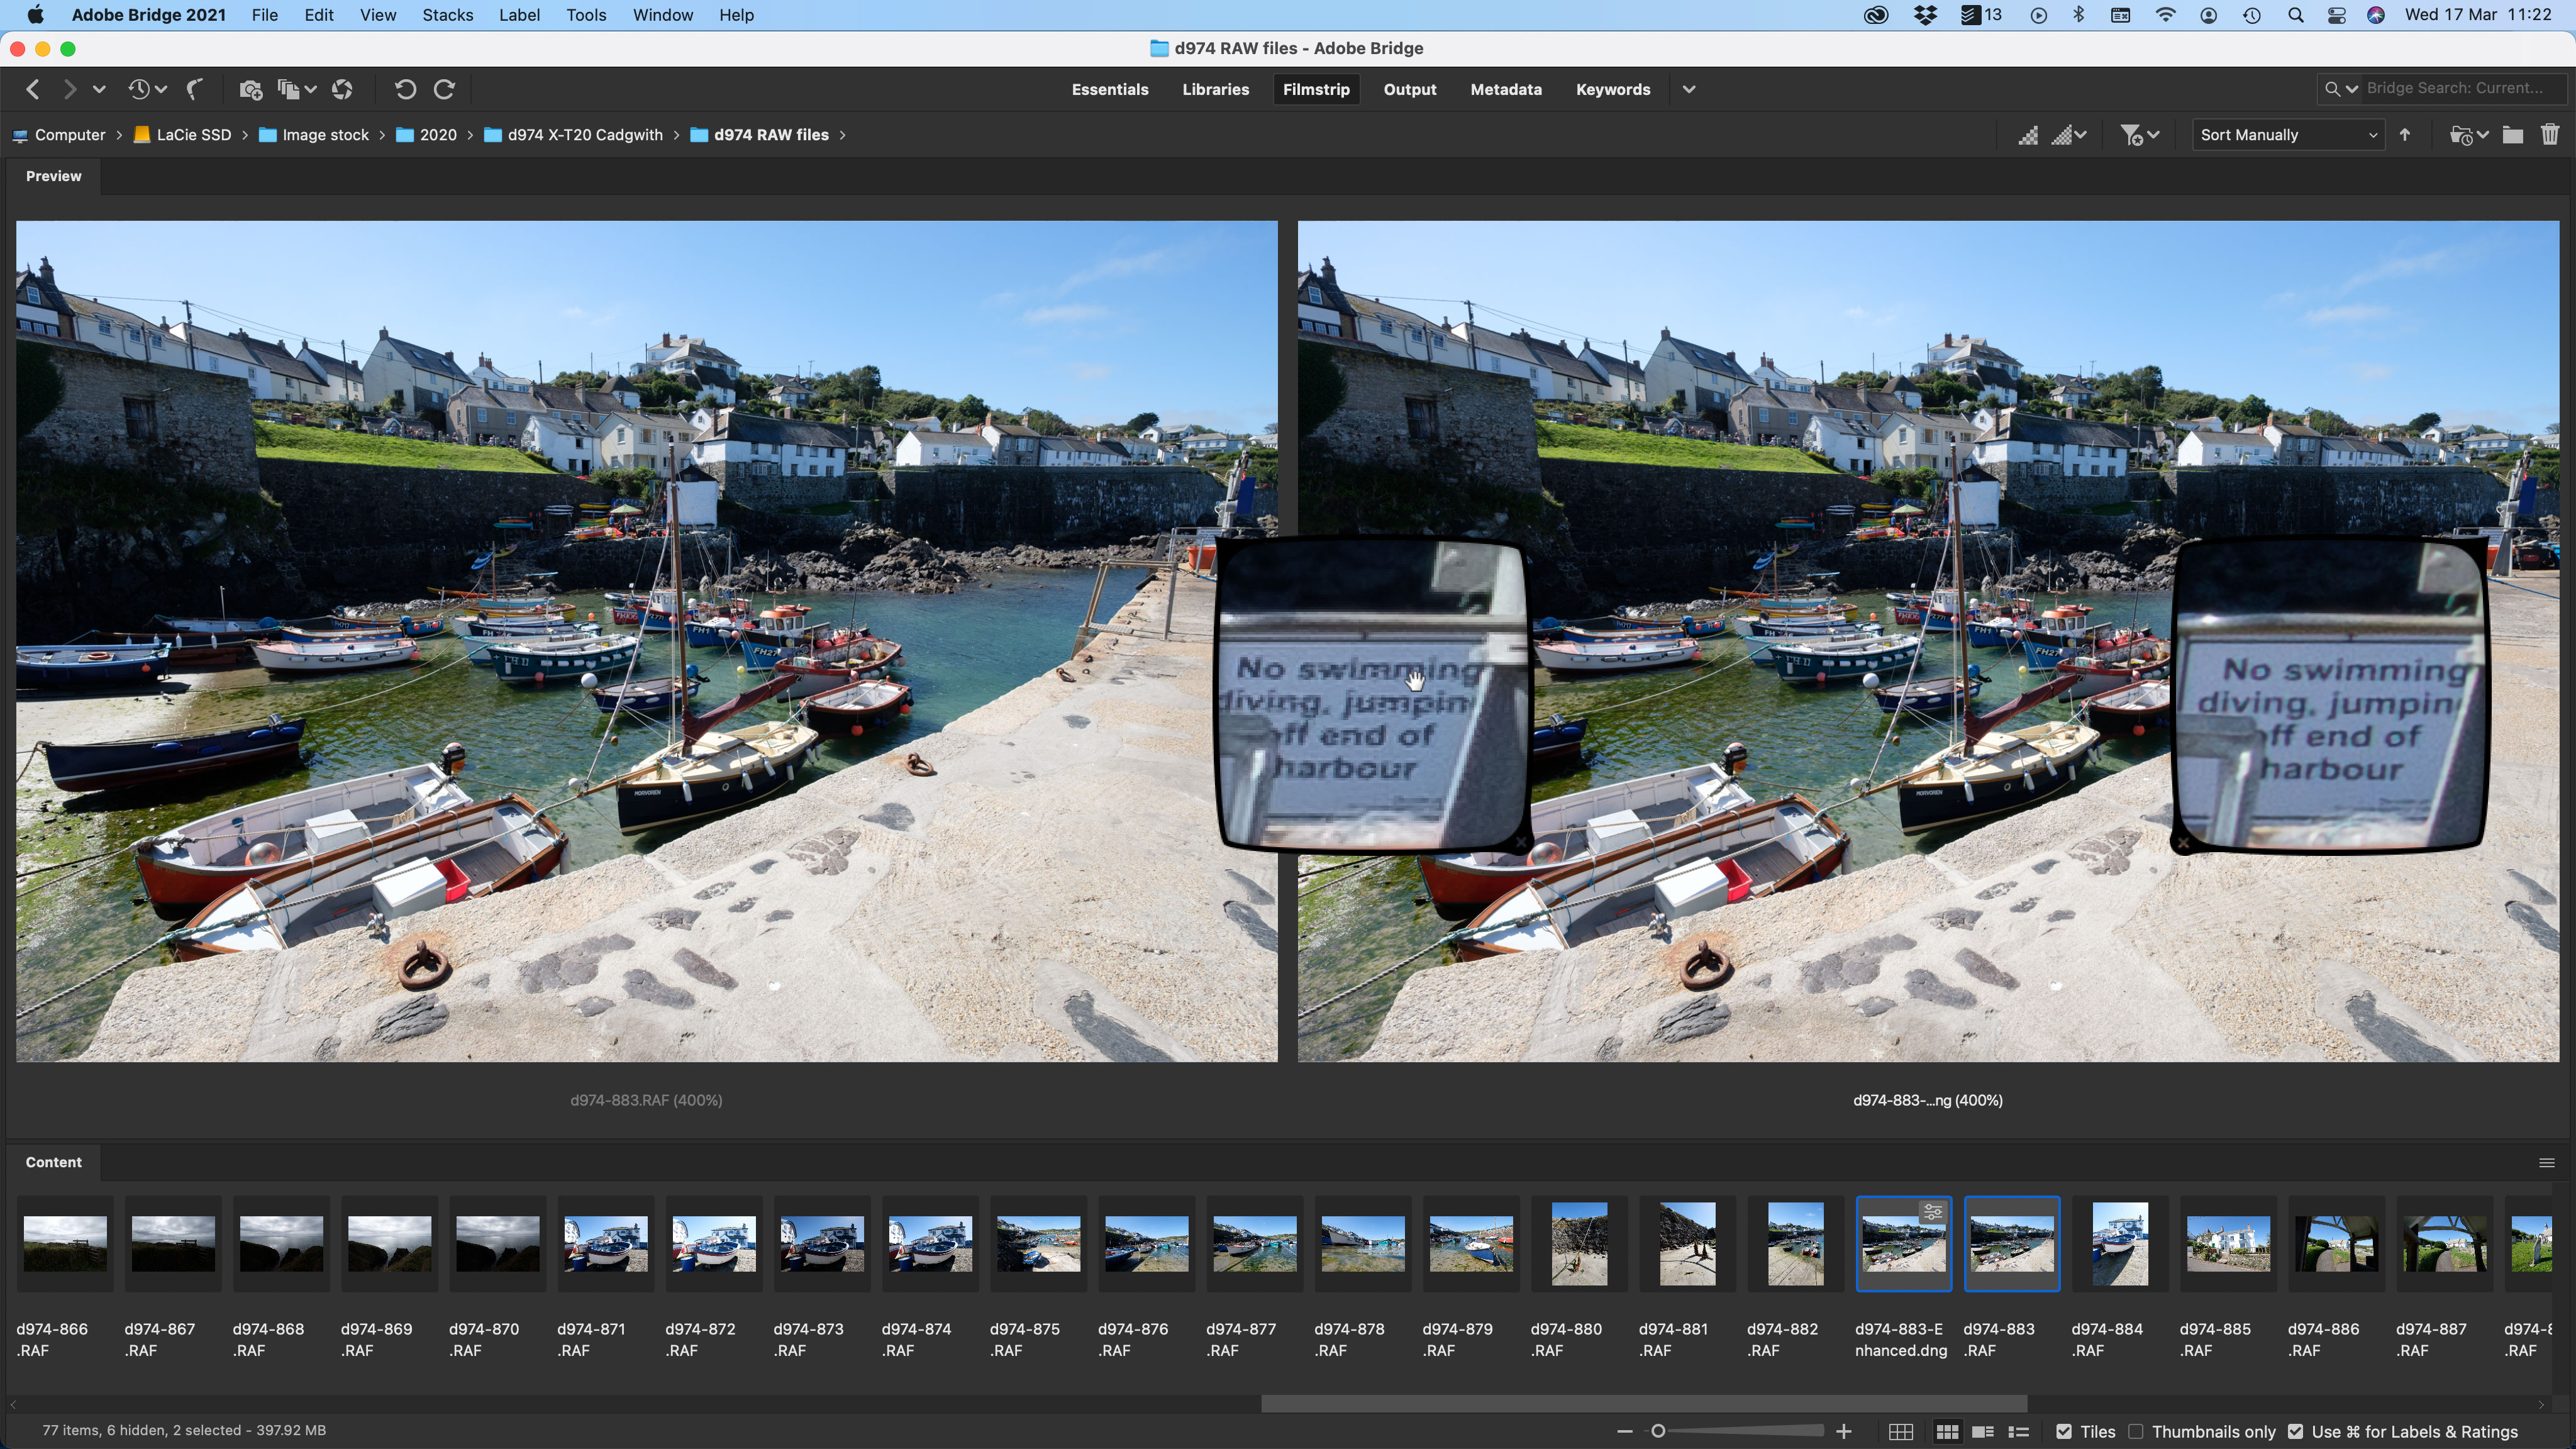
Of all the image upsamples we’ve tried, this is the most convincing. It does not give you the true detail rendition of a higher megapixel camera, but it does preserve edges and textures remarkably well – and can even make text legible where it wasn’t before, presumably thanks to Adobe’s AI technology and its font know-how.
We did find that any chromatic aberration or false color effects were magnified too, however, and that while Super Resolution is terrific on patterns, textures and type, it’s not equally effective on other types of detail.

Regardless of this, the results are clearly and visibly better than any combination of regular Photoshop upsampling methods.
Would we recommend this over any other upsampling tool? Yes and no. The fact that it creates such massive DNG files is a major downside, as its less effective performance with JPEGs and TIFFs. You do get it free when you update Adobe Camera Raw, but even so we would keep it for emergencies and certainly not use it all the time.
The fact is, though, that none of these upsampling tools, Adobe Super Resolution included, can ‘find’ extra image detail. The best they can do is preserve the appearance of sharpness and in some instances make a good guess at what the missing detail might have been.
Read more:
• Best photo editing software
• Best Adobe Photography Plans
• Best photo editing laptops
• Best photo editing monitors

Rod is an independent photography journalist and editor, and a long-standing Digital Camera World contributor, having previously worked as DCW's Group Reviews editor. Before that he has been technique editor on N-Photo, Head of Testing for the photography division and Camera Channel editor on TechRadar, as well as contributing to many other publications. He has been writing about photography technique, photo editing and digital cameras since they first appeared, and before that began his career writing about film photography. He has used and reviewed practically every interchangeable lens camera launched in the past 20 years, from entry-level DSLRs to medium format cameras, together with lenses, tripods, gimbals, light meters, camera bags and more. Rod has his own camera gear blog at fotovolo.com but also writes about photo-editing applications and techniques at lifeafterphotoshop.com
