Robot builder shares Raspberry Pi "Pikon" High Quality Camera in 3D-printed casing
Robotics creator and avid YouTuber Kevin McAleer shares his latest Pikon camera project created using a Raspberry Pi 4
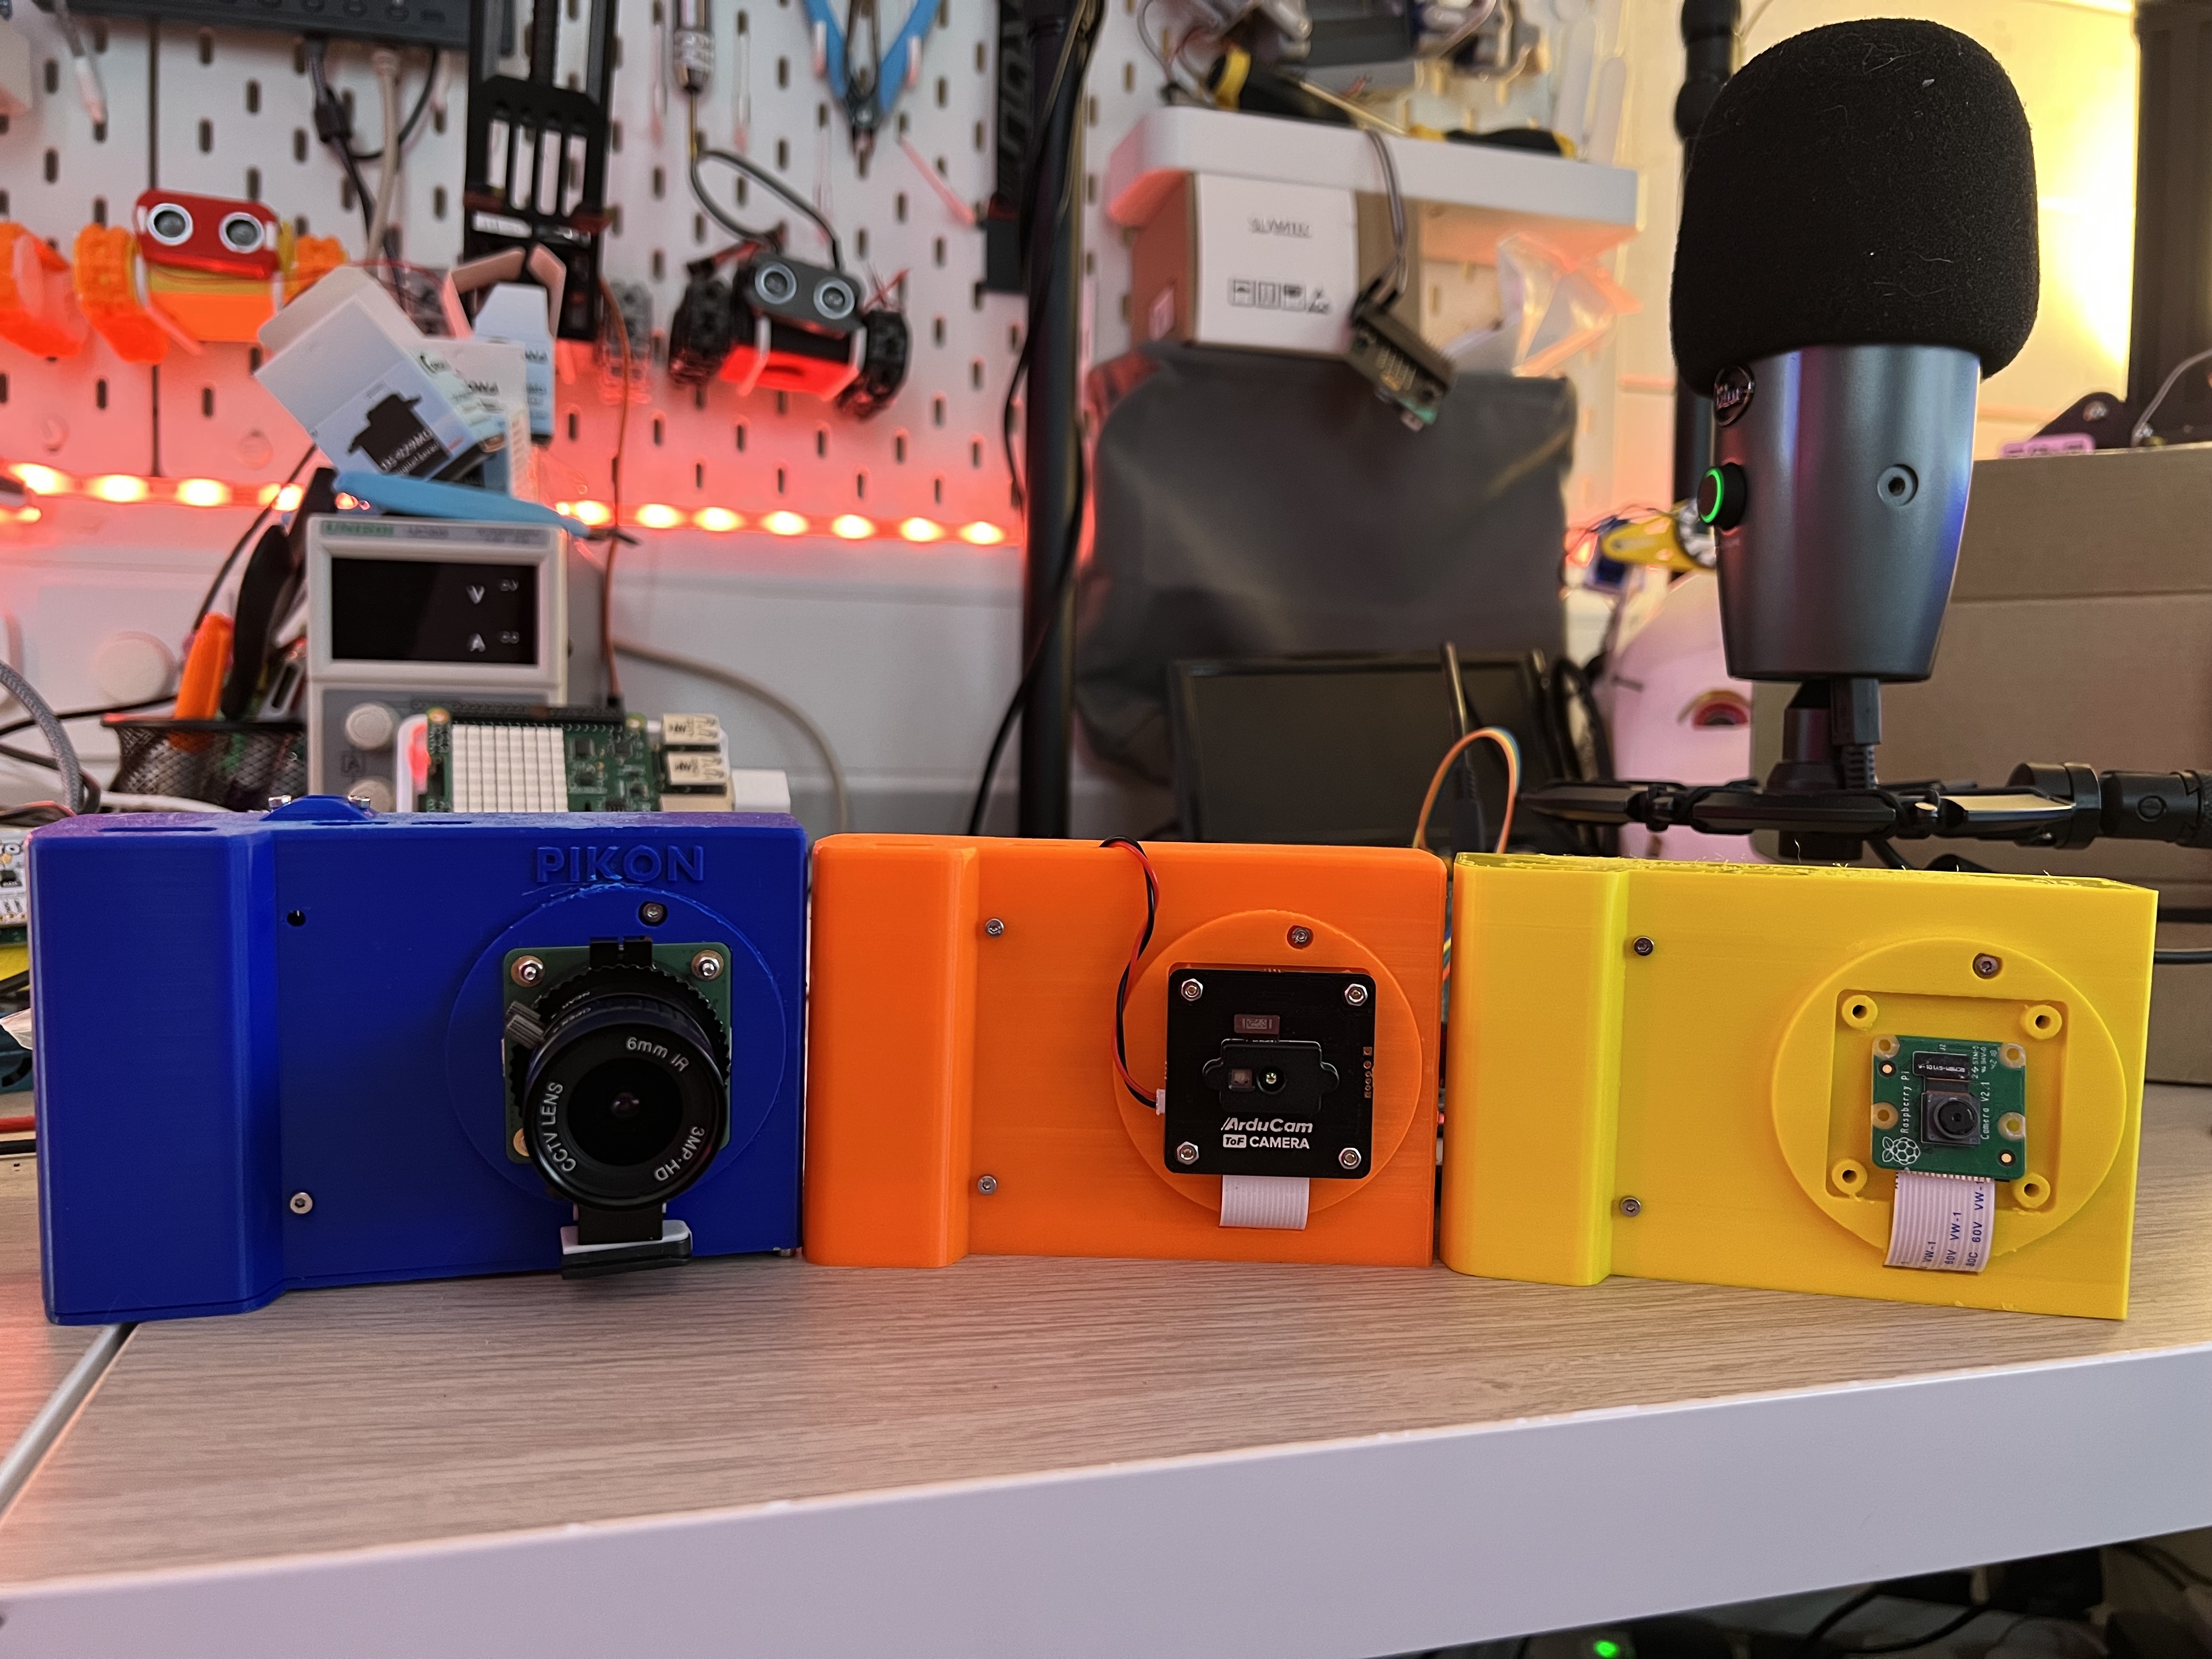
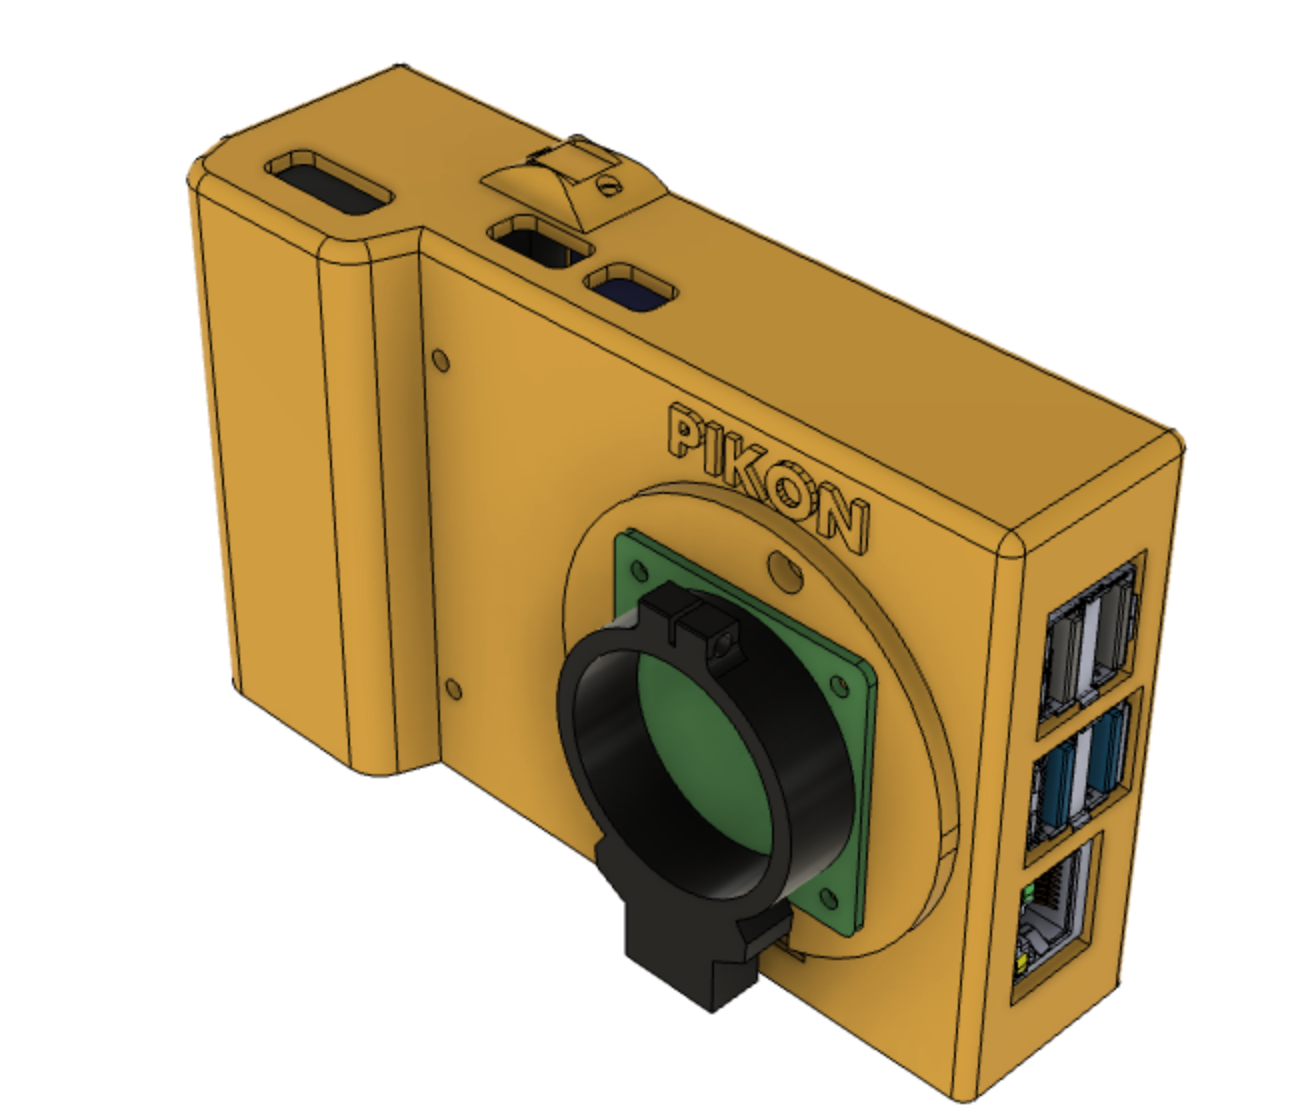
A new build from robotics enthusiast, Kevin McAleer, involves a very in-depth demonstration using the Raspberry Pi High-Quality Camera housed in a 3D-printed chassis, connected to a battery pack with an attached touchscreen rear 3.5" display.
Having cleverly named it the "Pikon" camera, a wordplay on the Raspberry "Pi" and Nikon camera brand, Kevin has explained the process of how he pieced together the build using his own 3D-design to create a functional, lens interchangeable, Pi-powered high-quality camera.
• For details on the Raspberry Pi camera module, see our original article on its initial release: Raspberry Pi launches 12.3MP camera module for just $50
If this is all sounding a bit too techy and going straight over your head (as it did mine initially) here's a little introductory explainer on what elements this clever Pikon camera build is composed of, and why any photographers might be interested in creating their own as a neat robotics project and gateway into programming.
Let's start with the basics – a Raspberry Pi for those unfamiliar is essentially a credit-card-sized functional single-board computer that can be used for programming and multiple other designs and DIY projects. It uses the Raspberry Pi OS system (previously called Raspbian), and a programming language called Python.
A Raspberry Pi is available in multiple models, the latest being the Raspberry Pi Pico W launched on June 30, 2022. The wireless models can be connected to a TV or monitor, with an additional keyboard and mouse, and have the capability to function as standalone computers that could potentially replace your laptop.
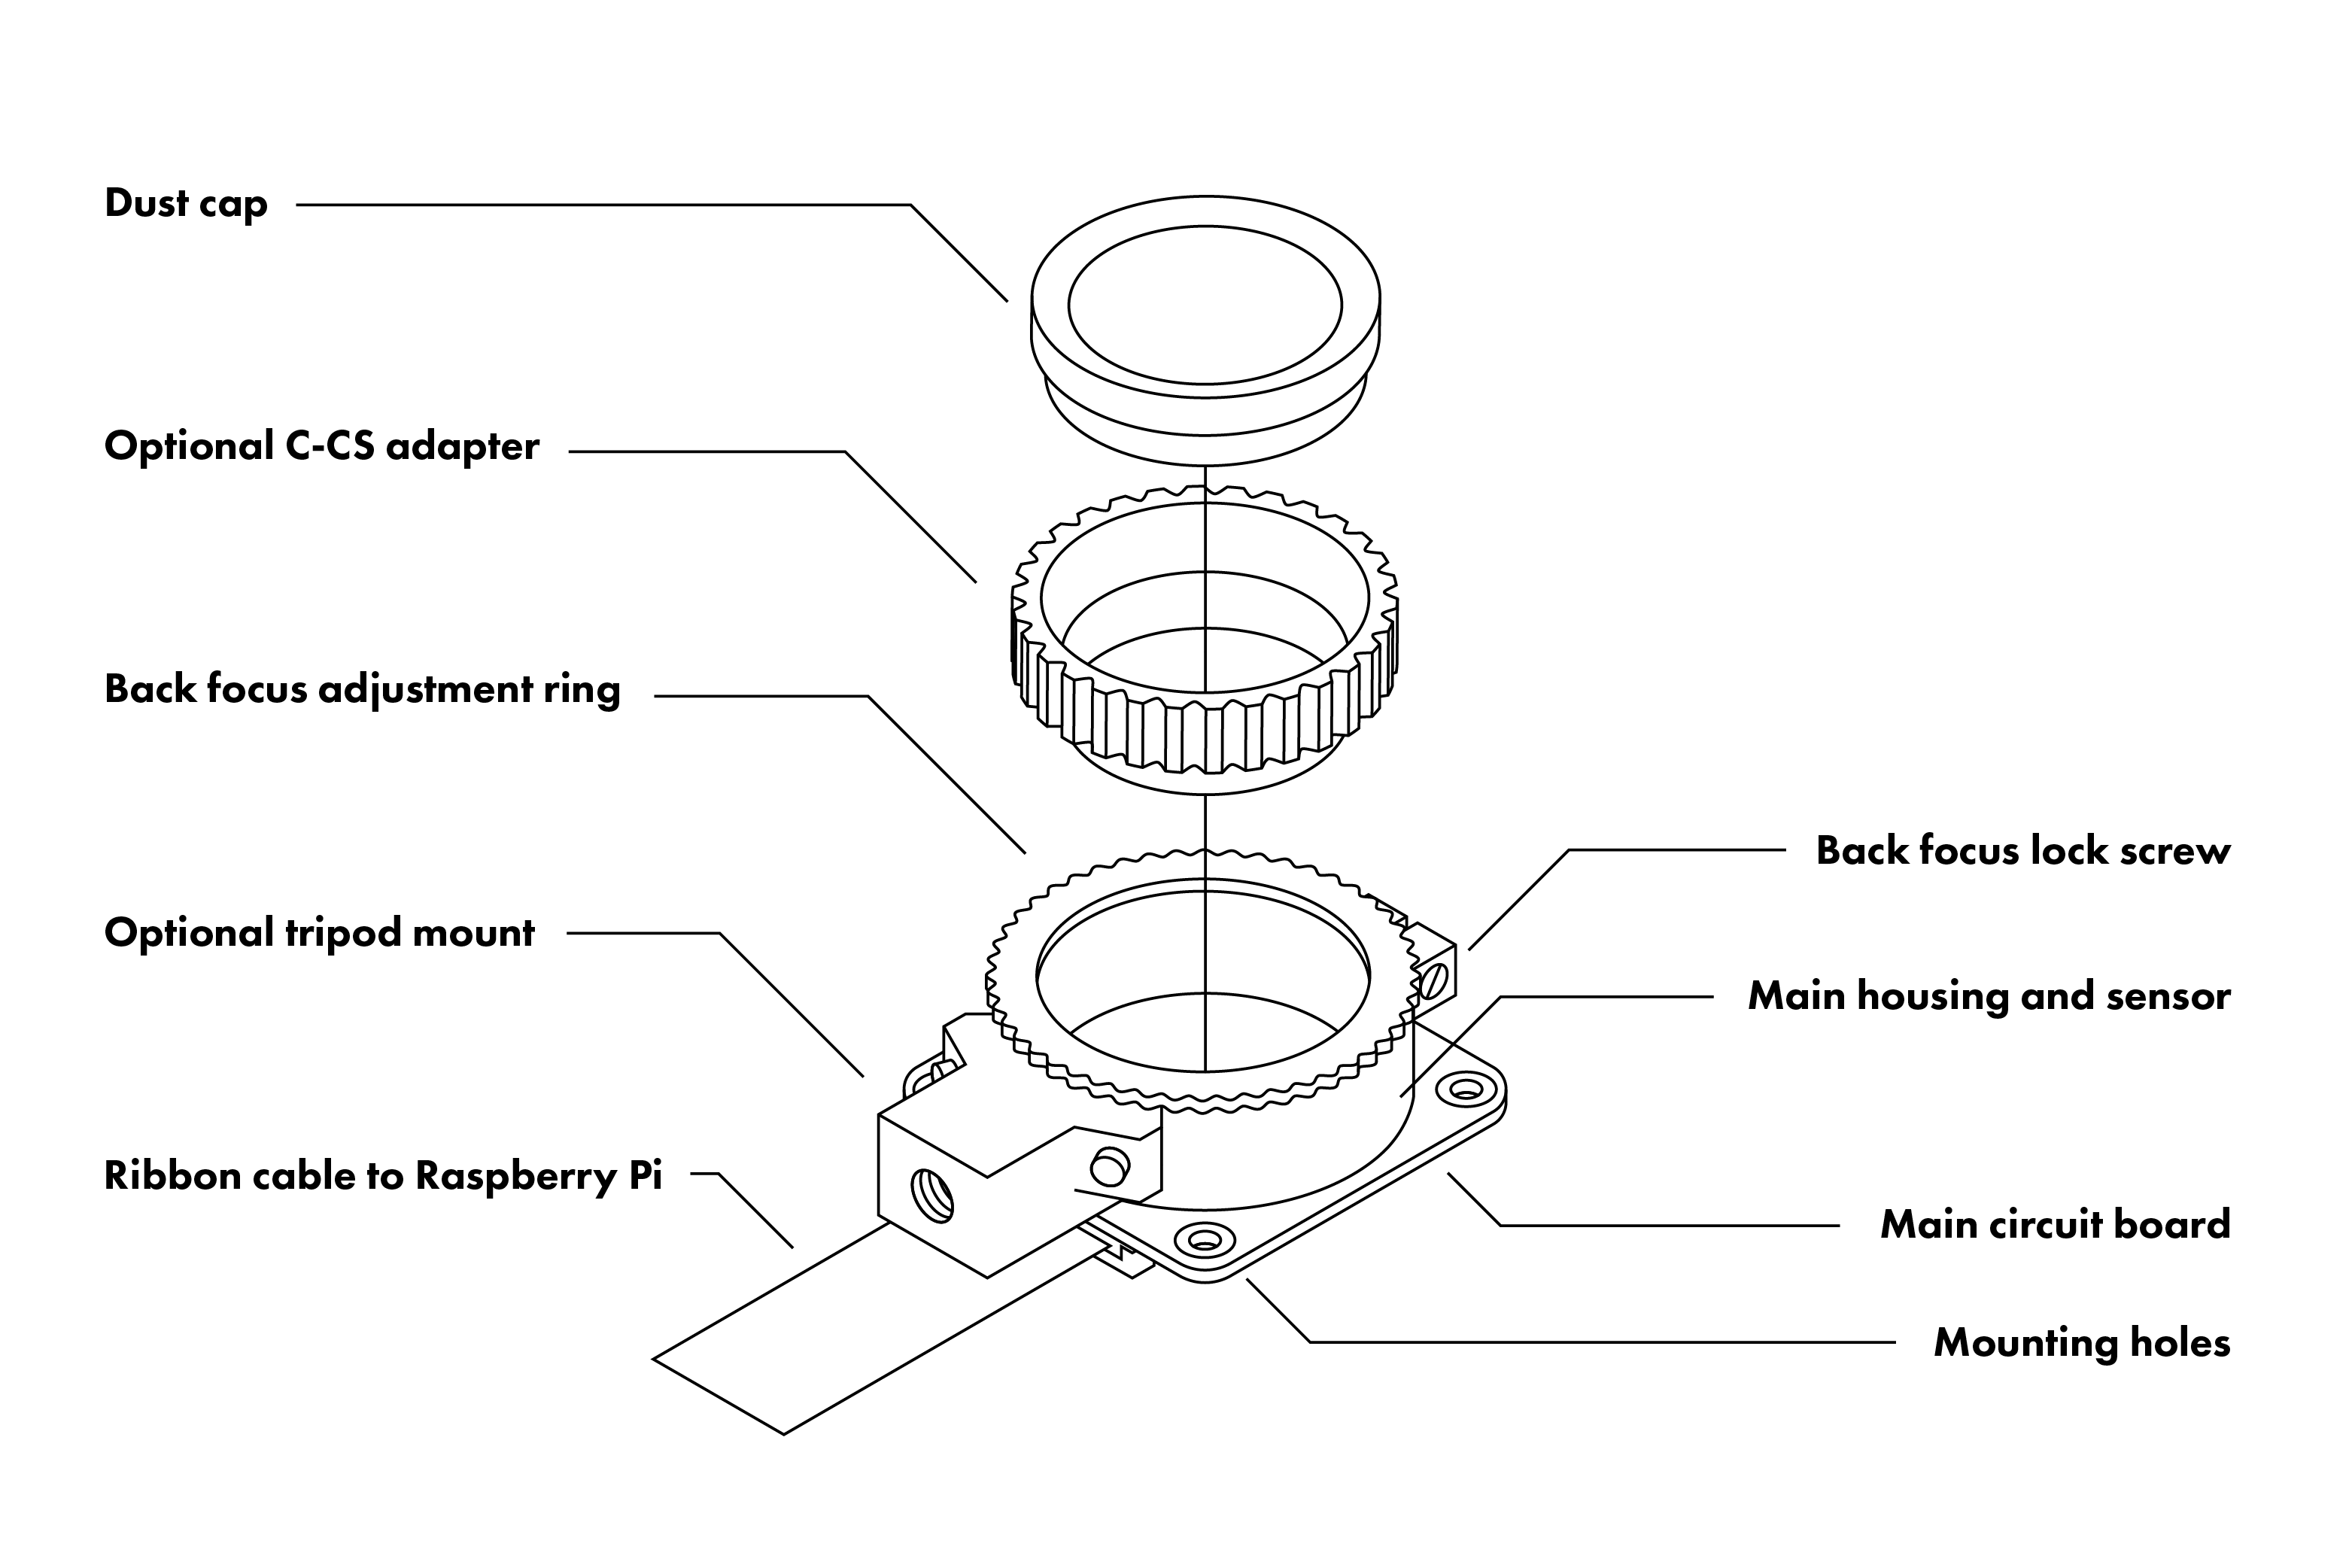
The Raspberry Pi High-Quality Camera has been around since April 2020, and comes fitted with a 12.3-megapixel Sony IMX477 sensor, with support for C and CS-mount lenses.
Get the Digital Camera World Newsletter
The best camera deals, reviews, product advice, and unmissable photography news, direct to your inbox!
The device needs to be connected and powered to a Raspberry Pi computer using the provided ribbon cable, and the main circuit board has mounting holes to attach it to a unit of choice, which in Kevin McAleer's case was a 3D-printed chassis of his own design, optimised to house an array of connected components to the Pi and camera module.
The camera module doesn’t come included with a lens, though, a low-cost 6mm CS-mount wide-angle lens can be purchased, and is suitable for the absolute basic photography. It can also however be used for macro photography due to its ability to focus objects at very short distances. The other CS-mount lenses available for the Pi camera include a zoom 2.8mm-12mm, and a microscope 0.12-1.8x lens.
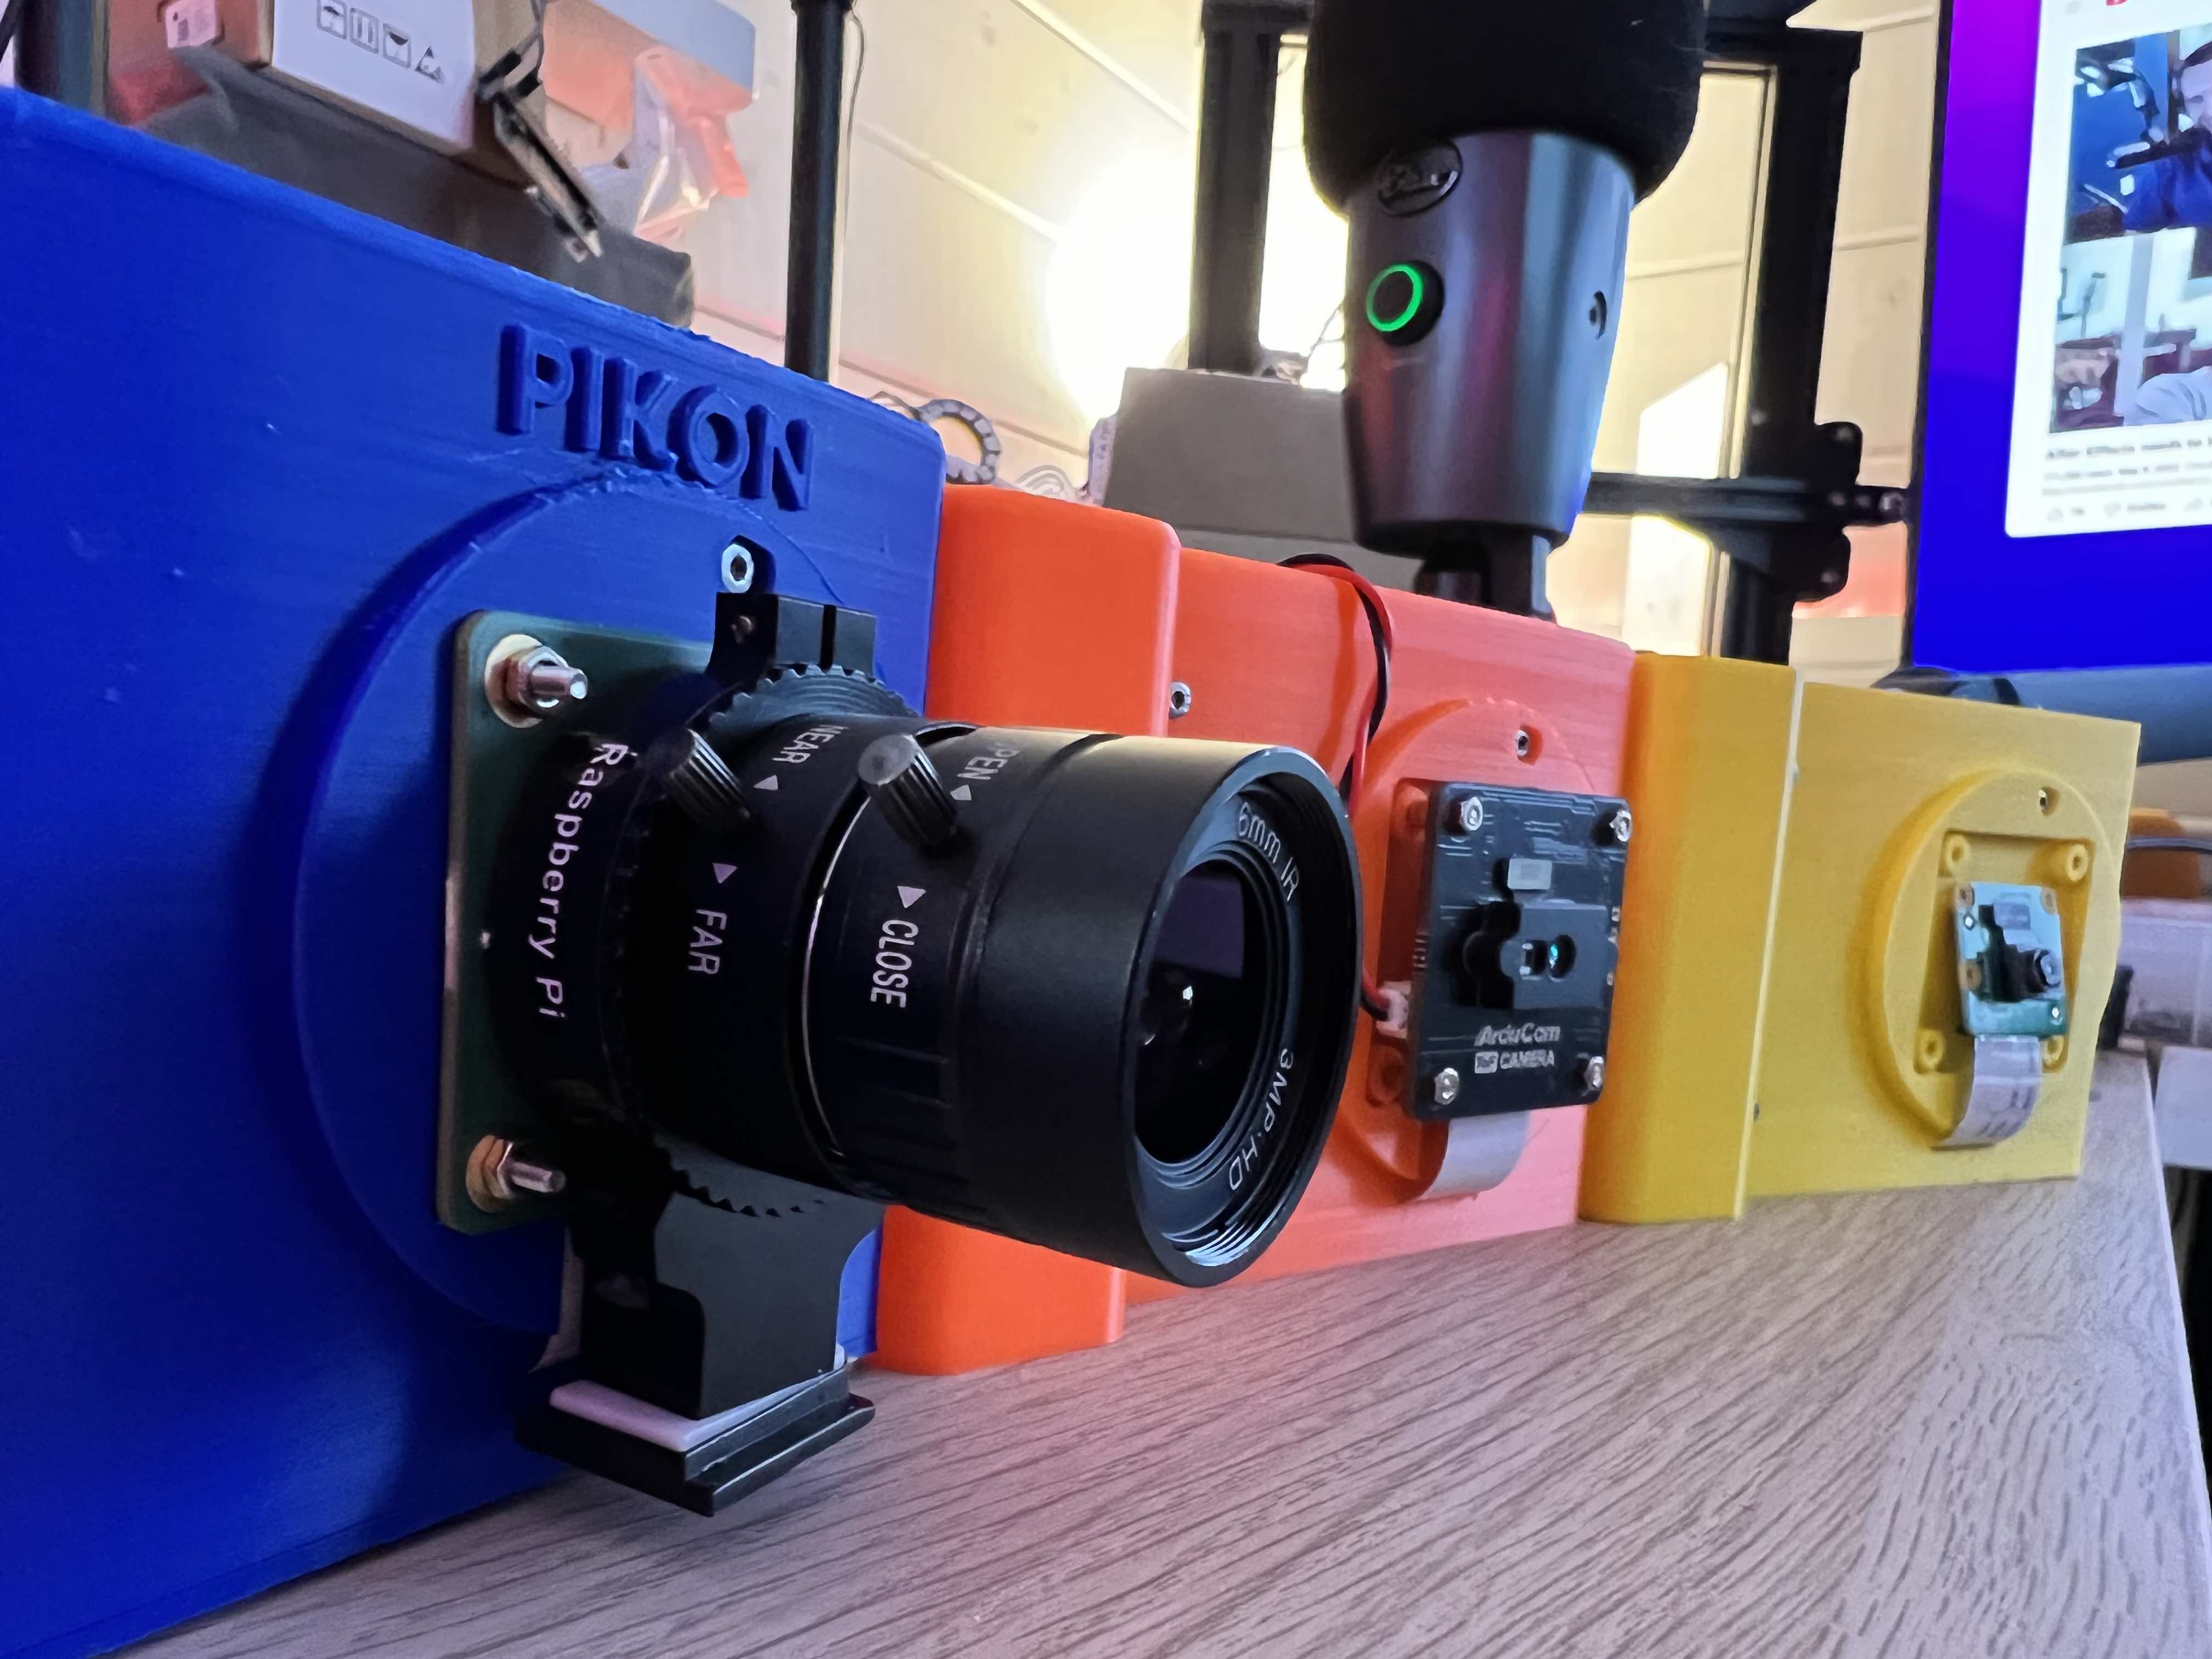
The alternative is a 16 mm C-mount telephoto lens with a narrower field of view. Both lenses allow for aperture and focus to be manually adjusted via the barrel. There are of course other lenses and options that can be used with this camera, with the potential for Sony E-mount lenses to be mounted using an adaptor.
Kevin has posted a very informative (but also very long) video to YouTube that can be watched below - where he explains exactly where he purchased each component to create the Pikon and how much it cost, along with an in-depth look at the software used to create and design the camera housing before being 3D-printed.
The Raspberry Pi camera was supposedly purchased on sale from a retailer known as Pimoroni for £44.40 (about $51.23 / AU$75), and then the 2.8mm-12mm lens used by Kevin cost approximately £9 ($10 / AU$15) from the same place. He uses a Waveshare 3.5" touchscreen display that supposedly cost him £29 ($33.50 /AU$49), and then a Raspberry Pi 4 itself costs around £70 ($80 / AU$120) at 2GB of RAM.
Excluding the costs of owning a 3D-printer and filament, a power bank to charge the Pi, plus extras such as M2 Nuts and bolts to hold everything together, shipping costs for delivery, and a computer to run 3D and CAD softwares such as Autodesk and MeshLab - the cost to make one of these Pikon cameras totals around £155 ($180 / AU$262)! So is it worth it?
The Raspberry Pi High Quality Camera is manual-focus only, and is fitted with an average 12.3-megapixel camera, though it does offer video modes capable of a maximum 1080p at 30 frames per second. The lenses sold separately include lens and body caps, and the camera itself has mounting point for tripods. If using the camera with a Raspberry Pi 3 or 4, these models have wifi so could potentially be used as a high quality webcam or surveillance system.
The Raspberry Pi High Quality Camera can function without the need for 3D-printed cases to house the computer, and without a display, so long as your Pi is connected to some sort of TV or monitor with a keyboard function, and running the Raspberry Pi OS system. This can bring down some of the costs of external batteries and parts but means your camera is entirely computer-reliant.
The camera can be operated using command prompts without the need to press any physical external buttons. For example, "raspistill" is a command line tool for capturing camera images, and "raspistill -t 0" allows you to use the camera as a viewfinder only. This of course isn't practical at all for taking the Pi and camera outdoors or to be used wirelessly.

The current 3D-housing 'Pikon' case that Kevin has designed isn't perfect just yet, and he intends to add features such as a physical shutter button, a tweaked battery compartment plus adjust the connection port section and lower where the camera sits on the front of the mount.
Kevin is also said to be intending to build a Python App that can run on the Raspberry Pi 4, that will be able to record video clips, photos and apply filters to the images captured with the Pi High Quality Camera. Using a Raspberry Pi 4, the camera should also be capable of live streaming in future too.
You may also want to take a look at our guides to the best PoE surveillance cameras, as well as the best 3D printers, and for further insight into Raspberry Pi photography check out the ArduCam Raspberry Pi camera and the awesome retro Pi-powered RUHAcam that you can print yourself!
Beth kicked off her journalistic career as a staff writer here at Digital Camera World, but has since moved over to our sister site Creative Bloq, where she covers all things tech, gaming, photography, and 3D printing. With a degree in Music Journalism and a Master's degree in Photography, Beth knows a thing or two about cameras – and you'll most likely find her photographing local gigs under the alias Bethshootsbands. She also dabbles in cosplay photography, bringing comic book fantasies to life, and uses a Canon 5DS and Sony A7III as her go-to setup.

