I broke ALL the rules to photograph this classic film noir portrait – harsh light and unflattering angles
I had to throw photographic convention out the window to capture my convincing film noir portrait, here’s how I did it…
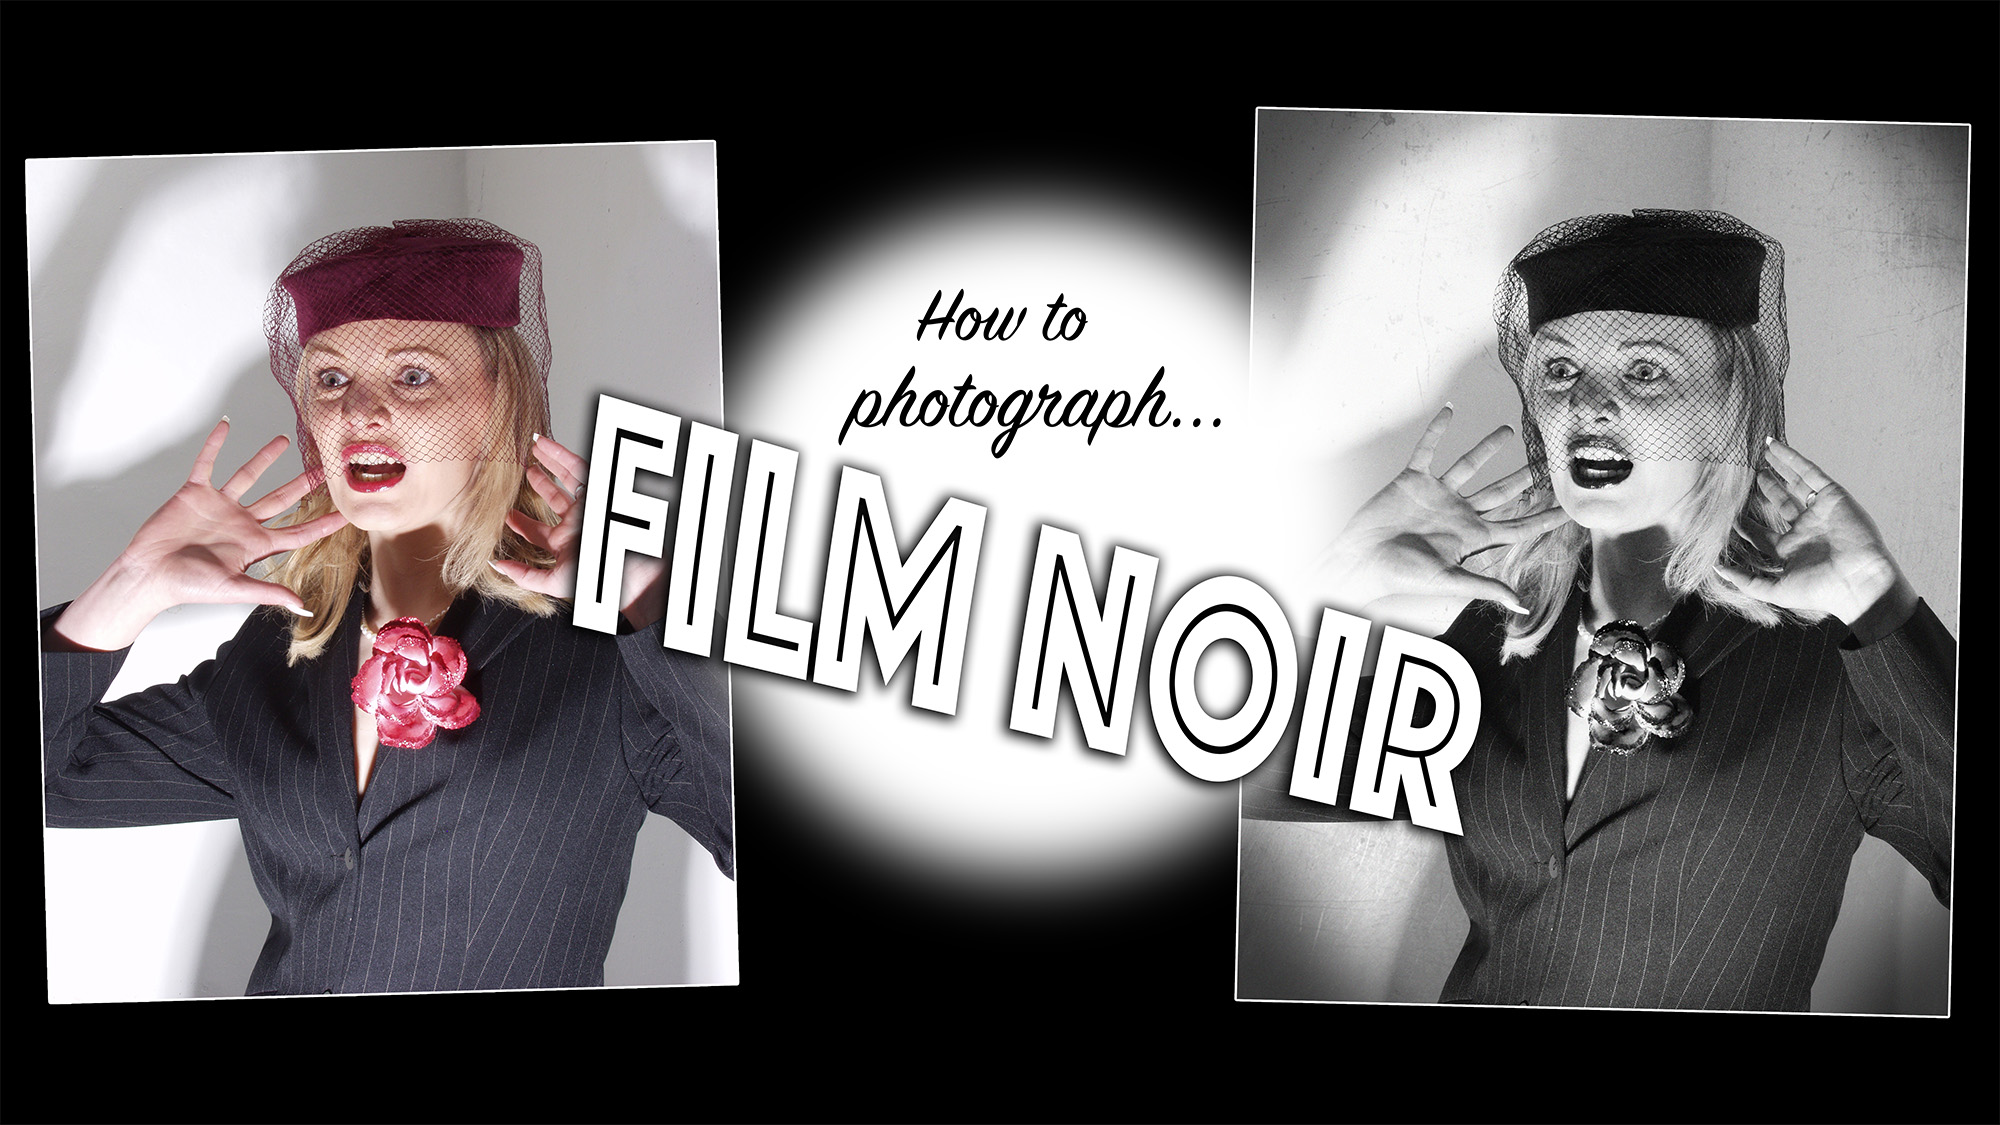
I opened an office on the bad side of town and investigated the dark stylings of classic film noir. Double-crosses, deep-rooted cynicism, tangled plots and flashbacks are all classic traits of American crime melodrama from the 1940s and ‘50s. However, it’s the unflattering camera angles, deep shadows and dramatic lighting that differentiate film noir from just another detective story.
Bringing this aesthetic to your portraits is easier than you think and can be achieved without the best photography lighting kits. In fact, you can operate without any specialist lighting equipment at all. The first stage is setting up the subject, whether that’s with vintage clothing or not. There’s a range of expressions that can be brought to the table, from the cynical detective to the manipulative or terrified client who has a secret agenda. So, depending on which character from this melodrama you’re photographing, it should determine how they look or appear.
The final step is to use the best photo editing software or best free photo editing software to convert your image to black and white. I used Adobe Photoshop to do this myself.
So, grab your fedora, overcoat and camera, and let's capture a moody film noir portrait...
Capture harsh film noir lighting

Usually, portrait photographers will opt for soft, flattering lighting, but I'm going to break the rules. The lighting needs to be unfiltered and harsh, so no softboxes are required here. The best flashgun or strobe, or the best LED light panels will afford you better control over your lighting, but if you’re operating on a budget, just a table lamp with no shade, placed below the eye level of the subject will do.
This creates ugly shadows on the face, suggesting menace or danger, depending on the expression of the subject. The lower the light source, the higher the shadows in the background. The closer the background is, the more defined and dramatic the shadows will be. It’s worth capturing a range of expressions and moving the light around to see what different kinds of looks you can get.
Convert the photo to black and white in post-production
1. Black-and-white conversion
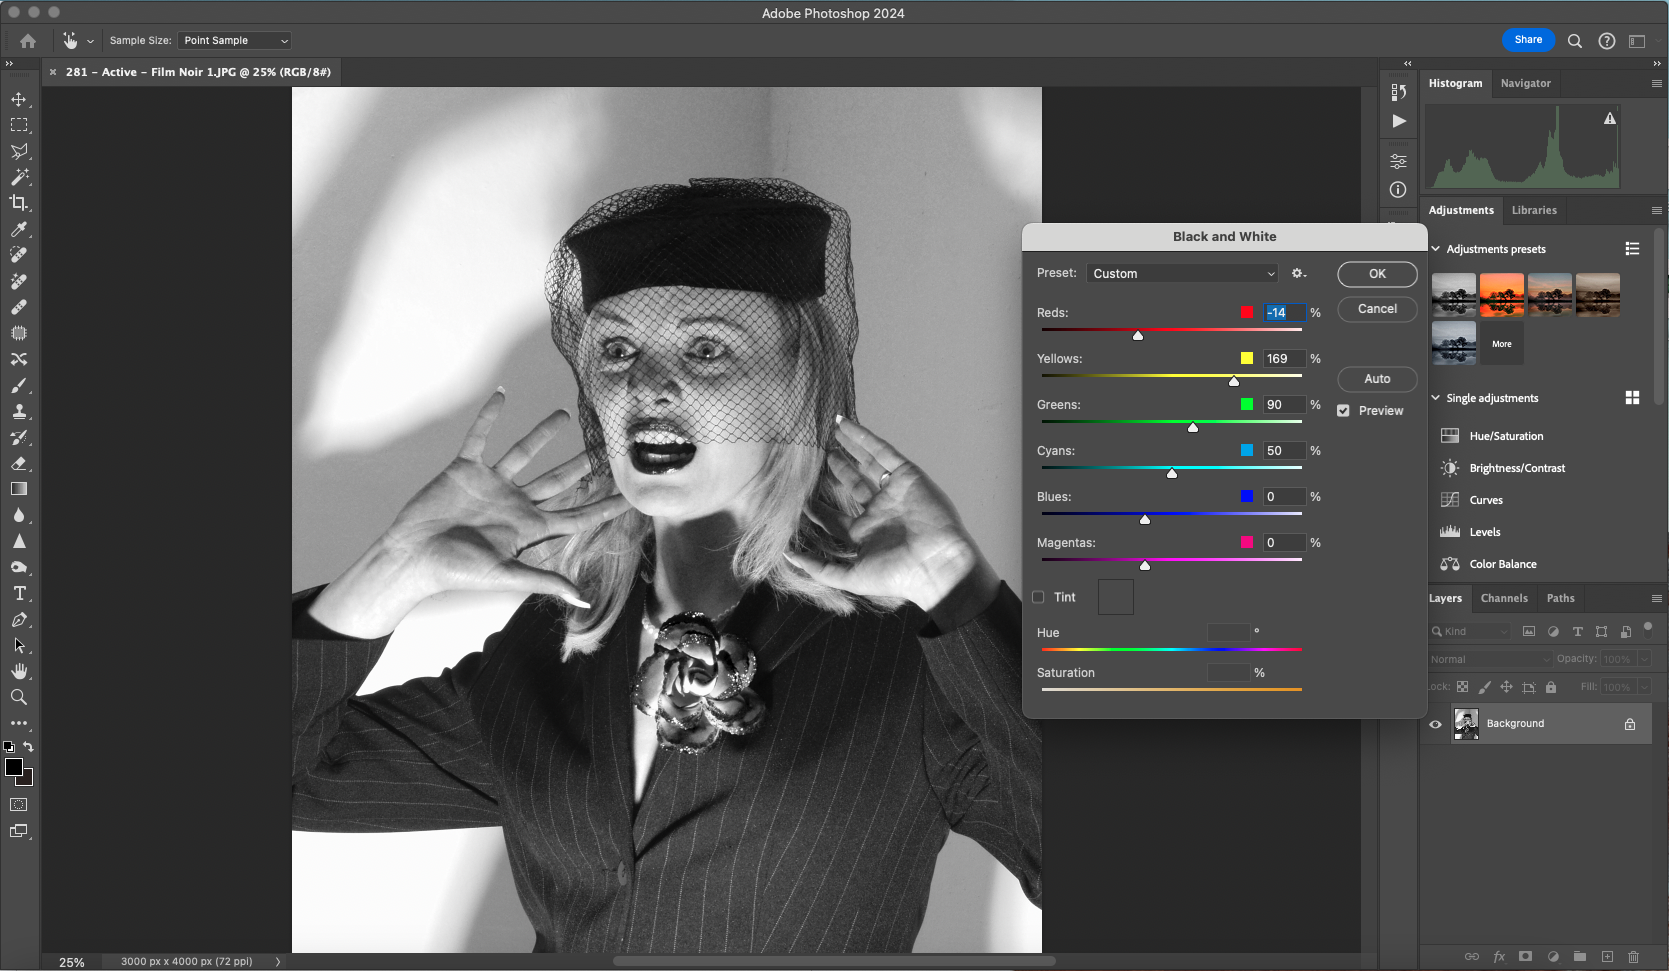
Once you’ve got your photo the next step is photo editing. There are some interesting presets in Adobe Lightroom, but it’s the Black & White filter in Photoshop that I’m using here to control the conversion. So, go to Image Adjustments>Black & White. Select the Green filter preset – the Blue is too dark and Red or Yellow give very bright skin tones. Now, tweak this by reducing the Red channel. For women, red lipstick was common and rendered quite dark on the film stocks of the time so ensure this is the case here. If the face is too dark, increase the Yellow channel.
2. Enhance and tweak
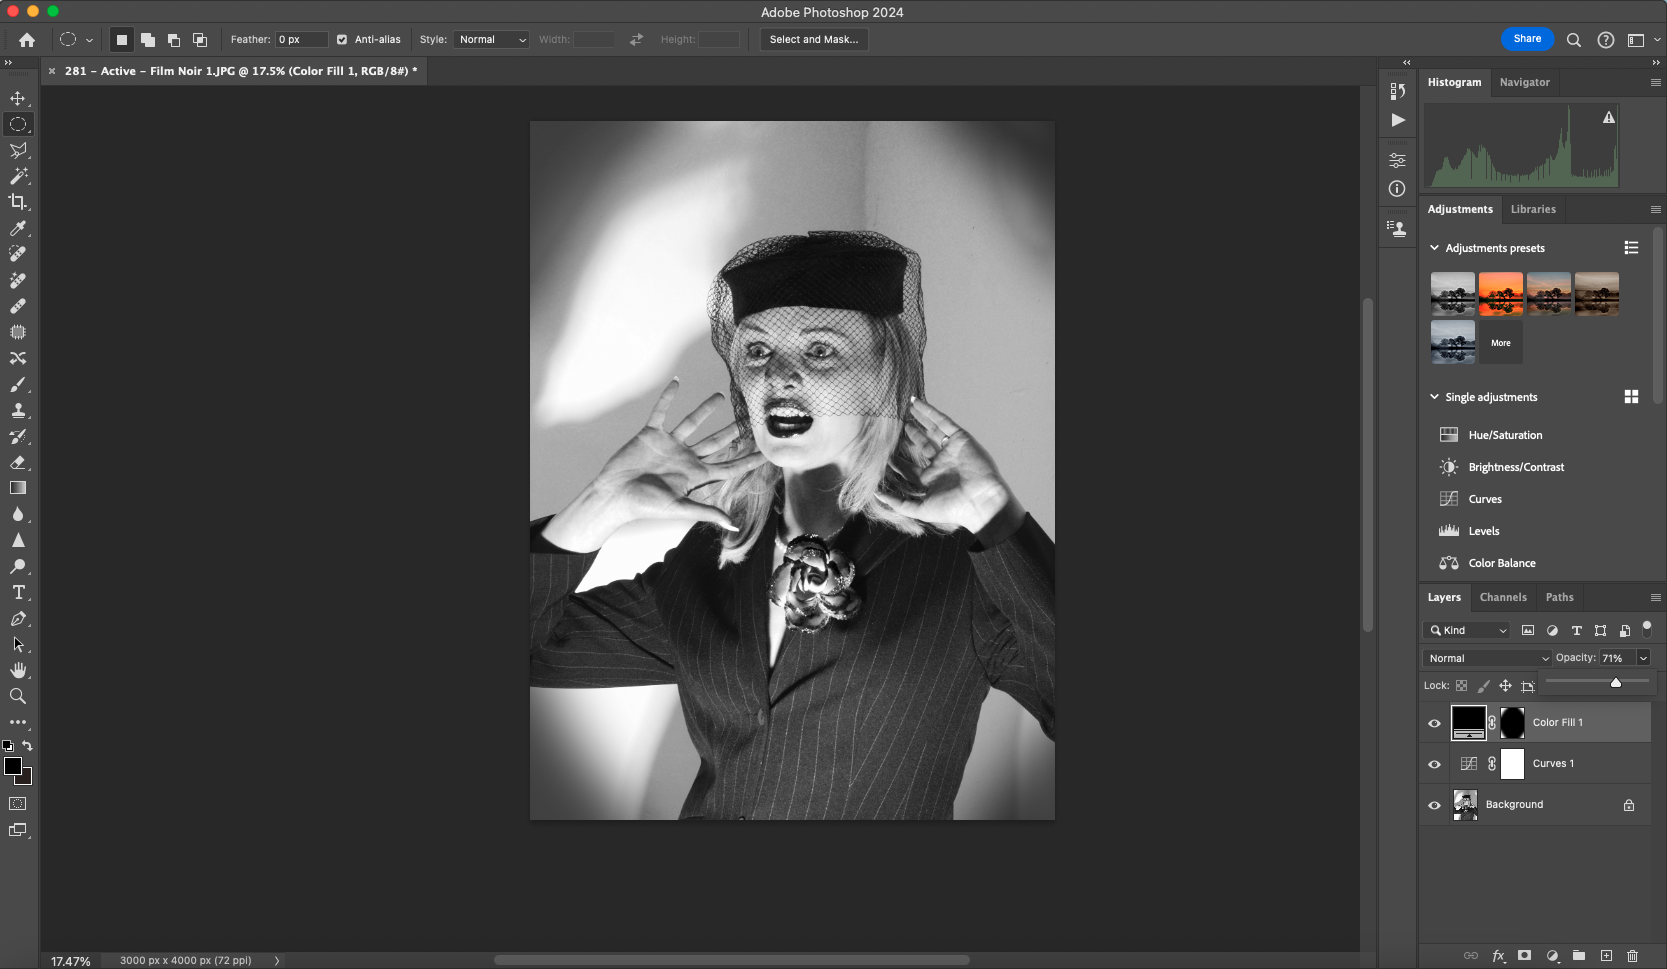
Depending on how punchy the black and white conversion was you might need to tweak things with an S-shaped Curves adjustment. Then use the Elliptical Marquee tool to select the central area. Feather this by 150 pixels – more if your photo is very high resolution, then invert the selection. Now add a Color Fill adjustment layer and reduce the opacity to create a vignetting effect.
3. Make some noise
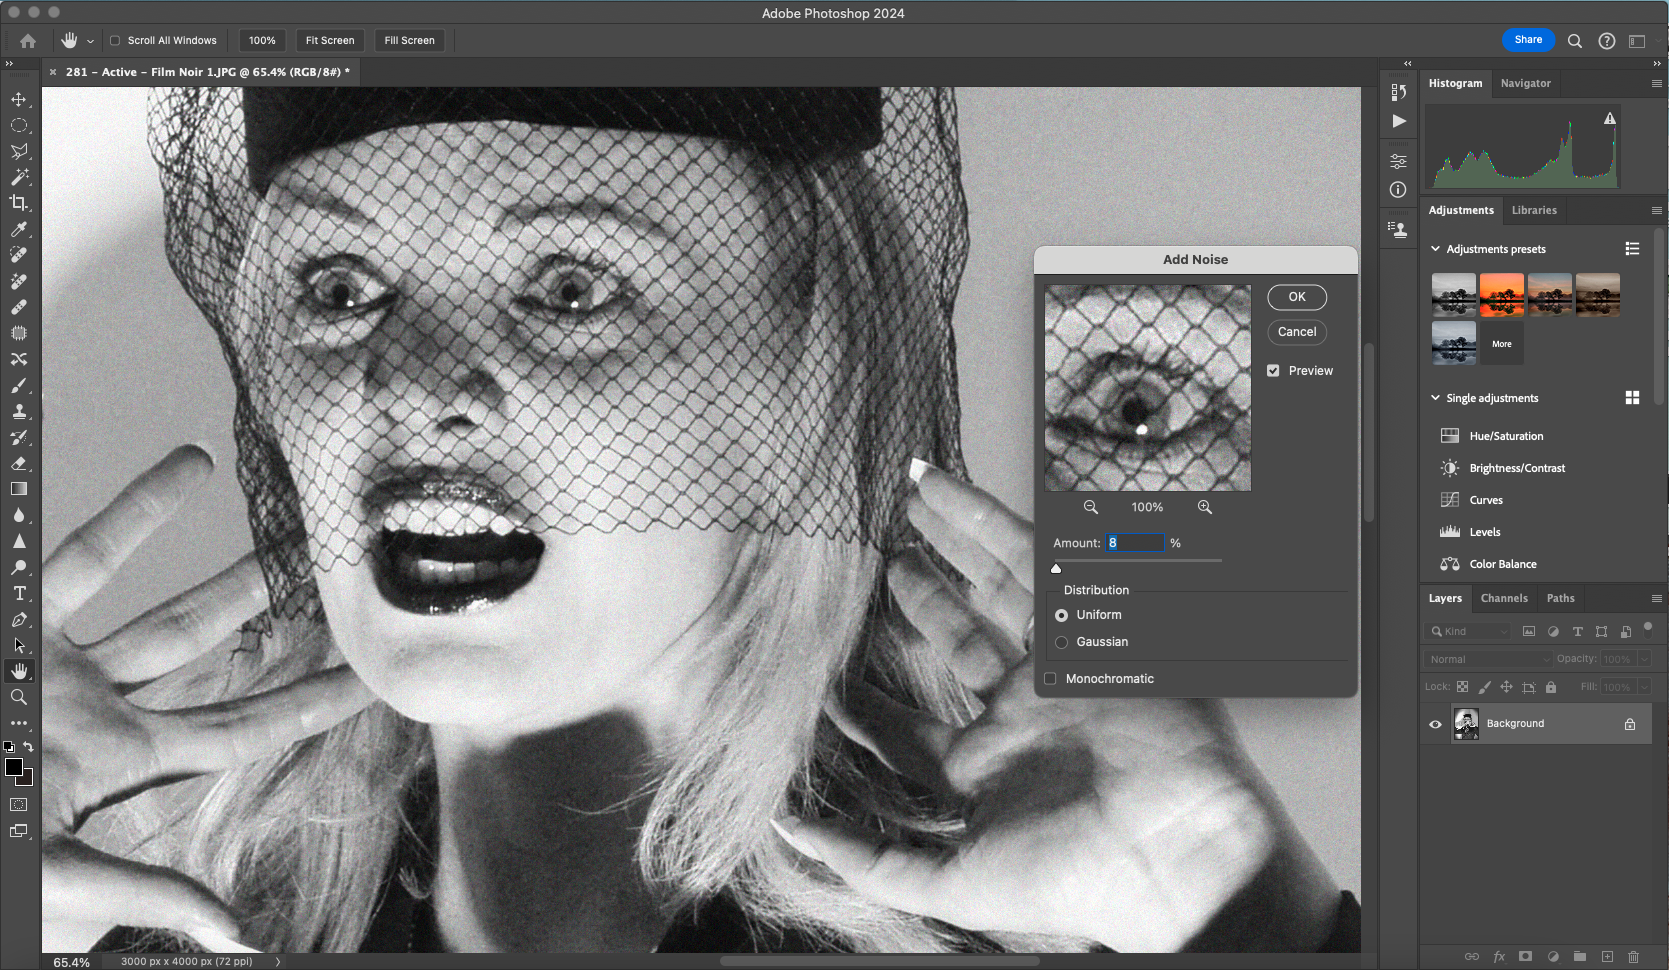
Use the Dodge and Burn tools to selectively lighten or darken parts of the image that need tweaks then flatten all the layers and go to Filter>Noise>Add Noise. Add as much as 10% for a really gritty effect, remembering to tick the Monochromatic box to avoid adding color. Other touches you might want to consider are vintage frames or a grungy overlap just to add some more character.
Digital Camera World is the world’s favorite photography magazine and is packed with the latest news, reviews, tutorials, expert buying advice, tips and inspiring images. Plus, every issue comes with a selection of bonus gifts of interest to photographers of all abilities.
You may also like...
If you want to shoot film noir images then a portrait lens is a must. Depending on your system, take a look at the best Nikon portrait lenses, best canon portrait lenses, and the best lens for portraits. If you'd like to learn more about portrait photography, check out 14 tips for getting your best-ever people shots.
Get the Digital Camera World Newsletter
The best camera deals, reviews, product advice, and unmissable photography news, direct to your inbox!
Wendy was the Editor of Digital Photo User for nearly five years, charting the rise of digital cameras and photography from expensive fad to mass market technology. She is a member of the Royal Photographic Society (LRPS) and while originally a Canon film user in the '80s and '90s, went over to the dark side and Nikon with the digital revolution. A second stint in the photography market was at ePHOTOzine, the online photography magazine, and now she's back again as Technique Editor of Digital Camera magazine, the UK's best-selling photography title. She is the author of 13 photography/CGI/Photoshop books, across a range of genres.
