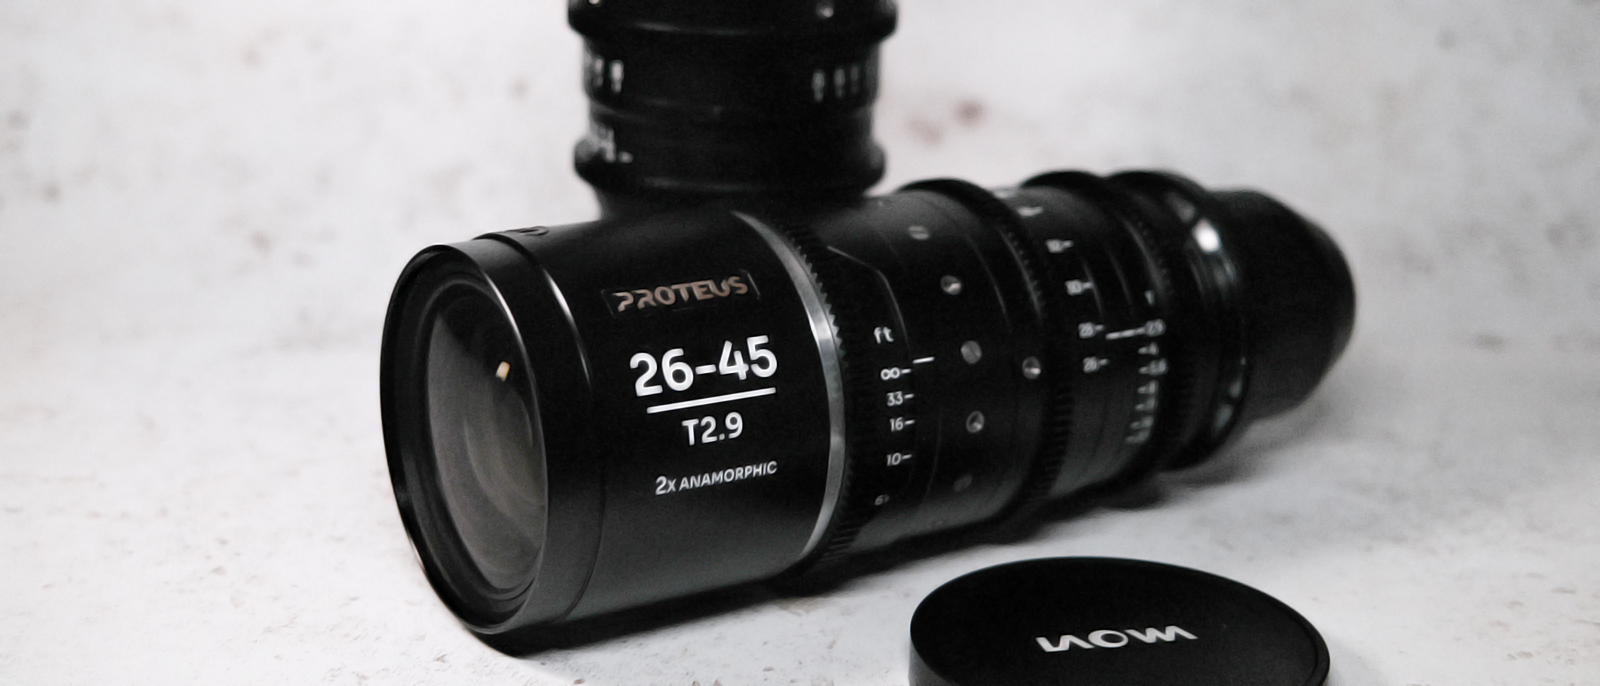
I love tilt-shift photography, but instead of spending a fortune on lenses I do this
Tilt-shift lenses can be pricey; here's a technique to recreate the effect on a budget
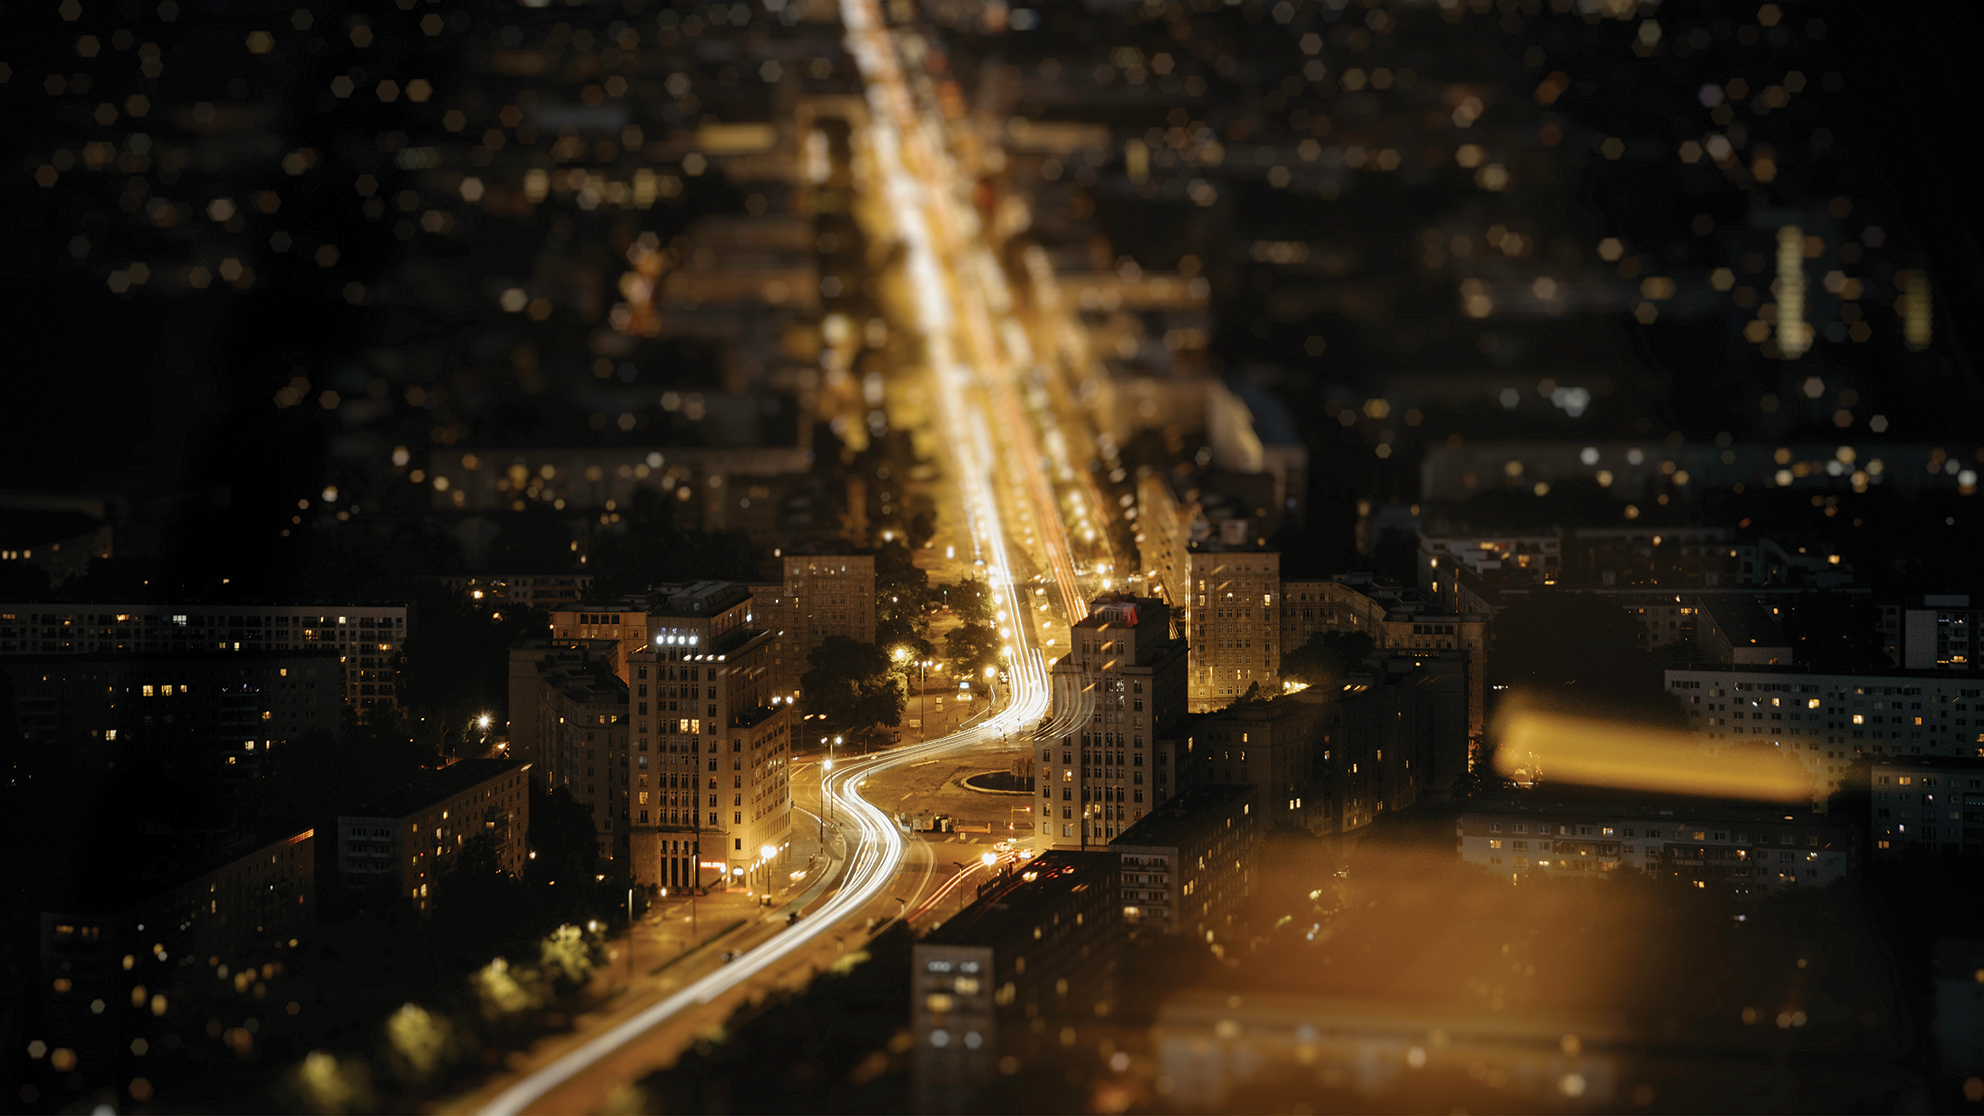
Tilt-shift photography is a technique that captures urban landscapes in a unique way. It transforms city structures into little playful worlds, reminding us of miniature model shots – but this can be expensive.
When I came across Natalia Zmyslowska's work online, I noticed her interest in the tilt-shift photography genre. She said, "Architecture photography encourages me to seek unique angles and perspectives, showcasing buildings in ways that people may not have seen before.
"That’s why I often work with the tilt-shift effect, a creative technique that selectively blurs certain parts of the image while keeping other areas sharp. By using a narrow depth of field on the subject, this effect simulates the shallow focus seen in macro photography or miniature model shots."
So, how does tilt-shift photography work?
Natalia explained that the miniature effect can be achieved in-camera using a tilt-shift lens. After some research, it turns out that the best tilt-shift lenses are more pricey than I initially thought. I can't be the only one who is refusing to invest in a lens that can 'only' shoot one specific style, making it useless for my other creative goals.
Natalia explained that, next to creating tilt-shift photography in-camera, the effect can also be recreated in post-processing with some simple editing steps.
Before and After
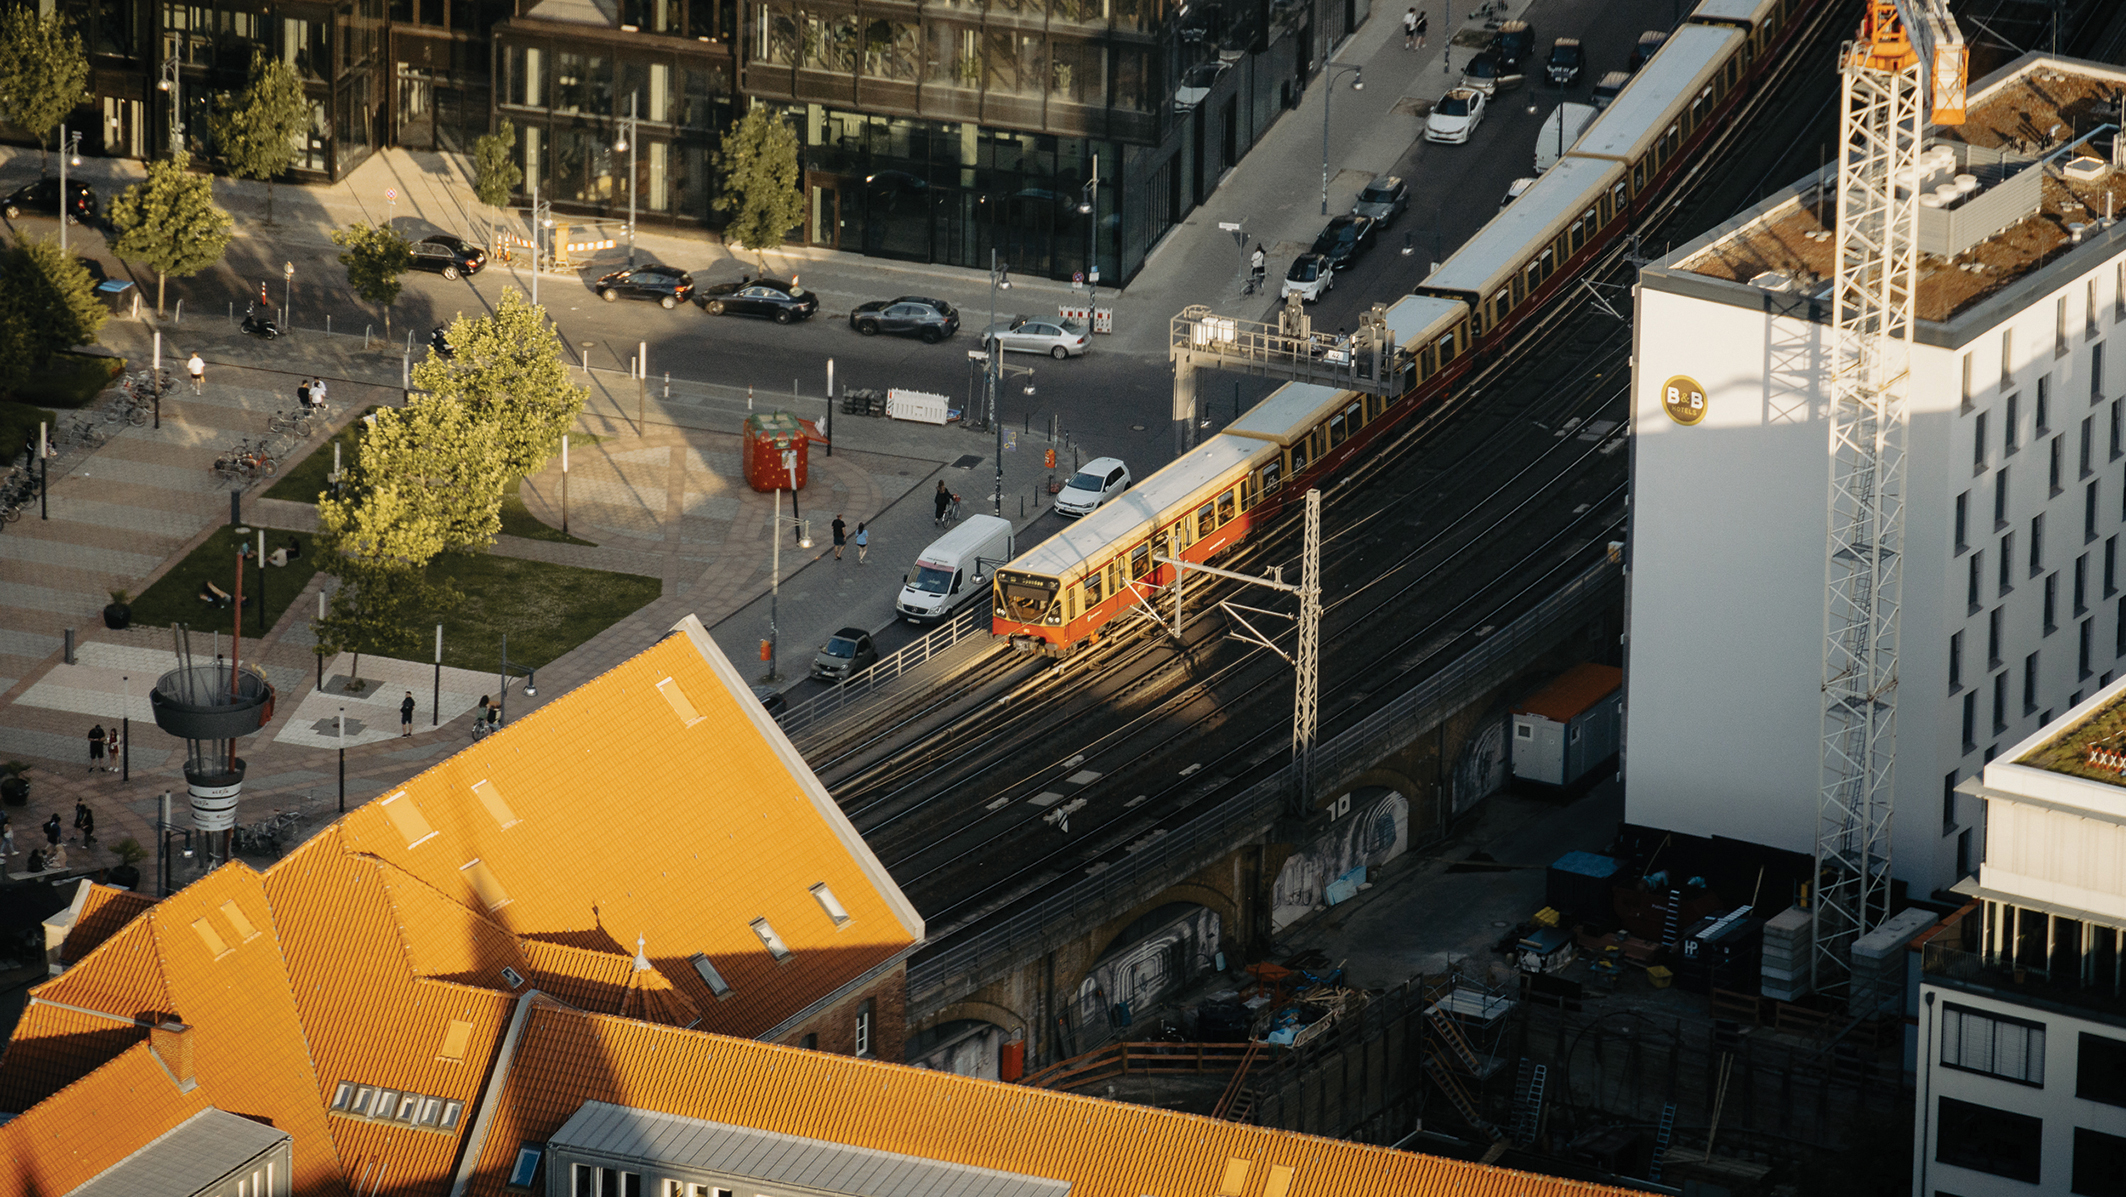
Before
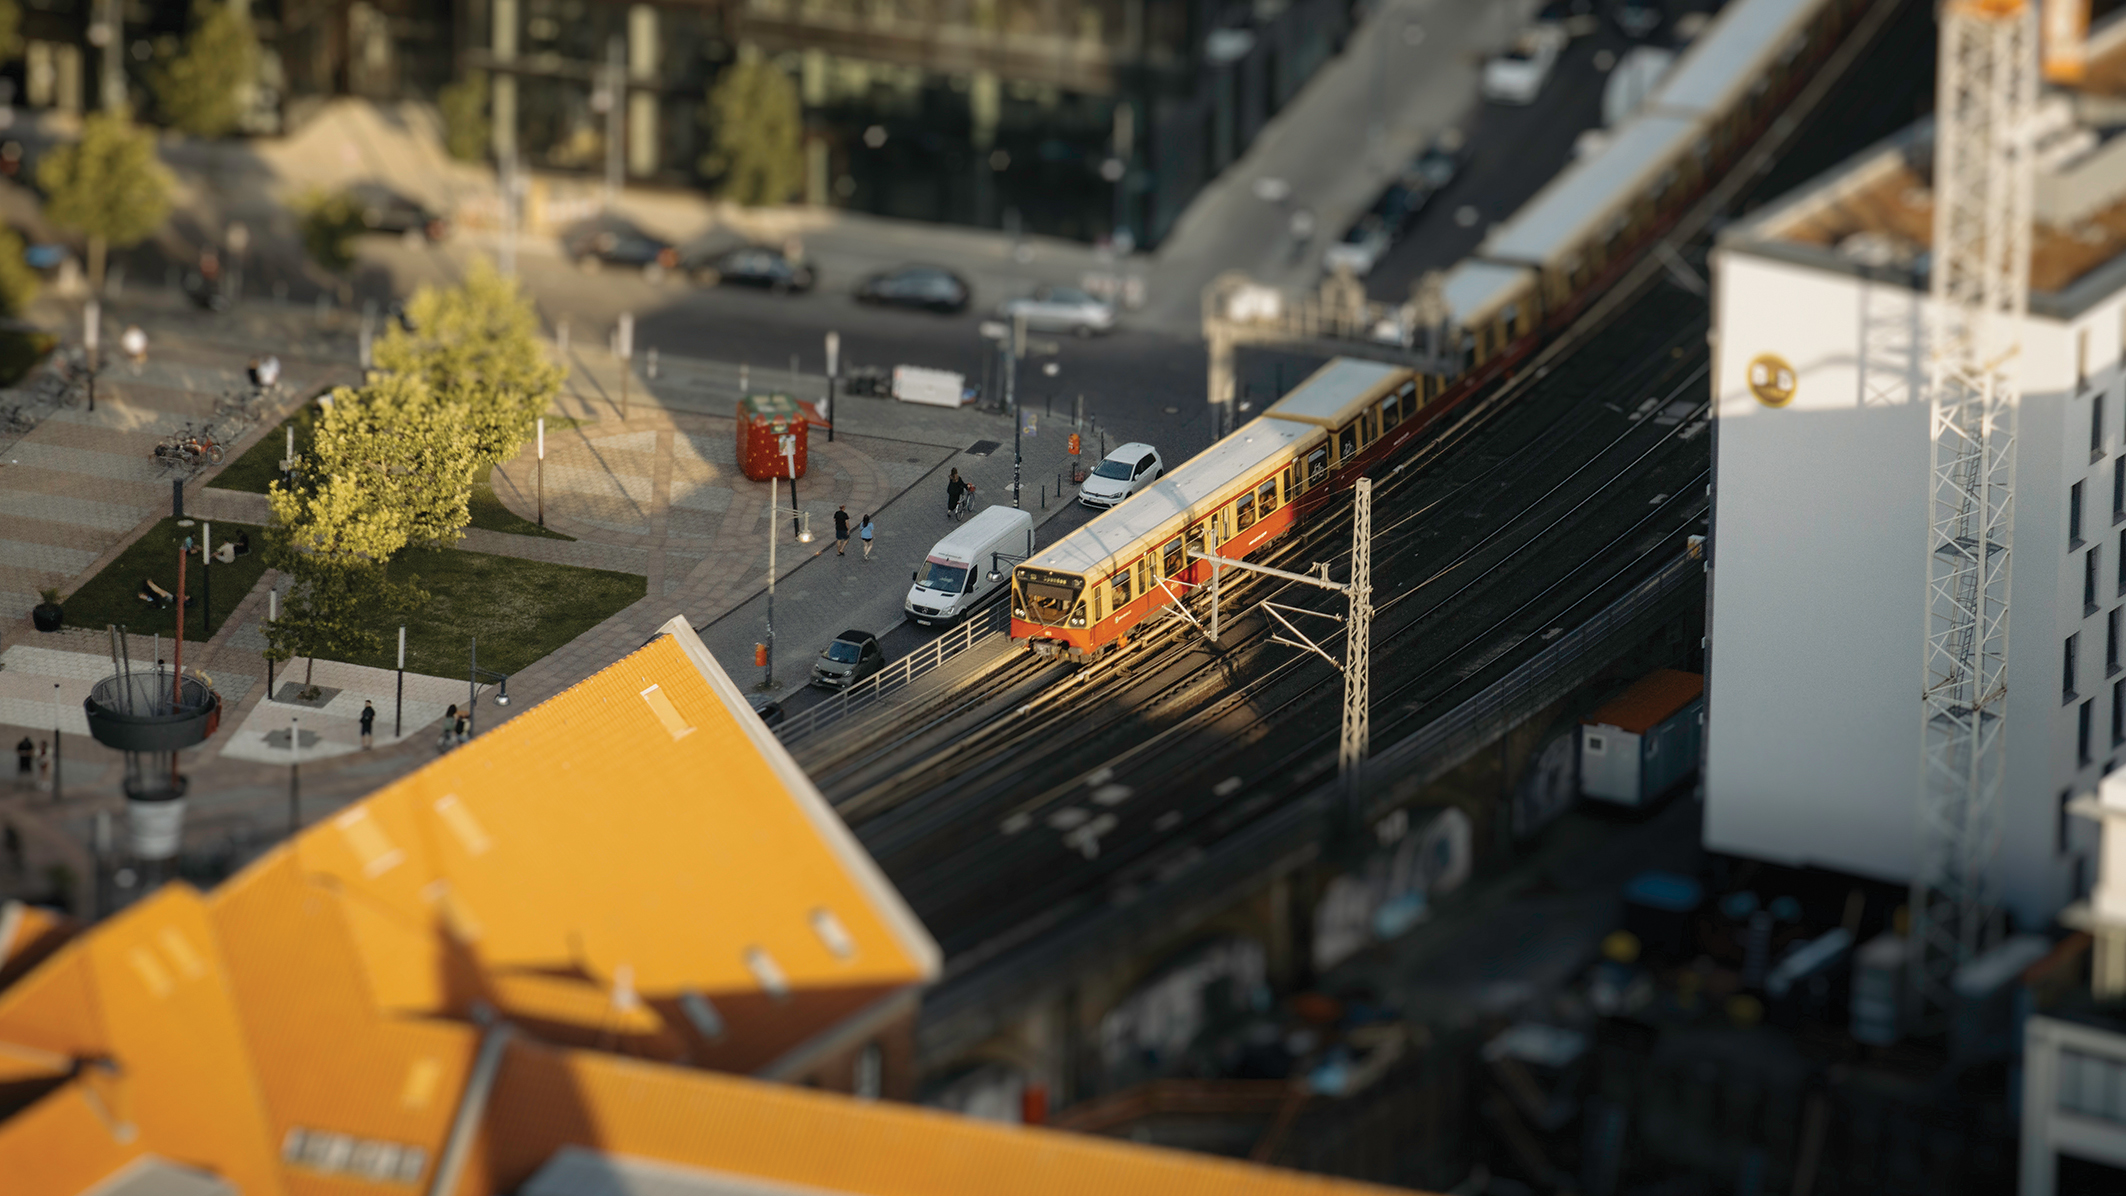
After
How to create the tilt-shift photography effect in post-processing
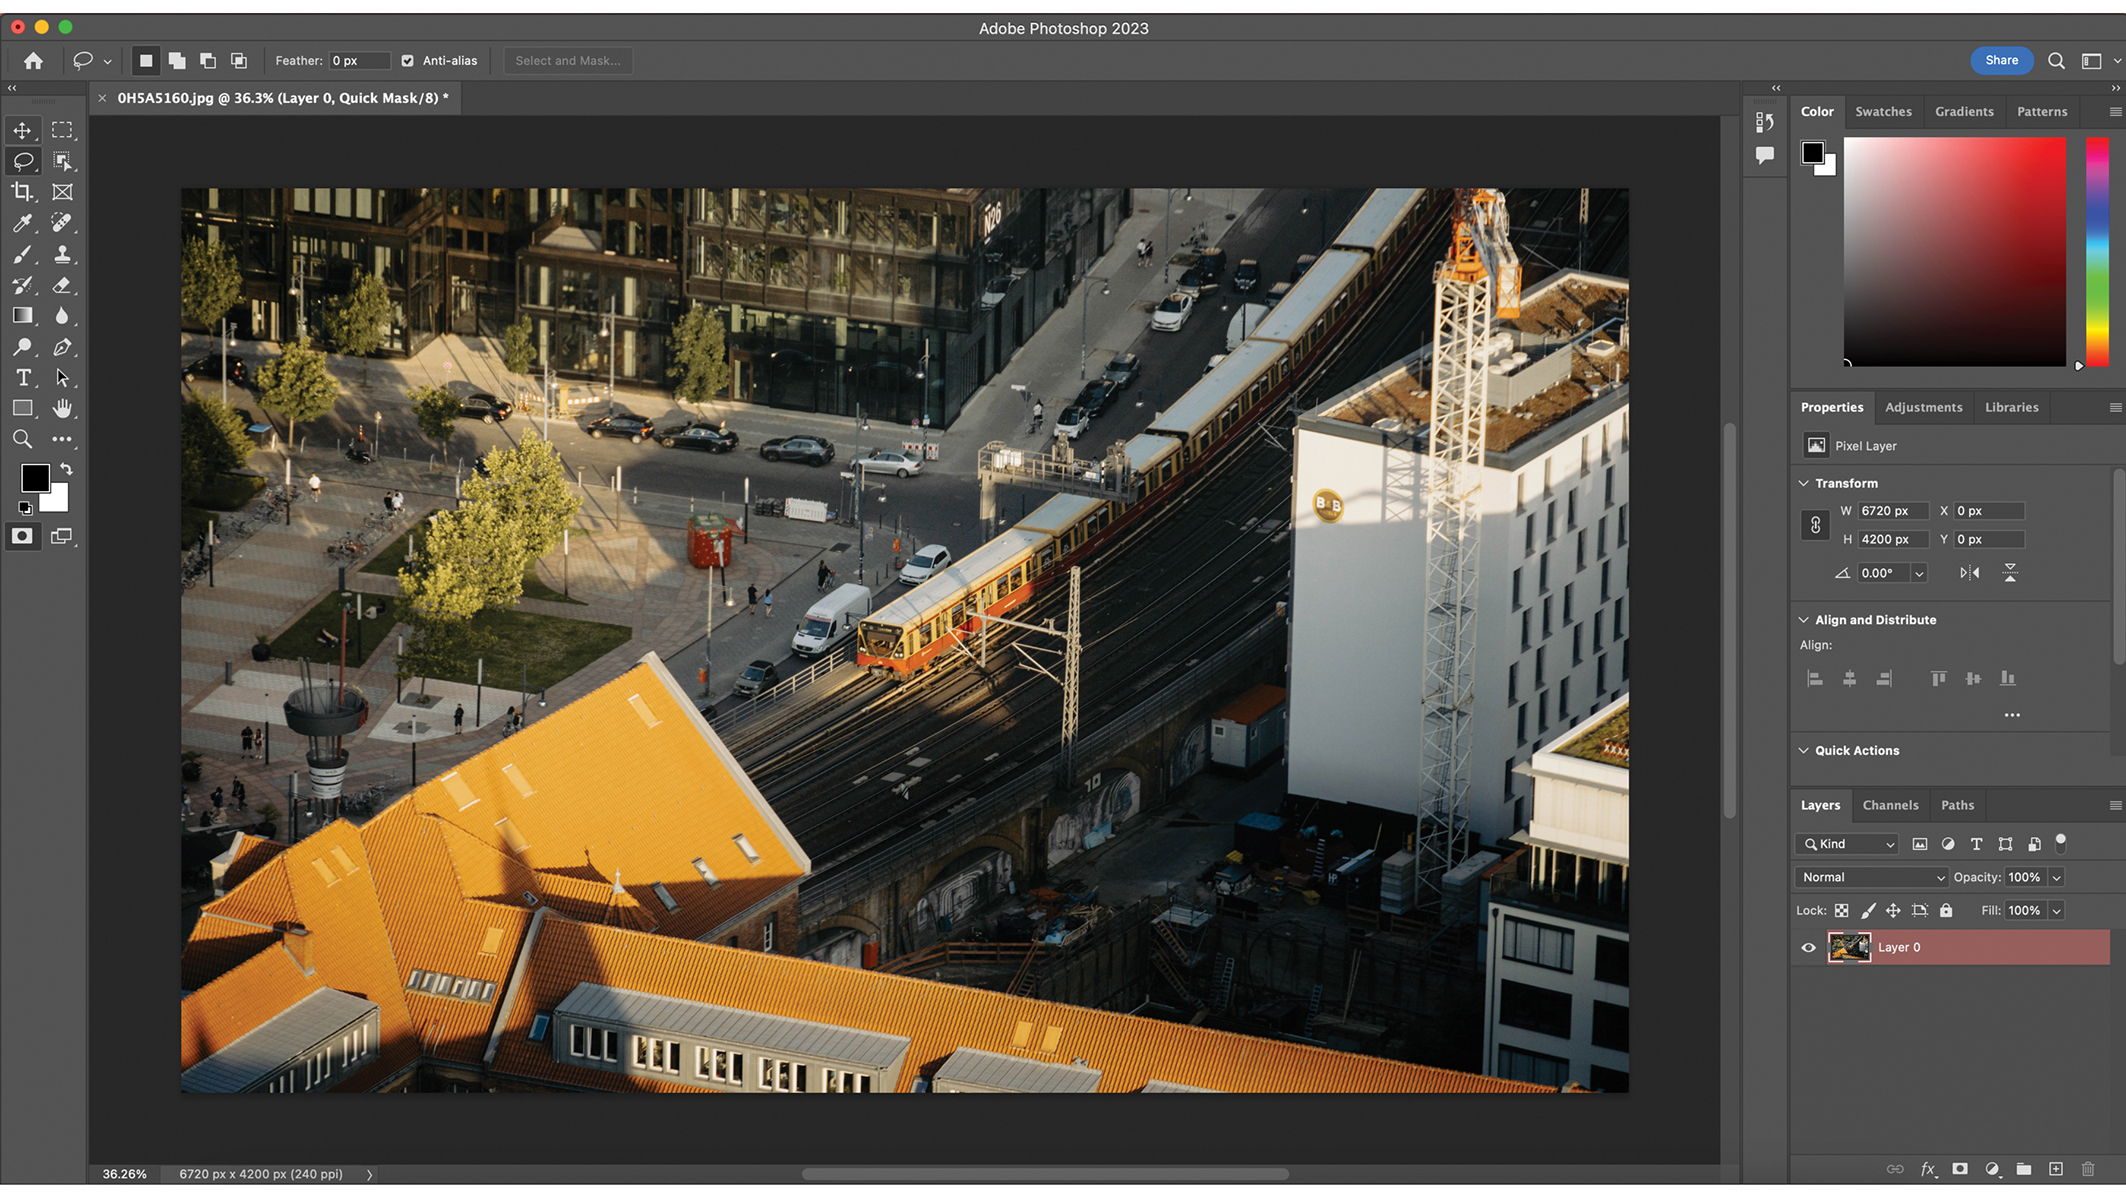
1. Edit in Quick Mask Mode
"When you open your image in your preferred editing software, press the Q key on the tools panel to start working in the Quick Mask mode. After enabling it, the selected areas of the image will turn red."
Get the Digital Camera World Newsletter
The best camera deals, reviews, product advice, and unmissable photography news, direct to your inbox!
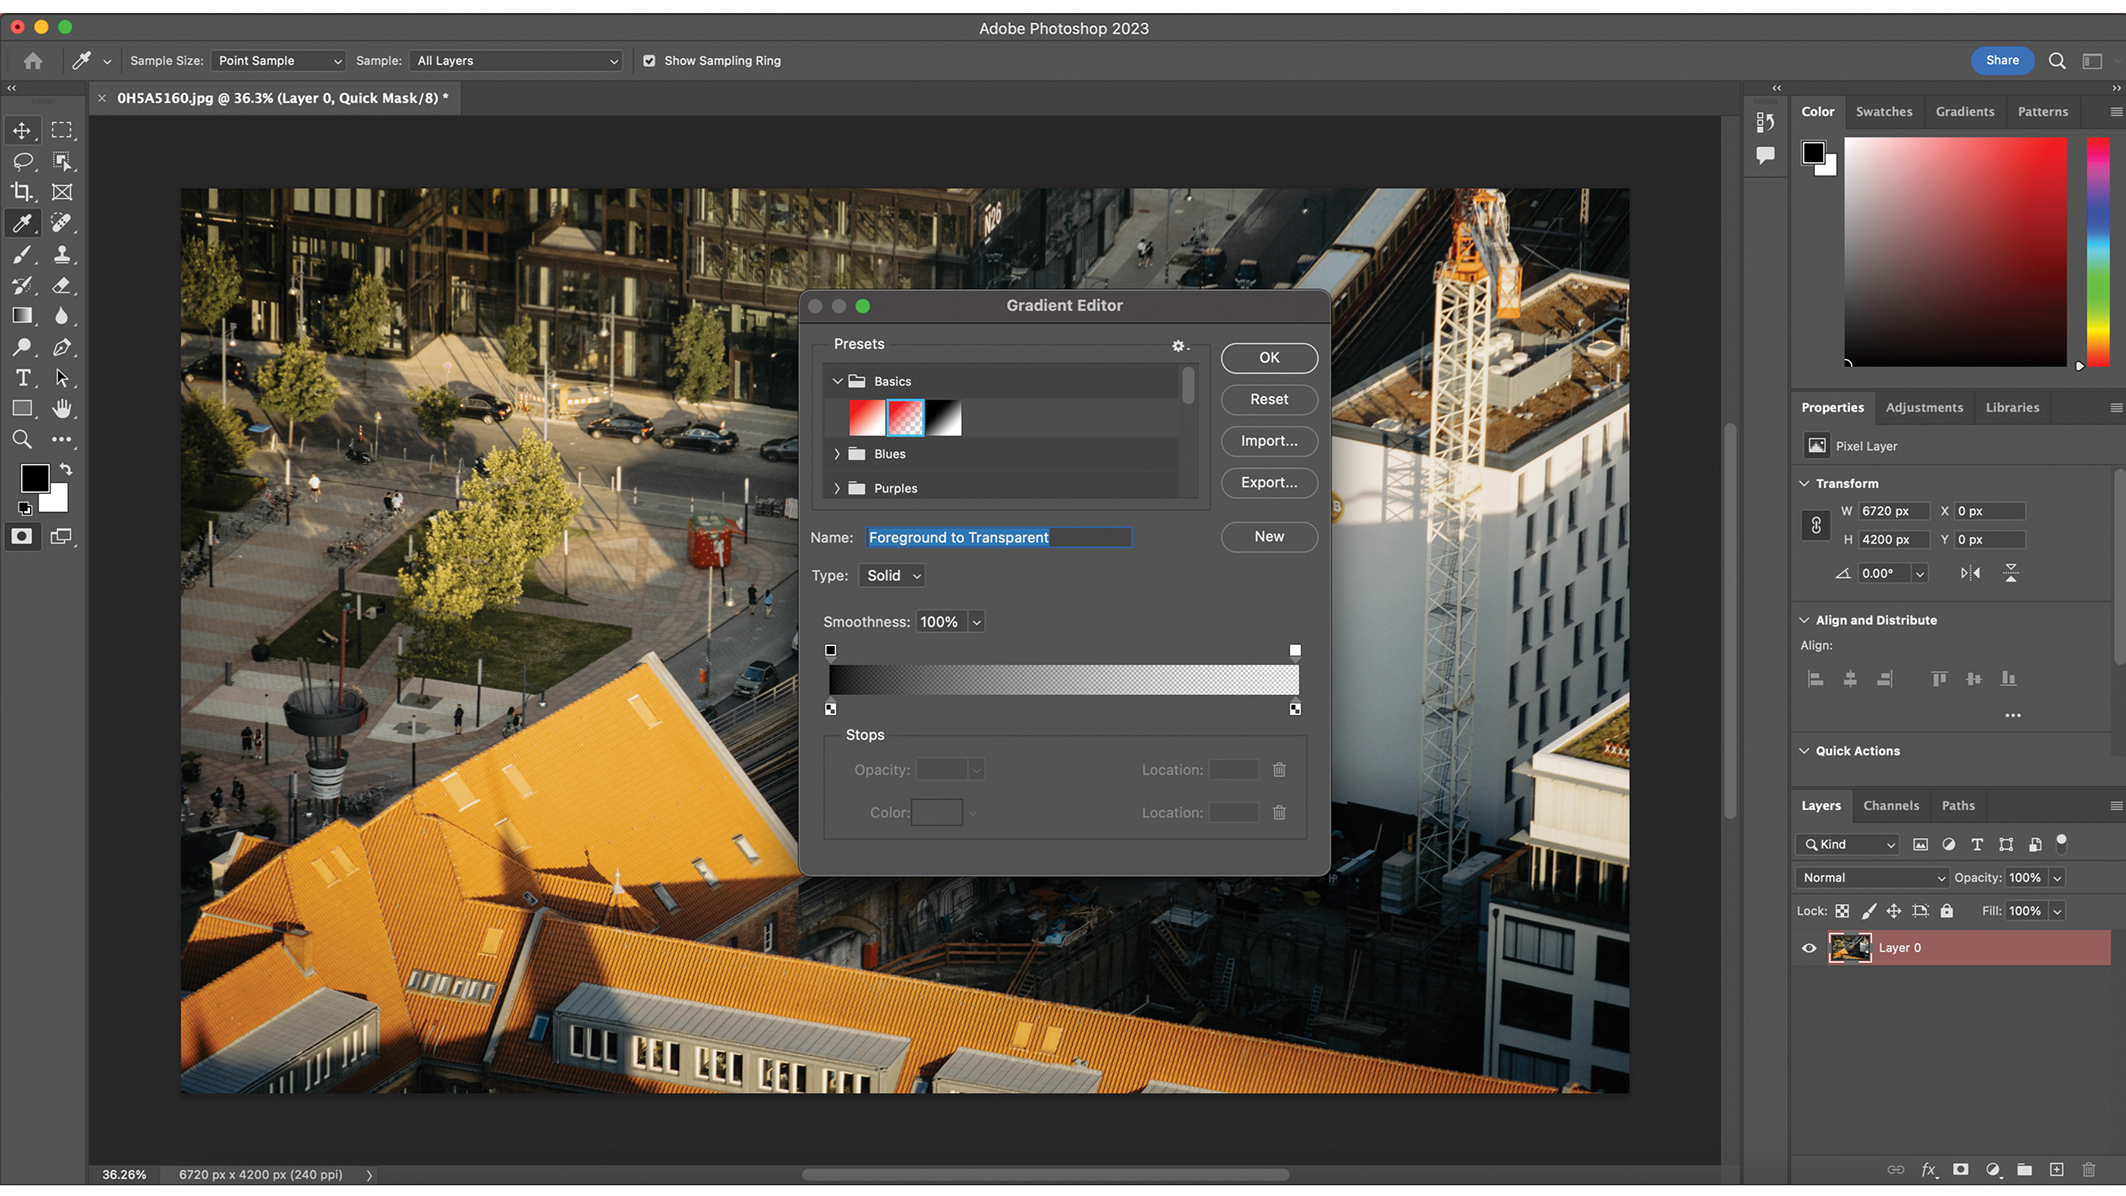
2. Choose gradient type
"Go to the tools panel on the left side and open the Gradient tool. As we want to use the semi-transparent gradient, choose the Foreground to Transparent gradient found in the Basic folder."
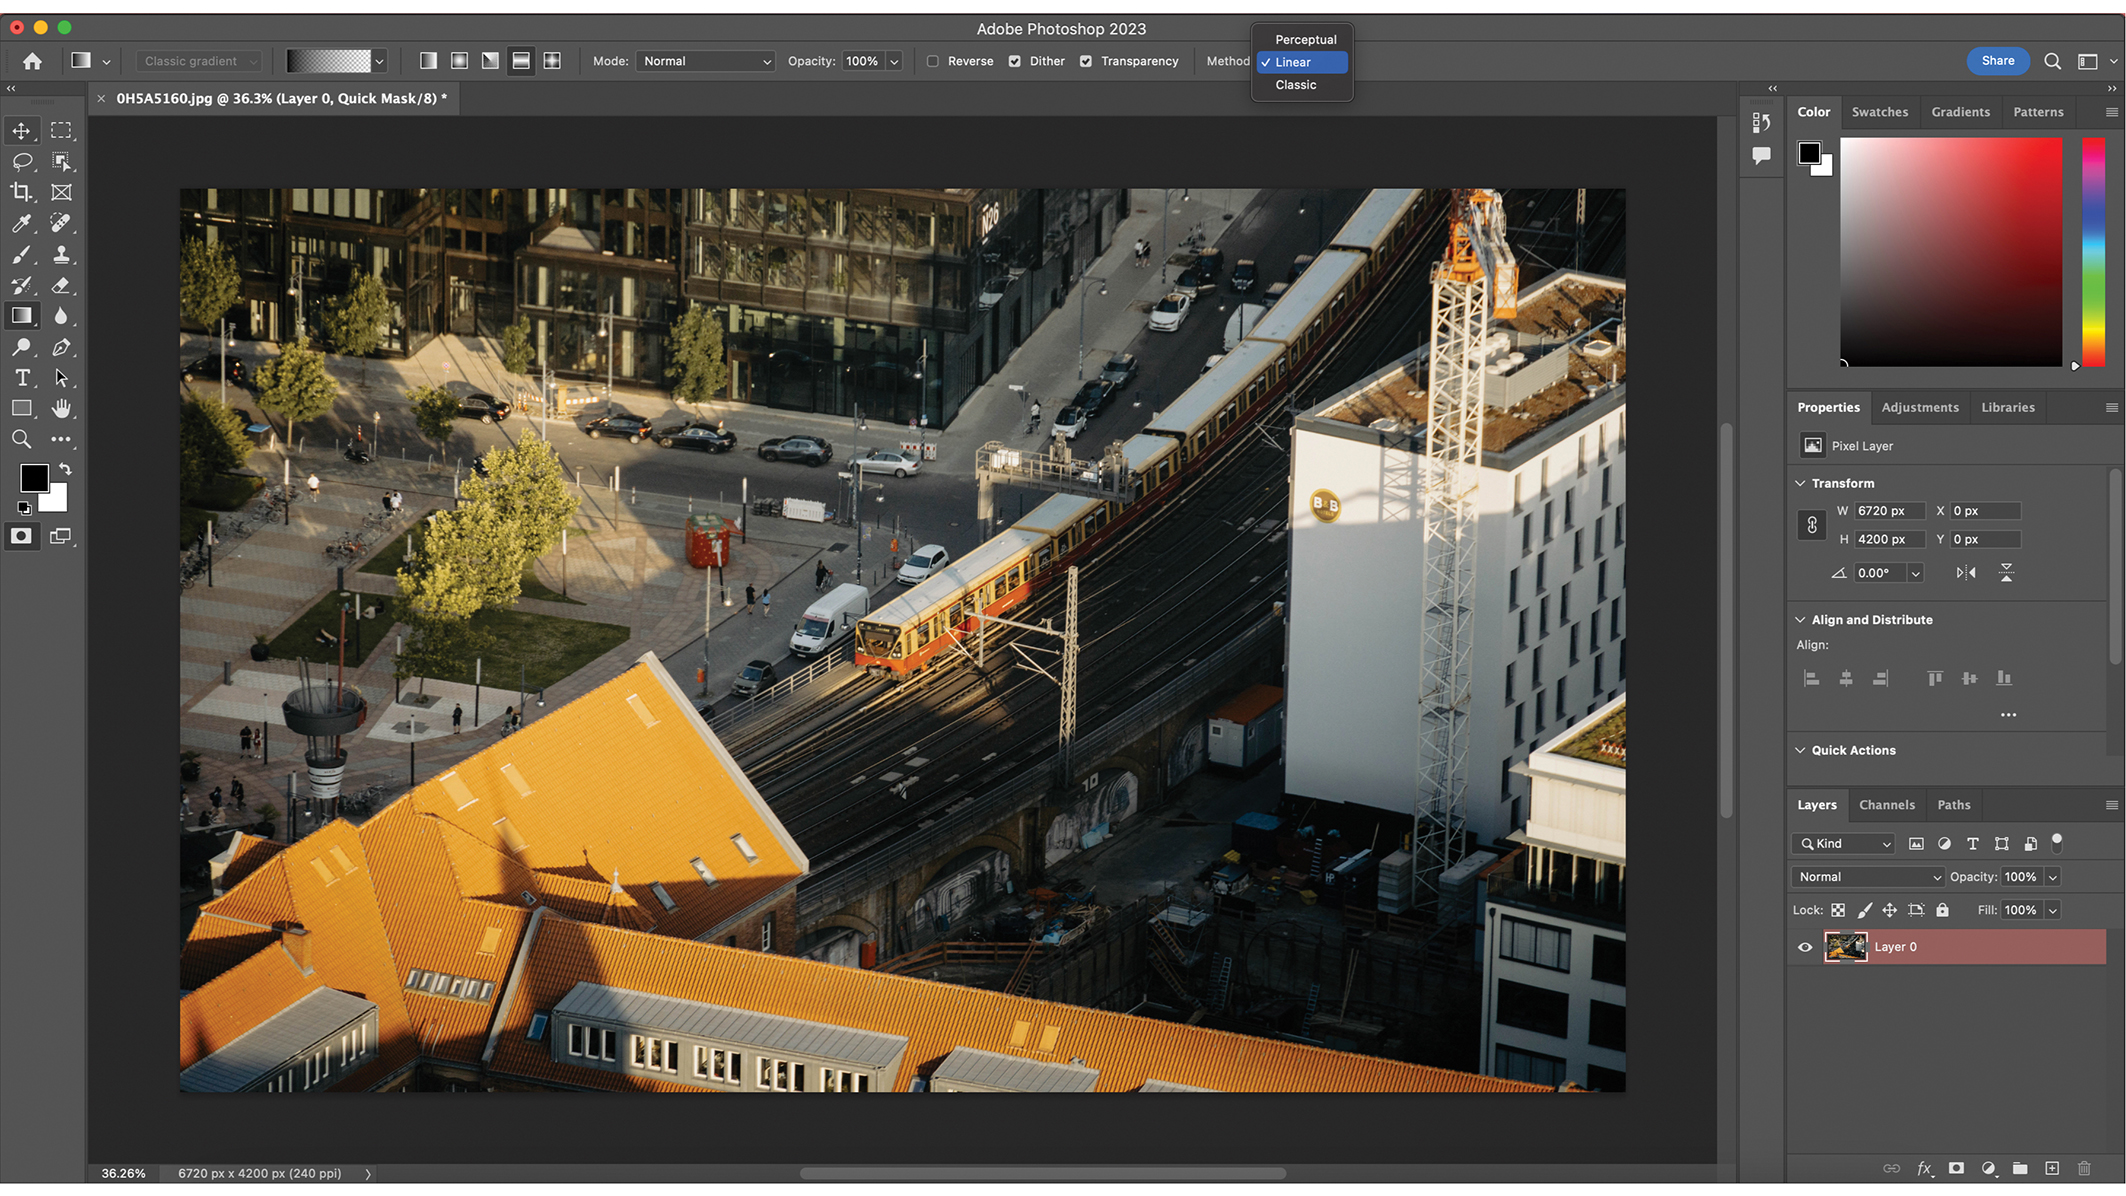
3. Select style and method
"Make sure you have the Reflected Gradient type selected. I also like to use the Linear interpolation method as it gives a closer approximation of the way the tilt-shift lens creates the in-focus area."
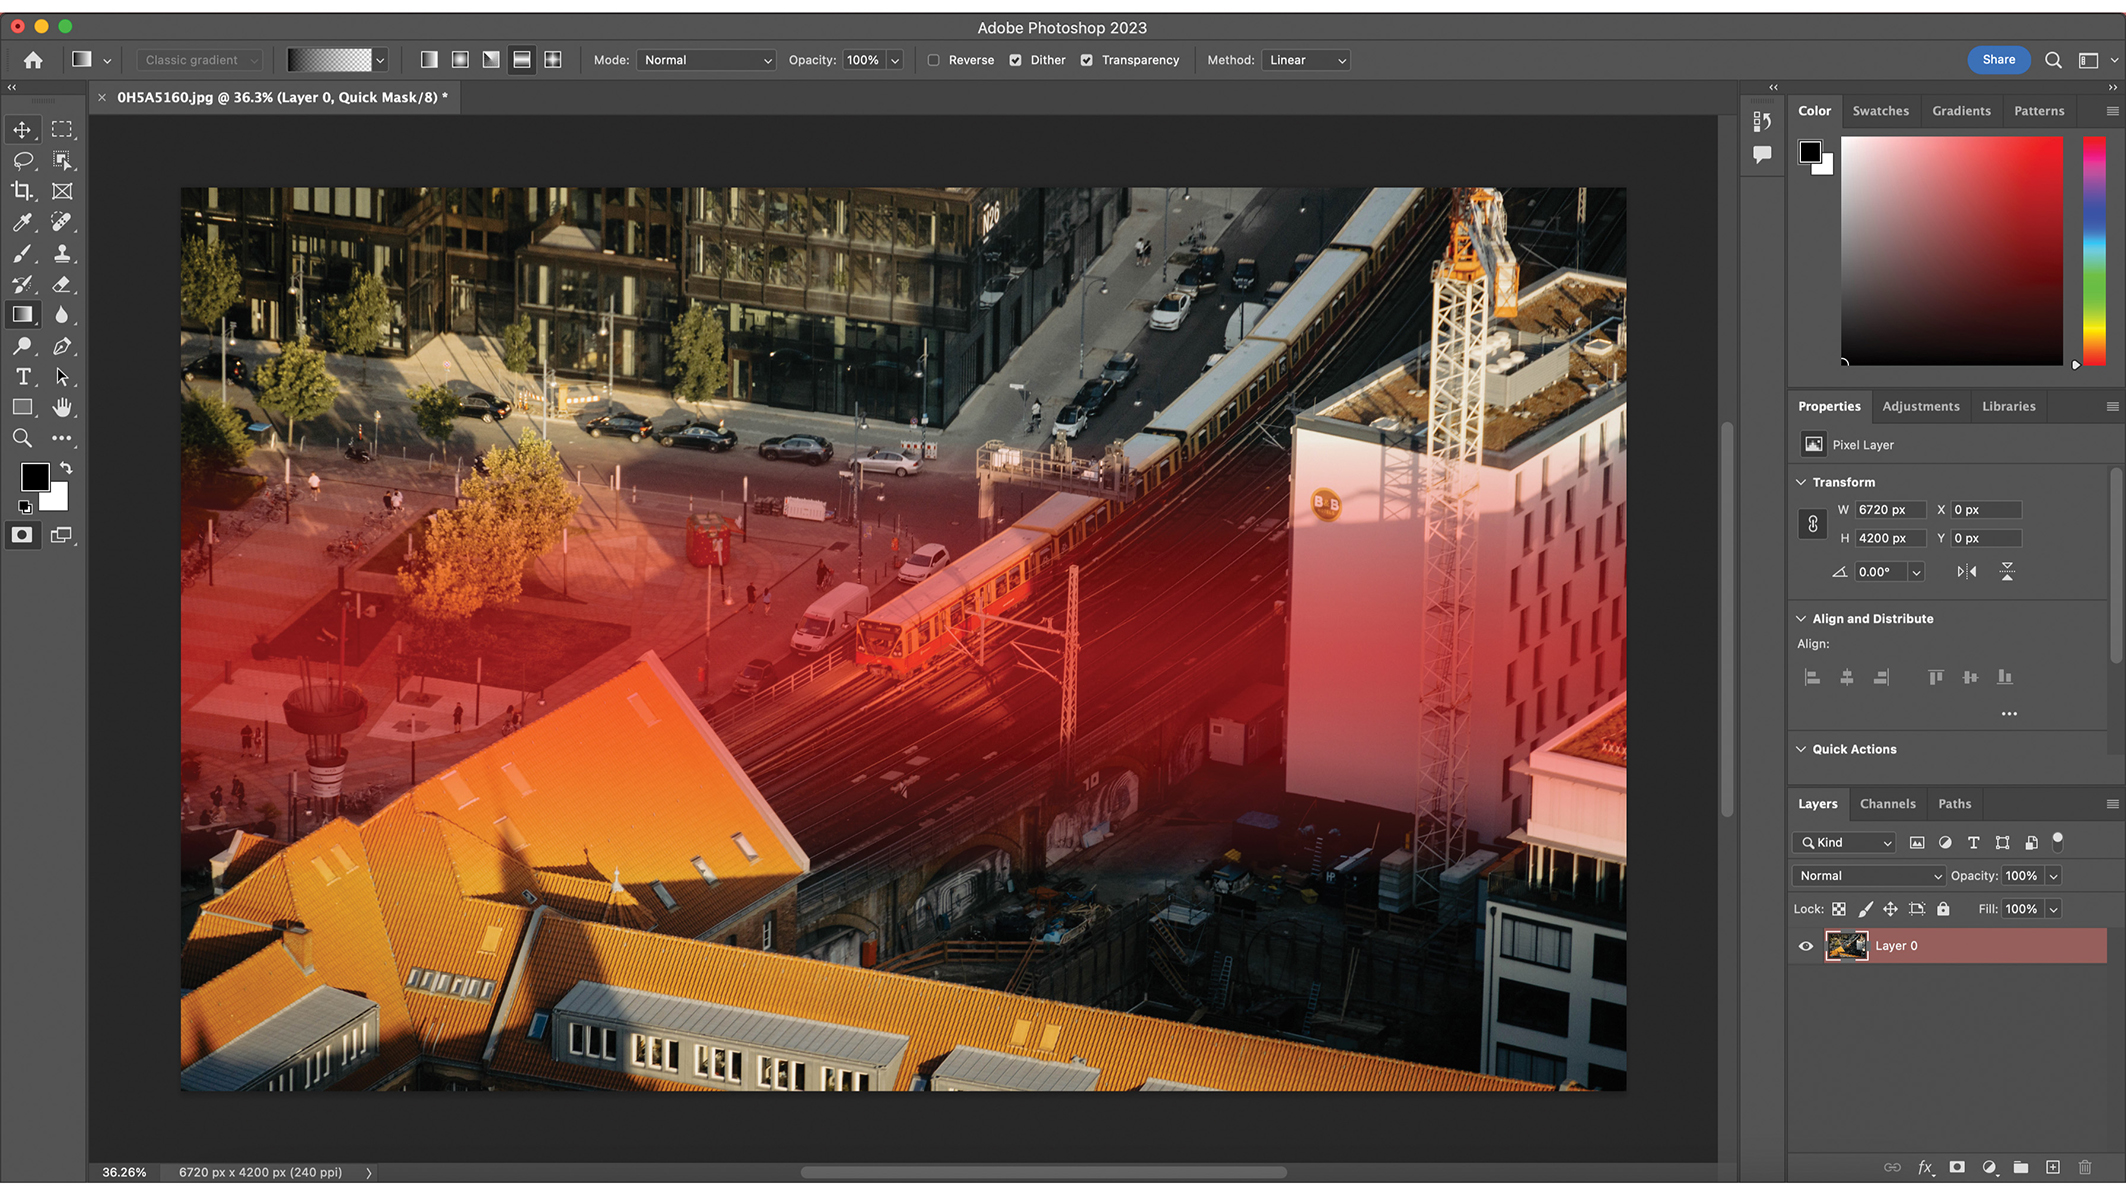
4. Define the in-focus area
"While pressing down the Shift key, draw a straight line on your photo. The coloured area will indicate the area that is going to be in focus. Everything above and below the line will be blurred out to create the tilt-shift effect."
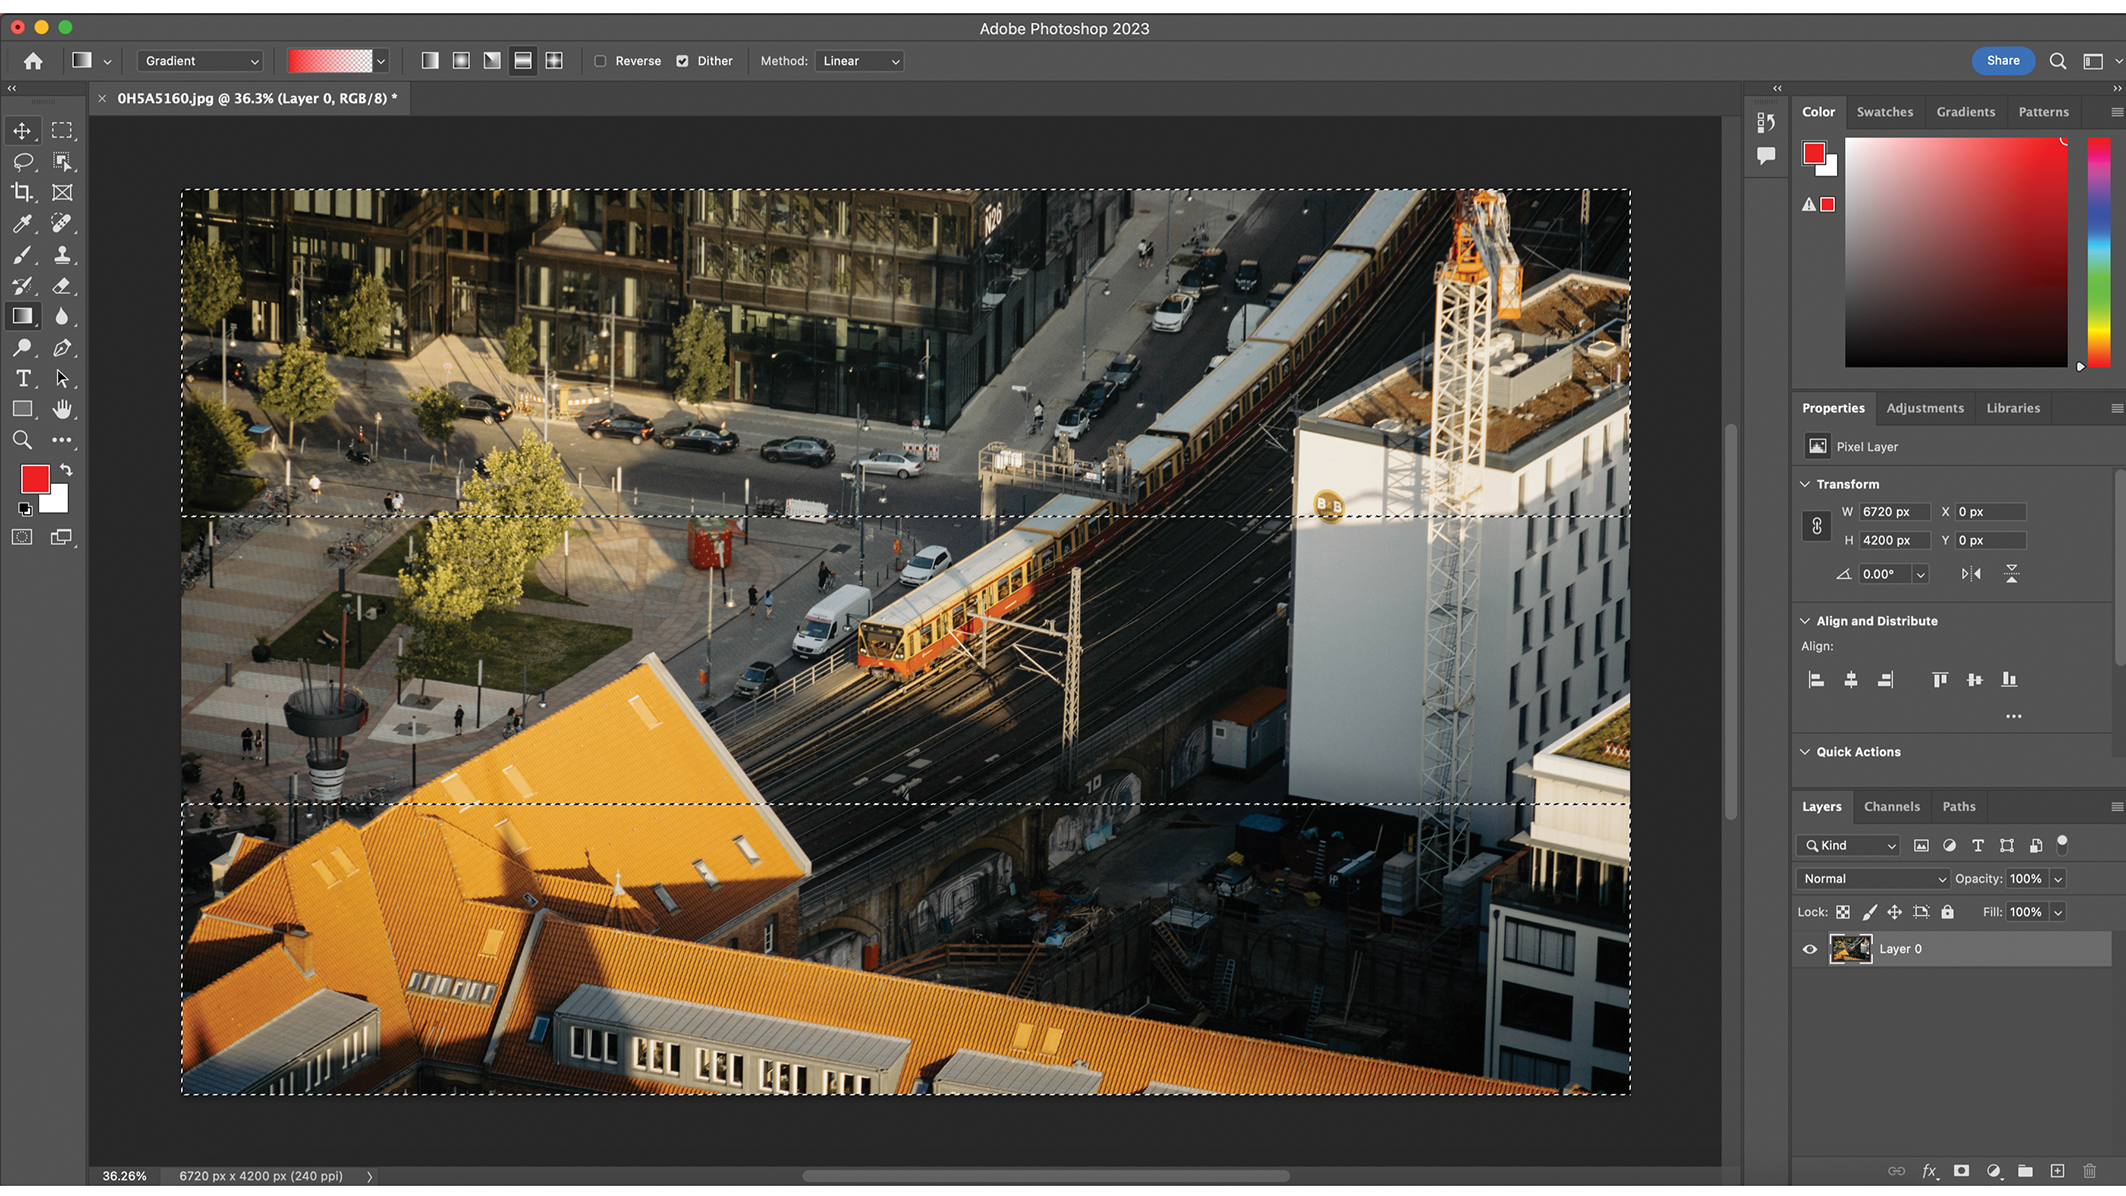
5. Edit in Standard Modes
"Press the Q key again to return to Standard Mode. You will see that everything that was outside the red area is now selected. That is the area to which we will be applying the gradient changes to achieve a tilt-shift look."
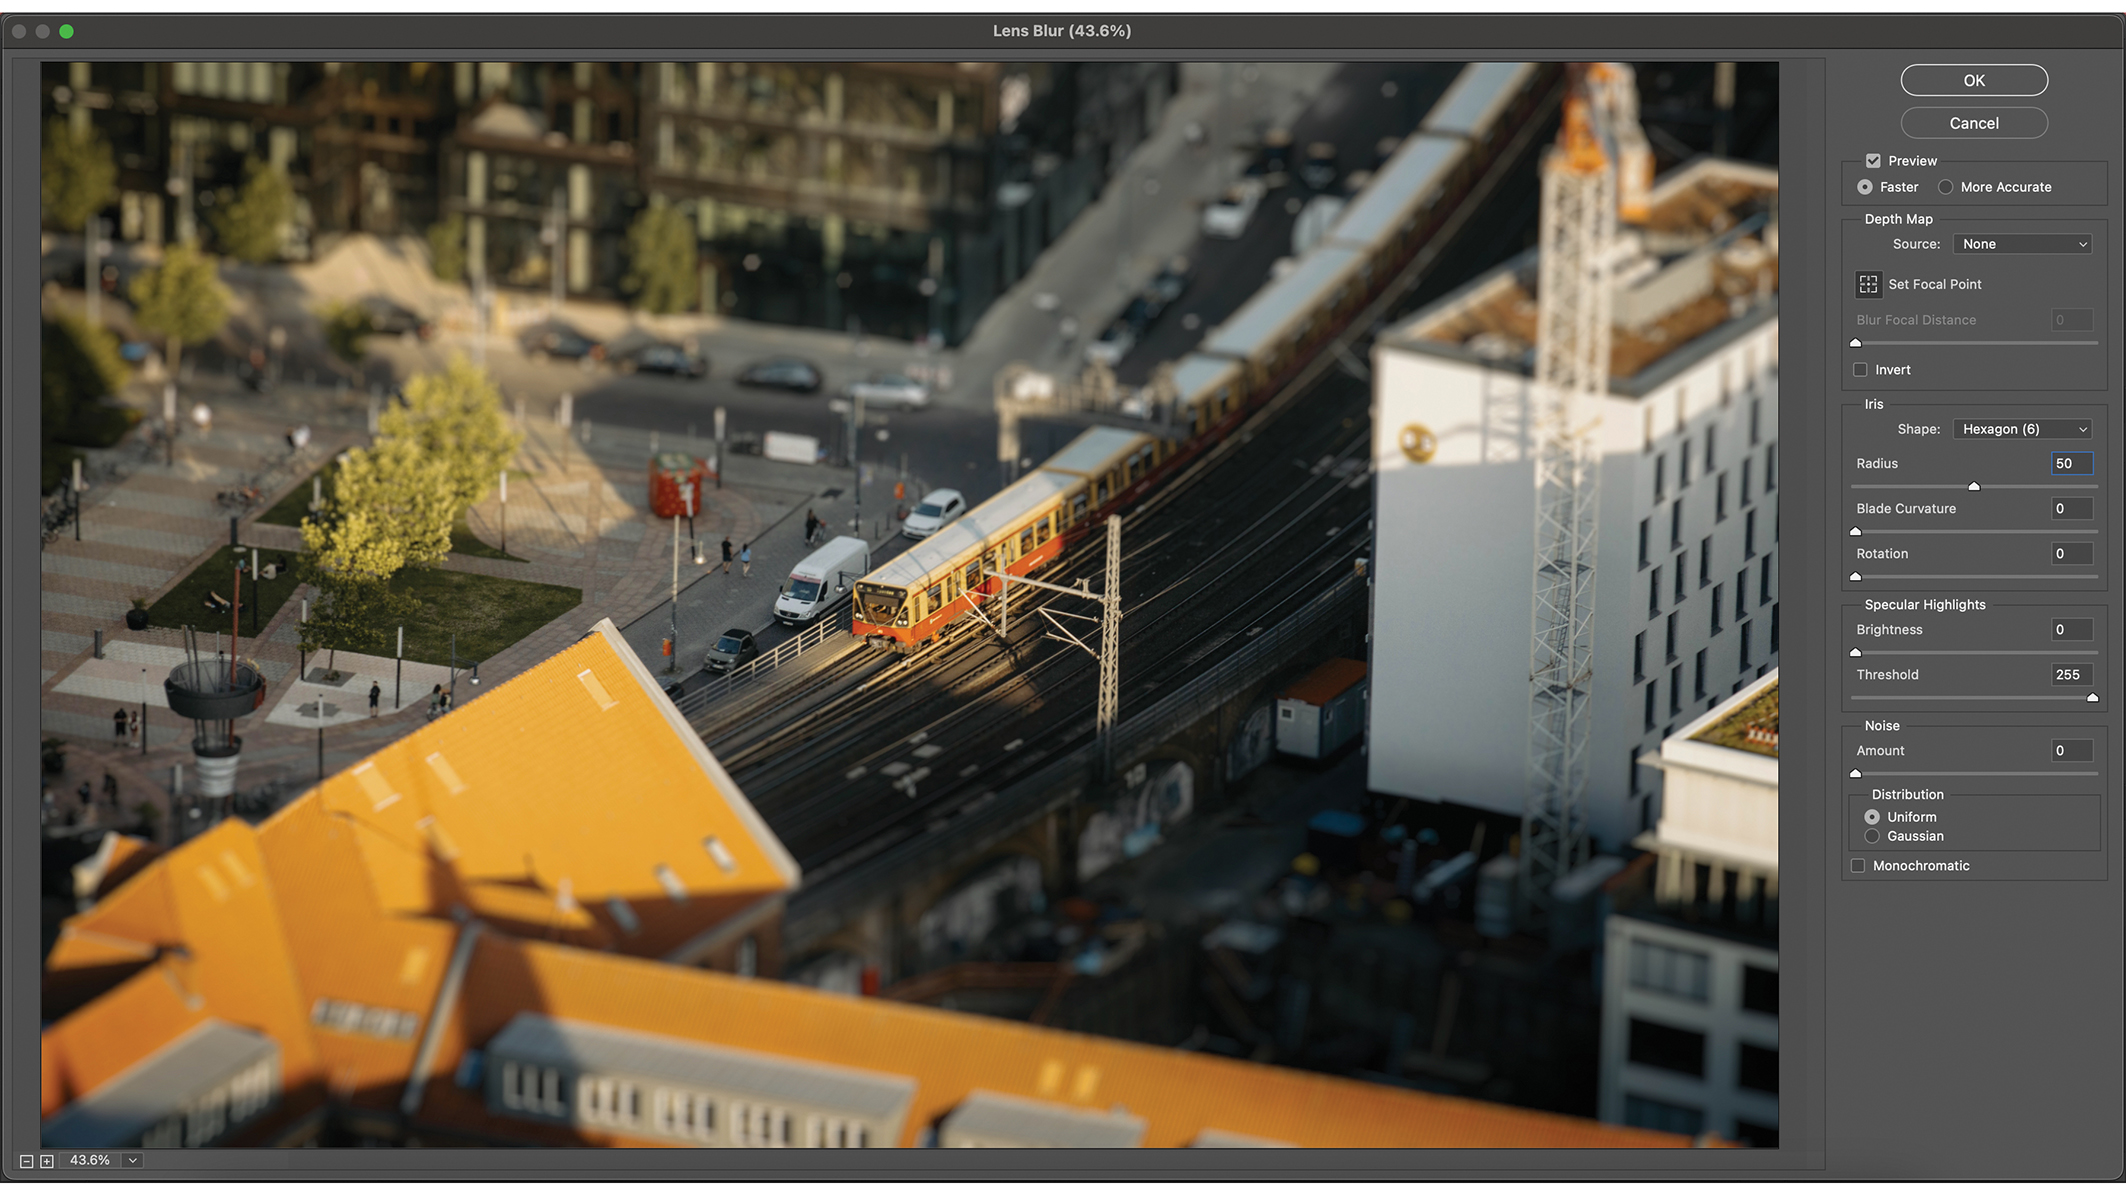
6. Add Lens Blur
"From the Filter tab, select Blur and then Lens Blur effect. In the new window, change the Radius property to somewhere between 40 and 60, depending on the strength that suits your photo. These areas will now appear blurred."

A passionate photographer with an insatiable wanderlust. Natalia's lens is drawn to architectural marvels, breathtaking landscapes, and the untamed beauty of wildlife. With her camera as a constant companion, she embarks on journeys, capturing the essence of the beauty of the world's most stunning places and the wonders of nature.
You might like...
If you're interested in architecture photography, check out our article on why breaking the rules in this genre can actually enhance your shots. If you decide not to go the tilt-shift route, some of the best wide-angle lenses and the best lenses for landscapes can also be great for architecture.

Kim is the Staff Writer on Digital Camera World, and formerly Technique Editor at Digital Photographer, focusing on the art and science of photography. With a Master’s degree in Photography and Media, she is driven to educate through an analytical approach, visually and technically. With her guides and tutorials, Kim seeks to uncover new facets of this time-honoured medium and foster a deeper understanding of its profound role in culture. Kim highlights topics that resonate with modern society, including women in photography and critical issues such as environmental conservation. She also discusses and reviews camera gear, giving you an overview to find the best fit for your photography journey.
You must confirm your public display name before commenting
Please logout and then login again, you will then be prompted to enter your display name.
