Don't be scared to use filters on your iPhone – you are not as committed to the look as you might think
Normally, when you use a filter on a camera, there’s no going back. The effect is ‘baked in’. Not with the iPhone…

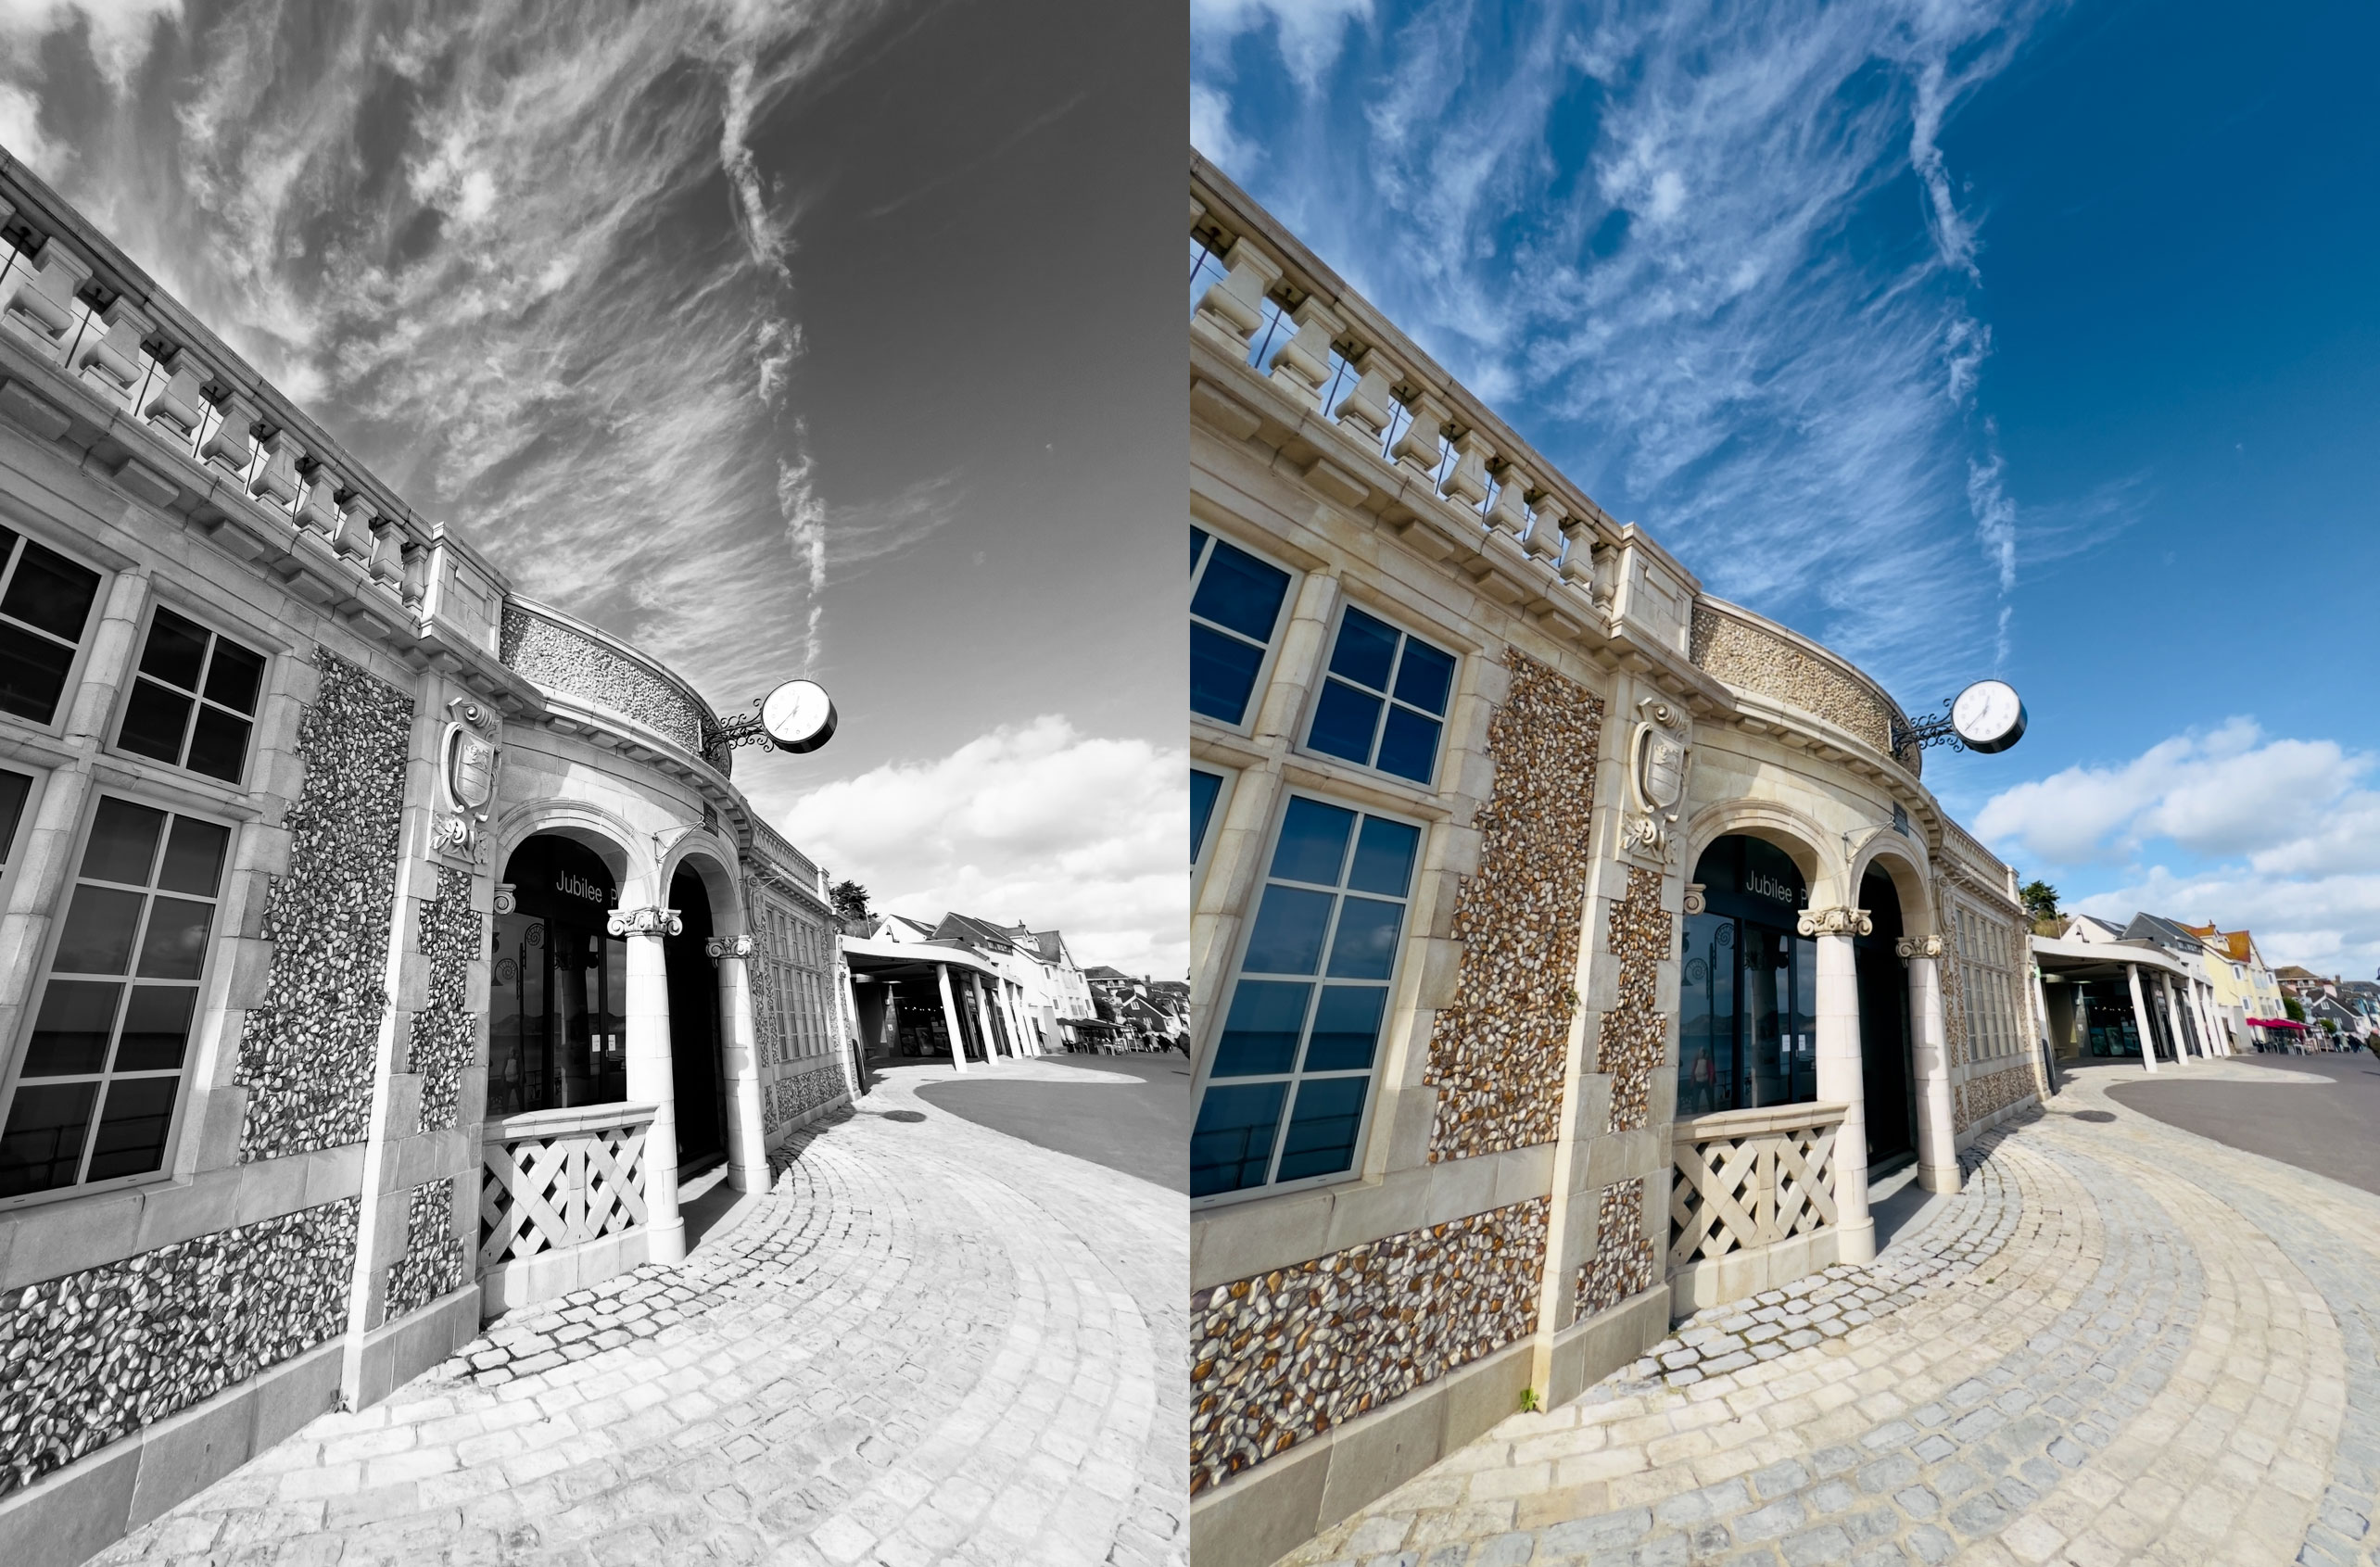
I do have a soft spot for iPhone filters – the ones included in the regular Camera app. The color filters I can take or leave, but I’m a big black and white fan and I do love the iPhone’s Noir and Silvertone filters in particular.
But my worry has always been that if I go out and shoot a lot of pictures with the Noir filter, then I’m stuck with a high-contrast black and white look that may be perfect but, sometimes, may not actually be the best treatment.
But I’m stuck with it, right? That’s what you might think, but it’s not actually the case. And I’m not talking about shooting raw images instead – I’m talking about the iPhone’s regular JPEG/HEIF mode, where the camera processes images on the spot.
You CAN change your iPhone Camera app filters later

Try it! Go back through your iPhone Photos and find an image shot with a filter – or take one specially just to try this out. Choose a black and white one if you can because then the demonstration will be more obvious. Now go into Edit mode and tap on the Filter icon at the bottom of the screen. You should see all the different filter options – but they’re all variations on your mono image. That’s not good.
Ah, but then if you tap the Revert button at the top right of the screen, something different happens – your photo goes back to full color and you can use any of the Camera app filters you want to. From now on, all the filter choices are there whenever you re-edit that photo.
(It looks like if you took the picture with no filter and added one in the app, then you don’t need to Revert your image – you only need this if you actually took the shot with the filter active. I think.)
So what’s happening here? It looks like the Camera app shoots a regular color photo whatever filter you choose, but then applies your chosen filter effect to save it. But what it’s actually doing is applying the filter AFTER it’s captured the image – which means you can un-apply it later!
So just remember – if you took a photo with a filter you want to change later, open it to edit it in the iOS Photos app and use the Revert button (‘Revert to Original’ in the macOS Photos app) to get back to the original color capture, and then choose the filter you want.
Get the Digital Camera World Newsletter
The best camera deals, reviews, product advice, and unmissable photography news, direct to your inbox!

Rod is an independent photography journalist and editor, and a long-standing Digital Camera World contributor, having previously worked as DCW's Group Reviews editor. Before that he has been technique editor on N-Photo, Head of Testing for the photography division and Camera Channel editor on TechRadar, as well as contributing to many other publications. He has been writing about photography technique, photo editing and digital cameras since they first appeared, and before that began his career writing about film photography. He has used and reviewed practically every interchangeable lens camera launched in the past 20 years, from entry-level DSLRs to medium format cameras, together with lenses, tripods, gimbals, light meters, camera bags and more. Rod has his own camera gear blog at fotovolo.com but also writes about photo-editing applications and techniques at lifeafterphotoshop.com
You must confirm your public display name before commenting
Please logout and then login again, you will then be prompted to enter your display name.
