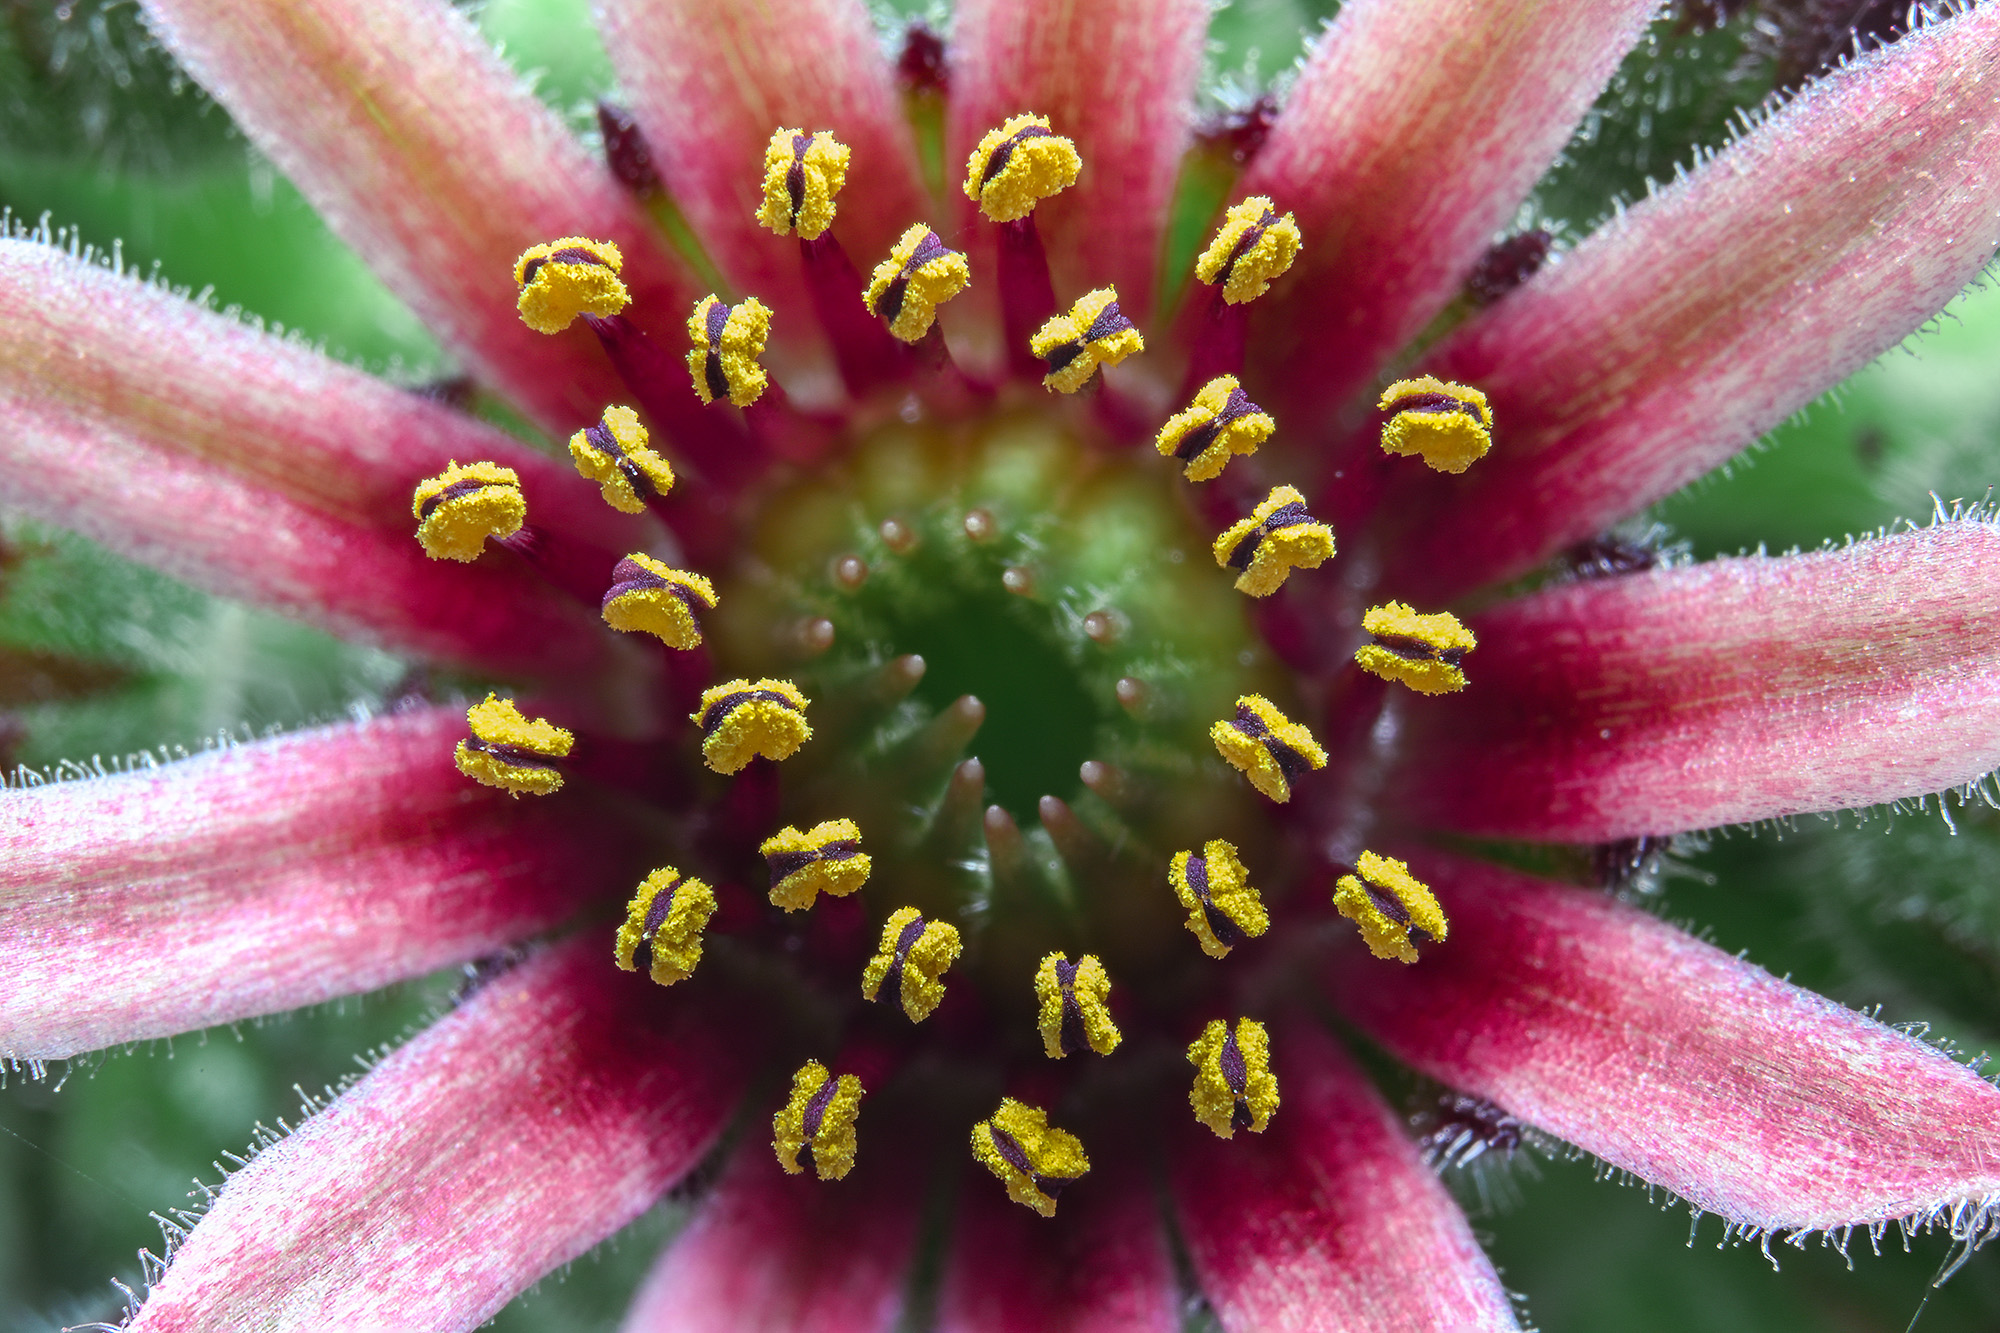
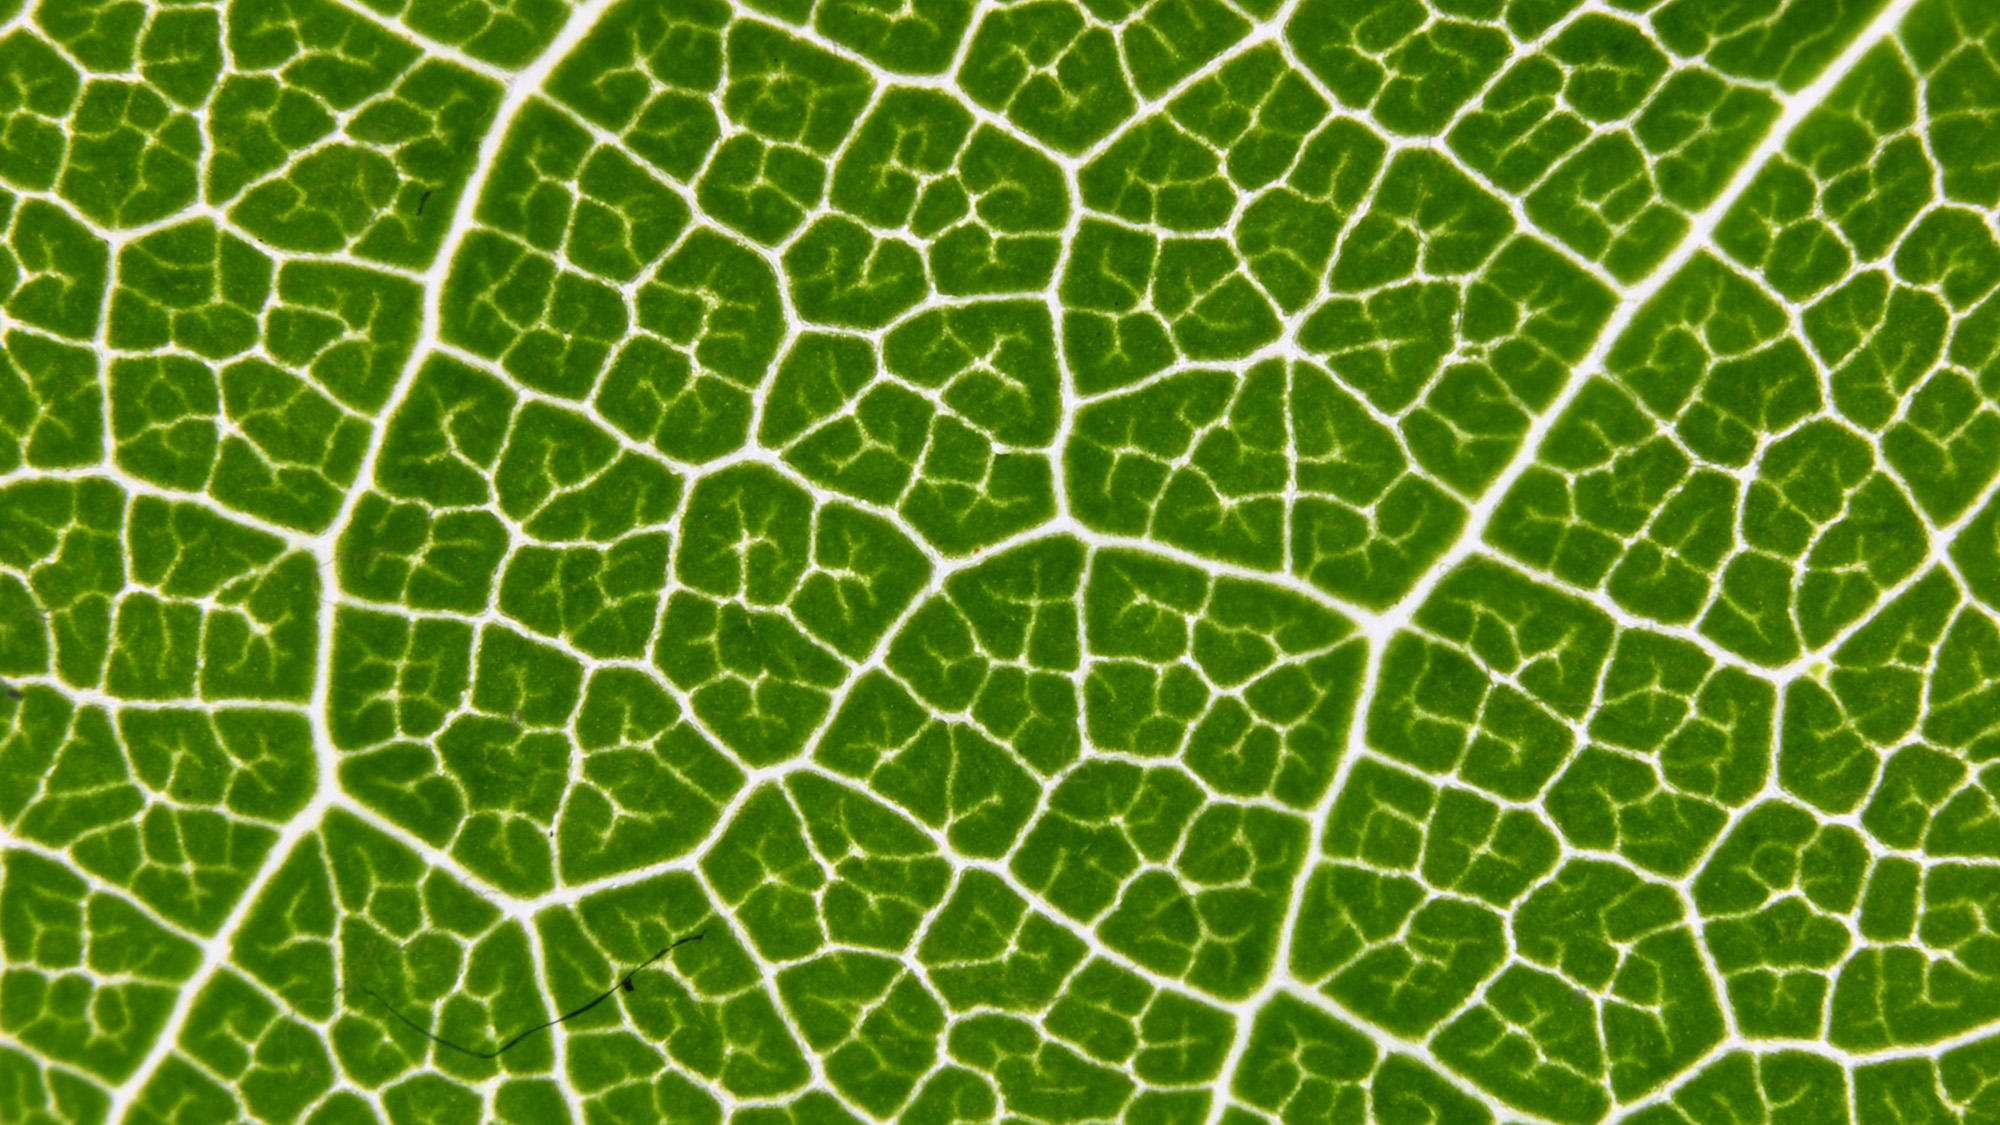
I used macro bellows on my camera for the first time to photograph an extreme close-up. The results are breathtaking!
Macro bellows are like instantly adjustable extension tubes and allow you to get REALLY close with a standard lens
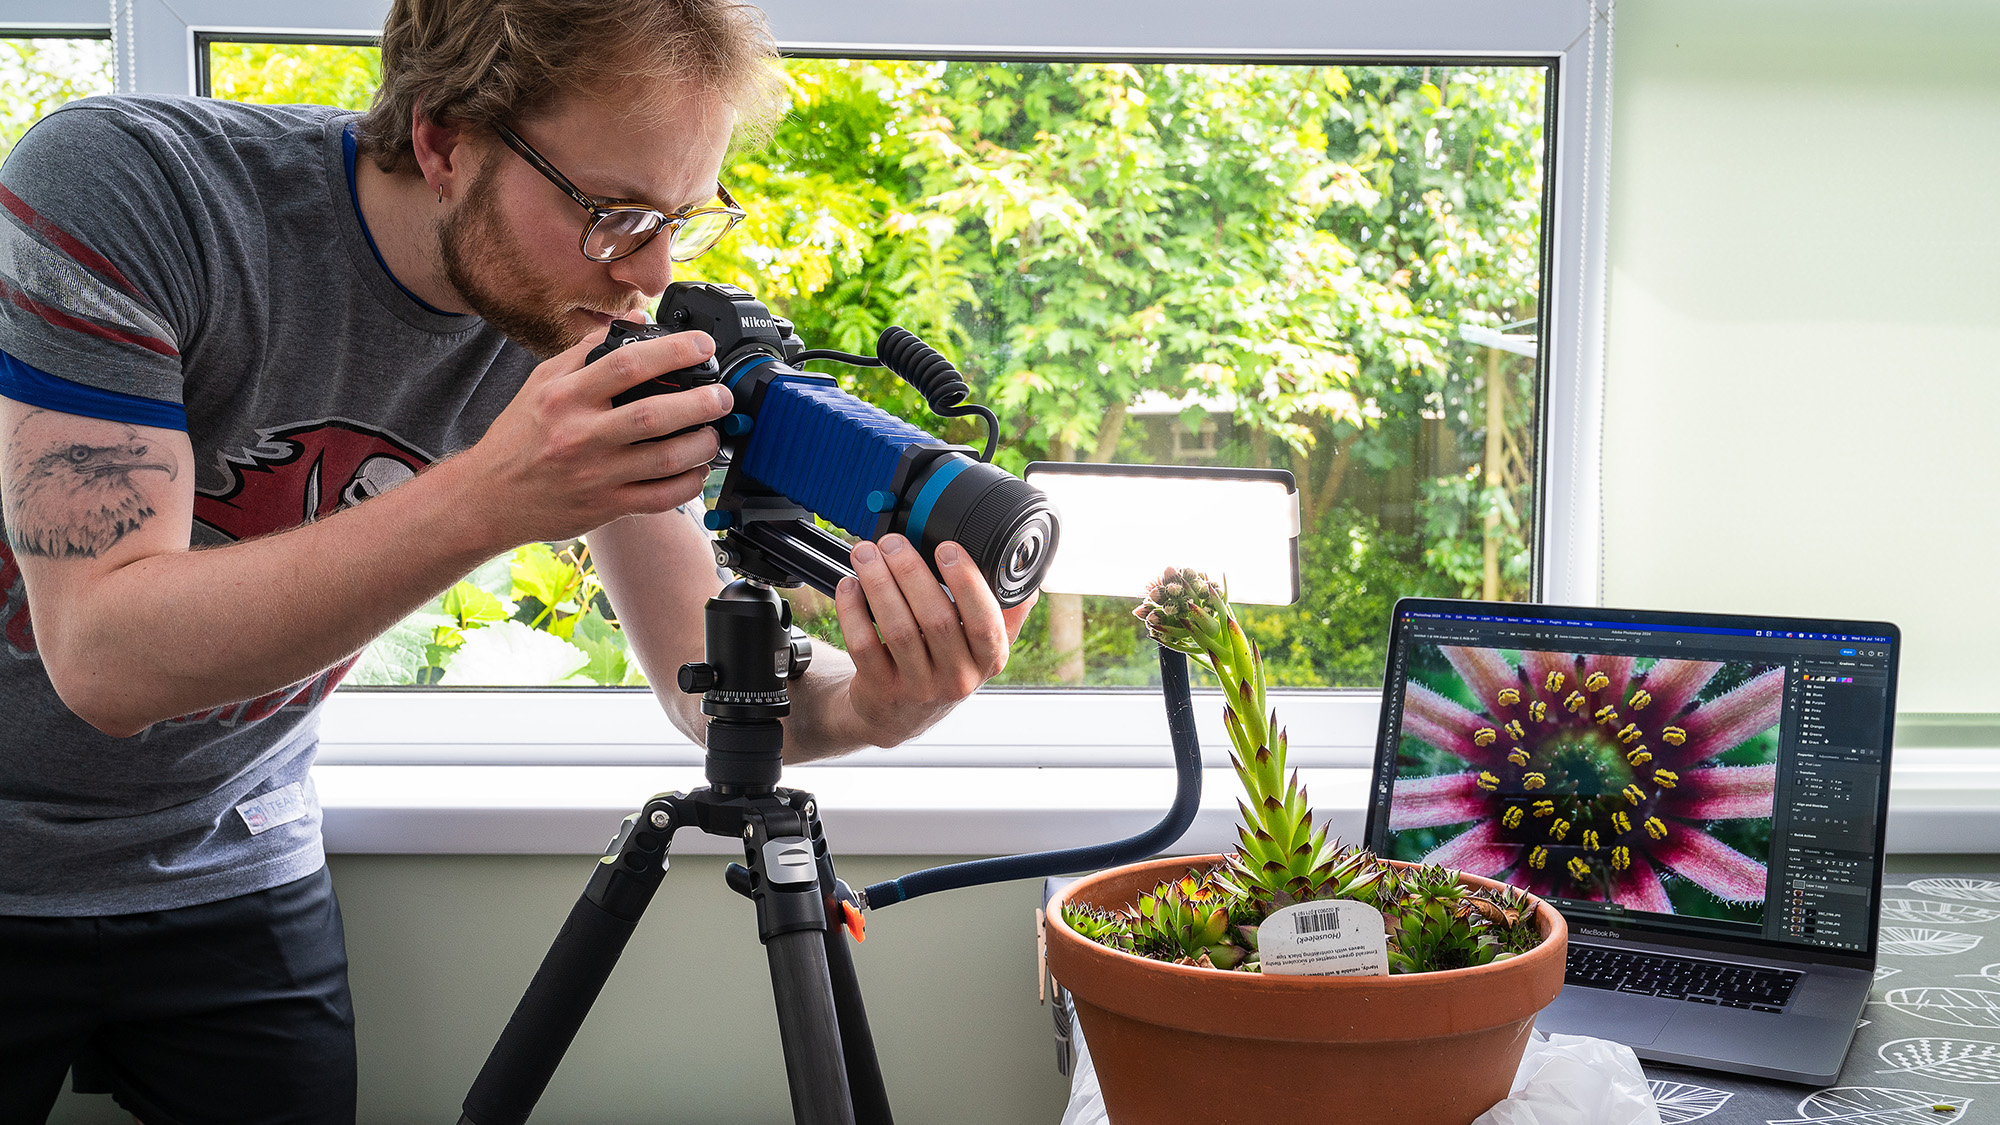
I've used my fair share of extension tubes, close-up filters and macro lenses over the years, but never macro bellows. So I was extremely excited to get my hands on the Novoflex Automatic Macro Bellows and use them to shoot an extreme close-up.
Macro bellows are essentially adjustable extension tubes. They work by increasing the distance between optic and sensor, which in turn increases the minimum focusing distance.
This means you can transform a standard lens, like my Nikon Z 40mm f/2, into an optic with true macro capabilities and beyond. You can pick up compatible bellows for various camera systems relatively cheaply.
- Macro bellows
- Tripod
- Camera
- Standard lens
- Focus-stacking software
Nikon even released its own range of F-mount bellows, some of which you can still find on the used market. The problem with conventional bellows is the lack of electronic connectors necessary for the camera and lens to communicate.
This means you have to control everything manually. You can’t even change the aperture unless your lens has a manual aperture ring.
That’s where the Novoflex Automatic Macro Bellows comes in. This German-made accessory maintains the connection between camera and lens, and is available in a huge range of mounts: Canon EF/RF, Nikon F/Z, Sony E, Fujifilm X, L-Mount and Micro Four Thirds.
So, read on and I'll show you how this incredibly fun piece of kit works. And don’t worry if you don’t have the same bellows as me; most of these tips and tricks are entirely transferable to other macro bellows and even macro photography in general.
1. Set your macro bellows up
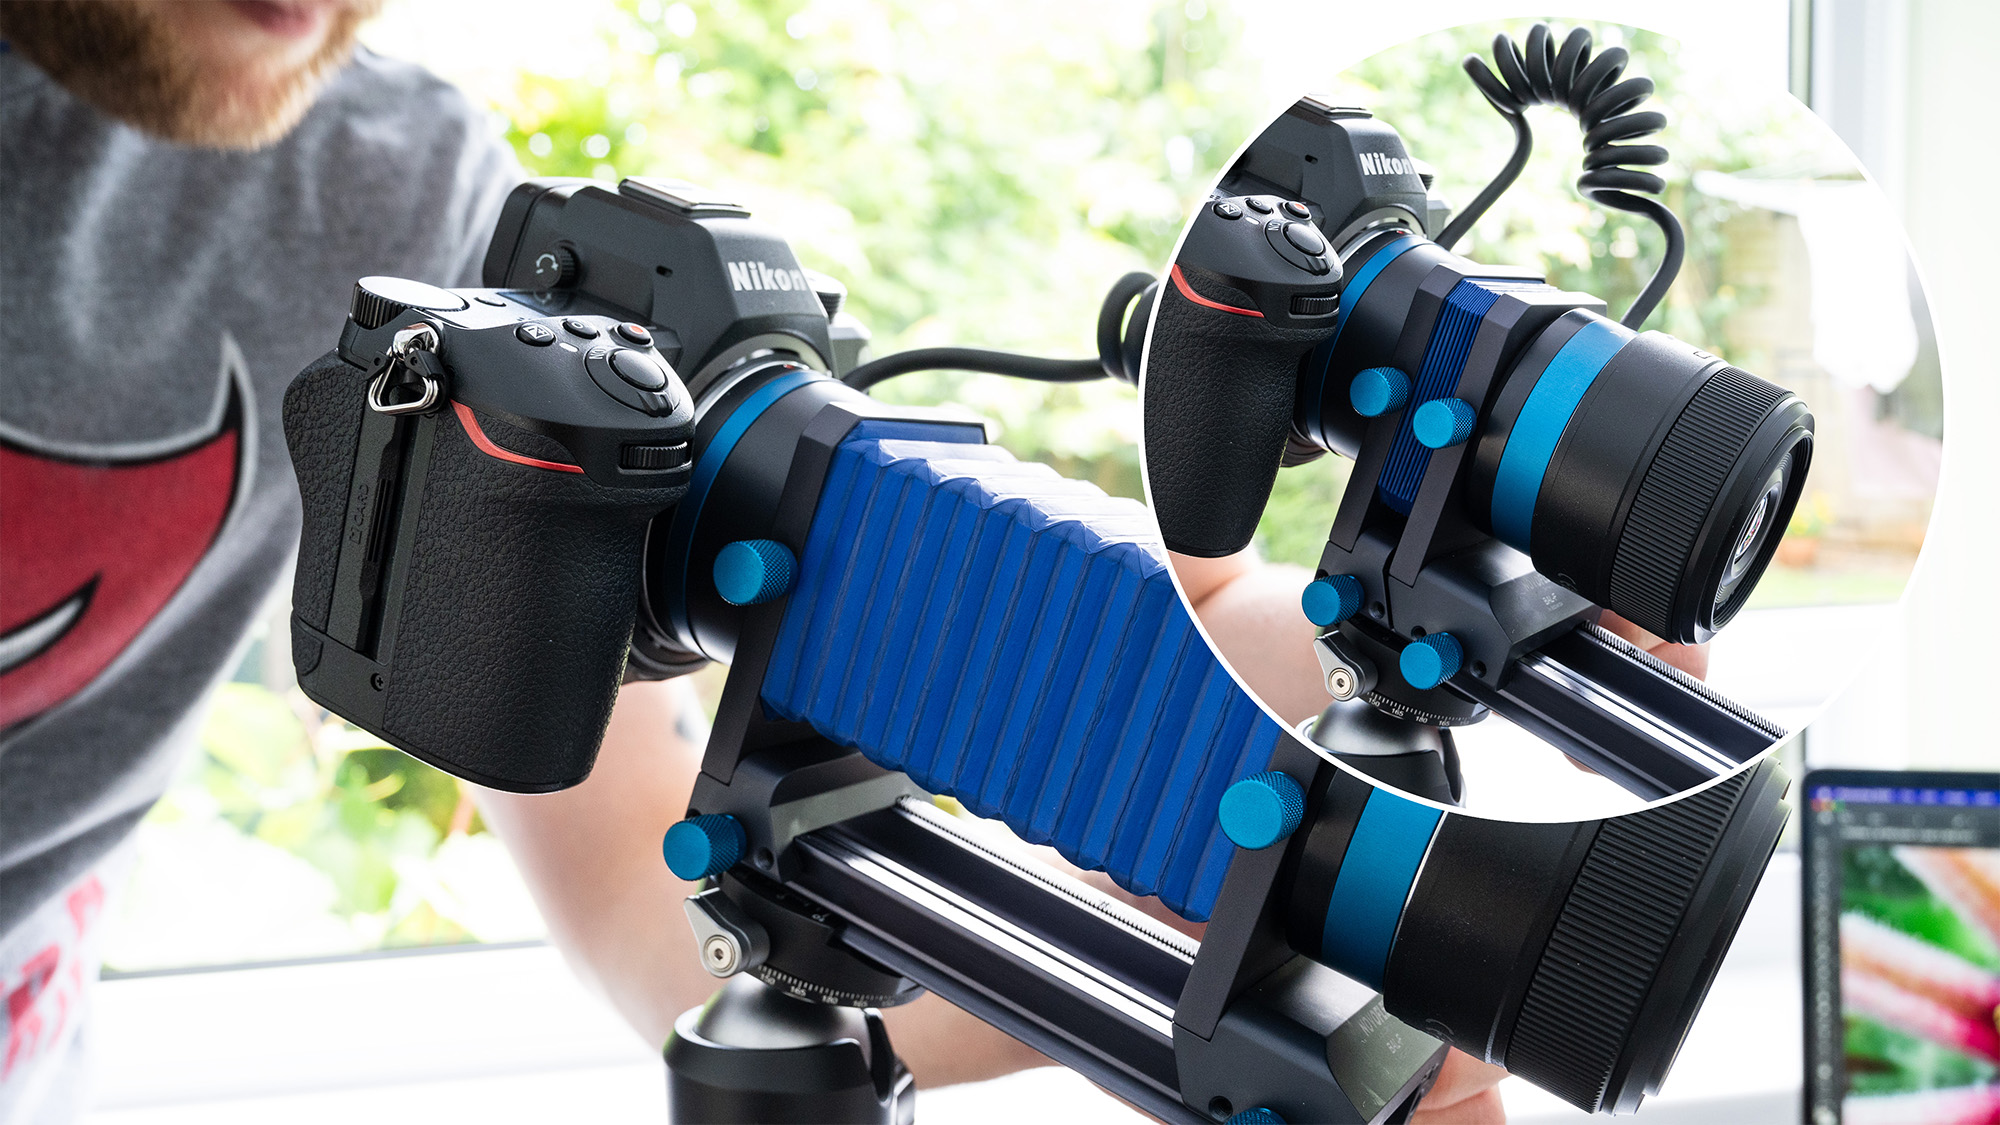
Unscrew the locking mechanism and extend your bellows to achieve the desired magnification – move the entire setup to alter the composition.
If you want to know how to achieve a specific magnification ratio, you can use an online extension-tube calculator. Bear in mind that at higher magnifications, less light is let into the camera. Live view is very useful here.
2. Camera settings
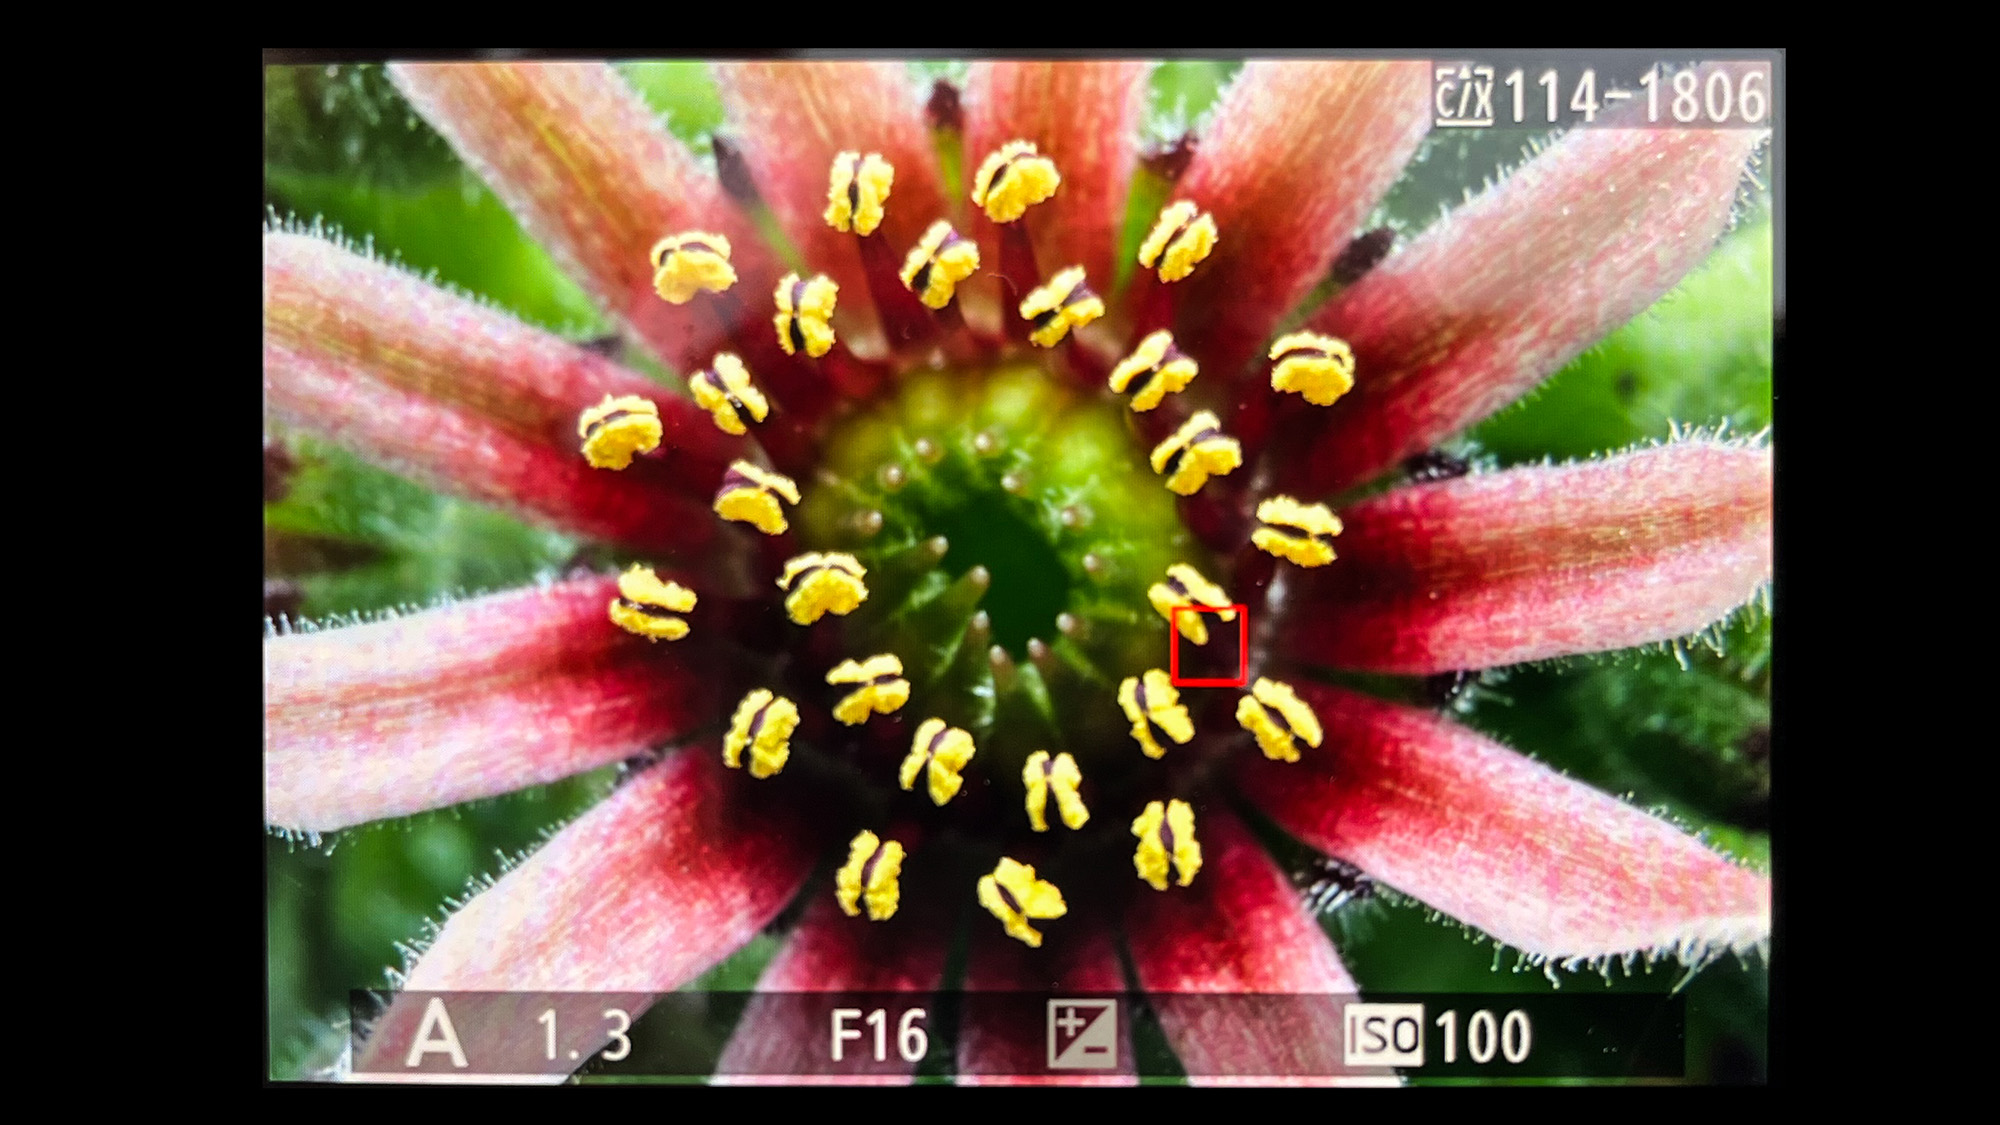
Traditional bellows prevent camera-lens communication, so you’ll need to use a lens with an aperture ring to alter the aperture. My Novoflex Bellows communicates seamlessly to provide full functionality, including AF.
I used a narrow aperture of f/16 to increase the unavoidably shallow depth of field. You may need to up your ISO if camera shake is an issue.
3. How to focus
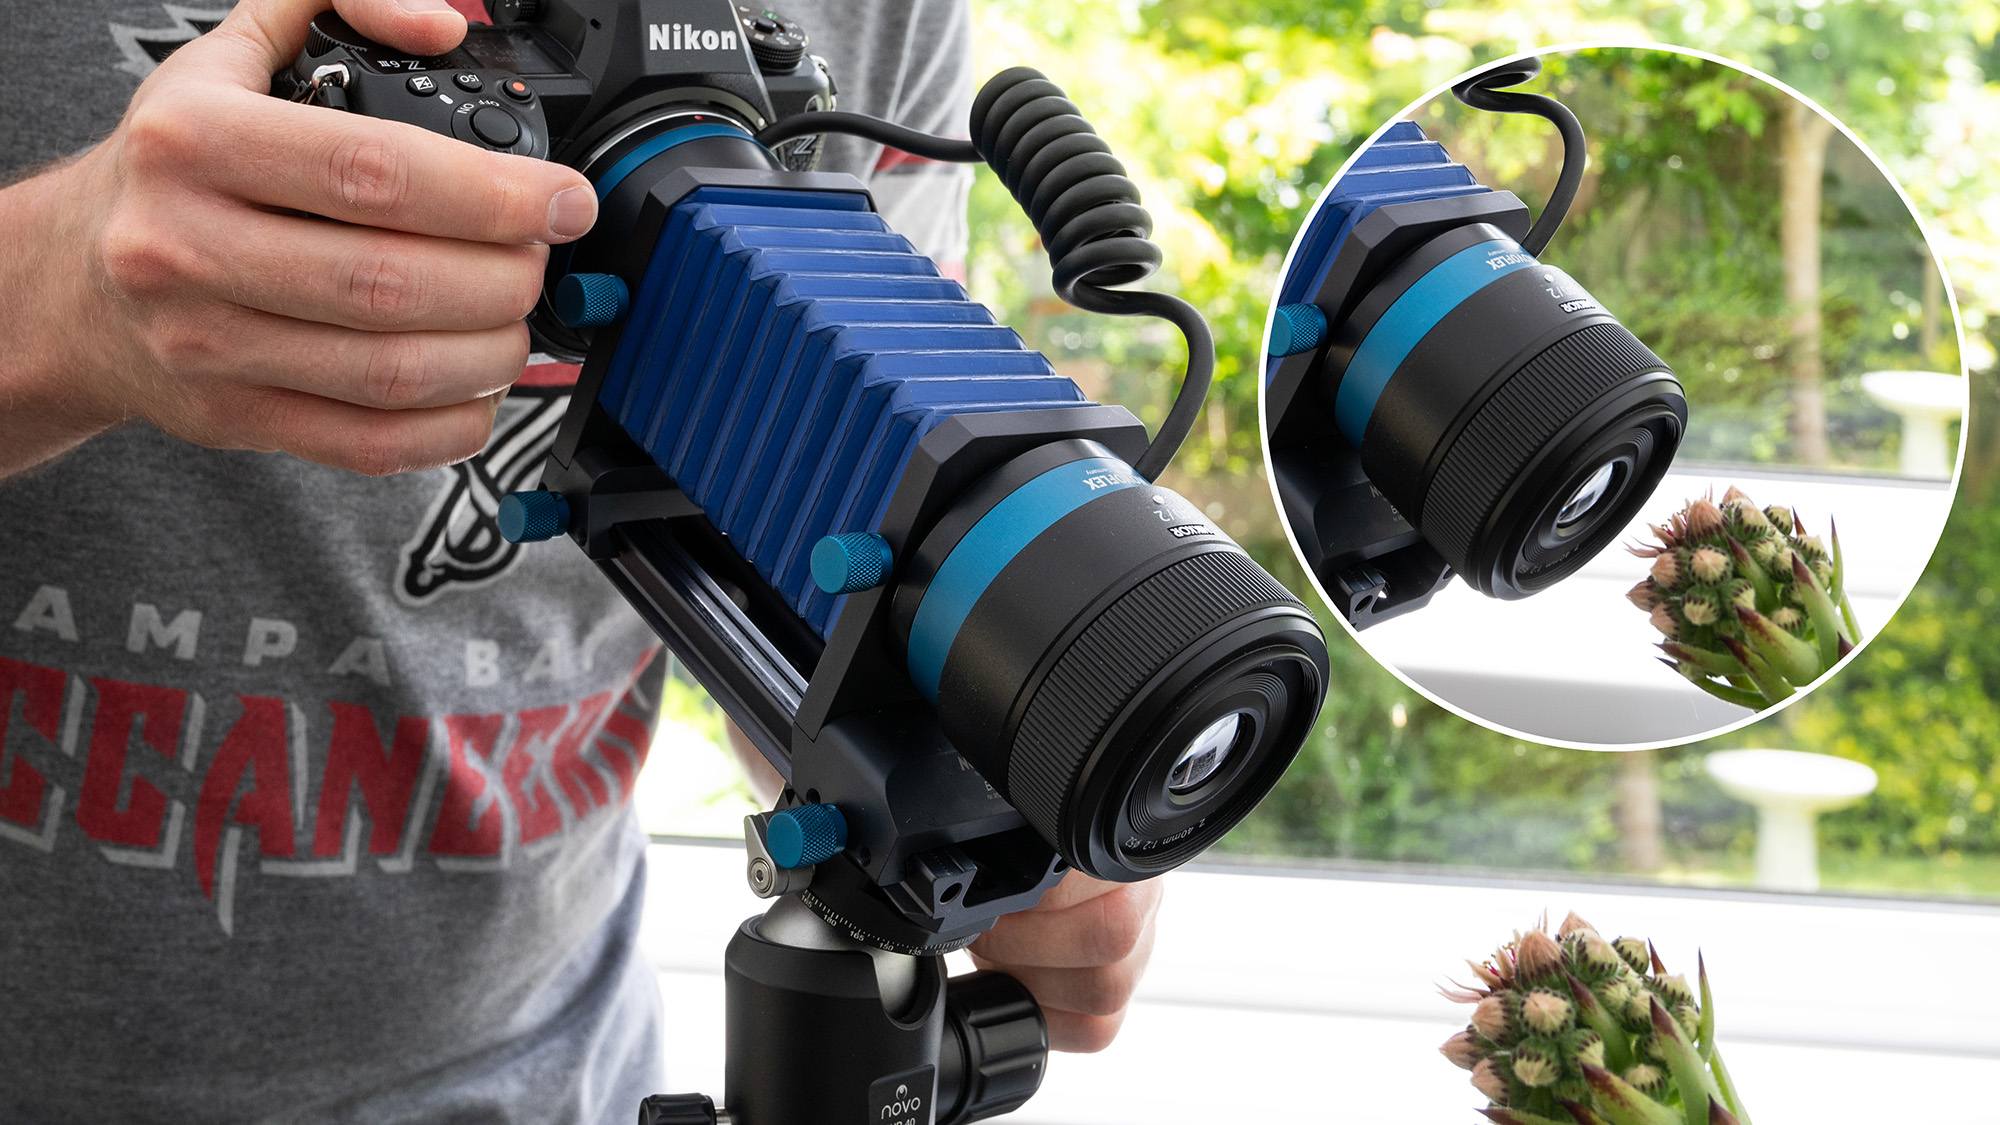
Even with my Automatic Bellows, I still recommend focusing manually. You can focus by retracting and extending the bellows, but this will alter the magnification.
This leaves using a focusing rail or focus ring. A rail is more precise, but moving the setup to focus when focus stacking can cause anomalies due to altering the framing, as can focus breathing.
4. Dealing with super-shallow depths of field

Extreme magnifications yield incredibly shallow depths of field (as you can see above). Unless you’re shooting something with very little depth you may need to focus stack.
Choose what you want sharp, focus on the area closest to the camera and capture the image. Adjust focus to where the image begins to soften and take another shot. Repeat until you’ve covered the entire subject.
5. Import your stack
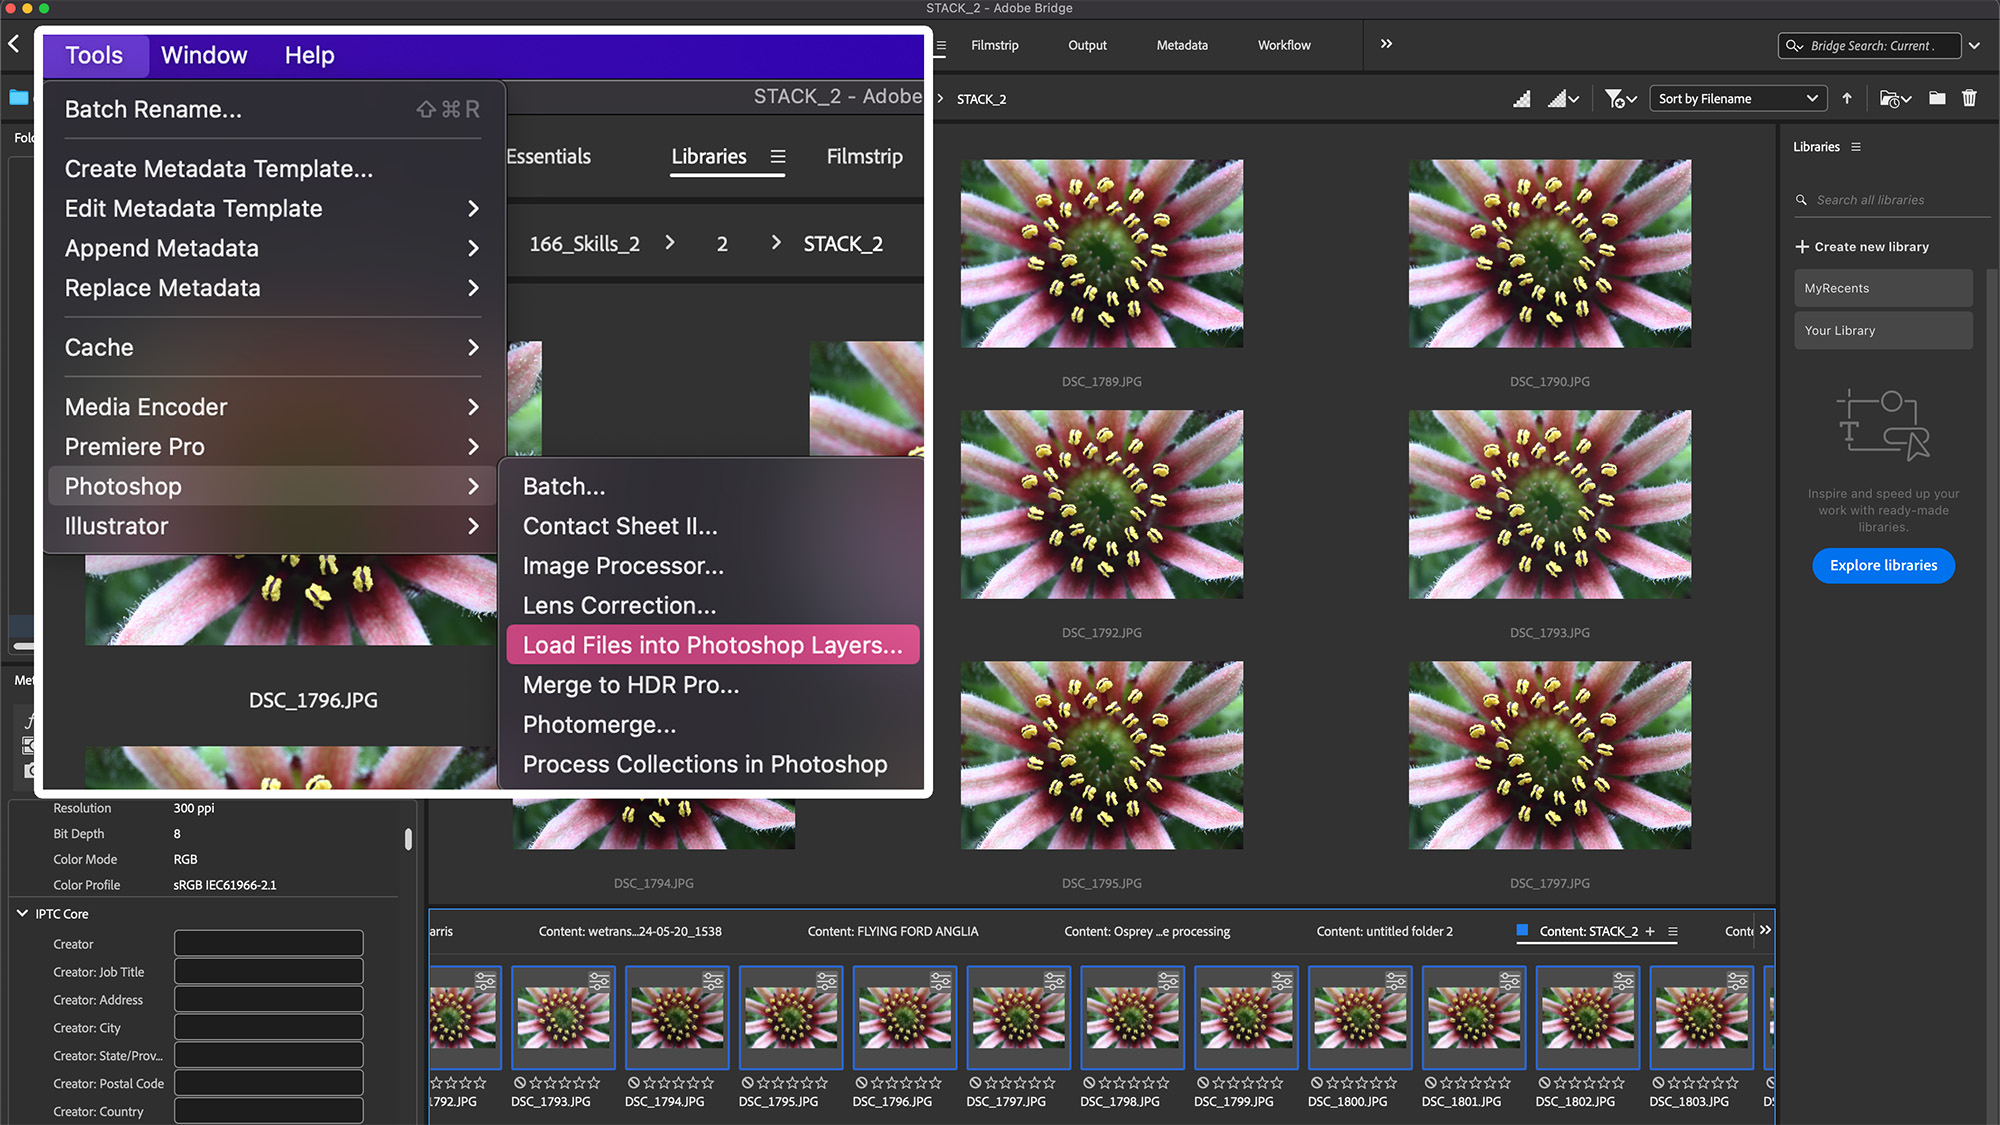
Helicon Focus is a popular dedicated focus-stacking software, but you can achieve desirable results in Adobe Photoshop.
Begin by opening your focus-stacked sequence in Adobe Bridge. Highlight the images in the stack and select Tools > Photoshop > Load Files into Photoshop Layers. All of the files will now load into the Layers panel of the same Photoshop document.
6. Align and blend
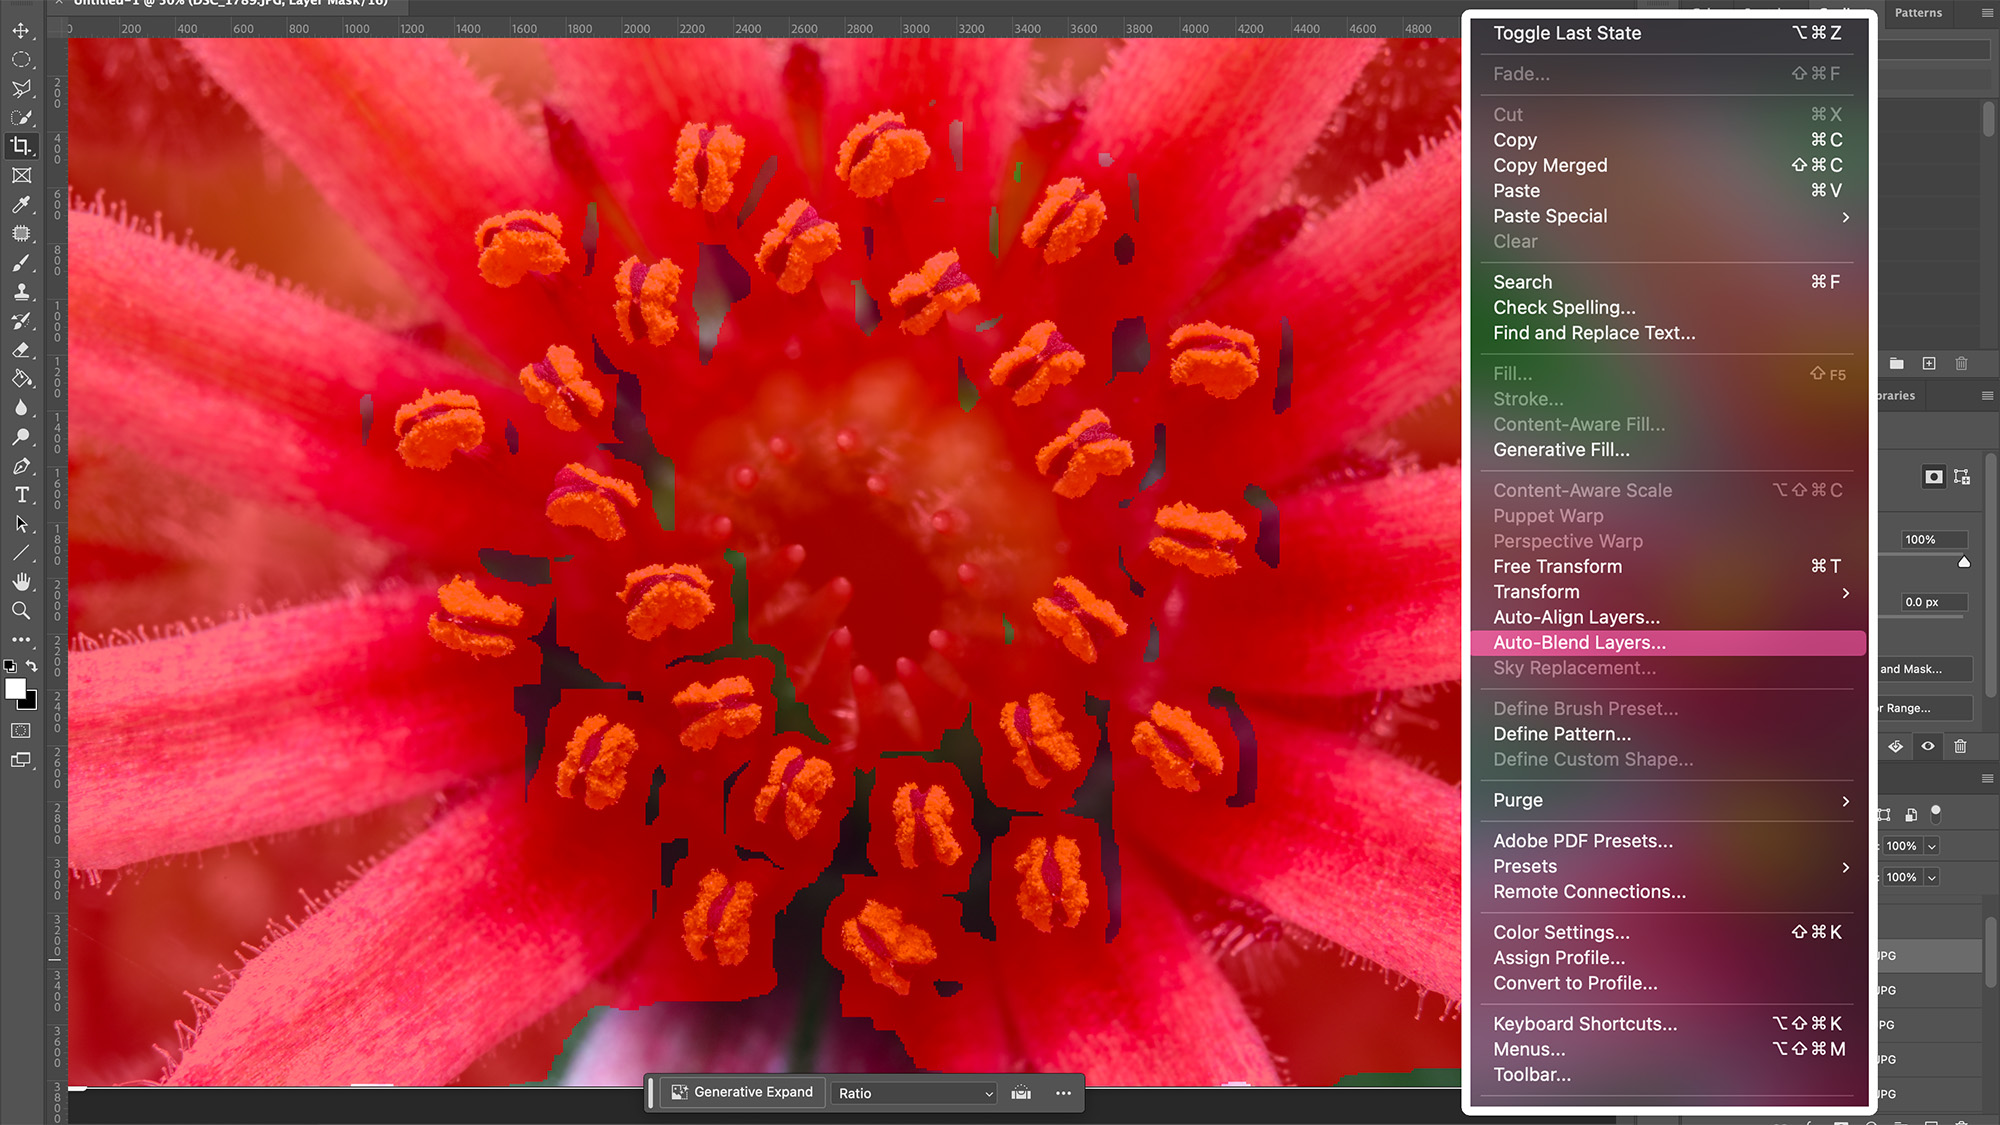
Highlight the stack in the Layers panel and select Edit > Auto-Align Layers. Ensure only ‘Auto’ is ticked in the Auto-Align Layers window and hit OK.
Once the images are aligned you can start the blending process by selecting Edit > Auto-Blend Layers. Check ‘Stack Images’ and ‘Seamless Tones and Colors’ in the Auto-Blend Layers window and hit OK to start the blend.
More Macro
If you want to get as close to your subject as possible, you can of course attach a macro lens to your bellows. But a standout feature of the Novoflex Automatic Bellows is the ability to detach the Reversing Adapter and use it as a fully automatic reversing ring with compatible lenses.
However, you can go a step further by pairing the reversing ring with the bellows to achieve even greater magnification (up to a whopping 6:1 magnification ratio and higher).
You might also like...
Check out the best camera for macro photography, the best macro lenses and the best extension tubes.
Get the Digital Camera World Newsletter
The best camera deals, reviews, product advice, and unmissable photography news, direct to your inbox!

Mike studied photography at college, honing his Adobe Photoshop skills and learning to work in the studio and darkroom. After a few years writing for various publications, he headed to the ‘Big Smoke’ to work on Wex Photo Video’s award-winning content team, before transitioning back to print as Technique Editor (later Deputy Editor) on N-Photo: The Nikon Magazine.
With bylines in Digital Camera, PhotoPlus: The Canon Magazine, Practical Photography, Digital Photographer, iMore, and TechRadar, he’s a fountain of photography and consumer tech knowledge, making him a top tutor for techniques on cameras, lenses, tripods, filters, and more. His expertise extends to everything from portraits and landscapes to abstracts and architecture to wildlife and, yes, fast things going around race tracks...
You must confirm your public display name before commenting
Please logout and then login again, you will then be prompted to enter your display name.
