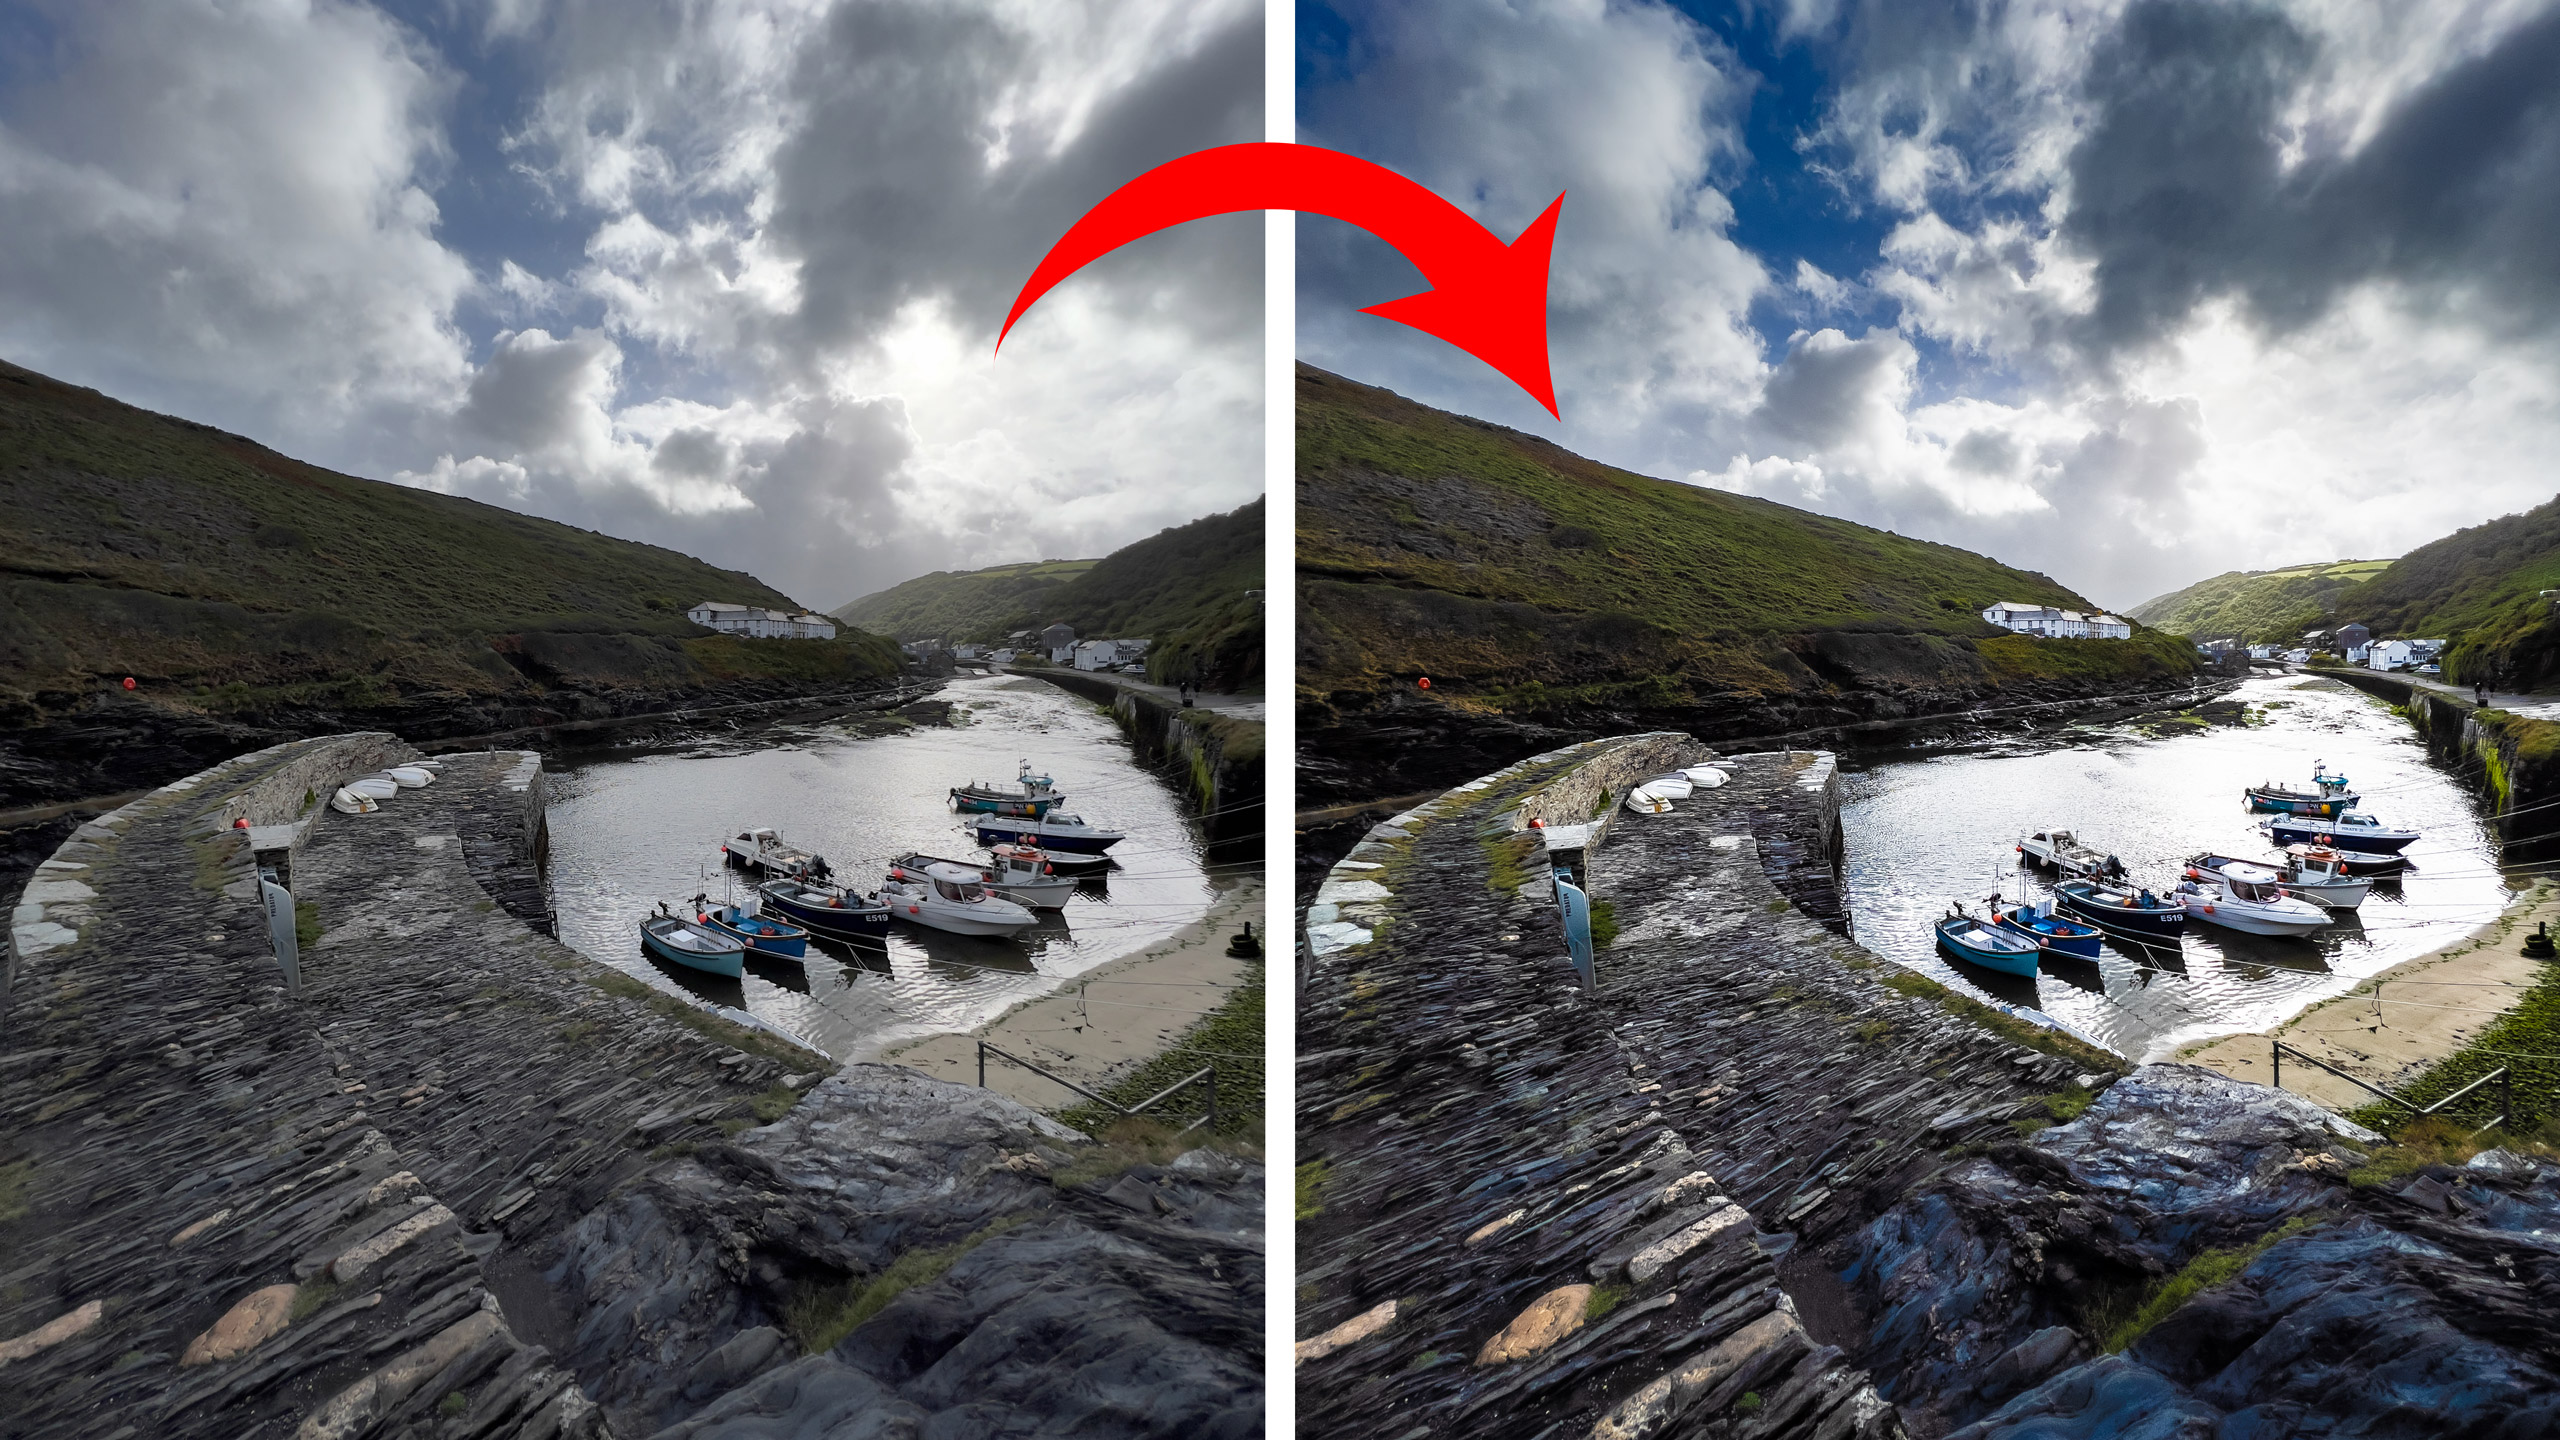
This is how I learned the exposure triangle and how I use it to shoot in manual mode
The exposure triangle needn’t be daunting for beginners. If you’re ready to take full control of your camera’s exposure settings, I’ll put you on the right path…
So, you’ve upgraded your phone or point-and-shoot camera and picked up one of the best cameras for beginners. The only logical thing to do now is to finally get to grips with the exposure triangle and switch to manual mode.
Use your camera's built-in light meter to make sure your exposure is correct. This is usually depicted as a bar that's visible through the viewfinder and live view. The point on the bar will move as you change your exposure settings – when it’s centered the exposure is correct. If you have one of the best mirrorless cameras, you'll likely have an electronic viewfinder. This will provide an LED preview of the scene you’re framing and the exposure will change in real time as you alter your exposure settings. When the exposure looks balanced, you're good to go!
If you’re wondering why this is so important, it’s what sets a serious DSLR or mirrorless camera apart from something more casual. Manual mode prevents the camera from making the technical decisions and hands the exposure controls – ISO, aperture, and shutter speed – over to you.
I’ve been writing photography tutorials for years and I reckon this is the single hardest thing for beginner photographers to get their head around. So, if you’re finally ready to conquer manual mode, you’ve come to the right place. In fact, I reckon I can get you shooting in manual mode by the end of this article. Are you up for the challenge?
This could be the most important photography tutorial you read... EVER!
Mike knows a thing or two about the exposure triangle, because he’s been producing photography tutorials for years, previously as Deputy Editor of N-Photo: The Nikon Magazine and now as Digital Camera World’s How To Editor. From macro to astro, he’s shot almost every photography genre you can think of. And when he’s not out in the field with his Nikon Z8, he’s hammering away at his desk to bring you brilliant jargon busters and top-notch tutorials.
The exposure triangle
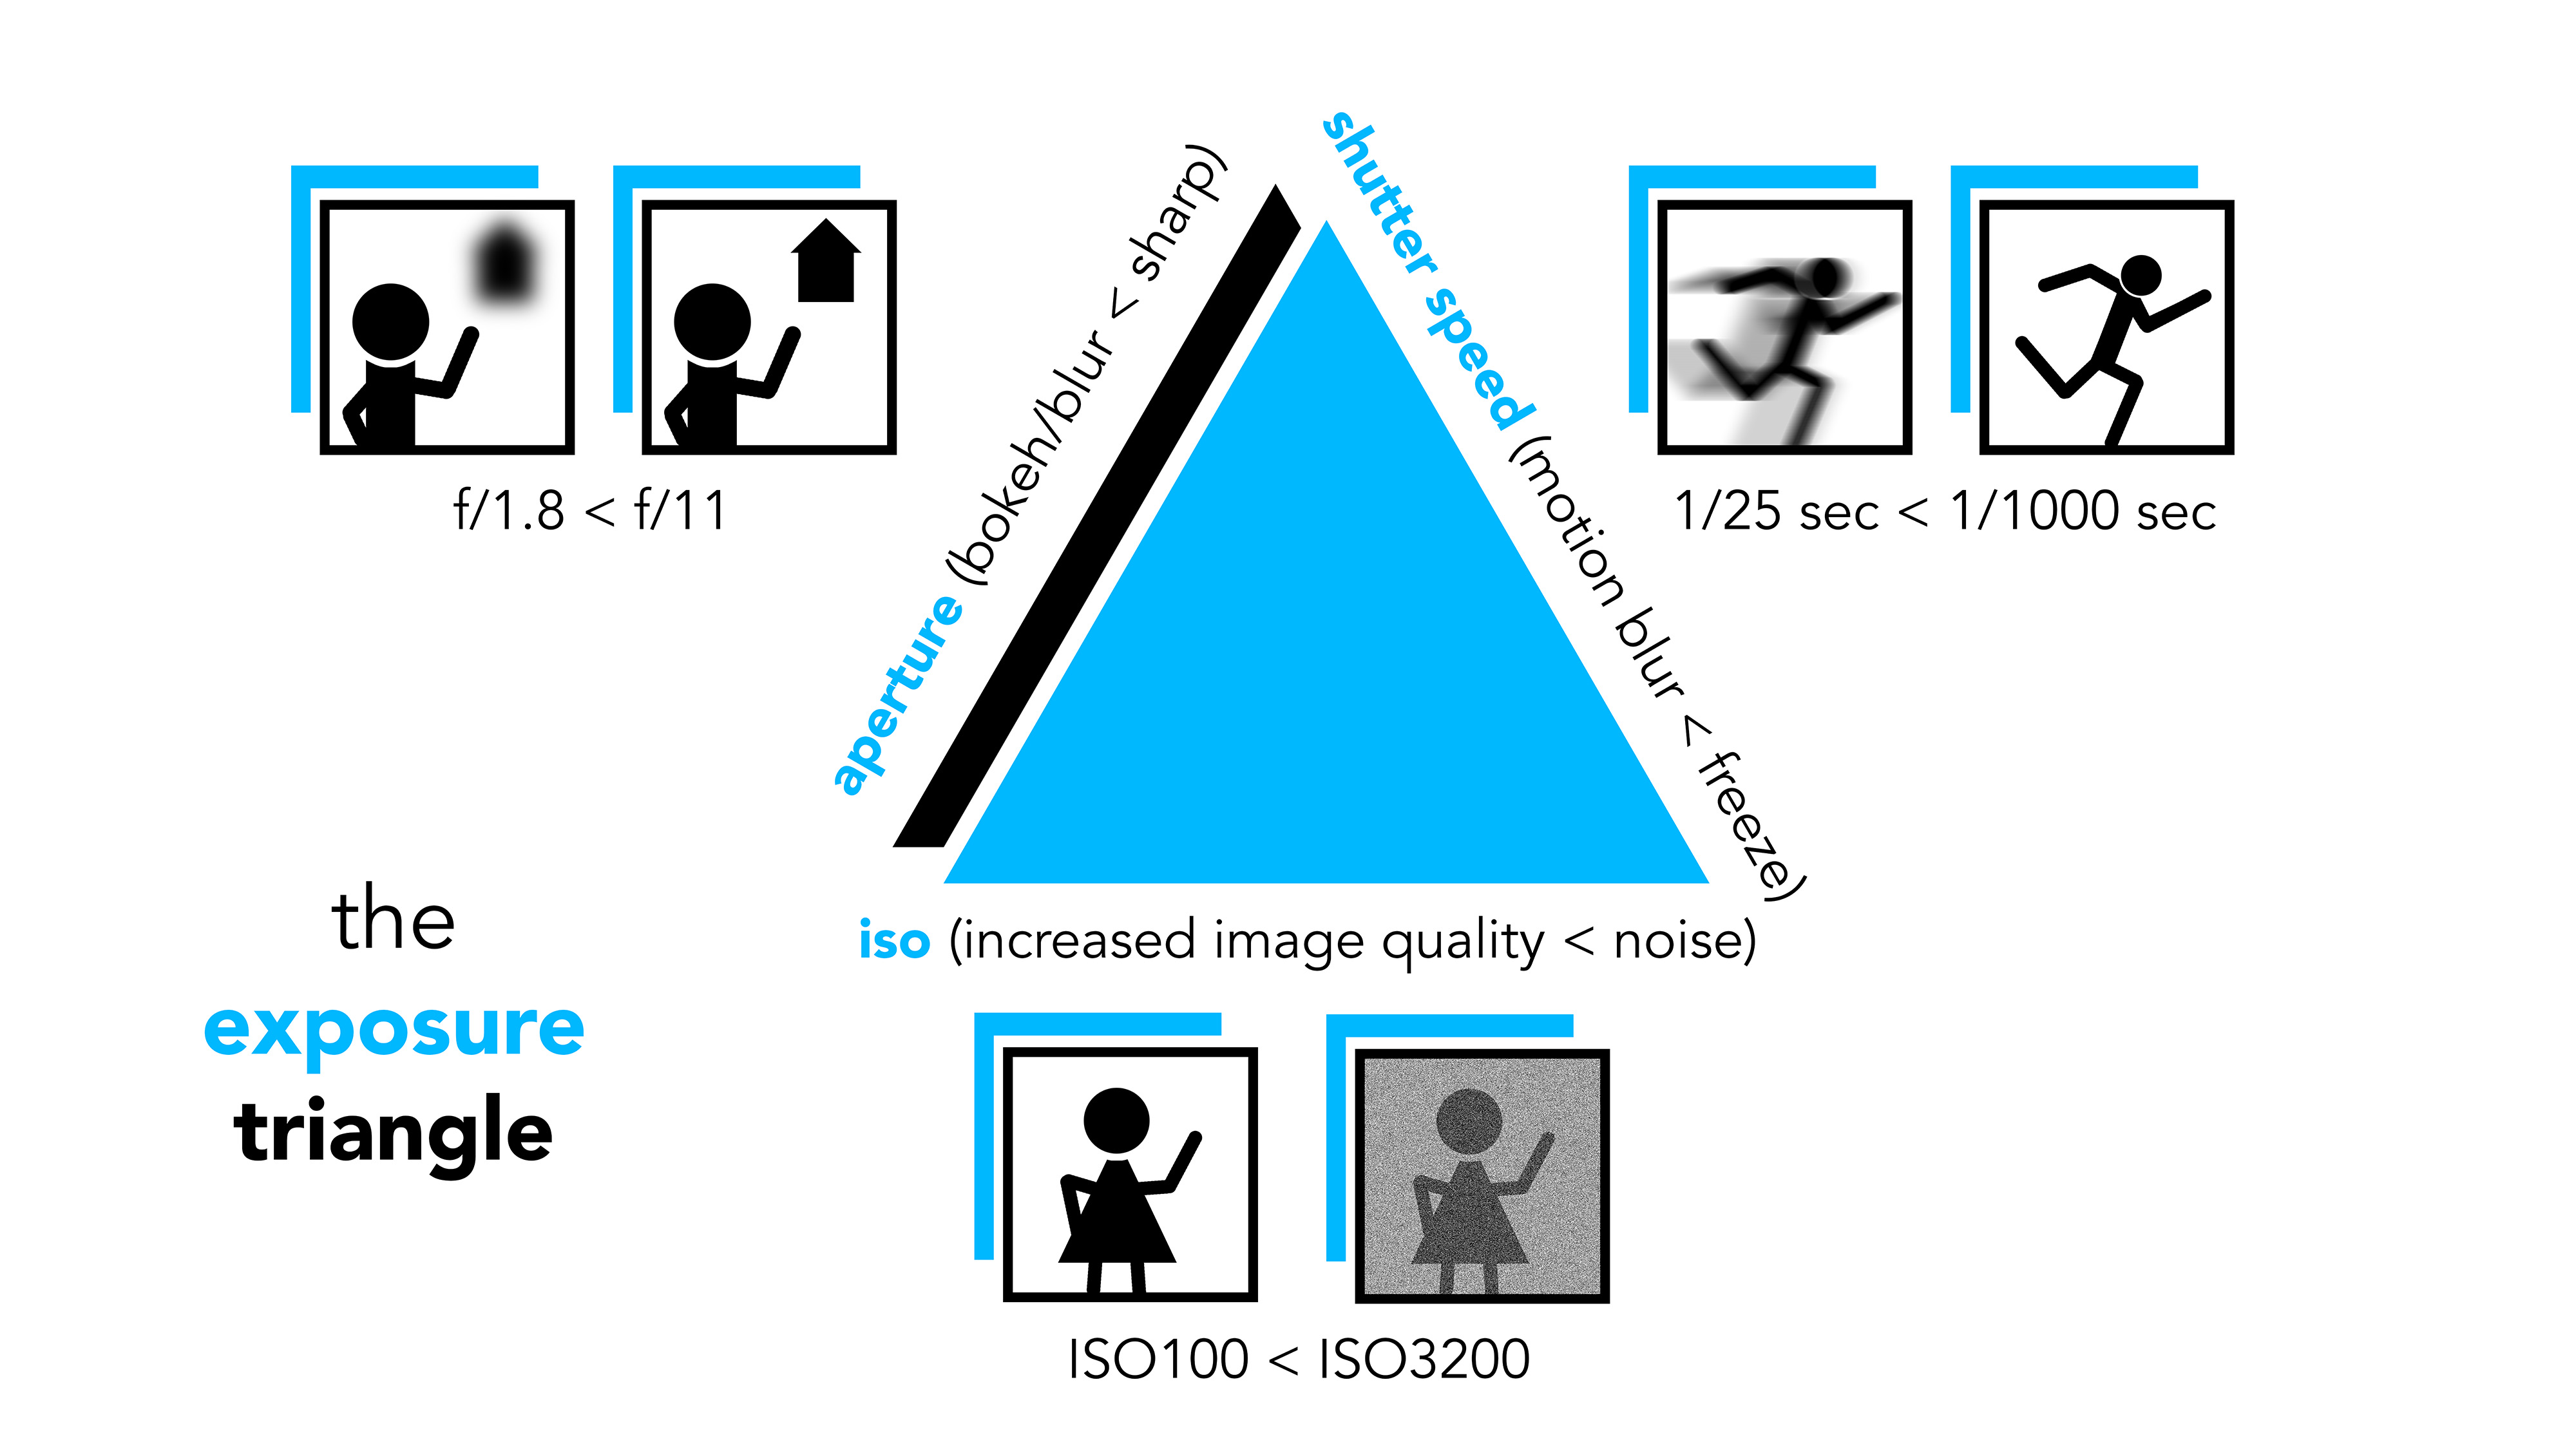
The exposure triangle comprises three exposure settings that you might already be familiar with: ISO, aperture, and shutter speed. I always think of them in that specific order, exactly why I’ll explain later. For now, let’s make sure you understand how each of these settings will affect your images. Referring to the pictogram (above) will help.
The exposure triangle: What is ISO?
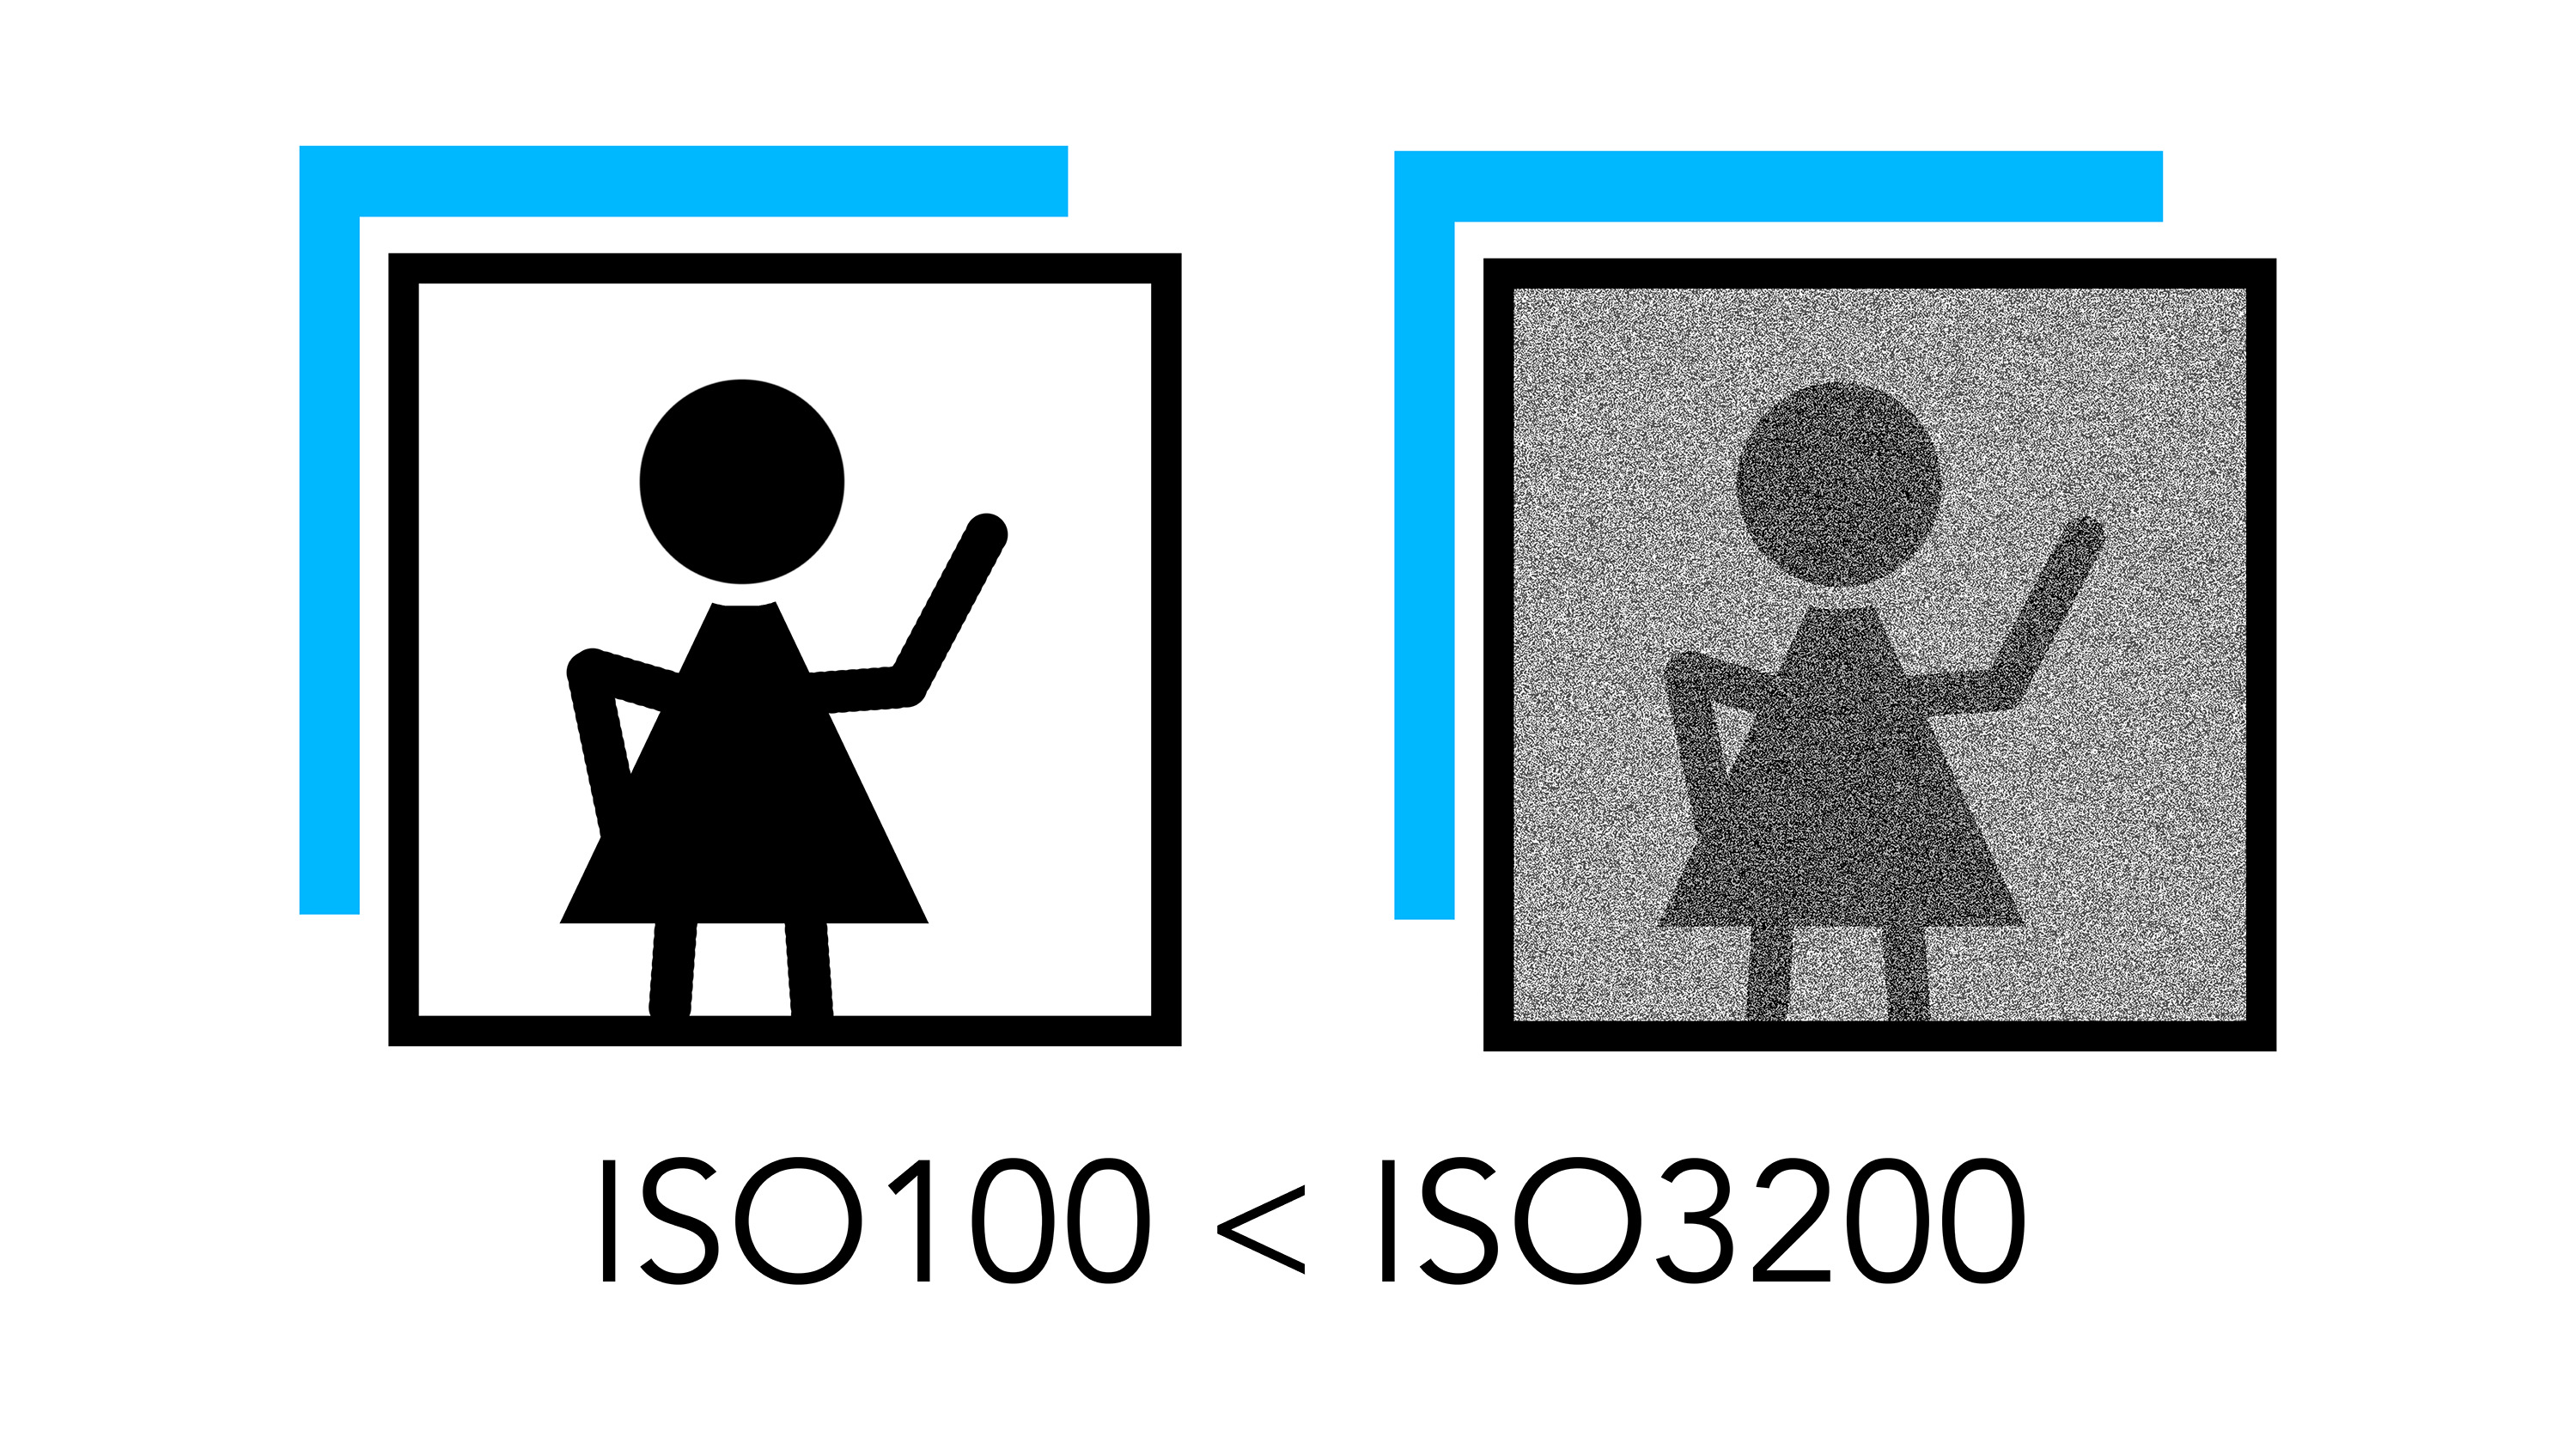
ISO is used to digitally enhance the sensitivity of the camera sensor, the higher the ISO, the more sensitive the sensor is to light. All you need to know is that a lower ISO will allow your camera to gather less light (darkening the exposure) and a higher ISO will allow your camera to gather more light (brightening the image). However, there is a trade-off when increasing the ISO and that trade-off is called noise. Noise is a luminous or black-and-white grain that increasingly reduces image quality, the higher you push the ISO.
The exposure triangle: What is Aperture?
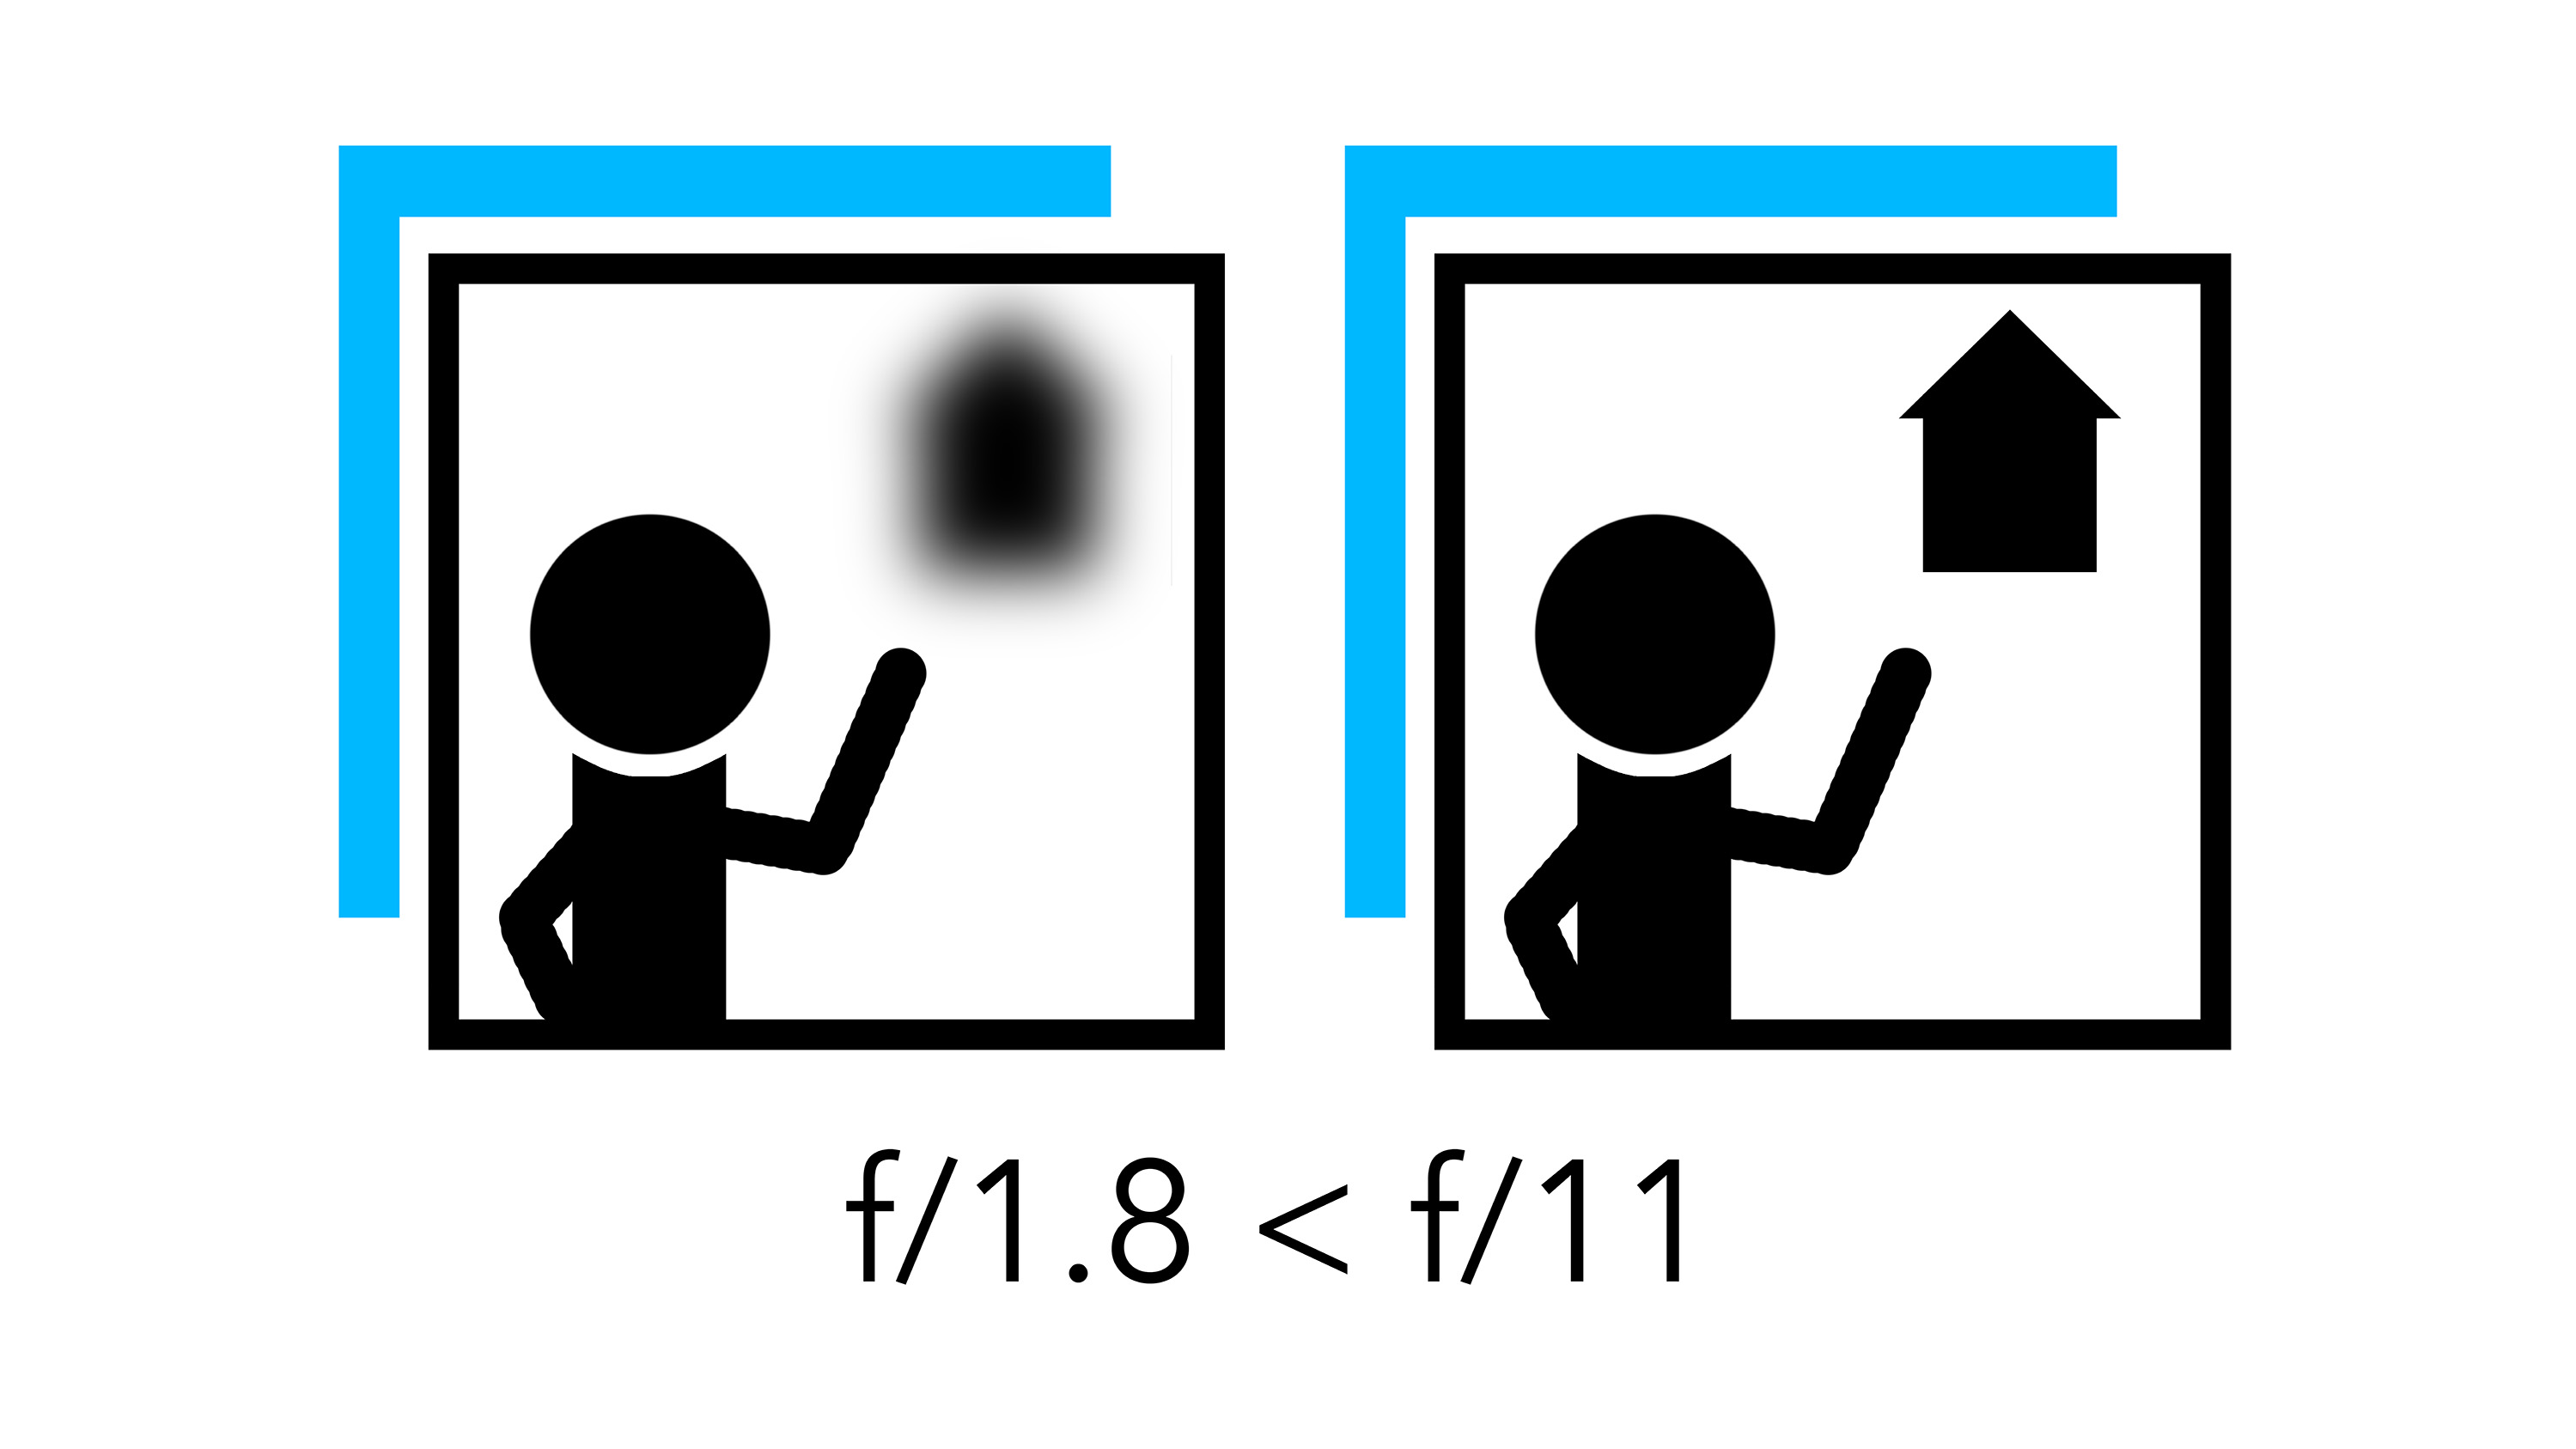
Most lenses have a variable aperture, which is simply an opening that you can make wider or narrower to let in more or less light, respectively. Widen the aperture (which means lowering the f-number) and you’ll let in more light, brightening the image. Narrow the aperture (which means increasing the f-number) and you’ll let in less light, darkening the image.
But aperture also affects a visual phenomenon called depth of field. This simply refers to how blurry or sharp things are in relation to the point of focus. All you need to remember is that a narrow aperture produces a wider depth of field and a wider aperture produces a shallower depth of field. A wider depth of field means elements of the image in front of and behind the point of focus appear sharper, and a shallower depth of field means elements appear blurrier.
The trade-off here is that precise focusing can prove harder at very wide apertures, due to the very shallow depth of field. And at very narrow apertures, an optical distortion called diffraction becomes visible, which will soften even areas of sharp focus. Generally avoid going beyond f/16 to avoid noticeable diffraction.
Note: Depth of field is also affected by both focal length and distance, but these things are not directly related to exposure, so I’m not going to overcomplicate things in this article.
The exposure triangle: What is shutter speed?
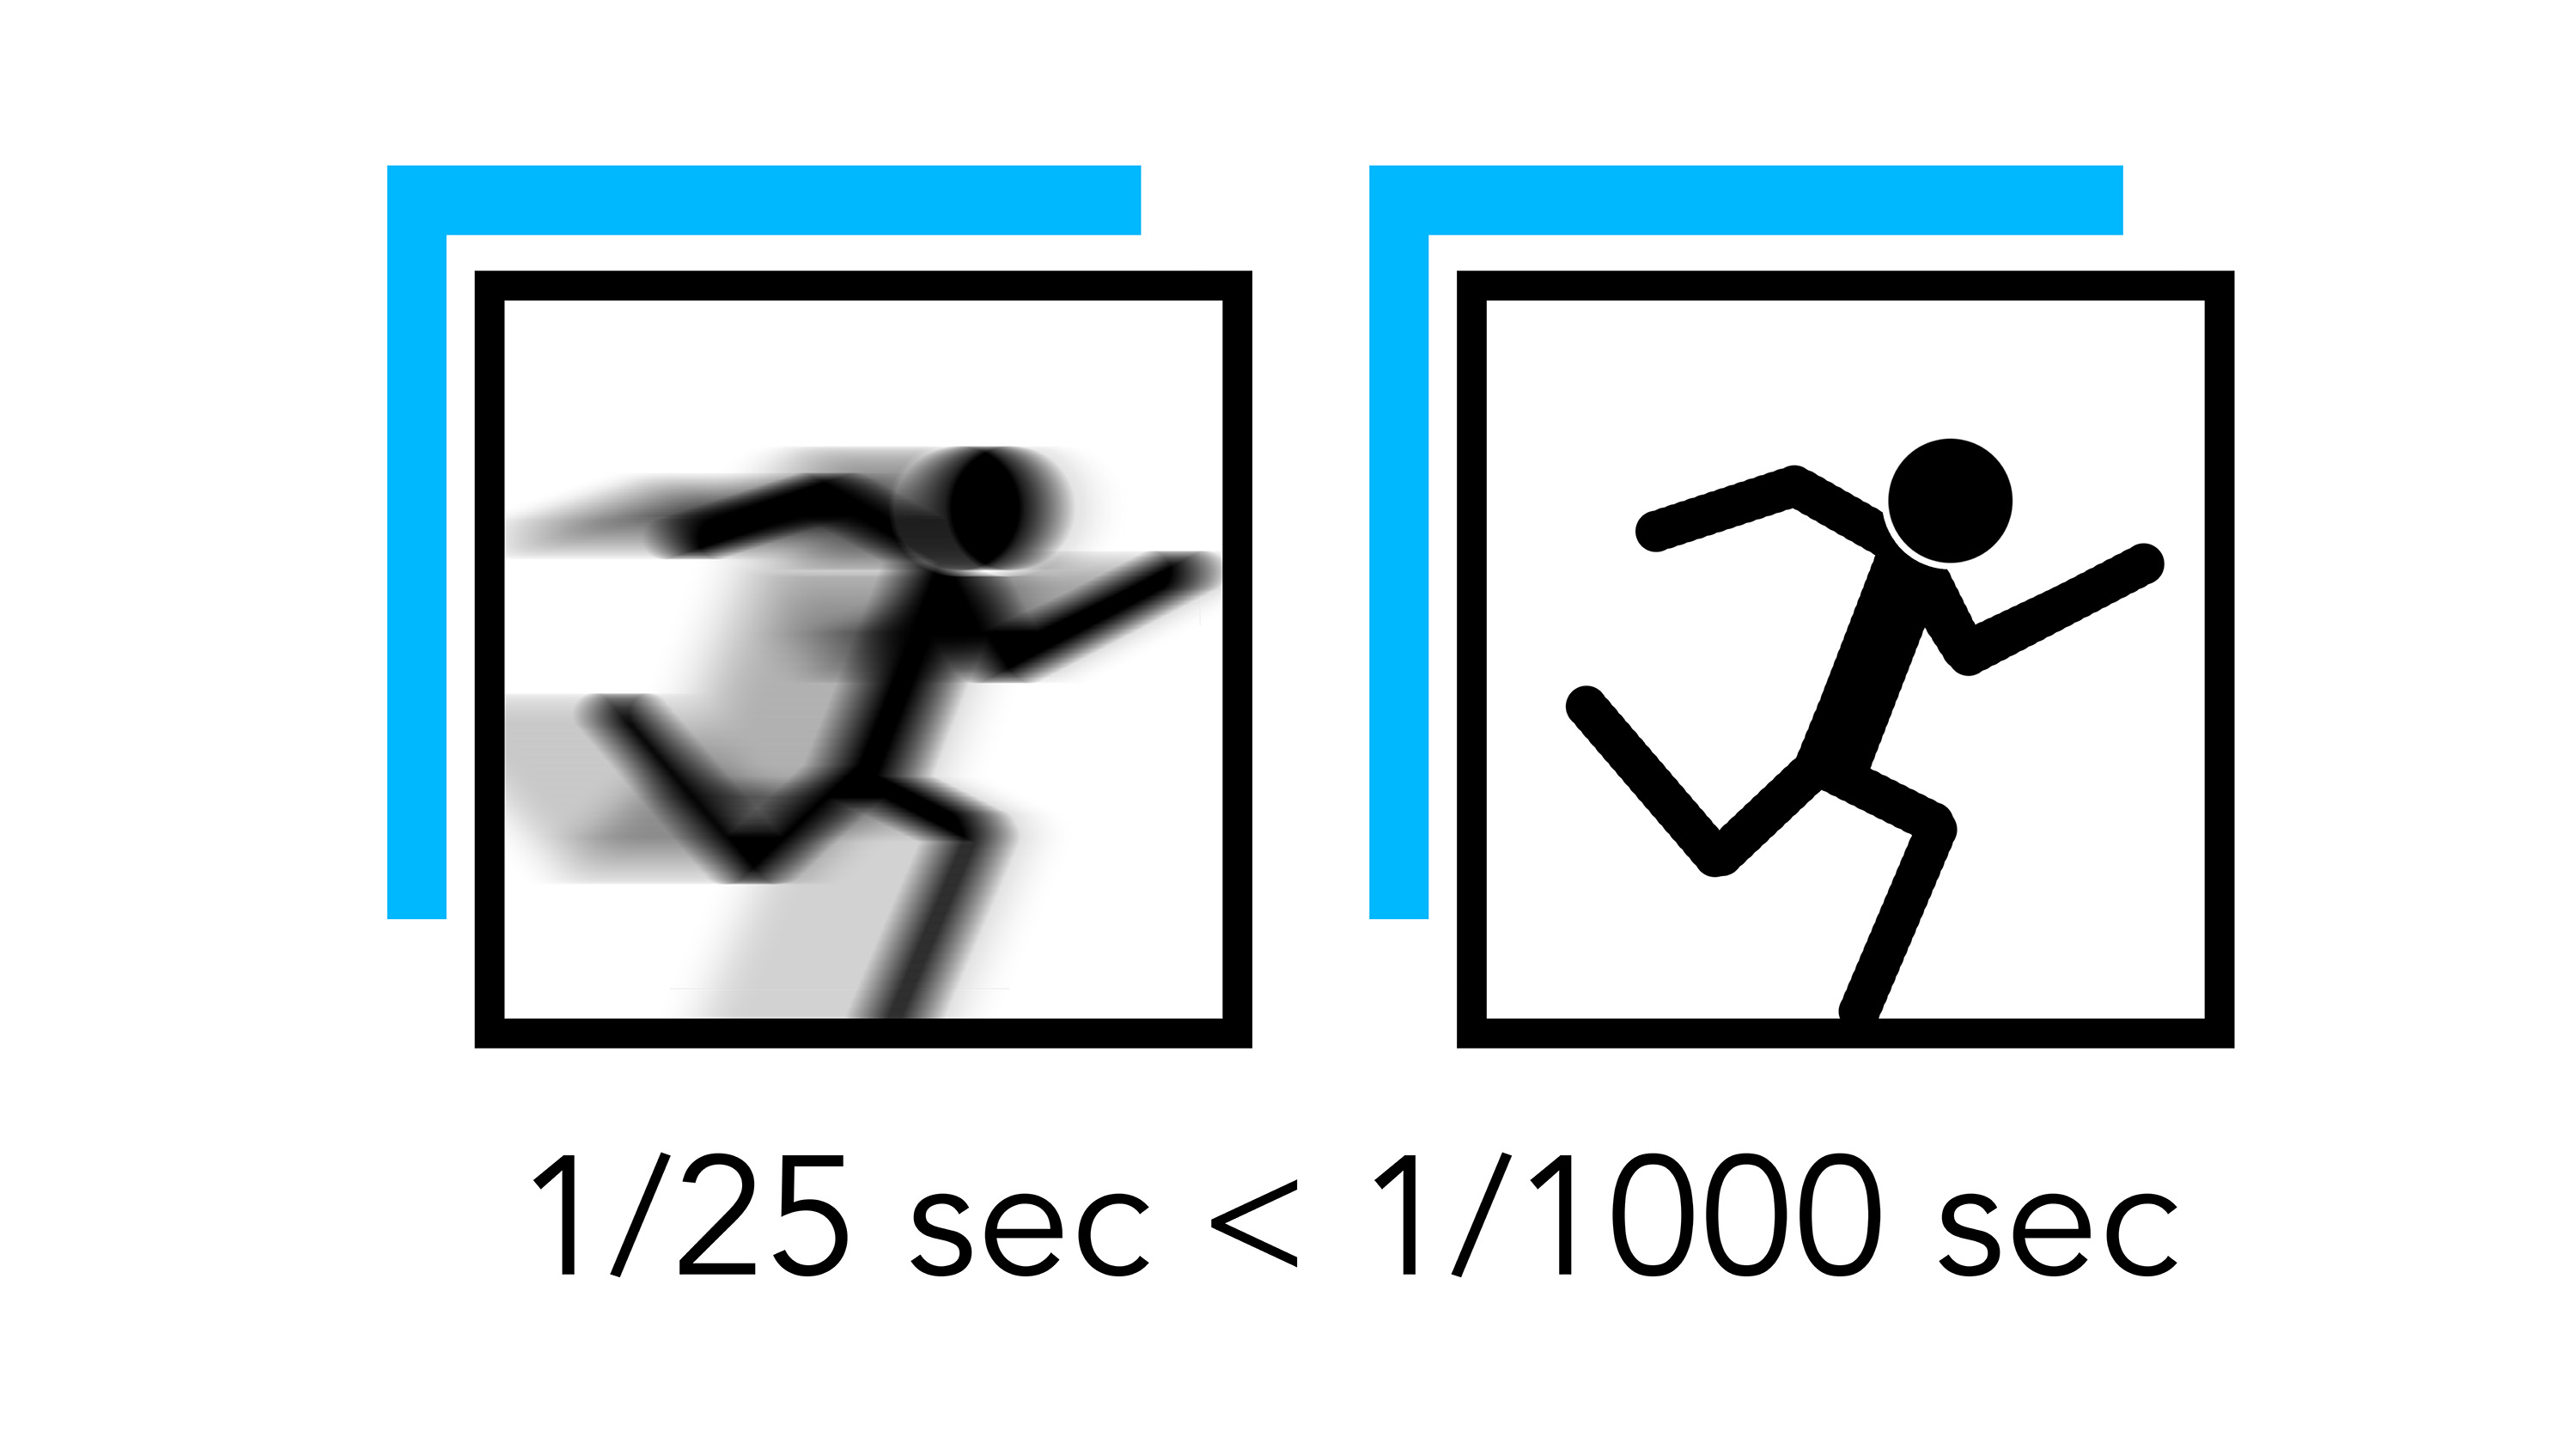
Shutter speed is arguably the easiest exposure setting to get your head around. It refers to how long the shutter stays open. The longer the shutter is open, the more light can enter the camera (brightening the image). And the shorter the amount of time it’s open for, the less light can enter the camera (darkening the image). As always, there’s a trade-off and in this case it’s motion blur.
Slower (or longer) shutter speeds will cause moving objects in your image to blur. Both Slower shutter speeds and faster objects will produce more motion blur. Shorter (or faster) shutter speeds are therefore used to freeze movement. The same logic applies, both shorter shutter speeds and slower objects will produce less motion blur.
You’ll often hear shutter speed referred to as exposure length. A longer exposure simply has a slower shutter speed and a shorter exposure simply has a faster shutter speed. For most images, the photographer will try to achieve a shutter speed that’s fast enough to freeze any movement within the frame. And/or micro-movements of the camera when it’s handheld (this is called camerashake).
How to apply the exposure triangle (and cheat)
Now you know exactly how each exposure setting affects your camera and imagery, it's time to put them to use. And I have a couple of little hacks that'll make your life much easier. Remember when I said that I always think of ISO, aperture, and shutter speed in that same order? That’s because this is typically the order I input the settings.
This means my shutter speed – inputted last – is determined via the camera’s in-built light meter, I don’t have determine it myself. If it turns out to be too slow, I can then adjust my settings accordingly.
I’m going to break things down further by showing you how I would apply manual settings to three different shooting scenarios. After all, the exposure settings you choose will very much depend on your subject and lighting conditions.
Photographing a landscape on a tripod
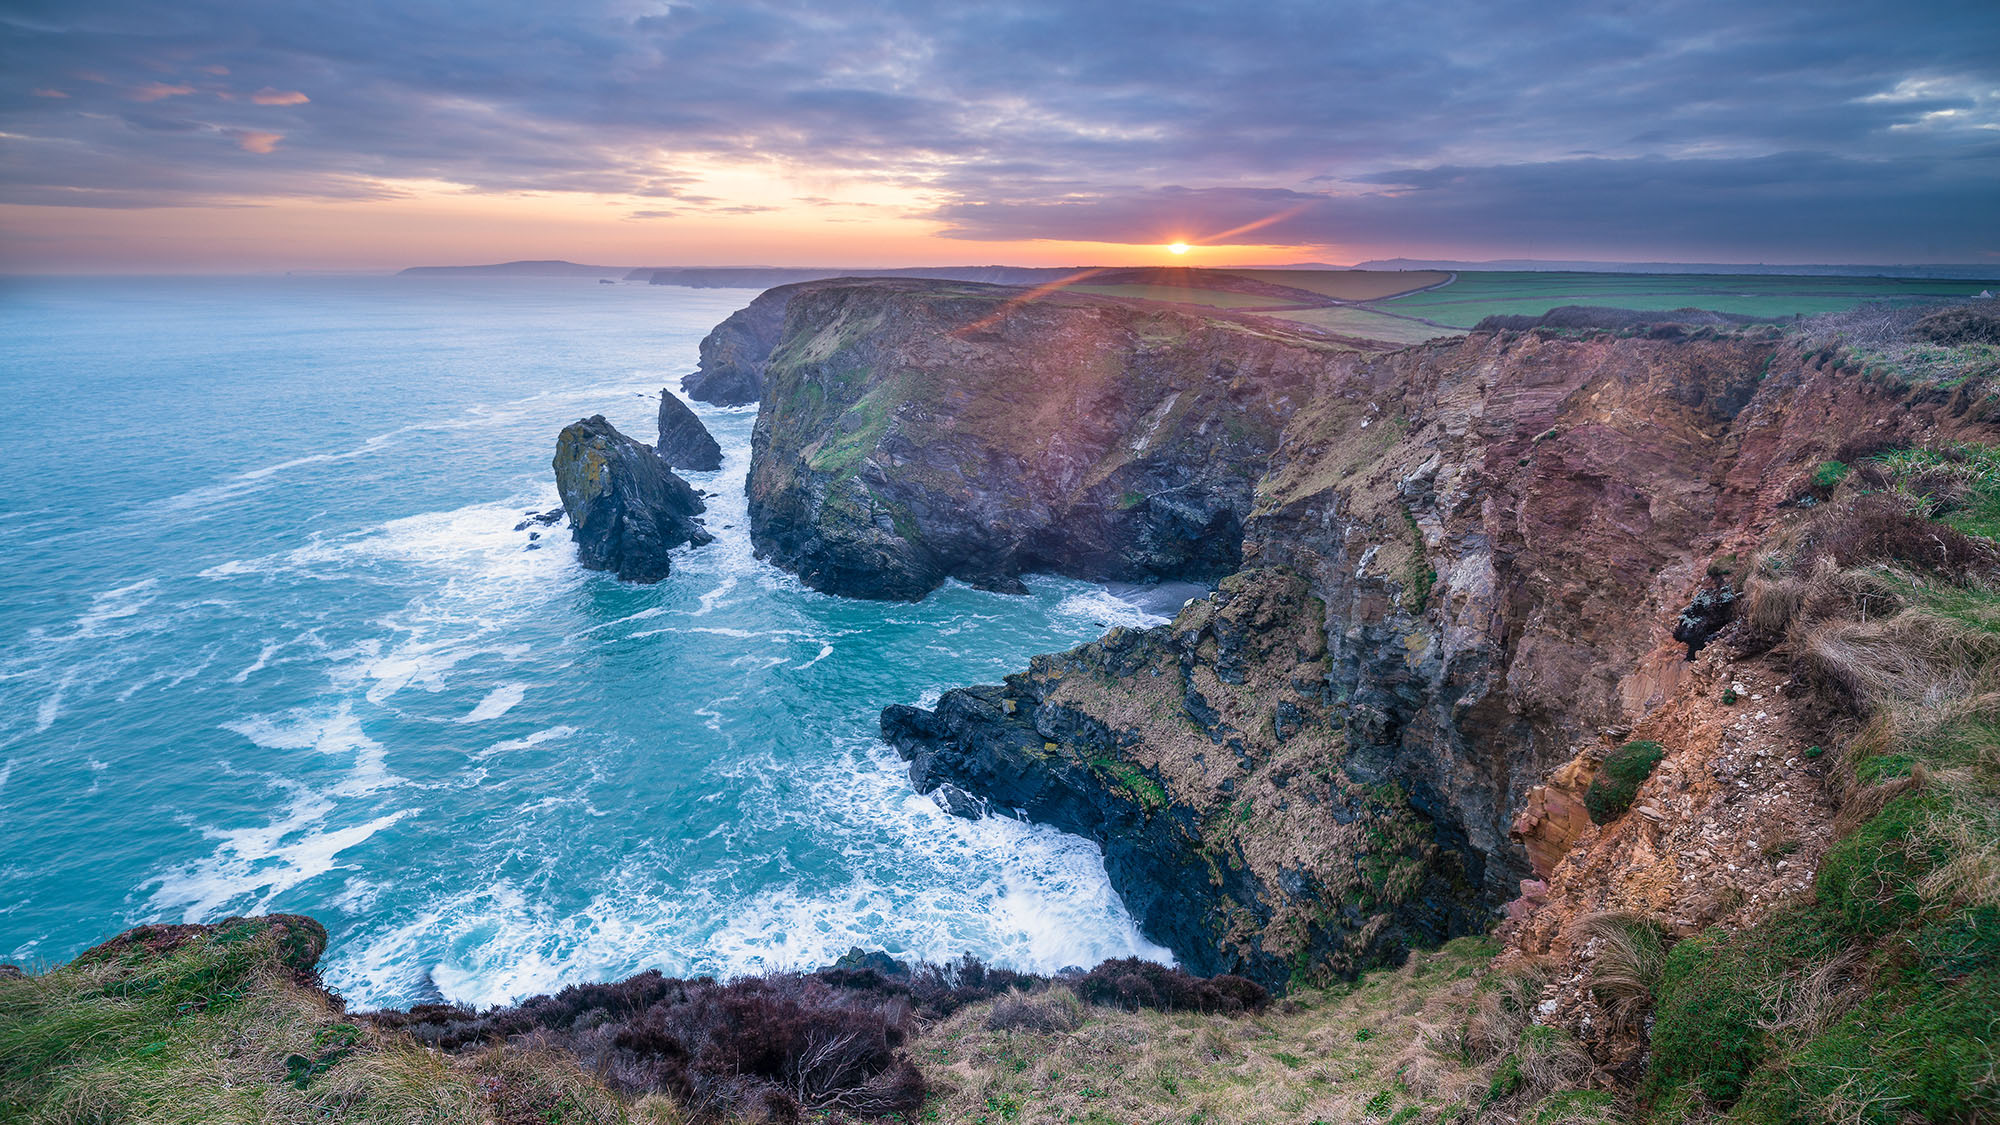
ISO: My camera and subject aren't moving, so I know I don’t have to worry about my shutter speed being too slow. This means I can select my camera’s base ISO (the lowest ISO available before entering extended ISO modes) to get maximum image quality. On most cameras, base ISOs are typically ISO64 or ISO100.
Aperture: Landscapes are about capturing as much detail as possible, which means rendering as much of the image as sharp as possible. A good way to maximize sharpness but avoid diffraction is to set a middling aperture of f/8 to f/11.
Shutter speed: Since you’re shooting on a tripod and not photographing a moving subject, you don’t have to worry about your shutter speed – unless you’re performing a more advanced technique such as using the best filters for photography, which I won’t cover here. So, you can simply pay attention to your camera’s light meter or electronic viewfinder and dial in the shutter speed that provides a balanced exposure.
Photographing handheld around the city during the day
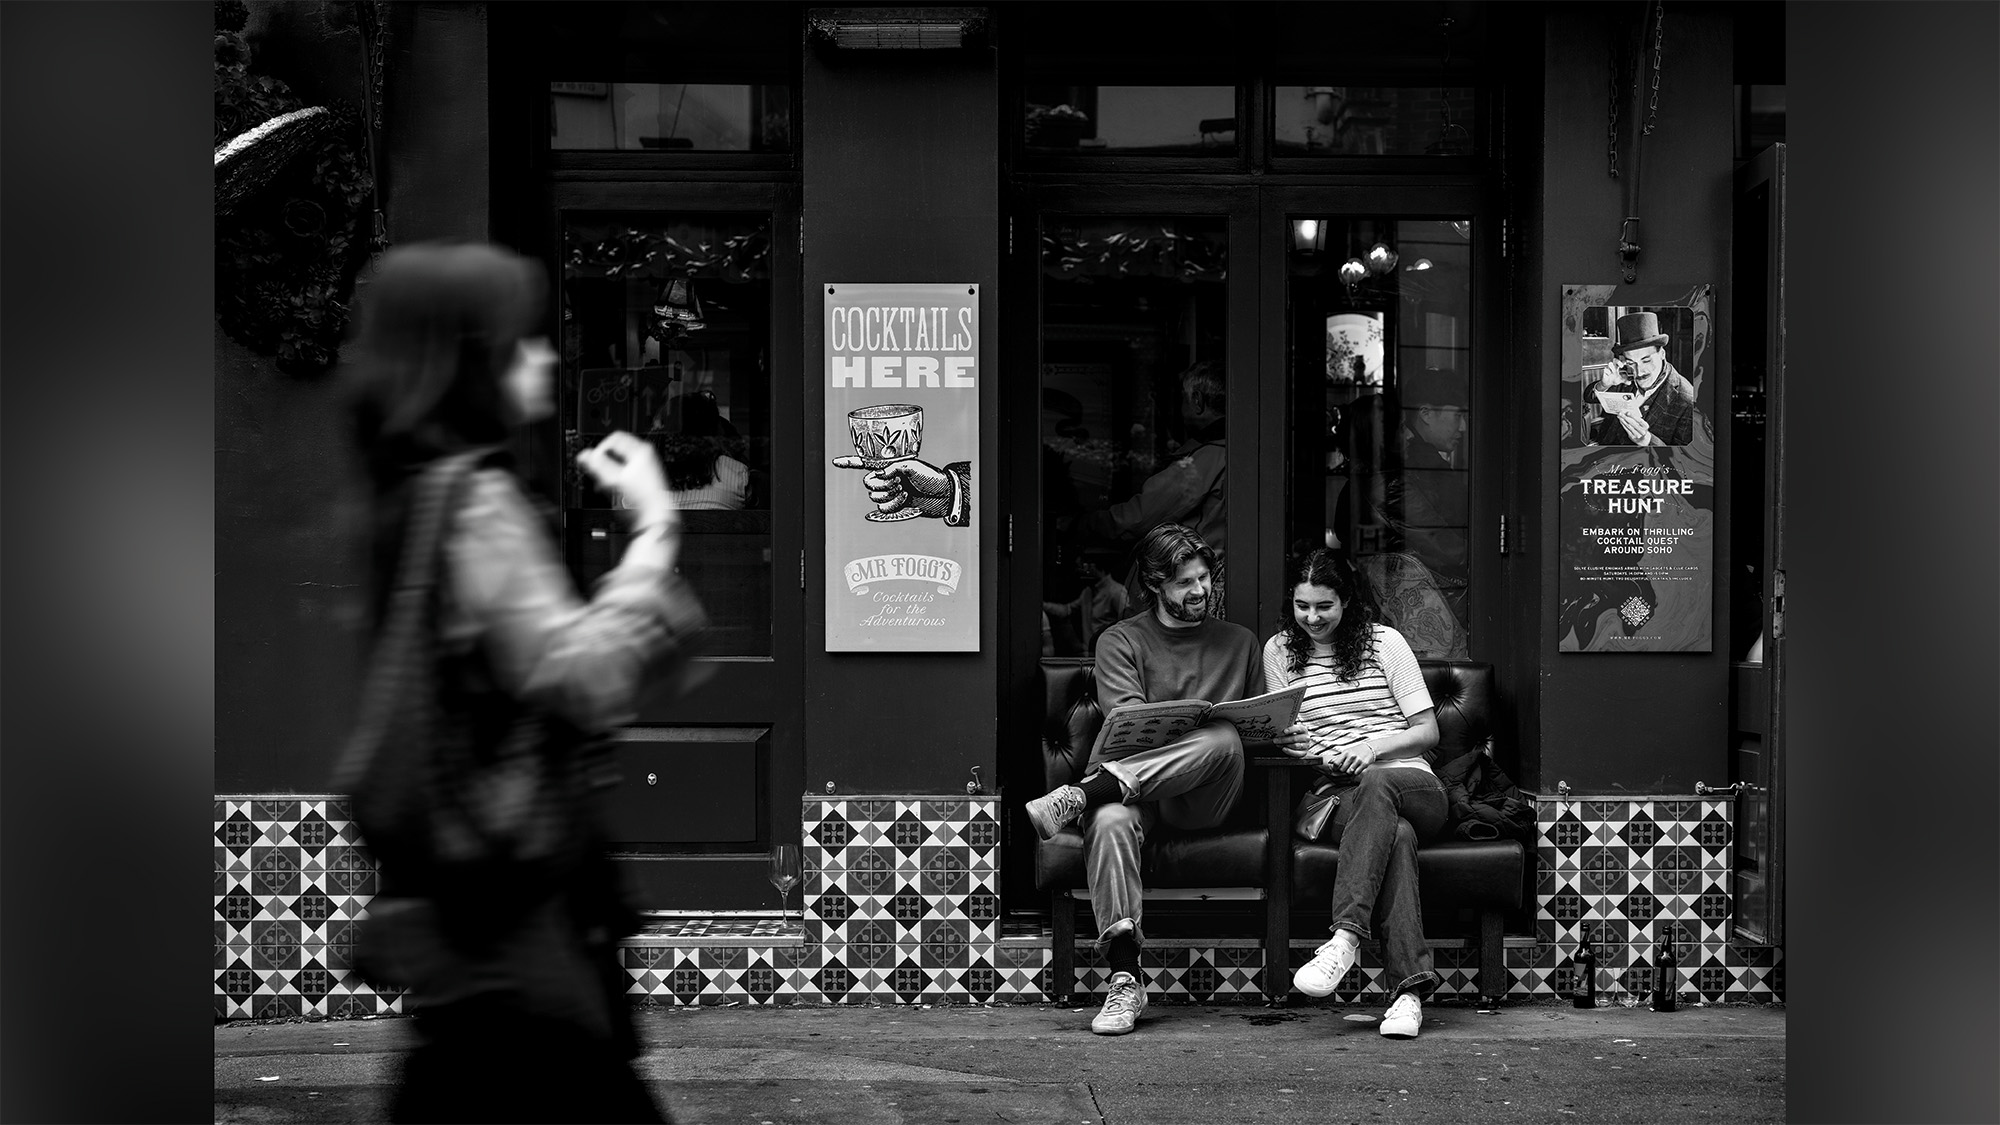
ISO: If it’s a very bright day you might be able to get away with ISO100, but if you’re shooting during an overcast day or in slightly lower lighting conditions, you may wish to bump it up to ISO400 or 800.
Aperture: If you’re simply photographing what comes your way as you walk around the city then an aperture of f/8 is your best bet, “f/8 and be there,” as photographer Arthur Fellig supposedly said. This is because it’s narrow enough to provide a suitably large depth of field for most subjects, but wide enough to still allow a decent amount of light into your camera.
Shutter speed: You can now input your shutter speed to balance your exposure. If it’s super fast, like 1/3,000 sec, you can choose to lower your ISO (if possible) to give you a bit better image quality. And if it’s a little too slow for handheld shooting, say, anything below 1/125 sec, you can simply up your ISO. If your ISO is getting a little too high for comfort, you can widen your aperture a bit.
Photographing wildlife with a long lens
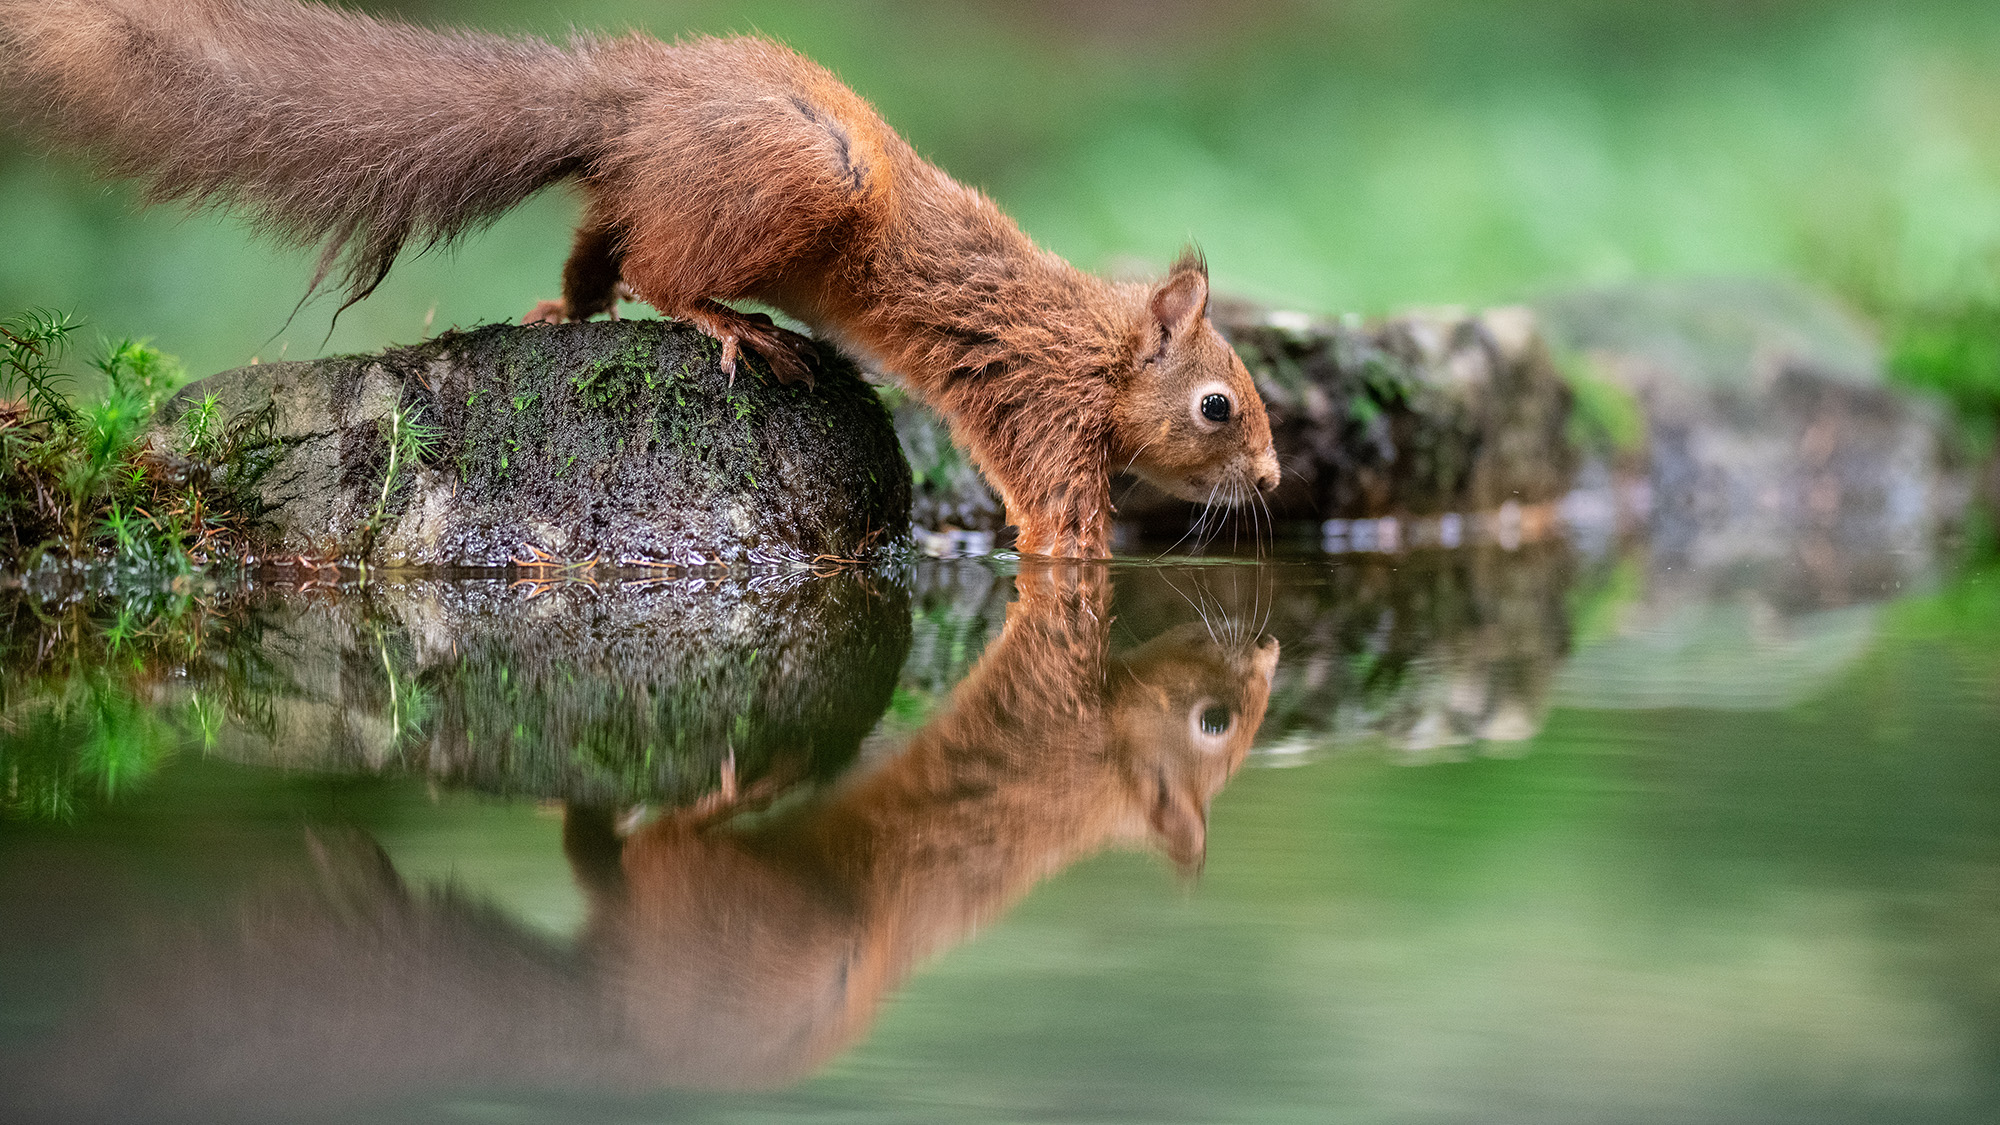
Aperture: I approach photographing wildlife or sports slightly differently. That’s because the need for a fast shutter speed tends to dictate the aperture and ISO you use. I’ll start with the aperture because it’s very likely it will have to be as wide open as possible if I’m to reach a fast enough shutter speed without using an unusably high ISO. The best telephoto lenses tend to max out at between f/2.8 and f/5.6, simply go as wide as you can.
Shutter speed: For most wildlife subjects and most long lenses, you’re looking at using a shutter speed over 1/1000 sec – ideally 1/2000 sec if you’re photographing birds in flight. You can more precisely calculate the shutter speed you need to prevent camera shake at long focal lengths by following the reciprocal rule, but I won’t go into that here.
ISO: It’s now a case of selecting the ISO you need to balance the exposure. If the ISO is simply too high, your only option is to reduce your shutter speed. However, this kind of photography is where noise trumps blurry images. Wildlife and sports photographers will often far exceed ISO1000. Noisier wildlife and sports images are simply more acceptable than noisy landscapes or portraits and preferable over a blurry subject. Plus, using the best photo editing software to perform noise reduction is another option, but that’s a more advanced technique for another day.
Note: Some wildlife and sports photographers use auto ISO, which means the camera automatically sets the ISO to balance the exposure, while the photographer still controls the aperture and shutter speed.
TL;DR
I've covered an awful lot in this article. You now known what ISO, aperture, and shutter speed are, and how to balance them independently from one another to achieve the perfect exposure. Here's a breakdown of my most important points...
- Manual mode allows you to control all three of your camera's exposure settings, removing the decision-making process from the camera.
- Low ISOs produce better image quality, but darken exposures, while high ISOs introduce noise but brighten exposures.
- Wider apertures let in more light but produce shallower depths of field, while narrower apertures let in less light but produce larger depths of field.
- You may start to notice diffraction at narrower apertures, usually above f/16.
- Faster shutter speeds let in less light but freeze moving subjects, while slower shutter speeds let in more light but add motion blur to moving subjects.
- It's often best to set your ISO, aperture, and shutter speed in that order.
- But when photographing wildlife or sports it's generally best to set a wide-open aperture first, then shutter speed, and finally, ISO.
You may also like...
Want to get better at editing, too? I'd recommend checking out these Photoshop editing tips, which will give you a great grounding in Adobe Photoshop CC. If you've just upgraded your camera and want to build up your camera gear, the best tripod is an essential purchase for low-light shooting and long exposures.
Get the Digital Camera World Newsletter
The best camera deals, reviews, product advice, and unmissable photography news, direct to your inbox!

Mike is Digital Camera World's How To Editor. He has over a decade of experience, writing for some of the biggest specialist publications including Digital Camera, Digital Photographer and PhotoPlus: The Canon Magazine. Prior to DCW, Mike was Deputy Editor of N-Photo: The Nikon Magazine and Production Editor at Wex Photo Video, where he sharpened his skills in both the stills and videography spheres. While he's an avid motorsport photographer, his skills extend to every genre of photography – making him one of Digital Camera World's top tutors for techniques on cameras, lenses, tripods, filters and other imaging equipment – as well as sharing his expertise on shooting everything from portraits and landscapes to abstracts and architecture to wildlife and, yes, fast things going around race tracks...
